

Page 1

Always there to help you
Question?
Contact
Philips
Register your product and get support at
www.philips.com/welcome
DCB2272
User manual
Page 2

Page 3

Contents
1 Safety 2
Safety 2
Hearing safety 2
2 Your micro music system 3
Introduction 3
What's in the box 3
Overview of the main unit 3
Overview of the remote control 4
3 Before use 6
Connect the radio antenna 6
Connect power 6
Install the remote control battery 7
4 Get started 8
Turn on 8
Set the clock 8
Select a source 9
Adjust the brightness of LCD display 9
5 Play from hard media 9
Play a disc 9
Play from a USB storage device 9
Control play 10
Program tracks 10
6 Use the dock 11
Compatible iPod/iPhone/iPad models 11
Enjoy audio through the dock 11
Charge your iPod/iPhone/iPad 12
Unload your iPod/iPhone/iPad 12
7 Listen to FM radio 13
Tune to an FM radio station 13
Program radio stations automatically 13
Program radio stations manually 13
Tune to a preset radio station 13
Display RDS information 14
Adjust FM settings 14
8 Listen to DAB radio stations 14
Use for the rst time 14
Program radio stations 15
Display DAB information 15
Use DAB menus 15
9 Adjust sound 16
Select a preset sound effect 16
Adjust volume level 16
Mute sound 16
10 Other features 17
Use the alarm timer 17
Use the sleep timer 17
Listen to an external device 18
Listen through headphone 18
Charge your USB device 18
11 Use system menus 19
Check the current software version 19
Reset the product 19
Upgrade the software 19
12 Product information 20
Specications 20
USB playability information 21
Supported MP3 disc formats 21
Maintenance 21
13 Troubleshooting 22
14 Notice 23
Compliance 23
Important notes for users in the U.K. 23
Care of the environment 23
Trademark notice 24
Copyright 24
1EN
Page 4

1 Safety
Read and understand all instructions before
you use this micro music system. If damage is
caused by failure to follow the instructions, the
warranty does not apply.
Safety
Warning
• Never remove the casing of this apparatus.
• Never lubricate any part of this apparatus.
• Never look into the laser beam inside this apparatus.
• Never place this apparatus on other electrical
equipment.
• Keep this apparatus away from direct sunlight, naked
ames or heat.
• Ensure that you always have easy access to the power
cord, plug or adaptor to disconnect the apparatus from
the power.
• The device shall not exposed to dripping
or splashing.
• Do no place any source of danger on the
device (e.g. liquid lled objects. lit candles).
• Where the MAINS plug or an appliance
coupler is used as the disconnect device,
the disconnect device shall remain readily
operable.
• Make sure that there is enough free space
around the product for ventilation.
• Only use attachments/accessories specied
by the manufacturer.
produce sounds in decibel ranges that may
cause hearing loss for a normal person,
even for exposure less than a minute. The
higher decibel ranges are offered for those
that may have already experienced some
hearing loss.
• Sound can be deceiving. Over time your
hearing 'comfort level' adapts to higher
volumes of sound. So after prolonged
listening, what sounds 'normal' can actually
be loud and harmful to your hearing. To
guard against this, set your volume to a safe
level before your hearing adapts and leave
it there.
To establish a safe volume level:
• Set your volume control at a low setting.
• Slowly increase the sound until you can
hear it comfortably and clearly, without
distortion.
Listen for reasonable periods of time:
• Prolonged exposure to sound, even
at normally 'safe' levels, can also cause
hearing loss.
• Be sure to use your equipment reasonably
and take appropriate breaks.
Be sure to observe the following guidelines
when using your headphones.
• Listen at reasonable volumes for
reasonable periods of time.
• Be careful not to adjust the volume as your
hearing adapts.
• Do not turn up the volume so high that
you can't hear what's around you.
• You should use caution or temporarily
discontinue use in potentially hazardous
situations.
Hearing safety
Listen at a moderate volume.
• Using headphones at a high volume can
impair your hearing. This product can
2 EN
Note
• The type plate is located on the back of the product.
Page 5

2 Your micro
jm
music system
Congratulations on your purchase, and
welcome to Philips! To fully benet from the
support that Philips offers, register your product
at www.philips.com/welcome.
If you contact the Consumer Care, you will
be asked for the model and serial number of
this apparatus. The model number and serial
number are on the rear of the apparatus. Write
the numbers here:
Model No. __________________________
Serial No. ___________________________
Introduction
With this product, you can:
• enjoy audio from discs, USB storage
devices, iPod/iPhone/iPad, and other
external devices, and
• listen to FM and DAB radio stations.
What's in the box
Check and identify the contents of the package:
• Micro music system
• Remote control (with one AAA battery)
• AC power adaptor
• Wall mounting kit (2 dowels and 2 screws)
• FM antenna
• Short user manual
• Wall mounting instructions
Always there to help you
Register your product and get support at
www.philips.com/welcome
Question?
Contact
Philips
Short User Manual
Always there to help you
Register your product and get support at
www.philips.com/welcome
DCM2260
Question?
Contact
Philips
Wall Mounting
Instructions
Overview of the main unit
abcdef ghi
l
k
a
• Turn on the product.
• Switch the product to eco power
standby mode or normal standby
mode.
b SOURCE
• Press repeatedly to select a source.
c
• Start, pause, or resume play.
d
• Stop the play of music.
• Access the playlist of a docked iPod/
iPhone.
e
• Connect a compatible USB storage
device for music play.
• Connect a compatible USB device for
charging.
onpqr
3EN
Page 6

f Disc compartment
g
• Press to eject the disc from the disc
compartment.
h /
• Skip to the previous or next track.
• Press and hold to search within a track.
• Tune to a radio station.
i VOL+/VOL-
• Increase or decrease the volume level.
j Dock for iPod/iPhone/iPad
• Connect to a compatible iPod/iPhone/
iPad.
k IR sensor
• Receive infrared signals from the
remote control.
l Indicator
• It lights red when the product is in the
eco power standby mode.
m LCD screen
n Micro USB socket
• This socket is for rmware upgrade
only.
o DC IN
• Connect to the AC power adaptor.
p
• Connect to a headphone with 3.5-mm
connector.
q AUDIO IN
• Connect to the audio output socket
(usually the headphone socket) of an
external device.
r FM ANT
• Connect to the FM antenna.
Overview of the remote control
a
b
c
d
e
f
g
h
i
j
k
l
a
• Turn on the product.
• Switch the product to eco power
standby mode or normal standby
mode.
b
• Eject the disc.
c DOCK/ CD
r
q
p
o
n
m
4 EN
Page 7

• Switch the source to the connected
iPod/iPhone/iPad or the disc in the disc
compartment.
d FM/DAB
• Switch the source to FM tuner or DAB
tuner.
e PRESET/ALBUM /
• Skip to the previous or next album.
• Select a preset radio station.
• Navigate through iPod/iPhone playlist.
f /
• Skip to the previous or next track.
• Press and hold to search within a track.
• Tune to a radio station.
• Select a menu option.
g + VOL -
• Increase or decrease the volume level.
h
• Start, pause, or resume play.
• In FM mode, press to switch the
sound setting between stereo and
monophonic.
i REPEAT/SHUFFLE
• Select a play mode.
j MUTE
• Mute or restore volume.
k SOUND
• Select a preset sound effect.
l SCAN/CLOCK
• In normal standby mode, press and
hold to start setting the clock.
• In working mode, press to display the
clock.
• In FM or DAB mode, press and hold to
start scanning for FM stations.
m TIMER/SLEEP
• Set the alarm timer.
• Set the sleep timer.
n PROG
• Program radio stations.
• Program tracks that are stored on a
disc or USB storage device.
o DISPLAY/RDS
• In working mode, press to toggle
through available information.
• In normal standby mode, press and
hold to adjust the brightness of LCD
display.
p /MENU
• Stop the play of music.
• Access the playlist of iPod/iPhone.
• In FM or DAB mode, access the menus.
q OK
• Conrm the current option.
• In FM mode, press to switch the
sound setting between stereo and
monophonic.
r USB/AUDIO IN
• Switch the source to USB storage
device or the audio input that is
transferred through the AUDIO IN
socket.
5EN
Page 8

3 Before use
Connect the radio antenna
Note
• For optimal reception, fully extend the antenna and
adjust its position, or connect an outdoor antenna.
• This product does not support AM (amplitude
modulation) radio reception.
1 Select an adaptor plug converter and x it
to the adaptor.
2 Connect the AC power adaptor to
• the DC IN socket on the back panel,
and
• the wall outlet.
Connect the radio antenna to the product.
Connect power
Caution
• Risk of product damage! Make sure that the power
supply voltage matches the voltage printed on the back
of the main unit.
• Risk of electric shock! Before you plug the AC power
adaptor, make sure that the adaptor plug converter is
xed securely. When you unplug the AC power adaptor,
always pull the plug, never the cord.
• Before you connect the AC power adaptor, make sure
that you have completed all the other connections.
6 EN
DC IN
Remove the plug converter
To replace a plug converter, remove it rst as
illustrated below.
Page 9

Install the remote control battery
a
c
b
1 Open the batter y compartment.
2 Inser t one AAA battery with correct
polarity (+/-) as indicated.
3 Close the batter y compartment.
7EN
Page 10
4 Get started
Caution
• Use of controls or adjustments or performance of
procedures other than herein may result in hazardous
radiation exposure or other unsafe operation.
Always follow the instructions in this chapter in
sequence.
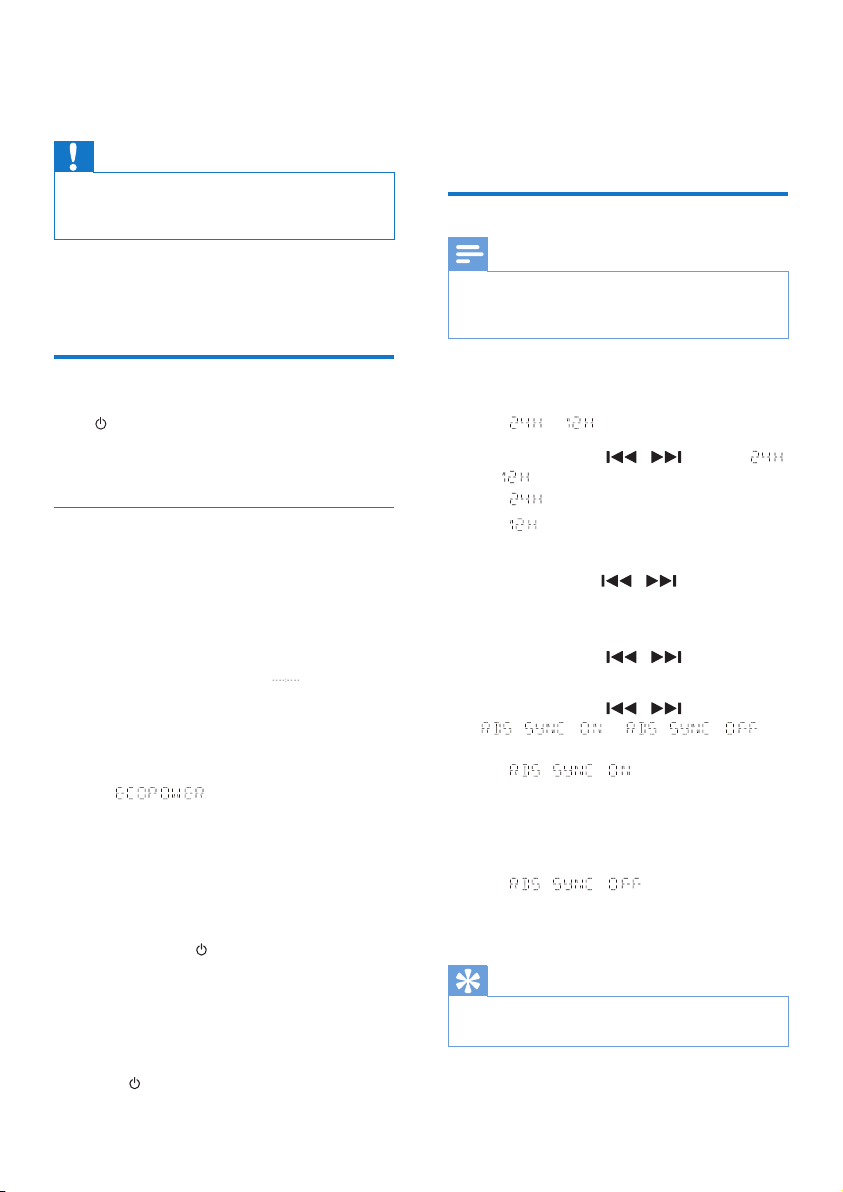
• between the working mode and the
normal standby mode, or
• from the eco power standby mode to
the working mode.
Set the clock
Note
• During setting, if no action is made within 90 seconds,
the product exits clock setting without saving earlier
operations.
Turn on
Press .
» This product switches to the last
selected source.
Switch modes
Automatically switch the modes:
• After this product stays inactive for 15
minutes, it automatically switches to the
normal standby mode.
» The clock is displayed.
» If the clock is not set, blinks.
• After this product stays in the normal
standby mode for 15 minutes, it
automatically switches to the eco power
standby mode.
» scrolls, and then the LCD
screen lights off.
» The LED indicator beside the LCD
screen lights in red.
Manually switch the modes:
• Press and hold to switch this product
• from the working mode or normal
standby mode to the eco power
standby mode, or
• from the eco power standby mode to
the normal standby mode.
• Press to switch this product
1 In standby mode, press and hold CLOCK
to enter the clock setting mode.
» or is displayed.
2 Press + VOL - or / to select
or , and then press CLOCK.
• : 24-hour time format
• : 12-hour time format
» The hour digits begin to blink.
3 Press + VOL -or / to set the hour,
and then press CLOCK.
» The minute digits begin to blink.
4 Press + VOL - or / to set the
minute, and then press CLOCK.
5 Press + VOL - or / to select
or ,
and then press CLOCK.
• : When you tune to
an RDS station that transmits time
signals, the product automatically
synchronizes its clock with the RDS
station.
• : Not synchronize
the clock automatically.
» The set clock is displayed.
Tip
• This product will synchronize its clock with the current
DAB station or the connected iPod/iPhone/iPad.
8 EN
Page 11
Select a source
5 Play from hard
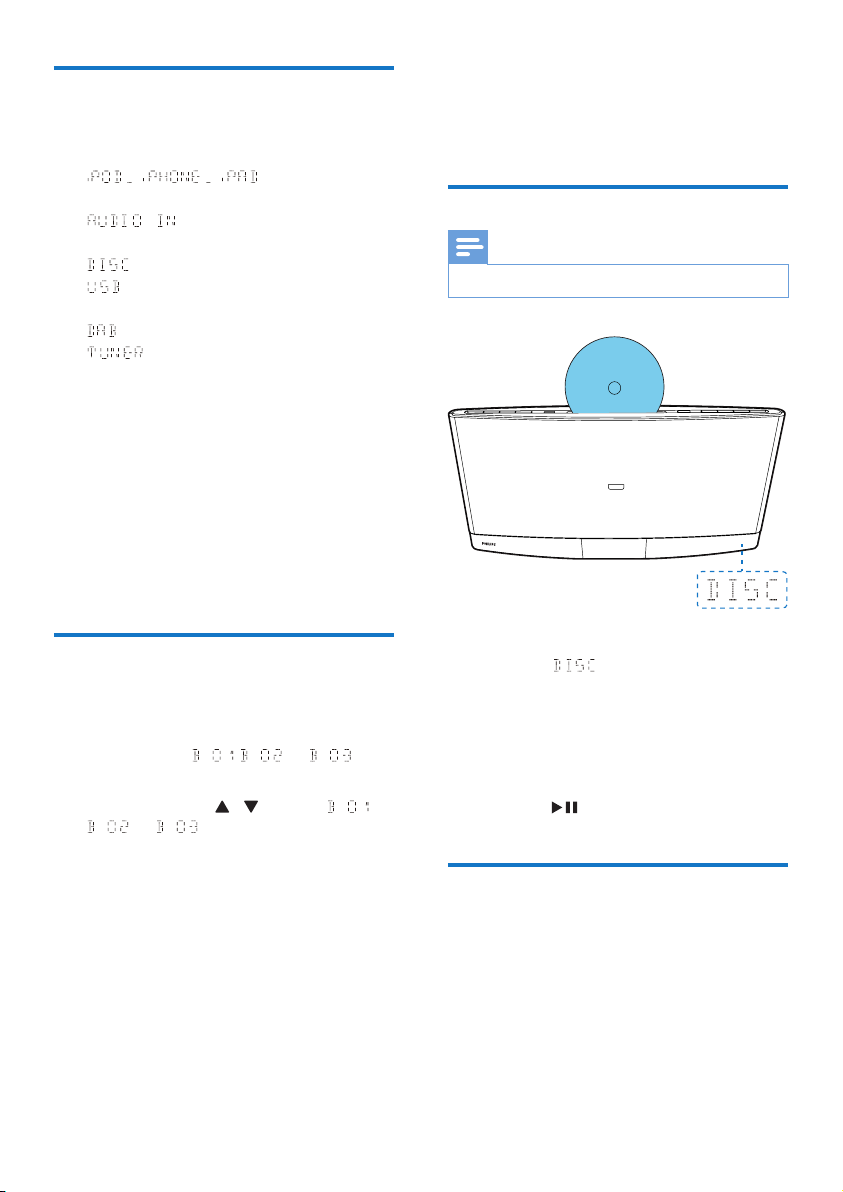
On the product, press SOURCE repeatedly to
select a source.
• : the playlist on the
connected iPhone/iPod/iPad
• : the audio input through the
AUDIO IN socket
• : the disc in the disc compartment
• : .mp3 les stored on the connected
USB storage device
• : the DAB tuner
• : the FM tuner
You can also press source buttons on the
remote control to select a source.
• FM/DAB: the FM tuner or DAB tuner
• DOCK/CD: the playlist on the connected
iPhone/iPod/iPad or the disc in the disc
compartment
• AUDIO IN/USB: the audio input through
the AUDIO IN socket, or the .mp3 les
stored on the connected USB storage
device
Adjust the brightness of LCD display
1 In normal standby mode, press and hold
DISPLAY until , , or is
displayed.
2 Press VOL +/- or / to select ,
, or .
media
Play a disc
Note
• Make sure that the disc contains playable audio content.
1 Press CD or SOURCE to switch the
source to .
2 Inser t a disc into the disc compar tment
with the printed side facing you.
» Play starts automatically after a few
seconds.
» If play does not start automatically,
press to start play.
Play from a USB storage device
This product can play .mp3 les that are copied
onto a compatible USB storage device.
• Flash drive
• Memory card reader
• HDD: hard disc drive (This product can
detect only a portable HDD with USB
9EN
Page 12
power peak current no more than 500
mA.)
Note
• WOOX Innovations does not guarantee compatibility
with all USB storage devices.
• FAT16 and FAT 32 le systems are supported, and
NTFS (New Technology File System) not.
Buttons Functions
Pause or resume play.
Stop play.
/ Skip to the previous or
next track.
/ Press and hold to rewind
a track or search forward
fast.
/ Skip to the previous or
next album when one or
more albums exist.
REPEAT/SHUFFLE Select an available play
mode.
• : repeat the
current track
• : repeat all
tracks
• : repeat the
current folder
• : play tracks
randomly
• To play tracks in
sequence, press
repeatedly until
REP and SHUF
disappear.
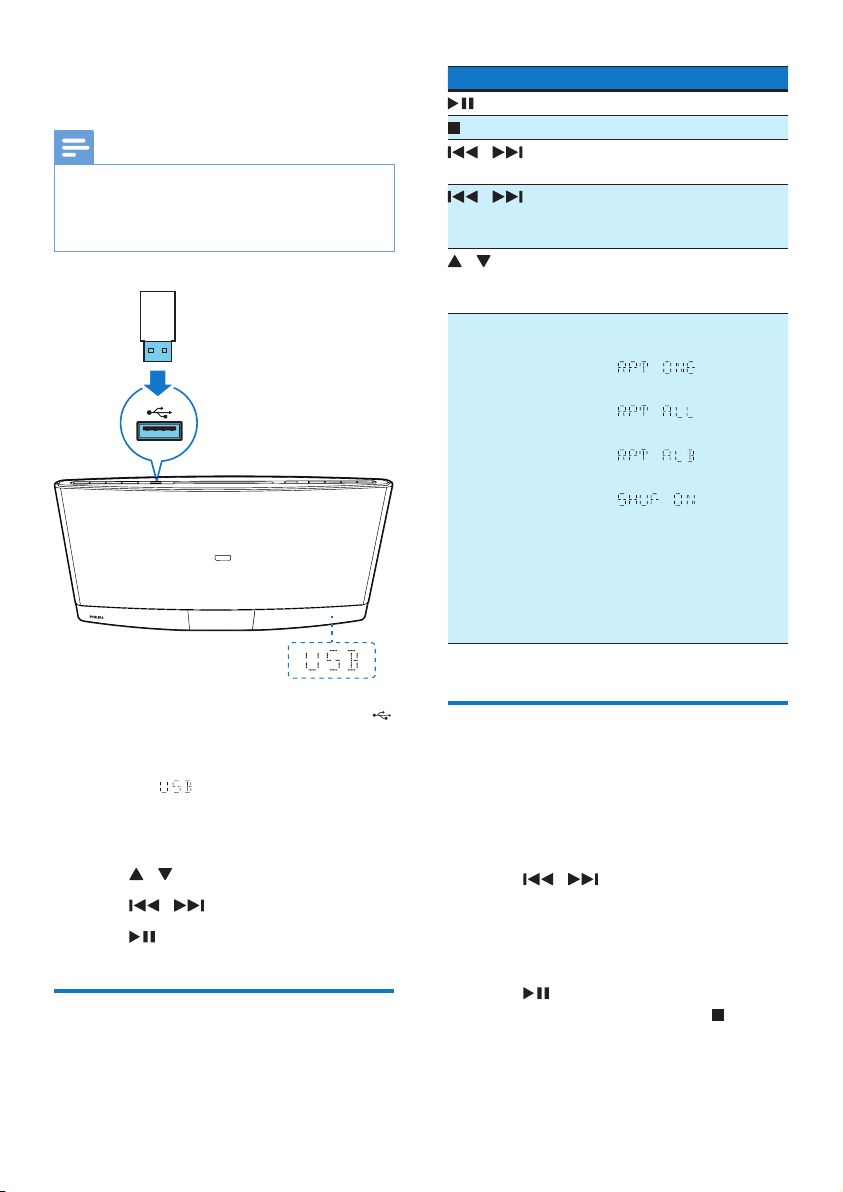
1 Connect the USB storage device to the
socket.
2 Press USB or SOURCE to switch the
source to .
» Play starts automatically.
If play does not start automatically,
1 Press / to select a folder.
2 Press / to select a le.
3 Press to start play.
Control play
During play, follow the instructions below to
control play.
10 EN
Program tracks
You can program a maximum of 20 tracks.
1 When no track is played, press PROG.
» The current track number blinks on
the display panel.
2 Press / to select a track number.
3 Press PROG to conrm.
4 Repeat steps 2 and 3 to program more
tracks.
5 Press to play the programmed tracks.
• To erase the program, press twice.
Page 13
6 Use the dock
You can enjoy audio from iPod/iPhone/iPad
through this product.
Note
• There is no audio output from the headphone socket
of the connected iPod/iPhone/iPad.
Compatible iPod/iPhone/iPad models
This product supports the following iPod,
iPhone, and iPad models.
• iPod nano (2nd, 3rd, 4th, 5th, 6th, and 7th
generation)
• iPod touch (1st, 2nd, 3rd, 4th, and 5th
generation)
• iPod classic
• iPhone 5S
• iPhone 5C
• iPhone 5
• iPhone 4S
• iPhone 4
• iPhone 3GS
• iPhone 3G
• iPhone
• iPad mini
• iPad 4th generation
• iPad 3rd generation
• iPad 2
• iPad
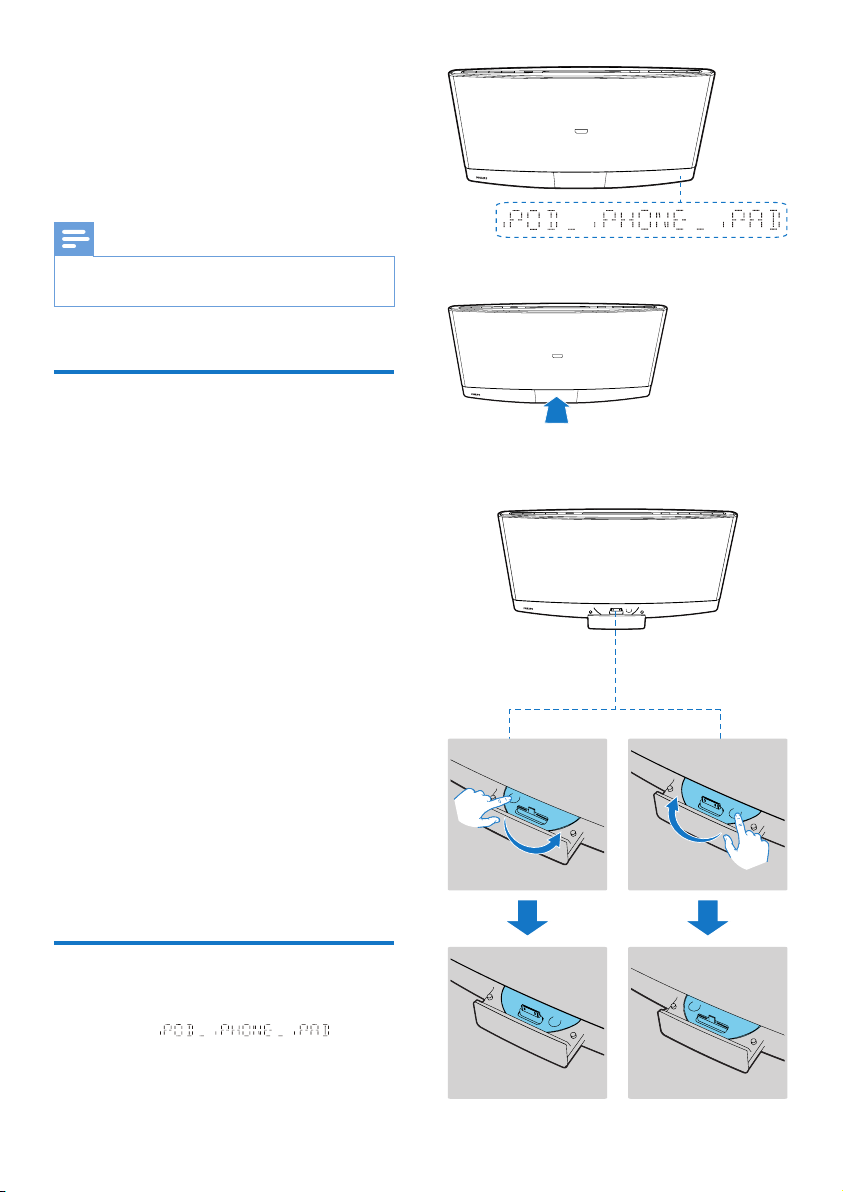
2 Eject the dock.
3 Turn the dock tray to select a connector
that matches your iPod/iPhone/iPad.
Enjoy audio through the dock
1 Press DOCK or SOURCE to switch the
source to .
11EN
Page 14
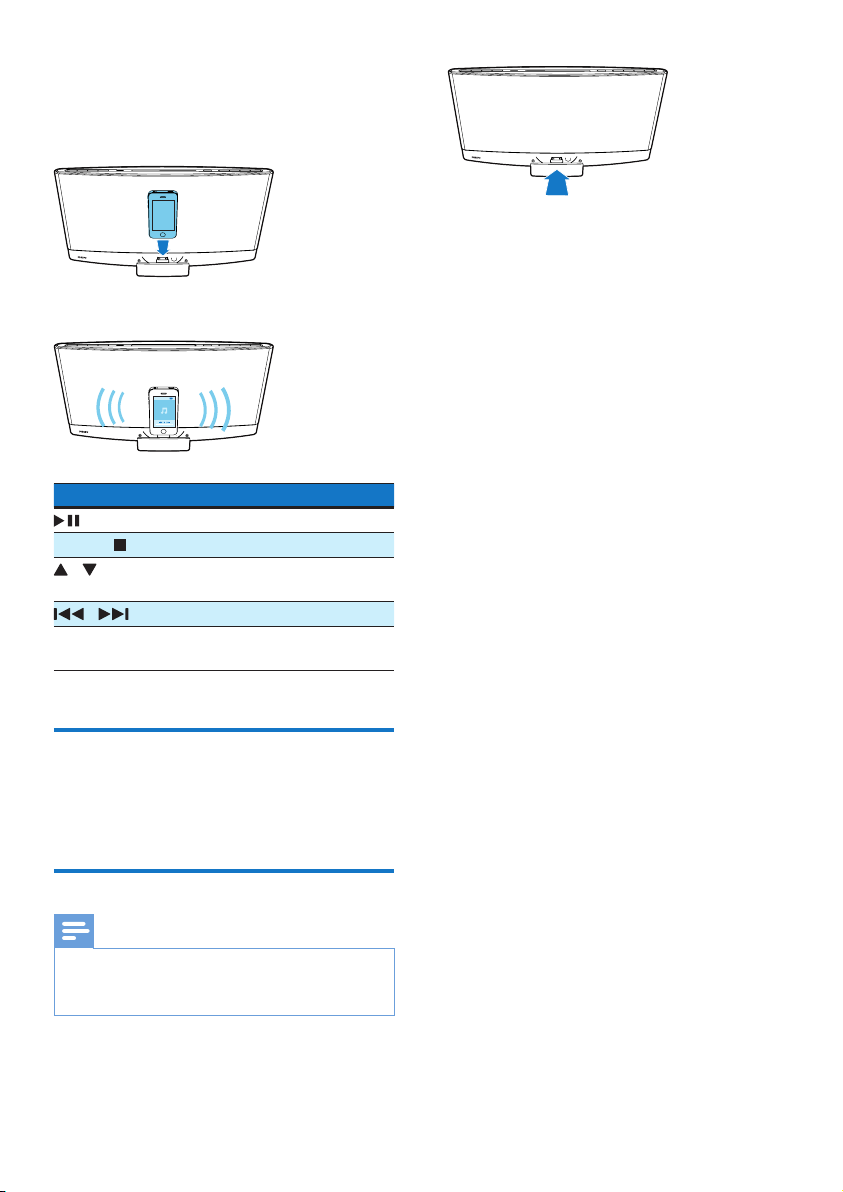
4 Connect your iPod/iPhone/iPad to the
dock.
» Once the iPod/iPhone/iPad is
recognized, the charging starts.
5 Play a track on your iPod/iPhone/iPad.
Buttons Functions
Start, pause, or resume play.
MENU/ Access the playlist of iPod/iPhone.
/ Navigate through the playlist of
iPod/iPhone.
/ Skip to the previous/next track.
Press and hold to rewind a track
or search forward fast.
Charge your iPod/iPhone/iPad
Once the iPod/iPhone/iPad is docked and
recognized, the charging starts.
Unload your iPod/iPhone/iPad
Note
• Risk of damage to the dock or your iPod/iPhone/iPad:
Do not twist or shake your iPod/iPhone/iPad during
unloading.
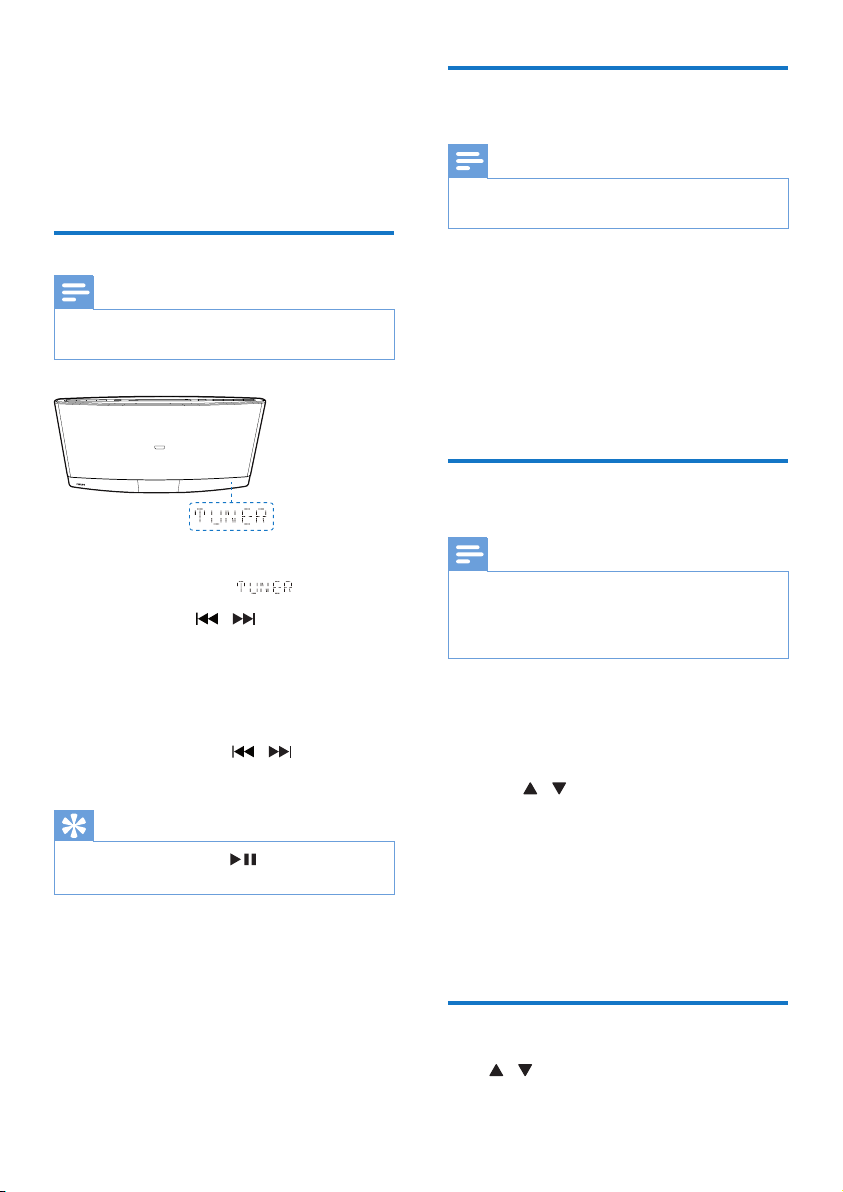
1 Pull the iPod/iPhone/iPad out of the dock.
2 Press inside to hide the dock.
12 EN
Page 15
7 Listen to FM
radio
Program radio stations automatically
Note
• You can program a maximum of 20 preset radio
stations.
Tune to an FM radio station
Note
• Make sure that you have connected and fully extended
the FM antenna.
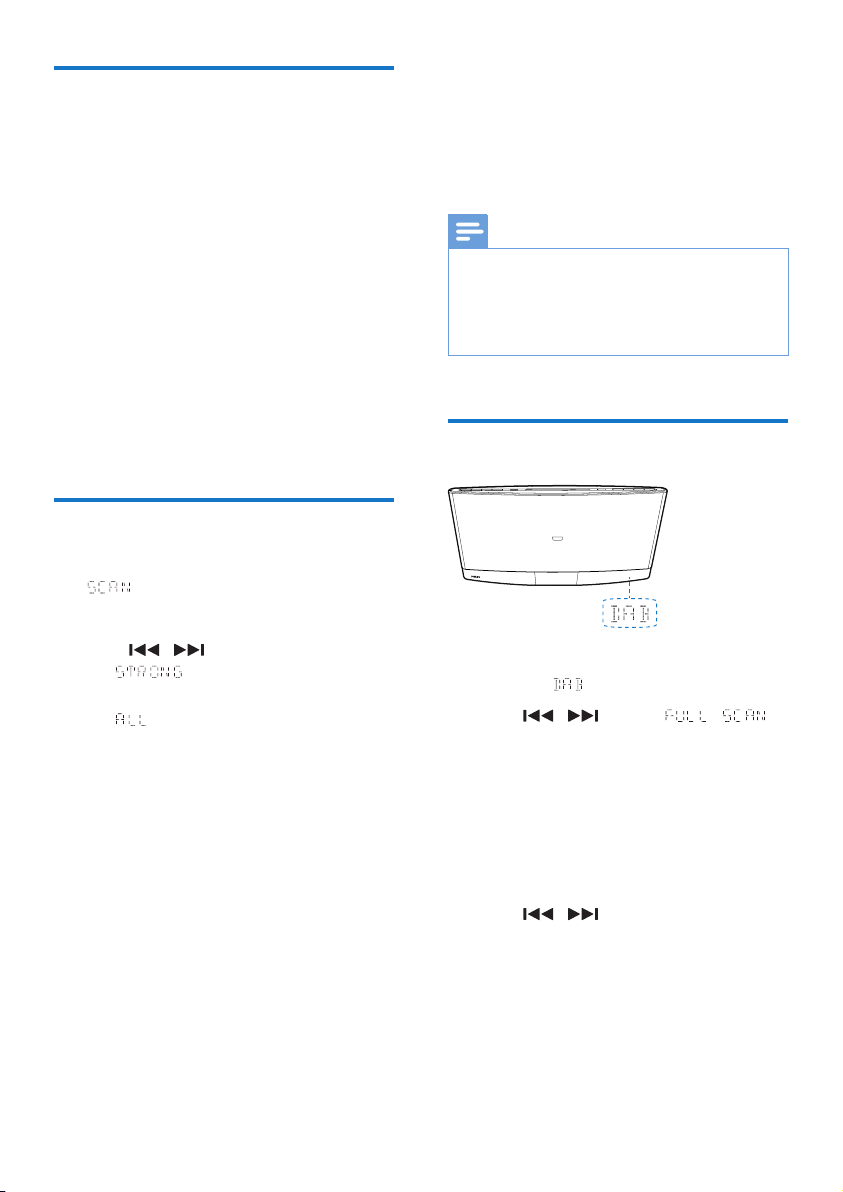
1 Press FM or SOURCE repeatedly to
switch the source to .
2 Press and hold / until the frequency
starts to change.
» The product automatically tunes to the
previous or next station with strong
reception.
• To tune to a station at a specic
frequency, press / repeatedly
until its frequency is displayed.
Tip
• In FM mode, you can press or OK to switch the
sound setting between stereo and monophonic.
Press and hold SCAN/CLOCK until the
frequency starts to change.
» All available stations are programmed
in the order of waveband reception
strength.
» The rst programed radio station is
broadcast automatically.
Program radio stations manually
Note
• You can program a maximum of 20 preset radio
stations.
• To overwrite a programmed radio station, store
another one with its sequence number.
1 Tune to a radio station.
2 Press PROG to activate programming.
» The sequence number blinks.
3 Press / to allocate a sequence
number from 1 to 20 to this radio station,
and then press PROG to conrm.
» The preset sequence number and
the frequency of this radio station are
displayed.
4 Repeat steps 1-3 to program more
stations.
Tune to a preset radio station
Press / to select the sequence number of
the preset radio station.
13EN
Page 16
Display RDS information
8 Listen to DAB
RDS (Radio Data System) is a service that
allows FM stations to transfer additional
information. If you tune to an RDS station, an
RDS icon is displayed.
1 Tune to an RDS station.
2 Press RDS repeatedly to scroll through the
following information (if available):
» Program service
» Program type such as [NEWS] (news),
[SPORT] (spor t), [POP M] (pop
music)...
» Radio text message
» Mono/Stereo
» Time
Adjust FM settings
1 In FM mode, press MENU to access the
menu.
2 Press OK to access sub-menus.
3 Press / to select an option.
• : Search for strong stations
only.
• : Search for all stations no matter
whether the signal strength of a station
is strong or weak.
4 Press OK to conrm the option.
radio stations
Note
• For optimal reception, fully extend the antenna and
adjust its position.
• You can program a maximum of 20 DAB radio stations.
• Check with local retailer or go to www.WorldDAB.org
for applicable DAB radio frequencies in your area.
Use for the rst time
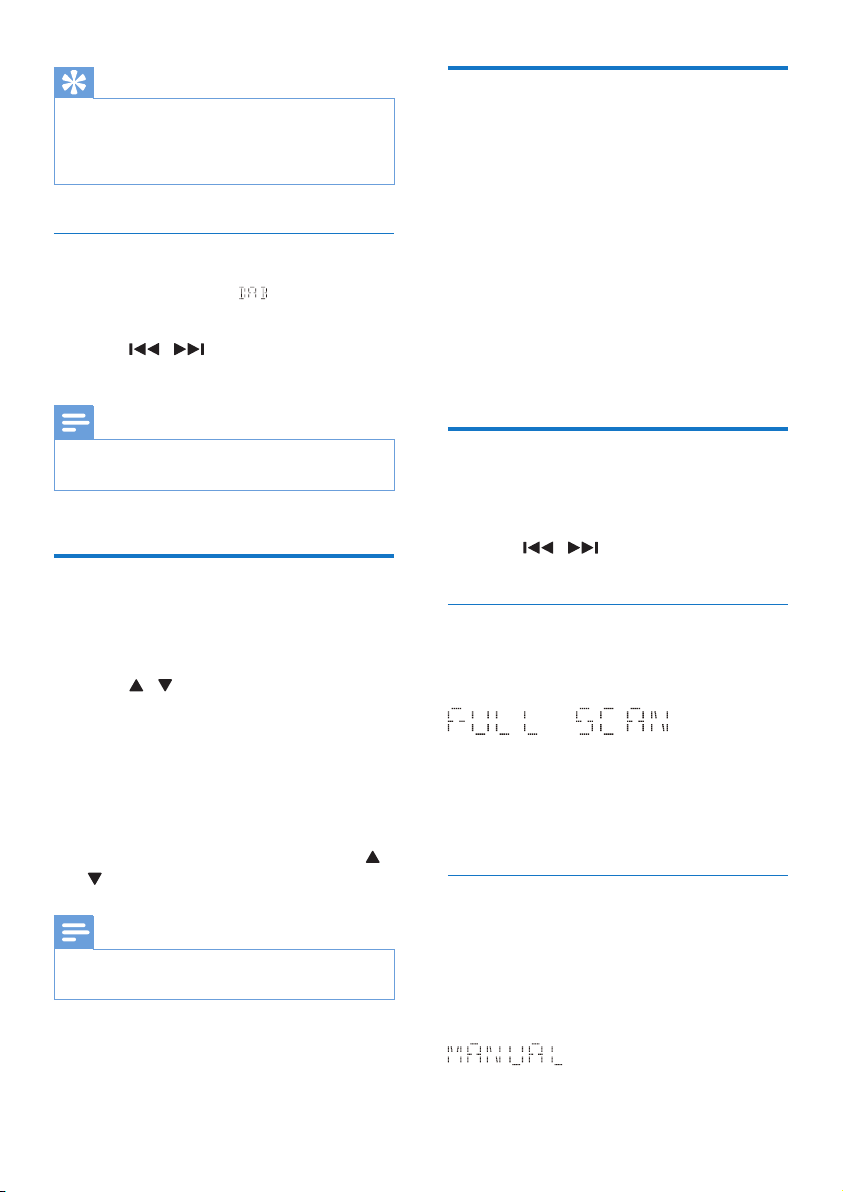
1 Press DAB or SOURCE to switch the
source to .
2 Press / until the
menu is displayed.
3 Press OK to activate the automatic search.
» This product automatically stores radio
stations with sufcient signal strength.
» After the search is complete, the
rst stored radio station is broadcast
automatically.
14 EN
4 Press / to select a station, and
then press OK to start listening.
• To re-scan for DAB stations, press and
hold SCAN/CLOCK for 2 seconds when
listening to a DAB station.
Page 17
Tip
• You can re-scan to update the list of stored stations
(see "Use DAB menus" > "Re-scan for stations").
• You can tune to a station manually (see "Use DAB
menus" > "Tune to a station manually").
Tune to a stored station
1 Switch the source to .
» The last listened station is broadcast.
2 Press / to select a station, and
then press OK to start listening.
Note
• If ? is displayed before the name of current station, the
station is unavailable or inactive.
Program radio stations
Display DAB information
Press DISPLAY repeatedly to cycle through the
following information (if available).
• Dynamic label segment (DLS)
• Signal strength
• Program type (PTY)
• Ensemble name
• Frequency
• Signal error rate
• Bitrate codec
• DAB/DAB+
• Time
• Date
Use DAB menus
1 In DAB mode, press MENU to access the
DAB menus.
2 Press / to toggle through the
menus.
1 Tune to a DAB radio station.
2 Press PROG to activate the programming.
3 Press / to select a preset sequence
number.
4 Press PROG to conrm.
» The radio station is stored with the
selected sequence number.
5 Repeat steps 1-4 to program more radio
stations.
• To tune to a preset radio station, press /
until its name is displayed.
Note
• If you store a radio station with the sequence number
of another one, the earlier one is overwritten.
Re-scan for stations
Full scan is used to perform a wide range
search for DAB radio stations.
Press OK to start scanning for available DAB
stations.
» After the scanning is complete, the rst
detected station is broadcast.
Tune to a station manually
With this feature, you can tune to a specic
channel/frequency manually. In addition to
antenna orientation for better radio reception,
the optimal reception can also be obtained with
this feature.
15EN
Page 18
1 Press OK to access the station list.
2 Press / to select a station from
5A to 13F.
3 Press OK to conrm the option.
Remove invalid stations
9 Adjust sound
The following operations are applicable to all
supported media.
This option lists active stations and removes any
stations that are in the list but have no service
in your area. In front of the station name of an
invalid station, a question mark (?) is displayed.
1 Press OK to access the sub-menus.
2 Press / to select an option.
• : Return to the previous menu.
• : Remove invalid stations from the
station list.
3 Press OK to conrm the option.
System menus
1 Press OK to access system menus.
2 Press / to select a sub-menu.
• For details, refer to the section 'Use
system menus'.
Select a preset sound effect
• Press SOUND repeatedly to select a
preset sound effect.
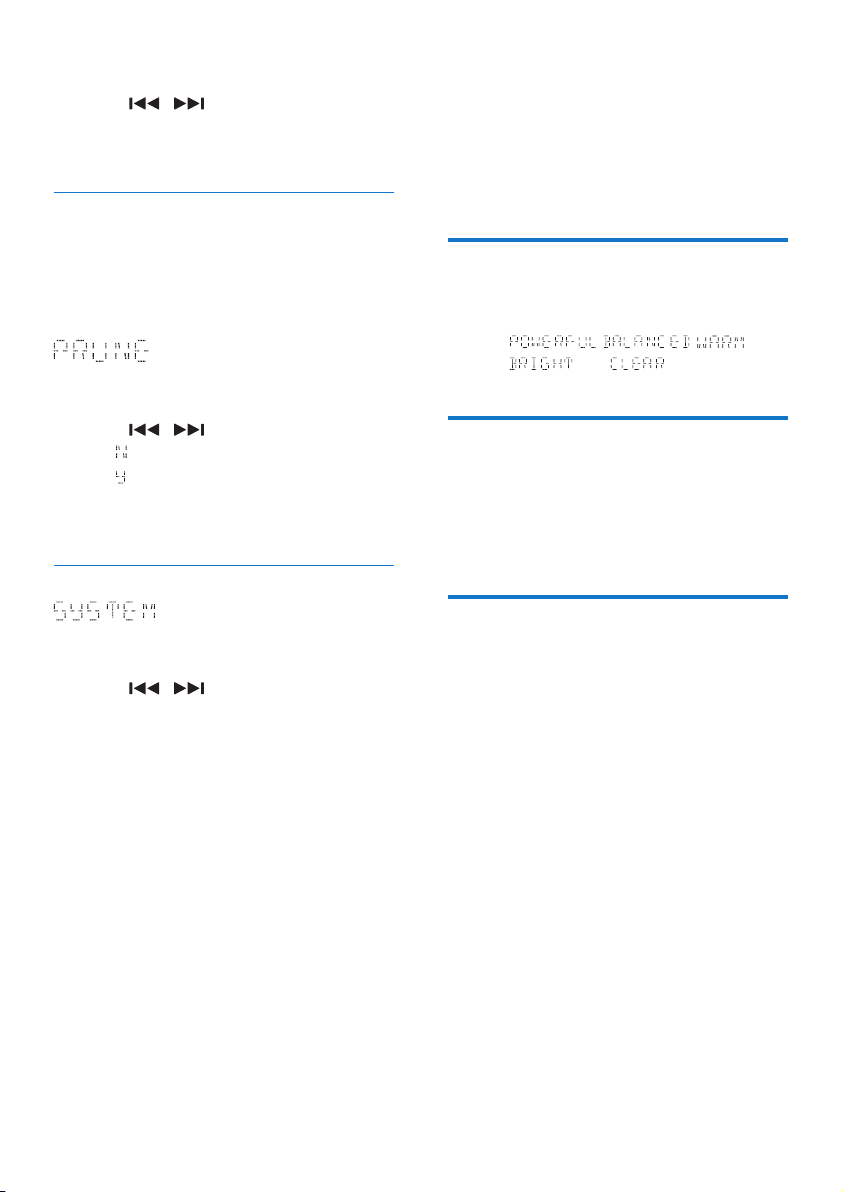
• , , ,
, and
Adjust volume level
• On the remote control, press VOL +/-
repeatedly.
• On the main unit, press VOL+/VOL-
repeatedly.
Mute sound
• Press MUTE to mute or restore the sound.
16 EN
Page 19
10 Other features
Use the alarm timer
This product can be used as an alarm clock.
You can select the disc, iPod/iPhone/iPad librar y,
FM radio station, DAB radio station, or .mp3
les stored on a USB storage device as alarm
source.
Note
• Make sure that you have set the clock correctly.
• If the selected alarm source is unavailable, this product
switches to FM mode automatically.
1 In normal standby mode, press and hold
SLEEP/TIMER.
» The alarm time is displayed with the
hour digits blinking.
» TIMER is displayed.
2 Press + VOL - or / repeatedly to
set the hour, and then press SLEEP/TIMER
to conrm.
» The minute digits blink.
3 Press + VOL - or / to set the
minute, and then press SLEEP/TIMER to
conrm.
» The alarm source name blinks.
4 Press + VOL - or / to select an
alarm source.
5 Press SLEEP/TIMER to conrm.
» XX (XX indicates the volume
level of alarm) blinks.
Deactivate/Re-activate the alarm
timer
In standby mode, press SLEEP/TIMER.
» If TIMER disappears, the alarm timer is
deactivated.
» If TIMER is displayed, the alarm timer
is activated.
Stop an alarm
When an alarm rings, press or SLEEP/TIMER
to stop it.
Note
• If you do not stop an alarm, it keeps ringing for 30
minutes, and then the product automatically switches to
normal standby mode.
Use the sleep timer
You can set a period of time after which the
product automatically switches to normal
standby mode.
In working mode, press SLEEP/TIMER
repeatedly to select a preset period (120, 90,
60, 45, 30, or 15 minutes).
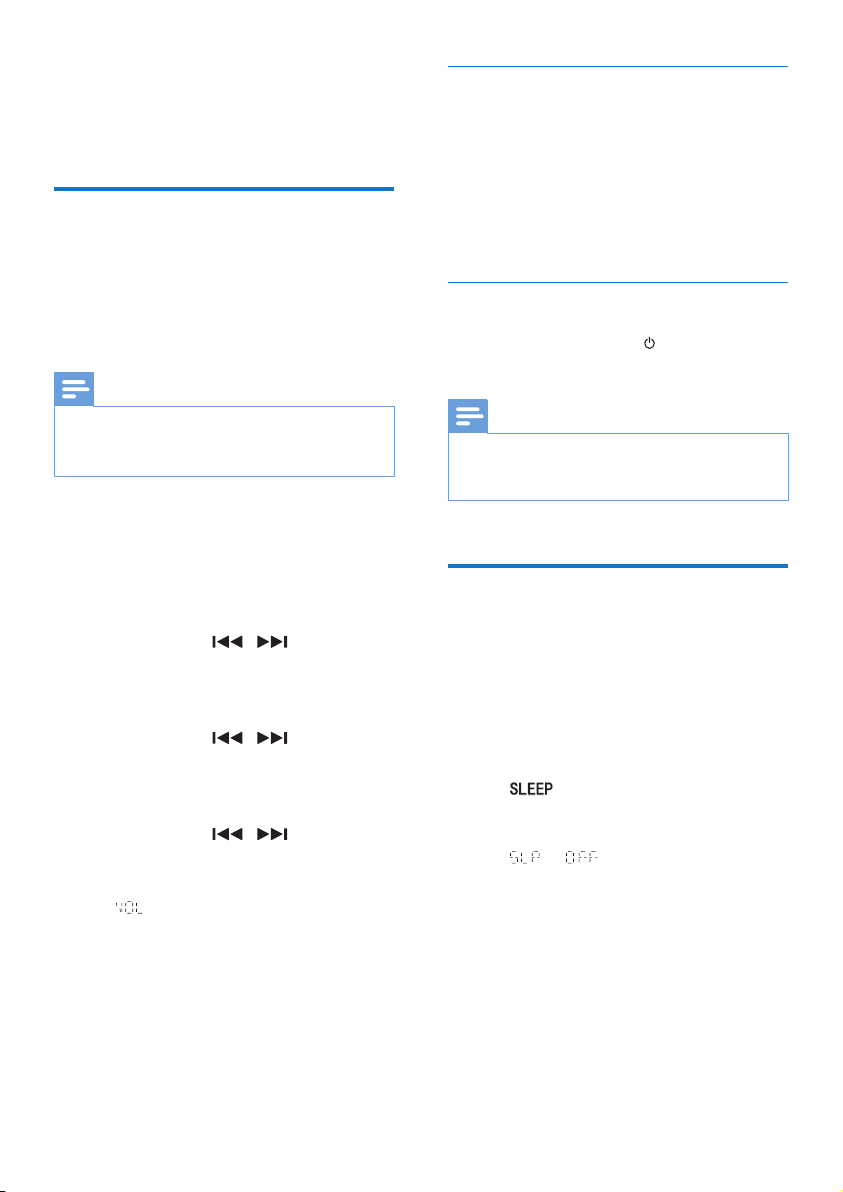
» When the sleep timer is activated,
is displayed.
• To deactivate the sleep timer, press
SLEEP/TIMER repeatedly until
is displayed.
6 Press + VOL - to set the alarm volume, and
then press SLEEP/TIMER to conrm.
17EN
Page 20
Listen through headphone
Plug a headphone into the socket on the
front panel of main unit.
Note
• No audio output from the headphone socket when
you listen to the docked iPod/iPhone/iPad. Listen
through the speakers instead.
Listen to an external device
You can also listen to an external audio device,
for example, MP3 player, through this product.
AUDIO
IN
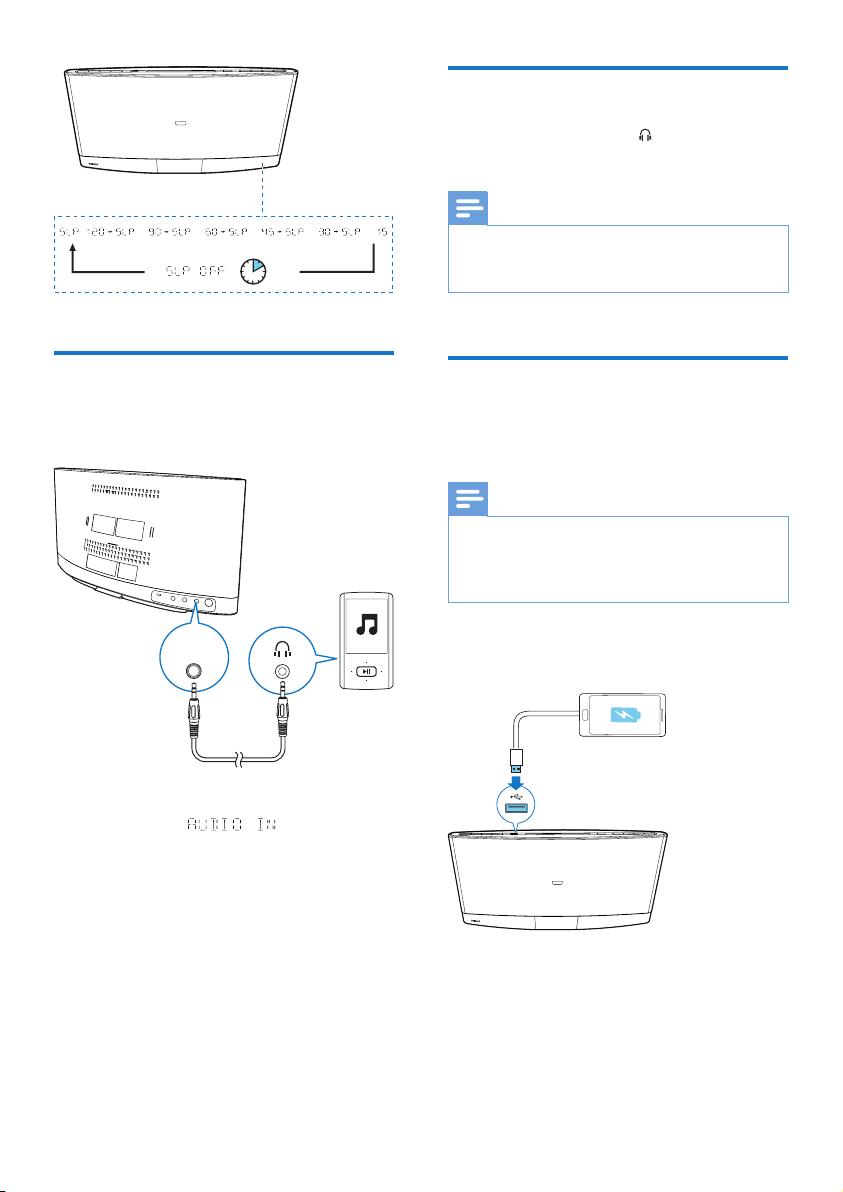
1 Press AUDIO IN or SOURCE to switch
the source to .
2 Connect an audio input cable with 3.5 mm
plug on both ends between
• the AUDIO IN socket on the back
panel of this product, and
• the headphone socket on the external
device.
3 Play audio on the external device (refer to
its user manual).
Charge your USB device
You can charge your USB device, for example,
smart phone, with this product.
Note
• The output voltage through the USB socket is 5 V with
output currency 0.5 A.
• WOOX Innovations does not guarantee the
compatibility with all USB devices.
Connect your USB device to this product with
USB cable.
18 EN
Page 21
11 Use system
menus
Use the system menus to
• check the version of current software of
this product,
• upgrade the software, and
• reset the product to factory default status.
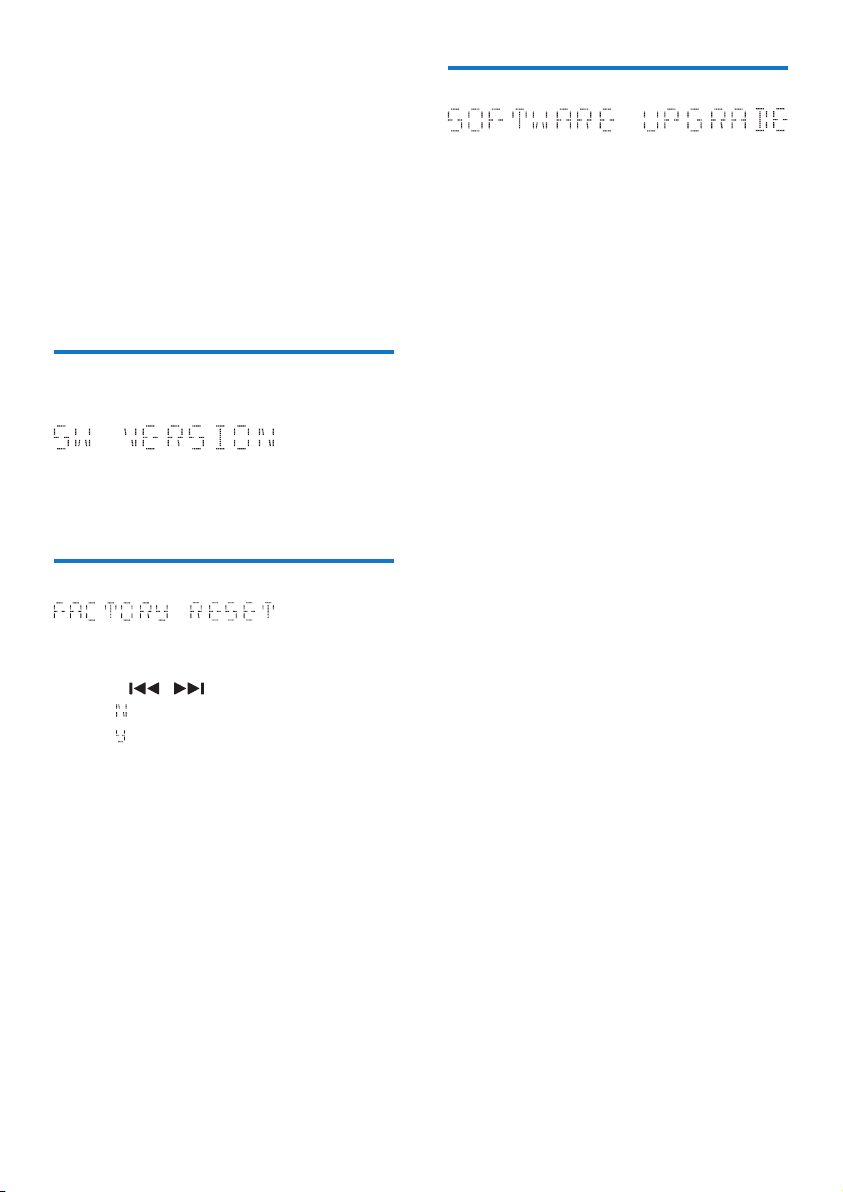
Check the current software version
Press OK to display the version of current
software.
Reset the product
1 Press OK to display the options.
2 Press / to select an option.
• : Return to the previous menu.
• : Reset the product to factory default
status.
3 Press OK to conrm the option.
Upgrade the software
1 Go to www.philips.com/support.
2 Search for suppor t information about
this product with "DCB2272/05" as the
keyword.
» When an upgrade packet is available,
the link of "Installation instructions"
under "Software & drivers" is
accessible. The exact wording of link
names may vary in different languages.
3 Click the link of "Installation instructions".
4 Read and understand the instructions on
software upgrade.
5 Follow the instructions to complete the
upgrade.
19EN
Page 22
12 Product
information
Note
• Product information is subject to change without prior
notice.
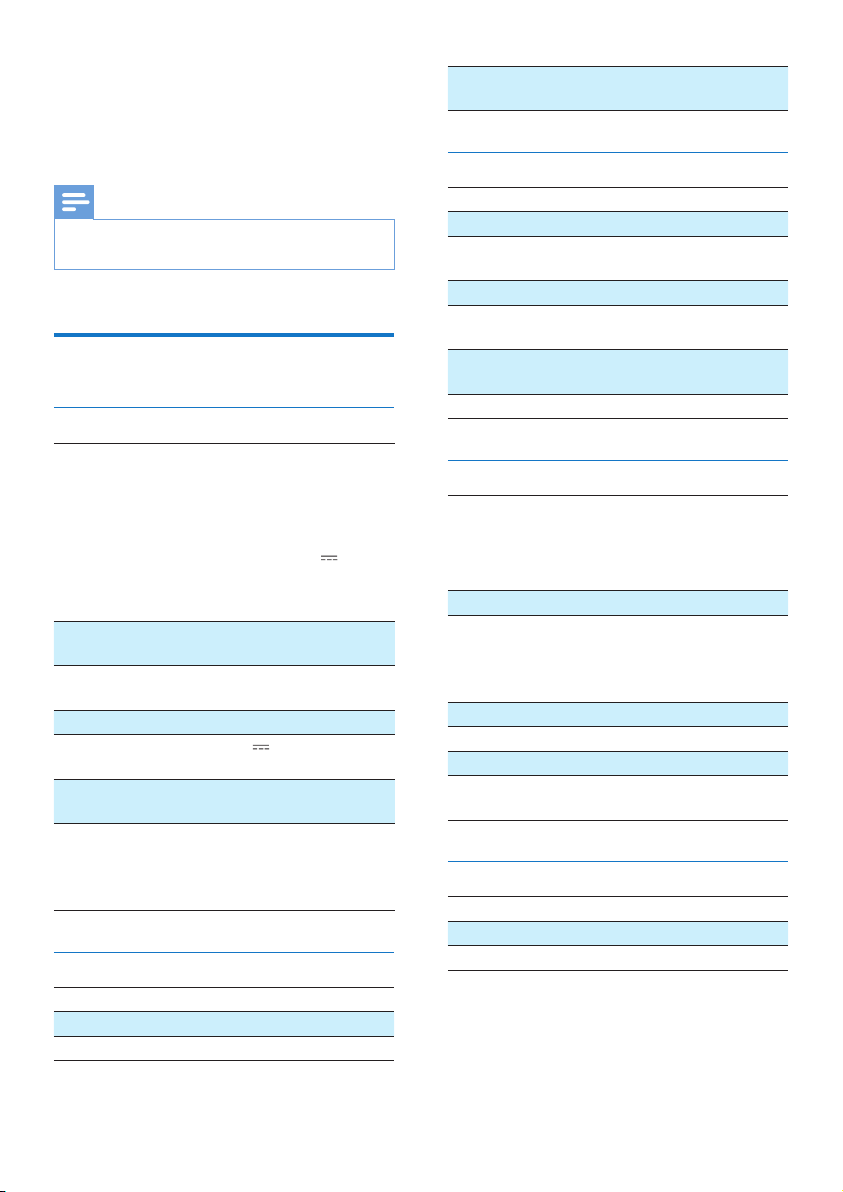
Specications
General information
AC power adaptor Model: AS360-120-
AD300 (Philips)
Input: 100 - 240 V ~,
50/60 Hz, 1.2 A
Output: 12 V 3.0 A
Safety standard:
EN60065
Operation power
consumption
Eco standby power
consumption
USB Direct Version 1.1, 2.0
Max. loading of USB
output
Dimensions: Main
unit (W x H x D)
Weight
- With packing
- Main unit
Amplier
Rated output power 2 X 5 W RMS
Frequency response 60 Hz - 16 kHz
Signal-to-noise ratio > 60 dBA
15 W
≤ 0.5 W
5 V 500 mA
420 x 226 x 97 mm
3.6 kg
2.3 kg
AUDIO INPUT 650 mV RMS 20
kOhm
Disc
Laser type Semiconductor
Disc diameter 12 cm
Support discs CD-DA, CD-R, CD-
RW, MP3-CD
Audio DAC 24 Bits, 44.1 kHz
Total harmonic
distortion
Frequency response 60 Hz - 16 kHz (44.1
S/N Ratio > 55 dB
< 1.5% (1 kHz)
kHz)
Tuner
Tuning range FM: 87.50 -
108.00 MHz;
DAB: 174.928-
239.200 MHz
Tuning grid 50 kHz (FM)
Sensitivity
- Mono, 26dB S/N Ratio
- Stereo, 46dB S/N Ratio
Search selectivity > 28 dBf
Total harmonic distortion < 3%
Signal-to-noise ratio > 55 dB
Number of preset radio
stations
< 22 dBf
< 43 dBf
FM (20), DAB
(20)
Speakers
Speaker impedance 6 Ohm
Speaker driver 2.75'' full range X 2
Sensitivity > 82 dB/m/W
20 EN
Page 23
USB playability information
Maintenance
Compatible USB devices:
• USB ash memory (USB 2.0 or USB1.1)
• USB ash players (USB 2.0 or USB1.1)
• Memory cards (requires an additional card
reader to work with this unit)
Supported formats:
• USB or memory le formats: FAT16, FAT32
(sector size: 512 bytes)
• MP3 bit rate (data rate): 32 - 320 kbps and
variable bit rate
• Directory nesting up to a maximum of 8
levels
• Number of albums/ folders: maximum 999
• Number of tracks/titles: maximum 999
• ID3 tag v2.0 or later
• File name in Unicode UTF8 (maximum
length: 128 bytes)
Unsupported formats:
• Empty albums: an empty album is an album
that does not contain .mp3 les, and will
not be shown in the display.
• Unsupported le formats are skipped. For
example, Word documents (.doc) or MP3
les with extension .dlf are ignored and
not played.
• AAC, WAV, PCM audio les
Clean the cabinet
• Use a soft cloth slightly moistened with
a mild detergent solution. Do not use a
solution containing alcohol, spirits, ammonia
or abrasives.
Clean discs
• When a disc becomes dirty, clean it with
a cleaning cloth. Wipe the disc from the
centre out.
• Do not use solvents such as benzene,
thinner, commercially available cleaners,
or antistatic spray intended for analogue
records.
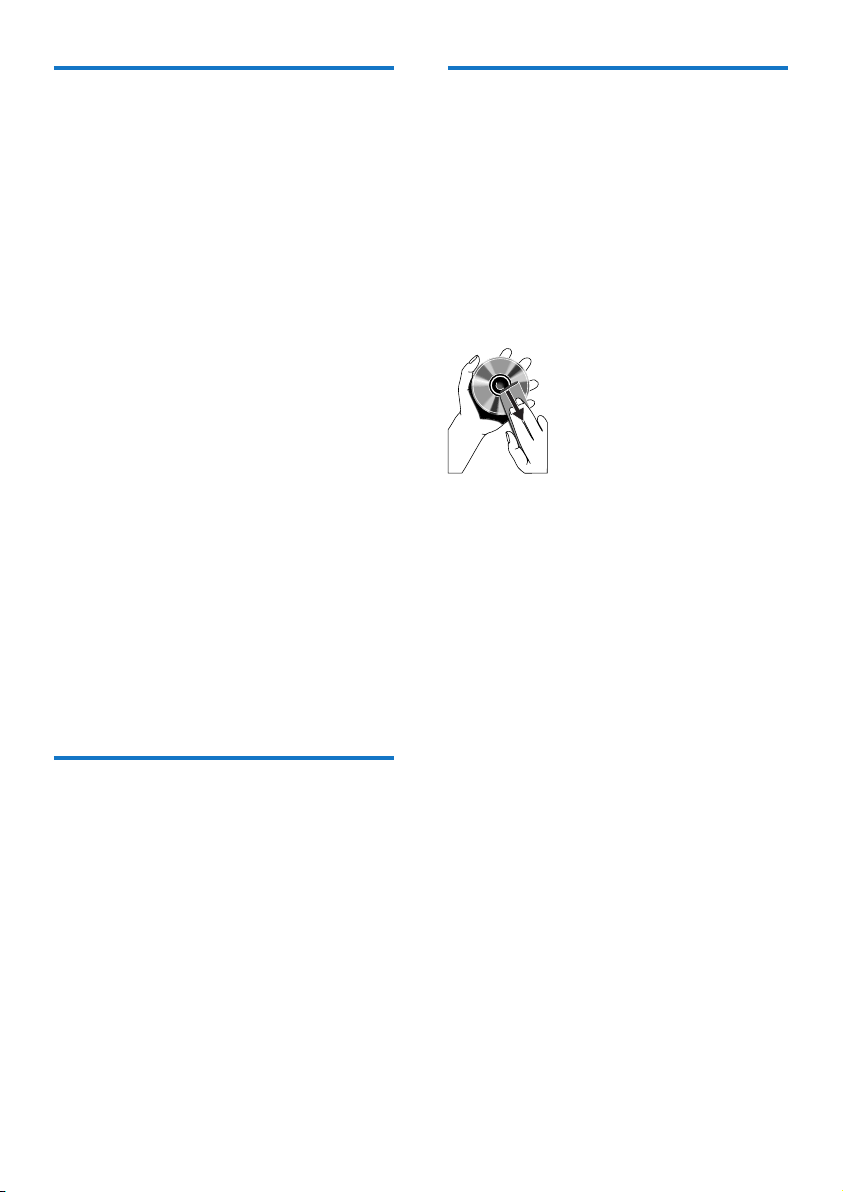
Clean the disc lens
• After prolonged use, dirt or dust may
accumulate at the disc lens. To ensure good
play quality, clean the disc lens with Philips
CD lens cleaner or any commercially
available cleaner. Follow the instructions
supplied with cleaner.
Supported MP3 disc formats
• ISO9660, Joliet
• Maximum track/le number: 999
(depending on le name length)
• Maximum album number: 99
• Supported sampling frequencies: 32 kHz,
44.1 kHz, 48 kHz
• Supported bitrates: 32-320 kbps, variable
bitrates
21EN
Page 24
13 Troubleshooting
Warning
• Never remove the casing of this product.
To keep the warranty valid, never try to repair
the product yourself.
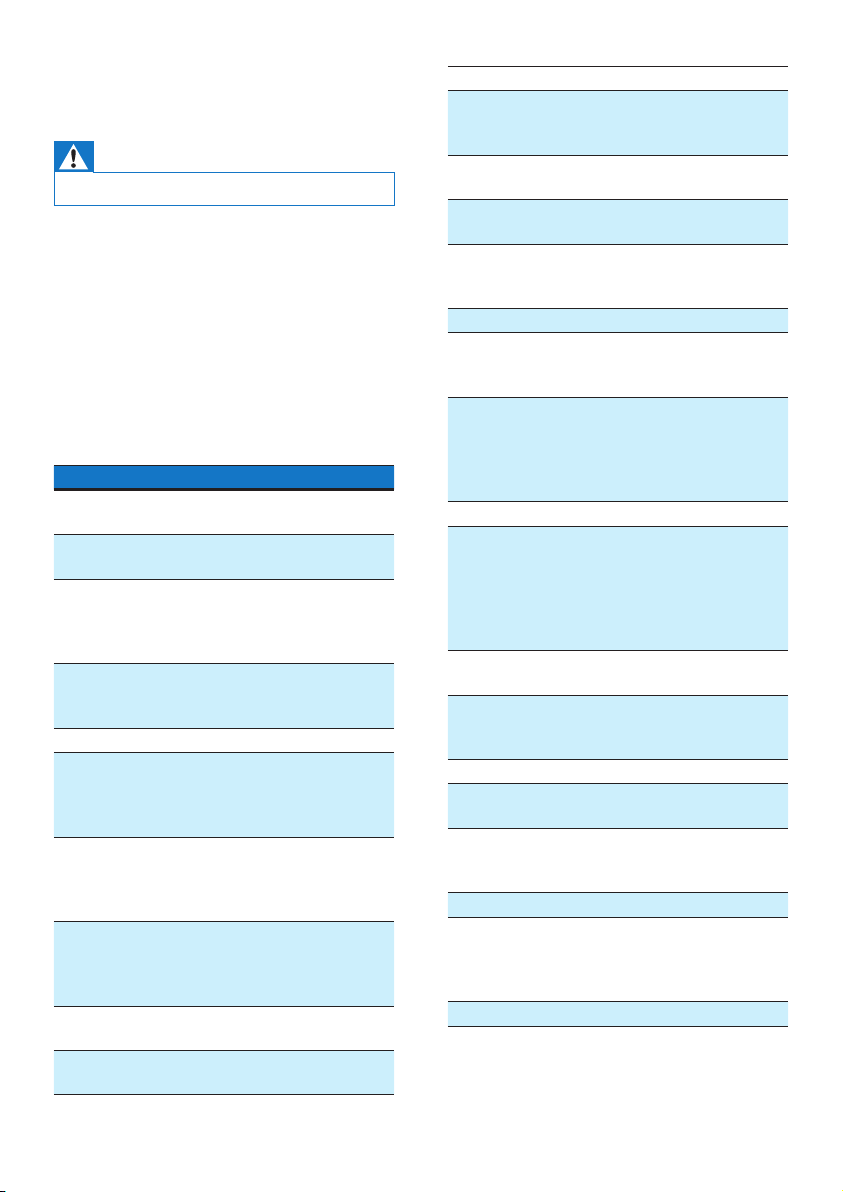
If you encounter problems when using this
device, check the following points before
requesting service. If the problem remains
unsolved, go to the Philips Web page (www.
philips.com/support). When you contact the
Consumer Care, make sure that the product
is nearby and the model number and serial
number are available.
Problem Solution
No power. Make sure that the AC power
adaptor is connected properly.
Make sure that there is power at
the AC outlet.
With a power-saving feature, the
product switches off automatically
15 minutes after the product stays
inactivity.
No sound
or poor
sound.
No
response
from the
product.
Remote
control
does not
work.
Adjust the volume.
Disconnect the headphones.
Reconnect the AC power adaptor,
and then turn on the product
again.
With a power-saving feature, the
product switches off automatically
15 minutes after the product stays
inactivity.
Before you press any function
button, select the correct source
with the remote control instead
of the main unit.
Reduce the distance between the
remote control and the main unit.
Insert the battery with its polarity
(+/– signs) aligned as indicated.
No disc is
detected.
USB
storage
device
is not
supported.
Cannot
play some
les on
the USB
storage
device.
Radio
reception
is poor.
Timer
does not
work.
Clock/
timer
setting is
erased.
Replace the battery.
Aim the remote control directly at
the sensor on the front panel of
the main unit.
Insert a disc.
Make sure that you place the disc
with its label facing upwards.
Wait until the moisture
condensation at the lens has
cleared.
Replace or clean the disc.
Make sure that the recordable
disc is nalized and the format
supported.
Make sure that the USB storage
device is compatible with the
product.
Tr y another one.
Make sure that the le format is
supported.
Make sure that the le quantity
does not exceed the maximum.
Increase the distance between
the product and other electrical
appliances.
Fully extend the antenna.
Connect an outdoor FM antenna
instead.
Set the clock correctly.
Activate the timer.
Power has been interrupted or
the AC power adaptor has been
disconnected.
Reset the clock/timer.
22 EN
Page 25
14 Notice
Any changes or modications made to this
device that are not expressly approved by
WOOX Innovations may void the user’s
authority to operate the equipment.
Compliance
This product complies with the radio
interference requirements of the European
Community.
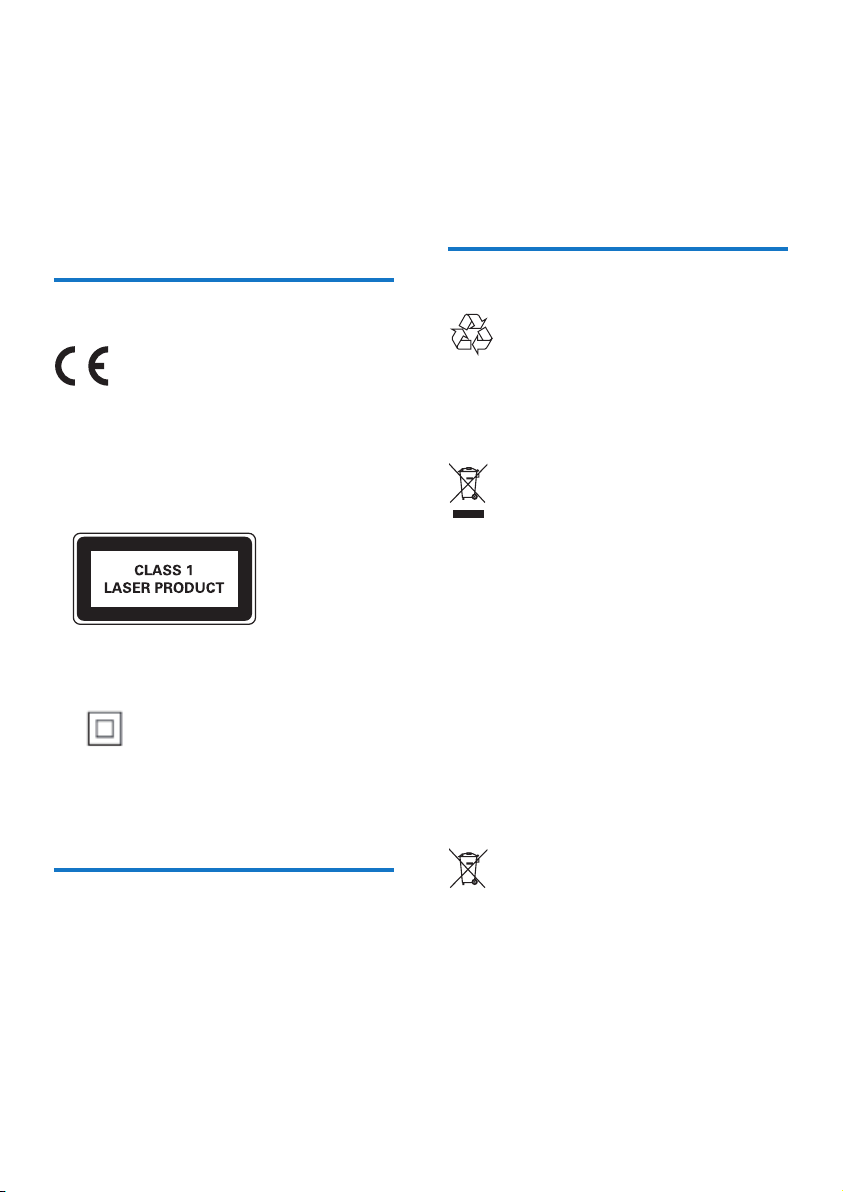
This apparatus includes this label:
Class II equipment symbol:
CLASS II apparatus with double insulation, and
no protective earth provided.
• the ASTA approval mark.
Contact your dealer if you are not sure about
what type of fuse to use.
Caution: To conform with the EMC directive
(2004/108/EC), do not detach the plug from
the power cord.
Care of the environment
Your product is designed and manufactured
with high quality materials and components,
which can be recycled and reused.
When this crossed-out wheeled bin symbol is
attached to a product it means that the product
is covered by the European Directive 2002/96/
EC.
Please inform yourself about the local separate
collection system for electrical and electronic
products.
Please act according to your local rules and
do not dispose of your old products with your
normal household waste. Correct disposal of
your old product helps to prevent potential
negative consequences for the environment and
human health.
Important notes for users in the U.K.
This information applies only to products with a
UK mains plug.
This product is tted with an approved molded
plug. If you replace the fuse, use one with:
• the ratings shown on the plug,
• a BS 1362 approval, and
Your product contains batteries covered by
the European Directive 2006/66/EC, which
cannot be disposed with normal household
waste.Please inform yourself about the local
rules on separate collection of batteries
because correct disposal helps to prevent
negative consequences for the environmental
and human health.
23EN
Page 26
Environmental information
All unnecessary packaging has been omitted.
We have tried to make the packaging easy to
separate into three materials: cardboard (box),
polystyrene foam (buffer) and polyethylene
(bags, protective foam sheet.)
Your system consists of materials which can
be recycled and reused if disassembled by
a specialized company. Please observe the
local regulations regarding the disposal of
packaging materials, exhausted batteries and old
equipment.
Trademark notice
“Made for iPod,” “Made for iPhone,” and “Made
for iPad” mean that an electronic accessory
has been designed to connect specically to
iPod, iPhone, or iPad, respectively, and has
been certied by the developer to meet
Apple performance standards. Apple is not
responsible for the operation of this device
or its compliance with safety and regulatory
standards. Please note that the use of this
accessory with iPod, iPhone, or iPad may affect
wireless performance.
iPod and iPhone are trademarks of Apple Inc.,
registered in the U.S. and other countries. iPad
is a trademark of Apple Inc.
Copyright
2014 © WOOX Innovations Limited. All rights
reserved.
Philips and the Philips’ Shield Emblem are
registered trademarks of Koninklijke Philips N.V.
and are used by WOOX Innovations Limited
under license from Koninklijke Philips N.V.”
Specications are subject to change without
notice. WOOX reser ves the right to change
products at any time without being obliged to
adjust earlier supplies accordingly.
24 EN
Page 27

25EN
Page 28

Specifications are subject to change without notice
2014 © WOOX Innovations Limited. All rights reserved.
Philips and the Philips’ Shield Emblem are registered trademarks of Koninklijke Philips
N.V. and are used by WOOX Innovations Limited under license from Koninklijke
Philips N.V.
DCB2272_05_UM_V1.0
 Loading...