

Page 1
Page 2

Table of contents
1. Discover your phone .................... 1
1.1 Keypad .............................................................. 1
1.1.1 Alphanumeric Keys ....................................1
1.1.2 Control Keys ................................................3
1.1.3 Key Operation in Idle Mode ...................5
1.1.4 Key Operation without a SIM Card
(SOS Emergency calls) .........................................6
1.2 Display Screen ................................................ 6
1.2.1 Main Screen ................................................6
1.2.2 Small LCD Screen ......................................8
1.3 Inserting the battery .................................... 10
1.4 Inserting the SIM card .................................10
1.5 Charging the battery ................................... 11
2. Main Features ...............................12
2.1 Switching on the phone .............................. 12
2.2 Switching off the phone ..............................12
2.3 Make a call ..................................................... 12
2.4 Answering a Call .......................................... 13
2.5 Text Input ...................................................... 13
2.5.1 T9 mode ....................................................14
2.5.2 Multi-Tap (abc/ABC) ..............................15
2.5.3 Numbers (123) .......................................15
2.6 Phonebook .................................................... 15
2.6.1 Search ........................................................ 16
2.6.2 Adding names to the phonebook .......17
2.6.3 Contacts List ............................................17
2.6.4 Memory Status ........................................ 19
2.6.5 Delete All ..................................................19
2.6.6 Copy All ..................................................... 19
2.6.7 Move All .................................................... 20
2.6.8 Group Settings ......................................... 20
2.6.9 Choosing a Storage Location ............... 20
2.6.10 Own Information .................................. 20
2.7 Transmission between Phone and PC .... 21
2.7.1 Before Using PC Sync ............................21
2.7.2 Using PC Sync software ........................21
2.8 Use your phone as a Modem .................... 26
2.9 Fotocall ........................................................... 27
2.10 Functions Demo ........................................ 27
3. Menu Options ...............................28
3.1 Messages (network-dependent) ............... 28
3.1.1 SMS (network-dependent) ...................28
3.2 Call List .......................................................... 34
3.3 Phone setting ................................................ 36
3.3.1 Group melody ..........................................36
i
Page 3

3.3.2 Ring Volume .............................................36
3.3.3 Phone setting ............................................36
3.3.4 Call setting ................................................39
3.3.5 Date/time settings ..................................41
3.3.6 Security Settings ......................................41
3.3.7 Call Screening ..........................................42
3.3.8 Network Setting ......................................43
3.3.9 Factory Settings .......................................44
3.4 Profile Settings ..............................................44
3.4.1 Personalised setting ................................46
3.5 Tool ................................................................. 46
3.5.1 Organiser ..................................................46
3.5.2 Alarm Clock ..............................................48
3.5.3 Calculator ..................................................49
3.5.4 Stopwatch .................................................50
3.5.5 Reverse Timer ..........................................50
3.5.6 Auto On/Off ..............................................50
3.5.7 World Time ..............................................50
3.6 Entertainment ...............................................51
3.6.1 Games ........................................................51
ii
3.6.2 Recorder .................................................... 52
3.6.3 Biorhythm Graph .................................... 52
3.7 WAP (Network-dependent) ..................... 53
3.7.1 Homepage ............................................... 53
3.7.2 Favorite ...................................................... 53
3.7.3 Last Visit Page .........................................53
3.7.4 Browse .......................................................53
3.7.5 Settings ...................................................... 53
3.8 Multimedia ..................................................... 55
3.8.1 Camera ..................................................... 55
3.8.2 Picture Album .......................................... 57
3.8.3 Capacity Query ....................................... 58
3.9 STK Service ................................................... 58
4. Accessories ...................................59
4.1 Charger .......................................................... 59
4.2 Earpiece .......................................................... 59
4.3 Data Cable ..................................................... 59
Precautions ........................................60
Page 4
1 • Discover your phone
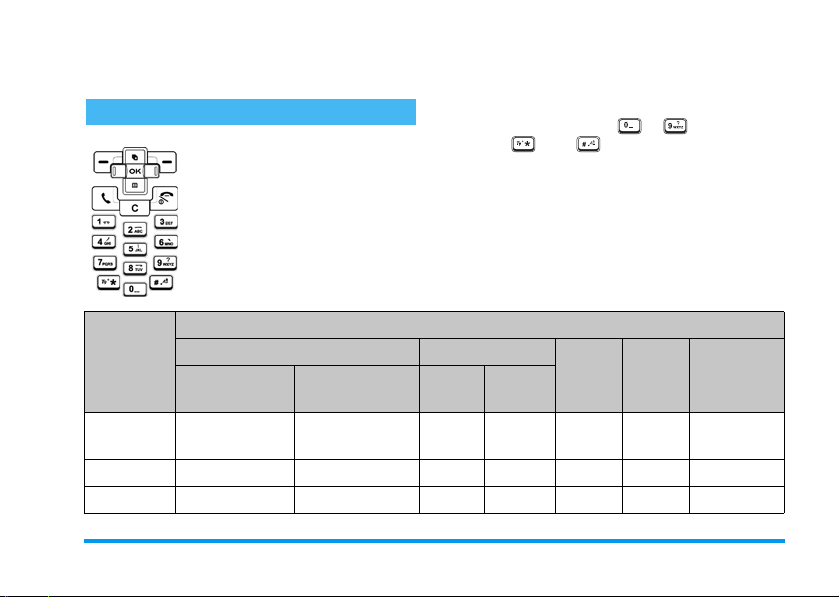
1.1 Keypad
This mobile phone comes with a
keypad that comprises 25 keys and
can be sub-divided into two areas as
follows:
• An alphanumeric key area, with a
total of 12 keys
• A control k ey area, with a total of
13 keys
Ke yp ad
Ta b s
1
2ABC ABC2AÄÅÆÇ abc2адежз
3DEF DEF3ÉE def3éè
Capital letters
1@_#= <>()&£$¥
Alphanumeric Numbers
Small letters
A, B, C
Space
a, b, c
Space
1@_#= <>()&£$¥
1.1.1 Alphanumeric Keys
There are 12 keys in the alphanumeric key area and
they are arranged according to a specific rule. There
are 10 number keys from ~ , the other two
keys are and .
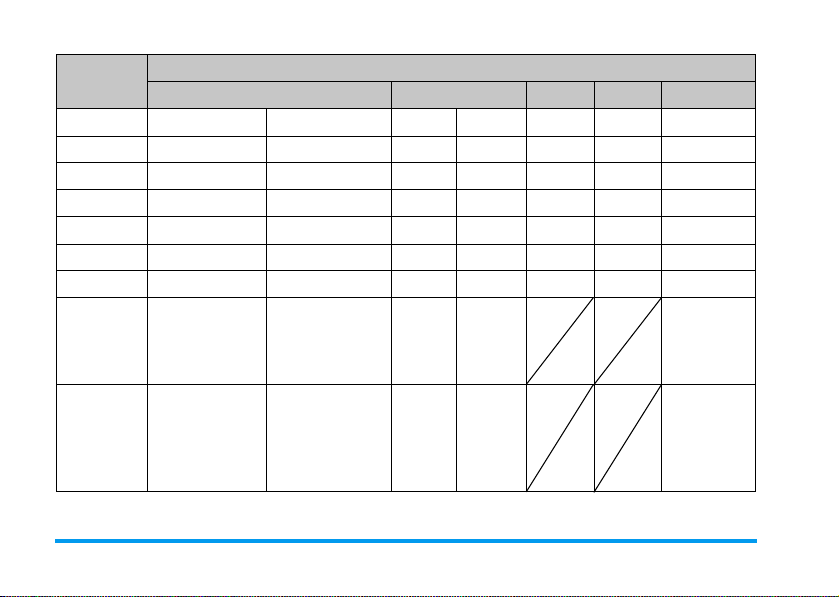
The keys in the keypad area allow you to enter
numbers or characters. Depending on the screen
environment, the same key may represent different
output values as shown in the following table:
Using the Editor function
Short
press
Long
press
1111 1
2222 2
3333 3
Code Time Calculator
Discover your phone 1
Page 5
Ke yp ad
Ta b s
4GHI GHI4
5JKL
6MNO MNO6ÑòÖØ mno6ñòöø
7PQRS PQRS7ß pqrs7ß
8TUV TUV8Üù tuv8üù
9WXYZ WXYZ9 wxyz9
0 .0/”’?!,:;¡¿*+-% .0/”’?!,:;¡¿*+-%
* Switch input modes Switch input modes
#.
Alphanumeric Numbers Code Time Calculator
ΓΙ
JKL5 jkl5 5 5 5 5 5
Short press:
Shift case
Long press:
Input symbols
Short press:
Shift case
Long press:
Input symbols
Using the Editor function
ghi4Γì
4444 4
6666 6
7777 7
8888 8
9999 9
0.00 0
+
*
#
+
wp
*
/
.
2 Discover your phone
Page 6
1.1.2 Control Keys
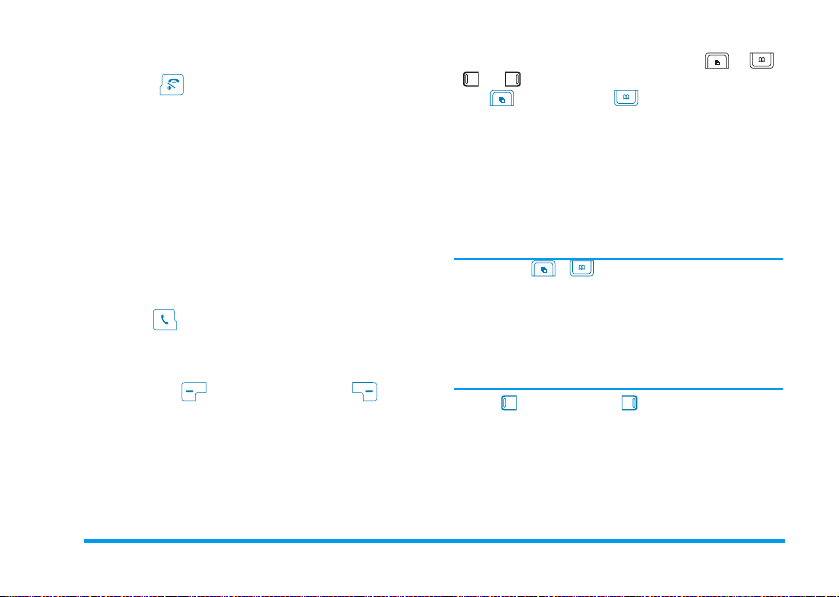
Hang up ( ) key:
The red key to the right of the keypad area, also called
the Red key or On/Off key.
• When the phone is switched off, press this key to
switch on the phone. (When the phone is charging,
a long press on this key is required to switch on the
phone).
• When the phone is switched on, a long press on
this key in any mode will switch off the phone.
• When browsing menus or in editing mode, a short
press on this key will return to the idle screen.
• Press this key to end a call.
• Press this key to reject an incoming call.
Pick-up ( ) key:
The green key to the left of the keypad area, a lso called
the Green key or Send key. Press this key to answer an
incoming call or dial a number.
Left softkey ( ) and right softkey ( )
The uppermost key to the left of the keypad area is the
Left Softkey, and the uppermost key to the right of the
keypad area is the Right Softkey. These keys generally
correspond to the functions shown in the softkey
indication area at the bottom of the screen. Hence,
depending on the definition of the application, they
have different functions.
Navigation key s:
, .
Up () and Down ()keys:
• Press to scroll up and down in the text editor to
display a list of applicable characters.
• Press to scroll up and down the screen.
• Press to browse short messages or long texts.
• Press to scroll to the next picture when browsing
pictures.
• Press to adjust the focus of the camera when taking
a picture.
Note: The / keys feature an auto-repeat
function: A long press on one of the two keys is
equivalent to pressing it repeatedly, i.e. when you press
the keys long enough such that it exceeds the preset
time, the auto-repeat function of the key will be
activated. The interval for auto-repeat is preset and
you cannot modify it.
Left () and Right () keys:
• Press to move the cursor left or right in an editor.
• Press to browse the main menu.
• Press to scroll the pages when browsing a list.
• Press to scroll to the next picture when browsing
pictures.
Consist of 4 keys - , ,
Discover your phone 3
Page 7

• Press to select a frame or background to overlap
when taking pictures with special effects.
• Press to adjust the focus when the camera is in
view-finding mode.
Confirm ( ) key
The key at the centre of the four navigation keys is
also known as the Middle key. By default, the key is
used to confirm a selection.
Clear/Cancel ( ) key:
Also called the Return key.
During editing, if there are texts in the editor, a short
press on key will clear the character to the left of
the cursor. If there is no character to the left of the
cursor, it will clear the character to the right of the
cursor. If there are no texts in the editor, short press
key to return to the previous menu. If there are
texts in the editor, a long press on key will clear
the entire character string regardless of where the
cursor is positioned. However, if there are no texts in
the editor, an idle screen will be displayed.
When browsing a menu, a short press on key
will return to the previous menu, while a long press on
key will return to idle screen.
There are three keys on the right side of the phone:
“Multimedia” Side key, “Up” Side key and “Down”
Side key (from top to bottom).
4 Discover your phone
Page 8

“Up/Down” Side keys “Multimedia” Side key:
• When the flip is closed and the earphone is
inserted, a short press either key allows you
to answer an incoming call.
• When the flip is closed, a long press on the key
will stop ringing/vibration when there is an
incoming call, regardless of whether the
earphone is inserted or not.
• When the flip is closed and the earphone is
inserted, a long press on the key will end the
current call.
• During a call, the keys can be used to adjust
the volume of the earpiece or earphone.
• When the flip is opened and the phone is in
idle mode, a short press on the key allows you
to adjust the volume of the ringing alert.
• When the camera is in view-finding mode,
short press to do a step-by-step focus
adjustment; or long press to adjust the focus
continuously.
• When the flip is opened and the phone is in
idle mode, a long press will activate Voice
Command (not supported when the flip is
closed).
• When the flip is opened, a short press will access
the camera interface. When the camera is in
view-finding mode, short press to take a picture.
The picture will be frozen. Short press again will
go back to view-finding mode and take the next
picture.
1.1.3 Key Operation in Idle Mode
When the phone is in idle screen, you can:
• Press key to access the
• Short press key to access the main menu;
long press to activate
Command
• Press key to access the
• Press key to access the
• Press key to access
• Press key to access
• Press key to access the camera view-finder
interface.
• Press key to access
.
Dialled Calls
Voi ce Di a l
Call list
Contacts
WA P
menu.
Messages
Contacts
.
list.
menu.
menu.
list.
or V
oice
Discover your phone 5
Page 9
• Enter phone numbers directly by using the
alphanumeric keys and dial the number, or access
the corresponding options menu.
• Hotkeys require user definitions. (See “Hotkey setting”
page 38)
1.1.4 Key Operation without a SIM Card
(SOS Emergency calls)
• Press key to access the first level menu.
• Press the left softkey to enter camera preview mode.
• Press the right softkey to access 'SOS'.
1.2 Display Screen
This mobile phone features two LCD screens: the
main internal LCD screen and the small external
LCD screen.
The main LCD screen supports a display resolution of
128 (W) x 160 (H) pixels, and features TFT
technology with 64K colours.
The small LCD screen supports a display resolution of
96 (W) x 64 (H) pixels, capable of displaying 3 colors
(yellow, green and blue), and features OLED
technology.
1.2.1 Main Screen
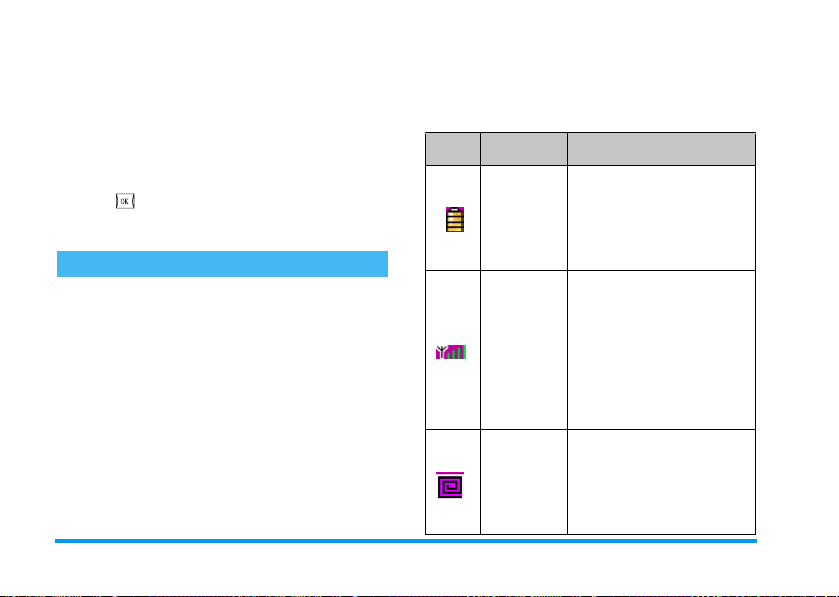
Icons are displayed only when the phone is in idle
mode. These icons will indicate the current phone
status, such as battery level, network signal, etc.
Icon Icon Name Description
Indicates the battery level
Battery
Network
Internationa
l Roaming
with 5 indicator bars. When
the battery is charging, the
battery charge indicator bars
will scroll on the screen.
The network icon is divided
into two portions. The left
portion indicates whether the
phone is registered with a
network while the right
portion indicates the signal
strength in 5 levels (from no
signal to the strongest signal).
This icon is displayed when
the phone is registered with a
network other than your
home network; otherwise it
will not be displayed.
6 Discover your phone
Page 10
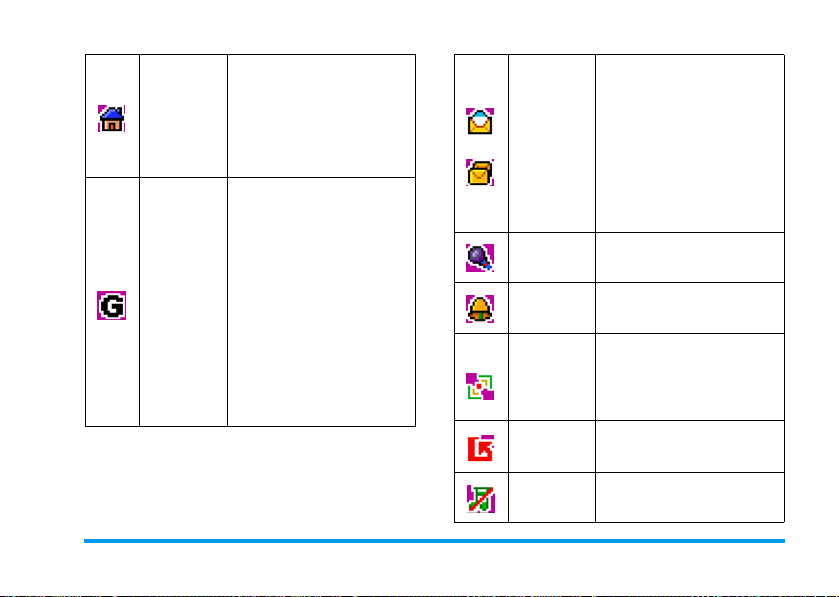
These two icons respectively
indicate that there is at least
one unread SMS in the
Messages list and the SMS
memory is full. If the memor y
is full and at the same time,
there is an unread SMS, only
the memory full icon will be
displayed.
Indicates there is an
unprocessed voice mail.
Indicates that the alarm clock
event is activated.
The phone will vibrate
whenever there is an
incoming call, new event or
alarm clock event.
Indicates that call forwarding
function is activated.
Indicates that the silence
mode is activated.
Local Area
Network
Logged on
to GPRS?
This icon is displayed when
the phone is registered to a
local area network; otherwise
it will not be displayed. (This
feature is network-
dependent.)
There are two scenarios in the
GPRS mode (mutually
exclusive):
The GPRS network is available,
but you have not logged on to
the network; or GPRS network
is available, and you have logged
on to the network.
This icon is displayed when you
are logged on to the network,
and will not be displayed when
you are not logged on to the
network.
Short
Messages
(SMS)
Voic e Mai l
Alarm Clock
Vibra
Call
Forward
Silence
Discover your phone 7
Page 11
Call a dialled number
Press key in idle mode to display the “Dialed
Calls” list. Use / key to select one of the
dialed numbers and press key to dial the number
directly.
1.2.2 Small LCD Screen
When there is no new event or action, the small LCD
screen will automatically switch off after 20 seconds.
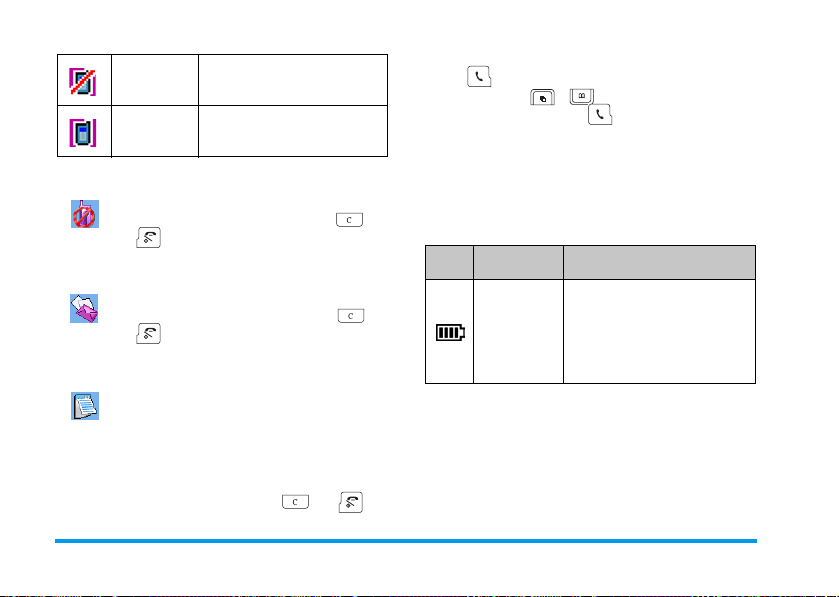
Icons displayed on the small LCD screen in idle mode
are listed in the table below:
Icon Icon Name Description
Indicates the battery level with 5
Battery
indicator bars. When the
battery is charging, the battery
charge indicator bars will scroll
on the screen.
Black list
VIP list
Idle Screen Events
•
Miss ed call
an incoming call. You can press or
to return to idle mode. Once you
exit from this screen, this prompt icon
will no longer appear again.
•
New message
received new SMS. You can press or
to return to idle mode. Once you
exit from this screen, this prompt icon
will no longer appear again.
•
Organiser alert
there is an event of higher priority, only
an alert tone will sound. The screen will
not display the organiser alert icon. The
organiser alert screen will only be
displayed after you exit from other events
of higher priority. Press or to
return to idle screen.
Indicates that the black list is
activated.
Indicates that the VIP list is
activated.
: Indicates that you have missed
: Indicates that you have
: Lowest priority. When
8 Discover your phone
Page 12
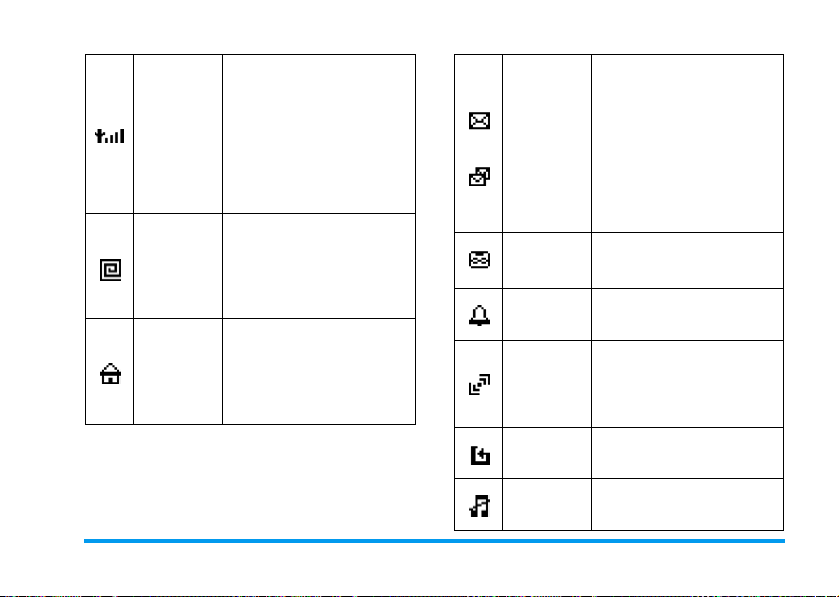
These two icons respectively
indicate that there is at least
one unread SMS in the
Messages list and the SMS
memory is full. If the memory
is full and at the same time,
there is an unread SMS, only
the memory full icon will be
displayed.
Indicates there is an
unprocessed voice mail.
Indicates that the alarm clock
event is activated.
The phone will vibrate
whenever there is an incoming
call, new event or alarm clock
event.
Indicates that call forwarding
function is activated.
Indicates that the silence mode
is activated.
Network
International
Roaming
Local Area
Network
The network icon is divided
into two portions. The left
portion indicates whether the
phone is registered with a
network while the right
portion indicates the signal
strength in 5 levels (from no
signal to the strongest signal).
This icon is displayed when the
phone is registered with a
network other than your
home network, otherwise it
will not be displayed.
This icon is displayed when the
phone is registered to a local
area network; otherwise it will
not be displayed. (This feature
is network-dependent.)
Short
Messages
(SMS)
Voic e Mai l
Alarm Clock
Vibra
Call Forward
Silence
Discover your phone 9
Page 13
Black list
VIP list
Indicates that the black list is
activated.
Indicates that the VIP list is
activated.
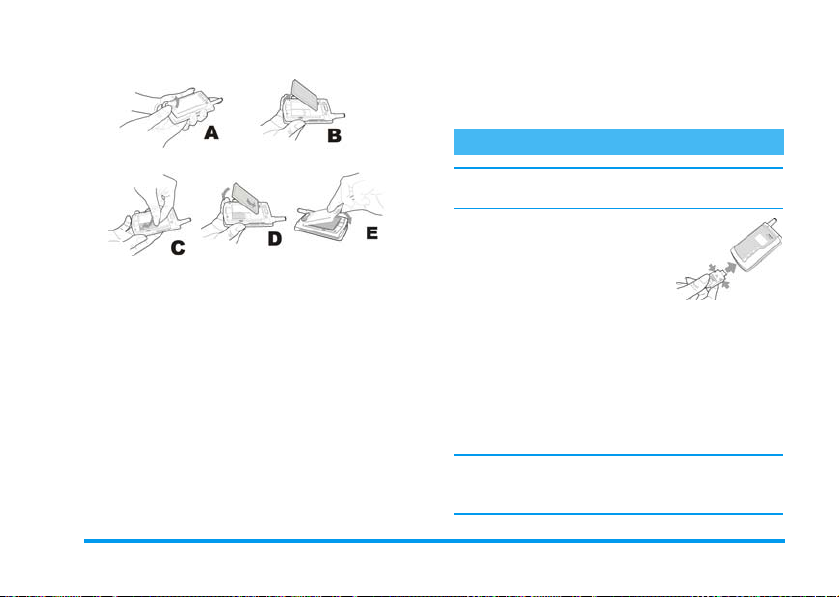
1.3 Inserting the battery
facing downwards and align with the corresponding
three small metal strips in the battery compartment).
Slide the battery into the phone and press downwards
until it snaps into place.
Remove the battery
Push the small release lock (at the bottom left of the
battery) upward and outward to release the battery.
Gently lift the battery from the phone.
1.4 Inserting the SIM card
To insert the SIM card
You must first purchase a valid SIM card supplied by
your network operator. The SIM card stores your
Insert the battery
Align the protruded section at the top of the battery
with the slot at the top of the battery compartment
(Note: The three small metal strips on the battery
phone number and your subscription information.
The SIM card can be used in any GSM mobile phone,
and your phone number and subscription
information will remain unchanged.
10 Discover your phone
Page 14
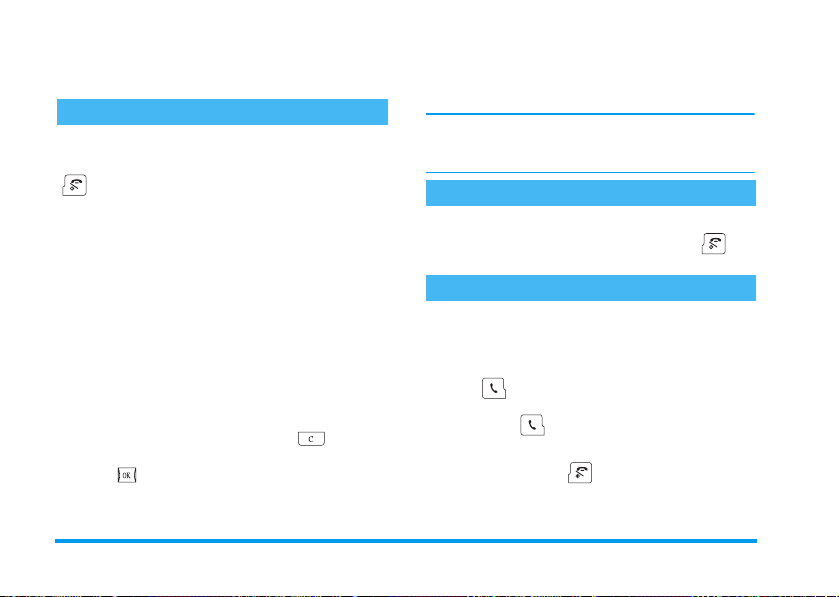
• Slide out the SIM card horizontally from the slot
using your finger tips.
• Remove the SIM card.
• Insert the battery and replace the back cover.
1.5 Charging the battery
Please use the charger provided with the phone to
charge the phone battery.
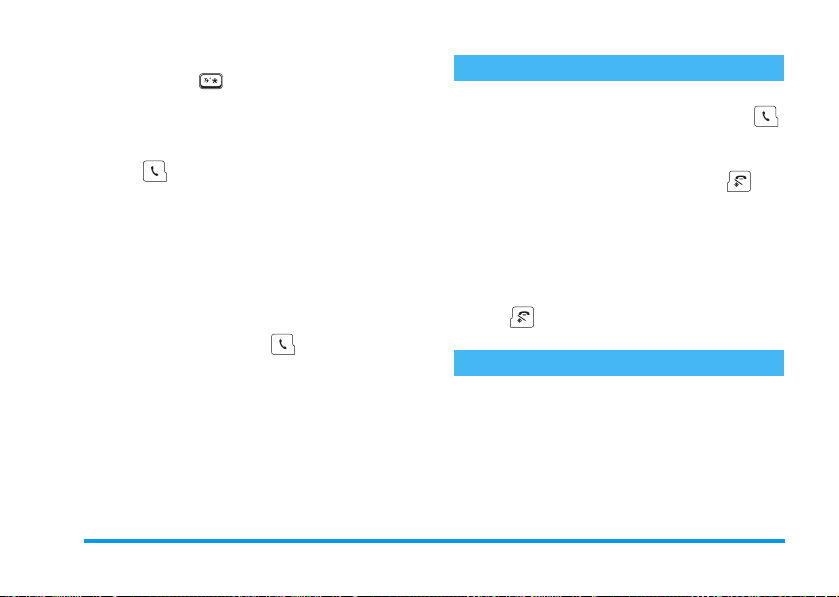
• Plug the connector of the
charger into a 220V AC power
• Ensure that the phone is switched off.
• Remove the back cover.
• Remove the phone battery.
• Insert the SIM card horizontally into its slot with
its gold contacts facing down (towards phone) and
the notched corner at the top left corner.
• Slide the SIM card into its slot until it engages.
• Insert the battery.
• Replace the back cover of your phone: Hook the
cover onto the hinges on the top of the phone. Press
and push the small latch at the bottom of the cover
(towards the phone) until it latches.
To r e m ov e th e S IM ca rd
• Switch off the phone and remove the battery.
socket.
• Connect the charger adapter
into the port at the base of the
phone (the side with an arrow
sign facing upwards) and push it into its slot.
• The battery charge indicator bars will start to scroll
on the display, indicating that the phone is
charging.
• When the battery charge indicator bars stop
scrolling, the battery is fully charged, and you can
disconnect the charger.
Note: The only way to stop the battery charging is to
unplug the charger, so please use an easily accessible
AC power socket.
Discover your phone 11
Page 15
2 • Main Features
2.1 Switching on the phone
To switch on the phone
Under normal circumstances, a long or short press on
key will switch on the phone. However, when
the battery is charging, a long press is required to
switch on the phone.
When the power-on animation is displayed, you can
press any key to stop the animation. Your phone is
then ready for your next operation.
Enter PIN code
To protect your SIM card from unauthorised use, you
can set a security code (PIN code). Once the PIN code
is set, you will be prompted to enter the PIN code
every time you switch on your phone.
• Enter PIN code (For security reasons, the screen
will display “*” to represent the input characters. If
you make a mistake, you can press to delete
the wrong input.)
• Press key to confirm. The phone will start
registering itself with the network after the PIN
code is validated.
Once the screen displays the name of a network, you
ca n di al a num ber or recei ve a call . If the scr een doe s not
display any network, you need to register again.
Note: If you enter a wrong PIN code 3 times in a row,
your SIM card will be blocked. If this happens, please
contact your SIM card provider.
2.2 Switching off the phone
Switch off the phone
Under normal circumstances, a long press on key
will switch off the phone.
2.3 Make a call
• This function is only available when a network is
established (indicated by the network name
displayed on the screen).
• Enter a phone number.
• Press key to dial directly or go to the options
menu and choose
function as key.
End a call
Press [End] softkey or key to end a call. You can
also close the flip to end a call.
Call
. Call option has the same
12 Main Features
Page 16
Make an international call
• Press and hold until a “+” sign appears on the
screen.
• Enter the country code.
• Enter the area code (normally without the preceding “0”)
and the telephone number.
• Press to dial directly or go to options menu
and choose
Call
.
Making two calls at the same time (networkdependent)
You can put an active call on hold and call another
number:
• Use the “Call options” menu to put the active call
on hold. Select a number from the phonebook or
dial a number directly from the keypad.
• Press the [Dial] softkey or to start dialing.
Switch calls (network-dependent)
If you have two calls in progress, one active and one on
hold, you can use the “Call options” menu to toggle
between the two calls.
2.4 Answering a Call
Answer a call
To answer a call, press the [Answer] softkey or
key.
Reject a call
To reject a call, press the [Reject] softkey or key.
Answer a second call (network-dependent)
If the Call Waiting option is activated, you will receive
a prompt when there is another incoming call. You
can:
• put the active call on hold and answer the second
call.
• press key to end the active call and answer or
reject the second call like in a normal call.
2.5 Text Input
This phone features T9 text input.
You will often need to enter text information when
using your phone; for example, names in the
phonebook, short messages (SMS), text in the
notepad, WAP input, mode names, group names, etc.
Texts can be entered in different input modes as
described below:
Main Features 13
Page 17

• T9 mode: Allows you to use the T9 predictive text
input method;
• Multi-Tap: Press the key corresponding to the letter
you wish to enter. To enter the first letter on the
key, press the key once. To enter the second letter
on the key, press the key twice quickly, and so on
until all the letters you need are displayed on the
screen.
• Numbers (123): Allows you to enter numbers.
Toggle between input modes
You can press to toggle between different input
modes in an editor. Press repeatedly to toggle
between the input modes.
Shift case
Press to toggle between upper case and lower case.
Input symbols
In any input mode, press to shift to symbols and
punctuation mode. To input a symbol, press the
number key corresponding to the number on the left
of the symbol. After which, your phone will
automatically return to the original input mode. If
there are too many symbols to fit within a screen, you
can press / keys to scroll through the pages.
Screen layout
Text area
Input lines
Displays the texts you have entered.
Displays the combination of letters.
Delete operations
When there are texts in the input line, pressing
will delete th e character or symbol to the extreme right
of the input line, and the contents of the candidate
line will be updated accordingly until the entire input
line is deleted. A long press on will clear the
entire input line.When there are texts in the candidate
line and the input line is empty, pressing will
clear the contents of the candidate line.
When both the input and candidate lines are empty, a
short press on will delete the character to the left
of the cursor in the text area, or the character to the
right of the cursor will be deleted if there is no character
on its left. A long press on will delete all contents
in the text area. When the text line is empty, another
short press on will allow you to exit from the
current editor and return to the previous state.
2.5.1 T9 mode
This feature allows you to enter each desired letter of
a word by pressing its corresponding number key just
once without having to consider the order of the letter
14 Main Features
Page 18
on the key. The possible letter combinations will be
displayed in the input line. (If there is an Up/Down
arrow to the right of the line, it means there are other
choices and you can press the / keys to
select.) After selecting a word, press . The word
will be inserted with a space after the cursor position
in the text area.
2.5.2 Multi-Tap (abc/ABC)
This feature allows you to input directly within the
text area.
Press the key corresponding to the letter you want. To
enter the first letter on the key, press the key once. To
enter the second letter on the key, press the key twice
quickly, and so on until you have the desired letters
displayed on the screen.
2.5.3 Numbers (123)
This feature allows you to input directly within the
text area.
Press the numeric keys - directly to add the
corresponding number to the text area currently being
edited.
2.6 Phonebook
Your mobile phone features a phonebook menu that
allows you to store commonly used numbers and
information in the phonebook located either in the
SIM card or on the phone itself. It also supports other
functions such as
Send SMS
Note: The phonebook cannot be used immediately
when the phone is just switched on, as the phonebook
is being initialized. Please wait a while before using it.
Phonebook classification
Your mobile phone features two phonebooks: one on
your SIM card (number of names it can store depends
on the card capacity) and the other one on your
mobile phone (which has the capacity to store up to
500 name cards). These two phonebooks are different
in terms of their contents and methods of operation.
However their records are combined and sorted
together in the contacts list. A SIM phonebook record
is identified by an icon on its right, which looks like a
SIM card; while a phone phonebook record has a
default field type icon on its right.
Search, Add, Edit, Delete, Flash Dial
, etc.
Main Features 15
,
Page 19
• SIM phonebook
Each record in the SIM phonebook includes a name and
phone number.
• Phone phonebook (i.e. smart phonebook)
Each record in the smart phonebook is called a
“Name card”. A name card may include the
following informat ion:
• Name (a maximum of 40 alphabets)
• Phone number (one name card can include a
maximum of five phone numbers and the type may be
duplicated.) The maximum length of a phone number
is 21 digits. If a phone number has 21 digits, the first
byte shall be a “+”, and the remaining 20 digits may be
any digits or symbols such as “0-9”, “*”, “#”, “w” and
“p” .
• Default number type (if the entries in the SIM card are
copied or moved to the phone, the numbers will be
placed in this field)
• Mobile phone number
• Office number
• Home number
• Fax number
• Pager number
• Email (a maximum 50 characters)
Each name card (when created) should include the name
(mandatory) and at least one other piece of information.
Your Smart phonebook allows you to group the name
cards into categories such as “Default”, “Family”,
“Friend”, “Colleague”, “Social” and “Private” (you
can change the group name and its corresponding
group icon). You can define a different melody for
each group to differentiate one from another.
2.6.1 Search
You can use this menu to access the composite list that
includes the contacts from both the SIM phonebook and
the Smart phonebook. Enter the first letter of the name
you are searching or simply press to access the list. If
there is a match for the letter you have entered, the first
record starting with this letter will be displayed in the list.
Otherwise the first record in the list will be displayed.
Tip: In idle mode, press to access the
directly.
By entering the first letter of the name, you can
quickly access the entries that begin with that letter.
Then you can press / keys to browse
through the entries.
Contacts
list
16 Main Features
Page 20
2.6.2 Adding names to the phonebook
SIM card
If you are using SIM Card memory, you may first
open the name editor, enter a name and press to
confirm. A number editor will be opened and you will
be prompted to enter a number. Press to
complete the input of a phonebook entry.
Phone
If you are using phone memory, you may first open
the name editor, enter a name and press to
access a name card field option list where you can
choose to enter different types of information. Press
to enter the information and press again to
complete the input of the phonebook entry.
Thereafter, you can add different fields to this newly
created name card, set default fields and assign a group
to this new record.
Note: A newly created record by default will be
assigned to the “Default” group, however you can reset
it later.
2.6.3 Contacts List
Using the Contacts List
The Contacts list displays a list of names. To the right
of each name is an icon indicating the type of record.
If it is a record in the SIM card, a SIM card icon will
be displayed. If the record is stored in your mobile
phone, the field type icon of the default number will
be displayed.
You can add a new record.
You can also perform the following operations in the
options menu:
•
Send SMS
number of the selected record.
•
Send business card
text in a SMS. (Note: As there is a limit on SMS
length, a record containing too many characters may
not be sent in full.)
•
Edit
•
Delete
•
Change Fotocall picture
associated with a Fotocall picture):
Access the picture list. Only pictures not bigger than
128 x 128 will appear. Press / to select and
press to confirm. Once a name is associated with
a Fotocall picture, the Fotocall picture will be
: You can send a SMS to the default
: You can send the selected record as
(name): To change the selected record (name).
: To delete the selected record.
(if the name card is
Main Features 17
Page 21

displayed on the screen when the person calls you
fro m any number stored in his/her name card or when
you call one of the numbers stored in this person's
name card.
•
Cancel Fotocall picture
associated with a Fotocall picture):
Select this option and you will be prompted to
confirm the cancellation. Once you have confirmed,
the association between the name card and Fotocall
picture will no longer exist.
•
Set Fotocall picture
associated with a Fotocall picture):
Access the Pictures list. Only pictures not bigger than
128 x 128 will appear. Press / to select and
press to confirm.
•
Group settings
records in the Smart phonebook and is used to set
the group that the record belongs to.
•
Flash dial
: Allows you to set a hotkey for the selected
default number of the record.
•
Voic e d i a l
: Allows you to set a voice dial key for the
default number of the selected record.
•
Copy to phone
When the selected records in the SIM card are copied to
the name cards in your phone’s phonebook, the phone
numbers in the SIM card will be stored in the default
(if the name card is
(if the name card is not yet
: This option is available only for
(if the record is in the SIM card):
number field of the name card (an d is automatically set a s
the default field).
•
Copy to SIM card
A selected name card in your phone’s phonebook may
contain up to three contact numbers. This operation
will copy all numbers to the SIM card and each
number will take up a record in the SIM card. The
names of these records come from the name field of
the name cards.
•
Move to phone
The operation is similar to the above copying
operation but will erase the source records after
copying.
•
Move to SIM card
The operation is similar to the above copying
operation but will erase the source records after
copying.
If a record selected from the Smart phonebook has
fields other than the phone-number field, such as
email, note, address, and zip code fields, these fields
will be retained. If a selected record in the Smart
phonebook has only phone-number fields, it will be
deleted once all its fields are moved to the SIM
phonebook.
•
Call
: Dial a number.
(if the record is in the phone):
(if the record is in the SIM card):
(if the record is in the phone):
18 Main Features
Page 22

Managing Phonebook Records
Once you have selected a record in the Contacts list,
press to manage the selected record.
Managing records in the SIM card
Send SMS, Send business card, Edit, Delete, Settings
(
Modify, Cancel
Copy to phone, Move to phone
),
Fotocall picture, Flash dial, Voi ce di a l
, and
Call
.
Managing records in the phone
When a phone number or fax number is selected, you
can choose the following options:
Send SMS, Send business card, Edit name, Edit number
Edit number type, Delete, Set default field, Flash dial
Voic e di a l, Display, Copy to SIM card, Move to SIM card
and
Call
.
When a note, email, address or postal code is selected,
you can choose to:
Edit name, Dele te, Edit, Send business card, Display
.
2.6.4 Memory Status
If you have selected Memory Status option, information
on the capacity of both the SIM phonebook and Smart
phonebook will be displayed, including:
• Used memory;
• Total capacity;
• Percentage of used memory.
2.6.5 Delete All
This function allows you to delete all records in the
SIM phonebook or Smart phonebook. However, once
deleted, the records cannot be recovered. Hence you
will be prompted to confirm before deletion.
,
2.6.6 Copy All
From SIM card to phone
As long as the memory of the Smart phonebook is not
full, this function allows you to copy records one by
one until all records are copied or until the memory of
,
the Smart phonebook is full.
,
By selecting this option, you will copy the name and
,
number of each record in your SIM card to the
phonebook in your phone, and the phone number on
the SIM card shall be set as the default phone number
(default field) of the name card.
From phone to SIM card
As long as the memory of the SIM phonebook is not
full, this function allows you to copy as many records
in the phone as you can to the SIM card one by one,
until all records are copied or the memory of the SIM
phonebook is full.
Main Features 19
Page 23

A name card in the Smart phonebook may contain up
to five numbers. By selecting this option, you will copy
all numbers to the SIM card with each number taking
up a record in the SIM card. Th e names of these records
come from the name field of the name cards.
In addition, if a record in the Smart phonebook does
not contain a phone number field, the phone will skip
this record and proceed to copy the next record.
2.6.7 Move All
This operation is similar to the above
but will erase the source records after copying.
If a selected record in the Smart phonebook has fields
other than phone number field, such as email, note,
address, and zip code fields, these fields will be
retained. If a selected Smart phonebook record has
only phone num ber fields, it will be de leted once all its
fields are moved to the SIM card phonebook.
Copy All
function
2.6.8 Group Settings
There are six preset groups, and you can rename
them or associate each group with a picture.
2.6.10 Own Information
This feature allows you to
your own personal information.
Enter, Display, Edit
and
Clear
Edit personal information
You can enter different fields by following the
prompts. If there is no field, press to skip
directly.
Delete personal information
This feature allows you to clear your own personal
information, i.e. clearing all
Own Information
fields.
Send personal information
You can send personal information as text in a SMS.
(Note: As there is a limit on SMS length, personal
information containing too many characters may not
be sent in full.)
Display personal information
This feature allows you to display all
fields and browse them using / keys.
Own Information
2.6.9 Choosing a Storage Location
If you have selected the type of phonebook (in SIM or
phone), the new number you have added will be
stored in the phonebook you have chosen.
20 Main Features
Page 24

2.7 Transmission between Phone and PC
Note: PC Sync software and data cable are optional
accessories and may not be included in the standard
package. Therefore you may need to purchase them
separately. Please contact an authorized Philips dealer
or network operator for more information.
PC Sy nc s of twa re is a po wer fu l too l f or m an agi ng you r
mobile phone information. A phone-specific data
cable and PC are what you need to use the PC Sync to
back up your phone information.
PC Sync software is mainly used to synchronize and
backup seven key information areas, which are:
Wallpaper, Phonebook, SMS, Photo
and
2.7.1 Before Using PC Sync
System Requirements
• To install and run PC Sync software, you need:
• A PC: Pentium 200 MHz or higher processor
• 32 MB or higher memory
• Operating system: Windows 95/98/Me/2000/X P
• Hard disk memory: 40 MB or higher
• A data cable: To connect the phone to your PC
Movie
MIDI
.
Connect Phone to PC
1.
Make sure the phone is switched on and connect the
data cable to the phone;
2.
Connect the other end of the data cable to your
PC’s serial port.
2.7.2 Using PC Sync software
Note: Make sure the data cable is connected properly
and your PC is successfully connected to the phone
before uploading or downloading any files. Initiate the
PC Sync software. Once the software is launched, there
will be seven icon buttons (i.e.
Phonebook, SMS, Photo
initial interface. These buttons allow you to switch
between these options.
,
Wallpaper Management
You can use the PC Sync software to open a picture
file stored in the PC and download it to the phone.
Before downloading the picture, you will be able to
resize or crop the picture or allow it to adapt
automatically to the viewer and then rename it before
downloading it to the phone. You can also delete a
picture stored in the phone using the PC Sync
software.
and
Wallpaper, MIDI
Movie
) shown on the
Main Features 21
,
Page 25
Upon successful connection, the stored pictures will
be displayed in a list together with the remaining
vacant locations available for downloading more
pictures. You can select from the list a picture you
want to delete or a vacant location for you to
download a new picture. Of course, you can also select
from the list a location that has been taken, where the
newly downloaded picture will replace the existing
one in that location.
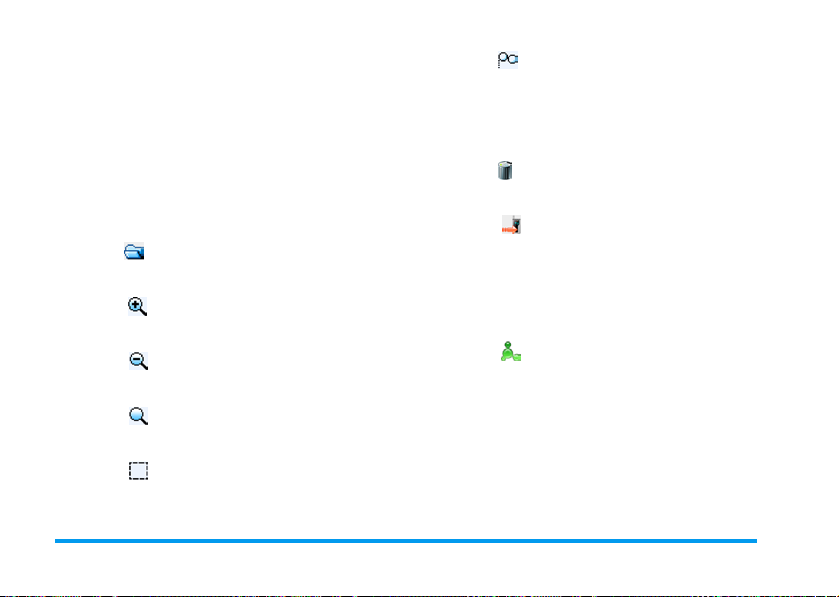
Actions
1.
Click “Open” icon, and an Open File windows
dialogue box will pop up. It allows you to select a picture
stored in the PC to be downloaded;
2.
Click “Enlarge” icon to enlarge the picture
within the picture editing frame up to 8 times the
original size;
3.
Click “Reduce” icon to reduce the picture
within the picture editing frame down to 1/8 of
the original size;
4.
Click “Restore” icon to restore the picture
within the picture editing frame to its normal
size;
5.
Click “Adapt to viewer” icon to adapt the
whole picture displayed within the picture
editing frame to the size of the viewer;
6.
Click “Preview” icon, and a dialogue box
will pop up. Th e portion of the picture within the
viewer is displayed in the center of the dialogue
box. At the bottom of the dialogue box is a
“Close” button for you to close the preview
dialogue box and return to picture-editing mode;
7.
Click “Delete” icon to delete your selected
picture. You must first select a picture to delete
before you click this icon;
8.
Click “Download” icon to download a
picture you have selected from the PC to the
phone. You should first select from the list box, a
vacant location for you to download the picture.
If you select a location that is already taken, you
can still download the picture but the existing
picture will be replaced;
9.
Click “Connect” icon to start connecting
the PC to phone.
MIDI
You can use t he PC Sync software to open a MIDI and
AMR file s tored in the PC and dow nl oad it to the MS.
Before you download it to your phone, you can listen
to the MIDI or AMR and rename the file. You can
also delete a ringtone stored in the phone from the PC
by using the PC Sync software.
22 Main Features
Page 26
Upon successful connection, the stored MIDI will be
shown in a list together with the remaining vacant
locations available for downloading more MIDI. You
can select from the list, a MIDI you wish to delete or
a vacant location for you to download a new MIDI.
Of course, you can also select from the list a location
that has been taken, where the newly downloaded
MIDI will replace the existing MIDI in that location.
Actions
1.
Click “Open” icon, and an Open File window
dialogue box will pop up. It allows you to select a MIDI
stored in the PC to be downloaded.
2.
Click “Play” icon to start playing the MIDI
you have sele cted;
3.
Click “Pause” icon to pause and press again
to continue playing the MIDI from the pause
point;
4.
Click “Stop” icon to stop playing the MIDI;
5.
Click “Delete” icon to delete the MIDI you
have selected. You must first select a MIDI to
delete before you click this icon;
6.
Click “Download” icon to download the
MIDI of your choice from the PC to the phone.
You should first select from the list box, a vacant
location for you to download the MIDI. If you
select a location that is already taken, you can still
download the MIDI but the existing MIDI will
be replaced;
7.
Click “Connect” icon to start connecting
the PC to the phone.
Phonebook Management
This feature allows you to synchronize the PC with
the phonebook in your phone so that the two can
share the same content. You can also upload the
phonebook in your phone to the PC to browse or
create, delete or modify the phonebook from the PC
and then reload it to your phone or store it as a file in
the PC. If your phone is lost and all the contact
information in the phonebook is gone with the
phone, you do not have to worry because you can still
import the phonebook file stored in the PC into the
Sync software which allows you to browse, modify,
add and delete it. Then you can download it from the
PC to an y mobi le phone that is successf ully connected
to the PC.
Before you can modify the phonebook from the PC
Sync software, you must first upload the phonebook
in yo ur p ho ne t o t he PC. Th en y ou can re load i t t o th e
phone once modifications are made.
Your phone stores the phonebook in two locations:
One in the SIM card and the other in the phone itself.
Main Features 23
Page 27
A phonebook record stored in the SIM phonebook
can only have one phone number while the record
stored in the phone’s phonebook can contain several
phone numbers and a variety of information. When
the phonebook in your phone is uploaded to the PC
and displayed, the “Storage location” column in the
list will specify whether the contact information is
stored in the SIM card or in your phone.
Actions
1.
Click “Export” icon and all contact information
displayed in the list in the PC Sync software will be
exported in file format to the PC for storage;
2.
Click “Import” icon. You can select and
open a phonebook file stored in the PC and
export all the contact information into the Sync
software and display them in a list;
3.
Click “Add new record” icon to add a new
contact person and other contact information;
4.
Click “Edit record” icon to edit and change
the record of an existing contact person and its
contact information. You must first select a
record to edit from the list box before you click
this icon;
5.
Click “Delete record” icon to delete the
record of an existing contact person and its
contact information. You must first select a
record to delete from the list box before you click
this icon;
6.
Click “Clear” icon to clear all contact
records displayed in the list box in the Sync
software on the PC and the list will be emptied;
7.
Click “Memory status” icon to view the
remaining phonebook memory both in the SIM
card and in the phone;
8.
Click “Upload” icon to upload all contact
information stored in the phone to the Sync
software on the PC to be displayed;
9.
Click “Download” icon to download all
contact information displayed in the Sync
software on the PC to the phone;
10.
Click “Connect” icon to start connecting
the PC to the phone.
SMS
Once uploaded from the phone to the PC, the short
message (SMS) will be stored in the Inbox and
Outbox, respectively. If an SMS stored in the Outbox
has been sent, it will be marked as “Sent”. Otherwise,
it will be marked as “Unsent”. If an SMS has been
opened before, it will be marked as “Read”.
Otherwise, it will be marked as “Unread”.
24 Main Features
Page 28
You can create a new SMS in the PC Sync software
and then save or send it. If you choose not to send but
to save it, it will be stored in the Outbox, marked as
“Unsent”, and can be sent later. If it is later sent, it will
remain in the Outbox, marked as “Sent”. You can also
edit an existing SMS and then save or send it.
You can double click an SMS in the Inbox or Outbox
to view it. You can reply or forward an SMS in the
Inbox. You can send or forward an Unsent SMS in the
Outbox and you can forward a sent SMS in the
Outbox.
You can backup the short messages into a PC and save
them in a file which can then be re-imported into the
PC Sync software for you to browse, modify and send.
You can select an SMS from the list box to be deleted.
If your phone rec eives a new SMS, the message w ill b e
forwarded to the PC Sync software and saved in the
Inbox as long as the phone is connected to the PC and
the screen will prompt you with a message dialogue
box, “You have a new SMS”. Clicking anywhere in the
message box will close the box. Then you can double
click the SMS in the Inbox to read, reply or forward it.
Actions
1.
Click “Export” icon to export (in file format) all
SMS messages currently displayed in the Inbox and
Outbox list in the PC Sync software into the PC for
storage;
2.
Click “Import” icon. You can select and
open the SMS file stored in the PC to export all
the SMS messages into the PC Sync software and
display them in a list in the Inbox and Outbox,
respectively;
3.
Click “Create SMS” icon to create a new
SMS;
4.
Click “Edit SMS” icon to edit an existing
SMS stored in the Outbox or Inbox;
5.
Click “Delete SMS” icon to delete an SMS
you have selected in the list box;
6.
Click “Empty” icon will clear all SMS
messages displayed in the list box in the PC Sync
software and the list box will be emptied;
7.
Click “Memory status” icon to view the
memory space utilised by the SMS messages
stored in the phone or SIM card, the remaining
memory space and their percentages;
8.
Click “Send SMS” icon and you can send
an unsent SMS you have selected in the Outbox;
Main Features 25
Page 29
9.
Click “Upload” icon to upload all SMS
messages stored in the phone to the PC Sync
software to be displayed;
10.
Click “Connect” icon to start connecting
the PC to phone.
Photo
Once your phone is successfully connected to the PC,
you can upload the pho tos stored in your phon e to the
PC Sync software and display the information of each
photo in a list box. You can also make a backup copy
of these photos to be stored in the PC.
Actions
1.
Click “Save” icon and you can save a copy of all
photos displayed in the list box in the PC Sync software
to be stored in the PC;
2.
Click “Upload” icon to upload all photos
stored in the phone to the PC Sync software and
display related information in a list box;
3.
Click “Connect” icon to start connecting
the PC to the phone.
Video
Once your phone is successfully connected to the PC,
you can upload the video files stored in the camera to
the PC Sync software and display the information of
each video files in a list box. You can also make a
backup copy of these video files to be stored in the PC.
Actions
1.
Click “Save” icon to backup all video files displayed
in a list box in the PC Sync software to be stored in the
PC;
2.
Click “Upload” icon to upload all photos
stored in the phone to the PC Sync software and
display related information in a list box;
3.
Click “Connect” icon to start connecting
the PC to the phone.
2.8 Use your phone as a Modem
Using Windows 2000 Operating System as an example:
1.
Connect one end of the data cable (optional accessory)
to COM1 (or COM2) port at the back of the PC and
the other end to the bottom of the phone.
2.
Select the “add new modem” option from the
Control Panel and select a standard modem type
with a standard 28800 bps.
3.
In the Advance Setting for modem, add an extra
initialization command, at+cgdcont=1, “IP”,
“cmnet”, and go to “Change default preferred
option” tab to select “None” in the “Flow
control” check box under the conventional “Data
connection preferred option”.
26 Main Features
Page 30

4.
In the Modem configuration, the maximum rate
is 115200. Deselect the “Use hardware flow
control” option in the “Hardware function” tab.
5.
Select com1 (or com2) to be used by the serial
cable.
6.
Set the port (where the modem is connected to)
speed at 115200.
7.
Set the network dial-up number and simply dial
the number.
2.10 Functions Demo
When you have not inserted any SIM card into your
phone, you are restricted to use only certain functions
in your phone. The phone will provide you with a
demo of the functions available in your phone: Access
the demo from the menu and you will see an
automatic display of some key features of the phone.
2.9 Fotocall
You can associate a picture not bigger than 128*128
(taken with the phone camera, downloaded from
WAP or via the data cable (optional accessory)), with
a name card in your phonebook. When you receive a
call from a number in your record associated with a
picture, the picture will be displayed on the screen as a
background picture. Similarly, when you dial a
number in your record associated with a picture, the
picture will be displayed as a background picture.
Main Features 27
Page 31
3 • Menu Options
Note: To access the various menu options as described
below, you must insert a valid SIM card into your
phone. Without a SIM card, your phone will be
restricted to idle mode when switched on, and an
“Insert SIM Card” message will be displayed on the
screen. In this mode, you are limited to use only some
key menus. Pressing a numeric key in the idle mode
will activate Emergency Dial Preparation editor
where you can enter a number of up to 5 digits. The
purpose of this featu re is t o allow yo u to use the k eypad
to dial an emergency number even without a SIM
card.
Press in idle mode to access the main menu. The
main menu features two styles: 9-cell menu and
animation menu.
You can press /// to select a
menu. After selecting a menu, press or to
access its next submenu, from which menus will be
displayed in a list.
Note: In the main menu, press numeric keys to
directly to select a particular menu.
You can press / to browse the menus at
various levels. Pressing or [Confirm] softkey will
bring you to the next submenu. Short press or
[Back] softkey to return to the previous menu. Long
press or short press to return to idle mode
directly.
3.1 Messages (network-dependent)
3.1.1 SMS (network-dependent)
Short message service (SMS) offers you a convenient
and economical mode of communication. It allows
you to send a text message quickly to others. You can
use the “SMS” menu to send a short text message to
another mobile phone or equipment capable of
receiving SMS.
Inbox
Your phone will store the received messages in its
inbox.
Apart from your SIM card (storage capacity is
dependent on the SIM card used), your messages can
al so be st ored in you r p hone , w hic h a llo ws you to stor e
100 more messages. You can choose your preferred
storage location. If the storage space in your preferred
location is used up, the messages will be stored in the
other storage space.
28 Menu Options
Page 32
If the inbox is empty, the phone will indicate that the
SMS list is empty.
There is an “Unread” icon to the right of a new SMS
in the Inbox list. Once you are in the “Details” screen
of the new message, the message will be changed to
“Read” state and the “Unread” icon will be changed to
“Read” icon.
Once you are in the Inbox, the stored SMS list will be
displayed. You can press / to browse the
messages and the highlighted message will scroll
horizontally to display its contents.
Randomly select a message and press to delete it.
Randomly select a message and press to access
Details
the
and number, followed by the date and time when the
message is sent and the emotion icon (if any), and
lastly details of the message. Press / to scroll
through the screen to read the remaining contents if it
cannot fit within one screen.
For short messages, you can choose the following
options:
•
screen: The header shows the caller’s name
Reply
: Automatically use the sender's number as the
recipient's.9 number and open an empty text editor
where you can enter the text message and send it
directly afterwards.
•
Forward
: After you have selected the “Forward”
option, the contents of the selected message will
appear in the editor where you can edit before
sending.
•
Delete
: Delete the message from the Inbox.
•
Call
: Retrieve the sender’s number from the short
message and dial the number.
•
Store number
in the phonebook does this menu becomes available.
This option allows you to extract the sender’s
number from the message and save it.
•
Move to phone
phone.
Outbox
Your phone stores sent short messages in its outbox. If
the outbox is empty, your phone will indicate that the
short message list is empty.
The Outbox is further divided into two folders, to
store sent and unsent messages respectively.
• If “Save Message” is selected, the message will be
placed in the “Unsent messages” outbox folder;
• If “Send and Save” is selected, it will be placed in
the “Sent messages” outbox folder when you send
the message;
: Only when the sender’s number is not
: Move the current selected SMS to
Menu Options 29
Page 33
• If “Send immediately” is selected, the message will
be sent directly and will not be stored in the
Outbox.
Once you are in the “Sent Messages” and “Unsent
Messages” outbox folders, the short messages will be
displayed in a list. Press / to scroll and view
the list. Randomly select a message and press to
access the Details screen. If the message cannot fit into
one screen, press / to scroll down t he screen
to view the remaining contents. Press again to
access the “Options” list:
• Send
• Forward
• Delete
You can choose to send or forward the message, or
delete the message from the Outbox. If you select a
message from the “Unsent Messages” outbox folder
and send it, the message will be moved directly to the
“Sent Messages” outbox folder upon being sent
successfully.
Write SMS
Note: To send SMS, you will need to set the correct
SMS Centre number. You can obtain the number from
your network operator.
New S MS
After confirmation, your phone opens a text editor
where you can enter your SMS message.
Press [Select] to confirm your entry and a screen will
appear for you to add recipient. Your phone supports
SMS group sending function (you can send a message
to a maximum of 12 recipients at one go). You can:
• Directly input a phone number in the vacant line,
then press / to switch to the next entry.
• Press the [Contacts] softkey to access the Contacts
list, then press the [Select]/[Cancel] softkey to
select/cancel (i.e. to select the number if not
selected and to cancel if already selected). All
selected records will have a selected mark on its
right. For selected names, their corresponding
default numbers will be used. Press the [Details]
softkey to select other numbers associated with the
name. Once you have selected multiple records,
press to confirm. All selected names will
appear in the Recipient editing screen.
• Press the [Contacts] softkey to access the Contacts
list. To facilitate the sending of SMS to one
recipient, when you have found the recipient and
the selection bar is on the recipient’s name, you can
press directly to confirm. The recipient’s
name will appear in the recipient editing screen.
30 Menu Options
Page 34
• Edit the number entered: When the cursor is on the
line for direct number input, you can edit the
number or delete the whole line.
• Delete name: When the cursor is on the selected
name in the phonebook, press to delete the
name.
After you have added all the recipients, confirm and
access the “Options” list to:
• Send immediately
• Attach emoticons (i.e. emotion icons)
• Save
• Send and save
•
Save As “User Define
If you have selected “Save Message”, the message will
be stored in “Unsent Messages” in the outbox folder.
If “Save as User-Define” is selected, the edited short
message shall be saved in the custom page (if the
custom page is full, you will have to remove unwanted
messages in order to make room for new ones).
You can resend it if it is not sent successfully. If all
sending attempts fail, please check that you have set
the SMS Centre number correctly.
”
Preset short messages
This phone provides you with some preset short
messages. You can select any one of them. After
confirming your choice, you can continue to edit the
preset message to form a new short message.
Subsequent operations are the same as “New Message”.
In addition, you can use the self-defined function to
preset up to 10 commonly used short messages. The
“Save As User defined” feature works in the same way,
but after you have edited a short message you can use this
feature to save the message before sending it.
Emoticons
This phone features an emoticon function that allows
you to attach an emotion icon when sending a
message. If the receiving phone supports the emotion
icon function, the icon will be displayed correctly
when the message is read.
Note: Only a phone that supports emotion icon
function can read an emotion icon that is attached to
a message, otherwise the icon will be displayed as ascii
characters.
SMS Settings
SMS Centre Number
Stores the SMS centre of the network that you are
registered with. The number can be edited. You cannot
send a short message without an SMS center number.
Menu Options 31
Page 35

Validity pe riod
Sets the length of time your message will be stored in
the SMS center:
12 hours, 1 day, 1 week
and
Maximum
Status report
You can c h o o s e t o
which will inform you if your message has been
successfully sent to the recipient, or sending is
unsuccessful.
Activate
or
Deactivate
this function,
Reply path
You can choose to
it is activated and the receiver uses
short message sent by him/her will automatically choose
the SMS centre you have used to send the message.
Activat e
or
Deactivate
this function. If
Reply
function, the
Signature
You can choose
Activate
signature. Subsequently every time you send a short
message, your signature will be automatically added to
the message as a new line at the end of the text message
once you have completed the message editing.
Note: If adding the signature results in the short
message exceeding the maximum allowable length, the
signature will not be attached.
Activate
or
, proceed to input the text content of the
Deactivate
. If you select
Select Memory
You can choose a location as your priority location
to store the short messages: SIM card or Mobile
.
phone.
Note: If the space in your priority location is used up,
the messages will be stored in other non-priority
locations.
User Defined SMS
You can edit a custom short message. You can delete
any unwanted custom short messages by simply
clearing their contents.
Delete SMS
This menu provides two functions:
• Inbox
• Outbox
When you have made your selection and confirm the
delete operation, the phone will delete all selected
mails in the Inbox/Outbox.
Capacity Query
You can view the memory used by the short messages
in the SIM card and the phone, the total capacity and
the percentage of used memory.
32 Menu Options
Page 36
Voice Ma il
Note: You can divert a call to the voice mailbox (the
number where callers leave voice messages) by
activating the
Call forward
function.
Call voice mail
When a voice mail is received, the phone will prompt
you. You can dial the voicemail number to listen to
the message.
In idle mode, you can long press key to
automatically dial your voicemail number. If the
number has not been set, the phone will prompt you
with a message, “Please enter the voicemail number”.
Voicemail number
Under normal circumstances, you can obtain two
numbers from your network provider.
• The number where callers leave voice messages
(voice message number).
• The number you enter with the keypad to retrieve
voice messages.
This function allows you to enter “Retrieve voice mail
number” so that you can use the “Call voicemail”
function.
Cell Broadcast
The network service allows you to receive various
kinds of text information such as news and traffic
information. This information is provide d by the
network to all subscribers within a certain area. If this
service is available, the network will provide you with
the available information channel numbers.
You can set up a total of 15 channels.
Cell broadcast Reception
You can choose to activate or deactivate the reception
of cell broadcast SMS service. If you choose to
Deactivate
messages whether or not you have set the
corresponding channel numbers.
When a broadcast short message is received, the
phone will prompt you and directly display the
content on the idle screen until you press a key to
return to idle mode. Broadcast messages will not be
stored in the phone or SIM card and will no longer be
available once you exit from them.
Note: When this function is activated, the phone’s idle
time will be reduced.
it, you will not receive any broadcast
Menu Options 33
Page 37

Channel list
<New channel>
You can add a new channel number to the channels
list, i.e., adding a new cell broadcast reception type.
The channel number contains 3-digits at most.
Existing channel list
Randomly select a number from the list and press the
[Option] softkey to perform the following operations:
•
Change: To change the channel number.
•
Delete: To delete a channel number from the list,
which means your phone will no longer receive the
messages of the corresponding channel.
3.2 Call List
The Call list is grouped into three categories:
• Dialed calls (All numbers dialed by the phone
regardless of whether the call is successful or not)
• Answered calls list
• Missed calls list (All calls rejected or missed)
Up to 10 numbers can be stored for each category.
The latest call appears at the top of the call list. If the
list is full and there is a new record, the last record in
the list will be deleted.
You can press [Send] key in the above list to directly
call the number. You can also press [OK] to view the
call time and press [Options] key to access options list
and display:
•
Send SMS
•
Delete record
•
Check numbers
•
Save
(available only when a number has not been
stored)
•
Call
•
Send number
Delete record
Delete record menu includes three sub-menus (Dialed
calls, Answered calls, Missed calls). Once you have
confirmed your selection of a sub-menu, all call
records under the selected category will be erased.
Call Duration and Cost
The phone can record a call’s duration and cost.
Usually, the cost information (network-dependent) is
PIN2 code protected.
Last call duration
Displays the last call duration.
34 Menu Options
Page 38

Last GPRS service
Displays the number of bytes transmitted during the
last GPRS service.
All calls’ duration
•
Outgoing call timer
dialed calls.
•
Incoming call timer
received calls.
•
Reset Timers
: To view the total duration of all
: To view the total duration of all
: To clear the timers and reset timer.
Show call cost (network-dependent)
You can choose to activate or deactivate this function.
If the function is activated, both the duration and call
cost will be displayed on the screen. It is set to “Off”
by default.
You need a PIN2 code provided by the network
operator in order to use this function.
Accum. Charges (network-dependent)
This service is available only when the SIM card
contains cost information. The function allows you to
set and view various information on a call’s cost.
You can perform the following operations:
•
Show cost
received calls since the last time the timer was cleared.
: To show the total costs for dialed and
Reset charge counter
to zero (protected by PIN2 code).
•
Show balance
for calls.
•
Show limit
call costs.
•
Cancel limit
(protected by the PIN2 code).
•
Set limit
call costs (protected by the PIN2 code).
If call costs exceed the maximum limit, you will not be
ab le to m ak e a c all and you wi ll b e p rom pt ed wi th “
call cost
will be automatically disconnected.
: To show the preset maximum limit of
: Allows you to set the maximum limit of
”. If this happens, all in-progress charged calls
Call Tariff (network-dependent)
You can view and change the unit rate. The unit rate is
in the decimal system and stored in the SIM card.
•
Display rate
•
Reset rate
reset the rates to the default value “1” upon confirmation.
•
Set rate
entering PIN2 code.
: This function is PIN2 protected and will
: Allows you to change the unit rate after
: To reset the counter’s reading
: To show account balance available
: To cancel the limit on call costs
No
: To show the current set rates.
•
Menu Options 35
Page 39

3.3 Phone setting
3.3.1 Group melody
Incoming alert
The phonebook in the phone is divided into six
groups. You can define different ring melodies for
each group so that you know which group the caller
belong to.
There are five types of melodies available under each
group and a tick will appear to the right of the type bar of
the selected melody. Once you are in a melody type, you
will find a list of melodies of this type. A tick appears to
the right of the melody currently selected. When you
browse the melody list, the selected melody will be
played after a certain delay at the volume level currently
set (if silence is set, the melody is played at low volume).
The melodies are classified as follows:
• Traditional ring tone: Different styles of ring
tone.
• MIDI ring tone: Pleasant MIDI melodies.
• Serial port MIDI ring tone: MIDI melody
downloaded via the serial port.
Alarm alert tone
Allows you to set the alert tone for alarm clock.
SMS alert tone
Allows you to set the alert tone for SMS.
3.3.2 Ring Volume
The “Ring Volume” menu is the same as the
“Preference Settings” menu in the “Quick Settings”.
Therefore, any changes done here will apply to the
environment setting you are currently in.
3.3.3 Phone setting
On/Off alert tone
You can set whether to produce an alert tone when the
phone is switched on/ off.
Idle screen setting
The idle screen can be set as follows:
• Idle screen type
You can specify the type of display on idle
screen.
For big screen: There are four types of idle screen
displays, including digital clock, analogue clock,
month view and world clock.
For small screen: There are two types of
displays, comprising digital clock and analogue
clock.
36 Menu Options
Page 40

• Wallpaper in idle screen
You can set the background picture when the
phone is in idle mode. There are 5 types of
wallpaper for selection as follows:
1. Built-in (FotoCall) static wallpaper. (Pictures that
are permanently stored in the phone's memory).
2. Built-in animation wallpaper. (Pictures that are
permanently stored in the phone's memory.) In
idle mode, this type of wallpaper will only
display time. No calendar will be displayed.
3. Wallpaper downloaded via data cable
(optional accessory).
4. Pictures taken with the phone’s camera and
not exceeding 128*128 in size.
• Show time only
This option is only applicable to digital clock
idle screen.
Digital clock idle screen is further divided into
two types: Animation and static.
In animation background, only time will be displayed.
No calendar will be displayed.
In static picture background, “Show time only”
option determines whether only time is
displayed on the screen. If “Show time only”
option is activated, only time will be displayed.
No calendar will be displayed.
Color scheme
You can set the phone’s color scheme (including the
colors of the softkey bar, title bar, etc.) There are four
different color schemes for you to choose.
Main menu theme
You can set the theme of the main menu. There are
two menu themes for you to choose.
Language
You can set the language used for the phone menus
and prompts. The phone provides a few languages,
depending on the country of use.
Backlight setting
You may choose to have the backlight turned off in
seconds
,
30 seconds, 60 seconds
The LCD backlight and keypad lamp will be activated
(unless the backlight is set to “
following circumstances:
• A key is pressed (a long press on the side key when
the flip is closed.)
• For a specific duration when an accessory is
connected to the phone.
or always
Off
”) under the
Off
.
Menu Options 37
10
Page 41
• For a specific duration when a new event occurs.
• For a specific duration when there is an incoming
call.
• For a specific duration whe n information about the
call is displayed after ending a call.
• For a specific duration after receiving information
from the network.
Hotkey setting
The Hotkey function allows you to execute some
commonly used functions quickly, without having
to scroll through the menu for the desired
function and confirm your choice one by one. You
will find it very convenient to use.
However, you cannot change the function of th e three keys
, , and as their functions are predefined.
A long press on key is used to select
A long press on key is used to dial
directly;
A long press on key is used to enter the
menu.
Note: Hotkeys are enabled only in idle mode and will
be disabled when the phone is in restricted-use idle
mode. (However, you are still able to change the
Language
setting using the hotkey.
Language
Voi c e mai l
WA P
This phone provides a total of 8 hotkeys ( keys) for you to set a shortcut method. Once you are
in the hotkey menu, select a hotkey and press or
[Set] softkey to access the function list. You can then
select a function from the list. If “No hotkey” is
selected, the hotkey setting is cancelled.
In idle mode, long press one of the keys, - ,
will execute the function assigned to the key. If no
function is assigned to the key, the phone will prompt
“Hotkey not set”. After confirmation, you will have
access to the function list and you can directly assign a
function to the key.
Voice Command setting
This phone supports both voice dial and voice
command functions. You should first perform voice
tag training on a sele cted n ame or comman d, and save
;
the training. Then in idle mode, long press the
key to perform a voice dial or voice command.
The total number of voice dials and voice commands
you can set is 40.
Once you are in Voice Command setting menu, you
will find the Voice Command list screen (the list is
empty when used for the first time).
38 Menu Options
Page 42

• Add a new voice command
Press the [New] softkey to access the Voice Command
Function list. Select the function you want to set and
you will be in the Voice Tag training process. Follow
the screen prompt and pronounce the same voice tag
twice. When pronouncing for the second time, try to
be consistent with the first time. The new voice
command will be saved if successful.
• Option operations
You can press the [Option] softkey to perform the
following operations on the voice command currently
selected:
• Play voice: Replay the tag of the voice command
• Update: Operations for updating the tag of a voice
command are similar to those for adding the tag of a
voice command
• Erase: To erase the selected voice command
3.3.4 Call setting
Call forwarding (network-depe ndent)
Th is i s use d to div ert an i ncom ing cal l to ano the r ph one
(or fax machine) when it is not convenient for you to
answer the call. You can also use it to set the forwarding
conditions. This function is network dependent.
Unconditional call forwarding
All calls from the network will be forwarded to a
preset number.
Call forwarding when busy
If you are busy, an incoming call will be diverted to a
preset phone number.
Call forwarding when no answer
If the call is not answered, it will be diverted to a preset
phone number.
Call forwarding when not reachable
If the called party cannot be reached, the call will be
diverted to a preset phone number.
Cancel call forwarding
Once you are in this menu, you will be shown a list of
the above four types of call forwarding, from which
you can select one and confirm your selection so that
the phone will send a request to the network to
deactivate the call forwarding function.
Status query
You can use this menu to query the current status of
all four types of call forwarding from the network.
Menu Options 39
Page 43

Note: After the call forwarding function is activated,
the idle screen will display the call forward soft icon.
Call waiting (network-dependent)
• GSM call:
When this function is activated, the phone will
display a call waiting screen for you to decide whether
or not to answer a new incoming call when you are
already on the first call. If it is not activated, a new call
will not be alerted when you are on a call and the caller
will hear a busy tone. You can choose to activate or
deactivate it or query the status.
• GPRS call:
This menu allows you to choose whether to be alerted
of a new voice call when you are using GPRS service.
You can activate or deactivate this function.
Minute Reminder
You can choose to have or not to have the minute
reminder during a call, i.e. whether or not to have the
phone emit a beep 10 seconds before the end of each
minute of a call.
Any Key Answer
When this feature is activated, you can answer a call
by pressing any key except the [Power] key.
Autoredial
You can choose to activate or deactivate autoredial
function.
After this function is activated and a call fails to be
connected, the phone will automatically redial the
number at a preset interval. There will be a prompt on
the screen for every redial. You can press the key
to end autoredial.
The autoredial process will end if you use the phone.
Auto answer
You can choose to activate or deactivate the “
answer
” function, i.e. to allow the phone to
Auto
automatically answer an incoming call after a short
period of ringing.
Active flip functi on
When activated, this function allows you to answer a call
by opening the flip, and end a call by closing the flip.
Send ID (network-dependent)
With this menu, you can choose whether to send your
own number to the called party or not.
You can use the status query function to check the
phone’s current status: Whether the function is
activated or deactivated.
40 Menu Options
Page 44

3.3.5 Date/time settings
You can use this menu to enter and set the date/time
displayed on the phone by using the suggested format.
3.3.6 Security Settings
PIN Code to switch on the Phone
You can choose to activate or deactivate the PIN code
function. When the function is activated, you will be
prompted for the PIN code and you will not be able to use
the phone unless you have entered the correct PIN code.
Call Barring (network-dependent)
This function allows you to bar both outgoing calls
and incoming calls. Before you can use the phone, you
need to enter the call barring password provided by
your network operator, and the password will be sent
to the network for authentication.
• Bar all calls: When activated, all incoming and
outgoing calls are barred.
• Bar international calls: When activated, all
outgoing international calls are barred.
• Local calls only: When activated, all international
dialing except to the home country network are
barred.
• All incoming: When activated, all incoming calls
are barred.
• Roaming incoming: When activated, all incoming
calls are barred when roaming.
When activated, the phone will prompt you for your
call barring password. If the password is correct, the
phone will communicate with the network and
request for access to the function.
Cancel barring
The options under
to those described above.
When activated, the phone will ask you to enter the call
barring password. If the password is correct, the phone
will communicate with the network and request the
network to cancel the function.
Cancel barring
menu are similar
Status query
The options under
those described above.
Once you have confirmed your query selection, the
phone sends a query request to the network and then
displays the status information on the screen.
Protection Function
You can protect the important information stored in
your phone, including your SMS messages,
phonebook and call record.
Status query
menu are similar to
Menu Options 41
Page 45

You can set a password for SMS, phonebook and call
record, or for one or some of the information type, or
not to set a password at all. When setting a password,
you need to select the i nformation type you wish to set
and press the key to confirm.
If the protection function is activated for one or some of
the above information type and you want to view or use
the function, as well as the menu, you will be prompted
to enter the protection password and you can use the
function only when the entered password is correct.
If the password is incorrect, the phone will display a password
error message.
The protection password has four digits, and the
default password is “0000”, which you can change.
Change Password
With this menu, you can change the password,
including changing the
barring and protection password.
The same procedure is used for the above changes:
• Enter the old password and confirm your entry.
• Enter the new password and confirm your entry.
• Re-enter the new password and confirm, system
prompts that the change is successful.
PIN
code,
PIN2
code, call
3.3.7 Call Screening
“VIP list” call screening function provides you with an
easy and convenient way to avoid receiving harassing calls.
The “Black list” stores the calls (up to 10) that you do not
wish to answer which will be automatically rejected; while
the “VIP list” stores only calls (up to 10) that you wish to
answer, and all other calls will be rejected.
Black list
This menu is used to add, query, change and erase a
number in the “Black list”. This menu includes two
submenu options, “Add new list” and “Search”.
The “Add new list” menu includes “New number”
and “
Contacts
menu is used to open the number editor, enter a new
number, and then add the new number to the reject
call list, while the “
phonebook list and select a number from the
phonebook list to add it to the reject call list.
The “Query” menu is used to scroll through the reject
call list, select a reject call by using the or
key, and then press the key to access the option
list which includes the two options “
“
Erase
the number editor and change the selected reject call
” options, in which “New number”
Contacts
” me nu is used to open the
”, where the “
Change
” option is used to access
Change
” and
42 Menu Options
Page 46

number, while the “
reject call number selected.
Allow List
The operation is the same as “Black list”.
Call Screen setting
In the Call Screen menu, you can activate the “Black
list” function, “VIP list” function or deactivate call
screening (only one of the three functions is valid at
one time).
When you choose to activate the “Call Screen”
function, the phone will automatically reject an
incoming call that is included in the “Black list”.
When you choose to activate the “VIP list” function,
the phone will only answer incoming calls that are in
the “VIP list” and reject all other calls that are not in
the “VIP list”.
When you have selected “Disa ble al l” fo r this f unction, t he
call screening function will not work.
Note: When the Black list/VIP list call screening is
activated, the idle screen shows the Black list/ VIP list
soft icon.
Erase
” option is used to erase the
3.3.8 Network Setting
The network name will be displayed on the idle
screen. If the phone cannot identify the network
name, it will show the country code and the unknown
network number.
Preferred networks
The preferred network list is stored in the SIM card,
which determines in which order of preference the
phone will try to register a network.
• Preferred networks
Display the preferred network list with the first one
having the highest priority.
To access the “Preferred” screen, press the [Select] key
and then the [Preferred] softkey. The system will
prompt “Preferred Network Confirmed”, and the
network will be moved to the top of the preferred list,
meaning it has the highest priority.
• Delete a network
After confirming, the preferred network list is
displayed, from which you can select one and press the
[Delete] key to delete it.
• Add an available network
Once a confirmation from you is received, the phone
starts searching for available networks and then
displays them in a list on the screen. You can select any
Menu Options 43
Page 47

one of them and press the [Add] key to add the
network to the end of the preferred network list.
• Add existing network
Once a confirmation is received from you, the screen
displays the existing network list stored in the phone.
You can select any one and press the [Add] key to add
the network to the end of the preferred network list.
• Add a network code
After confirming, the phone opens the editor where
you can in turn enter a mobile country code and
mobile network code. After confirming, the code is
added to the Preferred network list.
Log on to GPRS
This phone supports GPRS. This option is used to
define the attach mode of your phone to the GPRS
service: “
Always on
” or “
For data calls
”.
Register again
After confirming, the phone starts to search for
available networks and then list them on the screen.
Once you have selected one of the networks and
pressed the [Register] key, the phone will try to
register with the selected network.
3.3.9 Factory Settings
This is used to restore a set of parameters preset in
the factory, including profile settings, phone unit
settings, etc. All the settings you have previously
made will be lost once you use this menu. The
phone prompts you before the restoration
operation and will only proceed after you have
confirmed.
3.4 Profile Settings
Profile settings function allows you to access a group
of predefined settings, which lets you quickly adapt
your phone to your environment by changing several
settings at once. There is a selected mark to the right
of the current mode.
Profile settings are a group of preset characteristic
definitions that override the original settings when
activated. The phone provides a group of default modes
including
Normal, Silence, Meeting, Outdoor
Each mode has a set of default values (see the
following table). You can change the settings
according to your preference via the Personalised
function and store your changes automatically in the
mode. If the mode is activated, the changed settings
take effect immediately.
and
Car
44 Menu Options
.
Page 48
You can also rename the modes.
Profiles
Call alert
(includes al arm clock alert)
Vibration/Ringing/
alarm clock volume
Game tone
Orga nise r alert
SMS alert
Keypad tone
Connection alert
Battery low alert
General mode Silence mode Meeting mode Outdoors mode Car mode
Ringing and
backlight
Volume 5 Volume 1 Volume 1 Volume 5 Volume 5
On Off Off On On
Ringing Vibrate Vibrate
Ringing Vibration
On Off Off On On
On On On On On
On On On On On
Vibration Vibration
Ringing and
vibration
Ringing and
vibration
Ringing and
vibration
Ringing and
vibration
Ringing
Ringing
Ringing
Menu Options 45
Page 49

3.4.1 Personalised setting
On the basis of the default settings, you can set the
values in each mode according to your preference
Call al ert method
You can define the method of alert when there is a call,
e.g. to activate/deactivate ringer, vibra or backlight.
Ring volume
You can adjust the ring volume. There are five
levels of ring volume, as well as increasing volume
feature (an increasing mark appears on top of the
volume level). Once a level is selected, it shall
apply to all group ringing in this mode.
Alarm volume
You can also adjust the alarm volume. Once a volume
level is selected, it will apply to all types of alarm.
Game tone
You can define whether alert tones are required when
you are playing a game, including the game start tone,
game over tone, failure tone, upgrade tone, etc.
Organiser alert
You can define whether to produce an alert or vibra
when an event occurs.
SMS alert
You can define whether to produce an alert or vibra
when an SMS (including the
received.
Delivery report
) is
Keypad tone
You can define whether to produce an alert when a key
is pressed.
Connect tone
You can define whether to produce an alert tone when
the call is connected.
Battery low alert
You can define whether to produce an alert when the
battery runs low.
Automatic switch off when battery is flat: The phone
will automatically switch off when the battery runs so
low that the phone cannot operate properly.
3.5 Tool
3.5.1 Organiser
With the organiser menu, you can
View events list (Month view
event
,
Delete an event
or
Create a new event
or
Week view
Make a capacity query
),
Change an
.
46 Menu Options
,
Page 50

When an event is due, the phone automatically
displays the
event are shown and the organiser alert beep is
sounded.
You can create up to 30 events.
Week View/Month View
When in the organiser, the first screen displays the
current
there is an event due on that day. You can switch to
Week view by pressing the key.
You can view the particular event on that day by using
the navigation keys to select the day and press the
The following options are available:
Add
Event Due
Month view
key to reveal an event list on that day.
view, where the details of the
. The mark under a date indicates
Two t y pe s
• Meeting
If the type is “Meeting”, you need to set the date,
starting time, ending time (which shall be later than the
starting time), text, alert type and repeat mode.
• Memo
If the type is “Memo”, you need to set the event date,
starting time, contents, alert time, and alert method.
Reminder
You can set different kinds of reminders. The phone
provides the following options:
minutes earlier
earlier
reminder
when the event is due, but the event is stored in the list
and you can view it.
,
10 minutes earlier, 1 hour earlier, 1 day
,
1 week earlier
” is selected, the phone will not prompt you
and
At event time, 5
No reminder
. If “
No
Repeat mode
You can set the repeat mode for an event. The phone
provides the following repeat modes:
daily
,
Rpeat weekly, Repeat monthly
View
You can view the event list for a month (or a week).
You can al s o
Delete all events
After confirming, the phone will clear all events
(occurred or future).
Delete past events
After confirming, the phone will clear all occurred events.
Capacity Query
With this menu, you can check the space used by the
events such as the number of events, total capacity and
percentage of usage.
View all events
, and
list.
No repeat, Repeat
Repeat annually
Menu Options 47
.
Page 51

Event List
The event list displays all events for the current month,
week or day. To show details of an event, select the event
and press . If you press the [Option] softkey again,
the screen displays the following options:
Reminder, Repeat
•
Edit
:
After you have selected “
note type, date, alert time, content, reminder type and
repeat mode. If the event type is not changed, the
opened editor automatically displays the original
information.
•
Reminder
The option changes only the reminder.
•
Repeat
The option changes only the repeat mode.
•
Delete
Delete operation requires your confirmation.
:
mode:
:
mde and
Delete
.
Edit
”, you can change the
Edit
Important Notice
What happens to the event when the phone is switched off
Note: The alert for an organizer event will be delayed
,
until the phone is switched on. For repeated events, the
phone alerts the most recent one.
When there is a change to the phone’s date and time
Perform the following:
• If you consider only the most recent event in the
repeated event list, you can process the event as usual.
• Unrepeated events will not be changed. This means
you will be reminded again of an occurred event if you
have set your phone’s current time before that event.
3.5.2 Alarm Clock
This ph one has a 24-h our alarm clock function. There
are three sets of alarm clocks and you can activate or
deactivate them.
In the alarm clock menu, select a set of alarm clocks
and then “Use” to access the clock editor window
where you can enter the alarm clock time. There are
four repeat modes for you to select:
• Activate the alarm clock at a preset time on a
particular day
48 Menu Options
Page 52
• Activate the alarm clock at a preset time on every
day
• Activate the alarm clock at a preset time on every
working day (except weekends)
• Activate the alarm clock at a preset time on every
working day (except Sunday)
Press the and keys to select the repeat
mode field for a set of alarm clocks, and press the Left
and Right navigation keys to select a repeat mode. You
will also be able to set the ringer type for the alarm
clock by using the Left and Right navigation keys.
3.5.3 Calculator
The calculator can perform four kinds of operations:
addition, subtraction, multiplication and division.
Once in the calculator menu, you can enter the
number for calculation directly by pressing the
numerical keys and enter a decimal point by pressing
the key. After entering the first number, you can
use the / / / keys to enter “*”, “/”,
“+”, and “-”, and you can also select one of the four
operators by pressing the key once to get a “+”,
twice to get a “-”, thrice to get a “*”, and four times to
get a “/”. Then, you can enter the second operand by
using the numerical keys or key as required.
Finally, press to get the result. If you wish to
continue with the calculation, you can enter an
operator and use the result of the first operation as the
first operand.
The key allows you to perform the following
operations: Options menu includes:
MS
and M+. In which,
•
Reset
: To clear the editing window of the calculator
and restart input. (It will not affect the contents
stored in the memory.)
•
MC
: Memory Clear: To clear the number stored in
the memory.
•
MR
: Memory Read: To recall the number stored in
the memory without erasing it from the memory.
•
MS
: Memory Store: To store the displayed number
in the memory.
•
M+
: Memory Plus: To add the displayed number
and the number stored in the memory and store the
sum in the memory.
You can enter a number of up to 10 digits in the edit
window.
The operation precision for floating point number
can be approximated to the eighth digit after the
decimal point and a round off operation is executed
for the remaining part of the numeral (e.g.
0.123456789 is approximated to 0.12345679).
Reset, MC, MR
Menu Options 49
,
Page 53

You can short press the key to cancel an entry or
to exit the calculator if there is no entry. A long press
of the key will cancel all entries, and return to
idle mode if there is no entry.
3.5.4 Stopwatch
The screen displays the start time as 00:00.0. Once
the [Start] softkey is pressed, the watch starts and the
softkey changes to [Pause] and [Reset]. You can press
the [Pause] softkey to temporarily stop the watch and
keep its current reading, and then press the
[Continue] softkey or key to resume and
continue the timer. You press [Reset] softkey to reset
the stopwatch reading to zero.
3.5.5 Reverse Timer
This timer has a function similar to that of the alarm
clock but it alerts you when the preset remaining time
is reached. Once this feature is set to “
opens an editor for you to enter how much time is left
before it gives you an alert.
Note: The reverse timer will automatically switch on
the phone to alert you even if the phone is switched off.
On
”, the phone
3.5.6 Auto On/Off
This phone model features an automatic On/Off
switching function. You can set
Auto On
or
separately. When this option is set to “ON”, the
phone goes to time editing window and prompts you
to enter the time to switch the phone On/Off.
If PIN code authentication is required to switch on
the phone, the screen will stay at the PIN code input
screen.
Note: When you are boarding an airplane or when use
of mobile phone is prohibited, please make sure you are
not using this feature to prevent the phone from
automatically switching on. Philips shall not be liable
for any consequences arising from the use of this
feature.
3.5.7 World Time
The World Time function allows you to view the time
of major cities in different time zones and to set the
time of the phone to that of the selected city. You can
choose whether to use the daylight saving time.
There is a line to show the time both at the top and
bottom of the world map. The bottom line shows
local time and the top line shows the time of another
location.
If there is a daylight saving time sign next to a city, it
means that the city uses daylight saving time.
Off
50 Menu Options
Page 54
You can choose a city along the longitude by pressing
the / keys. You can choose a city along the
latitude by pressing the / keys.
You can set a remote city time using the option menu:
Whether to use daylight sa ving time, or to set a remo te
city as local.
3.6 Entertainment
3.6.1 Games
Six games are preset in the phone:
The menus in Games are different from the normal
menu. You can follow the screen instructions to
execute the appropriate moves.
Reflexes
The screen is divided into two areas: game area and
prompt area. The blocks are standard Russian blocks
for 7 programs. Once a line is filled with blocks, the
line is cleared and appropriate scores are added. The
more lines cleared, the more scores are added. If the
blocks are accumulated at the top line resulting in the
newly generated blocks being unable to move down
the line, the game is over. The prompt area displays
the current scores and the shape of next block. The
speed for the game is adjustable.
Smart Move
You can push the box, but you cannot pull the box; and
you can only push one box at a time! If you pushed all
the boxes to the place marked with small flowers, you
win the game. You can randomly choose a game.
Snake
There is a snake, an egg laid randomly and some
obstacles on the screen. The player uses direction keys
to control the moving direction of the snake.
Whenever the snake swallows an egg, its length
increases by one. When the snake hits an obstacle or
itself, you lose the game.
Mine
The objective of the Mine game is to find all land
mines as quickly as possible and not to step on the
mine. If you step on a mine, you lose the game.
The numbers shown on the block you have revealed
signifies the number of mines in the eight blocks
around it. You can mark a block as possible mine or
put a question mark (?) on it. The mark can be
removed. Each time you mark a mine, the mine
counter decreases by one.
If all mines around a numbered block are marked, you
can clear all mine-free areas around it.
Menu Options 51
Page 55

Brick Game
There are three catch boards in total. When all catch
boards are used up, the game is over.
At the beginning of the game, you will be asked to
choose a location to start. Click the launch button to
release the ball. The ball flies upward, hit and breaks a
brick. The ball bounces back and you have to catch
the ball, which will again bounce toward the bricks.
When all bricks are broken, you pass this level. You
can now proceed to the next level. When you pass a
level, you get one more catch board.
There are three colors of bricks and the blue ones
require two hits to break. If you miss the bouncing
ball, you lose one catch board.
In addition, when the ball hits a brick that is
accompanied with a gift, the gift will fall down. You can
eat the gift and you can see the change after eating it.
The gifts include: Extension club, shrinking club, one
more board, lose one board and directly pass the level.
Lucky Star
This is similar to the Slot Machine in the Casino.
Once the key is pressed, three columns of
pictures start rolling with each column consisting of 6
different patterns. If the key is pressed again,
victory or defeat is decided based on the different
combinations of pictures.
Here are some game rules: The score for different
combinations of pictures is different and the chance
for different pictures to appear in the same location is
different. The score for three identical pictures with
lower chance is more. You can place different bets and
the more bets you place, the more you win or lose.
3.6.2 Recorder
This mobile phone supports recording in ARM
format. This feature is used for recording and
managing sound files in ARM format
Once in the Recorder, you will see the list of sound
files in ARM format you have recorded. The Options
menu allows you to do the following:
Play
: Play the sound of your choice.
•
•
Record new sound clip
Press the key to start recording. Each clip can
last up to 30 seconds. The maximum number of
sound clips you can record is 32.
•
Delete
: To delete the sound of your choice.
•
Rename
: To rename the sound file you have
selected.
: Record new sound clip:
3.6.3 Biorhythm Graph
Biorhythm Graph allows you to draw a curve
reflecting changes in physical strength, intellect and
emotion in a month according to the date of birth you
52 Menu Options
Page 56
have entered and the calculated date. You can also
view your conditions of the
the
Next day
Next month
( key),
( key) in the main interface.
Previous day
Last month
( key),
( key), and
3.7 WAP (Network-dependent)
This phone has an integrated WAP browser. With
WAP, you have access to various WAP websites on the
Internet.
Note: To have access to the Internet, you need to
subscribe to the data service function from your
network operator. For details, contact your local
network operator.
You need to configure the WAP before you use the
WAP browser for the first time.
Note: Some entries in your phone configuration may
be factory preset to the WAP parameters of a
particular network operator. If you are a subscriber of
this preset network operator, you can use the
configuration directly. If you are a subscriber of other
network operators, you must reconfigure the settings.
Note: If you cannot browse a WAP homepage properly
because the network operator has changed its WAP
settings or the Internet content provider has changed
its WAP web site, our company will not be liable for
any consequence whatsoever arising from such change
and no prior notice will be given. For the latest
information, please contact your network operator
and Internet content provider.
3.7.1 Homepage
You can directly access the homepage by selecting this
menu. You can set the address of the homepage in the
WAP Setting.
3.7.2 Favorite
You can maintain the addresses of five web sites you
frequently visit and perform operations such as
browsing, editing and resetting.
3.7.3 Last Visit Page
You have direct access to the web page you have last
visited by selecting this menu.
3.7.4 Browse
By select ing this menu, you can directly enter the
address of a website you want to visit.
3.7.5 Settings
Mode
There are three different mode settings available. You
may activate and use one of the modes. You can also
edit them.
Menu Options 53
Page 57

The specific settings of each mode are as follows:
Mode name
You can set a name for the mode.
Home page
You can set the address of the homepage.
Network Operator
There are two types of network for WAP connection:
Traditional GSM or GPRS. You can set their priority here:
•
GPRS first
•
GPRS only
•
GSM only
: Use GPRS if GPRS is available.
: Use GPRS only.
: Use GSM only.
GSM settings
You can s e t :
•
Display
settings: To display the current setting of
the following items;
• Gateway
•
IP address
: IP address of the gateway ser ver. To enter 4
three-digit numbers and add zero in front if there are
less than 3 digits.
•
IP port
•
•
: IP port of the gateway server.
Data Call Type
Telephone number
dialed. When the phone is online, it will
automatically dial this number.
: ISDN (digital) or analogue mode.
: To enter the number to be
•
User name
WAP ser ve r.
•
User Password
: The user name you use to log on to the
: The password required to log on.
GPRS settings
You can s e t :
•
Display
settings: To display the current setting of
the following items
•
Gateway
•
IP address
: IP address of the gateway server. To enter 4
three-digit numbers and add a zero in front if there are
less than 3 digits.
•
IP port
•
•
•
Downloading Pictures
You can cho ose to activate or deactivate the Download
picture function.
This mobile phone currently supports downloading
of the following picture formats from a web page:
WBMP, GIF and JPEG. You can press the key
when the web page is displayed and select the picture
you want to store. The picture will be automatically
stored in the “WAP download pictures” in the picture
album.
: IP por t of the gateway server.
APN
settings: To set the access point name.
User name
WAP ser ve r.
User Password
: The user name you use to log on to the
: The password required to log on.
54 Menu Options
Page 58
Status Bar Display
You can choose whether to display the status bar or
not.
3.8 Multimedia
3.8.1 Camera
This mobile phone has a built-in digital camera,
which can take pictures with different resolutions,
qualities and effects. It can also record videos. The
pictures will be stored in JPEG format and the videos
in MJPEG format.
Preview
If you are in Multimedia menu screen, you can select
“
Camera
”; or if you are in idle screen, you can press
the left softkey or the multimedia side key directly to
bring the phone into photo preview mode. Now, you
can press the “
picture with special effect, several pictures in
succession or a video clip. The phone is set, by default,
to take a normal picture.
In non-video
take pictures. Whereas in video mode, an odd number
of presses of the middle key will start taking picture
and an even number of presses of the middle key will
end the picture taking process. The and
Mode
” key to take a normal picture, a
Preview
mode, the middle key is used to
keys and the and side keys are used to
adjust focus. The key is to “Bring” the object
closer, while the key is to “Push” the object
farther away. This mobile phone is capable of 21stepping, quadruple focusing. Short press the or
keys to adjust the focus in steps and long press
the or keys to continuously adjust the
focus.
Depending on the shooting mode, you can use the
“
Setup
” key to set the following options:
• Environment mode: You can set the light exposure
level for different environment (
Cloudy, Fluorescent
set, by default, to “
•
Color effects
effects for the picture you are taking or the video
you are recording.
•
Picture quality
normal shooting mode, special effect shooting
mode and successive shooting mode. You can select
to take a picture of “
fine
” quality. The phone is set, by default, to “
quality.
•
Picture size
shooting mode and successive shooting mode.
You can select to take a picture, sized
and
Tungstenic
Auto
: You can select different kinds of color
: This option is available in normal
”.
: This option is available only in
Standard
Auto, Sunlight
). The phone is
”, “
Fine
” or “
Extremely
Fine
128 x 128
Menu Options 55
,
”
,
Page 59
128 x 96, 320 x 240
picture size is
•
Self-timer
: This option is available when in normal
shooting mode. You can choose to “
“
Deactivate
“
Activate
immediately after you press the “
Instead, it will delay 7 seconds before taking the
picture. This option is valid just once when it is set
to “
returns to “
•
Overlap
shooting mode. It allows you to select a
background or frame to overlap. The phone will
add the selected background or frame to the viewfinding screen. Now, the or navigation
ke ys can be us ed t o s ele ct an in te rna l b ackg ro und or
frame to overlap and the key or middle key
can be used to select the background or frame that
is currently displayed. Once the picture is taken,
the selected background or frame will be added to
the picture.
•
Numbers of pictures to take
when in successive shooting mode. You can select
the number of pictures to take in succession up to 8.
” this feature. When this option is set to
”, the camera will not take the picture
Activate
Deactivate
: This option is available in special effect
or
128 x 128
” and when the picture is taken, it
640 x 480
.
” status.
: This option is available
. The default
Activate
” or
Shoot
” key.
Note: When the phone does not have enough memory,
it will automatically stop shooting.
Interval between pictures
•
when in successive shooting mode. You can enter
the time interval between taking two pictures. The
minimum interval for successive shooting is 1/16s
(16fps). The optimal interval range for successive
shooting is “10 to 63”, where 10 is tenfold, the
minimum interval.
•
Frame rate
recording mode. This option allows you to set the
number of video frames taken per second. The
phone offers three options: “
Taking pictures
Once you press the middle key to complete shooting,
the screen will stay at the last picture or video frame
taken. Now, you can press the “
picture in the “Photo” folder in the picture album,
and the videos in the “Video clip” folder. If there is
not enough memory, the phone will prompt you.
Perform a cleanup to make room. Then go to “Photo”
or “Video clip” list to organize the list. Press the
key and you will be prompted to save the picture.
Select “OK”, the phone saves the picture or video and
then returns to preview screen. If you select “Back”,
: This option is available when in video
: This option is available
16
”, “8” and “4”.
Save
” key to store the
56 Menu Options
Page 60

the phone goes back to preview screen straightaway. If
you press the “Save” key when the memory is full or
the phone has already stored 60 photos, the phone
will prompt you. Perform a cleanup and then proceed
to save it. Then go to “Photo” list.
Press the “Options” key to access the “Options”
menu, which allows you to:
•
Take a new picture
will be in preview screen again.
•
Photo
: This option is available when the phone is
not in video recording mode. When this option is
selected, you enter the photo folder.
•
Video clip
is in video recording mode. When this option is
selected, you will enter the video clip folder.
: Once this option is selected, you
: This option is available when the phone
3.8.2 Picture Album
The Multimedia feature is used to manage all built-in
pictures, and pictures and videos you have stored in
the phone.
You will find “Built-in pictures”, “Animation
wallpapers”, “Downloaded pictures”, “Photos”,
“Videos clips” and “Pictures by WAP download”
folders. Where “Built-in pictures” and “Animation
wallpapers” folders are used to store and manage builtin static pictures and animations. The “Downloaded
pictures” and “Pictures by WAP download” folders are
used to store and manage downloaded pictures. The
“Photos” and “Video clips” folders are used to store
and manage pictures and videos taken by the built-in
camera. In the Multimedia menu, you will also find
the “Delete picture” option, which allows you to clear
all the contents of a folder at once. The available
options include: “Downloaded pictures”, “Pictures by
WAP download” and “Photos”.
In the Multimedia menu screen, you can press the left
softkey or middle key to access the classified list. In the
pictures list, you can use the Up and Down key select
a picture and press “
picture. In the pictures preview screen, you can use th e
, , and navigation keys to go t o
the previous or next picture. In the Video clip list, you
can press the middle key to play the selected video clip
and if you press the middle key again, the phone will
stop playing.
Depending on the type of files, you can use the
“Options” key, which gives you acce ss to the following
functions (availability of some options depends on the
picture format and size):
Built-in pictures: “Set as FotoCall” option allows you
to set the current picture as the FotoCall picture of a
Preview
” to view the selected
Menu Options 57
Page 61

record in the phonebook. If you select “Set as idle
screen picture” and “View details” options, the phone
will display information about the file format and
resolution of the current picture.
Animation wallpaper: “Set as idle screen wallpaper”
and “View details”.
Photos: “Set as FotoCall”, “Set as idle screen
wallpaper”, “Rename”, “Delete” and “View details”.
Video clips: “Delete”, “Rename” and “View details”.
3.8.3 Capacity Query
This menu allows you to check the memory usage.
3.9 STK Service
Note: The structure and names under this menu are
set in the SIM card by the network operator; and
different STK providers may provide different services
which cannot be changed.
STK (SIM TOOL KIT) allows the smartcard-based
SIM to run its own applications.
The STK card can receive and send GSM short
message data, acting as the interface between the SIM
card and short messages, as well as allowing the SIM
card to run its own applications. These functions are
often displayed in the software-enabled phone screen
and adopt a user-friendly text menu to replace the
mechanical “dial - tune - answer” mode, allowing you
to do complex information retrieval operations or
transactions with ease by pressing the keys.
STK provides a simple, user-friendly, developable
platform for the SIM card value-added services. STKsupported mobile phones provide an additional STK
menu, the options of which are read from the STK
card by the phone and cannot be changed. Depending
on the type of STK, the menu options may be varied
and may be changed through your network operator.
This phone supports the valued-added service
provided by STK but different operators provide
different types of service.
• Mobile chat
• Location service
• Information service
• E-business
• Entertainment Services
• Personal Assistant
• E-mail
• Customer Service
58 Menu Options
Page 62

4 • Accessories
When it comes to performance, Philips Authentic
Accessories are designed to achieve optimal
performance of the Philips mobile phone.
4.1 Charger
When the charger is plugged in, the backlight will be
activated and the phone will emit an alert tone. The
phone automatically enters the battery-charging
mode, where the screen displays a scrolling battery
charge indicator bar. All vibra alerts will be
deactivated when the phone is charging.
When the battery charge indicator bar stops scrolling,
it means the battery is fully char ged.
When the charger is removed, the backlight will be
activated and the phone will emit an alert tone. The
phone automatically returns to its normal mode.
You can charge the battery with the phone switched
on or off.
4.2 Earpiece
This elegantly-designed earpiece offers you a
convenient and simple way to answer calls with
excellent sound quality.
4.3 Data Cable
Optional and sold separately
You can use the data cable to connect your phone to a
PC, where you can run software on the PC, download
MIDI melodies and wallpapers. Your PC can even use
your phone as a Modem.
To maximise the performance of your Philips phone
and not to void the warranty, always purchase Philips
Authentic Accessories that are specially designed for
use with your phone. Philips Consumer Electrics
cannot be held liable for any damages due to use with
non-authorised accessories. Ask for Philips Authentic
Accessories where you have purchased your phone.
Accessories 59
Page 63
Precautions
Radio waves
Your cellular mobile phone is a low power
radio transmitter and receiver. When it is
operating, it sends and receives radio waves.
The radio waves carry your voice or data
the telephone network. The network controls the
power at which the phone transmits.
• Your phone transmits/receives radio waves in the
• The GSM network controls transmission power
• Your phone complies with all relevant safety
• The CE mark on your phone shows compliancy
Your cellular mobile phone is your responsibility. To
avoid damage to yourself, to others or to the phone
itself, read and follow all the safety instructions and
make them known to anyone borrowing your phone.
Furthermore to prevent unauthorised use of your
phone:
signal to a base station that is connected to
GSM frequency (900 /1800MHz).
(0.01 to 2 watts).
standards.
with European electromagnetic compatibility
(Ref. 89/336/EEC) and low voltage directives
(Ref. 73/23/EEC).
Keep your phone in a safe place and keep it
out of small children's reach.
Avoid writing down your PIN code. Try to
remember it instead.
Switch off the phone and remove the battery if you are
going to leave it unused for a long time.
Use the
Security
purchasing the phone and to activate call restriction
should follow all local recommendations and
regulations when using your cellular phone both at
home and when away. Regulations on the use of
cellular phones in vehicles and aircraft are
particularly stringent.
Public concern has been focused for some time on the
possible health risks for users of cellular phones. The
current research on radio wave technology, including
the GSM technology, has been reviewed and safety
standards have been drawn up to ensure protection
from exposure to radio wave energy. Your cellular
telephone complies with all applicable safety
standards and the Radio Equipment and
Telecommunications Terminal Equipment Directive
1999/5/EC.
menu to change the PIN code after
options.
The design of your phone complies with all
applicable laws and regulations. However
your phone may cause interference with
other electronic devices. Consequently you
60 Precautions
Page 64
Always switch off your phone Users of pacemakers
Inadequately protected or sensitive electronic
equipment may be affected by radio energy. This
interference can lead to accidents.
Before boarding an aircraft and/or when
packing the phone in your luggage: the use
of mobile phones in an aircraft may be
dangerous for the operation of the aircraft, disrupt the
mobile phones network and may be illegal.
In hospitals, clinics, other health care
centres and anywhere else where you may be
in the close vicinity of medic
In areas with a potentially explosive
atmosphere (e.g. petrol stations and also
areas where the air contains dust particles,
such as metal powders).
In a vehicle transporting flammable
products (even if the vehicle is parked) or a vehicle
powered by liquefied petroleum gas (LPG), check first
that the vehicle complies with the applicable safety
rules.
In areas where you are requested to turn off radio
transmitting devices, such as quarries or other areas
where blasting operations are in progress.
Check with the vehicle manufacturer that
electronic equipment used in your vehicle
will not be affected by radio energy.
al equ
ipment.
If you are a user of a pacemaker:
• Always keep the phone more than 15 cm from
your pacemaker when the phone is switched on,
in order to avoid potential interference.
• Do not carry the phone in a breastpocket.
• Use the ear opposite to the pacemaker to
minimise the potential interference.
• Switch off your phone if you suspect that
interference is taking place.
Users of hearing aids
If you are a user of a hearing aid, consult your
physician and hearing aid manufacturer to learn
whether your particular device is susceptible to
cellular phone interference.
Performance improvement
In order to improve the performance of your phone,
reduce radio energy emission, reduce battery
consumption and ensure safe operation adhere to the
following guidelines:
For the optimal and satisfactory operation of
the phone you are recommended to use the
phone in the normal operating position
(when not using in hands-free mode or with
a hands-free accessory).
Precautions 61
Page 65
• Do not expose your phone to extreme
temperatures.
• Treat the phone with care. Any misuse will void
the International Guarantee.
• Do not immerse the phone in any liquid; if your
phone is damp, switch it off, remove the battery
and let them dry for 24hrs before using them
again.
• To clean the phone, wipe it with a soft cloth.
• Placing and receiving calls consumes the same
amount of battery energy. However, the mobile
consumes less energy in idle screen when kept in
the same place. When in idle screen and while
you are moving, your phone consumes energy to
transmit updated location information to the
network. Setting the backlight for a shorter
period of time as well as avoiding unnecessary
navigating in the menus will also help to save the
battery’s energy for longer phoning and stand-by
performances.
Information displayed on battery
Your phone is powered by a rechargeable battery.
• Use specified charger only.
• Do not incinerate.
• Do not deform or open the battery.
• Do not allow metal objects (such as keys in your
pocket) to short circuit the battery contacts.
• Avoid exposure to excessive heat (>60°C or
140°F), moisture or caustic environments.
You should only use Philips Authentic
Accessories, as the use of any other
accessories may damage your phone and will
make all guarantees for your Philips phone
null and void.
Make sure damaged parts are replaced immediately by
a qualified technician and that they are replaced with
genuine Philips replacement parts.
Do not use your phone while
driving
It lowers concentration, which can be
dangerous. Adhere to the following
guidelines:
Give your full attention to driving. Pull off the road
and park before using the phone.
Respect the local regulations in countries where you
drive and use your GSM phone.
If you want to use your phone in a vehicle, install the
hands-free car kit which is designed for that purpose,
still ensuring you give full attention to driving.
Ensure that your phone and car kit do not block any
air bags or other security devices fitted in your car.
The use of an alarm system to operate a vehicle's light
or horn to indicate incoming phone calls is prohibited
62 Precautions
Page 66
on public roads in some countries. Check local
regulations.
EN 60950 Norm
In case of hot weather or after a prolonged exposure to
the sun (e.g., behind a window or a windscreen), the
temperature of your phone's casing might increase,
especially when featuring a metallic finish. Be very
careful in this case when picking up your phone and
also avoid using it with an ambient temperature over
40°C.
The green point symbol signifies that a
financial contribution has been made to
the associated national packaging
recovery and recycling system (e.g.
EcoEmballage in France).
The chasing arrows symbol on the plastic
tray and plastic bag indicate that the
materials are recyclable and also identifies
the plastic material.
Environmental care
Remember to observe the local regulations
regarding the disposal of your packaging
materials, exhausted batteries and old phone
and please promote their recycling.
Philips has marked the battery and packaging with
standard symbols designed to promote the recycling
and appropriate disposal of your eventual waste.
The crosse d-out dustbin signifies that the
battery should not be disposed of with
general household waste.
The mobius loop symbol signifies the
labelled packaging material is recyclable.
Precautions 63
Page 67

SAR Information to end users
THIS MODEL PHONE MEETS THE EU REQUIREMENTS
Your mobile phone is a radio transmitter and receiver. It is designed and manufactured not to exceed the limits for
exposure to radio frequency (RF) energy recommended by the Council of the European Union. These limits are
part of comprehensive guidelines and establish permitted levels of RF energy for the general population. The
guidelines were developed by independent scientific organisations through periodic and thorough evaluation of
scientific studies. The limits include a substantial safety margin designed to assure the safety of all persons,
regardless of age and health.
The exposure standard for mobile phones employs a unit of measurement known as the Specific Absorption Rate,
or SAR. The SAR limit recommended by the Council of the European Union is 2.0 W/kg. Tests for SAR have
been conducted using standard operating positions with the phone transmitting at its highest certified power level
in all tested frequency bands. Although the SAR is determined at the highest certified power level, the actual SAR
level of the phone while operating can be well below the maximum value. This is because the phone is designed to
operate at multiple power levels so as to use only the power required to reach the network. In general, the closer
you are to a base station antenna, the lower the power output.
Before a phone model is available for sale to the public, compliance with the European RTTE directive must be
shown. This directive includes as one essential requirement the protection of the health and the safety for the user
and any other person. The highest SAR value for this Philips 659 / CT 6598 model phone when tested for
compliance against the sta ndard was 0.640 W/kg. While there may be difference s between the SAR levels of various
phones and at various positions, they all meet the EU requirements for RF exposure.
FOR EXPOSURE TO RADIO WAVES
SAR Information to end users
Page 68

SAR Information to end users
THIS MOBILE PHONE MEETS INTERNATIONAL REQUIREMENTS
Your mobile phone is a radio transmitter and receiver. It is designed and manufactured not to exceed the limits for
exposure to radio frequency (RF) recommended by international guidelines (ICNIRP). These limits are part of
comprehensive guidelines and establish permitted levels of RF energy for the general population. The guidelines
were developed by independent scientific organisations through periodic and thorough evaluation of scientific
studies. The guidelines include a substantial safety margin designed to assure the safety of all persons, regardless of
age and health.
The exposure standard for mobile phones employs a unit of measurement known as the Specific Absorption Rate,
or SAR. The SAR limit stated in the international guidelines is 2.0 W/kg. Tests for SAR are conducted using
standard operating positions with the phone transmitting at its highest certified power level in all tested frequency
bands. Although the SAR is determined at the highest certified power level, the actual SAR of the phone while
operating can be well below the maximum value. This is because the phone is designed to operate at multiple power
levels so as to use only the power required to reach the network. In general, the closer you are to a base station, the
lower the power output of the phone.
The highest SAR value for this Philips 659 / CT 6598 model phone when tested for use at the ear is 0.640 W/kg.
While there may be differences between the SAR levels of various phones and at various positions, they all meet
the relevant international guidelines for RF exposure.
FOR EXPOSURE TO RADIO WAVES
SAR Information to end users
Page 69

Declaration of
conformity
We,
Philips France - Mobile Telephony
4 rue du Port aux Vins - Les patios
92156 Suresnes Cedex
FRANCE
declare under our sole responsibility that the product
Philips 659
CT6598
Cellular Mobile Radio GSM 900/GSM 1800
TAC: 3 527 71
to which this declaration relates, is in conformity with
the following Standards:
EN 60950, EN 50360 and EN 301 489-07
EN 301 511 v 7.0.1
We hereby declare that all essential radio test suites
have been carried out and that the above named
product is in conformity to all the essential
requirements of Directive 1999/5/EC.
The conformity assessment procedure referred to in
Article 10 and detailed in Annex V of Directive 1999/
5/EC has been followed related to articles 3.1 and 3.2
with the involvement of the following Notified Body:
BABT, Claremont House, 34 Molesey Road, Waltonon-Thames, KT12 4RQ, UK
Identification mark: 0168
Le Mans, April 28, 2004
Jean-Omer Kifouani
Quality Manager
In case your Philips product is not working correctly or
is defective, please return your phone to the place of
purchase or to the Philips National Service Center.
Refer to the International Guarantee shipped in the
box for information on Service centers and technical
documentation relevant to your equipment.
 Loading...