

Philips 7819901511 User Manual
DVDR3395

Table of Contents
Important Safety Instructions ....................... 2
Warnings, Cautions and Others .................... 3
Overview
• Disc Types Supported .............................. 4
• Media Files Formats Supported .................. 5
Connecting Up
• Knowing Your DVD Recorder ...................... 6
• Connecting up Your DVD Recorder .............. 9
• Connecting to External Devices ..................11
Getting Started
Introducing System Setup ..........................12
• Setting TV Channels ...............................15
• Setting Aspect Ratio ...............................15
• Setting Parental Control ...........................15
Advanced System Setup ............................16
• Using Channel Editor ..............................16
• Setting the G-Code® System ....................18
Easier Application & Access
Tools ...................................................19
• Introducing Tools ...................................19
• Using Tools: Play ...................................19
• Using Tools: Record ...............................20
• Using Tools: Timer Recordg .....................20
• Using Tools: Disc Tools ...........................21
On-Screen Input Keypad ...........................23
• Introducing On-Screen Input Keypad ...........23
• Using On-Screen Input Keypad .................23
Recording
• Recording: Step by Step ..........................24
• Recording from TV .................................25
• Recording from External Devices ................25
• One-Touch Recording .............................25
• Inserting Chapter Mark during Recording ......26
Timer Recording
• Introducing Timer Record Menu .................27
• Setting Timer Program(Date/Time Mode) ......28
• Setting Timer Program(G-Code® Mode) .......29
• Notice for Timer Recording .......................29
Playback
• Playback: Step by Step ...........................30
• Programmed Playback for Audio CD ...........30
• Playing Picture File .................................30
• Introducing Navigation Menu .....................31
Digital Video Support
MPEG-4 ...............................................34
• Supporting Formats ................................34
• Playing MPEG-4 Files ............................34
• Subtitle of MPEG-4 Files .........................34
DivX® VOD ............................................35
• Step 1: Applying for a User Account ...........35
• Step 2: Registering Your DVD Recorder ........35
• Step 3: Selecting Video Files .....................35
• Step 4: Playing Video Files .......................35
Editing
• Introducing Edit Menu .............................36
• Editing Titles ........................................36
Troubleshooting
......................................38
Specifications
........................................40
Reference
42
• Guide to Recording Options ......................42
Glossary
................................................43
Recommended Disc List
...........................45
Check whether all the accessories are included in
your package box.
Remote Control (1)
Batteries (2)
Audio/Video Cable (1)
Power Cord (1)
Antenna Cable (1)
Quick Start Guide (1)
User’s Manual (2)

2
Important Safety Instructions
1. READ INSTRUCTIONS - Read the instructions carefully before using this product.
2. RETAIN INSTRUCTIONS -
Retain the instructions for
future reference.
3. HEED WARNINGS - Observe warnings listed in the
manual.
4. FOLLOW INSTRUCTIONS - Follow the instructions
when using this product.
5. CLEAN -
Use a dry cloth for cleaning.
6. VENTILATION - Do not block any ventilation openings
of this product. Allow at least 10 cm (4.5 inch)clearance
from the rear and the top of the set and 5 cm (2.3 inch)
from the left and right to prevent overheating.
7. MOISTURE - Do not use this product near water, and
be sure to prevent this product from being exposed to any
dripping or splashing.
8. HEAT -
Do not install this product near any heat sources,
such as radiators, heat registers, stoves or other devices
(including amplifier) which produce heat.
9. POLARIZATION -
Do not defeat the safety purpose of
the polarized or grounding-type plug. A polarized plug
has two blades with one wider than the other. A grounding
type plug has two blades and a third grounding prong. The
wide blade or the prong are provided for your safety. If
the provided plug does not fit into your outlet, consult an
electrician for replacement of the obsolete outlet.
10. POWER CORD - Protect the power cord from being
walked on or pinched, particularly at plugs, convenience
receptacles and the point where they exit from the
product.
11. ACCESSORIES/ATTACHMENTS -
Use only acces-
sories/attachments specified by the manufacturer.
12. USAGE -
Unplug this product during lightning storms or
when it is not used for long periods of time.
13. CART - Use only cart, stand, tripod bracket or table
specified by the manufacturer or sold with the product.
When a cart is used, operate carefully to prevent the
objects from tip-over.
14. SERVICING - Contact qualified personnel when servicing is needed. Servicing is required when this product has
been damaged in any way, for example, when the power
cord or plug is damaged; liquid has been spilled on the
product; objects have fallen into the product; the product
has been exposed to rain or moisture; the product does not
work normally; or the product has been dropped.
15. BATTERY - To prevent battery leakage which may result
in bodily injury, property damage or damage to the unit,
please follow the instructions listed below when using the
product’s remote control.
• Install
all batteries correctly, with + and - signs
matching the marks indicated.
• Do not mix batteries (old and new or carbon and
alkaline, etc.)
• Remove batteries when the remote is not used for a
long time.
16. WASTE - This product may contain lead and mercury.
Disposal of these material may be regulated due to
environment considerations. For disposal or recycling
information, please contact your local authorities or
the Electronic Industries Alliances: www.eias.org
3
Warnings, Cautions and Others
Warnings, Cautions and Others
CAUTION!
TO REDUCE THE RISK OF ELECTRIC SHOCK, DO NOT REMOVE THE
COVER OF THIS UNIT. THERE ARE NO USER SERVICEABLE PARTS
INSIDE. REFER SERVICING TO QUALIFIED SERVICE PERSONNEL.
The lighting flash with arrowhead symbol, within an
equilateral triangle, is intended to alert the user to the
presence of uninsulated ‘dangerous voltage’ within the
product enclosure that may be of sufficient magnitude
constitute a risk of electric shock to humans.
The exclamation point within an equilateral triangle is
intended to alert the user to the presence of important
operating and maintenance (servicing) instructions in
the literature accompanying the appliance.
CAUTION!
THIS PRODUCT UTILIZES A LASER.USE OF
CONTROLS OR ADJUSTMENTS OR PERFORMANCE OF PROCE
DURES OTHER THAN THOSE SPECIFIED HEREIN MAY RESULT IN
HAZARDOUS RADIATION EXPOSURE. DO NOT OPEN THE COVER
AND DO NOT REPAIR YOURSELF. REFER SERVICING TO QUALI
-
FIED SERVICE PERSONNEL.
WARNING:
TO REDUCE THE RISK OF FIRE, ELECTRIC SHOCK OR PRODUCT
DAMAGE, DO NOT EXPOSE THIS APPARATUS TO MOISTUREAND
ENSURE THAT OBJECTS FILLED WITH LIQUIDS, SUCH AS VASES,
SHALL BE PLACED AWAY FROM THE APPARATUS.
CAUTION! – POWER button
Disconnect the main plug to shut the power off completely. The POWER
button in any position does not disconnect the main line. Power can be
controlled from the remote.
G-Code is a registered trademark of Gemstar Development
Corporation.The G-Code system is manufactured under
license from Gemstar Development Corporation.
DivX, DivX Certified, and associated logos are
trademarks of DivXNetworks, Inc. and are used
under license.
Manufactured under license from Dolby Laboratories. ‘Dolby’ and the
double-D symbol are trademarks of Dolby Laboratories.
PRODUCTS WITH 525P/625P PROGRESSIVE SCAN
OUTPUTS NOTICE REQUIREMENTS
“CONSUMERS SHOULD NOTE THAT NOT ALL HIGH DEFINITION TELE
VISION SETS ARE FULLY COMPATIBLE WITH THIS PRODUCT AND MAY
CAUSE ARTIFACTS TO BE DISPLAYED IN THE PICTURE. IN CASE OF
525 OR 625 PROGRESSIVE SCAN PICTURE PROBLEMS, IT IS RECOM
MENDED THAT THE USER SWITCH THE CONNECTION TO THE ‘STAN
DARD DEFINITION’ OUTPUT. IF THERE ARE QUESTIONS REGARDING
OUR TV SET COMPATIBILITY WITH THIS MODEL 525P AND 625P DVD
PLAYER, PLEASE CONTACT OUR CUSTOMER SERVICE CENTER.”
IMPORTANT FOR LASER PRODUCTS
1. CLASS 1 LASER PRODUCT
2.
DANGER: Visible and invisible laser radiation when open and interlock
failed or defeated. Avoid direct exposure to beam.
3.
CAUTION: Do not open the top cover. There are no user serviceable
parts inside the Unit; leave all servicing to qualified service personnel.
CAUTION!
• CD-R/RW discs recorded using a personal computer or a CD Recorder
may not play if the disc is damaged or dirty, or if there is dirt or condensa
-
tion on the player lens.
• Unfinalized CD-R/RW discs can be played, but not all time information
(playing time, etc.) will be displayed.
• Check the copyright laws in your country before recording from DVD
VIDEO, SVCD, Video CD, Audio CD, MP3 and JPEG discs. Recording of
copyrighted material may infringe copyright laws.
Legal Notices Regarding
Macrovision Property Rights
“U.S. Patent Nos. 4,631,603; 4,577,216; 4,819,098; 4,907,093; and
6,516,132.”
“This product incorporates copyright protection technology that is protected
by U.S. patents and other intellectual property rights.Use of this copyright
protection technology must be authorized by Macrovision, and is intended
for home and other limited viewing uses only unless otherwise authorized
by Macrovision.Reverse engineering or disassembly is prohibited.”
CAUTION!
You may only use this DVD recorder to reproduce or copy materials for
which you own the copyright; or have obtained permission to copy from
the copyright owner; or you otherwise have a legal right to reproduce or
copy. Unless you own the copyright; or have obtained permission from
the copyright owner; or otherwise have a legal right to reproduce or copy,
you may be violating the law, including copyright law, and may be subject
to payment of damages and other remedies.
Copyright Protection Notice
You may not be able to record a program from TV or from another device
connected to this recorder, if the source material is copy-protected (e.g.
set in ‘Copy-Once’ or ‘Copy-Never’ modes).
4
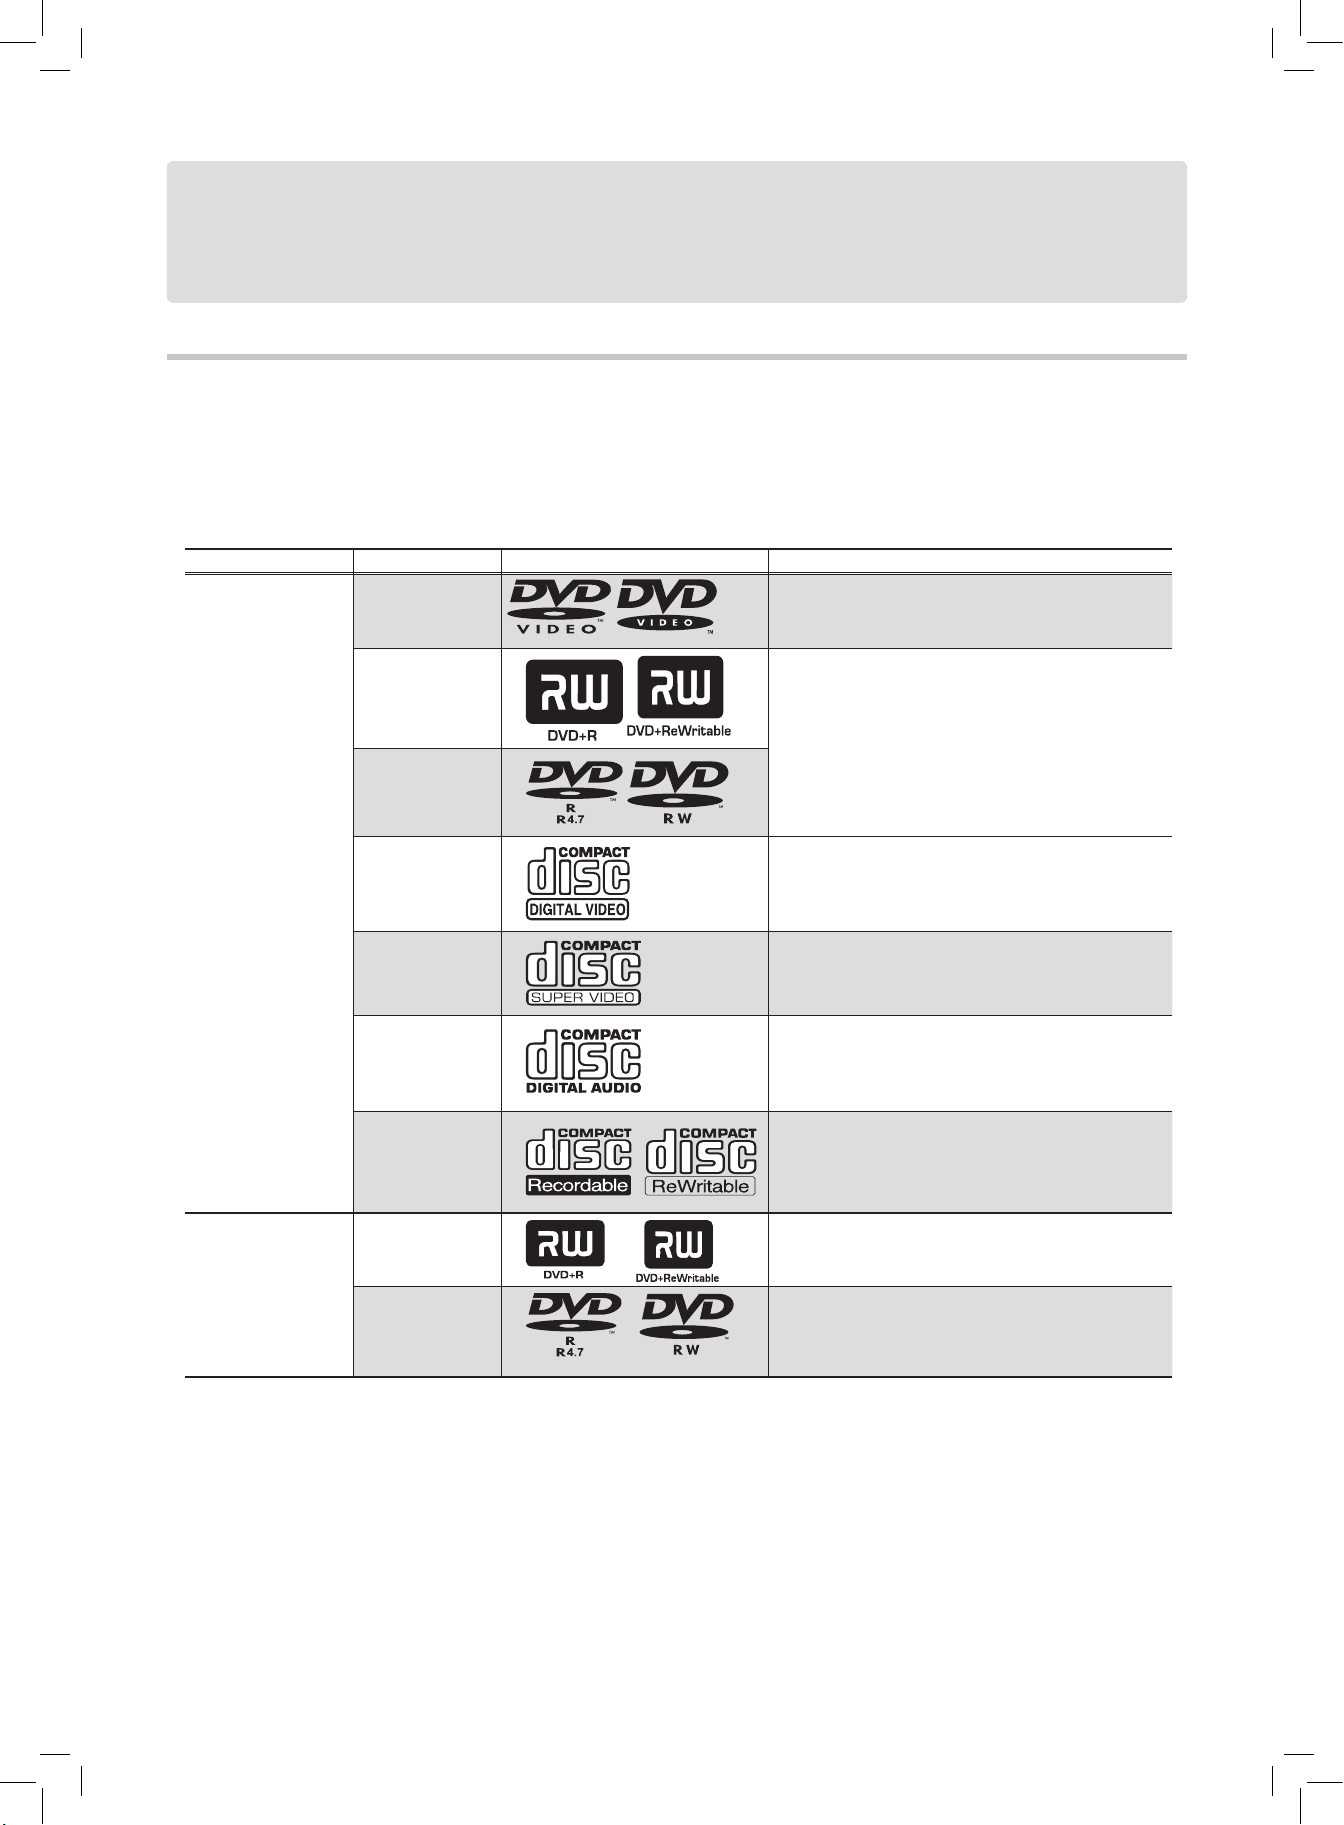
Overview
Disc Types Supported
Recordable DVD discs are divided into two categories: ‘plus(+)’and ‘minus(-)’ formats. Within these two groups, discs
are further classified as ‘write-once’ discs(+R or -R)on which the blank sections are used for recording once only, and
‘rewritable’ discs(+RW or -RW) on which the recording sections can be erased and used for recording new content repeat
-
edly. Refer to the following table for the disc types supported by this DVD recorder.
Application Disc Type Disc Logo Information
Playback
DVD-Video
Preset DVD-Video discs with supported region
code (Supported region code is printed on the rear
panel of recorder).
DVD+R/+RW
Discs written in DVD-Video or DVD+VR format
and finalized, or with JPEG/MP3/WMA/MPEG-4
files.
DVD-R/-RW
Video CD
(VCD)
CDs for video files recorded with CD sound, VHS
quality, MPEG-1 compression technology.
Super Video CD
(SVCD)
CDs for video files recorded with CD sound, SVHS
quality, MPEG-2 compression technology.
Audio CD
CDs for music files recorded in digital signal,
featuring better audio quality, less distortion and
less deterioration of audio quality over time.
CD-R/-RW
Finalized CD-R-/RW discs recorded in Audio CD
or Video CD formats, or with JPEG/MP3/WMA/
MPEG-4 files.
Recording /
Timer Recording
DVD+R/+RW
DVD+R/+RW discs in DVD+VR format
DVD-R/-RW
DVD-R/-RW discs in DVD+VR format
The DVD-Video/DVD+RW/DVD+R/DVD-R/DVD-RW/CD-R/CD-RW logos are trademarks of the respective compa-
nies.
For best results, use discs with the above logos. This DVD recorder may not play back other discs correctly. Do not use
irregular-shaped discs (e.g. heart-shaped), as these can damage the recorder.
It may not be possible to play CD-R, CD-RW, DVD-R, DVD-RW, DVD+R, DVD+RW in all cases due to the type of
disc or condition of the recording.

5
Overview
Unplayable Disc Types
This DVD recorder does not play back the disc types listed below. If you try to play back these discs, excessive noise may
cause damage to your speakers. When placing an unplayable disc on the disc tray, a message showing ‘Invalid Disc’ will be
displayed on the TV screen.
• Unfinalized discs recorded on other DVD/CD recorders
• DVD Audio discs
• PHOTO CDs
• DVD-Video discs with a region code not supported by the recorder
• DVD-RAMs
• Data discs (e.g. CD-ROMs, DVD-ROMs) without files supported by this DVD recorder
• Standard SACDs (Hybrid type of SACDs can be played as normal Audio CDs.)
Media Files Formats Supported
Application Category Formats (extention)
Playback
Video
MPEG-1
MPEG-2 (.VOB/ .DAT/ .MPG)
MPEG-4 (.AVI/ .DIV/ .DIVX)
Music .MP3
Picture JPEG (.JPG)
If an MP3 file name includes two-byte character, the recorder may not be able to display the name correctly.
This recorder does not support ID3 (for MP3) tag.
This recorder does not support MP3-Pro files.
MP3 file bitrates supported by this recorder are: 8kbps - 320kbps.
6
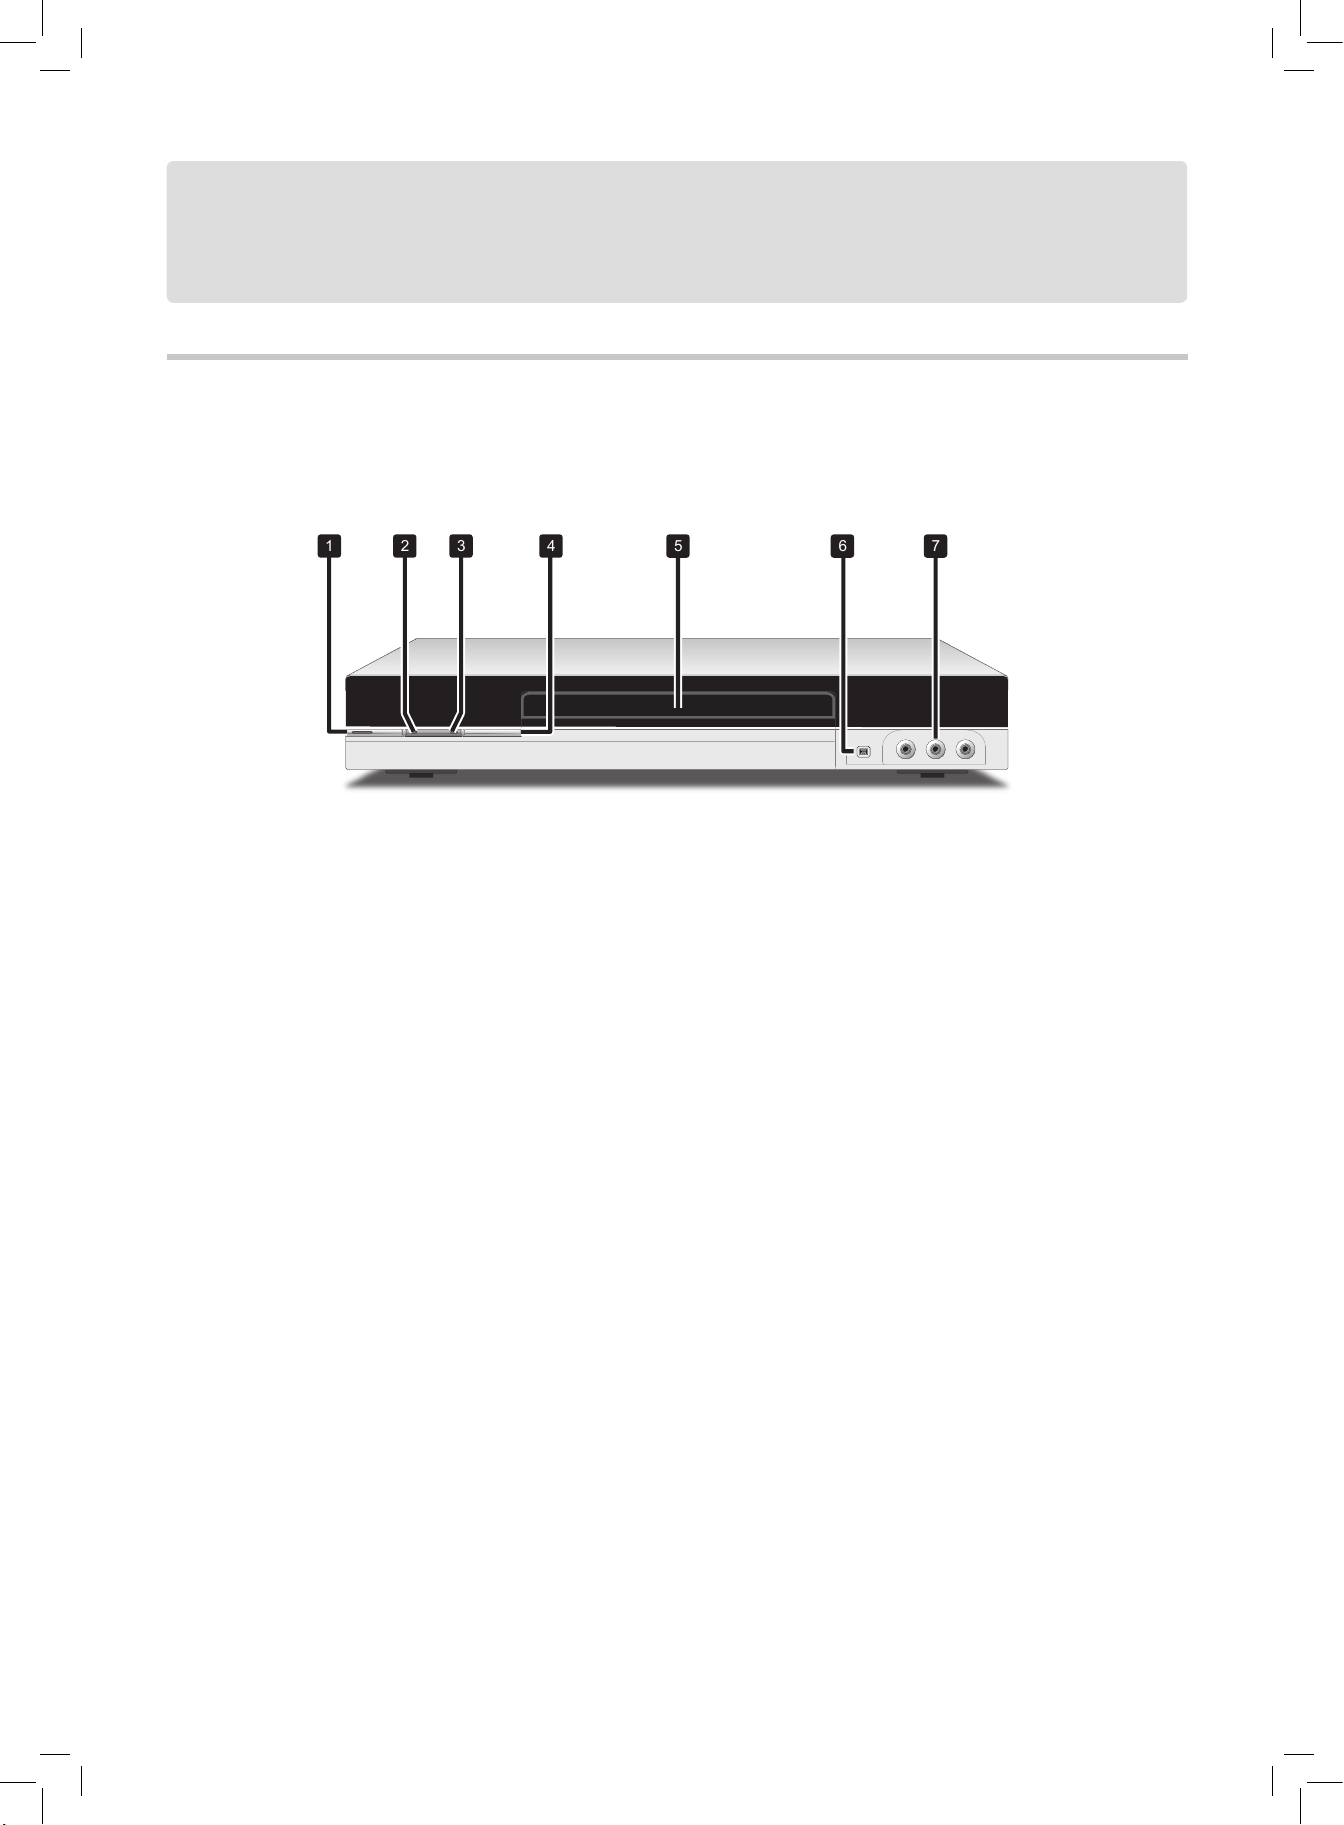
Knowing Your DVD Recorder
Front-Panel Connections
1
2
3
4
5
6
7
1. STANDBY-ON button
Switches the DVD recorder on and off
2. Play/Record indicators
Show the DVD recorder’s current mode.
Green indicator lights up during playback.
Red indicator lights up during recording and
timer recording.
3. Timer Record indicator
Shows the DVD recorder’s current mode
Orange indicator lights up when there are Timer
Programs set for recording.
4. OPEN/CLOSE button
Opens or closes the disc tray
5. Disc tray
Holds discs securely during recording or playback
Please do not put a disc on the tray and forcefully
close the tray during power-off mode. This may
cause malfunction of the DVD recorder.
6. DV-LINK (IEEE 1394) jack
Connects digital camcorder
7. LINE IN (VIDEO/AUDIO L/R) jacks
Connects the outputs of external equipment via
composite video/audio cables
Connecting Up
* The actual appearance of the unit may be slightly different.
7
Connecting Up
Rear-Panel Connections
1
2
3
4
5
6
1. DIGITAL AUDIO OUT (COAXIAL) jack
Connects an amplifier or a receiver having a digital
input jack
2. VHF/UHF IN/OUT jacks
Connects antenna cables
3. AV INPUT (VIDEO/AUDIO L/R) jacks
Connects the outputs of external equipment via
composite video/audio cables
4. COMP OUT (COMPONENT) jacks
Connects the inputs of external equipment via
component video cables
5. AV OUTPUT (VIDEO/AUDIO L/R) jacks
Connects the inputs of external equipment via
composite video/audio cables
6. AC IN terminal
Connects the power cord
* The actual appearance of the unit may be slightly different.

8
1
2
3
4
5
6
7
8
9
10
11
12
13
14
15
16
17
18
19
20
21
22
23
24
Remote Control
1. OPEN/CLOSE button
Press to open or close the disc
tray
2. SETUP button
Press to display the System
Setup menu
3. DISPLAY button
Press to view information
4. Alphabet and Number buttons
Press to enter numbers and
letters
5. NAVI. button
Press to display Navigation
menu
6.
RECORD button
Press to start recording
7. TIMER button
Press to display Timer Record
menu
8. DISC MENU button
Press to display disc’s top menu
ALBUM button
Press to go to previous file
folder
9. (direction) and OK
buttons
Press to make selection
CH / CH buttons
Press to select channel
10. CM SKIP button
(Commercial Skip)
Press to fast-forward playback
by 30 seconds
11. PREV button
Press to go to previous file/pic
-
ture/track/chapter
12. REW button
Press to reverse playback
13. STOP button
Press to stop playback or
recording
14. POWER button
Press to switch on or off the
recorder
15. SOURCE button
Press to select signal source
16. TV(MODE) button
Press to switch to TV source
17. TOOLS button
Press to display TOOLS menu
18. EDIT button
Press to display Edit menu or
Channel Editor menu
19. G-Code button
Press to display the G-Code
timer recording menu
20. PLAYLIST button
Press to display disc’s menu
ALBUM button
Press to go to next file folder
21. PAUSE/STEP button
Press to pause playback or
recording
22. NEXT button
Press to go to next file/picture/
track/chapter
23. FFW button
Press to advance playback
24. PLAY button
Press to start playback
9
Connecting Up
Using Remote Control
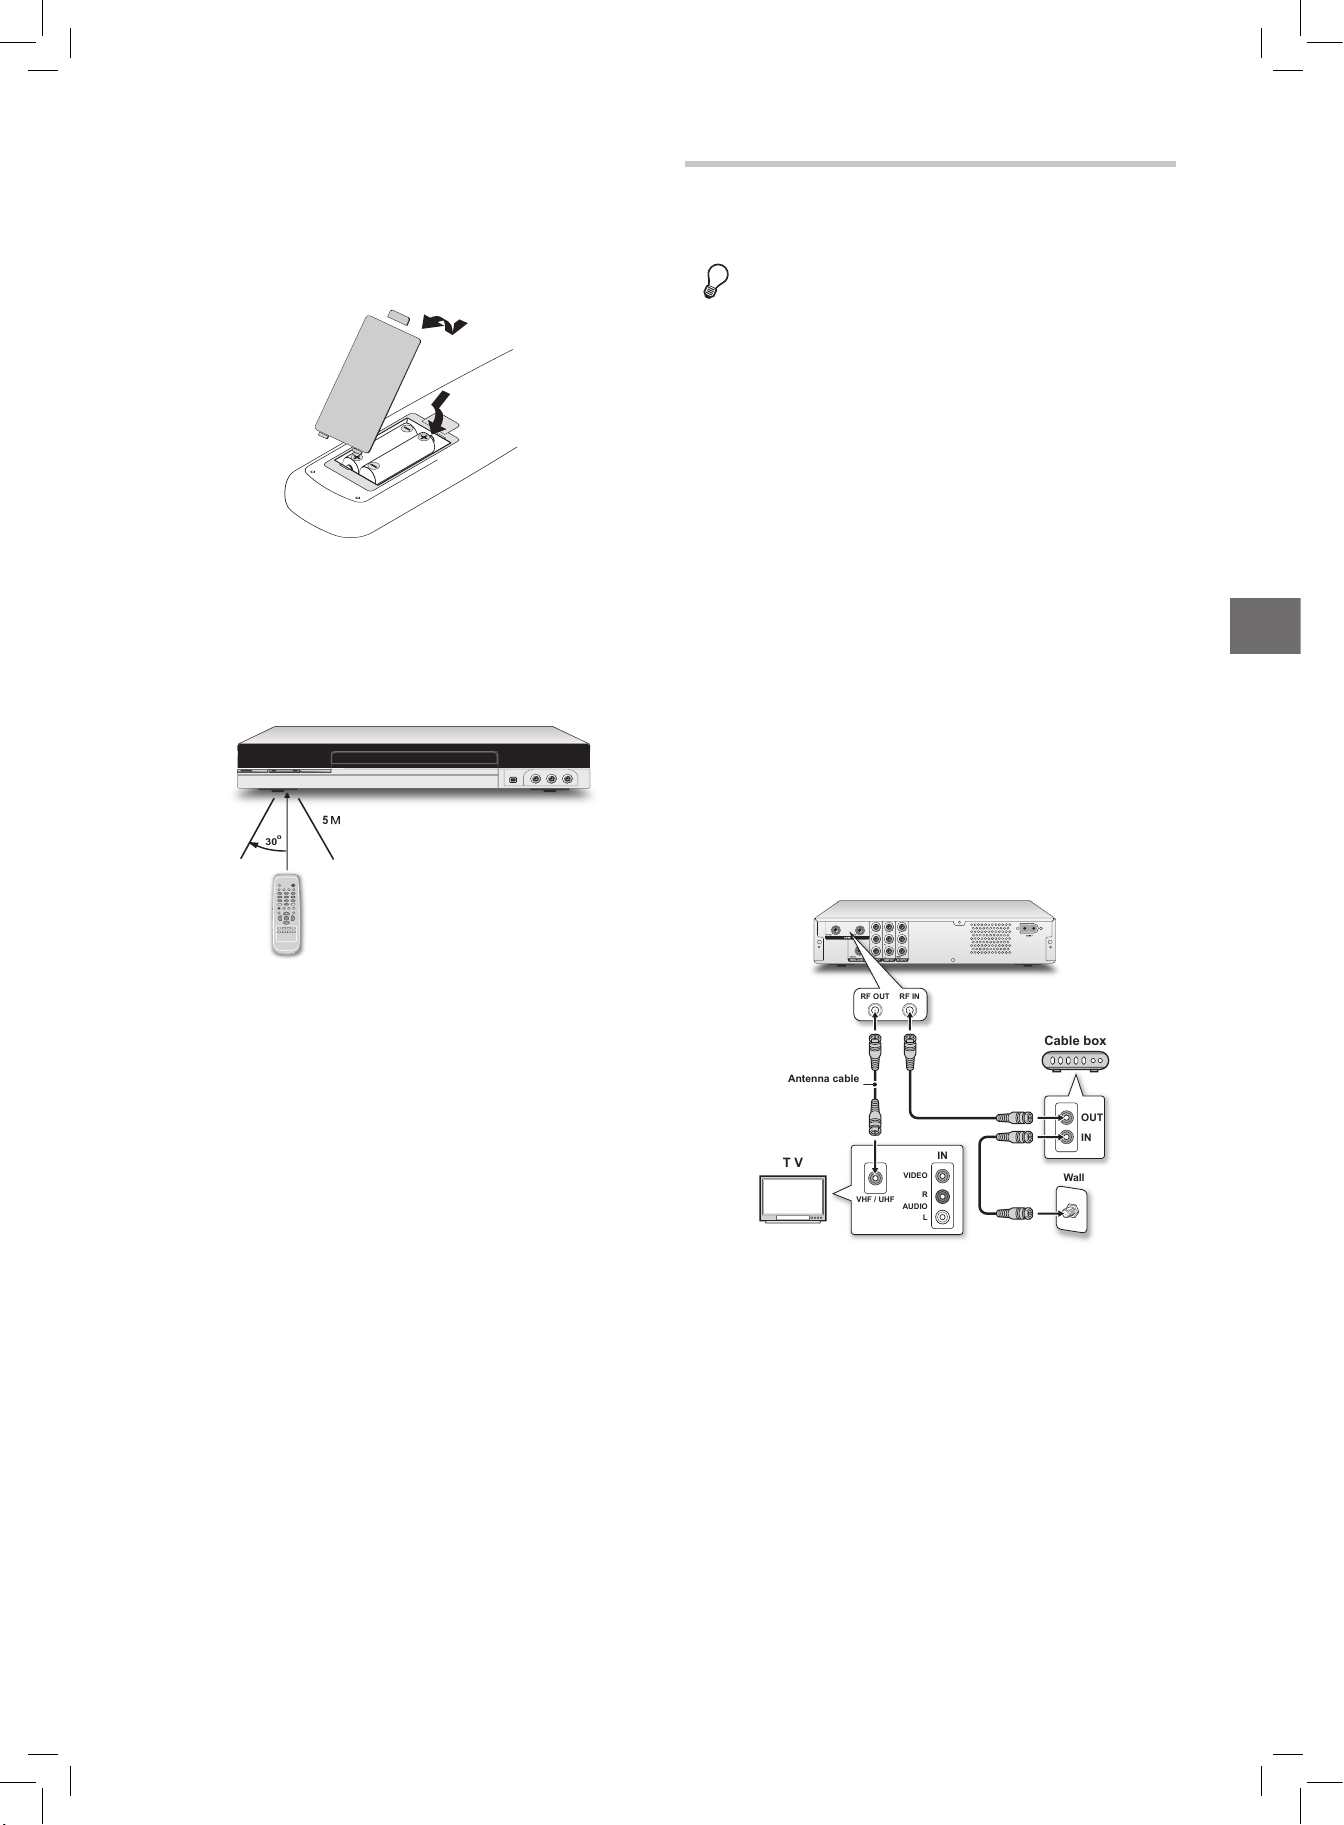
Preparing the Remote Control
Open the battery compartment and insert the batteries.
Make sure the polarities (+ and -) match the markings
inside the remote control.
Do not use rechargeable batteries.
Remote Control Signal
The remote has a range of approximately 5M and works
best when pointed directly at the unit horizontally at
angles up to 30° from the sensor window of the DVD
recorder.
30
0
5
Easier Application with Remote Control
Function buttons, such as TOOLS or TIMER, are
designed to offer you a quick access to intended applica
tions. Press these buttons to go directly to their individual
menus and complete your desired tasks. If you would like
to quit an application, simply press the designated button
again.
Connecting up Your DVD Recorder
Before you start...
1. Do not plug the AC power cord into the outlet until all
other connections are made.
2. It is recommended that you connect VIDEO OUT jack
of the DVD recorder directly to the video input of your
TV. Connecting VIDEO OUT jack of this recorder to
a TV via a VCR may cause a viewing problem when
playing a copyright-protected disc. The same viewing
problem may also occur when connecting the recorder
to an integrated TV/Video system.
..........................................................................................
Step 1: Connecting
Antenna/Satellite Cables
Option 1 With Cable Box
Wall Outlet Cable Box DVD Recorder TV
1.
Use an antenna cable to connect the RF IN jack on the
cable box to the antenna outlet on the wall.
2. Use an antenna cable to connect the RF OUT jack on
the cable box to the RF IN jack on the DVD recorder.
3. Use an antenna cable to connect the RF OUT jack on
the DVD recorder to the RF IN jack on the television.
IN
R
AUDIO
VIDEO
L
VHF / UHF
OUT
IN
Wall
Antenna cable
RF IN
RF OUT
Cable box
T V
Option 2 Without Cable Box
Wall Outlet DVD Recorder TV
1. Use an antenna cable to connect the RF IN jack on the
DVD recorder to the antenna outlet on the wall.
2. Use an antenna cable to connect the RF OUT jack on
the DVD recorder to the RF IN jack on the television.
(Please note that this serves as a pass-through only.)
10
Step 3: Connecting the Audio
Cable
Option 1 Using Composite Cable
Use the audio (red and white) ends of a composite cable to
connect the AUDIO OUT jack on the DVD recorder to the
AUDIO IN jack on the television.
TV
VIDEO
R
L
R
L
VIDEO IN
AUDIO IN
Option 2 Connecting to a Stereo Audio Amplifier or
Receiver
Use the audio (red and white) ends of a composite cable to
connect the AUDIO OUT jack on the DVD recorder to the
AUDIO IN jack on a stereo amplifier or a receiver.
Audio cable
IN
RIGHT
LEFT
VIDEO
R
L
Stereo audio ampl ifier
or rec eiver
Option 3 Connecting to a Digital Audio Device
Use a coaxial cable (not supplied) to connect the DIGITAL
OUT (COAXIAL) jack on the DVD recorder to the
coaxial digital input on a stereo amplifier or a receiver.
IN
OPTICAL
COAXIAL
COAXIAL
Digital Out (Optical)
DIGITAL AUDIO DEVICE
Coaxial digital cable
T V
RF OUT
RF IN
Wall
RF IN
..........................................................................................
Step 2: Connecting the Video
Cable
Option 1 Using Composite Cable
Use the video (yellow) end of a composite cable to
connect the VIDEO OUT jack on the DVD recorder to the
VIDEO IN jack on the television.
TV
VIDEO
R
L
R
L
VIDEO IN
AUDIO IN
Option 2 Using Component Cable
Use a component video (with green, blue and red ends)
cable to connect the COMPONENT OUT jack on the
DVD recorder to the COMPONENT IN jack on the
television.
Component video cable
Y
CB / PB
CR / PR
COMPONENT IN
Y
CB / PB
CR / PR
T V
If your television supports ‘Progressive Scan’ mode,
you may adjust the ‘Video Output’ setting accord
-
ingly in setup menu for better results. Go through
SetupSystemVideo Outpu, and select ‘Progressive’.
Introducing System Setup(p.14)
11
Connecting Up
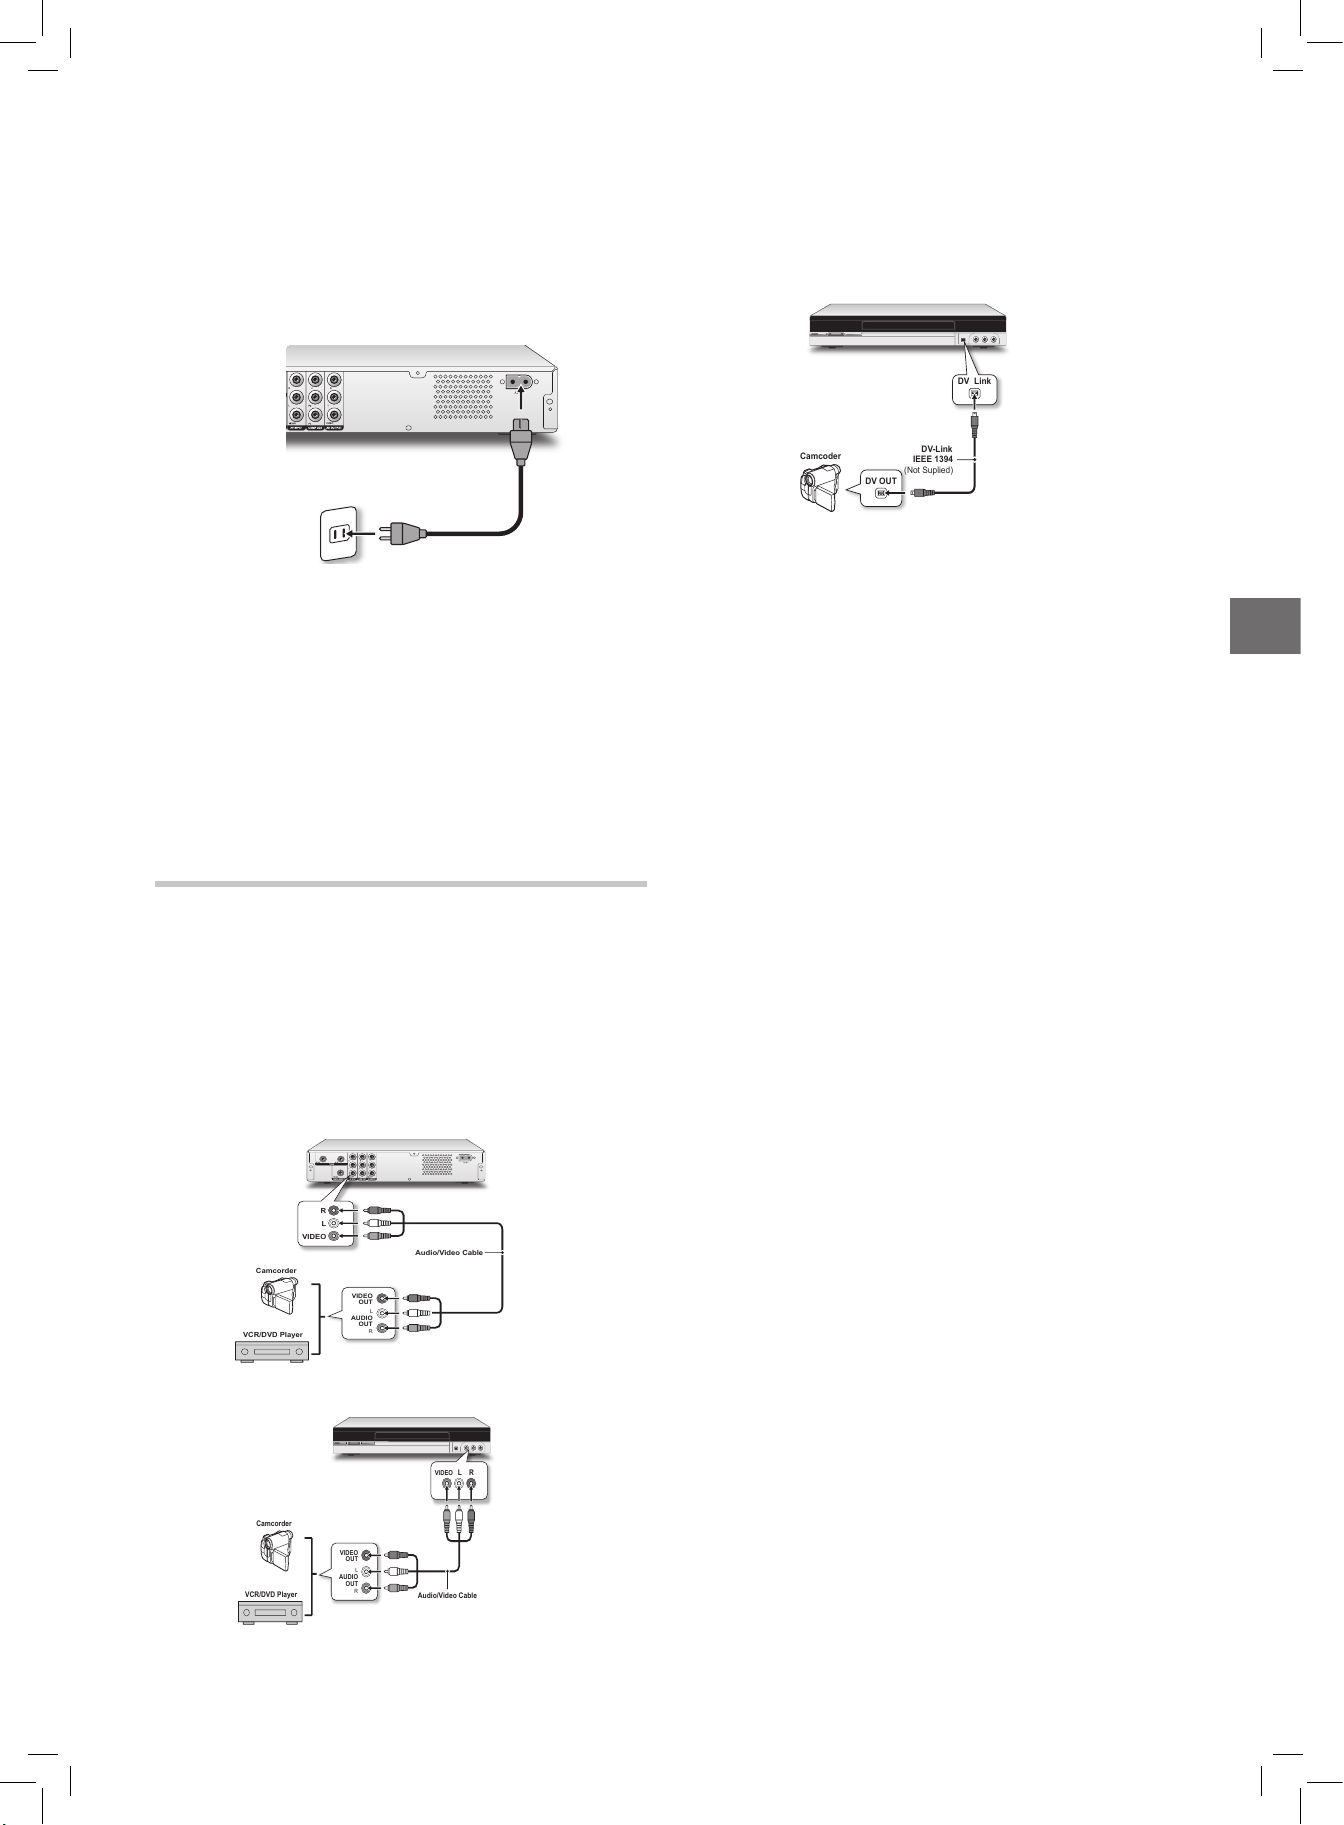
Step 4: Connecting the Power
Cord
Connect the power cord to the DVD recorder. After all the
cable connections are completed, you can now plug the
power cord of the recorder into the outlet, and start using
the recorder.
If you use a model which features attached power
cord, you only need to plug the power cord to the
outlet at this step.
..........................................................................................
To have the signal from this DVD recorder shown on
TV, switch TV’s input source to appropriate AV option
(the one connected to this unit). For further information on how to change TV’s input source, check the
instruction manual provided by your TV manufacturer.
Connecting to External Devices
Connecting to VCR/V8 Camcorder/DVD Player
Connects the AV OUTPUT jack on the camcorder
to the AV INPUT jack on this DVD recorder using a
composite(Audio/Video) cable.
When connecting via the rear-panel INPUT jacks
R
VIDEO
L
Audio/Video Cable
VCR/DVD Player
Camcorder
L
R
VIDEO
OUT
AUDIO
OUT
When connecting via the front-panel INPUT jacks
R
VIDEO
L
L
R
VIDEO
OUT
AUDIO
OUT
Audio/Video Cable
VCR/DVD Player
Camcorder
Connecting to DV (Digital
Camcorder)
Connects the DV-link jack on the DV to the DV-link jack
on this DVD recorder using a IEEE 1394 cable.
Camcoder
DV OUT
DV Link
DV-Link
IEEE 1394
(Not Suplied)
The DV-Link INPUT jack on this recorder is for use
with DV-compatible camcorders only, and not to be
used for connecting any other firewire devices.
..........................................................................................
To have the signal from this DVD recorder shown on
TV, switch TV’s input source to appropriate AV option
(the one connected to this unit). For further information on how to change TV’s input source, check the
instruction manual provided by your TV manufacturer.

12
Introducing System Setup
Before using this DVD recorder, you may like to change the system settings such as the language of on-screen display, clock
format, and recording mode. Use the Setup menu to complete the process.
In Setup menu, simply go through three levels of menus to complete a setting. Options in first-level menu are represented
by icons, while the ones in second and third levels are represented by text. The table below lists all the options available.
Refer to this table and follow the instruction to complete system settings. For some settings, more detailed descriptions are
provided in the latter part of this chapter.
How to set up the settings?
1. Press SETUP button on remote control to display the Setup menu.
2. In first- and second-level menu, press
to select one of the options,
then press or OK to go to next-level menu.
3. In third-level menu, press
to select one of the options. If it is required to enter num-
bers, press or number buttons (0-9). After completed, press OK to confirm.
4. To return to upper-level menu during setting, press
.
5. To completely exit the Setup menu, press
several times or SETUP.
For some settings, a dialogue box will appear after making a selection or after pressing OK in step 3. Select ‘Yes’ to
apply the setting. If you choose ‘No’ or do not confirm in 5 seconds, the change will be discarded
In this section, '’ is used to indicate the movement between different levels of options. For example, the procedure for
setting the language of subtitle is written as ‘Go through LanguageSubtitle’.
First- Level
Option
Second- Level
Option
Third- Level
Option
Description/Notice
System
Video Output • Component
• Progressive
If you accidentally set ‘Progressive’ as the video output mode when the
DVD recorder is not connected to a progressive-scan-compatible TV, you
may lose the video signal on your TV instantly. To recover the problem,
switch off the DVD recorder and switch it on again. After the recorder is
switched on, press , 5, 0, 2, 0, on remote control, then press ENTER.
The recorder will then be automatically switched off. When you switch on
the recorder next time, the video output mode will be restored to default
value.
Auto Sleep • Off
• 30 minutes
• 60 minutes
• 90 minutes
• 120 minutes
Desired time slot before the DVD recorder automatically switches to an
inactive mode
Restore Option for recovering default setup of the DVD recorder
Date/Time
Date System date of this DVD recorder
Date beyond 31/12/2099 (December 31, 2099)CANNOT be set.
Time
System time of this DVD recorder
Clock Format • M/D/Y-12Hr
• D/M/Y-12Hr
• Y/M/D-12Hr
• M/D/Y-24Hr
• D/M/Y-24Hr
• Y/M/D-24Hr
Date/time display format
Getting Started
Started_SystemSetup_02_02

13
Getting Started
First- Level
Option
Second- Level
Option
Third- Level
Option
Description/Notice
Language
OSD • English
• Traditional Chinese
• Simplified Chinese
Language to be displayed on screen
Menu Multiple
Languages
Language to be displayed on the menu page. Available options vary
depending on discs being played.
Audio Multiple
Languages
Language to be adopted for the spoken language. Available options vary
depending on discs being played.
Subtitle Multiple
Languages
Your preferred language for subtitle. Available languages vary depending
on discs being played.
Playback
Aspect Ratio* • 16:9 Widescreen
• 4:3 PanScan
• 4:3 Letterbox
For selecting a appropriate viewing mode available on users’ own television sets.
Parental Lock* • Off
• 8: Adult
• 7: NC-17
• 6: R
• 5: PG-R
• 4: PG-13
• 3: PG
• 2: G
• 1: Kid Safe
The level of parental control
Password* Password for parental control. Default: 0000
Slide Time • Off
• Interval
(3-99 Seconds)
Display interval for each picture
VCD PBC • On
• Off
For enabling/disabling playback control function on VCD discs which
adopt the VCD 2.0 standard
DivX(R) VOD • Registration
Code
For obtaining the registration code of this DVD recorder.
Recording
Mode • HQ
• SP
• SPP
• LP
• EP
• SLP
Recording mode of different quality and length. See
Recording Mode(p.42)
Chapter Mark • Off
• 5 Minutes
• 10 Minutes
• 15 Minutes
• 20 Minutes
• 25 Minutes
• 30 Minutes
The frequency of automatically inserting the chapter mark when recording
video titles
Audio
Dolby Digital • PCM
• Bit Stream
The mode (decoded/encoded) of Dolby digital audio signal transmitted
from the digital output jack on the DVD recorder
Select ‘PCM’ when your amplifier does not have an integrated Dolby
Digital decoder. Select ‘Bit Stream’ when your amplifier has an inte
-
grated Dolby Digital decoder.
MPEG • PCM
• Bit Stream
The mode (decoded/encoded) of MPEG signal transmtted from the digital
output jack on the DVD recorder
Select ‘PCM’ when your amplifier does not have an integrated
MPEG audio decoder. Select ‘Bit Stream’ when your amplifier has
an integrated MPEG decoder.

14
First- Level
Option
Second- Level
Option
Third- Level
Option
Description/Notice
TV Tuner
TV Signal • Antenna
• Cable
TV signal source
Country Multiple Countries For selecting the appropriate area where you are currently situated
Utilities* • Scan Channel
• Edit Channel
For setting/resetting TV channels
Exit
*Indicates more detailed descriptions are provided in the latter part of this chapter.
 Loading...