

Philips 43HFL3011T/12 Quick Start Guide
Installation Manual for EasySuite range
xxHFL3011
Status: Release
Version 1.1
Date: November 2016
Author: Bart Coppens

Contents
Changelog ................................................................................................................................................ 5
1. General information ........................................................................................................................ 6
1.1 Notice ...................................................................................................................................... 6
1.2 Help and support ..................................................................................................................... 6
1.3 How to navigate, open menu’s and make selections .............................................................. 7
2. Requirements before starting the installation of a TV .................................................................... 8
2.1 Remote control ........................................................................................................................ 8
2.1.1 Master remote control 22AV9573 .................................................................................. 8
2.1.2 Guest remote control 22AV1503A ......................................................................................... 8
2.1.3 Easy Remote 22AV1601A ....................................................................................................... 9
2.1.4 Health Care remote (22AV1604A) ......................................................................................... 9
2.2 Professional Settings menu ................................................................................................... 10
2.3 Software upgrade .................................................................................................................. 10
3 Starting the installation ................................................................................................................. 11
3.1 Virgin mode ........................................................................................................................... 11
3.2 Professional Mode ON/OFF ................................................................................................... 12
3.2.1 Disable the Professional mode ...................................................................................... 13
3.2.2 Enable the Professional mode ....................................................................................... 13
4 Reinstall TV .................................................................................................................................... 14
5 Virgin installation wizard ............................................................................................................... 15
5.1 Instant Initial Cloning (IIC) ..................................................................................................... 15
5.1.1 General .......................................................................................................................... 15
5.1.2 Upgrading and configuring the set ................................................................................ 15
5.2 Virgin Configuration .............................................................................................................. 16
6 Professional Settings ..................................................................................................................... 18
6.1 General Settings .......................................................................................................................... 18
6.1.1 Picture Settings .............................................................................................................. 18
6.1.2 Sound Settings ............................................................................................................... 22
6.1.3 General Settings ............................................................................................................ 26
6.2 Switch on Settings ................................................................................................................. 27
6.2.1 Channel Settings ................................................................................................................... 27
6.2.2 Feature Settings .................................................................................................................... 28
6.2.3 Picture Settings ..................................................................................................................... 28
2 | P a g e

6.2.4 Sound Settings ...................................................................................................................... 30
6.2.5 Subtitles ................................................................................................................................ 32
6.2.6 Region and Language ........................................................................................................... 32
6.3 Install Channels............................................................................................................................ 32
6.4 Channel and Source Settings ....................................................................................................... 33
6.4.1 Channel Settings ................................................................................................................... 33
6.4.2 Common Interface ................................................................................................................ 36
6.4.3 Languages ............................................................................................................................. 37
6.4.4 EasyLink ................................................................................................................................ 39
6.4.5 Mono/stereo Preference ...................................................................................................... 40
6.5 Feature Settings ........................................................................................................................... 41
6.5.1 Room ID ................................................................................................................................ 41
6.5.2 SmartInfo .............................................................................................................................. 41
6.5.3 ThemeTv ............................................................................................................................... 41
6.5.4 MyChoice .............................................................................................................................. 42
6.5.5 Scheduler .............................................................................................................................. 42
6.5.6 Date & Time .......................................................................................................................... 43
6.5.7 Switch Off timer .................................................................................................................... 44
6.5.8 On screen clock..................................................................................................................... 45
6.5.9 External Clock ....................................................................................................................... 45
6.5.10 Welcome Logo .................................................................................................................... 45
6.5.11 USB Autoplay ...................................................................................................................... 46
6.5.12 USB Media Browser ............................................................................................................ 46
6.5.13 Multi Remote Control ......................................................................................................... 46
6.6 Advanced settings ....................................................................................................................... 47
6.6.1 Professional mode ................................................................................................................ 47
6.6.2 Power .................................................................................................................................... 47
6.6.3 Input control ......................................................................................................................... 48
6.6.4 Security ................................................................................................................................. 50
6.6.5 Vsecure ................................................................................................................................. 51
6.6.6 Serial Xpress ......................................................................................................................... 53
6.6.7 UI .......................................................................................................................................... 54
6.6.8 Diagnostic Logging ................................................................................................................ 54
6.6.9 Reset ..................................................................................................................................... 55
3 | P a g e

6.7 Upgrade and clone settings ......................................................................................................... 55
6.7.1 USB Base Upgrade and cloning ............................................................................................ 55
6.7.2 RF Based Upgrade and cloning ............................................................................................. 56
6.7.3 Software and Clone information .......................................................................................... 57
6.7.4 Settings Overview ................................................................................................................. 58
7 Channel installation wizard ........................................................................................................... 59
7.1 Configuration ......................................................................................................................... 60
7.1.1 Analogue ........................................................................................................................ 61
7.1.2 DVB-T ............................................................................................................................. 62
7.1.3 DVB-C ............................................................................................................................. 62
7.2 Digital Settings ............................................................................................................................. 63
7.3 Reset ............................................................................................................................................ 63
7.4 Signal Testing ............................................................................................................................... 64
7.4.1 Analogue ............................................................................................................................... 64
7.4.2 Digital .................................................................................................................................... 64
7.5 Installing channels ....................................................................................................................... 65
8 SmartInfo ....................................................................................................................................... 69
8.1 SmartInfo Show ..................................................................................................................... 69
8.2 SmartInfo Browser................................................................................................................. 69
9 MyChoice ....................................................................................................................................... 70
9.1 Configuring the TV ................................................................................................................. 72
9.2 Checking MyChoice functionality. ............................................................................................... 74
10 Scheduler ................................................................................................................................... 76
11 CSM (Customer Service Menu)......................................................................................................... 79
Appendix 1 ............................................................................................................................................. 80
Appendix 2 ............................................................................................................................................. 81
Appendix 3 ............................................................................................................................................. 82
4 | P a g e

Changelog
Author
Date
Changes
Bart Coppens
26 October 2016
First Release finalized
Bart Coppens
16 November 2016
Added “Scheduler” chapter
5 | P a g e

1. General information
1.1 Notice
2016 © TP Vision Belgium NV All rights reserved. Specifications are subject to change without notice.
Trademarks are the property of Koninklijke Philips Electronics NV or their respective owners. TP
Vision Belgium NV reserves the right to change products at any time without being obliged to adjust
earlier supplies accordingly.
TP Vision Belgium NV cannot be held responsible neither for any errors in the content of this
document nor for any problems as a result of the content in this document. Errors reported to Philips
will be adapted and published on the Philips support website as soon as possible.
1.2 Help and support
Visit the Philips support website at http://www.philips.com/support/ for:
Leaflet and product documentation
Download a printable PDF version of the user manual
Contact details of the helpdesk
Download the latest available software
Visit the Philips support ticketing system at http://philipshtv.supportsystem.com/ for:
Entering after sales issues
Asking technical questions
Searching through the knowledge base that will enable you to find answers to questions we
receive on regular basis (FAQs)
An NDA section which contains specific questions that require an NDA to be in place to get
the detailed feedback
Visit the CMND website to find all info about CMND https://cmnd.io/
Definitions, Acronyms and Abbreviations
[ ]: The values between brackets are referring to a TV menu item
“ “: The values between quotation marks are referring to a remote button
DVB-T: Digital Video Broadcasting - Terrestrial
DVB-C: Digital Video Broadcasting - Cable
HTTP: Hyper Text Transfer Protocol
IR: Infrared
MB: Megabyte
MHz: Megahertz
OSD: On Screen Display
RC: Remote Control
SI: System Integrator
STBY: Standby
SW: Software
TV: Television
6 | P a g e

1.3 How to navigate, open menu’s and make selections
Navigating in the menu can be done with the “up-down-left-right arrow” buttons on the
remote control
Opening a menu can be done with the “OK” button
The “OK” button can also be used to activate buttons that can be seen on the screen like
[Done], [Cancel], [Close], [Yes], [No], …
In many places in the menu you need to press the “OK” button after you selected an item to
confirm your selection. Navigating to this menu item and going back to the menu will not
store your selection
Changing the value of a slider can be done using the “up-down arrow”, your selection will be
remembered without pressing the “OK” button
7 | P a g e
2. Requirements before starting the installation of a TV
Before starting the installation, make sure that you have everything you need at hand.
You need a USB stick and a remote control.
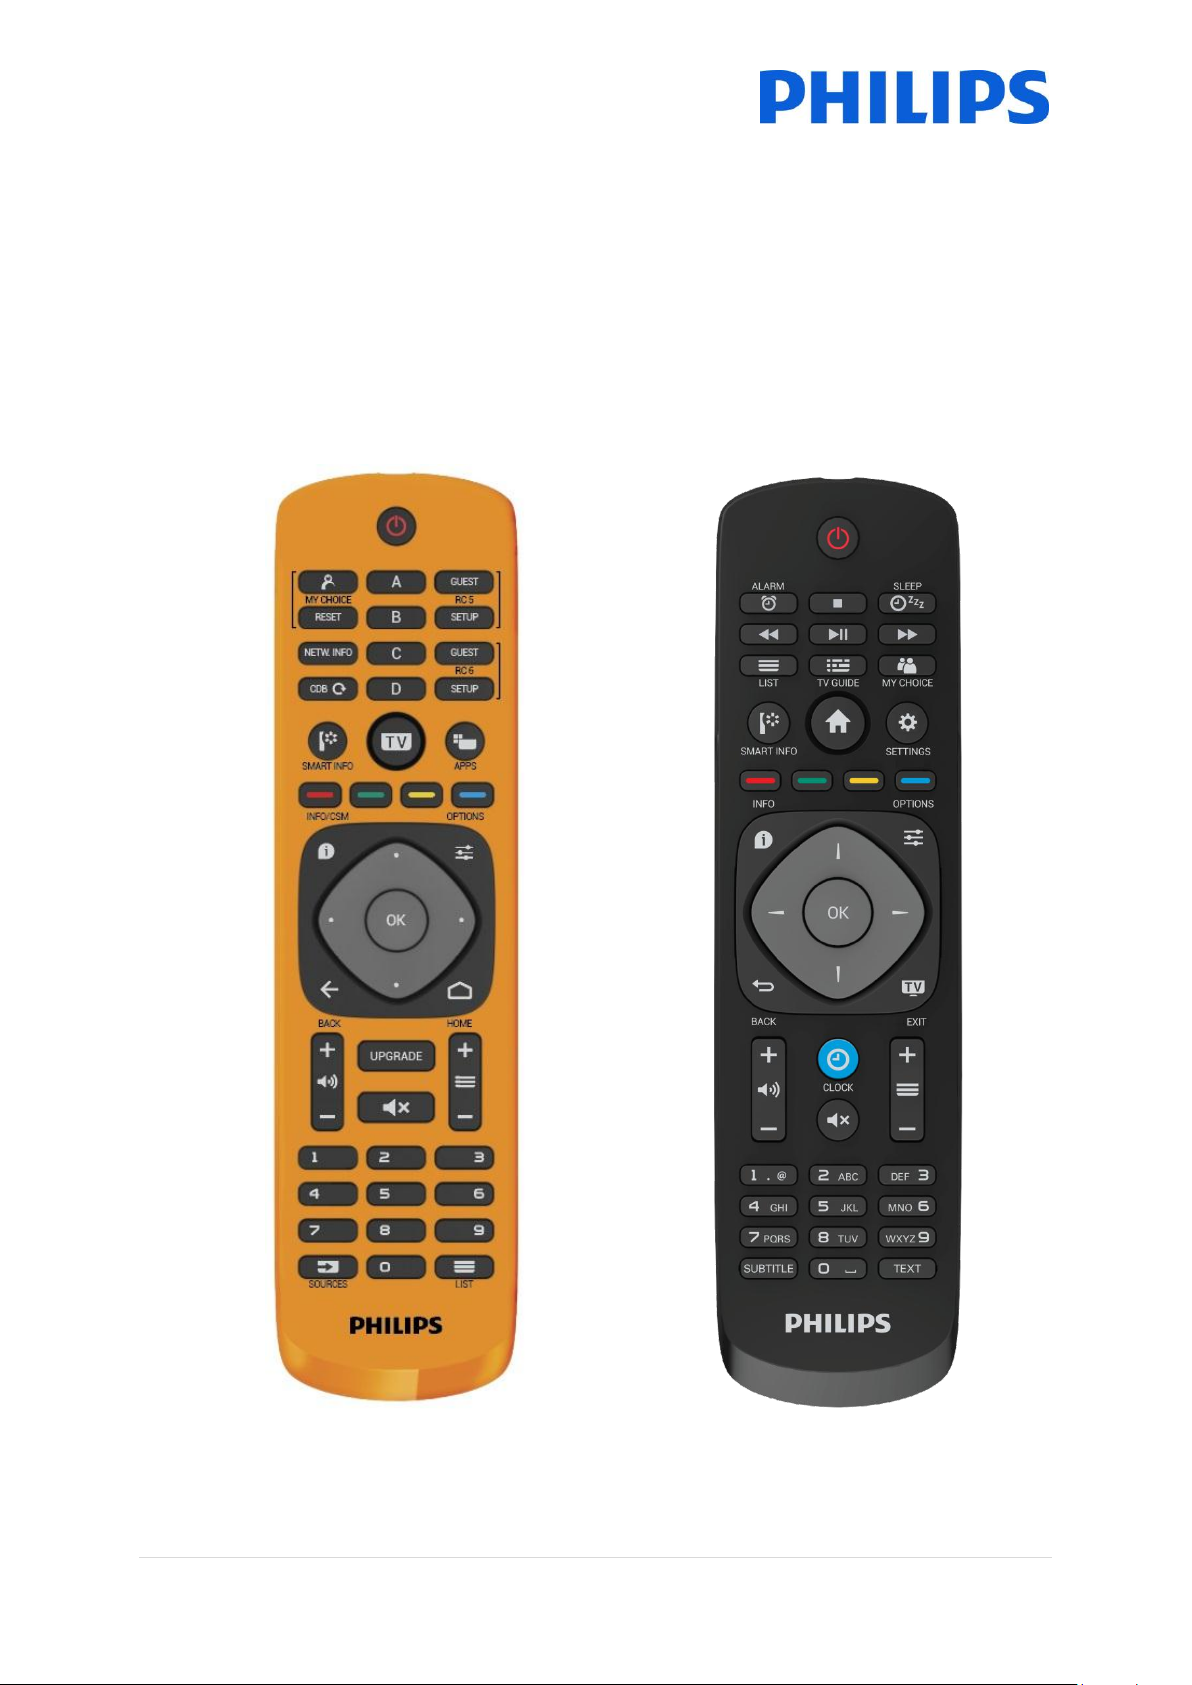
2.1 Remote control
2.1.1 Master remote control 22AV9573
2.1.2 Guest remote control 22AV1503A
8 | P a g e
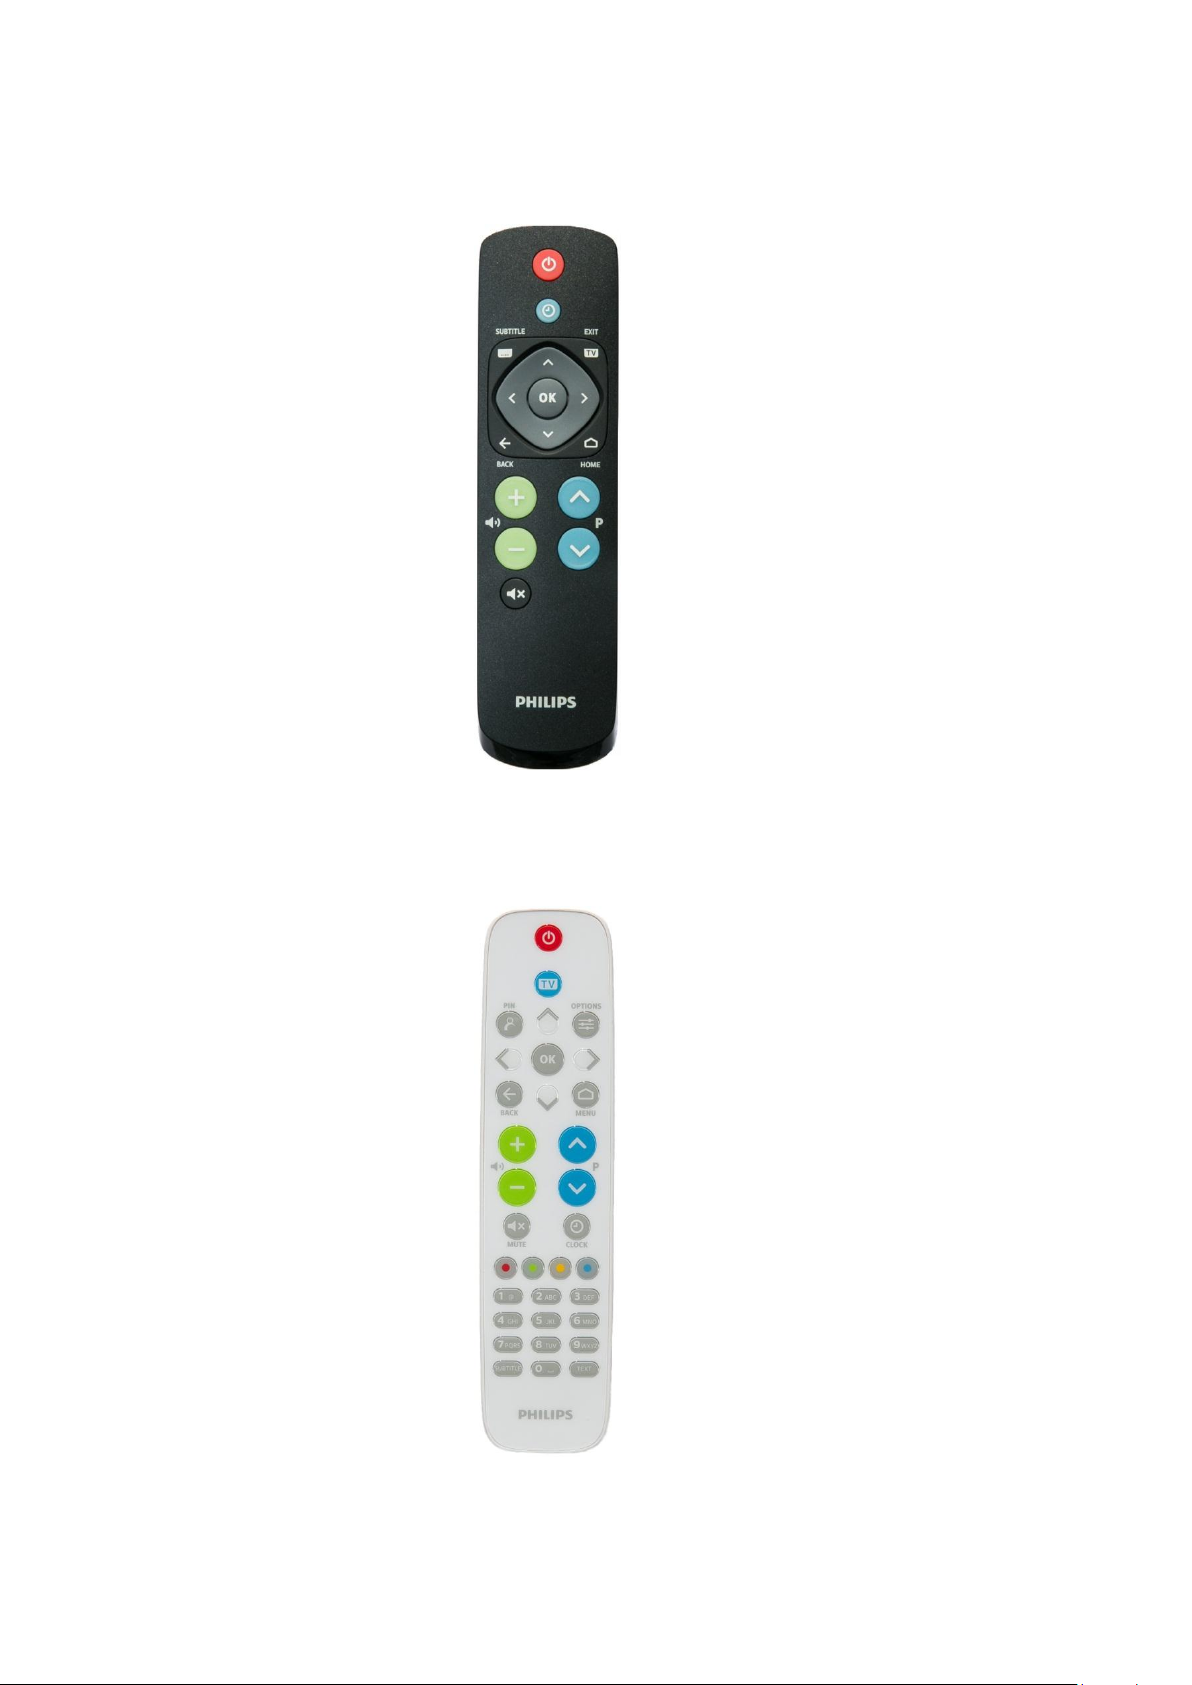
2.1.3 Easy Remote 22AV1601A
2.1.4 Health Care remote (22AV1604A)
2.2 Professional Settings menu
To access the [Professional Settings] menu you have 2 possibilities:
Using the master remote control, press the “RC 6 SETUP” key and then press the
“Home/Menu” button
Using the guest remote control, press the following keys sequentially: “3,1,9,7,5,3,MUTE”
Note: The sequence: “3,1,9,7,5,3,MUTE” will not show the [Professional Settings] if [High Security]
option is enabled.
2.3 Software upgrade
For the best guest experience it is highly recommended to use the latest software version available.
Go to: http://www.philips.com/support/
Select your country, enter the model number and download the latest software version
available
Unzip the software and follow the instructions how to upgrade the software on the TV
The USB flash drive used for software upgrade must be formatted as FAT32 and preferably
empty to avoid an accidental upload of a wrong setting or software
It’s recommended to first upgrade the TV and afterwards to perform the installation
The latest software version and cloning data can be stored on the same USB drive for a 2 in 1 action:
software upgrade and cloning during the instant initial cloning. See chapter “Instant Initial Cloning
(IIC)” for more information.
10 | P a g e
3 Starting the installation
It is important to know if a TV is in Virgin mode (out of the box) or if it has been installed before.
3.1 Virgin mode
If you can see below screen, you know that the TV is in ‘out of the box’ state and you can install the
set by using procedure described in chapter “Virgin install wizard” of this manual.
11 | P a g e
3.2 Professional Mode ON/OFF
Professional mode ON/OFF:
When you enable/disable there is a clear difference seen when opening
the [Home] menu.
Professional mode ON
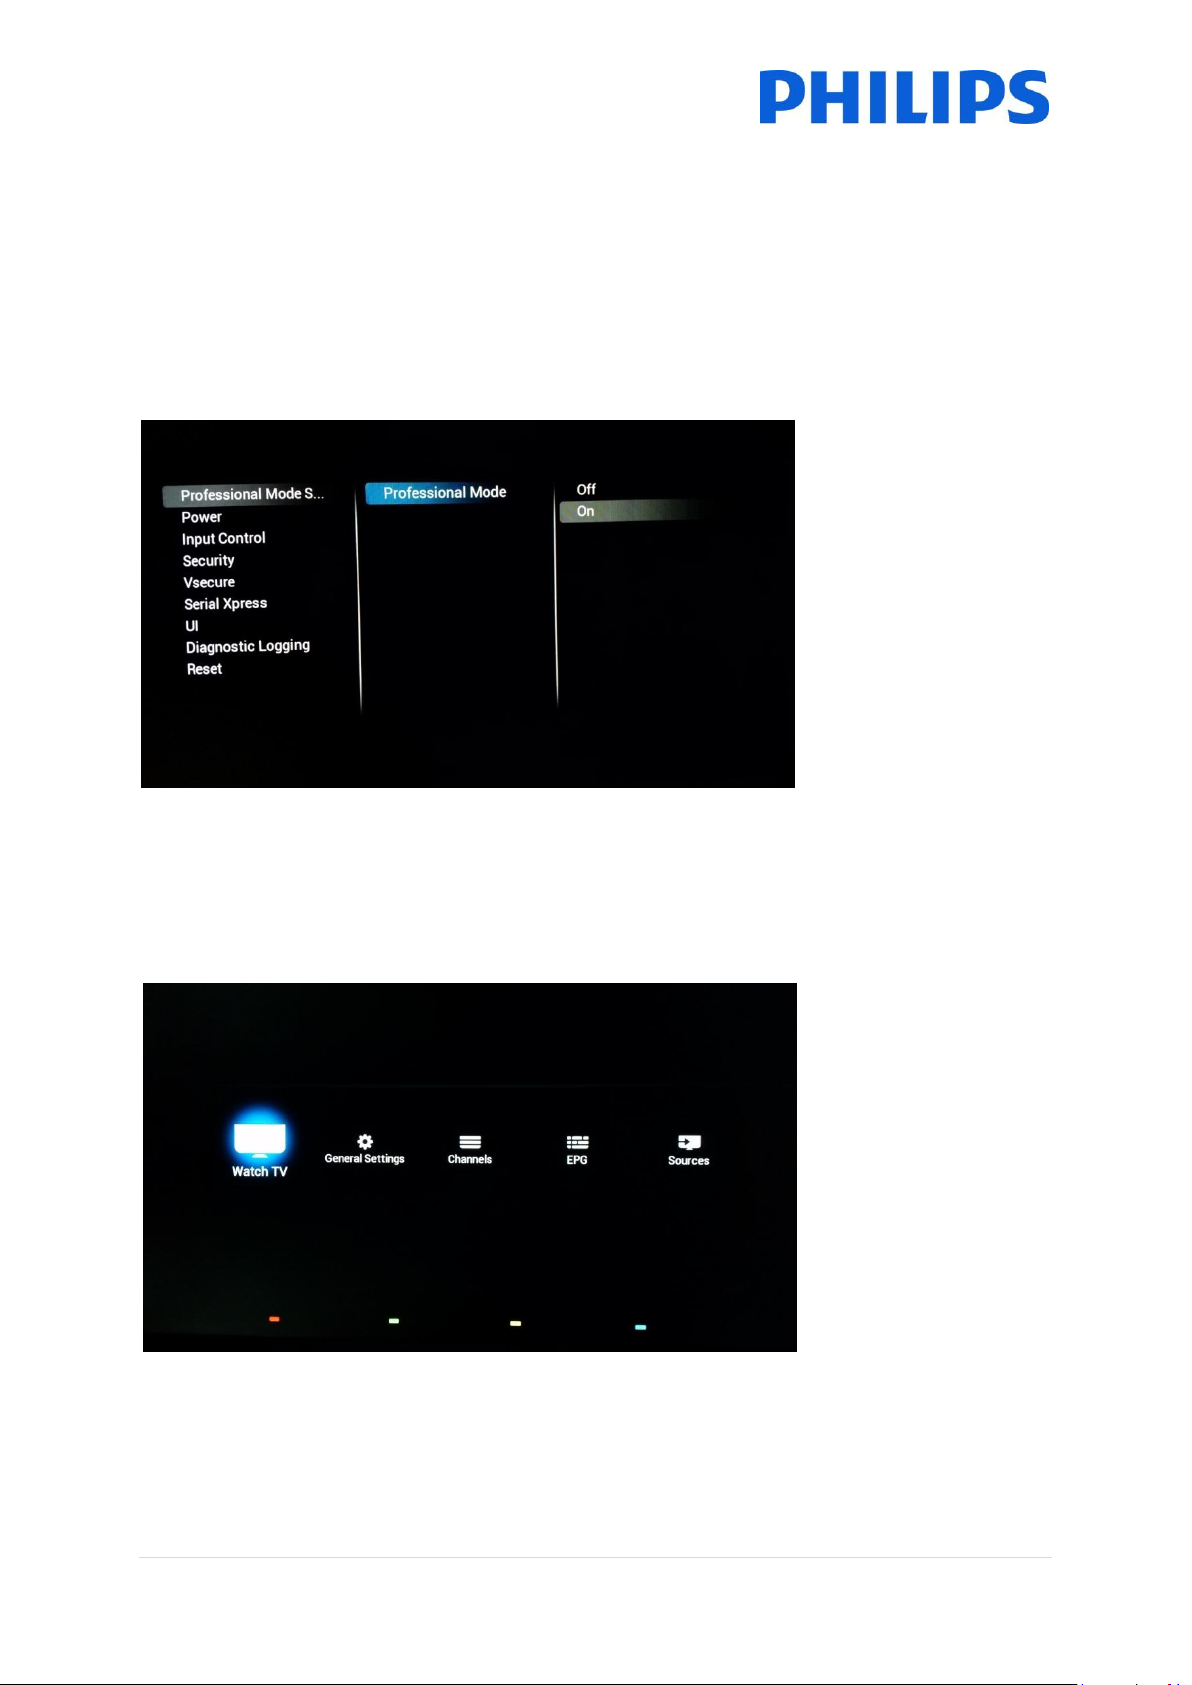
If your set is not in virgin mode you can check if the professional mode is ON or OFF. This can be
done by opening the professional menu (“3,1,9,7,5,3,MUTE”), navigating to “Advanced settings” and
pressing “OK”.
See below screenshot to know if the professional mode is ON or OFF.
12 | P a g e

Professional mode OFF
3.2.1 Disable the Professional mode
Open the [Professional Settings] menu.
Go to [Advanced Settings], select [Professional Mode Settings] ,select [Professional Mode]
and select [Off]. Confirm with “OK”
Press “Back” until you exit the [Professional settings] menu
Reboot the TV, after the reboot your TV will no longer be in Professional Mode
Remark: Professional displays operating in an installation with professional mode turned off will not
be granted the privilege of using any of the support means like the helpdesk or the ticket system.
3.2.2 Enable the Professional mode
Open the [Professional Settings] menu.
Go to [Advanced Settings], select [Professional Mode Settings], select [Professional Mode]
Press “Back” until you exit the [Professional settings] menu
You will see a notification that the TV needs to restart to apply some settings
Reboot the TV, after the reboot your TV will be in Professional Mode
and select [On]. Confirm with “OK”
13 | P a g e
4 Reinstall TV
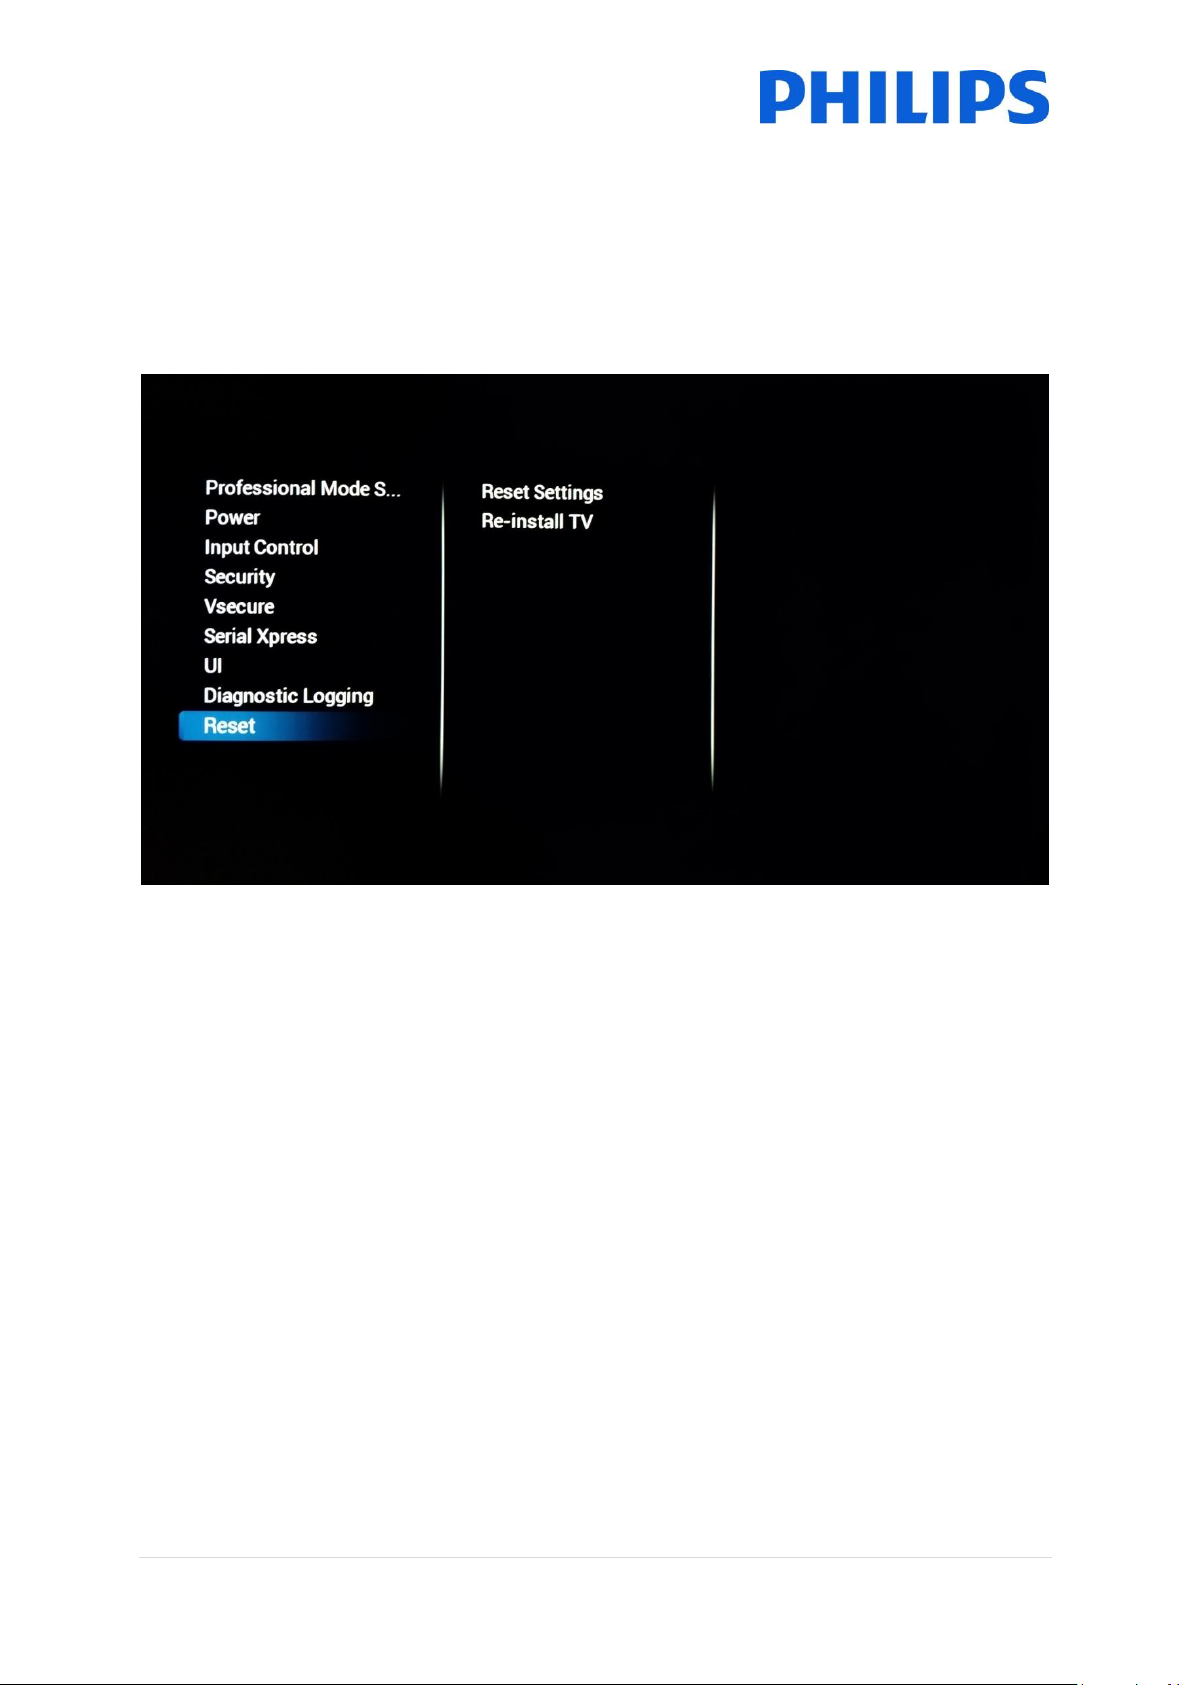
If you want to start an installation from scratch you can always reinstall the TV. All settings will be
reset to the default values and installed channels will be deleted.
Open the [Professional Settings] menu, go to [Advanced Settings] and navigate to [Reset], press
right cursor and select [Re-install TV]
14 | P a g e
5 Virgin installation wizard
When you get a new TV it will be in virgin mode. This means that you will have to go through the
virgin installation wizard to perform the first configuration of the TV.
5.1 Instant Initial Cloning (IIC)
5.1.1 General
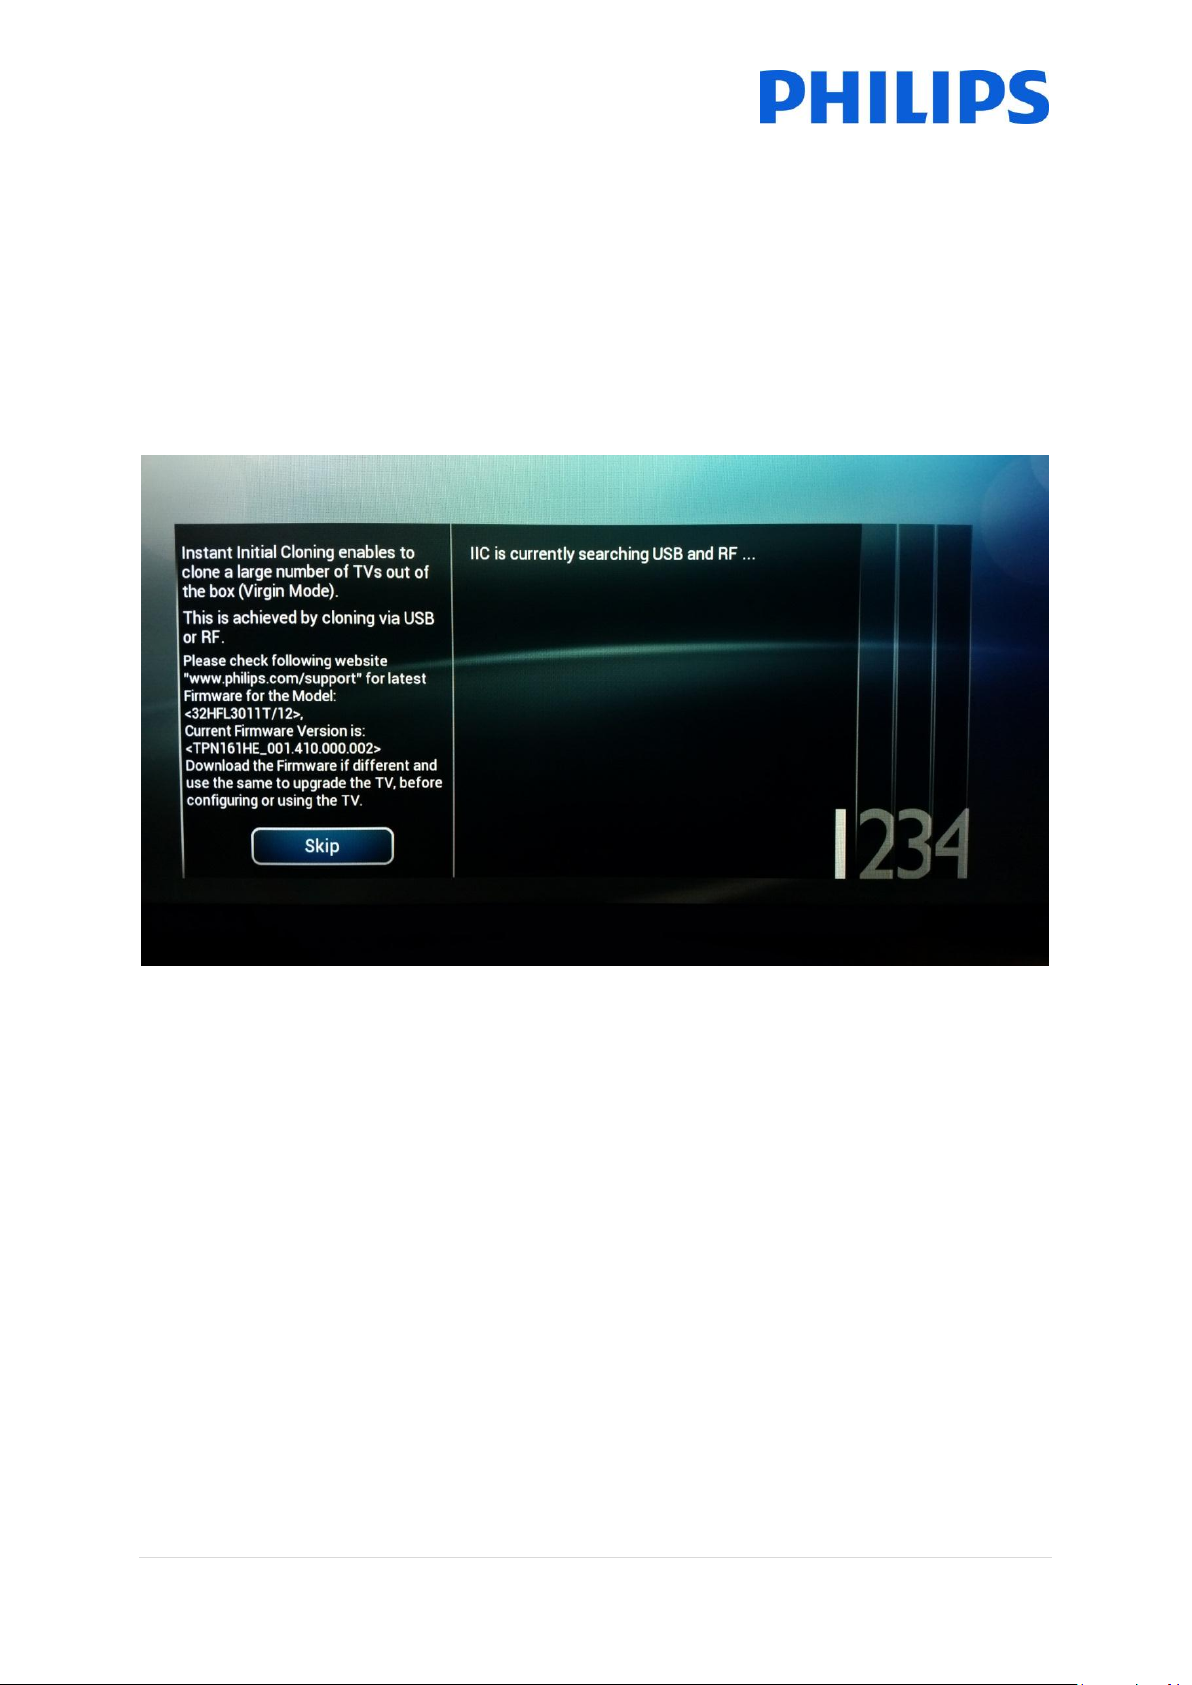
When starting up the TV in virgin mode you see the first screen indicating Instant Initial Cloning (IIC).
The TV is now searching on USB and RF for a new clone file containing all new settings for the TV.
You can also see the model name and SW version of the TV. If there is no need to load a clone file on
this TV (for example if you want to make a new installation to create a master clone file) then you
need to press “OK” to activate the skip button.
5.1.2 Upgrading and configuring the set
If you want to upgrade the TV software and load a new clone file in the TV you have to perform the
following steps:
Power on the set in virgin mode
Insert a USB device with both the new SW and the clone file you want to load in the TV
The TV will first upgrade the new SW version. After upgrade of new SW version is done, the
TV will restart and will detect the clone file to update the TV settings.
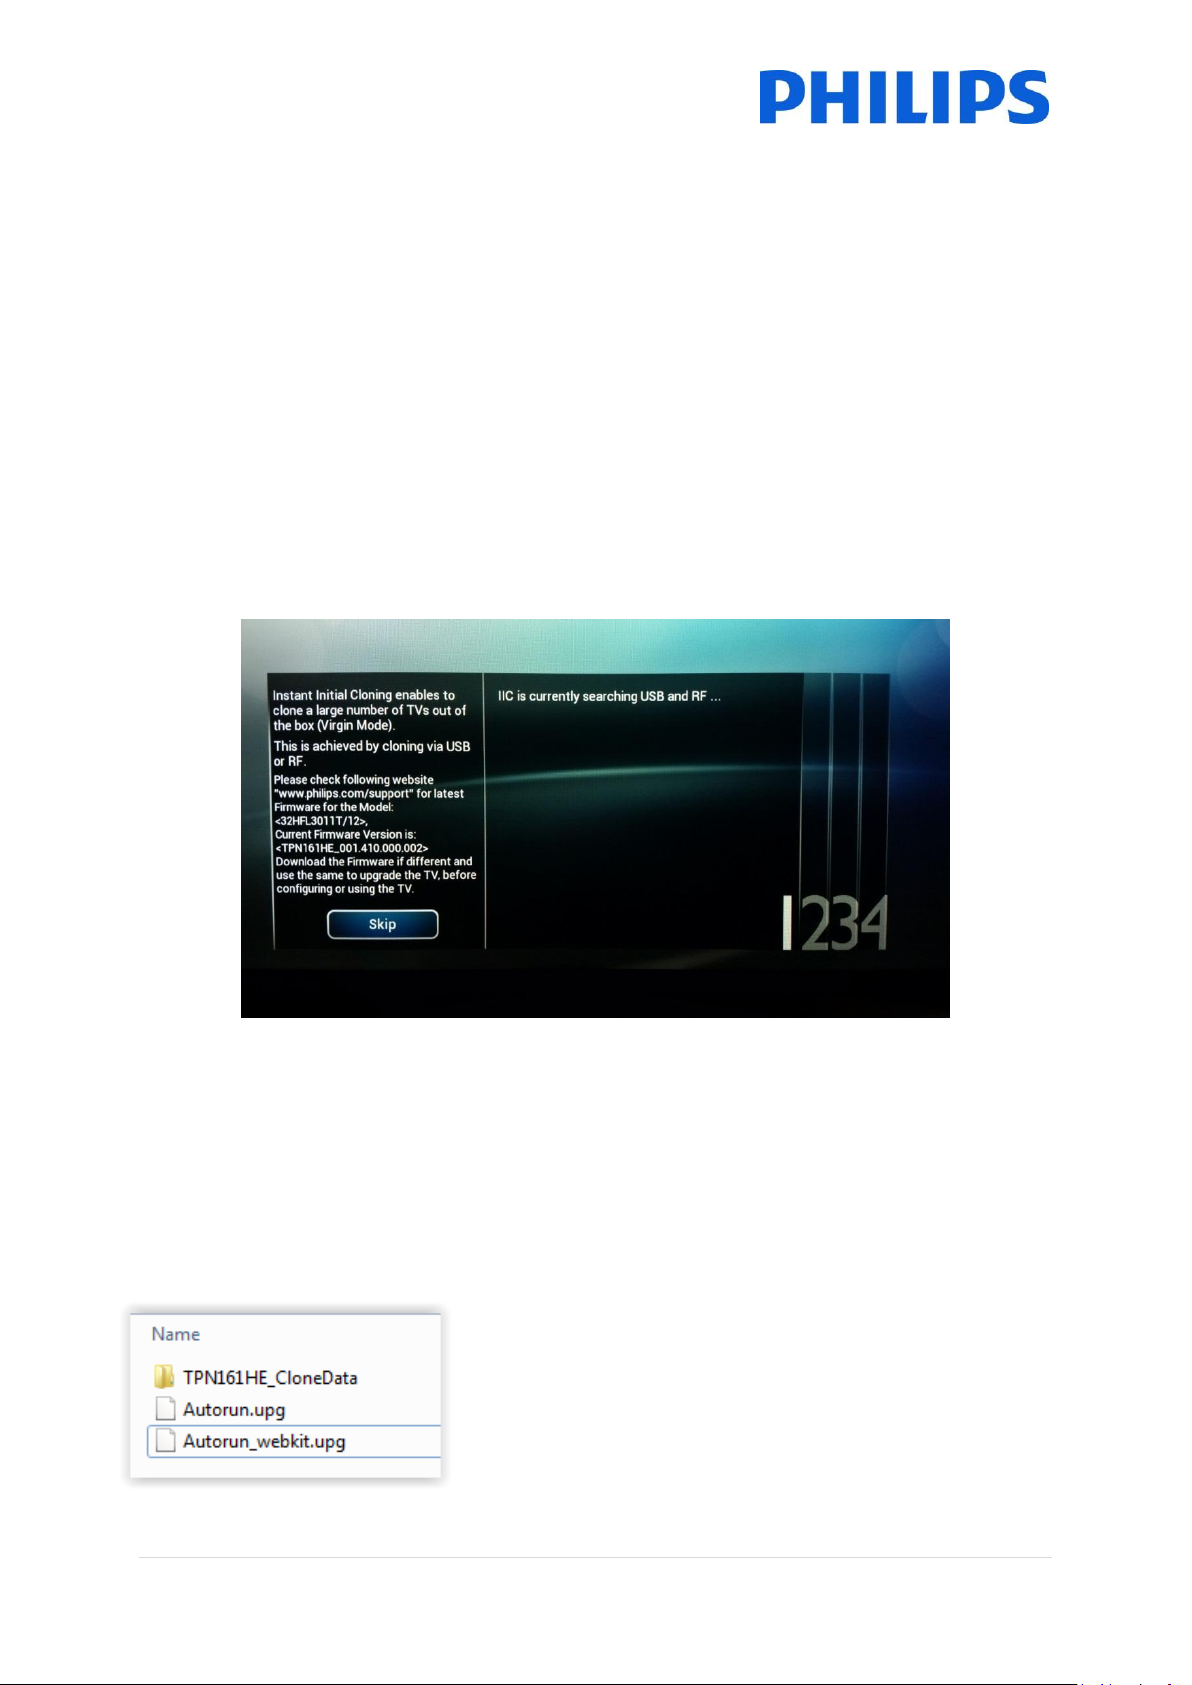
Remark: An EasySuite 3011 upgrade consists of 2 UPG’s that
have to be run sequentially. The first is the Autorun.upg which
contains the firmware for TV. And the Autorun_webkit.upg
which contains the web browser engine.
Note: If multiple clone files are on a USB device, the file called
“MasterCloneData” will be used for cloning
15 | P a g e
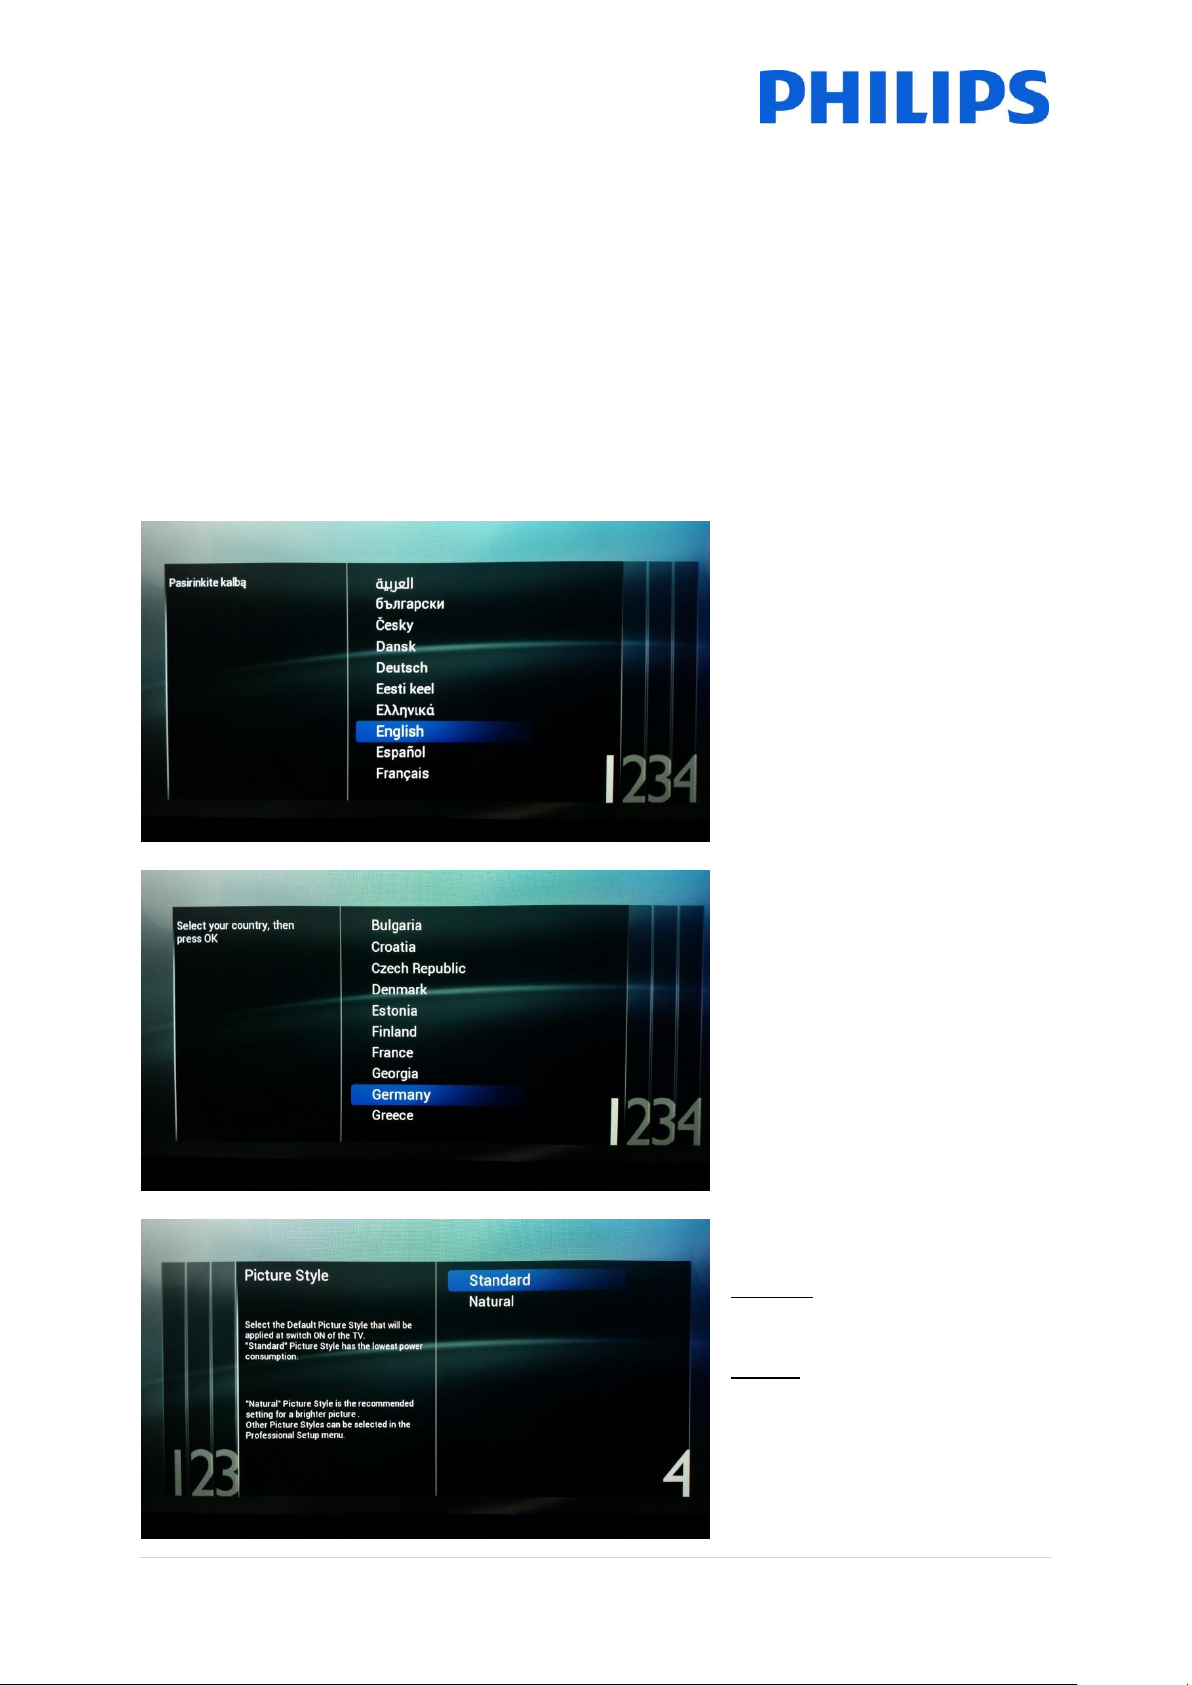
During this process you will see following:
Language selection
Here you can choose the main
language of the TV menu.
Country selection
Here you can choose the country
where the TV will be installed in.
This setting has an influence on
clock and channel installation
Picture style
Standard will have the best
energy consumption
Natural will be display more color
and contrast and will seem brighter
Other styles can be selected in the
professional menu.
o Detection of the Clone file
o SW upgrade will start, both UPG’s will be programmed
o Cloning update progress will be shown
o You have to press OK to close the overview screen, TV will then reboot with the new
settings and software
Remark: If you don’t press OK, the TV will go to standby after 30 minutes
5.2 Virgin Configuration
When you skip the IIC screen you will have to set several settings:
16 | P a g e
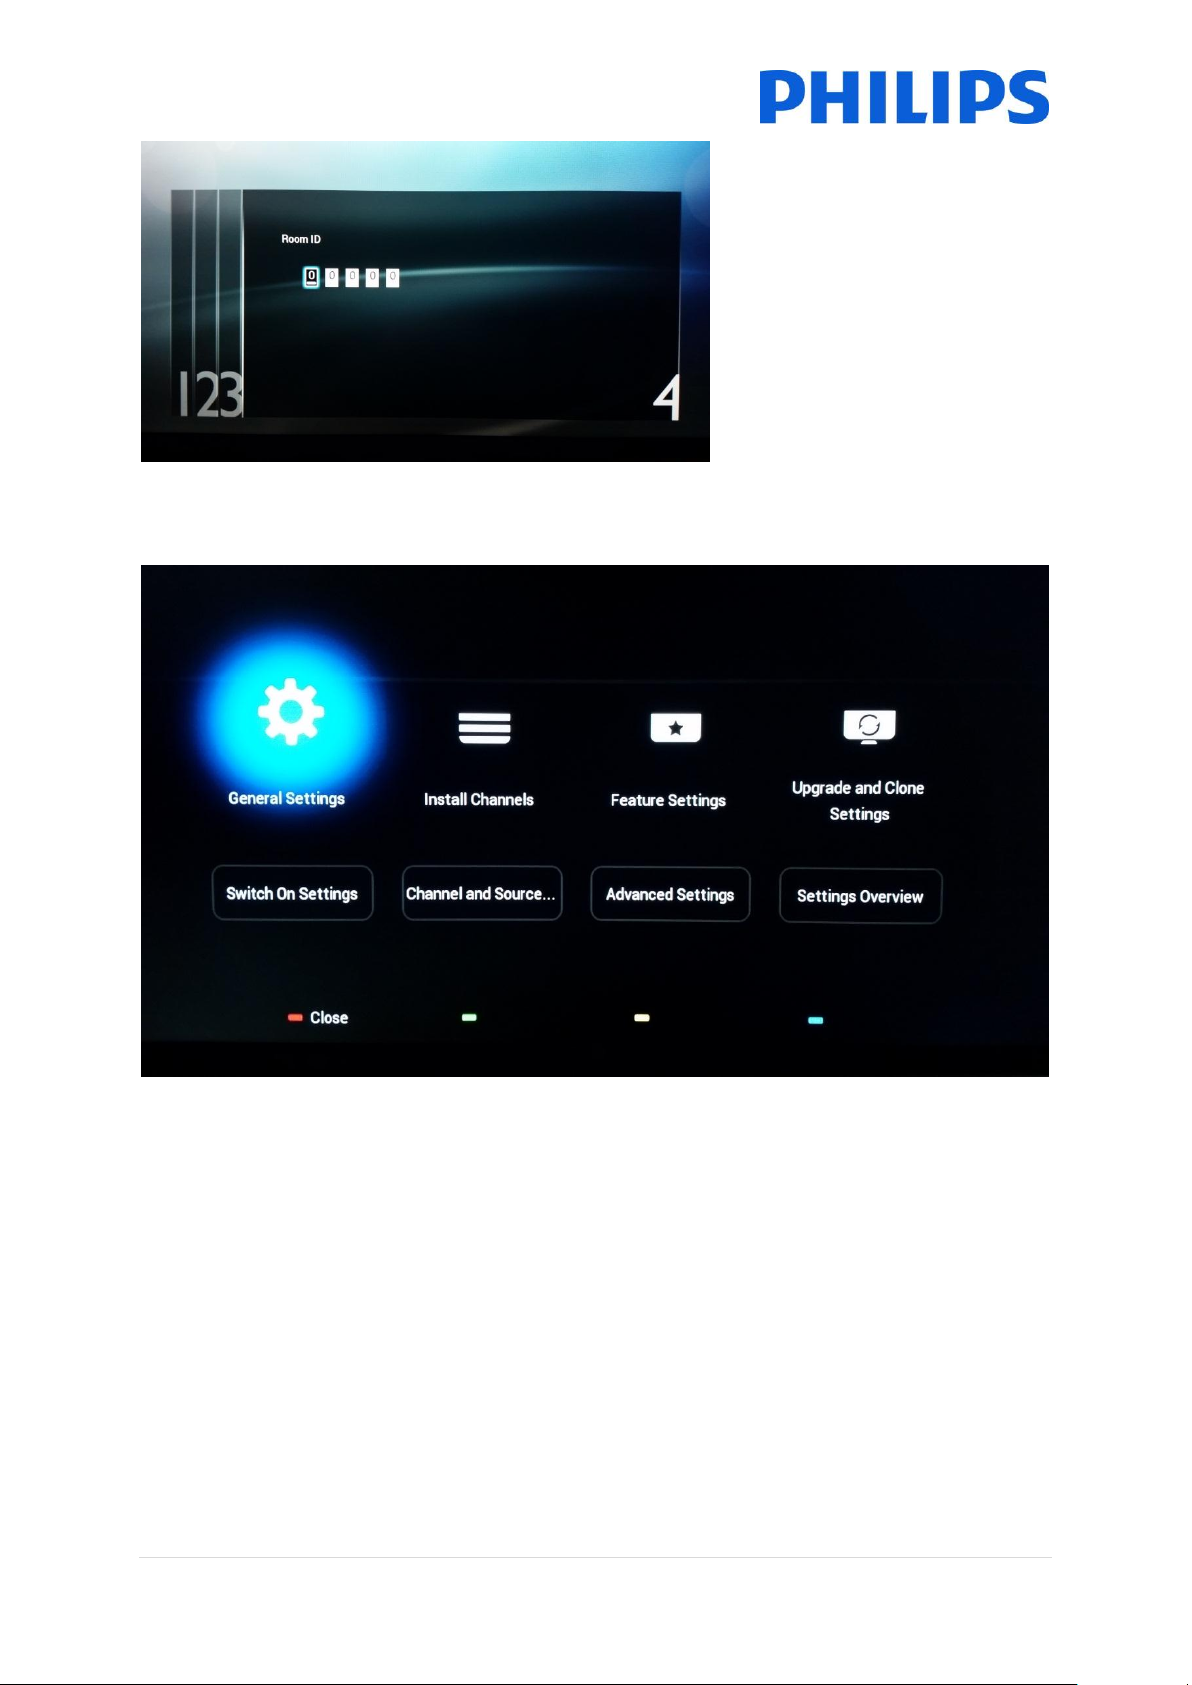
Room ID
Room ID is used to identify the TV
in a specific room.
Using “Digit numbers” you can
define the Room ID.
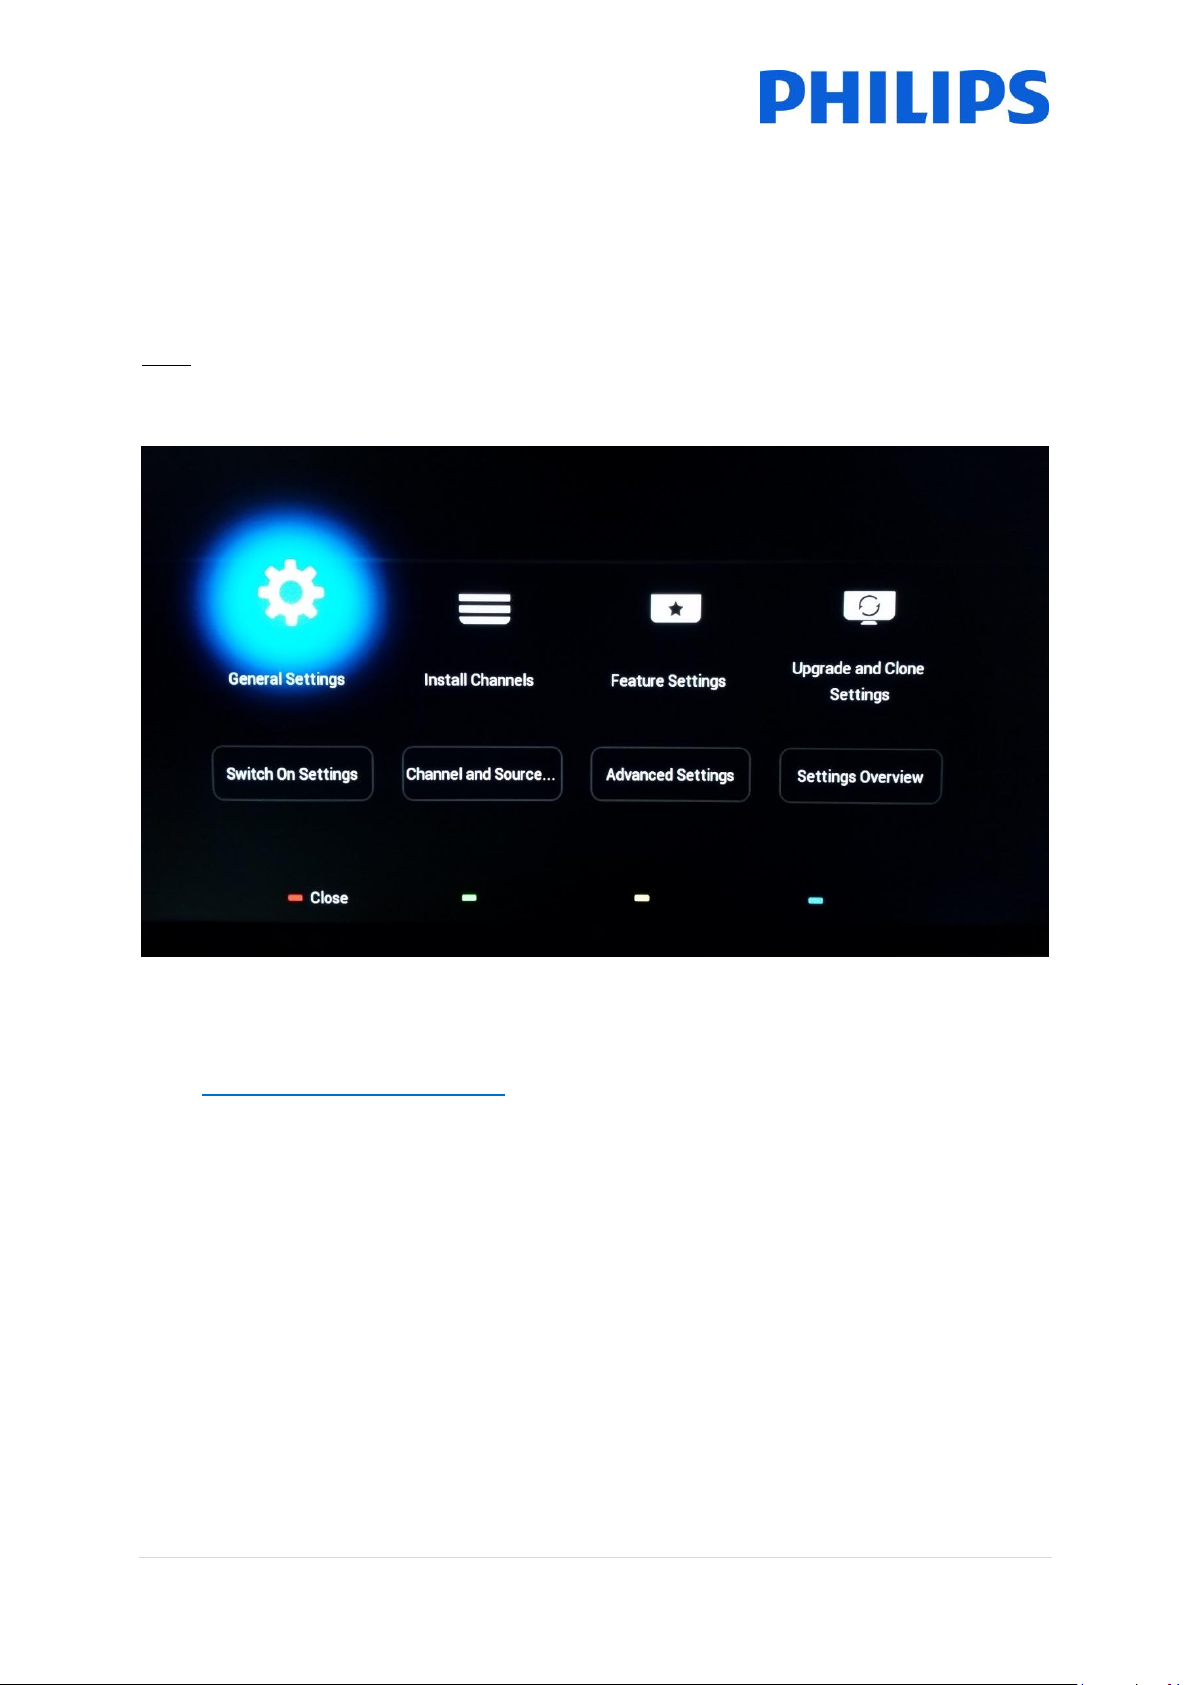
After finishing the Virgin installation you will see below professional settings menu.
17 | P a g e
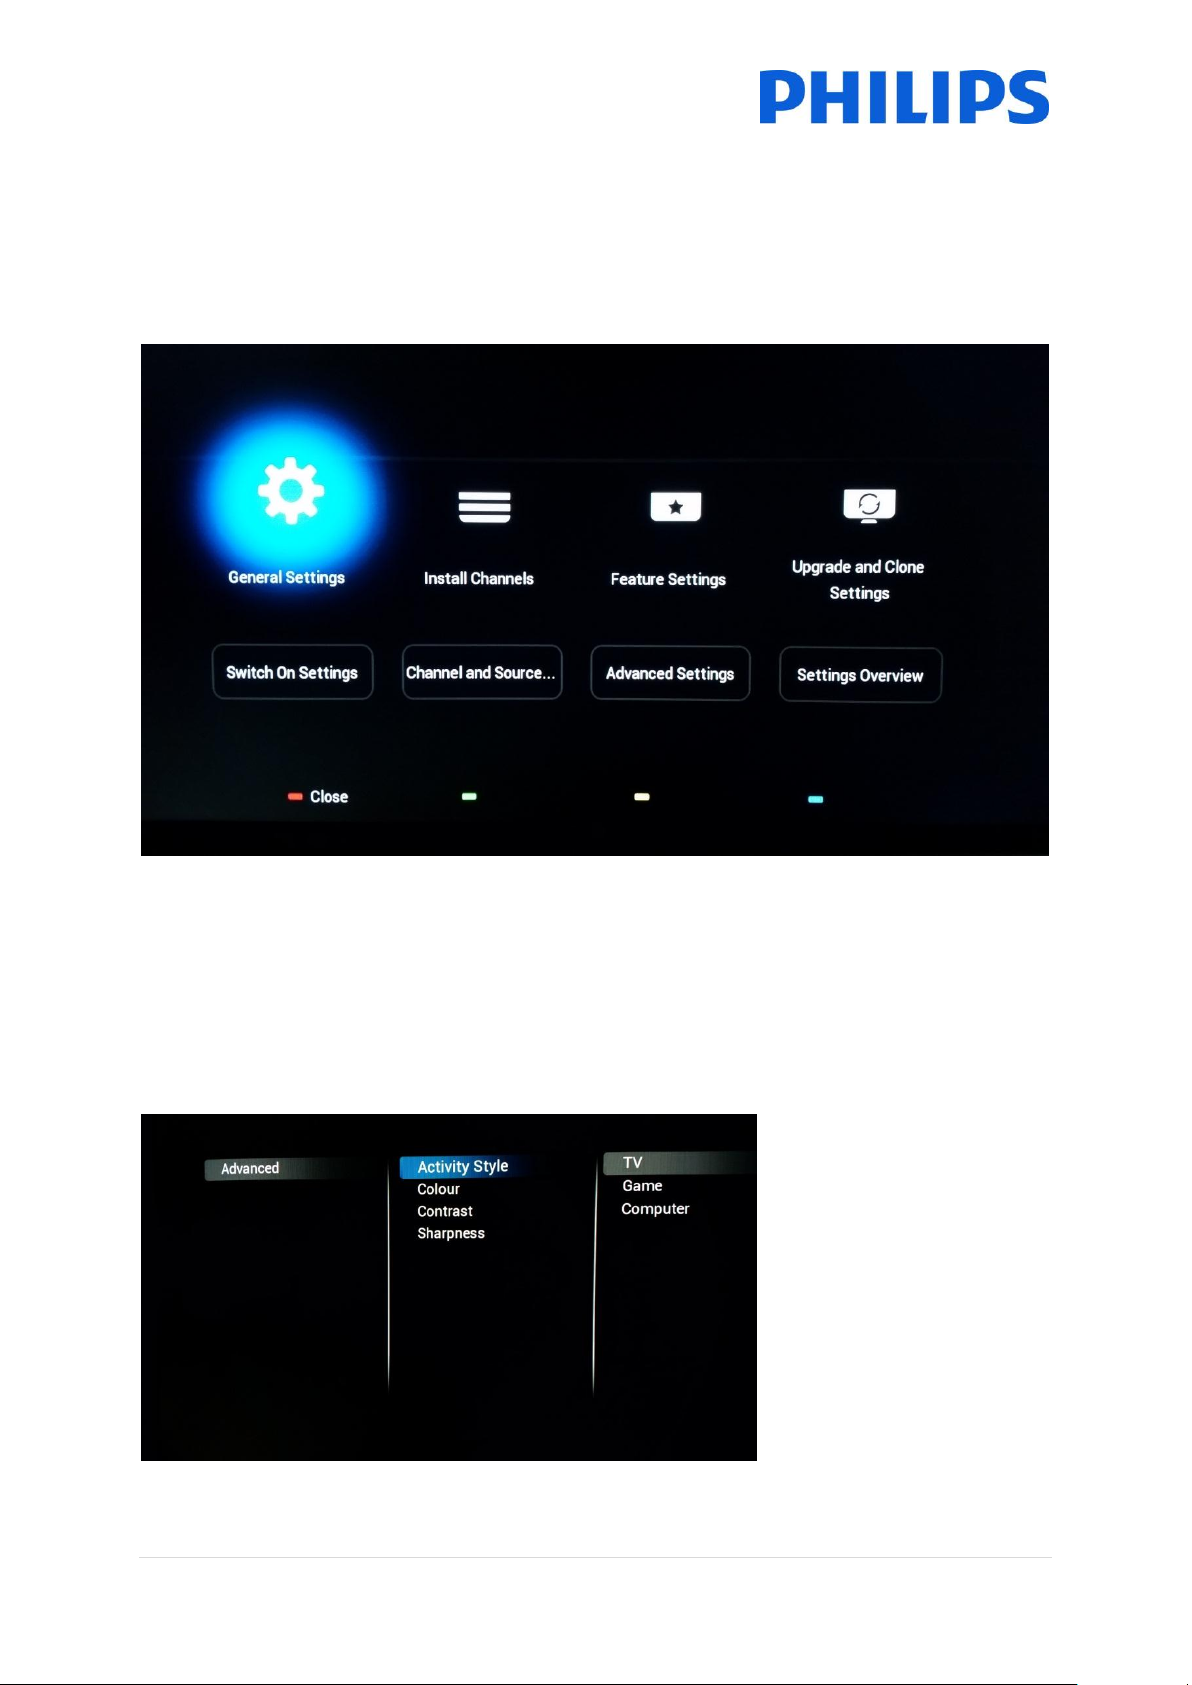
6 Professional Settings
[Activity style]
This setting will change the
response time of the Tv.
Depending on the chosen
setting, [TV]
[Game] or [Computer].
Please experiment for best
result in your environment.
When changing to
[Computer] this will have an
impact as well on the
overscan setting.
Below you can find an overview of all the professional settings with a small description of what the
function or impact is on the TV. The professional settings are divided in several parts on this set.
Below you can see an overview per menu item.
6.1 General Settings
6.1.1 Picture Settings
Here you can find all advanced picture settings that will be set each time the Tv starts up. These
settings can’t be changed by the guest.
18 | P a g e
[Colour enhancement] will
have an influence on how
vivid the pictures will be.
Depending on the set you can
have less or more boosting of
the colours.
[Colour Temperature] will
change the complete color
temperature. You can use the
standard settings or go for a
custom setting where you can
influence RGB separately
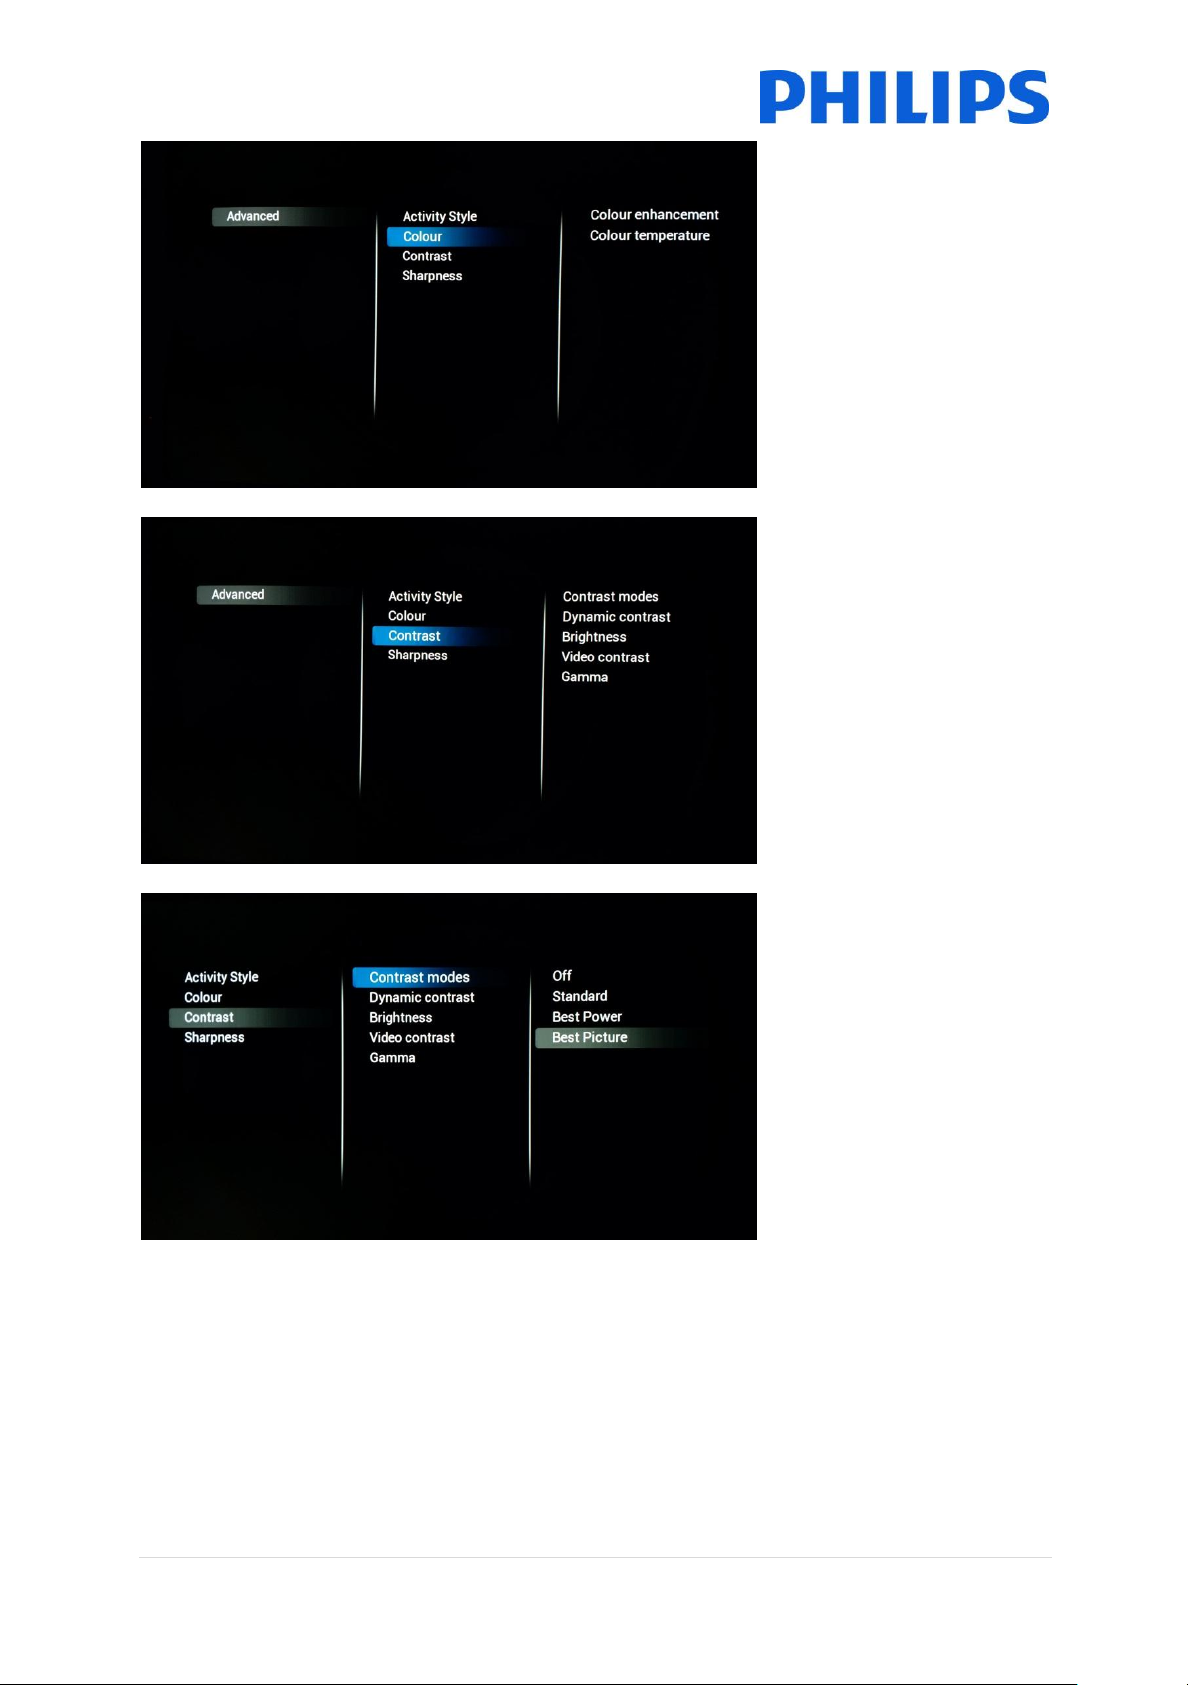
[Contrast]
Under this category you will
be able to change everything
pertaining to contrast
[Contrast modes]
Here you can influence the
contrast mode meaning that
depending on the setting
there will be a high or lower
difference between white and
dark value.
This setting will also influence
the energy consumption of
the set
19 | P a g e
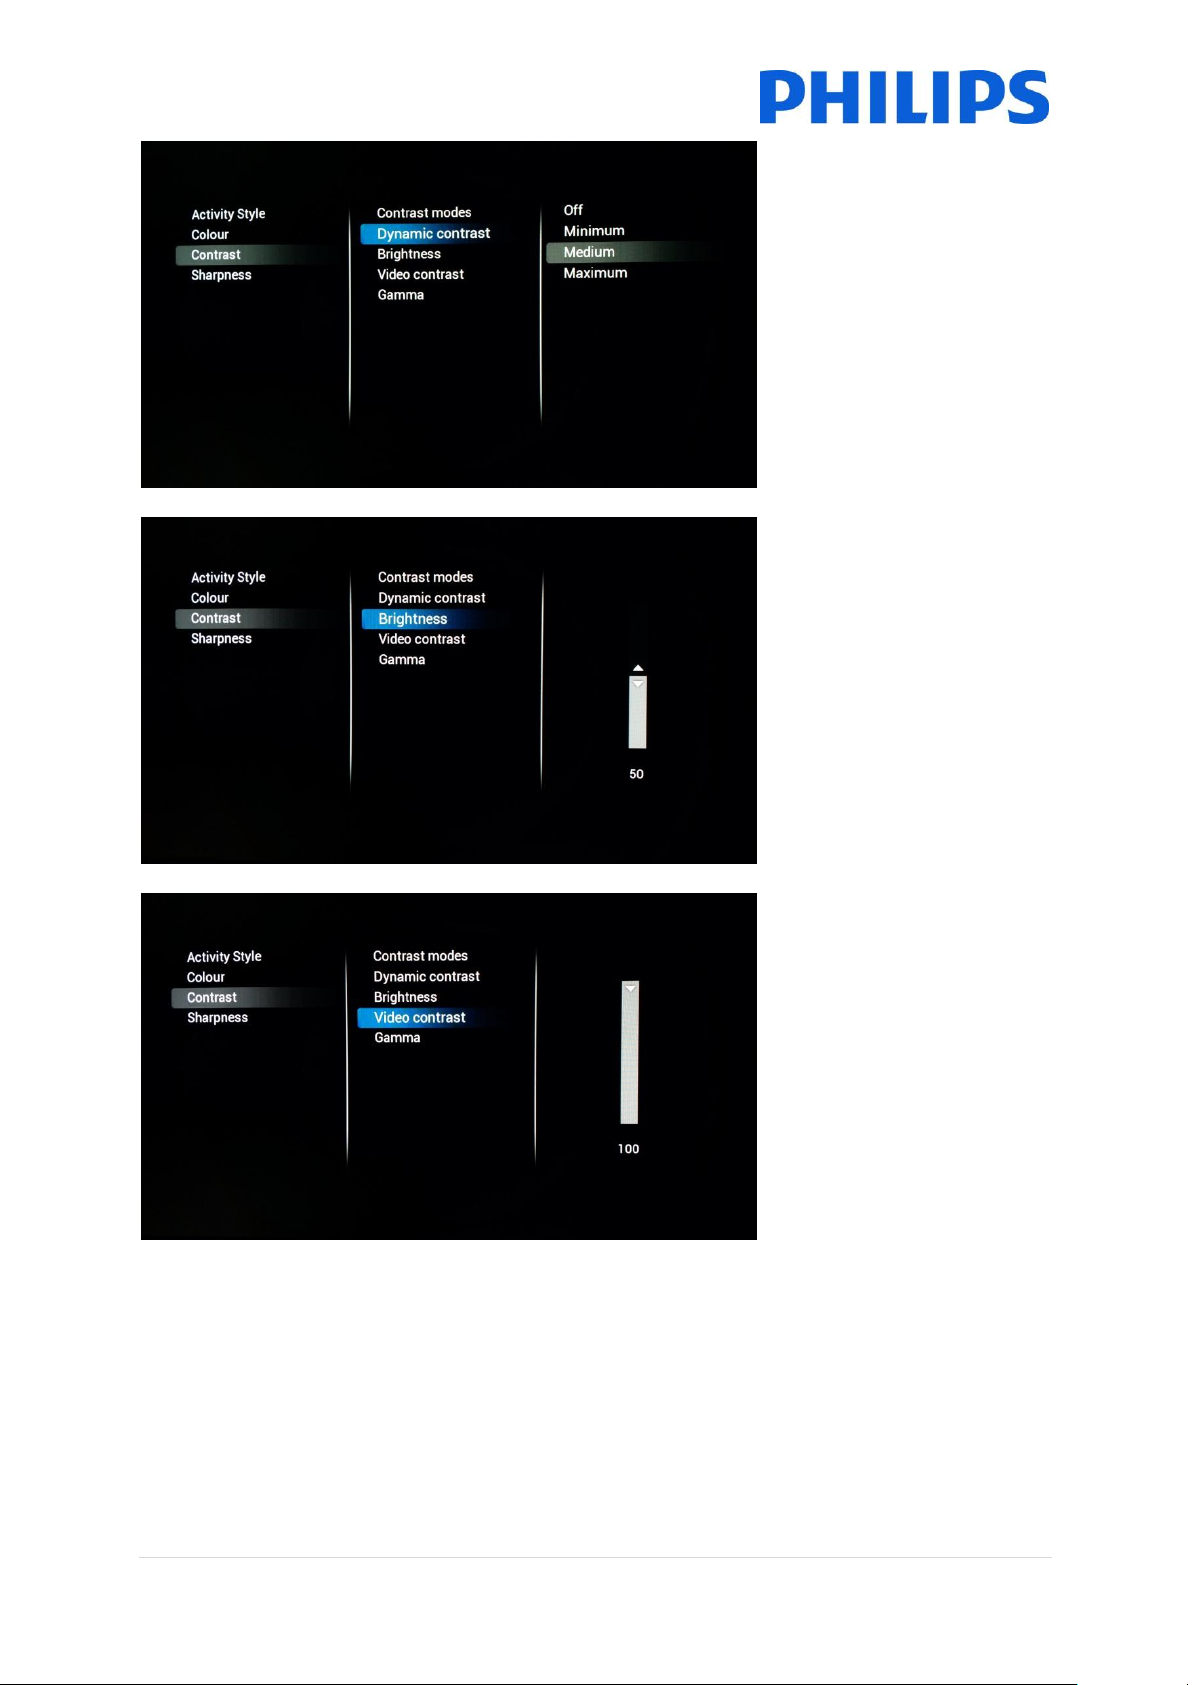
[Dynamic Contrast]
If turned on the Tv will
automatically adapt the
contrast to the content that is
being displayed
[Brightness]
This setting will adjust the
brightness of the displayed
content
[Video Contrast]
This setting will change the
contrast of the video. When
set to 0 the video will not be
visible anymore.
20 | P a g e
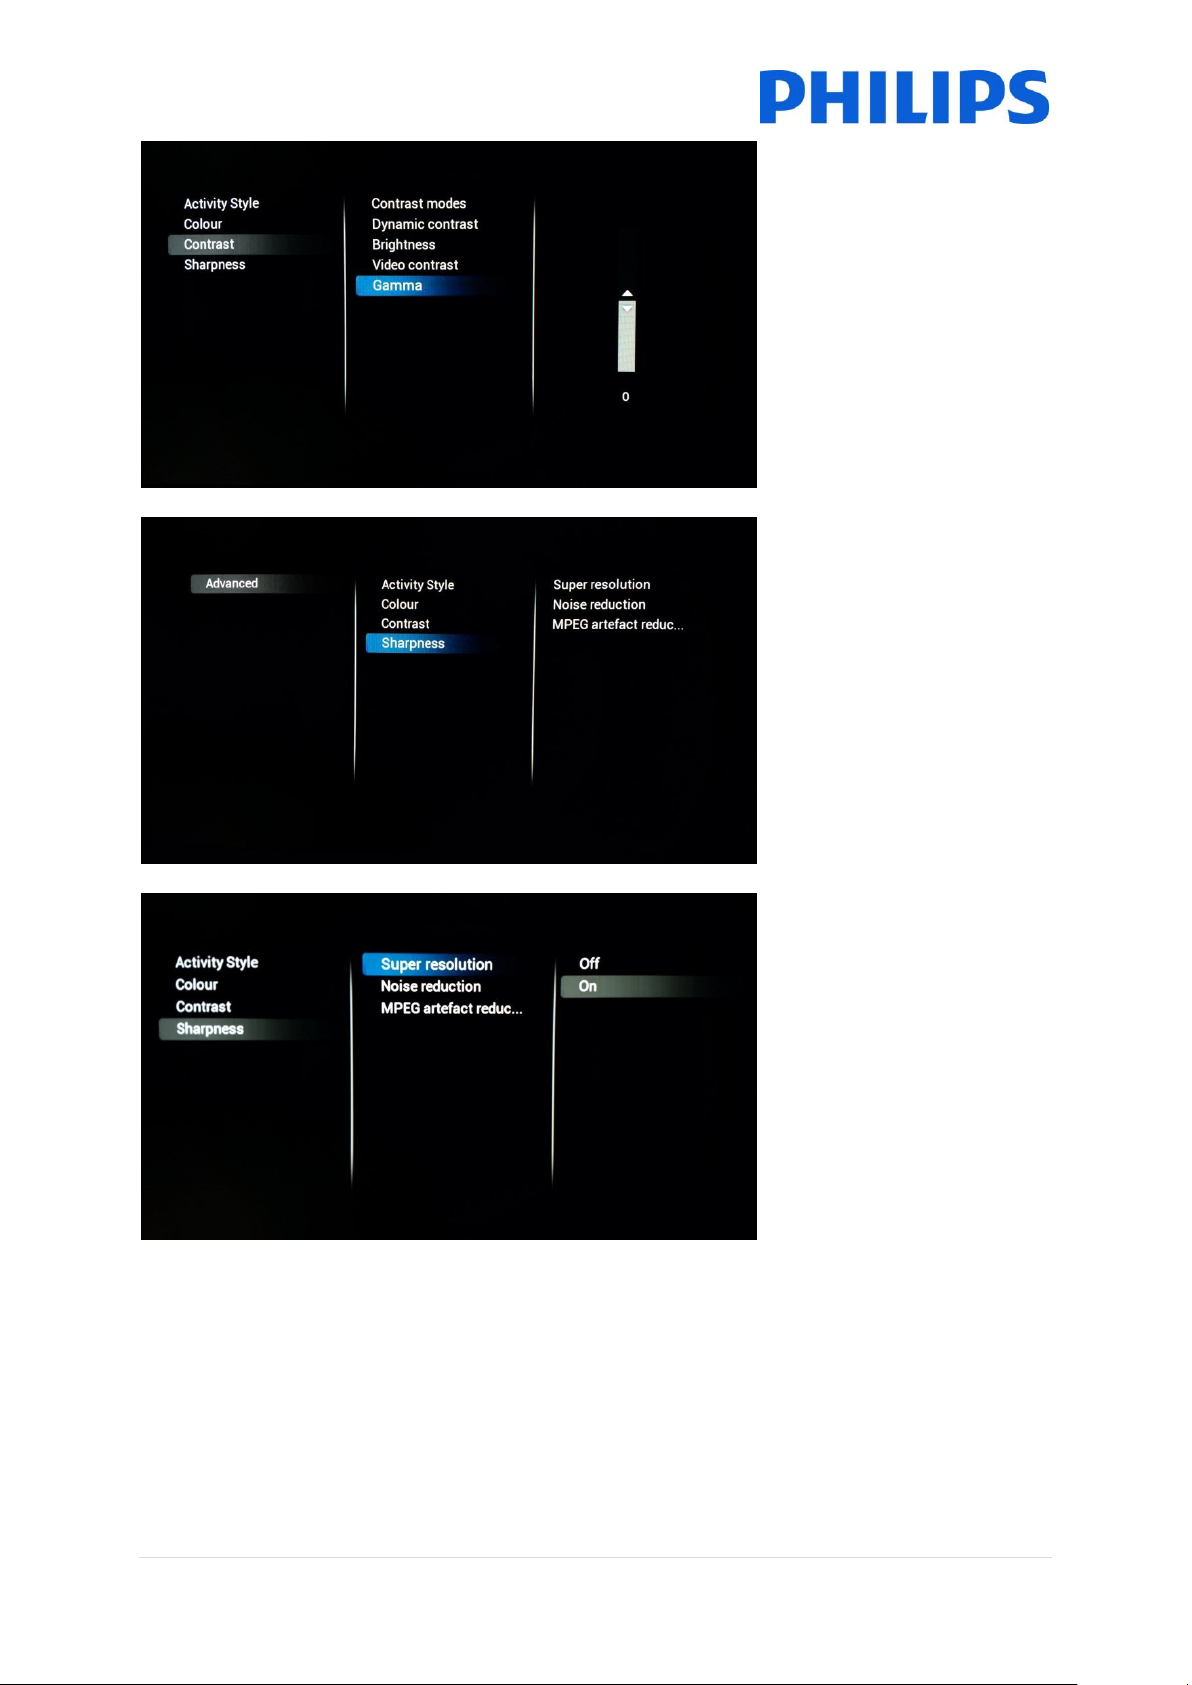
[Gamma]
You will see a slider to set a
non-linear setting for picture
luminance and contrast
Note: This is an expert users
settings and should normally
not be changed
[Sharpness]
Below this category you can
find the settings that will
influence the sharpness of the
content displayed on the TV
[Super resolution]
Super resolution will add
sharpness on the contours
and lines shown onscreen
21 | P a g e
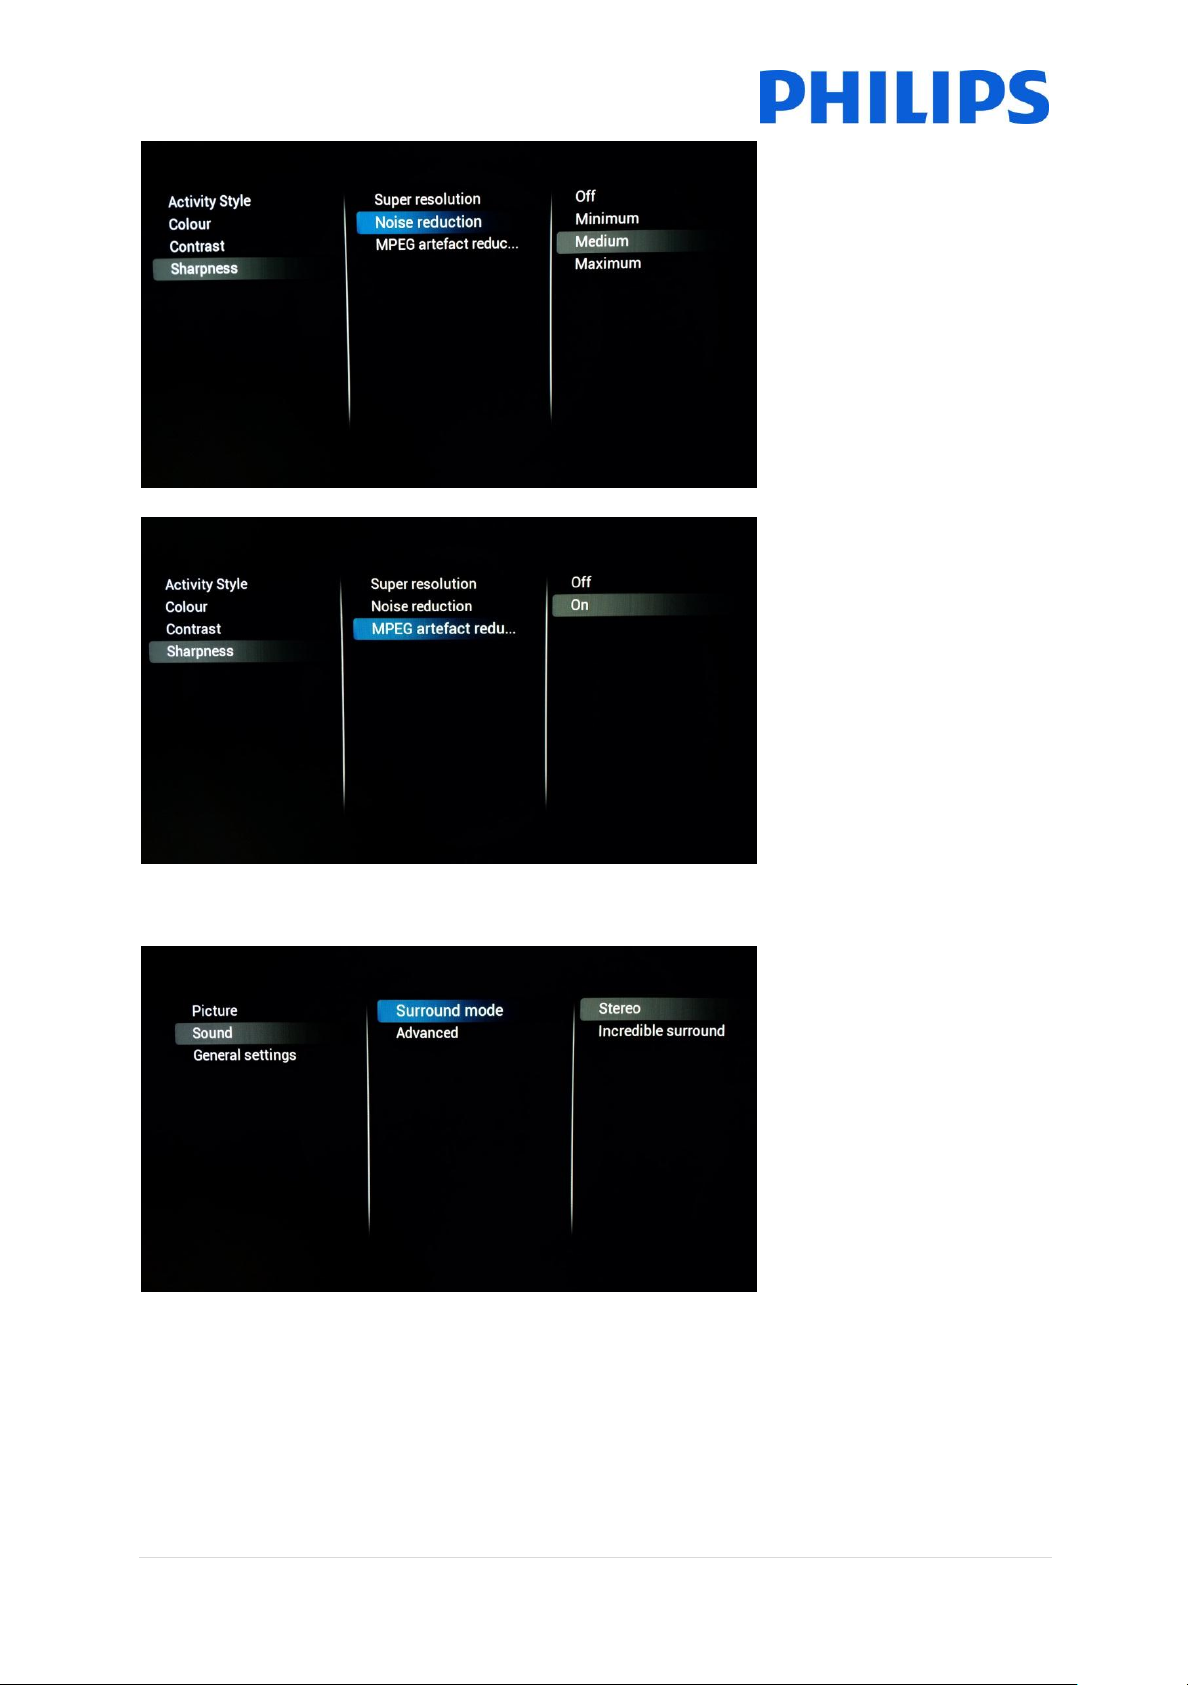
[Noise Reduction]
This setting will add noise
reduction filters to filter out
any noise that might be there
in the incoming signal
[MPEG artefact reduction]
When turned on the setting
will help smoothen digital
transitions onscreen.
[Surround mode]
This setting will influence the
surround sound effect on the
internal speakers of the TV
6.1.2 Sound Settings
22 | P a g e
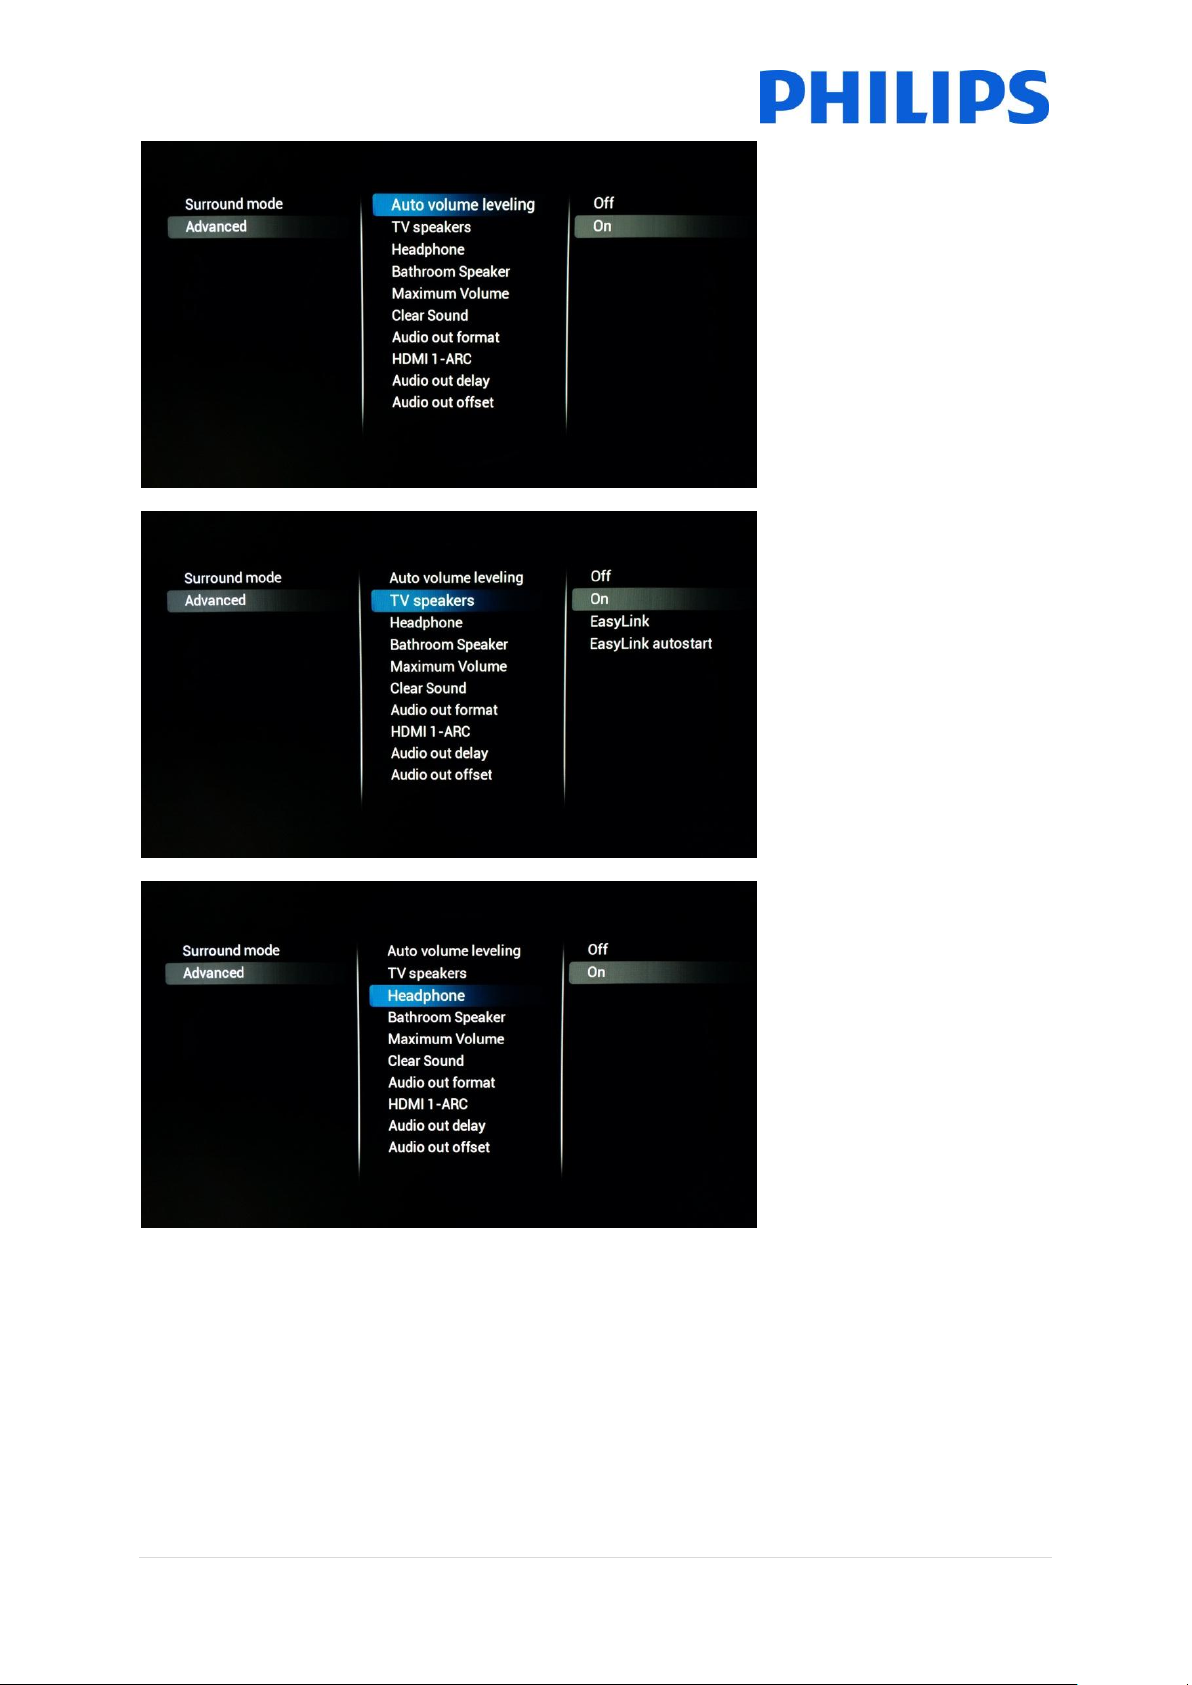
[Auto volume leveling]
When turned on this feature
will try to equalize the volume
differences between different
media
[TV Speakers]
TV Speakers can be turned
[On] or [Off]. Also you can
choose to use external
speakers which you can
control using [EasyLink]
If the external speakers need
to automatically start when
the TV is turned on then use
[Easylink autostart]
[Headphones]
Turn [On] or [Off] to enable
the headphone jack
23 | P a g e
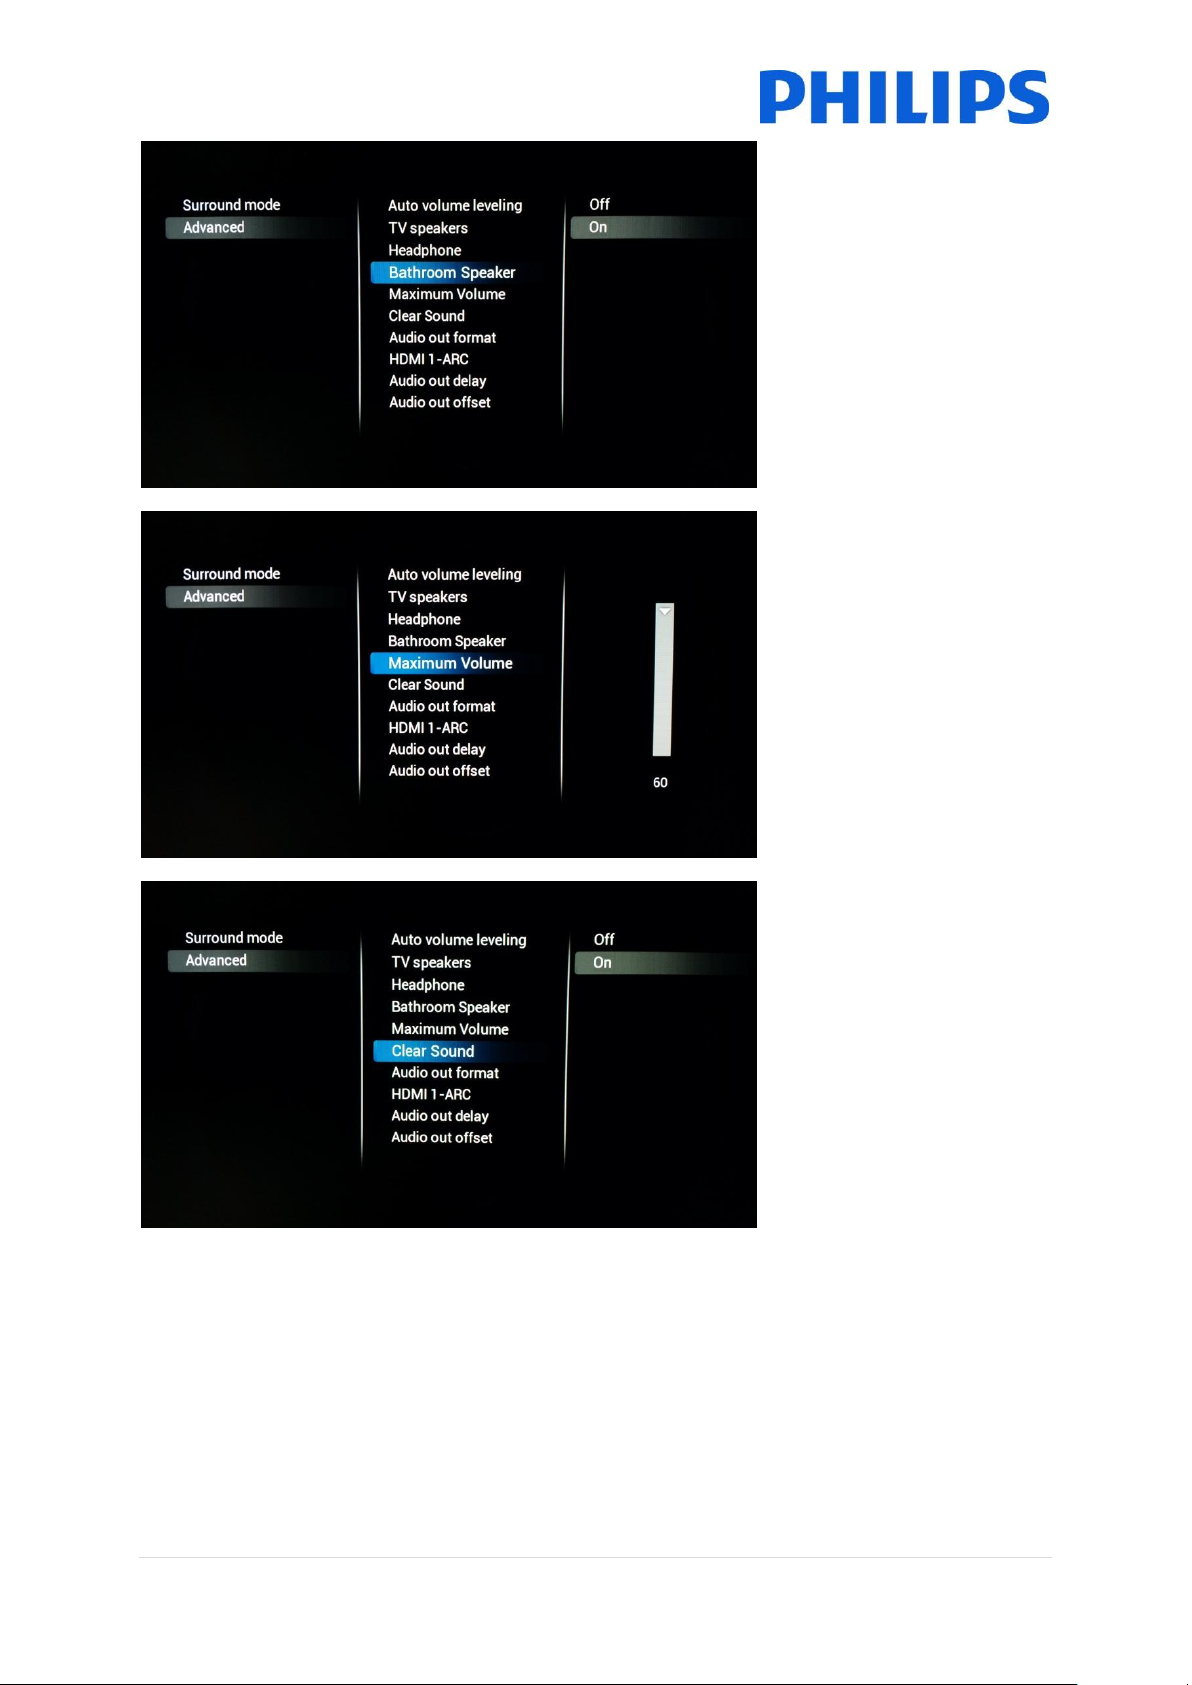
[Bathroom speaker]
Turn [On] or [Off] to control
the audio out jack
[Maximum volume]
This setting will limit the
maximum volume that a
guest will be able to reach on
his TV
[Clear Sound]
Select if you want to switch
the Clear Sound to improve
the sound for speech [On] or
[Off]
24 | P a g e
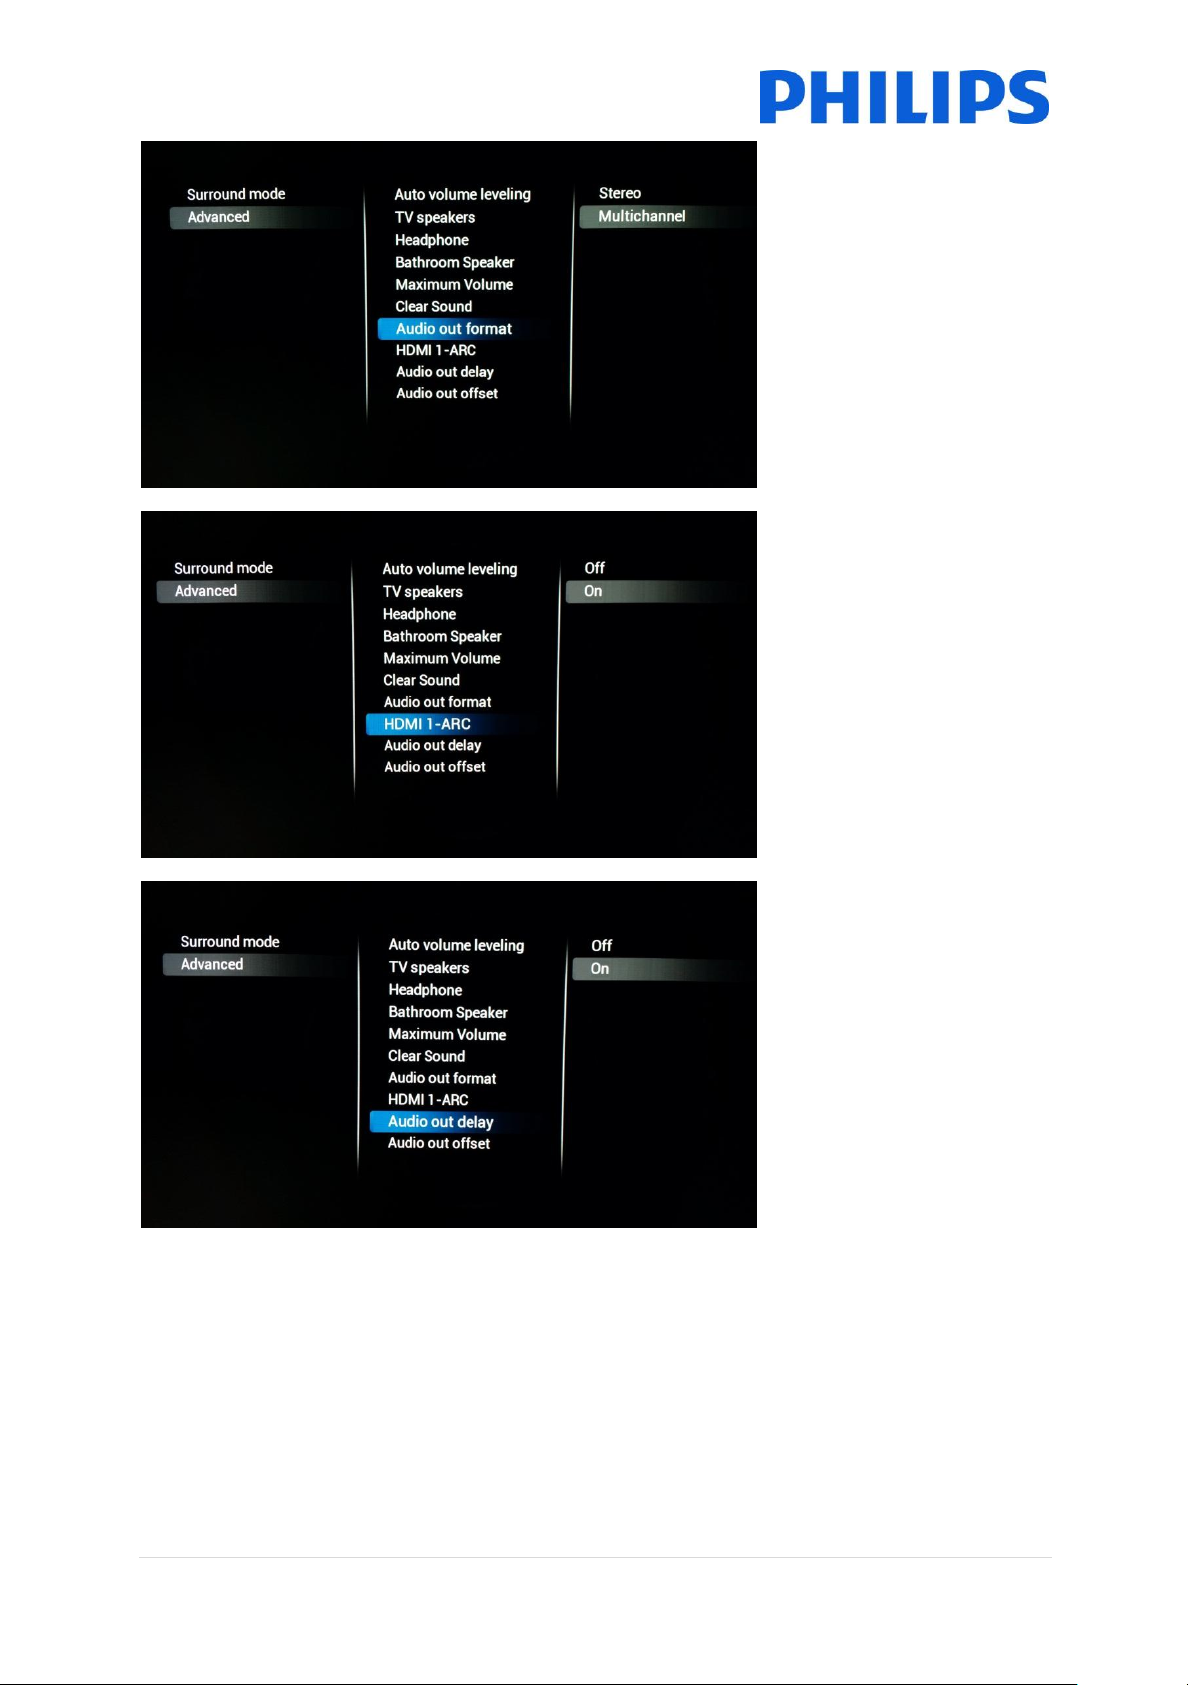
[Audio Out Format]
Set the audio out signal of the
TV to fit with the sound
capabilities of the connected
Home Theatre System to
[Multichannel] or [Stereo]
[HDMI 1 – ARC]
Turn [On] or [Off] to control
the Audio Return Channel on
HDMI port 1
[Audio Out Delay]
Switch the delay if a sound
delay is set on the Home
Theatre System to [On] or
[Off]
25 | P a g e
 Loading...