

Page 1

LCD TV
User Manual
26PF5320
32PF5320
EnglishFrançaiseEspañolPortuguês
Model No.:
Serial No.:
3139 125 34752 SD2 ME5
(and Model / Serial number)
Page 2

Return your Product Registration Card today
to get the very most from your purchase.
Registering your model with PHILIPS makes you eligible for all of the valuable benefits listed below, so don’t miss out.
Complete and return your Product Registration Card at once to ensure:
*Proof of
Purchase
Returning the enclosed card guarantees
that your date of purchase will be on file,
so no additional paperwork will be
required from you to obtain warranty
service.
*Product Safety
Notification
By registering your product, you’ll
receive notification - directly from the
manufacturer - in the rare case of a
product recall or safety defect.
Congratulations on your purchase,
and welcome to the “family!”
Dear PHILIPS product owner:
Thank you for your confidence in PHILIPS.You’ve selected one
of the best-built, best-backed products available today.We’ll do
everything in our power to keep you happy with your purchase
for many years to come.
As a member of the PHILIPS “family,” you’re entitled to
protection by one of the most comprehensive warranties and
outstanding service networks in the industry.What’s more, your
purchase guarantees you’ll receive all the information and special
offers for which you qualify, plus easy access to accessories from
our convenient home shopping network.
Most importantly, you can count on our uncompromising
commitment to your total satisfaction.
All of this is our way of saying welcome - and thanks for investing
in a PHILIPS product.
*Additional Benefits
of Product Ownership
Registering your product guarantees that
you’ll receive all of the privileges to which
you’re entitled, including special moneysaving offers.
This “bolt of lightning” indicates
uninsulated material within your unit
may cause an electrical shock. For the
safety of everyone in your household, please
do not remove product covering.
The “exclamation point” calls atten-
tion to features for which you should
read the enclosed literature closely
to prevent operating and maintenance problems.
WARNING: To reduce the risk of fire or
electric shock, this apparatus should not be
exposed to rain or moisture and objects filled
with liquids, such as vases, should not be
placed on this apparatus.
CAUTION: To prevent electric shock, match
wide blade of plug to wide slot, fully insert.
ATTENTION: Pour éviter les choc électriques, introduire la lame la plus large de la
fiche dans la borne correspondante de la prise
et pousser jusqu’au fond.
P.S. To get the most from your PHILIPS purchase, be
sure to complete and return your Product Registration
Card at once.
Visit our World Wide Web Site at www.usasupport.philips.com
2
For Customer Use
Enter below the Serial No. which is located on
the rear of the cabinet. Retain this information
for future reference.
Model No. _____________________________
Serial No. _____________________________
Page 3
IMPORTANT SAFETY INSTRUCTIONS
Read before operating equipment
1. Read these instructions.
2. Keep these instructions.
3. Heed all warnings.
4. Follow all instructions.
5. Do not use this apparatus near water.
6. Clean only with a dry cloth.
7. Do not block any of the ventilation openings. Install in accordance with
the manufacturers instructions.
8. Do not install near any heat sources such as radiators, heat registers,
stoves, or other apparatus (including amplifiers) that produce heat.
9. Do not defeat the safety purpose of the polarized or groundingtype plug.
A polarized plug has two blades with one wider than the other. A ground
ing type plug has two blades and third grounding prong. e wide blade
or third prong are provided for your safety. When the provided plug
does not fit into your outlet, consult an electrician for replacement of the
obsolete outlet.
10. Protect the power cord from being walked on or pinched particularly at
plugs, convenience receptacles, and the point where they exit from the
apparatus.
11. Only use attachments/accessories specified by the manufacturer.
12. Use only with a cart, stand, tripod, bracket, or table specified
13. Unplug this apparatus during lightning storms or when unused for long
periods of time.
14. Refer all servicing to qualified service personnel. Servicing is required
when the apparatus has been damaged in any way, such as power-supply
cord or plug is damaged, liquid has been spilled or objects have fallen
into apparatus, the apparatus has been exposed to rain or moisture, does
not operate normally, or has been dropped.
15. is product may contain lead and mercury. Disposal of these materials
may be regulated due to environmental considerations. For disposal or
recycling information, please contact your local authorities or the Elec
tronic Industries Alliance: www.eiae.org
16. Damage Requiring Service - e appliance should be serviced by qualified service personnel when:
A. e power supply cord or the plug has been damaged; or
B. Objects have fallen, or liquid has been spilled into the appliance; or
by the manufacturer, or sold with the apparatus. When a cart is
used, use caution when moving the cart/apparatus combination
to avoid injury from tip-over.
-
C. e appliance has been exposed to rain; or
D. e appliance does not appear to operate normally or exhibits a
marked change in performance; or
E. e appliance has been dropped, or the enclosure damaged.
17. Tilt/Stability - All televisions must comply with recommended inter-
national global safety standards for tilt and stability properties of its
cabinet design.
• Do not compromise these design standards by applying excessive
pull force to the front, or top, of the cabinet which could ultimately
overturn the product.
• Also, do not endanger yourself, or children, by placing electronic
-
equipment/toys on the top of the cabinet. Such items could un
suspectingly fall from the top of the set and cause product damage
and/or personal injury.
18. Wall or Ceiling Mounting - e appliance should be mounted to a
wall or ceiling only as recommended by the manufacturer.
19. Power Lines - An outdoor antenna should be located away from power
lines.
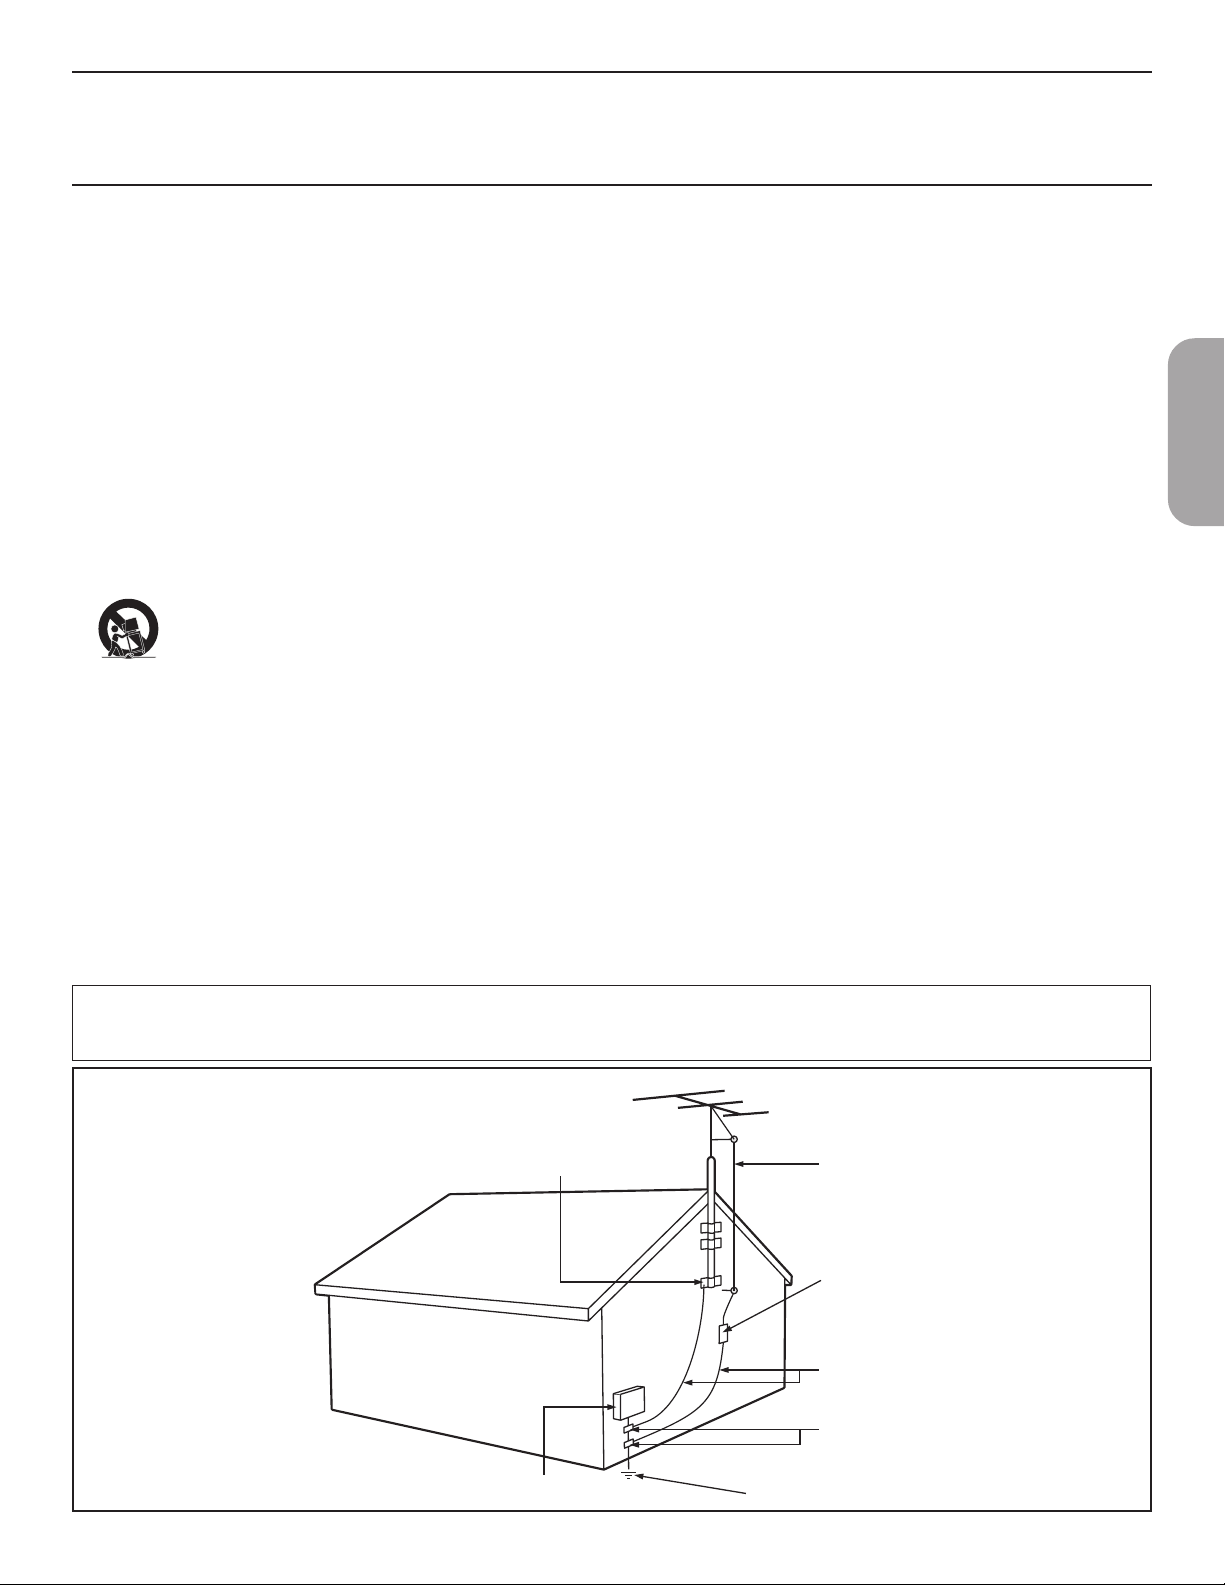
20. Outdoor Antenna Grounding - If an outside antenna is connected to
the receiver, be sure the antenna system is grounded so as to provide
some protection against voltage surges and built up static charges. Sec
tion 810 of the National Electric Code, ANSI/NFPA No. 70- 1984,
provides information with respect to proper grounding of the mast
and supporting structure, grounding of the lead-in wire to an antenna
discharge unit, size of grounding connectors, location of antenna-dis
charge unit, connection to grounding electrodes, and requirements for
the grounding electrode. See Figure below.
21. Object and Liquid Entry - Care should be taken so that objects do not
fall and liquids are not spilled into the enclosure through openings.
a) Warning: To reduce the risk of fire or electric shock, this apparatus
should not be exposed to rain or moisture and objects filled with
liquids, such as vases, should not be placed on this apparatus.
22. Battery Usage CAUTION - To prevent battery leakage that may result
in bodily injury, property damage, or damage to the unit:
• Install all batteries correctly, with + and - aligned as marked on the
unit.
• Do not mix batteries (old and new or carbon and alkaline, etc.).
• Remove batteries when the unit is not used for a long time.
-
English
-
-
Note to the CATV system installer: This reminder is provided to call the CATV system installer’s attention to Article 820-40 of the NEC
that provides guidelines for proper grounding and, in particular, specifies that the cable ground shall be connected to the grounding system of
the building, as close to the point of cable entry as practical.
Example of Antenna Grounding
as per NEC - National Electric Code
GROUND CLAMP
GROUND CLAMP
POWER SERVICE GROUNDING ELECTRODE SYSTEM
(NEC ART 250, PART H)
3
ANTENNA LEAD IN WIRE
ANTENNA DISCHARGE UNIT
(NEC SECTION 810-20)
GROUNDING CONDUCTORS
(NEC SECTION 810-21)
GROUND CLAMPS
Page 4
PRECAUTIONS
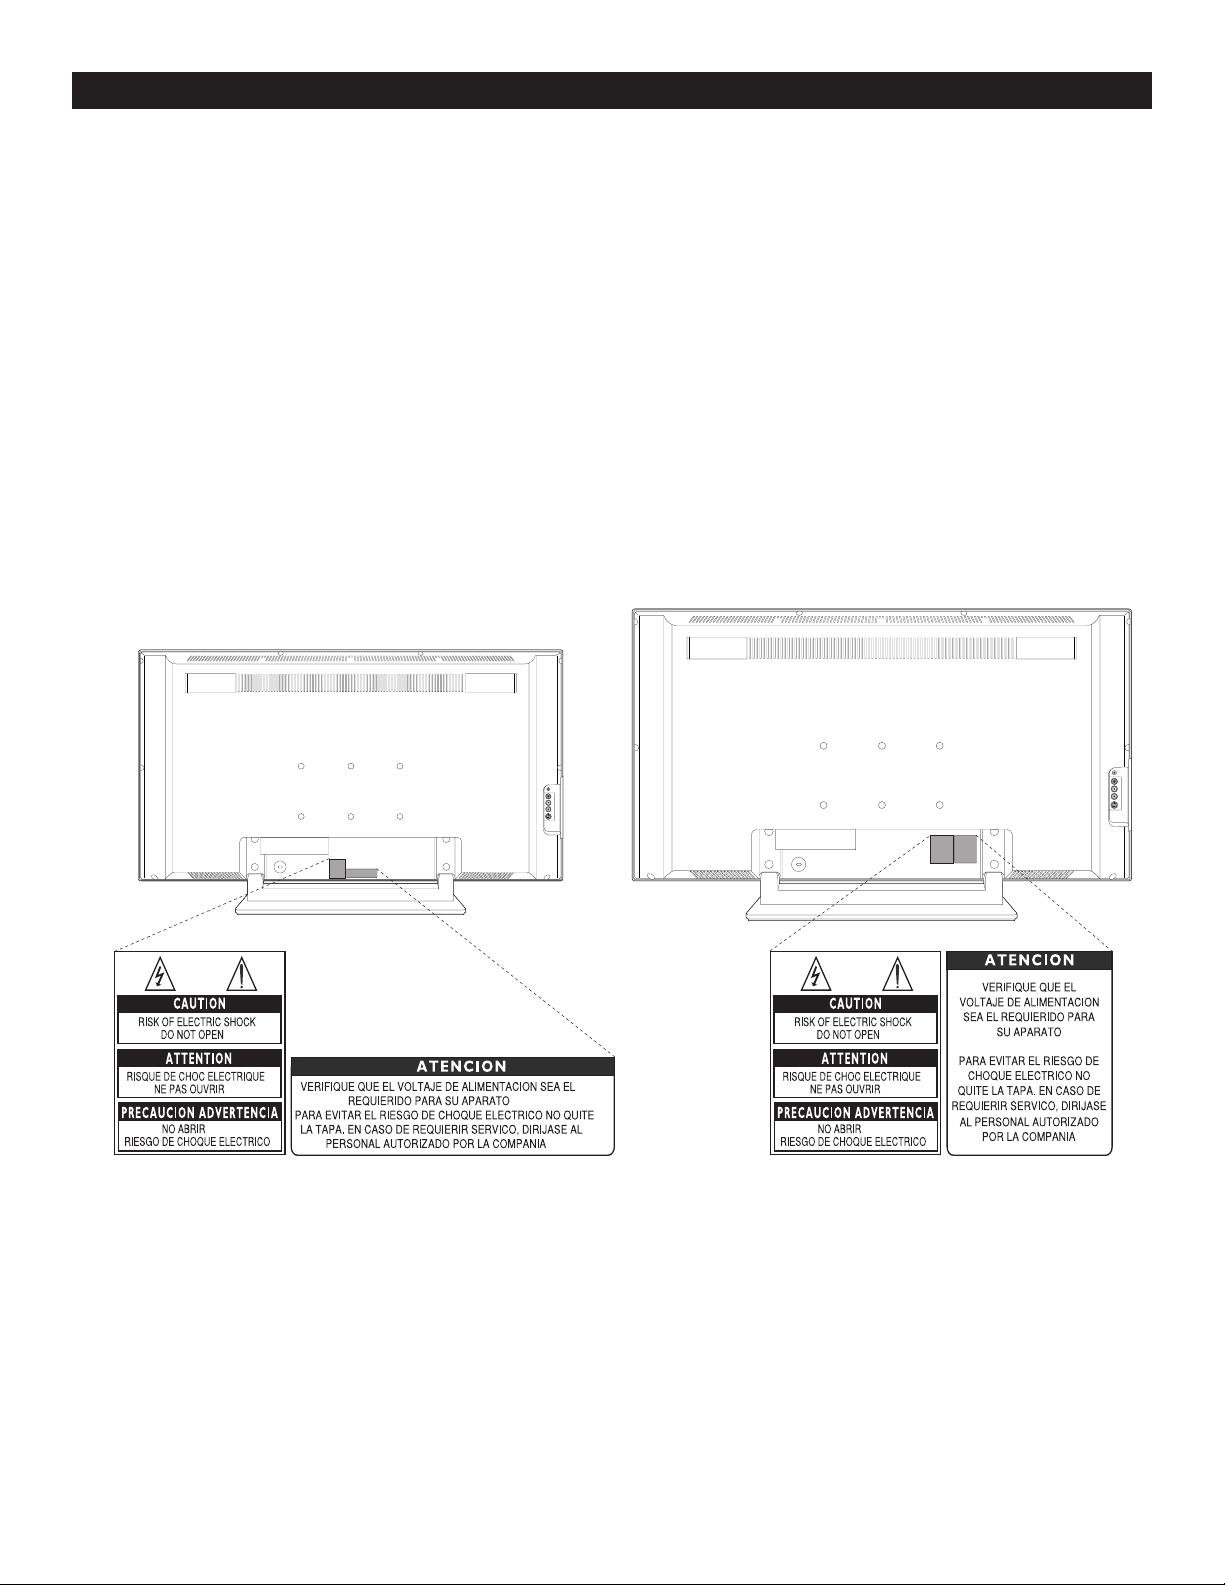
ADDITIONAL SAFETY PRECAUTIONS
• ENSURE that LCD TV stand is tightened properly to the set (See Quick Guide on the right way of tightening of the screw of the
stand to the set. Improper tightening of screw may render the set unsafe.
• If LCD TV is installed on the wall, installation should be carried out by qualified servicemen. Improperor incorrect installation may
render the set unsafe.
• Disconnect mains plug when :
– cleaning the TV screen, never use abrasive cleaning agents.
– there is a lightning storm.
– the set is left unattended for a prolonged period of time.
• Do not shift or move the LCD TV around when it is powered on.
• Do not touch, push or rub the surface of the LCD screen with any sharp or hard objects.
• When the surface of the LCD screen becomes dusty, wipe it gently with an absorbent cotton cloth or other soft material like chamois.
DO NOT USE acetone, toluene or alcohol to clean the surface of the screen. ese chemicals will cause damage to the surface.
• Wipe off water, or saliva as soon as possible. ese liquids can cause deformation and color fading of the LCD screen when left exposed
for some time.
• Be careful of condensation when temperature changes occur. Condensation can cause damage to the LCD screen and electrically parts.
After condensation fades, spots or blemishes will be present on the LCD screen.
• CAUTION information is located on the back of the TV (see diagrams below).
POSITIONING THE LCD TELEVISON
• Place the LCD TV on a solid, sturdy base or stand. Be sure the stand is strong enough to handle the weight of the LCD TV.
• Try to leave at least 6” of space around each side of the LCD TV cabinet to allow for proper ventilation.
• Do not place the LCD TV near a radiator or other sources of heat.
• Do not place the LCD TV where it can be exposed to rain or excessive moisture.
RECYCLING PROCEDURE/END OF LIFE DISPOSAL
• To minimize harm to the environment, the batteries supplied with the LCD TV do not contain mercury or nickel cadmium. If pos
sible, when disposing of batteries, use recycling means available in your area.
• e LCD TV uses materials that can be recycled. To minimize the amount of waste in the environment, check your area for companies
that will recover used televisions for dismantling and collection of reusable materials, or contact your dealer for TV recycling tips.
• Please dispose of the carton and packing material through the proper waste disposal management in your area.
4
-
Page 5

CONTENTS
INTRODUCTION
Welcome/Registration of Your TV ................................................2
Safety/Precautions .....................................................................
3-4
Contents ......................................................................................5
Features ........................................................................................
INSTALLATION MENU
How to use the Language Controls ..................................6
How to use the Tuner Mode Controls ..........................................
How to use the Auto Program Controls .......................................
How to use the Channel Edit Controls ........................................
Selecting the System .....................................................................
Fine Tune .....................................................................................
PICTURE MENU CONTROLS
How to use the Picture Adjustment Controls .................. 9
SOUND MENU CONTROLS
How to use the Sound Adjustment Controls ................. 10
FEATURE MENU CONTROLS
How to use the Timer Menu Controls ........................... 11
Understanding the AutoLock™ Controls ....................................
Setting up an AutoLock™ Access Code .......................................
How to block channels using AutoLock™ ...................................
How to clear all locked channels at the same time ......................
How to block programming using the Movie Ratings Controls ..
How to block programming using the TV Ratings Controls ......
Other AutoLock™ Blocking options ...........................................
Using the AutoLock™ Review screen ..........................................
How to use the Contrast+ Control .............................................
How to use the DNR Control ....................................................
How to use the PIP Control .......................................................
How to use the Source List .........................................................
12
13
14
15
16
17
18
19
20
20
21
22
REMOTE CONTROL RELATED FEATURES
How to use the Format Control ..................................... 22
How to use the Closed Captioning Controls ..............................
How to use the Sleeptimer Control ............................................
How to use the Program List Control .........................................
How to use the Active Control feature .......................................
How to use the Surf Control ......................................................
How to use the Pixel Plus™ Control
(depending on model) .......... 25
How to use the AutoPicture™ Control ........................................
How to use the AutoSound™ Control .........................................
Remote Control Accessory Device Related Buttons ....................
How to use the Remote Control with Philips accessory devices ..
23
23
24
24
25
26
26
27
28
SETTING UP THE PC (PERSONAL COMPUTER) MODE
How to use the Picture Controls ....................................29
How to use the Audio Selection Control ....................................
How to use the PC Features Controls .........................................
How to use the PIP Control .......................................................
29
30
31
SETTING UP THE HD (HIGH DEFINITION) MODE
How to Select HD Mode ...............................................31
How to use the Picture Controls ................................................
How to use the Sound Controls .................................................
How to use the PIP Control .......................................................
32
33
34
IMPORTANT INFORMATION
Troubleshooting Tips ..................................................... 35
Cleaning and Care .....................................................................
Index ..........................................................................................
Limited Warranty .......................................................................
36
37
38
Features
Active Control™ continuously measures and corrects all incoming sig-
nals to help provide the best picture quality. is feature monitors and
corrects both the sharpness control and noise reduction control.
5
Audio/Video Jack Panel allows direct connections with VCRs, DVDs,
or other devices, providing quality TV picture and sound playback.
Audio Volume Leveler (AVL) Control keeps the TV sound at an even
level. Peaks and valleys that occur during program changes or com
6
mercial breaks are reduced, making for a more consistent, comfortable
7
sound.
7
AutoLock™ allows you to block the viewing of certain channels or
8
programs with certain ratings if you do not want your children to view
8
inappropriate materials.
AutoPicture™ allows you to change the picture settings (color, tint,
contrast, etc.) for various types of programming, such as sports, movies,
multimedia (games), or weak signals with the push of one button.
AutoSound™ allows you to select from three factory-set controls and a
personal control that you set according to your own preferences through
the onscreen Sound menu. e three factory-set controls (Voice, Music
and eatre) enable you to tailor the TV sound so as to enhance the
particular programming you are watching.
Channel Edit allows you to add or delete channels from the list stored
in the TV s memory. Channel Edit makes it easy to limit or expand the
number of channels that are available to you when you press the Chan
nel (+) or (–) buttons on your remote control.
Closed Captioning allows the viewer to read TV program dialogue or
voice conversations as onscreen text.
Infrared Remote Control works your TV and other remote-controlled
devices, such as VCRs, DVD players, cable converters, and satellite
receivers.
Onscreen Menu shows helpful messages and instructions for setting
TV feature controls (can be viewed in English, French, or Spanish).
Sleep Timer automatically turns the TV OFF after a set amount of
time that you choose.
Timer allows you to set your TV to turn itself ON and OFF once or
daily like an alarm clock.
As an Energy Star® Partner, Philips Consumer
Electronics has determined this product meets the
Energy Star® guidelines for energy efficiency. Energy
Energy Star® label can save energy. Saving energy reduces air pollution
and lowers utility bills.
Active Control, AutoPicture, and AutoSound Surround are trademarks
of Philips Consumer Electronics Company. Copyright 2001 Philips
Consumer Electronics.
*Manufactured under license from Dolby Laboratories. Dolby and the
double-D symbol are trademarks of Dolby Laboratories.
Star® is a U.S. registered mark. Using products with the
QUICK USE AND SETUP GUIDE
Refer to the simple Quick Use
and Setup Guide (supplied with
your TV) for details on making
Connections and Remote
Control Operation.
-
English
-
5
Page 6

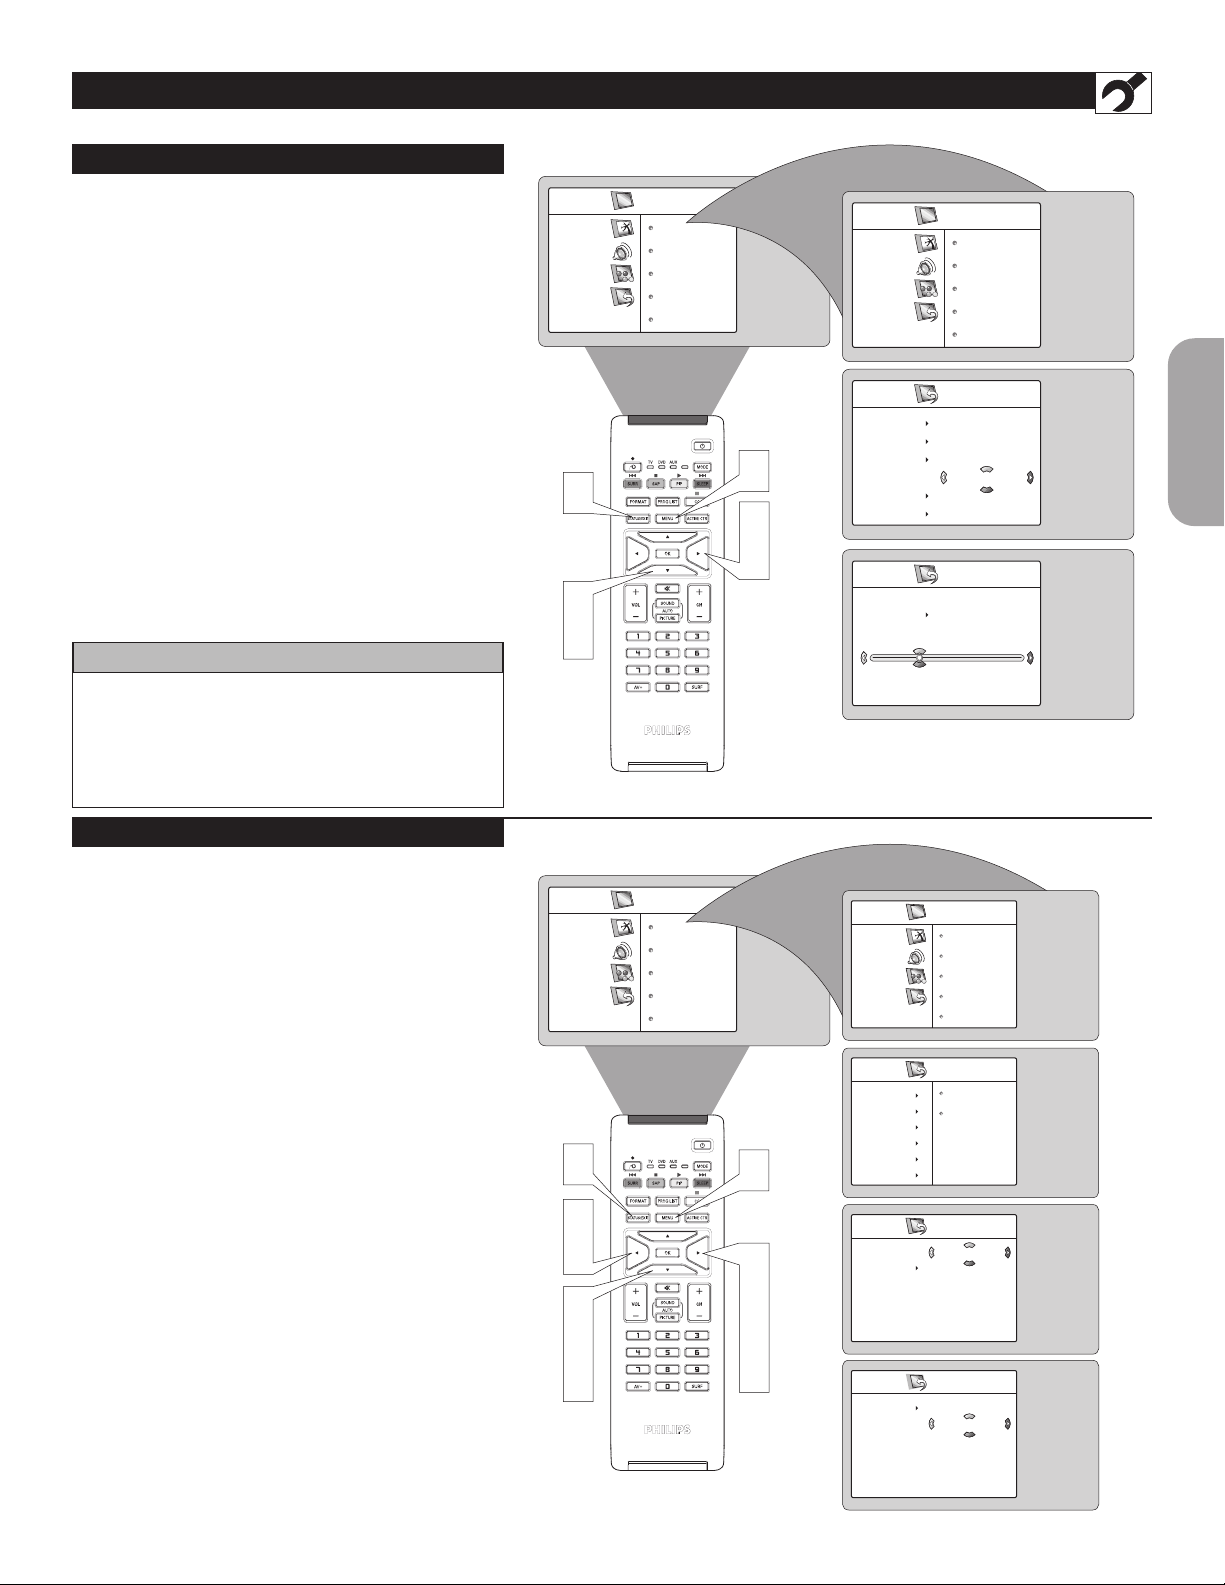
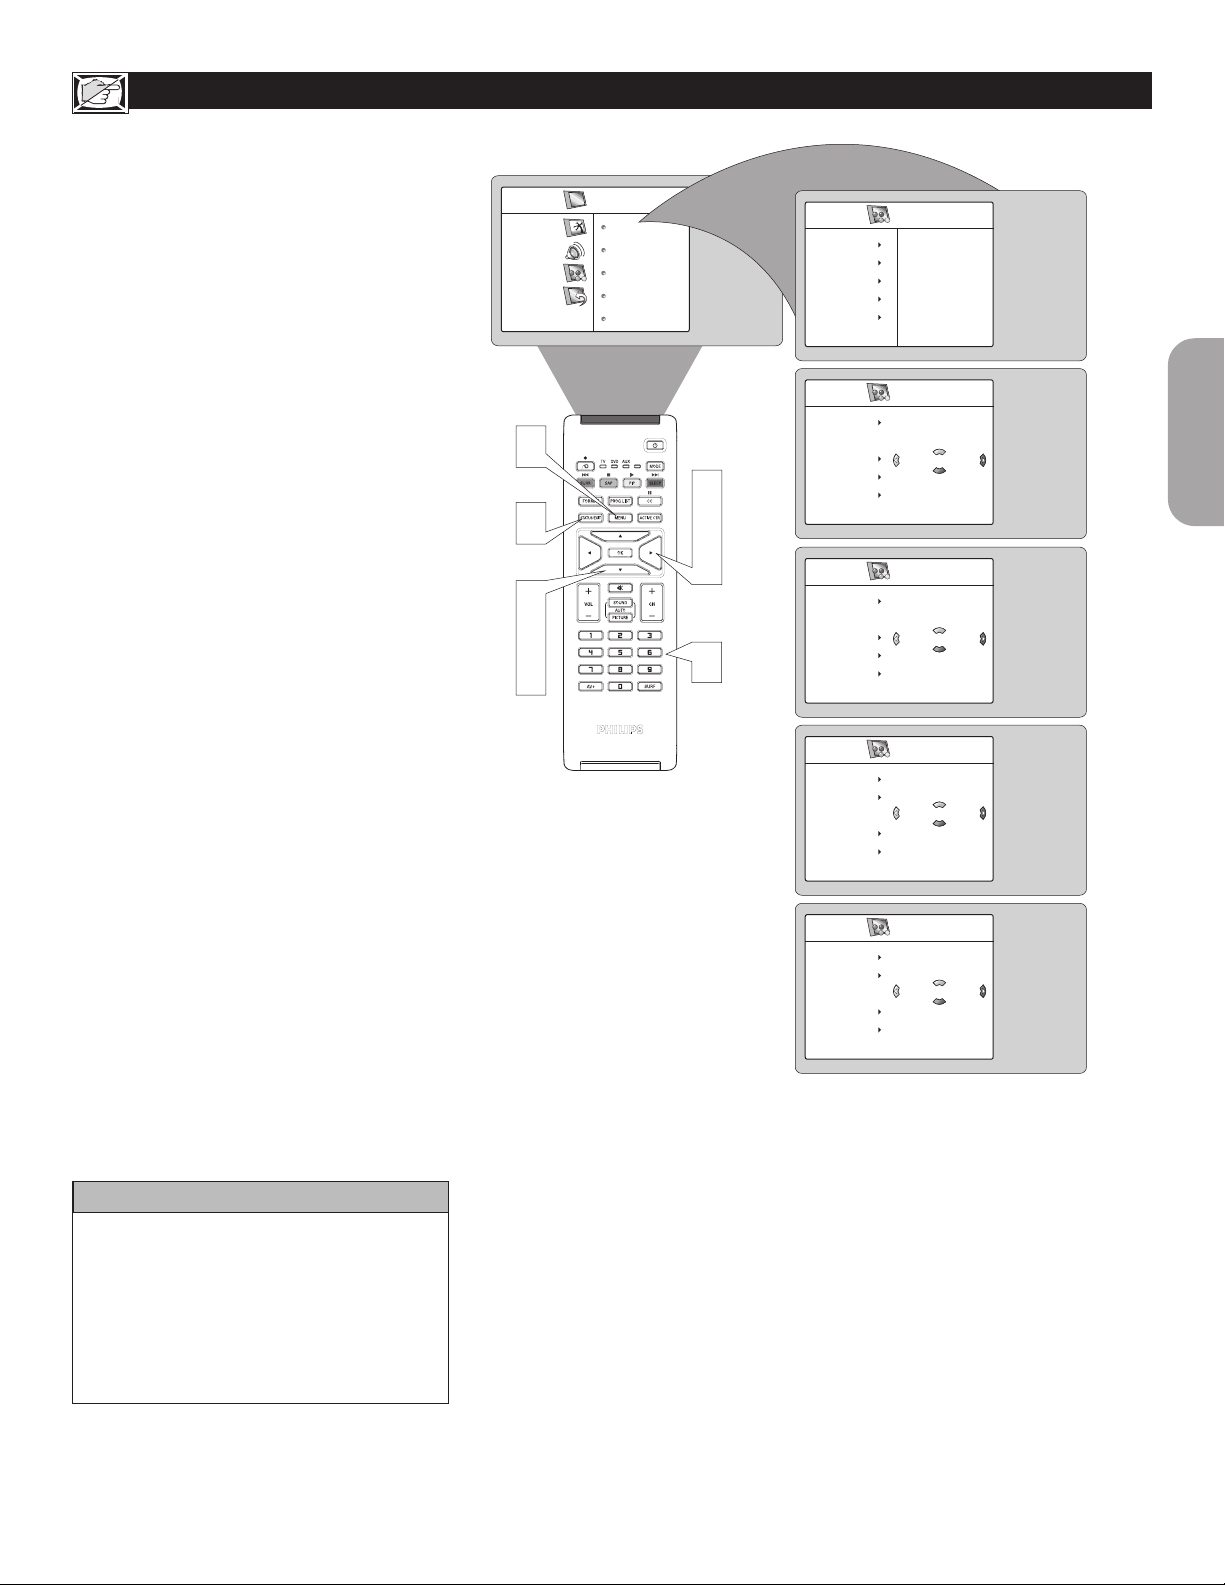
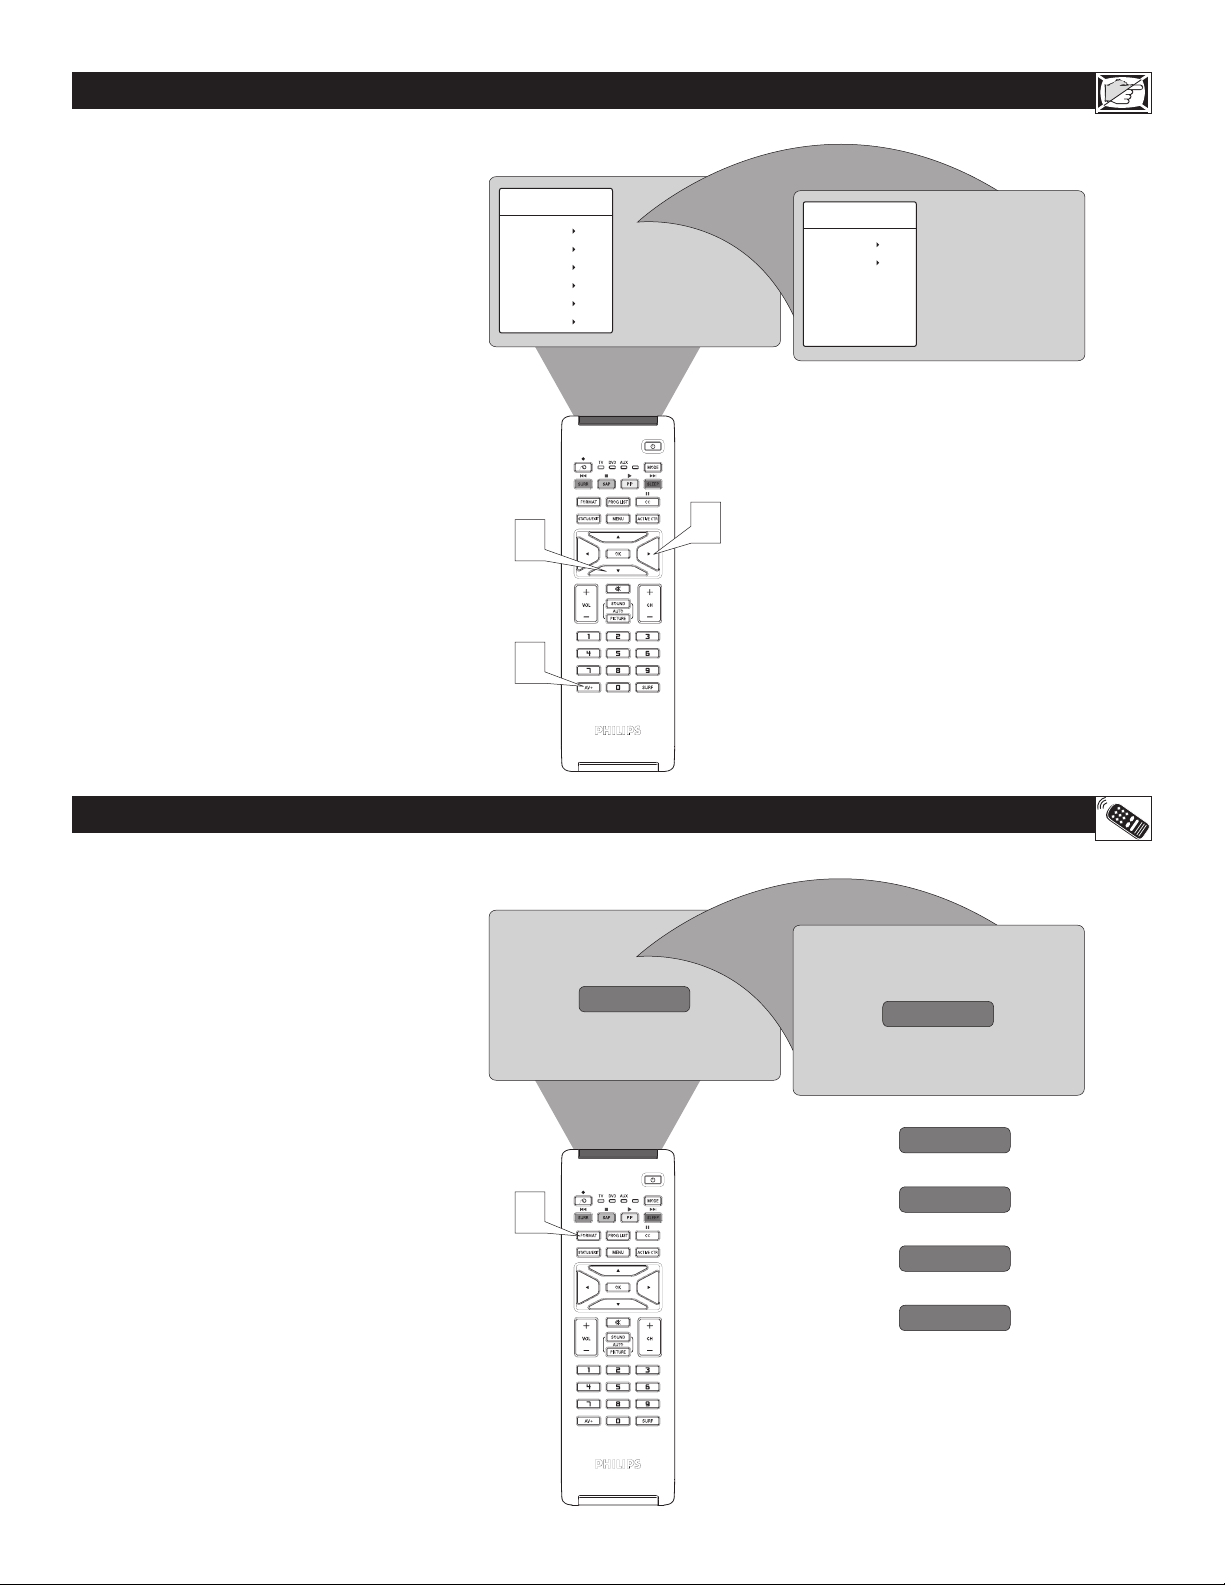
LANGUAGE
HOW TO USE THE INSTALLATION FEATURES
or our French, Spanish, and Portuguese-
F
speaking TV owners, an onscreen Language
option is present. e Language control enables you
to set the TV’s onscreen menu to be shown in either
English, French, Spanish or Portuguese.
Press the MENU button on the remote
1
control to show the onscreen menu.
Press the CURSOR DOWN button
2
repeatedly until Install is highlighted.
Press the CURSOR RIGHT button to
3
access the Install menu. Language will be
highlighted.
Press the CURSOR RIGHT or CURSOR
4
LEFT button to select English, Francais,
Portugués
Press the STATUS/EXIT button to
5
remove the menu from the screen.
or Español.
HELPFUL HINT
Remember, the Language control makes
only the TV’s onscreen Menu items appear in
English, French, Spanish or Portuguese text.
It does not change the other onscreen text
features, such as Closed Captioning (CC),
with TV shows.
TV Menu
Picture
Sound
Features
Install
5
4
2
Brightness
Color
Picture
Sharpness
Tint
1
3
4
TV Menu
Picture
Sound
Features
Install
Install
Language
System
Tuner Mode
Auto Program
Channel Edit
Fine Tune
Language
System
Tuner Mode
Auto Program
Channel Edit
English
OR
Langue Français
OR
Idioma Español
OR
Idioma Portuguese
TUNER MODE
he Tuner Mode allows you to change the
T
Tv’s signal input to Cable, Antenna, or Auto
Mode. It’s important for the TV to know what type
of signal is connected, either Antenna or Cable.
Press the MENU button on the remote
1
control to show the onscreen menu.
Press the CURSOR DOWN button
2
repeatedly until Install
Press the CURSOR RIGHT button
3
to access the Install menu. Language is
highlighted.
Press the CURSOR DOWN button to
4
select the Tuner Mode control.
Press the CURSOR RIGHT or CURSOR
5
LEFT button to select Cable, Antenna,
or Auto. If Tuner Mode is set to Auto,
Auto Program will detect if a cable signal is
present.
Press the STATUS/EXIT button to
6
remove the menu from the screen.
is highlighted.
HELPFUL HINT
When Cable is selected, channels 1-125 are
available.
When Antenna is selected, channels 2-69 are
available.
TV Menu
Picture
Sound
Features
Install
6
5
2
4
Brightness
Color
Picture
Sharpness
Tint
6
1
3
5
TV Menu
Picture
Sound
Features
Install
Install
Language
System
Tuner Mode
Auto Program
Channel Edit
Fine Tune
Install
Language
System
Tuner Mode
Auto Program
Channel Edit
Fine Tune
Tuner Mode Auto
Tuner Mode Antenna
Language
System
Tuner Mode
Auto Program
Channel Edit
English
Cable
OR
OR
Page 7
HOW TO USE THE INSTALLATION FEATURES
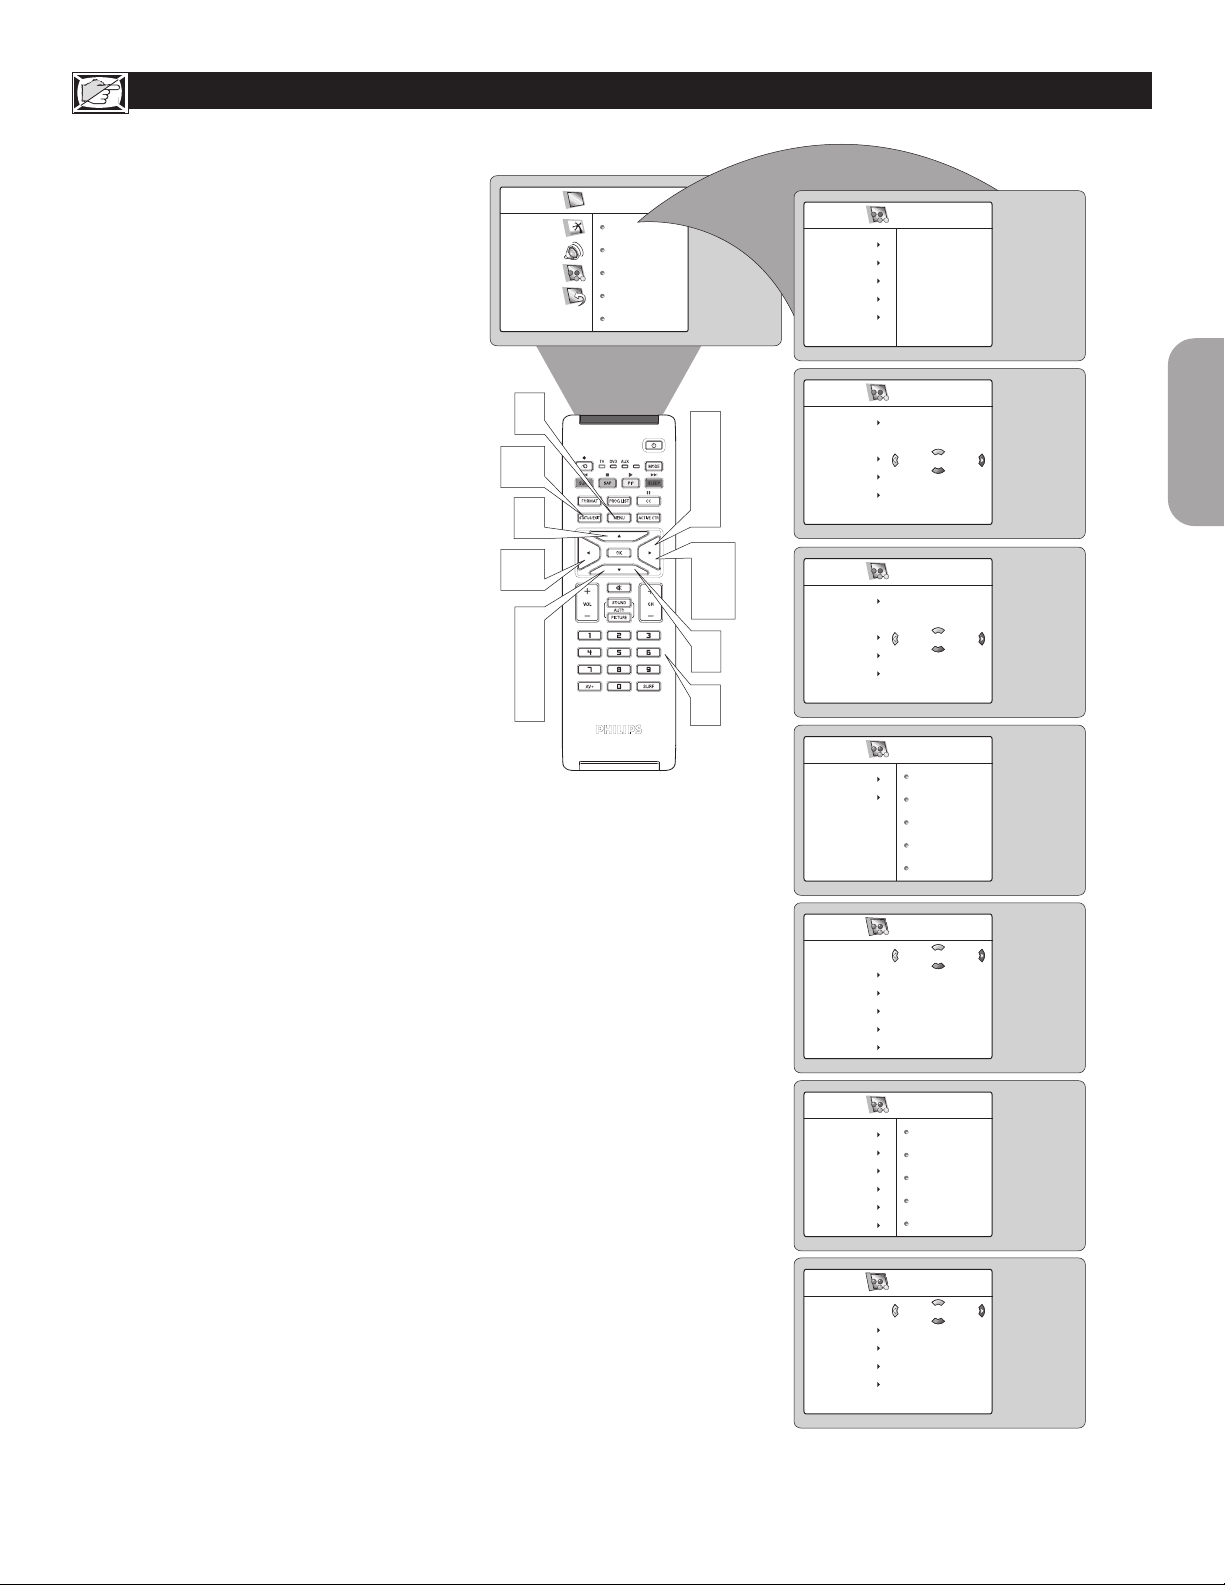
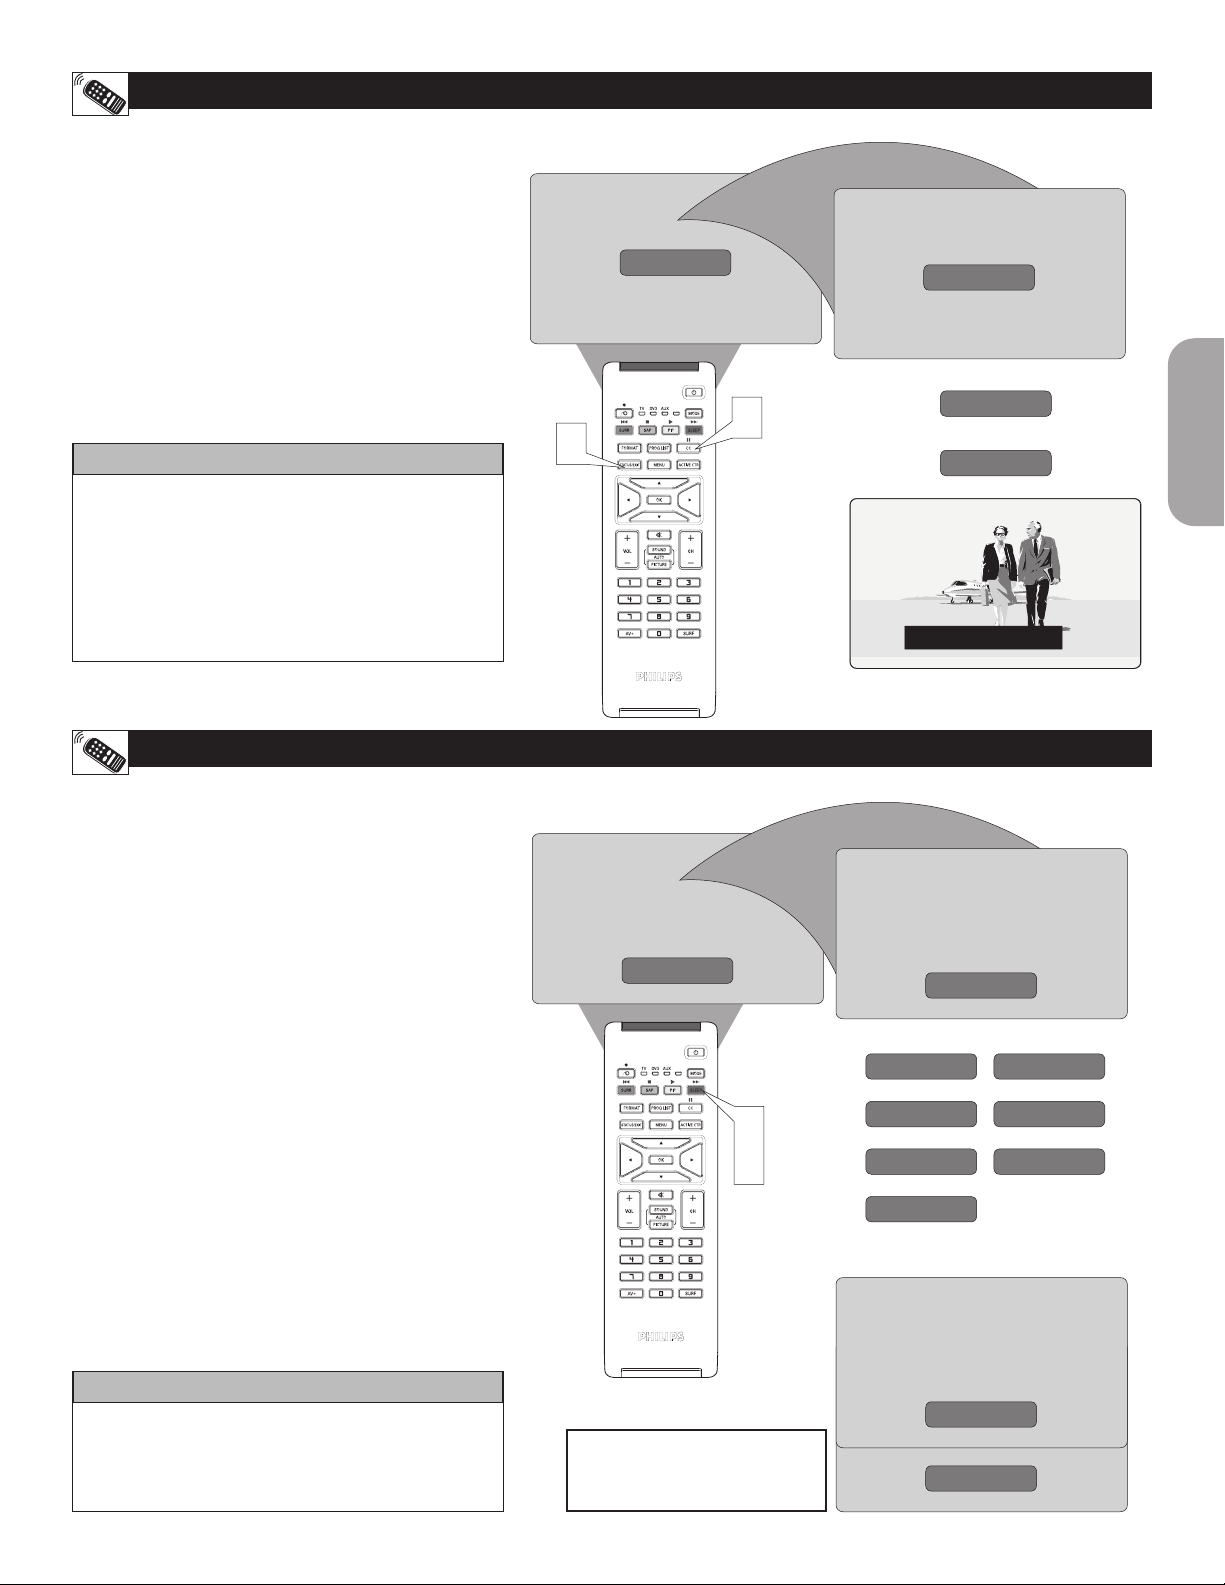
AUTO PROGRAM
our TV can automatically set itself for local area (or
Y
cable TV) channels. is makes it easy for you to
select only the TV stations in your area by pressing the
CHANNEL (+) or (–) button.
Press the MENU button on the remote control to
1
show the onscreen menu.
Press the CURSOR DOWN button repeatedly
2
until Install is highlighted.
Press the CURSOR RIGHT button to enter the
3
4
5
6
After you’ve run Auto Program, check out the
results. Press the CHANNEL (+) or (–) button and
see which channels you can select.
Remember, an antenna or cable TV signal must first
be connected to your TV, see Quick-Use Guide for
making connections.
menu. Language will be highlighted.
Install
Press the CURSOR DOWN button repeatedly
until Auto Program is selected. “Start ?” will
appear.
Press the CURSOR RIGHT button to start the
Auto Programming process.
Press the STATUS/EXIT button to remove
the menu from the screen when the Auto
programming process has finished.
HELPFUL HINT
TV Menu
Picture
Sound
Features
Install
6
2
4
Brightness
Color
Picture
Sharpness
Tint
1
3
5
TV Menu
Picture
Sound
Features
Install
Install
Language
System
Tuner Mode
Auto Program
Channel Edit
Fine Tune
Auto Program
Channel
Language
System
Tuner Mode
Auto Program
Channel Edit
Start ?
English
8
CHANNEL EDIT
hannel Edit makes it easy for you to add or delete
C
channels from the list of channels stored in the TV’s
memory.
Press the MENU button on the remote control to
1
show the onscreen menu.
Press the CURSOR DOWN button repeatedly
2
until Install is highlighted.
Press the CURSOR RIGHT button to enter the
3
Install menu. Language will be highlighted.
Press the CURSOR DOWN button repeatedly
4
until Channel Edit is selected.
Press the CURSOR RIGHT button to enter the
5
Channel Edit menu. Channel will be highlighted.
Press the CURSOR RIGHT or CURSOR LEFT
6
buttons to scroll through the list of available
channels, you can also press the CH+ or CH- to
scroll through the list of channels. Or, press the
numbered buttons to select a specific numbered
channel.
Press the CURSOR DOWN button to select
7
Skipped while you are tuned to the channel to be
skipped.
Press the CURSOR LEFT or CURSOR RIGHT
8
button to select On to activate the skipping of a
channel. Or, select Off, to deactivate the skipping
of a channel.
Press the STATUS/EXIT button to remove the
9
onscreen menu from the screen.
TV Menu
Picture
Sound
Features
Install
9
6
8
2
4
7
Brightness
Color
Picture
Sharpness
Tint
1
3
TV Menu
Picture
Sound
Features
Install
Install
Language
System
Tuner Mode
Auto Program
Channel Edit
Fine Tune
Channel Edit
Channel
Skipped
Language
System
Tuner Mode
Auto Program
Channel Edit
Channel
Skipped
2
5
6
8
7
Channel Edit
Channel
Skipped
On
Page 8

HOW TO USE THE INSTALLATION FEATURES
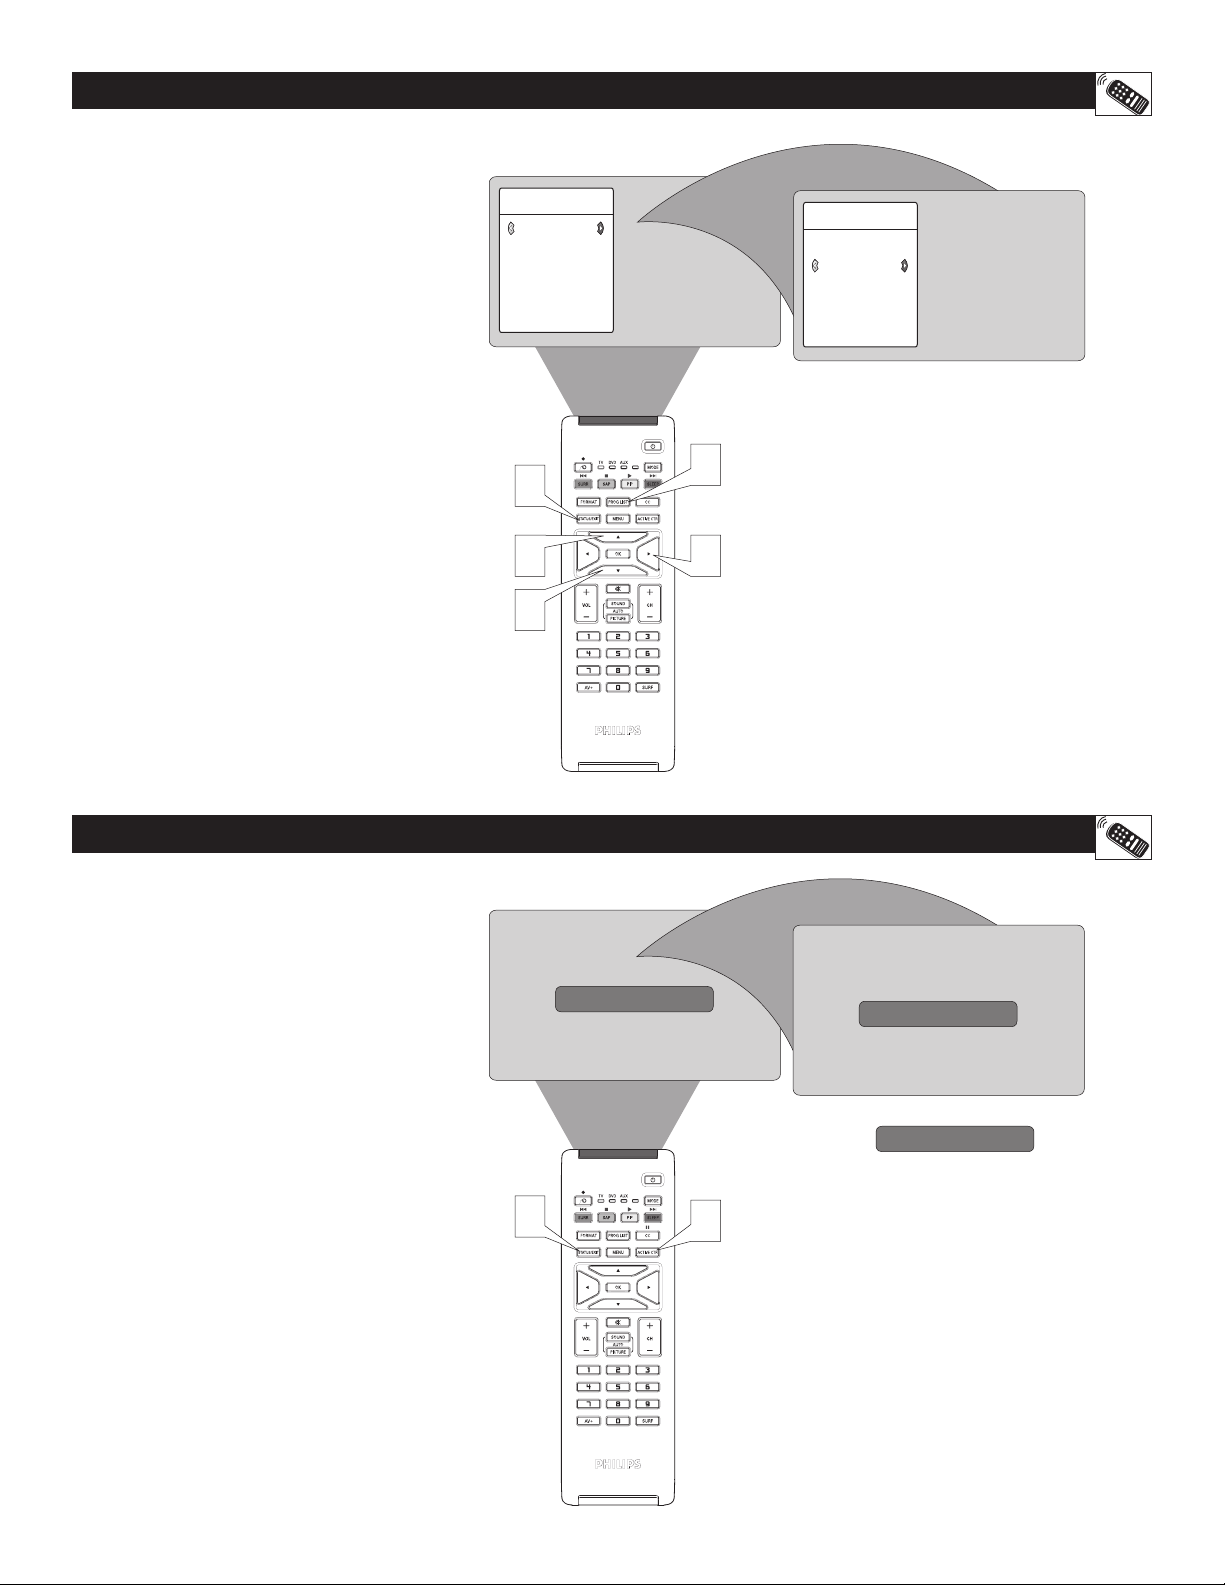
SELECTING THE SYSTEM
he System feature allows you to select the desired TV
T
System. If Auto is selected, the respective system will
automatically be selected according to the transmission
system. Select appropriate system if the reception is poor
when Auto is selected.
Press the MENU button on the remote control to
1
show the onscreen menu.
Press the CURSOR DOWN button repeatedly
2
until Install is highlighted.
Press the CURSOR RIGHT button to enter the
3
4
5
6
menu. Language will be highlighted.
Install
Press the CURSOR DOWN button until System
is selected.
Press the CURSOR RIGHT button to select the
System (Auto, NTSC, PAL-M or PAL-N) of your
choice.
Press the STATUS/EXIT button to remove the
menu from the screen.
TV Menu
Picture
Sound
Features
Install
6
2
4
Brightness
Color
Picture
Sharpness
Tint
1
3
5
TV Menu
Picture
Sound
Features
Install
Install
Language
System
Tuner Mode
Auto Program
Channel Edit
Fine Tune
System
System
System
Language
System
Tuner Mode
Auto Program
Channel Edit
Auto
OR
NTSC
OR
PAL-M
OR
PAL-N
FINE TUNE
his feature allows you to adjust the picture reception in
T
area of weak reception.
Press the MENU button on the remote control
1
to show the onscreen menu.
Press the CURSOR DOWN button repeatedly
2
until Install is highlighted.
Press the CURSOR RIGHT button to enter the
3
Install menu. Language will be highlighted.
Press the CURSOR DOWN button repeatedly
4
until Fine Tune is selected.
Press the CURSOR RIGHT button to enter the
5
Fine Tune menu.
Press the CURSOR RIGHT or CURSOR LEFT
6
buttons to fine tune.
Press the STATUS/EXIT button to remove the
7
onscreen menu from the screen.
TV Menu
Picture
Sound
Features
Install
7
6
2
4
Brightness
Color
Picture
Sharpness
Tint
1
3
5
6
TV Menu
Picture
Sound
Features
Install
Install
Language
System
Tuner Mode
Auto Program
Channel Edit
Fine Tune
Language
System
Tuner Mode
Auto Program
Channel Edit
2
8
Page 9
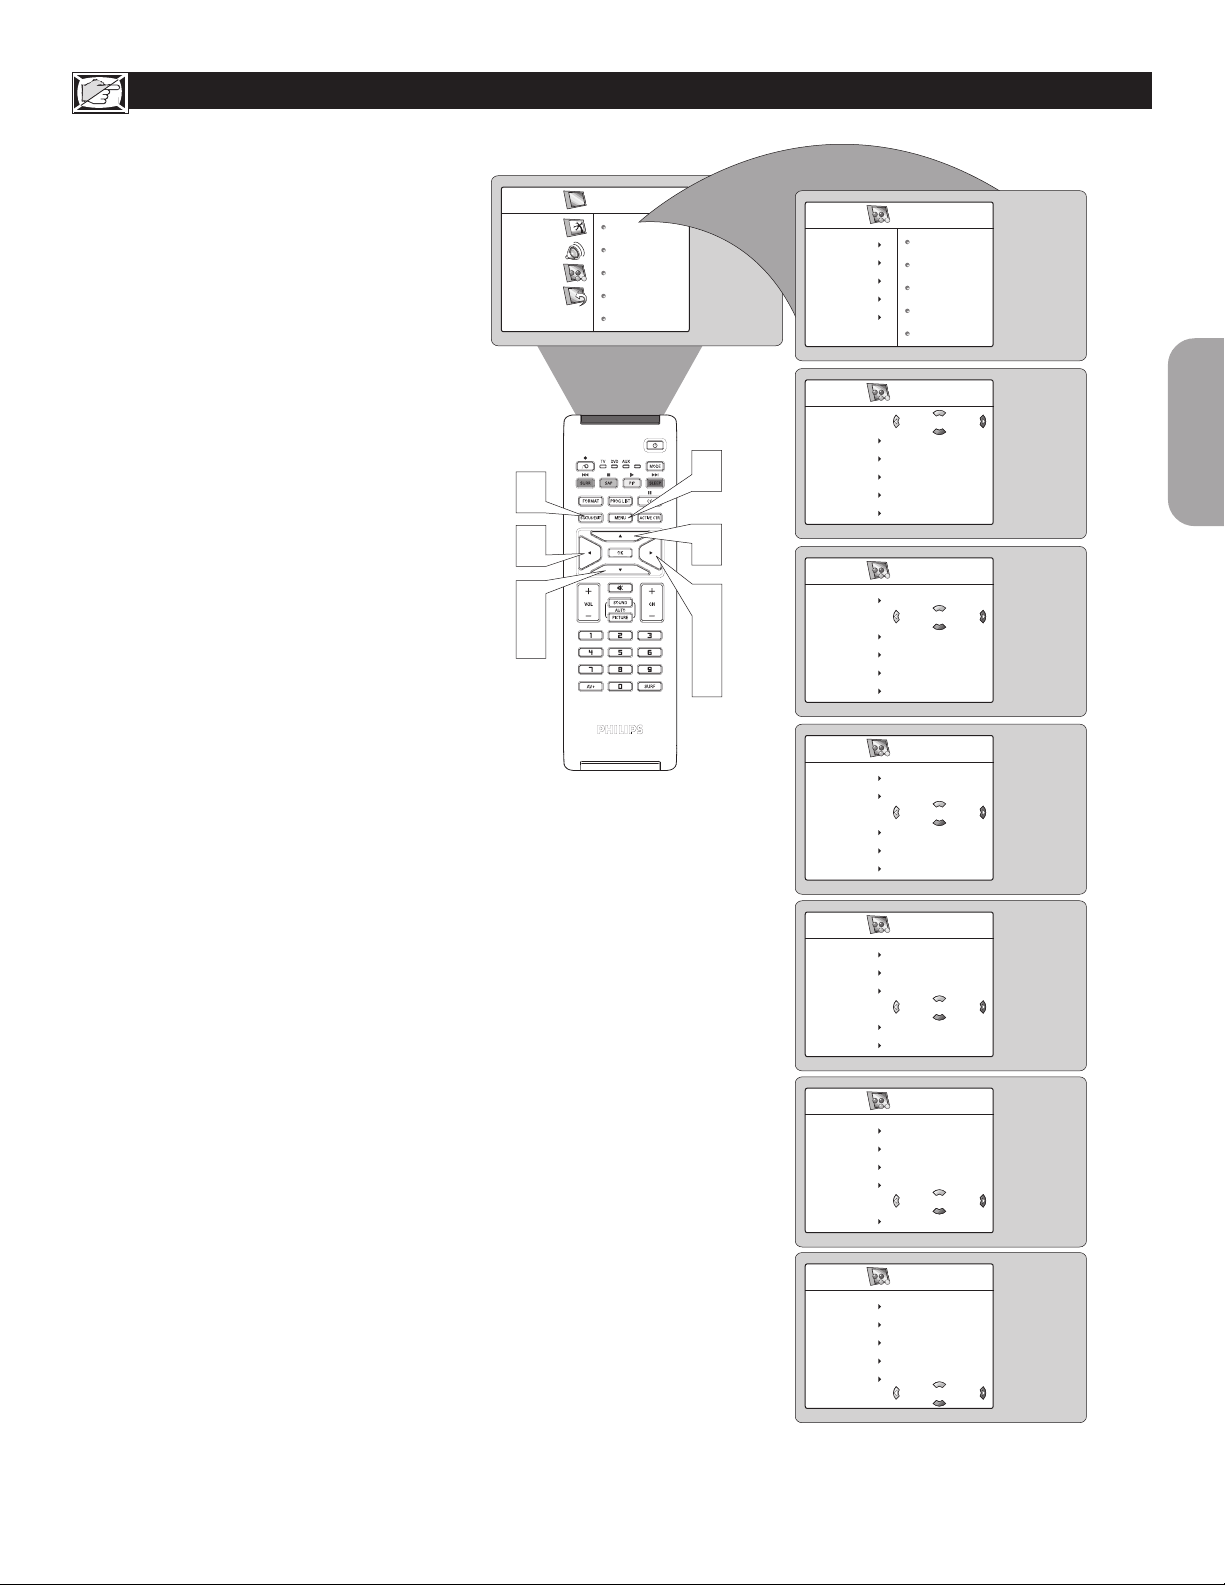
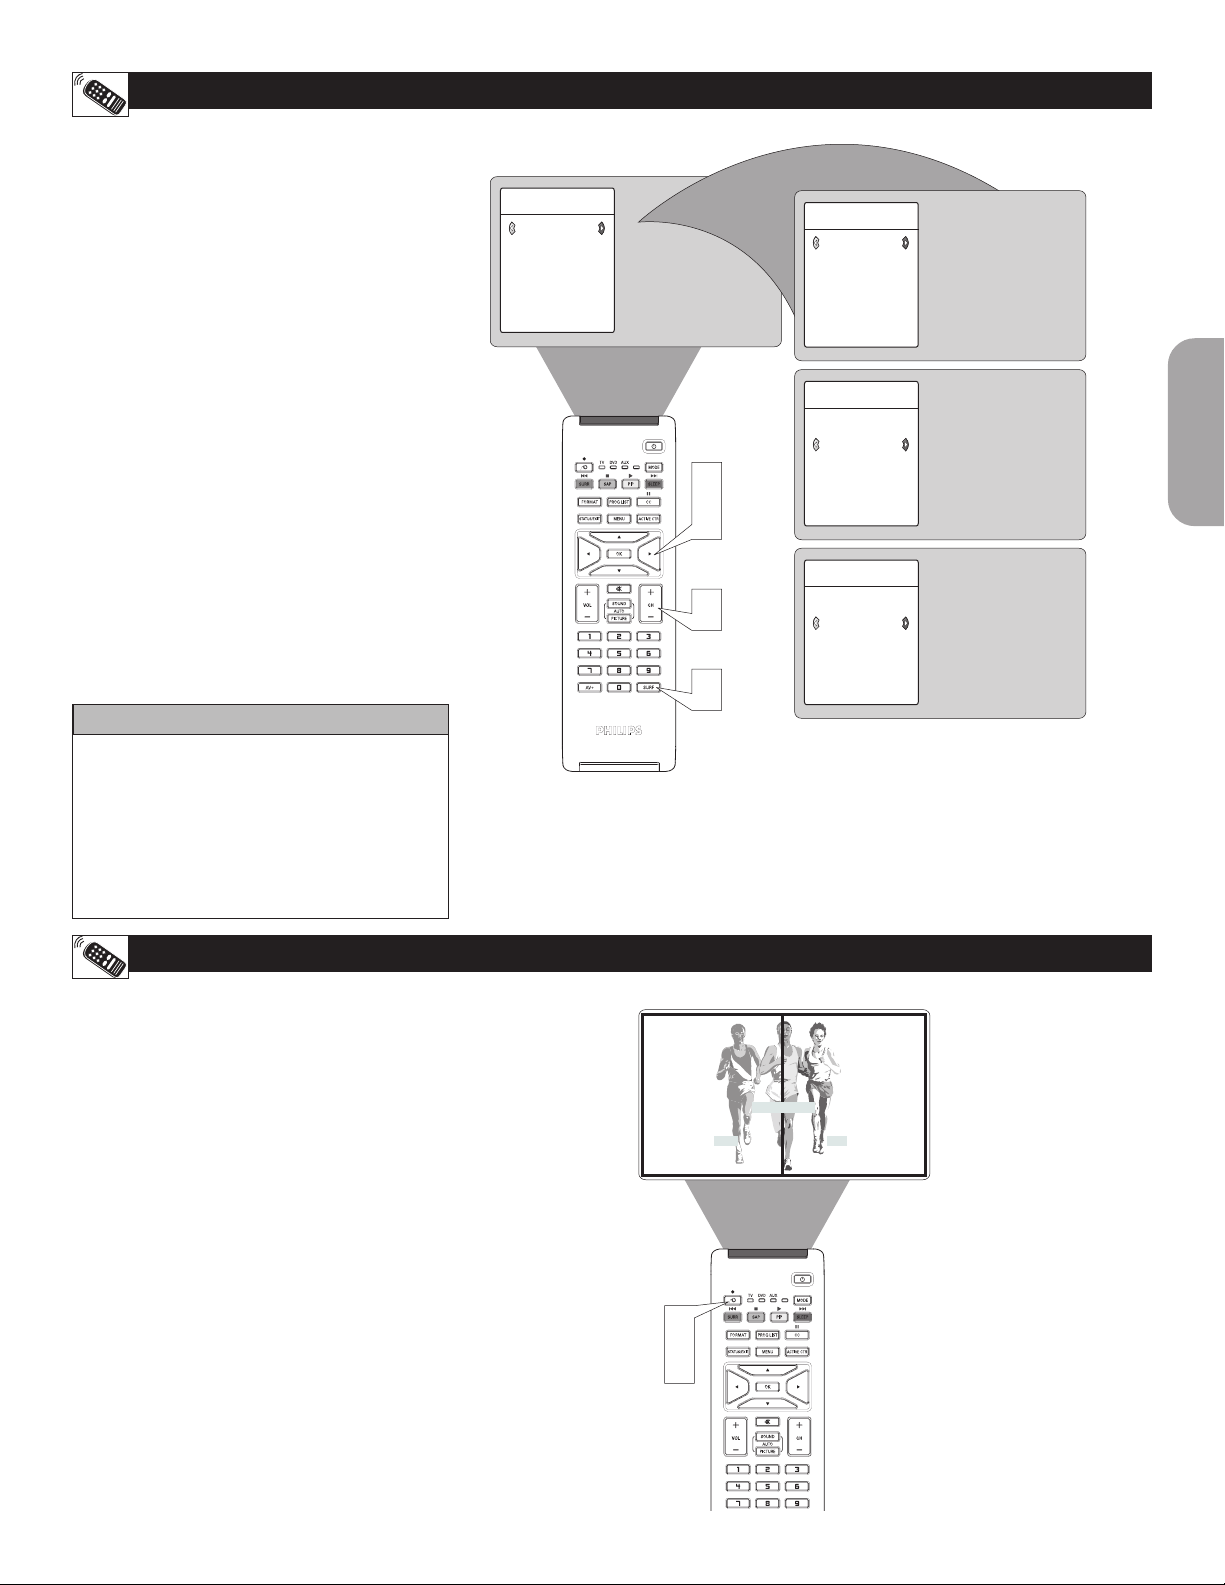
HOW TO USE THE PICTURE ADJUSTMENT CONTROLS
o adjust your TV picture controls, select a
T
channel and follow these steps.
Press the MENU button on the remote
1
control to show the onscreen menu.
Press the CURSOR RIGHT button to
2
enter the Picture menu. Brightness
highlighted.
Press the CURSOR UP or CURSOR
3
DOWN button to select the picture
adjustment you want to change:
Brightness, Color, Picture, Sharpness,
or Color Temp.
Tint,
Press the CURSOR LEFT or CURSOR
4
RIGHT button to adjust the selected
control.
Press the STATUS/EXIT button when
5
finished to remove the menu from the
screen.
will be
TV Menu
Picture
Sound
Features
Install
5
3
4
3
Brightness
Color
Picture
Sharpness
Tint
1
2
4
Picture
Brightness
Color
Picture
Sharpness
Tint
Color Temp.
Picture
Brightness
Color
Picture
Sharpness
Tint
Color Temp.
Picture
Brightness
Color
Picture
Sharpness
Tint
Color Temp.
48
38
English
42
HELPFUL HINT
Remember, when the bar scale is centered
, the control settings are at
normal, mid-range levels.
NOTE: e Sharpness and Tint Controls will
not be available for adjustments when tuned
to the CVI Inputs.
Brightness – adds or subtracts light from the
darkest part of the picture.
Color – adds or eliminates color.
Picture – improves the detail of the lightest
parts of the picture.
Sharpness – improves the detail in the
picture.
Tint – adjusts the picture to obtain natural
skin tones.
Color Temp. - offers NORMAL, COOL,
or WARM picture preferences. (Normal
will keep the whites, white; Cool will make
the whites, bluish; and Warm will make the
whites, reddish.)
Picture
Brightness
Color
Picture
Sharpness
Tint
Color Temp.
Picture
Brightness
Color
Picture
Sharpness
Tint
Color Temp.
Picture
Brightness
Color
Picture
Sharpness
Tint
Color Temp.
8
30
Normal
9
Page 10
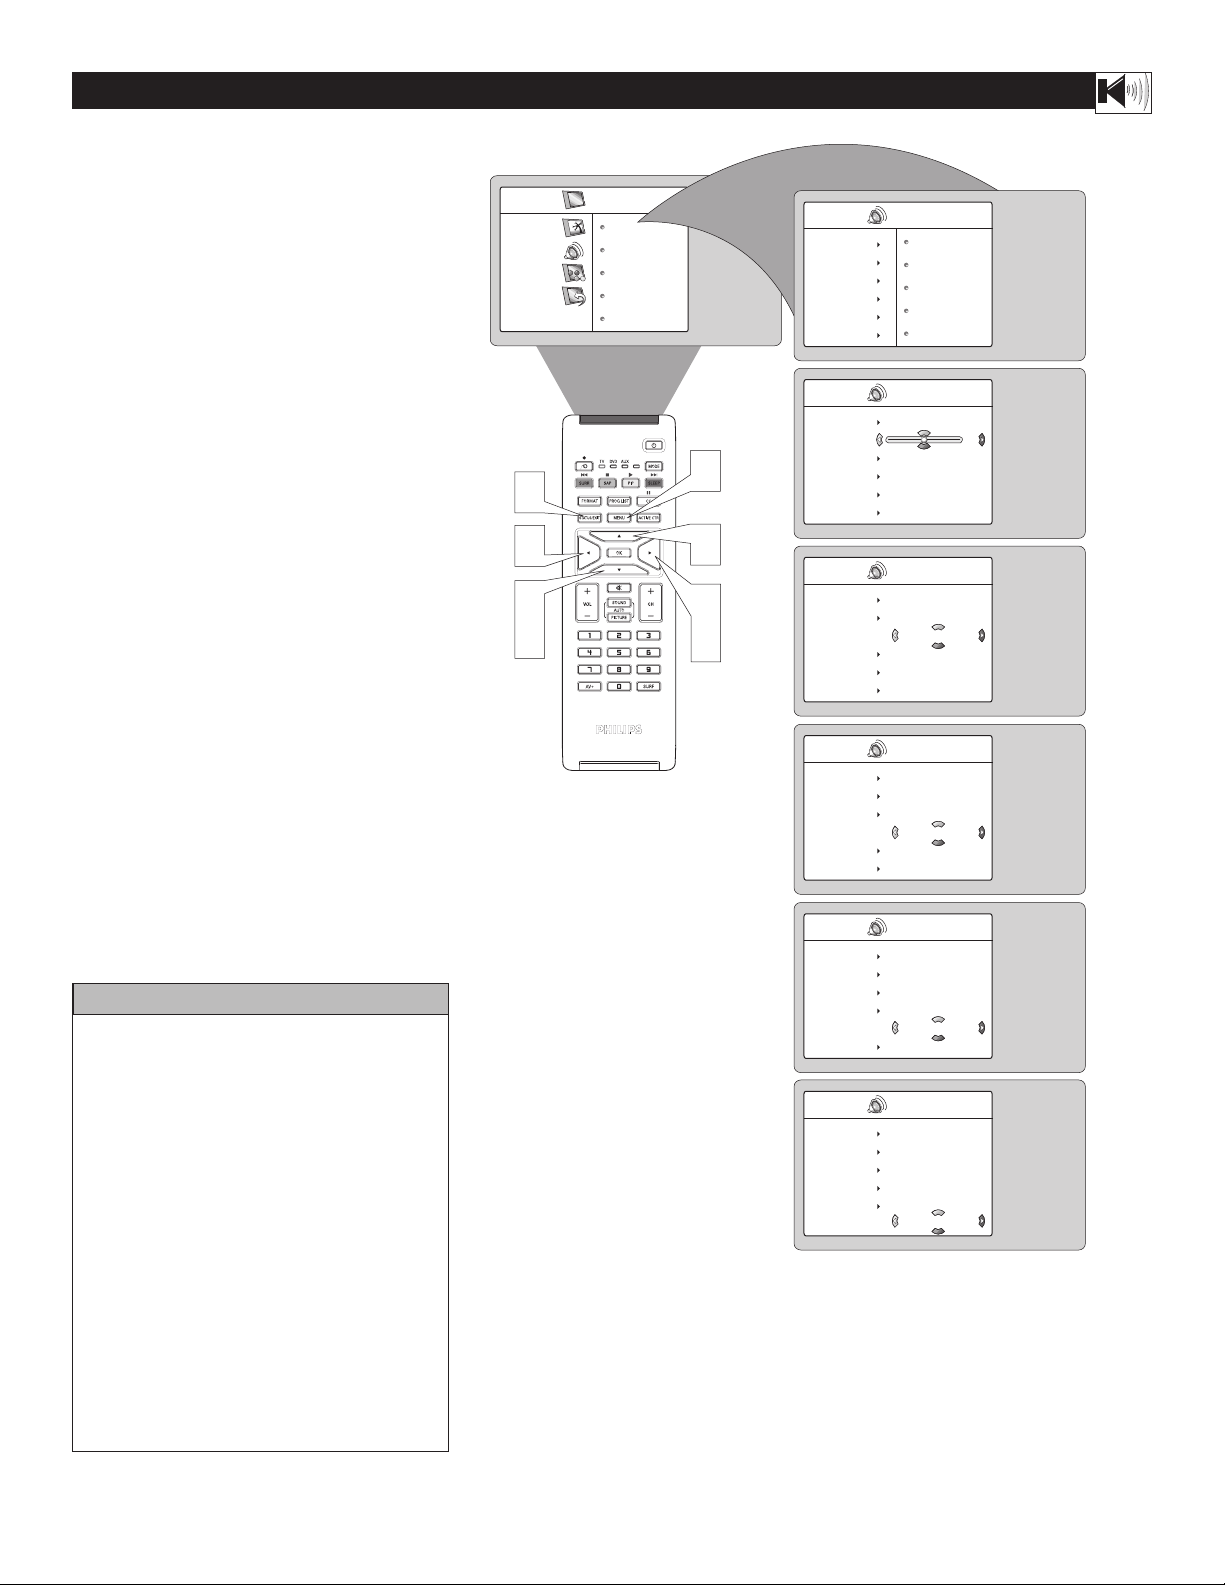
HOW TO USE THE SOUND ADJUSTMENT CONTROLS
o adjust your TV sound controls, select a
T
channel and follow these steps.
Press the MENU button on the remote
1
control to show the onscreen menu. Picture
will be highlighted.
Press the CURSOR DOWN button to
2
highlight Sound.
Press the CURSOR RIGHT button to
3
enter the sound menu.
Press the CURSOR UP or CURSOR
4
DOWN button
adjustment you want to change: Equalizer,
Balance, AVL, Dolby Virtual, SAP,
.
Sound
Press the CURSOR LEFT or CURSOR
5
RIGHT button to adjust the selected
control.
Press the STATUS/EXIT button when
6
finished to remove the menu from the
screen.
to select the sound
or
TV Menu
Picture
Sound
Features
Install
6
5
2
4
Equalizer
Balance
AVL
Dolby Virtual
SAP
1
4
3
5
Sound
Equalizer
Balance
AVL
Dolby Virtual
SAP
Sound
Sound
Equalizer
Balance
AVL
Dolby Virtual
SAP
Sound
Sound
Equalizer
Balance
AVL
Dolby Virtual
SAP
Sound
120 Hz
500 Hz
1500 Hz
5 KHz
10 KHz
0
On
HELPFUL HINT
Equalizer – adjusts the sound tones. Select
120Hz to 10KHz.
Balance – adjusts the level of sound coming
from the left and right speakers.
AVL (Auto Volume Leveler) – when On,
AVL will level out the sound being heard
when sudden changes in volume occur during
commercial breaks or channel changes.
Dolby Virtual – adds greater depth and
dimension to TV sound. Select from Dolby
Virtual or Stereo sound (if Stereo) or Spatial
or Mono (if Mono).
SAP (Secondary Audio Programming)
– sent as a third audio channel, a SAP signal
can be heard apart from the current TV
program sound. Note: If SAP is not available,
“No SAP” will appear on the screen.
Sound – select from Stereo or Mono.
Sound
Equalizer
Balance
AVL
Dolby Virtual
SAP
Sound
Sound
Equalizer
Balance
AVL
Dolby Virtual
SAP
Sound
Sound
Equalizer
Balance
AVL
Dolby Virtual
SAP
Sound
Dolby Virtual
On
Stereo
10
Page 11
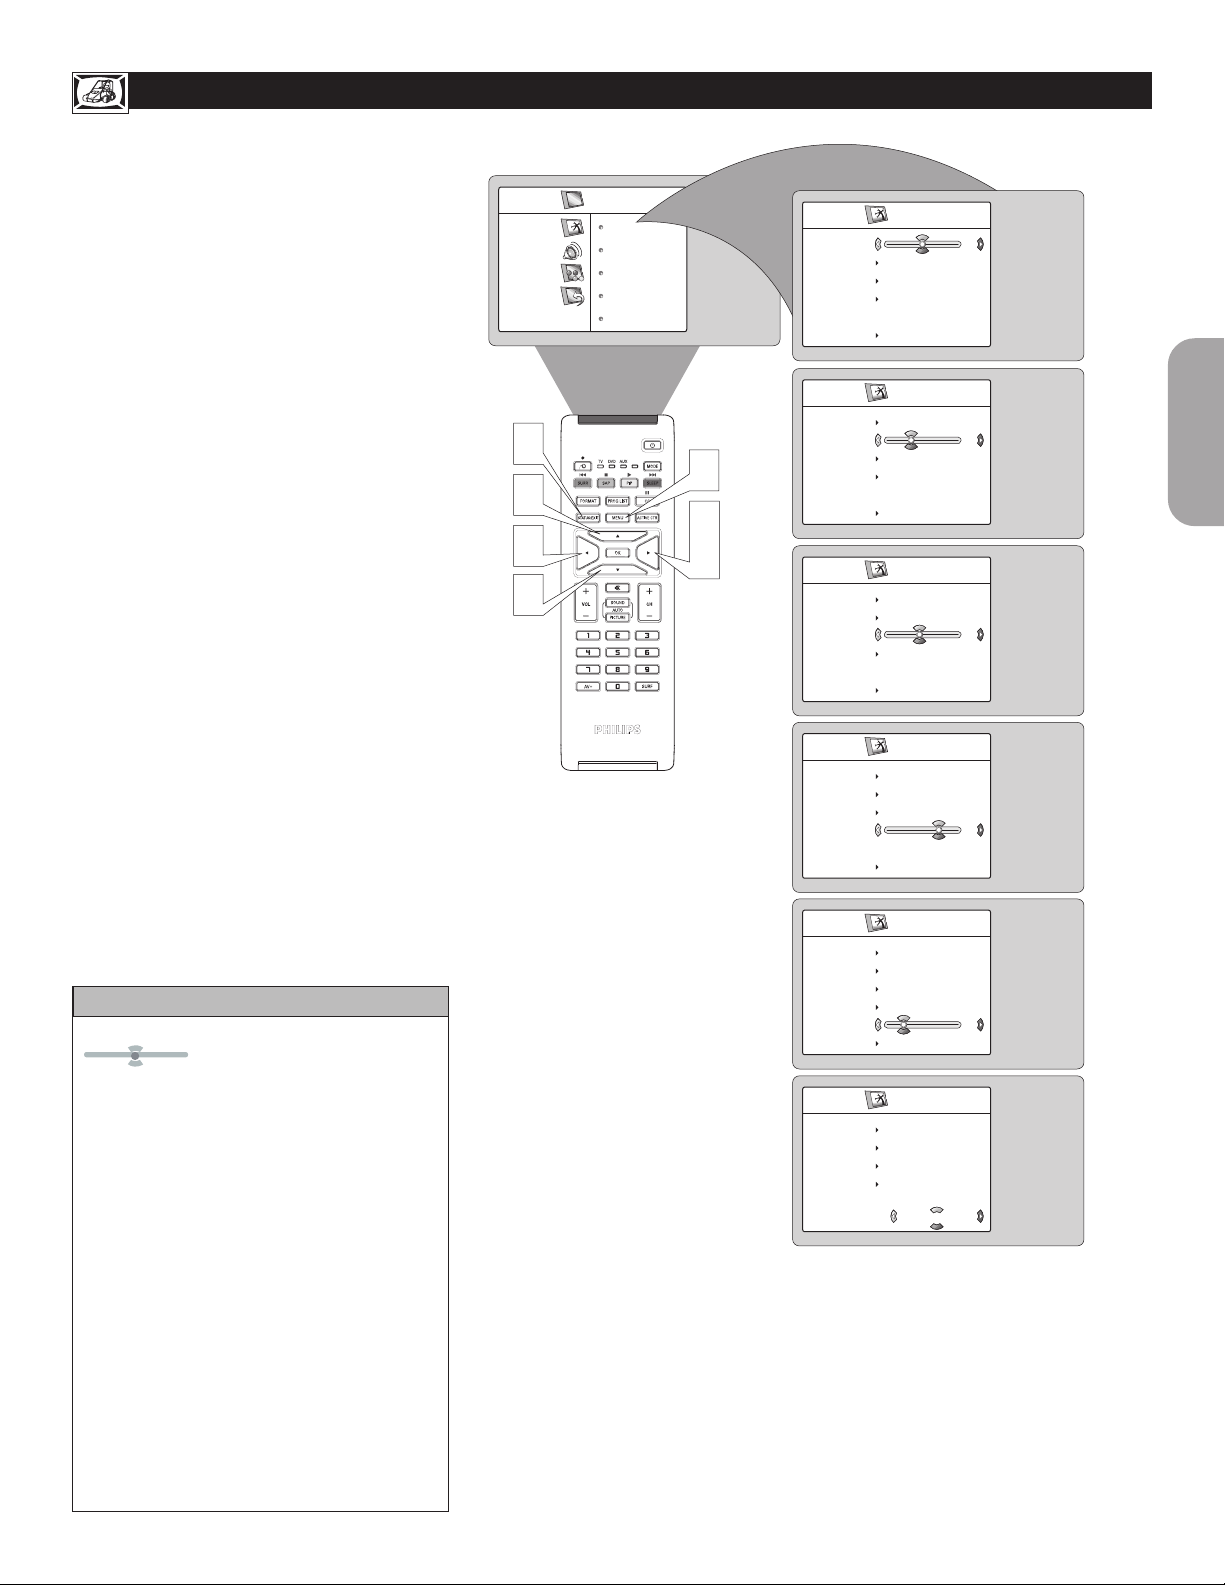
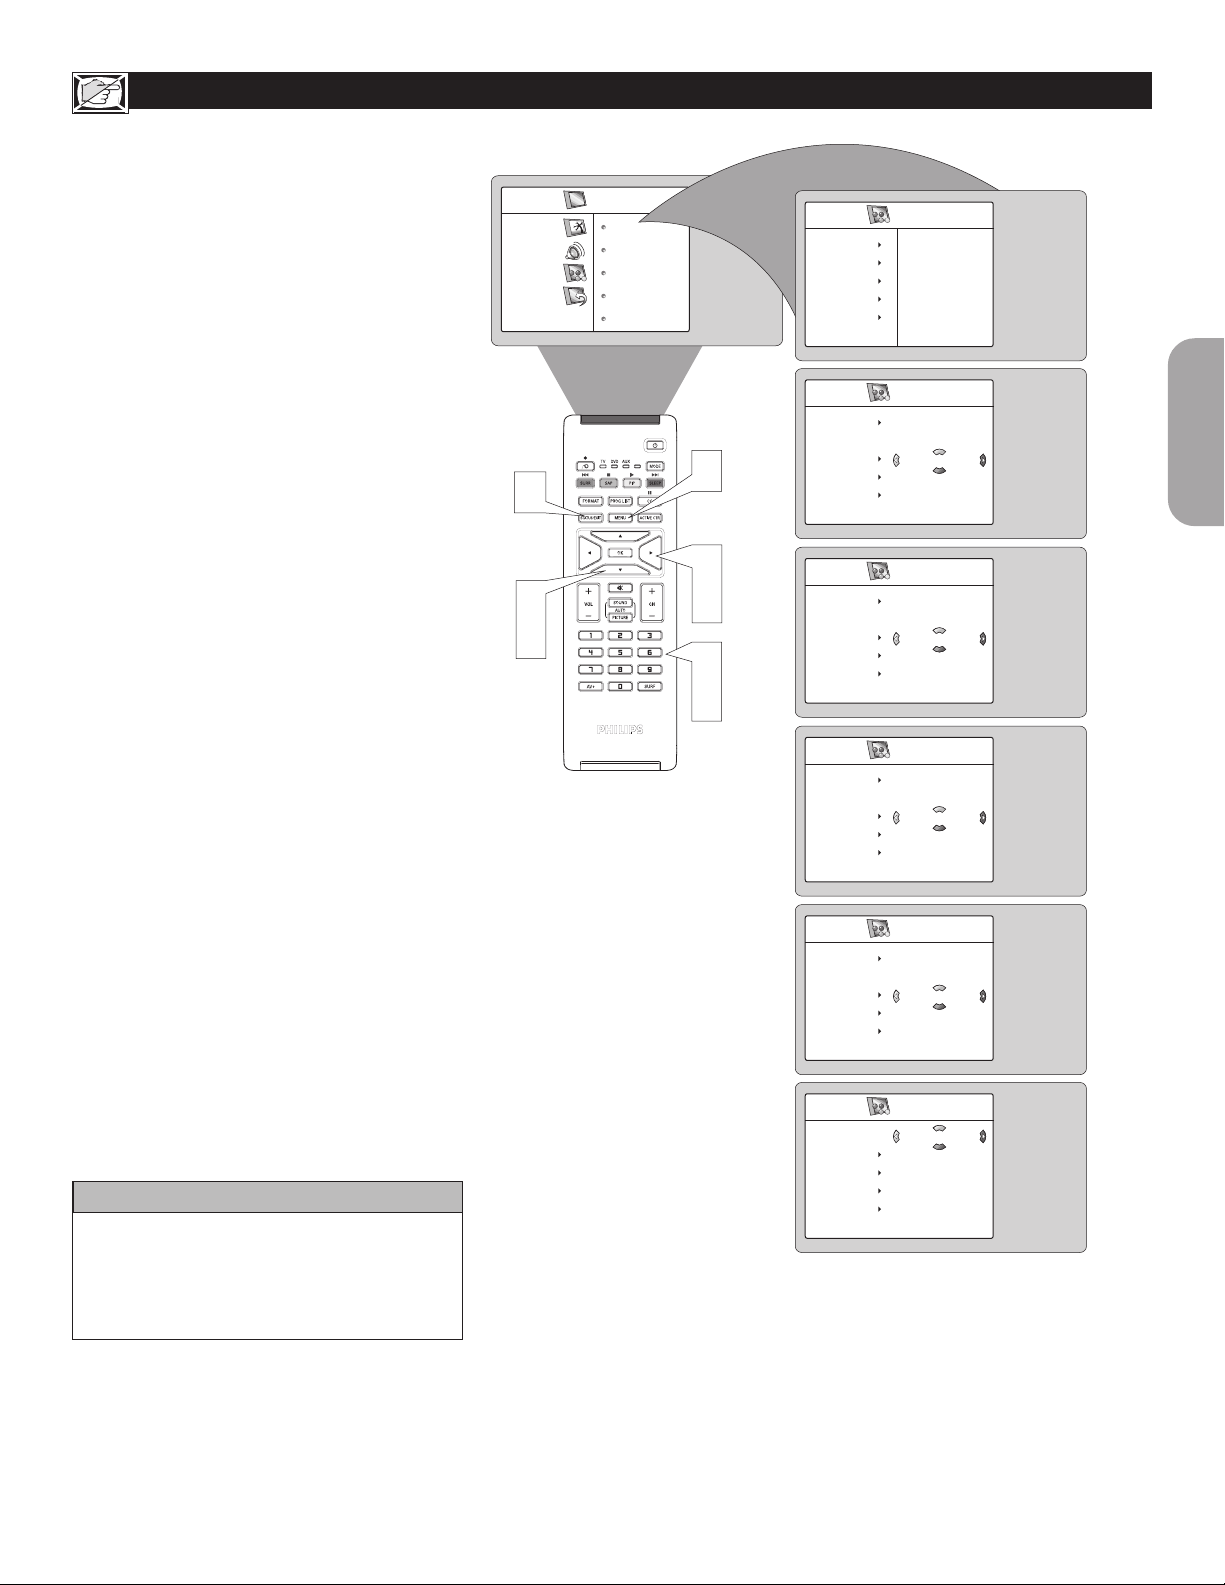
HOW TO USE THE TIMER MENU CONTROLS
our television comes with an onscreen clock.
Y
e TV can also be set to turn on or off at a
specific time and tune to a specific channel when it
powers itself on.
Press the MENU button on the remote
1
control to show the onscreen menu.
Press the CURSOR DOWN button to
2
highlight Features.
Press the CURSOR RIGHT button to
3
enter the Features menu. Timer
highlighted.
Press the CURSOR RIGHT button to
4
enter the Timer menu.
Press the CURSOR UP or CURSOR
5
DOWN button
to highlight one of the
Timer controls. ese controls are Time,
Start Time, Stop Time, Program No.,
Activate
and Display.
Press the CURSOR RIGHT or CURSOR
6
LEFT button to make adjustments or to
toggle the On or Off options.
Time: Enter the current time using the
Numbered buttons. Use the CURSOR
RIGHT to move to the AM/PM slot and
use the CURSOR LEFT or CURSOR
RIGHT buttons to toggle the AM and PM
setting.
Start Time: Use the numbered buttons to
enter the time you want the TV to turn
itself On. Use the CURSOR RIGHT and
CURSOR LEFT buttons to toggle the AM
and PM setting.
Stop Time: Use the numbered buttons to
enter the time you want the TV to turn
itself Off. Use the CURSOR RIGHT and
CURSOR LEFT buttons to toggle the AM
and PM setting.
Program No.: Use the NUMBERED but-
tons or the CH + or CH- buttons to enter
the desired start-up channel. You can also
press the CURSOR RIGHT or CURSOR
LEFT buttons to enter the desired start-up
channel.
Activate: Set the timer to turn itself On
(Once or Daily) or Off. Press the CURSOR
RIGHT and CURSOR LEFT buttons to
select Once, Daily, or Off.
Display: Press the CURSOR RIGHT or
CURSOR LEFT to toggle between On
or Off. If On is selected, the time will be
displayed all the time when the TV is on.
When Off is selected, the time will only
appear when the STATUS/EXIT button is
pressed.
Press the STATUS/EXIT button to
7
remove the menu from the screen.
will be
TV Menu
Picture
Sound
Features
Install
7
6
2
5
Timer
AutoLock
Contrast+
DNR
PIP
1
5
3
4
6
Features
Timer
AutoLock
Contrast+
DNR
PIP
Timer
Time
Start Time
Stop Time
Program No.
Activate
Display
Timer
Time
Start Time
Stop Time
Program No.
Activate
Display
Timer
Time
Start Time
Stop Time
Program No.
Activate
Display
Timer
Time
Start Time
Stop Time
Program No.
Activate
Display
Timer
Time
Start Time
Stop Time
Program No.
Activate
Display
Timer
Time
Start Time
Stop Time
Program No.
Activate
Display
Time
Start Time
Stop Time
Program No.
Activate
– – : – – PM
English
– – : – – PM
– – : – – PM
8
Once
On
11
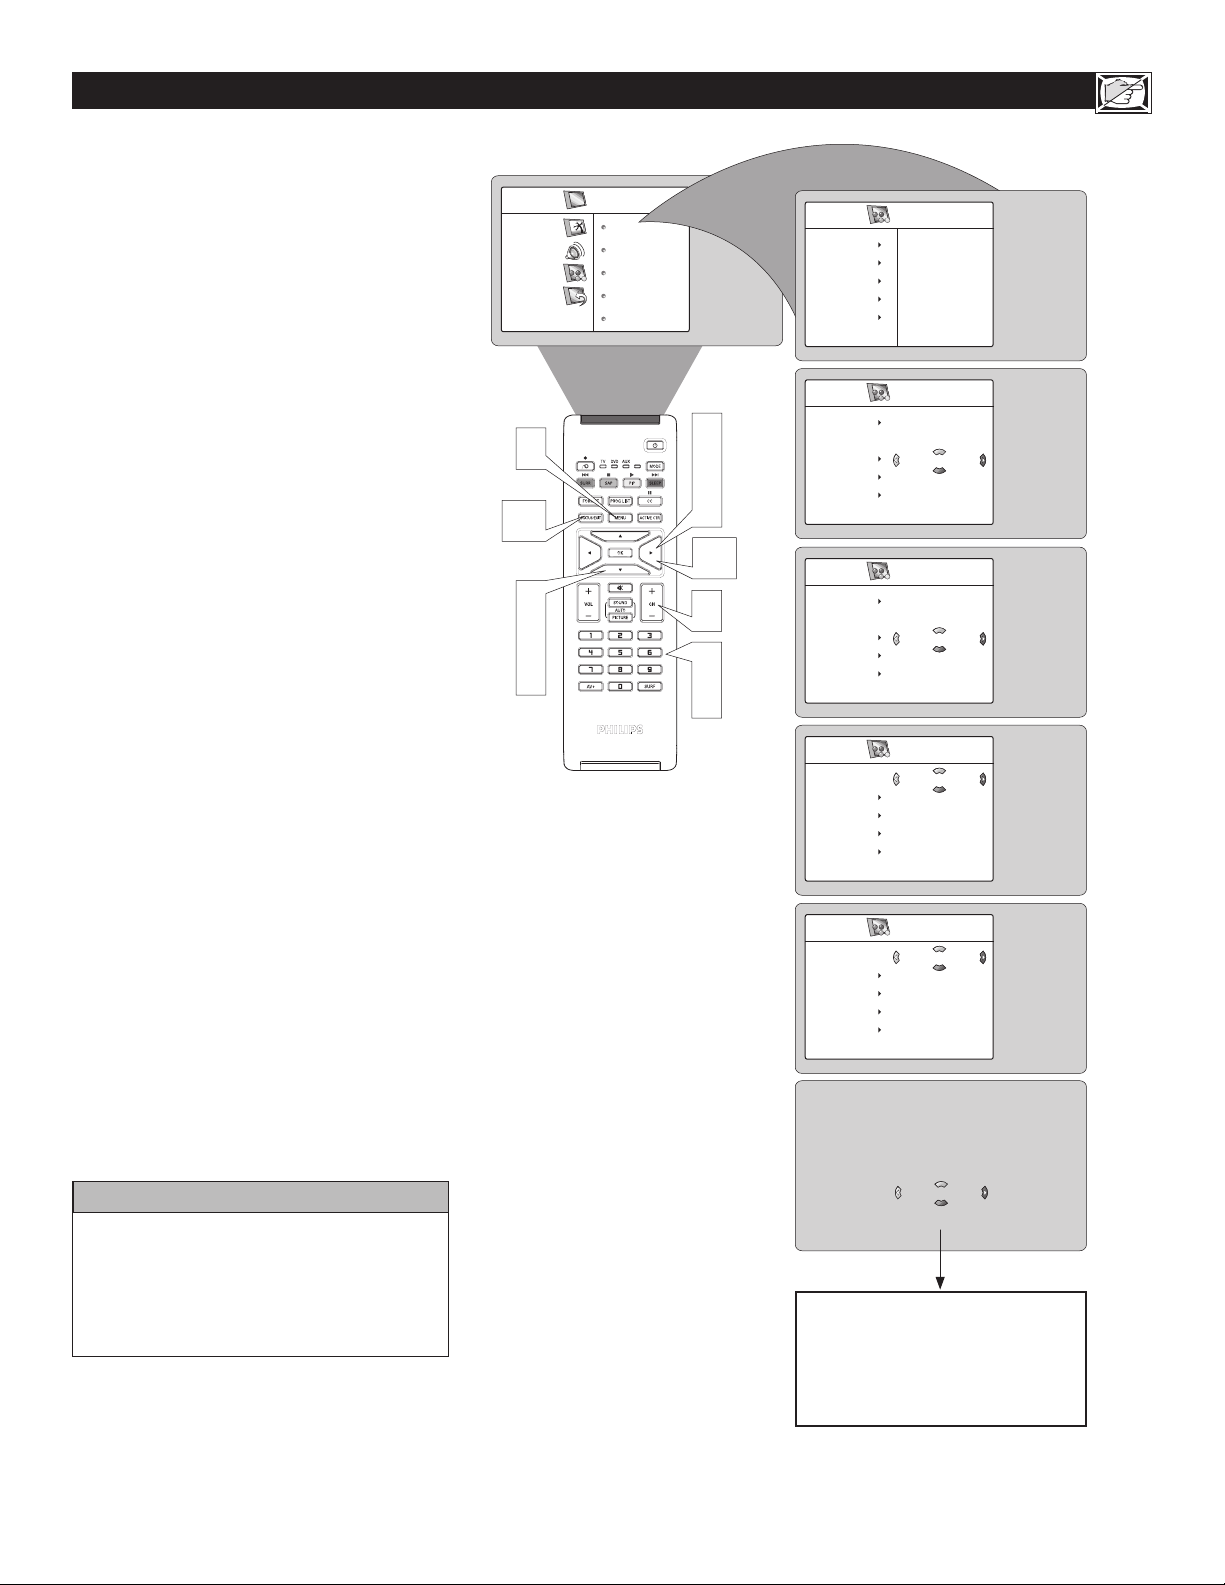
Page 12

UNDERSTANDING THE AUTOLOCK™ CONTROLS
he AutoLock™ feature receives and processes
T
data sent by broadcasters or other program
providers that contain program content advisories.
When programmed by the viewer, a TV with
AutoLock™ can respond to the content advisories
and block program content that may be found
objectionable (such as offensive language, violence,
sexual situations, etc.). is is a great feature to
censor the type of programming children may
watch.
In the AutoLock™ section, you’ll learn how to
block channels and programming that is not
rated, is unrated, or has no rating. You will also
find out how to turn these blocking features
ON or OFF. Following are brief explanations
of some terms and ratings related to the
AutoLock™ feature.
AutoLock™ offers various Blocking Options
from which to choose:
BLOCKING: e BLOCKING control is what
can be thought of as the “master switch” for
AutoLock™. is control affects the settings you
have chosen for blocking programs according
to movie ratings or TV ratings, or for blocking
programs that have no rating or are unrated.
When the BLOCKING control is OFF, the
blocking or censoring of programs is disabled.
When the BLOCKING control is ON, blocking
will occur according to the settings you have
chosen.
NO RATING: ALL programming with no
content advisory data can be blocked if NO
RATING is set to ON.
Programming that has No Rating is not encoded
with any rating information from the MPAA
or the Parental Guidelines. Any programming
could fall into this category.
You also can block individual channels or
block programming
based on ratings of the
MPAA and TV broadcasters. (See a description
of the ratings on this page.)
Movie Rating
G
PG
PG-13
R
NC-17
X
On
MOVIE RATINGS
(MOTION PICTURE ASSOCIATION OF AMERICA)
G: General Audience – All ages
admitted. Most parents would find this
programming suitable for all ages. is
type of programming contains little or no
violence, no strong language, and little or
no sexual dialogue or sexual situations.
PG: Parental Guidance Suggested
is programming contains material that
parents may find unsuitable for younger
children. It may contain one or more
of the following: Moderate violence,
some sexual situations, infrequent coarse
language, or some suggestive dialogue.
PG-13: Parents Strongly Cautioned
– is programming contains material
that parents may find unsuitable for
children under the age of 13. It contains
one or more of the following: violence,
sexual situations, coarse language, or
suggestive dialogue.
R: Restricted – is programming
is specifically designed for adults.
Anyone under the age of 17 should
view this programming only with
an accompanying parent or adult
guardian. It contains one or more of the
following: intense violence; intense sexual
situations; strong, coarse language; or
intensely suggestive dialogue.
NC-17: No one under the age of 17 will
be admitted – is type of programming
should be viewed by adults only. It
contains graphic violence; explicit sex; or
crude, indecent language.
X: Adults Only – is type of
programming contains one or more of
the following: very graphic violence, very
graphic and explicit or indecent sexual
acts, very coarse and intensely suggestive
language.
–
TV Rating
TV-Y
TV-Y7
TV-G
TV-PG
TV-14
TV-MA
On
TV PARENTAL GUIDELINES
(TV BROADCASTERS)
TV-Y: (All children – is program is
designed to be appropriate for all children.
Designed for a very young audience,
including children ages 2-6. is type of
programming is not expected to frighten
younger children.
(Directed to Older Children
TV-Y7:
– is program is designed for children ages
7 and above.) It may be more appropriate
for children who have acquired the
development skills needed to distinguish
between make-believe and reality. is
programming may include mild fantasy
and comic violence (FV).
(General Audience – Most parents
TV-G:
would find this program suitable for all
ages.) is type of programming contains
little or no violence, no strong language,
and little or no sexual dialogue or sexual
situations.
TV-PG:
– is program contains material that
parents may find unsuitable for younger
children.) is type of programming
contains one or more of the following:
Moderate violence (V), some sexual
situations (S), infrequent coarse language
(L), or some suggestive dialogue (D).
TV-14:
– is program contains some material
that many parents would find unsuitable
for children under 14 years of age.) is
type of programming contains one or
more of the following: intense violence
(V); intense sexual situations (S);
strong, coarse language (L); or intensely
suggestive dialogue (D).
TV-MA:
program is specifically designed to be viewed
by adults and therefore may be unsuitable
for children under 17.) is type of
programming contains one or more
of the following: graphic violence (V);
explicit sexual situations (S); or crude,
indecent language (L).
(Parental Guidance Suggested
(Parents Strongly Cautioned
(Mature Audience Only – is
)
12
Page 13
SETTING UP AN AUTOLOCK™ ACCESS CODE
utoLock TM allows par ents to block out or
A
“censor” any channels they think children
should not watch. A channel blocked by the
AutoLock control cannot be TM viewed until a
correct access code is used to unlock the channel for
viewing. First, let’s set your AutoLock access code.
Press the MENU button on the remote
1
control to show the onscreen menu.
Press the CURSOR DOWN button to
2
highlight Features.
Press the CURSOR RIGHT button to
3
enter the Features menu.
Press the CURSOR DOWN button to
4
highlight the AutoLock control.
Press the CURSOR RIGHT button to
5
enter the AutoLock mode. “Access Code
- - - -” will appear.
Using the numbered buttons on the
6
remote control, enter the access code. If
you do not know your code,
default code. After you have entered the
code once, Incorrect will appear on the
screen. Enter the code a second time, It will
then prompt you to change code.
Using the numbered buttons on the
7
remote control, enter the access code
of your choice. Enter the code a second
time to confirm it. Once the new code is
confirmed, the AutoLock menu will appear.
You can proceed to access the functions
available in the menu.
If you do not wish to access the other
8
fuctions, press the STATUS/EXIT button
to remove the menu from the screen.
0,7,1,1 is the
TV Menu
Picture
Sound
Features
Install
8
2
4
Timer
AutoLock
Contrast+
DNR
PIP
1
3
5
6
7
Features
Timer
AutoLock
Contrast+
DNR
Features
Timer
AutoLock
Contrast+
DNR
Features
Timer
AutoLock
Contrast+
DNR
Features
Timer
AutoLock
Contrast+
DNR
Features
Timer
AutoLock
Contrast+
DNR
PIP
PIP
PIP
PIP
PIP
Access Code
* * * *
Incorrect
Change Code
* * * *
Correct
Change Code
* * * *
Confirm Code
* * * *
Confirmed
English
HELPFUL HINT
Remember that 0711 is the default AutoLock™
code. If your access code has been changed by
someone other than you (a child, for example)
or you have forgotten the code, you can always
get in by inputting the default code.
NOTE TO PARENTS: It isn’t possible for your
child to unblock a channel without knowing your
access code or changing it to a new one. If your
code has been changed without your knowledge,
then you will become aware that blocked channels
may have been viewed.
AutoLock
Block Channel
Change Code
Clear All
Block All
Movie Rating
13
Off
Page 14
HOW TO BLOCK CHANNELS USING AUTOLOCK™
fter your personal access code has been set (see
A
the previous page), you are ready to select the
channels or inputs you want to block out or censor.
Press the MENU button on the remote
1
control to show the onscreen menu.
Press the CURSOR DOWN button to
2
highlight Features.
Press the CURSOR RIGHT button to
3
display the Features menu.
Press the CURSOR DOWN button to
4
highlight AutoLock™.
Press the CURSOR RIGHT button again
5
display the Acess Code menu prompt.
Enter your four-digit ACCESS CODE.
6
Correct will flash very briefly and the
AutoLock™ will be accessible.
You can choose to block individual
7
channels or all channels at the same
time. For individual channels, press the
CURSOR RIGHT to select On option to
activate the blocking of channel.
Using the numbered buttons or the CH+
8
or CH- buttons enter the channel you wish
to lock.
Repeat step 7 for any channels you want to lock.
To block all channels, press the CURSOR
9
DOWN button until Block All is selected.
Press the CURSOR RIGHT button to
10
select On to activate the blocking of all
channels. To deactivate the blocking of all
channels, select Off.
Press the STATUS/EXIT button to
11
remove the menu from the screen.
TV Menu
Picture
Features
1
11
2
4
9
Sound
Install
Timer
AutoLock
Contrast+
DNR
PIP
3
5
7
10
8
6
8
Features
Timer
AutoLock
Contrast+
DNR
PIP
Features
Timer
AutoLock
Contrast+
DNR
PIP
Features
Timer
AutoLock
Contrast+
DNR
PIP
AutoLock
Block Channel
Change Code
Clear All
Block All
Movie Rating
AutoLock
Block Channel
Change Code
Clear All
Block All
Movie Rating
Access Code
– – – –
Access Code
* * * *
Correct
Off
On
HELPFUL HINT
Remember that 0711 is the default
AutoLock™ code. If your access code has been
changed by someone other than you (a child,
for example) or you have forgotten the code,
you can always get in by inputting the default
code.
NOTE TO PARENTS: It isn’t possible for your
child to unblock a channel without knowing
your access code or changing it to a new one.
If your code has been changed without your
knowledge, then you will become aware that
blocked channels may have been viewed.
Channel 2
Channel Blocking
Access Code
– – – –
If a channel is blocked by the Block
Channel or Block All option, the TV
will display the above screen. To watch
the channel, enter your access code
or you can change the Block Channel
option back to Off.
14
Page 15
HOW TO CLEAR ALL LOCKED CHANNELS AT THE SAME TIME
arious onscreen messages will appear when
V
someone tries to view blocked programming.
e message is determined by how the current
programming is blocked. You may view the blocked
programming and turn OFF the AutoLock™
feature by using the Clear All control or by entering
your access code.
Press the MENU button on the remote
1
control to show the onscreen menu.
Press the CURSOR DOWN button to
2
highlight Features.
Press the CURSOR RIGHT button to
3
display the Features menu.
Press the CURSOR DOWN button to
4
select the AutoLock™ control.
Press the CURSOR RIGHT button again
5
to highlight Access Code.
Enter your four-digit Access Code,
6
“Correct” will briefly appear on the screen
and the AutoLock menu will be accessible.
Press the CURSOR DOWN button to
7
select Clear All. Clear? will appear on the
screen.
Press the CURSOR RIGHT button to
8
activate the clearing of all channels.
Press the STATUS/EXIT button to
9
remove the menu from the screen.
TV Menu
Picture
Sound
Features
Install
1
9
2
4
7
Timer
AutoLock
Contrast+
DNR
PIP
3
5
8
6
Features
Timer
AutoLock
Contrast+
DNR
PIP
Features
Timer
AutoLock
Contrast+
DNR
PIP
Features
Timer
AutoLock
Contrast+
DNR
PIP
AutoLock
Block Channel
Change Code
Clear All
Block All
Movie Rating
Access Code
– – – –
Access Code
* * * *
Correct
Clear ?
English
HELPFUL HINT
If you tune to a specific channel that has
been blocked by Block Channel or any of the
AutoLock™ Rating options, simply enter your
four-digit access code to view the channel.
NOTE : is will unblock ALL channels
until the TV is shut OFF. When powered
back ON, all previously blocked channels will
be blocked again.
AutoLock
Block Channel
Change Code
Clear All
Block All
Movie Rating
Cleared
15
Page 16

BLOCKING PROGRAMS BASED ON MOVIE RATINGS
fter your personal access code has been set, you
A
can select specific movie ratings that you want
to censor.
Press the MENU button on the remote
1
control to show the onscreen menu.
Press the CURSOR DOWN button to
2
highlight Features.
Press the CURSOR RIGHT button to
3
display the Features menu.
Press the CURSOR DOWN button to
4
highlight the AutoLock™ control.
Press the CURSOR RIGHT button again
5
to highlight Access Code.
Enter your four-digit Access Code. Correct
6
will flash very briefly and the menu will
move to the left with the AutoLock menu
now accessible.
Press the CURSOR DOWN button
7
repeatedly until Movie Rating
highlighted.
Press the CURSOR RIGHT button and
8
the Rating menu shifts to the left with G
highlighted.
Press the CURSOR UP or DOWN
9
buttons to highlight each rating you want.
Press the CURSOR RIGHT button to
10
turn the rating ON or OFF. Turning the
rating ON will block programs with that
rating from being seen.
Press the STATUS/EXIT button to
11
remove the menu from the screen.
is
TV Menu
Picture
Features
1
11
9
2
4
7
Sound
Install
Timer
AutoLock
Contrast+
DNR
PIP
3
5
8
10
9
6
Features
Timer
AutoLock
Contrast+
DNR
Features
Timer
AutoLock
Contrast+
DNR
Features
Timer
AutoLock
Contrast+
DNR
AutoLock
Block Channel
Change Code
Clear All
Block
Movie Rating
Movie Rating
PG-13
NC-17
PIP
Access Code
– – – –
PIP
PIP
G
PG
R
X
Access Code
* * * *
Correct
G
PG
PG-13
R
NC-17
On
16
Page 17
BLOCKING PROGRAMS BASED ON TV RATINGS
ou can select specific TV ratings that you want
Y
to censor by following these steps.
Press the MENU button on the remote
1
control to show the onscreen menu.
Press the CURSOR DOWN button to
2
highlight Features.
Press the CURSOR RIGHT button to
3
display the Features menu.
Press the CURSOR DOWN button to
4
highlight the AutoLock™ control.
Press the CURSOR RIGHT button again
5
to highlight Access Code.
Enter your four-digit Access Code. Correct
6
will flash very briefly and the menu will
move to the left with the AutoLock menu
now accessible.
Press the CURSOR DOWN button
7
repeatedly until TV Rating
Press the CURSOR RIGHT button to
8
enter the TV Rating menu.
Press the CURSOR UP or DOWN
9
button to select a desired rating (TV-Y, TVY7, TV-G, TV-PG, TV-14,
Press the CURSOR RIGHT or LEFT
10
button to turn the block on the rating
On or Off
NOTE: More specific subratings (for violence,
sexual content, dialogue, or fantasy violence) are
available for TV-Y7, TV-PG, TV-14, and TVMA. (Refer to page 11 for definitions.)
.
is highlighted.
or TV-MA).
TV Menu
Features
1
12
9
10
2
4
7
Picture
Sound
Install
Timer
AutoLock
Contrast+
DNR
PIP
3
5
8
10
11
9
6
Features
Timer
AutoLock
Contrast+
DNR
Features
Timer
AutoLock
Contrast+
DNR
Features
Timer
AutoLock
Contrast+
DNR
AutoLock
TV Rating
Block Options
PIP
Access Code
– – – –
PIP
PIP
Access Code
* * * *
Correct
TV-Y
TV-Y7
TV-G
TV-PG
TV-14
English
To access these subratings, with the main
11
rating selected, press the CURSOR
RIGHT button. en, repeat steps 9-10 to
turn the sub-ratings ON or OFF.
Press the STATUS/EXIT button to
12
remove the menu from the screen.
TV Rating
TV-Y
TV-Y7
TV-PG
TV-14
TV-MA
TV Rating
TV-Y7
TV-PG
TV-14
TV-MA
TV-PG
Block All
TV-G
TV-Y
TV-G
On
Block All
V
S
L
D
On
V
S
L
D
17
Page 18

OTHER AUTOLOCK™ BLOCKING OPTIONS
he AutoLock™ control offers the viewer other
T
blocking options as well/ With Block Options,
the censoring can be turned On or Off.
Press the MENU button on the remote
1
control to show the onscreen menu.
Press the CURSOR UP or CURSOR
2
DOWN button to highlight Features.
Press the CURSOR RIGHT button to
3
display the Features menu.
Press the CURSOR DOWN button to
4
highlight the AutoLock™ control.
Press the CURSOR RIGHT button again
5
to highlight Access Code.
Enter your four-digit Access Code.
6
Correct will flash very briefly and the menu
will move to the left with the AutoLock
menu now accessible.
Press the CURSOR DOWN button
7
repeatedly until Block Options
highlighted.
Press the CURSOR RIGHT button to
8
enter the Block Options menu.
Press the CURSOR UP or DOWN
9
buttons to select the desired block option.
Blocking: Might be called the “master
switch” for AutoLock™. When On, All
blocking/censoring will take place. When
Off, All blocking is disabled.
Unrated: All unrated programs based on
the Movie Ratings or Parental (TV) Guidelines can be blocked if this feature is set to
On.
No Rating: ALL programming with NO
content advisory data can be blocked if set
to On.
Press the CURSOR RIGHT or LEFT
10
button to toggle blocking On or Off .
Press the STATUS/EXIT button to
11
remove the menu from the screen.
is
TV Menu
Features
1
11
9
10
2
4
7
Picture
Sound
Install
Timer
AutoLock
Contrast+
DNR
PIP
3
5
8
10
9
6
Features
Timer
AutoLock
Contrast+
DNR
PIP
Features
Timer
AutoLock
Contrast+
DNR
PIP
Features
Timer
AutoLock
Contrast+
DNR
PIP
AutoLock
TV Rating
Block Options
Block Options
Unrated
No Rating
Blocking
Block Options
Unrated
No Rating
Blocking
Access Code
– – – –
Access Code
* * * *
Correct
Unrated
No Rating
Blocking
On
On
HELPFUL HINT
Remember, when the Blocking control is
Off, the blocking or censoring of programs is
disabled. When the Blocking control is On.
blocking will occur according to the settings
you have chosen.
Block Options
Unrated
No Rating
Blocking
18
On
Page 19
USING THE AUTOLOCK™ REVIEW SCREEN
o remind you wich rating you have locked
T
and which Block Options you have selected,
a review screen is available to review your
AutoLockTM settings. To access this screen follow
the steps below.
Press the STATUS/EXIT button on the
1
remote control TWICE. Your AutoLock™
settings will appear on the screen.
NOTE: If you have blocked specific subratings,
such as V for violence in the TV-PG category,
these blocked subratings will not appear in the
review. e subratings however are still blocked
according to your selections.
After a few seconds, the settings will leave
2
the screen automatically, or you can press
the STATUS/EXIT button a third time to
remove them from the screen.
HELPFUL HINT
e AutoLock™ status screen will only appear
if the Block option is set to On. See previous
page for details.
AutoLock is set to Off by default.
Movie Rating
G
PG
PG-13
R
NC-17
X
1
2
TV Rating
Off
TV-Y
Off
TV-Y7
On
On
On
Off
Off
TV-G
TV-PG
TV-14
TV-MA
Unrated
No Rating
On
On
On
Off
Off
Off
Off
English
is display will appear after Step One
(above) is completed if the AutoLock™
Block Option is set to On
Movie Rating
G
PG
PG-13
R
NC-17
X
TV Rating
Off
TV-Y
Off
TV-Y7
On
On
On
Off
Off
TV-G
TV-PG
TV-14
TV-MA
Unrated
No Rating
19
On
On
On
Off
Off
Off
Off
.
is display will appear after Step One
(above) is completed if the AutoLock™
Block Option is set to
AutoLock Disabled
Off.
Page 20

HOW TO USE THE CONTRAST+ CONTROL
he Contrast + function helps to sharpen the
T
picture quality. e black portions of the
picture become richer in darkness and the white
portions become brighter.
Press the MENU button on the remote
1
control to show the on-screen menu.
Press the CURSOR DOWN button to
2
highlight Features.
Press the CURSOR RIGHT button to
3
access the Features menu.
Press the CURSOR DOWN button until
4
the Contrast + control is highlighted.
Press the CURSOR RIGHT or LEFT
5
button to toggle the On or Off option.
Press the STATUS/EXIT button to
6
remove the menu from the screen.
TV Menu
Picture
Sound
Features
Install
6
5
2
4
Timer
AutoLock
Contrast+
DNR
PIP
1
3
5
Features
Timer
AutoLock
Contrast+
DNR
Features
Timer
AutoLock
Contrast+
DNR
Off
PIP
On
PIP
he DNR (Dynamic Noise Reduction) function
T
helps to diminish signal “noise” in the picture
or what is known as “speckled” picture.
Press the MENU button on the remote
1
control to show the on-screen menu.
Press the CURSOR DOWN button to
2
highlight Features.
Press the CURSOR RIGHT button to
3
access the Features menu.
Press the CURSOR DOWN button until
4
the DNR is highlighted.
Press the CURSOR RIGHT or LEFT
5
button to toggle the On or Off option.
Press the STATUS/EXIT button to
6
remove the menu from the screen.
HOW TO USE THE DNR CONTROL
TV Menu
Picture
Sound
Features
Install
Timer
AutoLock
Contrast+
DNR
PIP
1
6
5
3
5
2
4
Features
Timer
AutoLock
Contrast+
DNR
Features
Timer
AutoLock
Contrast+
DNR
Off
PIP
PIP
On
20
Page 21
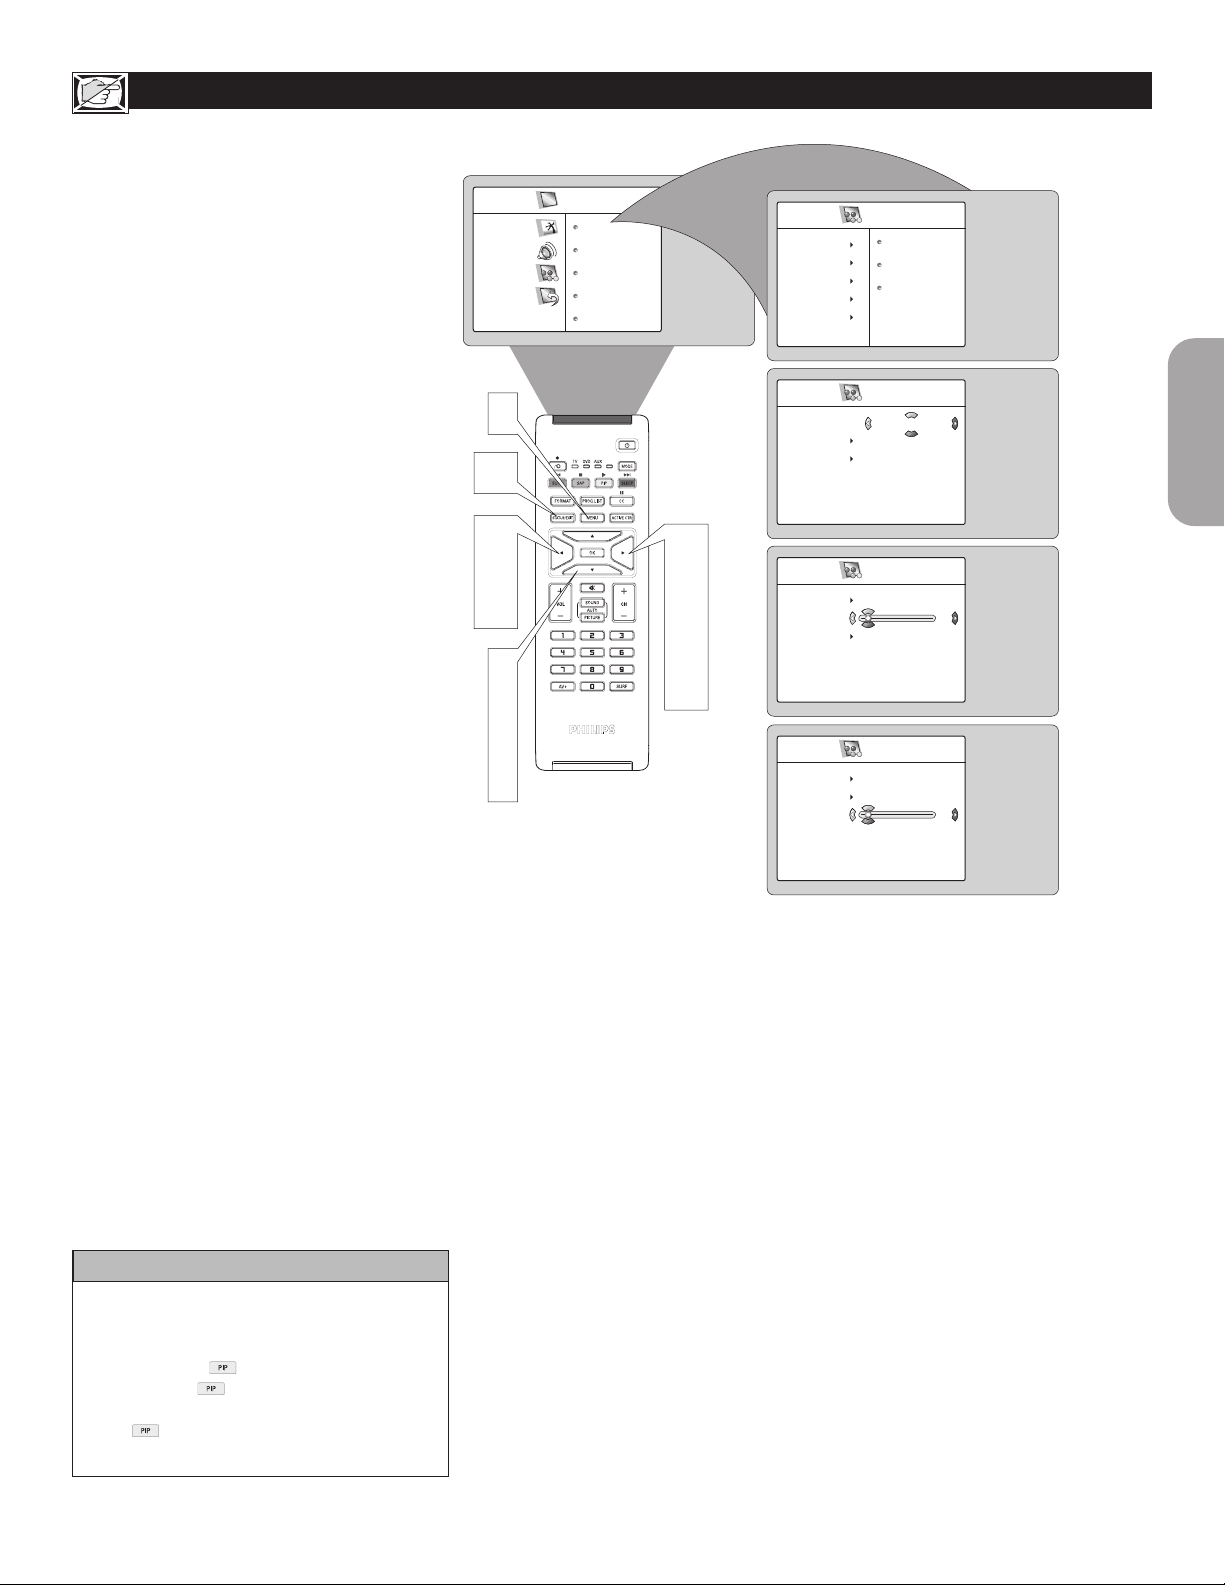
HOW TO USE THE PIP (PICTURE IN PICTURE) CONTROL
hile you are in TV mode, you can call up
W
a PIP window for the PC and HD. To
enable the PIP function, a HDMI Input source
must be selected. (Refer to the QUG for details on
connections.)
Press the MENU button on the remote
1
control to show the onscreen menu.
Press the CURSOR DOWN button to
2
highlight Features.
Press the CURSOR RIGHT button access
3
the Features menu.
Press the CURSOR DOWN button until
4
PIP is highlighted.
Press the CURSOR RIGHT button
5
to enter the PIP menu. PIP Size will be
highlighted.
Press the CURSOR LEFT or CURSOR
6
RIGHT button to select the available PIP
Size options including Off, On, Small,
Medium, Large, or Side-by-Side.
Press the CURSOR DOWN button to
7
highlight Horizontal.
Press the CURSOR LEFT or CURSOR
8
RIGHT button to move the PIP screen
horizontally to the desired position.
If you want to move the PIP screen
9
vertically, press the CURSOR DOWN
button to highlight Vertical.
Press the CURSOR LEFT or CURSOR
10
RIGHT button to move the PIP screen
up or down.
Press the STATUS/EXIT button to exit
11
the menu from the screen.
TV Menu
Features
1
11
6
8
10
2
4
7
9
Picture
Sound
Install
Timer
AutoLock
Contrast+
DNR
PIP
3
5
6
8
10
Features
Timer
AutoLock
Contrast+
DNR
PIP
PIP
PIP Size
Horizontal
Vertical
PIP
PIP Size
Horizontal
Vertical
PIP
PIP Size
Horizontal
Vertical
PIP Size
Horizontal
Vertical
Off
1
1
English
HELPFUL HINT
To turn off the PIP window, select PIP Size
and select the Off option.
NOTE: You can also access the PIP window
by pressing the button on the remote
control. Press once to display the PIP
screen.
Press repeatedly to toggle through the
various PIP screen sizes.
21
Page 22
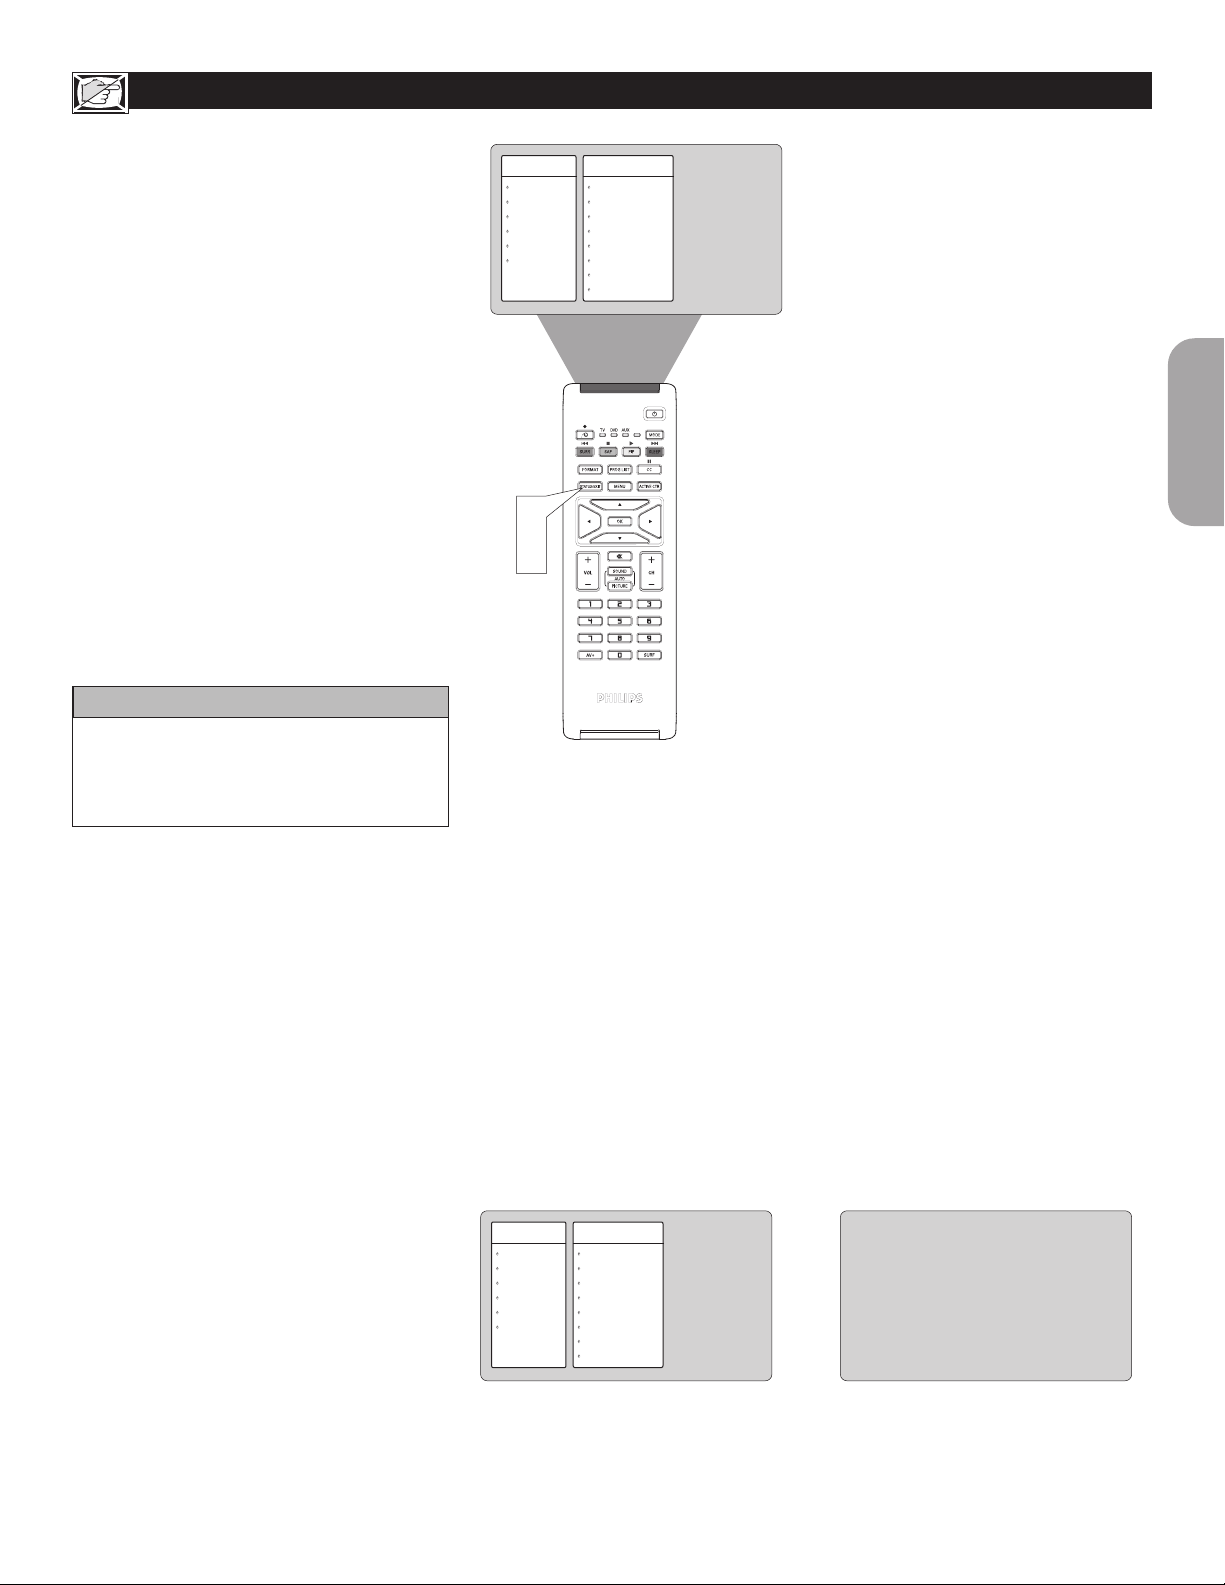
HOW TO USE THE SOURCE LIST
he Source will allow you to use the TV into the
T
TV, HD or PC Modes. Depending on how the
TV will be used, these modes may have their own
onscreen menu controls to optimize capability when
used with computers or high-definition receivers.
Press the AV+ button on the remote
1
control to show the Source menu.
Press the CURSOR DOWN button until
2
the desired Mode (TV, AV, REAR/SVHS,
CVI-1[SD/HD], CVI-2[SD/HD], HDMI,
PC-VGA, or PC-D) is highlighted.
After you have highlighted the desired
3
mode, press the CURSOR RIGHT
button to enter the selected Mode.
Source
TV
AV/SVHS
SIDE/SVHS
CVI-1 (SD/HD)
CVI-2 (SD/HD)
HDMI
Source
PC-VGA
PC-D
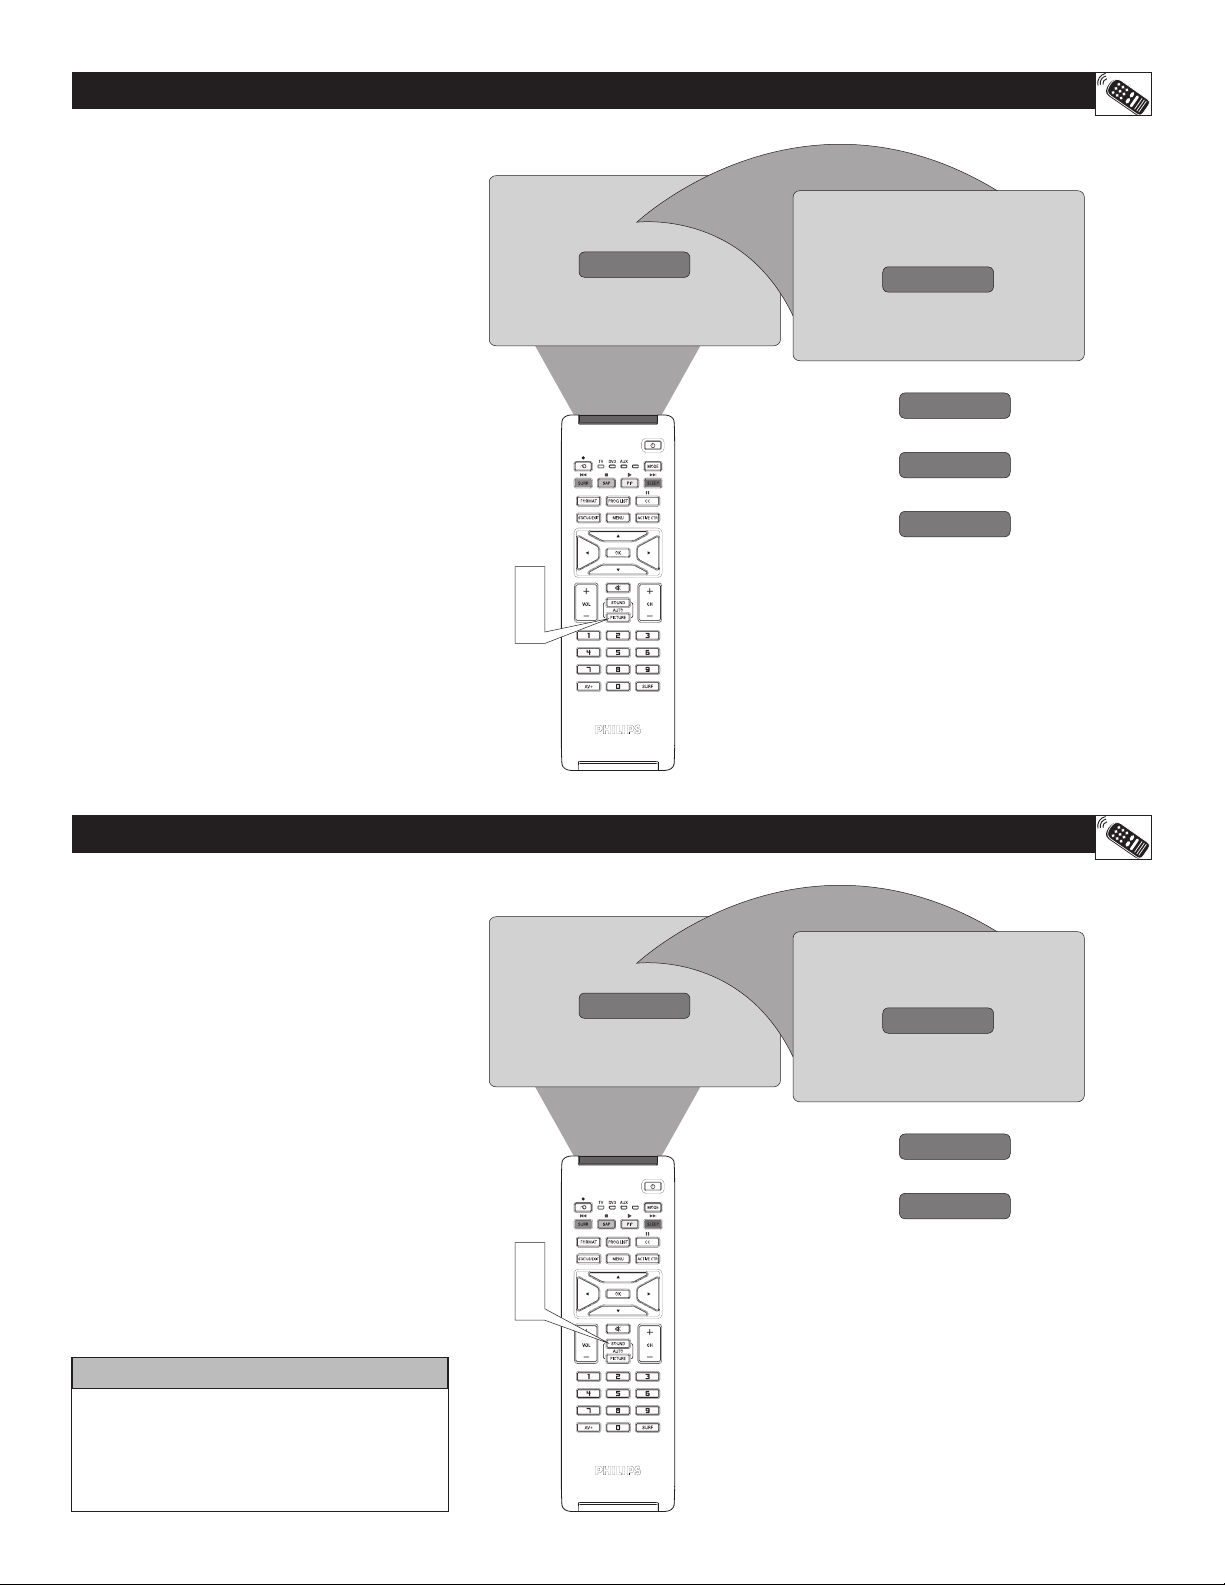
HOW TO USE THE FORMAT CONTROL
ou can change the screen format size to match
Y
the type of program you’re watching. Select the
normal 4:3, Movie Expand 14:9, Movie Expand
16:9, Subtitle Zoom, Super Zoom or Widescreen.
Press the FORMAT button repeatedly
1
to toggle the different format modes. You
can select from normal 4:3, Movie Expand
14:9, Movie Expand 16:9, Subtitle Zoom,
Super Zoom or Widescreen.
2
1
1
3
4:3
Movie Expand 14:9
OR
Movie Expand 16:9
OR
Subtitle Zoom
OR
Super Zoom
OR
Widescreen
22
Page 23
HOW TO USE THE CLOSED CAPTIONING CONTROL
losed Captioning (CC) allows you to read the voice
C
content of television programs on the TV screen.
Designed to help the hearing impaired, this feature uses
onscreen “text boxes” to show dialogue and conversations
while the TV program is in progress.
Press the CC button on the remote control to
1
select a caption mode: CC Off, CC1, CC2, or
CC Mute if the TV station broadcasting on the
channel is making Closed Captioning available. To
turn the Closed Captioning off, select CC Off.
Press the STATUS/EXIT button to remove the
2
menu from the screen.
HELPFUL HINT
NOTE : Not all TV programs and product
commercials are broadcast with Closed Captioning
(CC). Nor are all Closed Captioning MODEs
necessarily being used by broadcast stations during
the transmission of a program offering Closed
Captioning. Refer to your area’s TV program listings
for the stations and times of shows being broadcast
with Closed Captioning.
2
CC Off
1
CC1
OR
CC2
OR
CC Mute
JOHN: Why did they move the meeting up to this week?
MARSHA: I dont know, but they are pushing to close the deal.
English
HOW TO USE THE SLEEPTIMER CONTROL
ave you ever fallen asleep in front of the TV, only to
H
have it wake you up at two in the morning with a
test pattern sound screeching in your ears? Well, your TV
can enable you to avoid that discomfort by automatically
turning itself off. With the Sleeptimer feature, you can set
a timer to automatically switch the TV off after a period of
time you choose (15-minute increments up to 60 minutes,
then 30-minute increments up to 90 minute increments,
and 60-minute increments up to 240 miutes).
Press the SLEEP button on the remote control.
1
e Sleeptimer will appear in the lower part of the
screen.
Within five seconds, press the SLEEP button
2
repeatedly to pick the amount of time (15-minute
increments up to 60 minutes, then 30-minute
increments up to 90 minute increments, and 60minute increments up to 240 miutes) before the
TV will turn itself off.
An onscreen countdown will appear during the last
minute before the TV shuts itself off.
Sleep Off
1
2
Sleep 15
OR
Sleep 30 Sleep 45
Sleep 60 Sleep 90
Sleep 120 Sleep 180
Sleep 240
HELPFUL HINT
To see how many minutes remain before the TV
shuts itself off, press the STATUS/EXIT button. A
Sleeptimer setting can be cancelled by pressing any
button during the last minute of the operation.
During the last minute of a
SLEEP timer setting, an onscreen
countdown will be displayed.
23
Sleep 49
Sleep 9
Page 24
HOW TO USE THE PROGRAM LIST CONTROL
he Program List Control will allow you to
T
quickly overview all the programmed channels
that have been placed into the televisions memory
(see the Auto Programming section of this manual
for more details). Program List will let you
easily select the desired channels your looking for.
Program List will display the channel number, the
name of the channel if you have given it one, and
whether it have AutoLock turn on or off.
Press the PROGRAM LIST button on the
1
remote control to show the current list of
installed channels (the current channel will
be highlighted).
Press the CURSOR UP or DOWN
2
buttons to scroll the list of channel,
highlighting the one you want to activate.
Press the CURSOR RIGHT button to
3
activate the channel. e TV will tune to
that channel.
Press the STATUS/EXIT button to
4
remove the menu from the screen.
Program List
2
3
4
5
6
4
2
Program List
2
3
4
5
6
1
32
HOW TO SET THE ACTIVE CONTROL
he Active Control monitors and adjusts
T
incoming video signals to help provide the best
picture quality.
When you choose to turn the Active Control
ON, the picture sharpness and noise reduction
are controlled automatically. Active Control
adjusts these picture settings continuously and
automatically.
You have a choice of three modes: Active Control
Off, Active Control On, or Active Control On with
Sensor.
Press the Active Control button on the
1
remote control to toggle the three options
and select the desired option.
Press the STATUS/EXIT button to
2
remove the menu from the screen.
Active Control Off
2
Active Control On
OR
Active Control On With Sensor
1
24
Page 25
HOW TO USE THE SURF CONTROL
list or series of previously viewed channels can
A
be selected with the SURF button on your
remote control. With this feature, you can easily
switch between different TV channels that currently
interest you. e SURF control allows you to set up
to ten channels in its quick viewing list.
Surf List
3
Add?
Surf List
Surf List
3
3 Delete?
Press the CHANNEL(+) or (–) button (or
1
the numbered buttons) to select a channel
to add to the SURF list.
Press the SURF button on the remote
2
control. e onscreen display may read,
“SURF LIST EMPTY.” e number of
the current channel will be shown with
“ADD?” to the right.
While the SURF list message or the SURF
3
channel list appears on the screen, press
the CURSOR RIGHT button to add the
present channel to the SURF list.
If you want to delete the present channel
4
from the SURF list, press the CURSOR
RIGHT button again.
Repeat steps 1 through 3 to add more channels
(up to 10) to the SURF list.
HELPFUL HINT
Along with regularly programmed channels,
the external video source connections can be
added to the SURF list. is means that the
external A/V Jacks and their channels can
be added to your SURF list. Use the Source
button to tune their channel and use the same
steps described on this page to add those
channels to the Surf list.
Surf List Empty
3
4
1
2
Surf List
3
5
Surf List
3
5
Add?
English
Delete?
HOW TO USE THE PIXEL PLUS CONTROL (depending on model)
PixelPlus™ creates near high-definition (HD)
performance inside the TV on the basis of a regular
input signal. By doubling the number of lines
and the number of pixels per line, PixelPlus™
enhances both regular broadcasts and DVD input
for unparalleled sharpness and depth. You can view
the difference in a regular broadcast signal and one
enhanced with PixelPlus™ by following the steps
below.
Press the Pixel Plus button on the remote
1
control. APixel Plus demo will appear
on the screen. e left hand side of the
screen show the picture without Pixel Plus
enhancement while the right side is shown
with the Pixel Plus control On.
Press the Pixel Plus button on the remote
2
control to remove the demo screen.
NOTE: You cannot turn Pixel Plus™ off, it is a
feature of the TV. You can only see the difference
in a signal with or without PixelPlus™.
Pexel Plus Demo
Pixel Plus Demo
Off On
1
2
25
Page 26
HOW TO USE THE AUTO PICTURE™ CONTROL
hether you’re watching a movie or a video
W
game, your TV has automatic video control
settings that will match with your current program
source or content. AutoPicture™ quickly resets your
TV’s video controls for a number of different types
of programs and viewing conditions that you may
have in your home. e Rich, Natural, Soft and
Multimedia AutoPicture™ controls have been preset
at the factory to automatically adjust the TV’s
brightness, color, picture, sharpness, tint, and color
temperature levels. e Personal AutoPicture™
settings are the ones that you made through the
PICTURE options within the onscreen menu.
Press the PROGRAM LIST button on the
1
remote control to show the current list of
installed channels (the current channel will
be highlighted).
Press the PICTURE button repeatedly to
2
select either Personal, Rich, Natural, Soft or
Multimedia picture settings.
NOTE: e Personal setting and the Picture
options within the onscreen menu are the same.
is is the only option in AutoPicture™ that
can be changed. To adjust these settings, use the
Pictureoptions within the onscreen menu. All
other settings are set up at the factory during
production and cannot be adjusted.
1
2
Personal
Rich
OR
Natural
OR
Soft
OR
Multimedia
HOW TO USE THE AUTO SOUND™ CONTROL
utoSound™ allows you to select from three
A
factory-set controls and a personal control that
you set according to your own preferences through
the onscreen Sound menu. e three factory-set
controls (eater, Music and Voice) enable you to
tailor the TV sound so as to enhance the particular
program you are watching. Follow these steps to
select any of the options.
Press the SOUND button on the remote
1
control. e current AutoSound™ setting
will appear in the middle of the screen.
Press the SOUND button repeatedly to
2
toggle among the four settings: Personal,
eater, Music or Voice.
Remember, only the Personal control can be
changed by the viewer. is changes the settings
in the main onscreen menu’s Sound controls
HELPFUL HINT
AutoSoundTM works only with the programs
coming through the ANTENNA/CABLE
(ANT) input on the rear of the TV (RF
audio). It will not control the sound levels for
the external connections.
1
2
Personal
Theater
OR
Music
OR
Voice
26
Page 27

REMOTE CONTROL ACCESSORY DEVICE RELATED BUTTONS
RECORD BUTTON ®
Press the record button to begin recording.
POWER BUTTON
Press to turn the accessory device ON and OFF.
MODE BUTTON
Select the correct mode to send remote
commands to the accessory device. A light will
appear above the selected mode.
‡
Ò
I
REWIND BUTTON
Press to rewind tapes. For some VCRs, the
STOP button may have to be pressed first, then
REWIND. May be used to scan back through
chapters or titles on DVD movies.
STOP BUTTON
Press to stop the motion of a tape or to stop the
playback of a DVD.
NUMBER BUTTONS
Press buttons for direct channel selections. May
also be used for direct number entries in certain
onscreen menu feature settings.
FAST FORWARD BUTTON
Press to rapidly advance a tape or DVD. For
some accessory devices, you may need to
press the STOP button first, then the FAST
FORWARD button. In playback mode, hold the
button down to view the picture moving rapidly
in the forward direction.
PAUSE BUTTON
Press to temporarily stop the tape during a
playback or recording or pause the playback of a
DVD. Press again to release Pause.
PLAY BUTTON
Press to begin playback of a video tape, DVD,
etc.
CHANNEL + / – BUTTONS
Press to scan up or down through the channel
numbers if your accessory device will change
channels.
º
π
†
I
English
HELPFUL HINT
e buttons on the remote will not operate
your accessory device if those features are not
found on your accessory’s remote control.
Note : All functions (particularly Search,
Rewind, Fast Forward, etc.) will operate the
same as with the original remote control
provided with your accessory device.
27
Page 28
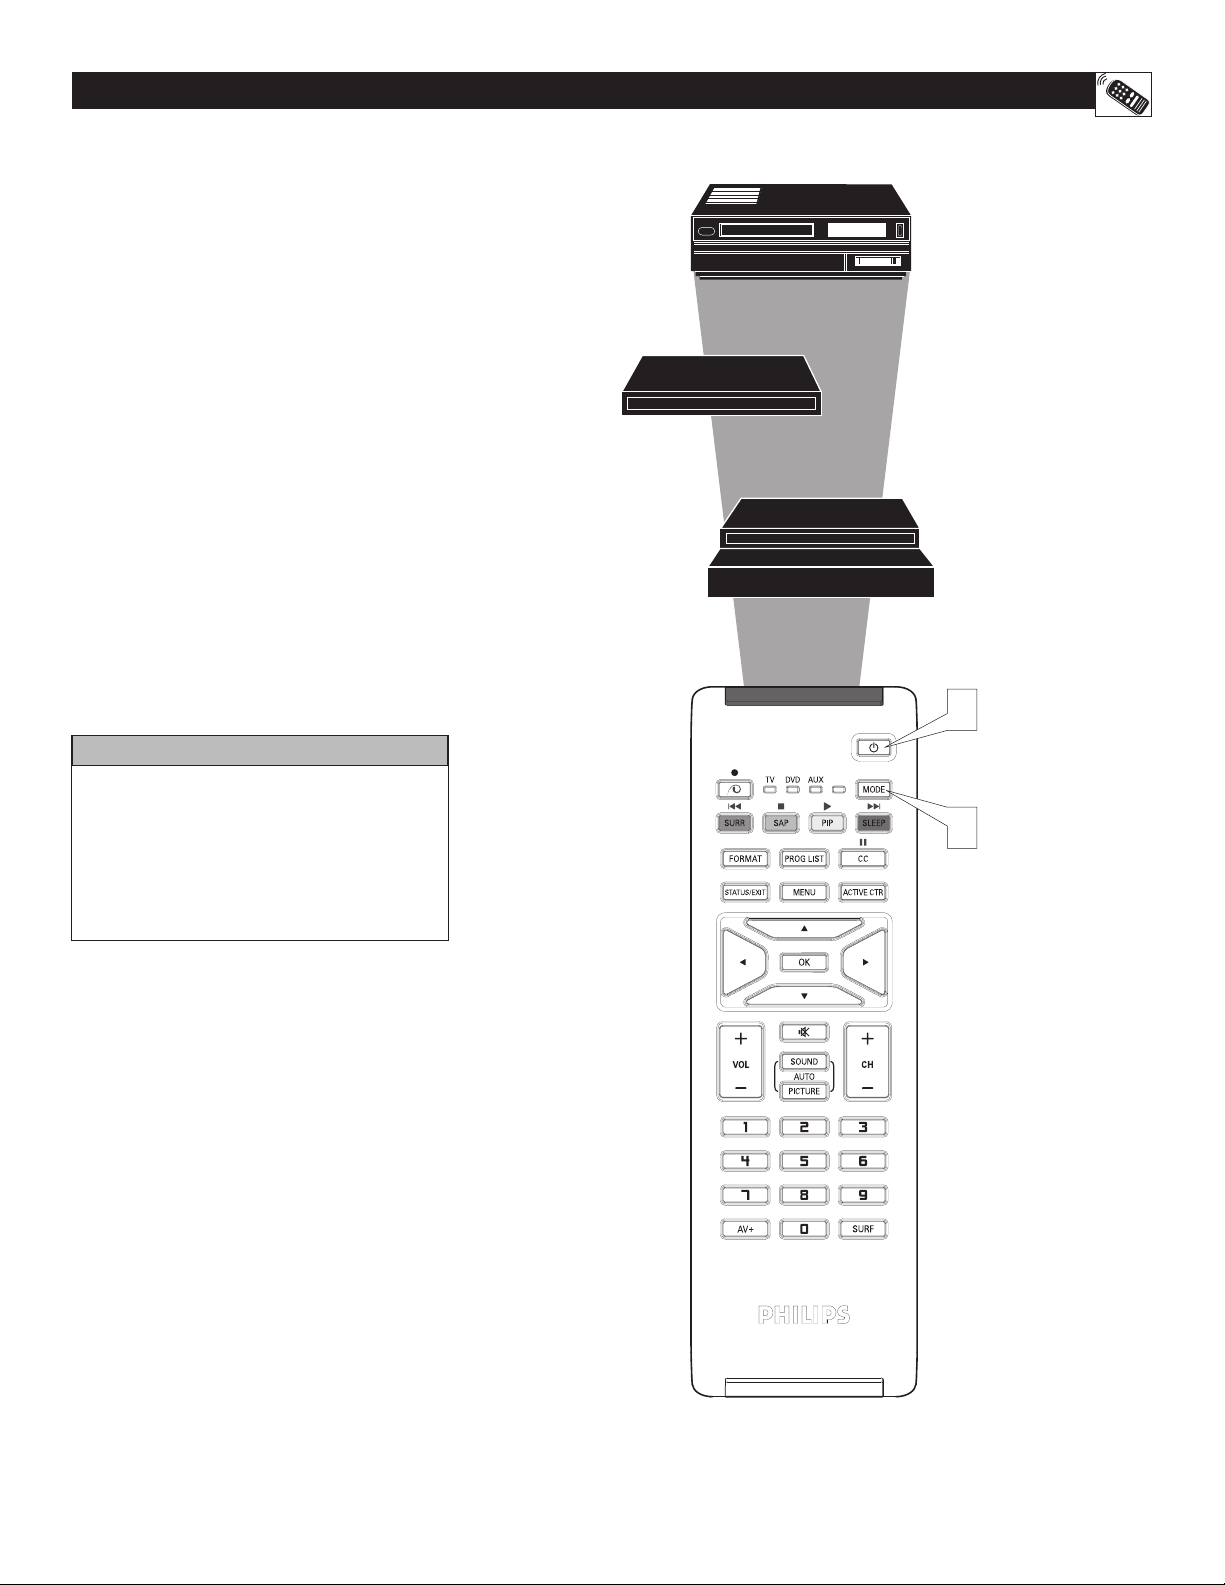
HOW TO USE THE REMOTE CONTROL WITH PHILIPS ACCESSORY DEVICES
our remote control is set to work your TV and
Y
many infrared remote (IR) control VCRs,
Cable Boxes, Satellite Systems, DBS, DVD, etc.
However, an easy one time step may be necessary
before the remote will work your VCR.
is Direct Access Method is used for most of
Philips accessory devices and not for use with other
accessory devices brands.
Press the TV/DVD/AUX MODE button
1
repeatedly to select the desired mode.
Point the remote control at the device and
2
press the POWER
Does the remote turn the device ON?
If YES, stop and try other accessory device
related function buttons on the remote. If
they also work the device, then the remote
is ready and no further steps are needed.
If NO, your accessory device does not work
with this method. You have to use the ac-
cessory device remote control.
button.
VCR
Satellite Receiver
Cable Converter
2
HELPFUL HINT
e buttons on the remote will not operate
your accessory device if those features are not
found on your accessory’s remote control.
Note : All functions (particularly Search,
Rewind, Fast Forward, etc.) will operate the
same as with the original remote control
provided with your accessory device.
1
28
Page 29
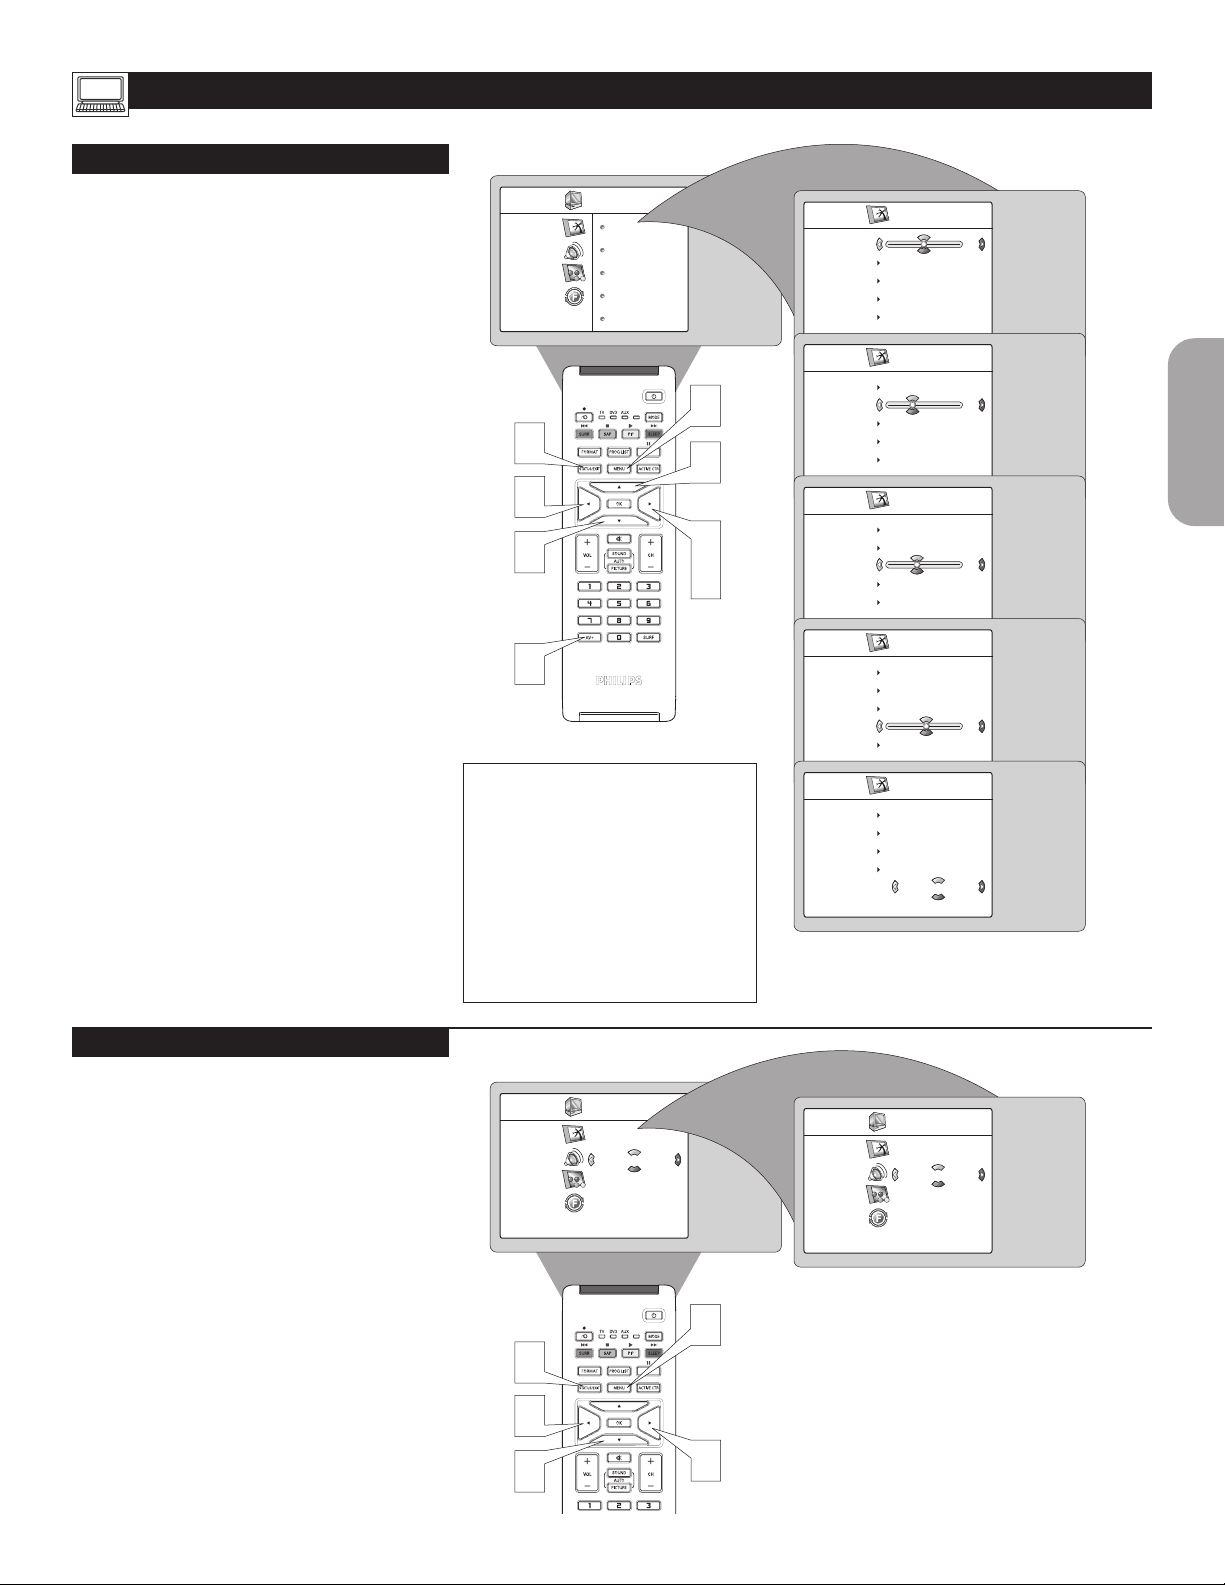
SETTING UP THE PC MODE (PERSONAL COMPUTER MONITOR)
PC PICTURE CONTROLS
o ensure the best picture quality from the PC
T
feature of this TV, several Picture Controls are
available for adjustment.
From the Source, choose PC-VGA or
1
PC-D mode (depending on the cable used
to connect the TV from the PC). Refer to
page 22 and follow the steps in “How to use
the Source List”.
Press the MENU button on the remote
2
control to display the Picture menu.
Press the CURSOR RIGHT button to
3
access the Picture menu.
Press the CURSOR UP or CURSOR
4
DOWN button repeatedly to select any of
the picture items:
Brightness – adds or subtracts light from
the darkest part of the picture.
Picture – improves the detail of the lightest
parts of the picture.
Horizontal – Allows you to adjust the
horizontal placement of the image.
Vertical – allows you to adjust the vertical
placement of the image.
Color Temp. – Allows you to adjust the
color temperature of the picture. Select
from Normal, Cool, or Warm.
Once you have highlighted a selection,
5
press the CURSOR LEFT or CURSOR
RIGHT button to navigate, adjust, or
activate the specific controls.
Press the STATUS/EXIT button to
6
remove the menu from the screen.
PC Menu
Picture
Audio Selection
Features
Reset to Factory
Brightness
Picture
Horizontal
Vertical
Color Temp.
2
6
4
5
4
3
5
1
Note: When using the LCD
TV as a PC monitor, slight
diagonal interference lines may
be observed when it is operated
under electromagnetic interference
environment but will not affect
the performance of this product.
For better performance, good
quality VGA cable with good noise
isolation filter is recommended.
Picture
Brightness
Picture
Horizontal
Vertical
Color Temp.
Picture
Brightness
Picture
Horizontal
Vertical
Color Temp.
Picture
Brightness
Picture
Horizontal
Vertical
Color Temp.
Picture
Brightness
Picture
Horizontal
Vertical
Color Temp.
Picture
Brightness
Picture
Horizontal
Vertical
Color Temp.
48
38
39
32
Normal
English
PC AUDIO SELECTION
his TV lets you choose the sound that is heard
T
while in PC Mode. You can select TV or PC/
HD. For example, you can listen to the sound from
the current TV channel while you use the computer.
NOTE: You must select the source before selecting
PC. You cannot change the channel while in PC
Mode.
Press the MENU button on the remote
1
control to display onscreen menu.
Press the CURSOR DOWN button
2
repeatedly to highlight Audio Selection.
Press the CURSOR LEFT or CURSOR
3
RIGHT button repeatedly to select PC/
HD, or TV.
Press the STATUS/EXIT button to
4
remove the menu from the screen.
PC Menu
Picture
Audio Selection
Features
Reset to Factory
4
3
2
PC / HD
29
1
3
PC Menu
Picture
Audio Selection
Features
Reset to Factory
TV
Page 30

SETTING UP THE PC MODE (PERSONAL COMPUTER MONITOR)
PC FEATURES
Press the MENU button on the remote
1
control to display onscreen menu.
Press the CURSOR DOWN button
2
repeatedly to highlight the Features.
Press the CURSOR RIGHT button to
3
access the Features menu.
Press the CURSOR UP or CURSOR
4
DOWN buttons
to access the items in the
Features menu:
Phase – eliminates the horizontal interfer-
ing lines
Clock – eliminates the vertical interfering
lines
Format – choose between Full Screen and
the original format (Native) of the PC
screen.
PIP – call up a PIP window for TV or HD.
Auto Adjustment – automatically adjusts
the control based on the signal being received to give the best possible picture.
Press the CURSOR LEFT or CURSOR
5
RIGHT button to make the desired
adjustments.
Note : For Auto Adjustment feature, press
the CURSOR LEFT to start adjustment.
When adjustment is completed, press the
CURSOR UP or DOWN to select Yes if
you want to store adjustment or select No
if you do not want to store adjustment.
Press the STATUS/EXIT button to
6
remove the menu from the screen.
PC Menu
Picture
Audio Selection
Features
Reset to Factory
6
5
2
4
Phase
Clock
Format
PIP
Auto Adjust
1
4
3
5
Features
Phase
Clock
Format
Auto Adjust
Features
Phase
Clock
Format
Auto Adjust
Features
Phase
Clock
Format
Auto Adjust
Features
Phase
Clock
Format
PIP
Auto Adjust
Features
Phase
Clock
Format
Auto Adjust
3
PIP
2
PIP
Fullscreen
PIP
PIP Size
Horizontal
Vertical
PIP
Start?
efore using the PIP feature configure the computer
B
for optimum resolution (1024 x 768, 60 Hz).
Note: if you select another resolution, the feature
may not work.
640 x 480, 60 Hz 800 x 600, 56 Hz 1024 x 768, 60 Hz
640 x 480, 67 Hz 800 x 600, 60 Hz 1024 x 768, 70 Hz
640 x 480, 72 Hz 800 x 600, 72 Hz 1024 x 768, 75 Hz
640 x 480, 75 Hz 800 x 600, 75 Hz
720 x 400, 70 Hz 832 x 624, 75 Hz
Features
Phase
Clock
Format
PIP
Auto Adjust
30
Store?
No
Yes
Page 31

SETTING UP THE PC MODE (PERSONAL COMPUTER MONITOR)
1
PC PIP CONTROLS
hile in PC mode, you can bring up a PIP
W
window for the TV or HD channel. For
PIP to function, an accessory must be connected
to the CVI-1 (SD/HD), CVI-2 (SD/HD) or
HDMI Input (Refer to the QUG for details on
connections.)
From the Source, choose PC-VGA or
1
PC-D mode (depending on the cable used
to connect the TV from the PC). Refer to
page 22 and follow the steps in “How to use
the Source List”.
Press the MENU button to access the PC
2
3
4
5
6
7
8
9
10
11
12
menu.
Mode
Press the CURSOR DOWN button to
highlight Features.
Press the CURSOR RIGHT button to
access Features menu.
Press the CURSOR DOWN button
repeatedly to highlight PIP.
Press the CURSOR RIGHT button to
access PIP menu.
Press the CURSOR LEFT or CURSOR
RIGHT buttons to select the PIP Size
options : Off, Small, Medium, Large or
Side-by-Side.
If you want to move the PIP screen
horizontally, press the CURSOR DOWN
button again to highlight Horizontal.
Press the CURSOR LEFT or CURSOR
RIGHT buttons to move the picture
horizontally.
If you want to move the PIP screen
vertically, press the CURSOR DOWN
button again to highlight Vertical.
Press the CURSOR LEFT or CURSOR
RIGHT buttons to move the picture
vertically.
Press the STATUS/EXIT button to exit
the menu from the screen.
PC Menu
Picture
Audio Selection
Features
Reset to Factory
12
7
9
11
3
5
8
10
Phase
Clock
Format
PIP
Auto Adjust
2
9
11
4
6
7
1
Features
Phase
Clock
Format
PIP
Auto Adjust
PIP
PIP Size
Horizontal
Vertical
PIP
PIP Size
Horizontal
Vertical
PIP
PIP Size
Horizontal
Vertical
PIP Size
Horizontal
Vertical
Off
1
1
English
SETTING UP THE HD MODE (HIGH DEFINITION)
HOW TO SELECT HD MODE
ou can quickly change from TV or any other
Y
mode to the HD Mode.
From the Source, choose CVI-1 (SD/HS),
1
CVI-2 (SD/HD) or HDMI (depending on
the digital accessory devices connected to
your TV). Refer to page 22 and follow the
steps in “How to use the Source List”.
Source
TV
AV/SVHS
REAR/SVHS
CVI-1 (SD/HD)
CVI-2 (SD/HD)
HDMI
31
Page 32

SETTING UP THE HD MODE (HIGH DEFINITION)
PICTURE CONTROLS
he HD Mode offers certain Picture, Sound and
T
Blocking options within its onscreen menu.
Below is a list of Picture Menu options.
From the Source, choose HD mode. Refer
1
to page 22 and follow the steps in “How to
use the Source List”.
Press the MENU button on the remote
2
control to display the HD Mode onscreen
menu. e Picture option will be
highlighted.
Press the CURSOR DOWN buttons until
3
4
5
Brightness – is control will adds or
Color – is control adds or eliminates
Picture – is control improves the detail
Sharpness – is control improves the
Tint – is control adjusts the picture to
Color Temp – Choose from Normal (keeps
6
7
is highlighted.
Picture
Press the CURSOR RIGHT button to
shift the menu to the left, accessing the
Picture onscreen menu options.
Press the CURSOR UP or DOWN
buttons to highlight any of the HD Mode
Picture Controls. Choose from: Brightness,
Color, Picture, Sharpness, Tint, Color
Temp.
subtracts light from the darkest part of the
picture.
color intensity from the picture.
of the lightest parts of the picture.
detail in the picture.
obtain natural skin tones.
white, white), Cool (makes white bluish),
or Warm (makes white, reddish) picture
preferences.
Press the CURSOR RIGHT or LEFT
buttons to adjust the selected control.
Press the STATUS/EXIT button to
remove the onscreen menu from the TV
screen when finished. Or, let the display
time out and the menu will disappear after
a few second.
HD Menu
Picture
Sound
Features
Install
7
6
3
5
1
Brightness
Color
Picture
Sharpness
Color Temp.
2
5
4
6
Picture
Brightness
Color
Picture
Sharpness
Tint
Color Temp.
Picture
Brightness
Color
Picture
Sharpness
Tint
Color Temp.
Picture
Brightness
Color
Picture
Sharpness
Tint
Color Temp.
Picture
Brightness
Color
Picture
Sharpness
Tint
Color Temp.
Picture
Brightness
Color
Picture
Sharpness
Tint
Color Temp.
Picture
Brightness
Color
Picture
Sharpness
Tint
Color Temp.
48
38
42
8
30
Normal
32
Page 33

SETTING UP THE HD MODE (HIGH DEFINITION)
SOUND CONTROLS
he HD Mode also offers certain Sound control
T
adjustments to fine tune the sound being heard
when in the HD mode.
From the Source, choose HD mode. Refer
1
to page 22 and follow the steps in “How to
use the Source List”.
Press the MENU button on the remote
2
control to show the onscreen menu.
Press the CURSOR DOWN button to
3
highlight Sound.
Press the CURSOR RIGHT button to
4
enter the Sound menu.
Press the CURSOR UP or CURSOR
5
DOWN button
to select sound adjustment
you want to change : Equalizer, Balance,
or Dolby Virtual.
AVL
Press the CURSOR LEFT or CURSOR
6
RIGHT button to adjust the selected
control.
NOTE : If Equalizer is selected, press the
CURSOR RIGHT button to enter Equa
izer menu and press the CURSOR UP or
CURSOR DOWN button to select from
120Hz to 10KHz. en press the CUR-
SOR LEFT or CURSOR RIGHT button
to adjust the selected control.
Press the STATUS/EXIT button to
7
remove the menu from the screen.
HD Menu
Picture
Sound
Features
Install
7
6
3
5
1
Equalizer
Balance
AVL
Dolby Virtual
SAP
2
5
4
6
Sound
Equalizer
Balance
AVL
Dolby Virtual
SAP
Sound
Sound
Equalizer
Balance
AVL
Dolby Virtual
SAP
Sound
Sound
Equalizer
Balance
AVL
Dolby Virtual
SAP
Sound
Sound
Equalizer
Balance
AVL
Dolby Virtual
SAP
Sound
120 Hz
500 Hz
1500 Hz
5 KHz
10 KHz
0
English
On
Dolby Virtual
HELPFUL HINT
Equalizer - adjusts the sound tones. Select
120Hz to 10KHz.
Balance - adjusts the level of sound coming
from the left and right speakers.
Dolby Virtual - adds greater depth and
dimension to TV sound. Select from Dolby
Virtual or Stereo sound (if Stereo) or Spatial
or Mono (if Mono).
Sound
Equalizer
Balance
AVL
Dolby Virtual
SAP
Sound
Sound
Equalizer
Balance
AVL
Dolby Virtual
SAP
Sound
On
Stereo
33
Page 34

SETTING UP THE HD MODE (HIGH DEFINITION)
HD PIP CONTROLS
hile you are in HD mode, you can call
W
up a PIP window for a HD channel. For
PIP to function, an accessory must be connected
to the CVI-1 (SD/HD), CVI-2 (SD/HD) or
HDMI Input . (Refer to the QUG for details on
connections.)
From the Source, choose CVI-1 (SD/HD),
1
CVI-2 (SD/HD) or HDMI (depending
on the connection). Refer to page 22 and
follow the steps in “How to use the Source
List”.
Press the MENU button to access the HD
2
menu.
Press the CURSOR DOWN button to
3
highlight Features.
Press the CURSOR RIGHT button to
4
access Features menu.
Press the CURSOR DOWN button
5
repeatedly to highlight PIP.
Press the CURSOR RIGHT button to
6
access PIP menu.
Press the CURSOR LEFT or CURSOR
7
RIGHT buttons to select the PIP Size
options : Off, Small, Medium, Large or
Side-by-Side.
If you want to move the PIP screen
8
horizontally, press the CURSOR DOWN
button again to highlight Horizontal.
Press the CURSOR LEFT or CURSOR
9
RIGHT buttons to move the picture
horizontally.
If you want to move the PIP screen
10
vertically, press the CURSOR DOWN
button again to highlight Vertical.
Press the CURSOR LEFT or CURSOR
11
RIGHT buttons to move the picture
vertically.
Press the STATUS/EXIT button to exit
12
the menu from the screen.
HD Menu
Picture
Features
12
7
9
11
3
5
8
10
Sound
Install
Timer
AutoLock
Contrast+
DNR
PIP
2
9
11
4
6
7
1
Features
Timer
AutoLock
Contrast+
DNR
PIP
PIP
PIP Size
Horizontal
Vertical
PIP
PIP Size
Horizontal
Vertical
PIP
PIP Size
Horizontal
Vertical
PIP Size
Horizontal
Vertical
Off
1
1
HELPFUL HINT
To turn off the PIP window, select PIP Size
and select the Off option.
NOTE: You can also access the PIP window
by pressing the æ button on the remote
control. Press æ once to display the PIP
screen.
Press æ repeatedly to toggle through the
various PIP screen sizes.
34
Page 35

TROUBLESHOOTING TIPS
No Power
• Check the TV power cord. Unplug the TV, wait 10 seconds,
then reinsert the plug into the outlet and push the POWER
button again.
• Check that the outlet is not on a wall switch.
• Be sure the fuse is not blown on the AC power strip, if one is
being used.
No Picture
• Check antenna/cable connections. Are they properly secured to
the TV’s ANT 75Ω plug?
• Check the TUNER MODE control for the correct tuner
setting.
• Try running the Auto Program feature to find all available
channels.
• Press the SOURCE button on the remote to make sure the
correct signal source is selected.
• If using an accessory device, be sure that it is functioning
properly.
• If in PC Mode, a video signal MUST BE present or the TV will
turn off.
No Sound
• Check the VOLUME buttons.
• Check the MUTE button on the remote control.
• If you’re attempting to hook up auxiliary equipment, check the
audio jack connections.
TV Only Produces MONO Sound
• If using a cable box with RF only type connections, the signal
coming from the cable box will be produced in MONO only.
• Check Sound control setting. Change setting to Stereo.
Remote Does Not Work
• Check the battery. If necessary, replace them with Lithium
battery (3V).
• Clean the remote control and the remote control sensor window
on the TV.
• Check the TV power cord. Unplug the TV, wait 10 seconds,
then reinsert the plug into the outlet and push the POWER
button again.
• Be sure the fuse is not blown on the AC power strip, if one is
being used.
• Check to be sure the TV outlet is not on a wall switch.
• Be sure that the remote is in the correct operating mode.
• Be sure the remote is pointed at the Remote Sensor Window on
the TV. See page 1 of the
TV Displays Wrong Channel or No Channels Above 13
• Repeat channel selection.
• Add the desired channel numbers (using the CHANNEL EDIT
control) into the TV’s memory.
• Check to be sure the TUNER MODES are set to the CABLE
option and run the Auto Program feature to find all available
channels.
for details.
English
S-VHS color becomes faint
• If S-VHS is disconnected, picture color will become faint. To
restore picture color, press the CH +/– button on the remote
control and do a channel up followed by a channel down.
35
Page 36

CLEANING AND CARE
WARNING Concerning Stationary Images on the TV
Screen:
Do not leave stationary or letterbox images on screen
for extended periods of time. This can cause uneven
display aging.
Normal use of the TV should involve the showing of pictures
that contain constantly moving and changing images that fill the
screen. Be careful not to leave nonmoving images on screen for
extended periods of time, or to display the same images on screen
too frequently, because subtle ghost images can be left on the
picture tubes. Sources of stationary images may be DVD disks,
laser disks, video games, CD-i disks, videotapes, digita television
boxes, broadcast channels, cable channels, satellite channels, and
others. Here are some examples of stationary images (this is not an
all-inclusive list; you may encounter others in your viewing):
• DVD menus – listings of DVD disk content
• Letterbox black bars – shown at the top and bottom of the TV
screen when a wide screen (16:9) movie is viewed on a TV with
standard (4:3) aspect ratio.
• Video-game images and scoreboards
• Television station logos – present a problem if they are bright
and stationary; moving or low-contrast graphics are less likely to
cause uneven aging of the picture tube
• Stock-market tickers – presented at the bottom of the TV
screen
• Shopping channel logos and pricing displays – bright and
shown constantly or repeatedly in the same location on the TV
screen.
Placement of the TV
• To avoid cabinet warping, cabinet color changes, and increased
chance of set failure, do not place the TV where temperatures
can become excessively hot; for example, in direct sunlight or
near a heating appliance.
• Be sure to allow a free flow of air to and from the perforated
back cover of the set.
Cleaning
• To avoid possible shock hazard, be sure the TV is unplugged
from the electrical outlet before cleaning.
• Regularly dust the TV with a dry, nonscratching duster to keep
the TV clean.
• When cleaning the TV, take care not to scratch or damage
the screen surface. Avoid wearing jewelry or using anything
abrasive. Do not use household cleaners. Wipe the front screen
with a clean cloth dampened with water. Use even, easy, vertical
strokes when cleaning.
• Gently wipe the cabinet surfaces with a clean cloth or sponge
dampened in a solution of cool, clear water and a mild soap or
detergent. Use a clean, dry cloth to dry the wiped surfaces. Do
not use acetone, toluene, or alcohol to clean the screen.
• Occasionally vacuum the ventilation holes or slots in the back
cover of the set.
• Never use thinners, insecticide sprays, or other chemicals on or
near the cabinet, as they might cause permanent marring of the
cabinet finish.
36
Page 37

INDEX
Cleaning and Care ................................................ 36
Sound Adjustment Controls
AVL (Auto Volume Leveler) Control ..................................10
Balance Control ..................................................................
Equalizer Controls ..............................................................
Dolby Virtual Control ........................................................
SAP ....................................................................................10
Sound Control ....................................................................
10
10
10
10
Timer Controls ..................................................... 11
HD Mode Controls
How to Select HD Mode ....................................................31
Picture Adjustment Controls ..............................................
Sound Adjustment Controls ...............................................
PIP Controls ......................................................................
32
33
34
Index .....................................................................37
PC Mode Controls
Audio Selection Controls ....................................................29
PC Feature Controls ...........................................................
Picture Adjustment Controls ..............................................
PIP Controls ......................................................................
30
29
31
Registration Information ........................................ 2
Safety/Precautions ...............................................
3-4
Table of Contents ....................................................
Troubleshooting Tips ............................................
35
AutoSound™ Control .........................................................
Auto Program Control .........................................................
AutoPicture™ Control ........................................................
AVL (Auto Volume Leveler) Control ...................................
Balance Control .................................................................
Channel Edit (Add or Delete Channels) Control ..................
Closed Captioning Control ................................................
Dolby Virtual Control ........................................................
Equalizer Control ...............................................................
Fine Tune ..............................................................................
Language Control ................................................................
Picture Adjustment Controls ................................................
Pixel Plus Controls .............................................................
Program List Control .........................................................
Remote Control Programming for Accessory Devices
Remote Control Accessory Device Related Buttons .............
Remote Control with Philips Accessory Devices ..................
SAP (Secondary Audio Programming) Control ..................
Sleeptimer Control .............................................................
Source Control ...................................................................
Stereo/Mono Control .........................................................
Surf Control .......................................................................
System ..................................................................................
Timer Controls ...................................................................
Tuner Mode Control ............................................................
Widescreen (Screen Format) Control .................................
5
Warranty ............................................................... 38
26
26
10
10
23
10
10
25
24
27
28
10
23
22
10
25
11
22
7
7
8
6
9
8
6
English
TV Mode Controls
Active Control ....................................................................24
AutoLock Controls
Access Code ........................................................................
Block Channels ...................................................................
Blocking Options ................................................................
Clear All Locked Channels ..................................................15
Movie Ratings .....................................................................
Review Screen .....................................................................
TV Ratings .........................................................................17
Understanding the AutoLock™ Control ...............................
13
14
18
16
19
12
37
Page 38

PHILIPS LIMITED WARRANTY
One (1) Year Labor and Parts Repair
PHILIPS CONSUMER ELECTRONICS warrants
this product against defect in material or workmanship, subject
to any conditions set forth as follows:
PROOF OF PURCHASE:
You must have proof of the date of purchase to receive
warranted repair on the product. A sales receipt or other
document showing the product and the date that you
purchased the product as well as the authorized retailer
included, is considered such proof.
COVERAGE:
(If this product is determined to be defective)
LABOR: For a period of one (1) year from the date of
purchase, Philips will repair or replace the product, at its
option, at no charge, or pay the labor charges to any Philips
authorized repair facility. After the period of one (1) year,
Philips will no longer be responsible for charges incurred.
PARTS: For a period of one (1) year from the date of purchase,
Philips will supply, at no charge, new or rebuilt replacement
parts in exchange for defective parts, through a Philips
authorized service center.
Note: If Philips is unable to provide service in your area, receipt
of the paid service can be submitted for consideration of
adjustment or full reimbursement at Philips discretion.
EXCLUDED FROM WARRANTY COVERAGE
Your warranty does not cover:
• Labor charges for installation or setup of the product,
adjustment of customer controls on the product, and
installation or repair of antenna systems outside of the
product.
• Product repair and/or part replacement because of improper
installation, connections to improper voltage supply, abuse,
neglect, misuse, accident, unauthorized repair or other cause
not within the control of Philips.
• A product that requires modification or adaptation to
enable it to operate in any country other than the country
for which it was designed, manufactured, approved and/
or authorized, or repair of products damaged by these
modifications.
• Damage occurring to product during shipping when
improperly packaged or cost associated with packaging.
• Product lost in shipment and no signature verification of
receipt can be provided.
• A product used for commercial or institutional purposes
(including but not limited to rental purposes).
• Products sold AS IS or RENEWED.
CARRY-IN / SHIP-IN WARRANTY
For Carry-In warranty repair, take the product to a Philips
authorized service center for repair. When the product has
been repaired, you must pick up the unit at the center. For
Ship-In warranty repair, ship the product to a Philips authorized
service center for repair in its original carton and packing
material. If you do not have the original carton or packing
material, have your product professionally packed for shipping.
Ship product via a traceable carrier. When it is necessary
for you to ship the product to Philips for repair, you will pay
the shipping cost for shipment to Philips. Philips will pay the
shipping costs when returning the product to you.
TO OBTAIN WARRANTY SERVICE IN THE
U.S.A., PUERTO RICO, OR U.S. VIRGIN
ISLANDS…
Contact Philips Customer Care Center at:
1-888-PHILIPS (1-888-744-5477)
TO OBTAIN WARRANTY SERVICE IN
CANADA…
1-800-661-6162 (French Speaking)
1-888-PHILIPS (1-888-744-5477) - (English or Spanish
Speaking)
REPAIR OR REPLACEMENT AS PROVIDED UNDER THIS
WARRANTY IS THE EXCLUSIVE REMEDY FOR THE
CONSUMER. PHILIPS SHALL NOT BE LIABLE FOR ANY
INCIDENTAL OR CONSEQUENTIAL DAMAGES FOR
BREACH OF ANY EXPRESS OR IMPLIED WARRANTY ON
THIS PRODUCT. EXCEPT TO THE EXTENT PROHIBITED
BY APPLICABLE LAW, ANY IMPLIED WARRANTY OF
MERCHANTABILITY OR FITNESS FOR A PARTICULAR
PURPOSE ON THIS PRODUCT IS LIMITED IN DURATION
TO THE DURATION OF THIS WARRANTY.
Some states do not allow the exclusions or limitation of
incidental or consequential damages, or allow limitations on
how long an implied warranty lasts, so the above limitations or
exclusions may not apply to you. In addition, if you enter into a
service contract agreement with the PHILIPS partnership within
ninety (90) days of the date of sale, the limitation on how long
an implied warranty lasts does not apply.
This warranty gives you specific legal rights. You may have other rights which vary from state/province to state/province.
Philips, P.O. Box 671539, Marietta, GA. 30006-0026
(Warranty: 4835 710 27175)
Page 39

TV LCD
Manuel d’utilisation
26PF5320
32PF5320
Française
No. de modèle:
No. de série:
3139 125 34752 SD2 ME5
(et model / serial nombre)
Page 40

Retournez rapidement votre carte d’enregistrement de
garantie pour profiter pleinement de votre achat.
L’enregistrement de votre modèle auprès de PHILIPS confirme votre éligibilité à tous les bénéfices mentionnés
ci-dessous. N’oubliez donc pas de remplir votre carte d’enregistrement de garantie et de nous la retourner le plus
tôt possible afin d’assurer :
*Preuve d’achat
Retournez la carte d’enregistrement
ciinclus afin de garantir que la
date d’achat de votre produit sera
classée dans nos dossiers et éviter
ainsi le besoin de remplir d’autres
formulaires afin d’obtenir votre
service de garantie.
*Avis sur la sécurité
des produits
En enregistrant votre produit, vous
serez avisé - directement par le
fabriquant - de toutes défectuosités
compromettant la sécurité ou de tout
retrait du produit du marché.
Nous vous félicitons de votre achat et vous souhaitons
la bienvenue dans la « famille »!
Cher propriétaire d’un produit PHILIPS :
Merci de votre confiance en PHILIPS.Vous avez choisi un produit
de fabrication et de garantie supérieures parmi les meilleurs
disponibles sur le marché. Et nous ferons tout en notre pouvoir
pour que vous soyez pleinement satisfait de votre achat pour des
années à venir.
En tant que membre de la « famille » PHILIPS, vous avez droit à
une protection inégalée par l’une des garanties les plus complètes
de l’industrie ainsi qu’à des réseaux de service sans pareil.
De plus, votre achat garantit que vous recevrez toutes les
informations et offres spéciales auxquelles vous avez droit, ainsi
qu’un accès facile à toute une gamme d’accessoires disponibles
via notre réseau de téléachat.
Mais ce qui est encore plus important, vous pouvez compter
sur notre engagement total quand il s’agit de votre entière
satisfaction. C’est notre façon de vous souhaiter la bienvenue
et de vous remercier de votre investissement dans un produit
PHILIPS.
P.S. Pour bénéficier au maximum de votre produit
PHILIPS, assurez-vous de remplir et de retourner votre
carte d’enregistrement de garantie le plus tôt possible.
*Bénéfices additionnels
de l’enregistrement du
produit
L’enregistrement de votre produit garantit
que vous bénéficierez de tous les privilèges
auxquels vous avez droit y compris des offresrabais spéciales.
Ce symbole « d’éclair » s’applique
aux matériaux non isolés présents
dans votre appareil et pouvant causer
un choc électrique. Pour assurer la sécurité
des membres de votre famille, veuillez ne pas
enlever le couvercle de votre produit.
Les « points d’exclamation » ont pour
but d’attirer votre attention sur des
caractéristiques à propos desquelles
vous devez lire soigneusement la documentation accompagnant l’appareil afin d’éviter tout
problème d’exploitation ou d’entretien.
AVERTISSEMENT: Afin de réduire les risques d’incendie ou de choc électrique, ne pas
exposer cet appareil à la pluie ou à l’humidité
et les objets remplis de liquide, comme les
vases, ne doivent pas être placés sur le dessus
de l’appareil.
CAUTION: To prevent electric shock, match
wide blade of plug to wide slot, fully insert.
ATTENTION: Pour éviter les choc électriques, introduire la lame la plus large de la
fiche dans la borne correspondante de la prise
et pousser jusqu’au fond.
À l’usage du client
Entrez ci-dessous le numéro de série qui se trouve
à l’arrière du boîtier du dispositif. Conservez ces
informations pour référence ultérieure.
No. de modèle: __________________________
No. de série: ____________________________
Visitez notre site sur le Web à www.usasupport.philips.com
2
Page 41

CONSIGNES DE SÉCURITÉ IMPORTANTES
Veuillez lire ces consignes avant de faire fonctionner cet appareil
1. Lire les instructions.
2. Conserver les instructions.
3. Obéir à tous les avertissements.
4. Suivre toutes les instructions.
5. Éviter d’utiliser cet appareil à proximité d’une source d’eau.
6. Nettoyer à l’aide d’un linge sec seulement.
7. Ne pas nuire à la circulation des orifices de ventilation. Effectuer l’installation selon
les instructions du fabricant.
8. Ne pas installer près d’une source de chaleur comme un radiateur, un registre de
chaleur, une cuisinière ou tout autre appareil (y compris les amplificateurs) qui
dégage de la chaleur.
9. Ne pas contourner la mesure de sécurité de la fiche polarisée ou de mise à la terre.
Une fiche polarisée dispose de deux lames dont l’une est plus large que l’autre. Une
fiche avec mise à la terre est dotée de deux lames ainsi que d’une troisième broche
de mise à la terre. La lame plus large ou troisième broche est fournie pour votre
sécurité. Lorsque la fiche fournie ne correspond pas à votre prise, consulter un
électricien pour qu’il effectue le remplacement de la prise périmée.
10. Protéger le cordon d’alimentation en évitant de marcher dessus ou de le coincer
particulièrement au niveau de la fiche, des prises de courant et à l’endroit où il sort
de l’appareil.
11. N’utiliser que l’équipement ou les accessoires spécifiés par le fabricant.
12. L’appareil ne doit être utilisé qu’avec le chariot, socle, trépied, support ou table
spécifié par le fabricant ou vendu avec l’appareil. Un appareil utilisé en
combinaison avec un chariot doit être déplacé avec soin afin d’éviter les
risques de blessures occasionnées par le renversement de l’appareil.
13. Débrancher cet appareil durant les orages électriques ou lorsqu’il n’est
pas utilisé pour une période de temps prolongée.
14. L’entretien ou la réparation de l’appareil doit être effectué par un personnel qualifié
seulement. Il faut faire réparer l’appareil dès que celui-ci a été endommagé, qu’il
s’agisse du cordon ou de la fiche d’alimentation, si du liquide a été renversé ou des
objets sont tombés dans l’appareil, s’il a été exposé à la pluie ou à une humidité
excessive, s’il ne fonctionne pas normalement ou s’il a subi un choc.
15. Ce produit peut contenir du plomb et du mercure. La mise au rebut de ces
substances peut être réglementée par suite de considérations environnementales.
Pour de plus amples informations concernant la mise au rebut ou le recyclage de
l’appareil, communiquer avec les autorités locales ou avec la Electronic Industries
Alliance : www.eiae.org
16. Dommages nécessitant des réparations - L’appareil doit être réparé par un personnel qualifié lorsque :
A. Le cordon ou la fiche d’alimentation est endommagé ;
B. Des objets sont tombés dans l’appareil ou du liquide a été renversé dans
l’appareil ; ou
C. L’appareil a été exposé à la pluie ; ou
D. L’appareil semble ne pas fonctionner correctement ou affiche un changement
marqué dans la performance ; ou
E. L’appareil a subi un choc ou le boîtier est endommagé.
17. Inclinaison/stabilité - Tous les postes de télévision doivent répondre aux normes
de sécurité internationales globales recommandées, relativement aux propriétés
d’inclinaison et de stabilité du boîtier.
• Il ne faut pas compromettre ces normes de construction par une utilisation
excessive de force sur la partie avant ou supérieure du boîtier afin d’éviter de
faire renverser l’appareil.
• De plus, ne pas mettre vos enfants ou vous-même en danger, en plaçant
des dispositifs électroniques ou des jouets sur le dessus du poste. Ces objets
pourraient tomber du téléviseur sans qu’on s’y attende et entraîner des dom
mages ou des blessures.
18. Montage mural ou montage au plafond - Si l’appareil doit être monté au mur
ou au plafond, l’installation doit être effectuée selon les recommandations du
fabricant.
19. Lignes électriques - Une antenne extérieure doit être installée loin des lignes
électriques.
20. Mise à la terre d’une antenne extérieure - Si une antenne extérieure est connec
tée au récepteur, s’assurer que le système d’antenne est mis à la terre de façon à
fournir une protection contre les surcharges de courant et les charges statiques
accumulées.
L’article 810 du Code national de l’électricité, ANSI/NFPA No. 70-1984, offre
des informations relatives à la mise à la terre correcte du mât et des structures
de support, la mise à la terre de la descende d’antenne vers un dispositif de
décharge, la taille des connecteurs de mise à la terre, l’emplacement du dispositif
de décharge d’antenne, le raccordement des conducteurs de terre ainsi qu’aux
exigences relatives au conducteur de terre. Voir la figure ci-dessous.
21. Pénétration d’objet et de liquide - Prendre tous les soins nécessaires pour éviter
que des objets tombent ou que des liquides coulent dans le boîtier à travers les
orifices.
a) Avertissement : Afin de réduire les risques d’incendie ou de choc électrique, ne
pas exposer cet appareil à la pluie ou à l’humidité et les objets remplis de liquide,
comme les vases, ne doivent pas être placés sur le dessus de l’appareil.
22. MISE EN GARDE concernant les piles - Pour prévenir la fuite des piles pouvant
entraîner des blessures, des dégâts matériels ou endommager l’appareil :
• Installer toutes les piles de façon à ce qu’elles correspondent aux bornes + et
–, tel qu’indiqué sur le dispositif.
• Ne pas mélanger les piles (neuves et usagées ou carbone et alcaline, etc.).
• Retirer les piles du boîtier lorsque la télécommande n’est pas utilisée pour une
période de temps prolongée.
-
-
Française
Remarque pour les installateurs de système de câble: ce rappel est à l’intention des installateurs de système de câble afin d’attirer leur
attention sur l’article 820-40 du code NEC fournissant les marches à suivre en ce qui a trait à une mise à la terre adéquate et en particulier
spécifie que le câble de masse doit être raccordé au système de mise à la masse du bâtiment, aussi près que possible du point d’entrée du câble.
EXEMPLE DE MISE À TERRE
D’UNE ANTENNE SUIVANT
LES RECOMMANDATIONS
ATTACHE DE TERRE
FIL D’ENTRÉE DE L’ANTENNE
DU NATIONAL ELECTRICAL
CODE (NEC)
APPAREIL DÉCHARGE/ANTENNE
CONDUCTEURS DE MISE À TERRE
ATTACHES DE TERRE
ÉLECTRIQUES MATÉRIEL DE SERVICE
3
SYSTÈME ÉLECTRODE DE TERRE POUR
SOURCE ÉLECTRIQUE
Page 42

MESURES DE PRÉCAUTION
MESURES DE PRÉCAUTION ADDITIONNELLES
• S’ASSURER que le support du téléviseur ACL est fixé solidement au poste (voir le guide d’utilisation rapide pour savoir com ment
serrer la vis du support sur le poste). Le serrage incorrect de la vis pourra rendre l’utilisation du poste dangereuse.
• Si le téléviseur ACL est monté sur le mur, l’installation doit être réalisée par un technicien qualifié. Une installation incorrecte pourra
rendre l’utilisation du poste dangereuse.
• Débrancher le cordon d’alimentation de la prise murale lors :
– du nettoyage de l’écran de télévision,
– d’un orage électrique,
– lorsque le poste n’est pas utilisé pour une période de temps prolongée.
• Éviter de déplacer le téléviseur ACL lorsqu’il est sous tension.
• Éviter de toucher, d’appuyer ou de frotter la surface de l’écran à cristaux liquides contre des objets durs ou pointus.
• Lorsque la surface de l’écran ACL est poussiéreuse, essuyer délicatement à l’aide d’un tissu de coton absorbant ou autre matériel
non abrasif comme de la chamoisine. NE JAMAIS utiliser d’acétone, de toluène ou d’alcool pour nettoyer la surface de l’écran. Ces
produits chimiques endommageront l’écran du téléviseur.
• Essuyer l’eau ou la salive le plus rapidement possible. Une exposition prolongée à ces liquides peut entraîner la déformation et la
décoloration de l’écran ACL.
• Être vigilant de la condensation lors des changements de température. La condensation peut endommager l’écran ACL ainsi que les
circuits électriques. Lorsque la condensation s’atténue, des taches ou des marques apparaissent sur l’écran ACL.
• Les informations de MISE EN GARDE se trouvent à l’arrière du téléviseur (voir les schémas ci-dessous).
POSITIONNEMENT DU TÉLÉVISEUR ACL
• Placer le téléviseur ACL sur un support ou une base solide et robuste. S’assurer que le support est suffisamment robuste pour soutenir le poids
du téléviseur ACL.
• Laisser un dégagement d’au moins 6 pouces de chaque côté du téléviseur ACL afin d’offrir une bonne ventilation.
• Ne pas placer le téléviseur ACL près d’un radiateur ou d’une source de chaleur.
• Ne pas placer le téléviseur ACL où il sera exposé à la pluie ou à une humidité excessive.
PROCÉDURE DE RECYCLAGE/MISE AU REBUT EN FIN DE VIE
• Afin de réduire les effets nuisibles sur l’environnement, les piles fournies avec votre téléviseur ACL ne contiennent pas de mer cure ou de
nickel-cadmium. Dans la mesure du possible, utiliser le service de recyclage disponible dans votre région lors de la mise au rebut des piles.
• Le téléviseur ACL utilise des matériaux recyclables. Afin de réduire les effets nuisibles sur l’environnement, repérer les entrepris es de votre
région intéressées à récupérer les téléviseurs usagés pour les démanteler et réutiliser certaines pièces ou communiquer avec le revendeur qui
pourra offrir des conseils de recyclage.
• Mettre la boîte ainsi que son emballage au rebut en utilisant les services d’élimination des déchets disponibles dans votre région.
4
Page 43

CONTENTS
INTRODUCTION
Bienvenue/Enregistrement de votre téléviseur ............................... 2
Sécurité/Précautions ..................................................................
Fonctionnalités .............................................................................
Table des matières ........................................................................
MENU INSTALLATION
Comment utiliser la commande Langue .......................... 6
Comment utiliser la commande Mode de syntonisation ...............
Comment utiliser la commande Programmation automatique .....
Comment utiliser la commande Editer programmation ................
Sélection du Systéme ....................................................................
Ajust Fin ......................................................................................
COMMANDES DE MENU IMAGE
Comment utiliser la commande de menu Image .............. 9
COMMANDES DE MENU SON
Comment utiliser la commande de menu Son ............... 10
COMMANDES DE MENU CARACTÉRISTIQUES
Comment utiliser la commande de menu Minuterie ...... 11
Comprendre les commandes Verr. auto. .....................................
Réglage d’un code d’accès Verr. auto. ..........................................
Comment bloquer les canaux à l’aide de Verr. auto. ....................
Comment effacer tous les canaux bloqués à la fois ......................
Comment bloquer des programmes à l’aide de la commande
Classement de filmss ..................................................................
Comment bloquer des programmes à l’aide de la commande de
classement d’émissions de télévision ...........................................
Autres options de blocage Verr. auto. ..........................................
Utilisation de l’écran de révision Verr. auto. ................................
Comment utiliser la commande Contraste+ ............................... 20
Comment utiliser la commande DNR ....................................... 20
Comment utiliser la commande PIP ...........................................
Comment utiliser la Liste de sources. .........................................
FONCTIONS CONNEXES DE LA TÉLÉCOMMANDE
Comment utiliser la commande Format ........................ 22
Comment utiliser la commande Veille ........................................
Comment utiliser la commande Sous-titres ................................
Comment utiliser la commande Liste de programmes ................
Comment utiliser la commande Active Control .........................
Comment utiliser la commande Surf ..........................................
Comment utiliser la commande Pixel Plus™
(dépendre du modèle)
Comment utiliser la commande AutoPicture™ ...........................
Comment utiliser la commande AutoSound™ ............................
Utilisation de la télécommande avec des dispositifs externes
Boutons Reliés a la télécommande du dispositif externe .............
Comment utiliser la télécommande avec des dispositif
externes Philips ..........................................................................
RÉGLAGE DU MODE PC (ORDINATEUR PERSONNEL)
Comment utiliser la commande Image .......................... 29
Comment utiliser la commande Sél. audio .................................
Comment utiliser la commande Caractéristiques PC .................. 30
Comment utiliser la commande PIP ...........................................
RÉGLAGE DU MODE HD (HAUTE DÉFINITION)
Comment sélectionner le mode HD .............................. 31
Comment utiliser la commande Image .......................................
Comment utiliser la commande Son ..........................................
Comment utiliser la commande PIP ...........................................
INFORMATIONS IMPORTANTES
Dépannage ....................................................................35
Soins et nettoyage .......................................................................
Index ..........................................................................................
Garantie limitée .........................................................................
3-4
12
13
14
15
16
17
18
19
21
22
23
23
24
24
25
.. 25
26
26
27
28
29
31
32
33
34
36
37
38
Fonctionnalités
Active Control™ permet de mesurer et de corriger continuellement tous les
signaux entrants afin d’obtenir une qualité d’image supérieure. Cette fonc
4
tion permet de surveiller et de corriger la commande de netteté ainsi que la
5
commande de réduction de bruit.
Panneau de prises audio/vidéo permet d’effectuer des connexions directes
avec des magnétoscopes, DVD ou autres dispositifs et de fournir une image
6
de télévision et une lecture audio de qualité.
7
Commande AVL (Audio Volume Leveler) ou limiteur de niveau audio. Per
7
met de garder le son du téléviseur à un niveau égal. Les variations sonores
8
qui se produisent lors d’un changement de programme ou durant les pauses
commerciales sont ainsi réduites afin d’offrir une sonorité plus uniforme et
8
agréable.
AutoLock™ (
grammes ou canaux selon certains classements si vous ne voulez pas que vos
enfants écoutent des émissions qui vous semblent inappropriées.
AutoPicture™ permet de modifier les paramètres d’image (couleur, teinte,
contraste, etc.) pour différents types de programme, comme sports, films,
multimédia (jeux) ou signaux faibles par simple pression d’un bouton.
AutoSound™ permet de sélectionner entre trois commandes réglées en usine
et une commande personnelle que vous réglez selon vos préférences via le
menu Son à l’écran. Les trois commandes réglées en usine (éatre, Mu
sique et Parole), vous permettent de personnaliser l’audio de votre téléviseur
et d’améliorer le programme en cours de visualisation.
Editer progr. permet d’ajouter ou de supprimer des canaux de la liste de
canaux sauvegardés dans la mémoire du téléviseur. Grâce à Editer pro
gramme, il est facile de limiter ou d’augmenter le nombre de canaux qui
vous sont disponibles lorsque vous appuyez sur les boutons CH +/– de votre
télécommande.
Sous-titres permet de lire le contenu vocal des programmes de télévision sur
l’écran de votre téléviseur.
Télécommande infrarouge fait fonctionner votre téléviseur et autres
dispositifs de commande à distance comme magnétoscope, lecteur DVD,
convertisseur de canaux et récepteur satellite.
Menu à l’écran permet d’afficher des messages et des instructions concer
nant les différentes fonctions du téléviseur (affichables en anglais, français
ou espagnol).
Veille met automatiquement le téléviseur hors tension après une période de
temps déterminée.
Minuterie permet de régler votre téléviseur pour qu’il s’allume ou qu’il
s’éteigne une fois ou chaque jour comme un réveille-matin.
Unis. L’utilisation de produits portant l’étiquette Energy Star® permet
d’économiser l’énergie. Économiser l’énergie réduit la pollution de l’air ainsi
que votre facture d’électricité !
Active Control, AutoPicture et AutoSound Surround sont des marques de
commerce de Philips Consumer Electronics Company. Copyright 2001
Philips Consumer Electronics.
*Manufacturé avec l’autorisation de Dolby Laboratories. “Dolby” et le sym
bole double D sont des marques de commerce de Dolby Laboratories.
verrouillage automatique)permet de bloquer certains pro-
En tant que partenaire Energy Star®, Philips Consumer
Electronics a déterminé que ce produit répond aux
directives d’efficacité énergétique Energy Star®. Energy
Star® est une marque de commerce déposée aux États-
GUIDE D’INSTALLATION ET
D’UTILISATION RAPIDES
Veuillez consulter votre Guide
d’utilisation et de configuration rapides
(fourni avec votre téléviseur) pour de
plus amples détails sur la réalisation
des connexions et le fonctionnement
de la télécommande.
-
-
-
-
-
-
Française
5
Page 44

LANGUE
COMMENT UTILISER LES FONCTIONS D’INSTALLATION
our nos propriétaires de téléviseur de langue
française, espagnole ou portugaise, une option de
P
Langue est affichable à l’écran. La commande de langue
permet à l’utilisateur de régler le menu à l’écran du
téléviseur pour afficher en langue anglaise, française,
espagnole ou portugaise.
Appuyez sur le bouton MENU de la
télécommande pour afficher le menu à l’écran.
1
Appuyez sur le bouton CURSEUR BAS à
plusieurs reprises jusqu’à ce que Installation soit
2
affiché en surbrillance.
Appuyez sur le bouton CURSEUR DROITE
pour accéder au menu Installation. Langue est
3
affiché en surbrillance.
Appuyez sur le bouton CURSEUR DROITE
ou CURSEUR GAUCHE
4
française, espagnole ou portugaise
Appuyez sur le bouton STATUS/EXIT pour
supprimer le menu à l’écran.
5
pour anglaise,
.
ASTUCE
La commande Langue fait apparaître les éléments
de menu seulement à l’écran du téléviseur en
anglais, française, espagnole ou portugaise. Elle
ne permet pas de changer les autres options de
texte comme le sous-titrage (CC) des émissions de
télévision.
Menu TV
Image
Caractér.
Installation
5
4
2
Son
Lumière
Couleur
Image
Définition
Teinte
1
3
4
Menu TV
Image
Caractér
Installation
Installation
Langue
Système
Mode synt.
Progr. auto.
Éditer progr.
Mise au point
Langue
Son
Système
Mode synt.
Progr. auto.
Éditer progr.
Français
Idioma Español
Idioma Portuguese
Language English
OU
OU
OU
MODE DE SYNTONISATION
a commande Mode de syntonisation vous permet de
changer l’entrée de signal du téléviseur aux modes
L
Câble, Antenne ou Automatique. Il est important
d’indiquer au téléviseur le type de signal qui est connecté,
c’est-à-dire une antenne ordinaire ou le service du câble.
Appuyez sur le bouton MENU de la
télécommande pour afficher le menu à l’écran.
1
Appuyez sur le bouton CURSEUR BAS à
plusieurs reprises jusqu’à ce que Installation soit
2
affiché en surbrillance.
Appuyez sur le bouton CURSEUR DROITE
pour accéder au menu Installation. Langue est
3
affiché en surbrillance.
Appuyez sur le bouton CURSEUR BAS
pour sélectionner la commande Mode de
4
syntonisation.
Appuyez sur le bouton CURSEUR DROITE
ou CURSEUR GAUCHE
5
Câble, Antenne ou Auto. Si le mode de
syntonisation est réglé à Auto, la fonction de
programmation automatique détectera si un
signal de câblodiffusion est présent.
Appuyez sur le bouton STATUS/EXIT pour
supprimer le menu à l’écran.
6
pour sélectionner
Menu TV
Image
Caractér.
Installation
6
5
2
4
Son
Lumière
Couleur
Image
Définition
Teinte
1
3
5
Menu TV
Image
Caractér.
Installation
Installation
Langue
Système
Mode synt.
Progr. auto.
Éditer progr.
Mise au point
Installation
Langue
Système
Mode synt.
Progr. auto.
Éditer progr.
Mise au point
Son
Langue
Système
Mode synt.
Progr. auto.
Éditer progr.
Français
Cable
ASTUCE
Lorsque Câble est sélectionné, les canaux 1–125
sont disponibles. Lorsque ANTENNE est
sélectionné, les canaux 2–69 sont disponibles.
OU
Mode synt. Auto
OU
Mode synt. Antenne
6
Page 45

COMMENT UTILISER LES FONCTIONS D’INSTALLATION
PROGRAMMATION AUTOMATIQUE
otre téléviseur peut se régler automatiquement aux canaux
locaux (ou de câblodiffusion). Vous n’avez qu’à appuyer sur
V
les boutons CH (+) ou (–) pour sélectionner seulement les stations
locales.
Appuyez sur le bouton MENU de la télécommande
pour afficher le menu à l’écran.
1
Appuyez sur le bouton CURSEUR BAS à plusieurs
reprises jusqu’à ce que Installation soit affiché en
2
surbrillance.
Appuyez sur le bouton CURSEUR DROITE pour
accéder au menu Installation. Langue est affiché en
3
surbrillance.
Appuyez sur le bouton CURSEUR BAS à plusieurs
reprises jusqu’à ce que Programmation automatique soit
4
sélectionné. « Commencer? » est affiché.
Appuyez sur le bouton CURSEUR DROITE pour
démarrer la procédure de programmation automatique.
5
Appuyez sur le bouton STATUS/EXIT pour supprimer
le menu de l’écran du téléviseur lorsque la procédure de
6
programmation automatique est terminée.
ASTUCE
Après avoir exécuté la fonction d’auto programmation,
vérifiez vos résultats. Appuyez sur les boutons CH (+) ou
(–) et vérifiez les canaux que vous pouvez sélectionner.
N’oubliez pas que vous devez d’abord raccorder un signal
d’antenne ou du service du câble sur votre téléviseur.
Voir le guide d’utilisation rapide pour la réalisation de ces
connexions.
Menu TV
Image
Caractér.
Installation
6
2
4
Son
Lumière
Couleur
Image
Définition
Teinte
1
3
5
Menu TV
Image
Son
Caractér.
Installation
Installation
Langue
Système
Mode synt.
Progr. auto.
Éditer progr.
Mise au point
Progr. auto.
Prog.
Langue
Système
Mode synt.
Progr. auto.
Éditer progr.
Commencer?
8
Française
ÉDITION DES PROGRAMMES
râce à la fonction Editer Progr., vous pouvez facilement
G
ajouter ou supprimer des canaux de la liste de canaux
sauvegardés dans la mémoire du téléviseur.
Appuyez sur le bouton MENU de la télécommande pour
afficher le menu à l’écran.
1
Appuyez sur le bouton CURSEUR BAS à plusieurs
reprises jusqu’à ce que Installation soit affiché en
2
surbrillance.
Appuyez sur le bouton CURSEUR DROITE pour
accéder au menu Installation. Langue est affiché en
3
surbrillance.
Appuyez sur le bouton CURSEUR BAS à plusieurs
reprises jusqu’à ce que Éditer progr. soit sélectionné.
4
Appuyez sur le bouton CURSEUR DROITE pour
5
accéder au menu Éditer progr.
Appuyez sur les boutons CURSEUR DROITE ou
CURSEURGAUCHE pour faire défiler la liste des canaux
6
disponibles. Vous pouvez également appuyer sur les
boutons CH+ ou CH- pour faire défiler la liste de canaux.
Ou, appuyez sur les touches numérotées pour sélectionner
un canal de numéro spécifique.
Appuyez sur le bouton CURSEUR BAS pour
sélectionner Passé avec le canal que vous voulez éliminer
7
toujours syntonisé.
Appuyez sur le bouton CURSEUR GAUCHE ou
CURSEUR DROITE pour sélectionner Marche et
8
activer l’élimination d’un canal. Ou, sélectionnez Arrêt
pour désactiver l’élimination d’un canal.
Appuyez sur le bouton STATUS/EXIT pour supprimer
le menu de l’écran.
9
Menu TV
Image
Caractér.
Installation
9
6
8
2
4
7
Son
Lumière
Couleur
Image
Définition
Teinte
1
3
Menu TV
Image
Son
Caractér.
Installation
Installation
Langue
Système
Mode synt.
Progr. auto.
Éditer progr.
Mise au point
Éditer progr.
Prog.
Passé
Langue
Système
Mode synt.
Progr. auto.
Éditer progr.
Prog.
Passé
2
5
6
8
7
Éditer progr.
Prog.
Passé
Marche
Page 46

COMMENT UTILISER LES FONCTIONS D’INSTALLATION
SÉLECTION DU SYSTÈME
a fonction Système vous permet de sélectionner le système de
télévision de votre choix. Si Auto est sélectionné, le système
L
respectif sera automatiquement sélectionné selon le système de
transmission. Sélectionnez le système approprié si la réception est
mauvaise lorsque Auto est sélectionné.
Appuyez sur le bouton MENU de la télécommande
pour afficher le menu à l’écran.
1
Appuyez sur le bouton CURSEUR BAS à plusieurs
reprises jusqu’à ce que Installation soit affiché en
2
surbrillance.
Appuyez sur le bouton CURSEUR DROITE pour
accéder au menu Installation. Langue est affiché en
3
surbrillance.
Appuyez sur le bouton CURSEUR BAS jusqu’à ce que
Système soit sélectionné.
4
Appuyez sur le bouton CURSEUR DROIT pour
sélectionner le système (Auto, NTSC, PAL-M ou PAL-
5
N) de votre choix.
Appuyez sur le bouton STATUS/EXIT pour supprimer
le menu de l’écran du téléviseur lorsque la procédure de
6
programmation automatique est terminée.
ASTUCE
Après avoir exécuté la fonction d’auto programmation,
vérifiez vos résultats. Appuyez sur les boutons CH (+) ou
(–) et vérifiez les canaux que vous pouvez sélectionner.
N’oubliez pas que vous devez d’abord raccorder un signal
d’antenne ou du service du câble sur votre téléviseur.
Voir le guide d’utilisation rapide pour la réalisation de ces
connexions.
Menu TV
Image
Son
Caractér.
Installation
6
2
4
Lumière
Couleur
Image
Définition
Teinte
1
3
5
Menu TV
Image
Son
Caractér.
Installation
Installation
Langue
Système
Mode synt.
Progr. auto.
Éditer progr.
Mise au point
Progr. auto.
Prog.
Langue
Système
Mode synt.
Progr. auto.
Éditer progr.
Commencer?
8
AJUST. FIN
ette fonction vous permet de régler la réception de l’image
dans les zones de r
C
Appuyez sur le bouton MENU de la télécommande pour
afficher le menu à l’écran.
1
Appuyez sur le bouton CURSEUR BAS à plusieurs
reprises jusqu’à ce que Installation soit affiché en
2
surbrillance.
Appuyez sur le bouton CURSEUR DROITE pour
accéder au menu Installation. Langue est affiché en
3
surbrillance.
Appuyez sur le bouton CURSEUR BAS à plusieurs
reprises jusqu’à ce que Éditer progr. soit sélectionné.
4
Appuyez sur le bouton CURSEUR DROIT pour
accéder au menu Réglage fin.
5
Appuyez sur les boutons CURSEUR DROIT ou
CURSEUR GAUCHE pour réaliser un réglage fin.
6
Appuyez sur le bouton CURSEUR BAS pour
sélectionner Passé avec le canal que vous voulez éliminer
7
toujours syntonisé.
Appuyez sur le bouton CURSEUR GAUCHE ou
CURSEUR DROITE pour sélectionner Marche et
8
activer l’élimination d’un canal. Ou, sélectionnez Arrêt
pour désactiver l’élimination d’un canal.
Appuyez sur le bouton STATUS/EXIT pour supprimer
le menu de l’écran.
9
éception faible.
Menu TV
Image
Son
Caractér.
Installation
9
6
8
2
4
7
Lumière
Couleur
Image
Définition
Teinte
1
3
5
6
8
Menu TV
Image
Son
Caractér.
Installation
Installation
Langue
Système
Mode synt.
Progr. auto.
Éditer progr.
Mise au point
Éditer progr.
Prog.
Passé
Éditer progr.
Prog.
Passé
Langue
Système
Mode synt.
Progr. auto.
Éditer progr.
Prog.
Passé
2
Marche
8
Page 47

COMMENT UTILISER LES COMMANDES DE RÉGLAGE D’IMAGE
our effectuer le réglage des commandes d’image de
votre téléviseur, sélectionnez un canal puis effectuez
P
la procédure suivante.
Appuyez sur le bouton MENU de la
télécommande pour afficher le menu à l’écran.
1
Appuyez sur le bouton CURSEUR DROITE
pour accéder au menu Image. Lumière est
2
affiché en surbrillance.
Appuyez sur le bouton CURSEUR HAUT ou
3
CURSEUR BAS pour sélectionner le réglage
d’image que vous voulez modifier : Lumière,
Couleur, Image, Définition, Teinte
couleur.
Appuyez sur les boutons CURSEUR
GAUCHE ou CURSEUR DROITE
4
effectuer le réglage de la commande sélectionnée.
Appuyez sur le bouton STATUS/EXIT lorsque
vous avez terminé pour supprimer le menu de
5
l’écran.
ou Temp.
pour
Menu TV
Image
Son
Caractér.
Installation
5
3
4
3
Lumière
Couleur
Image
Définition
Teinte
1
2
4
Image
Lumière
Couleur
Image
Définition
Teinte
Temp. couleur
Image
Lumière
Couleur
Image
Définition
Teinte
Temp. couleur
Image
Lumière
Couleur
Image
Définition
Teinte
Temp. couleur
48
38
42
Française
ASTUCE
Veuillez noter que les paramètres de mise au point
sont en milieu de gamme lorsque
l’indicateur est au centre.
REMARQUE: Les commandes de Définition et de
Teinte ne peuvent pas être réglées lorsqu’elles sont
syntonisées sur les entrées CVI.
Lumière – permet d’augmenter ou de diminuer
la quantité de lumière dans les zones sombres de
l’image.
Couleur – permet d’ajouter ou de supprimer des
couleurs.
Image – permet d’améliorer la définition des
parties claires de l’image.
Définition – permet d’améliorer la définition de
l’image.
Teinte – permet de régler l’image afin d’obtenir
une coloration naturelle de peau.
Temp. couleur – permet de sélectionner entre
des préférences d’image NORMAL, FROID ou
CHAUD. (Normal rend les blancs plus blancs ;
Froid rend les blancs plus bleus et CHAUD rend
les blancs plus rouges.)
Image
Lumière
Couleur
Image
Définition
Teinte
Temp. couleur
Image
Lumière
Couleur
Image
Définition
Teinte
Temp. couleur
Image
Lumière
Couleur
Image
Définition
Teinte
Temp. couleur
8
-30
Normale
9
Page 48

COMMENT UTILISER LES COMMANDES DE RÉGLAGE DU SON
our faire le réglage des commandes de son de votre
téléviseur, sélectionnez un canal puis effectuez la
P
procédure suivante.
Appuyez sur le bouton MENU de la
télécommande pour afficher le menu à l’écran.
1
Image est affiché en surbrillance.
Appuyez sur le bouton CURSEUR BAS pour
mettre Son en surbrillance.
2
Appuyez sur le bouton CURSEUR DROITE
pour accéder au menu Son.
3
Appuyez sur le bouton CURSEUR HAUT ou
4
CURSEUR BAS pour sélectionner le réglage
sonore que vous voulez effectuer : Égalisation,
Équilibre, AVL, Dolby Virtual, SAP
Appuyez sur le bouton CURSEUR GAUCHE
ou CURSEUR DROITE pour faire le réglage
5
de la commande sélectionnée.
Appuyez sur le bouton STATUS/EXIT lorsque
vous avez terminé pour supprimer le menu de
6
l’écran.
ou Son.
Menu TV
Image
Son
Caractér.
Installation
6
5
2
4
Égalisation
Équilibre
AVL
Dolby Virtual
SAP
1
4
3
5
Son
Égalisation
Équilibre
AVL
Dolby Virtual
SAP
Son
Son
Égalisation
Équilibre
AVL
Dolby Virtual
SAP
Son
Son
Égalisation
Équilibre
AVL
Dolby Virtual
SAP
Son
120 Hz
500 Hz
1500 Hz
5 KHz
10 KHz
0
Marche
ASTUCE
Égalisation – permet d’ajuster les tonalités du son.
Sélectionnez des valeurs entre 120Hz et 10KHz.
Équilibre – vous permet de régler les niveaux de
l’audio en provenance des haut-parleurs droite et
gauche.
AVL (Limiteur de niveau audio) – l’option
AVL, lorsqu’elle est activée, permet de garder le
volume à un niveau régulier en cas de variations
soudaines dans le niveau du son durant les pauses
commerciales ou les changements de canal.
Dolby Virtual – ajoute de la profondeur et de
l’ampleur au son du téléviseur. Sélectionnez entre
Dolby Virtual ou Stéréo (si stéréo) ou Spatial ou
Mono (si mono).
SAP (Voie audio secondaire)
troisième voie audio, un signal SAP peut être
entendu en sus de l’audio du programme de
télévision en cours. Remarque : Si SAP n’est pas
disponible, « Non disponible » est affiché à l’écran.
Son – choisissez entre Stéréo ou Mono.
– utilisée comme
Son
Égalisation
Équilibre
AVL
Dolby Virtual
SAP
Son
Son
Égalisation
Équilibre
AVL
Dolby Virtual
SAP
Son
Son
Égalisation
Équilibre
AVL
Dolby Virtual
SAP
Son
Dolby Virtual
Marche
Stéréo
10
Page 49

COMMENT UTILISER LES COMMANDES DE MENU MINUTERIE
otre téléviseur dispose d’une horloge à l’écran. Le
téléviseur peut également être réglé pour s’éteindre et
V
s’allumer à une heure particulière et se syntoniser à un
canal spécifique à la mise sous tension.
Appuyez sur le bouton MENU de la
télécommande pour afficher le menu à l’écran.
1
Appuyez sur le bouton CURSEUR BAS pour
mettre Caractéristiques
2
Appuyez sur le bouton CURSEUR DROITE
3
pour accéder au menu Caractéristiques.
Minuterie est affiché en surbrillance.
Appuyez sur le bouton CURSEUR DROITE
pour accéder au menu Minuterie.
4
Appuyez sur le bouton CURSEUR HAUT
5
ou CURSEUR BAS pour mettre l’une des
commandes de minuterie en surbrillance. Ces
options sont Heure, Heure début, Heure fin,
No. de programme, Activer
Appuyez sur les boutons CURSEUR DROITE
ou CURSEUR GAUCHE pour faire des
6
réglages ou pour basculer entre les options de
marche et d’arrêt.
Heure: Entrez l’heure en cours à l’aide des
touches numérotées. Utilisez le bouton curseur
droit pour déplacer le curseur dans la zone AM/
PM et les boutons curseur gauche et droit pour
faire basculer entre AM et PM.
Heure Début:Utilisez les touches numérotées
pour entrer l’heure où le téléviseur s’allumera
automatiquement. Utilisez les boutons CUR
SEUR DROITE et CURSEUR GAUCHE pour
basculer entre AM et PM.
Heure fin: Utilisez les touches numérotées pour
entrer l’heure où le téléviseur s’éteindraautom
atiquement. Utilisez les boutons CURSEUR
DROITE et CURSEUR GAUCHE pour bas
culer entre les réglages AM et PM.
N°de prog.: Utilisez les touches NUMÉRO-
TÉES ou les boutons CH + ou CH- pour
accéder au menu de démarrage de votre
choix. Vous pouvez également appuyer sur les
boutons CURSEUR DROITE ou CURSEUR
GAUCHE pour accéder à ce menu de démar
rage.
Activer: Réglez la minuterie pour qu’elle se
mette en Marche (Une fois ou Journalier) ou
en Arrêt. Appuyez sur les boutons CURSEUR
DROITE et CURSEUR GAUCHE pour sélec
tionner Une fois, chaque jour (Journalier) ou
Arrêt.
Affichage: Appuyez sur le bouton CURSEUR
DROITE ou CURSEUR GAUCHE pour faire
basculer entre Marche et Arrêt. Si Marche est
sélectionné, l’heure est affichée constamment
lorsque le téléviseur est allumé. Si Arrêt est sélec
tionné, l’heure n’apparaît que lorsque le bouton
STATUS est enfoncé.
Appuyez sur le bouton STATUS/EXIT pour
supprimer le menu à l’écran.
7
en surbrillance.
ou Affichage.
-
-
-
Menu TV
Image
Son
Caractér.
Installation
Minuterie
Verr. auto.
Contraste+
Réduct. bruit
PIP
1
7
6
2
5
5
3
4
6
-
-
Caractér.
Minuterie
Verr. auto.
Contraste+
Réduct. bruit
Minuterie
Heure
Heure Début
Heure fin
Nº de prog.
Activer
Affichage
Minuterie
Heure
Heure Début
Heure fin
Nº de prog.
Activer
Affichage
Minuterie
Heure
Heure Début
Heure fin
Nº de prog.
Activer
Affichage
Minuterie
Heure
Heure Début
Heure fin
Nº de prog.
Activer
Affichage
Minuterie
Heure
Heure Début
Heure fin
Nº de prog.
Activer
Affichage
Minuterie
Heure
Heure Début
Heure fin
Nº de prog.
Activer
Affichage
Heure
Heure Dèbut
Heure fin
Nº de prog.
PIP
Activer
– – : – – PM
– – : – – PM
Française
– – : – – PM
8
Une fois
Marche
11
Page 50

COMMENT UTILISER LA COMMANDE VERR. AUTO.
a fonction AutoLock™ (verrouillage automatique)
effectue le traitement des données envoyées par
L
les diffuseurs ou autres fournisseurs de programmes
contenant des directives sur le contenu. Une fois
AutoLock™ programmé, un téléviseur doté d’une telle
fonction peut répondre aux directives de contenu et
bloquer les programmes dont le contenu semble douteux
(langage grossier et injurieux, violence ou scènes sexuelles
etc.). Cette fonction est très utile pour censurer les
programmes regardés par des enfants.
Sous cette rubrique, vous apprendrez comment
bloquer des canaux et des programmes sans
classement, non classés ou manquant d’informations.
Vous apprendrez également comment activer et
désactiver ces options de blocage. Vous trouverez
ci-dessous des informations décrivant en peu de
mots certains termes relatifs à AutoLock™ et aux
classements de programme.
AutoLock™ propose plusieurs options de
blocage:
Blocage : La commande de blocage est en réalité le «
sélecteur maître » de AutoLock™. Cette commande
modifie les paramètres que vous avez choisis pour
le blocage des programmes selon le classement des
films ou des émissions de télévision ou pour bloquer
les programmes manquant d’informations ou non
classifiés. Lorsque la commande Blocage est en
ARRÊT, le blocage ou la censure des programmes
est désactivée. Lorsque la commande Blocage est en
MARCHE, le blocage s’effectue selon les paramètres
que vous avez choisis.
MANQUE D’INFOS : TOUS les programmes sans
données de directives sur le contenu peuvent être
bloqués si l’option MANQUE D’INFOS est réglée à
MARCHE.
Un programme manquant d’informations n’est
encodé d’aucune information de classement de la
MPAA ou des Directives parentales. N’importe quel
programme peut entrer dans cette catégorie.
Vous pouvez également bloquer des canaux ou des
programmes particuliers
MPAA et des télédiffuseurs. (Voir une description de
ces classements sur cette page.)
selon les classements de la
Films/class.
G
PG
PG-13
NC-17
Marche
R
X
CLASSEMENT DES FILMS
(SELON L’ASSOCIATION AMÉRICAINE DU CINÉMA)
G: Général Convient à tous les âges. Ce type
de film convient aux enfants de tout âge.
Il ne contient que peu ou pas de violence,
aucun langage grossier et peu ou pas de
situations d’ordre sexuel.
SP : Surveillance parentale – Une
surveillance parentale est suggérée, car ce film
contient certaines scènes ne convenant pas
aux enfants. Ce type de film contient : un
certain niveau de violence, quelques situations
d’ordre sexuel et à l’occasion un langage
grossier et des dialogues suggestifs.
SP-13: Parents fortement prévenus – Ce
film contient certaines scènes ne convenant
pas aux enfants de moins de 13 ans. Les
programmes portant la classification SP
contiennent l’une ou l’autre des situations
suivantes : de la violence, des situations
sexuelles, des mots grossiers ou des dialogues
suggestifs.
R : Réservé – Ce type de film s’adresse
spécifiquement aux adultes. Toute personne
de moins de 17 ans doit être accompagnée
d’un adulte pour visionner ce film. Il peut
contenir l’une ou l’autre des situations
suivantes : de la violence explicite, des scènes
sexuelles explicites, un langage grossier et
injurieux ou des dialogues extrêmement
suggestifs.
NC-17 : Ne convient pas à une personne de
moins de 17 ans. – Ce type de film est réservé
aux adultes. Les films portant la mention
NC-17 contiennent de la violence graphique,
des scènes sexuelles explicites et un langage
grossier et injurieux.
X : Adultes seulement. Ce type de film
contient : de la violence extrêmement
graphique, de scènes sexuelles extrêmement
graphiques ou explicites et indécentes ou un
langage extrêmement grossier et suggestif.
TV/classement
TV-Y
TV-Y7
TV-G
TV-PG
TV-14
TV-MA
Marche
TV PARENTAL GUIDELINES
(TÉLÉDIFFUSEURS)
: (Convient à un public de tous les
TV-Y
âges) – Ce type d’émission s’adresse aux
enfants de très bas âge de 2 ans à 6 ans. Les
émissions portant cette classification ne
contiennent rien pouvant troubler de jeunes
enfants.
TV-Y7 : (Convient aux enfants de sept ans
et plus.) – Cette émission peut troubler les
enfants âgés de moins de 7 ans. L’écoute de
telles émissions convient mieux aux enfants
capables de faire la différence entre le réel et
l’imaginaire. Celles-ci sont traitées quelquefois
sur le mode de la fantaisie réaliste et de
comédies de violence (FV).
: (Général – Ce type d’émissions
TV-G
convient aux enfants de tout âge.) Elles
contiennent peu ou pas de violence, de
langage grossier ou de scène et dialogue
sexuels.
TV-PG : (Surveillance parentale suggérée
– Ce type d’émissions peut ne pas convenir à
de jeunes enfants.)
Elles peuvent contenir l’une ou l’autre des
situations suivantes : certaines scènes de
violence (V), certaines scènes sexuelles (S)
et à l’occasion, un langage grossier (L) et des
dialogues (D) suggestifs.
TV-14
: (Surveillance parentale fortement
recommandée
convenir aux enfants de moins de 14 ans.)
Elle peut contenir : une ou plusieurs scènes
de violence intense (V), de situations sexuelles
intenses (S), un langage grossier (L) ou des
dialogues extrêmement suggestifs (D).
TV-MA
spécifiquement aux adultes et peut ne pas
convenir aux personnes de moins de 17 ans.
Ce type d’émission contient : une violence
graphique soutenue (V), des situations
sexuelles explicites (S), un langage grossier ou
indécent (L).
– Cette émission peut ne pas
: (Réservé aux adultes) – s’adresse
12
Page 51

RÉGLAGE DU CODE D’ACCÈS VERROU AUTO™
errou AutoTM permet aux parents de bloquer ou de
« censurer » tout programme ne convenant pas aux
V
enfants. Il est impossible de regarder un canal bloqué
par la commande AutoLockTM à moins de saisir le code
d’accès exact pour déverrouiller le canal. Il faut d’abord
déterminer votre code d’accès Verrou Auto..
Appuyez sur le bouton MENU de la
télécommande pour afficher le menu à l’écran.
1
Appuyez sur le bouton CURSEUR BAS pour
mettre Caractéristiques
2
Appuyez sur le bouton CURSEUR DROITE
pour afficher le menu Caractéristiques.
3
Appuyez sur le bouton CURSEUR BAS
pour mettre la commande Verrou auto en
4
surbrillance.
Appuyez sur le bouton CURSEUR DROITE
pour accéder au mode de verrouillage. « Code
5
d’accès » est affiché.
À l’aide des touches numérotées de la
6
télécommande, entrez le code d’accès. Si vous
n’avez pas de code,
Après avoir entré le code une première fois,
Inexact est affiché à l’écran. Entrez le code une
deuxième fois, Exact est maintenant affiché. Un
message est affiché vous indiquant de changer le
code.
Entrez le code d’accès de votre choix à l’aide
des touches numérotées de la télécommande
7
Entrez le code une deuxième fois pour confirmer
votre code d’accès. Une fois le nouveau code
confirmé, le menu Verr. auto. est affiché. Vous
pouvez maintenant accéder aux fonctions
disponibles sur le menu.
Si vous ne souhaitez pas accéder aux autres
8
fonctions, appuyez sur le bouton STATUS/
EXIT pour supprimer le menu à l’écran.
en surbrillance.
0,7,1,1 est le code par défaut.
Menu TV
Caractér.
Installation
10
Image
Son
Minuterie
Verr. auto.
Contraste+
Réduct. bruit
PIP
1
Caractér.
Minuterie
Verr. auto.
Contraste+
Réduct. bruit
PIP
Caractér.
Minuterie
Verr. auto.
Contraste+
Réduct. bruit
PIP
Code d’accès
* * * *
Incorrect
3
Caractér.
Minuterie
Verr. auto.
Contraste+
Réduct. bruit
PIP
Conf. code
* * * *
Exact
Française
2
4
7
5
8
6
8
.
9
Caractér.
Minuterie
Verr. auto.
Contraste+
Réduct. bruit
PIP
Caractér.
Minuterie
Verr. auto.
Contraste+
Réduct. bruit
PIP
Conf. code
* * * *
Conf. code
* * * *
Confirmé
ASTUCE
Rappelez-vous que 0711 est le code Verrou AutoTM
par défaut. Si votre code d’accès a été modifié par
quelqu’un d’autre (un enfant, par exemple) ou si
vous ne vous en souvenez plus, vous pouvez quand
même accéder au menu en utilisant ce code par
défaut.
REMARQUE AUX PARENTS: Il est impossible pour
votre enfant de débloquer un canal sans connaître votre
code d’accès ou en modifiant le code d’accès. Si vous
remarquez que votre code d’accès a été changé, vous
pouvez en conclure que des canaux bloqués ont été
visionnés.
Verr. auto.
Bloquer prog.
Changer code
Tout effacer
Tout bloquer
Films/class.
TV/classement
13
Arrêt
Page 52

COMMENT BLOQUER DES CANAUX AVEC VERROU AUTO™
près avoir réglé votre code d’accès personnel (voir
la page précédente), vous êtes prêt à sélectionner
A
les canaux ou les entrées que vous voulez bloquer ou
censurer.
Appuyez sur le bouton MENU de la
télécommande pour afficher le menu à l’écran.
1
Appuyez sur le bouton CURSEUR BAS pour
mettre Caractéristiques en surbrillance.
2
Appuyez sur le bouton CURSEUR DROITE
pour afficher le menu Caractéristiques.
3
Appuyez sur le bouton CURSEUR BAS pour
mettre Verrou auto en surbrillance.
4
Appuyez sur le bouton CURSEUR DROITE
de nouveau pour afficher l’invite de code d’accès.
5
Entrez votre CODE D’ACCÈS à quatre
chiffres. Exact
6
commande Verrou enfant est accessible.
Vous pouvez choisir de bloquer des canaux
individuels ou tous les canaux à la fois. Pour
7
bloquer un seul canal, appuyez sur le bouton
CURSEUR DROITE pour sélectionner Marche
et activer le blocage de les canaux.
À l’aide des touches numérotées ou des
8
boutons CH+ ou CH-, entrez le canal que vous
voulez verrouiller.
Effectuez l’étape 7 de nouveau pour chaque canal que
vous voulez verrouiller.
Pour bloquer tous les canaux, appuyez sur le
9
bouton CURSEUR BAS jusqu’à ce que Tout
bloquer soit sélectionné.
Appuyez sur le bouton CURSEUR DROITE
10
pour sélectionner Marche et activer le blocage
de tous les canaux. Pour désactiver le blocage de
tous les canaux, sélectionnez Arrêt
Appuyez sur le bouton STATUS/EXIT pour
supprimer le menu à l’écran.
11
clignote rapidement et la
.
Menu TV
Caractér.
Installation
1
11
2
4
9
Image
Son
Minuterie
Verr. auto.
Contraste+
Réduct. bruit
PIP
3
5
7
10
8
6
8
Caractér.
Minuterie
Verr. auto.
Contraste+
Réduct. bruit
PIP
Caractér.
Minuterie
Verr. auto.
Contraste+
Réduct. bruit
PIP
Caractér.
Minuterie
Verr. auto.
Contraste+
Réduct. bruit
PIP
Verr. auto.
Bloquer prog.
Changer code
Tout effacer
Tout bloquer
Films/class.
Verr. auto.
Bloquer prog.
Changer code
Tout effacer
Tout bloquer
Films/class.
Code d’accès
– – – –
Code d’accès
* * * *
Exact
Arrêt
Marche
ASTUCE
Rappelez-vous que 0711 est le code Verrou
AutoTM par défaut. Si votre code d’accès a été
modifié par quelqu’un d’autre (un enfant, par
exemple) ou si vous ne vous en souvenez plus, vous
pouvez quand même accéder au menu en utilisant
ce code par défaut.
REMARQUE AUX PARENTS: Il est impossible
pour votre enfant de débloquer un canal sans
connaître votre code d’accès ou en modifiant le code
d’accès. Si vous remarquez que votre code d’accès a
été changé, vous pouvez en conclure que des canaux
bloqués ont été visionnés.
Prog. 2
Bloqué Par Verr. auto.
Blocage des canaux
Code d’accès
– – – –
Si un canal est bloqué par l’option
Bloquer programme ou l’option Tout
bloquer, le téléviseur affiche l’écran
ci-dessus. Pour écouter le programme,
entrez votre code d’accès ou mettez
l’option Bloquer programme en Arrêt.
14
Page 53

COMMENT EFFACER TOUS LES CANAUX BLOQUÉS À LA FOIS
ivers messages sont affichés à l’écran lorsque
quelqu’un essaie de regarder un programme bloqué.
D
Le message est déterminé par la méthode de blocage
utilisée. Vous pouvez regarder le programme bloqué et
mettre la fonction Verrou auto™ en ARRÊT en utilisant
la commande Tout Effacer ou par la saisie de votre code
d’accès.
Appuyez sur le bouton MENU de la
télécommande pour afficher le menu à l’écran.
1
Appuyez sur le bouton CURSEUR BAS pour
mettre Caractéristiques
2
Appuyez sur le bouton CURSEUR DROITE
pour afficher le menu Caractéristiques.
3
Appuyez sur le bouton CURSEUR BAS pour
4
sélectionner la commande Verrou auto.
Appuyez sur le bouton CURSEUR DROITE
de nouveau pour mettre Code d’accès en
5
surbrillance.
Entrez votre code d’accès à quatre chiffres, «
Exact »est affiché brièvement à l’écran et le menu
6
Verrouillage automatique est accessible.
Appuyez sur le bouton CURSEUR BAS pour
sélectionner Tout effacer. Effacer? est affiché à
7
l’écran.
Appuyez sur le bouton CURSEUR DROITE
pour activer l’effacement de tous les canaux.
8
Appuyez sur le bouton STATUS/EXIT pour
supprimer le menu à l’écran.
9
en surbrillance.
Menu TV
Image
Caractér.
Installation
1
9
2
4
7
Son
Minuterie
Verr. auto.
Contraste+
Réduct. bruit
PIP
3
5
8
6
Caractér.
Minuterie
Verr. auto.
Contraste+
Réduct. bruit
Caractér.
Minuterie
Verr. auto.
Contraste+
Réduct. bruit
Caractér.
Minuterie
Verr. auto.
Contraste+
Réduct. bruit
Verr. auto.
Bloquer prog.
Changer code
Tout effacer
Tout bloquer
Films/class.
TV/Classement
PIP
Code d’accès
– – – –
PIP
PIP
Code d’accès
* * * *
Exact
Française
Effacer?
ASTUCE
Si vous syntonisez un canal spécifique qui a été
bloqué par Bloquer programme ou par l’une des
options Verrou. auto™, vous n’avez qu’à entrer
votre code d’accès à quatre chiffres pour afficher le
canal. REMARQUE : Vous pouvez ainsi débloquer
TOUS les canaux jusqu’à la mise hors tension
du téléviseur. Lorsque le téléviseur est allumé de
nouveau, tous les canaux bloqués précédemment
seront bloqués de nouveau.
Verr. auto.
Bloquer prog.
Changer code
Tout effacer
Tout bloquer
Films/class.
TV/classement
Effacé
15
Page 54

COMMENT BLOQUER DES PROGRAMMES SELON LES CLASSEMENTS DE FILM
près avoir réglé votre code d’accès personnel, vous
pouvez bloquer les films selon des classements de film
A
spécifiques.
Appuyez sur le bouton MENU de la
télécommande pour afficher le menu à l’écran.
1
Appuyez sur le bouton CURSEUR BAS pour
mettre Caractéristiques en surbrillance
2
Appuyez sur le bouton CURSEUR DROITE
pour afficher le menu Caractéristiques.
3
Appuyez sur le bouton CURSEUR BAS
pour mettre la commande Verrou auto en
4
surbrillance.
Appuyez sur le bouton CURSEUR DROITE
de nouveau pour mettre Code d’accès en
5
surbrillance.
Entrez votre code d’accès à quatre chiffres.
Exact clignote brièvement à l’écran et le menu se
6
déplace vers la gauche avec le menu Verrouillage
automatique maintenant accessible.
Appuyez sur le bouton CURSEUR BAS
à plusieurs reprises jusqu’à ce que Films/
7
classement soit affiché en surbrillance.
Appuyez sur le bouton CURSEUR DROIT et
le menu de classement se déplace vers la gauche
8
avec G mis en surbrillance.
Appuyez sur le bouton CURSEUR HAUT ou
9
BAS pour mettre chaque classe de votre choix en
surbrillance.
Appuyez ensuite sur le bouton CURSEUR
DROIT pour mettre la classe en MARCHE
10
ou en ARRÊT. Pour empêcher l’écoute de ces
programmes, vous n’avez qu’à sélectionner
MARCHE à côté de la classe.
Appuyez sur le bouton STATUS/EXIT pour
supprimer le menu à l’écran.
11
Menu TV
Image
Son
Caractér.
.
Installation
1
Minuterie
Verr. auto.
Contraste+
Réduct. bruit
PIP
3
5
11
9
8
10
2
4
7
9
6
Caractér.
Minuterie
Verr. auto.
Contraste+
Réduct. bruit
Caractér.
Minuterie
Verr. auto.
Contraste+
Réduct. bruit
Caractér.
Minuterie
Verr. auto.
Contraste+
Réduct. bruit
Verr. auto.
Bloquer prog.
Changer code
Tout effacer
Tout bloquer
Films/class.
TV/classement
Films/class.
PG-13
NC-17
PIP
Code d’accès
– – – –
PIP
PIP
G
PG
R
X
Code d’accès
* * * *
Exact
G
PG
PG-13
R
NC-17
Marche
16
Page 55

COMMENT BLOQUER DES PROGRAMMES SELON LES CLASSEMENTS D’ÉMISSIONS DE TÉLÉVISION
ffectuez la procédure suivante pour sélectionner les
classes d’émissions de télévision spécifiques que vous
E
voulez bloquer.
Appuyez sur le bouton MENU de la
télécommande pour afficher le menu à l’écran.
1
Appuyez sur le bouton CURSEUR BAS pour
mettre Caractéristiques en surbrillance.
2
Appuyez sur le bouton CURSEUR DROITE
pour afficher le menu Caractéristiques.
3
Appuyez sur le bouton CURSEUR BAS
pour mettre la commande Verrou auto en
4
surbrillance.
Appuyez sur le bouton CURSEUR DROITE
de nouveaupour mettre Code d’accès en
5
surbrillance.
Entrez votre code d’accès à quatre chiffres.
Exactclignote brièvement à l’écran et le menu se
6
déplace vers la gauche avec le menu Verrouillage
automatique maintenant accessible.
Appuyez sur le bouton CURSEUR BAS
à plusieurs reprises jusqu’à ce que Films/
7
classement soit affiché en surbrillance.
Appuyez sur le bouton CURSEUR DROITE
pour accéder au menu Films/classement .
8
Appuyez sur le bouton CURSEUR HAUT ou
BAS pour sélectionner la classe de votre choix
9
(TV-Y, TV-Y7, TV-G, TVPG, TV-14 ou TVMA).
Appuyez sur le bouton CURSEUR DROITE
ou GAUCHE pour mettre la classe en marche
10
ou en arrêt.
REMARQUE: des sous-classes plus spécifiques
(violence, contenu sexuel, dialogue ou comédie de
violence) sont disponibles pour TVY7, TV-PG,
TV-14 et TV-MA. (Consultez la page 11 pour des
définitions.)
Pour accéder à ces sous classes, avec la classe
11
principale sélectionnée, appuyez sur le bouton
CURSEUR DROITE. Effectuez de nouveau
les étapes 9-10 pour mettre les sous classes en
MARCHE ou en ARRÊT.
Appuyez sur le bouton STATUS/EXIT pour
supprimer le menu à l’écran.
12
Menu TV
Caractér.
Installation
1
12
9
10
2
4
7
Image
Son
Minuterie
Verr. auto.
Contraste+
Réduct. bruit
PIP
3
5
8
10
11
9
6
Caractér.
Minuterie
Verr. auto.
Contraste+
Réduct. bruit
Caractér.
Minuterie
Verr. auto.
Contraste+
Réduct. bruit
Caractér.
Minuterie
Verr. auto.
Contraste+
Réduct. bruit
Verr. auto.
Bloquer prog.
Changer code
Tout effacer
Tout bloquer
Films/class.
TV/classement
TV/classement
TV-Y
TV-Y7
TV-G
TV-PG
TV-14
TV-MA
TV/classement
TV-Y
TV-Y7
TV-G
TV-PG
TV-14
TV-MA
PIP
Code d’accès
– – – –
PIP
PIP
Code d’accès
* * * *
Exact
Française
TV-Y
TV-Y7
TV-G
TV-PG
TV-14
Marche
Tout bloquer
V
S
L
D
TV-PG
Tout bloquer
17
Marche
V
S
L
D
Page 56

AUTRES OPTIONS DE BLOCAGE VERROU AUTO™
a commande Verrou Auto™offre à l’utilisateur
d’autres options de blocage / Grâce aux options de
L
blocage, la fonction de censure peut être mise en Marche
ou en Arrêt.
Appuyez sur le bouton MENU/SELECT de la
télécommande pour afficher le menu à l’écran.
1
Appuyez sur le bouton CURSEUR HAUT ou
2
CURSEUR BAS pour mettre Caractéristiques
en surbrillance.
Appuyez sur le bouton CURSEUR DROITE
pour afficher le menu Caractéristiques.
3
Appuyez sur le bouton CURSEUR BAS
pour mettre la commande Verrou auto™ en
4
surbrillance.
Appuyez sur le bouton CURSEUR DROITE
de nouveau pour mettre Code d’accès en
5
surbrillance .
Entrez votre code d’accès à quatre chiffres .
Exactclignote brièvement à l’écran et le menu se
6
déplace vers la gauche avec le menu Verrou auto
maintenant accessible.
Appuyez sur le bouton CURSEUR BAS à
plusieurs reprises jusqu’à ce que Options blocage
7
soit affiché en surbrillance.
Appuyez sur le bouton CURSEUR DROITE
pour accéder au menu Options blocage.
8
Appuyez sur le bouton CURSEUR HAUT ou
9
BAS pour sélectionner l’option de blocage de
votre choix.
Blocage :la commande de blocage est en réalité
le « sélecteur maître » de AutoLock™. Lorsque la
commande est en Marche, TOUS les blocages/
censures seront effectués. Lorsque la commande
est en Arrêt, Tout bloquer est désactivé.
Non classé : TOUS les programmes non classés
selon les classements de films ou les directives
parentales (télévision) peuvent être bloqués si
cette fonction est réglée à Marche et la fonction
de Blocage est réglée à ARRÊT.
Sans classement : TOUS les programmes SANS
directives sur le contenu peuvent être bloqués
si l’option est réglée à Marche et la fonction de
Blocage est réglée à ARRÊT.
Appuyez sur le bouton CURSEUR DROITE
ou GAUCHE pour faire basculer Blocage entre
10
Marche et Arrêt.
Appuyez sur le bouton STATUS/EXIT pour
supprimer le menu à l’écran.
11
Menu TV
Caractér.
Installation
1
11
9
10
2
4
7
Image
Son
Minuterie
Verr. auto.
Contraste+
Réduct. bruit
PIP
3
5
8
10
9
6
Caractér.
Minuterie
Verr. auto.
Contraste+
Réduct. bruit
Caractér.
Minuterie
Verr. auto.
Contraste+
Réduct. bruit
Caractér.
Minuterie
Verr. auto.
Contraste+
Réduct. bruit
Verr. auto.
Opt. classem
Opt. blocage
Non classé
Sans classem.
Blocage
Opt. blocage
Non classé
Sans classem.
Blocage
PIP
Code d’accès
– – – –
PIP
PIP
Code d’accès
* * * *
Exact
Non classé
Sans classem.
Blocage
Marche
Marche
ASTUCE
Lorsque la commande Blocage est en ARRÊT,
le blocage ou la censure des programmes est
désactivé. Lorsque la commande de Blocage est
en MARCHE, le blocage s’effectue selon les
paramètres que vous avez choisis.
Opt. blocage
Non classé
Sans classem.
Blocage
18
Marche
Page 57

COMMENT UTILISER L’ÉCRAN DE RÉVISION VERROU AUTO™
our vous rappeler des classements que vous avez
bloqués et des options de blocage que vous avez
P
sélectionnées, un écran de révision est mis à votre
disposition pour vérifier vos réglages Verrou AutoTM.
Pour accéder à cet écran, effectuez la procédure suivante.
Appuyez DEUX FOIS sur le bouton STATUS
de la télécommande. Vos paramètres Verrou
1
auto™ sont affichés à l’écran.
REMARQUE: Si vous avez bloqué des sous classes
spécifiques, comme V pour Violence dans la catégorie
TV-PG, ces sous classes bloquées n’apparaîtront pas
à l’écran de révision. Les sous classes sont néanmoins
bloquées selon les sélections effectuées.
Après quelques secondes, les paramètres
disparaîtront de l’écran automatiquement, ou
2
vous pouvez appuyer sur le bouton STATUS/
EXIT une troisième fois pour les supprimer de
l’écran.
ASTUCE
L’écran d’état Verrou auto™ n’est affiché que si
l’option Blocage est réglée à Marche. Pour de plus
amples détails, consultez la page précédente.
La fonction de verrouillage automatique est réglée
à Arrêt par défaut.
Films/class.
G
PG
PG-13
R
NC-17
X
1
2
Arrêt
Marche
Marche
Marche
Arrêt
Arrêt
TV/classement
TV-Y
TV-Y7
TV-G
TV-PG
TV-14
TV-MA
Non classé
Sans classem.
Arrêt
Marche
Marche
Marche
Arrêt
Arrêt
Arrêt
Arrêt
Française
Cet écran est affiché après avoir complété
l’étape 1 ci-dessus et si l’option de blocage
d’
Verr. auto est réglée à Marche.
Films/class.
G
PG
PG-13
R
NC-17
X
Arrêt
Marche
Marche
Marche
Arrêt
Arrêt
TV/classement
TV-Y
TV-Y7
TV-G
TV-PG
TV-14
TV-MA
Non classé
Sans classem.
19
Arrêt
Marche
Marche
Marche
Arrêt
Arrêt
Arrêt
Arrêt
Cet écran est affiché après avoir complété
l’étape 1 ci-dessus et si l’option de blocage
d’
Verr. auto est réglée à Arrêt.
Verr. auto Désactivé
Page 58

COMMENT UTILISER LES COMMANDES DE CONTRASTE +
a fonction Contraste + aide à améliorer la qualité de
l’image. Les zones noires de l’image deviennent d’un
L
noir plus riche et les blancs sont plus brillants.
Appuyez sur le bouton MENU de la
télécommande pour afficher le menu à l’écran.
1
Appuyez sur le bouton CURSEUR BAS pour
mettre Caractéristiques en surbrillance.
2
Appuyez sur le bouton CURSEUR DROITE
3
pour accéder au menu Caractéristiques.
Appuyez sur le bouton CURSEUR BAS
jusqu’à ce que Contraste + soit affiché en
4
surbrillance.
Appuyez sur le bouton CURSEUR DROITE
ou GAUCHE pour basculer entre Marche
5
Arrêt
.
Appuyez sur le bouton STATUS/EXIT pour
supprimer le menu à l’écran.
6
ou
Menu TV
Image
Caractér.
Installation
6
5
2
4
Son
Minuterie
Verr. auto.
Contraste+
Réduct. bruit
PIP
1
3
5
Caractér.
Minuterie
Verr. auto.
Contraste+
Réduct. bruit
PIP
Caractér.
Minuterie
Verr. auto.
Contraste+
Réduct. bruit
PIP
Arrêt
Marche
COMMENT UTILISER LES COMMANDES DNR
a fonction DNR (Réduction dynamique du bruit)
aide à réduire les « parasites » dans l’image que l’on
L
appelle « speckles ».
Appuyez sur le bouton MENU de la
télécommande pour afficher le menu à l’écran.
1
Appuyez sur le bouton CURSEUR BAS pour
mettre Caractéristiques en surbrillance
2
Appuyez sur le bouton CURSEUR DROITE
3
pour accéder au menu Caractéristiques.
Appuyez sur le bouton CURSEUR BAS
jusqu’à ce que Réduct. bruit (DNR) soit affiché
4
en surbrillance.
Appuyez sur le bouton CURSEUR DROITE
ou GAUCHE pour faire basculer entre Marche
5
et Arrêt.
Appuyez sur le bouton STATUS/EXIT pour
supprimer le menu à l’écran.
6
Menu TV
Image
Son
.
Caractér.
Installation
Minuterie
Verr. auto.
Contraste+
Réduct. bruit
PIP
1
6
5
3
Caractér.
Minuterie
Verr. auto.
Contraste+
Réduct. bruit
PIP
Caractér.
Minuterie
Verr. auto.
Contraste+
Réduct. bruit
PIP
Arrêt
Marche
5
2
4
20
Page 59

COMMENT UTILISER LA COMMANDE PIP (IMAGE SUR IMAGE)
ous le mode TV, vous pouvez afficher une fenêtre
PIP pour votre ordinateur personnel. Pour activer
S
la fonction PIP, une source d’entrée HDMI doit être
sélectionnée. (Consultez le guide d’utilisation rapide pour
plus de détails sur les connexions.)
Appuyez sur le bouton MENU de la
télécommande pour afficher le menu à l’écran.
1
Appuyez sur le bouton CURSEUR BAS pour
mettre Caractéristiques en surbrillance.
2
Appuyez sur le bouton CURSEUR DROITE
3
pour accéder au menu Caractéristiques.
Appuyez sur le bouton CURSEUR BAS
jusqu’à ce que PIP soit affiché en surbrillance.
4
Appuyez sur le bouton CURSEUR DROITE
pour accéder au menu PIP. PIP Taille est affiché
5
en surbrillance.
Appuyez sur le bouton CURSEUR GAUCHE
ou CURSEUR DROITE
6
options de taille PIP disponibles comme Arrêt,
Marche, Petit, Moyen, Grand
Appuyez sur le bouton CURSEUR BAS pour
mettre Horizontal en surbrillance
7
Appuyez sur le bouton CURSEUR GAUCHE
ou CURSEUR DROITE
8
fenêtre PIP horizontalement à la position de
votre choix.
Si vous voulez déplacer la fenêtre PIP
verticalement, appuyez sur le bouton
9
CURSEUR BAS pour mettre Vertical en
surbrillance.
Appuyez sur le bouton CURSEUR
GAUCHE ou CURSEUR DROITE
10
déplacer la fenêtre PIP vers le haut ou vers le bas.
Appuyez sur le bouton STATUS/EXIT pour
supprimer le menu de l’écran.
11
pour sélectionner les
ou Côte à côte.
.
pour déplacer la
pour
Menu TV
Caractér.
Installation
1
11
6
8
10
2
4
7
9
Image
Son
Minuterie
Verr. auto.
Contraste+
Réduct. bruit
PIP
3
5
6
8
10
Caractér.
Minuterie
Verr. auto.
Contraste+
Réduct. bruit
PIP
PIP
PIP-Taille
Horizontal
Vertical
PIP
PIP-Taille
Horizontal
Vertical
PIP
PIP-Taille
Horizontal
Vertical
PIP-Taille
Horizontal
Vertical
Arrêt
1
Française
1
ASTUCE
Pour supprimer la fenêtre PIP, sélectionnez PIP
Taille puis l’option Arrêt.
REMARQUE : Vous pouvez également accéder à
la fenêtre PIP en appuyant sur le bouton
la télécommande.
Appuyez sur une fois pour afficher l’écran
PIP. Appuyez sur
faire défiler les différentes tailles de fenêtre PIP.
à plusieurs reprises pour
de
21
Page 60

COMMENT UTILISER LA LISTE DE SOURCES
a Liste de sources vous permet d’utiliser le téléviseur
dans les modes TV, HD ou PC. Selon la façon dont
L
le téléviseur sera utilisé, ces modes pourront disposer de
leur propre commande de menu à l’écran afin d’optimiser
les fonctionnalités lorsqu’ils sont utilisés avec des
ordinateurs ou récepteurs haute-définition.
Appuyez sur le bouton AV+ de la
télécommande pour afficher le menu Liste de
1
sources.
Appuyez sur le bouton CURSEUR BAS
jusqu’à ce que le mode de votre choix (TV, AV,
2
ARRIÈRE/SVHS, CVI-1[SD/HD], CVI-2[SD/
HD], HDMI, PC-VGA ou PC-D) soit affiché
en surbrillance.
Après avoir mis le mode de votre choix en
3
surbrillance, appuyez sur le bouton CURSEUR
DROIT
pour passer au mode sélectionné.
Source
TV
AV/SVHS
SIDE/SVHS
CVI-1 (SD/HD)
CVI-2 (SD/HD)
HDMI
2
1
Source
PC-VGA
PC-D
3
COMMENT UTILISER LA COMMANDE FORMAT
ous pouvez modifier la taille du format d’écran pour
le faire correspondre au type de programme que vous
V
écoutez. Sélectionnez entre un zoom normal 4:3, Zoom
14:9, Zoom 16:9, Zoom Sous-titres, Zoom Super ou
16:9.
Appuyez sur le bouton FORMAT à plusieurs
reprises pour faire défiler les différents modes de
1
format. Vous pouvez choisir entre Normal 4:3,
Zoom 14:9, Zoom 16:9, Zoom Sous-titres,
Zoom Super
ou 16:9.
1
4:3
Zoom 14:9
OU
Zoom 16:9
OU
Zoom sous-t.
OU
Zoom Super
OU
16:9
22
Page 61

UTILISATION DE LA COMMANDE SOUS-TITRES
a commande de sous-titres vous permet de lire le contenu
vocal des programmes de télévision à l’écran du téléviseur.
L
Cette fonction, à l’intention des malentendants, utilise des
« boîtes de texte » à l’écran pour afficher les dialogues et les
conversations en même temps que le programme de télévision.
Appuyez sur le bouton CC de la télécommande pour
sélectionner un mode de sous-titres: STC Arrêt, STC1,
1
STC2 ou STC/Sourdine lorsque la station de télévision
diffusant l’émission offre elle-même la fonction de
sous-titres. Pour désactiver la fonction de sous-titres,
sélectionnez STC Arrêt.
Appuyez sur le bouton STATUS/EXIT pour supprimer
le menu à l’écran.
2
ASTUCE
REMARQUE : Les programmes de télévision et les
pauses publicitaires ne sont pas toujours conçus pour la
diffusion avec les informations de sous-titres (CC). Les
modes de sous-titres ne sont pas nécessairement utilisés
par les stations de diffusion lors de la transmission d’un
programme offrant des sous-titres. Consultez le guide des
programmes de télévision de votre région pour les chaînes
de télévisionet les heures des spectacles sous-titrés.
2
STC-Arrêt
1
STC1
OU
STC2
OU
STC/Sourdine
JOHN: Why did they move the meeting up to this week?
MARSHA: I dont know, but they are pushing to close the deal.
Française
COMMENT UTILISER LA COMMANDE VEILLE
ous arrive-t-il de vous endormir devant votre téléviseur puis
d’être réveillé en sursaut à deuxheures du matin par une
V
tonalité aiguë et perçante ? Enfin, cela est maintenant chose du
passé puisque votretéléviseur vous permet d’éviter cette situation
inconfortableen s’éteignant de lui-même. Grâce à la fonction
Veille, il est possible de régler une minuterie pour éteindre votre
téléviseur automatiquement suivant la période de temps de
votre choix (en incréments de 15 minutes jusqu’à 60 minutes,
ensuite en incréments de 30 minutes jusqu’à 90 minutes puis en
incréments de 60 minutes jusqu’à 240 minutes).
Appuyez sur le bouton SLEEP de la télécommande. La
minuterie de veille est affichée dans la partie inférieure
1
de l’écran.
Dans les cinq secondes, appuyez sur le bouton SLEEP
à plusieurs reprises pour sélectionner la période de temps
2
((en incréments de 15 minutes jusqu’à 60 minutes,
ensuite en incréments de 30 minutes jusqu’à 90 minutes
puis en incréments de 60 minutes jusqu’à 240 minutes)
avant que le téléviseur ne s’éteigne.
Un compte à rebours est affiché à l’écran au cours de la
dernière minute de mise hors tension du téléviseur.
Veille Arrêt
1
2
Veille 15
OU
Veille 30 Veille 45
Veille 60 Veille 90
Veille 120 Veille 180
Veille 240
ASTUCE
Pour savoir le nombre de minutes qui restent avant que le
téléviseur ne s’éteigne, appuyez sur le bouton STATUS/
EXIT.
Les paramètres de veille peuvent être annulés en appuyant
sur n’importe quel bouton durant la dernière minute de
la procédure.
Un compte à rebours est affiché
à l’écran au cours de la dernière
minute d’un paramètre de
VEILLE.
23
Veille 49
Veille 9
Page 62

COMMENT UTILISER LA COMMANDE LISTE DE PROGRAMMES
a commande Liste de programmes vous permet
d’afficher une vue d’ensemble de tous les canaux
L
programmés et placés dans la mémoire du téléviseur (voir
la rubrique Programmation automatique du présent
manuel pour de plus amples renseignements). Grâce à la
fonction Liste de programmes, vous pouvez facilement
sélectionner les canaux de votre choix. Vous pouvez
afficher le numéro du canal, le nom du canal, si vous lui
en avez donné un et si la commande Verrou Auto est en
marche ou en arrêt.
Appuyez sur le bouton PROG LIST de
1
la télécommande pour afficher la liste des
canaux installés (le canal en cours est affiché en
surbrillance).
Appuyez sur le bouton CURSEUR HAUT ou
2
BAS pour faire défiler la liste de canaux et mettre
en surbrillance le canal que vous désirez activer.
Appuyez sur le bouton CURSEUR DROIT
pour activer le canal. Le téléviseur se syntonisera
3
à ce canal.
Appuyez sur le bouton STATUS/EXIT pour
supprimer le menu à l’écran.
4
Liste progr.
4
2
2
3
4
5
6
Liste progr.
2
3
4
5
6
1
32
COMMENT RÉGLER LA COMMANDE ACTIVE CONTROL
a commande Active Control (Commande active)
permet d’effectuer la surveillance et le réglage des
L
signaux vidéo entrants afin d’obtenir la meilleure qualité
d’image possible.
Lorsque vous choisissez d’activer Active Control™, le
contrôle de la netteté de l’image et de la réduction du
bruit s’effectuent automatiquement. La fonction Active
Control permet d’effectuer un réglage continuel et
automatique des paramètres de l’image.
Vous pouvez choisir entre trois modes : Comm. active
Arrêt, Comm. active Marche ou Comm. Active ON with
Sensor (Marche avec capteur).
Appuyez sur le bouton ACTIVE CTR de la
télécommande pour faire défiler les trois options
1
et sélectionnez l’option de votre choix.
Appuyez sur le bouton STATUS/EXIT pour
supprimer le menu à l’écran.
2
Comm. active Arrêt
2
1
Comm. active Marche
OU
Comm. active
MARCHE/dét
24
Page 63

COMMENT UTILISER LA COMMANDE SURF
ne liste ou série de canaux précédemment affichés
peut être sélectionnée à l’aide du bouton SURF de
U
la télécommande. Grâce à cette fonction, vous pouvez
basculer facilement entre les différentes chaînes/sources
de télévision qui vous intéressent le plus. La commande
SURF vous permet de paramétrer jusqu’à dix canaux
dans sa liste d’affichage rapide.
Liste surfing
3
Ajouter?
Liste surfing
Liste surfing
3
3
Supprimer?
Appuyez sur les boutons CH (+) ou (–) (ou les
touches numérotées) pour sélectionner un canal
1
et l’ajouter à la liste SURF.
Appuyez sur le bouton SURF de la
télécommande. L’écran peut afficher « LISTE
2
VIDE » à l’écran. Le numéro du canal en cours
est affiché avec « AJOUTER? » à droite.
Avec le message Liste SURF ou la liste des
canaux SURF affichée à l’écran, appuyez sur
3
le bouton CURSEUR DROIT
canal en cours à la liste SURF.
Si vous voulez supprimer le canal en cours de la
liste SURF, appuyez sur le bouton CURSEUR
4
DROIT de nouveau.
Répétez les étapes 1 à 3 pour ajouter d’autres canaux
(un maximum de 10) à la liste SURF.
pour ajouter le
ASTUCE
En plus des canaux de programmation ordinaires,
vos connexions de source vidéo externes peuvent
être ajoutées à la liste SURF . En d’autres termes,
les prises A/V externes ainsi que leurs canaux
peuvent être ajoutés à votre liste SURF. Vous n’avez
qu’à utiliser le bouton Source pour syntoniser les
canaux puis effectuez la même procédure décrite
sur cette page pour ajouter ces canaux à la liste
Surf.
Liste Vide
3
4
1
2
Liste surfing
3
5
Ajouter?
Liste surfing
3
5
Supprimer?
Française
COMMENT UTILISER LA COMMANDE PIXEL PLUS (dépendre du modèle)
Pixel Plus™ offre une performance quasi haute définition
(HD) à l’intérieur du téléviseur à partir d’un signal
d’entrée ordinaire. En doublant le nombre de lignes et le
nombre de pixels par ligne, Pixel Plus™ accentue l’entrée
des programmes ordinaires ainsi que l’entrée DVD pour
une définition et une profondeur incomparables. Vous
pouvez constater la différence entre un signal de diffusion
ordinaire et un signal accentué avec Pixel Plus™ en
effectuant la procédure ci-dessous.
Appuyez sur le bouton Pixel Plus de la
télécommande. Une démonstration Pixel Plus
1
est affichée à l’écran. Le côté gauche de l’écran
montre l’image sans Pixel Plus alors que le côté
dr oit montr e l’image avec la fonction Pixel Plus
activée.
Appuyez sur le bouton Pixel Plus de la
télécommande pour supprimer l’écran de
2
démonstration.
REMARQUE : il n’est pas possible de désactiver la
fonction Pixel Plus™ car il s’agit d’une fonction du
téléviseur . Vous pouvez voir la différence seulement
dans un signal avec ou sans Pixel Plus™.
Pexel Plus Demo
Pixel Plus Demo
Off On
1
2
25
Page 64

COMMENT UTILISER LES COMMANDES AUTO PICTURE™
ue vous regardiez un film ou un jeu vidéo, votre
téléviseur dispose de paramètres vidéo automatiques
Q
correspondant à la source ou au contenu du programme
en cours. AutoPicture™ permet de réinitialiser
rapidement les commandes vidéo de votre téléviseur
pour un nombre de types différents de programmes et de
conditions de visionnement présentes dans votre foyer.
Les commandes AutoPicture™ Intense, Naturel, Doux
et Multimédia ont été réglées en usine pour contrôler
automatiquement les niveaux de luminosité, couleur,
image, netteté, teinte et température de couleur. Les
paramètres PERSONNEL de AutoPicture™ sont ceux
que vous avez sélectionnés via les options IMAGE du
menu à l’écran.
Appuyez sur le bouton PICTURE de la
télécommande. Le paramètre AutoPicture TM
1
en cours est affiché dans le milieu de l’écran.
Appuyez sur le bouton PICTURE à plusieurs
reprises pour sélectionner les réglages d’image
2
Personnel, Intense, Naturel, Doux
Multimédia
.
ou
1
Personnel
Intense
OU
Naturel
OU
Doux
OU
Multimédia
REMARQUE : Les paramètres Personnel et les
options d’image du menu à l’écran sont les mêmes. Il
s’agit de la seule option AutoPictureTM pouvant être
modifiée. Pour effectuer le réglage de ces paramètres,
utilisez les options Image depuis le menu à l’écran.
Tous les autres paramètres ont été réglés en usine au
moment de la production et ne sont pas réglables.
COMMENT UTILISER LA COMMANDE AUTO SOUND™
utoSound™ vous permet de sélectionner entre trois
commandes réglées en usine et une commande
A
personnelle que vous réglez selon vos préférences via le
menu Son à l’écran. Les trois commandes réglées en
usine —Parole, Musique et éâtre—vous permettent
de personnaliser l’audio de votre téléviseur et d’améliorer
le programme en cours de visualisation. Effectuez la
procédure suivante pour sélectionner l’une ou l’autre des
options.
Appuyez sur le bouton SOUND de la
télécommande. Le paramètre AutoSound en
1
cours est affiché dans le milieu de l’écran.
Appuyez sur le bouton SOUND plusieurs fois
pour faire défiler les quatre options : Personnel,
2
Parole, Musique ou éâtre.
N’oubliez pas que seule la commande Personnel peut
être modifiée par l’utilisateur. Ceci aura pour effet
de modifier les paramètres des commandes SON du
menu principal à l’écran.
2
1
2
Personnel
Théâtre
OU
Musique
OU
Parole
ASTUCE
AutoSoundTM ne fonctionne qu’avec les
programmes en provenance de l’entrée
ANTENNA/ CABLE (ANT) à l’arrière du
téléviseur (RF audio). Il ne peut pas contrôler les
niveaux de l’audio des connexions externes.
26
Page 65

BOUTONS RELIÉS À LA TÉLÉCOMMANDE DU DISPOSITIF EXTERNE
BOUTON ALIMENTATION
Appuyez sur ce bouton pour allumer et éteindre le
dispositif externe.
BOUTON ENREGISTRER ®
Appuyez sur le bouton ENREGISTRER pour
commencer un enregistrement de magnétoscope.
BOUTON DE REMBOBINAGE
Appuyez sur ce bouton pour rembobiner les cassettes.
Sur certains magnétoscopes, il faut d’abord appuyer
sur le bouton d’arrêt ensuite sur le bouton de
rembobinage. Peut être utilisé pour effectuer une
recherche arrière des chapitres ou titres de films sur
DVD.
BOUTON D’ARRÊT
Appuyez sur ce bouton pour interrompre le
déroulement d’une cassette ou la lecture d’un DVD.
TOUCHES NUMÉROTÉES
Appuyez sur ces boutons pour une sélection directe
des canaux. Ces touches peuvent également être
utilisées pour entrer des numéros directement dans
certains paramètres de fonction de menu à l’écran.
‡
Ò
I
BOUTON MODE
Sélectionnez le mode approprié pour envoyer des
commandes à distance vers le dispositif externe. Un
voyant apparaît au dessus du mode sélectionné.
π
†
I
BOUTON AVANCE RAPIDE
Appuyez sur ce bouton pour faire avancer la cassette
ou le DVD rapidement vers l’avant. Sur certains
dispositifs externes, vous devez d’abord appuyer sur le
bouton d’arrêt, puis sur le bouton d’avance rapide. En
mode de lecture, tenez le bouton enfoncé pour faire
dérouler l’image rapidement en marche avant.
BOUTON PAUSE
Appuyez sur ce bouton pour arrêter la cassette de
façon temporaire durant la lecture ou l’enregistrement
ou pour arrêter momentanément la lecture d’un
DVD. Appuyez de nouveau pour relâcher la pause.
BOUTON DE LECTURE
Appuyez sur ce bouton pour commencer la lecture
d’une cassette vidéo, d’un DVD etc.
BOUTONS CH + / –
Appuyez sur ces boutons pour faire défiler les
numéros de canaux vers le haut ou vers le bas si votre
dispositif externe peut changer les canaux.
º
Française
ASTUCE
N’oubliez pas que les boutons de votre
télécommande ne feront pas fonctionner votre
dispositif externe si ces fonctions ne sont pas prises
en charge par la télécommande de votre dispositif.
Remarque : toutes les fonctions (particulièrement
Recherche, Rembobinage, Avance rapide,
etc.) fonctionneront de la même façon que la
télécommande originale fournie avec le dispositif
externe.
27
Page 66

COMMENT UTILISER LA TÉLÉCOMMANDE AVEC DES DISPOSITIFS EXTERNES PHILIPS
otre télécommande peut faire fonctionner non
seulement le téléviseur mais également d’autres
V
dispositifs à télécommande infrarouge (IR) comme
magnétoscope, convertisseur de canaux, récepteur de
signaux par satellite, RDS, lecteur DVD etc. Par contre,
il est nécessaire d’effectuer une simple procédure pour que
votre commande à distance puisse faire fonctionner votre
magnétoscope.
Cette méthode d’accès direct est utilisée pour la majorité
des dispositifs externes Philips et n’est pas utilisée avec
d’autres marques de dispositifs externes.
Placez le bouton de mode SELECT TV/DVD/
AUX pour sélectionner le mode de votre choix.
1
Dirigez la télécommande vers le dispositif
externe et appuyez sur le bouton d’alimentation.
2
La télécommande réussit-elle à allumer le dispositif
externe ?
Si Oui, essayez d’autres boutons de fonction de la
télécommande. Si ces boutons font fonctionner le
dispositif externe, la télécommande est prête et la
procédure est terminée.
Si Non, votre dispositif externe ne fonctionne
pas avec cette méthode. Vous devez utiliser la
télécommande du dispositif externe.
Magétoscope
Récepteur par
satellite ou
RSD, DVD.
Convertisseur
de canaux
2
ASTUCE
N’oubliez pas que les boutons de votre
télécommande ne feront pas fonctionner votre
dispositif externe si ces fonctions ne sont pas prises
en charge par la télécommande de votre dispositif.
Remarque : toutes les fonctions (particulièrement
Recherche, Rembobinage, Avance rapide,
etc.) fonctionneront de la même façon que la
télécommande originale fournie avec le dispositif
externe.
1
28
Page 67

COMMENT EFFECTUER LE RÉGLAGE DU MODE PC
COMMANDE D’IMAGE PC
fin d’obtenir la meilleure qualité sonore possible de
la fonction PC de ce téléviseur, plusieurs commandes
A
d’image sont disponibles.
À partir de la Liste de sources, choisissez le
mode PC-VGA ou PC-D
1
pour raccorder le téléviseur et le PC). Consultez
la page 21 et suivez les étapes sous “ Comment
utiliser la Liste de sources “.
Appuyez sur le bouton MENU de la
télécommande pour afficher le menu Image.
2
Appuyez sur le bouton CURSEUR DROITE
pour accéder au menu Image.
3
Appuyez sur les boutons CURSEUR HAUT
4
ou CURSEUR BAS à plusieurs reprises pour
sélectionner l’un des éléments d’image :
Lumière - permet d’augmenter ou de diminuer
la quantité de lumière dans les zones sombres de
l’image.
Image - permet d’améliorer la définition des par-
ties claires de l’image.
Horizontal - permet de régler la position hori-
zontale de l’image.
Vertical - permet de régler la position verticale
de l’image.
Temp. couleur - permet de régler la tempéra-
ture des couleurs de l’image. Choisissez entre
Normal, Froid ou Chaud.
Une fois votre sélection en surbrillance, appuyez
sur le bouton CURSEUR GAUCHE ou
5
CURSEUR DROITE pour naviguer, faire des
réglages ou activer les commandes spécifiques.
Appuyez sur le bouton STATUS/EXIT pour
supprimer le menu de l’écran du téléviseur
6
lorsque vous avez terminé.
(selon le câble utilisé
Menu PC
Image
Sél. audio
Caractér.
Param. usine
Lumière
Contraste
Horizontal
Vertical
Temp. couleur
2
6
4
5
4
3
5
1
Remarque: Lors de l’utilisation du
téléviseur ACL comme moniteur
d’ordinateur personnel, des lignes
d’interférence diagonales peuvent être
observées lors d’une opération dans
un environnement sous interférences
électromagnétiques mais sans nuire à la
performance du produit. Afin d’obtenir
une meilleure performance, un câble
VGA de bonne qualité doté d’un filtre
d’isolation acoustique est recommandé.
Image
Lumière
Contraste
Horizontal
Vertical
Temp. couleur
Image
Lumière
Contraste
Horizontal
Vertical
Temp. couleur
Image
Lumière
Contraste
Horizontal
Vertical
Temp. couleur
Image
Lumière
Contraste
Horizontal
Vertical
Temp. couleur
Image
Lumière
Contraste
Horizontal
Vertical
Temp. couleur
48
38
39
Française
32
Normale
SÉLECTION AUDIO PC
otre téléviseur vous laisse choisir le son que vous
entendez sous le mode PC. Vous pouvez sélectionner
V
TV/HD ou PC.
REMARQUE : Vous devez sélectionner la source avant
de pouvoir sélectionner PC.
Appuyez sur le bouton MENU de la
télécommande pour afficher le menu à l’écran.
1
Appuyez sur le bouton CURSEUR BAS à
plusieurs reprises pour mettre Sél. audio en
2
surbrillance.
Appuyez sur le bouton CURSEUR GAUCHE
ou CURSEUR DROITE à plusieurs reprises
3
pour sélectionner PC/HD ou TV.
Appuyez sur le bouton STATUS/EXIT pour
supprimer le menu de l’écran du téléviseur
4
lorsque vous avez terminé.
Menu PC
Image
Sél. audio
Caractér.
Param. usine
4
3
2
PC / HD
29
1
3
Menu PC
Image
Sél. audio
Caractér.
Param. usine
TV
Page 68

CONFIGURACIÓN DEL MODO PC (MONITOR DE COMPUTADOR PERSONAL)
FUNCIONES DE PC
Presione el botón MENU del control remoto
1
para mostrar el menú en pantalla.
Presione VARIAS VECES el botón del
CURSOR HACIA ABAJO para resaltar
2
FUNCIONES.
Presione el botón del CURSOR A LA
DERECHApara acceder al menú Funciones.
3
Presione el botón del CURSOR
HACIAARRIBA o HACIAABAJO para acceder
4
a los elementos del menú Funciones:
Fase - elimina las líneas horizontales perturbado
ras
Reloj - elimina las líneas verticales perturbadoras
Formato - escoge entre Full Screen y el formato
original (Natural) de la pantalla PC.
PIP - llame una ventana PIP para TV o HD.
Auto ajuste - ajusta automáticamente el control
a fin de dar la mejor calidad de imagen posible
basándose en la señal que se está recibiendo.
Presione el botón del CURSOR A LA
IZQUIERDA o A LA DERECHA para realizar
5
los ajustes deseados.
Nota: Para la función Auto ajuste, presione el
CURSOR HACIA LA IZQUIERDA para co
menzar el ajuste. Cuando el ajuste esté completo,
presione el CURSOR HACIA ARRIBA o HA
CIA ABAJO para seleccionar SÍ si es que desea
almacenar el ajuste o seleccione NO si no desea
almacenar el ajuste.
Presione el botón STATUS/EXIT para borrar el
6
menú de la pantalla.
-
Menu PC
Image
Sél. audio
Caractér.
Param. usine
-
Phase
Horloge
Format
PIP
Ajustem. auto.
1
6
4
5
2
4
-
3
5
Caractér.
Phase
Horloge
Format
Ajustem. auto.
Caractér.
Phase
Horloge
Format
Ajustem. auto.
Caractér.
Phase
Horloge
Format
Ajustem. auto.
Caractér.
Phase
Horloge
Format
PIP
Ajustem. auto.
3
PIP
2
PIP
Plein écran
PIP
PIP-Taille
Horizontal
Vertical
vant d’utiliser la fonction PIP, configurez votre
ordinateur à une résolution maximale (1024 x 768,
A
60Hz).
Remarque : si vous sélectionnez une autre résolution, la
fonction PIP peut ne pas fonctionner.
640 x 480, 60 Hz 800 x 600, 56 Hz 1024 x 768, 60 Hz
640 x 480, 67 Hz 800 x 600, 60 Hz 1024 x 768, 70 Hz
640 x 480, 72 Hz 800 x 600, 72 Hz 1024 x 768, 75 Hz
640 x 480, 75 Hz 800 x 600, 75 Hz
720 x 400, 70 Hz 832 x 624, 75 Hz
Caractér.
Phase
Horloge
Format
Ajustem. auto.
Caractér.
Phase
Horloge
Format
Ajustem. auto.
PIP
PIP
Commencer?
Mémoriser?
Non
Oui
30
Page 69

COMMENT EFFECTUER LE RÉGLAGE DU MODE PC (MONITEUR D’ORDINATEUR)
1
COMMANDES PIP PC
ous le mode PC, vous pouvez afficher une fenêtre PIP
S
pour le canal télévision ou le canal HD. Pour que
PIP fonctionne, un dispositif externe doit être raccordé à
l’entrée CVI-1 (SD/HD), CVI-2 (SD/HD) ou HDMI
(consultez le guide d’utilisation rapide pour de plus
amples détails sur les connexions).
À partir de la Liste de sources, choisissez le
mode PC-VGA ou PC-D
1
pour raccorder le téléviseur et le PC). Consultez
la page 21 et suivez les étapes sous “ Comment
utiliser la Liste de sources “.
Appuyez sur le bouton MENU pour accéder au
2
menu de mode PC.
Presione VARIAS VECES el botón del CURSOR
HACIA ABAJO para resaltar
3
Presione el botón del CURSOR A LA DERECH
Apara acceder al menú Funciones.
4
Appuyez sur le bouton CURSEUR BAS à
plusieurs reprises pour mettre PIP en surbrillance.
5
Appuyez sur le bouton CURSEUR DROITE
pour accéder au menu PIP.
6
Appuyez sur le bouton CURSEUR GAUCHE
ou CURSEUR DROITE
7
options de taille
PIP : Arrêt, Petit, Moyen, Grand ou Côte à côte.
Si vous voulez déplacer la fenêtre PIP
horizontalement, appuyez sur le bouton
8
CURSEUR BAS de nouveau pour mettre
Horizontal en surbrillance.
Appuyez sur les boutons CURSEUR GAUCHE
ou CURSEUR DROITE pour déplacer l’image
9
horizontalement.
Si vous voulez déplacer la fenêtre PIP
verticalement. Appuyez sur le bouton
10
CURSEUR BAS de nouveau pour Vertical en
surbrillance.
Appuyez sur les boutons CURSEUR GAUCHE
ou CURSEUR DROITE pour déplacer l’image
11
verticalement.
Appuyez sur le bouton STATUS/EXIT pour
supprimer le menu à l’écran.
12
(selon le câble utilisé
FUNCIONES.
pour sélectionner les
Menu PC
Sél. audio
Caractér.
Param. usine
11
6
8
10
2
4
7
9
Image
Phase
Horloge
Format
PIP
Ajustem. auto.
1
8
10
3
5
6
Caractér.
Phase
Horloge
Format
Ajustem. auto.
PIP
PIP-Taille
Horizontal
Vertical
PIP
PIP-Taille
Horizontal
Vertical
PIP
PIP-Taille
Horizontal
Vertical
PIP
PIP-Taille
Horizontal
Vertical
Arrêt
1
1
Française
COMMENT SÉLECTIONNER LE MODE HD
ous pouvez passer rapidement du mode TV ou de
tout autre mode au mode HD.
V
À partir de la Liste de sources, choisissez CVI-
1
1 (SD/HD), CVI-2 (SD/HD) ou HDMI (selon
les dispositifs externes numériques raccordés à
votre téléviseur). Consultez la page 21 et suivez
les étapes sous “Comment utiliser la Liste de
sources”.
RÉGLAGE DU MODE HD (HAUTE DÉFINITION )
Source
TV
AV/SVHS
SIDE/SVHS
CVI-1 (SD/HD)
CVI-2 (SD/HD)
HDMI
31
Page 70

COMMENT EFFECTUER LE RÉGLAGE DU MODE HD (HAUTE DÉFINITION)
COMMANDES D’IMAGE
e Mode HD offre certaines options d’image, de son
et de blocage à partir de son menu à l’écran. Vous
L
trouverez ci-dessous une liste des options de menu Image.
À partir de la Liste de sources, choisissez
1
le mode HD. Consultez la page 22 et suivez
les étapes sous “Comment utiliser la Liste de
sources”.
Appuyez sur le bouton MENU de la
télécommande pour afficher le menu Mode
2
HD à l’écran. L’option IMAGE est affichée en
surbrillance.
Appuyez sur le bouton CURSEUR BAS
jusqu’à ce que Image soit affiché en surbrillance.
3
Appuyez sur le bouton CURSEUR DROIT
pour faire déplacer le menu vers la gauche et
4
accéder aux options de menu d’image à l’écran.
Appuyez sur le bouton CURSEUR HAUT
5
ou BAS pour mettre l’un des modes HD
de la commande IMAGE en surbrillance.
Choisissez entre : LUMIÈRE, COULEUR,
IMAGE, DÉFINITION, TEINTE,
COULEUR
LUMIÈRE - Cette commande permet
d’augmenter ou de diminuer la quantité de
lumière dans les zones sombres de l’image.
COULEUR - Cette commande a permet
d’ajouter ou de supprimer des couleurs de
l’image.
IMAGE - Cette commande i permet d’améliorer
la définition des parties claires de l’image.
DÉFINITION - Cette commande i permet
d’améliorer la définition des images.
TEINTE - Cette commande permet de régler
l’image afin d’obtenir une coloration naturelle de
peau..
TEMP. COULEUR - Choisissez entre des
préférences d’image NORMAL (rend les blancs
plus blanc), FROID (rend les blancs plus bleu)
ou CHAUD (rend les blancs plus rouge).
Appuyez sur les boutons CURSEUR DROIT
ou GAUCHE pour effectuer le réglage de la
6
commande sélectionnée.
Appuyez sur le bouton STATUS/EXIT pour
supprimer le menu de l’écran du téléviseur
7
lorsque vous avez terminé. Ou attendez quelques
secondes et laissez l’écran s’effacer de lui-même.
.
ou TEMP.
Menu HD
Image
Son
Caractér.
Installation
7
6
3
5
1
Lumière
Couleur
Image
Définition
Temp. couleur
2
5
4
6
Image
Lumière
Couleur
Image
Définition
Teinte
Temp. couleur
Image
Lumière
Couleur
Image
Définition
Teinte
Temp. couleur
Image
Lumière
Couleur
Image
Définition
Teinte
Temp. couleur
Image
Lumière
Couleur
Image
Définition
Teinte
Temp. couleur
Image
Lumière
Couleur
Image
Définition
Teinte
Temp. couleur
Image
Lumière
Couleur
Image
Définition
Teinte
Temp. couleur
48
38
42
8
-30
Normale
32
Page 71

COMMENT EFFECTUER LE RÉGLAGE DU MODE HD (HAUTE DÉFINITION )
COMMANDES SON
e Mode HD propose également certains réglages
audio pour faire la mise au point de l’audio
L
entendue en mode HD.
À partir de la Liste de sources, choisissez
1
le mode HD. Consultez la page 22 et suivez
les étapes sous “Comment utiliser la Liste de
sources”.
Appuyez sur le bouton MENU de la
télécommande pour afficher le menu Mode
2
HD à l’écran. L’option IMAGE est affichée en
surbrillance.
Appuyez sur le bouton CURSEUR BAS
jusqu’à ce que Son soit affiché en surbrillance.
3
Appuyez sur le bouton CURSEUR DROITE
pour déplacer le menu vers la gauche et accéder
4
aux options de menu Son.
Appuyez sur le bouton CURSEUR HAUT
5
ou BAS pour mettre en surbrillance l’une ou
l’autre des options de commande audio HD .
Choisissez entre : Égalisation, Équilibre, AVL
ou Dolby Virtual
Appuyez sur les boutons CURSEUR DROIT
6
ou GAUCHE pour effectuer le réglage de la
commande sélectionnée.
Appuyez sur le bouton STATUS/EXIT pour
supprimer le menu de l’écran du téléviseur
7
lorsque vous avez terminé. Ou attendez quelques
secondes et laissez l’écran s’effacer de lui-même.
.
Menu HD
Image
Son
Caractér.
Installation
6
5
2
4
Égalisation
Équilibre
AVL
Dolby Virtual
1
4
3
5
Son
Égalisation
Équilibre
AVL
Dolby Virtual
SAP
Son
Son
Égalisation
Équilibre
AVL
Dolby Virtual
SAP
Son
Son
Égalisation
Équilibre
AVL
Dolby Virtual
SAP
Son
Son
Égalisation
Équilibre
AVL
Dolby Virtual
SAP
Son
120 Hz
500 Hz
1500 Hz
5 KHz
10 KHz
0
Marche
Française
Dolby Virtual
ASTUCE
Égalisation – permet d’ajuster les tonalités du son.
Sélectionnez des valeurs entre 120Hz et 10KHz.
Équilibre – vous permet de régler les niveaux de
l’audio en provenance des haut-parleurs droite et
gauche.
Dolby Virtual – ajoute de la profondeur et de
l’ampleur au son du téléviseur. Sélectionnez entre
Dolby Virtual ou Stéréo (si stéréo) ou Spatial ou
Mono (si mono).
Son
Égalisation
Équilibre
AVL
Dolby Virtual
SAP
Son
Son
Égalisation
Équilibre
AVL
Dolby Virtual
SAP
Son
Marche
Stéréo
33
Page 72

COMMENT EFFECTUER LE RÉGLAGE DU MODE HD (
COMMANDES PIP HD
HAUTE DÉFINITION
)
ous le mode HD, vous pouvez afficher une fenêtre
PIP pour un canal HD. Pour que PIP fonctionne,
S
un dispositif externe doit être raccordé à l’entrée CVI-1
(SD/HD), CVI-2 (SD/HD) ou HDMI (consultez le
guide d’utilisation rapide pour de plus amples d
les connexions).
À partir de la Liste de sources, choisissez le
mode PC-VGA ou PC-D
1
pour raccorder le téléviseur et le PC). Consultez
la page 21 et suivez les étapes sous “ Comment
utiliser la Liste de sources “.
Appuyez sur le bouton MENU pour accéder au
2
menu de mode PC.
Presione VARIAS VECES el botón del CURSOR
HACIA ABAJO para resaltar
3
Presione el botón del CURSOR A LA DERECH
Apara acceder al menú Funciones.
4
Appuyez sur le bouton CURSEUR BAS à
plusieurs reprises pour mettre PIP en surbrillance.
5
Appuyez sur le bouton CURSEUR DROITE
pour accéder au menu PIP.
6
Appuyez sur le bouton CURSEUR GAUCHE
ou CURSEUR DROITE
7
options de taille
PIP : Arrêt, Petit, Moyen, Grand ou Côte à côte.
Si vous voulez déplacer la fenêtre PIP
horizontalement, appuyez sur le bouton
8
CURSEUR BAS de nouveau pour mettre
Horizontal en surbrillance.
Appuyez sur les boutons CURSEUR GAUCHE
ou CURSEUR DROITE pour déplacer l’image
9
horizontalement.
Si vous voulez déplacer la fenêtre PIP
verticalement. Appuyez sur le bouton
10
CURSEUR BAS de nouveau pour Vertical en
surbrillance.
Appuyez sur les boutons CURSEUR GAUCHE
ou CURSEUR DROITE pour déplacer l’image
11
verticalement.
Appuyez sur le bouton STATUS/EXIT pour
supprimer le menu à l’écran.
12
(selon le câble utilisé
FUNCIONES.
pour sélectionner les
étails sur
Menu HD
Sél. audio
Caractér.
Param. usine
11
6
8
10
2
4
7
9
Image
Phase
Horloge
Format
PIP
Ajustem. auto.
1
8
10
3
5
6
Caractér.
Phase
Horloge
Format
Ajustem. auto.
PIP
PIP-Taille
Horizontal
Vertical
PIP
PIP-Taille
Horizontal
Vertical
PIP
PIP-Taille
Horizontal
Vertical
PIP-Taille
Horizontal
Vertical
PIP
Arrêt
1
1
ASTUCE
Pour supprimer la fenêtre PIP, sélectionnez PIP
Taille puis l’option Arrêt.
REMARQUE : Vous pouvez également accéder à
la fenêtre PIP en appuyant sur le bouton de
la télécommande.
Appuyez sur une fois pour afficher l’écran
PIP.
Appuyez sur à plusieurs reprises pour faire
défiler les différentes tailles de fenêtre PIP.
34
Page 73

ASTUCES DE DÉPANNAGE
Pas d’alimentation
• Vérifiez le cordon d’alimentation du téléviseur. Débranchez
le téléviseur, attendez 10 secondes puis rebranchez la fiche
dans la prise murale et appuyez de nouveau sur le bouton
d’alimentation.
• Vérifiez que la prise murale n’est pas sur un interrupteur mural.
• Assurez-vous que le fusible de la prise multiple CA n’a pas sauté,
si ce type de prise est utilisé.
Pas d’image
• Vérifiez les connexions de l’antenne/du câble. Les fils de
l’antenne sont-ils bien raccordés à la prise ANT 75Ω du
téléviseur ?
• Vérifiez le réglage du syntoniseur depuis la commande TUNER
MODE (Mode Syntoniseur).
• Essayez d’exécuter la fonction Programmation Automatique
pour trouver tous les canaux disponibles.
• Appuyez sur le bouton SOURCE de la télécommande afin de
vous assurer que la source de signal appropriée est sélectionnée.
• Si un dispositif externe est utilisé, assurez-vous qu’il fonctionne
correctement.
• En mode PC, un signal vidéo DOIT ÊTRE disponible sinon le
téléviseur se met en attente.
Pas d’audio
• Vérifiez les boutons de VOLUME.
• Vérifiez le boutonMUTEde la télécommande.
• Si vous essayez de connecter un dispositif externe, vérifiez les
connexions de prise audio.
Coleur S-VHS perd son éclat
• Si S-VHS est déconnecté, la couleur de l’image s’affaiblit. Pour
restaurer la couleur de l’image, appuyez sur le bouton CH
+/– de la télécommande puis faites un canal haut suivi d’un
canal bas.
L’AUDIO DU TÉLÉVISEUR EST MONO SEULEMENT
• Si vous utilisez un boîtier du service du câble doté de
connexions de type RF seulement, le signal en provenance du
boîtier ne vous parvient qu’en MONO.
• Vérifiez les paramètres de commande de Son. Changez le réglage
à Stéréo.
La télécommande ne fonctionne pas
• Vérifiez les piles. Remplacez-les au besoin avec des piles grande
capacité AA (chlorure de zinc) ou alcalines.
• Nettoyez la télécommande ainsi que la fenêtre du capteur sur le
téléviseur.
• Vérifiez le cordon d’alimentation du téléviseur. Débranchez
le téléviseur, attendez 10 secondes puis rebranchez la fiche
dans la prise murale et appuyez de nouveau sur le bouton
d’alimentation.
• Assurez-vous que le fusible de la prise multiple CA n’a pas sauté,
si ce type de prise est utilisé.
• Assurez-vous que la prise de courant du téléviseur n’est pas sur
une prise murale.
• Assurez-vous que la télécommande est dans le mode de
fonctionnement approprié.
• Assurez-vous que la télécommande est pointée en direction de
la fenêtre de télécapteur du téléviseur. Consultez la page 1 du
Quick d’utilisation rapide pour de plus amples détails.
Le téléviseur affiche les mauvais canaux ou aucun canal
au-dessus de 13
• Effectuez la sélection de canal de nouveau.
• Ajoutez les numéros de canaux désirés (à l’aide de la commande
CHANGER PROGRAMME) dans la mémoire du téléviseur.
• Assurez-vous que les options MODE DE SYNTONISATION
sont réglées à l’option CÂBLE et exécutez la fonction de
Programmation automatique pour trouver tous les canaux
disponibles.
Française
35
Page 74

NETTOYAGE ET ENTRETIEN
AVERTISSEMENT concernant les images stationnaires
sur votre écran de télévision :
Évitez de laisser des images stationnaires ou de format
extra large “letterbox” sur l’écran pour des périodes
de temps prolongées. Vous évitez ainsi de faire vieillir
le tube de manière inégale.
Une utilisation normale du téléviseur implique l’affichage d’im ages
dont le contenu se déplace et change constamment en remplissant
l’écran. Assurez-vous de ne pas laisser d’images immobiles à
l’écran pour des périodes de temps prolongées, ou d’afficher
les mêmes images à l’écran trop souvent, parce que des images
fantômes peuvent apparaître en permanence sur le tube image. Les
sources d’images stationnaires peuvent provenir de disques DVD,
disques laser, jeux vidéo, disques CD-i, vidéocas settes, boîtiers de
télévision numérique, canaux de diffusion, canaux du service de
câble, canaux de transmission par satellite et autres. Voici quelques
exemples d’images stationnair (il ne s’agit pas d’une liste complète ;
vous pourrez en trouver d’autres durant votre écoute):
• Menus DVD - listes du contenu du disque DVD
• Barres noires du format letterbox – apparaissant dans le haut
et le bas de l’écran de télévision lorsqu’un film grand écran
(16:9) est visionné sur un téléviseur utilisant un rapport d’aspect
standard (4:3).
• Images et tableaux d’affichage des résultats de jeux vidéo.
• Les logos des stations de télévision – peuvent présenter un
problème s’ils sont très brillants et stationnaires ; des graphiques
de faible contraste ou qui se déplacent sont moins susceptibles
de faire vieillir le tube à image de manière irrégulière.
• Téléscripts du marché boursier – qui apparaissent dans le bas
de l’écran de télévision
• Logos des canaux commerciaux et écrans d’affichage des prix
– très brillants et af endroit de l’écran de télévision.
POSITIONNEMENT DU TÉLÉVISEUR
• POUR ÉVITER QUE LE COFFRET DU TÉLÉVISEUR
NE SE DÉFORME OU QUE SES COULEURS SOIENT
ALTÉRÉES ET POUR DIMINUER LES POSSIBILITÉS
DE PANNE, NE PAS PLACER LE TÉLÉVISEUR OÙ LA
TEMPÉRATURE PEUT DEVENIR EXCESSIVEMENT
ÉLEVÉE PAR EXEMPLE, DANS LES RAYONS
DIRECTS DU SOLEIL OU PRÈS D’UN APP AREIL DE
CHAUFFAGE.
• ASSUREZ-VOUS QUE L’AIR CIRCULE LIBREMENT
À TRAVERS LES PERFORATIONS DU COUVERCLE
ARRIÈRE DU TÉLÉVISEUR
Nettoyage
• Pour éviter tout risque d’électrocution, assurez-vous de bien
débrancher le téléviseur de la prise murale avant de procéder au
nettoyage.
• Époussetez régulièrement le téléviseur à l’aide d’un chif sec et
non abrasif pour garder votre téléviseur propre.
• Lors du nettoyage de votre téléviseur, prenez soin de ne pas
égratigner ou d’endommager la surface d’écran. Enlevez vos
bijoux et évitez d’utiliser toute matière abrasive. Ne pas utiliser
de produits d’entretien ménager. Essuyez l’écran à l’aide d’un
chiffon propre humide. Utilisez le chiffon verticalement et de
façon régulière, sans trop appuyer.
• Essuyez légèrement les surfaces du boîtier à l’aide d’un chiffon
ou d’une éponge propre, mouillée d’une solution d’eau fraîche
et claire et d’un savon ou détergent doux. Utilisez un chiffon
propre et sec pour assécher les surfaces nettoyées. Ne pas utiliser
d’acétone, de toluène ou d’alcool pour nettoyer l’écran.
• Passez l’aspirateur de temps en temps pour nettoyer les orifices
ou fentes d’aération sur le couvercle arrière du téléviseur.
• Ne jamais utiliser des solvants, des atomiseurs d’insecticide ou
autres produits chimiques sur le boîtier ou à proximité de celuici afin d’éviter d’endommager le fini de façon permanente.
36
Page 75

INDEX
Nettoyage et entretien ........................................... 36
Commandes de réglage du son
Commande AVL (Limiteur de niveau audio) ......................10
Commande Équilibre ..........................................................
Commandes Égalisation ......................................................
Commande Dolby Virtual ..................................................
SAP .....................................................................................10
Commande Stéréo ..............................................................
10
10
10
10
Commandes de minuterie ..................................... 11
Commandes de mode HD
Comment Sélectionner Le Mode HD .................................31
Commandes de réglage de l’image ......................................
Commandes de réglage de son ............................................
Commandes PIP..................................................................34
32
33
Index .....................................................................37
Commandes de mode PC
Commandes Sél. audio .......................................................29
Commandes Caractéristiques PC .......................................
Commande de réglage de l’image .......................................
Commandes PIP ................................................................
30
29
31
Informations d’enregistrement de garantie .............2
Consignes de sécurité/Mesures de précaution ......
3-4
Table des matières ...................................................
Commande Program auto ....................................................
Commande AutoPicture™ ...................................................
Commande AVL (Limiteur de niveau audio) ......................
Commande Équilibre .........................................................
Commande Changer Programme (Ajout ou suppression
de canaux) ............................................................................7
Commande Sous-titres .......................................................
Commande Dolby Virtual ..................................................
Commande Égalisation ......................................................
Ajust. Fin............................................................................. 8
Commande Langue ..............................................................6
Commandes de réglage de l’image ........................................
Commande Liste de programmes .......................................
Commande Pixel Plus ........................................................
Programmation de la télécommande pour les dispositifs
externes
Boutons Reliés a la télécommande du dispositif externe ......
Comment utiliser la télécommande avec des dispositif
externes Philips ...................................................................
Commande SAP (Voie audio secondaire) ...........................
Commande Veille ...............................................................
Commande Source .............................................................
Commande Stéréo/Mono ...................................................
Commande Surf .................................................................
Systema................................................................................ 8
Commandes Minuterie .......................................................
Commande Mode de syntonisation ......................................
5
Commande Grand Écran (format d’écran) .........................
7
26
10
10
23
10
10
9
25
24
27
28
10
23
22
10
25
11
6
22
Française
Astuces de dépannage ...........................................
Commandes de mode TV
Active Control ....................................................................24
Commandes AutoLock™ (verrouillage automatique)
Code d’accès .......................................................................
Blocage des canaux ..............................................................
Options de blocage .............................................................
Effacer tous les canaux verrouillés ........................................
Classement des films ...........................................................
Écran de révision .................................................................
Classement des émissions de télévision ................................17
Comprendre la commande AutoLock™ ...............................
Commande AutoSound™ ....................................................
35
13
14
18
15
16
19
12
26
Garantie ................................................................ 38
37
Page 76

GARANTIE LIMITÉE PHILIPS
Un (1) an sur la main d’oeuvre et Un (1) an sur les pièces et
Deux (2) ans sur la réparation des afficheurs
PHILIPS CONSUMER ELECTRONICS garantit
ce produit contre tout défaut de matière ou de main d’oeuvre,
sous réserve de toutes les conditions énoncées, comme suit :
PREUVE D’ACHAT :
Vous devez fournir une preuve de la date d’achat afin de
bénéficier du service de réparation garanti pour votre produit.
Un reçu ou tout autre document faisant preuve de la date
d’achat du produit et du détaillant agréé est considéré comme
une preuve d’achat.
COUVERTURE :
(S’il est déterminé que le produit est défectueux)
MAIN D’OEUVRE : Pour une période de un (1) an à partir de
la date d’achat, Philips s’engage, à son choix, à réparer ou à
remplacer le produit gratuitement, ou à rembourser les frais de
main d’oeuvre au centre de service agréé Philips. Suivant cette
période de un (1) an, Philips ne sera plus responsable d’aucun
frais encouru.
PIÈCES :Pour une période de un (1) an à partir de la date
d’achat, Philips fournira, gratuitement, des pièces de rechange
neuves ou remises à neuf en échange des pièces défectueuses.
Un centre de réparation agréé Philips effectuera le démontage
et le montage des pièces pour une période de un (1) an. (Les
écrans PTV s’accompagnent d’une garantie de remplacement de
trente (30) jours.)
AFFICHEUR : Pour une période de deux (2) ans à partir de la
date d’achat, Philips fournira, gratuitement, un afficheur actif
neuf ou remis à neuf en échange de l’afficheur défectueux. Un
centre de réparation agréé Philips effectuera le démontage et le
montage des pièces sous la garantie de main d’oeuvre spécifiée.
EXCLUSIONS DE LA GARANTIE
Votre garantie ne couvre pas :
• les frais de main d’oeuvre pour l’installation ou la
configuration du produit, le réglage des commandes sur le
produit du client ainsi que l’installation ou la réparation du
système d’antenne externe au produit.
• la réparation du produit et/ou le remplacement des pièces
à cause d’une mauvaise installation, d’un raccordement à
une alimentation électrique incorrecte, d’un emploi abusif,
d’une négligence, d’un mauvais usage, d’un accident, d’une
réparation non autorisée ou de toute autre cause non
contrôlable par Philips.
• un produit nécessitant une modification ou adaptation
afin de permettre l’utilisation dans tout pays autre que
celui pour lequel il était désigné, fabriqué, approuvé et/ou
autorisé ou toute réparation du produit endommagé par ces
modifications.
• Philips n’est aucunement responsable de tout dommage
au produit lors de l’expédition lorsque celui-ci n’a pas été
emballé correctement ou de tout frais associé à l’emballage.
• un produit perdu lors de l’expédition sans preuve signée de
la réception.
• un produit utilisé à des fins commerciales ou institutionnelles
(y compris mais non de façon limitative les fins de location).
• un produit vendu TEL QUEL ou RÉNOVÉ.
POUR OBTENIR UN SERVICE DE GARANTIE
AUX ÉTATS-UNIS, À PORTO RICO OU AUX
ÎLES VIERGES AMÉRICAINES …
Communiquez avec le centre de service à la clientèle de Philips
au :
1-888-PHILIPS (1-888-744-5477)
POUR OBTENIR UN SERVICE DE GARANTIE
AU CANADA…
1-800-661-6162 (pour un service en français)
1-888-PHILIPS (1-888-744-5477) - (pour un service en
anglais ou en espagnol)
LA RÉPARATION OU LE REMPLACEMENT
CONFORMÉMENT À CETTE GARANTIE CONSTITUE
LE SEUL REMÈDE POUR LE CONSOMMATEUR. PHILIPS
N’EST AUCUNEMENT RESPONSABLE DE TOUT
DOMMAGE ACCESSOIRE OU INDIRECT RÉSULTANT
DE LA VIOLATION DE TOUTE GARANTIE EXPRESSE OU
IMPLICITE SUR CE PRODUIT. SAUF DANS LA MESURE
INTERDITE PAR LES LOIS APPLICABLES, TOUTE GARANTIE
IMPLICITE DE QUALITÉ LOYALE ET MARCHANDE OU
D’UTILITÉ PARTICULIÈRE DU PRODUIT EST LIMITÉE DANS
LE TEMPS À LA DURÉE DE CETTE GARANTIE.
Certains états ne reconnaissent pas l’exclusion ou la limitation
de la responsabilité pour dommages indirects ou accessoires,
ou autorisent des limitations sur la durée d’une garantie
implicite, il est donc possible que les limitations ou exclusions
mentionnées ci-dessus soient sans effet dans votre cas. En
outre, si vous concluez une entente de contrat de service avec
la société PHILIPS dans les quatre-vingt-dix (90) jours suivant la
date d’achat, la limitation sur la durée de la garantie implicite ne
s’applique pas.
Cette garantie vous donne des droits légaux spécifiques. Il est possible que vous bénéficiiez de droits supplémentaires variant d’un état/province à l’autre.
Philips, P.O. Box 671539, Marietta, GA. 30006-0026
(Garantie: 4835 710 27275)
Page 77

TV LCD
Manual del usuario
26PF5320
32PF5320
(y número de model / serial)
Español
Model No.:
Serial No.:
3139 125 34752 SD2 ME5
Page 78

Devuelva su tarjeta de registro de producto hoy mism
y obtenga lo mejor de su compra.
Al registrar su modelo con PHILIPS usted cumplirá con los requisitos para obtener todos los valiosos beneficios que se
indican a continuación, ¡no se los pierda! Llene y devuelva su tarjeta de registro del producto ahora mismo para garantizar:
*Comprobante de
Compra
La devolución de la tarjeta incluida
garantiza que se archive la fecha de
compra, de modo que no necesitará
más papeleo para obtener el servicio
de garantía.
*Seguridad
del producto
Notificación
Al registrar su producto, recibirá la
notificación (directamente del fabricante)
en el raro caso de un retiro de productos
o de defectos en la seguridad.
¡Felicitaciones por su compra
y bienvenido a la “familia”!
Estimado propietario de un producto PHILIPS:
Gracias por su confianza en PHILIPS. Usted ha escogido uno de
los productos mejor construidos y con mejor respaldo disponible
hoy en día. Haremos todo lo que esté a nuestro alcance por
mantenerle satisfecho con su compra durante muchos años.
Como miembro de la “familia” PHILIPS, usted tiene derecho a
estar protegido con una de las garantías más completas y redes
de servicio más sobresalientes de la industria. Lo que es más: su
compra le garantiza que recibirá toda la información y ofertas
especiales a las que tiene derecho, además de un fácil acceso a
los accesorios desde nuestra cómoda red de compra desde el
hogar.
Y lo que es más importante: usted puede confiar en nuestro
irrestricto compromiso con su satisfacción total.
Todo esto es nuestra manera de decirle bienvenido y gracias por
invertir en un producto PHILIPS.
*Beneficios adicionales
de la propiedad del
producto
Registrar su producto garantiza que recibirá
todos los privilegios a los cuales tiene
derecho, incluyendo las ofertas especiales
para ahorrar dinero.
Este “relámpago” indica material no
aislado dentro de la unidad que puede
causar una descarga eléctrica. Para la
seguridad de todos en su hogar, por favor no
retire la cubierta del producto.
El “signo de exclamación” llama la
atención hacia funciones sobre las
que debería leer con atención en la
literatura adjunta para evitar problemas operativos y de mantenimiento.
ADVERTENCIA: Para reducir el riesgo de
incendios o de descarga eléctrica, este aparato
no se debe exponer a la lluvia ni a la humedad,
y no se le deben colocar encima objetos llenos
de líquido como jarrones.
PRECAUCIÓN: Para evitar descargas
eléctricas, haga que la paleta ancha del enchufe
coincida con la ranura ancha e introdúzcala
hasta el fondo.
ATTENTION: Pour éviter les choc électriques, introduire la lame la plus large de la
fiche dans la borne correspondante de la prise
et pousser jusqu’au fond.
P.S. Con el fin de obtener lo mejor de su compra
PHILIPS, asegúrese de llenar y de devolver
inmediatamente su tarjeta de registro del producto.
Visite nuestro sitio en el World Wide Web en www.usasupport.philips.com
2
Sólo para uso del cliente
Escriba a continuación el Nº de serie, el cual se
ubica en la parte posterior del gabinete. Guarde
esta información para futura referencia.
Nº de modelo. ________________________
Nº de serie. __________________________
Page 79

INSTRUCCIONES DE SEGURIDAD IMPORTANTE
Lea antes de operar el equipo
1. Lea estas instrucciones.
2. Guarde estas instrucciones.
3. Preste atención a todas las advertencias.
4. Siga todas las instrucciones.
5. No use este aparato cerca del agua.
6. Límpielo solamente con un paño seco.
7. No bloquee ninguno de los orificios de ventilación. Instálelo de acuerdo
con las instrucciones de los fabricantes.
8. No lo instale cerca de fuentes de calor, tales como radiadores, compuertas
de tiro (registros) de calor, estufas u otros aparatos (incluidos amplificadores) que generen calor.
9. No anule el objetivo de seguridad del enchufe polarizado o de conexión
a tierra. Un enchufe polarizado tiene dos paletas, una más ancha que
la otra. Un enchufe de conexión a tierra tiene dos paletas y una tercera
espiga de conexión a tierra. La paleta más ancha o la tercera espiga es
entregada para su seguridad. Si el enchufe suministrado no se ajusta a su
tomacorriente, consulte a un electricista para que reemplace el tomacorriente obsoleto.
10. Evite pisar o apretar el cable de suministro eléctrico, especialmente en los
enchufes, tomacorrientes y el punto en que salen del aparato.
11. Sólo use aditamentos o accesorios especificados por el fabricante.
12. Utilice sólo un carro, soporte, trípode, repisa o mesa especifi-
cados por el fabricante o que se vendan junto con el aparato. Si
usa el carro, tenga precaución cuando mueva la combinación
carro/aparato para evitar lesiones si éste se vuelca.
13. Desenchufe este aparato durante las tormentas eléctricas o cuando no se
use durante largos períodos.
14. Deje que personal calificado realice todo el servicio. Es necesario que el
aparato reciba servicio si se ha dañado en algún modo, como cuando se
daña el cable o enchufe de suministro de corriente, se ha derramado líquido u objetos han caído dentro él, cuando el aparato ha estado expuesto a
lluvia o humedad, no opera bien o se ha caído.
15. Es posible que este producto contenga plomo y mercurio. La eliminación
de estos materiales podría estar regulada debido a consideraciones medioambientales. Para obtener información acerca de la eliminación o del
reciclaje, póngase en contacto con sus autoridades locales o con la Alianza
de Industrias Electrónicas: en www.eiae.org
16. Daños que requieran servicio - El aparato debe recibir servicio de personal de servicio calificado cuando:
A. Se ha dañado el cable de alimentación o el enchufe; o
B. Han caído objetos o se ha derramado líquido dentro del aparato; o
C. El aparato ha quedado expuesto a la lluvia; o
Nota para el instalador del sistema CATV: Se hace este recordatorio para llamar la atención del instalador del sistema CATV sobre el
Artículo 820-40 de donde se proporcionan instrucciones para la apropiada conexión a tierra y, en particular, se especifica que la tierra de los
cables se conectará al sistema de conexión a tierra del edificio tan cerca del punto de entrada del cable como sea posible.
D. El aparato parece no funcionar normalmente o su rendimiento ha
cambiado notoriamente; o
E. Se ha dejado caer el aparato o se ha dañado la caja.
17. Inclinación/estabilidad - Todos los televisores deben cumplir con las
normas de seguridad generales recomendadas internacionalmente en
cuanto a las propiedades de inclinación y estabilidad del diseño de su
gabinete.
• No comprometa estas normas de diseño aplicando una fuerza de
tracción excesiva a la parte delantera o superior del gabinete lo que
finalmente puede hacer que el producto se vuelque.
• Además, no se ponga en peligro usted mismo o a sus niños colocando equipos electrónicos o juguetes sobre el gabinete. Dichos
artículos pueden caer inesperadamente desde la parte superior del
producto y dañar el producto y/o causar lesiones personales.
18. Montaje en la pared o cielorraso - El aparato se debe montar en una
pared o cielorraso únicamente como lo recomienda el fabricante.
19. Líneas de energía eléctrica - Una antena exterior se debe ubicar lejos
de las líneas de energía.
20. Conexión a tierra de la antena exterior - Si se conecta una antena
exterior o un sistema de cable al producto, asegúrese de que la antena
o el sistema de cable estén conectados a tierra para proporcionar cierta
protección contra sobrevoltajes y acumulación de cargas electrostáticas.
En la Sección 810 del Código Eléctrico Nacional, ANSI/NFPA 70, se
proporciona información sobre la adecuada conexión a tierra de las esteras y estructuras de apoyo, conexión a tierra del alambre de acometida
a una unidad de descarga de antena, tamaño de los conectores de conexión a tierra, ubicación de la unidad de descarga de antena, conexión a
los electrodos y requerimientos del electrodo de conexión a tierra. Vea la
Figura que aparece más abajo.
21. Entrada de objetos y líquidos - Se debe tener cuidado de que no
caigan objetos dentro de los orificios de la caja ni se derramen líquidos a
través de ellos.
a) Advertencia: Para reducir el riesgo de incendios o de descarga eléc-
trica, este aparato no se debe exponer a la lluvia ni a la humedad, y no se
le deben colocar encima objetos llenos de líquido como jarrones.
22. Uso de las baterías PRECAUCIÓN - Para evitar escapes de las baterías
que pueden resultar en lesiones corporales, daño a la propiedad o a la
unidad:
• Instale correctamente todas las baterías, con los polos + y - alineados
como está marcado en la unidad.
• No mezcle las baterías (nuevas con antiguas o de carbono con alcali
nas, etc.).
• Retire las baterías cuando no use la unidad por un largo tiempo
Español
-
Ejemplo de conexión a tierra
de la antena según NEC,
Código Eléctrico Nacional
CAJA DE LA ENTRADA DEL SUMINISTRO ELECTRICO
ABRAZADERAS DE TIERRA
3
CONDUCTOR DE ENTRADA
DE LA ANTENA
UNIDAD DE DESCARGA
DE LA ANTENA
CONDUCTOR DE TIERRA
ABRAZADERAS DE TIERRA
SISTEMA DE ELECTRODO DE PUESTA A
TIERRA DEL SUMINISTRO ELECTRICO
Page 80

PRECAUCIONES
PRECAUCIONES DE SEGURIDAD ADICIONALES
• ASEGÚRESE que el soporte del TV LCD esté adecuadamente apretado al aparato (Consulte la Guía rápida para saber la manera correcta de apretar el tornillo del soporte en el aparato. Hacerlo inadecuadamente puede hacer que el aparato sea inseguro.
• Si se instala el TV LCD en la pared, la instalación debe realizarla un técnico calificado. Hacerlo inadecuada o incorrectamente puede
hacer que el aparato sea inseguro.
• Desconecte los enchufes principales cuando:
– limpie la pantalla del TV, nunca use agentes de limpieza abrasivos.
– haya una tormenta eléctrica.
– el aparato quede sin supervisión por mucho tiempo.
• No cambie ni mueva el TV LCD cuando esté encendido.
• No toque, presione ni frote la superficie de la pantalla LCD con ningún objeto puntiagudo o duro.
• Cuando la superficie de la pantalla LCD acumule polvo, límpiela suavemente con un paño de algodón absorbente o con otro material
suave como la gamuza. NO USE acetona, tolueno o alcohol para limpiar la superficie de la pantalla. Estos productos químicos dañaran
la superficie.
• Si le cae agua o saliva, límpiela rápidamente. Estos líquidos pueden causar deformación y disminución en la intensidad de los colores de
la pantalla LCD cuando se le expone a éstos por algún tiempo.
• Cuando ocurran cambios de temperatura, tenga cuidado con la condensación. Ésta puede causar daño a la pantalla LCD y en las piezas
eléctricas. Después de que desaparezca la condensación quedarán manchas en la pantalla.
• La información de PRECAUCIÓN se ubica en la parte posterior del TV (consulte los diagramas a continuación).
UBICACIÓN DEL TELEVISOR LCD
• Coloque el TV LCD sobre una base sólida y firme o sobre un soporte. Asegúrese de que sea lo suficientemente fuerte para soportar el
peso del TV LCD.
• Trate de dejar un espacio de aproximadamente 6” a cada costado del gabinete del aparato para una ventilación apropiada.
• No coloque el TV LCD cerca de fuentes de calor o de un radiador.
• No coloque el TV LCD donde pueda quedar expuesto a la lluvia o a humedad excesiva.
PROCEDIMIENTO DE RECICLAJE/ELIMINACIÓN AL FINAL DE LA VIDA ÚTIL
• Para minimizar el daño al medioambiente, las baterías que vienen con el TV LCD no contienen mercurio ni níquel-cadmio. Si es po
sible, cuando elimine las baterías, use los medios de reciclaje disponibles en su área.
• Los materiales que usa el TV LCD pueden ser reciclados. Para minimizar la cantidad de desperdicios en el medioambiente, ver ifique si
en su área hay empresas que recojan televisores usados para desmantelamiento y recolección de materiales reutilizables o comuníquese
con su distribuidor para obtener consejos acerca del reciclaje.
• Elimine el cartón y el material de embalaje a través de medios adecuados de eliminación de desperdicios en su área.
4
-
Page 81

CONTENTS
INTRODUCCIÓN
Bienvenido/Registro de su TV ...................................................... 2
Seguridad/Precauciones .............................................................
3-4
Funciones .....................................................................................
Contenidos .................................................................................. 5
MENÚ DE INSTALACIÓN
Uso de los Controles de Idioma ....................................... 6
Uso del control Sintonía ...............................................................
Uso de los Controles de Auto Programa .......................................
Uso de los Controles de Editar canal ............................................
Seleccion del Sistema.................................................................... 8
Ajuste Fino................................................................................... 8
CONTROLES DEL MENÚ IMAGEN
Uso de los controles del menú Imagen ............................. 9
CONTROLES DEL MENÚ SONIDO
Uso de los controles del menú Sonido ........................... 10
CONTROLES DEL MENÚ FUNCIONES
Uso de los controles del menú Temporizador ................. 11
Comprensión de los controles de AutoLock™ ............................. 12
Configuración de un código de acceso de AutoLock™ ................. 13
Uso de AutoLock™ para bloquear canales ................................... 14
Borrado de todos los canales bloqueados a la vez ........................15
Uso de los Controles Clasificación de películas para bloquear
programación ............................................................................. 16
Uso de los Controles Clasificación de TV para bloquear
programación ............................................................................. 17
Otras opciones de bloqueo de AutoLock™ .................................. 18
Uso de la pantalla de revisión de AutoLock™ .............................. 19
Uso del Control Contraste + ......................................................20
Uso de Control Reducir Ruido ................................................... 20
Uso del Control PIP ................................................................... 21
Uso de la Lista fuente ................................................................. 22
FUNCIONES RELACIONADAS CON EL CONTROL REMOTO
Uso del Control formato ...............................................22
Uso de los Controles de Subtítulos .............................................
Uso de los Controles de Apagado Programado ............................
Uso de Control Lista Canales .....................................................
Uso de la función Control Activo
(dependiendo del modelo) ........24
Uso de Control Surf ...................................................................
Uso de Pixel Plus ........................................................................
Uso de Control AutoPicture™ .....................................................
Uso de Control AutoSound™ ......................................................
23
23
24
25
25
26
26
Uso del control remoto con dispositivos accesorios
Botones del control remoto relacioados con el dispositivos accesorios
Cómo usar el control remoto con dispositivos accesorios Philips
... 27
..... 28
CONFIGURACIÓN DEL MODO PC (COMPUTADOR PERSONAL)
Uso de los Controles Imagen ......................................... 29
Uso del Control Selección de audio ............................................
Uso de los Controles de las funciones de PC ..............................
Uso del Control PIP ...................................................................
29
30
31
CONFIGURACIÓN DEL MODO HD (ALTA DEFINICIÓN)
Cómo Seleccionar el Modo HD .................................... 31
Uso de los Controles Imagen ......................................................
Uso de los Controles de Sonido ..................................................
32
33
Uso del Control PIP.................................................................... 34
INFORMACIÓN IMPORTANTE
Localización de fallas .....................................................35
Cuidado y limpieza ....................................................................
Índice .........................................................................................
Garantía limitada .......................................................................
36
37
38
La función
Active Control™ continuamente mide y corrige todas las señales entrantes
para proporcionar la mejor calidad de imagen.
5
Esta función monitorea y corrige el control de nitidez y el control de reduc
ción de ruido.
El panel de enchufes de audio/vídeo permite conexiones directas con
VCR, DVD u otros dispositivos, proporcionando una imagen de TV y
reproducción de sonido de calidad.
6
7
El control Nivelador del volumen de audio (AVL) mantiene el sonido del
TV a un nivel parejo. Los picos y valles que ocurren durante los cambios
7
de programa o pausas comerciales se reducen, produciendo un sonido más
uniforme y cómodo.
AutoLock™ le permite bloquear la vista de ciertos canales o programas con
ciertas clasificaciones si no desea que sus hijos vean materiales impropios.
AutoPicture™ le permite cambiar la configuración de imagen (color, tinte,
contraste, etc.) para diversos tipos de programación, tales como deportes,
películas, multimedia (juegos) o señales débiles con sólo presionar un botón.
AutoSound™ le permite escoger entre tres controles ajustados en fábrica y
un control personal que usted ajusta según sus propias preferencias a través
del submenú en pantalla Sonido. Los tres controles ajustados en fábrica
(Teatro, Música y Voz) le permiten adaptar el sonido del TV para mejorar la
programación en particular que está viendo.
Editar canal le permite agregar o quitar canales de la lista de canales alma
cenada en la memoria del TV. Editar canal facilita el limitar o ampliar el
número de canales disponibles cuando presiona los botones canal (+) o (–)
de su control remoto.
Subtítulos le permite leer el diálogo o conversaciones de voz del programa
de TV como texto en pantalla.
Control remoto infrarrojo hace funcionar su TV y otros dispositivos a
control remoto, como VCR, reproductores de DVD, convertidores de cable
y receptores de satélite.
El menú en pantalla muestra instrucciones y mensajes útiles para con
figurar los controles de funciones del TV (se puede ver en inglés, francés o
español).
El Apagado Programado apaga automáticamente el TV después de un
período determinado que usted escoge.
Temporizador le permite configurar su TV para encenderse y apagarse en
forma autónoma, una vez o todos los días como un reloj despertador.
Como socio de Energy Star®, Philips Consumer Electronics ha determinado
Active Control, AutoPicture, AutoSound y Surround son marcas comer
ciales de Philips Consumer Electronics Company. Derecho de autor 2001
Philips Consumer Electronics.
*Fabricado bajo licencia de Dolby Laboratories. “Dolby” y el símbolo de
doble D son marcas registradas de Dolby Laboratories.
que este producto satisface las pautas para la eficiencia de
energía Energy Star®. Energy Star® es una marca registrada
en EE.UU. El uso de productos con la etiqueta Energy
Star® puede ahorrar energía. El ahorro de energía reduce la
contaminación del aire y reduce las cuentas de electricidad.
GUÍA RÁPIDA DE USO Y
CONFIGURACIÓN
Consulte la simple Guía rápida
de uso y configuración (que
viene con su TV) para detalles
sobre conexiones y operación del
control remoto.
-
-
-
Español
-
5
Page 82

IDIOMA
USO DE LAS FUNCIONES DE INSTALACIÓN
ara los propietarios de TV que hablen francés,
portugués o inglés, existe una opción Idioma en
P
pantalla. El control Idioma le permite configurar el
menú en pantalla del TV para que aparezca en inglés,
francés, español o portugués.
Presione el botón MENU del control remoto
1
para mostrar el menú en pantalla.
Presione el botón CURSOR HACIA ABAJO
varias veces hasta que se resalte Instalar
2
Presione el botón CURSOR A LA DERECHA
para acceder al menú Instalar. Se resaltará
3
Idioma.
Presione el botón CURSOR A LA DERECHA
4
o para seleccionar English, Francais, Español o
Portugués
Presione el botón STATUS/EXIT para borrar el
5
menú de la pantalla.
.
.
CONSEJO ÚTIL
Recuerde el control Idioma sólo hace que los
elementos del menú en la pantalla del TV
aparezcan en texto inglés, francais, español o
portugués. No cambia las otras cateristicas del texto
en pantalla, tales como Subtítulos (CC), con los
programas de TV.
Menú del TV
Imagen
Sonido
Funciones
Instalar
5
4
2
Brillo
Color
Imagen
Nitidez
Tinte
1
3
4
Menú del TV
Imagen
Sonido
Funciones
Instalar
Instalar
Idioma
System
Sintonía
Auto Programa
Editar Canal
Sintonía Fina
Idioma
System
Sintonía
Auto Programa
Editar Canal
Español
O
Idioma Portuguese
O
Language English
O
Langue Français
SINTONÍA
a Sintonía le permite cambiar la entrada de señal del
TV al modo Cable, Antena o Auto. Es importante
L
que el TV sepa qué tipo de señal está conectada, ya sean
antena o cable.
Presione el botón MENU del control remoto
1
para mostrar el menú en pantalla.
Presione el botón del CURSOR HACIA
2
ABAJO varias veces hasta que se resalte Instalar.
Presione el botón del CURSOR A LA
3
DERECHA para acceder al menú Instalar. Se
resalta Idioma.
Presione el botón del CURSOR HACIA
4
ABAJO para seleccionar el control Sintonía.
Presione el botón del CURSOR A LA
DERECHA o A LA IZQUIERDA
5
seleccionar Cable, Antena, o Auto. Si Sintonía
se configura en Auto, Auto Programa detectará si
hay una señal de cable.
Presione del botón STATUS/EXIT para borrar
6
el menú de la pantalla.
para
CONSEJO ÚTIL
Cuando se selecciona Cable, están disponibles los
canales 1 al 125.
Cuando se selecciona Antena, están disponibles los
canales 2 al 69.
Menú del TV
Imagen
Sonido
Funciones
Instalar
6
5
2
4
Brillo
Color
Imagen
Nitidez
Tinte
6
1
3
5
Menú del TV
Imagen
Sonido
Funciones
Instalar
Instalar
Idioma
System
Sintonía
Auto Programa
Editar Canal
Sintonía Fina
Instalar
Idioma
System
Sintonía
Auto Programa
Editar Canal
Sintonía Fina
Idioma
System
Sintonía
Auto Programa
Editar Canal
Español
Cable
O
Sintonía Auto
O
Sintonía Antena
Page 83

USO DE LAS FUNCIONES DE INSTALACIÓN
AUTO PROGRAMA
u TV puede configurarse automáticamente para los canales
del área local (o TV cable). Esto le facilita seleccionar sólo
S
las estaciones de TV que hay en su área presionando el botón
CANAL (+) o (–).
Presione el botón MENU del control remoto para
1
mostrar el menú en pantalla.
Presione el botón del CURSOR HACIA ABAJO varias
veces hasta que se resalte Instalar.
2
Presione el botón del CURSOR A LA DERECHA
para ingresar al menú Instalar. Se resaltará Idioma.
3
Presione el botón del CURSOR HACIA ABAJO varias
veces hasta que se seleccione Auto Programa. Aparecerá
4
“Iniciar?”.
Presione el botón del CURSOR A LA DERECHA
para comenzar el proceso de programación automática.
5
Presione el botón STATUS/EXIT para borrar el menú
6
de la pantalla.
Menú del TV
Imagen
Sonido
Funciones
Instalar
6
Brillo
Color
Imagen
Nitidez
Tinte
1
3
5
Menú del TV
Imagen
Sonido
Funciones
Instalar
Instalar
Idioma
System
Sintonía
Auto Programa
Editar Canal
Sintonía Fina
Auto Programa
Idioma
System
Sintonía
Auto Programa
Editar Canal
Iniciar?
CONSEJO ÚTIL
Después de ejecutar Auto Programa, revise los
resultados. Presione el botón CANAL (+) o (–) y vea
qué canales puede seleccionar. Recuerde que primero
se debe conectar a su TV una señal de TV de antena
o de cable. Consulte la Guía de uso rápido para
realizar las conexiones.
EDITAR CANAL
ditar Canal le facilita agregar o eliminar canales de la lista
de canales almacenada en la memoria del TV.
E
Presione el botón MENU del control remoto para
1
mostrar el menú en pantalla.
Presione el botón del CURSOR HACIA ABAJO varias
veces hasta que se resalte Instalar.
2
Presione el botón del CURSOR A LA DERECHA
para ingresar al menú Instalar. Se resaltará Idioma.
3
Presione el botón del CURSOR HACIA ABAJO varias
veces hasta que se seleccione Editar Canal
4
Presione el botón del CURSOR A LA DERECHA
para ingresar al menú Editar Canal. Se resaltará Canal.
5
Presione los botones del CURSOR A LA DERECHA
o A LA IZQUIERDA
6
de canales disponibles. También puede presionar los
botones canal (+) o canal (-) para desplazarse por la lista
de canales. O bien, presione los botones de número para
seleccionar un número de canal específico.
Presione el botón del CURSOR HACIAABAJO para
seleccionar Borrado al tiempo que se lo lleva al canal
7
que se va a borrar.
Presione el botón del CURSOR A LA IZQUIERDA
o A LA DERECHA para seleccionar Sí y activar el
8
borrado de un canal. O seleccione No para desactivar el
borrado de un canal.
Presione el botón STATUS/EXIT para borrar el menú
9
de la pantalla.
para desplazarse por la lista
.
2
4
Menú del TV
Imagen
Sonido
Funciones
Instalar
9
6
8
2
4
7
Brillo
Color
Imagen
Nitidez
Tinte
1
3
5
6
8
Canal
Menú del TV
Imagen
Sonido
Funciones
Instalar
Instalar
Idioma
System
Sintonía
Auto Programa
Editar Canal
Sintonía Fina
Editar Canal
Canal
Borrado
Editar Canal
Canal
Borrado
8
Español
Idioma
System
Sintonía
Auto Programa
Editar Canal
Canal
Borrado
2
Sí
7
Page 84

USO DE LAS FUNCIONES DE INSTALACIÓN
SELECCIÓN DEL SISTEMA
a función Sistema le permite seleccionar el sistema de TV que
desee. Si se selecciona Auto, se seleccionará automáticamente
L
el sistema respectivo de acuerdo con el sistema de transmisión.
Seleccione el sistema correspondiente si la recepción es deficiente al
seleccionar Auto.
Presione el botón MENU del control remoto para
1
mostrar el menú en pantalla.
Presione el botón del CURSOR HACIA ABAJO varias
veces hasta que se resalte Instalar.
2
Presione el botón del CURSOR A LA DERECHA
para ingresar al menú Instalar. Se resaltará Idioma.
3
Presione el botón del CURSOR HACIA ABAJO hasta
que se seleccione Sistema.
4
Presione el botón del CURSOR HACIA LA
5
DERECHA para seleccionar el sistema (Auto, NTSC,
PAL-M o PAL-N) de su elección.
Presione el botón STATUS/EXIT para borrar el menú
6
de la pantalla.
Menú del TV
Imagen
Sonido
Funciones
Instalar
6
Brillo
Color
Imagen
Nitidez
Tinte
1
3
5
Menú del TV
Imagen
Sonido
Funciones
Instalar
Instalar
Idioma
System
Sintonía
Auto Programa
Editar Canal
Sintonía Fina
Auto Programa
Idioma
System
Sintonía
Auto Programa
Editar Canal
Iniciar?
CONSEJO ÚTIL
Después de ejecutar Auto Programa, revise los
resultados. Presione el botón CANAL (+) o (–) y vea
qué canales puede seleccionar. Recuerde que primero
se debe conectar a su TV una señal de TV de antena
o de cable. Consulte la Guía de uso rápido para
realizar las conexiones.
AJUSTE FINO
sta función le permite adjustar la recepción de la imagen en
áreas en dónde la recepción sea débil.
E
Presione el botón MENU del control remoto para
1
mostrar el menú en pantalla.
Presione el botón del CURSOR HACIA ABAJO varias
veces hasta que se resalte Instalar.
2
Presione el botón del CURSOR A LA DERECHA
para ingresar al menú Instalar. Se resaltará Idioma.
3
Presione el botón del CURSOR HACIA ABAJO varias
veces hasta que se seleccione Editar Canal
4
Presione el botón del CURSOR HACIA LA
5
DERECHA para ingresar al menú Ajuste Fino.
Presione el botón del CURSOR HACIA LA
DERECHA o HACIA LA IZQUIERDA para realizar
6
el ajuste fino.
Presione el botón del CURSOR HACIAABAJO para
seleccionar Borrado al tiempo que se lo lleva al canal
7
que se va a borrar.
Presione el botón del CURSOR A LA IZQUIERDA
o A LA DERECHA para seleccionar Sí y activar el
8
borrado de un canal. O seleccione No para desactivar el
borrado de un canal.
Presione el botón STATUS/EXIT para borrar el menú
9
de la pantalla.
.
2
4
Menú del TV
Imagen
Sonido
Funciones
Instalar
9
6
8
2
4
7
Brillo
Color
Imagen
Nitidez
Tinte
1
3
5
6
8
Canal
Menú del TV
Imagen
Sonido
Funciones
Instalar
Instalar
Idioma
System
Sintonía
Auto Programa
Editar Canal
Sintonía Fina
Editar Canal
Canal
Borrado
Editar Canal
Canal
Borrado
8
Idioma
System
Sintonía
Auto Programa
Editar Canal
Canal
Borrado
2
Sí
8
Page 85

USO DE LOS CONTROLES DE AJUSTE DE IMAGEN
ara ajustar los controles de imagen de su TV,
P
seleccione un canal y siga estos pasos.
Presione el botón MENU del control remoto
1
para mostrar el menú en pantalla.
Presione el botón del CURSOR A LA
2
DERECHA para ingresar al menú Imagen. Se
resaltará Brillo.
Presione el botón del CURSOR
HACIAARRIBA o HACIAABAJO
3
seleccionar el ajuste de imagen que desea
cambiar. Brillo, Color, Imagen, Nitidez, Tinte,
o Temp. De Color.
Presione el botón del CURSOR A LA
DERECHA o A LA IZQUIERDA
4
el control seleccionado.
Presione el botón STATUS/EXIT para borrar el
5
menú de la pantalla.
para
para ajustar
Menú del TV
Imagen
Sonido
Funciones
Instalar
Brillo
Color
Imagen
Nitidez
Tinte
5
1
3
Imagen
Brillo
Color
Imagen
Nitidez
Tinte
Temp. De Color
Imagen
Brillo
Color
Imagen
Nitidez
Tinte
Temp. De Color
48
38
2
4
3
4
Imagen
Brillo
Color
Imagen
Nitidez
Tinte
Temp. De Color
42
CONSEJO ÚTIL
Recuerde, cuando la escala de barra está
centrada , los ajustes de los
controles están a niveles normales, de rango
medio.
NOTA: Los controles Tinte no estarán
disponibles para ajustes cuando se sintonice
en las entradas CVI.
Brillo - agrega o resta luz desde la parte más
oscura de la imagen.
Color - agrega o elimina color.
Imagen - mejora el detalle de las partes más
claras de la imagen.
Nitidez - mejora el detalle en la imagen.
Tinte - ajusta la imagen para obtener tonos de
piel naturales.
Temp. De Color - ofrece preferencias de
imagen Normal, Caliente o Frio. (Normal
mantiene blancos los blancos, Caliente vuelve
azulados los blancos y Frio vuelve rojizos los
blancos).
Imagen
Brillo
Color
Imagen
Nitidez
Tinte
Temp. De Color
Imagen
Brillo
Color
Imagen
Nitidez
Tinte
Temp. De Color
Imagen
Brillo
Color
Imagen
Nitidez
Tinte
Temp. De Color
8
Español
-30
Normal
9
Page 86

USO DE LOS CONTROLES DE AJUSTE DE SONIDO
ara ajustar los controles de sonido de su TV, seleccione
P
un canal y siga estos pasos.
Presione el botón MENU del control remoto
para mostrar el menú en pantalla. Se resaltará
1
Imagen.
Presione el CURSOR HACIAABAJO para
resaltar Sonido.
2
Presione el botón del CURSOR A LA
3
DERECHA para ingresar al menú Sonido.
Presione el botón del CURSOR
HACIAARRIBA o HACIAABAJO
4
seleccionar el ajuste de sonido que desea
cambiar: Ecualizador, Balance, AVL, Dolby
Virtual, SAP,
Presione el botón del CURSOR A LA
DERECHA o A LA IZQUIERDA
5
el control seleccionado.
Presione del botón STATUS/EXIT para borrar
6
el menú de la pantalla.
o Sonido.
para
para ajustar
Menú del TV
Imagen
Sonido
Funciones
Instalar
6
5
2
4
Ecualizador
Balance
AVL
Dolby Virtual
SAP
1
4
3
5
Sonido
Ecualizador
Balance
AVL
Dolby Virtual
SAP
Sonido
Sonido
Ecualizador
Balance
AVL
Dolby Virtual
SAP
Sonido
Sonido
Ecualizador
Balance
AVL
Dolby Virtual
SAP
Sonido
120 Hz
500 Hz
1500 Hz
5 KHz
10 KHz
0
Sí
CONSEJO ÚTIL
Ecualizador – ajusta los tonos del sonido.
Seleccione entre 120 Hz y 10 KHz.
Balance – ajusta el nivel de sonido que
proviene de los altavoces izquierdo y derecho.
AVL (Nivelador automático de volumen)
– cuando está encendido, el AVL nivelará el
sonido que se escuche cuando se produzcan
cambios repentinos en el volumen durante
pausas comerciales o cambios de canal.
Dolby Virtual – agrega una mayor
profundidad y dimensión al sonido del TV.
Seleccione entre sonido Dolby Virtual o
Estereo (si es estéreo) o entre Espacial o Mono
(si es mono).
SAP (Programación de audio secundario)
– enviada como un tercer canal de audio,
una señal SAP se puede oír aparte del sonido
del programa de TV actual. Nota: Si no se
encuentra disponible el control SAP, en la
pantalla aparecerá “No disponible”.
Sonido – seleccione entre Estereo y Mono.
Sonido
Ecualizador
Balance
AVL
Dolby Virtual
SAP
Sonido
Sonido
Ecualizador
Balance
AVL
Dolby Virtual
SAP
Sonido
Sonido
Ecualizador
Balance
AVL
Dolby Virtual
SAP
Sonido
Dolby Virtual
Sí
Estereo
10
Page 87

USO DE LOS CONTROLES DEL MENÚ TEMPORIZADOR
u TV viene con un reloj en pantalla. También es
posible configurar el TV para que se encienda o se
S
apague a una hora específica y para que sintonice un
canal específico cuando se encienda.
Presione el botón MENU del control remoto
1
para mostrar el menú en pantalla.
Presione el CURSOR HACIAABAJO para
resaltar Funciones.
2
Presione el botón del CURSOR A LA
3
DERECHA para ingresar al menú Funciones. Se
resaltará Temporizador
Presione el botón del CURSOR A
LA DERECHA para ingresar al menú
4
Temporizador.
Presione el botón del CURSOR HACIA
ARRIBA o HACIA ABAJO para resaltar uno de
5
los controles del Temporizador. Estos controles
son Hora, Hora De Inicio, Hora De Paro,
Canal No, Activar
Presione el botón del CURSOR A LA
DERECHA o A LA IZQUIERDA
6
ajustes o alternar las opciones entre Sí o No.
Hora: Introduzca la hora actual con los botones
de número. Use el botón del CURSOR A LA
DERECHA para ir al espacio AM/PM y el
botón del CURSOR A LA IZQUIERDA o A
LA DERECHA para alternar el ajuste AM y
PM.
Hora de inicio:Use los botones de número
para ingresar la hora en que desee que el TV
se encienda. Use el botón del CURSOR A LA
DERECHA y A LA IZQUIERDA para alternar
el ajuste AM y PM.
Hora de paro: Use los botones de número
para ingresar la hora en que desee que el TV
se apague. Use el botón del CURSOR A LA
DERECHA y A LA IZQUIERDA para alternar
el ajuste AM y PM.
Canal No.:Use los botones DE NÚMERO o
los botones canal (+) o (-) para ingresar el canal
de inicio deseado. También puede presionar los
botones del CURSOR A LA DERECHA o A
LA IZQUIERDA para ingresar el canal de inicio
deseado.
Activar: Ajuste el temporizador para que se
encienda o se apague automáticamente, una vez
o todos los días. Presione el botón del CURSOR
A LA DERECHA o A LA IZQUIERDA para
seleccionar Una Vez al día, Diariamente o No.
Mostrar: Presione el botón del CURSOR A LA
DERECHA o A LA IZQUIERDA para alternar
entre Sí y No. Si selecciona Sí, la hora aparecerá
siempre que el TV se encuentre encendido.
Cuando se selecciona No, la hora sólo aparecerá
cuando presione el botón STATUS.
Presione el botón STATUS/EXIT para borrar
7
el menú de la pantalla.
.
o Mostrar.
para hacer
Menú del TV
Imagen
Sonido
Funciones
Instalar
7
6
2
5
Temporizador
AutoLock
Contraste+
Reducir Ruido
PIP
1
5
3
4
6
Funciones
Temporizador
AutoLock
Contraste+
Reducir Ruido
Temporizador
Hora
Hora De Inicio
Hora De Paro
Canal No.
Activar
Mostrar
Temporizador
Hora
Hora De Inicio
Hora De Paro
Canal No.
Activar
Mostrar
Temporizador
Hora
Hora De Inicio
Hora De Paro
Canal No.
Activar
Mostrar
Temporizador
Hora
Hora De Inicio
Hora De Paro
Canal No.
Activar
Mostrar
Temporizador
Hora
Hora De Inicio
Hora De Paro
Canal No.
Activar
Mostrar
Temporizador
Hora
Hora De Inicio
Hora De Paro
Canal No.
Activar
Mostrar
Hora
Hora De Inicio
Hora De Paro
Canal No.
PIP
Activar
– – : – – PM
– – : – – PM
– – : – – PM
Español
8
Una Vez
Sí
11
Page 88

COMPRENSIÓN DE LOS CONTROLES DE AUTOLOCK™
a función AutoLock™ recibe y procesa datos enviados
por las emisoras u otros proveedores de programas
L
que contienen orientaciones de contenido de los
programas. Cuando el espectador lo programa, un TV
con AutoLock™ puede responder a la información sobre
el contenido y bloquear programas con contenido que se
pueda considerar objetable (tal como lenguaje ofensivo,
violencia, situaciones sexuales, etc.). Es una excelente
función para censurar el tipo de programación que los
niños pueden ver.
En la sección AutoLock™, aprenderá a bloquear
canales y programación que no está clasificada,
está desclasificada o no tiene ninguna clasificación.
Aprenderá también a activar y desactivar estas
funciones de bloqueo. Las siguientes son algunas
breves explicaciones de algunos términos y
clasificaciones relacionados con la función
AutoLock™.
AutoLock™ ofrece diversas Opciones de bloqueo
entre las cuales escoger:
BLOQUEO: El control BLOQUEO se puede
considerar el “interruptor maestro” de AutoLock™.
Este control afecta las configuraciones que usted ha
escogido para bloquear programas de acuerdo a las
clasificaciones de las películas o clasificaciones de TV,
o para bloquear programas que no tienen ninguna
clasificación o están desclasificados. Cuando el
control BLOQUEO está en No, el bloqueo o censura
de los programas está inactivo. Cuando el control
BLOQUEO está en Sí, el bloqueo ocurrirá de acuerdo
a las configuraciones que usted haya elegido.
Ninguna/ Clasif: Si se activa el control Ninguna/
Clasif, se puede bloquear TODOS los programas sin
datos de orientación de contenido.
La programación que no tiene ninguna clasificación no
está codificada con información de clasificación de la
MPAA o pautas para los padres. Cualquier programación
puede entrar en esta categoría.
Usted también puede bloquear canales individuales
o bloquear programación en base a clasificaciones
de la MPAA y de las emisoras de TV. (Vea una
descripción de las clasificaciones en esta página).
Clasif Película
G
PG
PG-13
R
NC-17
X
Sí
CLASIFICACIONES DE PELÍCULAS
(MOTION PICTURE ASSOCIATION OF AMERICA)
G: Todo espectador – Se admiten todas las
edades. La mayoría de los padres encontraría
esta programación adecuada para todas las
edades. Este tipo de programación contiene
poca o no contiene violencia, no hay un
lenguaje fuerte y hay escasos o no hay
diálogos o situaciones sexuales.
PG: Se sugiere supervisión de los padres
– Esta programación contiene material que
los padres pueden considerar inadecuado para
los niños más pequeños. Puede contener uno
o más de los siguientes elementos: Violencia
moderada, algunas situaciones sexuales,
lenguaje fuerte aun cuando no frecuente o
algún diálogo sugerente.
PG-13: Con alta supervisión de los padres
– Esta programación contiene material que
los padres pueden considerar inadecuado para
menores de 13 años. Contiene uno o más de
los siguientes elementos: violencia, situaciones
sexuales, lenguaje fuerte o diálogo sugerente.
R: Restringido – Esta programación está
específicamente diseñada para adultos.
Los menores de 17 años deben ver esta
programación sólo acompañados por uno de
sus padres o por un adulto a cargo. Contiene
uno o más de los siguientes elementos:
extremada violencia; intensas situaciones
sexuales, lenguaje grosero o diálogo
intensamente sugerente.
NC-17: No se admiten menores de 17 años.
– Este tipo de programación debe ser vista
sólo por adultos. Contiene clara violencia,
sexo explícito, o lenguaje crudo e indecente.
X: Sólo adultos – Este tipo de programación
contiene uno o más de los siguientes
elementos: escenas claras de extrema violencia,
actos sexuales muy claros y explícitos
o indecentes o lenguaje muy grosero e
intensamente sugerente.
ClasificaciónTV
TV-Y
TV-Y7
TV-G
TV-PG
TV-14
TV-MA
Sí
PAUTAS DE TV PARA LOS PADRES
(EMISORAS DE TV)
TV-Y
: (Infantil – Este programa está diseñado
para todos los niños.) Diseñado para un
público muy joven, incluyendo aquellos entre
las edades de 2 a 6 años. Se espera que este
tipo de programación no asuste a los niños
más pequeños.
TV-Y7: (Dirigido a niños mayores – Este
programa está diseñado para niños de 7 años
y mayores.) Puede ser más apropiado para
niños con habilidades de desarrollo suficientes
para distinguir entre ficción y realidad. Tales
programas pueden incluir fantasía liviana y
violencia cómica (FV).
TV-G
: (Todo espectador – La mayoría de los
padres encontraría este programa adecuado para
todas las edades.) Este tipo de programación
contiene poca o ninguna violencia, no tiene
lenguaje fuerte y poco o ningún diálogo
sexual o situaciones sexuales.
TV-PG: (Se sugiere supervisión de los
padres
– Este programa contiene material
que los padres podrían considerar inadecuado
para niños más pequeños.
programación contiene uno o más de los
siguientes elementos: Violencia moderada
(V), algunas situaciones sexuales (S), lenguaje
grosero poco frecuente (L) o algunos diálogos
sugerentes (D).
TV-14
: (Con alta supervisión de los padres
– Este programa contiene algún material que
muchos padres pueden considerar inadecuado
para niños menores de 14 años de edad.
tipo de programación contiene uno o más
de los siguientes elementos: violencia intensa
(V), situaciones sexuales intensas (S), lenguaje
fuerte, grosero (L) o diálogos intensamente
sugerentes (D).
: (Sólo personas con criterio
TV-MA
formado
– Este programa está específicamente
diseñado para ser visto por adultos y por lo tanto
puede ser inadecuado para menores de 17 años
de edad.) Este tipo de programación contiene
uno o más de los siguientes elementos: clara
violencia (V), situaciones sexuales explícitas
(S) o lenguaje crudo, indecente (L).
) Este tipo de
) Este
12
Page 89

CONFIGURACIÓN DE UN CÓDIGO DE ACCESO DE AUTOLOCK™
utoLockTM permite a los padres bloquear o
“censurar” los canales que consideran que los niños
A
no deben ver. Un canal bloqueado mediante el control
AutoLockTM no puede ser visto hasta que se use el
código de acceso correcto para desbloquearlo. Primero,
configuremos su código de acceso AutoLock.
Presione el botón MENU del control remoto
1
para mostrar el menú en pantalla.
Presione el botón del cursor HACIA ABAJO
para resaltar Funciones
2
Presione el botón del CURSOR ALA
3
DERECHA para mostrar el menú Funciones.
Presione el botón del CURSOR HACIA
4
ABAJO para resaltar el control AutoLock.
Presione el botón del CURSOR ALA
5
DERECHA para ingresar al modo AutoLock.
Aparecerá “Accese Código ——”.
Usando los botones de número en el control
remoto, ingrese el código de acceso. Si no lo
6
conoce, 0,7,1,1 es el código predeterminado.
Después de ingresar una vez el código, Incorrecto
aparecerá en la pantalla. Ingréselo por segunda
vez. Luego le solicitará que cambie el código.
Use los botones de número del control remoto
para ingresar el código de acceso de su elección.
7
Ingréselo por segunda vez para confirmarlo. Después
que se confirme el código nuevo, aparece el menú
AutoLock. Puede acceder a las funciones que se
encuentren disponibles en el menú.
Si no desea acceder a las otras funciones,
presione el botón STATUS/EXIT
8
menú de la pantalla.
.
para borrar el
Menú del TV
Imagen
Sonido
Funciones
Instalar
10
Temporizador
AutoLock
Contraste+
Reducir Ruido
PIP
1
Funciones
Temporizador
AutoLock
Contraste+
Reducir Ruido
PIP
Funciones
Temporizador
AutoLock
Contraste+
Reducir Ruido
PIP
Accese Código
* * * *
Incorrecto
3
5
2
8
4
7
6
Funciones
Temporizador
AutoLock
Contraste+
Reducir Ruido
PIP
Cambiar Código
* * * *
Correcto
8
9
Funciones
Temporizador
AutoLock
Contraste+
Reducir Ruido
PIP
Cambiar Código
* * * *
Español
CONSEJO ÚTIL
Recuerde que 0711 es el código predeterminado
de AutoLockTM. Si su código de acceso ha sido
cambiado por alguien que no es usted (un niño,
por ejemplo), o usted ha olvidado el código,
siempre puede entrar introduciendo el código
predeterminado.
NOTAPARALOS PADRES: No es posible que su hijo
desbloquee un canal sin conocer su código de acceso o
cambiarlo por uno nuevo. Si su código ha cambiado sin
su conocimiento, usted sabrá que los canales bloqueados
pueden haber sido vistos.
Funciones
Temporizador
AutoLock
Contraste+
Reducir Ruido
PIP
AutoLock
Bloquear Canal
Cambiar Código
Borrar Todo
Bloquear Todo
Clasif Película
Clasificación TV
Confirme Code
* * * *
Confirmado
No
13
Page 90

USO DE AUTOLOCK™ PARA BLOQUEAR CANALES
na vez que ha definido su código de acceso personal
(vea la página anterior), usted está listo para
U
seleccionar los canales o entradas que desea bloquear o
censurar.
Presione el botón MENU del control remoto
1
para mostrar el menú en pantalla.
Presione el botón del CURSOR
HACIAABAJO para resaltar Funciones.
2
Presione el botón del CURSOR A LA
3
DERECHA para mostrar el menú Funciones.
Presione el botón del CURSOR
HACIAABAJO para resaltar AutoLock
4
Presione el botón del CURSOR A LA
5
DERECHA nuevamente y aparecerá el menú
que le pide el código de acceso.
Introduzca su CÓDIGO DE ACCESO de
cuatro dígitos. Correcto destellará brevemente en
6
la pantalla y tendrá acceso a AutoLock.
Usted puede elegir bloquear canales individuales
o todos los canales al mismo tiempo. Para
7
canales individuales, presione el botón del
CURSOR A LA DERECHA para seleccionar Sí
para activar el bloqueo de los canales.
Usando los botones de número o canal (+) o
8
(-), ingrese el canal que desea bloquear.
Repita el paso 8 para cualquier canal que desee
bloquear.
Para bloquear todos los canales, presione el
botón del CURSOR HACIA ABAJO
9
se seleccione Bloquear Todo.
Presione el botón del CURSOR ALA
10
DERECHA para seleccionar Sí para activar el
bloqueo de todos los canales. Para desactivar el
bloqueo de todos los canales, seleccione No.
Presione el botón STATUS/EXIT para borrar
11
el menú de la pantalla.
™.
hasta que
Menú del TV
Imagen
Sonido
Funciones
Instalar
1
11
2
4
9
Temporizador
AutoLock
Contraste+
Reducir Ruido
PIP
3
5
7
10
8
6
8
Funciones
Temporizador
AutoLock
Contraste+
Reducir Ruido
PIP
Funciones
Temporizador
AutoLock
Contraste+
Reducir Ruido
PIP
Funciones
Temporizador
AutoLock
Contraste+
Reducir Ruido
PIP
AutoLock
Bloquear Canal
Cambiar Código
Borrar Todo
Bloquear Todo
Clasif Película
Clasificación TV
AutoLock
Bloquear Canal
Cambiar Código
Borrar Todo
Bloquear Todo
Clasif Película
Clasificación TV
Accese Código
– – – –
Accese Código
* * * *
Correcto
No
Sí
CONSEJO ÚTIL
Recuerde que 0711 es el código predeterminado
de AutoLockTM. Si su código de acceso ha sido
cambiado por alguien que no es usted (un niño,
por ejemplo), o usted ha olvidado el código,
siempre puede entrar introduciendo el código
predeterminado.
NOTA PARA LOS PADRES: No es posible que su
hijo desbloquee un canal sin conocer su código de
acceso o cambiarlo por uno nuevo. Si su código ha
cambiado sin su conocimiento, usted sabrá que los
canales bloqueados pueden haber sido vistos.
Canal 2
Bloqueado Por Autolock
Bloqueo de Canal
Accese Código
– – – –
Si se bloquea un canal a través de las
opciones Bloquear Canal o Bloquear
Todo, el TV mostrará la pantalla que
se observa arriba. Para ver el canal,
introduzca su código de acceso o
devuelva la opción Bloquear Canal a
No.
14
Page 91

BORRADO DE TODOS LOS CANALES BLOQUEADOS A LA VEZ
uando alguien trate de ver programación bloqueada,
aparecerán diversos mensajes en pantalla. El mensaje
C
está determinado por la forma en que esté bloqueada la
programación actual. Usted puede ver la programación
bloqueada y desactivar la función AutoLock™ usando el
control Borrar Todo o ingresando su código de acceso.
Presione el botón MENU del control remoto
1
para mostrar el menú en pantalla.
Presione el CURSOR HACIA ABAJO para
resaltar Funciones.
2
Presione el botón del CURSOR A LA
3
DERECHA para mostrar el menú Funciones.
Presione el botón del CURSOR
HACIAABAJO para seleccionar el control
4
AutoLock
Presione el botón del CURSOR A LA
5
DERECHA nuevamente para resaltar Accese
Código.
Teclee su código de acceso de cuatro dígitos,
“Correcto” aparecerá brevemente en la pantalla y
6
tendrá acceso al menú AutoLock.
Presione el botón del CURSOR
HACIAABAJO para seleccionar Borrar Todo.
7
En pantalla aparecerá Borrar?.
Presione el botón del CURSOR A LA
8
DERECHA para borrar todos los canales.
Presione el botón STATUS/EXIT para borrar el
9
menú de la pantalla.
.
Menú del TV
Imagen
Sonido
Funciones
Instalar
1
9
2
4
7
Temporizador
AutoLock
Contraste+
Reducir Ruido
PIP
3
5
8
6
Funciones
Temporizador
AutoLock
Contraste+
Reducir Ruido
PIP
Funciones
Temporizador
AutoLock
Contraste+
Reducir Ruido
PIP
Funciones
Temporizador
AutoLock
Contraste+
Reducir Ruido
PIP
AutoLock
Bloquear Canal
Cambiar Código
Borrar Todo
Bloquear Todo
Clasif Película
Clasificación TV
Accese Código
– – – –
Accese Código
* * * *
Correcto
Borrar?
Español
CONSEJO ÚTIL
Si sintoniza un canal específico que ha sido
bloqueado por medio de Bloquear Canal o
alguna de las opciones de clasificación de
AutoLock™, simplemente ingrese su código de
acceso de cuatro dígitos para verlo.
NOTA: Esto desbloqueará TODOS los
canales hasta que se apague el TV. Al
encenderse nuevamente, todos los canales
previamente bloqueados se volverán a
bloquear.
AutoLock
Bloquear Canal
Cambiar Código
Borrar Todo
Bloquear Todo
Clasif Película
Clasificación TV
Borrado
15
Page 92

BLOQUEO DE PROGRAMAS EN BASE A CLASIFICACIONES DE PELÍCULAS
espués de configurar su código de acceso personal,
usted puede seleccionar clasificaciones de películas
D
específicas que desea censurar.
Presione el botón MENU del control remoto
1
para mostrar el menú en pantalla.
Presione el botón del CURSOR
HACIAABAJO para resaltar Funciones
2
Presione el botón del CURSOR A LA
3
DERECHA para mostrar el menú Funciones.
Presione el botón del CURSOR
HACIAABAJO para resaltar el control
4
AutoLock
Presione el botón del CURSOR A LA
5
DERECHA nuevamente para resaltar Accese
Código.
Ingrese su código de acceso de cuatro dígitos.
Correcto destellará brevemente en la pantalla y
6
el menú se moverá a la izquierda, con el menú
AutoLock disponible.
Presione el botón del CURSOR
HACIAABAJO varias veces hasta que se resalte
7
Clasif Película.
Presione el botón del CURSOR A LA
8
DERECHA y el menú Clasif Película se
desplazará a la izquierda con G resaltado.
Presione el botón del CURSOR
HACIAARRIBA o HACIAABAJO para resaltar
9
las clasificaciones que desea.
Presione el botón del CURSOR A LA
10
DERECHA para configurar la clasificación en
SÍ o en NO. Al configurar la clasificación en SÍ
se bloqueará la vista de dichos programas.
Presione el botón STATUS/EXIT para borrar
11
el menú de la pantalla.
.
Menú del TV
Imagen
Sonido
Funciones
.
Instalar
1
Temporizador
AutoLock
Contraste+
Reducir Ruido
PIP
3
5
11
9
8
10
2
4
7
9
6
Funciones
Temporizador
AutoLock
Contraste+
Reducir Ruido
PIP
Funciones
Temporizador
AutoLock
Contraste+
Reducir Ruido
PIP
Funciones
Temporizador
AutoLock
Contraste+
Reducir Ruido
PIP
AutoLock
Bloquear Canal
Cambiar Código
Borrar Todo
Bloquear Todo
Clasif Película
Clasificación TV
Clasif Película
G
PG
PG-13
R
NC-17
X
Accese Código
– – – –
Accese Código
* * * *
Correcto
G
PG
PG-13
R
NC-17
Sí
16
Page 93

BLOQUEO DE PROGRAMAS EN BASE A CLASIFICACIONES DE TV
iguiendo estos pasos, usted puede seleccionar
clasificaciones específicas de TV que desea censurar.
S
Presione el botón MENU del control remoto
1
para mostrar el menú en pantalla.
Presione el CURSOR HACIA ABAJO para
resaltar Funciones.
2
Presione el botón del CURSOR A LA
3
DERECHA para mostrar el menú Funciones.
Presione el botón del CURSOR
HACIAABAJO para resaltar el control
4
AutoLock
Presione el botón del CURSOR A LA
5
DERECHA nuevamente para resaltar Accese
Código.
Ingrese su código de acceso de cuatro dígitos.
Correcto destellará brevemente en la pantalla y
6
el menú se moverá a la izquierda, con el menú
AutoLock disponible.
Presione el botón del CURSOR HACIA
7
ABAJO varias veces hasta que se resalte
Clasificación TV.
Presione el botón del CURSOR A LA
8
DERECHA para ingresar al menú Clasificación
TV.
Presione el botón del CURSOR HACIA
ARRIBA o HACIA ABAJO
9
una clasificación deseada (TV-Y, TV-Y7, TV-G,
TV-PG, TV-14,
Presione el botón del CURSOR A LA
DERECHA o A LA IZQUIERDA
10
el bloqueo de la clasificación
apague.
NOTA: Hay más subclasificaciones específicas (para
violencia, contenido sexual, diálogo o violencia
ficticia) disponibles para TV-Y7, TVPG, TV-14 y TVMA. (Consulte las definiciones en la página 11).
Para acceder a estas subclasificciones, con la
clasificación principal seleccionada, presione
11
el botón del CURSOR A LA DERECHA
Luego, repita los pasos 9 a 10 para cambiar la
clasificación a Sí o No.
Presione el botón STATUS/EXIT para borrar
12
el menú de la pantalla.
.
para seleccionar
o TV-MA).
para que
seencienda o se
.
Menú del TV
Imagen
Sonido
Funciones
Instalar
1
12
9
10
2
4
7
Temporizador
AutoLock
Contraste+
Reducir Ruido
PIP
3
5
8
10
11
9
6
Funciones
Temporizador
AutoLock
Contraste+
Reducir Ruido
PIP
Funciones
Temporizador
AutoLock
Contraste+
Reducir Ruido
PIP
Funciones
Temporizador
AutoLock
Contraste+
Reducir Ruido
PIP
AutoLock
Bloquear Canal
Cambiar Código
Borrar Todo
Bloquear Todo
Clasif Película
Clasificación TV
Clasificación TV
TV-Y
TV-Y7
TV-G
TV-PG
TV-14
TV-MA
Clasificación TV
TV-Y
TV-Y7
TV-G
TV-PG
TV-14
TV-MA
Accese Código
– – – –
Accese Código
* * * *
Correcto
TV-Y
TV-Y7
TV-G
TV-PG
TV-14
Sí
Bloquear Todo
V
S
L
D
Español
TV-PG
Bloquear Todo
V
S
L
D
17
Sí
Page 94

OTRAS OPCIONES DE BLOQUEO DE AUTOLOCK™
l control AutoLock™ también ofrece al espectador
otras opciones de bloqueo. Con Tipo de Bloqueo, la
E
censura se puede encender o apagar.
Presione el botón SELECT del control remoto
1
para mostrar el menú en pantalla.
Presione el botón del CURSOR HACIA
ARRIBA o HACIA ABAJO para resaltar
2
Funciones.
Presione el botón del CURSOR ALA
3
DERECHA para mostrar el menú Funciones.
Presione el botón del CURSOR HACIA
4
ABAJO para resaltar el control AutoLock.
Presione el botón del CURSOR ALA
5
DERECHA nuevamente para resaltar Accese
Código.
Ingrese su código de acceso de cuatro dígitos.
Correcto destellará brevemente en la pantalla y
6
el menú se moverá a la izquierda, con el menú
AutoLock disponible.
Presione el botón del CURSOR HACIA
7
ABAJO varias veces hasta que se resalte Tipo de
Bloqueo.
Presione el botón del CURSOR ALA
8
DERECHA para ingresar al menú Tipo de
Bloqueo.
Presione el botón del CURSOR HACIA
ARRIBA o HACIA ABAJO
9
opción de bloqueo deseada.
Bloqueo: Se le podría llamar “el interruptor
maestro” de AutoLock™. Cuando está en Sí, se
aplicará TODO el bloqueo/censura. Cuando está
en No, TODO bloqueo está desactivado.
No Clasificada: TODOS los programas sin
clasificación basados en las clasificaciones de
películas o en las Pautas de TV para los padres se
pueden bloquear si esta función está ajustada en
Sí y la función Bloqueo está en No.
Ninguna/ Clasif: TODAla programación que
NO tenga datos de orientación de contenido
se pueden bloquear si está ajustada en Sí y la
función Bloqueo está en NO.
Presione el botón del CURSOR ALA
DERECHA o A LA IZQUIERDA
10
alternar la función Bloqueo en Sí y No.
Presione el botón STATUS/EXIT para borrar
11
el menú de la pantalla.
para seleccionar la
para
Menú del TV
Imagen
Sonido
Funciones
Instalar
1
11
9
10
2
4
7
Temporizador
AutoLock
Contraste+
Reducir Ruido
PIP
3
5
8
10
9
6
Funciones
Temporizador
AutoLock
Contraste+
Reducir Ruido
PIP
Funciones
Temporizador
AutoLock
Contraste+
Reducir Ruido
PIP
Funciones
Temporizador
AutoLock
Contraste+
Reducir Ruido
PIP
AutoLock
Tipo de Bloqueo
Tipo de Bloqueo
Ninguna/Clasifi
No Clasificada
Bloqueo
Tipo de Bloqueo
Ninguna/Clasifi
No Clasificada
Bloqueo
Accese Código
– – – –
Accese Código
* * * *
Correcto
Ninguna/Clasifi
No Clasificada
Bloqueo
Sí
Sí
CONSEJO ÚTIL
Recuerde, cuando el control BLOQUEO está
en NO, el bloqueo o censura de los programas
está inactivo. Cuando el control BLOQUEO
está en SÍ, el bloqueo ocurrirá de acuerdo a las
configuraciones que usted haya elegido.
Tipo de Bloqueo
Ninguna/Clasifi
No Clasificada
Bloqueo
18
Sí
Page 95

USO DE LA PANTALLA DE REVISIÓN DE AUTOLOCK™
ara recordarle las clasificaciones que usted ha
bloqueado y los tipos de bloqueo que ha seleccionado,
P
hay disponible una pantalla de revisión para revisar
su configuración AutoLockTM. Para acceder a esta
pantalla, siga estos pasos.
Presione el botón STATUS/EXIT en el
control remoto DOS VECES. Su configuración
1
AutoLock™ aparecerá en pantalla.
NOTA: Si ha bloqueado subclasificaciones específicas,
como V para Violencia en la categoría TV-PG, estas
subclasificaciones bloqueadas no aparecerán en la
revisión. No obstante, las subcategorías siguen estando
bloqueadas de acuerdo a sus selecciones.
Después de unos segundos, las configuraciones
2
se borrarán automáticamente de la pantalla o
usted puede presionar el botón STATUS una
tercera vez para borrarlas de la pantalla.
CONSEJO ÚTIL
La pantalla de estado AutoLock™ sólo aparecerá si
se configuró en Sí la opción Bloqueo. Consulte las
páginas anteriores para obtener detalles.
AutoLock™ se encuentra configurado en No como
valor predeterminado.
Clasif Película
G
PG
PG-13
R
NC-17
X
1
2
No
Sí
Sí
Sí
No
No
Clasificación TV
TV-Y
No
TV-Y7
Sí
Sí
TV-G
Sí
TV-PG
TV-14
No
TV-MA
No
Ninguna/Clasifi
No Clasificada
No
No
Esta pantalla aparecerá si el paso uno
(arriba) está terminado y si la opción
Bloqueo de AutoLock™ está ajustada en Sí
Clasif Película
G
PG
PG-13
R
NC-17
X
No
Sí
Sí
Sí
No
No
Clasificación TV
TV-Y
No
TV-Y7
Sí
Sí
TV-G
Sí
TV-PG
TV-14
No
TV-MA
No
Ninguna/Clasifi
No Clasificada
No
No
Español
Esta pantalla aparecerá si el paso uno (arriba)
.
está terminado y si la opción Bloqueo de
AutoLock™ está ajustada en No.
AutoLock Deshabilitado
19
Page 96

a función Contraste + ayuda a volver más nítida la
calidad de la imagen. Las partes negras de la imagen
L
se oscurecen más y las blancas brillan más.
Presione el botón MENU del control remoto
1
para mostrar el menú en pantalla.
Presione el botón del CURSOR HACIA
2
ABAJO para resaltar Funciones.
Presione el botón del CURSOR A LA
3
DERECHA para acceder al menú Funciones.
Presione el botón del CURSOR HACIA
4
ABAJO hasta que el control Contraste + se
resalte.
Presione el botón CURSOR A LA DERECHO
o IZQUIERDA para alternar las opciones entre
5
Sí
o No.
Presione el botón STATUS/EXIT para borrar el
6
menú de la pantalla.
USO DEL CONTROL CONTRASTE +
Menú del TV
Imagen
Sonido
Funciones
Instalar
Temporizador
AutoLock
Contraste+
Reducir Ruido
PIP
1
6
5
3
5
2
4
Funciones
Temporizador
AutoLock
Contraste+
Reducir Ruido
PIP
Funciones
Temporizador
AutoLock
Contraste+
Reducir Ruido
PIP
No
Sí
USO DE LOS CONTROLES REDUCIR RUIDO
a función DNR (Reducción dinámica de ruido)
ayuda a disminuir el “ruido” de la señal en la
L
imagen o lo que se conoce como “motitas” de la imagen.
Presione el botón MENU del control remoto
1
para mostrar el menú en pantalla.
Presione el botón del CURSOR HACIA
2
ABAJO para resaltar Funciones.
Presione el botón del CURSOR A LA
3
DERECHA para acceder al menú Funciones.
Presione el botón del CURSOR HACIA
4
ABAJO hasta que Reducir Ruido se resalte.
Presione el botón CURSOR A LA DERECHA
o IZQUIERDA para alternar las opciones entre
5
Sí o No.
Presione el botón STATUS/EXIT para borrar el
6
menú de la pantalla.
Menú del TV
Imagen
Sonido
Funciones
Instalar
6
5
2
4
Temporizador
AutoLock
Contraste+
Reducir Ruido
PIP
1
3
5
Funciones
Temporizador
AutoLock
Contraste+
Reducir Ruido
PIP
Funciones
Temporizador
AutoLock
Contraste+
Reducir Ruido
PIP
No
Sí
20
Page 97

USO DEL CONTROL PIP (PICTURE IN PICTURE)
ientras está en el modo TV, usted puede llamar
una ventana PIP para PC. Para que funcione PIP
M
se debe seleccionar una fuente de entrada de HDMI.
(Consulte la Guía de uso rápido para los detalles de las
conexiones.)
Presione el botón MENU del control remoto
1
para mostrar el men˙ en pantalla.
Presione el botón del CURSOR HACIA
2
ABAJO para resaltar Funciones.
Presione el botón del CURSOR A LA
3
DERECHA para acceder al menú Funciones.
Presione el botón del CURSOR HACIA
4
ABAJO hasta que PIP se resalte.
Presione el botón del CURSOR A LA
5
DERECHA para ingresar al menú PIP. Tamaño
PIP se resaltará.
Presione el botón del CURSOR A LA
IZQUIERDA o A LA DERECHA
6
seleccionar las opciones de Tamaño PIP, como
No, Sí, Pequeño, Mediano, Grande, o Lado a
Lado.
Presione el botón del CURSOR HACIA
7
ABAJO para resaltar Horizontal.
Presione el botón del CURSOR A LA
IZQUIERDA o A LA DERECHA para mover
8
la pantalla PIP de manera horizontal a la
posición deseada.
Si desea mover la pantalla PIP de manera
vertical, presione el botón del CURSOR
9
HACIA ABAJO para resaltar Vertical.
Presione el botón del CURSOR A LA
IZQUIERDA o A LA DERECHA para mover
10
la pantalla PIP hacia arriba o hacia abajo.
Presione el botón STATUS/EXIT para borrar
11
el menú de la pantalla.
para
Menú del TV
Imagen
Sonido
Funciones
Instalar
1
11
6
8
10
2
4
7
9
Temporizador
AutoLock
Contraste+
Reducir Ruido
PIP
3
5
6
8
10
Funciones
Temporizador
AutoLock
Contraste+
Reducir Ruido
PIP
PIP
Tamaño PIP
Horizontal
Vertical
PIP
Tamaño PIP
Horizontal
Vertical
PIP
Tamaño PIP
Horizontal
Vertical
Tamaño PIP
Horizontal
Vertical
No
1
1
Español
CONSEJO ÚTIL
Para apagar la ventana PIP, seleccione Tamaño PIP
y la opción No.
NOTA: También puede acceder a la ventana PIP
presionando el botón
Presione
Presione
de los varios tamaños pantallas de PIP.
una vez para mostrar la pantalla PIP.
repetidamente para alternar a través
del control remoto.
21
Page 98

a Lista fuente le permitirá usar el TV en los modos
TV, HD o PC. Dependiendo de cómo use el TV, es
L
posible que estos modos tengan sus propios controles de
menú en pantalla para optimizar su capacidad cuando se
empleen con computadores o receptores de alta definición.
Presione el botón AV+ del control remoto para
1
mostrar el menú Lista fuente.
Presione el botón del CURSOR HACIA
2
ABAJO hasta que se resalte el modo deseado
(TV, AV, POSTERIOR/SVHS, CVI-1[SD/
HD], CVI-2[SD/HD], HDMI, PC-VGA o
PC-D).
Después de que haya resaltado el modo deseado,
presione el botón del CURSOR HACIA LA
3
DERECHA para ingresar al modo seleccionado.
USO DE LA LISTA FUENTE
Fuente
TV
AV/SVHS
SIDE/SVHS
CVI-1 (SD/HD)
CVI-2 (SD/HD)
HDMI
Fuente
PC-VGA
PC-D
sted puede cambiar el tamaño del formato de
pantalla para adaptarlo al tipo de programa que
U
está viendo. Seleccione las proporciones de ancho normal
4:3, Imag. expand 14:9, Imag. expand 16:9, Zoom
Subtítulo, Super Zoom o Imagen Ancha.
Presione el botón FORMAT varias veces para
alternar entre los diferentes modos de formato.
1
Puede seleccionar las proporciones de ancho
normal 4:3, Imag. expand 14:9, Imag. expand
16:9, Zoom Subtítulo, Super Zoom
Ancha.
o Imagen
2
3
1
USO DEL CONTROL FORMATO
4:3
1
Imag. expand 14:9
O
Imag. expand 16:9
O
Zoom Subtítulo
O
Super Zoom
O
Imagen Ancha
22
Page 99

USO DEL CONTROL SUBTÍTULOS
ubtítulos (CC) le permite leer el contenido hablado de los
programas de televisión en la pantalla del TV. Diseñada para
S
ayudar a las personas con discapacidad auditiva, esta función
usa cuadros de texto en pantalla para mostrar el diálogo y las
conversaciones mientras se desarrolla el programa de TV.
Presione el botón CC del control remoto para
seleccionar un modo de subtítulos: CC No, CC1,
1
CC2, o CC Mudo si la estación de TV que transmite
en el canal tiene subtítulos disponibles. Para apagar los
subtítulos, seleccione CC No.
Presione el botón STATUS/EXIT para borrar el menú
2
de la pantalla.
CONSEJO ÚTIL
NOTA : No todos los programas de TV y publicidad
comercial se transmiten con Subtítulos (CC). Tampoco
las estaciones emisoras usan necesariamente todos los
MODOS de Subtítulos durante la transmisión de un
programa que ofrezca Subtítulos. Consulte el listado de
programas de TV de su área para conocer las estaciones
y horarios de los programas que se transmiten con
Subtítulos.
2
CC No
1
CC1
O
CC2
O
CC Mudo
JOHN: Why did they move the meeting up to this week?
MARSHA: I dont know, but they are pushing to close the deal.
USO DE LOS CONTROLES DE APAGADO PROGRAMADO
Se ha quedado dormido alguna vez frente al TV, solamente
para que lo despierte a las dos de la mañana el ruido de la
¿
carta de ajuste chillando en sus oídos? Bien, su TV le permite
evitar esta molestia apagándose a sí mismo. Con la función
Apagado Progr., usted puede ajustar un temporizador para que
apague automáticamente el TV después del lapso de tiempo que
usted elija (en incrementos de 15 minutos hasta 60 minutos,
luego incrementos de 30 minutos hasta 90 minutos, luego
incrementos de 60 minutos hasta 240 minutos).
Presione el botón SLEEP del control remoto. La
función Apagado Progr. aparecerá en la parte inferior de
1
la pantalla.
Dentro de cinco segundos, presione el botón SLEEP
repetidamente para elegir la cantidad de tiempo
2
(incrementos de 15 minutos hasta 60 minutos, luego
incrementos de 30 minutos hasta 90 minutos, luego
incrementos de 60 minutos hasta 240 minutos) antes de
que se apague el TV.
Durante el último minuto antes de que el TV se apague,
aparecerá en pantalla una cuenta regresiva.
Apagado Progr. No
1
2
Español
Apagado Progr. 15
O
Apagado Progr. 30 Apagado Progr. 45
Apagado Progr. 60 Apagado Progr. 90
Apagado Progr. 120 Apagado Progr. 180
Apagado Progr. 240
CONSEJO ÚTIL
Para ver cuántos minutos quedan antes de que el TV se
apague a sí mismo, presione el botón STATUS/EXIT.
Una configuración del Apagado Progr. se puede cancelar
presionando cualquier botón durante el último minuto
de la operación.
Durante el último minuto de la
configuración de un Apagado
Progr., aparecerá en pantalla una
cuenta regresiva.
23
Apagado Progr. 49
Apagado Progr. 9
Page 100

USO DE CONTROL LISTA CANALES
l control Lista Canales le permitirá revisar
rápidamente todos los canales programados que han
E
sido colocados en la memoria del televisor (para obtener
más detalles, consulte la sección Auto Programación en
este manual) Esta función le permitirá seleccionar con
facilidad los canales deseados que está buscando. Lista
Canales le mostrará el número de canal, el nombre del
canal si le ha dado alguno y si tiene AutoLock encendido.
Presione el botón PROGR LIST del control
remoto para mostrar la lista actual de canales
1
instalados (se resaltará el canal actual).
Presione los botones CURSOR HACIA
ARRIBA o HACIA ABAJO
2
lista de canales, resaltando el que desea activar.
Presione el botón del CURSOR A LA
3
DERECHA para activar el canal. El TV
sintonizará dicho canal.
Presione el botón STATUS/EXIT para borrar el
4
menú de la pantalla.
para desplegar la
Lista Canales
2
3
4
5
6
4
2
Lista Canales
2
3
4
5
6
1
32
CONFIGURACIÓN DE CONTROL ACTIVO
ctive Control (Control Activo) monitorea y ajusta las
señales entrantes de vídeo para proporcionar la mejor
A
calidad de imagen.
Cuando usted escoge activar Control Activo, la nitidez
de la imagen y la reducción del ruido se controlan
automáticamente. Control Activo ajusta continua y
automáticamente estas configuraciones de imagen.
Puede escoger tres modos: Control Activo No, Control
Activo Sí o Control Activo Sensor de luz.
Presione el botón Control Activo del control
remoto para alternar entre las tres opciones y
1
seleccionar la deseada.
Presione el botón STATUS/EXIT para borrar el
2
menú de la pantalla.
Control Activo No
2
Control Activo Sí
O
Control Activo Sensor de Luz
1
24
 Loading...