How it Works
Log In / Sign Up
Buy Points
How it Works
FAQ
Contact Us
Questions and Suggestions
Users
Philips
Loading...
#
27RF70S
2
27SPORTS
27ST1100
27ST1100-27
27ST2200
2
27ST2300
27ST2300-27B
27ST2400
27ST6210-27B
27T500
27TS54C
27TS57C
2
27XE1C
282XL
28-32PW6006
28-32PW9616
283U
283-V
2840/PB
2841/PB
284E5QHAD
2
284E5QHAD/00
284E5QSD
2853-R
3
286NS
286NS-05
288
3
2801
2802
3
2805
2820
2
2822
2823
2826
2
2830
2831
2843
2850
2853
3
2858
2864
2880
2882
2883
2
288E2
2
284E5
9
288E2A
8
288E2A/00
288E2UAE
288P6
16
288P6LJEB
11
288P6LJEB/00
2
289-A
289-BV
28CE5290
10
28CE5590
10
28CE5591
2
28CE5595
2
28CE6290
10
28CE6291
11
28CE6295
28CE6590
10
28CE6591
10
28CE9590
28CL6776
4
28CL6776/10Z
4
28CL6776/33
4
28CL6776/33Z
4
28DC2070
5
28DC2070/41R
3
28DC2075
4
28DC2075/40R
4
28DC2271
28DC2670
5
28DW6557
2
28DW6558
2
28DW6558/01
2
28DW6559
28DW6559/01
28DW6559/05
28DW6658
2
28DW6658/01
28DW6734/25
28DW9625
28GR5670
11
28GR5731
28GR5770
11
28GR5774
5
28GR5775
9
28GR5776
28GR5777
28GR5974
5
28GR7580
28GR7680
28GR7685
28 PT 7109
28 PT 7159
281337
281352
288720
Loading...
Loading...
Nothing found
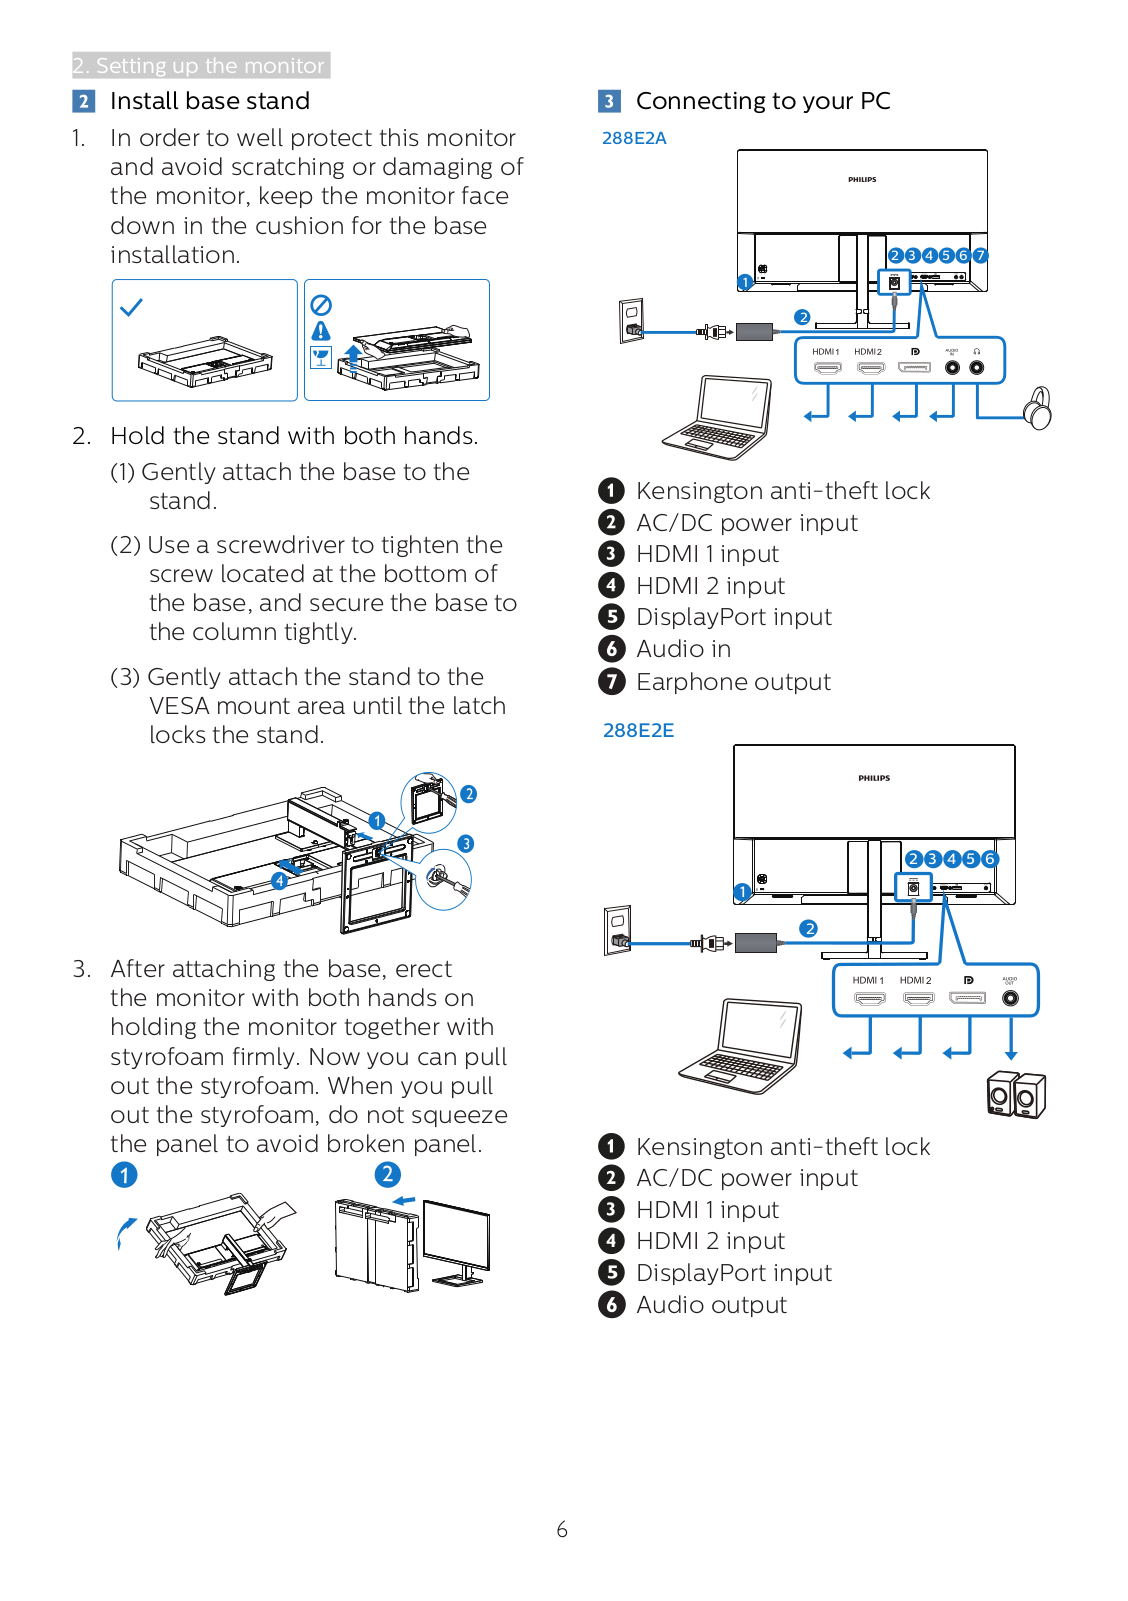
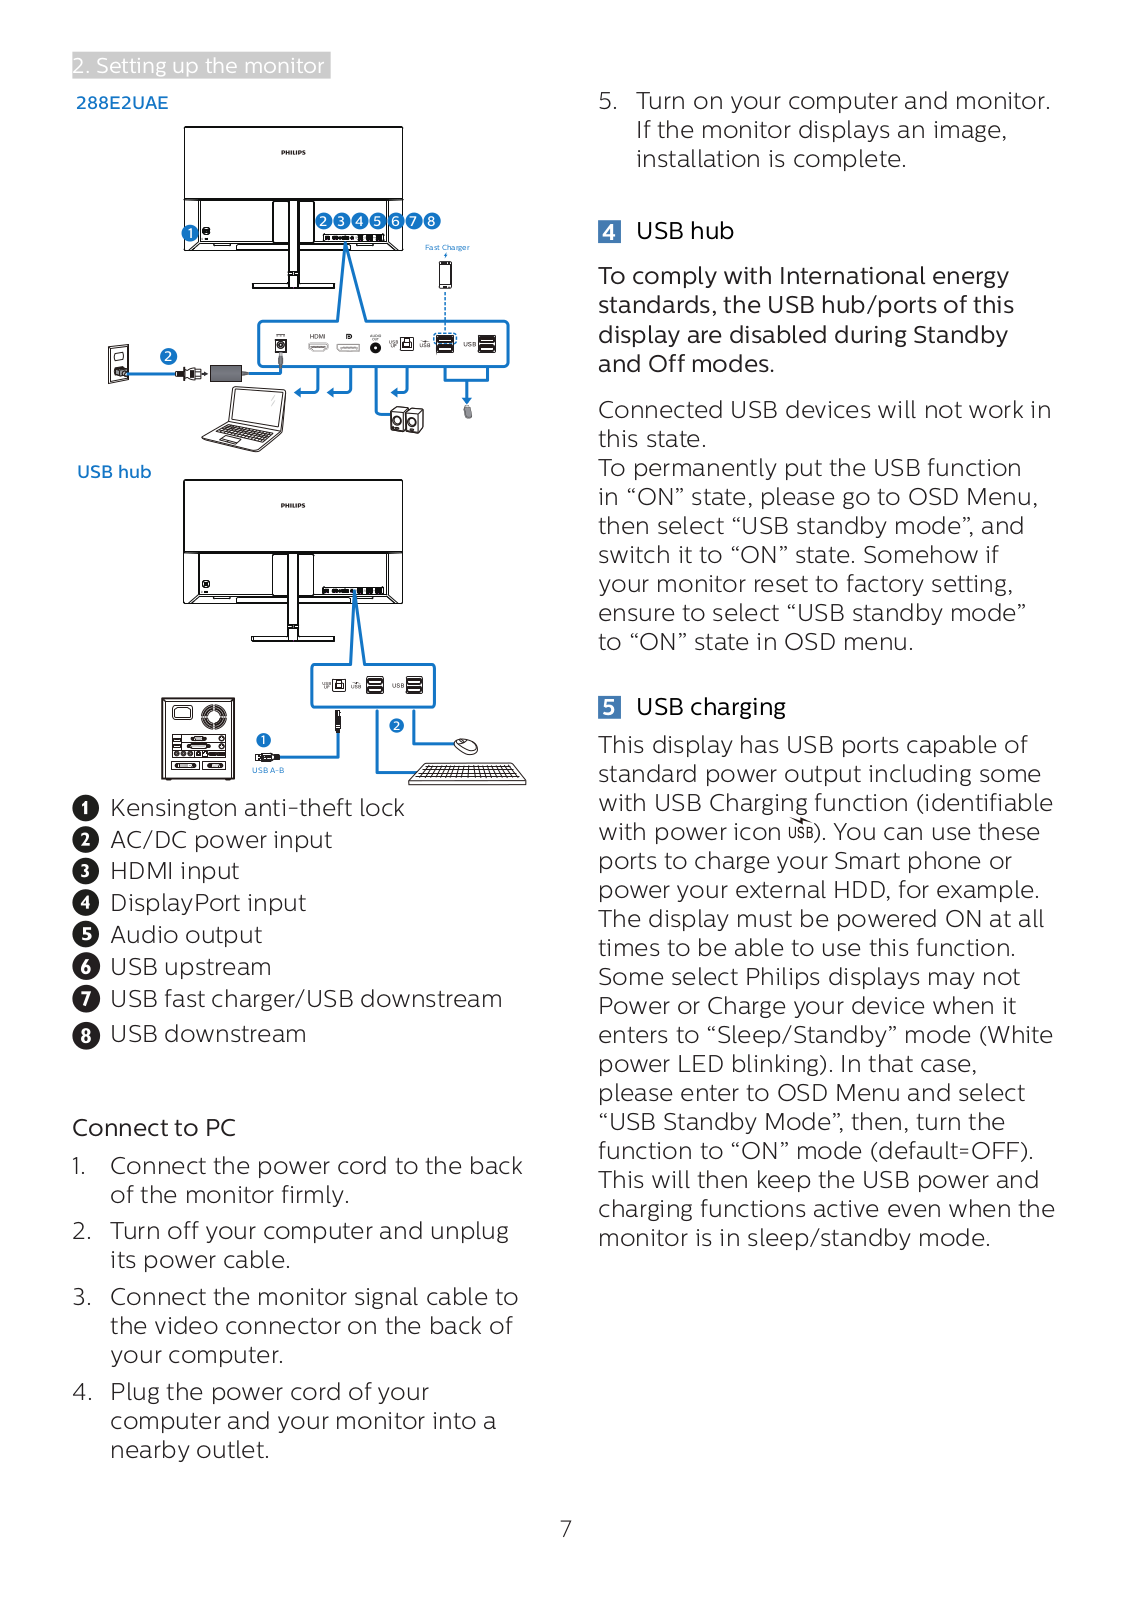
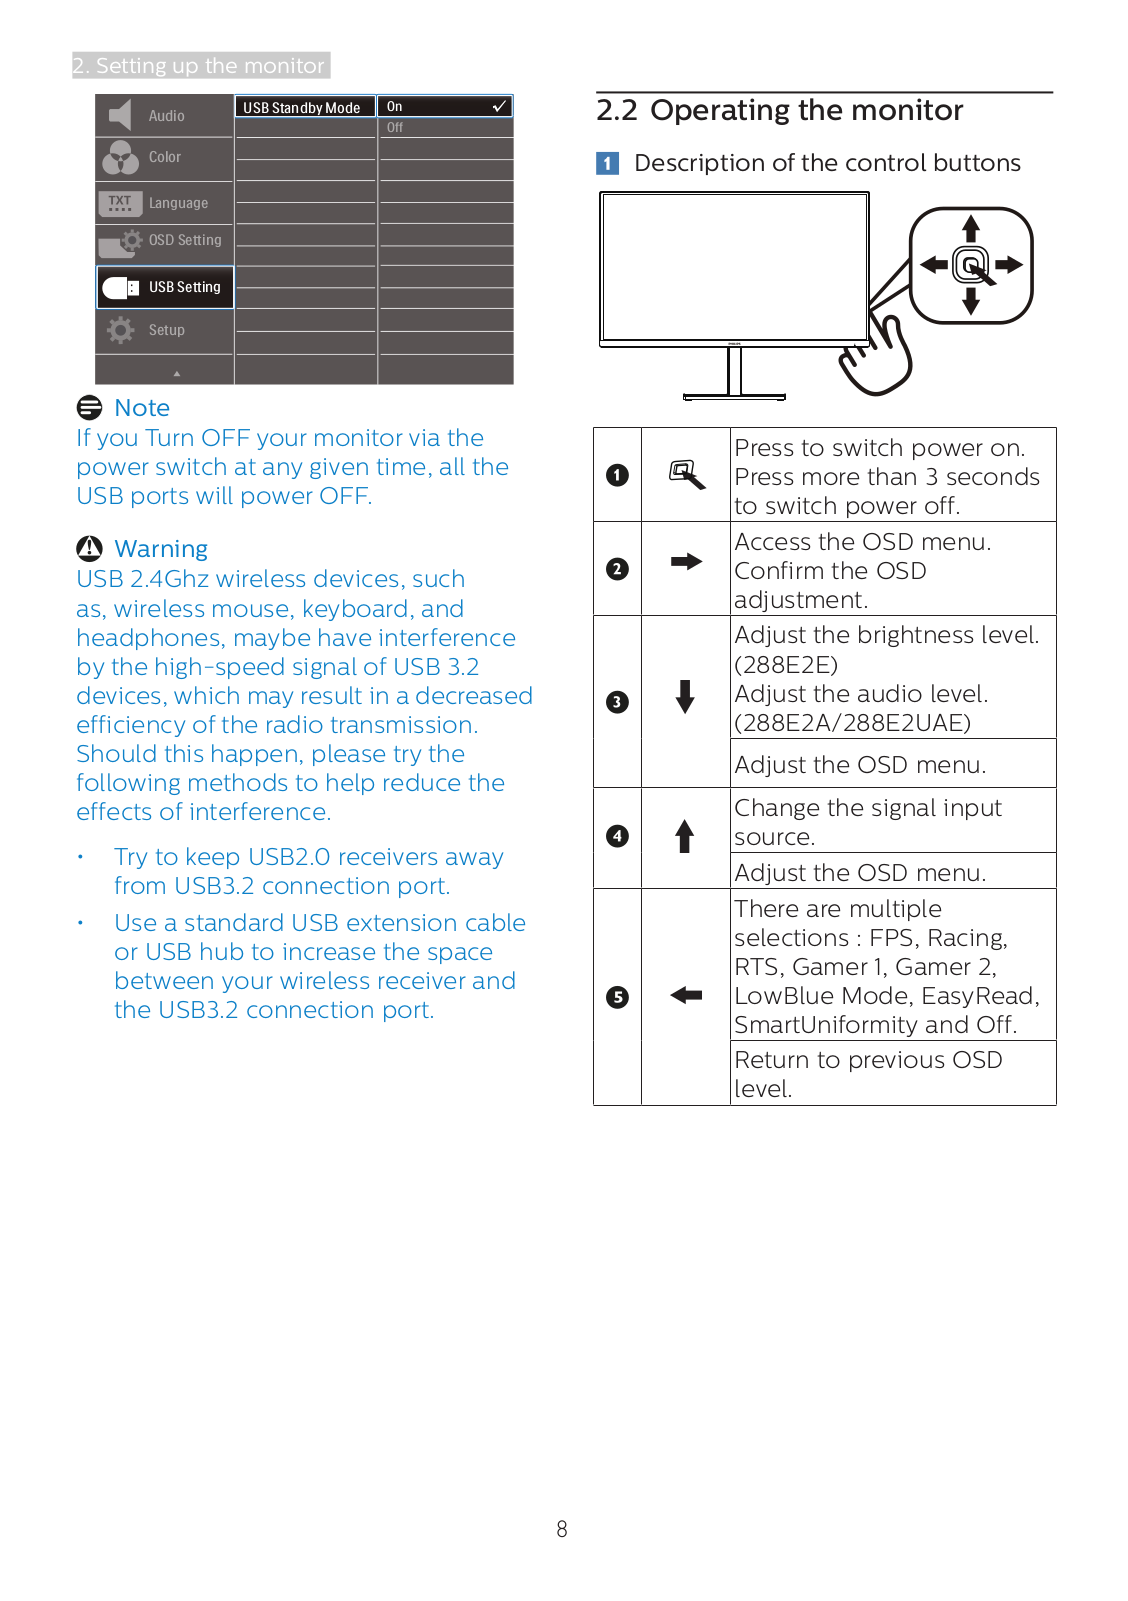
288E2
User Manual
33 pgs
3.29 Mb
0
User Manual
30 pgs
3.18 Mb
0
Table of contents
Loading...
Philips 288E2 User Manual
...
Philips User Manual
Download
Specifications and Main Features
Frequently Asked Questions
User Manual
Download
Loading...
+
23
hidden pages
Unhide
You need points to download manuals.
1 point = 1 manual.
You can buy points or you can get point for every manual you upload.
Buy points
Upload your manuals
 Loading...