

Philips 26PFL5322, 32PFL5332, 37PFL5332, 42PFL5332 User Manual

FLAT TV
TÉLÉVISEUR À ÉCRAN PLAT
User Manual
Guide de l’utilisateur
Manual del Usuario
philips
26PFL5322
32PFL5332
37PFL5332
42PFL5332
Française
English
Spanish

IMPORTANT!

Registering your model with PHILIPS makes you eligible for all of the valuable benefits
listed below, so don’t miss out. Complete and return your Product Registration Card at
once to ensure:
Return your Warranty Registration card today to
ensure you receive all the benefits you’re entitled to
For Customer Use
Enter below the Serial No., which is
located on the rear of the cabinet. Retain
this information for future reference.
Model No. __________________________
Serial No. __________________________
Congratulations on your purchase, and welcome to the
“family!”
Dear PHILIPS product owner:
Thank you for your confidence in PHILIPS.You’ve selected one
of the best-built, best-backed products available today. We’ll do
everything in our power to keep you happy with your
purchase for many years to come.
As a member of the PHILIPS “family,” you’re entitled to
protection by one of the most comprehensive warranties and
outstanding service networks in the industry.
What’s more, your purchase guarantees you’ll receive all the
information and special offers for which you qualify, plus easy
access to accessories from our convenient home shopping
network.
Most importantly, you can count on our uncompromising
commitment to your total satisfaction.
All of this is our way of saying welcome - and thanks for
investing in a PHILIPS product.
P.S. To get the most from your PHILIPS purchase, be
sure to complete and return your Product
Registration Card at once.
Know these
safety
symbols
This “bolt of lightning” indicates
uninsulated material within your unit
may cause an electrical shock. For the safety
of everyone in your household, please do not
remove product covering.
The “exclamation point” calls attention
to features for which you should read
the enclosed literature closely to prevent
operating and maintenance problems.
WARNING:To reduce the risk of fire or
electric shock, this apparatus should not be
exposed to rain or moisture and objects
filled with liquids, such as vases, should not
be placed on this apparatus.
CAUTION: To prevent electric shock,
match wide blade of plug to wide slot, fully
insert.
ATTENTION : Pour éviter les chocs
électriques, introduire la lame la plus large de
la fiche dans la borne correspondante de la
prise et pousser jusqu’au fond.
* Proof of Purchase
Returning the enclosed card
guarantees that your date of
purchase will be on file, so no
additional paperwork will be
required from you to obtain
warranty service.
* Product Safety
Notification
By registering your product you’ll
receive notification - directly
from the manufacturer - in the
rare case of a product recall or
safety defect.
* Additional Benefits of
Product Ownership
Registering your product
guarantees that you’ll receive all
of the privileges to which you’re
entitled, including special moneysaving offers.
Visit our World Wide Web Site at http://www.philips.com

English
Overview of television controls and
connectors .........................................................5
Side controls .................................................5
Overview of remote control keys and
functions .............................................................6
Using the on-screen menus ...........................8
Searching and storing your channels
automatically .....................................................9
Manual installation ...........................................10
Changing the Tuner Mode .........................10
Changing the TV System ............................11
Fine Tuning your channels .........................12
Naming your channels ....................................13
Storing your favorite channels ......................14
Adjusting your picture settings .....................15
Adjusting your sound settings .......................16
Using the timer .................................................17
Setting the TV time .....................................18
Displaying the TV time ...............................18
Setting the wake-up clock..........................19
Child-locking the TV ......................................21
Enabling Child Lock .....................................21
Disabling Child Lock ...................................21
Controlling access to TV channels ..............22
Accessing Parental Lock .............................22
Changing Access Code ...............................23
Locking channels ..........................................24
Controlling access to TV programs.............25
Using the movie rating lock
(for certain regions only) ...........................25
Using the TV Rating lock
(For certain regions only) ..........................27
Turning off Blocking ....................................29
Blocking other programs ...........................29
Using Active Control ......................................30
Turning off Active Control ........................30
Turning on Closed Captions .........................31
Changing your picture format .......................32
Using the Auto Sound and Auto Picture
features ...............................................................33
Using the Surf feature .....................................34
Adding channels to your Surf list .............34
Removing channels from Surf list .............34
Using the Source List ......................................35
Using your TV as a computer monitor .......36
Picture settings (VGA mode) ....................36
Feature settings (VGA mode) ...................36
Troubleshooting ...............................................37
Specifications .....................................................39
CONTENTS
5
English
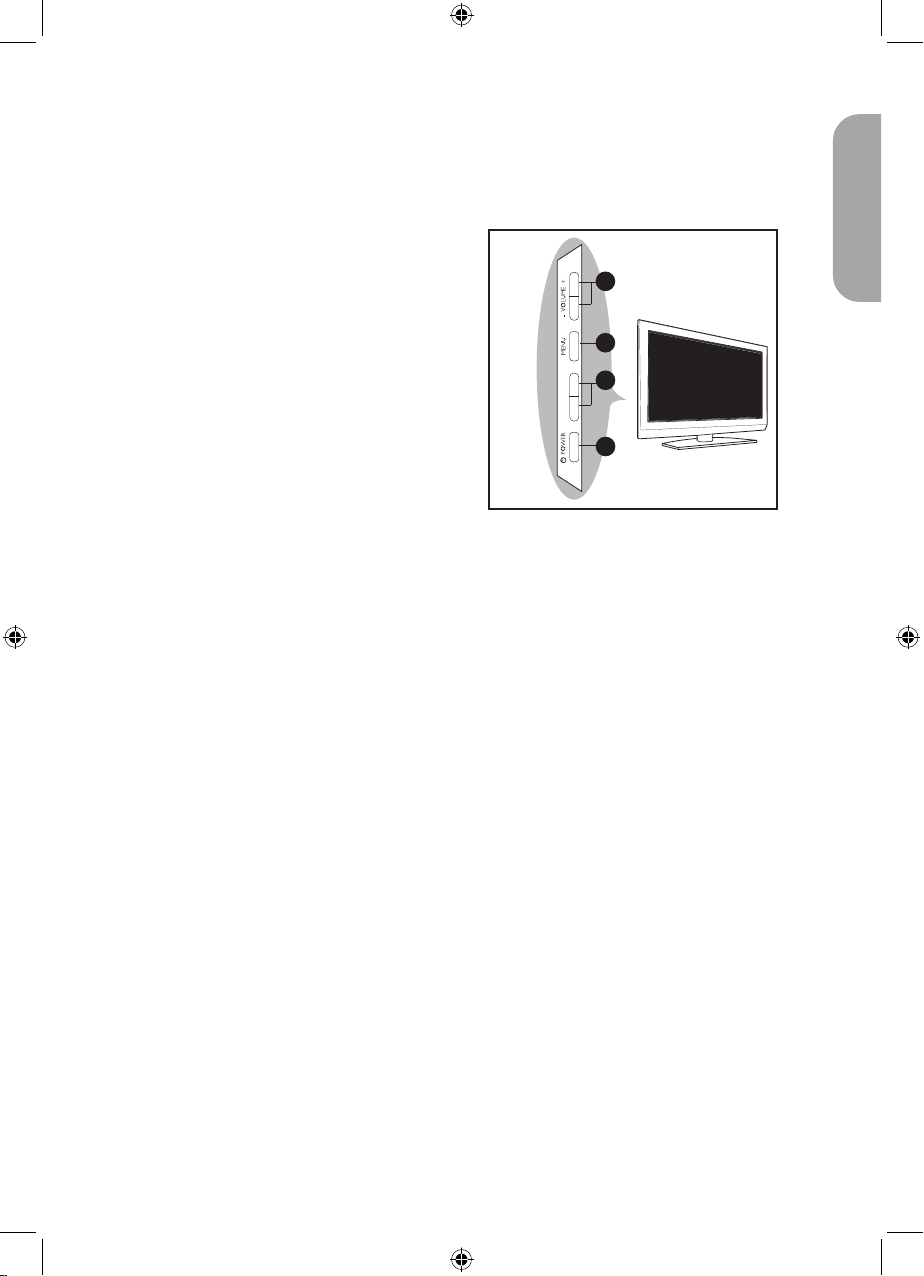
Overview of television controls and connectors
Side controls
The side controls are on the left side or top
of the TV set.
VOLUME + / -
To increase volume level, press VOLUME
+, to decrease level, press VOLUME -.
MENU
To display the on-screen menus or to
exit from the on-screen menus.
The CHANNEL + /- buttons can be
used to navigate the menu items.
The VOLUME + / - buttons can be used
to select the menu items.
CHANNEL + / -
To select the TV channel numbers upwards or downwards.
POWER .
To turn off or turn on the TV set.
1.
2.
3.
4.
2
3
4
1
- CHANNEL +

6
English
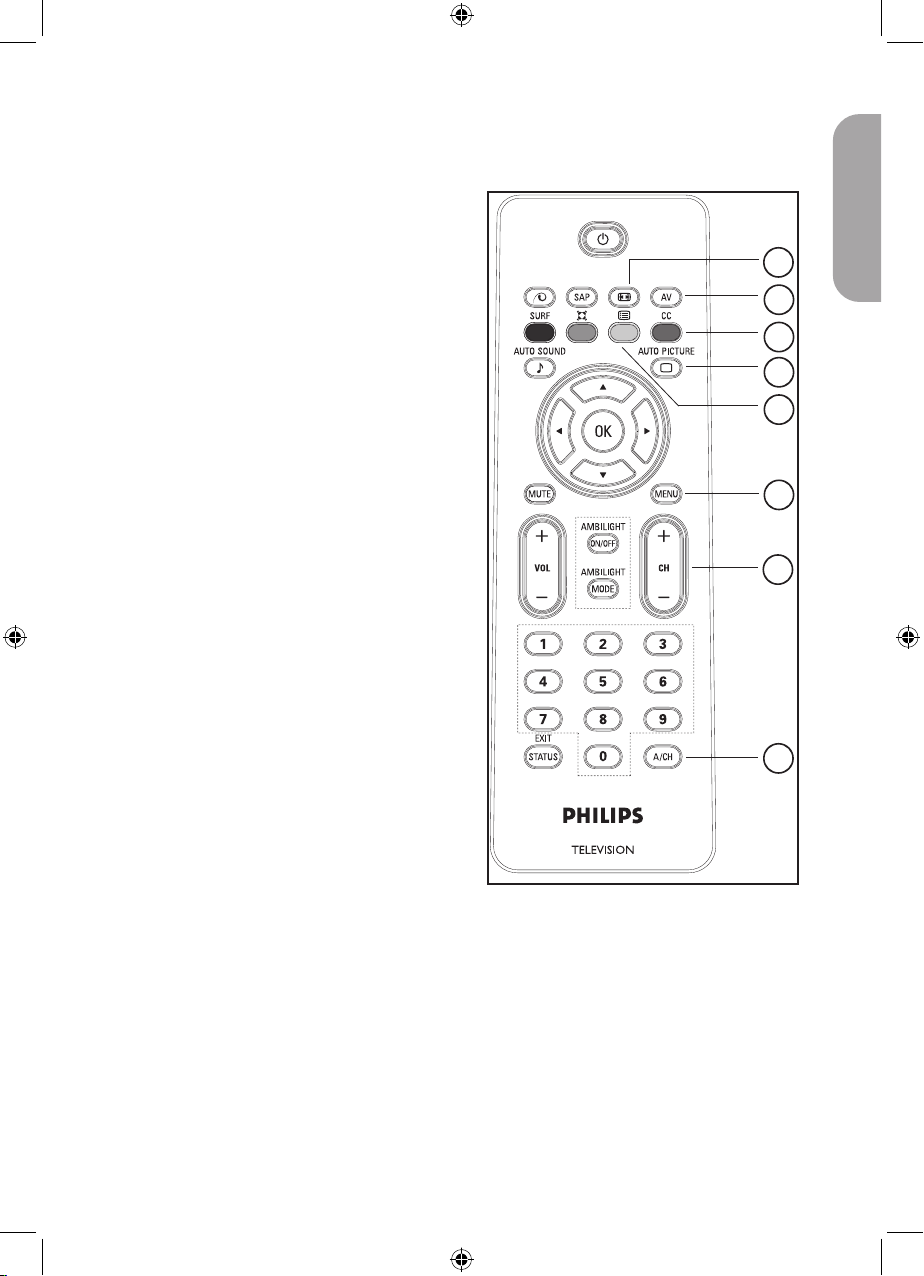
Overview of remote control keys and functions
1
2
3
4
5
6
7
8
9
10
11
12
13
Standby button .
To switch the TV to standby mode if it
is already turned on. Or to turn on TV
when it is in standby mode.
SAP button
To select SAP, Stereo and forced Mono.
Pixel Plus Demo button
To turn on or turn off Pixel Plus Demo.
When turned on, a split-screen display
shows Pixel Plus active on one half and
Pixel Plus inactive on the other half.
SURF button
To channel surf up to 8 channels.
Auto Sound button
To select factory pre-set Sound settings.
Incredible Surround button
To enable Incredible Surround in stereo
mode and Spatial in mono mode.
Cursor buttons
To navigate and select menu items and
adjust indiividual settings
OK button
To select menu items or confirm selection.
Mute button
To turn up or turn down the sound level.
Volume buttons
To turn up or turn down the sound level.
Not applicable.
Numeric (0-9) buttons
To enter channel number, set time or
timer.
Exit / Status button
To exit on-screen menus.
Or to display information on the current
channel.
1.
2.
3.
4.
5.
6.
7.
8.
9.
10.
11.
12.
13.
7
English
Overview of remote control keys and functions
14
15
16
17
18
19
20
21
Picture Format button
To cycle through list of available picture
formats.
AV button
To display AV source list or to cycle
through list of AV sources by repeatedly
pressing button.
Closed Captions button
To display current Closed Caption setting
or cycle through list by repeatedly pressing button.
Auto Picture button
To select factory pre-set Picture settings.
Program List button
To display the list of available channels
which you can scroll through using the
cursor buttons.
Menu button
To display the on-screen menus and exit
menus from the screen.
Channel buttons
To select the channel number upwards or
downwards.
Alternate Channel button
To display the last viewed channel and
the current channel.
NOTE:
The u button is used to select menu items
or confirm your selection.
You can also press the Æ button instead of
the u button. Either buttons will work in
the same context. For brevity, only the u
button will be mentioned in the User Manual.
14.
15.
16.
17.
18.
19.
20.
21.
8
English
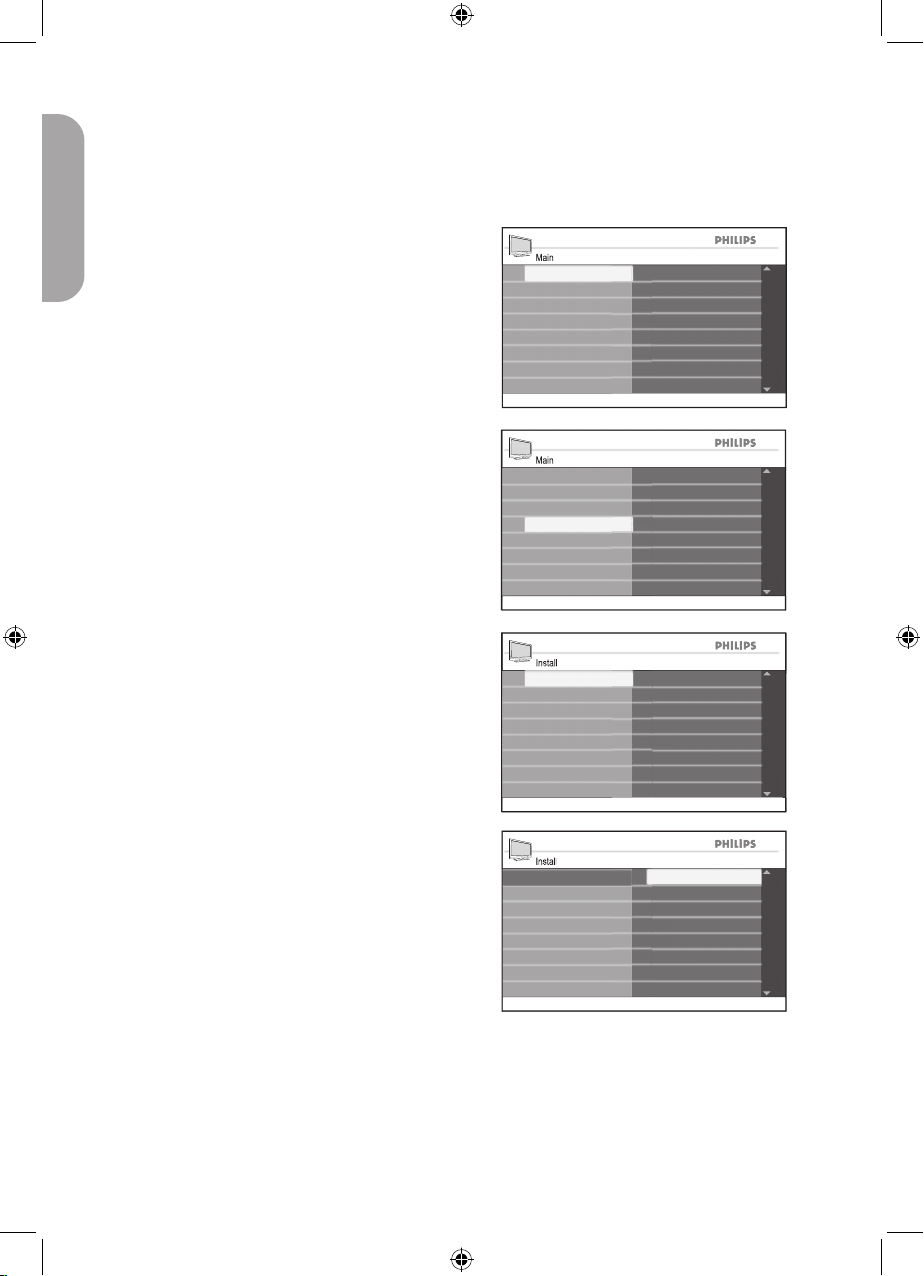
Using the on-screen menus
Main
Brightness
Color
Install
Picture
Features
Sound
Contrast
Sharpness
Color Temp
Contrast +
NR
Install
English
Portuguese
Manual
Language
Auto Program
Tuner Mode
Français
Name
Fav. Program
Main
Language
Tuner Mode
Install
Picture
Features
Sound
Auto Program
Manual
Name
Fav. Program
NR
Install
English
Spanish
Manual
Auto Program
Tuner Mode
Français
Name
Fav. Program
NR
Language
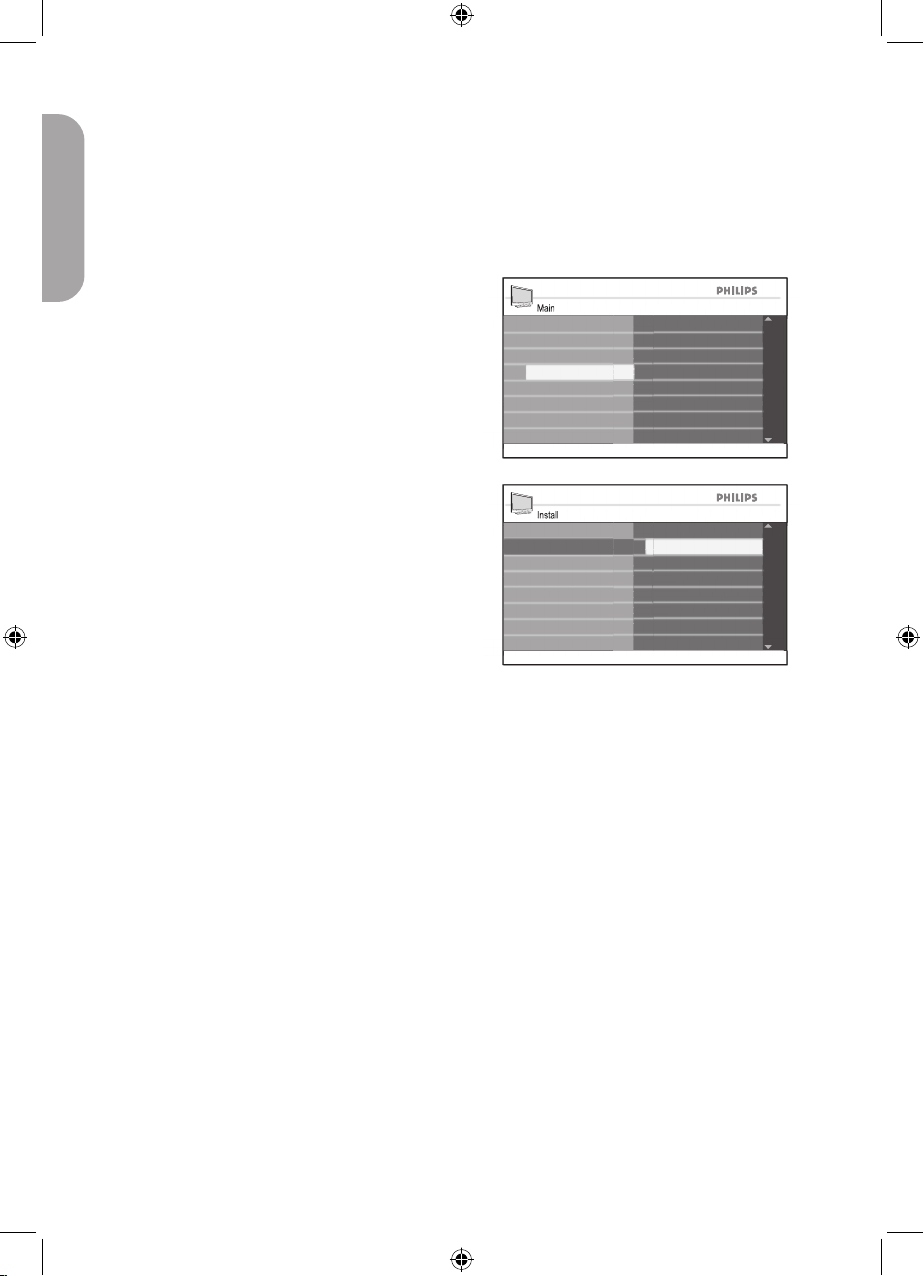
Before using the on-screen menus, select
your menu language.
Press h button to display the on-screen
menus.
Press ï button untill Install is
highlighted.
Press u button to select Language.
The available languages for your TV will
be displayed on the right panel.
Press u button to highlight the first language or ï to select the other available
languages.
Press u button to select the language.
Press h or EXIT button to exit the
on-screen menus.
1.
2.
3.
4.
5.
6.
9
English
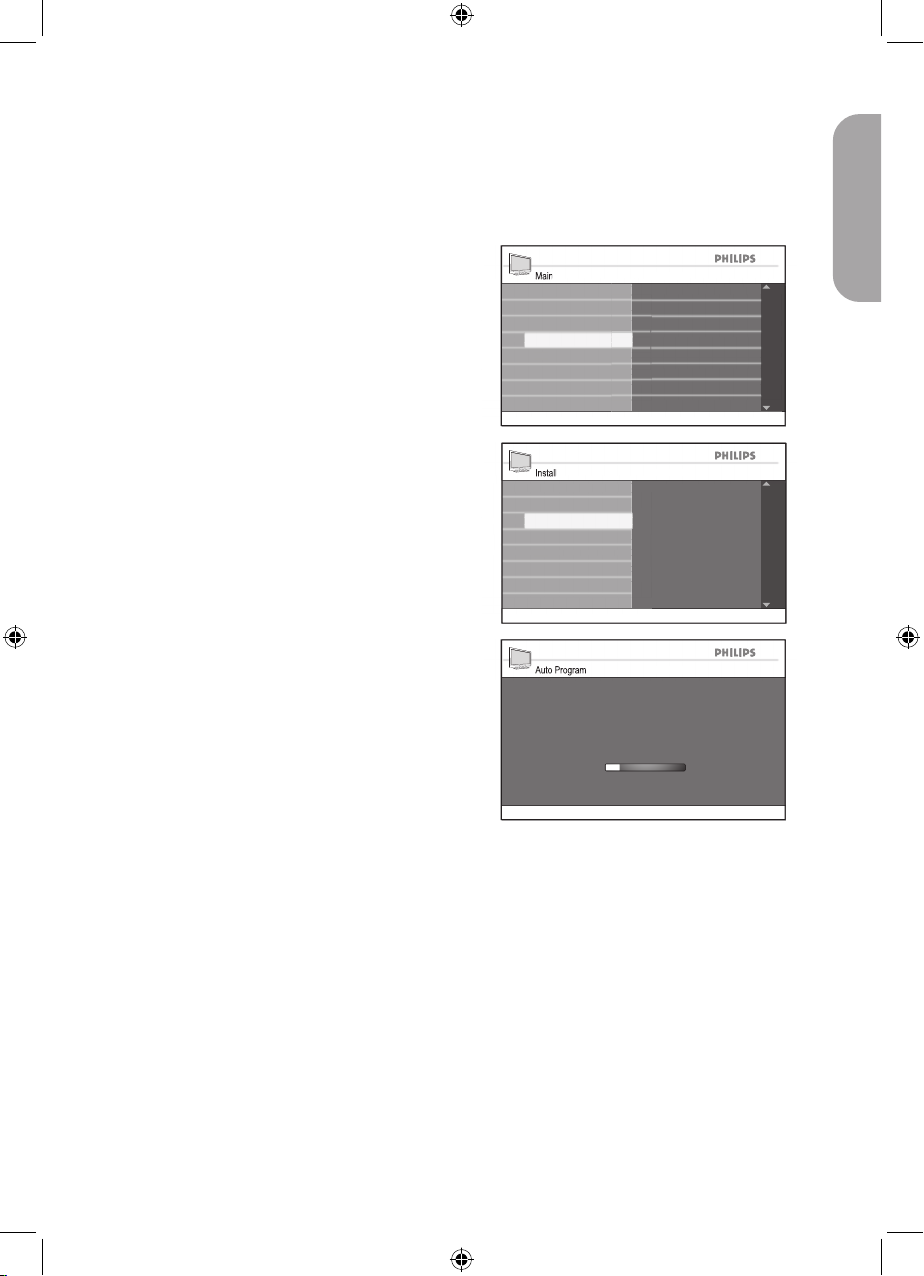
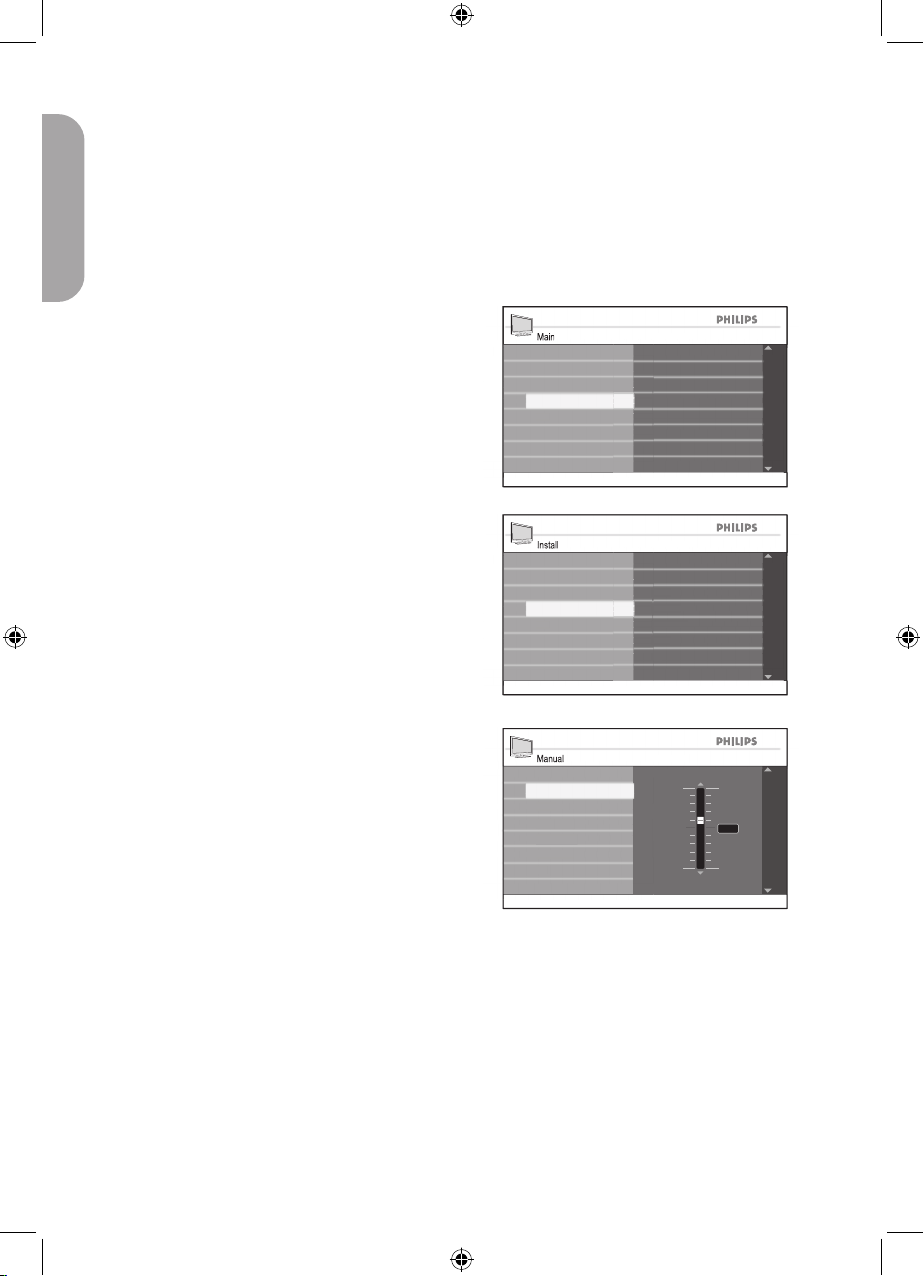
Searching and storing your channels automatically
When you are using the TV for the first time,
you will need to run the automatic or manual
searching of channels.
Press h button to display the on-screen
menus.
Press ï button until Install is highlighted.
Press u button to select Install.
Press ï button until Auto Program is
highlighted.
Press u to start Auto Program.
Auto Program will start scanning for
channels automatically. When scanning
has completed, the progress bar display
will exit from the screen.
The first channel found will be displayed
on the screen.
Press h or EXIT button to exit the
on-screen menus.
TIP:
To cancel or interrupt auto searching, press
the h or EXIT button. Only channels that
were found before interruption will be
stored.
1.
2.
3.
4.
5.
6.
Main
Language
Tuner Mode
Install
Picture
Features
Sound
Auto Program
Manual
Name
Fav. Program
NR
Install
Language
Manual
Name
Fav. Program
Press OK
to continue
Tuner Mode
Auto Program
Auto Program
Channel
TV
14
471 MHz
10
English
Manual installation
Main
Language
Tuner Mode
Install
Picture
Features
Sound
Auto Program
Manual
Name
Fav. Program
NR
You can manually set the TV tuner and system as well as fine tune the channels.
Changing the Tuner Mode
If you have problems using Auto Program
to search for channels, you can manually set
the tuner system.
Press h button to display the on-screen
menus.
Press ï button until Install is highlighted.
Press u button to select Install.
Press ï button until Tuner Mode is
highlighted.
Press u button to select Tuner Mode.
Press ï or Î button to select Auto,
Antenna or Cable.
Press h or EXIT button to exit the
on-screen menus.
Tuner Modes:
Automatic: The TV will automatically
detect whether or not cable signal input
is present.
Antenna: The TV will detect antenna
signals and will search for all antenna TV
channels available in your local area.
Cable: The TV will detect cable signals
and will search for all cable TV channels
available in your local area.
1.
2.
3.
4.
5.
6.
7.
•
•
•
Install
Cable
NR
Auto
Manual
Name
Fav. Program
Auto Program
Antenna
Language
Tuner Mode

11
English
Manual installation
Main
Language
Tuner Mode
Install
Picture
Features
Sound
Auto Program
Manual
Name
Fav. Program
NR
Install
System
Fine Tune
Language
Tuner Mode
Name
Fav. Program
Auto Program
Manual
Manual
PAL-M
PAL-N
Fine Tune
NR
Auto
NTSC
System
Changing the TV System
Press h button to display the on-screen
menus.
Press ï button until Install is highlighted.
Press u button to select Install.
Press ï button until Manual is
highlighted.
Press u button to select Manual.
Press u button to select System.
Press ï or Î button to select Auto,
NTSC, PAL-M or PAL-N.
Press h or EXIT button to exit the
on-screen menus.
TV Systems:
Automatic: The TV will automatically
detect the tuner system.
NTSC: Used mainly in North America
and some South American countries.
PAL-M: Used in Brazil.
PAL-N: Used in Argentina, Uruguay and
Paraguay.
1.
2.
3.
4.
5.
6.
7.
8.
•
•
•
•
12
English
Manual installation
Main
Language
Tuner Mode
Install
Picture
Features
Sound
Auto Program
Manual
Name
Fav. Program
NR
Install
System
Fine Tune
Language
Tuner Mode
Name
Fav. Program
Auto Program
Manual
Manual
System
10
-10
2
Fine Tune
Fine Tuning your channels
You can fine tune the channels after you have
searched them automatically by using the
Fine Tune feature.
Switch to the channel number that you want
to fine tune.
Press h button to display the on-screen
menus.
Press ï button until Install is highlighted.
Press u button to select Install.
Press ï button until Manual is highlighted.
Press u button to select Manual.
Press ï button until Fine Tune is
highlighted.
Press u button to select Fine Tune.
The Fine Tune level bar will be
displayed.
Press ï or Î button to manually fine
tune the channel reception.
Press h or EXIT button to exit the
on-screen menus.
1.
2.
3.
4.
5.
6.
7.
8.
9.
 Loading...