

Page 1
PENTAX Industrial Instruments Co.,Ltd.
2-36-9, Maeno-cho
Itabashi-ku, Tokyo 174-0063 Japan
Tel. +81 3 3960 0502
Fax +81 3 3960 0509
E-mail: international@piic.pentax.co.jp
Website:www.pentax.co.jp/piic/survey
www.pentaxsurveying.com
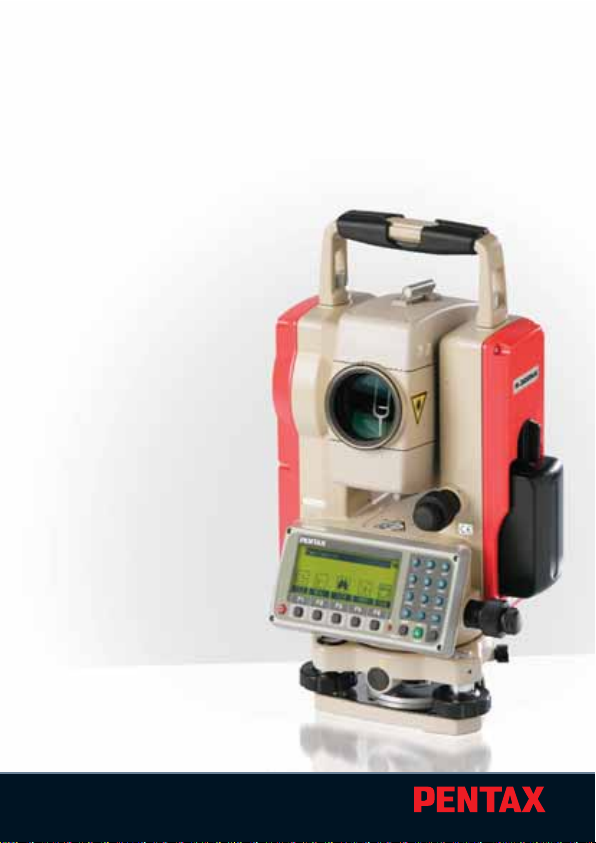
TTOOTTAALL SSTTAATTIIOONN
QUICK
REFERENCE
GUIDE
BASIC PPROCEDURES
FOR R-300X SERIES
R-322NX R-322EX
R-323NX R-323EX
R-325NX R-325EX
R-335NX R-335EX
R-315NX R-315NX
R-326EX
The reflectorless function is applied to
R-322NX, R-323NX, R-325NX, R-326EX,
R-335NX, R-315NX
SERIES
R-300X
Page 2

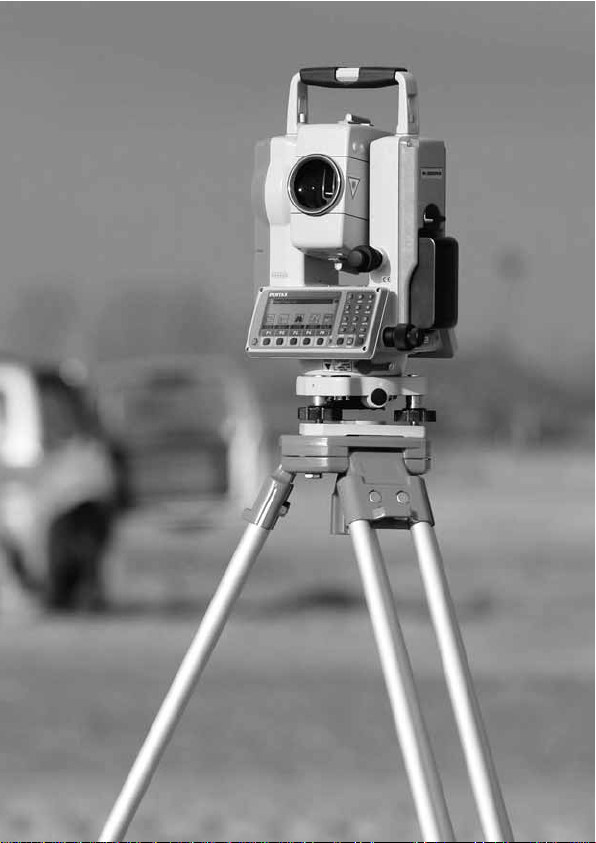
Electronic T otal Station
Quick Reference Guide
Basic Procedures
for R-300X series
R-322NX,R-323NX,R-325NX,R-335NX,R-315NX,
R-322EX,R-323EX,R-325EX,R-335EX,R-315EX,R-326EX
The description concerning the reflectorless function
in this guide is applied to
R-322NX,R-323NX,R-325NX, R-326EX,R-335NX,R-315NX.
PENTAX Industrial Instruments Co.,Ltd.
Page 3
Page 4

5
CONTENTS
GGeenneerraall 66
Instruction Manuals 6
Precautions regarding safety 6
Warning 6
Usage Precautions 7
11 BBaassiicc OOppeerraattiioonn 99
1.1 Removing the Battery 9
1.2 Attaching the Battery 9
1.3 Turning the Power On and Off 9
1.4 Centering and Leveling 9
1.5 Target Sighting (Focusing) 10
1.5.1 Auto-Focus 10
1.5.2 Power Focus 10
1.5.3 Manual Focus 10
1.5.4 Continuous AF mode 10
1.6 Angle Measurement 11
1.6.1 Horizontal Angle 11
1.6.2 Vertical Angle 11
1.7. Distance Measurement 12
1.7.1 Select your target 12
1.7.2 Distance Measurement 12
1.7.3 Changing Target constants 12
1.7.4 Input Temperature and Atmospheric pressure 13
1.7.5 Laser pointer 13
1.7.6Adjusting Laser Plummet brightness 13
1.7.7 Adjusting LCD contrast 13
1.7.8 Adjusting Illumination brightness 14
22 CChhaannggiinngg IInnssttrruummeenntt SSeettttiinnggss 1155
33 BBaassiicc FFiieelldd CChheecckkiinngg PPrroocceedduurreess 1166
3.1 Electronic Vial 16
3.2 Laser Plummet 16
3.3 Laser Pointer 16
3.4 Warning and Error Messages 17
3.5 Atmospheric Correction 18
44 SSppeecciiffiiccaattiioonnss 1199
Notice to the user of this product 20
Page 5
6
IInnssttrruuccttiioonn MMaannuuaallss
Quick Reference Guide is intended to provide a quick referenc e in the
field.For ease of use in the field,the following Quick Reference Guide
booklets are provided in the carrying case.
1. Basic procedure
2. PowerTopoLite for R-300X series,Operating procedure
The complete instruction manuals are contained on the CD that is
attached to each R-300X.
This guide uses the symbol “
xN
”as an expression of repeating times
of key operation. For example. “ x2” means that [ESC] key is
pressed two times.
The symbol “+”expresses that multiple keys are pressed simultaneously.
PPRREECCAAUUTTIIOONNSS RREEGGAARRDDIINNGG SSAAFFEETTYY
Before using this product, be sure that you have thoroughly read
and understood the instruction manual that is included in the
attached CD-ROM to ensure proper operation.
WARNING
Solar Observation
Never view the sun directly using the telescope as this may result
in loss of sight.
Laser Safety
R-300NX is a class-IIIa (3R) Laser product.Avoid direct eye exposure.
R-300X without “NX”is a class-II (2) Laser product. Do not stare into
laser beam.
Electro-Magnetic Compatibility (EMC)
This instrument complies with the protection requirement for
residential and commercial areas.If this instrument is used close to
industrial areas or transmitters,the equipment can be influenced
by electromagnetic fields.
Page 6

7
Risk of Explosion
Do not use this product in a location where there is coal dust, or
near flammable material as there is a risk of explosion.
USAGE PRECAUTIONS
Target Constant
Confirm the Target Constant of the instrument before measurement.
Reflectorless and Reflecting sheet
The reflectorless measurement range may vary depending on the
target and surrounding brightness.
In case the reflectorless measurement results in low accuracy,
perform the distance measurement by Reflector sheet or Prism.
(R-322NX,R-323NX,R-325NX, R-335NX,R-315NX,)
BBaatttteerryy && CChhaarrggeerr
Use the battery charger that is suitable to the battery you are using.
If water should happen to splash on the instrument or the battery,
wipe it off immediately and allow it to dry in a dry location.
Auto focus
The Auto focus may not function under every condition depending
on brightness,contrast,and the shape and size of the target.In such
a case,use the Power Focus buttons or the manual focus ring.
Atmospheric correction
During surveys for which the survey precision or atmospheric
measurement method is defined, measure the atmospheric
temperature and pressure separately and enter those values rather
than using the Automatic Atmospheric Correction function.
Page 7
Page 8
9
1.Basic Operation
11..11 RReemmoovviinngg tthhee BBaatttteerryy
(1) Rotate the knob above the battery pack counter-clockwise.
(2) Lift up the batter y pack and remove it from the instrument.
11..22 AAttttaacchhiinngg tthhee BBaatttteerryy
(1) Place the channel on the bottom of the battery pack,onto the
protrusion of the instrument and push the battery pack down
into place.
(2) Turn the knob clockwise.
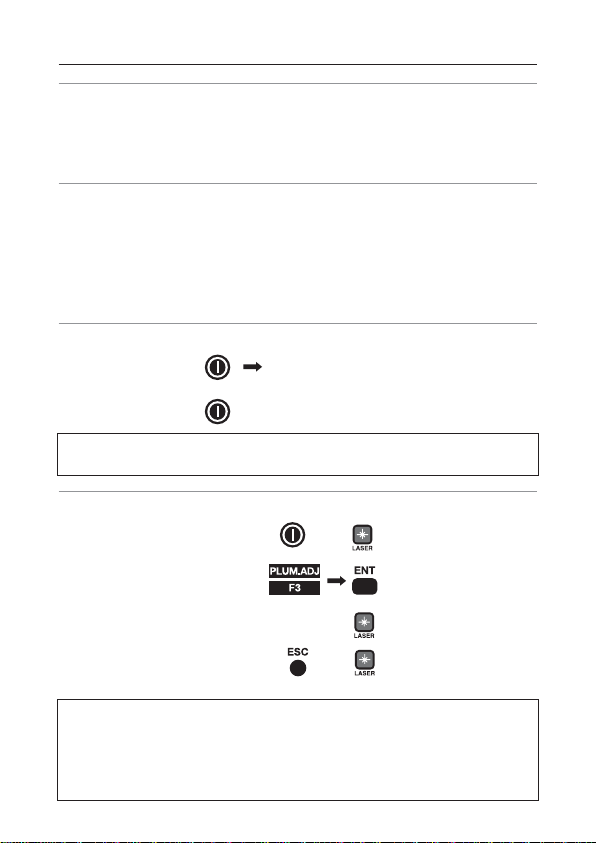
11..33 TTuurrnniinngg tthhee PPoowweerr OOnn aanndd OOffff
To set power on : Electronic vial screen
To shut down :
NNOOTTEE::
The power is automatically turned off after 10 minutes
of inactivity (Factory default setting).
11..44 CCeenntteerriinngg aanndd LLeevveelliinngg ((LLaasseerr pplluummmmeett aanndd EElleeccttrroonniicc vviiaall))
To activate electronic vial : or:
To activate laser plummet : (for the first time
after power on)
NNOOTTEE::
The laser plummet and the electronic vial are always
activated at the same time.When the power is switched on,
however,only electronic vial is activated (Factory default setting).
To change the power-on activation of laser plummet,refer to
“2.3 Instrument setting items”.F
or:
To deactivate :
or:
Page 9

10
11..55 TTaarrggeett SSiigghhttiinngg ((FFooccuussiinngg))
11..55..11 AAuuttoo--FFooccuuss
Aim using the telescope collimator,and press
NOTE: Place the target near the reticle center.The AF sensor is
located around the horizontal line of the reticle.
11..55..22 PPoowweerr ffooccuuss
If the AF failed or if you need to adjust the focus,use the
Power focus knob.
To focus on a closer object :Rotate Power Focus knob clockwise
To focus on a farther object : Rotate Power Focus knob counterclockwise
NOTE: Focus speed can be controlled by the rotation angle of
the knob:
Low speed: when rotated by approx.5 degrees
Middle speed: when rotated fully by approx.10 degrees
High speed: after one second of time has passed in the
middle speed position
11..55..33 MMaannuuaall ffooccuuss
Rotate the focus ring manually:
11..55..44 CCoonnttiinnuuoouuss AAFF mmooddee
To activate the continuous AF: … for 2 seconds
NOTE: Track the target by keeping the target close to the center
of the reticle as much as possible.
To quit: or rotate the Power focus knob :
NOTE: In case the focus does not change for one minute,the
continuous AF mode will also terminate automatically.
Page 10

11
11..66 AAnnggllee MMeeaassuurreemmeenntt
11..66..11 HHoorriizzoonnttaall AAnnggllee
Set the screen MODE A : or
MODE A screen
Control keys for measuring horizontal angle:
To set the angle to 0 :
To hold the angle :
To release HOLD :
To input an angle :
To read clockwise angle :
11..66..22 VVeerrttiiccaall aannggllee
To display vertical angle :
To change permanently the combination of values displayed in
MODE A:
To read the slope % :
11..77 DDiissttaannccee MMeeaassuurreemmeenntt
Set the screen MODE A: or
MODE A screen
,
,
,
input value by using:
x2
x2 x3
Select by
x3
or
+
[ ]
[ ]
Page 11

12
11..77..11 SSeelleecctt yyoouurr ttaarrggeett
Select target type (measurement mode):
(Reflecting sheet) (Prism) (Reflectorless)
NOTE: The selected target is maintained until next time you change.
11..77..22 DDiissttaannccee mmeeaassuurreemmeenntt
For a single shot measurement:
NOTE: “Long Range Mode”is displayed only when measuring with
higher laser power (in reflectorless measurement with the
instrument setting “REF.LESS RANGE”set as “LONG”and
“Warning Message”set as “ON”.)
For tracking measurement :
NOTE: The number of shots can be defined.The default is
“one time”. The measuring modes activated by the above operations
can be also changed.
NOTE: Quick mode is the function to shorten the initial
measurement time using prism and reflector sheet.To set the mode,
use direct command number [0][0][7][5][2][2].When the meas key is
pressed during quick mode,”<-- -->”is displayed on the screen.
11..77..33 CChhaannggiinngg TTaarrggeett ccoonnssttaannttss
The default constants are:
Reflecting sheet : 0mm
Prism : -30mm
Reflector-less : always 0mm
Before changing the constants, set Target Constant in the Initial
Setting to“INPUT”mode:
To change Prism constant:
When “Long Range
Mode” is displayed
x2
x2
x3
[]
+
input value
by using:
,,
,,
,,
x2
Page 12

13
To change Sheet constant:
11..77..44 IInnppuutt TTeemmppeerraattuurree aanndd AAttmmoosspphheerriicc pprreessssuurree
The default atmospheric correction mode is “Automatic”.
Before manual input,change the default mode to “ATM INPUT”:
To Input temperature :
To Input atmospheric pressure:
11..77..55 LLaasseerr ppooiinntteerr
To activate Laser pointer :
To quit Laser pointer :
NOTE: The laser pointer is kept activated until it is deactivated by
the above procedure.
11..77..66 AAddjjuussttiinngg LLaasseerr PPlluummmmeett bbrriigghhttnneessss
or
11..77..77 AAddjjuussttiinngg LLCCDD ccoonnttrraasstt
or
input value by using:
,,
,,
,,
x2
x2
x2
x2
input value by using:
,,
,,
,,
x2
x3
input value by using:
,,
,,
,,
x2
+
+
Page 13

14
11..77..88 AAddjjuussttiinngg IIlllluummiinnaattiioonn bbrriigghhttnneessss
for LCD (for Reticle) or
2.Changing Instrument settings
You can change the instrument settings by “HELP”menu or by
inputting “007”code.
22..11 HHeellpp mmeennuu
While the screen is in MODE A or MODE B,
Select a desired item by or
NOTE: Some items have sub-menus where the selecting
procedure by using F1 - F4 is again repeated.
22..22 ““000077”” ccooddee
While the screen is in MODE A or MODE B,
Input 007 code by using
NOTE: Some items have sub-menus where the selecting
procedure by using F1 - F4 is again repeated.
22..33 IInnssttrruummeenntt sseettttiinngg iitteemmss
See chart on page 15
+
+
Change the setting
x2
Change the setting
x2
Page 14

007 code HELP menu list Default Other options
401 TARGET CONST PRISM CONST -30mm 0mm, INPUT
SHEET CONST 0mm INPUT
402 ATM CORR AUTO ATM INPUT,ppm INPUT,NIL
501 MEAS.MIN DISP COARSE FINE
502 SHOT COUNT SHOT CONT 1 time 3 times,5 times, INPUT
SHOT INPUT 01 times (input)
503 CRV/REF CORR 0.14 0.2,NIL
504 MIN UNIT ANG. FINE COARSE
505 V.ANG. STYLE Z.0 H.0,COMPASS
508 DIST.BUZ ON OFF
509 QUAD BUZ OFF ON
510 AUTO OFF 10 MIN 20 MIN,30 MIN,NIL
511 EDM OFF 3 MIN 5 MIN, 10 MIN, NIL
512 ILLU.OFF 3 MIN 5 MIN,10 MIN,NIL
514 MEAS.SIGNAL MARK VALUE
515 PRIORITY SELECT PRIM.MEAS KEY MEAS SHOT MEAS CONT,TRACK SHOT,TRACK CONT
SEC.MEAS KEY TRACK CONT TRACK SHOT, MEAS CONT,MEAS SHOT
AUTO MEAS. NIL MEAS., TRACK
PRIORITY DISP HA/HD/VD HA/VA/SD,HA/VA/HD/SD/VD
517 COMP AXIS 3 Axis (2/3”model) or 2 Axis 2 Axis (2/3”model),1Axis,,NIL
520 LD PLUM.&E.VIAL LD PLUM. OFF (when Power On) ON (automatically ON)
TILT DISP. OFF ON
TILT DISP.UNIT COARSE FINE
521 REF.LESS RANGE RANGE NORMAL LONG
MESSAGE ON (when Range is LONG) OFF
SETUP EACH TIME (w/ Power ON) PERMANENT
522 QUICK MEAS OFF ON
701 ATM UNIT TEMP.UNIT Centigrade Fahrenheit
PRESS UNIT hPa mmHg,inchHg
702 DIST.UNIT m ft, ft+inch
703 ANG.UNIT DEG DEC,GRD,MIL
801 SET UP COM. BAUD RATE 1200 2400,4800,9600
DATA LENGTH 8 7
PARITY BITS NIL E VEN, ODD
STOP BITS 1 2
SIGNAL CONTROL ON OFF
XON/XOFF ON OFF
THROUGH COMMAND NIL a, b,c,d,e,f
Page 15

16
3.Basic Field Checking Procedures
Checks and Adjustments should be performed before and during
measurement.
33..11 EElleeccttrroonniicc VViiaall
To display vials: or (from measurement screen)
Check if the bubble stays at the center of each vial,when rotating
the instrument by 180°.
To adjust the vials: operate according to the
instruction on the screen
NOTE: Press these two keys for 1 second longer,then release
key first.
33..22 LLaasseerr PPlluummmmeett
To activate the laser plummet:
(for the first timeafter Power on) or (from measurement screen)
Check if the laser spot on the ground stays at the same position when
rotating the instrument around the vertical axis.
To adjust the laser plummet:Contact your local dealer
33..33 LLaasseerr PPooiinntteerr
To activate the laser pointer:
or (from measurement screen)
Check if the projected laser spot points at the same position that is
aimed by the center of the cross-hair line of the telescope.
To adjust the laser pointer:Consult your local dealer.
+
Page 16

17
33..44 WWaarrnniinngg aanndd EErrrroorr MMeessssaaggeess
WWaarrnniinngg MMeessssaaggee
MMeeaanniinngg WWhhaatt ttoo ddoo
Displayed when the instrument is tilted beyond the vertical compensation
range (±3’) in case 1 axis or 2 axis
automatic compensation is selected.
This message may be temporarily displayed if the instrument is turned too
fast.
The input data exceeds the allowable
range.
• This message is displayed if a long
distance which is a far beyond
measurable distance of R-300X
series is measured with a wrong
target mode.
Please select a correct target then
measure.
If a wrong target is selected,a
correct distance cannot be
measured.
• The measurement distance is less
than 1.5m in Reflector sheet mode.
• The measurement distance is less
than 1.5m in Prism mode.
• Under too strong sun light.
• Unstable light value owing to
shimmer or obstacles.
• Reflector sheet,Target and Prism do
not face the instrument.
• Reflector sheet,Target and Prism are
not correctly sighted.
• Measurement range is over in
Reflectorless mode.
• Sufficient signal does not return by
sighting sharp edge etc. at
Reflectorless mode.
• The Date Clock is powered by the
built-in lithium battery.
• The lithium battery needs to be
replaced in five years.
Re-level the instrument.
Repair is needed if the
message is displayed
when it is properly
leveled.
Press the [ESC] key and
enter the correct data.
Select the correct target
mode.
Select a longer point,
or use a tape measure.
Change the object
that has much better
reflectivity,or use a
reflecting sheet,or wait
until the sun activity
has weakened.
Have the lithium battery
replaced by the dealer
from whom the
instrument was purchased.
Out of tilt range
Excess data
Mismatched
Target
Target is too
close.
Unsuitable
Condition
Li-batt.voltage is
low.
Page 17

18
ERROR!! EDM ERROR
04 -05,34-39,50-53
ERROR!!
ETH ERROR 70-76
ERROR!!
MEMORY ERROR 19
ERROR PS DATA of EDM
ERROR P DATA of EDM
ERROR ETH DATA
Distance measurement system problem
Angle measurement system problem
Memory problem
Problem of the internal EDM parameters
Problem of the internal ETH parameters
Turn the power
off,and then turn on
again.Repair is
needed when the
message appears
consistently.
EErrrroorr MMeessssaaggee MMeeaanniinngg WWhhaatt ttoo ddoo
33..55 AAttmmoosspphheerriicc CCoorrrreeccttiioonn
The speed at which light travels through the air varies depending
on the temperature and atmospheric pressure.The R-300X series is
designed to measure distances at the speed of light in order to
measure accurately, atmospheric correction needs to be used.
The instrument is designed to correct for weather conditions
automatically if the temperature and pressure are input.
Correction is then carried out based on the following formula.
Calculation formula:
K= (276.26713 -
78.565271 • P
) x10
-6
K:Atmospheric Correction Constant
P:Atmospheric pressure (hPa)
t:Temperature(°C)
Distance after Atmospheric Correction D = Ds (1+K)
Ds:Measured distance when no Atmospheric Correction is used.
273.14941 + t
Page 18

19
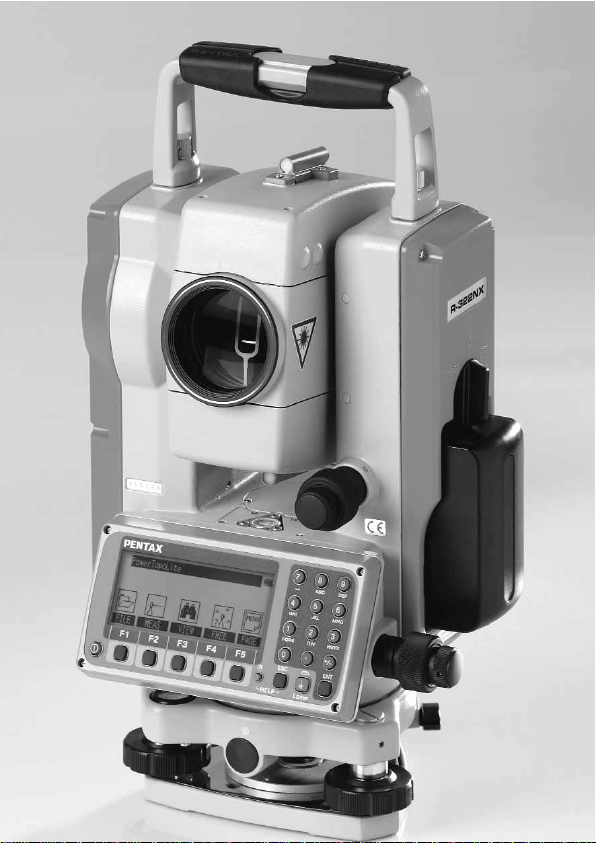
4.Specifications
R-322NX R-323NX R-325NX R-335NX R-315NX
R-322EX R-323EX R-325EX R-335EX R-315EX R-326EX
TTeelleessccooppee
Magnification 30 x
Resolving power 3”
Field of view 2.6% (1° 30’)
Minimum focus 1.0m
Focus Auto-focus / Power Focus / Manual Manual
DDiissttaannccee mmeeaassuurreemmeenntt
Laser Class Visible Laser:Class II (2) / Class IIIa (3R)
Visible Laser:Class II (2)
- Long range mode in Reflectorless (“NX” models only)
Measurement range (Good condition)
Reflectorless 1.5m - Normal range mode:90m / Long range mode 270m (“NX”models only) -
Reflector sheet 1.5m-600m (800m)
Mini prism 1.5m-1100m (1600m)
1P 1.5m-3400m (4500m) 1.5m-3000m (4000m) 1.5m-2000m (2800m)
3P 200m-4500m (5600m) 200m-4000m (5000m) 200m-2800m (3500m)
AAccccuurraaccyy
Prism ±(2+2ppm x D)mm ±(3+2ppm x D)mm
Reflector Sheet
Reflectorless ±1.5 to 200m: ±1.5 to 200m:
±(5+2ppm x D)mm ±(5+3ppm x D)mm
over 200 to 270m:±(7+10ppm x D)mm
At Auto-Atm.Correction Prism, Ref.sheet:±(2 +10ppm x D)mm / ±(3+10ppm x D)mm
Reflectorless:±(5 + 10ppm x D)mm (“NX”models only)
Minimum count Fine mode (0.1mm) Normal mode (1mm) Track mode (1cm)
MMeeaassuurriinngg ttiimmee
Repeat meas. Normal:Prism,Ref.sheet 2.0sec.(1mm) Normal:Prism,Ref.sheet 1.2sec.(1mm)
Track: Prism,Ref.sheet 0.4sec.(1cm) *Quick mode
Initial meas. Normal:Reflectorless 2.3sec.(1mm) Normal:Prism,Ref.sheet 2.5sec.(1mm)
(“NX”models only) *Quick mode
AAnnggllee mmeeaassuurreemmeenntt
Measuring method Absolute rotary encoder
Detection 2 sides
Minimum count 1”(2cc) / 5”(10cc) selectable
Accuracy(ISO 17123-3) 2” 3” 5” 6”
CCoommppeennssaattoorr
Triple axis Dual axis
TTaannggeenntt ssccrreeww
2 speed 1 speed
SSeennssiittiivviittyy ooff vviiaallss
Plate level (electronic) 30”/1div.
Circular level 8’/2mm
PPlluummmmeett
Visible Laser,±0.8mm (instrument height 1.5m)
BBaassee
Detachable Shifting Fixed Detachable
WWaatteerr rreessiissttaanntt
IP56 (instrument only)
AAmmbbiieenntt tteemmppeerraattuurree
-20°C ~ +50°C / -4°F ~122°F (Working range)
TTrriippoodd tthhrreeaadd
5/8”x 11 35mm x 2 5/8”x 11
DDiimmeennssiioonnss//WWeeiigghhtt
Instrument 177( W) x 343(H) x 177(L)mm
Weight (incl. Batter y) 5.7kg 5.5kg 5.7kg
Carrying case 268( W) x 442(H) x 465(L)mm/3.9kg
BBaatttteerryy ppaacckk BBPP0022
Power source Ni-MH (Rechargeable)(4300mAh) ,DC6V
Reflectorless items are applicable to “NX”models only.
Page 19

20
R-322NX R-323NX R-325NX R-335NX R-315NX
R-322EX R-323EX R-325EX R-335EX R-315EX R-326 EX
Operation time
Continuous Approx. 5 hrs (ETH+EDM),12 hrs (ETH) with Approx. 2.2 hrs
of charging time
Weight Approx.380g
CChhaarrggeerr BBCC0033 aanndd AACC AAddaapptteerr AACC0011
Input voltage (AC01) AC 100~240V (AC01)
Output voltage (BC03) DC7.5V (BC03)
Weight 280g
IInntteerrnnaall MMeemmoorryy
Coordinates data 18.600 points 16.000 points 12.000 points
Date Clock
NX MODEL Yes Yes EX MODEL Yes No No
NOTE:
* The measurement range may vary by measurement conditions.
* Normal conditions:20km visibility with slight shimmer.
* Good conditions:40km visibility,overcast,no heat,no shimmer
and moderate wind.
* Reflector sheet:PENTAX genuine Reflector sheet (5cm x 5cm).
* Quick mode,which is effective only under Normal mode
(1mm) setting,functions with Prism and Reflector Sheet.It is
incorporated in all X series models and effective up to 500m.
* When Quick Mode is on,the EDM accuracy using Prism and
Reflector Sheet is ±(3+2ppm x D)mm. When Automatic Correction
is activated in Quick Mode,the EDM accuracy is ±(3+10ppm x D)mm
* EDM Measuring time varies according to distance to be
measured and conditions of the environment.
* Reflectorless:
- The measurement range and accuracy of Reflectorless are based
on the condition that laser beam is emitted perpendicular to the
white side of the Kodak Gray Card.
- The measurement range may be influenced by the shape
of the target and its environment.
- The measurement range at TRACK mode is over 5m.
- It takes time,longer than usual,to measure the distance exceeding
200m or to measure the distance to the object that is hard to measure.
- The maximum distance that can be shown on the display is 322m in
the non-prism measurement mode.
- The measurement range,accuracy of distance measurement and
time required to measure may be influenced by the shape,size of
surface area and reflection rate of the target and its environment.
* The operating time becomes shorter under the low temperature,
due to the temperature dependence of the battery performance.
Page 20

21
NOTICE TO THE USER OF THIS PRODUCT
To assure compliance with the Safety standard 21 CFR, Chapter 1.
Subchapter J. The U.S. bureau of Radiological Health requires the
following information to be provided to user.:
It can be dangerous to look into the beam with optical equipment such as binoculars and telescopes.
11.. SSppeecciiffiiccaattiioonnss ooff LLaasseerr RRaaddiiaattiioonn
A) The EDM module of the R-300X produces a visible light beam,
which is emitted from the telescope objective lens and the
center hole of the instrument base plate.The R-300X is designed
and built to have a laser diode radiating at 620-690nm.
B) Radiant power
The R-300X is designed and built to radiate a maximum average
radiant power of 4.75mW (0.95mW for the model without “NX”)
from the telescope,and 0.95mW from the center hole of the base
plate.The user may be subject to this radiation as a beam while
operation until such time that the instrument is turned off.
22.. TThhee ffoolllloowwiinngg llaabbeellss aarree aaffffiixxeedd ttoo aanndd mmuusstt rreemmaaiinn
aattttaacchheedd ttoo tthhiiss llaasseerr pprroodduucctt..
A) The following Certification label is located near the Plate level:
“This laser product is complied with the provisions of 21 CFR
1040.10 and 1040.11.For a Class II laser product.”
Or for R-300 NX models:
“This laser product is complied with the provisions of 21 CFR
1040.10 and 1040.11.For a Class IIIa laser product.”
B) Caution label is located near the exit aper ture:
“AVOID EXPOSURE.Laser radiation is emitted from this aperture.”
Page 21

22
C) Warning logotype is located on the surface of the telescope:
“CAUTION LASER RADIATION DO NOT STARE INTO BEAM”
Or for R-300 NX models:
“DANGER LASER RADIATION AVOID DIRECT EYE EXPOSURE”
D) Warning label is Located near the exit aperture.
33.. CCaauuttiioonn ttoo mmaaiinnttaaiinn tthhee ssaaffeettyy iinn ccoommpplliiaannccee wwiitthh tthhee ssttaannddaarrdd
A) To maintain the safety standard, refrain from any operation,
maintenance, or adjustment other than described in this
instruction manual.
B) Operation, maintenance or adjustment other than those
specified in this instruction manual may result in hazardous
radiation exposure.
C) Maintenance and repair not covered in this manual must be
done by an authorized Pentax dealer.
D) The Laser beam emission by the Distance measurement can be
terminated by pressing key.
E)
Pressing keys can terminate the laser beam emission
by the laser pointer.
F) The Laser beam emission by the Laser plummet can be terminated
by pressing key.
Page 22

23
AVOID EXPOSURE
Laser radiation
is emitted from
this aperture
Aperture label
AVOID EXPOSURE
Laser radiation
is emitted from
this aperture
Aperture label
Warning label
Laser beam is transmitted
from this aperture
Identification label
Laser beam is transmitted from this aperture
Page 23

24
Warning logotype Warning logotype
Laser beam is transmitted
from this aperture
For North America Certification
LASER RADIATION
AVOID DIRECT EYE
EXPOSURE
CLASS 3R LASER PRODUCT
LAS
ER R
ADIA
TION
A
V
O
ID
D
IR
E
C
T
E
Y
E
E
X
P
O
S
U
R
E
C
LA
S
S
3
R
LA
SE
R
P
R
O
D
U
C
T
LASER RADIATION
DO NOT STARE INTO BEAM
CLASS 2 LASER PRODUCT
For R-300NX model
For R-300EX model
For R-300NX model
For R-300EX model
For R-300NX model
For R-300EX model
2-5-2 Higashi Oizumi Nerima-ku. Tokyo 178-8555 Japan
This Laser product is complied with the provisions of 21
CFR 1040-10 and 1040-11 For a class IIIa product
ASSEMBLED BY PENTAX VN Co. LTD
Sai Dong B Industrial zone. Gia Lam. Hanoi Vietnam
2-5-2 Higashi Oizumi Nerima-ku. Tokyo 178-8555 Japan
This Laser product is complied with the provisions of 21
CFR 1040-10 and 1040-11 For a class II product
ASSEMBLED BY PENTAX VN Co. LTD
Sai Dong B Industrial zone. Gia Lam. Hanoi Vietnam
CAUTION
D
A
N
G
E
R
LED is turned on at the time of emission
DANGER
Page 24

Laserclass IIIa,conform FDA 21 CFR
Ch.1 § 1040
DANGER
LASER RADIATION - DO NOT STARE
INTO BEAM OR VIEW DIRECTLY
WITH OPTICAL INSTRUMENT
INTO SUNLIGHT
620-690 nm/4.95mW max.
CLASS IIIa LASER PRODUCT
Laserclass II,conform FDA 21 CFR
Ch.1 § 1040
CAUTION
LASER RADIATION - DO NOT
STARE INTO BEAM
620-690nm/0.95mW max.
CLASS II LASER PRODUCT
Page 25

26
Page 26

Member symbol of the Japan Surveying
Instruments Manufacturers’
Association representing the high quality
surveying products.
Printed in Belgium
TS01403
PENTAX Industrial Instruments Co.,Ltd.
2-36-9,Maeno-cho
Itabashi-ku, Tokyo 174-0063 Japan
Tel.+81 3 3960 0502
Fax +81 3 3960 0509
E-mail:international@piic.pentax.co.jp
Website:www.pentax.co .jp/piic/survey
www.pentaxsurveying.com
Japan Surveying Instruments Manufacturers’ Association
 Loading...