

Page 1
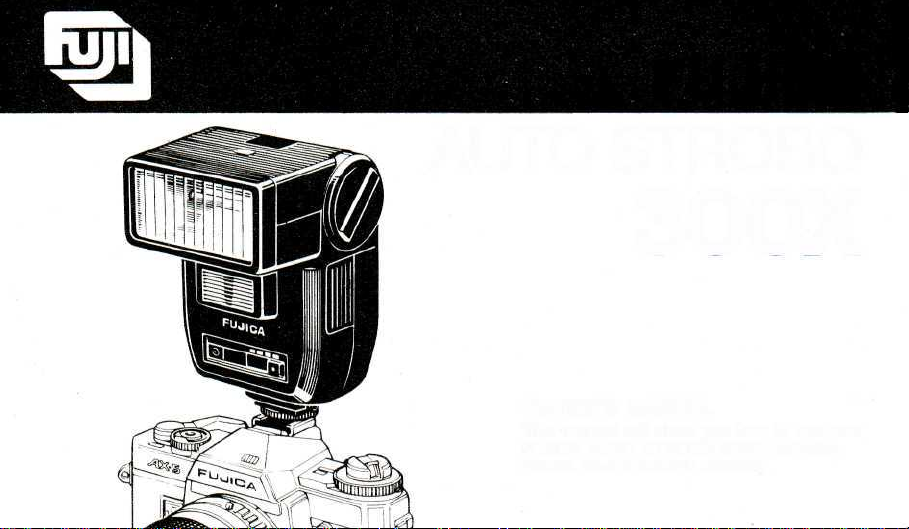
FUJICA
AUTO STROBO
300X
OWNER'S MANUAL
This manual will show you how to use your
FUJICA AUTO STROBO 300X correctly.
Please read it through carefully.
Page 2
SPECIAL FEATURES
1. Your Fujica Auto Strobo 300X is a high-power
series-circuitry computer flash (guide number
30). It provides an option of three apertures to
let you freely take automatic flash pictures. For
example, if you want to take long-range flash
shots, you can use a large aperture and shoot at
up to 11 meters. If you want everything in your
picture sharply focused, the aperture can be
stopped down as far as f/11 (with ISO/ASA 100
film).
2. It is provided for twin-light bounce flash. If the
flash head is tilted for bounced lighting, it auto-
matically converts into a twin flash unit having
a main light and a sublight. With this flash, you
can take perfect bounce-light pictures everytime,
although this type of pictures are generally considered difficult to take with flash.
2
3. Used on the Fujica AX-5, AX-3, AX-1, or AZ-1,
it will automatically switch the camera's shutter
speed to 1/60-sec. as soon as it is fully charged.
Since you can check the flash charge-up while
looking through the viewfinder, you will not lose
any shooting opportunities.
Page 3
SPECIFICATION
Type
Connection
Guide Number
Flash Duration
Angle of Coverage
Recycle Time
Light Quality
Number of Flashes
Light Control
Selection of Apertures
Automatic Flash Range
Bounce Flash
Power Source
Film Speed
Aperture Scale
Series-circuitry computer flash.
Hotshoe and clip-on type with safety lock.
30 (ISO/ASA 100 m) with new batteries, 30 seconds after the neon lamp turns on.
Guide number for bounce flash: 25 for main light, 6 for sublight.
1/1,000 ~ 1/30,000 sec.
Covers the view angle of a 35 mm lens (35 mm format); with wideangle adapter
attached, covers the view angle of a 28 mm lens (35 mm format).
9 sec. after lighting of the neon lamp with new alkaline-manganese batteries.
Daylight type.
150 with fresh alkaline-manganese batteries.
Silicon photocells and thyristor circuit.
Manual and three-step automatic apertures (yellow, red, green).
Aperture setting for ISO/ASA 100: Red f/2.8. Green f/5.6. Yellow f/11
Red : 1.5 ~ 10.7 m (5 ~ 35 ft)
Green : 1 ~ 5.3 m (3.3~18 ft)
Yellow : 0.8 ~ 2.7 m (2.6- 9 ft)
Flash head tiltable 0 ~90°; when tilted, a sublight switches on and the flash is
set up for twin-light bounce flashing.
Four penlight batteries (AA size)
ISO/ASA 25 400
f/1.4 ~ f/32
Notice: Specifications are subject to change without notice.
3
Page 4
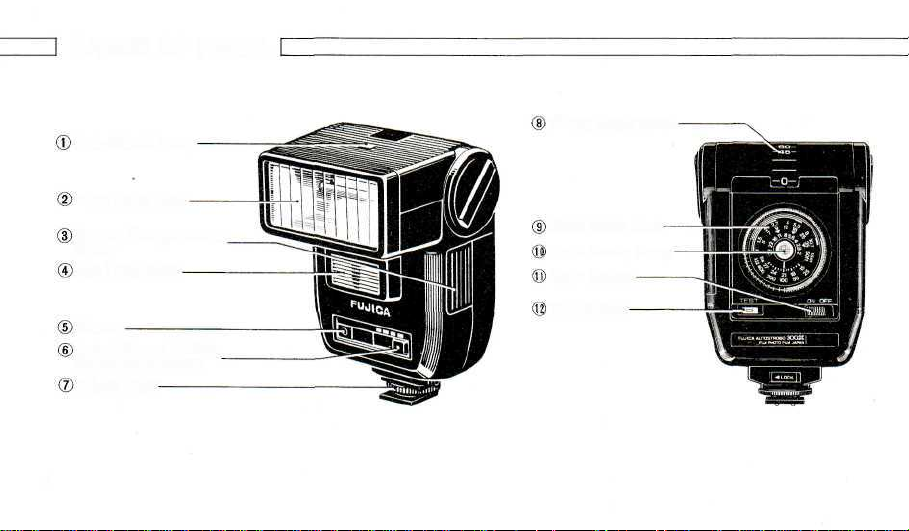
NAMES OF PARTS
Auto Check Lamp
Main Lamp Face
Battery Compartment
Cover
Sub Lamp-Face
Sensor
Auto/Manual Switch
(Distance Selector)
Wheel Lock
4
Tilting Angle Scale
Flash Guide Disk
Flash Ready Lamp
Main Switch
Test Button
Page 5

LOADING THE BATTERIES
• Battery type
Use four penlight batteries (AA
size). Alkaline-manganese batteries
are recommended because of their
long service life.
• Recycle time will be longer in
cold weather because low
temperatures will reduce battery efficiency. Try to keep
the batteries warm in cold
weather by carrying them in
your coat pocket until they
are needed.
• If the flash is not being used
for a long interval, remove the
batteries before putting it
away because old batteries can
develop leaks and damage it.
How to load the batteries
1. Remove the Battery Compartment Cover by pulling it out in
the direction of the arrow.
2. Insert four batteries, plus (+)
and minus (-) ends correctly
as illustrated in the Battery
Compartment, then replace
the cover by sliding it in until
it locks.
5
Page 6

3. Turn on the Main Switch. If
the red Flash Ready Lamp
(located in the center of the
Flash Guide Disk) turns on in
a few seconds, the batteries are
properly loaded.
6
4. After checking the batteries,
be sure to turn off the Main
Switch.
Note: If the Main Switch is left
on, the batteries will be exhausted
in a short time even if the flash is
not discharged.
• Battery life
• On manual flash, a new set of
alkaline-manganese batteries
will provide about 150 flashes
but it is always best to change
them as soon as they start to
show wear. If the recycle time
lags to 30-second or more, the
batteries should be considered
exhausted.
• Be sure to change the four batteries all at once and make
sure all four are of the same
brand and are new.
• After you are through taking
pictures, always turn the Main
Switch off to save battery.
Page 7

MOUNTING THE FLASH ON THE CAMERA
1. Turn off the Main Switch.
2. Loosen the Wheel Lock by
turning it counterclockwise,
grip the bottom part of the
flash and clip the Strobo Foot
into the camera's accessory
shoe. Make sure the foot goes
all the way in because the flash
might not function properly if
it is only part of the way in.
then turn the Wheel Lock
clockwise to lock the flash
securely in place.
3. To dismount the flash, loosen
the Wheel Lock by turning it
counterclockwise then grip the
bottom part of the flash and
slide the Strobo Foot out.
TAKING FLASH
PICTURES (I)
• Setting the camera's
shutter speed
1. If you are using the flash with
a Fujica AX-series camera, the
camera's shutter speed will
automatically switch to 1/60
sec. (X-sync) as soon as it is
fully charged, regardless of
where the shutter speed dial
has been set (except "B").
2. If you are using it with the
Fujica AZ-1, the camera's
shutter speed will automatical-
ly switch to 1/60 sec. (X-sync)
with the shutter speed dial set
to AE as soon as it is fully
charged.
3. If you are using it with other
cameras, set the camera's shut-
ter speed to (1/60 or 1/125
sec.) (X-sync.).
7
Page 8

Setting the Strobo's
Distance Selector
Set the Distance Selector on the
Strobo front to either the red,
green,or yellow mark. These marks
represent the following shooting
distances:
Red 1.5- 10.7m
Green 1 — 5.3m
Yellow 0.8 - 2.7m
8
(5~35ft.)
(3.3~ 18 ft.)
(2.6 ~ 9 ft.)
Setting the film speed
Turn the Flash Guide Disk on the
Strobo back and set the speed
of the film you are using opposite
the index mark.
Example: If you are using Fuji-
color HR100, set "100" on the
ISO/ASA scale opposite the index
mark.
• Setting the aperture
Read off trie aperture indicated
on the Flash Guide Disk for the
color of the mark you selected
and set the lens' aperture ring
accordingly.
Example: With ISO/ASA 100 film,
the apertures to be set for the
different colors are as follows:
Red f/2.8
Green f/5.6
Yellow f/11
Page 9

• Switch on the Main Switch.
As soon as the Flash Ready
Lamp turns on, press in the
Test Button to make sure the
Auto Check Lamp turns on. If
it turns on, you are ready to
take automatic flash pictures.
The flash will automatically
provide the right amount of
light for correct exposure.
• If the Auto/Manual Switch is
set to M, your Auto Strobo
300X will work as a manualoperation flash having a guide
number of 30 (ISO/ASA100 m).
To find the correct aperture,
divide the guide number by
the flash-subject distance, and
set the aperture ring accordingly. The guide numbers rela-
tive to the film ISO/ASA speeds
are shown in the followng
table.
ISO/
ISO/
ASA25
15DIN
m
15
50
ft
Note: If you are using bounced
lighting on the manual mode, care
must be taken because the guide
number will become smaller.
18DIN
21
71
ASA100
21
DIN
30
100
ISO/
ASA50
ISO/
ASA200
24DIN
42
140
ISO/
ASA400
27 DIN
60
200
TAKING FLASH
PICTURES(II)
(Bounce-light pictures)
If your subject is standing near a
wall, you will get distracting
shadows in your picture if you
flash it from the front. In this
case, rotate the flash head upward
so that it is indirectly illuminated
by the light reflected from the
ceiling. The lighting will thus be
soft and shadows can be practical-
ly controlled. This is called
"bounce flash."
9
Page 10

1. Taking into account the height
of the reflecting surface (ceiling, wall, etc.) and the shooting distance, choose the tilting
10
angle of the flash head. A practical way of bounced lighting
is to tilt the flash head 60° ~
90° so that the light reaches
the subject from the ceiling.
The tilting angles of the flash
head depending on the shoot-
ing distance are shown below.
Use this table only as a guide.
m
1
1.5
2
3
4
ft
3.3
5
6.6
10
13
Tilting
Angle
90°
75°
90"
75°
60'
75°
60"
2. The procedure for picture-taking is the same as that for taking non-bounce-light pictures.
3. The automatic flash ranges for
bounced lighting are approxi-
mately as follows:
Red mark 1 - 4m
(3 ~ 12 ft.)
Green mark 1 - 2m
Do not use the yellow mark.
(3 ~ 6 ft.)
4. The automatic flash range will
differ depending on the reflect-
ing surface. Before shooting,
always press in the Test Button to make sure the Auto
Check Lamp turns on.
5. When the flash head is tilted,
the Auto Strobo 300X will
automatically convert into a
twin flash. For bounce flash,
a sublight located below the
main light will fire at the same
time to insure that the main
subject is correctly exposed.
Page 11

USING THE WIDEANGLE ADAPTER
• Automatic flash range
If you are taking flash pictures
with a 28mm lens, attach the
Wideangle Adapter (included) to
the front of the flash lamp-face.
The illumination angle will thus
cover the view angle of a 28 mm
lens (53° vertical, 70° horizontal).
Since the use of the wideangle
adapter results in a loss of light,
refer to the following instructions
to set the exposure.
If the Wideangle Adapter is used,
the automatic flash range changes
as follows:
Red mark .... 1.5 - 7.6m
Green mark ... 1 - 3.8m
Yellow mark . . 0.7 - 2 m
• Manual flash exposure
In this case, the aperture should
be opend by one step from that
obtained by dividing the guide
number by the flash-subject
distance.
Example: If the shooting dis-
tance is 5 m, the aperture to use is
f/5.6 without wideangle adapter
because 30 5 = 6. With it attached, however, open the aperture by one step and use f/4.
(5~25ft.)
(3.3 ~ 12.5 ft.)
(2.3 ~ 6.6 ft.)
OFF-CAMERA
FLASH OPERATION
It is possible to use Auto Strobo
300X away from the camera by
means of the PC synchro cord
supplied. When employed in this
way, always ensure that the total
flash-to-subject distance is taken
into account, or under-exposure
will result.
Also ensure that the flash unit is
held "square" to the camera, i.e.
do not allow the flash to face
away from a reflecting surface.
11
Page 12

<Fuji Film Abroad>
In North America
In Europe
In South America
In Asia
In Oceania
Printed in Japan
FUJI PHOTO FILM CO., LTD.
26-30, Nishiazabu 2-chome, Minato-ku, Tokyo 106, Japan.
FUJI PHOTO FILM U.S.A., INC.
350 Fifth Ave., New York, N.Y. 10118, U.S.A.
FUJI PHOTO FILM CANADA INC.
743 Renaud Ave., Dorval, P.Q- Canada H9P 2N1
FUJI PHOTO FILM HAWAII, INC.
Pacific International Bldg., Suite 304,
677 Ala Moana Blud., Honolulu. Hawaii 96813, U.S.A.
FUJI PHOTO FILM (EUROPE) G.m.b.H.
4 Dijsseldorf 1, Postfach 3204, Berliner Allee 8, West Germany
FUJI PHOTO FILM (U.K.) LTD.
99 Baker Street, London, W1M 1FB, England
FUJI PHOTO FILM DO BRASIL LTDA.
Caixa Postal 9959, Rua Major diogo, 128, CEP 01, 324, Sao Paulo. Brasil
FUJI PHOTO FILM CO., LTD., HONG KONG OFFICE
15th Floor, Melbourne Plaza, No. 33. Queens Road, Central, Hong Kong
FUJI PHOTO FILM CO., LTD., SINGAPORE OFFICE
Unit 537, 5th Floor, Plaza Singapura, 68, Orchard Road, Singapore, 9
FUJI PHOTO FILM CO., LTD., BANGKOK OFFICE
K 8 Y Bldg., 5th Floor. 16 Surasak Road, Bangkok, Thailand
FUJI PHOTO FILW CO., LTD., TAIPEI OFFICE
Rm. 501 Hung Chong Bldg., No. 20, Chiling Road, Taipei. Taiwan
FUJI PHOTO FILM CO., LTD., SEOUL OFFICE
Mee Wha Building, 30-1, Mukjong-dong, Chung-ku, Seoul, korea
FUJI PHOTO FILM CO., LTD., MANILA OFFICE
16th Floor, Citibank Center Bldg., Paseo de Roxas, Makati, Metro Manila, Philippines
FUJI PHOTO FILM CO., LTD., SYDNEY OFFICE
Hanimex Bldg.. Old Pittwater Road, Brookvale, N.S.W. 2100, Australia
 Loading...