

Pella 81CM0100 User Manual
Part Number: 81CM0100© 2011 Pella Corporation
INSTALLATION INSTRUCTIONS - INSTRUCCIONES DE INSTALACION
ALUMINUM-CLAD SLIDING PATIO DOORS WITH
FLUSH FLANGE
Lea las instrucciones en español en el reverso
Installation Instructions for Replacement of Aluminum Sliding Doors in Hard Coat Stucco
Applications in arid climates.
These instructions are designed for typical hard coat stucco exterior applications in arid climates.
The installation must leave the existing aluminum door frame and weep system in place. These
instructions are not to be used with any other construction method and rely on the integrity
of the existing aluminum sliding door and flashing system. Building designs, construction
methods, building materials, and site conditions unique to your project may require an installation
method different from these instructions and additional care. Determining the appropriate
installation method is the responsibility of you, your architect, or construction professional. If you
have questions, please contact your local Pella retailer.
REMEMBER TO USE APPROPRIATE PERSONAL PROTECTIVE EQUIPMENT.
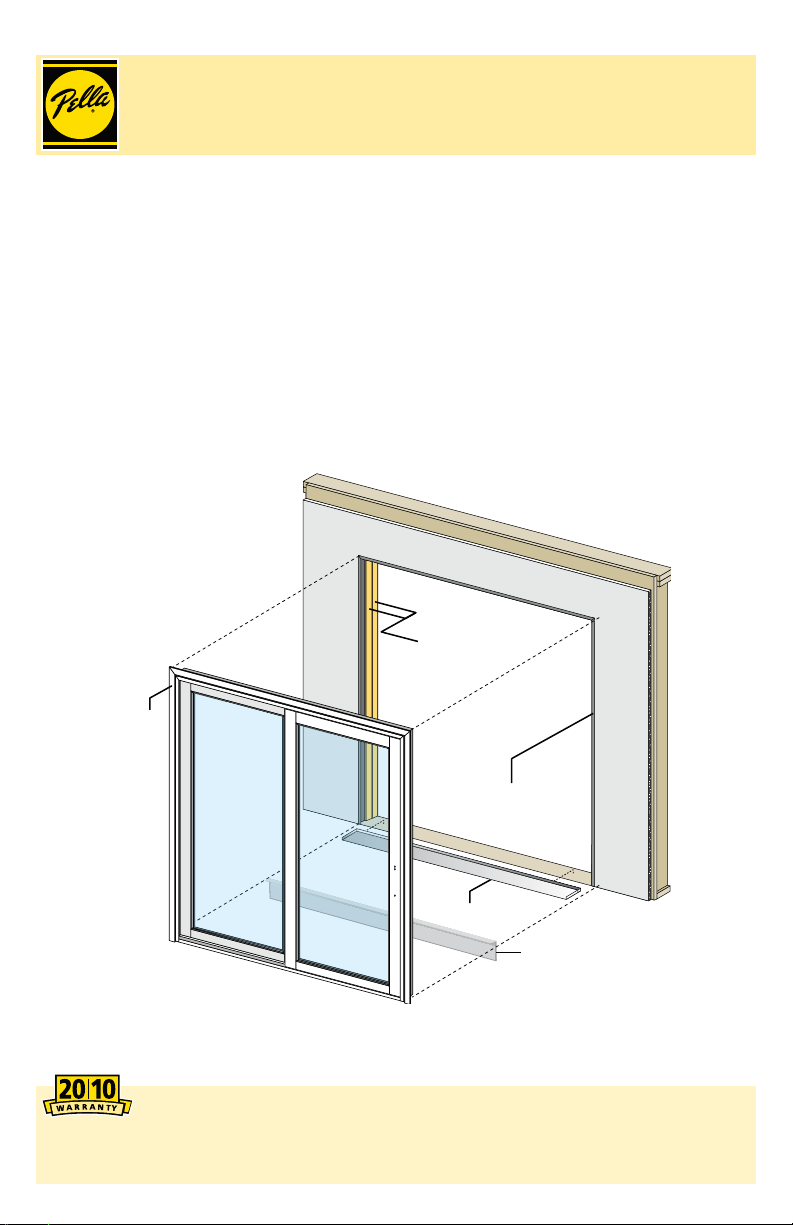
Wood
Blocking
Flush
Flange
Existing Aluminum
Door Frame
Sill Pan
Optional Sill Nose
Always read the Pella® Limited Warranty before purchasing or installing Pella
Warranty is part of the terms of the sale. Failure to comply with all Pella installation and
maintenance instructions may void your Pella product warranty.
See Limited Warranty for complete details at http://warranty.pella.com.
products. By installing this product, you are acknowledging that this Limited
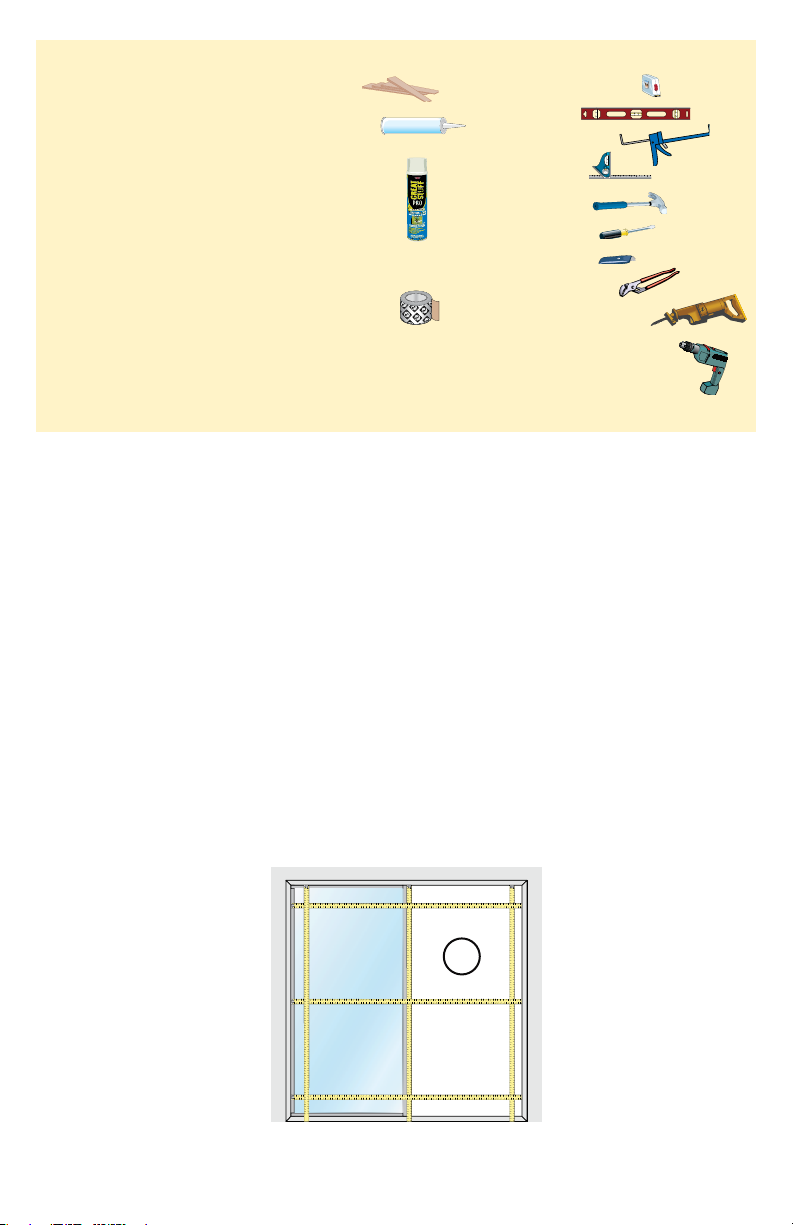
YOU WILL NEED TO SUPPLY: TOOLS REQUIRED:
ŘComposite or Impervious shims/spacers
(12 to 20)
ŘHigh quality exterior grade polyurethane or
silicone sealant (3 to 4 tubes per door)
ŘGreat Stuff™ Window and Door Insulating
Foam Sealant by the Dow Chemical Company
or equivalent low pressure polyurethane
window and door foam - DO NOT use high
pressure or latex foams.
ŘWood blocking, 3/4" x 4" x 96" (2 or 3 pieces)
ŘScrews (#10 x 3-1/2")
ŘPella® SmartFlash™ foil backed butyl flashing
tape or equivalent.
ŘSill pan
Installation will require two or
more persons for safety reasons.
4&"-"/5
4&"-"/5
ŘTape measure
ŘLevel
ŘSealant gun
ŘSquare
ŘHammer
ŘScrewdriver
ŘUtility knife
ŘWide jaw pliers
ŘReciprocating saw
Ř1/8" and 1/4" drill bit
ŘDrill
BEFORE YOU START
1
A. Remove the vent panel from the existing door frame. Check the dimensions of the
existing door and the new door to make sure the new door will fit correctly. The opening
must be 1/2" larger than the new door frame in both width and height. Measurements
should be taken as follows:
Width - measure the inside dimension of existing jambs.
Height - measure from the subfloor or cement slab to the lowest point of the existing head.
Confirm the flange will overlap the stucco by 1/2".
1A
OPENING PREPARATION
2
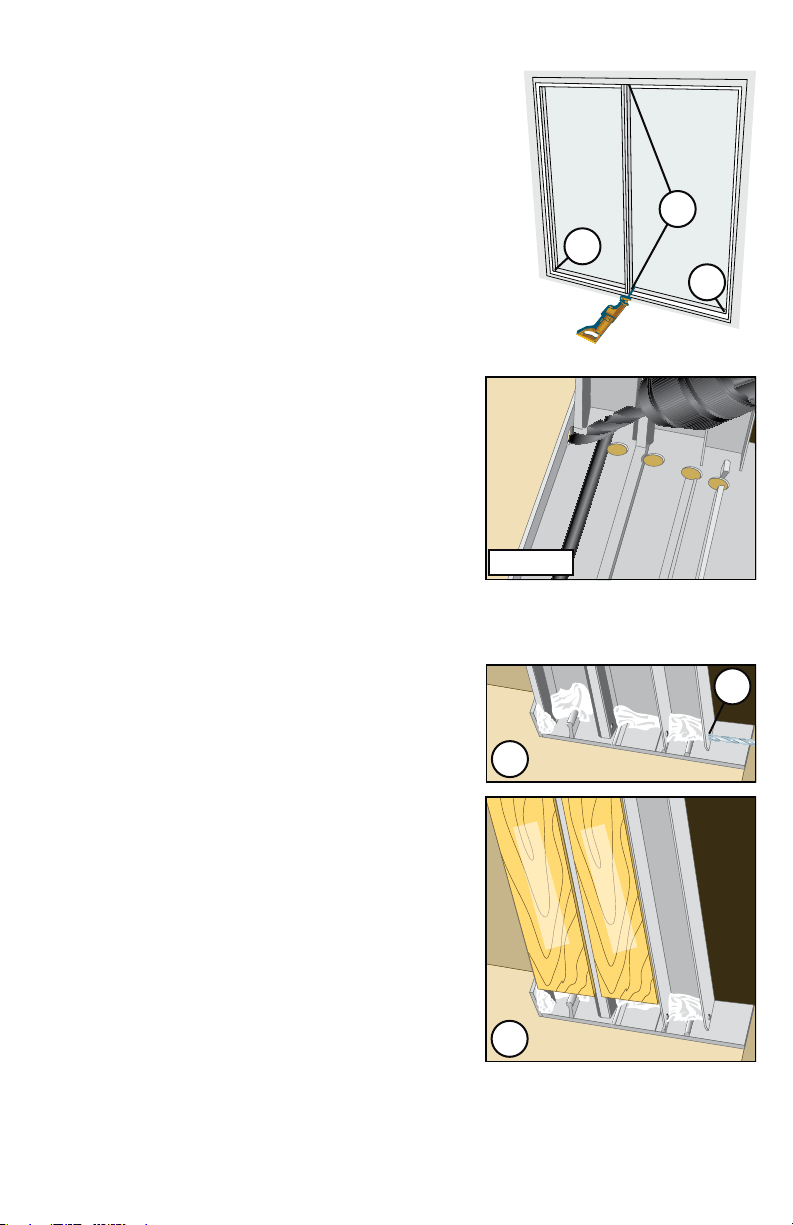
A. Prepare the door opening by removing the venting
panel and the glass from the existing fixed side of the
aluminum door frame.
Note: It may be necessary to cut the divider
between the venting panel and fixed glass areas
with a reciprocating saw. The existing aluminum
frame is left in place so as not to disturb the existing
exterior stucco flashing or drainage system.
B. Cut the existing door sill out of the opening. Using a
reciprocating saw or side grinder, cut the existing sill as
close to the longest leg of the jamb extrusion as possible.
Note: Be careful to avoid damage to the interior
flooring materials. Drilling holes in the sill prior
to cutting may make the removal of the existing
sill easier. If existing sill has a stainless steel cap
on the sill, removing the cap prior to cutting will
make cutting easier.
C. Clean old sealant and other debris from the
door opening.
D. Remove the door lock strike from the lock
jamb of the existing door frame.
2A
2B
2B
2B NOTE
E. Place a bead of sealant at each joint where the
existing door frame jambs meet the existing
door sill pieces. Fill any holes in the jamb and
head with sealant.
F. If the weep holes of the existing sill have been
cut away, drill new weep holes in the existing
door jambs. Be sure to drill weep holes in all
vertical jamb legs, except the most interior leg.
Note: Ensure all new or existing weep holes are
open before proceeding with the installation.
G. Cut wood blocking to fill the vent and fixed panel
cavities in the head and jamb of the existing door
frame. The depth of the blocking should be the
same height as the tallest leg of the existing jamb
extrusion. Cut the head blocking to fill the entire
length of the head in both channels. Cut the
jamb blocking to fill both jamb channels to within
approximately 1" of the bottom of the jamb.
H. Set the wood blocking in sealant in the existing door frame. Make sure the blocking is
flush with the furthest protruding part of the existing jamb. Place a 3/16" bead of sealant
in the door panel cavities, then insert the wood blocking into the head cavities followed
by the jamb cavities. Next insert the wood blocking into the jamb panel cavities of the
existing door frame. Secure the blocking by pre-drilling and inserting #8 x 2-1/2" screws.
INTERIOR
2E
Wood Blocking
2G
Wood Blocking
2F
OPENING PREPARATION (CONTINUED)
2
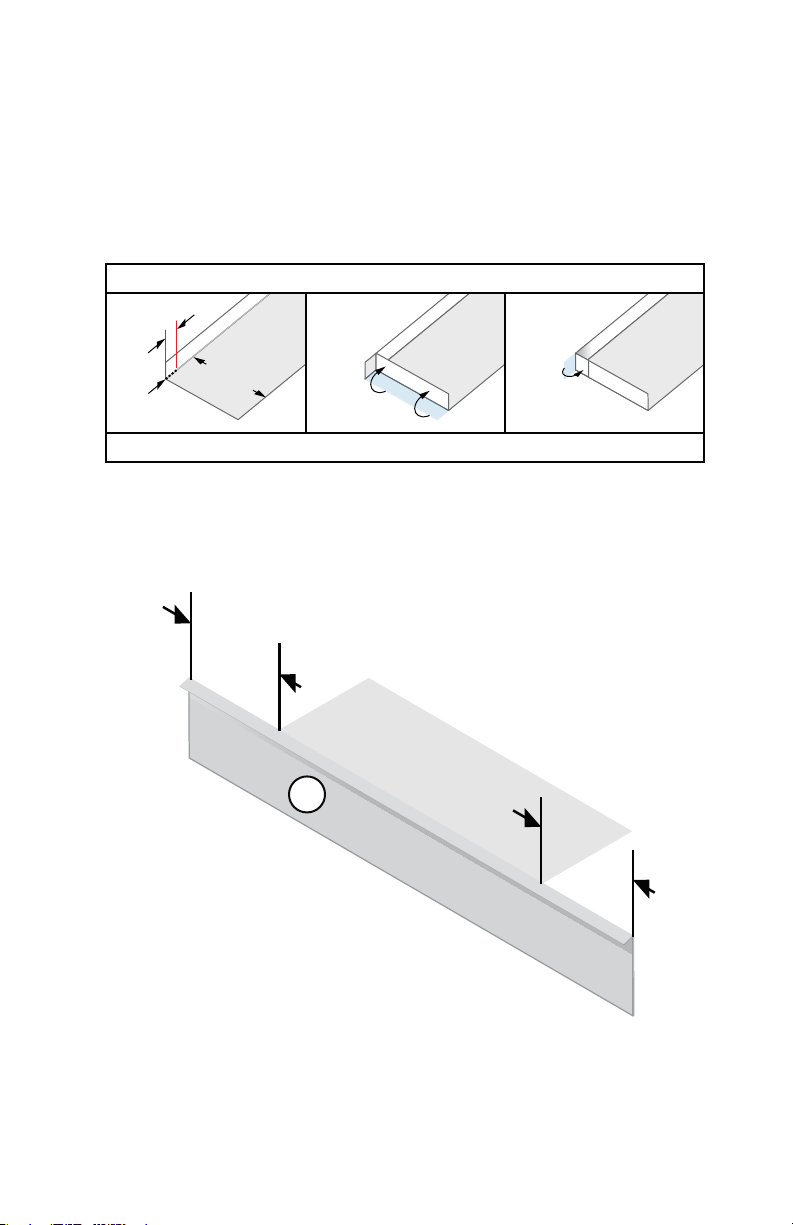
I. Construct a sill pan for the door. Measure the rough opening width and add 2". Measure
1" up from each end and cut through the vertical leg of the pan material. If there is a step
down at the exterior of the door opening, make the sill pan depth equal to the door frame
depth - 2-1/8". If there is NO step down, make the sill pan depth equal to the frame depth.
Bend the bottom (side) flaps of the pan material up, then bend the back leg around the
end of the pan.
Dry fit the sill pan and the door into the opening.
$0/4536$5"%0034*--1"/
i
4JMMQBO
EFQUI
$VU
IFSF
3&1&"545&14'0301104*5&&/%
J. If there is a step down at the exterior of the door opening, cut the sill nosing to the
rough opening width plus two times the flange width. Notch the sill nosing. If there is
NO step down, skip to step K.
'-"/(&
8*%5)
'PME
VQ
FOE
'PME
JOUBC
306()01&/*/(8*%5)
2J
4JMM/PTJOH
'-"/(&
8*%5)
Note: If the new door frame is deeper than the existing door frame, it will be necessary
to cut the interior flooring material back to allow the door flush flanges to contact the
existing aluminum door frame.
 Loading...