

Pella 816G0101 User Manual
© 2010 Pella Corporation
Part Number: 816G0101
INSTALLATION INSTRUCTION - INSTRUCCIONES DE INSTALACIÓN
FOR PELLA
®
PRECISION FIT®, CASEMENT, RENOVATION POCKET
REPLACEMENT AND FIXED WINDOW REPLACEMENT
Lea las instrucciones en español en el reverso.
Important! e Pella Precision Fit Casement Replacement Window is designed to replace older style
double-hung windows. e original window frame will remain in place and only the existing sash
will be removed. e Pella Precision Fit Casement Fixed Window is a companion to the Precision Fit
Casement and is designed to replace the xed center window that shares a common stool and sloped
sill with the adjacent windows and has removable interior stops. is application is typically found
in older homes. e original window frame will remain in place and only the existing sash, glass and
existing stops must be removed. ese instructions are not to be used with any other construction
methods. Read these instructions thoroughly before beginning. Failure to install as recommended will
void any warranty, express or implied. For types of installation other than shown, contact your local
Pella representative or visit http://www.pella.com. Building designs, construction methods, building
materials and site conditions unique to your project may require an installation method dierent
from these instructions and additional care. Determining the appropriate installation method is the
responsibility of you, your architect or construction professional.
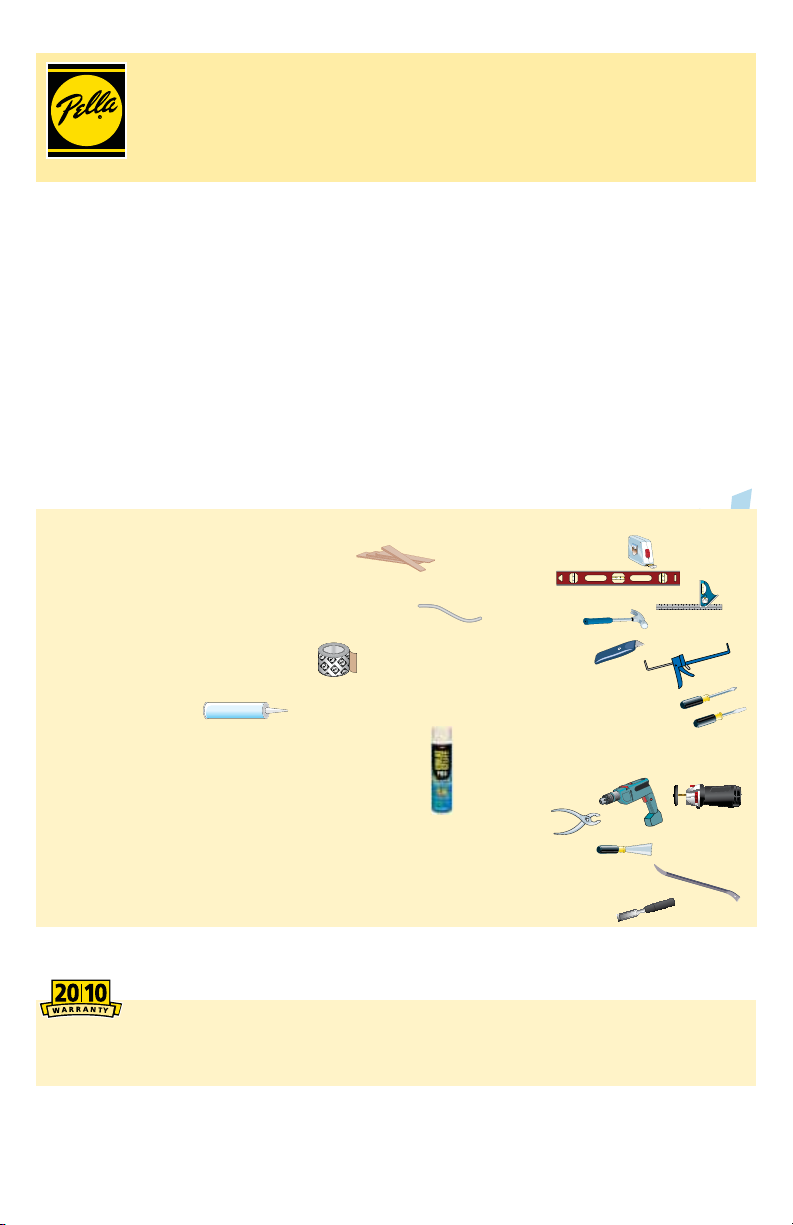
YOU WILL NEED TO SUPPLY: TOOLS REQUIRED:
• Cedar or Impervious shims/spacers (12 to 20)
• Wood blocking and bracing
• Closed cell foam backer rod/sealant backer (12 to 30 ft.)
• Pella® SmartFlash™ foil backed butyl window
and door ashing tape or equivalent
• High quality exterior grade polyurethane or silicone sealant
(1 tube per window)
SEA
SEA
LAN
LANT
T
• Tape measure
• Level
• Square
• Hammer
• Utility knife
• Sealant gun
• Screwdrivers
(#2 Phillips and Flat blade)
• Great Stu ™ Window and Door Insulating Foam Sealant
by the Dow Chemical Company or equivalent low pressure
• Rotary cutting tool w/ cut-o wheel (if
existing window has press t pulleys)
polyurethane window and door foam -
DO NOT use high pressure or latex foams
• Drill
• Pliers
• Putty Knife
Installation will require two or more
persons for safety reasons.
• Pry bar
• T-25 TORX® Driver
• Chisel
REMEMBER TO USE APPROPRIATE PERSONAL PROTECTIVE EQUIPMENT.
Always read the Pella Limited Warranty before purchasing or installing Pella products.
By installing this product, you are acknowledging that this Limited Warranty is part of the terms of
the sale. Failure to comply with all Pella installation and maintenance instructions may void your Pella
product warranty. See Limited Warranty for complete details at http://warranty.pella.com.
CAUTION: Many windows in older homes are painted with lead-based paint. Removal of old
windows may disturb this paint. Proper precautions must be taken to minimize exposure to dust
and debris. Consult state or local authorities for more information.
INTERIOR
INTERIOR
Flashing tape
Pocket Replacement –
Go to Step 1 SASH REMOVAL
POCKET REPLACEMENT:
1
SASH REMOVAL
Note: Verify the opening and window dimensions prior to removing the existing
window sash.
POCKET REPLACEMENT
&YUFSJPS
CMJOETUPQ
$
1BSUJOHTUPQ
*OUFSJPS
"
TBTITUPQ
"
Flashing tape
Fixed Window Replacement – Go to
Step 6 FIXED SASH REMOVAL on page 7
#BMBODF
DPSEQVMMFZT
*OUFSJPS
TBTITUPQ
1BSUJOH
TUPQ
4UPPM
"QSPO
#PUUPN
TBTI
#PUUPN
CBMBODF
DPSET
5PQTBTI
&YUFSJPS
CMJOE
TUPQ
4JMM
5PQ
CBMBODF
DPSE
#PUUPN
TBTI
XFJHIU
5PQTBTI
XFJHIU
A. Score paint or varnish along interior sash stops with a sharp utility knife.
Remove the interior sash stops at jambs (sides) and head (top) using a putty knife
and pry bar.
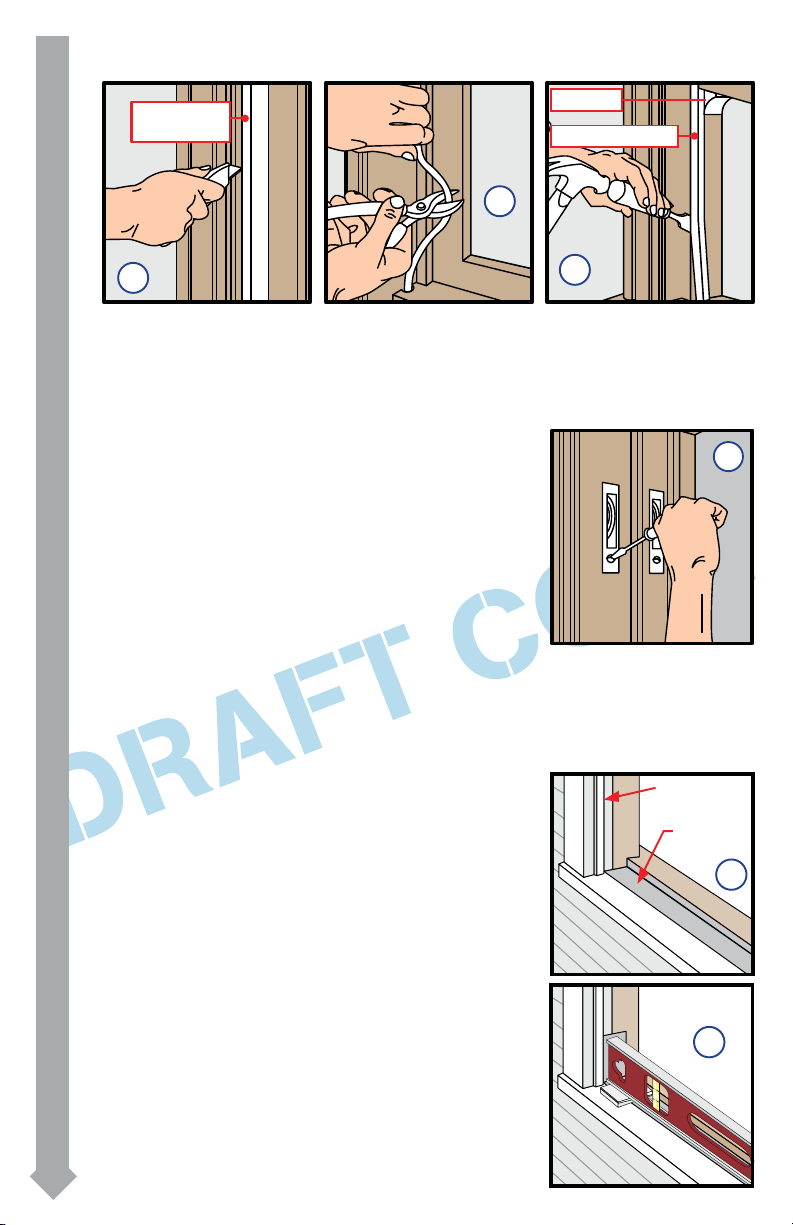
1
SASH REMOVAL (CONTINUED)
*/5&3*03
4"4)4501
8&%(&
1"35*/(4501
#
"
B. Cut the balance cords on the bottom sash and lift out the sash. Allow weights to fall
to the bottom of the weight pocket.
C. Remove the parting stops by prying them out or by pulling them out with a channel
lock. ere may be a small wedge of wood at the bottom of the upper sash that is next
to the parting stops. To make it easier to remove the parting stop, use a chisel to knock
o the wedge.
POCKET REPLACEMENT
D. Lower the top sash and cut the balance cords
allowing the balance weights to fall into the weight
pocket. Remove the top sash.
E. Remove the balance cord pulleys. Unscrew and
remove the balance cord pulleys. If the pulleys are
press-in t type, follow these steps:
1. Cut o accessible portions of the collars using a rotary
cutting tool with cut-o wheel.
2. Bend up the remaining areas of the collars.
3. Knock the pulleys into the balance cavity. (e pin will fall with the pulleys.)
4. If desired, remove pulleys via bottom balance access panel.
NOTE: If the pulleys and pins are not removed, they may interfere with the
replacement window’s attachment screws.
F. If desired, insulate the weight chamber by lling it
with low pressure window and door insulating foam.
2
PREPARE THE OPENING
A. Apply one piece of sill ashing tape to the sill of the
existing window. Cut the tape the same length as the
width of the existing window sill. Place one side of the
tape against the vertical leg of the stool, and work the
tape into the corner before applying to the sill. Press
down rmly. DO NOT allow the ashing tape to
extend past the blind stops.
$
&
#MJOETUPQ
'MBTIJOH
5BQF
"
B. Check to ensure the existing sill is level and not
bowed (humped) upward. If necessary, place shims
on the bottom of the window opening 1/2" from each
side. Shim sill only at the jambs. Once level, attach
shims to prevent movement.
Note: Improper placement of shims may result in
bowed (humped) sill.
2B

2
PREPARE THE OPENING (CONTINUED)
C. Remove plastic wrap and card board packaging from window. DO NOT remove
plastic shipping spacers located between the window sash and frame. e shipping
spacers will help keep the window square during installation. DO NOT unlock or
open window until it is fully fastened in the opening.
Note: If screens, grilles or hardware are removed from the window at this time,
label them and store them in a protected area.
D. Test t the window. e window should be
approximately 1/2” smaller than the opening
in both width and height. Measure the distance
between the frame and the sloped sill, this will
be the height to which to cut the sill adapter.
Check to ensure the window rests against the
exterior blind stops and will make contact with
the sealant to be applied in steps 3 A, B, and C.
Conrm the installation screws will fasten into
solid wood. If not, repair the existing frame to
ensure there is solid wood at the installation
screw locations.
POCKET REPLACEMENT
E. Trim the sill adapter to the proper
height by breaking o the grooved leg at
the desired dimension (see chart). Once
trimmed, apply a bead of sealant to the sill
adapter. Attach the sill adapter into the sill
by using a board and hammer.
Note: Scoring the leg groove multiple times
at the desired dimension with a utility
knife will help the leg break easier. e sill
adapter may also be trimmed to correct
dimension using a table saw.
2E
2D
Sill Adapter
Sealant goes here
5/16” - 3/8”
7/16” - 1/2”
9/16” - 5/8”
11/16” - 3/4”
13/16” - 7/8”
15/16” - 1”
Score leg at desired dimension.
Use pliers to break off leg.
2E
2E
Sealant
Sill Adapter
3
SEALING AND FASTENING THE WINDOW
A. Apply a 3/8" continuous bead of sealant to the
interior face of the existing blind stops at the head
and both jambs.
Note: Sealant bead placement is critical to ensure
contact with replacement window
Head blind
stop
Jamb
blind
stop
3A
 Loading...