

Pella 812WO100 User Manual

© 2009 Pella Corporation
INSTALLATION INSTRUCTION - INSTRUCCIONES DE INSTALACIÓN
FOR CLAD AWNING, CASEMENT &
NON-RECTANGULAR CASEMENT WINDOW
pARA LAS VENTANAS DE MADERA RECUbIERTAS DE ALUMINIO
TIpO bISAGRAS, bATIENTE y bATIENTE NO-RECTANGULAR
Part Number: 812W0100
Corner
Flashing
Tape
Corner
Flashing
Tape
Top
Flashing
Tape
Side
Flashing
Tape
Fin
Corner
Side
Flashing
Tape
Window Bottom
Window Top
Nailing Fin
Sill Flashing Tape #1
Sill Flashing Tape #2
Water Resistive Barrier
Sheathing
Framing
Always read the Pella® Limited Warranty before purchasing or installing Pella products.
By installing this product, you are acknowledging that this Limited Warranty is part of the terms of
the sale. Failure to comply with all Pella installation and maintenance instructions may void your Pella
product warranty. See Limited Warranty for complete details at http://warranty.pella.com.
Installation Instructions for Typical Wood Frame Construction.
These instructions were developed and tested for use with typical wood frame wall construction
in a wall system designed to manage water. These instructions are not to be used with any
other construction method. Installation instructions for use with other construction methods,
multiple units or bow and bay windows, may be obtained from Pella Corporation, a local Pella
retailer, or by visiting http://www.pella.com. Building designs, construction methods, building
materials, and site conditions unique to your project may require an installation method
different from these instructions and additional care. Determining the appropriate installation
method is the responsibility of you, your architect, or construction professional.
YOU WILL NEED TO SUPPLY: TOOLS REQUIRED:
Exterior
1D
• Cedar or Impervious shims/spacers (12 to 20)
• 2" galvanized roofing nails (1/4 lb.)
• Closed cell foam backer rod/sealant backer (12 to 30 ft.)
• Pella® SmartFlash™ foil backed butyl window and door
flashing tape or equivalent
• High quality exterior grade polyurethane or silicone sealant
SEALANT
(1 tube per window)
SEALANT
• Great Stuff ™ Window and Door Insulating Foam Sealant
by the Dow Chemical Company or equivalent low pressure
polyurethane window and door foam - DO NOT use high
pressure or latex foams
• Interior trim and/or jamb extensions (15 to 40 ft.)
• Tape measure
• Level
• Square
• Hammer
• Stapler
• Scissors or utility knife
• Small flat-blade screwdriver
• Sealant gun
REMEMBER TO USE APPROPRIATE PERSONAL PROTECTIVE EQUIPMENT.
ROUGH OpENING pREpARATION
1
A. Verify the opening is plumb and level.
Note: It is critical that the bottom is level.
B. Verify the window will fit the opening.
Measure all four sides of the opening to make
Interior
1A
sure it is 3/4" larger than the window in
both width and height. On larger openings
measure the width and height in several
places to ensure the header or studs are not
bowed.
Note: 1-1/2" or more of solid wood blocking
is required around the perimeter of the
opening. Fix any problems with the rough
opening before proceeding.
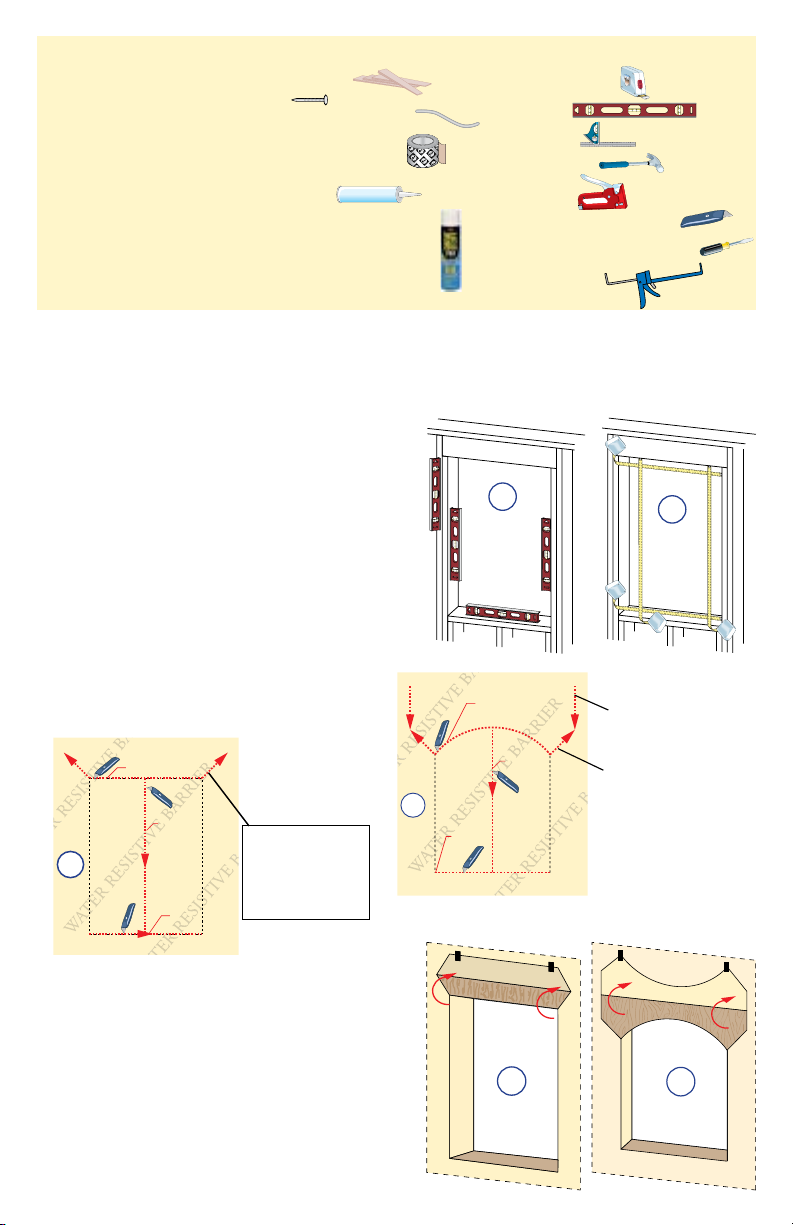
C. Cut the water resistive barrier (1C).
Water Resistive Barrier
1st cut
1C
3rd cut
2nd
cut
4th cut:
Make a 6" cut up from
each top corner at a 45˚
angle to allow the water
resistive barrier to be
lapped over the fin at the
head of the window.
Water Resistive Barrier
st
cut
1
2nd cut
1C
3rd cut
5th cut:
Cut down to meet the 6"
45° cut on each corner.
4th cut:
Make a 6" cut up from
each top corner at a 45°
angle to allow the water
resistive barrier to be
lapped over the fin at the
head of the window.
*Additional shape cut patterns at end of instruction.
Interior
1B
D. Fold the water resistive barrier (1D). Fold
side flaps into the opening and staple to
inside wall. Fold top flap up and temporarily
fasten with flashing tape.
Exterior
1D
ROUGH OpENING pREpARATION (continued)
1
E. Apply sill flashing tape #1. Cut a piece of flashing tape 12"
longer than the opening width. Apply at the bottom of the
opening as shown (1E) so it overhangs 1" to the exterior.
Note: The tape is cut 12" longer than the width so that it
will extend 6" up each side of the opening.
F. Tab the sill flashing tape and fold. Cut 1" wide tabs at each
corner (1/2" from each side of corner) (1F). Fold tape to the
exterior and press firmly to adhere it to the water resistive
barrier.
G. Apply sill flashing tape #2. Cut a piece of flashing tape
12" longer than the opening width. Apply at the bottom,
overlapping tape #1 by at least 1". Do not allow the tape to
extend past the interior face of the framing (1G).
Note: The flashing tape may not fully cover the framing
members.
SETTING AND FASTENING THE WINDOW
2
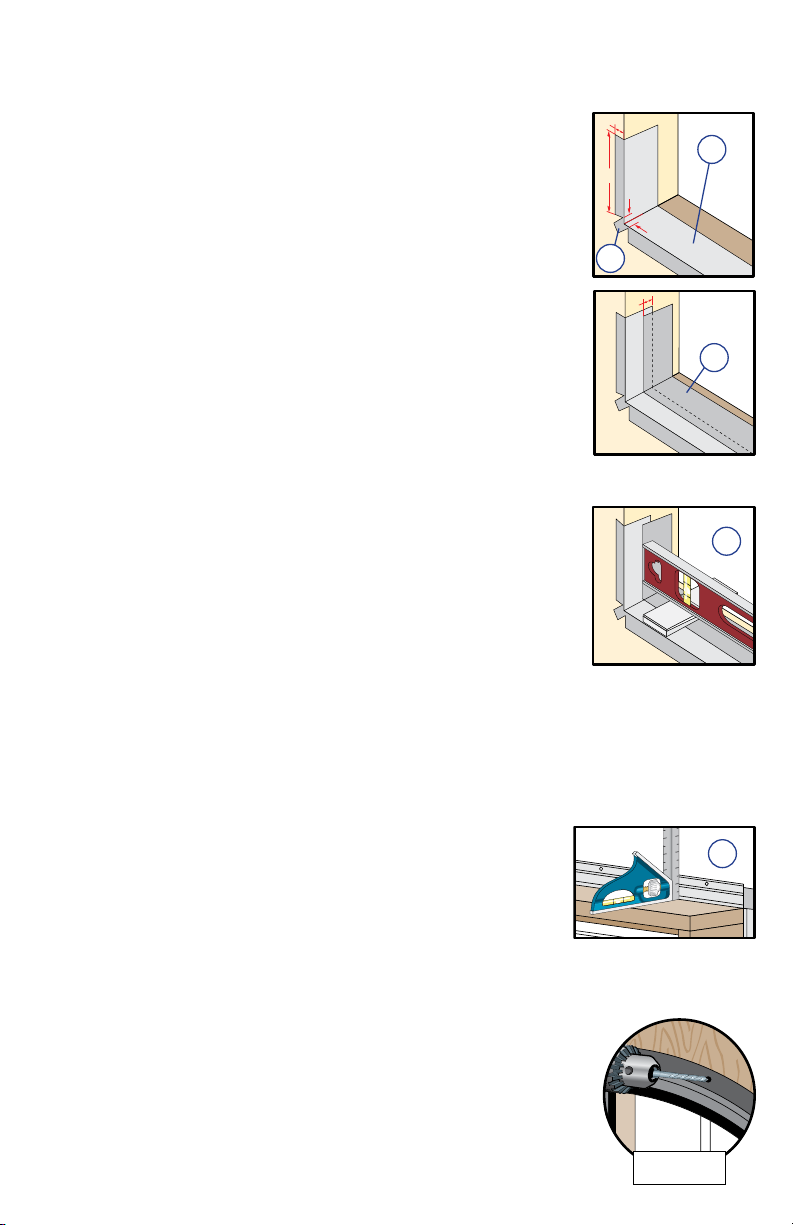
A. Install and level sill spacers. Place 1" wide by 3/8" thick spacers
on the bottom of the window opening 1/2" from each side.
Spacers are also required at points where windows are joined in
multiple window applications. Add shims as necessary to ensure
the spacers are level. Once level, attach spacers and shims to
prevent movement.
Note: Improper placement of shims or spacers may result in
bowing the bottom of the window.
B. Remove plastic wrap and cardboard packaging from window. DO NOT remove plastic
shipping spacers located between the window sash and frame. The shipping spacers will
help keep the window square during installation. DO NOT unlock or open the window
until it is fully fastened.
Note: If screens, grilles or hardware are removed from the window at this time, label
them and store them in a protected area.
1"
6"
1F
1"
1/2"
1/2"
1E
1G
2A
C. Fold out installation fin to 90°. Be careful not to remove or
tear the fin corners.
Note: If the fin is not at 90
correctly on the interior.
D. Curved Units with Fins:
Curved Units with frame radius > 12" will be provided with fixed fin.
On windows with fixed extruded fin, drill 1/8" diameter holes in the fin every 12".
°, the window will not line up
Fixed
Extruded Fin
2C
 Loading...