

Pella 80ML0106 Installation Instruction

Page 1 of 6
INSTALLATION INSTRUCTION – INSTRUCCIONES DE INSTALACIÓN
DESIGNER SERIES® HINGED GLASS PANEL,
GRILLE, BLIND AND SHADE INSTRUCTIONS
© 2016 Pella Corporation
CAUTION:
DO NOT remove or cut the white cord that limits the opening of the hinged
glass panel. Doing so may cause serious damage, including glass breakage, to your
Pella product. The cord should only be detached by a qualified service technician when
performing service related procedures.
Latch
release
Shade
operator
handle
Latch
release
Casement window is shown.
Part Number: 80ML0106
Table of Contents:
1. Operating the Hinged Glass Panel
2. Grille Removal and Installation
3. Bottom Up Slimshade Blind and Cellular Shade Removal and Installation
4. Tilt Only Slimshade Blind Removal and Installation
5. Top Down Cellular Shade Removal and Installation
Page 2 of 6
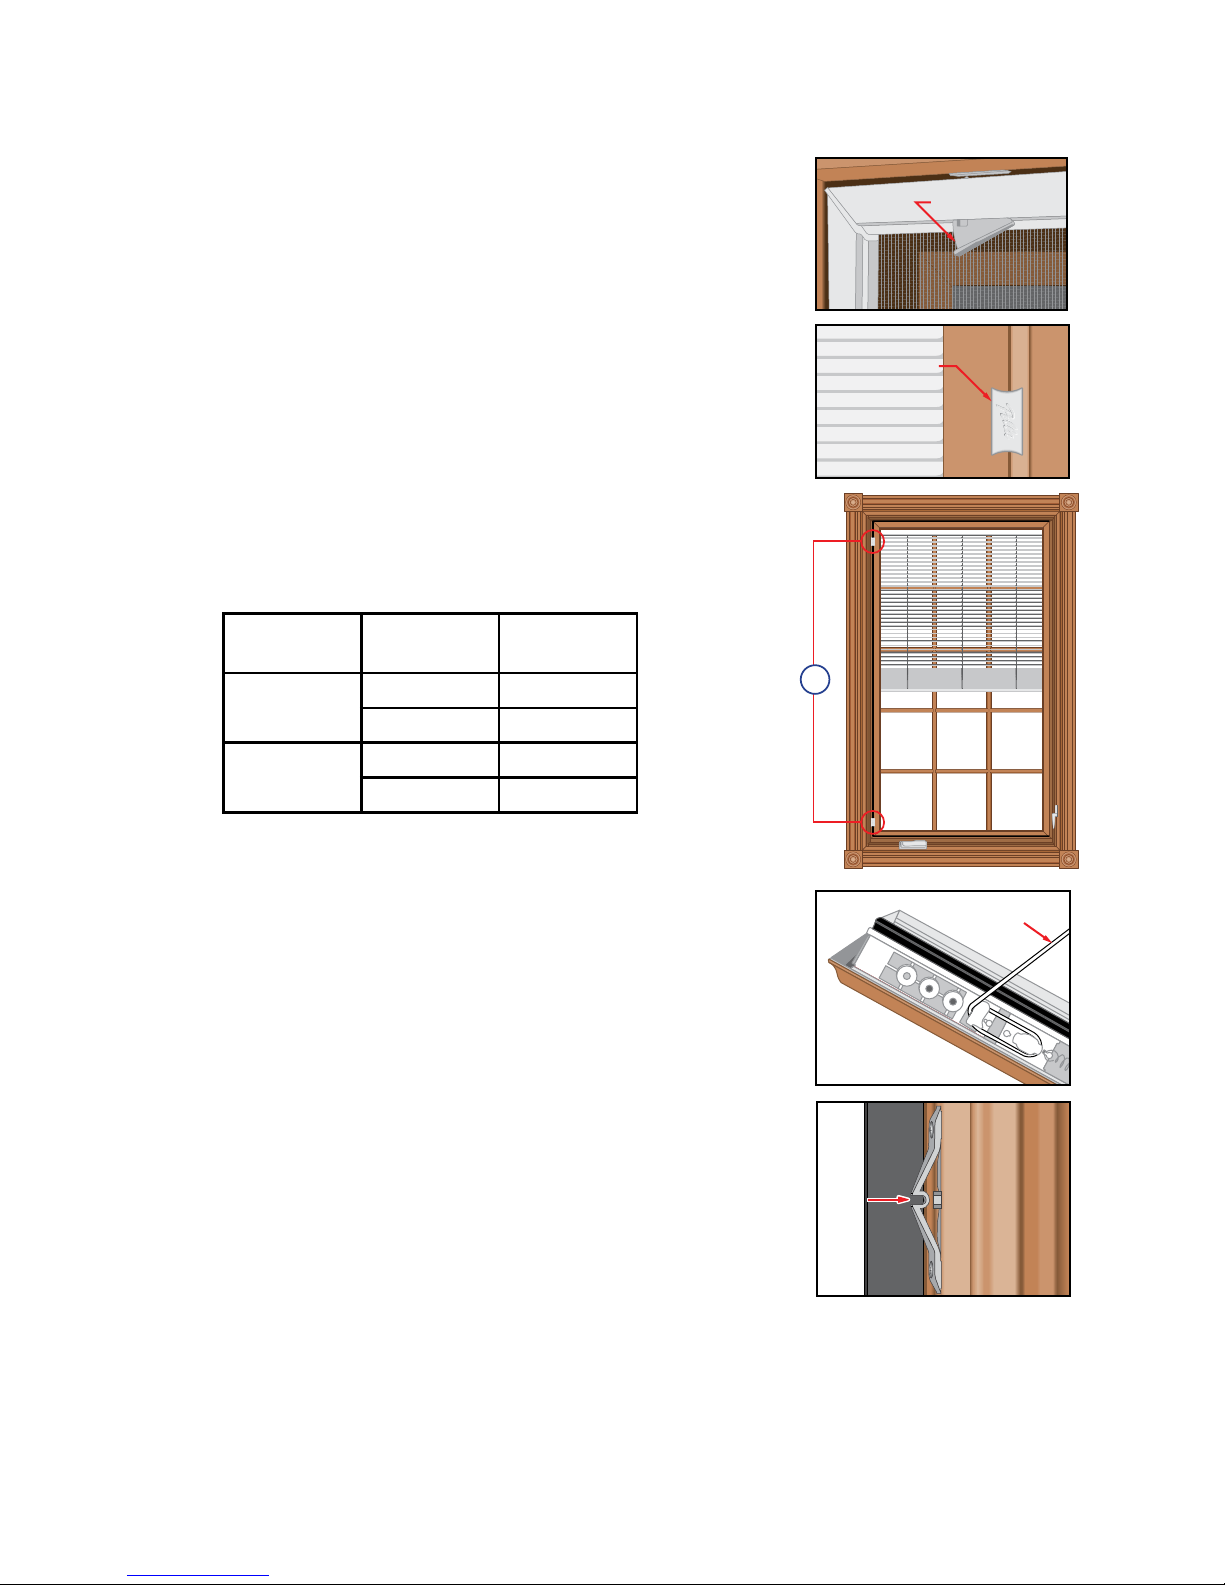
1
OPERATING THE HINGED GLASS PANEL
Note: For products other than venting casement windows,
proceed to Step C.
A. Casement window with flat screen: Remove the flat screen
by unlatching the screen clips and pulling the screen to the
interior.
B. Casement window with Rolscreen: Unlock and open the
sash to 90° so that the hinged panel will not interfere with the
Rolscreen.
C. Locate the latch release(s) on a side or top of the hinged glass
panel. On large panels check the top and bottom for additional
latch releases.
D. Slide each latch release away from the corner(s) of the sash.
You will feel resistance at the latching points. Push past the
resistance. (On venting double-hung windows, slide the latch
release from the center toward one corner then back toward
the opposite corner.)
E. Return the latch releases to the original positions.
Screen Clip
Latch Release
1E
Product
Type
Frame
Height
Number of
Latches
Fixed or Vent
Casement
> 53" 3
≤ 53" 2
Door
> 82.5" 4
≤ 82.5" 3
Latch
DO NOT unhook
or cut cord
F. Open the hinged glass panel. DO NOT unhook or cut the white
cord that restricts the opening of the hinged glass panel.
Note: Hinged glass panels may be hinged on a side or at the bottom
depending on the unit type.
G. Close the hinged glass panel, noting the latch locations. Press
firmly on the hinged glass panel frame at the latch locations
until you hear a click which indicates the latch has engaged.
Note: Ensure all latches are engaged.
 Loading...