

Pella 6000, 3010, 3020, 4601, 4602 Owner's Manual And Installation Manual
...
Part Number:
Owner’s Guide and Installation Manual
®
PELLA
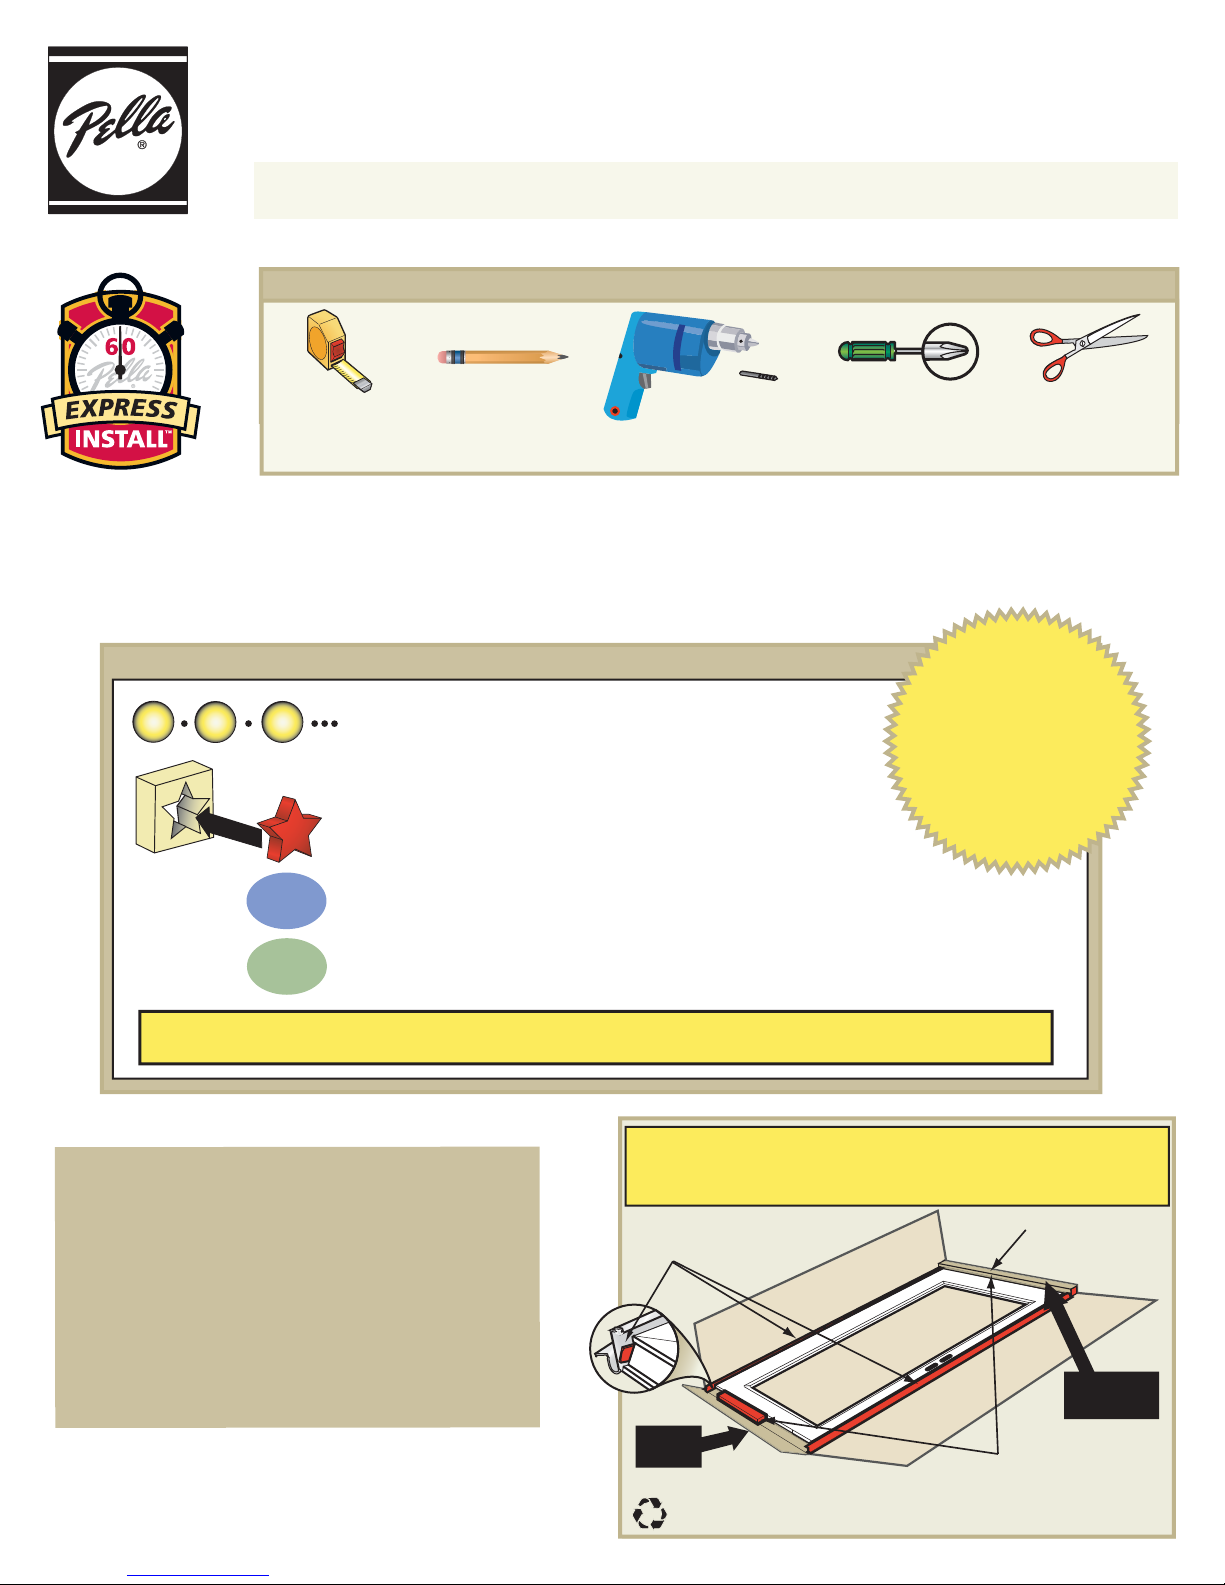
Read the legend below in order to easily follow along and install your storm door.
For reference, the storm door assembly is illustrated on page 2.
EXPRESS INSTALL™ STORM DOOR MODELS
NOTE TO THE INSTALLER: This Owner's Guide and Installation Manual is the property of the
homeowner. Please leave it with the homeowner upon completion of the installation.
Tools required
2
1
Tape Measure
For safety reasons, the assistance of a second person is recommended when handling the door.
Pencil
Power Drill with
3/32” drill bit
Phillips
Screwdriver #2
33258
Scissors
Legend
1
2
Insert
MUST READ!
3
Follow the steps in order, from 1 to 35.
RED objects are the action items for that step.
Steps in BLUE apply to LEFT HINGE configurations ONLY.
(Hinge side will be determined in a later step.)
Steps in GREEN apply to RIGHT HINGE configurations ONLY.
(Hinge side will be determined in a later step.)
Instructions in this box style are IMPORTANT!
To order replacement parts, call
1-800-374-4758
or visit us at
www.pella.com
NEW
Installation
Procedure.
Follow this manual for
a fast and proper
installation.
Lay door flat.
Before discarding the carton, make sure ALL parts are
accounted for -- check in carton roll-ups.
Loose
Parts
Loose Parts
(In Roll-up)
Please have your registration number
ready when you contact us either by
telephone or on the internet.
TROUBLE SHOOTING GUIDE
is located on page 12 of this manual
Carton
Roll-up
The carton material is recyclable
Carton
Roll-up
Hardware
Kit(s)
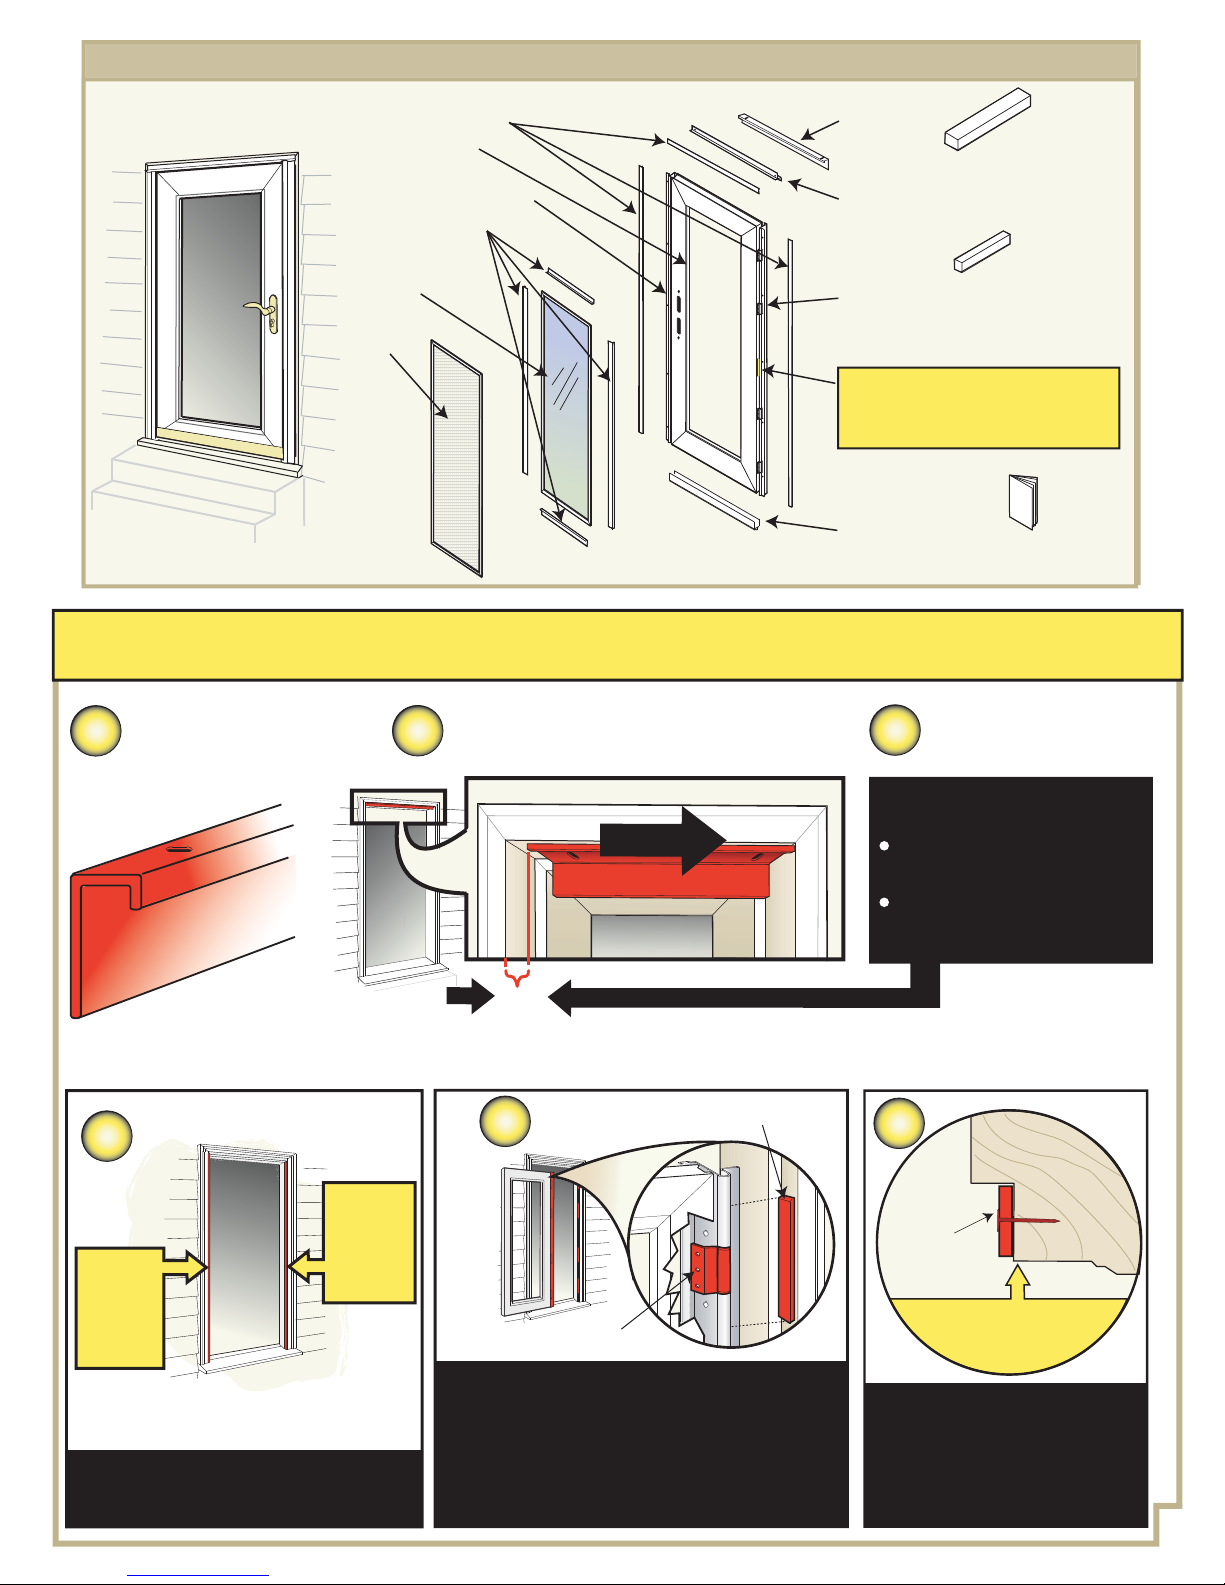
Storm Door Components
NOTE: Actual door styles may vary from illustrations, however, the installation steps will be the same.
Screw Cover Strips
Door
Latch Mounting Frame
Glass/Screen
Retainer Strips
Glass
Screen
Header
Frame
Top
Mounting
Frame
Hinge
Mounting
Frame
Registration
Number
Bottom
Expander
Hardware Kit
Door Closers
Includes mounting
screws and some
handle components
Handle Kit
Includes handle
hardware with
separate instruction
sheet
This is your door’s
identification number.
Leave this sticker on
your door.
Installation
Instructions
Before you Begin Follow steps a, b and c to verify your entryway opening requirements.
Locate header
a
frame.
b
d
RIGHT
HINGE
doors,
LEFT
HINGE
doors,
shim this
side
Shim on YOUR hinge side - see Step 6
on Page 3, to determine your hinge
side.
© 2004 Pella Corporation All Rights Reserved
shim this
side
Slide to one side of the entryway.
Slide Tight
Gap
e
Hinge
Shim may be one long piece or small 8” to
12” sections.
NOTE: small sections must fully support the
hinges on the mounting frame.
Use an appropriate shim thickness to
reduce the gap in step C, to 1/4” or less.
Household shim materials may include paint stir
sticks or wooden yardsticks.
Shim
Measure gap.
c
If this gap is ...
LESS than 1/4”,
Go to START on page 3
1/4” or GREATER,
Go to Step d, to shim
Note: if this gap is over 9/16”,
a custom storm door is required.
f
Shim
Shim must not
extend beyond
entryway face
Nail shims in place.
Note: If you removed an older
storm door, you may wish to
paint and cover any existing
holes before proceeding.
Go to START on page 3.
2
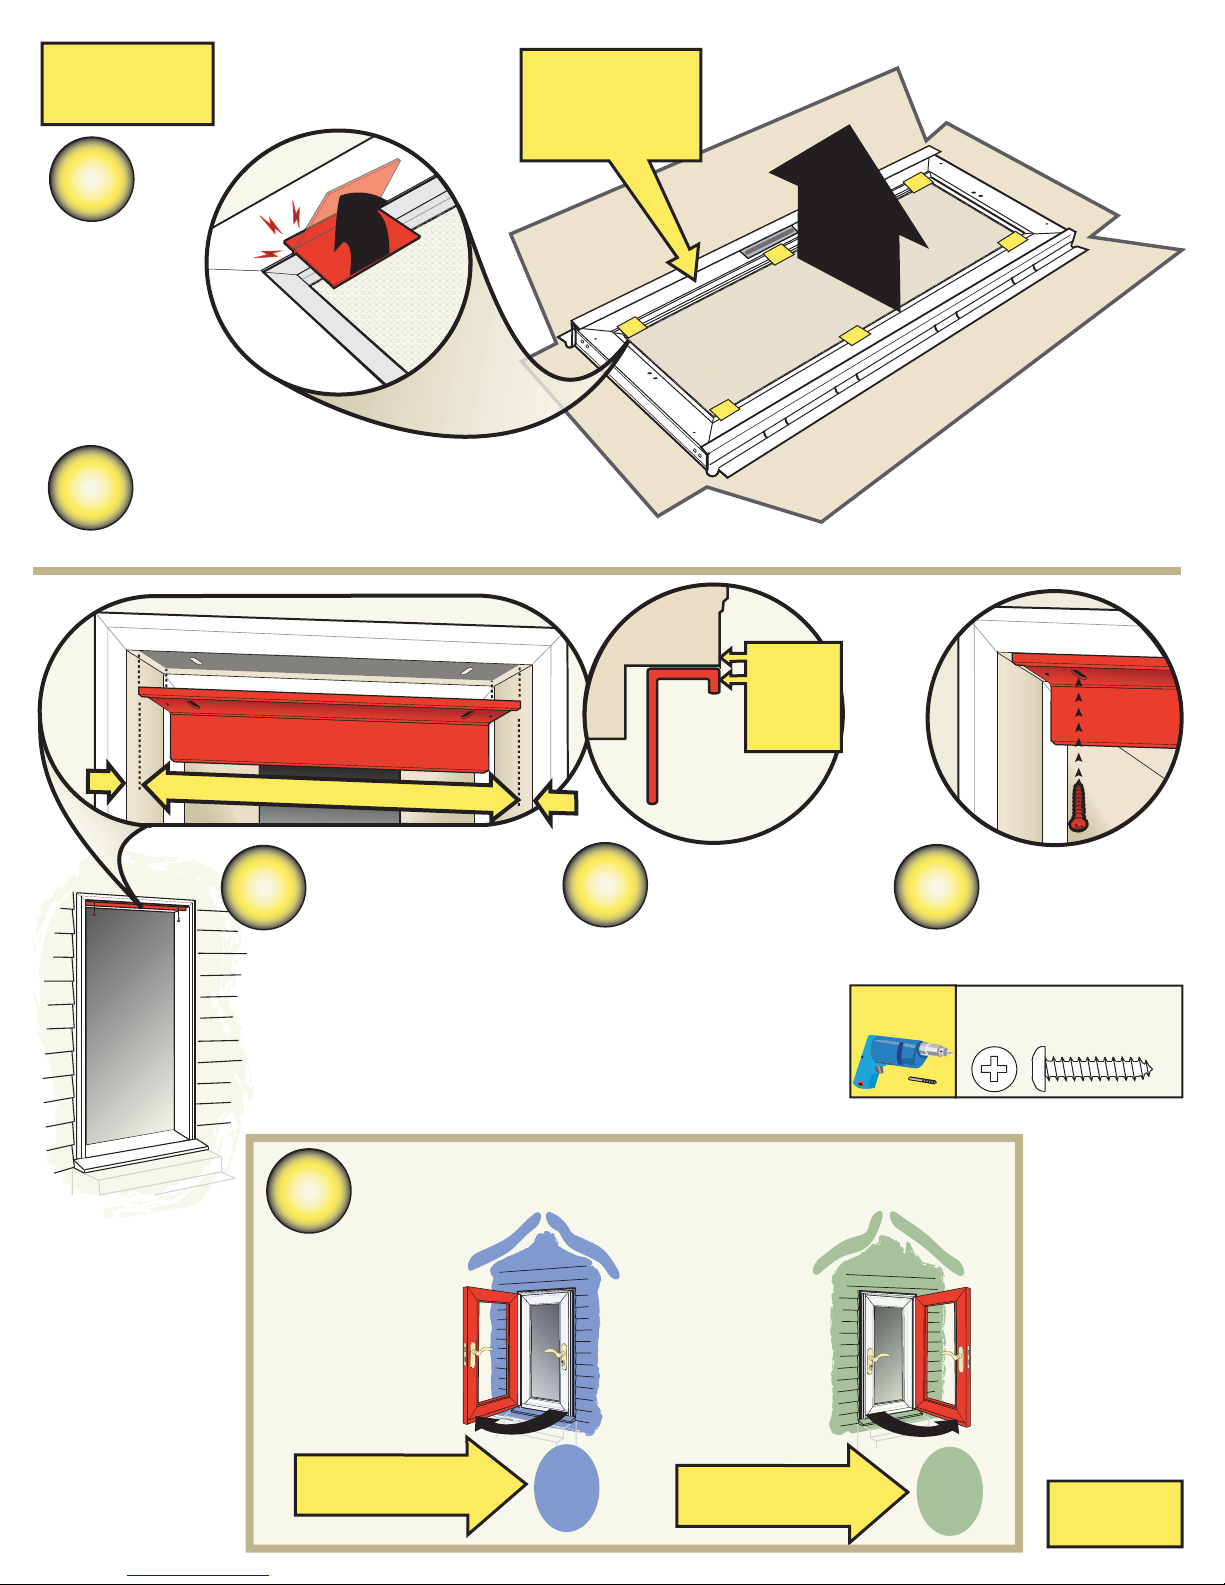
START
Your Installation
Remember
this is the
INTERIOR SIDE
of the door
1
Turn door
over.
Remove
shipping
clips.
Remove glass
2
and screen.
Snap
Lift
Remove
glass
and
screen
Align
outer
edges
Center in Opening
FIRST, center
3
header frame in
entryway
opening ...
Determine the side you want your door to hinge.
6
4
S
I
D
E
W
E
I
V
... THEN,
align with face
of brickmold.
5
Drill 3/32”
Pilot Holes
Predrill the
two holes.
Secure with
jamb screws.
Qty.
“Jamb Screw Bag”
2
unpainted
#8 x 3/4” Pan Head
Le Hinge
Orientation
viewed from outside
LEFT HINGE
Watch for this color
throughout the manual
3
Right Hinge
Orientation
viewed from outside
RIGHT HINGE
Watch for this color
throughout the manual
Continued
on page 4
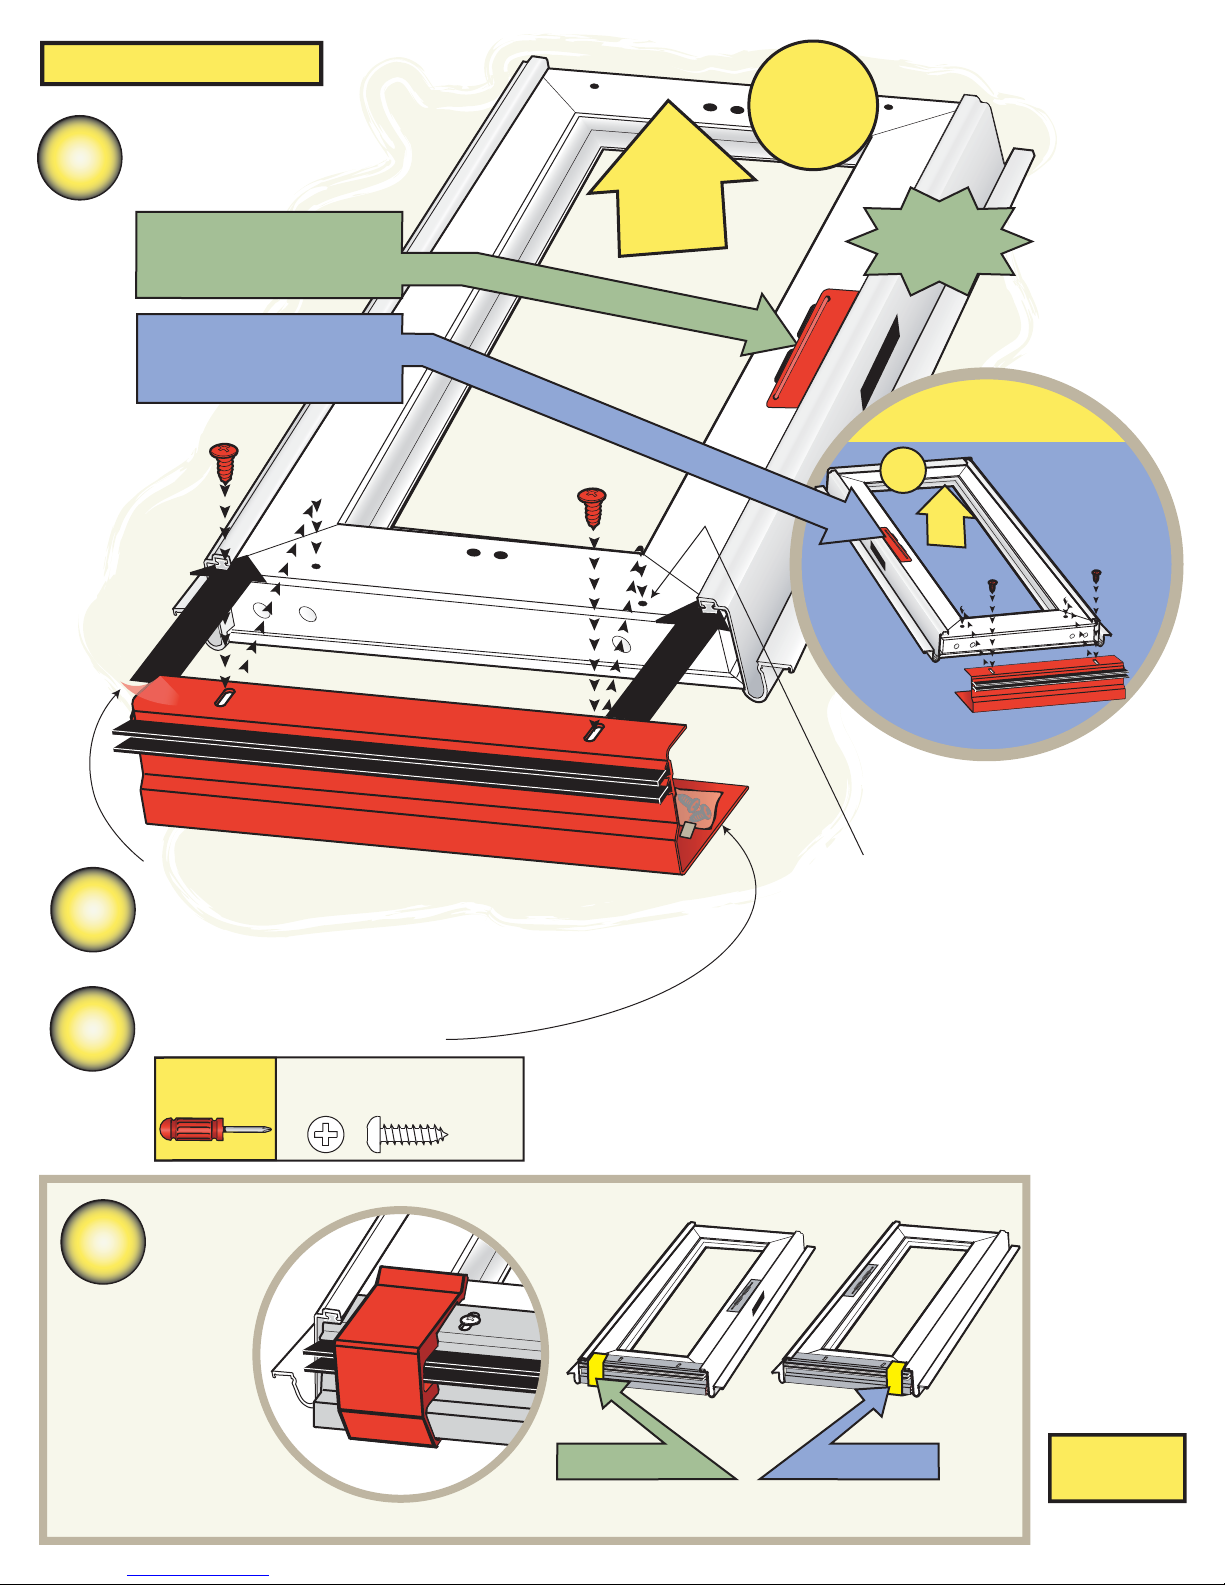
Continued from Page 3
Position door for
7
LEFT hinge or
RIGHT hinge.
RIGHT HINGE DOORS
position metal plate
on this side.
LEFT HINGE DOORS
position metal plate
on this side.
Inside
Facing
UP
This is
the TOP
of Your
Door
Right
Hinge
Illustrated
Left Hinge
Illustration
This is
the TOP
of Your
Door
Inside
Facing
UP
8
9
Slide
Remove any protective film.
Slide boom expander
tight onto boom of door.
Secure with screws
(Bag taped inside expander).
Use a HAND
Screwdriver
Qty.
#6 x 1/2” Pan Head
2
(Extra screw provided)
Slide
Factory
Drilled
Holes
10
Place
installation
support block
on door’s
HINGE side.
Right Hinge
Left Hinge
Continued
on page 5
4
 Loading...