

Pelco Calipsa Integration Guide — Vivotek user-guide

Calipsa® Vivotek Integration
User Guide
Document number:C6746M
Publication date:03/23
C6746M | 03/23 1

Calipsa® Vivotek Integration User Guide
Table of Contents
Introduction 3
Vivotek 3
Adding a Vivotek Camera to Calipsa 3
Creating a Site 3
Adding a Camera 3
Configuring the Device 4
Editing Camera DNS Settings 6
Adjusting Camera Video Settings 7
Enabling Camera Motion Detection 8
Creating an Event 9
Editing Camera Email Settings 10
Adding a Camera Event Schedule 11
Creating a Camera Event Trigger 12
Troubleshooting Questions 14
Adding your Monitoring Station SMTP Details 16
Accessing Calipsa Account Settings 16
Editing Global Configuration 16
Inputting Your Credentials 17
C6746M | 03/23 2
Calipsa® Vivotek Integration User Guide
Introduction
This guide covers the steps required to integrate your Vivotek cameras with the Calipsa platform. Other
common integration steps, such as configuring your system to send alarms to your gmail account are
also covered.
Vivotek
This guide outlines the manual process of configuring aVivotek camerato send email alerts to Calipsa
Adding a Vivotek Camera to Calipsa
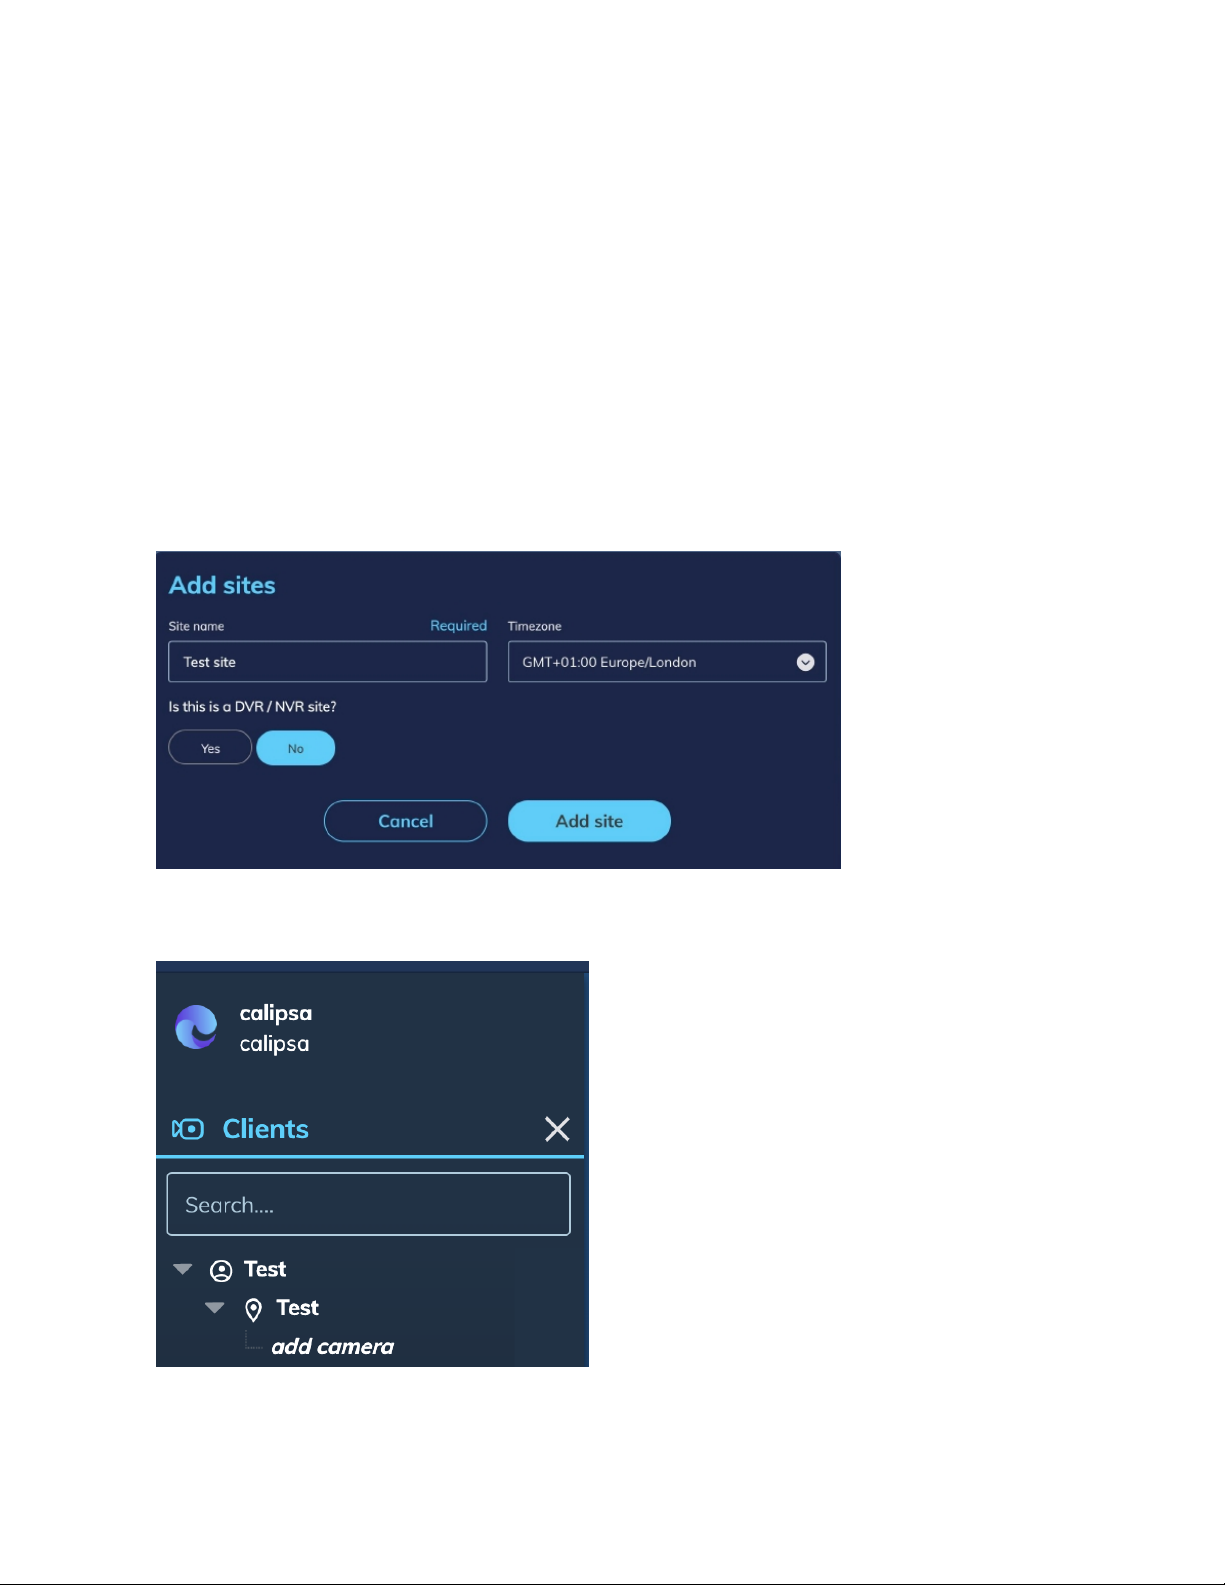
Creating a Site
1. Under Add sites, enter the Site Name.
2. When asked is this a DVR/NVR site, select No.
3. Click Add site.
Adding a Camera
1. Once the site has been created, click add camera in the left-hand tree.
C6746M | 03/23 3

Calipsa® Vivotek Integration User Guide
2. Under Camera name, enter the camera's name.
3. Under Notification email,enter theemail address where you would like these alarms to be sent
to e.g., Immix S-number, Gmail address, etc.
4. Click Add camera.
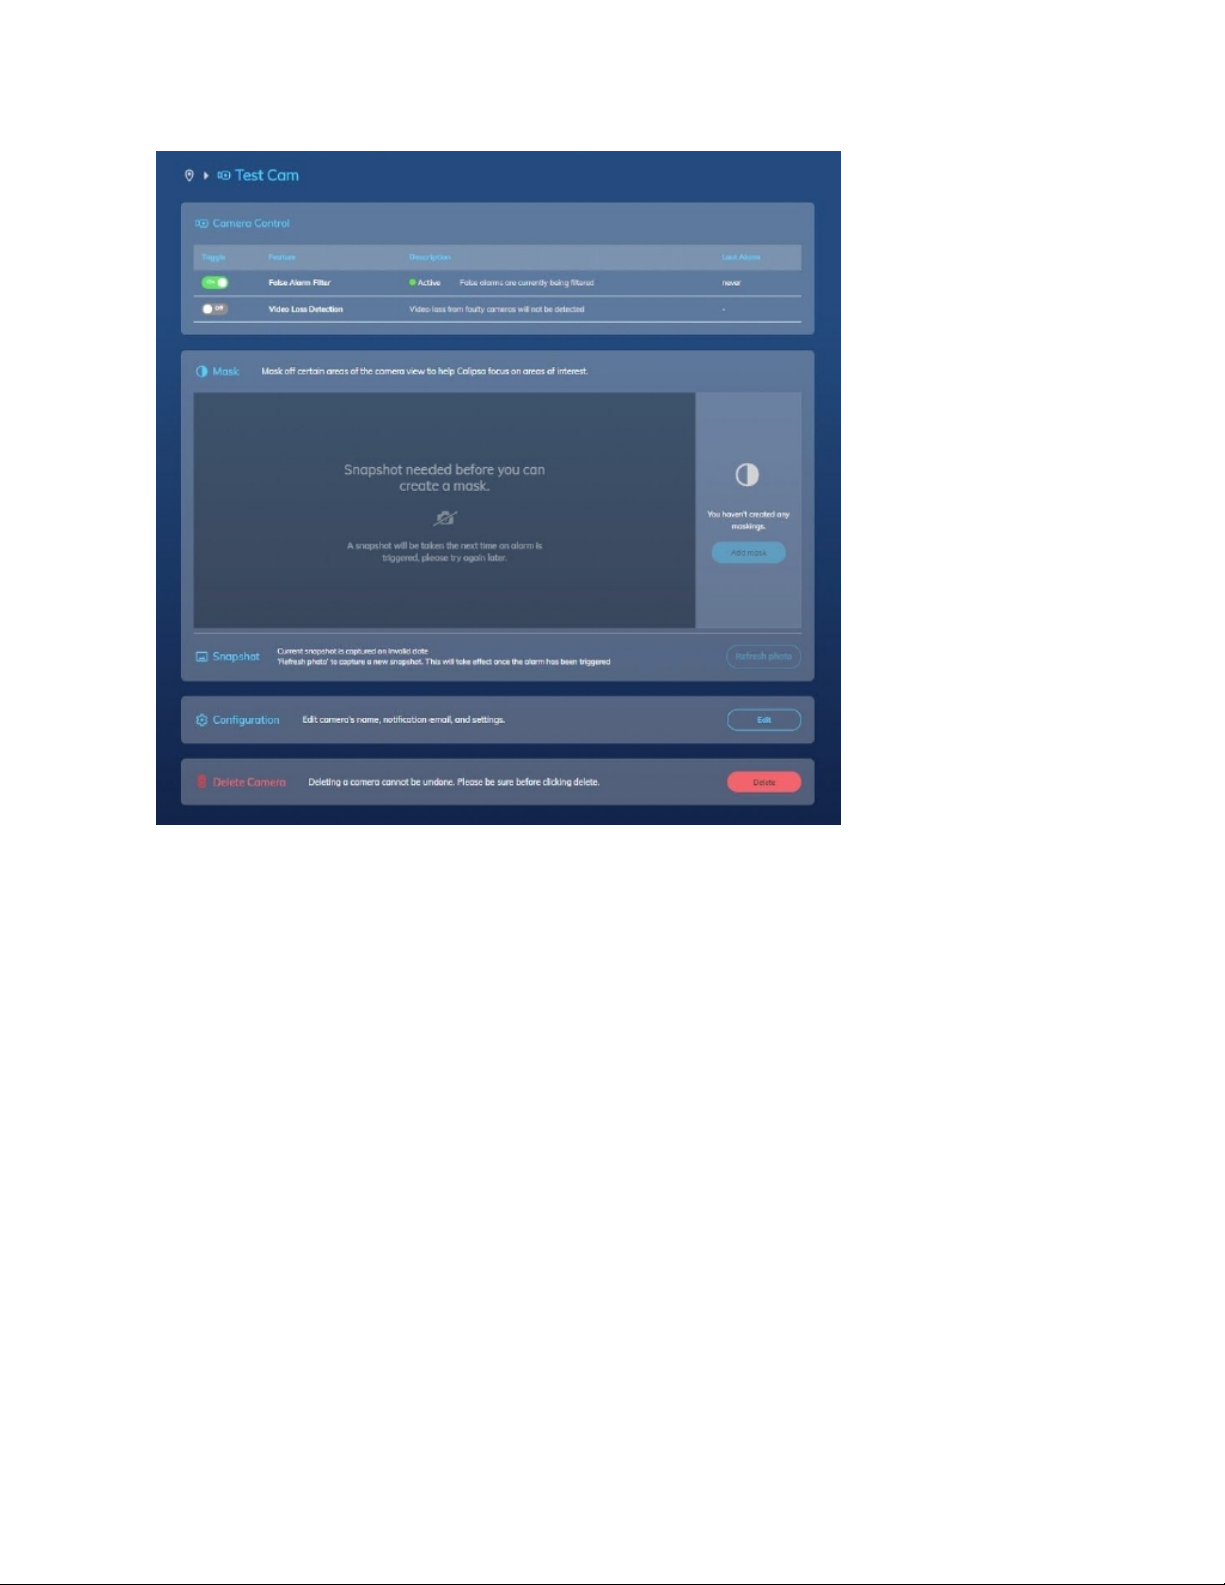
Configuring the Device
1. Under Configuration, click Edit.
C6746M | 03/23 4
Calipsa® Vivotek Integration User Guide
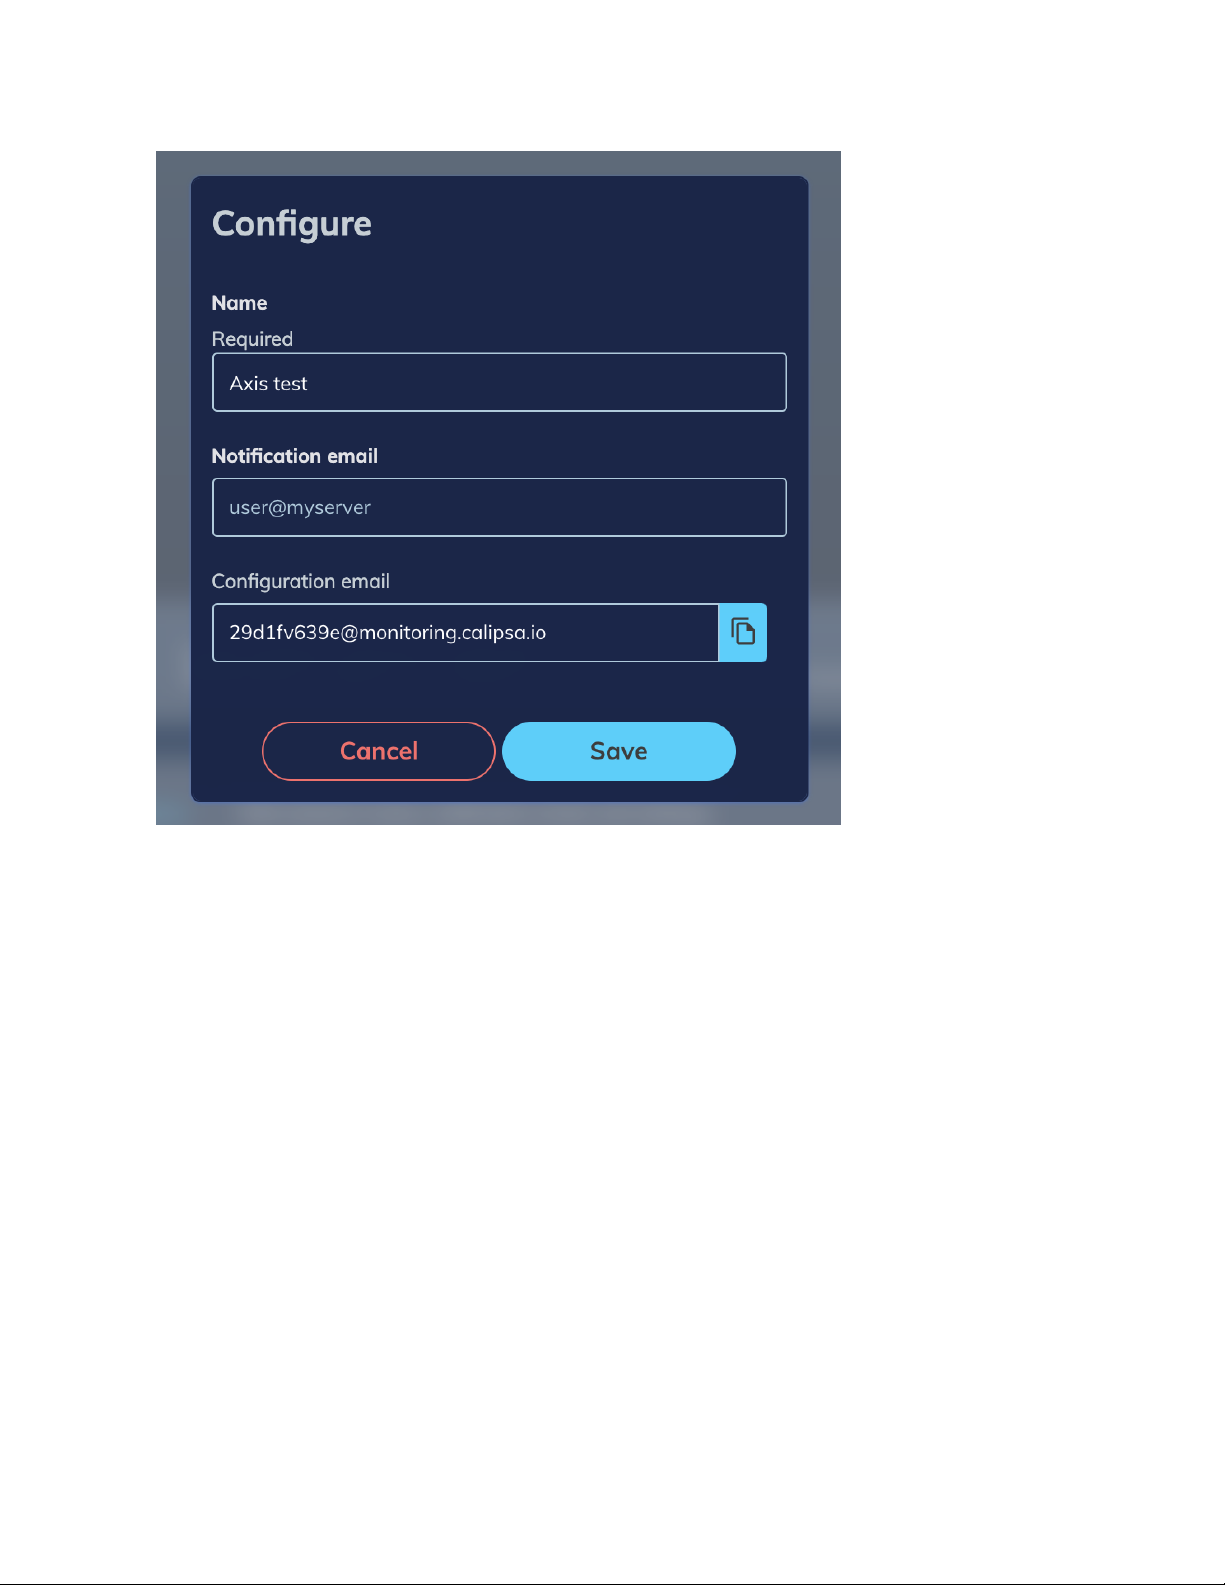
2. Under Configure, click on the blue icon to the right of Configuration email. The email address is
now copied to your clipboard.
C6746M | 03/23 5
Calipsa® Vivotek Integration User Guide
Editing Camera DNS Settings
1. Log in to your Uniview camera.
2. Under Setup, navigate to Network, and select DNS.
3. For Preferred DNS Server, enter 8.8.8.8.
4. For Alternate DNS Server, enter 8.8.4.4.
5. ClickSave.
C6746M | 03/23 6
 Loading...