

Page 1
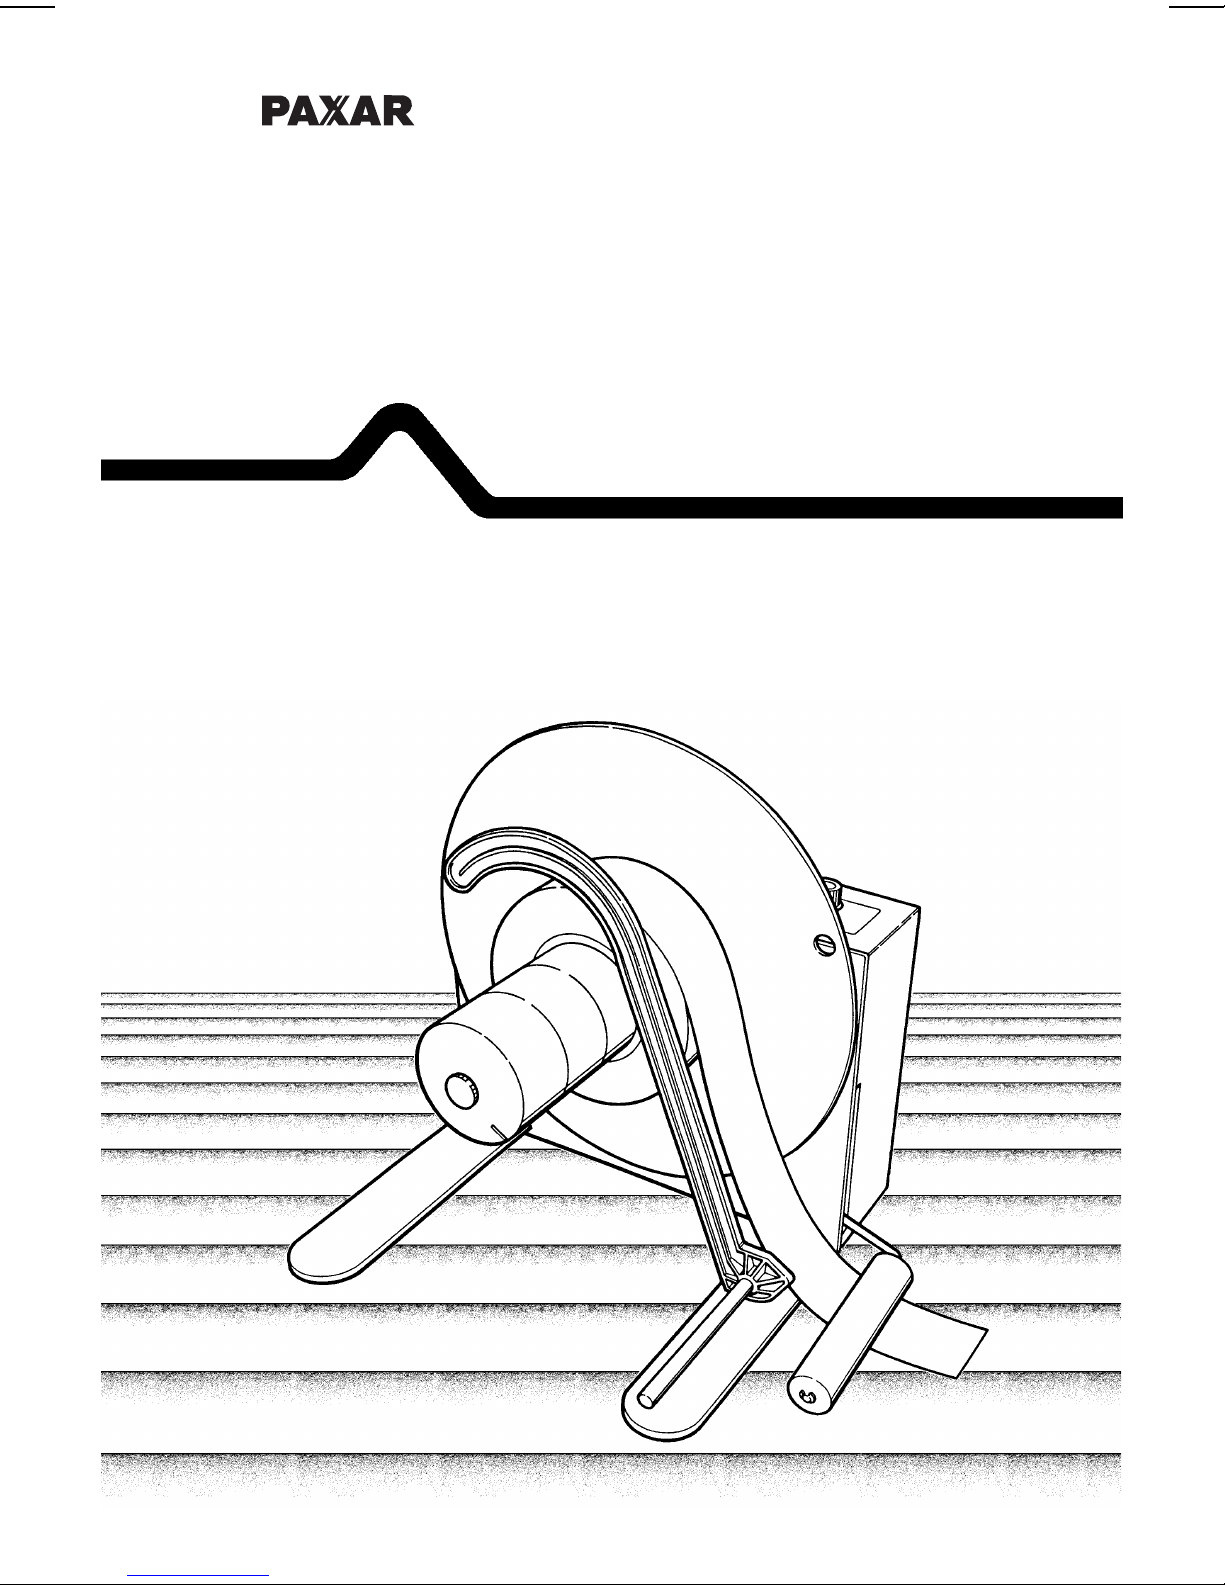
Monarch 415
Rewind
Operator’s Handbook
TM
TC0415OH Rev. D 5/96 ©1990-96 Monarch Marking Systems, Inc. All rights reserved.
Page 2

Each product and program carries a respective written
warranty, the only warranty on which the customer can rely.
Monarch reserves the right to make changes in the product
and the programs and their availability at any time and without
notice. Although Monarch has made every effort to provide
complete and accurate information in this manual, Monarch
shall not be liable for any omissions or inaccuracies. Any
update will be incorporated in a later edition of this manual.
Trademarks
MONARCH is a registered trademark of Monarch Marking Systems, Inc.
415 is a trademark of Monarch Marking Systems, Inc.
Paxar is a trademark of Paxar Corporation.
Monarch Marking Systems
P.O. Box 608
Dayton, Ohio 45401
Page 3

Table of Contents
1. Setting Up
2. Connecting Supplies
Rewinding on the Hub.................................................. 3
Rewinding on a Paper Core ......................................... 5
3. Operating the Rewind
Starting......................................................................... 7
Stopping ....................................................................... 8
4. Changing Hubs
5. Burster Option Setup and Operation
Supply Removal ......................................................... 19
.......................................................................... 1
........................................................ 3
....................................................... 7
................................................................. 9
............................ 11
6. Specifications and Supplies
7. Troubleshooting
Appendix A: Rewind Alignment
............................................................... 22
.......................................... 21
......................................... 23
i
Page 4

Monarch 415 Rewind Operator’s Handbook
ii
Page 5
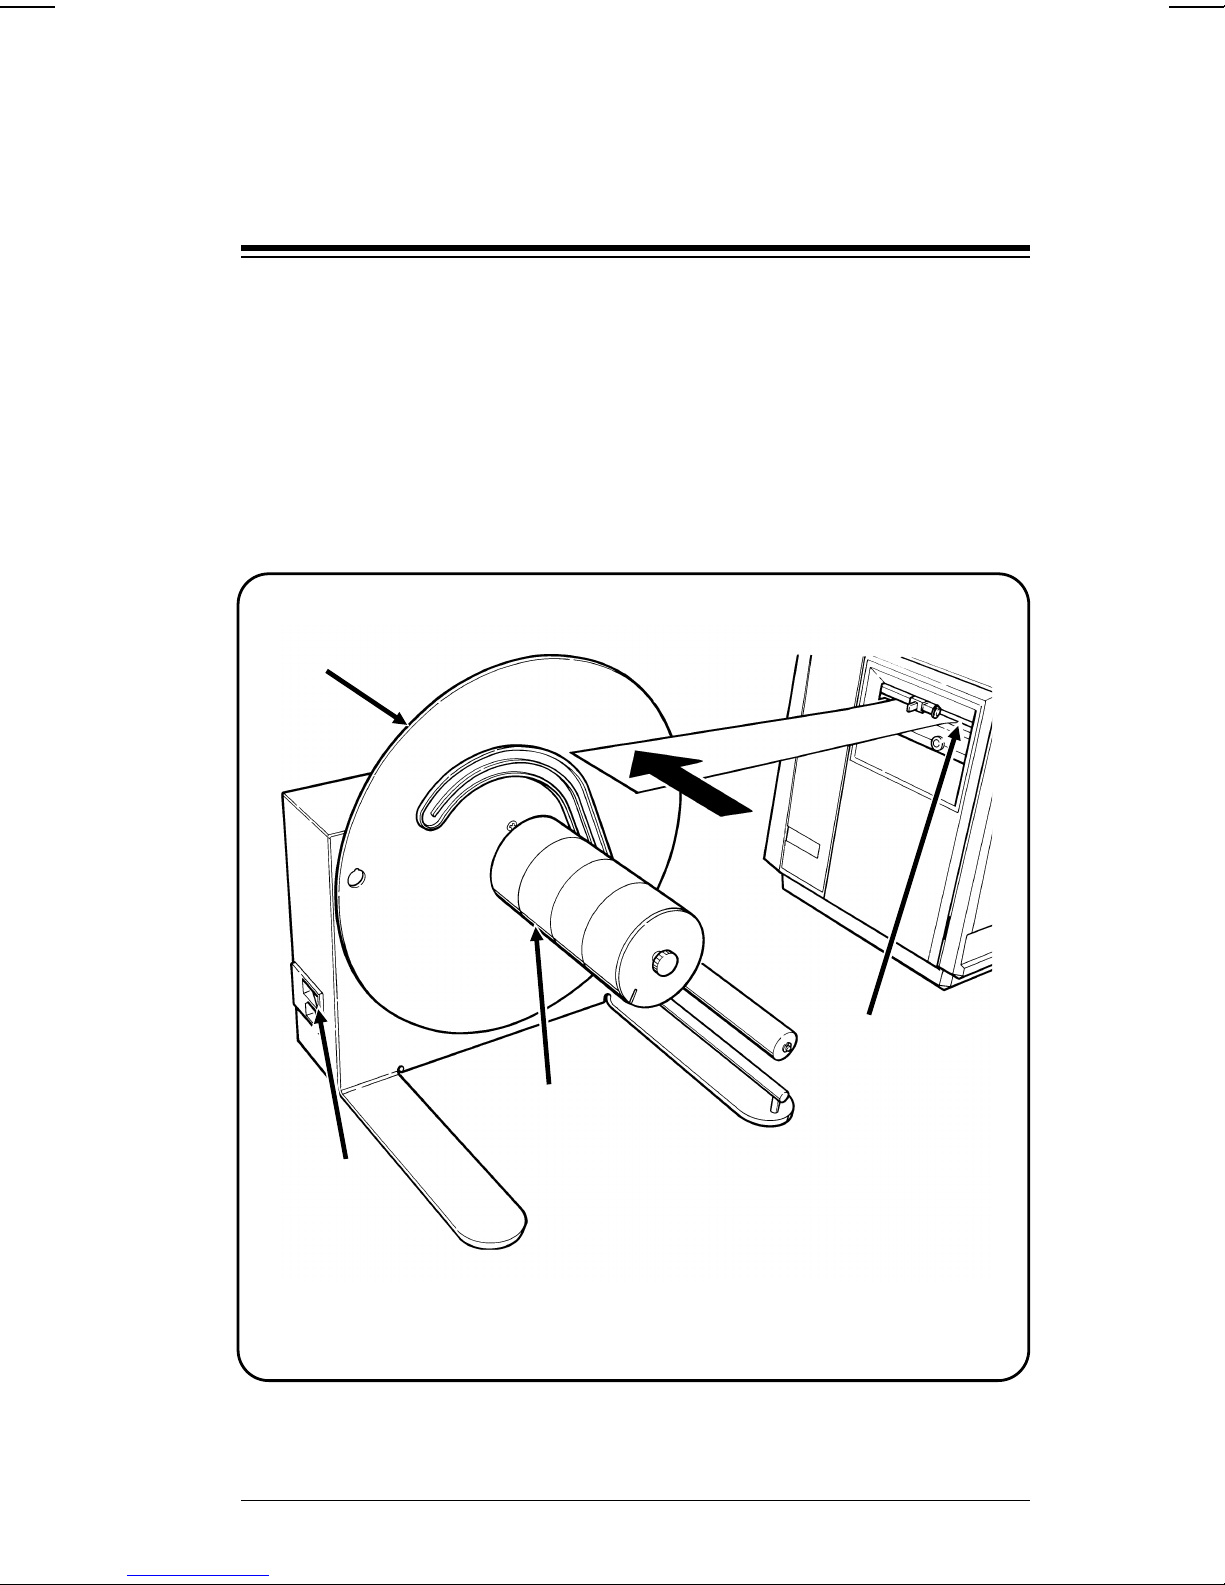
1. Setting Up
Push the 415 Rewind power switch
1.
Place the rewind on a level surface. Be sure it is at least
2.
OFF
.
ten inches away from the supply exit of the printer
(Figure 1).
Squarely align the rewind’s hub flange with the edge of the
3.
supply. See Appendix A, "Rewind Alignment."
Hub
Flange
Power
Switch
Hub
Printer
Supply
Exit
Figure 1
1
Page 6
Monarch 415 Rewind Operator’s Handbook
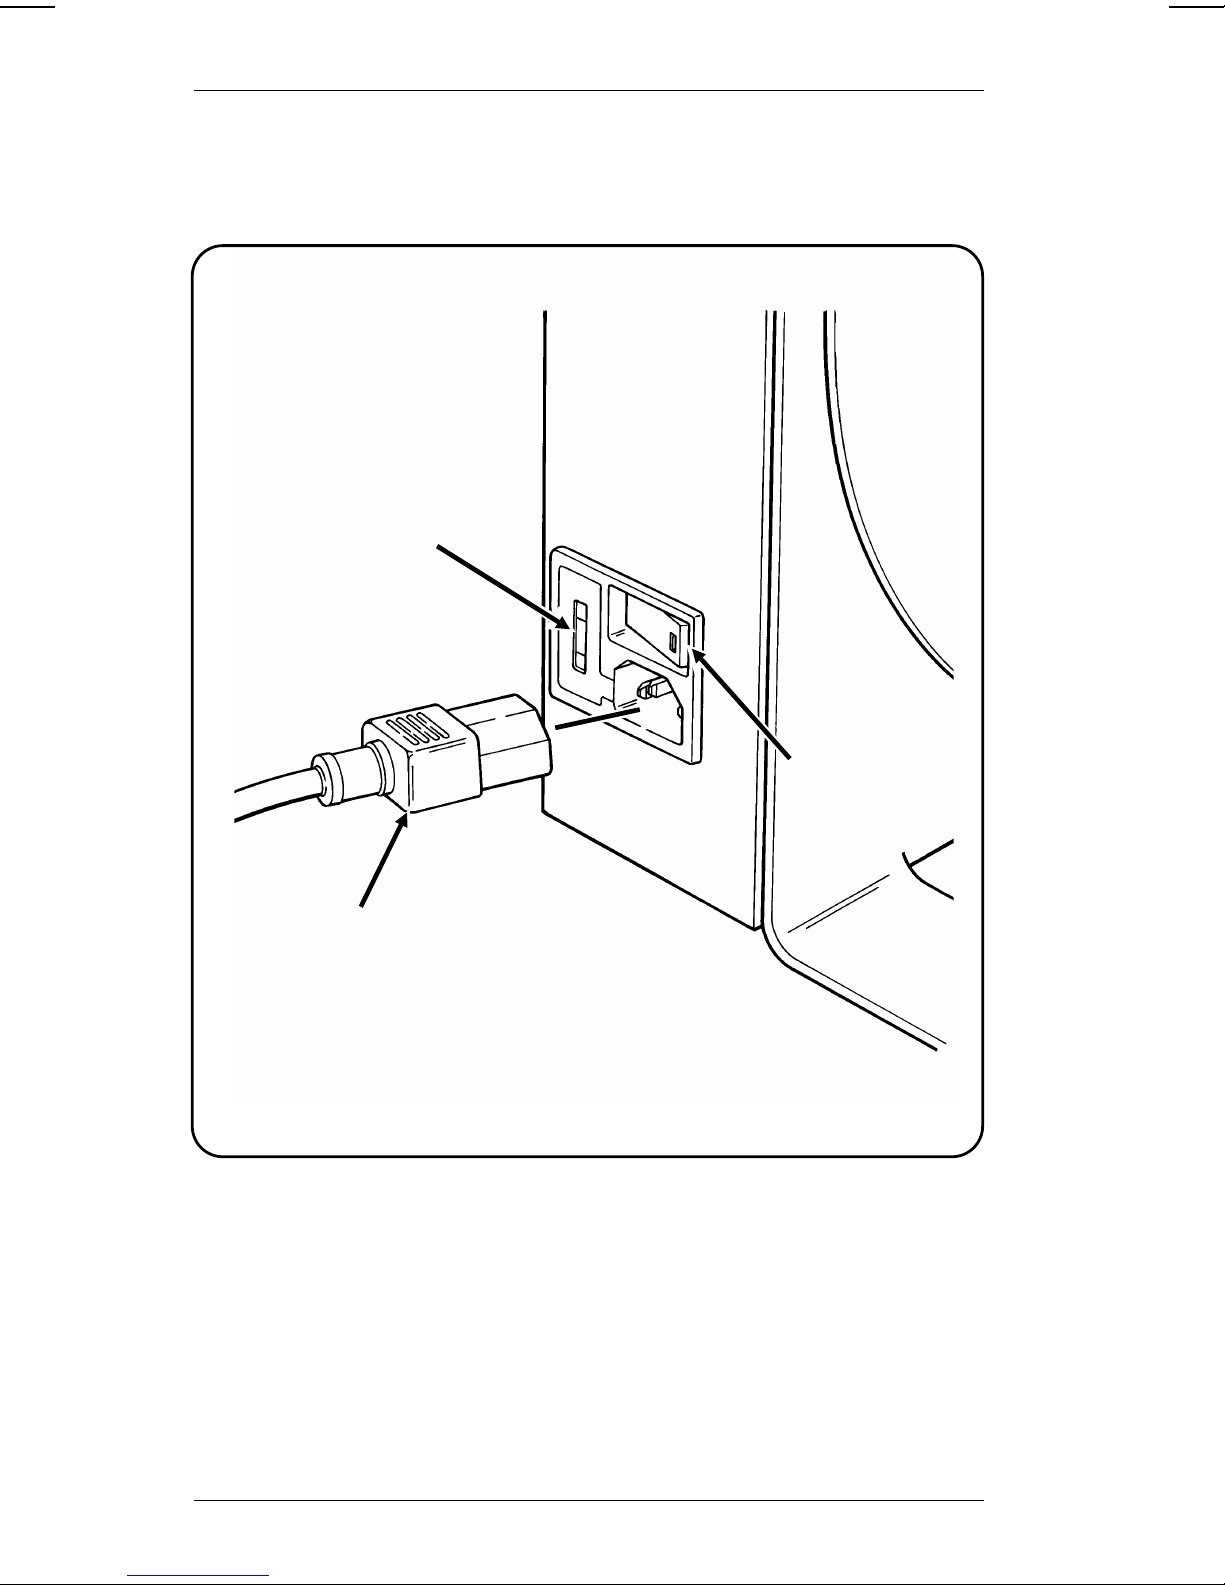
Plug the power cord into the rewind (Figure 2). Then, plug
4.
the power cord into a grounded electrical outlet.
Fuse Holder
Power
Cord
Power
Switch
Figure 2
2
Page 7

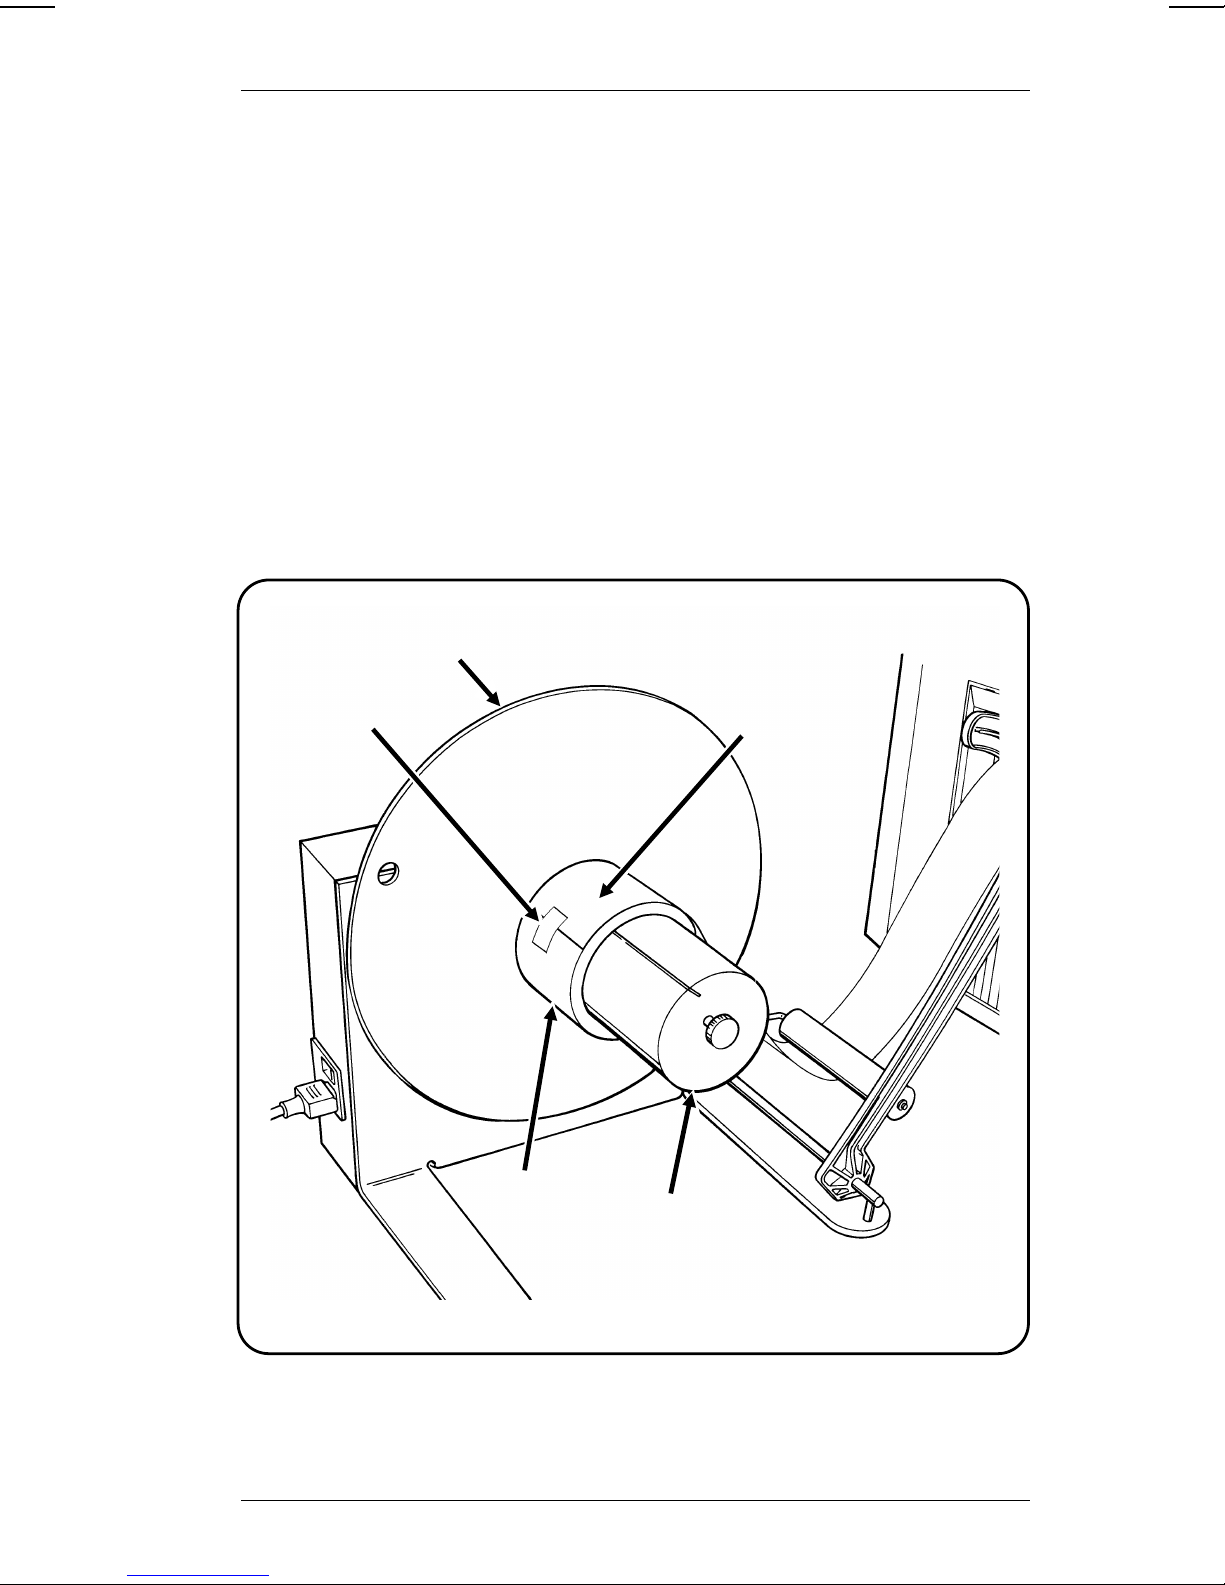
2. Connecting Supplies
Rewinding on the Hub
Slide the supply guide away from the hub flange and pull it
1.
away from the hub.
Print or feed enough supplies from the printer to wrap
2.
around the hub one and one half times.
Hold the hub flange and twist the hub
3.
clockwise
until it
stops.
Thread the supply strip under the dancer roller.
4.
Fold and insert the end of the supply strip into the slot
5.
(Figure 3). Be sure the supply is against the hub flange.
Supply
Hub
Flange
Strip
Slot
Dancer
Roller
Figure 3
Supply
Guide
3
Page 8
Monarch 415 Rewind Operator’s Handbook
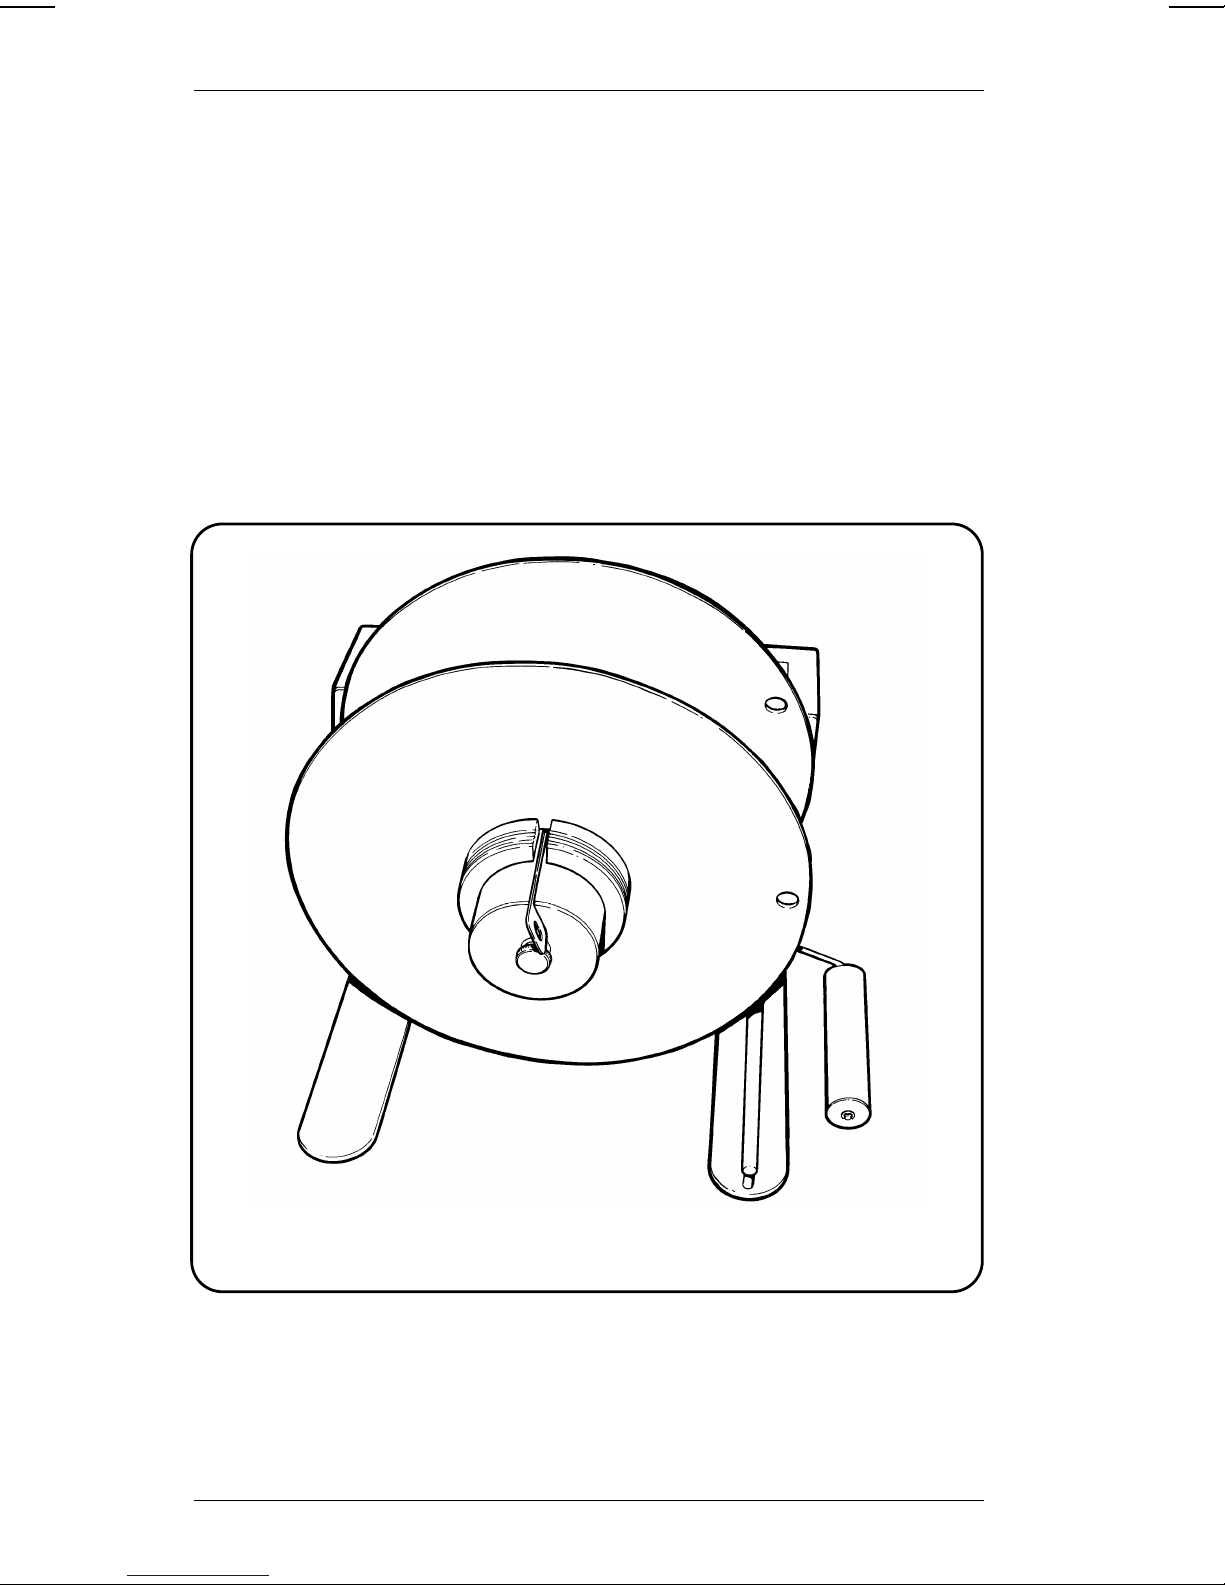
Turn the hub and hub flange at least one full turn
6.
counterclockwise
Push the supply guide against the hub then slide it against
7.
to tighten the supply strip.
the supply.
NOTE:
Units with 3" hubs have a flanged disk instead of
a supply guide.
Slide this disk over the hub and against the
stock/core (Figure 4).
4
Figure 4
Page 9
2. Connecting Supplies
Rewinding on a Paper Core
Slide the supply guide away from the hub flange and pull it
1.
away from the hub.
Push the paper core on the hub until it is against the hub
2.
flange.
Hold the hub flange and twist the hub
3.
clockwise
until the
paper core is tight.
Tape the supply strip to the paper core (Figure 5). Be sure
4.
the supply is against the hub flange.
Hub
Flange
Supply
Tape
Strip
Paper
Core
Hub
Figure 5
5
Page 10

Monarch 415 Rewind Operator’s Handbook
Turn the hub and hub flange at least one full turn
5.
counterclockwise
Push the supply guide against the hub then slide it against
6.
to tighten the supply strip.
the supply.
6
Page 11

3. Operating the Rewind
Starting
Turn the speed control knob (Figure 6) to
1.
Push the rewind power switch (Figure 7)
2.
NOTE:
The rewind will start to turn. When the dancer
SLOW
ON
roller is almost horizontal, the rewind will stop.
Start the printer.
3.
Adjust the rewind speed to the speed of the printer.
4.
NOTE:
If you stop the printer, the rewind will stop. If the
printer runs out of supplies, the rewind will keep
running until you turn it off.
Speed Control
Knob
.
.
Figure 6
Power
Switch
Figure 7
7
Page 12

Monarch 415 Rewind Operator’s Handbook
Stopping
Stop the printer.
1.
Push the rewind power switch
2.
Pull the supply guide away from the hub.
3.
Cut the supply at the supply exit of the printer (Figure 8).
4.
Tape the end of the supply to the roll on the rewind.
5.
Pull the supply guide away from hub.
6.
Hold the hub flange and turn the hub
7.
OFF
.
counterclockwise
until the roll is loose.
Slide the roll off the hub.
8.
Supply
Strip
Figure 8
8
Page 13

4. Changing Hubs
If you change to a different supply, you may need to use a
different hub. One, three, and four inch diameter hubs (short
and long) are available from Monarch.
To change hubs
Pull the supply guide away from the hub (Figure 9).
1.
Supply
Guide
Figure 9
Unscrew the hub knob (Figure 10).
2.
NOTE:
The hub diameter must be the same as the inside
diameter of the supplies.
Hub
Sections
Figure 10
Hub
Knob
9
Page 14

Monarch 415 Rewind Operator’s Handbook
Remove the hub sections and replace them with the new
3.
ones (Figure 11).
Slide the new hub spindle on the shaft. Be sure the
a.
notch fits over the raised portion of the hub flange.
Slide the hub sections on to the shaft with the open
b.
ends facing out. The hub section that fits against the
hub spindle has two curved grooves instead of peg
holes. Be sure the slot in this section is aligned with
the smaller side of the hub spindle. Also be sure the
slots in the rest of the hub sections are aligned with
this section.
Slide the hub end on.
c.
NOTE:
For a four or six inch long hub, screw on the
extension shaft before you install the hub
sections.
Screw the hub knob on.
d.
Hub
Hub
End
Hub
Spindles
Extension
Shaft
Hub
Knob
10
Figure 11
Page 15

5. Burster Option Setup and
Operation
Proper positioning of the printer, burster, and supplies is
critical.
Place the Rewind/Burster assembly in the proper position
1.
in front of the printer. A drawing showing the correct
position for all supported printers and optional location
guides for alignment is inside the back cover.
Print or feed approximately 36 inches of labels from the
2.
printer.
Bend and separate the supply along the perforations into
3.
individual strips for about 18 inches (Figure 12).
Figure 12
11
Page 16

Monarch 415 Rewind Operator’s Handbook
Figure 13 shows the burster with the supplies installed.
4.
Place the separator bars in their approximate working
positions (i.e. in line with the perforations). When only one
bar is needed (for two part supply), slide unused bar to the
outboard side.
Separator
Bars
Figure 13
Thread the inner strip of supplies under the dancer arm
5.
roller, behind the two lower burster shafts, and in front of
the top shaft.
Thread the middle strip under the dancer arm roller,
6.
behind the lower burster shaft, and in front of the two top
shafts.
Thread the outer strip under the dancer arm roller, behind
7.
the two lower burster shafts, and in front of the top shaft.
12
Page 17

5. Burster Option Setup and Operation
Slide the first core onto the 415 hub until it is against the
8.
hub flange.
Hold the hub flange and twist the hub clockwise until the
9.
paper core is tight.
Position the slot in the hub to the top.
10.
Align the leading edge of the first label on the inside strip
11.
with the slot in the hub and tape the supply to the core
(Figure 14).
Label Edge
Slot
Figure 14
13
Page 18

Monarch 415 Rewind Operator’s Handbook
Slide the separator disk and the next core onto the hub
12.
(Figure 15).
Hold the core against the separator disk, insert the core
13.
lock (metal strip) into the slot, and slide it into the core.
Align the leading edge of the first label on the middle strip
14.
with the slot in the hub and tape the supply to the core.
First Separator
Label
Edge
Disk
Slot
Core
Lock
Figure 15
14
Page 19

5. Burster Option Setup and Operation
Hold the second separator disk with the inside notch up
15.
(in line with the core lock) and slide it onto the hub (Figure
16).
Place the third core over the core lock and slide it onto the
16.
hub.
Second Separator
Disk
Notch in
Disk
Core Lock
Figure 16
Third
Core
15
Page 20

Monarch 415 Rewind Operator’s Handbook
Slide the third core against the second separator disk
17.
(Figure 17).
Align the leading edge of the first label on the outside strip
18.
with the slot in the hub and tape the supply to the core.
Second
Label Edge
Separator Disk
Figure 17
Slot
16
Page 21

5. Burster Option Setup and Operation
Hold the flanged collar assembly with the opening in the
19.
collar up. Then install it on the hub as shown in Figure 18.
Opening in
Collar
Figure 18
17
Page 22

Monarch 415 Rewind Operator’s Handbook
Recheck the printer to rewind alignment and fine adjust as
20.
necessary.
Verify that the separator bars are located between the
21.
strip as shown in Figure 19.
Verify that the labels on all three strips are aligned.
22.
NOTE:
All labels must be aligned as though the supply
was never separated to prevent torn strips or
labels coming off.
Label
Edges
Turn the flange counterclockwise to take up any slack in
23.
the strips.
Set the speed control knob to SLOW.
24.
Turn on the rewind, operate the printer, and increase the
25.
speed if necessary.
18
Separator
Bars
Figure 19
Page 23

5. Burster Option Setup and Operation
Supply Removal
Remove the core lock (metal strip).
1.
Remove the flanged collar assembly.
2.
Remove the outside core and roll of labels.
3.
Remove the second separator disk.
4.
Remove the middle core and roll of labels.
5.
Remove the inside separator disk.
6.
Unlock the inside core.
7.
Remove the inside core and roll of labels
8.
19
Page 24

Monarch 415 Rewind Operator’s Handbook
20
Page 25

6. Specifications and Supplies
Specifications
Height:
Width:
Depth:
Weight:
Shipping Weight:
Power:
Fuse:
Temperature:
Relative Humidity:
Hub Diameter:
(Options)
13.75 inches (349.25 mm)
12.50 inches (317.5 mm)
11.5 inches (292.10 mm)
18 lbs. (8.14 kg)
20 lbs. (9.05 kg)
115 VAC 60 HZ 30 Watts .3 Amps
220/240 50/60 HZ 30 Watts .15 Amps
3/8 Amp
Operating: 50° to 95° F (10° to 35° C)
Storage: 15° to 120° F (-9° to 49° C)
Operating: 10 to 80%
Storage: 5 to 90%
1 inch (25 mm)
3 inch (76 mm)
4 inch (102 mm)
Hub Lengths: 3.62 inch (91.9 mm)
6.75 inch (171.5 mm)
Supplies
Supply Thickness
Tags or Labels:
Supply Width:
3.62 inch shaft
(91.9 mm)
6.75 inch shaft
(171.5 mm)
Minimum: .007 inches (.17 mm)
Maximum: .015 inches ( .4 mm)
Minimum: .75 inches (19.05 mm)
Maximum: 3.37 inches (85.6 mm)
Minimum: .75 inches (19.05 mm)
Maximum: 6.5 inches (165 mm)
21
Page 26

7. Troubleshooting
Problem Corrective Action
Power switch light does
not light.
Dancer arm does not
activate the rewind.
Connect the power cord.
Call Monarch Service.
Make sure the rewind is on a level
surface.
22
Page 27

Appendix A:
Rewind Alignment
Location Guide 113580
Location Guide 113576
Location Guide not availabl e
Location Guide 113576
Location Guide 113576
Location Guide 113576
Location Guide 114664
23
Page 28

For supplies, service, or assistance call:
TOLL FREE:
1-800-543-6650 (In the U.S.A.)
1-800-263-4650 (In Canada)
www.paxar.com
 Loading...