

Paxar Monarch series, Monarch Pathfinder Ultra Platinum 6039, Pathfinder series Operator's Handbook Manual
Operator’s
Operator’s
Monarch
Pathfinder Ultra
®
®®
Handbook
Handbook
653258
04/18/02 7512
$15.50
Platinum
Printer
SALE
58523
49
$25.00
32232
PEARL EARRINGS
99565
45453
7512
8
04/18/02
9
$200.00
TC6039OH Rev. AB 9/05 ©2005 Paxar Americas, Inc. All rights reserved.

This device has been tested and found to comply with the limits for a
Class B digital device pursuant to Part 15 of the Federal Communications
Commissions Rules and Regulation. These limits are designed to provide
reasonable protection against harmful interference when the equipment is
operated in a commercial environment. This equipment generates, uses,
and can radiate radio frequency energy and, if not installed and used in
accordance with the instruction manual, may cause harmful interference
to radio communications. Operation of this equipment in a residential
area is likely to cause harmful interference in which case the user will be
required to correct the interference at his own expense. However, there
is no guarantee that interference will not occur in a particular installation.
If the equipment does cause harmful interference to radio or television
reception, which can be determined by turning the equipment off and on,
the user is encouraged to try to correct the interference by one or more of
the following measures:
♦ Re-orient or relocate the receiving antenna.
♦ Increase the separation between the equipment and receiver.
♦ Connect the equipment into an outlet on a circuit different from that
which the receiver is connected.
This Class B digital apparatus meets the requirements of the Canadian
Interference-Causing Equipment Regulations.
Cet appareil numérique de la Classe B respecte toutes les exigences du
Règlement sur le Matériel Brouilleur du Canada.
Note: Information in this document supercedes information in previous
versions.
Trademarks
Monarch®, Pathfinder®, Ultra®, 6039, 6063, 9462, and 9465 are trademarks of Paxar
Americas, Inc.
Paxar® is a trademark of Paxar Corporation.
Microsoft and Windows are trademarks
of Microsoft Corporation.
Paxar Americas, Inc.
170 Monarch Lane
Miamisburg, OH 45342
Outside the U.S., send batteries to:
Paxar EMEA, 4 Awberry Court
Croxley Business Park, Hatters Lane,
Watford, WD18 8PD

Table of Contents i
TABLE OF CONTENTS
Introduction ..................................................................................................... 1-1
Using this Manual......................................................................................... 1-2
Important Printer Usage Information ...............................................................1-3
Attaching the Safety Strap............................................................................. 1-4
Regulatory Compliance ................................................................................. 1-5
Radio Frequency Interference Requirements ................................................... 1-5
Radio Frequency Interference Requirements – Canada.....................................1-6
European Economic Area .............................................................................. 1-6
Using Batteries ................................................................................................ 2-1
Using the Main Battery.................................................................................. 2-1
Charging the Main Battery.......................................................................... 2-1
Changing the Main Battery ......................................................................... 2-2
Charging the Backup Battery ......................................................................... 2-3
Checking the Battery Status ..........................................................................2-4
Main Battery Safety Information ..................................................................... 2-5
Using Supplies................................................................................................. 3-1
Selecting the Supply Type ............................................................................. 3-5
Loading Supplies.......................................................................................... 3-1
Loading for Peel Mode............................................................................... 3-3
Loading for Non-Peel Mode ........................................................................ 3-5
Removing Supplies when Using Peel Mode .....................................................3-5
Entering and Printing Data ...............................................................................4-1
Using the Keypad ......................................................................................... 4-1
Entering Data ...........................................................................................4-2
Entering Special Characters/Symbols.......................................................... 4-2

ii Table of Contents
Using the Display .........................................................................................4-3
Reading the Status Bar.............................................................................. 4-3
Scanning Bar Codes ..................................................................................... 4-4
Certification Note ......................................................................................... 4-5
Printing ....................................................................................................... 4-6
Adjusting the Print Contrast........................................................................... 4-6
Power Management ...................................................................................... 4-8
Radio Frequency Communications.................................................................. 4-8
Care and Maintenance ...................................................................................... 5-1
Cleaning...................................................................................................... 5-1
Cleaning the Printhead .............................................................................. 5-2
Cleaning the Platen Roller .........................................................................5-3
Cleaning the Pinch and Feed Rollers........................................................... 5-4
Cleaning the Sensors ................................................................................ 5-4
Cleaning the Scanner Window .................................................................... 5-5
Cleaning the Scanner Flex Cable................................................................ 5-5
Clearing Supply Jams ................................................................................... 5-6
Storing the Printer ........................................................................................ 5-6
Troubleshooting............................................................................................... 6-1
Checking the Software Version ...................................................................... 6-2
Printing a Test Label..................................................................................... 6-2
Error Codes.............................................................................................. 6-4
Specifications and Accessories ........................................................................A-1
Specifications ..............................................................................................A-1
Accessories .................................................................................................A-2
Introduction 1-1
INTRODUCTION
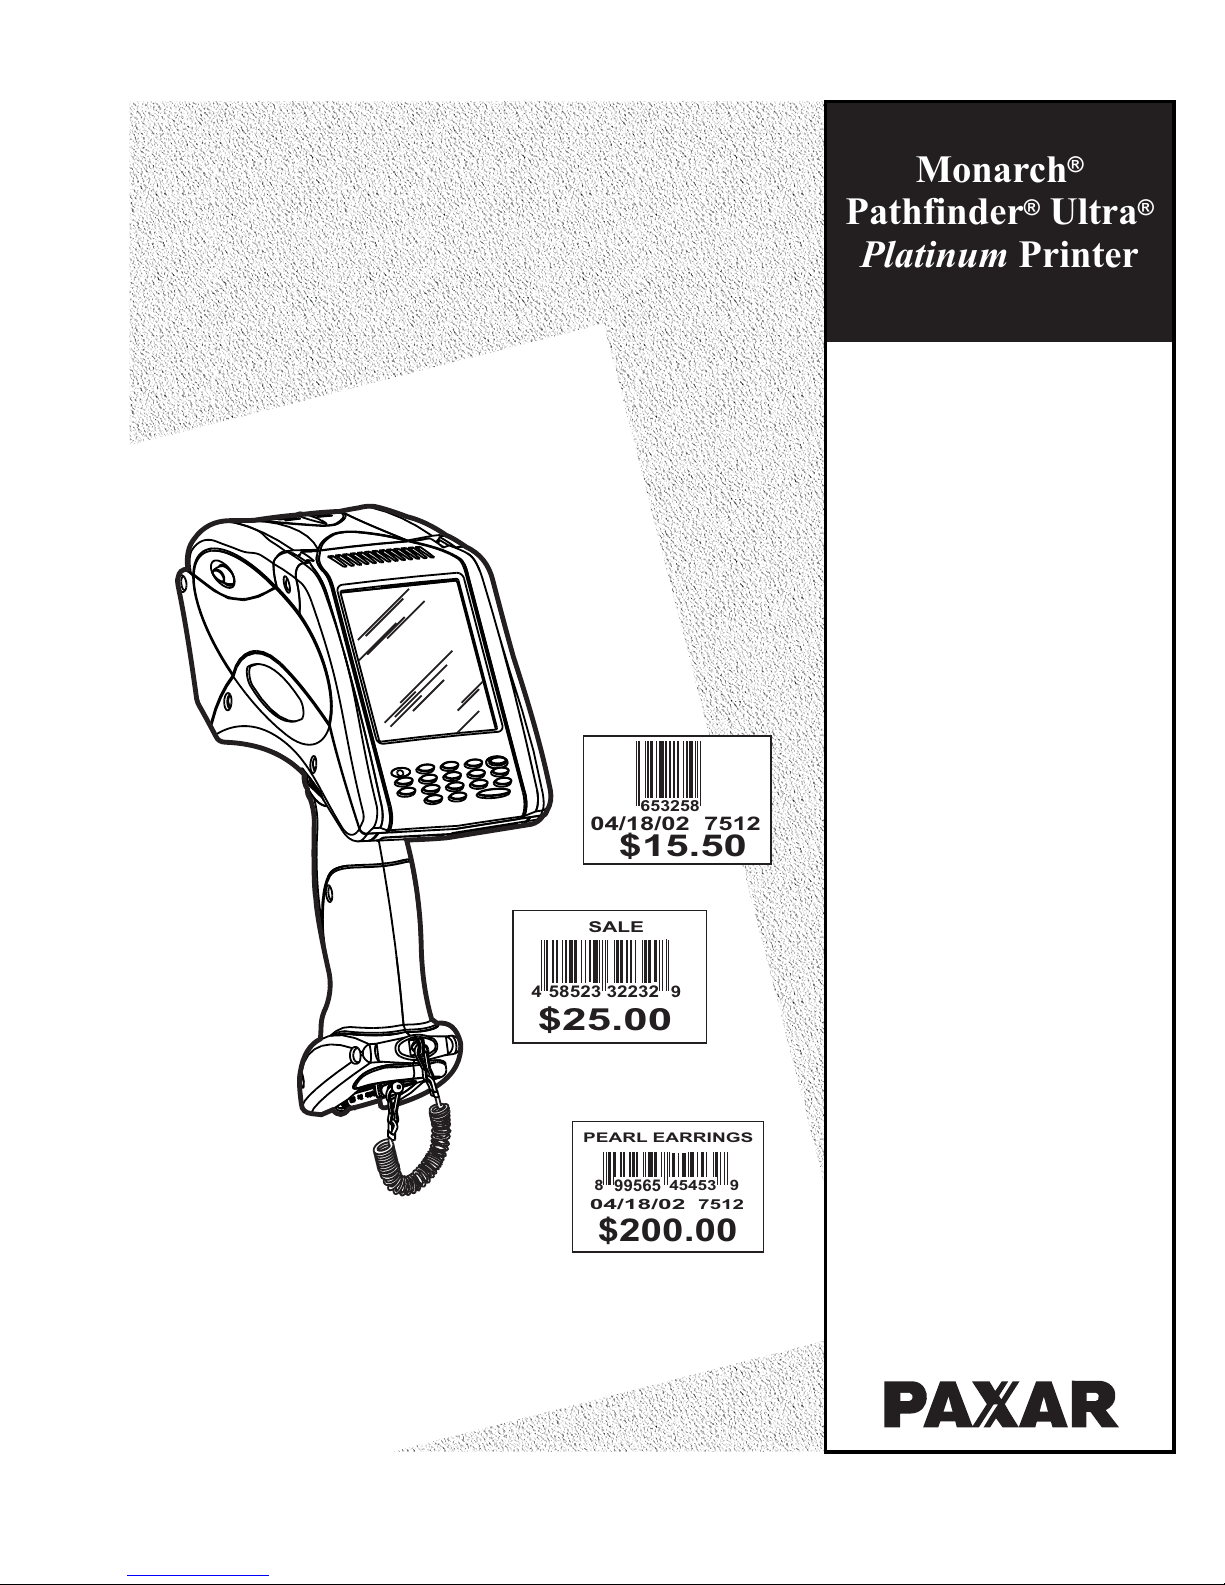
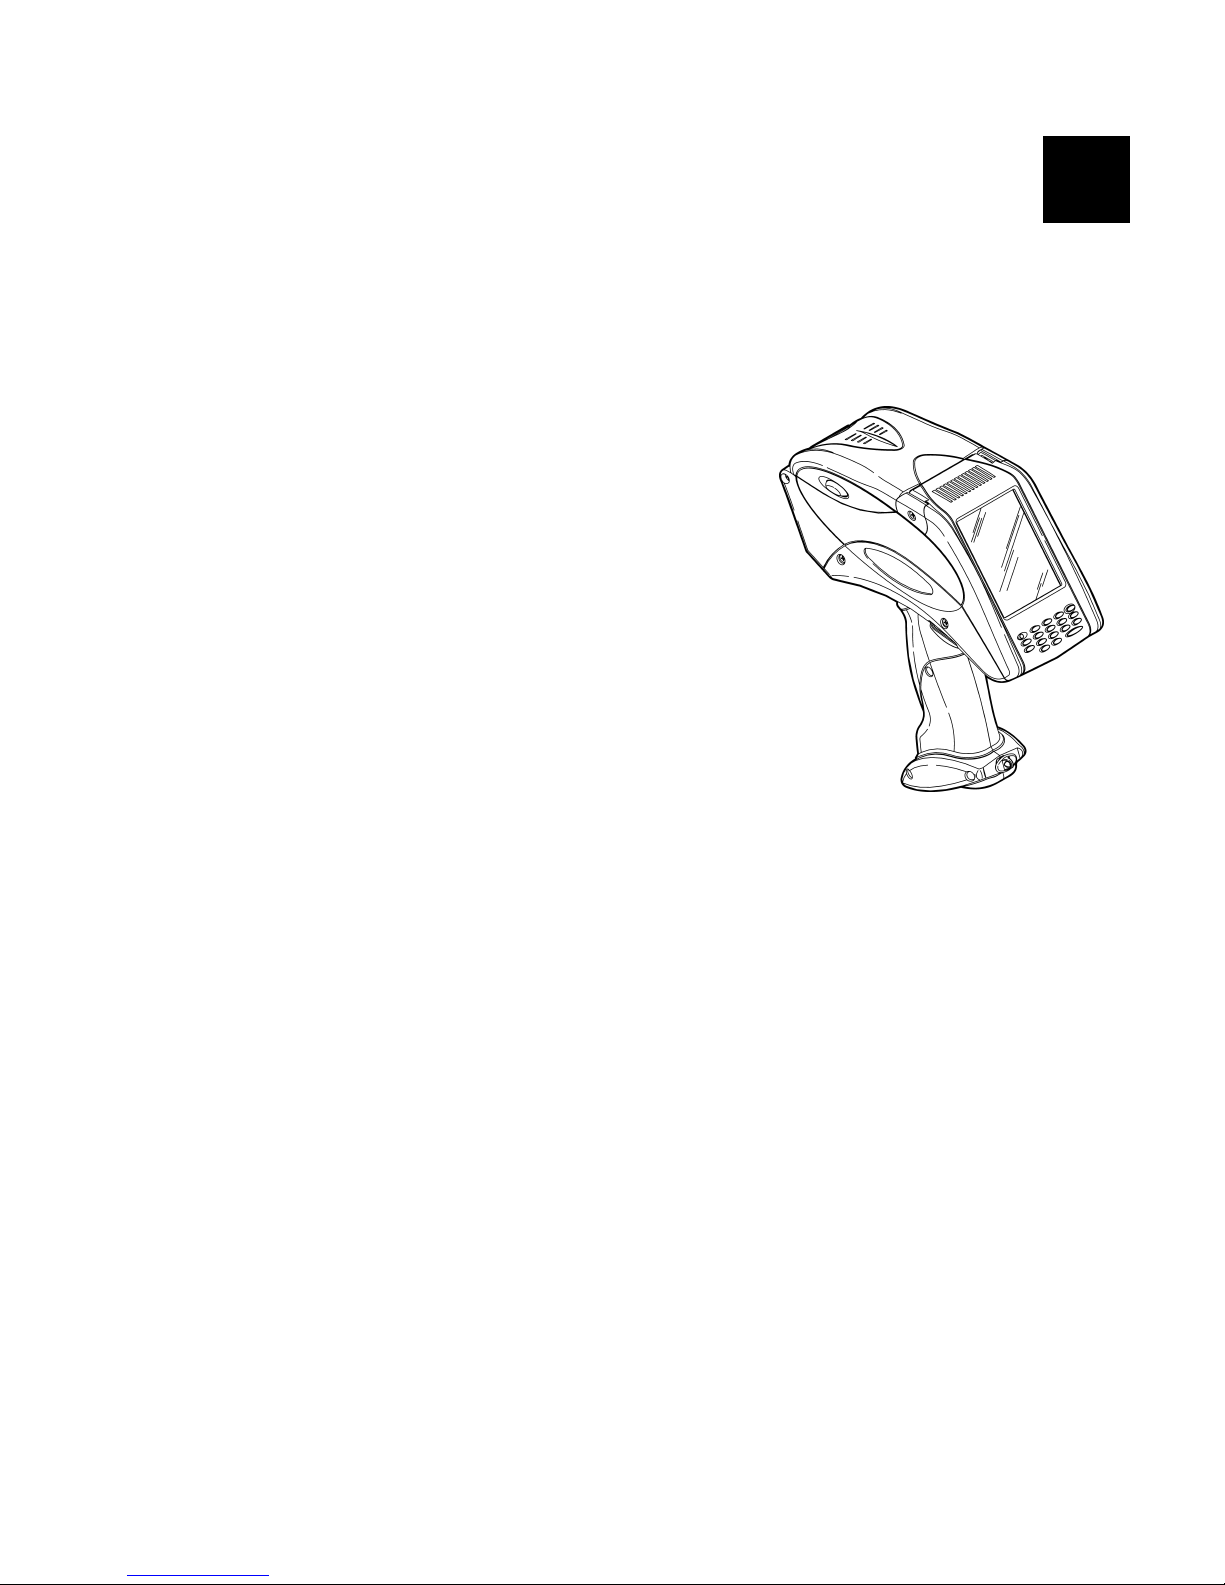
The Monarch® Pathfinder® Ultra® Platinum 6039™ printer prints,
scans bar codes, collects data, and communicates with other devices.
The printer operates on a Microsoft Windows-based CE platform.
The printer features
♦ Touch screen display
♦ 16-key alphanumeric keypad
♦ On-Demand and continuous printing
♦ Adjustable supply width capabilities
♦ Clock/calendar
♦ USB port communications
♦ Graphic printing capabilities
♦ Display backlight
♦ Low power shutdown to conserve the
battery
♦ Laser scanner (factory-installed option)
♦ Wireless LAN Radio (factory-installed option)
♦ 128MB and 256MB SD memory card (factory-installed option)
1

1-2 Introduction
Using this Manual
Following is a summary of the contents of this manual.
Chapter Contents
1 Introduction Information you should know before using the printer.
2 Using the Battery Charging, changing, and using batteries safely.
3 Using Supplies Supply loading and removal.
4
Entering and
Printing Data
Information about using the display, keypad, scanner,
and printing.
5
Care and
Maintenance
Clearing supply jams and cleaning the printer.
6 Troubleshooting Common problems and their solutions.
A Glossary Printer terms and their definitions.
B
Reference
Information
Printer specifications and accessories/options.
Audience
This manual is for the operator who scans or manually enters data and
prints and applies labels.
A Quick Reference for this printer is available in the box. A Programmer’s
Manual and other documentation are available on our Web site
(www.paxar.com).

Introduction 1-3
Getting Started
To start using the printer, you must:
1. Charge the main battery. See “Charging the Main Battery” in
Chapter 2 for more information.
Note: You must charge the battery before using it.
2. Insert the main battery. See “Changing the Main Battery” in
Chapter 2 for more information.
3. Attach the safety strap found in the documentation package. See
“Attaching the Safety Strap” later in this chapter for more information.
4. Load supplies in the printer. See “Loading the Supplies” in
Chapter 3 for more information.
5. Turn on the printer.
Note: Your System Administrator must load an application in the printer
before you can use it.
Important Printer Usage Information
♦ Always start with a fully charged battery.
♦ Attach the safety strap to your wrist before using the printer.
♦ Do not pound the printer when applying labels printed in peel mode.
♦ Switch to a fully charged battery every time you load a new roll of
supplies (doing so ensures optimum print quality).
♦ Turn off the printer when not using it.
♦ When you remove the main battery, connect the printer to the Battery
Backup Power.
♦ Operate and store the printer with the recommended temperature and
humidity ranges. See Appendix A, “Specifications and Accessories,”
for more information.
1-4 Introduction
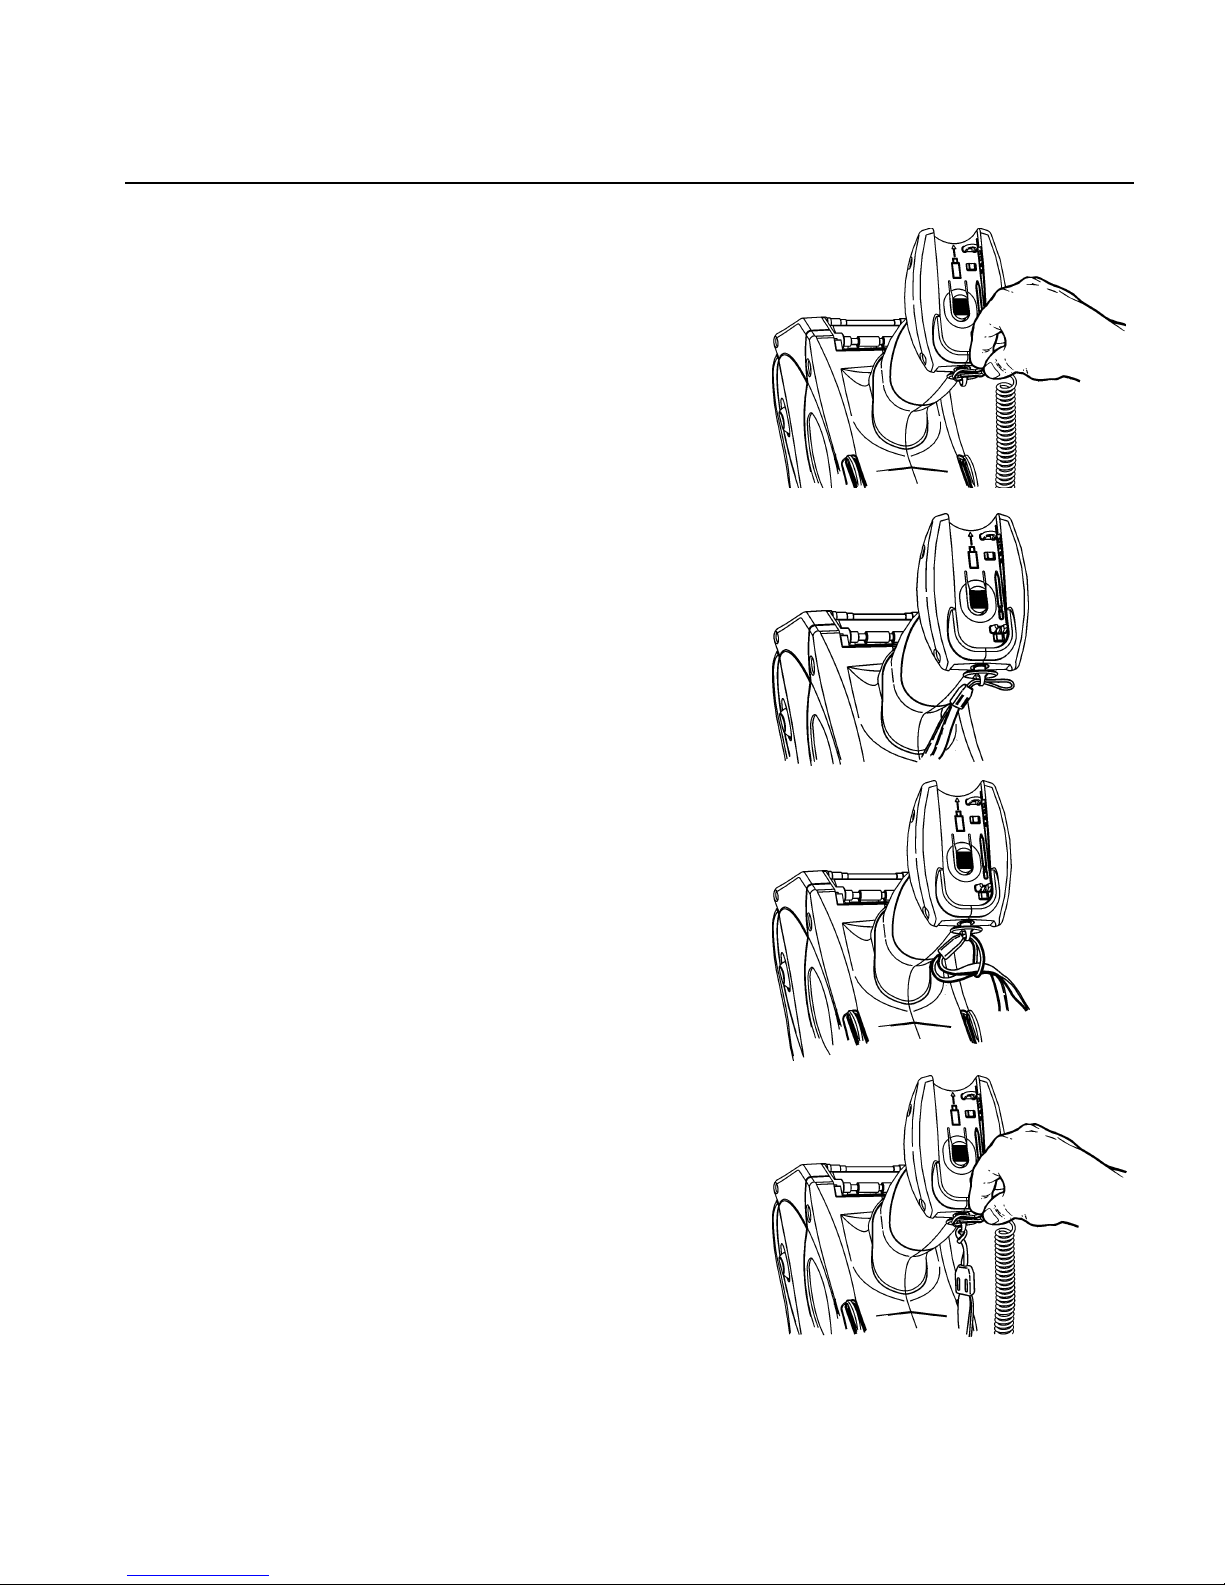
Attaching the Safety Strap
1. Turn the printer upside down, resting its
top on the table.
2. Remove the stylus strap from the loop.
3. Take the thin end of the safety strap, and
push it through the loop at the bottom of
the printer handle (near the battery
compartment).
4. Push the thick end of the safety strap
through the thin end’s loop.
5. Pull the strap. It may be necessary to
help the thin end’s loop fit over the plastic
piece in the middle of the strap.
6. Pull the strap tight.
7. Attach the stylus strap to the loop as
shown.

Introduction 1-5
Regulatory Compliance
Paxar RF products are designed to be compliant with the rules and
regulations in the locations into which they are sold and will be labeled as
required. The majority of Paxar RF devices are type approved and do not
require the user to obtain license or authorization before using the
equipment. Any changes or modifications to Paxar equipment not
expressly approved by Paxar could void the user authority to operate the
equipment.
Radio Frequency Interference Requirements
This device has been tested and found to comply with the limits for a
Class B digital device pursuant to Part 15 of the Federal Communications
Commissions Rules and Regulation. These limits are designed to provide
reasonable protection against harmful interference when the equipment is
operated in a commercial environment. This equipment generates, uses,
and can radiate radio frequency energy and, if not installed and used in
accordance with the instruction manual, may cause harmful interference
to radio communications. Operation of this equipment in a residential
area is likely to cause harmful interference in which case the user will be
required to correct the interference at his own expense. However, there
is no guarantee that interference will not occur in a particular installation.
If the equipment does cause harmful interference to radio or television
reception, which can be determined by turning the equipment off and on,
the user is encouraged to try to correct the interference by one or more of
the following measures:
♦ Re-orient or relocate the receiving antenna.
♦ Increase the separation between the equipment and receiver.
♦ Connect the equipment into an outlet on a circuit different from that
which the receiver is connected.

1-6 Introduction
Radio Frequency Interference Requirements – Canada
This Class B digital apparatus meets the requirements of the Canadian
Interference-Causing Equipment Regulations.
Cet appareil numérique de la Classe B respecte toutes les exigences du
Règlement sur le Matériel Brouilleur du Canada.
Warning: This wireless portable device has been shown to be capable
of compliance for localized specific absorption rate (SAR) for
uncontrolled environment/general population exposure limits
specified in ANSI/IEEE Std. C95.1-1992 and has been tested
in accordance with the measurement procedures specified in
FCC/OET Bulletin 65 Supplement C (2001) and IEEE Std.
1528-200X (Draft 6.4, July 2001).
European Economic Area
The European variant is intended for use throughout the European
Economic Area; however, authorization for use is restricted as follows:
♦ European standards dictate the maximum radiated transmit power of
100 mW EIRP and frequency range 2.400 – 2.4835 GHz.
♦ France, the equipment is to be restricted to the 2.4465 – 2.4835 GHz
frequency range.
♦ Belgium outside, the equipment is to be restricted to the
2.460 – 2.4835 GHz frequency range.
♦ Operation in Italy requires a user license.
Using Batteries 2-1
USING BATTERIES
The printer uses two batteries: a main battery and a backup
battery.
Battery Use
Main
Running the printer. It is also rechargeable using the
Monarch 9462 single-station or the Monarch 9465
four-station charger.
Backup Maintaining the printer’s system settings.
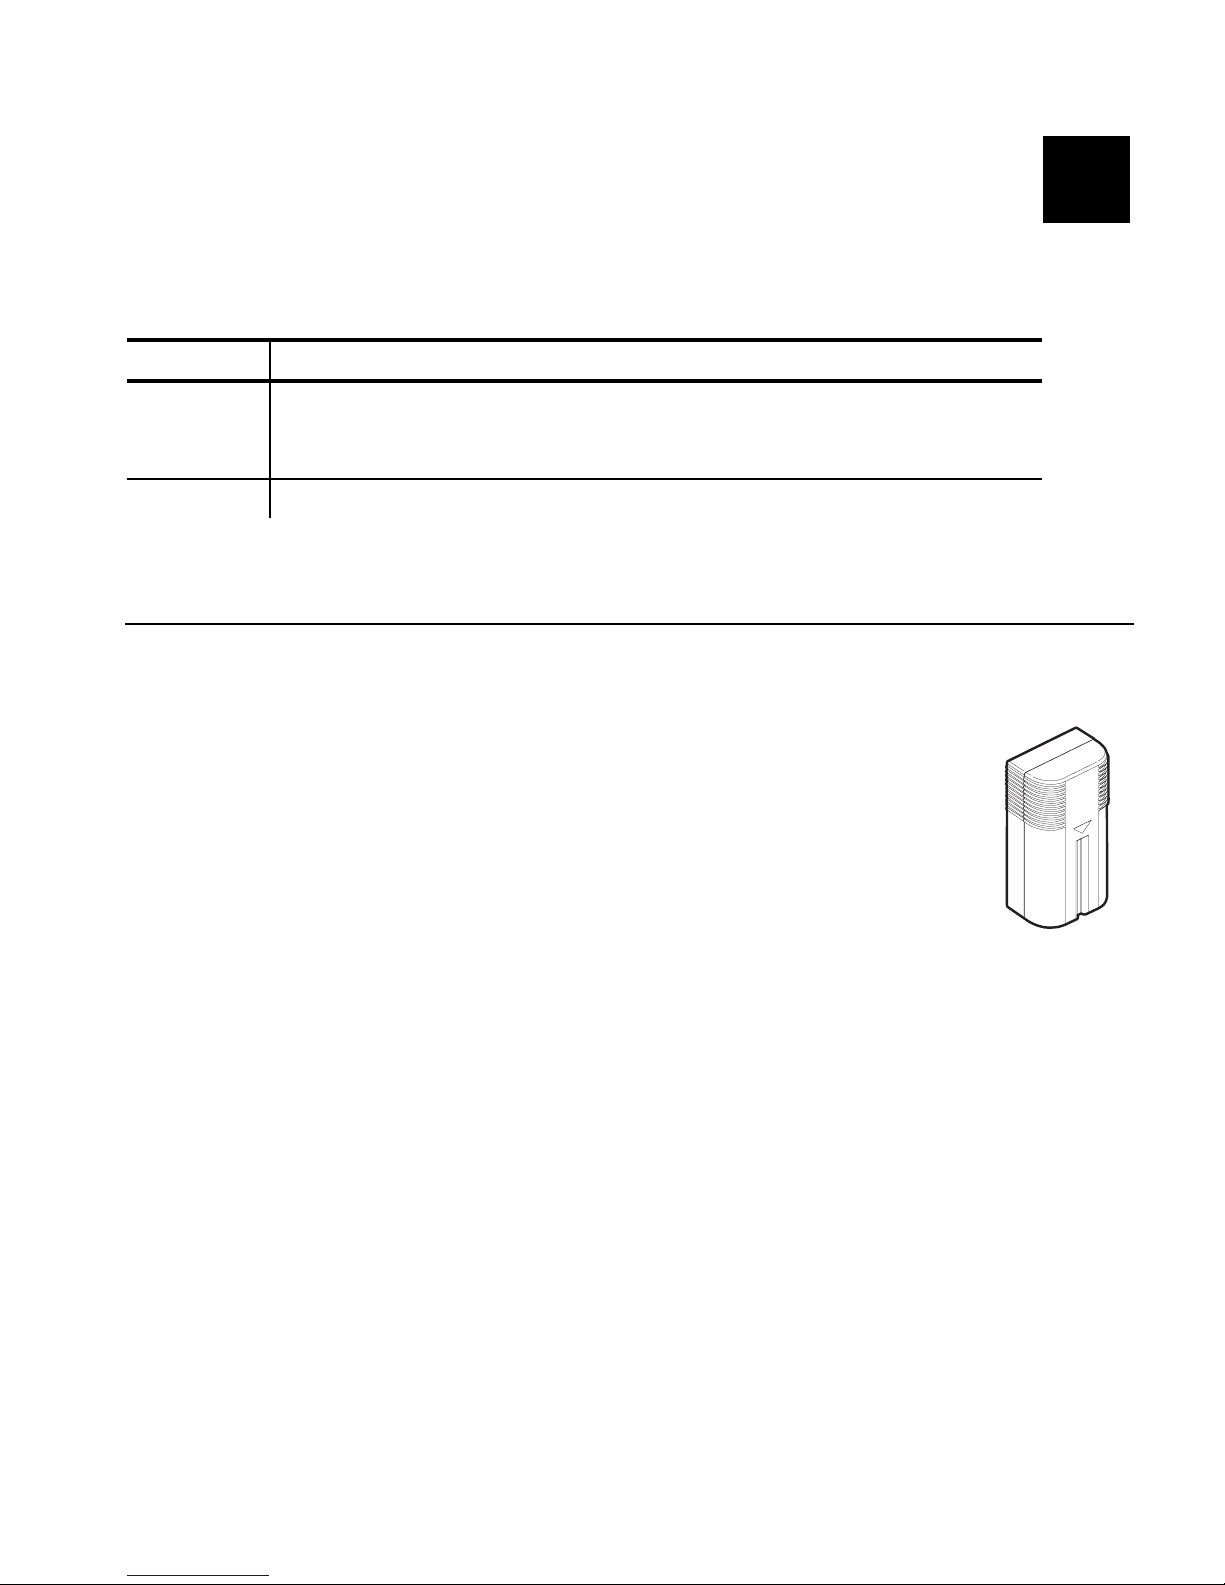
Using the Main Battery
The printer’s main power source is a 7.4V lithium-ion battery.
Note: The printer only takes this battery. Do not substitute
batteries from any other manufacturer.
You must charge the battery when you receive the printer,
even if you do not use it right away.
Charging the Main Battery
To charge the main battery, use either the 9462 single-station
or 9465 four-station battery chargers. Refer to the documentation
provided with the chargers for more information. Charging time is
approximately 1.5 – 3 hours.
Warning: The battery might explode if placed on a different charger.
2
2-2 Using Batteries
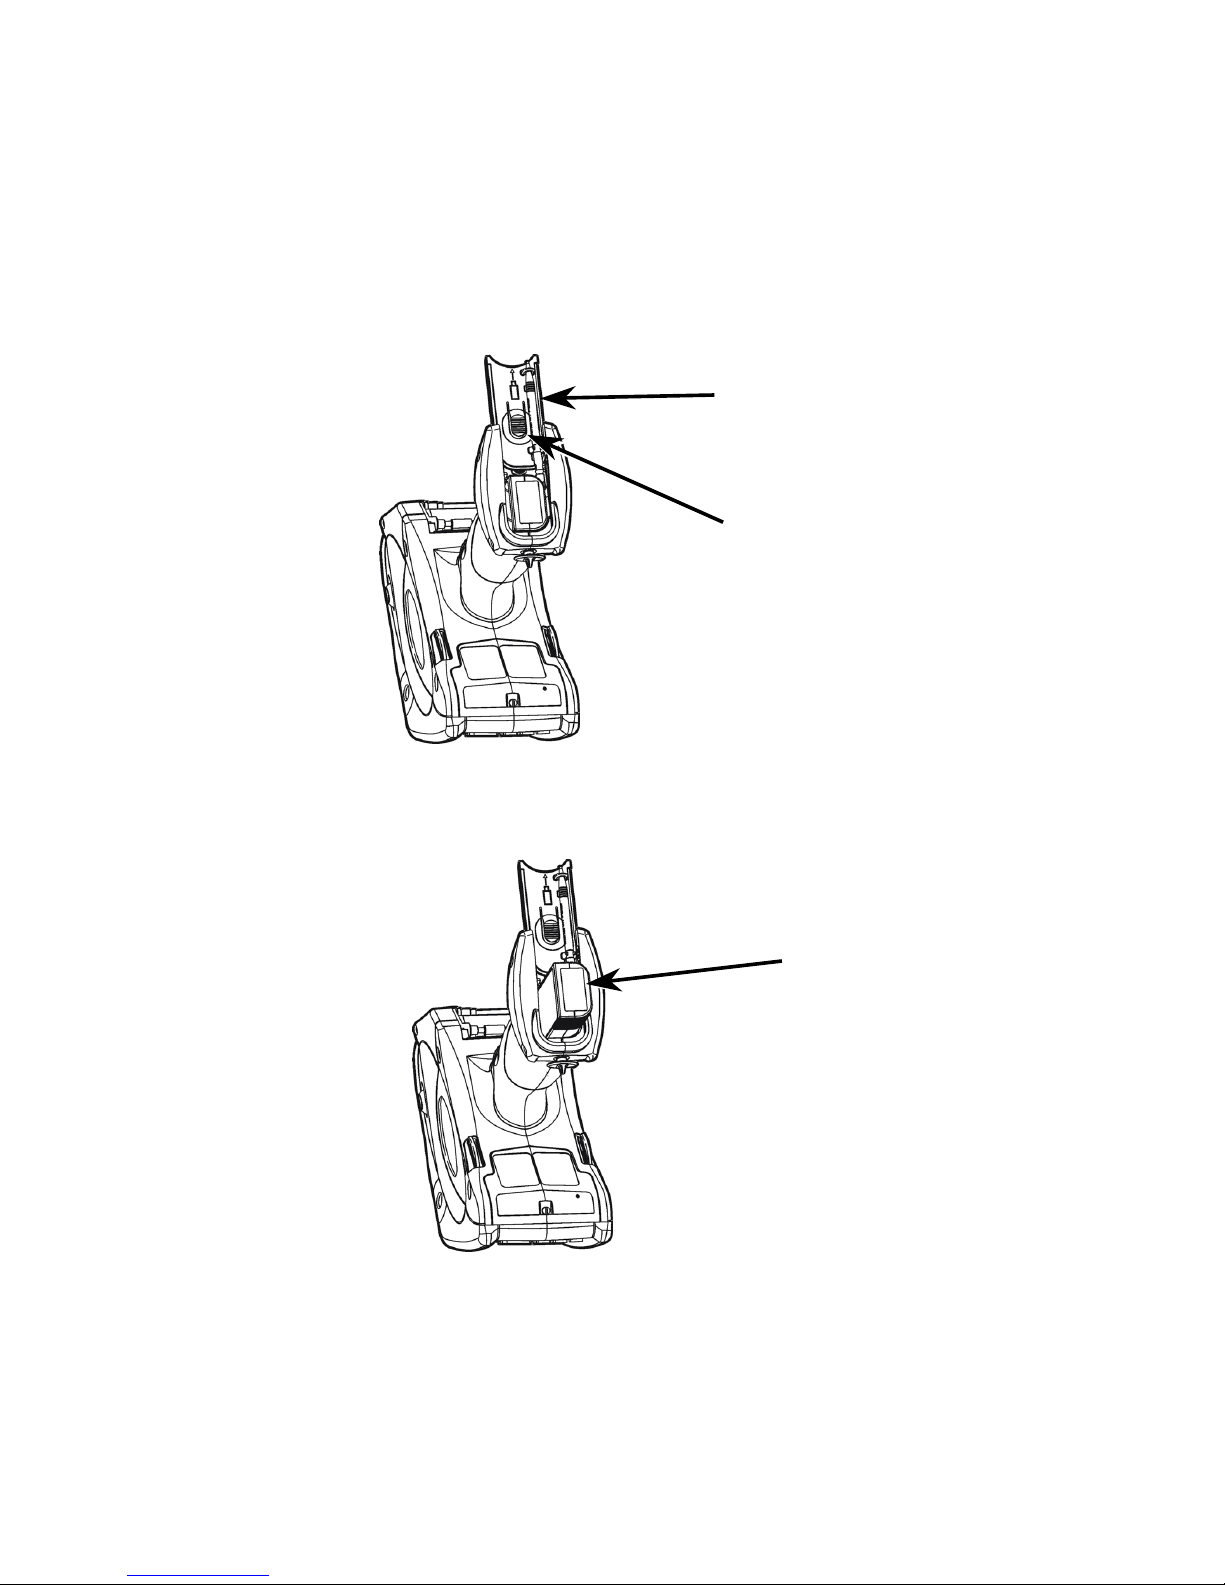
Changing the Main Battery
To change the main battery:
1. Turn the printer over and press the button on the battery compartment
door (at the bottom of the printer’s handle) and slide it open.
2. Turn the printer upright, holding your palm beneath the open battery
compartment. Hit the printer on your hand and catch the battery as it
slides out.
3. Insert a new battery into the compartment (connector end first).
4. Slide the compartment door shut until clicks into place.
Main Battery
Battery
Compartment
Door
Button
Using Batteries 2-3
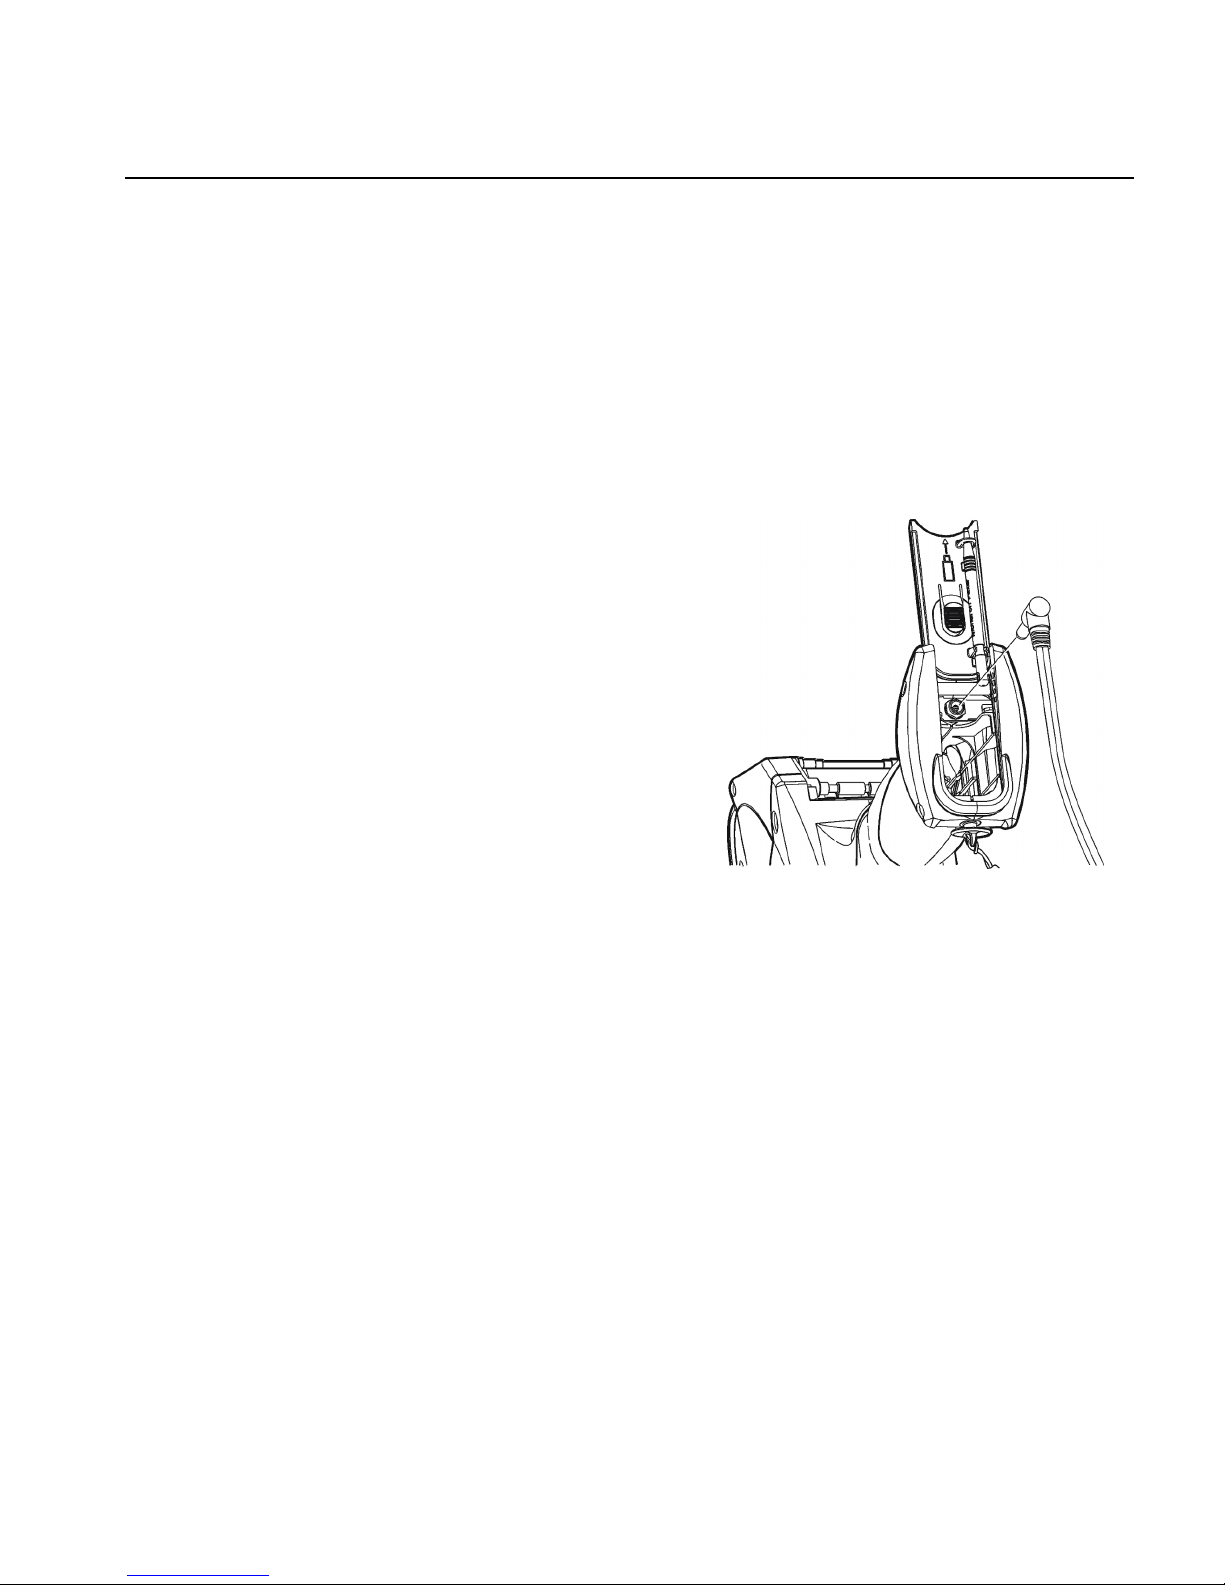
Charging the Backup Battery
The internal backup battery is a 3.6-volt lithium-ion battery that maintains
the printer’s system settings. The backup battery maintains its charge
through the main battery or the Battery Backup Power. When fully
charged, the backup battery provides seven days of power. To keep the
battery fully charged, connect the Backup Batter Power whenever you
remove the main battery.
Note: If the printer does not have a main battery or is not connected to
the Battery Backup Power, it loses its charge and the printer’s
system settings.
1. Remove the main battery from the
battery compartment.
2. Connect the Battery Backup Power as
shown.
2-4 Using Batteries
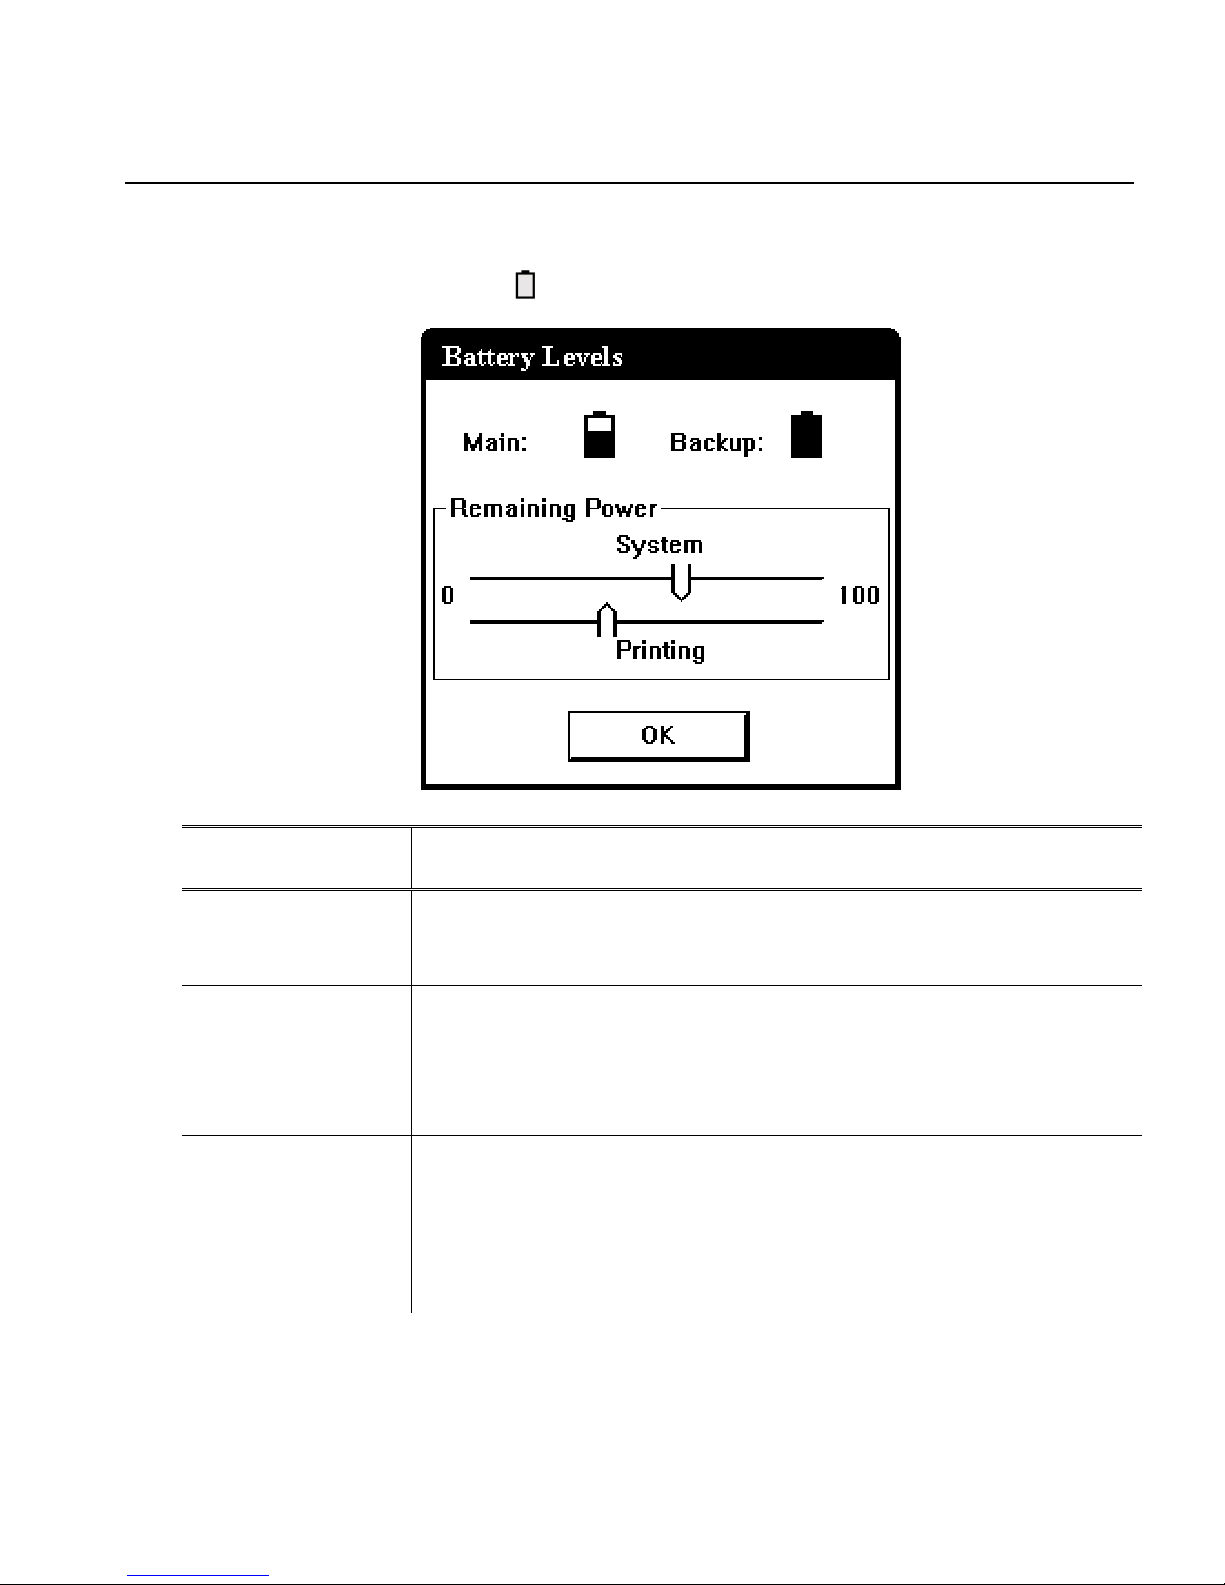
Checking the Battery Status
The printer easily provides the status of the main and backup batteries.
1. Select the battery icon ( ) on the status bar of the display.
Power Supply Description
Main Battery
Shows the status of the main battery. If the status is
low, printing may be interrupted. Replace the main
battery in the printer with a fully charged battery.
Backup Battery
Shows the status of the backup battery. If the status is
low, remove the main battery and connect the printer to
the Battery Backup Power. If you replace the main
battery, its charge depletes while charging the backup
battery. You cannot replace the backup battery.
Remaining
Power
Shows the power levels of the main battery for system
operations and printing. If the printing power level is
low, you may still be able to use Windows functions, but
you do not have enough battery power to print. Replace
the main battery in the printer with a fully charged
battery.
2. Select OK.
 Loading...