

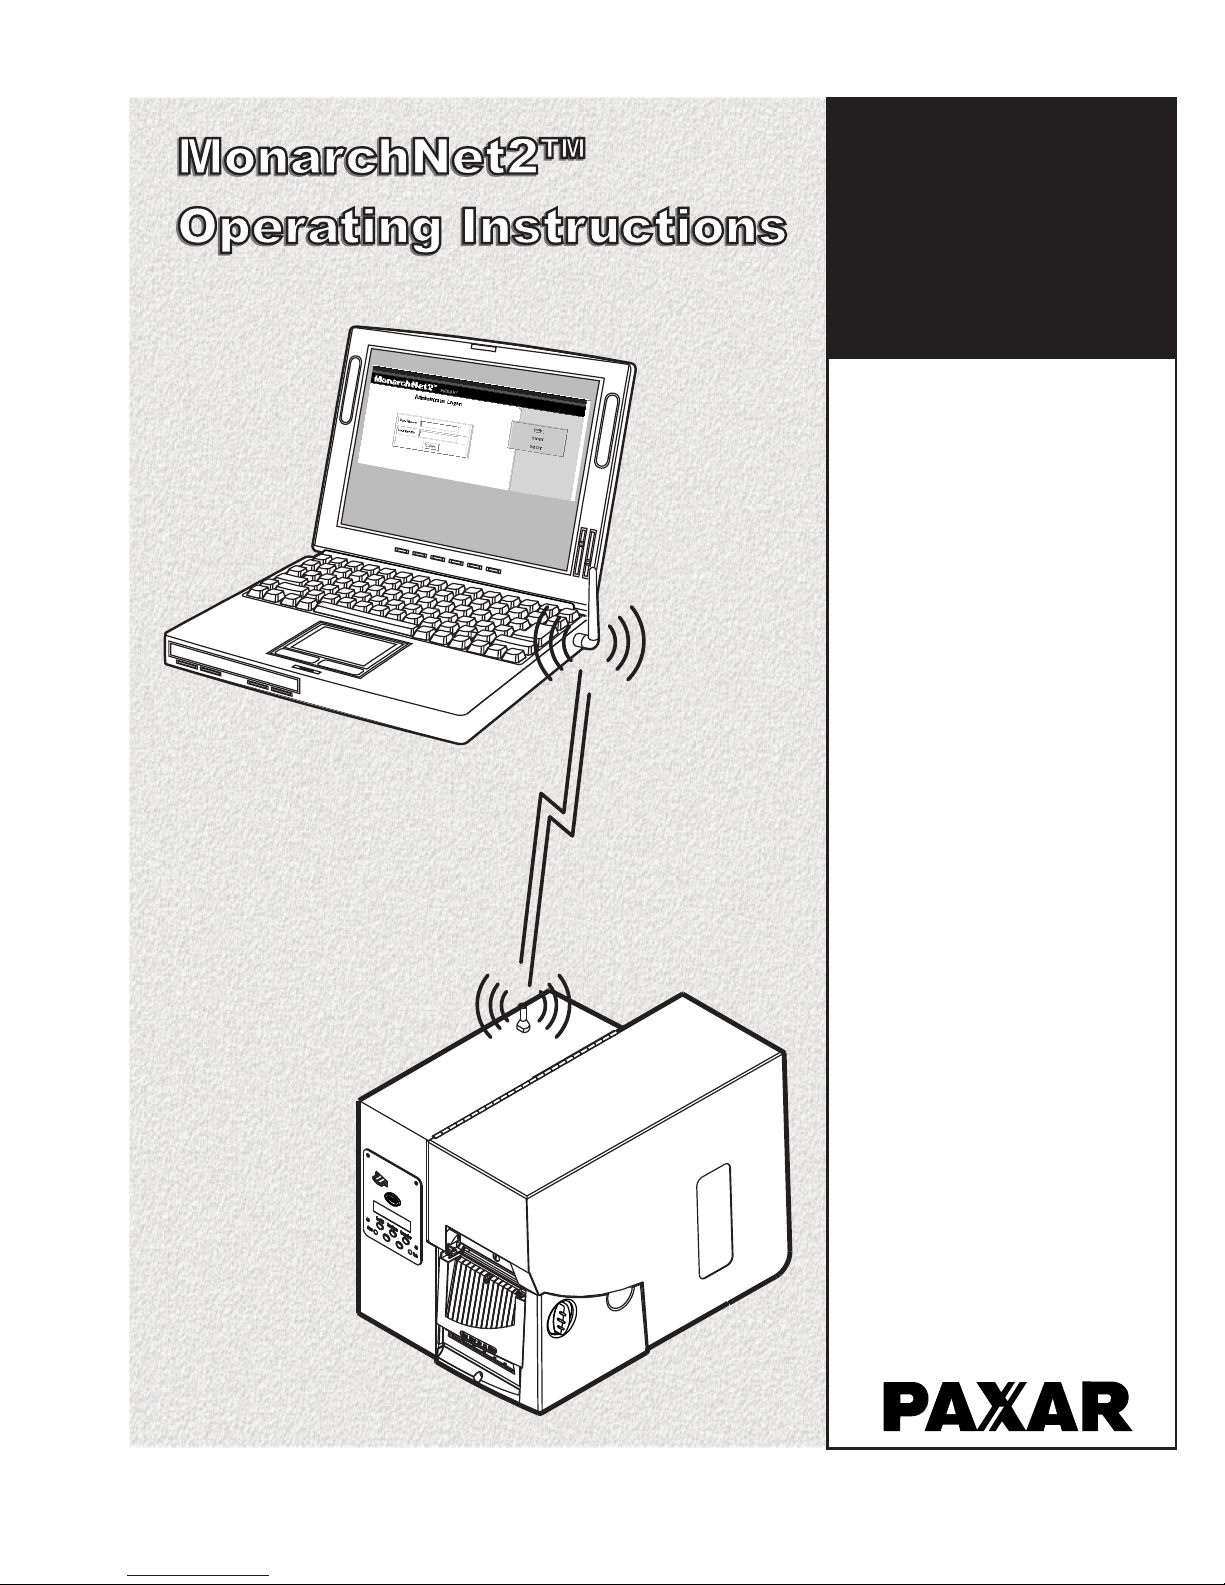
Paxar MonarchNet2 Operating Instructions Manual
u
®
9855
u
9860™
®
Monarch
Printers
TC7411MN2OI Rev. AD 5/07 ©2007 Paxar Americas, Inc. All rights reserved.

Each product and program carries a respective written warranty, the only
warranty on which the customer can rely. Paxar reserves the right to make
changes in the product, the programs, and their availability at any time and
without notice. Although Paxar has made every effort to provide complete
and accurate information in this manual, Paxar shall not be liable for any
omissions or inaccuracies. Any update will be incorporated in a later
edition of this manual.
2006 Paxar Americas, Inc. All rights reserved. No part of this publication
may be reproduced, transmitted, stored in a retrieval system, or translated
into any language in any form by any means, without the prior written
permission of Paxar Americas, Inc.
Trademarks
Paxar is a trademark of Paxar Corporation.
Monarch, Monarch Net2, Smart Relay, 7411, 939, 9855®, and 9860 are
trademarks of Paxar Americas, Inc.
Microsoft, Windows, and NT are trademarks of Microsoft Corporation in the
United States and/or other countries.
Firefox is a trademark of Mozilla Corporation.
UNIX is a trademark of The Open Group.
Novell and NetWare are trademarks of Novell, Inc. in the United States and
other countries.
HP Jet Admin and HP Web Jet Admin are trademarks of Hewlett-Packard,
Inc.
The Bluetooth trademarks are owned by Bluetooth SIG, Inc.
Netscape and Netscape Navigator are trademarks of Netscape
Communications Corporation in the United States and other countries.
Netscape's logos and Netscape product and service names are also
trademarks of Netscape Communications Corporation, which may be
registered in other countries.
Excerpts reprinted from Wireless LANs Implementing High Performance
IEEE 802.11 Networks, Second Edition with permission.
Excerpts reprinted from the TROY200 Installation and User’s Guide with
permission from Silex Technology America, Inc.
Paxar Americas, Inc.
170 Monarch Lane
Miamisburg, OH 45342

i
TABLE OF CONTENTS
GETTING STARTED......................................................................................1-1
Overview ................................................................................................1-1
Audience ................................................................................................1-1
About This Manual...................................................................................1-2
System Requirements ..............................................................................1-2
Supported Operating Systems...................................................................1-3
Supported Network Protocols....................................................................1-3
Setting Up the Print Server.......................................................................1-4
Checking the Print Server Hardware..........................................................1-5
Verifying Successful Installation ...............................................................1-5
Verifying Successful Installation ...............................................................1-6
About “Print Mode Ready” ........................................................................1-8
Printing a Configuration Label...................................................................1-9
CONFIGURING THE 802.11B/G AND IP SETTINGS .........................................2-1
Saving Settings .......................................................................................2-2
MAC Address ..........................................................................................2-2
IP Address..............................................................................................2-3
Subnet Mask ...........................................................................................2-4
IP Gateway .............................................................................................2-5
Boot Method ...........................................................................................2-6

ii
Wireless .................................................................................................2-7
Signal Strength....................................................................................2-8
SSID...................................................................................................2-9
Wireless Mode ...................................................................................2-10
A-Point Density..................................................................................2-11
Transmit Rate.................................................................................... 2-12
Channel ............................................................................................ 2-13
Default Network ....................................................................................2-14
Factory Defaults ................................................................................2-15
Test Label .........................................................................................2-16
USING THE WEB INTERFACE .......................................................................3-1
Logging In ..............................................................................................3-2
Configuring the Printer.............................................................................3-4
Changing the Printer Setup ...................................................................3-5
Changing the System Setup ..................................................................3-7
Reset/Initialize Network ...........................................................................3-8
Configuring the Network Settings ..............................................................3-9
Changing TCP/IP Settings................................................................... 3-10
Changing SNMP Settings .................................................................... 3-12
Changing Wireless Settings ................................................................3-14
Setting Alerts..................................................................................... 3-18
Receiving An Alert .............................................................................3-19
Reading the Virtual Panel....................................................................... 3-20
Using Custom Commands....................................................................... 3-21
Changing the Password .........................................................................3-22
Updating Firmware ................................................................................ 3-24
Basic Security Configurations .................................................................3-25

iii
CONSOLE COMMANDS ................................................................................4-1
Help Commands ......................................................................................4-4
General Commands .................................................................................4-6
Setup Commands .................................................................................. 4-11
802.11b/g Wireless Commands ...............................................................4-16
TCP/IP Commands ................................................................................4-19
SNMP Commands..................................................................................4-22
RFID Commands ................................................................................... 4-22
Using the Network Packet ......................................................................4-23
USING THE SMART RELAY SYSTEM .............................................................5-1
Initial Smart Relay Setup Procedures ........................................................5-2
About the Primary Printer .........................................................................5-2
About the Partner Printer .........................................................................5-3
Connecting the Printers............................................................................5-4
Configuring the Partner Printer .................................................................5-5
Using the Smart Relay Telnet Commands ..................................................5-5
About the Smart Relay Counter.................................................................5-7
TROUBLESHOOTING....................................................................................6-1
Printing a Test Label ...............................................................................6-1
General Troubleshooting Information.........................................................6-4
Troubleshooting Wireless Configuration Problems ......................................6-7
Technical Support ...................................................................................6-7
SPECIFICATIONS........................................................................................ A-1
802.3 Specifications ............................................................................... A-1
Optional 802.11b/g Specifications ............................................................ A-1
Options ................................................................................................. A-2
GLOSSARY................................................................................................. G-1
INDEX ..........................................................................................................I-i

iv

Getting Started 1-1
GETTING STARTED
Your Monarch 9855 or 9860 Version 5.0 or greater printer
contains MonarchNet2 software, which allows you to access, configure,
and control your printers with the Monarch 7411 Ethernet Print Server
remotely across a LAN (local area network), WLAN (wireless local area
network), or WWW (world-wide web) connection.
Information in this document supercedes information in previous
versions. Check our Web site (www.paxar.com) for the latest release
and documentation information.
Overview
The Monarch 7411 Print Server lets you communicate with Monarch
printers on an 802.11b and 802.11g wireless network or wired Ethernet
802.3 network. 802.11b/g refers to 802.11b and 802.11g in this manual.
You can use the print server in Ad-Hoc (peer-to-peer) or infrastructure
(access point) wireless mode. The print server operates at speeds of up
to 54 Mbps on any IEEE 802.11b/g wireless compatible network. It
includes a dual-mode built-in wired Ethernet (802.3) connection. So, the
print server automatically switches between wireless and wired Ethernet
mode.
Refer to your network manuals for more information. This manual does
not include information about setting up your wireless or wired network.
We recommend reviewing the terms in the glossary before you
begin.
Audience
This manual is written for the System Administrator who sets up printers
on the network and is familiar with basic networking principles.
1

1-2 MonarchNet2 Operating Instructions
Using This Manual
Following is a summary of the contents of this manual:
Chapter Contents
1 Getting Started Information you should know before using the
printer.
2 Configuring the
802.11b/g and
IP Settings
Setting communications between your network and
printer.
3 Using a Web Browser Using your Web browser to configure and monitor
your network printer.
4 Console Commands Lists the supported console commands for your
network printer.
5 Using the Smart Relay
System
Explains how to configure a primary and partner
printer.
6 Troubleshooting Common problems and their solutions.
A Specifications Printer and radio specifications.
G Glossary Networking and printer terms and their definitions.
System Requirements
To use the print server for printing from a wireless network, you need an
802.11b/g wireless network. The wireless network consists of either of
the following:
♦ An 802.11b/g wireless enabled computer printing straight to the
printer
(Ad-Hoc mode).
♦ An 802.11b/g wireless access point allowing wireless and wired
Ethernet enabled computers to print to the print server (infrastructure
mode).
To configure and print, you need the following:
1. The MAC address from the label of the print server (for example:
004017023F96).
2. Obtain the following information from your wireless network
administrator:
♦ Wireless mode (infrastructure or Ad-Hoc).
♦ The SSID (service set identifier) for your wireless network.

Getting Started 1-3
♦ If you are using TCP/IP (recommended for Windows Networks) and
are not connected to a DHCP server (for obtaining an IP address
automatically), you need a unique IP address for the wireless print
server (for example: 192.0.0.192) and a subnet mask. If the print
server is not on the same IP subnet as the computers you are printing
from, you need a router. A print server with an IP address of
192.0.0.192 will not be seen by a network looking for devices with a
prefix of 10.1.xxx.xxx. A router (default gateway) address is optional.
♦ Wireless security settings.
Supported Operating Systems
The print server supports multiple network protocols for users with
Microsoft Windows, Novell NetWare, NDS, and UNIX.
Supported Network Protocols
♦ TCP/IP:
LPD/LPR
BOOTP
DHCP
HP JetDirect
Raw TCP/IP (port 9100 or any chosen port)
NetWare (NEST)
NetBIOS over IP (with SMB)
NetBEUI
DLC
♦ Telnet
♦ RSH or REMSH (remote shell)
♦ WINS
♦ DHCP
♦ FTP
♦ SNMP
All protocols are simultaneously active.

1-4 MonarchNet2 Operating Instructions
Setting Up the Print Server
For MonarchNet2 to operate, make sure the print server is set to use the
printer’s internal parallel port and use bi-directional communications.
If this is not already set for you:
1. From the printer’s Main Menu, select Setup, Port Settings, Parallel
Comm., Port, and press or until you see Internal. Press
Enter/Pause to save the setting.
2. Then, press to display Mode. Press Enter/Pause. Press or
until you see IEEE1284. Press Enter/Pause to save the setting.
3. Press Escape/Clear until you see the Main Menu.
Note: MonarchNet2 uses the printer’s internal parallel port.
You can switch between MonarchNet2 and using the parallel port, but
you must set the Port to External and the Mode to Compatible. Then,
turn off the printer and turn it back on to detect the cable. MonarchNet2
is not available until you disconnect the parallel cable and change the
Port to Internal and Mode to IEEE1284.
The serial and USB port are still active. However, allow a two-second
delay when switching from one port (serial, Ethernet, or USB) to another.
Getting Started 1-5
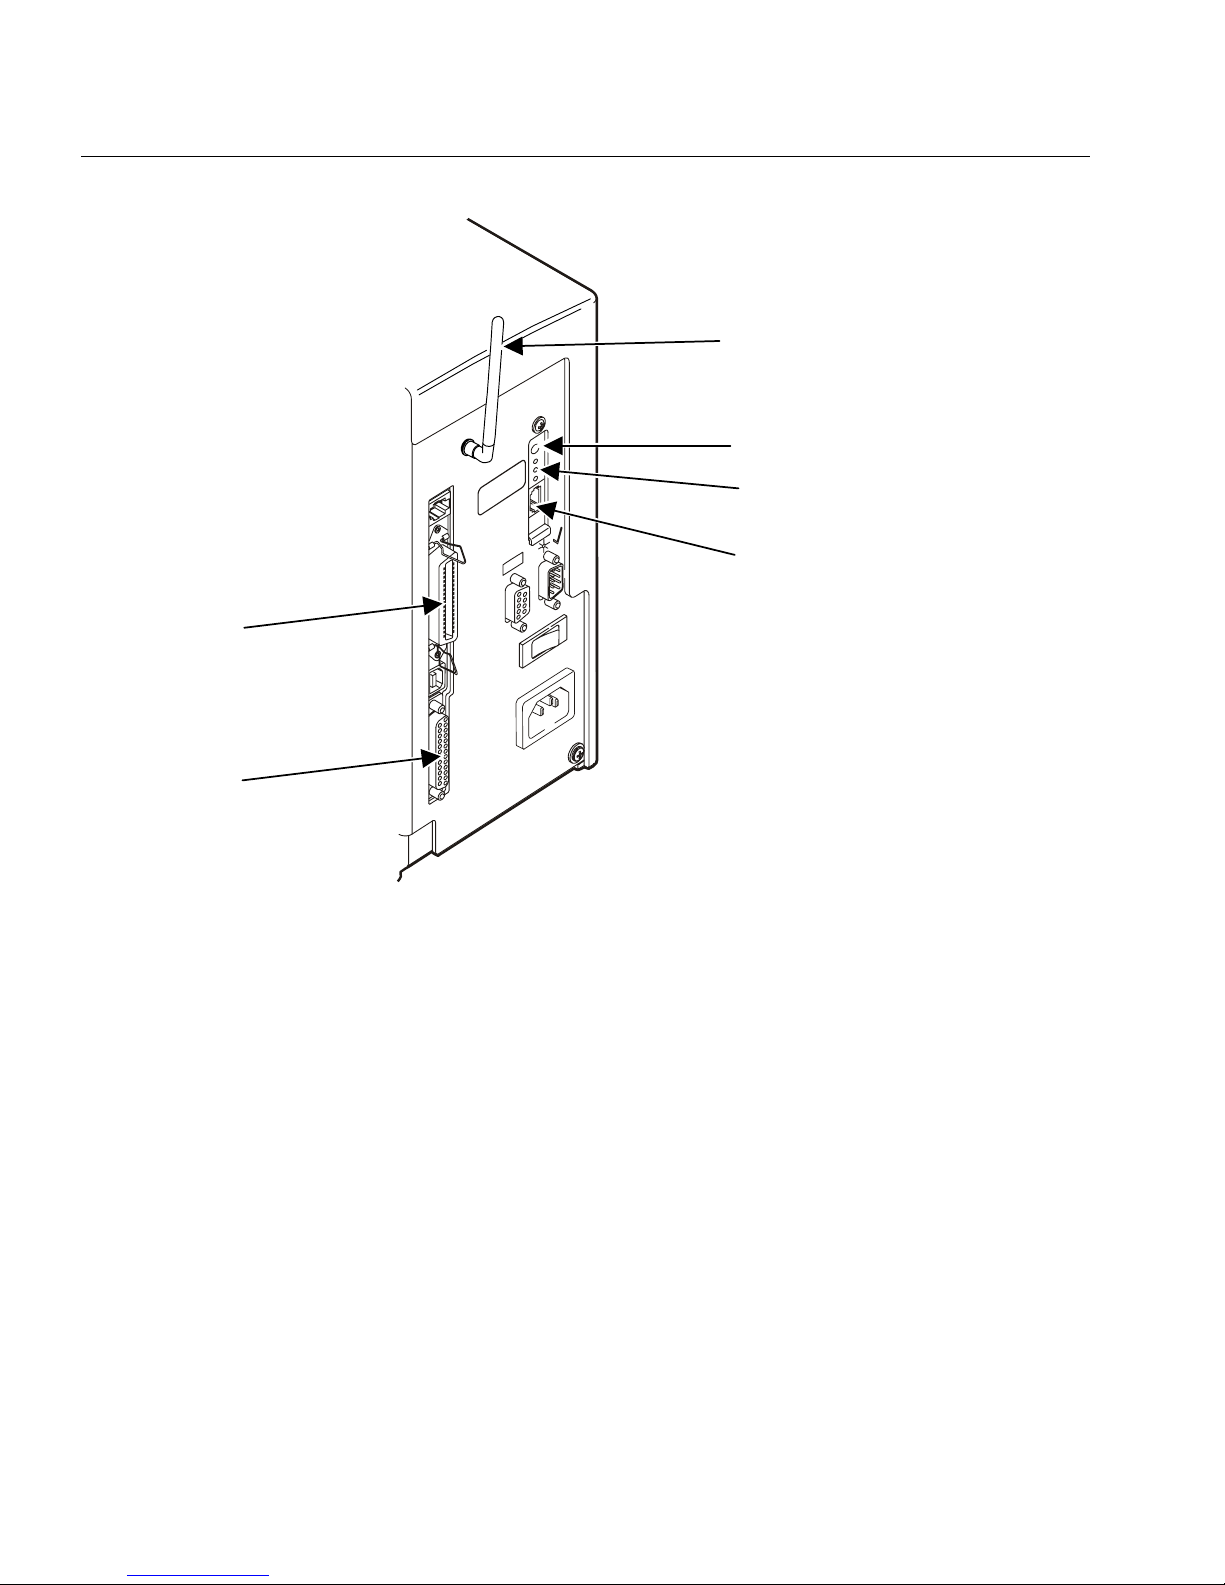
Checking the Print Server Hardware
The Ethernet print server comes preinstalled and tested in your printer.
Test Button
Antenna
Serial
Port
LEDs
9855 Plastic Cover Printer
Parallel
Port
Ethernet Port

1-6 MonarchNet2 Operating Instructions
Verifying Successful Installation
When the printer is turned on, the print server runs through a set of
power-up diagnostics for a few seconds. All three LEDs blink
momentarily. Then, the LEDs indicate the following activity:
LED Indicators Status
solid printer is on
blinking error
Orange
off printer is off
solid Ethernet link (wired 10baseT)
blinking network activity
Yellow
off no Ethernet connection
solid Ethernet link (wired 100baseTX)
blinking network activity
Green
off no Ethernet connection
solid wireless link
blinking network activity
Yellow & Green
off no wireless connection

Getting Started 1-7
Test Button
Press this button down for less than five seconds
to print a configuration label on the printer. The
label shows the current wireless and network
settings of the print server. See “Printing a
Configuration Label” for more information. If the
label does not print, see Chapter 6,
“Troubleshooting.”
Press this button down for 10 seconds to reset
the password to “access.” To reset the print
server to its factory default parameters, see
“Default Network” for more information.
LED Status
Indicators
The orange light comes on when the printer is
turned on. The yellow light comes on solid when
an Ethernet link (wired 10baseT) is established.
The green light comes on solid when an Ethernet
link (wired 100baseTX) is established. Both the
yellow and green lights come on solid when a
wireless link is established. The lights blink
during network activity.
Antenna A rugged 802.11b/g compatible antenna, mounted
on the back of plastic-cover printers or on the top
of metal-cover printers.
1-8 MonarchNet2 Operating Instructions
About “Print Mode Ready”
When you turn on your printer, you may see several different “Print Mode
Ready” screens based on your printer’s current configuration.
When you see Description
Print Mode
Ready
The printer is ready to accept data, but it
does not have a print server with a
MonarchNet2 connection.
Print Mode
█ █ █ Ready
A connection is established between the
Ethernet print server and the MonarchNet2
protocol.
It may take a minute or more before a
wireless connection is associated between
the print server and the access point.
N Print Mode
Ready
A connection is established between the
Ethernet print server and the MonarchNet2
protocol.
It may take a minute or more before a
wired connection is associated with the
Ethernet print server and the network.
The boxes on the display indicate the signal strength of the connection
between the printer and access point. This is an approximation and
should be used for reference. For example, these boxes
█ █ ▌ indicate
of signal strength of approximately 80 percent.

Getting Started 1-9
Printing a Configuration Label
To print a configuration label, press the Test button on the back of the
print server.
Use 6-inch long supply. If you are using supply that is shorter than 6
inches long, temporarily change your Supply Type in the printer menu to
“continuous” to print the entire test label. After printing the test label,
change your supply type to your previous setting. Some information may
print outside the label edges of narrow supply.
MonarchNet 2 Network Status
Connected – Wireless
MAC – 00-33-22-AK-35-18
Nwk Ver – CZMO –7.01L (2006.05.23)
Boot Ver – 1.0
WiFi Ver – 2.13.10.0 LMAC
Prn Ver – Version 5.0
Boot Ver – VERSION 3.2
IP Address 192.0.0.192
Subnet Mask 255.255.0.0
IP Gateway 192.0.0.192
(via DHCP 192.0.10.192)
Boot Method AUTO
Boot Tries 3
Timeout 0 min
Keep Alive 1 min
WiFi Information
WiFi SSID ABC123
WiFi Mode INFRASTRUCTURE
WiFi Speed 11
WiFi WEP Disabled
Signal Strength 72
Actual SSID
Attached AP MAC
Network Stats
Packets Received 2485
Bytes Received 225990
Bad Packets Received 448
Receiver Overruns 0
Packets Transmitted 193
Bytes Transmitted 23731
At the printer, you can also print a network/wireless test label (third test
label), which lists the IP address, subnet mask, etc. See Chapter 6,
“Troubleshooting,” for more information.
IP Address
WiFi Mode

1-10 MonarchNet2 Operating Instructions
Configuring the 802.11b/g and IP Settings 2-1
CONFIGURING THE 802.11b/g
AND IP SETTINGS
This chapter explains how to configure and view your network settings
by using the printer’s Main Menu. You can set the MAC address, IP
address, subnet mask, IP gateway, boot method, wireless information,
and default network. If the printer is not communicating with the print
server’s network card, the Network Menu options do not appear.
All nodes of a wireless network need to have the same settings to
communicate with each other. We recommend reviewing the
terms in the glossary before you begin.
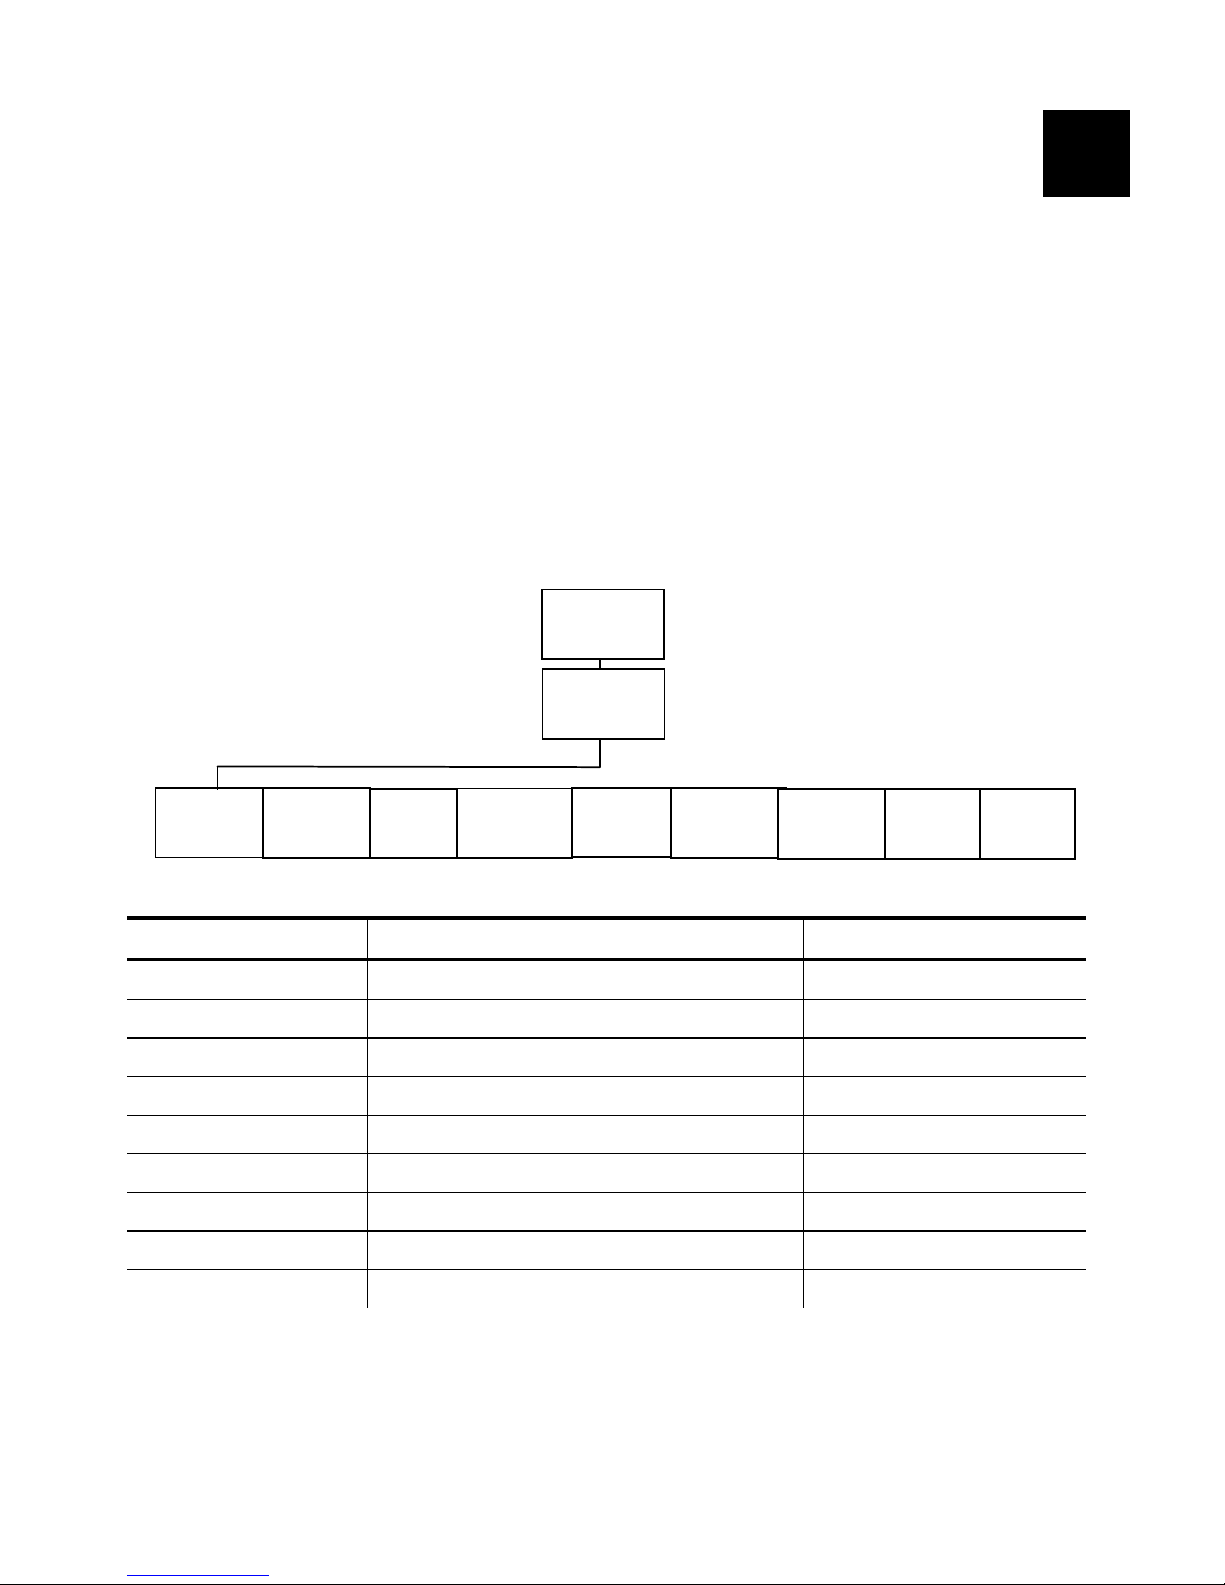
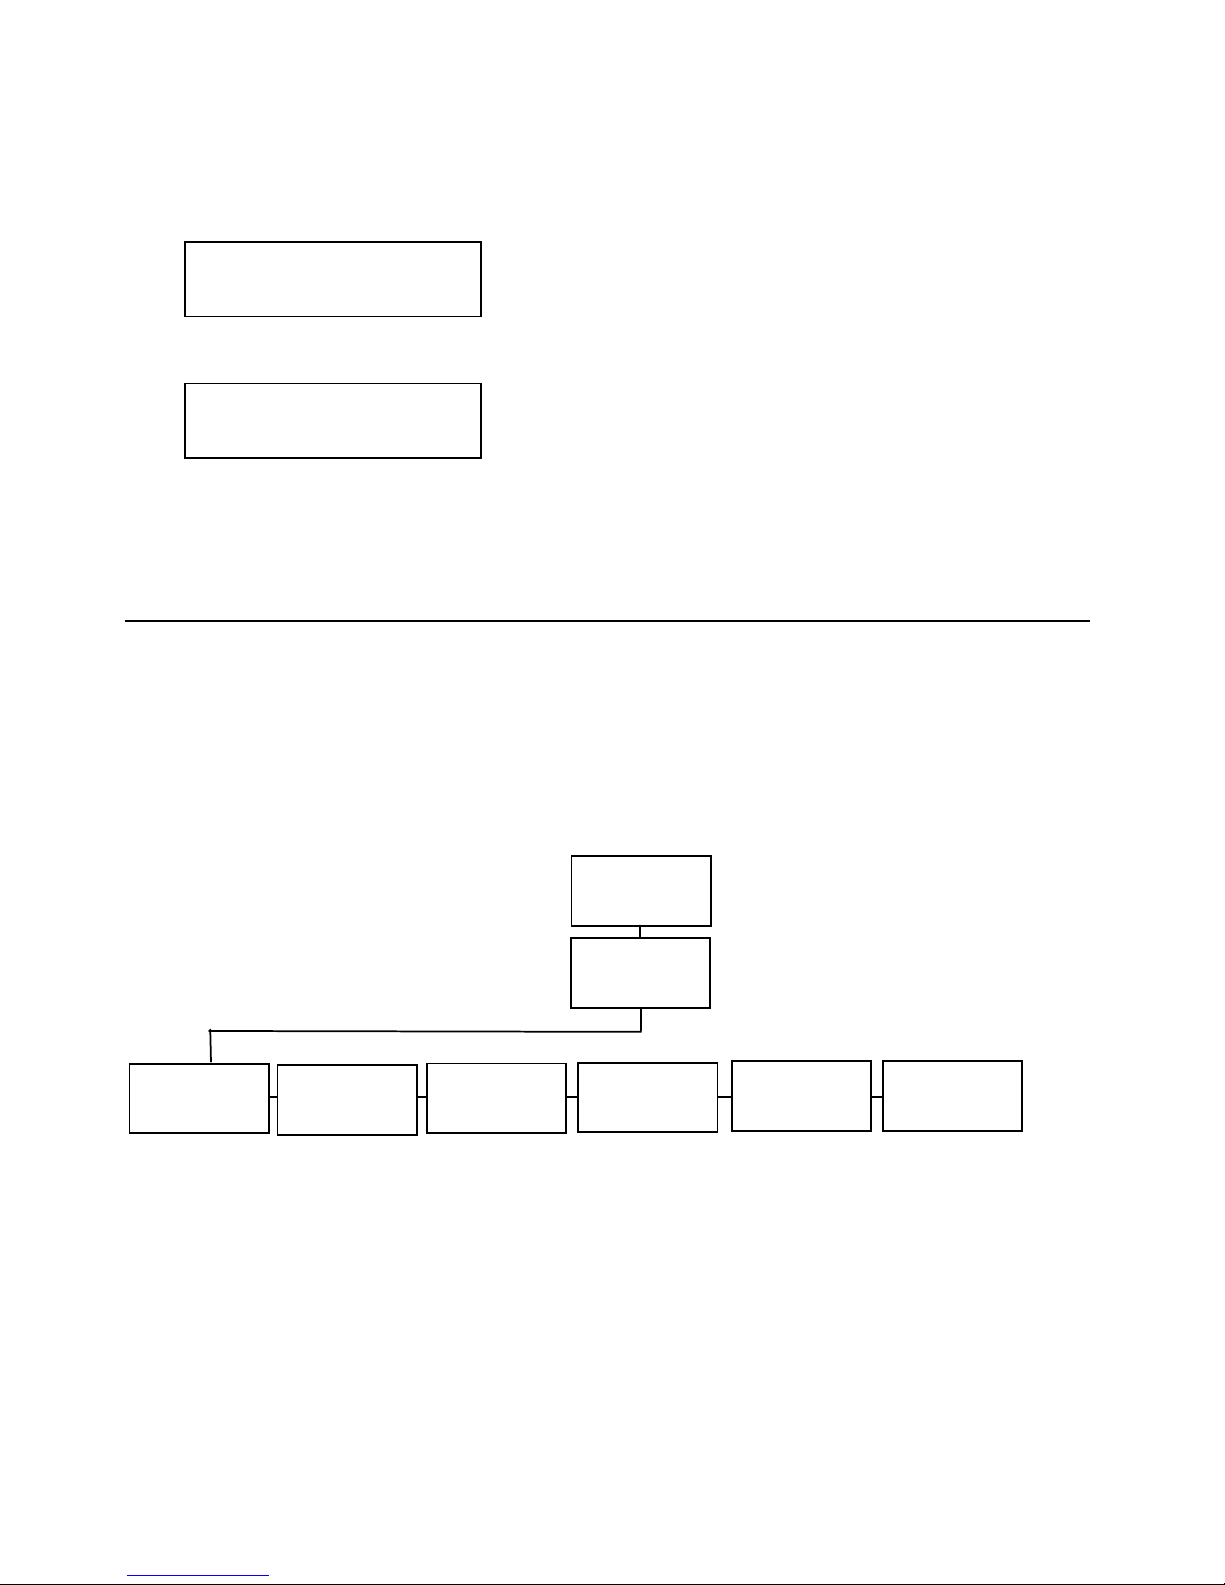
MAIN MENU
The options are listed in the table below.
Option Choices Default
MAC Address View only None – preset value
IP Address xxx.xxx.xxx.xxx 192.0.192.0
Subnet Mask xxx.xxx.xxx.xxx 0.0.0.0
IP Gateway xxx.xxx.xxx.xxx 0.0.0.0
Boot Method Auto/Static/BOOTP/DHCP/RARP Auto
Wireless See “Wireless” section N/A
Default Network Default Setting/Factory Default N/A
Test Label Yes/No No
NCL Settings Reinit NCL/Get First NCL None
2
Setup
Network
MAC
A
ddress
Boot
Method
IP
A
ddress
Subnet
Mask
IP
Gateway
Wireless
Default
Network
Test
Label
NCL
Settin
g
2-2 MonarchNet2 Operating Instructions
Saving Settings
After you display the option you need, press Enter/Pause to save the
setting. Press Escape/Clear to exit to the next higher menu. If you
save any network or wireless options, the print server resets and uses
the new settings. It may take a minute or more, depending on
network traffic, for the print server to reset and connect to the
network. “Please wait…” is displayed while the print server resets
and is connecting to the network.
Note: Whenever you press Escape/Clear, you lose all previous
entries you have made since the last time you pressed
Enter/Pause.
Make sure to inform your System Administrator if you change any
settings. Keep a record of each of your network printer’s settings in a
safe place.
MAC Address
The Media Access Control (MAC) Address is a hard-coded value that
cannot be changed (like a serial number). It consists of four 3-digit
numeric fields, usually separated by periods. The MAC address of
the print server is located on the label of the printer server.
Note: If the printer is not communicating with the print server’s
network card, the Network Menu options do not appear.
To view the MAC address, from the Main Menu: Select Setup,
Network. Then follow these steps.
1. Press or until you see
NETWORK
MAC Address
2. Press Enter/Pause. The current setting is displayed, for example:
MAC Address
000123ABC321
3. Press Enter/Pause.
4. Press Escape/Clear until you see the Main Menu.
Configuring the 802.11b/g and IP Settings 2-3
IP Address
The IP (Internet Protocol) Address is a unique identifier for a device
on a network. It consists of four 3-digit numeric fields, separated by
periods.
To change the setting, from the Main Menu: Select Setup, Network.
Then follow these steps.
1. Press or until you see
NETWORK
IP Address
2. Press Enter/Pause. The current setting is displayed, for example:
IP Address
192.0.192.0
3. Press or to move through the positions. Press Feed/Cut to
scroll one digit at a time from 0-9. After you display the option
you need, press Enter/Pause.
For example, to change the IP address from 192 to 000, press
or to highlight the first position and press Feed/Cut until
you see 0
, then press to select the next position and press
Feed/Cut until you see 0
, then press to select the next
position and press Feed/Cut until you see 0
. Press
Enter/Pause to save the setting or press Escape/Clear to exit
without saving.
If you enter a series of digits greater than 255 for any
segment of the IP address and press Enter/Pause, the printer
does not save the setting. However, no error appears on the
display. Correct the IP address and then press Enter/Pause
to save the setting.
4. Press Escape/Clear until you see the Main Menu.
2-4 MonarchNet2 Operating Instructions
Subnet Mask
IP networks are divided using subnet masks. The subnet mask
address determines where the IP address belongs in the network. It
consists of four 3-digit numeric fields.
To change the setting, from the Main Menu: Select Setup, Network.
Then follow these steps.
1. Press or until you see
NETWORK
Subnet Mask
2. Press Enter/Pause. The current setting is displayed, for example:
Subnet Mask
255.255.000.000
3. Press or to move through the positions. Press Feed/Cut to
scroll one digit at a time from 0-9. After you display the option
you need, press Enter/Pause.
For example, to change the subnet mask from 192 to 000,
press or to highlight the first position and press
Feed/Cut until you see 0
, then press to select the next
position and press Feed/Cut until you see 0
, then press to
select the next position and press Feed/Cut until you see 0
.
Press Enter/Pause to save the setting or press Escape/Clear
to exit without saving.
If you enter a series of digits greater than 255 for any
segment of the subnet mask and press Enter/Pause, the
printer does not save the setting and no error appears on the
display. Correct the subnet mask and then press Enter/Pause
to save the setting.
4. Press Escape/Clear until you see the Main Menu.
Configuring the 802.11b/g and IP Settings 2-5
IP Gateway
The IP Gateway (or router) allows connections (communications)
between different subnets on a network. It consists of four 3-digit
numeric fields.
To change the setting, from the Main Menu: Select Setup, Network.
Then follow these steps.
1. Press or until you see
NETWORK
IP Gateway
2. Press Enter/Pause. The current setting is displayed, for example:
Gateway Address
010.192.000.000
3. Press or to move through the positions. Press Feed/Cut to
scroll one digit at a time from 0-9. After you display the option
you need, press Enter/Pause.
For example, to change the Gateway Address from 192 to
000, press or to highlight the first position and press
Feed/Cut until you see 0
, then press to select the next
position and press Feed/Cut until you see 0
, then press to
select the next position and press Feed/Cut until you see 0
.
Press Enter/Pause to save the setting or press Escape/Clear
to exit without saving.
If you enter a series of digits greater than 255 for any
segment of the Gateway Address and press Enter/Pause, the
printer does not save the setting and no error appears on the
display. Correct the Gateway Address and then press
Enter/Pause to save the setting.
4. Press Escape/Clear until you see the Main Menu.

2-6 MonarchNet2 Operating Instructions
Boot Method
The boot method sets the way the device receives its IP address.
The choices include Auto, Static, BOOTP, DHCP, and RARP.
Auto
Tries DHCP, BOOTP, and RARP, then sets to Static if the
IP address is not automatically set using any of the
previous methods.
Static
Use if your network uses fixed configuration. The IP
address remains the same every time the device connects
to the network.
BOOTP
The device broadcasts its hardware address and the MAC
address and the BOOTP server responds with the IP
address.
DHCP
The network automatically assigns IP addresses within a
specified range to devices when they are first turned on.
A device could have a different IP address every time it
connects to the network.
RARP
The device sends a RARP request and the RARP server
responds with an IP address. The device knows its MAC
address and the server responds with the IP address.
Configuring the 802.11b/g and IP Settings 2-7
To change the setting, from the Main Menu: Select Setup, Network.
Then follow these steps.
1. Press or until you see
NETWORK
Boot Method
2. Press Enter/Pause. The current setting is displayed, for example:
BOOT METHOD
BOOTP
3. After you display the option you need, press Enter/Pause.
4. Press Escape/Clear until you see the Main Menu.
Wireless
Using the Wireless Menu, you can view the signal strength, set the
Service Set Identifier (SSID), wireless mode, A-Point density, transmit
rate, and channel.
Note: All nodes of a wireless network need to have the same
settings to communicate with each other. We recommend
reviewing the terms in the glossary before you begin.
Network
Wireless
Signal
Strength
Transmit
Rate
SSID
Wireless
Mode
APoint
Density
Channel
2-8 MonarchNet2 Operating Instructions
The options are listed in the table below.
Option Choices
Signal Strength 0 to 100
SSID xxxxxxxxxxxxxx
Wireless Mode infrastructure or Ad-Hoc
APoint Density Low/Med/High
Transmit Rate 1/2/5.5/11/12/18/24/36/48/54
Channel 1 to 11
Signal Strength
The connection between the device and access point is shown as
signal strength, which is a percentage from 0 to 100, where 0 is no
connection and 100 is an excellent connection. A percentage below
30 indicates you may be experiencing interference or are close to
being out of the access point’s range. With a percentage below 50,
printing performance could be affected. If the signal strength is low,
increase the number of retries. To improve the signal strength, try
moving the printer closer to the access point and away from other
radio devices such as Bluetooth wireless devices, microwave ovens,
or 2.4-gigahertz cordless phones.
Note: If the printer is not communicating with the print server’s
network card, the Network Menu options do not appear.
To view the signal strength, from the Main Menu: Select Setup,
Network, Wireless. Then follow these steps.
1. Press or until you see
WIRELESS
Signal Strength
2. Press Enter/Pause. The current setting is displayed, for example:
Signal Strength
100
3. Press Escape/Clear until you see the Main Menu.
Configuring the 802.11b/g and IP Settings 2-9
SSID
The Service Set Identifier (SSID) is a unique identifier that must
match for all nodes on a subnetwork to communicate with each other.
It consists of up to 32 characters (any printable character, including
spaces). If using the space character, it must be enclosed in
quotation marks.
Note: The SSID is case-sensitive.
To change the setting, from the Main Menu: Select Setup, Network,
Wireless. Then follow these steps.
1. Press or until you see
WIRELESS
SSID
2. Press Enter/Pause. The current setting is displayed, for example:
SSID
ABC1234
3. Press or to move through the positions. Hold Feed/Cut to
scroll quickly through the characters from 0-9;A-Z;a-z or press
Feed/Cut once to scroll one character at a time. After you display
the character you need, press Enter/Pause. You must press
Enter/Pause after each character to save the change and
continue.
To clear the SSID, press and at the same time when you
are at the end of the SSID field. If you are in the middle of
the field and you press and at the same time, any
characters to the right of the cursor are cleared.
Note: If using the Monarch Paxar 9860 printer with the attached
Monarch Paxar 939 keyboard, you may simply enter the
SSID you need using the numeric keys and press .
4. Press Escape/Clear until you see the Main Menu.

2-10 MonarchNet2 Operating Instructions
Wireless Mode
The wireless mode sets how you communicate with your wireless
network.
In Ad-Hoc mode, you do not need an access point. Ad-Hoc mode is
also called peer-to-peer (point-to-point) communications, so as long
as the devices are in range, they will connect and communicate with
each other.
Infrastructure mode requires an access point to communicate.
Note: If communicating in a mixed environment where both Ad-Hoc
and infrastructure mode are used, make sure the SSIDs are
unique in both modes.
From the Main Menu: Select Setup, Network, Wireless. Then follow
these steps.
1. Press or until you see
WIRELESS
Wireless Mode
2. Press Enter/Pause. The current setting is displayed, for example:
WiFi Mode
Ad Hoc
3. Press or to change the setting. After you display the option
you need, press Enter/Pause.
4. Press Escape/Clear until you see the Main Menu.

Configuring the 802.11b/g and IP Settings 2-11
A-Point Density
The A-Point density is the access point’s density. If the
communication quality (transmit rate) between devices on a network
drops below a certain level, the devices scan for another access point
in the area offering better transmit rates, etc. The range is Low,
Medium, or High.
If set to High density, the device searches for another access point in
range using 11 Mbps communications; Medium uses 2 to 5.5 Mbps
communications; Low uses 1 to 2 Mbps communications.
From the Main Menu: Select Setup, Network, Wireless. Then follow
these steps.
1. Press or until you see
WIRELESS
APoint Density
2. Press Enter/Pause. The current setting is displayed, for example:
APOINT DENSITY
Low
3. Press or to change the setting. After you display the option
you need, press Enter/Pause.
4. Press Escape/Clear until you see the Main Menu.
2-12 MonarchNet2 Operating Instructions
Transmit Rate
The transmit rate sets the maximum speed at which the devices
communicate with each other on the network. The speeds are in
Mbps (megabits per second). Choices include: 1, 2, 5.5, 11, 12, 18,
24, 36, 48, or 54. The transmit rate is negotiated with the access
point and this setting may be ignored.
From the Main Menu: Select Setup, Network, Wireless. Then follow
these steps.
1. Press or until you see
WIRELESS
Transmit Rate
2. Press Enter/Pause. The current setting is displayed, for example:
TRANSMIT RATE
1
3. Press or to change the setting. After you display the option
you need, press Enter/Pause.
4. Press Escape/Clear until you see the Main Menu.
Configuring the 802.11b/g and IP Settings 2-13
Channel
This option selects the channel on which your network devices
communicate. All devices must be on the same channel to
communicate. Other radio devices such as Bluetooth wireless
devices, microwave ovens, or 2.4-gigahertz cordless phones may
operate on the same channel as your network. Channels 1-11 are
available. Use the channel for Ad-Hoc mode. In infrastructure mode,
the channel is negotiated with the access point and this setting is
ignored.
Note: Make sure all network devices are set to the same channel.
From the Main Menu: Select Setup, Network, Wireless. Then follow
these steps.
1. Press or until you see
WIRELESS
Channel
2. Press Enter/Pause. The current setting is displayed, for example:
Channel
[1/11] +5
3. Press or to change the setting. After you display the option
you need, press Enter/Pause.
4. Press Escape/Clear until you see the Main Menu.
Note: If you have problems connecting to your network, change the
channel to at least three channels lower or higher than any
other wireless networks within range.
2-14 MonarchNet2 Operating Instructions
Default Network
The default network option allows you to reset the print server to
default settings or factory default settings.
♦ If you select default setting, any defaults set using the SET
DEFAULT Telnet console command are restored.
♦ If you select factory default, the print server is reset to factory
defaults. See “Factory Defaults” for the list of default values.
When the print server is reset to factory defaults, you must
reconfigure all your specific network settings, including IP
address, SSID, etc.
To change the setting, from the Main Menu: Select Setup, Network.
Then follow these steps.
1. Press or until you see
NETWORK
Default Network
2. Press Enter/Pause.
Default Network
Default Setting
3. After you display the option you need, press Enter/Pause.
The print server is reset to your defaults or factory defaults.
4. Press Escape/Clear until you see the Main Menu.
5. Turn off the printer and turn it back on to initialize the factory
settings.
Note: Depending on your printer’s boot method, the IP address may
be automatically assigned when you turn on the printer.
The new IP address may not be the same as the previous
one.
 Loading...