

Paxar Monarch9856 Operator's Handbook Manual
Monarch
9856 Printer
88-2229-01 (TC9856OH Rev. B 7/98) ©1998 Monarch Marking Systems, Inc. All rights reserved.

Each product and program carries a respective written warranty, the only
warranty on which the customer can rely. Monarch reserves the right to make
changes in the product, the programs, and their availability at any time and
without notice. Although Monarch has made every effort to provide complete
and accurate information in this manual, Monarch shall not be liable for any
omissions or inaccuracies. Any update will be incorporated in a later edition of
this manual.
©1998 Monarch Marking Systems, Inc. All rights reserved. No part of this
publication may be reproduced, transmitted, stored in a retrieval system, or
translated into any language in any form by any means, without the prior written
permission of Monarch Marking Systems, Inc.
WARNING
This equipment has been tested and found to comply with the limits for a Class A digital
device, pursuant to Part 15 of the FCC Rules. These limits are designed to provide
reasonable protection against harmful interference when the equipment is operated in a
commercial environment. This equipment generates, uses, and can radiate radio frequency
energy and, if not installed and used in accordance with the instruction manual, may cause
harmful interference to radio communications. Operation of this equipment in a residential
area is likely to cause harmful interference in which case the user will be required to correct
the interference at his own expense.
CANADIAN D.O.C. WARNING
This digital apparatus does not exceed the Class A limits for radio noise emissions from
digital apparatus set out in the Radio Interference Regulations of the Canadian Department
of Communications.
Le présent appareil numérique n’émet pas de bruits radioélectriques dépassant les limites
applicables aux appareils numériques de la classe A prescrites dans le Réglement sur le
brouillage radioélectrique édicte par le ministère des Communications du Canada.
Trademarks
MONARCH is a registered trademark of Monarch Marking Systems, Inc.
Paxar is a trademark of Paxar Corporation.
9856 is a trademark of Monarch Marking Systems, Inc.
Monarch Marking Systems
P.O. Box 608
Dayton, Ohio 45401

i
TABLE OF CONTENTS
GETTING STARTED ...............................................................................1-1
Audience ............................................................................................1-1
Connecting the Power Cable................................................................1-2
Establishing Communications ..............................................................1-2
Connecting the Communication Cable ..............................................1-3
Using the Control Panel.......................................................................1-3
Buttons and Lights ..............................................................................1-4
Using the Keypad................................................................................1-5
Using the Main Menu...........................................................................1-5
Selecting a Function............................................................................1-6
LOADING SUPPLIES..............................................................................2-1
Loading Non-Peel and Fan-Fold Supply ...............................................2-1
Loading a Ribbon................................................................................2-3
Removing a Ribbon.............................................................................2-4
Tear Bar Installation........................................................................2-5
Using the Internal Rewind Option.....................................................2-5
SETTING SUPPLY OPTIONS ..................................................................3-1
Ribbon................................................................................................3-2
Batch Separators ................................................................................3-2
Feed Mode..........................................................................................3-3
Print Position ......................................................................................3-4
Supply Position...................................................................................3-5
Margin Position...................................................................................3-6
Cut Position........................................................................................3-7
Supply Type........................................................................................3-7
Speed.................................................................................................3-8

ii
COMMUNICATION VALUES....................................................................4-1
Baud Rate...........................................................................................4-2
Word Length .......................................................................................4-2
Stop Bits.............................................................................................4-3
Parity..................................................................................................4-3
Flow Control .......................................................................................4-4
Reset to Default Values.......................................................................4-4
SETTING CONTRAST.............................................................................5-1
SETTING DEFAULTS .............................................................................6-1
Monetary Sign.....................................................................................6-2
Secondary Sign...................................................................................6-3
Decimal Places ...................................................................................6-4
Slashed Zero ......................................................................................6-4
Power-Up Mode ..................................................................................6-5
Prompt Set..........................................................................................6-6
CARE AND MAINTENANCE....................................................................7-1
Cleaning the Printhead........................................................................7-1
Adjusting the Supply Sensor................................................................7-2
Adjusting the Supply Width..................................................................7-3
DIAGNOSTICS .......................................................................................8-1
Factory Set Password .........................................................................8-1
Checking the Software Version............................................................8-1
Printing Test Labels ............................................................................8-2
Service Diagnostics.............................................................................8-2
TROUBLESHOOTING .............................................................................9-1
Common Errors...................................................................................9-2
SPECIFICATIONS ................................................................................. A-1
Printer ............................................................................................... A-1

Getting Started 1-1
GETTING STARTED
The Monarch
9856
TM
printer lets you print text, graphics, and bar
codes on thermal transfer (ribbon) and thermal direct labels. You can print
on die cut, black mark, or continuous supplies. The printer has an
adjustable label edge sensor and a 300 dots per inch (dpi) printhead.
This chapter includes information about
♦ connecting the power cable.
♦ establishing communications.
♦ using the control panel and main menu.
Keep the box and packaging material in case you need to
return the printer.
Audience
The Operator’s Handbook is for the person who prints and applies labels.
1

1-2 Getting Started
Connecting the Power Cable
Connect the AC power cord to the back of the printer and then plug into the
AC wall outlet. Make sure the printer is off before connecting the power
cord.
There may be a delay when the printer is turned off and
then quickly turned back on.
Establishing Communications
Before the printer can accept print jobs from the host, you must
♦ connect the communication cable to the printer and to the host.
♦ set the communication values on the printer to match those at the
host (only required if you are using the serial port).
AC
Connector
Power Switch
Getting Started 1-3
The factory defaults are
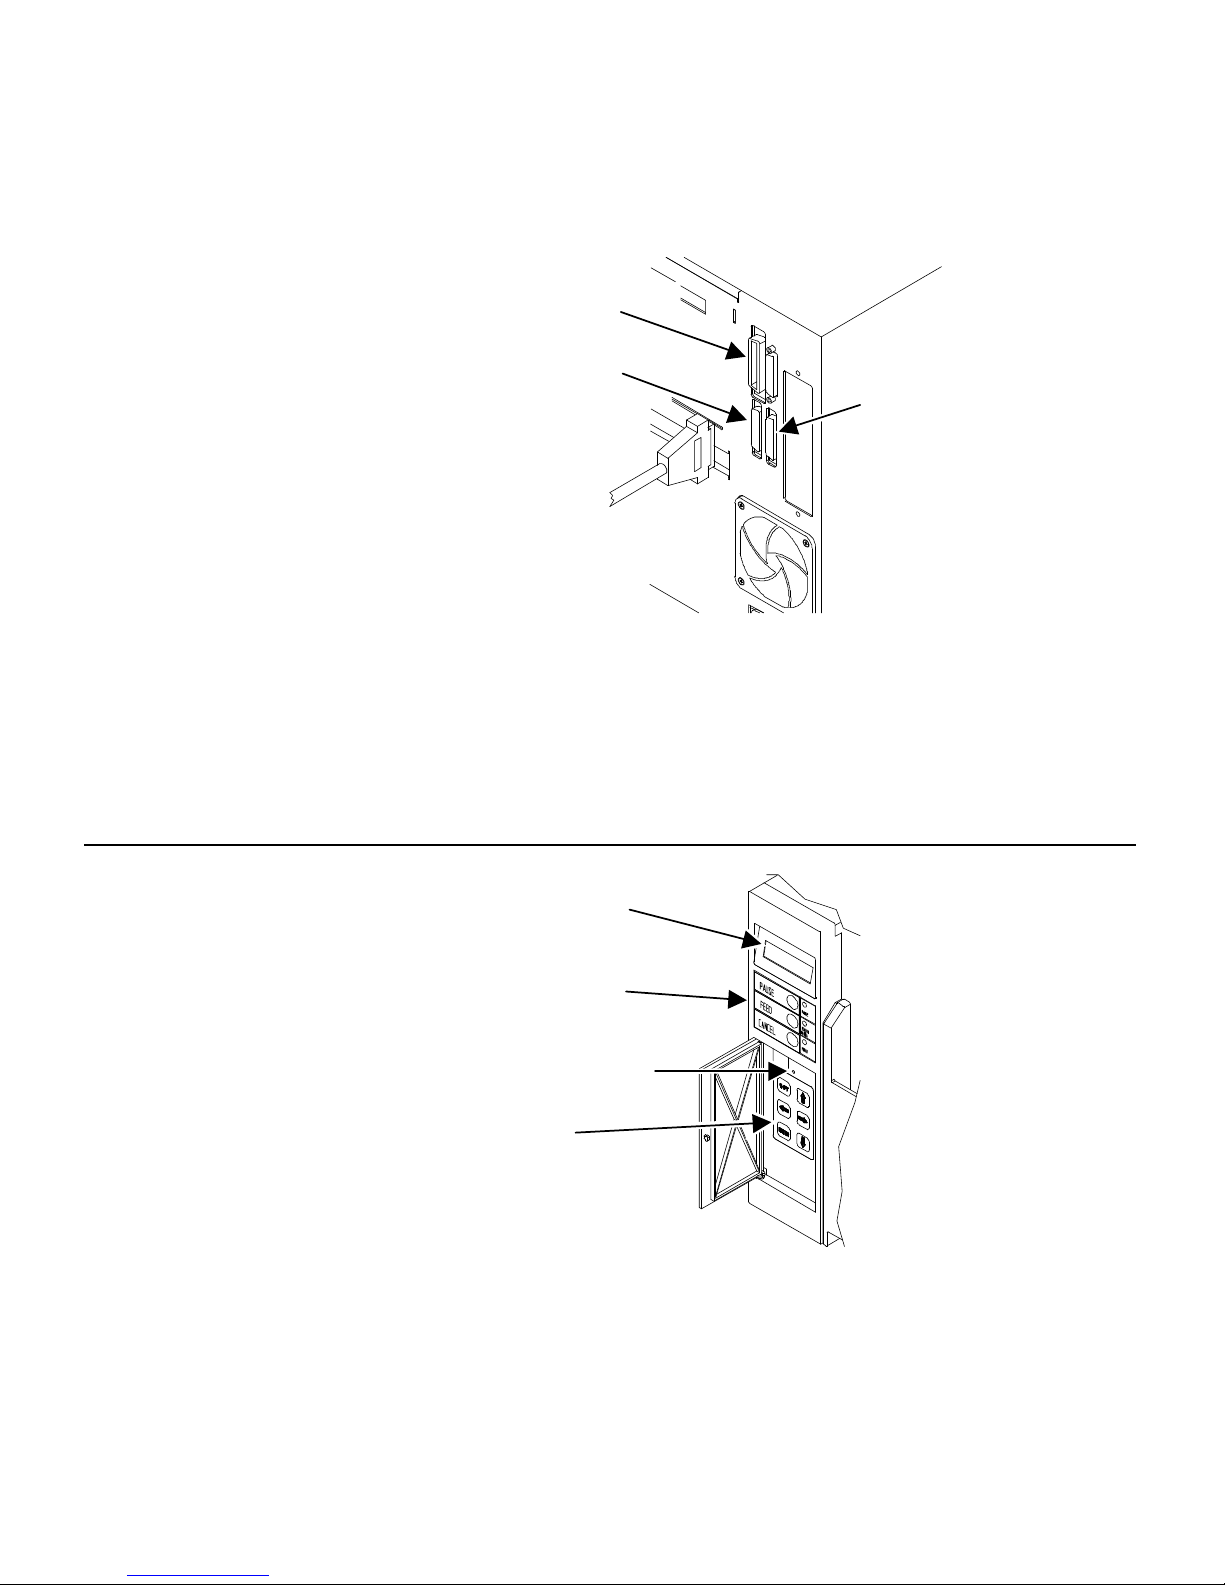
Connecting the Communication Cable
Make sure the printer is off before connecting the cable to the
communication port.
Using the Control Panel
The printer has a control
panel containing a
two-row x 16 character
LCD display, control
buttons, lights, and a
keypad with six buttons
used to access and
change the printer's
configuration settings.
The three buttons and
lights are used to control
and indicate printer
status.
♦ 9600 Baud
♦ 8 bit parity
♦ 1 stop bit
♦ no parity
♦ DTR flow control.
Parallel Port
Serial Port B
Serial Port A
LCD Display
Control Buttons
and Lights
Contrast Pot
Keypad
1-4 Getting Started
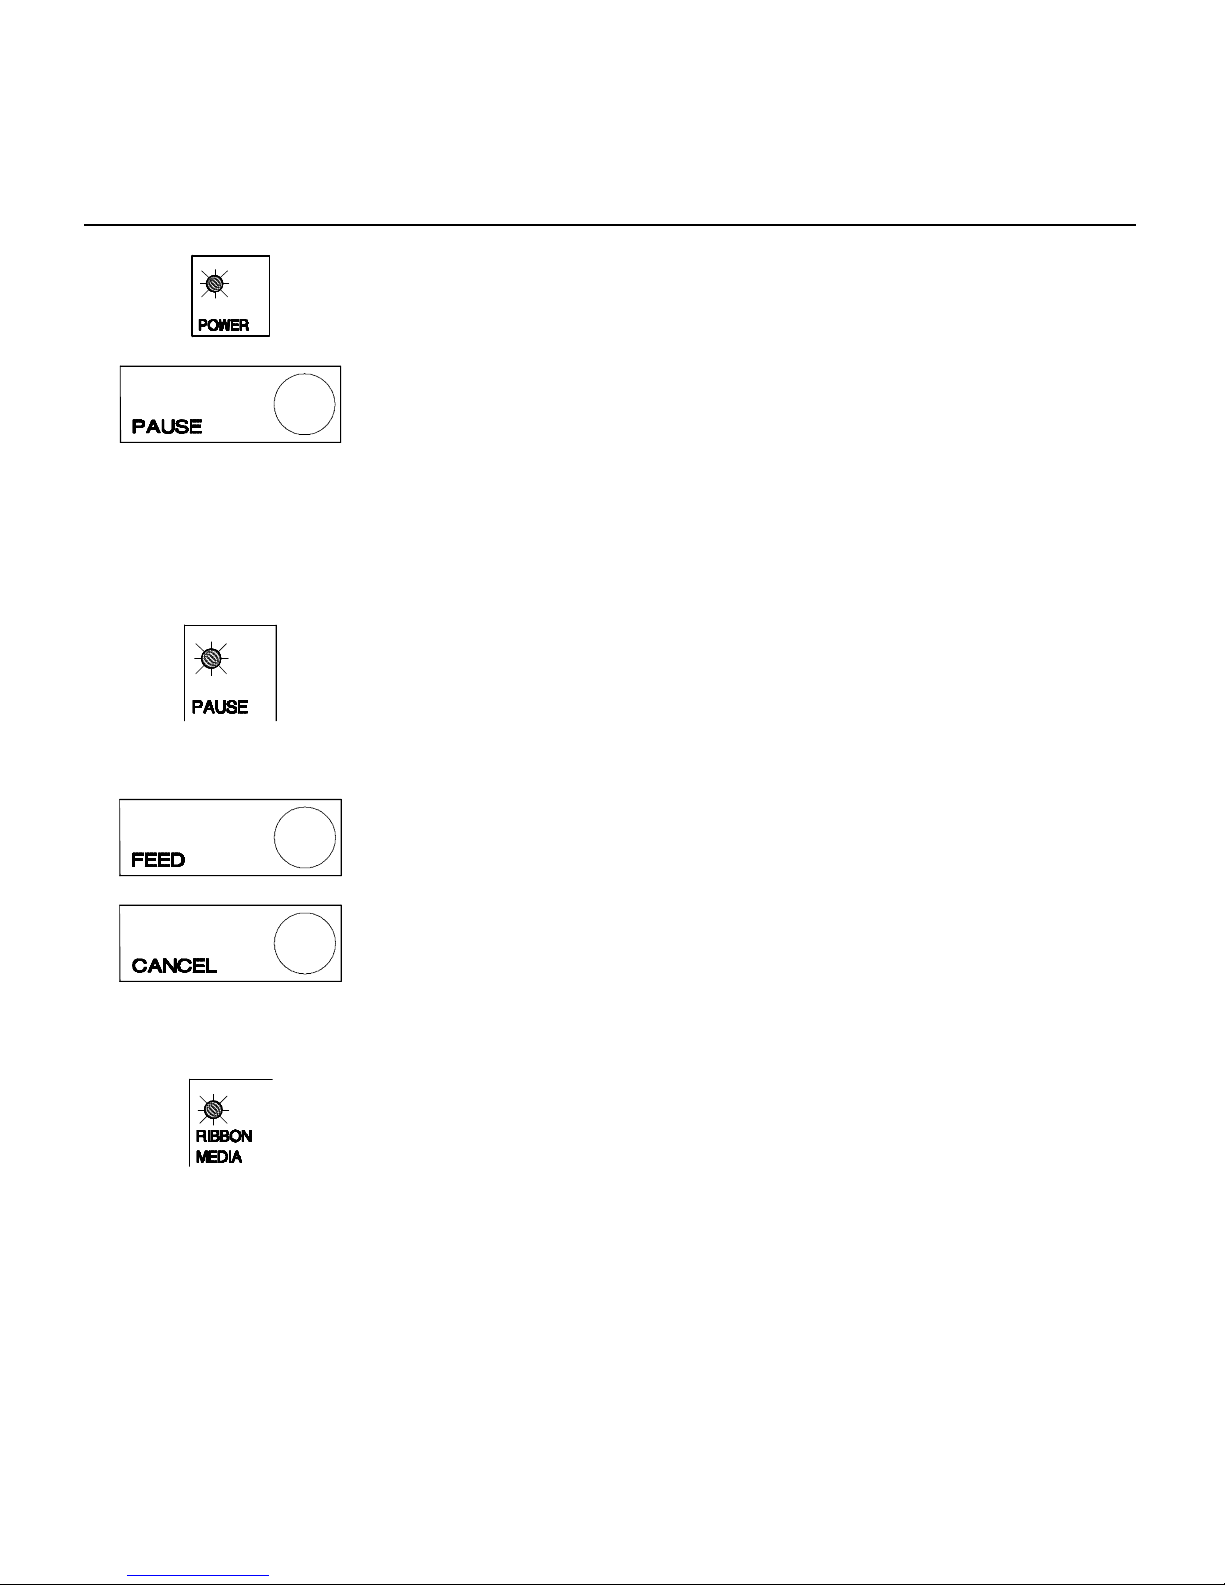
Buttons and Lights
The printer shows a steady green light when it
is on.
Pressing PAUSE
♦ pauses the current print job.
♦ displays “PAUSE MENU” on the display.
♦ stops the label counter (but maintains the
count balance).
The PAUSE light is on when
PAUSE
is pressed.
The PAUSE light blinks when there is a data,
communication, or data formatting error (errors
below 700).
Pressing FEED feeds a blank label if there is
no print job.
Pressing CANCEL
♦ clears an error.
♦ cancels the current job.
The RIBBON MEDIA light is on when
♦ the sensors do not detect labels or the
presence of a ribbon.
♦ a supply fault (error over 700) occurs.

Getting Started 1-5
Using the Keypad
s
Has no function.
L R
Scrolls through the current menu selections.
Increases and decreases values.
U
Exits an options without saving changes.
D
Has no function.
E
Selects/sets a displayed function or value.
Answers yes to an operator query.
Clears supply errors (over 700).
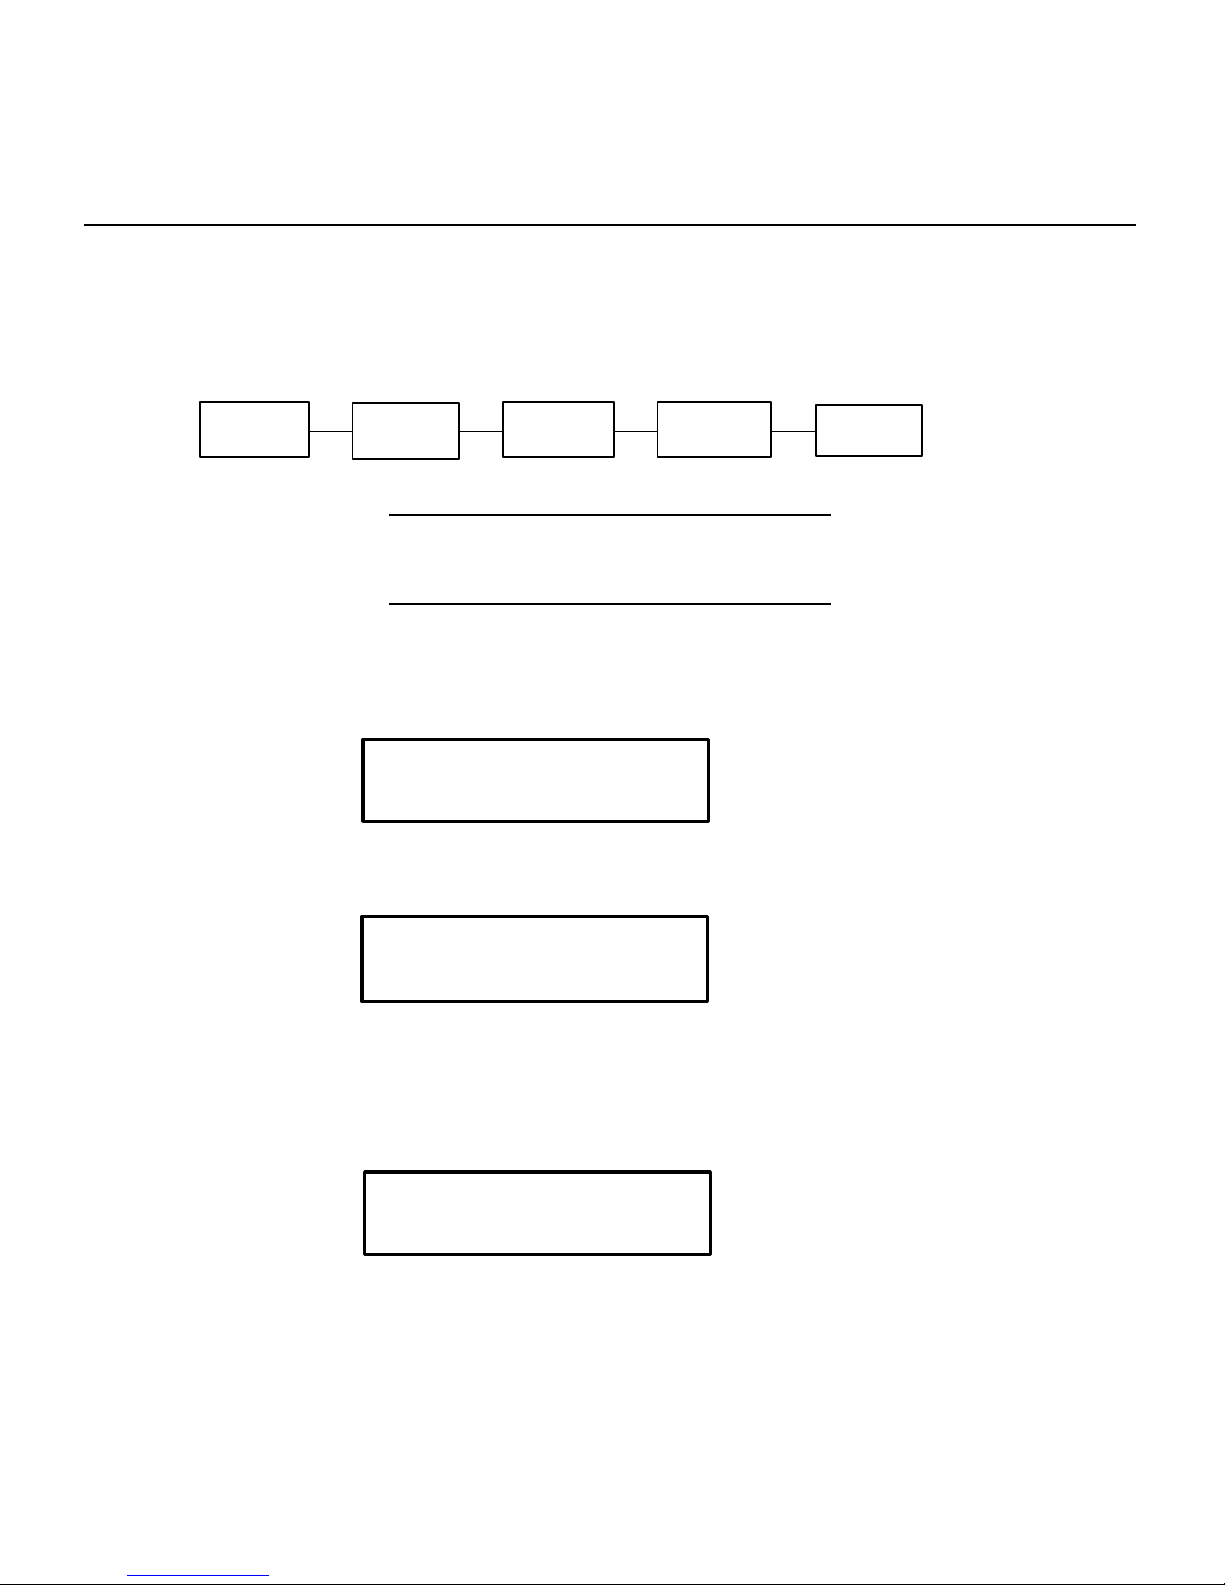
Using the Main Menu
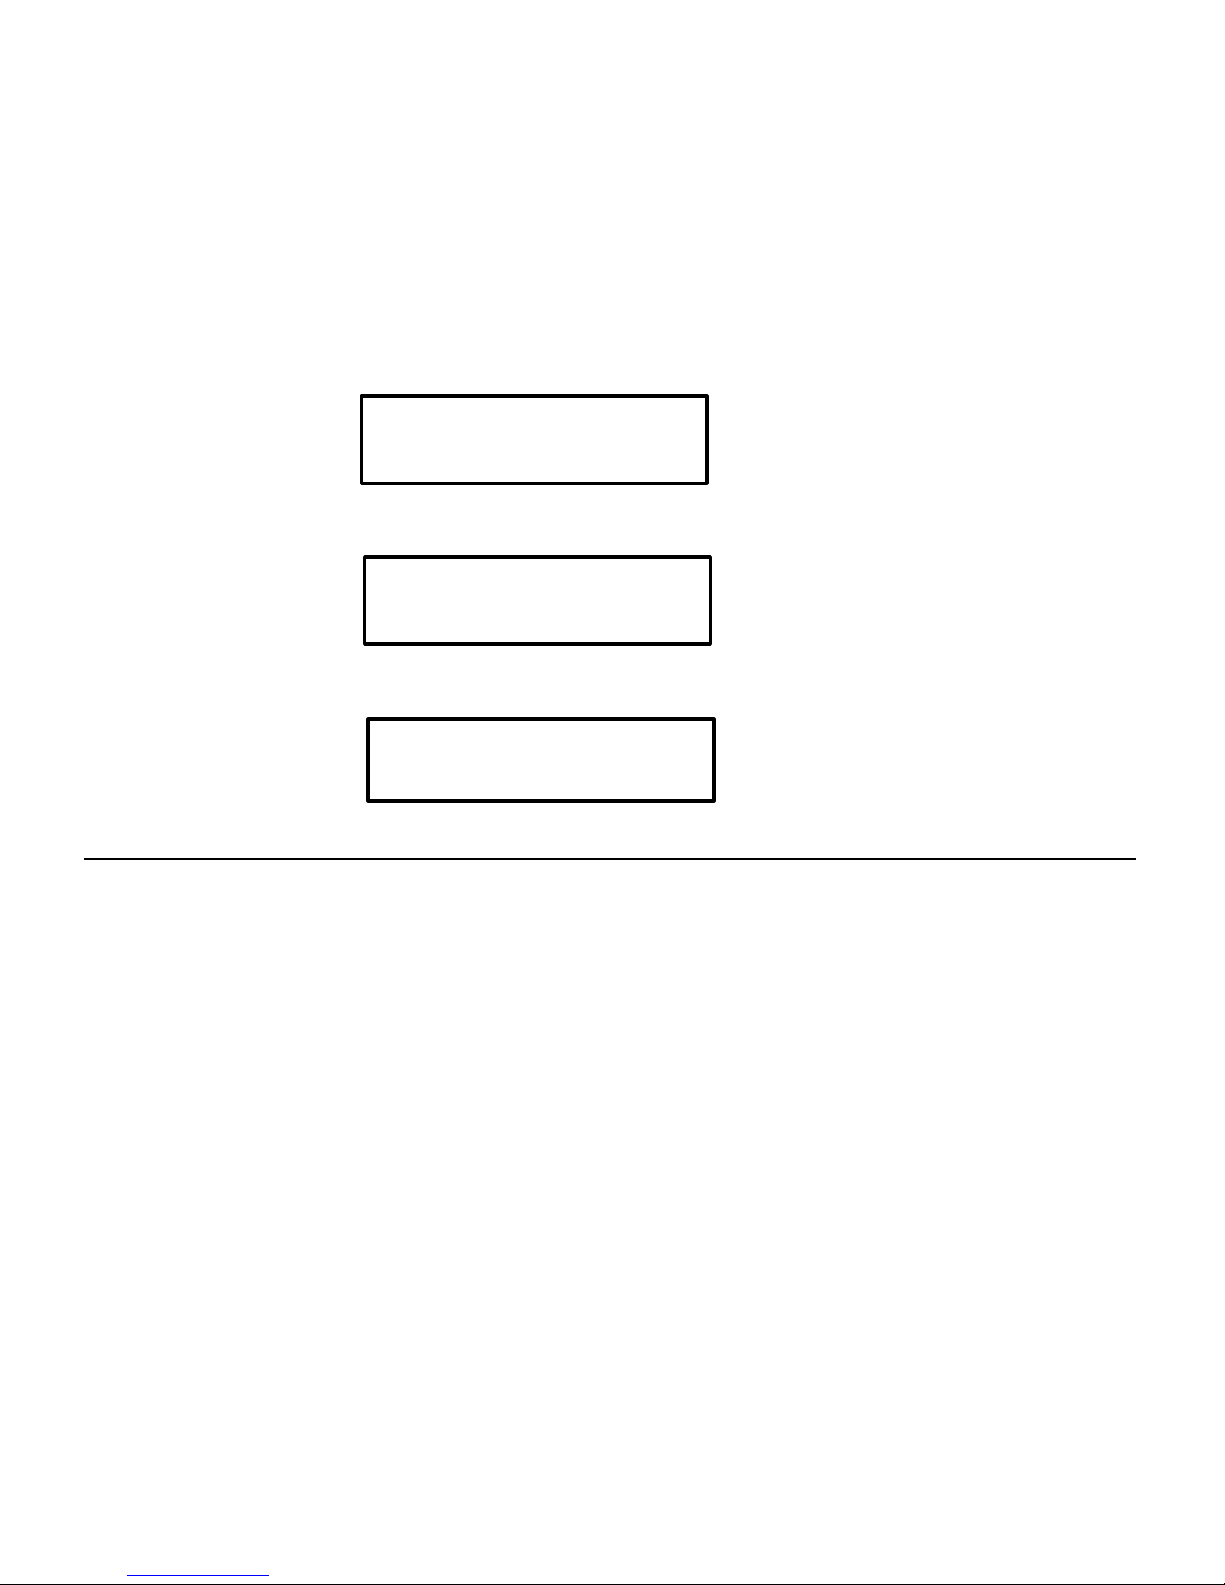
Many chapters in this manual have one or more charts showing the printer’s
menu structure. For example:
♦ Normal border boxes show the menu options.
♦ Heavy border boxes show the selections to get the functions.
♦ Black background boxes show the functions.
♦ The black boxes show where you are; the bordered boxes show how you
got there.
MAIN MENU
PRINT
MODE
CANCEL
ALL
REPEAT
BATCH
SETUP
DIAG.
SUPPLY
CONTRAST DEFAULTS
PORT
SETTINGS
1-6 Getting Started
Selecting a Function
The Main Menu has several functions (operating modes). These functions
are shown in the chart below.
MAIN MENU
If the printer displays PRINT MODE Ready when you turn
it on, press U to display the Main Menu.
To display menu options, press L or R.
♦ When the screen displays a right arrow, press R to display more options.
♦ When the screen displays a left arrow, press L to display more options.
♦ When the screen displays a left and a right arrow, press either L or R
to display more options.
♦ When you see the menu option you want, press E to select it.
MAIN MENU
l Diagnostics
CANCEL
ALL
PRINT
MODE
REPEAT
BATCH
SETUP
DIAG.
MAIN MENU
Cancel All r
MAIN MENU
l Print Mode r
Getting Started 1-7
The Main Menu controls the printer’s setup and operation. Through the
Setup Menu, you can select a sub-menu for the supply, contrast, default, or
port settings. Each of those sub-menus have several selections, such as
ribbon, speed, monetary symbols, and baud rate.
1.
From the Main Menu, press L or R until you see
2.
Press E. You will see
3.
Press E. You will see the following option:
Exiting an Option
To exit an option, press U once. You will exit to the next higher menu.
If you press U from a menu, your settings are not saved. Your settings are
only saved when you press E from a menu.
MAIN MENU
l Setup r
SETUP
Supply r
SUPPLY
Ribbon r

1-8 Getting Started

Loading Supplies 2-1
LOADING SUPPLIES
The printer accepts a wide range of supplies. You can use roll,
fan-fold, or die cut continuous supply for thermal transfer or thermal direct.
Using thermal direct supply with a ribbon produces unacceptable print
quality.
Loading Non-Peel and Fan-Fold Supply
To load a roll of labels or fan-fold labels:
1.
Open the side access cover.
2.
Slide a roll of labels onto the supply hub assembly and position it
against the inner guide. If using fan-fold supply, slide an empty supply
core onto the supply hub assembly. Install the fan-fold supply from the
rear or the bottom of the printer.
3. Lift and rotate the printhead latch wing counterclockwise one half turn to
unlock the printhead. Release the latch and raise the printhead to an
upright position
2
Printhead
Printhead
Latch Wing
2-2 Loading Supplies
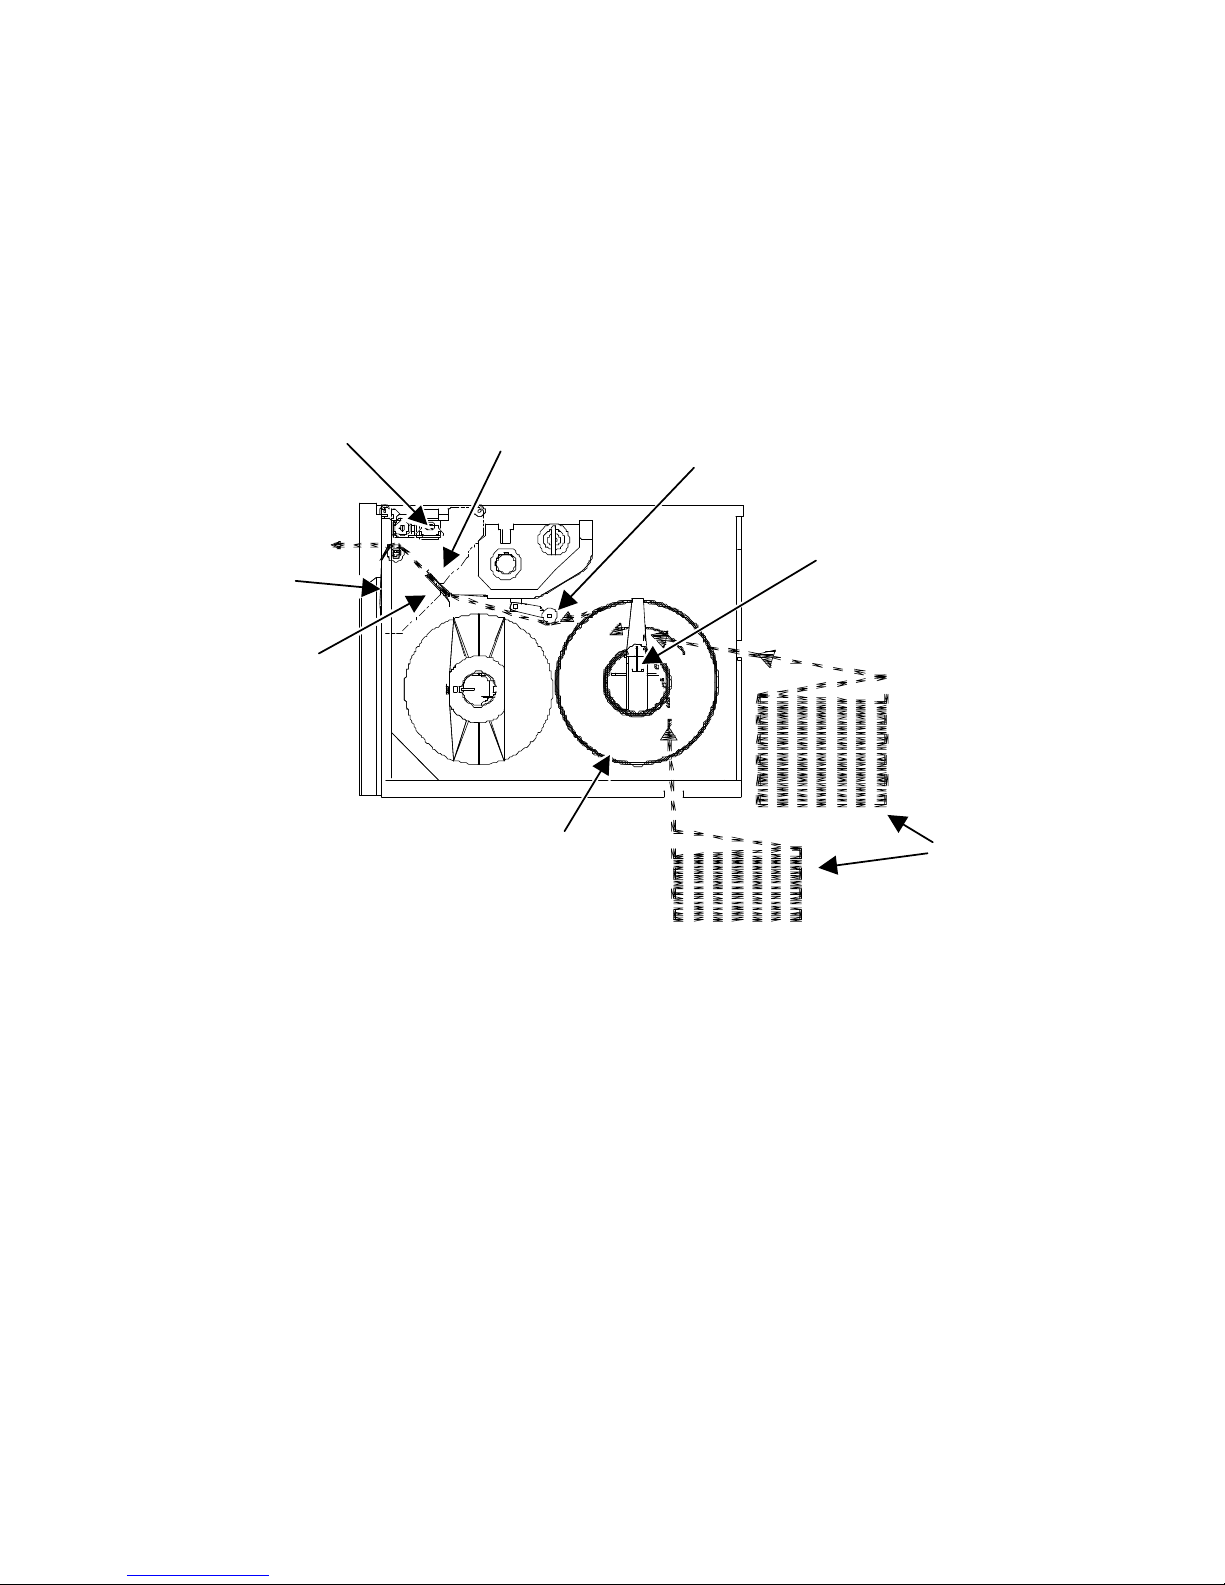
4. Thread the supply under the bouncer assembly and between the upper
and lower supply guides. Feed the supply until it exits the printhead
assembly through the front slot.
5.
Lower the printhead and close the printhead latch. Rotate the printhead
latch wing clockwise and snap it down to lock the printhead into position.
6. Close the side access cover.
You may need to feed several labels to align the supply correctly.
Printhead
Latch
Tear Bar
Fan-fold
Roll Supply
Supply Hub
Upper Supply
Guide
Lower Supply
Guide
Bouncer
Assembly

Loading Supplies 2-3
Loading a Ribbon
To load a new ribbon:
1.
Open the side access cover.
2.
Raise the printhead latch wing and rotate counterclockwise one-half turn
to unlock the printhead. Raise the printhead to an upright position.
3.
Slide the ribbon roll onto the hub, making sure the ribbon roll is up
against the hub flange.
4. Feed the ribbon as shown.
5.
Lower the printhead, but do not close the latch.
6.
Rotate the J-hook counterclockwise to unlatch it while holding the ribbon
take-up hub.
Ribbon Rollers
Latch Wing
Ribbon
Take-up Hub
Ribbon Supply
Hub
2-4 Loading Supplies
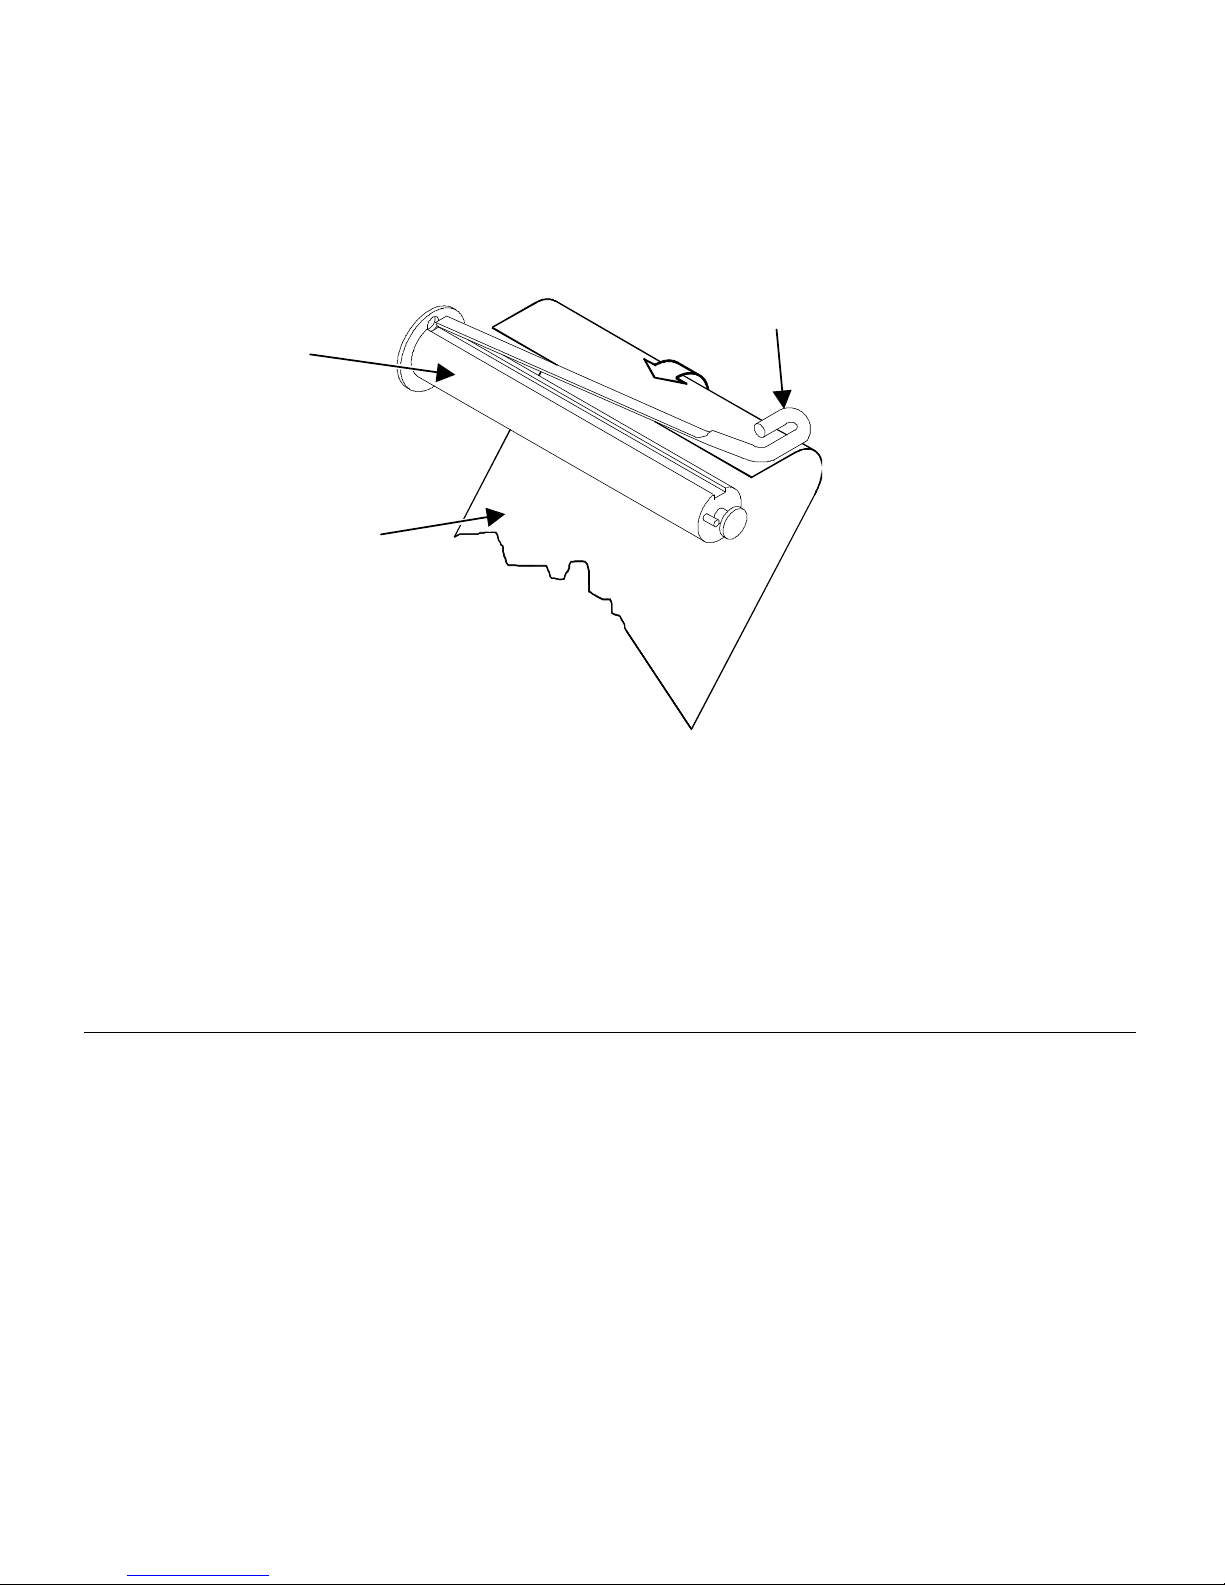
7. Pull the ribbon over the ribbon rollers. Wrap the free end of the ribbon
around the ribbon take-up hub. Slide the J-hook into place. Hold the
ribbon take-up hub and rotate the J-hook clockwise to latch it.
8. Rotate the hub until you remove all slack from the ribbon. Do not use
the J-hook to rotate the hub.
9.
Close the printhead latch, rotate the latch wing clockwise, and lower the
latch wing.
10.
Close the side access cover.
Removing a Ribbon
1. Cut the ribbon in between the ribbon rollers.
2.
Rotate the ribbon supply hub clockwise to draw the unused portion of
the ribbon back onto the supply hub.
3.
Rotate the ribbon take-up hub counterclockwise to roll up the used
portion of the ribbon, and slide the used ribbon off the hub.
4.
Hold the ribbon take-up hub and rotate the J-hook counterclockwise to
unlatch it. Slide off the used portion of the ribbon.
Take-up Hub
Ribbon
J-hook
 Loading...