

Page 1
J640/J641 Quick Reference
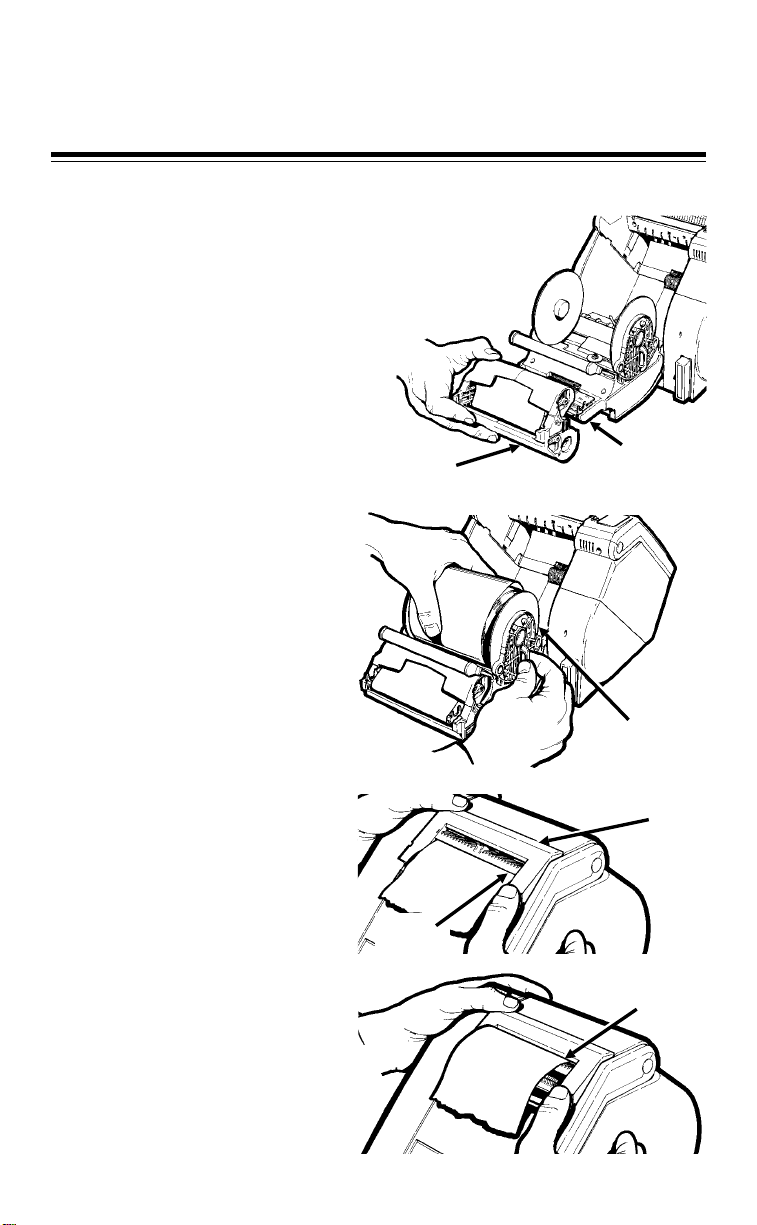
Loading Ribbon
1. Open the printer.
2. Remove the old ribbon
cassette.
3. Slide a new ribbon
cassette onto the printhead
assembly.
Loading Labels
1. Open the printer.
2. Grasp the handles to pull the
supply holders apart and
insert the roll of labels into
place between the supply
holders. The label roll
should unwind as shown.
Make sure the labels are
free to unwind.
3. Load labels in peel or
non-peel mode.
Loading for peel mode
Feed the labels over the peel bar
and through the lower opening
in the label guide.
Ribbon
Cassette
Lower
Opening
Printhead
Assembly
Supply
Holder
Label
Guide
Upper
Opening
Loading for non-peel mode
Feed the labels through the upper
opening in the label guide.
SV60254 Rev. A 3/95 ©1995 Pitney Bowes, Inc. All rights reserved.
Page 2
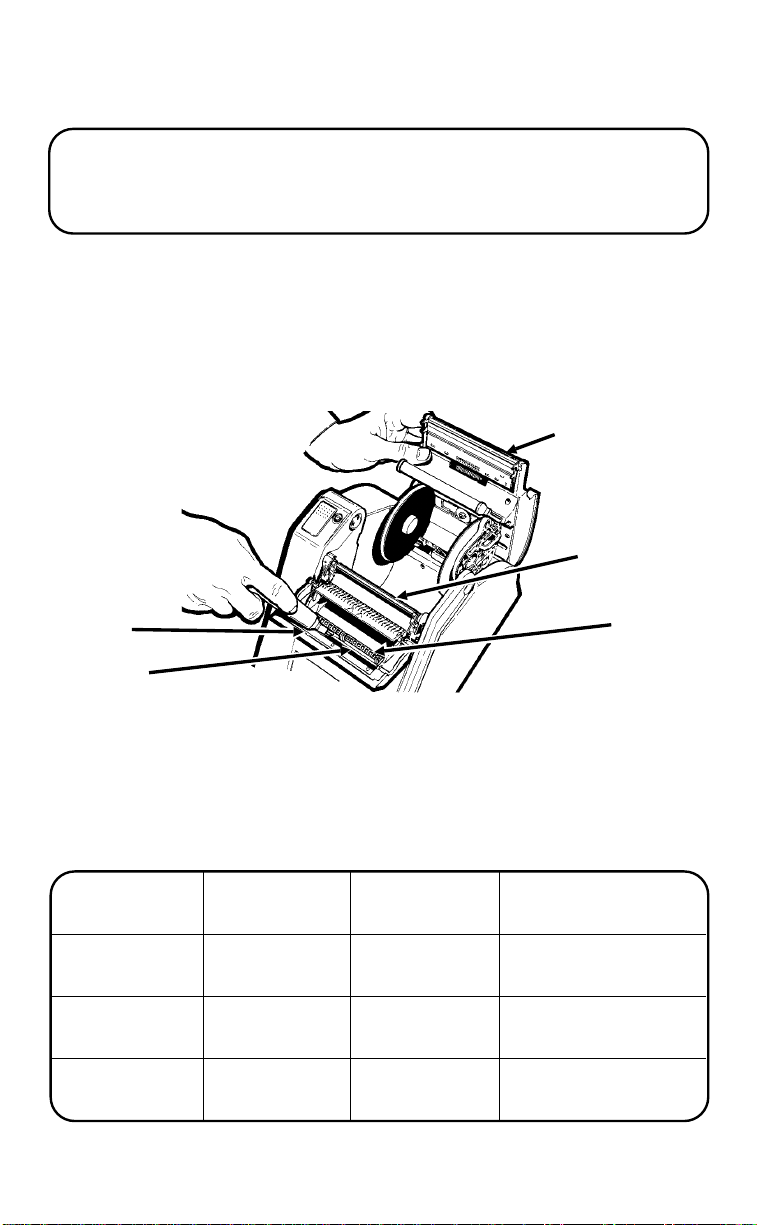
Cleaning
CAUTION
DO NOT touch the printhead with your hands. This may damage the
printhead.
1. Turn the power off and open the printer.
2. Remove the label roll and ribbon cassette.
3. Moisten a cotton swab with alcohol or use a cleaning pen. Rub it
back and forth across the printhead, platen roller, peel bar, pinch
rollers, peel blade, and tear bar to remove build-up.
Printhead
Platen
Roller
Tear Bar
Peel Blade
4. Let the printer dry and reload the supplies.
LED Indicator
Use the color of the LED and whether it is solid, blinking slowly, or
blinking rapidly to determine the meaning of the LED indicator.
LED States Solid Fast Blink
GREEN Ready...
AMBER Ready...
AMBER/
GREEN
On-Demand
Continuous
N/A Hardware
1
(
⁄4 second)
Label Ready N/A
Error Printhead Hot...Wait
Error
Slow Blink
(2 seconds)
Firmware
Error
Pinch
Roller
 Loading...