

Paxar AAFES User Manual
User
User
Monarch
Printers
®
Manual
Manual
AAFES Kit
TC9416AAUM Rev. AC 12/07 ©2006 Paxar Americas, Inc. a subsidiary of Avery Dennison Corp. All rights reserved.

Each product and program carries a respective written warranty, the only
warranty on which the customer can rely. Paxar reserves the right to make
changes in the product, the programs, and their availability at any time and
without notice. Although Paxar has made every effort to provide complete and
accurate information in this manual, Paxar shall not be liable for any omissions
or inaccuracies. Any update will be incorporated in a later edition of this
manual.
©2006 Paxar Americas, Inc. a subsidiary of Avery Dennison Corp. All rights
reserved. No part of this publication may be reproduced, transmitted, stored in
a retrieval system, or translated into any language in any form by any means,
without the prior written permission of Paxar Americas, Inc.
WARNING
This equipment has been tested and found to comply with the limits for a
Class A digital device, pursuant to Part 15 of the FCC Rules. These
limits are designed to provide reasonable protection against harmful
interference when the equipment is operated in a commercial
environment. This equipment generates, uses, and can radiate radio
frequency energy and, if not installed and used in accordance with the
instruction manual, may cause harmful interference to radio
communications. Operation of this equipment in a residential area is
likely to cause harmful interference in which case the user will be
required to correct the interference at his own expense.
CANADIAN D.O.C. WARNING
This digital apparatus does not exceed the Class A limits for radio noise
emissions from digital apparatus set out in the Radio Interference
Regulations of the Canadian Department of Communications.
Le présent appareil numérique n'émet pas de bruits radioélectriques
dépassant les limites applicables aux appareils numériques de la classe
A prescrites dans le Réglement sur le brouillage radioélectrique édicte
par le ministère des Communications du Canada.
Trademarks
MONARCH®, 9416®, and 939i, are trademarks of Paxar Americas, Inc.
Paxar® is a trademark of Paxar Corporation.
Avery Dennison® is a trademark of Avery Dennison Corp.
Avery Dennison Printer Systems Division
170 Monarch Lane
Miamisburg, Ohio 45342

TABLE OF CONTENTS
INTRODUCTION 1-1
Using This Manual...................................................................................1-1
Audience ................................................................................................1-1
Terms You Should Know ..........................................................................1-2
Unpacking the Kit ....................................................................................1-3
Connecting the Cables.............................................................................1-3
Using the Keyboard .................................................................................1-5
Startup...................................................................................................1-5
Control Keys...........................................................................................1-6
SETTING UP THE PRINTER 2-1
Setting the Baud Rate..............................................................................2-1
Using the Configuration Menu...................................................................2-2
Selecting the Format Sending Mode.......................................................2-3
Using Batch Separators ........................................................................2-3
Using Data Preloading..........................................................................2-3
Setting the Print Mode..........................................................................2-4
Setting the Supply Type........................................................................2-4
Setting the Ribbon ...............................................................................2-5
Sending the Printer Reset Command......................................................2-5
Sending a Virgin Reset Command..........................................................2-5
Printing a Test Label ............................................................................2-6
Setting the Packet Delay ......................................................................2-6
Setting the Print Contrast .....................................................................2-7
Setting the Print Position ......................................................................2-8
Setting the Supply Position ...................................................................2-9
Resetting the Configuration ......................................................................2-9
i

PRINTING 3-1
Selecting a Format .................................................................................. 3-1
Using the Custom Formats .......................................................................3-1
Format 01: UPC...................................................................................3-2
Format 02: CRC...................................................................................3-3
Format 03: NSC CODE ......................................................................... 3-4
Format 04: Fashion ..............................................................................3-5
Format 05: EAN-13 ..............................................................................3-6
Format 06: Price ..................................................................................3-7
Format 07: Tearaway ...........................................................................3-8
Format 08: Jewelry ............................................................................ 3-10
Format 09: Shelf ................................................................................ 3-11
Format 10: Barshelf ........................................................................... 3-13
Format 11: UPC E.............................................................................. 3-15
Format 12: EAN 8 .............................................................................. 3-16
Format 13: Non RPOS ........................................................................ 3-17
TROUBLESHOOTING 4-1
Technical Support ...................................................................................4-1
ii
INTRODUCTION
The Monarch® AAFES kit allows you to print bar code labels
offline using the Monarch® 9416® XL® printer. For information about
supply loading or care and maintenance, refer to your printer’s
Equipment Manual on our Web site (www.monarch.com). For more
information about setting up the printer and keyboard, refer to the
AAFES Setup Guide, included in your kit.
1
Using This Manual
Following is a summary of the contents of this manual.
Chapter Contents
1 Introduction Information you should know before using the kit,
including unpacking the components and connecting
the cables.
2 Setting Up the
Printer
3 Printing Using custom formats and entering data for tags and
4 Troubleshooting Common problems and their solutions.
Setting the printer configuration options.
labels.
Audience
This manual is for the person who sets up the AAFES kit and enters
format data.
Information in this document supercedes information in previous
versions. Check our Web site for any updates.
Introduction 1-1

Terms You Should Know
Please review the following terms before reading this manual.
batch separator
character
continuous
(non-peel)
cursor
digits
enter
field
format
offline
on demand
(peel)
online
print job
queue
supplies
An extra label between print jobs that shows where one
job ends and the next one begins.
A letter, number, or symbol.
Print mode in which the printer prints all the labels in a
job in a continuous strip, without stopping.
The underline symbol that shows where you are on the
screen.
Numbers only.
Type in data on the keyboard.
An area on the supply where data prints.
The arrangement of fields printed on the supply.
Entering data and printing jobs by using the printer
alone (without a computer).
Print mode in which the printer peels the backing paper
from each label and stops to let the operator remove it
before printing the next label.
Entering data and printing jobs by sending data from a
computer.
A group of tags or labels with the same data.
Jobs waiting to print (also includes the job that is
printing).
Tags or labels used for printing.
1-2 User Manual
Unpacking the Kit
After you unpack the kit, you should have the following:
♦ 9416 printer and power supply (24V)
♦ 939i keyboard and power supply (5V)
♦ Adapter cable
♦ AAFES Setup Guide
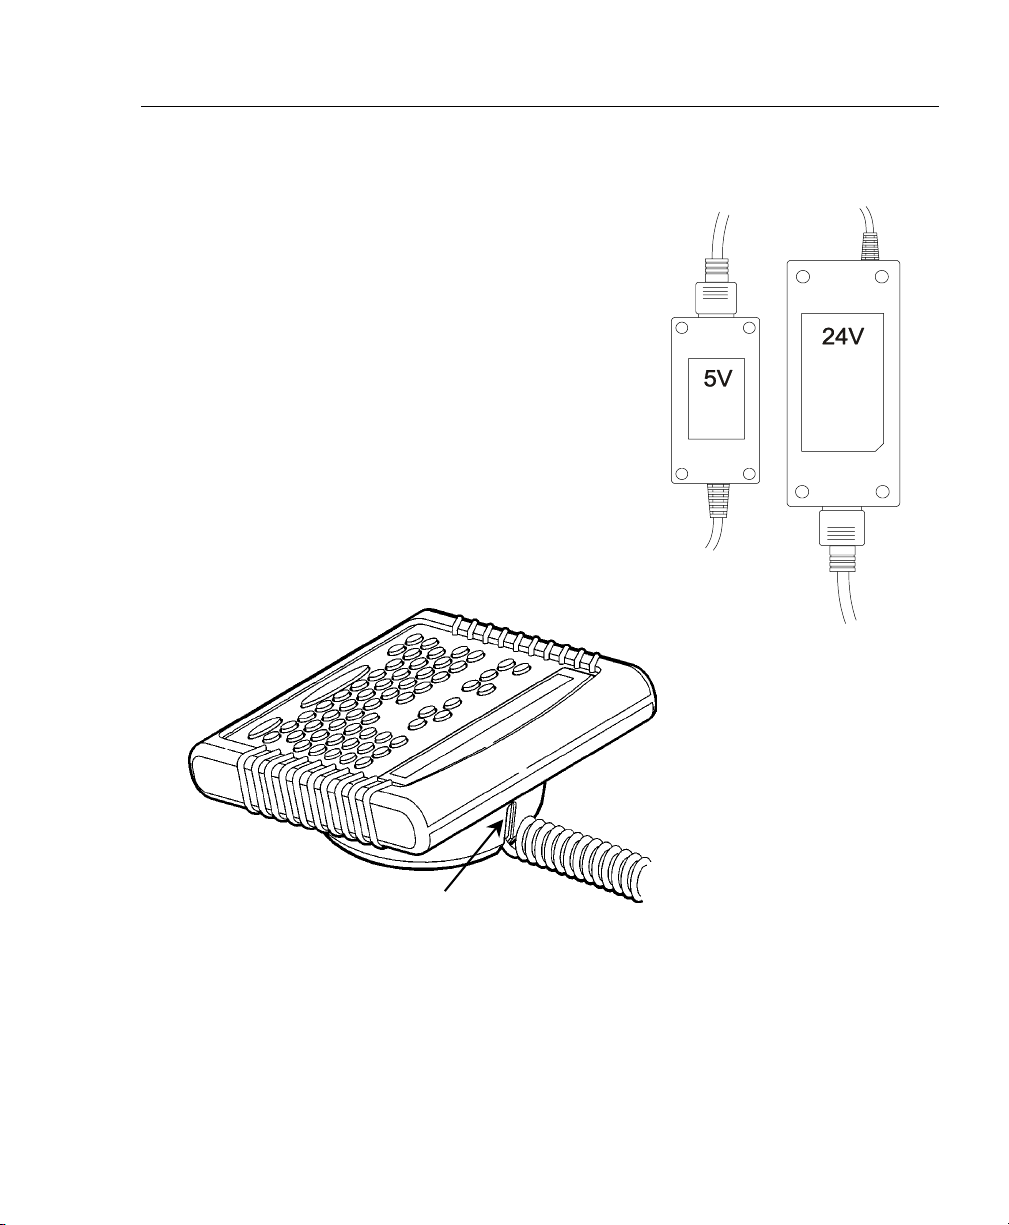
The power supplies are labeled with the
output voltage: 24V or 5V. The 24V printer
power supply is labeled “Printer.”
The power supplies are not
interchangeable.
1. Pull the long, coiled cable out from the
bottom of the keyboard’s base.
2. Slide the first loop in the cable slot as
shown.
Keyboard
Power
Printer
Power
Cable
Slot
Introduction 1-3
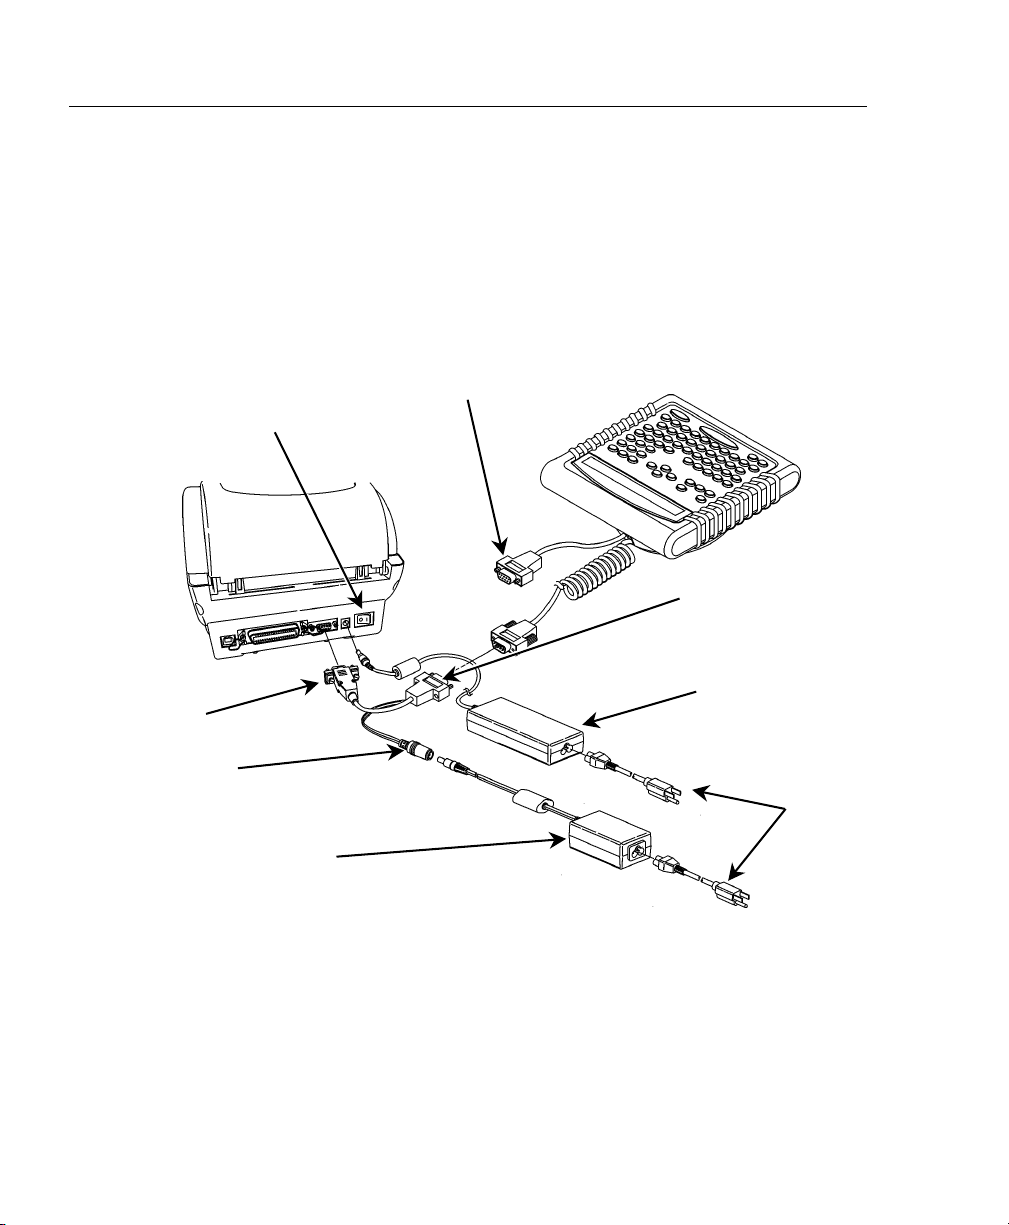
Connecting the Cables
Warning: If the power supplies are not connected correctly, the
keyboard and printer are damaged.
Refer to the AAFES Setup Guide, included in your kit, for more
information on setting up the printer and keyboard.
1. Turn OFF the printer before you connect the keyboard's cable.
2. Plug the 9-pin coiled keyboard cable into the end of the adaptor
cable.
Optional Scanner
ON/OFF
Switch
Cable
Keyboard
Cable goes here
Printer’s
Adaptor
Cable
Power
Connector
Keyboard
Power Supply (5V)
Power Supply
(24V)
Power
Cords
3. Attach the other end of the adaptor cable to the 9-pin port on the
printer. Tighten the screws on the cables.
1-4 User Manual
4. Connect the power cords to the power supplies.
5. Connect the printer’s large power supply (24V) to the printer.
Note: Do not connect the 24V power supply to the keyboard.
This damages the keyboard.
6. Connect the keyboard’s small power supply (5V) to the adaptor
cable's power connector.
7. Plug the power supplies into a grounded electrical outlet.
8. Turn ON the printer. The keyboard receives power from the 5V
auxiliary power supply when the printer is turned on.
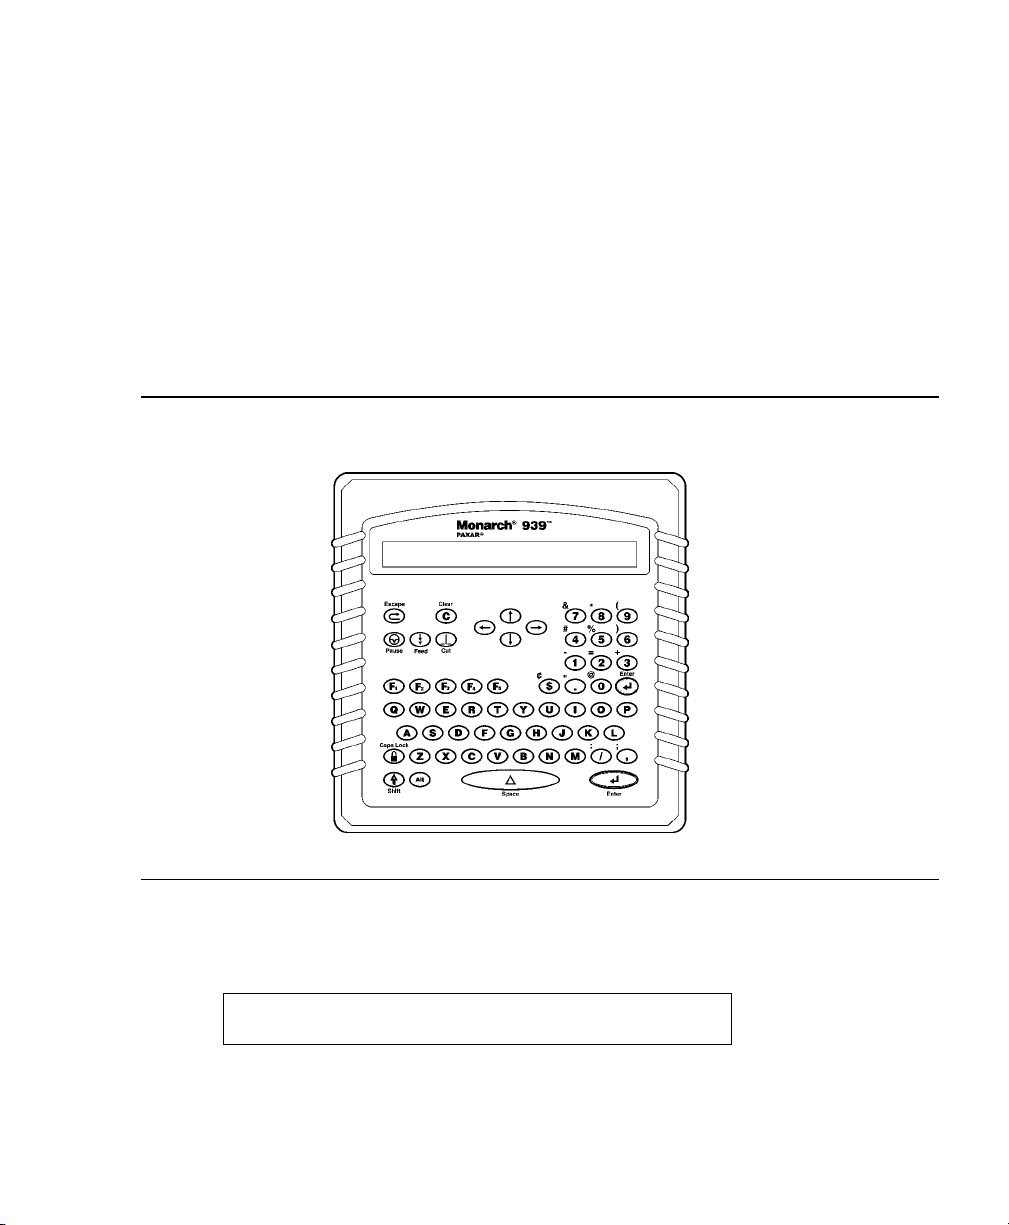
Using the Keyboard
The keyboard has full alphabetic keys with 10 numeric keys, five
function keys, four arrow keys, and several special keys.
Startup
When you turn on the printer and keyboard, the keyboard displays a
message to press a key when the printer is in Ready mode. The
keyboard automatically selects the Batch Entry function and displays
the name and number of the first custom format.
-=Main Menu=01 UPC
Introduction 1-5
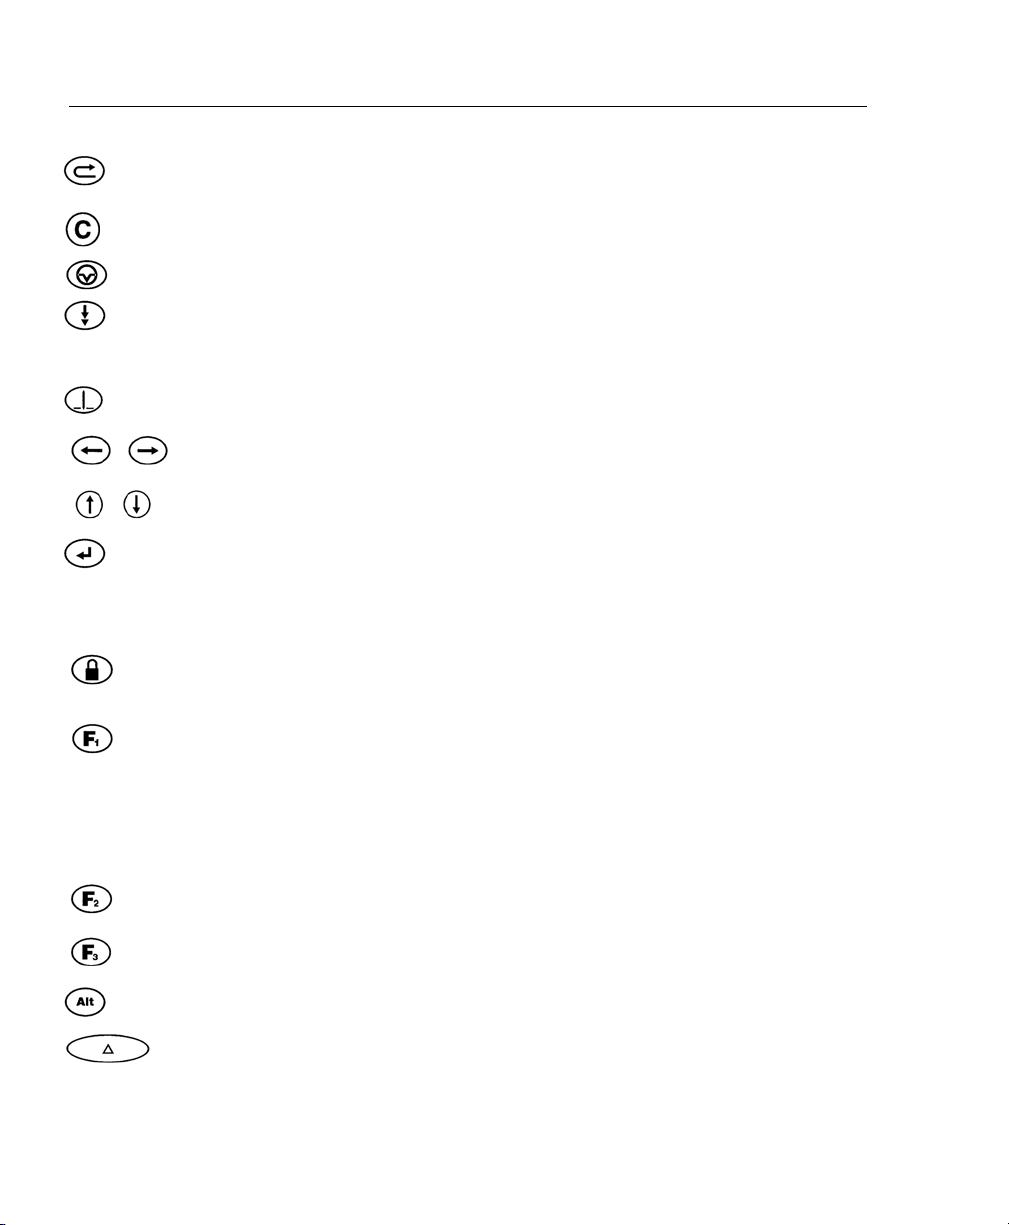
Control Keys
This table lists the keyboard control keys and their functions.
Escape. Returns the display to the previous menu. Also clears
an error.
Clear. Clears the entire field.
Pause. Stops printing.
Feed. Feeds a blank label if there is no print job. Prints a label
in on-demand mode. Prints a label with error information that is
useful to your System Administrator if an error is displayed.
Cut. Cuts the supply.
Displays menu items and allows you to move the cursor.
Moves between fields in Batch Entry.
Enter. Selects the displayed menu item.
Shift. Toggles between upper and lower-case. Use with other
keys to display ¢, ", @ , :, ;, - , =, +, # , %, (, ), &, * .
Caps Lock. Allows you to type all upper-case characters.
When the caps lock is on, a padlock symbol is displayed in the
upper right hand corner.
Keyboard menu. Exits the AAFES application and allows you to
delete the application, change keyboard settings, and perform
diagnostics.
Note: There is a service charge to reload the application if it
is deleted. Follow the instructions carefully when
changing any settings in the F1 menu.
Configuration Menu. Allows you to change the printer settings.
See Chapter 2, “Setting Up the Printer” for more information.
Reset defaults.
Enters an international character for printing when pressed and
held along with a character code.
Space. Inserts a blank space between characters.
1-6 User Manual
SETTING UP THE PRINTER
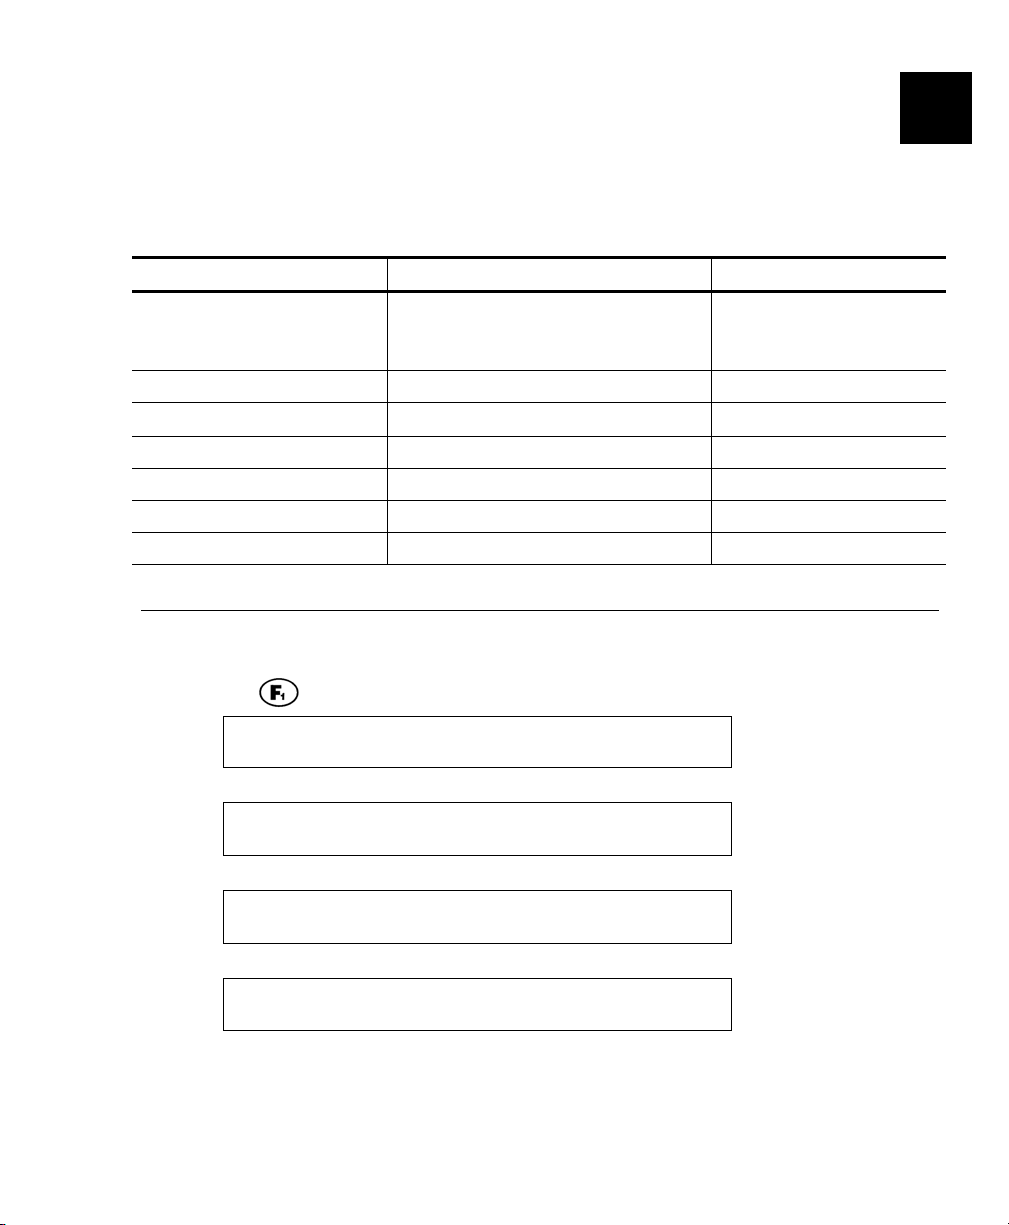
You must configure the printer before printing formats.
The most common configuration options are listed in the following
table:
Option Choices Default
Baud Rate 1200, 2400, 4800, 9600,
19200, 38400, 57600,
115200
Format Sending Mode As Needed/Always As Needed
Separators Enabled/Disabled Disabled
Preloading Enabled/Disabled Disabled
Print Mode Continuous/On Demand Continuous
Supply Type Black Mark/Die Cut Black Mark
Ribbon With Ribbon/Without Without
19200
2
Setting the Baud Rate
To print, you must change the baud rate setting to 9600 from the
default setting of 19200.
1. Press
Exit – Are you
sure? Y/N
2. Press Y. You see
MAIN MENU
← Scripts →
3. Press ← or → until you see
MAIN MENU
← Setup →
4. Press Enter. You see
SETUP
Comm 1 →
from the Main Menu. You see
Setting Up the Printer 2-1
5. Press Enter. You see
COMM 1
Baud Rate →
6. Press Enter. You see
BAUD RATE
← 19200 →
7. Press ← until you see
BAUD RATE
← 9600 →
8. Press Enter to select 9600, then press Escape twice until you see
the Main Menu.
9. Press → until you see
MAIN MENU
← Exit
10. Press Enter to save your new settings and return to your
application.
Note: You must select Exit to save your settings or the keyboard
will return to the default settings the next time it is turned on.
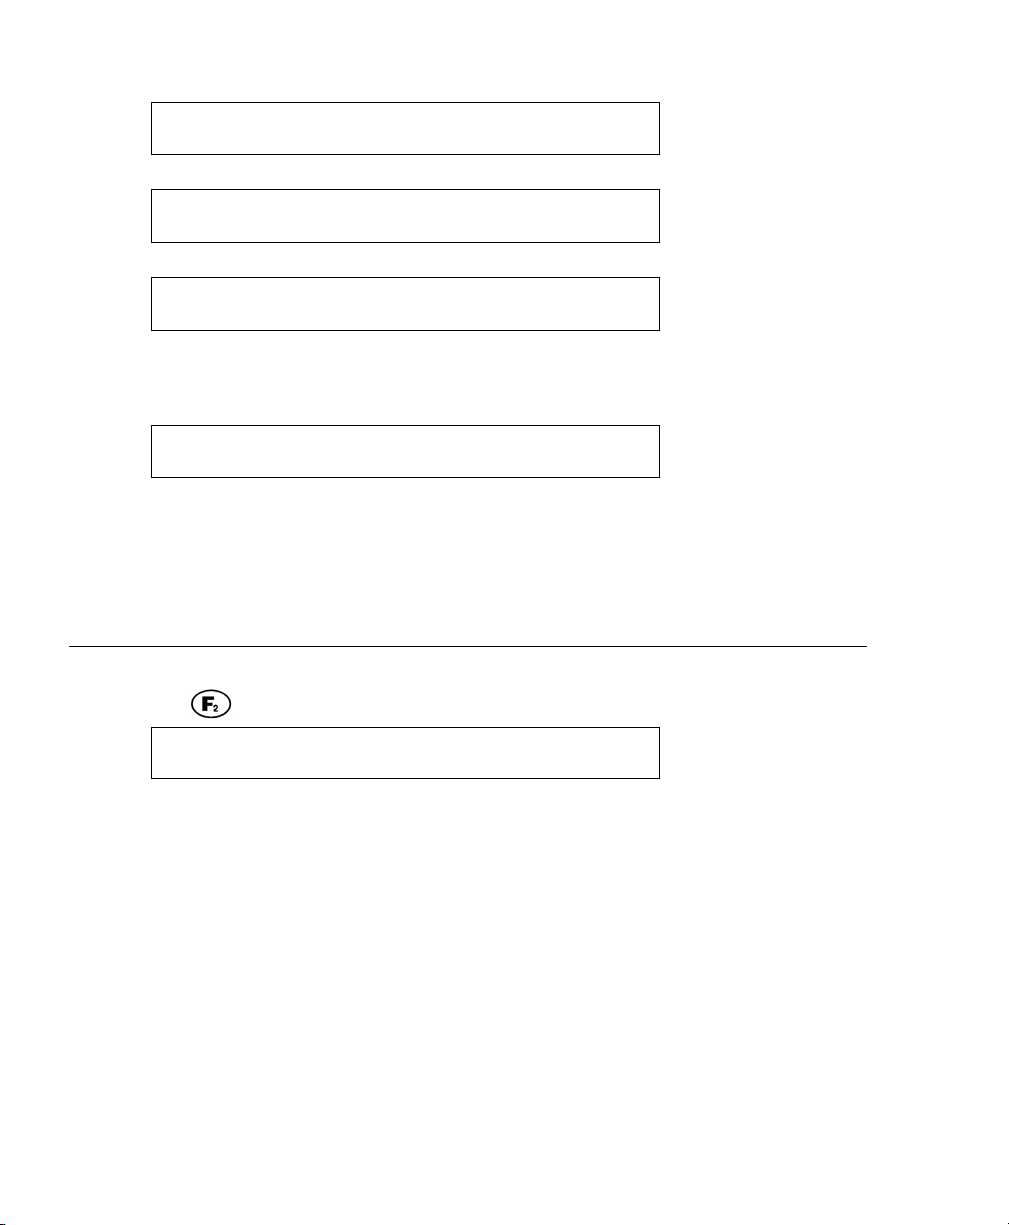
Using the Configuration Menu
To access the printer configuration menu:
1. Press
-=Config Menu=- --Esc to exit
1. Format Sending Mode
2. Press ← or → to move through the Configuration Menu.
2-2 User Manual
from the Main Menu. You see
Selecting the Format Sending Mode
There are two Format Sending Modes: As Needed and Always. To
send all formats at once, select Always. To send only the correct
format, select As Needed. The default is As Needed.
1. From the Config Menu, press ← or → until you see
1. Set Format Sending Mode
2. Press Enter. You see
Select format sending mode
1=AS NEEDED, 2=Always >
The current setting is displayed in all caps.
3. Press 1 or 2 to select the mode you need. You return to the
Config Menu.
Using Batch Separators
The Batch Separators option is for use in other applications. The
9416 printer does not use Batch Separators and any settings will be
ignored during printing.
Using Data Preloading
The Preload Data function keeps any data you enter in memory when
enabled. The default is Disabled.
1. From the Config Menu, press ← or → until you see
3. Set Preloading
2. Press Enter. You see
Set Data Preloading
1=Enabled, 2=DISABLED >
The current setting is displayed in all caps.
3. Select 1 to retain data. If you press 2, the printer does not keep
data you previously entered in memory. You return to the Config
Menu.
Setting Up the Printer 2-3
 Loading...