

Page 1
Monarch
Printers
®
u
9855
u
9860™
®
TC7411MN2OI Rev. AD 5/07 ©2007 Paxar Americas, Inc. All rights reserved.
Page 2

Each product and program carries a respective written warranty, the only
warranty on which the customer can rely. Paxar reserves the right to make
changes in the product, the programs, and their availability at any time and
without notice. Although Paxar has made every effort to provide complete
and accurate information in this manual, Paxar shall not be liable for any
omissions or inaccuracies. Any update will be incorporated in a later
edition of this manual.
2006 Paxar Americas, Inc. All rights reserved. No part of this publication
may be reproduced, transmitted, stored in a retrieval system, or translated
into any language in any form by any means, without the prior written
permission of Paxar Americas, Inc.
Trademarks
Paxar is a trademark of Paxar Corporation.
Monarch, Monarch Net2, Smart Relay, 7411, 939, 9855®, and 9860 are
trademarks of Paxar Americas, Inc.
Microsoft, Windows, and NT are trademarks of Microsoft Corporation in the
United States and/or other countries.
Firefox is a trademark of Mozilla Corporation.
UNIX is a trademark of The Open Group.
Novell and NetWare are trademarks of Novell, Inc. in the United States and
other countries.
HP Jet Admin and HP Web Jet Admin are trademarks of Hewlett-Packard,
Inc.
The Bluetooth trademarks are owned by Bluetooth SIG, Inc.
Netscape and Netscape Navigator are trademarks of Netscape
Communications Corporation in the United States and other countries.
Netscape's logos and Netscape product and service names are also
trademarks of Netscape Communications Corporation, which may be
registered in other countries.
Excerpts reprinted from Wireless LANs Implementing High Performance
IEEE 802.11 Networks, Second Edition with permission.
Excerpts reprinted from the TROY200 Installation and User’s Guide with
permission from Silex Technology America, Inc.
Paxar Americas, Inc.
170 Monarch Lane
Miamisburg, OH 45342
Page 3

TABLE OF CONTENTS
GETTING STARTED......................................................................................1-1
Overview ................................................................................................1-1
Audience ................................................................................................1-1
About This Manual...................................................................................1-2
System Requirements ..............................................................................1-2
Supported Operating Systems...................................................................1-3
Supported Network Protocols....................................................................1-3
Setting Up the Print Server.......................................................................1-4
Checking the Print Server Hardware..........................................................1-5
Verifying Successful Installation ...............................................................1-5
Verifying Successful Installation ...............................................................1-6
About “Print Mode Ready” ........................................................................1-8
Printing a Configuration Label...................................................................1-9
CONFIGURING THE 802.11B/G AND IP SETTINGS .........................................2-1
Saving Settings .......................................................................................2-2
MAC Address ..........................................................................................2-2
IP Address..............................................................................................2-3
Subnet Mask ...........................................................................................2-4
IP Gateway .............................................................................................2-5
Boot Method ...........................................................................................2-6
i
Page 4

Wireless .................................................................................................2-7
Signal Strength....................................................................................2-8
SSID...................................................................................................2-9
Wireless Mode ...................................................................................2-10
A-Point Density..................................................................................2-11
Transmit Rate.................................................................................... 2-12
Channel ............................................................................................2-13
Default Network ....................................................................................2-14
Factory Defaults ................................................................................2-15
Test Label .........................................................................................2-16
USING THE WEB INTERFACE .......................................................................3-1
Logging In ..............................................................................................3-2
Configuring the Printer.............................................................................3-4
Changing the Printer Setup ...................................................................3-5
Changing the System Setup ..................................................................3-7
Reset/Initialize Network ...........................................................................3-8
Configuring the Network Settings ..............................................................3-9
Changing TCP/IP Settings................................................................... 3-10
Changing SNMP Settings .................................................................... 3-12
Changing Wireless Settings ................................................................3-14
Setting Alerts..................................................................................... 3-18
Receiving An Alert .............................................................................3-19
Reading the Virtual Panel....................................................................... 3-20
Using Custom Commands....................................................................... 3-21
Changing the Password .........................................................................3-22
Updating Firmware ................................................................................3-24
Basic Security Configurations ................................................................. 3-25
ii
Page 5

CONSOLE COMMANDS ................................................................................4-1
Help Commands ......................................................................................4-4
General Commands .................................................................................4-6
Setup Commands ..................................................................................4-11
802.11b/g Wireless Commands ...............................................................4-16
TCP/IP Commands ................................................................................4-19
SNMP Commands..................................................................................4-22
RFID Commands ................................................................................... 4-22
Using the Network Packet ......................................................................4-23
USING THE SMART RELAY SYSTEM .............................................................5-1
Initial Smart Relay Setup Procedures ........................................................5-2
About the Primary Printer .........................................................................5-2
About the Partner Printer .........................................................................5-3
Connecting the Printers............................................................................5-4
Configuring the Partner Printer .................................................................5-5
Using the Smart Relay Telnet Commands ..................................................5-5
About the Smart Relay Counter.................................................................5-7
TROUBLESHOOTING....................................................................................6-1
Printing a Test Label ...............................................................................6-1
General Troubleshooting Information.........................................................6-4
Troubleshooting Wireless Configuration Problems ......................................6-7
Technical Support ...................................................................................6-7
SPECIFICATIONS........................................................................................ A-1
802.3 Specifications ............................................................................... A-1
Optional 802.11b/g Specifications ............................................................ A-1
Options ................................................................................................. A-2
GLOSSARY................................................................................................. G-1
INDEX ..........................................................................................................I-i
iii
Page 6

iv
Page 7

GETTING STARTED
Your Monarch 9855 or 9860 Version 5.0 or greater printer
contains MonarchNet2 software, which allows you to access, configure,
and control your printers with the Monarch 7411 Ethernet Print Server
remotely across a LAN (local area network), WLAN (wireless local area
network), or WWW (world-wide web) connection.
Information in this document supercedes information in previous
versions. Check our Web site (www.paxar.com) for the latest release
and documentation information.
1
Overview
The Monarch 7411 Print Server lets you communicate with Monarch
printers on an 802.11b and 802.11g wireless network or wired Ethernet
802.3 network. 802.11b/g refers to 802.11b and 802.11g in this manual.
You can use the print server in Ad-Hoc (peer-to-peer) or infrastructure
(access point) wireless mode. The print server operates at speeds of up
to 54 Mbps on any IEEE 802.11b/g wireless compatible network. It
includes a dual-mode built-in wired Ethernet (802.3) connection. So, the
print server automatically switches between wireless and wired Ethernet
mode.
Refer to your network manuals for more information. This manual does
not include information about setting up your wireless or wired network.
We recommend reviewing the terms in the glossary before you
begin.
Audience
This manual is written for the System Administrator who sets up printers
on the network and is familiar with basic networking principles.
Getting Started 1-1
Page 8

Using This Manual
Following is a summary of the contents of this manual:
Chapter Contents
1 Getting Started Information you should know before using the
printer.
2 Configuring the
802.11b/g and
IP Settings
3 Using a Web Browser Using your Web browser to configure and monitor
4 Console Commands Lists the supported console commands for your
5 Using the Smart Relay
System
6 Troubleshooting Common problems and their solutions.
A Specifications Printer and radio specifications.
G Glossary Networking and printer terms and their definitions.
Setting communications between your network and
printer.
your network printer.
network printer.
Explains how to configure a primary and partner
printer.
System Requirements
To use the print server for printing from a wireless network, you need an
802.11b/g wireless network. The wireless network consists of either of
the following:
♦ An 802.11b/g wireless enabled computer printing straight to the
printer
(Ad-Hoc mode).
♦ An 802.11b/g wireless access point allowing wireless and wired
Ethernet enabled computers to print to the print server (infrastructure
mode).
To configure and print, you need the following:
1. The MAC address from the label of the print server (for example:
004017023F96).
2. Obtain the following information from your wireless network
administrator:
♦ Wireless mode (infrastructure or Ad-Hoc).
♦ The SSID (service set identifier) for your wireless network.
1-2 MonarchNet2 Operating Instructions
Page 9

♦ If you are using TCP/IP (recommended for Windows Networks) and
are not connected to a DHCP server (for obtaining an IP address
automatically), you need a unique IP address for the wireless print
server (for example: 192.0.0.192) and a subnet mask. If the print
server is not on the same IP subnet as the computers you are printing
from, you need a router. A print server with an IP address of
192.0.0.192 will not be seen by a network looking for devices with a
prefix of 10.1.xxx.xxx. A router (default gateway) address is optional.
♦ Wireless security settings.
Supported Operating Systems
The print server supports multiple network protocols for users with
Microsoft Windows, Novell NetWare, NDS, and UNIX.
Supported Network Protocols
♦ TCP/IP:
LPD/LPR
BOOTP
DHCP
HP JetDirect
Raw TCP/IP (port 9100 or any chosen port)
NetWare (NEST)
NetBIOS over IP (with SMB)
NetBEUI
DLC
♦ Telnet
♦ RSH or REMSH (remote shell)
♦ WINS
♦ DHCP
♦ FTP
♦ SNMP
All protocols are simultaneously active.
Getting Started 1-3
Page 10

Setting Up the Print Server
For MonarchNet2 to operate, make sure the print server is set to use the
printer’s internal parallel port and use bi-directional communications.
If this is not already set for you:
1. From the printer’s Main Menu, select Setup, Port Settings, Parallel
Comm., Port, and press or until you see Internal. Press
Enter/Pause to save the setting.
2. Then, press to display Mode. Press Enter/Pause. Press or
until you see IEEE1284. Press Enter/Pause to save the setting.
3. Press Escape/Clear until you see the Main Menu.
Note: MonarchNet2 uses the printer’s internal parallel port.
You can switch between MonarchNet2 and using the parallel port, but
you must set the Port to External and the Mode to Compatible. Then,
turn off the printer and turn it back on to detect the cable. MonarchNet2
is not available until you disconnect the parallel cable and change the
Port to Internal and Mode to IEEE1284.
The serial and USB port are still active. However, allow a two-second
delay when switching from one port (serial, Ethernet, or USB) to another.
1-4 MonarchNet2 Operating Instructions
Page 11
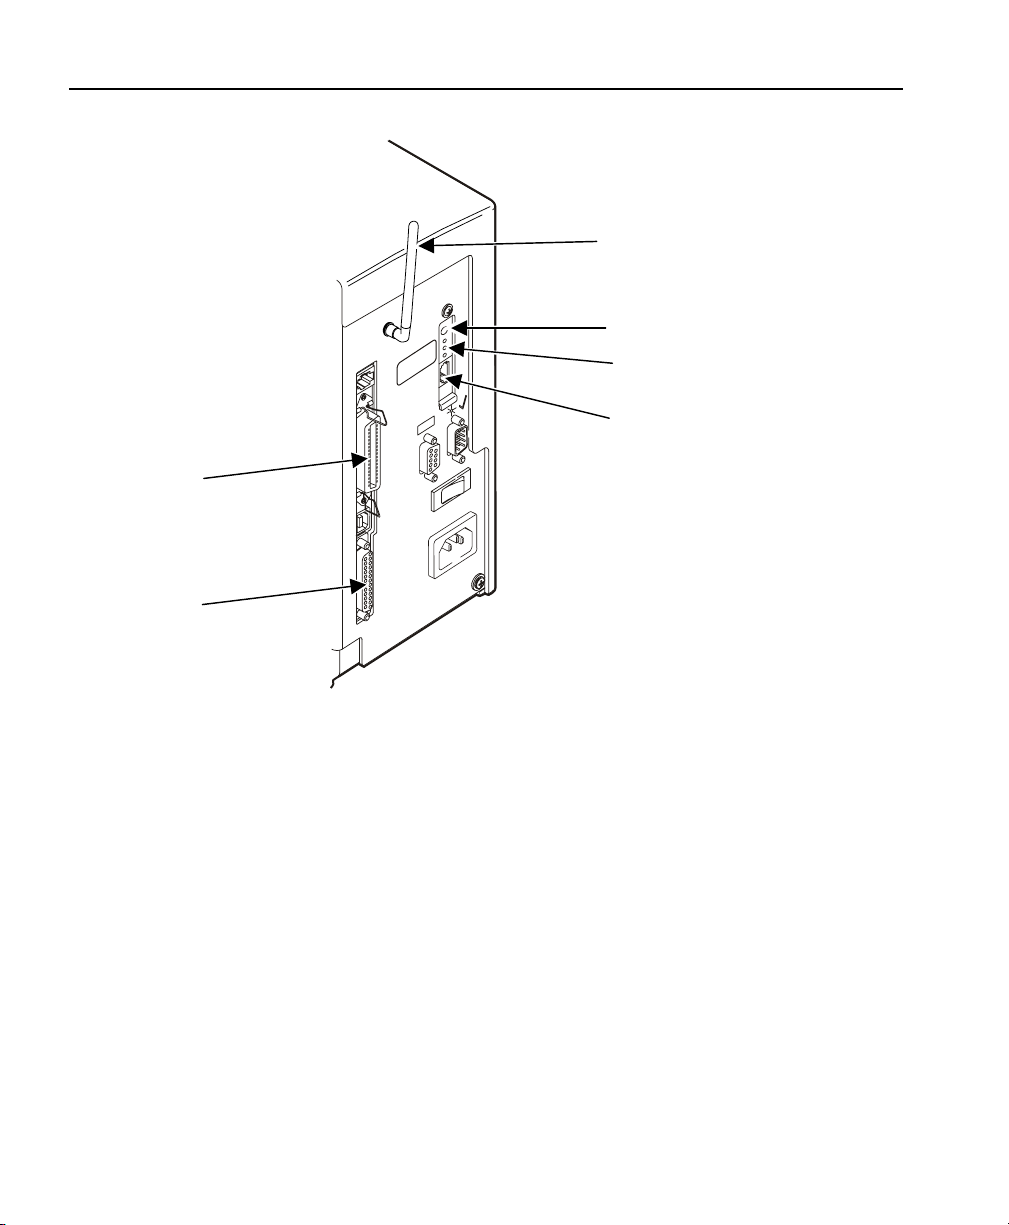
Checking the Print Server Hardware
The Ethernet print server comes preinstalled and tested in your printer.
Antenna
Test Button
LEDs
Ethernet Port
Parallel
Port
Serial
Port
9855 Plastic Cover Printer
Getting Started 1-5
Page 12

Verifying Successful Installation
When the printer is turned on, the print server runs through a set of
power-up diagnostics for a few seconds. All three LEDs blink
momentarily. Then, the LEDs indicate the following activity:
LED Indicators Status
solid printer is on
Orange
Yellow
Green
Yellow & Green
blinking error
off printer is off
solid Ethernet link (wired 10baseT)
blinking network activity
off no Ethernet connection
solid Ethernet link (wired 100baseTX)
blinking network activity
off no Ethernet connection
solid wireless link
blinking network activity
off no wireless connection
1-6 MonarchNet2 Operating Instructions
Page 13

Test Button
Press this button down for less than five seconds
to print a configuration label on the printer. The
label shows the current wireless and network
settings of the print server. See “Printing a
Configuration Label” for more information. If the
label does not print, see Chapter 6,
“Troubleshooting.”
Press this button down for 10 seconds to reset
the password to “access.” To reset the print
server to its factory default parameters, see
“Default Network” for more information.
LED Status
Indicators
The orange light comes on when the printer is
turned on. The yellow light comes on solid when
an Ethernet link (wired 10baseT) is established.
The green light comes on solid when an Ethernet
link (wired 100baseTX) is established. Both the
yellow and green lights come on solid when a
wireless link is established. The lights blink
during network activity.
Antenna A rugged 802.11b/g compatible antenna, mounted
on the back of plastic-cover printers or on the top
of metal-cover printers.
Getting Started 1-7
Page 14
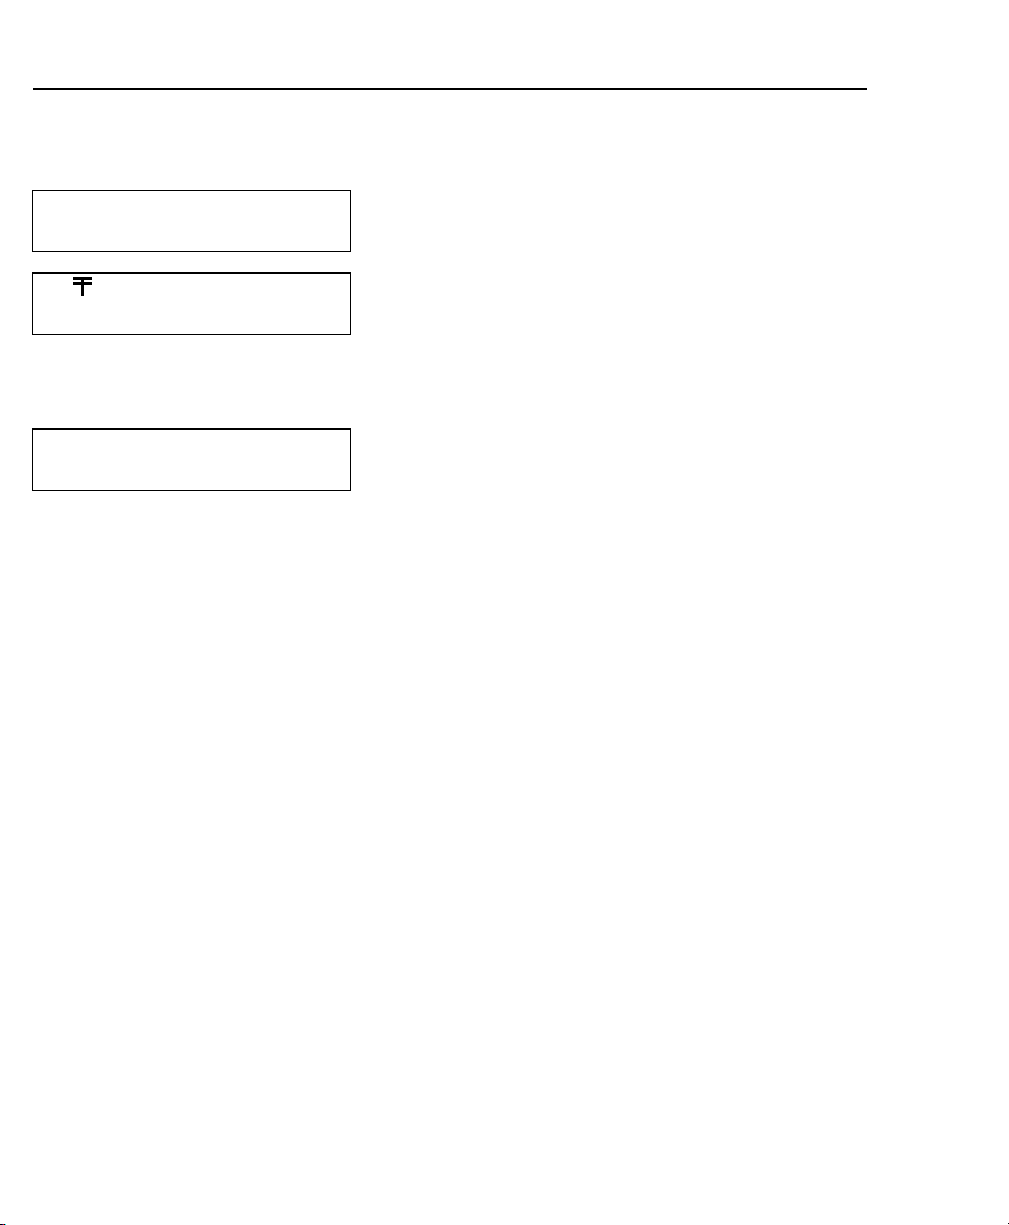
About “Print Mode Ready”
When you turn on your printer, you may see several different “Print Mode
Ready” screens based on your printer’s current configuration.
When you see Description
Print Mode
Ready
Print Mode
█ █ █ Ready
N Print Mode
Ready
The boxes on the display indicate the signal strength of the connection
between the printer and access point. This is an approximation and
should be used for reference. For example, these boxes
of signal strength of approximately 80 percent.
The printer is ready to accept data, but it
does not have a print server with a
MonarchNet2 connection.
A connection is established between the
Ethernet print server and the MonarchNet2
protocol.
It may take a minute or more before a
wireless connection is associated between
the print server and the access point.
A connection is established between the
Ethernet print server and the MonarchNet2
protocol.
It may take a minute or more before a
wired connection is associated with the
Ethernet print server and the network.
█ █ ▌ indicate
1-8 MonarchNet2 Operating Instructions
Page 15
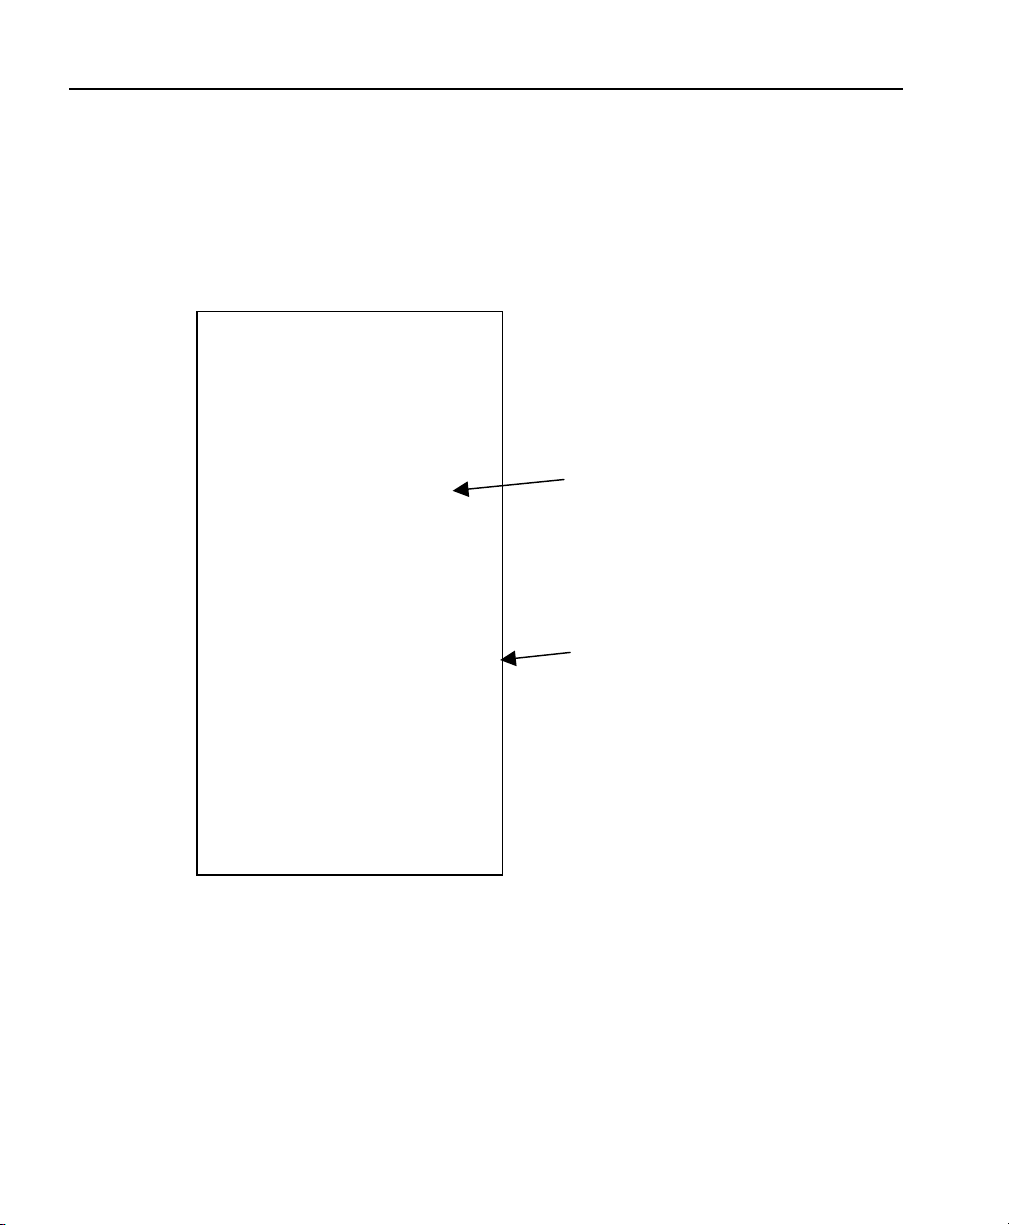
Printing a Configuration Label
To print a configuration label, press the Test button on the back of the
print server.
Use 6-inch long supply. If you are using supply that is shorter than 6
inches long, temporarily change your Supply Type in the printer menu to
“continuous” to print the entire test label. After printing the test label,
change your supply type to your previous setting. Some information may
print outside the label edges of narrow supply.
MonarchNet 2 Network Status
Connected – Wireless
MAC – 00-33-22-AK-35-18
Nwk Ver – CZMO –7.01L (2006.05.23)
Boot Ver – 1.0
WiFi Ver – 2.13.10.0 LMAC
Prn Ver – Version 5.0
Boot Ver – VERSION 3.2
IP Address 192.0.0.192
Subnet Mask 255.255.0.0
IP Gateway 192.0.0.192
(via DHCP 192.0.10.192)
Boot Method AUTO
Boot Tries 3
Timeout 0 min
Keep Alive 1 min
WiFi Information
WiFi SSID ABC123
WiFi Mode INFRASTRUCTURE
WiFi Speed 11
WiFi WEP Disabled
Signal Strength 72
Actual SSID
Attached AP MAC
Network Stats
Packets Received 2485
Bytes Received 225990
Bad Packets Received 448
Receiver Overruns 0
Packets Transmitted 193
Bytes Transmitted 23731
IP Address
WiFi Mode
At the printer, you can also print a network/wireless test label (third test
label), which lists the IP address, subnet mask, etc. See Chapter 6,
“Troubleshooting,” for more information.
Getting Started 1-9
Page 16

1-10 MonarchNet2 Operating Instructions
Page 17
CONFIGURING THE 802.11b/g
A
A
g
2
AND IP SETTINGS
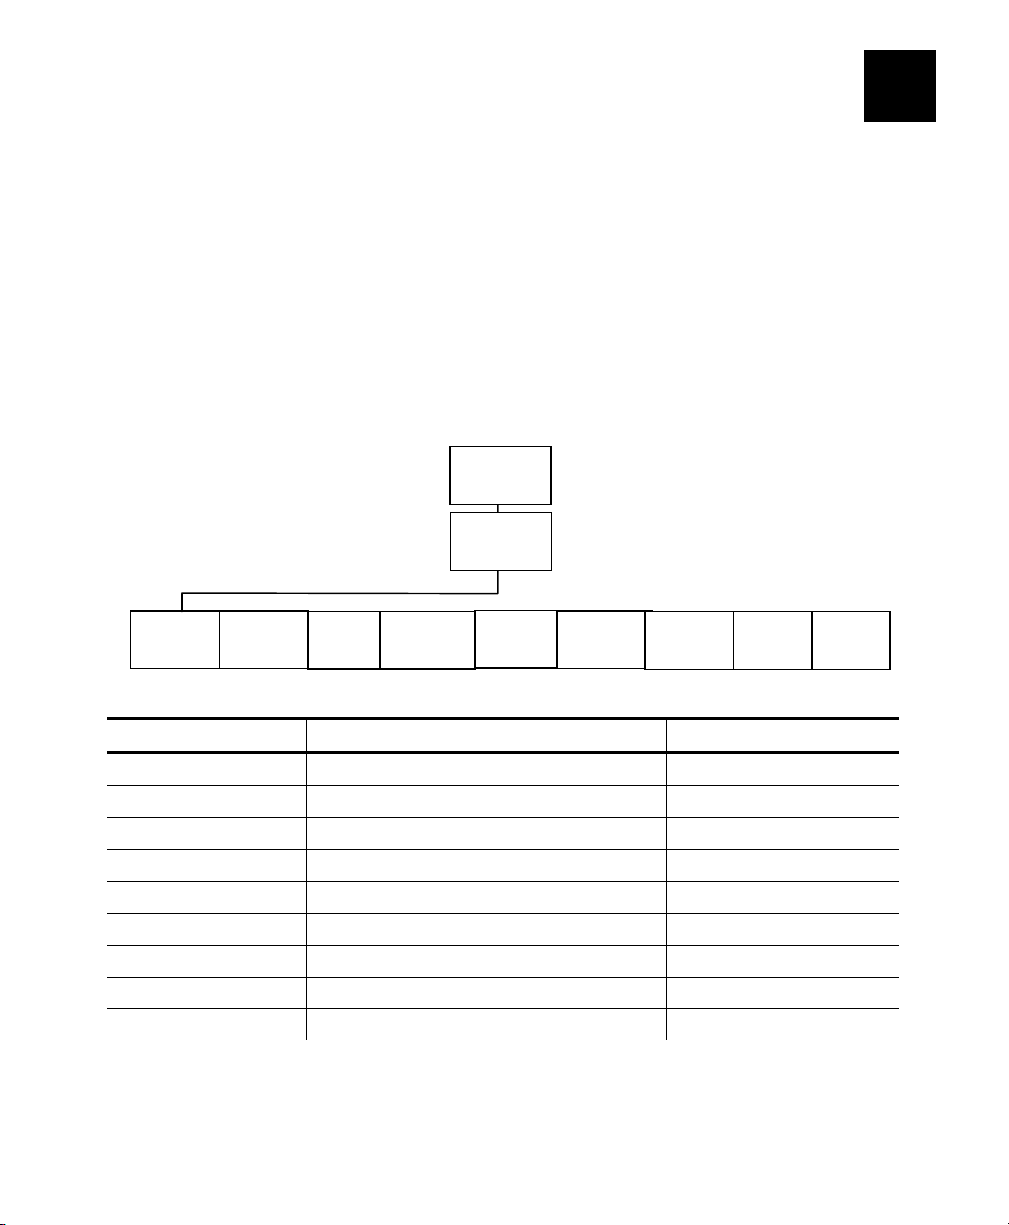
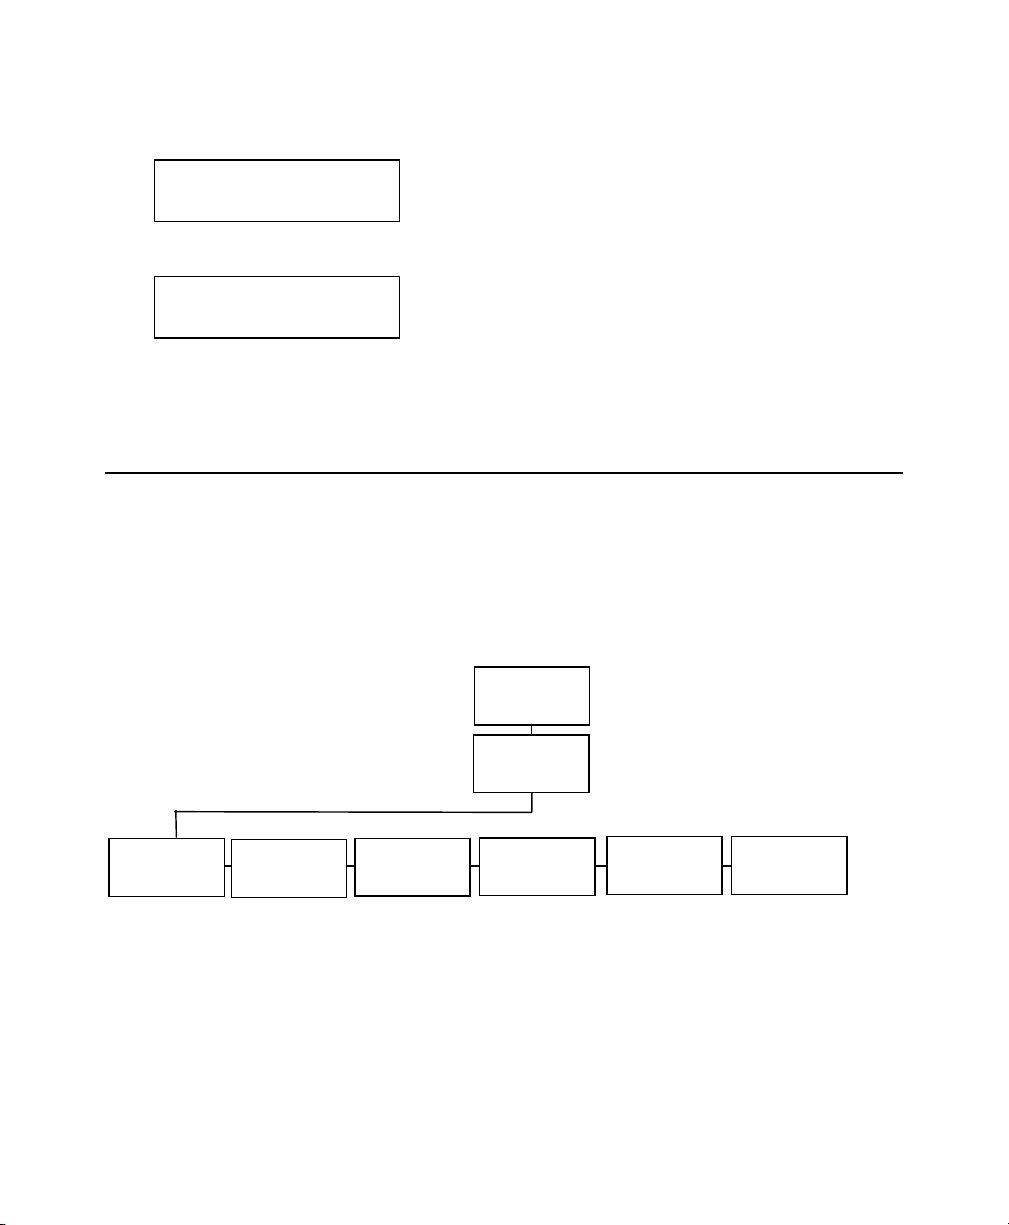
This chapter explains how to configure and view your network settings
by using the printer’s Main Menu. You can set the MAC address, IP
address, subnet mask, IP gateway, boot method, wireless information,
and default network. If the printer is not communicating with the print
server’s network card, the Network Menu options do not appear.
All nodes of a wireless network need to have the same settings to
communicate with each other. We recommend reviewing the
terms in the glossary before you begin.
MAIN MENU
Setup
Network
MAC
ddress
IP
ddress
Subnet
Mask
IP
Gateway
Boot
Method
Wireless
Default
Network
Test
Label
NCL
Settin
The options are listed in the table below.
Option Choices Default
MAC Address View only None – preset value
IP Address xxx.xxx.xxx.xxx 192.0.192.0
Subnet Mask xxx.xxx.xxx.xxx 0.0.0.0
IP Gateway xxx.xxx.xxx.xxx 0.0.0.0
Boot Method Auto/Static/BOOTP/DHCP/RARP Auto
Wireless See “Wireless” section N/A
Default Network Default Setting/Factory Default N/A
Test Label Yes/No No
NCL Settings Reinit NCL/Get First NCL None
Configuring the 802.11b/g and IP Settings 2-1
Page 18
Saving Settings
After you display the option you need, press Enter/Pause to save the
setting. Press Escape/Clear to exit to the next higher menu. If you
save any network or wireless options, the print server resets and uses
the new settings. It may take a minute or more, depending on
network traffic, for the print server to reset and connect to the
network. “Please wait…” is displayed while the print server resets
and is connecting to the network.
Note: Whenever you press Escape/Clear, you lose all previous
entries you have made since the last time you pressed
Enter/Pause.
Make sure to inform your System Administrator if you change any
settings. Keep a record of each of your network printer’s settings in a
safe place.
MAC Address
The Media Access Control (MAC) Address is a hard-coded value that
cannot be changed (like a serial number). It consists of four 3-digit
numeric fields, usually separated by periods. The MAC address of
the print server is located on the label of the printer server.
Note: If the printer is not communicating with the print server’s
network card, the Network Menu options do not appear.
To view the MAC address, from the Main Menu: Select Setup,
Network. Then follow these steps.
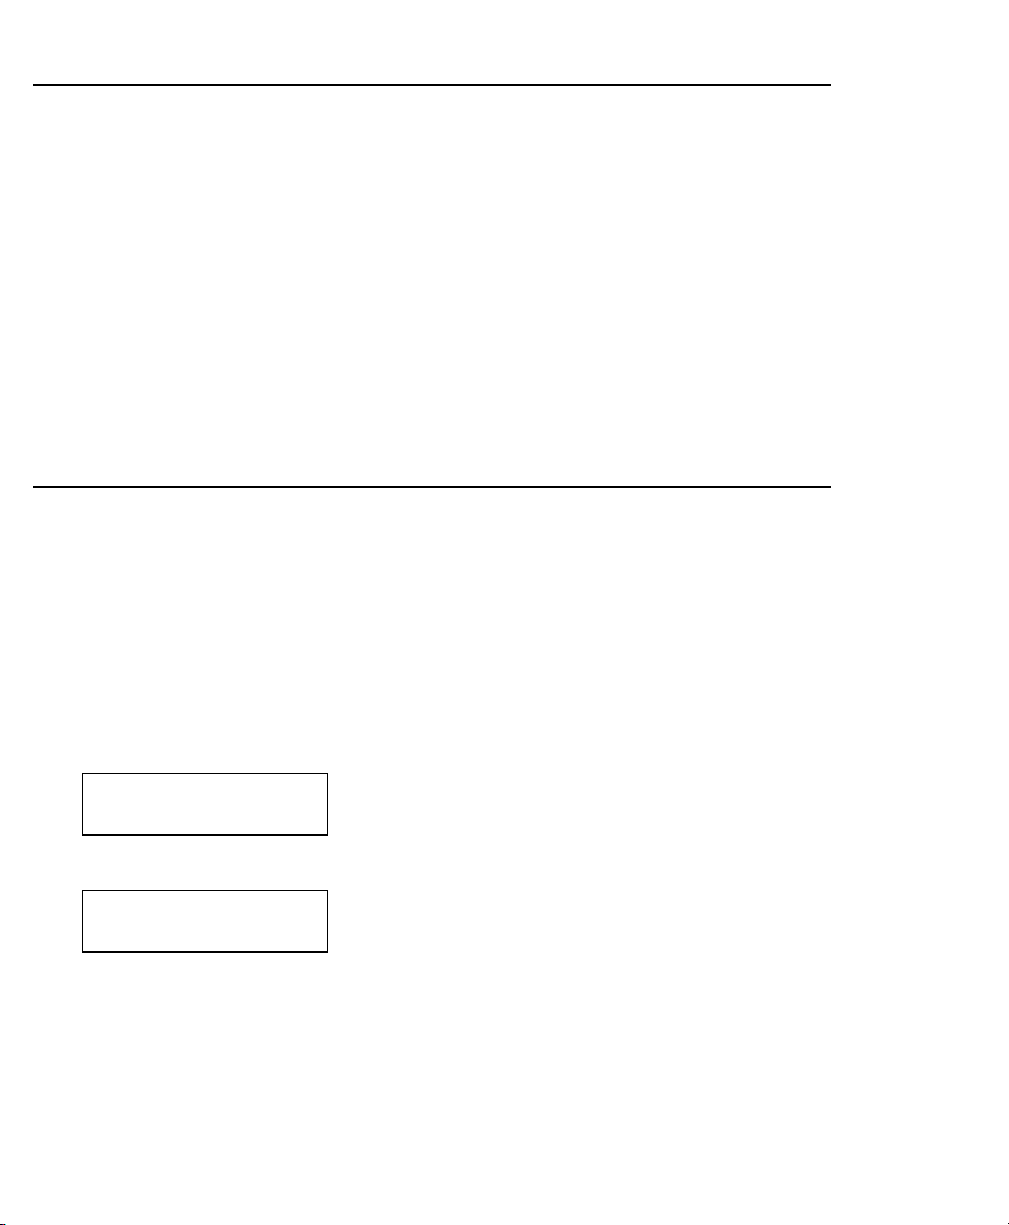
1. Press or until you see
NETWORK
MAC Address
2. Press Enter/Pause. The current setting is displayed, for example:
MAC Address
000123ABC321
3. Press Enter/Pause.
4. Press Escape/Clear until you see the Main Menu.
2-2 MonarchNet2 Operating Instructions
Page 19
IP Address
The IP (Internet Protocol) Address is a unique identifier for a device
on a network. It consists of four 3-digit numeric fields, separated by
periods.
To change the setting, from the Main Menu: Select Setup, Network.
Then follow these steps.
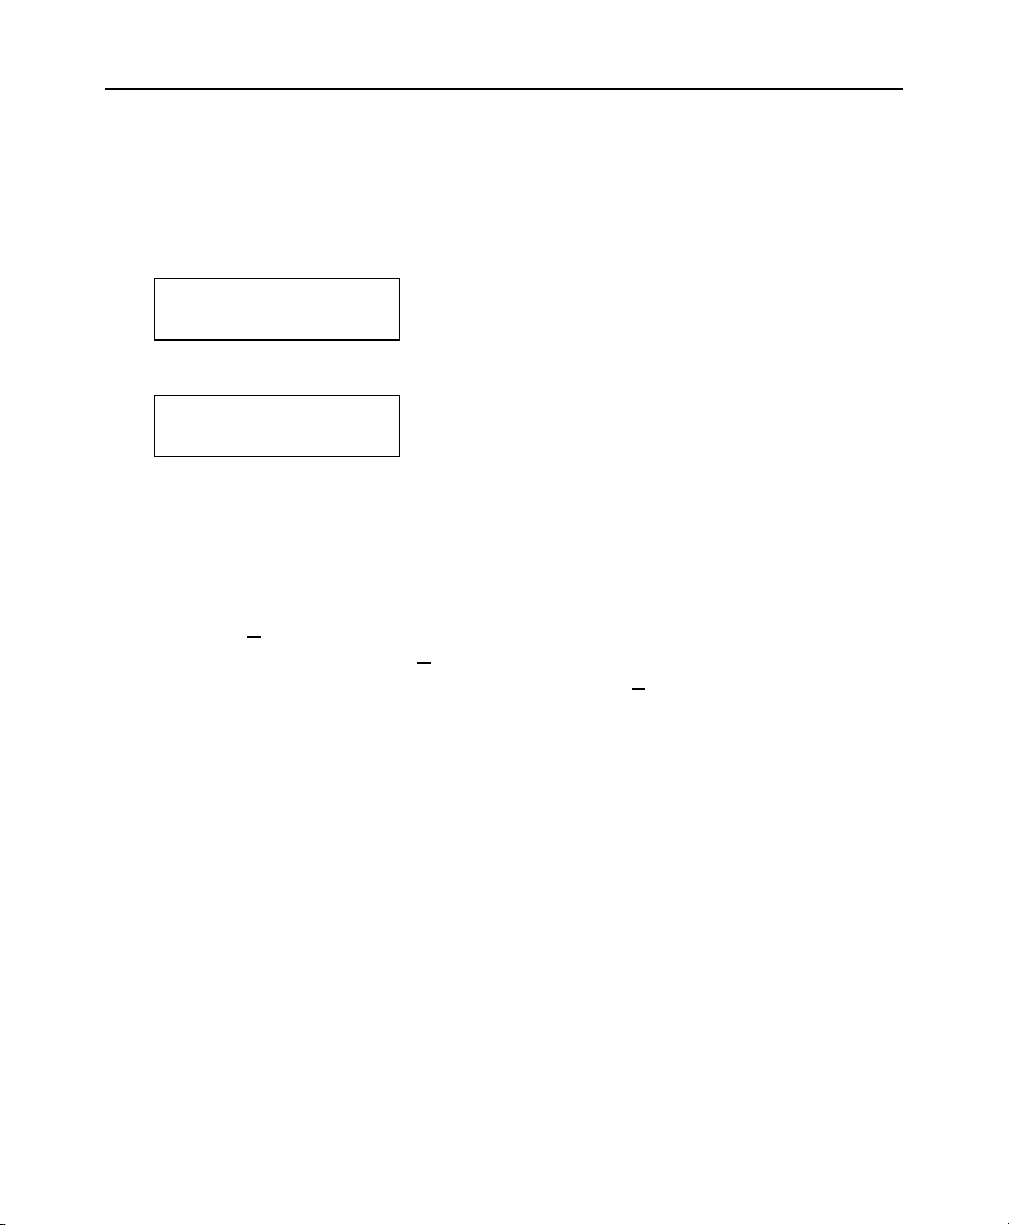
1. Press or until you see
2. Press Enter/Pause. The current setting is displayed, for example:
3. Press or to move through the positions. Press Feed/Cut to
scroll one digit at a time from 0-9. After you display the option
you need, press Enter/Pause.
For example, to change the IP address from 192 to 000, press
or to highlight the first position and press Feed/Cut until
you see 0
Feed/Cut until you see 0
position and press Feed/Cut until you see 0
Enter/Pause to save the setting or press Escape/Clear to exit
without saving.
If you enter a series of digits greater than 255 for any
segment of the IP address and press Enter/Pause, the printer
does not save the setting. However, no error appears on the
display. Correct the IP address and then press Enter/Pause
to save the setting.
NETWORK
IP Address
IP Address
192.0.192.0
, then press to select the next position and press
, then press to select the next
. Press
4. Press Escape/Clear until you see the Main Menu.
Configuring the 802.11b/g and IP Settings 2-3
Page 20
Subnet Mask
IP networks are divided using subnet masks. The subnet mask
address determines where the IP address belongs in the network. It
consists of four 3-digit numeric fields.
To change the setting, from the Main Menu: Select Setup, Network.
Then follow these steps.
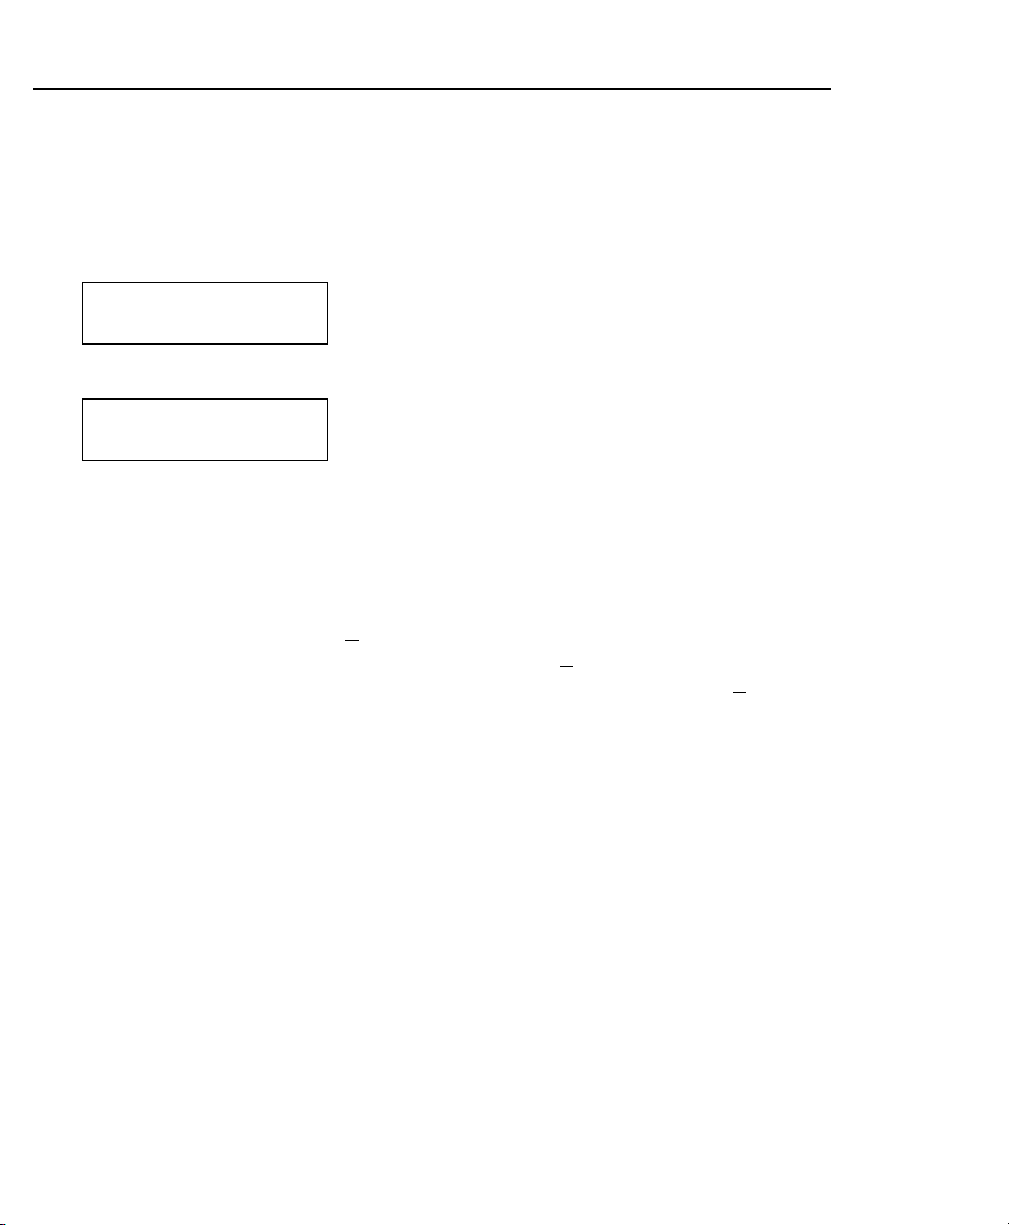
1. Press or until you see
NETWORK
Subnet Mask
2. Press Enter/Pause. The current setting is displayed, for example:
Subnet Mask
255.255.000.000
3. Press or to move through the positions. Press Feed/Cut to
scroll one digit at a time from 0-9. After you display the option
you need, press Enter/Pause.
For example, to change the subnet mask from 192 to 000,
press or to highlight the first position and press
Feed/Cut until you see 0
position and press Feed/Cut until you see 0
select the next position and press Feed/Cut until you see 0
Press Enter/Pause to save the setting or press Escape/Clear
to exit without saving.
If you enter a series of digits greater than 255 for any
segment of the subnet mask and press Enter/Pause, the
printer does not save the setting and no error appears on the
display. Correct the subnet mask and then press Enter/Pause
to save the setting.
, then press to select the next
, then press to
.
4. Press Escape/Clear until you see the Main Menu.
2-4 MonarchNet2 Operating Instructions
Page 21
IP Gateway
The IP Gateway (or router) allows connections (communications)
between different subnets on a network. It consists of four 3-digit
numeric fields.
To change the setting, from the Main Menu: Select Setup, Network.
Then follow these steps.
1. Press or until you see
NETWORK
IP Gateway
2. Press Enter/Pause. The current setting is displayed, for example:
Gateway Address
010.192.000.000
3. Press or to move through the positions. Press Feed/Cut to
scroll one digit at a time from 0-9. After you display the option
you need, press Enter/Pause.
For example, to change the Gateway Address from 192 to
000, press or to highlight the first position and press
Feed/Cut until you see 0
position and press Feed/Cut until you see 0
select the next position and press Feed/Cut until you see 0
Press Enter/Pause to save the setting or press Escape/Clear
to exit without saving.
If you enter a series of digits greater than 255 for any
segment of the Gateway Address and press Enter/Pause, the
printer does not save the setting and no error appears on the
display. Correct the Gateway Address and then press
Enter/Pause to save the setting.
, then press to select the next
, then press to
.
4. Press Escape/Clear until you see the Main Menu.
Configuring the 802.11b/g and IP Settings 2-5
Page 22

Boot Method
The boot method sets the way the device receives its IP address.
The choices include Auto, Static, BOOTP, DHCP, and RARP.
Auto
Static
BOOTP
DHCP
RARP
Tries DHCP, BOOTP, and RARP, then sets to Static if the
IP address is not automatically set using any of the
previous methods.
Use if your network uses fixed configuration. The IP
address remains the same every time the device connects
to the network.
The device broadcasts its hardware address and the MAC
address and the BOOTP server responds with the IP
address.
The network automatically assigns IP addresses within a
specified range to devices when they are first turned on.
A device could have a different IP address every time it
connects to the network.
The device sends a RARP request and the RARP server
responds with an IP address. The device knows its MAC
address and the server responds with the IP address.
2-6 MonarchNet2 Operating Instructions
Page 23
To change the setting, from the Main Menu: Select Setup, Network.
Then follow these steps.
1. Press or until you see
NETWORK
Boot Method
2. Press Enter/Pause. The current setting is displayed, for example:
BOOT METHOD
BOOTP
3. After you display the option you need, press Enter/Pause.
4. Press Escape/Clear until you see the Main Menu.
Wireless
Using the Wireless Menu, you can view the signal strength, set the
Service Set Identifier (SSID), wireless mode, A-Point density, transmit
rate, and channel.
Note: All nodes of a wireless network need to have the same
settings to communicate with each other. We recommend
reviewing the terms in the glossary before you begin.
Signal
Strength
SSID
Wireless
Mode
Network
Wireless
APoint
Density
Configuring the 802.11b/g and IP Settings 2-7
Transmit
Rate
Channel
Page 24
The options are listed in the table below.
Option Choices
Signal Strength 0 to 100
SSID xxxxxxxxxxxxxx
Wireless Mode infrastructure or Ad-Hoc
APoint Density Low/Med/High
Transmit Rate 1/2/5.5/11/12/18/24/36/48/54
Channel 1 to 11
Signal Strength
The connection between the device and access point is shown as
signal strength, which is a percentage from 0 to 100, where 0 is no
connection and 100 is an excellent connection. A percentage below
30 indicates you may be experiencing interference or are close to
being out of the access point’s range. With a percentage below 50,
printing performance could be affected. If the signal strength is low,
increase the number of retries. To improve the signal strength, try
moving the printer closer to the access point and away from other
radio devices such as Bluetooth wireless devices, microwave ovens,
or 2.4-gigahertz cordless phones.
Note: If the printer is not communicating with the print server’s
network card, the Network Menu options do not appear.
To view the signal strength, from the Main Menu: Select Setup,
Network, Wireless. Then follow these steps.
1. Press or until you see
WIRELESS
Signal Strength
2. Press Enter/Pause. The current setting is displayed, for example:
Signal Strength
100
3. Press Escape/Clear until you see the Main Menu.
2-8 MonarchNet2 Operating Instructions
Page 25
SSID
The Service Set Identifier (SSID) is a unique identifier that must
match for all nodes on a subnetwork to communicate with each other.
It consists of up to 32 characters (any printable character, including
spaces). If using the space character, it must be enclosed in
quotation marks.
Note: The SSID is case-sensitive.
To change the setting, from the Main Menu: Select Setup, Network,
Wireless. Then follow these steps.
1. Press or until you see
WIRELESS
SSID
2. Press Enter/Pause. The current setting is displayed, for example:
SSID
ABC1234
3. Press or to move through the positions. Hold Feed/Cut to
scroll quickly through the characters from 0-9;A-Z;a-z or press
Feed/Cut once to scroll one character at a time. After you display
the character you need, press Enter/Pause. You must press
Enter/Pause after each character to save the change and
continue.
To clear the SSID, press and at the same time when you
are at the end of the SSID field. If you are in the middle of
the field and you press and at the same time, any
characters to the right of the cursor are cleared.
Note: If using the Monarch Paxar 9860 printer with the attached
Monarch Paxar 939 keyboard, you may simply enter the
SSID you need using the numeric keys and press .
4. Press Escape/Clear until you see the Main Menu.
Configuring the 802.11b/g and IP Settings 2-9
Page 26
Wireless Mode
The wireless mode sets how you communicate with your wireless
network.
In Ad-Hoc mode, you do not need an access point. Ad-Hoc mode is
also called peer-to-peer (point-to-point) communications, so as long
as the devices are in range, they will connect and communicate with
each other.
Infrastructure mode requires an access point to communicate.
Note: If communicating in a mixed environment where both Ad-Hoc
and infrastructure mode are used, make sure the SSIDs are
unique in both modes.
From the Main Menu: Select Setup, Network, Wireless. Then follow
these steps.
1. Press or until you see
WIRELESS
Wireless Mode
2. Press Enter/Pause. The current setting is displayed, for example:
WiFi Mode
Ad Hoc
3. Press or to change the setting. After you display the option
you need, press Enter/Pause.
4. Press Escape/Clear until you see the Main Menu.
2-10 MonarchNet2 Operating Instructions
Page 27
A-Point Density
The A-Point density is the access point’s density. If the
communication quality (transmit rate) between devices on a network
drops below a certain level, the devices scan for another access point
in the area offering better transmit rates, etc. The range is Low,
Medium, or High.
If set to High density, the device searches for another access point in
range using 11 Mbps communications; Medium uses 2 to 5.5 Mbps
communications; Low uses 1 to 2 Mbps communications.
From the Main Menu: Select Setup, Network, Wireless. Then follow
these steps.
1. Press or until you see
WIRELESS
APoint Density
2. Press Enter/Pause. The current setting is displayed, for example:
APOINT DENSITY
Low
3. Press or to change the setting. After you display the option
you need, press Enter/Pause.
4. Press Escape/Clear until you see the Main Menu.
Configuring the 802.11b/g and IP Settings 2-11
Page 28
Transmit Rate
The transmit rate sets the maximum speed at which the devices
communicate with each other on the network. The speeds are in
Mbps (megabits per second). Choices include: 1, 2, 5.5, 11, 12, 18,
24, 36, 48, or 54. The transmit rate is negotiated with the access
point and this setting may be ignored.
From the Main Menu: Select Setup, Network, Wireless. Then follow
these steps.
1. Press or until you see
WIRELESS
Transmit Rate
2. Press Enter/Pause. The current setting is displayed, for example:
TRANSMIT RATE
1
3. Press or to change the setting. After you display the option
you need, press Enter/Pause.
4. Press Escape/Clear until you see the Main Menu.
2-12 MonarchNet2 Operating Instructions
Page 29

Channel
This option selects the channel on which your network devices
communicate. All devices must be on the same channel to
communicate. Other radio devices such as Bluetooth wireless
devices, microwave ovens, or 2.4-gigahertz cordless phones may
operate on the same channel as your network. Channels 1-11 are
available. Use the channel for Ad-Hoc mode. In infrastructure mode,
the channel is negotiated with the access point and this setting is
ignored.
Note: Make sure all network devices are set to the same channel.
From the Main Menu: Select Setup, Network, Wireless. Then follow
these steps.
1. Press or until you see
WIRELESS
Channel
2. Press Enter/Pause. The current setting is displayed, for example:
Channel
[1/11] +5
3. Press or to change the setting. After you display the option
you need, press Enter/Pause.
4. Press Escape/Clear until you see the Main Menu.
Note: If you have problems connecting to your network, change the
channel to at least three channels lower or higher than any
other wireless networks within range.
Configuring the 802.11b/g and IP Settings 2-13
Page 30
Default Network
The default network option allows you to reset the print server to
default settings or factory default settings.
♦ If you select default setting, any defaults set using the SET
DEFAULT Telnet console command are restored.
♦ If you select factory default, the print server is reset to factory
defaults. See “Factory Defaults” for the list of default values.
When the print server is reset to factory defaults, you must
reconfigure all your specific network settings, including IP
address, SSID, etc.
To change the setting, from the Main Menu: Select Setup, Network.
Then follow these steps.
1. Press or until you see
NETWORK
Default Network
2. Press Enter/Pause.
Default Network
Default Setting
3. After you display the option you need, press Enter/Pause.
The print server is reset to your defaults or factory defaults.
4. Press Escape/Clear until you see the Main Menu.
5. Turn off the printer and turn it back on to initialize the factory
settings.
Note: Depending on your printer’s boot method, the IP address may
be automatically assigned when you turn on the printer.
The new IP address may not be the same as the previous
one.
2-14 MonarchNet2 Operating Instructions
Page 31

Factory Defaults
If you reset the print server to factory defaults, the following values
are restored. Some settings may stay the same, depending on
your network configuration.
Description Default
MAC This value is hard-coded and does not change
TCP/IP Enabled
Name PXR_xxxxxx (xxxxxx = the last six digits of the
MAC address.)
IP Address *
Subnet Mask *
IP Gateway *
Boot Method *
Boot Tries 3
Timeout 0 min
Keep Alive 1 min
SSID <none>
LPD banner Disabled
LPD retries Disabled
Port X1
TCP port 9100
WiFi Mode infrastructure
Speed 54
Actual SSID “discover any AP set for broadcast”
Encryption Disabled
Authentication Type Open System
AP density Low
International Roaming Flexible
Regulatory Domain USI (United States, Indoor)
* May keep previous values based on network configuration.
Configuring the 802.11b/g and IP Settings 2-15
Page 32

Test Label
You can print a configuration label if your print server does not have a
test button. The label is best-displayed using 2” wide by 4” long
labels. If the label is too small, some information may print outside
the label edges.
To change the setting, from the Main Menu: Select Setup, Network.
Then follow these steps.
1. Press or until you see
NETWORK
Test Label
2. Press Enter/Pause.
Test Label
No
3. Press to display “Yes” and press Enter/Pause. The
configuration label prints.
See “Printing a Configuration Label” earlier in this manual for a
sample label.
2-16 MonarchNet2 Operating Instructions
Page 33

NCL Settings
The Network Control Language files (NCL) are in a readable format
similar to Microsoft Windows 3.0 initialization (.ini) files. For
example, you can create an NCL file that sets your printer to specific
settings every time you turn on the printer, such as black mark
supply, high energy ribbon, and on-demand mode.
Use Reinit NCL to process the NCL file saved in the printer’s flash
memory. An NCL file exists in flash memory if the word “NCL”
appears on the first test label’s right side.
Use Get First NCL to process the first (initial) configuration file. This
file can be configured to mimic factory default settings.
For more information about NCL, refer to the Network Control
Language Programmer’s Manual.
To change the setting, from the Main Menu: Select Setup, Network.
Then follow these steps.
1. Press or until you see
NCL Settings
Reinit NCL ¼
2. Press Enter/Pause.
Are you sure?
No ¼
3. Press ¼ to display "Yes" and press Enter/Pause.
Configuring the 802.11b/g and IP Settings 2-17
Page 34

2-18 MonarchNet2 Operating Instructions
Page 35

USING A WEB BROWSER
You can configure and manage the printer and print server using
your Web browser: Microsoft Internet Explorer, version 6.0, or
greater; Netscape Communicator, version 4.7 or greater; or Mozilla
Firefox.
Notes:
♦ The screen pictures shown in this manual may not
exactly match the software.
3
It may take a minute or more, depending on network traffic, for the
print server to connect to an access point. When the printer is
connected to an access point, you see
Print Mode
█ █ █ Ready
The printer is connected and ready to receive data.
♦ The recommended screen area resolution for your
computer is 1024 x 768 pixels.
♦ Before you begin, you need to know your printer’s IP
address. The printer should be turned on and ready
to receive data.
Using a Web Browser 3-1
Page 36

Logging In
1. Start your Web browser.
2. Type in your printer’s IP address and press Enter. For example,
192.0.0.192.
The printer’s display shows the “N” network symbol or the
antenna symbol when the printer is connected and ready to
receive data.
If the printer is experiencing a ribbon or supply problem,
this graphic appears with a red background for Printer
Status.
If the printer has a wireless connection, this graphic
appears for Signal Quality.
If the printer has an AC power connection, this graphic
appears for Power Status.
3-2 MonarchNet2 Operating Instructions
Page 37

3. Click Administrator Log On or the printer’s name (for example,
PXR_8A983A).
4. Type access for the password and click Submit. You do not
need a User Name. The password is case-sensitive and saved in
the printer’s flash memory. See “Access Control” to change the
password.
Using a Web Browser 3-3
Page 38

The About tab appears with information about your printer, including
printer name, IP address, installed/enabled options, and more.
Click the Tech Support tab if you need to contact us.
Configuring the Printer
You can configure the printer using your Web browser.
1. From the side Menu Bar, click Printer Configuration.
Tabs
Side
Menu
Bar
2. Select one of the following tabs: Printer Setup or Supply Setup.
3-4 MonarchNet2 Operating Instructions
Page 39

Changing the Printer Setup
Only configure the settings required for your network/printer.
Note: Only the available options for your printer are displayed.
1. On the Printer Setup tab, set the Ribbon: None, Ribbon, or High
Energy.
2. Set the Supply Type: Aperture, Die Cut, Black Mark, or
Continuous. If you are using edge aperture supplies, use the die
cut setting. If you are using center aperture supplies, use the
aperture setting.
3. Set the Feed Mode: Continuous or On Demand.
4. Enter a value for the Cut Adjust (Position). The range is –300 to
300. This adjusts where the tag is cut.
5. Enter a value for the Supply Position. The range is –300 to 300.
This adjusts the printer to print at the vertical 0,0 point. Only
adjust on initial printer setup.
6. Set the Batch Separators: No, Yes, or Long.
Using a Web Browser 3-5
Page 40

7. Set the Skip Index mode: No or Yes. Skip index allows you to
print an image over multiple labels.
8. Set the Backfeed: Off, On, or Extended. Backfeed advances
each printed label to the specified dispense position and then
backs up the next label to be printed underneath the printhead.
Do not use extended backfeed on non-knife printers.
9. Enter a value for the Dispense Position (range is 50 to 200).
This adjusts the stopping point of the label after it is printed.
10. Enter a value for the Backfeed Distance (range is 10 to 200).
This is the amount to move the label backwards before printing.
11. Enter a value for the Contrast (range is –699 to 699). This
adjusts the darkness of printing on the supply.
12. Enter a value for the Print Position (range is –450 to 450). This
adjusts where data prints vertically on the supply.
13. Enter a value for the Margin Position (range is –99 to 99). This
adjusts where data prints horizontally on the supply.
14. Click Submit when finished.
3-6 MonarchNet2 Operating Instructions
Page 41

Changing the System Setup
Only configure the settings required for your network/printer.
1. On the System Setup tab, set the Flash Storage: Enabled or
Disabled. Flash storage allows packets with “R” or “N” selectors
to be stored in Flash Memory, instead of volatile RAM. Packets
stored in flash memory are saved when the printer is turned off.
2. Set the Speed Adjustment: Default, 2.5, 4.0, 6.0, 8.0 10.0, or
12.0 ips. If you select “Default,” serial bar codes print at 2.5 ips;
parallel bar codes print at 6.0 ips.
3. Set the Power Up Mode: Online or Offline.
4. Select the Prompt Set: English, French, German, Spanish-ES,
Japanese, Portuguese, Italian, Swedish, Spanish-MX, Danish,
Dutch, Finnish, or Norwegian.
5. Set the Monetary Sign: None, USA, UK, Japan, Germany,
France, Spain, Italy, Sweden, Finland, Austria, India, Russia,
Korea, Thailand, China, Euro-Dollar.
6. Set the Secondary Sign: No or Yes.
Using a Web Browser 3-7
Page 42

7. Set the number of Decimal Places: 0, 1, 2, or 3.
8. Select Slashed Zero to print zeros with a slash (Ø): No or Yes.
9. Click Submit when finished.
Reset/Initialize Network
Click Save/Re-init Network (on the Protocols tab) to reset and
initialize the network interface. Any changes made on previous
screens do not take effect until you click Reset Network.
This process takes a few minutes for the printer to respond with the
new settings.
3-8 MonarchNet2 Operating Instructions
Page 43

Configuring the Network Settings
You can configure the print server to operate on your network.
1. From the side Menu Bar, click Network Configuration.
2. Select one of the following tabs: Protocols, SNMP, Wireless, or
Alerts.
Using a Web Browser 3-9
Page 44

Changing TCP/IP Settings
Only configure the settings required for your network/printer.
1. On the Protocols tab, set the Boot Method: Auto, BOOTP,
DHCP, RARP, or Static.
2. Set the number of Boot Tries: 1-10. The default is 3. If you are
having a problem receiving an IP address with BOOTP, set this
number to 10.
3. Change the IP Address if necessary.
4. Set or change the Subnet Mask.
5. Set or change the Gateway.
6. Select either No Subnet or No Gateway for RARP.
3-10 MonarchNet2 Operating Instructions
Page 45

7. Select Automatic DNS Settings to automatically configure the
domain name settings.
8. Enter the Domain Name.
9. Enter the Primary DNS Server’s IP address.
10. Enter the Secondary DNS Server’s IP address.
11. Select Enable Network Time to enable the network time protocol,
which allows the printer to query a time server on the network and
synchronize the clock in the printer.
12. Enter the Time Server’s IP address. The printer waits 20
seconds for the server to respond. The status is displayed within
parentheses: “Waiting for Server,” “Time Server Error,” or the
current date and time.
13. Enter the Time Zone Adjustment in hours and minutes, from
Greenwich Mean Time (GMT). This offset varies by location and
time zone. For example, Eastern/Standard time is five hours
behind GMT. Use –5:00 for the offset. For an offset of 3.5 hours,
use 3:30.
Note: Changes for Daylight Savings Time are not made
automatically. If your time zone participates in Daylight
Savings Time, change the time zone offset accordingly.
14. Set the TCP Window. 10240 is the default.
15. Set the TCP Port. Port 9100 is the default.
16. Set the TCP Timeout (in minutes). The default is 0, which is no
timeout.
17. Set the Keepalive Timer (in minutes). The default is 1 minute.
18. Enable or Disable IP Receive CheckSum and Probe Idle
Connections.
19. Select Retry Enable for LPD/LPR.
Using a Web Browser 3-11
Page 46

20. Select Enable Web Authorization Timeout to make the Web
pages time out after five (5) minutes of inactivity.
Note: The time out period is set for five minutes and cannot be
changed.
21. Select Enable HP Jet Admin if using HP Jet Admin. No other
settings are required for HP JetAdmin.
22. Click Save Changes to save changes or click Save/Re-init
Network to save the changes and re-initialize the network with
the new settings. Any changes made on this screen or other
screens do not take effect until you click Save/Re-init Network.
This process takes a few minutes.
Changing SNMP Settings
Only configure the settings required for your network/printer.
1. Click the SNMP tab to change SNMP settings.
2. Enter the System Name, if it does not automatically appear.
3. Enter the System Contact.
3-12 MonarchNet2 Operating Instructions
Page 47

4. Enter the System Location.
5. Verify the Read Community Name and change if necessary.
6. Verify the Read/Write Community Name and change if
necessary.
7. Verify the Trap Community Name and change if necessary.
8. Enter the Trap IP address, if it does not automatically appear.
9. Enter the Trap IP port, if it does not automatically appear.
10. Enable SNMP Alerts if necessary. Set which alerts you need to
receive. See “Setting Alerts” for more information.
11. Click Submit when you are finished.
12. Click the Protocols tab.
13. Click Save Re-init Network (on the Protocols tab) before any
changes take effect. Even though you submitted your changes on
the previous screen, they do not take effect until you click Save
Re-init Network. This process takes a few minutes.
Using a Web Browser 3-13
Page 48

Changing Wireless Settings
Only configure the settings required for your network/printer.
1. Click the Wireless tab to configure the wireless network
(802.11b/g) settings.
2. Set the Mode: Ad-Hoc or infrastructure. In Ad-Hoc mode, you do
not need an access point. Infrastructure mode requires an access
point to communicate.
3. Set the SSID. The SSID is a unique identifier that must match for
all nodes on a subnetwork to communicate with each other.
4. Select the Radio type: 802.11b or 802.11b/g.
5. Set the Ad-Hoc channel: 1 to 11. All devices must be on the
same channel to communicate.
6. Set the Speed: 1, 2, 5.5, 11, 12, 18, 24, 36, 48, or 54 (megabits
per second).
7. Set the International Roaming: Disable, Strict, or Flexible.
3-14 MonarchNet2 Operating Instructions
Page 49

8. Set the Regulatory Domain, which is the country of use.
9. Set the AP Density: Low, Medium, or High. If the communication
quality (transmit rate) between devices on a network drops below
a certain level, the devices scan for another access point in the
area offering better transmit rates, etc.
10. Set the Encryption Mode: Disable, 64 BIT Encryption, 128 BIT
Encryption, WPA, WPA2, WPA2-WPA. WPA2-WPA works as
either WPA2 or WPA. The encryption mode determines the
algorithm used to encrypt messages.
11. Set the Authentication Type: Open, Shared, TLS, TTLS, LEAP,
PEAP, EAP-FAST, or PSK. The authentication type specifies how
users are identified and verified on a network. These options vary
depending on what was selected as the Encryption Mode. See
“Basic Security Configurations” for more information.
12. Enable WPA Group Key to use a group key for data link
encryption.
13. Enter the maximum number of Authentication Attempts.
14. Enter the Pre-shared key, which must be exactly 64 hex
characters. If using a pass-phrase, it must be 8 to 63 displayable
characters.
15. Set the Authentication Protocol: PAP, or MSCHAP_V2. See
“Basic Security Configurations” for more information.
16. Enter the User ID.
17. Enter the Password.
18. Click Submit when you are finished.
19. Click the Protocols tab.
20. Click Save Re-init Network (on the Protocols tab) before any
changes take effect. Even though you submitted your changes on
the previous screen, they do not take effect until you click Save
Re-init Network. This process takes a few minutes.
Using a Web Browser 3-15
Page 50

Using WEP
If you select 64 BIT Encryption or 128 BIT Encryption, you need to
enter the WEP keys.
1. Determine which Key Selection to use: 1-4.
2. Set the WEP Key values. You must use the same key values for
devices to communicate with each other on the network.
Note: As you enter the values for the WEP keys, you can see the
characters. However, the next time you view this tab, the
values are displayed as asterisks (*).
3. Click Submit when finished.
4. Click the Protocols tab.
5. Click Save Re-init Network (on the Protocols tab) before any
changes take effect. Even though you submitted your changes on
the previous screen, they do not take effect until you click Save
Re-init Network. This process takes a few minutes.
3-16 MonarchNet2 Operating Instructions
Page 51

Configuring Certificates
For TLS and TTLS authentication, you may need to configure the
Authentication Server Certificate.
1. Select Configure Authentication Server Certificate (on the
Wireless tab).
2. Click Browse to search for the appropriate Root Certificate.
Click Submit. You see the Root (Public) Key in the Certificate
Root Key window. The exponent is almost always 65537
(default). See “Basic Security Configurations” for more
information.
The Certificate Root Key is used to verify the root certificate
in the certificate chain provided by the authentication server.
Leaving this field blank sets the value to “null.”
The Certificate Root Key Exponent value must match the
authentication server certificate value.
3. Enter the Certificate Common Name 1, which is the name of the
certificate on the primary authentication server.
Note: If both common names are left blank, the values are set to
“null” and all host certificates are accepted.
Using a Web Browser 3-17
Page 52

4. Click Submit at the bottom of the screen when finished.
5. Click Back
6. Click the Protocols tab.
7. Click Save Re-init Network (on the Protocols tab) before any
changes take effect. Even though you submitted your changes on
the previous screen, they do not take effect until you click Save
Re-init Network. This process takes a few minutes.
to return to the previous screen.
Setting Alerts
Alerts and SNMP are supported with the release of version 3.0 or
greater printer firmware. The printer also contains the minimum set
required to be compliant with printer MIB version 2.0 (RFC 3805).
1. Click the Alerts tab to setup the mail server and select users to
receive messages about the printer’s status.
2. Enter the Mail Server IP Address.
3-18 MonarchNet2 Operating Instructions
Page 53

3. Enter the Mail Server Port.
4. Enter the Mail Domain Name.
5. Select the message format: Plain Text or HTML.
6. Specify up to three users who will receive alert messages.
7. Select the alerts for each user. ALL is a toggle switch to select or
deselect all the boxes for each user. The “Printer Offline” alert
only appears if the operator presses Escape/Clear on the printer,
not Enter/Pause.
8. Click Apply Changes to save your alert settings.
9. Click the Protocols tab.
10. Click Save Re-init Network (on the Protocols tab) before any
changes take effect. Even though you submitted your changes on
the previous screen, they do not take effect until you click Save
Re-init Network. This process takes a few minutes.
Receiving An Alert
When the printer goes offline, has a ribbon error, or any other error
that you selected notification for, a similar email appears in the
specified User’s inbox:
The text of the email follows:
MonarchNet2 Printer Alert!!!
Prn IP:192.0.0.192
Prn Name:PXR8A97CA
Going Off-Line
Please DO NOT REPLY to this message.
Perform the appropriate action to correct the problem. Make sure the
printer is ready to receive data (displays shows the “N” network
symbol or the antenna symbol) after the problem has been corrected.
Using a Web Browser 3-19
Page 54

Reading the Virtual Panel
The virtual panel operates just like the printer’s control panel. You
can use the virtual panel to clear errors, feed labels, and more.
1. From the side Menu Bar, click Virtual Panel Display.
2. The current status of the printer appears on the virtual panel’s
display.
3. If there is an error, click Escape/Clear to clear the error. If you
want to feed a label, click Feed/Cut.
3-20 MonarchNet2 Operating Instructions
Page 55

Using Custom Commands
The Custom Commands menu allows you to enter MPCL format and
batch data to print a label or enter Telnet console commands.
1. From the side Menu Bar, click Custom Command.
2. Enter any MCPL format and batch data or enter a Telnet console
command. See Chapter 4, “Console Commands,” for more
information.
Using a Web Browser 3-21
Page 56

3. Click Submit. The MPCL format is sent or results from a Telnet
console command appear.
Changing the Password
You can change the access password for MonarchNet2. This should
only be done by your System Administrator. The default is access.
The password is case-sensitive and saved in the printer’s flash
memory.
Note: Make a note of the password if you change it. Changing the
password also restricts access to Telnet sessions.
1. From the side Menu Bar, click Access Control.
2. Enter the Current Password.
3. Enter the New Password.
3-22 MonarchNet2 Operating Instructions
Page 57

4. Retype the New Password to confirm it.
5. Press Submit when finished.
If you change the password and attempt to log in using the old
password, this message appears. It also appears for various
error conditions when configuring the printer.
6. Click LOGIN
problem.
to login using the correct password and correct the
Using a Web Browser 3-23
Page 58

Updating Firmware
You can update the printer’s firmware. Make sure the Resident (Boot
Loader) is version 2.3 or greater.
1. From the side Menu Bar, click Firmware Update.
2. Make sure your printer is connected and ready to receive data.
3. Enter the TFTP Server IP Address.
4. Enter the Firmware Path and Filename (relative pathname to
your TFTP server). Refer to your TFTP Server’s documentation
for more information about setting up and using the TFTP server.
Note: Depending on your TFTP server, you may only need the
filename, not the entire path.
5. Click Submit to load the firmware. If you lose power while
updating the firmware, call Service.
3-24 MonarchNet2 Operating Instructions
Page 59

Basic Security Configurations
There are two main decisions to be made when choosing wireless
security: encryption method and authentication protocol. The
encryption method determines the algorithm used to encrypt the
message. The authentication type specifies how users are identified
and verified on a network. Is the device seeking connection what
(and who) it claims to be?
Select an Encryption Method from the following table:
Encryption Method
Type Algorithm Size
(bits)
WEP RC 4 64/128 This is the 64 or 128 bit WEP Key that
WPA RC 4 64/128
WPA 2 AES 128 Improves on WPA by replacing RC 4 with
Description
must match other nodes’ encryption keys
in order to communicate. The user can
only define 10 hex characters (40 bits) for
64 bit WEP or 26 characters (104 bits) for
128 bit WEP.
Improves on WEP by using TKIP*
(Temporal Key Integrity Protocol), which
dynamically changes the encryption key
and MIC (Message Integrity Code), which
replaces CRC.
AES (Advanced Encryption Standard) for
encryption. The user can only define 26
characters (104 bits) for 128 bit WPA 2.
* Dynamic WEP cannot be selected directly, so select 128 for the
encryption mode and select an authentication mode from one of the
following: LEAP, PEAP, EAP-FAST, TLS, or TTLS.
Using a Web Browser 3-25
Page 60

Authentication Protocol
Type RADIUS
Server
Protocol
Enterprise
Personal PSK N/A
LEAP No N/A
PEAP* N/A
TLS Required*
TTLS
EAPFAST
PAP or
MSCHAPv2
User ID &
Password
Required
Certificate Private Key
Info File
Optional*
N/A
PAC* N/A
*PEAP This is only for server-side certificates.
*Optional Leaving the Certificate Root Key and the Certificate CN (common) names blank, no
validation of the host certificate is performed. The values are set to “null” and all host
certificates are accepted.
*Required The Print Server comes with a default Private Key Information File. You can either
download that file from the print server and add it to the TLS authentication server, or
overwrite a new one on the print server.
*PAC EAP-FAST does not use certificates to authenticate, but a PAC (Protected Access
Credential), which is managed dynamically by the server. The PAC is distributed one at a
time to the client manually or automatically.
See the following table of acceptable combinations:
Encryption
Authentication WEP WPA, WPA (TKIP), WPA2
Open
Shared
PSK
LEAP
PEAP
EAP-FAST
TLS*
TTLS
* Load the local key before enabling TLS.
3-26 MonarchNet2 Operating Instructions
Static No
Dynamic Yes
Page 61

CONSOLE COMMANDS
Use this chapter to configure the Print Server using Telnet. You
must have a basic understanding of the Telnet application. For initial
setup, do not use Telnet, use auto-discover mode. Once you have
the IP address, you can use Telnet or a Web browser.
RSH or REMSH (remote shell) support is available with the release of
version 3.0 or greater printer firmware. Remote shell support is a
common UNIX application that provides remote command execution
capability for networked devices. For more information, refer to your
UNIX documentation.
♦ You can use Telnet if you do not have access to the MonarchNet2
software.
♦ This chapter also includes information about the Network Packet
(Console Passthru).
Note: The default port is Port 23.
4
Console Commands 4-1
Page 62

Conventions
This section uses the following conventions:
KEYwords
[options
]
<values>
n
Type the capitalized letters of each keyword instead of
the whole keyword. Some keywords require more
capitalized letters than others. For example,
SEt
KEYVAL
RAdio
Mutually-exclusive options are included within square
brackets and separated by a forward slash. Select only
ONE of the options. For example,
[DISable/STRICT/FLEXible]
Values are included within brackets. Values that
contain spaces (multiple words) must be enclosed
within quotation marks (""). For example,
SEt EN PW <value>
SEt EN PW "Store 876"
Numeric digits are indicated by the letter (n). For
example,
SEt IP BOot n
SEt IP BOot 5
SEt EN CHannel nn
SEt EN CHannel 11
Accessing Telnet Console Mode
1. Start a Telnet session.
2. Type telnet 192.0.0.192 (your printer’s IP address) and
press Enter.
3. You see “Welcome to MonarchNet2 Enter Password:”
Type access as the password and press Enter. (access is the
default password.)
The password is case-sensitive. Depending on your printer’s
firmware version, you may not be prompted for a username.
Note: The Telnet session times out after 10 minutes of inactivity.
4-2 MonarchNet2 Operating Instructions
Page 63

4. To view the current wireless settings, type sh en (show wireless
settings) or sh nw (show network settings) and press Enter:
WiFi Mode = INFRASTRUCTURE
WiFi SSID: ABC123
Speed = 54
International Roaming: Flexible
Dynamic Frequency Selection: Unsupported
Regulatory Domain = USI
WiFi FW Ver = 2.13.10.0 LMAC, 2.12.18.0 UMAC
AP density = LOW
Authentication type= OPEN SYSTEM
Encryption is Disabled
Local certificate loaded
AP MAC Address = 00 A0 F8 51 B4 FC
Signal Quality = Excellent (100%)
Connected to SSID ENG4121 on channel 11
5. To show the current IP settings, type sh ip (show TCP/IP
settings) and press Enter.
IP is enabled
IP address 192.0.0.192 Boot tries 3
Subnet mask 255.255.0.0 Boot method AUTO
IP Gateway 192.1.1.192 Max window 10240
(via DHCP 192.2.2.192)
LPD banner disabled Timeout 0 min
LPD retries are disabled Keepalive 1 min
Service Port TCP port
PXR1E8580_X1 X1 9100
6. To change the SSID, type set en ssid testsystem and press
Enter.
7. To set the IP address, type set ip ad 192.0.0.192 and press
Enter.
8. To set the subnet mask, type set ip sub 255.255.0.0 and
press Enter.
9. Type INIT and press Enter to save the settings and initialize the
unit.
10. Type EXIT to exit Telnet.
Console Commands 4-3
Page 64

See the following sections for a list of the most frequently used
commands.
Help Commands
For help at any time, type “Help” and a list of available commands
appears. The Help command builds on itself, because for each
command you type, more details appear for each option.
Note: There are help menus for all supported commands. To access
a help menu for a specific command, type HElp <command>.
Syntax: Help set
DEFAULT Set parameters to factory defaults
EN Network Parameters
LOAd Firmware update parameters
PAssword <password> Set console password
PORt <name> . Parameter for port <name>
PROtect <password> Set update password
SERVEr Server and LAT parameters
SERVIce <name> Service Parameters
SNMP SNMP Variables
Syslog Syslog Parameters
DNS DNS Parameters
STRing n "..." BOT/EOT string
IP LPD/TCP Parameters
POP3 POP3 Parameters
SMTP SMTP Parameters
NETWare Netware Parameters
POWERON <delay-sec> Power on delay
Displays a list of the available help commands for “Set.”
4-4 MonarchNet2 Operating Instructions
Page 65

Syntax: Help set ip
IP LPD/TCP Parameters
ADdress aa.bb.cc.dd IP node address
ARP [EN/DI] IP set via ARP
BAnner [EN/DI] LPD banner printing
CHKSUM [EN/DI] IP receive checksum
BOot n Number of DHCP/BOOTP tries
ENable/DISable Enable or Disable IP Processing
FTIme [EN/DI] Fast timeout
FTP [EN/DI] FTP protocol
HTTP [EN/DI] HTTP protocol
KEepalive n Keepalive interval (min)
LPD [EN/DI] LPD protocol
MEthod <type> Set method of getting IP address
PIng aa.bb.cc.dd Test connection to IP host
PRObe [EN/DI] TCP connection probes
RANge [EN/DI/ALL] aa.bb.cc.dd {MAx ee.ff.gg.hh}
RARp flags nn 1=no subnet, 2=no router,
3=neither
REtry [EN/DI] LPD retry continuation
ROuter aa.bb.cc.dd Default router address
SUbnet aa.bb.cc.dd Subnet mask
TCP [EN/DI] Raw TCP (9100) protocol
TELnet [EN/DI] TELNET protocol
TFTP [EN/DI] TFTP protocol
TImeout n Inactivity timeout (minutes)
TRAP n [ADDR/PORT/TRIG] TRAP configuration
WIndow nn LPD/TCP maximum window size
Displays a list of the available help commands for “Set IP.”
Console Commands 4-5
Page 66

General Commands
From the list of commands, the brackets - [] indicate to pick one of the
options listed, the items inside curly braces - {} are optional and do
not need to be specified.
CHange
Changes configuration items.
CLear FATal
Deletes fatal error log.
CLear PAssword
Removes the console password.
CLear POrt portname JOB
Clears current entry in the print server's internal queue for the specified
portname (P1 for the first parallel port).
CLear PROTect
Sets the update password to “null.”
CLear SERVEr STRing n
Removes BOT/EOT string.
DEfine
Defines configuration items.
DElete
Removes configuration item.
EXIT
Exits console mode.
EXIT/^D
Exits the print server console.
4-6 MonarchNet2 Operating Instructions
Page 67

HElp
Displays the list of available commands.
SET
Sets a specified parameter.
SHow
Displays current settings.
CLear
Removes a specified parameter.
INIT
Saves settings and initializes unit.
PUrge
Removes configuration item.
SAVE
Saves configuration settings.
SET DEFAULT
Sets print server to factory defaults.
SET LOAD [EN/DI]
Enables or disables firmware reload after exit.
SET LOAD HOst <name>
Sets node name of boot host (NetWare firmware load).
SET LOAD IP aa.bb.cc.dd
Sets IP address of load host (TCP/IP firmware load).
SET LOAD SOftware <filename>
Sets print server’s firmware filename to load.
SET LOAD XModem
Begins XModem serial download of new firmware.
SET PAssword
Sets console password. The user is prompted for old password, new
password, and to verify new password. The default password is access.
Note: The password is case-sensitive.
Console Commands 4-7
Page 68

SET PROTect <password>
Sets the update password.
SET SERVEr DEscription
Sets mode description to string displayed with SHOW SERVER command.
SET SERVEr NAme <name>
Sets server node name.
SET SERVIce <servicename> <protocol> [EN/DI]
Enables or disables specified protocol on specified service.
SET SERVIce <servicename> BOT nn
Sets service BOT string to nn.
SET SERVIce <servicename> EOT nn
Sets service EOT string to nn.
SET SERVIce <servicename> FIlter nn
Sets service filter to nn.
SET SERVIce <servicename> FMS nn
Sets filter 1 match string to nn.
SET SERVIce <servicename> FRS nn
Sets filter 1 replace string to nn.
SET SERVIce <servicename> NAme <newname>
Changes service name.
SET SERVIce <servicename> POrt <portname>
Changes the service port (<portname> is P1 and P2 for the first and second
parallel ports and S1 and S2 for the first and second serial ports.)
SET SERVIce <servicename> REceive [EN/DI]
Sets receive only mode on specified service.
SET SERVIce <servicename> TCP nn
Sets TCP port number of service.
SHow DATE or DATE
Shows the current date in format Day mm/dd/yy hh:mm:ss.
SHow FATal
Shows the fatal error log.
4-8 MonarchNet2 Operating Instructions
Page 69

SHow FREE
Shows amount of available memory.
SHow LOAd
Shows the print server’s firmware update parameters.
SHow POP3
Shows POP3 parameters
SHow PORt
Shows port parameters.
SHow PORt <name> STA
Shows the current port status.
SHow PRN DISplay
Shows the text currently on the LCD display.
SHow PRN CFG
Displays the printer configuration as an NCL file.
SHow PRN FEEdlabel
Feeds a label.
SHow PRN FFILE
Shows an existing NCL file in flash memory.
SET PRN FIRMWARE
Sets the printer in boot loader mode to reload the firmware.
SHow PRN FORmats {0/ALl/format#} {RAW}
Shows the specified format from flash memory. If no format is specified, or
you choose 0 or ALl, then shows all formats that are stored in flash
memory. If the optional “raw” argument is not specified, formats are
displayed in default format, with each field on a separate line and formats
separated by a blank line. If “raw” is specified, each format is displayed on
a single line (fields are not separated).
Note: This command does not show formats that are only stored in RAM. To
see format headers and clear formats, use the STOrage commands.
Console Commands 4-9
Page 70

SHow PRN KEYpad
Shows the current status of the keypad lock.
SET PRN KEYpad [LOck/UNlock]
Locks or unlocks the printer’s keypad.
SHow PRN LOG
Displays the NCL log file.
SET PRN RESET
Rests the printer (Telnet and remote shell only).
SHow PRN STAtus
Shows the printer’s current status (decoded ENQ status bytes).
SHow PRN TEStlabel
Prints a test label.
SHow PRN UPASSwordstatus
Shows the current status of the offline menu user password (on or off).
SET PRN USPASSword status [YEs/NO]
Turns the offline menu user password on or off.
SHow SERVEr
Shows the server parameters.
SHow SERVEr COunters
Shows the server statistics.
SHow SERVEr QUeue
Shows the print server internal queue.
SHow SERVIce
Shows service parameters.
SHow TEstpage
Prints a test page.
SHow TIME
Shows the current time in format hh:mm:ss.
SHow VErsion
Shows the server firmware version.
4-10 MonarchNet2 Operating Instructions
Page 71

UNPROTect
Allows the user to enter the update password (if one has been defined).
Once the update password is entered correctly, SET commands can be
used to modify the configuration until the console session is closed with
EXIT.
UPTIME
Shows how long the printer has been on in format hh:mm:ss up N day(s),
hh:mm:ss.
ZEro
Zeros statistical counts.
Setup Commands
SET PRN BACkfeedcontrol [ACtion/ DISPenseposition/
DISTance] value
Sets the specified backfeedcontrol parameter to the specified value.
SHow PRN BACkfeedcontrol {ACtion/ DISPenseposition/
DISTance}
Shows the specified backfeedcontrol parameter’s current setting. If no
parameter is specified, it shows the current settings of all parameters in the
backfeedcontrol category.
SET PRN BATchoptions [CLearfields/ NUmberofparts/
CUTOption/ CUTMultiple/ PRintmultiple/
QUantity] PRompt [YEs/ NO]
Turns on or off the specified batch entry prompt. These parameters also
have corresponding values, such as “cut last ticket” for CUTOption.
SET PRN BATchoptions [CLearfields/ NUmberofparts/
CUTOption/ CUTMultiple/ PRintmultiple/
QUantity] value
Sets the specified batchoptions parameter to the specified value.
SET PRN BATchoptions [CUTLTicketprompt/
CUTAfterbatchprompt/ NOCutbeforeprompt/
CUTLStripprompt] [YEs/ NO]
Sets the specified batchoptions parameter’s current setting. If no parameter
is specified, it shows the current setting of all parameters in the
batchoptions category.
Console Commands 4-11
Page 72

SHow PRN BATchoptions {CLearfields/ NUmberofparts/
CUTOption/ CUTMultiple/ CUTLTicketprompt/
CUTAfterbatchprompt/ NOCutbeforeprompt/
CUTLStripprompt/ PRintmultiple/ QUantity}
Shows the specified batchoptions parameter’s current setting. If no
parameter is specified, it shows the current settings of all parameters in the
batchoptions category.
SET PRN COMmunication [BAudrate/ WOrdlength/
STopbits/ PArity/ FLowcontrol/ PPort/ PMode]
value
Sets the specified communication parameter to the specified value.
SHow PRN COMmunication {BAudrate/ WOrdlength/
STopbits/ PArity/ FLowcontrol/ PPort/ PMode}
Shows the specified communication parameter’s current setting. If no
parameter is specified, it shows the current settings for all parameters in
the communication category.
SET PRN CONtrolcharacters [STartheader/
PAramseparator/ QUotedstrings/ FIeldseparator/
ENDheader DAtaescape/ IMmediatecmd/
ENQRequest/ ENQTerminator/ JObterminator]
value
Sets the specified control character to the specified value. Setting the
immediate command character enables immediate commands; setting the
ENQ status request character enables ENQ status polling.
SHow PRN CONtrolcharacters {STartheader/
PAramseparator/ QUotedstrings/ FIeldseparator/
ENDheader/ DAtaescape/ IMmediatecmd/
ENQRequest/ ENQTerminator/ JObterminator}
Show the specified control character’s current setting. If no parameter is
specified, it shows the current settings of all parameters in the control
characters category.
CLear PRN CONtrolcharacters [DAtaescape/
IMmediatecmd/ ENQRequest/ ENQTerminator/
JObterminator]
Clears the specified control character. Clearing the immediate command
character disables immediate commands. Clearing the ENQ status request
character disables ENQ status polling.
4-12 MonarchNet2 Operating Instructions
Page 73

SHow PRN INFo {MOdel/ SErial/ FIrmversion/
BOotversion/ COntrastpot/ PIcversion/
KNifeversion/ RFidversion/ NEtworkversion/
TOtals}
Shows the specified info parameter. If no parameter is specified, it shows
all parameters in the info category.
SET PRN MEMoryconfig [DOwnloadablefonts/ FORmat/
IMage/ REceive/ TRansmit/ VEctorfonts] value
Sets the specified buffer’s size the specified value.
SHow PRN MEMoryconfig [DOwnloadablefonts/ FORmat/
IMage/ REceive/ TRansmit/ VEctorfonts]
Shows the specified buffer’s current size. If no buffer is specified, it shows
the current sizes of all buffers.
SET PRN MONetary [MOnetarysign/ SEcondarysign/
DEcimaldigits] value
Sets the specified monetary parameter to the specified value.
SHow PRN MONetary {MOnetarysign/ SEcondarysign/
DEcimaldigits}
Shows the specified monetary parameter’s current setting. If no parameter
is specified, it shows the current settings of all parameters in the monetary
category.
SET PRN PRIntcontrol [COntrast/ PRintoposition/
MArginposition/ SPeed/ PHeadwidth] value
Sets the specified printcontrol parameter to the specified value.
SHow PRN PRIntcontrol {COntrast/ PRintoposition/
MArginposition/ SPeed/ PHeadwidth}
Shows the specified printcontrol parameter’s current setting. If no
parameter is specified, it shows the current settings of all parameter’s in
the print control category.
SET PRN QUEuecontrol REpeat
Repeats last printed batch.
CLear PRN QUEuecontrol [ALlcancel/ CUrrentcancel/
ABorterror/ Reseterror]
Performs the specified action.
Console Commands 4-13
Page 74

SHow PRN STOrage FLash
Shows the amount of unused flash memory.
SHow PRN STOrage FORmats {format # or ALl}
Shows headers for individual or all formats. Note that ‘0’ is shorthand for
‘ALl’.
SHow PRN STOrage FONts
Shows headers for all fonts.
CLear PRN STOrage FLash
Formats flash memory (user area only).
CLear PRN STOrage [RAm/ FLash] FORmats [format # or
ALl]
Clears the specified format or all formats from volatile RAM or flash
memory. Note that ‘0’ is shorthand for ‘ALl’.
CLear PRN STOrage [RAm/ FLash] FONts [font # or ALl]
Clears the specified font or all fonts from volatile RAM or flash memory.
Note that ‘0’ is shorthand for ‘ALl’.
CLear PRN STOrage [RAm/ FLash] GRaphics [graphic # or
ALl]
Clears the specified graphic or all graphics from volatile RAM or flash
memory. Note that ‘0’ is shorthand for ‘ALl’.
CLear PRN STOrage [RAm/ FLash] CDigits [CD scheme #]
Clears the specified check digit scheme from volatile RAM or flash
memory.
SET PRN SUPply [TYpe/ RIbbon/ FEedmode/
SUpplyposition/ CUtposition/ SKipindex/
KNifecontrol/ ERroraction] value
Sets the specified supply parameter to the specified value.
SHow PRN SUPply [TYpe/ RIbbon/ FEedmode/
SUpplyposition/ CUtposition/ SKipindex/
KNifecontrol/ ERroraction]
Shows the specified supply parameter’s current setting. If no parameter is
specified, it shows the current settings of all parameter’s in the supply
category.
4-14 MonarchNet2 Operating Instructions
Page 75

SHow PRN SUPply SYncsupply
Resynchronizes the supply.
SET PRN SYStem [POwerupmode/ LAnguage/
BAtchseparators/SLashedzero/SYmbolset] value
Sets the specified system parameter to the specified value.
SHow PRN SYStem {POwerupmode/ LAnguage/
BAtchseparators/SLashedzero/SYmbolset}
Shows the specified system parameter’s current setting. If no parameter is
specified, it shows the current settings of all parameters in the system
category.
SET PRN SCRipts [LOad/ ENable/ DISable/ DELETE]
Loads, enables, disables, or deletes a script. Note that LOad, ENAble,
DISable, and DELETE take no arguments.
SET PRN SCRipts [ENQpollbeforescript/
IMmcmdbeforscript] value
Sets the specified scripts parameter to the specified value.
SHow PRN SCRipts {STatus/ INfo/ ENQpollbeforescript/
IMmcmdbeforescript}
Shows the specified scripts parameter’s current setting. If no parameter is
specified, it shows the currents settings of all parameters in the scripts
category.
SET PRN VERifier [STate/ SCanbeam/ CAbledetect] value
Sets the specified verifier parameter to the specified value.
SHow PRN VERifier {STate/ SCanbeam/ CAbledetect/
SUmmary}
Shows the specified verifier parameter’s current setting. If no parameter is
specified, it shows the current settings of all parameters in the verifier
category.
CLear PRN VERifier SUmmary
Clears the verifier summary data (number of good and bad verifier labels).
Console Commands 4-15
Page 76

802.11b/g Wireless Commands
In the following commands, EN and NW (network settings) are
interchangeable.
CLear EN SSid
Clears the SSID, so the server connects to any access point.
SET EN
Sets 802.11b/g Wireless Settings.
SET EN APDEN [LOW/MED/HI]
Sets 802.11b/g access point density.
SET EN AUTHtype [OPEN/SHARED/TTLS/LEAP/PEAP/WPA-PSK]
Sets the authentication type. See Chapter 3, “Using the Web Interface” for
more information.
SET EN CERTCN <name>
Sets the EAP common name. If no value is set (null), all host certificates
are accepted.
SET EN CERTCN2 <name>
Sets the second EAP common name. If no value is set (null), all host
certificates are accepted.
SET EN CERTEXP <value>
Sets the EAP certificate exponent value.
SET EN CERTKEY <keyvalue>
Sets the EAP root key value.
SET EN CHannel nn
Sets 802.11b/g wireless channel.
SET EN ENC [DIsable/64/128/WPA/WPA2/WPA2-WPA/
Dynamic WEP]
Sets the encryption mode. See Chapter 3, “Using the Web Interface” for
more information.
SET EN ID <userID>
Sets the authentication user ID. It may include the realm, separated with
the at (“@”) character.
4-16 MonarchNet2 Operating Instructions
Page 77

SET EN INAP [PAP/MSCHAP_V2]
Sets the EAP inner authentication protocol.
SET EN IROAM [DISable/STRICT/FLEXible]
Controls whether the radio frequencies are set based on the radio
configuration or from its access point. Disabled uses the radio defaults.
Flexible uses access point settings if present, otherwise the radio defaults
are used. Strict uses access point regulatory frequency information.
SET EN PW <password>
Sets the password for 802.11b/g EAP authentication.
SET EN KEY# <1/2/3/4>
Sets which WEP key number to use (default is 1).
SET EN KEYVAL <WEPkey>
Sets WEP key value. Must be hexadecimal.
SET EN MODE [IN/AD]
Sets 802.11b/g wireless mode to infrastructure or Ad-Hoc mode.
SET EN RAdio [802.11b/802.11b-g]
Sets the radio type.
SET EN REALM <realm>
Sets the realm portion of the 802.11b/g EAP authentication ID.
Console Commands 4-17
Page 78

SET EN REGDOMain <countrycode>
Sets the region of operation for the print server using the following table.
The list of supported countries varies based on the radio type (802.11b or
802.11b/g).
Country
Code
US UNITED STATES ITI ITALY, INDOOR
USI UNITED STATES, INDOOR JP JAPAN
AU AUSTRALIA JPI JAPAN, INDOOR
AT AUSTRIA JPO JAPAN, OUTDOOR
ATI AUSTRIA, INDOOR LU LUXEMBOURG
BE BELGIUM LUI LUXEMBOURG, INDOOR
BEI BELGIUM, INDOOR NL NETHERLANDS
CA CANADA NLI NETHERLANDS, INDOOR
DK DENMARK NZ NEW ZEALAND
DKI DENMARK, INDOOR NO NORWAY
FI FINLAND NOI NORWAY, INDOOR
FII FINLAND, INDOOR CN PRC
FR FRANCE PT PORTUGAL
FRI FRANCE, INDOOR PTI PORTUGAL, INDOOR
DE GERMANY PL POLAND,
DEI GERMANY, INDOOR SG SINGAPORE
GR GREECE ES SPAIN
HU HUNGARY ESI SPAIN, INDOOR
HK HONG_KONG SE SWEDEN
IS ICELAND SEI SWEDEN, INDOOR
ISI ICELAND, INDOOR CH SWITZERLAND
IN INDIA CHI SWITZERLAND, INDOOR
IE IRELAND TW TAIWAN
IEI IRELAND, INDOOR GB UK
IT ITALY GBI UK, INDOOR
Description Country
Code
Description
4-18 MonarchNet2 Operating Instructions
Page 79

SET EN SPeed <1/2/5.5/6/9/11/12/18/24/48/54>
Sets 802.11b/g wireless speed in megabits per second (Mpbs).
SET EN SSID “<ssid>”
Sets 802.11b/g wireless SSID. Use quotes if there is a space in SSID.
This is case sensitive.
SH EN STATS
Shows the network I/O statistics.
SET EN WEP [DI/64/128]
Sets wired equivalent privacy encryption level to disabled, 64-bit, or 128bit.
SET EN WIRED [AUTO/10BASE/100BASE]
Sets the Ethernet speed.
SET EN WPAAUTO [EN/ DIS]
Sets the 802.11g wireless WPA auto mode (allows a connection to either
WPA or non-WPA access points.)
SET EN WPAGROUP [ENABLE/DISABLE]
Selects whether to use the WPA group key mode. When enabled, group
keys are used for data link encryption.
SET EN WPAPSK <WPAkey>
Sets the WPA pre-shared key or pass-phrase. Use 64 hex characters for
the PSK or 8-63 characters for the pass-phrase. This is only valid when
authentication mode is WPA-PSK.
TCP/IP Commands
SET IP [EN/DI]
Selects whether to use IP-based protocols.
SET IP ACcess [EN/DI/ALL] aa.bb.cc.dd
[Mask ee.ff.gg.hh]
Allows or prevents specified IP address from accessing print server.
SET IP ADdress
Sets IP address of print server.
SET IP ARP [EN/DI]
Selects whether to use an IP address with an ARP packet.
Console Commands 4-19
Page 80

SET IP BANNER [EN/DI]
Sets printing of LPD job banners.
SET IP BOot n
Sets number of retries (n) for DHCP, BOOTP, RARP
SET IP CHKSum [EN/DI]
Enables or disables IP receive checksum.
SET IP FTime [EN/DI]
Enables or disables fast timeout.
SET IP FTP [EN/DI]
Selects whether to use the FTP protocol.
SET IP HTTP [EN/DI]
Selects whether to use the HTTP protocol.
SET IP KEepalive n
Sets keep alive interval (n) in minutes.
SET IP LPD [EN/DI]
Selects whether to use the LPD protocol.
SET IP MEthod [AUTO/BOOTP/RARP/DHCP/STATIC]
Sets method of getting IP address.
SET IP PING aa.bb.cc.dd
Sends IP ping packets to test the host connection.
SET IP PRObe [EN/DI]
Enables or disables the TCP connection probe.
SET IP RArp nn
0 Both
1 no subnet
2 no router
3 neither
Default (0) - IP address is set with subnet mask and router that is the same
address as host.
4-20 MonarchNet2 Operating Instructions
Page 81

SET IP RANGE [EN/DI/ALL]
Sets the valid range of IP addresses.
SET IP REtry [EN/DI]
Enables or disables LPD retry continuation
SET IP ROuter aa.bb.cc.dd
Sets default Router/Gateway address (or access point).
SET IP SUBnet aa.bb.cc.dd
Sets default subnet mask.
SET SERVIce <servicename> IP [EN/DI]
Enables or disables TCP/IP jobs on specified service.
SET SERVIce <servicename> TCP nn
Sets TCP port number (>1023 on service).
SET IP TCP [EN/DI]
Selects whether to use the raw TCP (port 9100) protocol.
SET IP TELNET [EN/DI]
Selects whether to use the Telnet protocol.
SET IP TFTP [EN/DI]
Selects whether to use the TFTP protocol.
SET IP TImeout n
Sets timeout (n) in minutes.
SET IP WIndow nn
Sets the LPD/TCP maximum window size
Console Commands 4-21
Page 82

SNMP Commands
CLear SNMP CONtact <string>
Removes SNMP SysContact.
CLear SNMP LOCation <string>
Removes SNMP SysLocation.
SET SNMP GETCOMM <string>
Gets SNMP community.
SET SNMP SETCOMM1 <string> or SET SNMP SETCOMM2
<string>
Sets SNMP community 1 or community 2 name.
Note: An incoming set request can use either name for comm1 or
comm2.
SET SNMP CONtact <string>
Sets SNMP SysContact.
SET SNMP LOCation <string>
Sets SNMP SysLocation.
SET SNMP JETADmin [EN|DIS]
Selects whether to use the JetAdmin protocol.
RFID Commands
SET PRN RFId [WRiteattempts/ PRotocol/ SIgnal/
RPower/ WPower] value
Sets the specified RFID parameter to the specified value.
SHow PRN RFId {MOduletype/ VErsion/ WRiteattempts/
PRotocol/ SIgnal/ RPower/ WPower/ REgion/
FRequency/ SUmmary/ COnfiglabel}
Shows the specified RFID parameter’s current setting. If no parameter is
specified, it shows the current settings of all parameters in the RFID
category.
SHow RFId LOG
Shows the RFID log.
CLear PRN RFId SUmmary
Clears RFID summary data (number of good and bad RFID tags).
4-22 MonarchNet2 Operating Instructions
Page 83

Using the Network Packet
Use the Network Packet to send console commands directly to the
network card via the printer’s serial port. If the network card does not
appear to be communicating with the printer, you can use the Network
Packet to change the SSID, IP address, etc. of the network card.
Note: You can use Network Packet even if MonarchNet2 is disabled
or not installed. Printer console commands are available but
network console commands are not.
Syntax {N,number,action,device,”name”¦
C,”con_cmds”¦}
N1. N Network Console Packet.
N2. number Number from 0-999 to identify the network
console packet.
N3. action Enter A to add to packet to the printer.
N4. device Enter T to pass the packet through the printer and
stores the packet in the network card.
N5. “name” Packet name, 0-8 characters, enclose within
quotation marks.
C1. C Command field.
C2. “con_comds” Console commands. Must be enclosed within
quotation marks. Each command must be on a
separate line. The maximum number of
characters per command is 100. See the list of
commands earlier in this chapter for more
information.
Note: The maximum number of commands per packet is ten
(10).
Example {N,1,A,T,”mystore”¦
C, ”set ip me static”¦
C, ”init” ¦
C, ”exit” ¦}
Sends the Network Packet 1 “my store” directly to the network card
(T) and sets the IP method to static for determining IP addresses.
Init and Exit commands must be used to save changes and initialize
the network card.
Console Commands 4-23
Page 84

4-24 MonarchNet2 Operating Instructions
Page 85

USING THE SMART RELAY
5
SYSTEM
The Smart Relay System consists of two printers (primary and
partner) connected with a serial cable. Based on the type of data
sent, the batch prints to the appropriate printer. The primary printer
must be a 9855 printer with Version 3.1 or greater firmware using
MonarchNet2 software. The partner printer can be a Monarch
9855® or 9860 printer.
The primary printer forwards the batches, according to the Smart
Relay configuration. Use this addendum to configure the Smart Relay
commands using Telnet.
Additionally, you can number all the labels in a batch with a collation
number that prints on every label. The primary printer controls the
collation number, according to the Smart Relay configuration.
Note: If you need to turn off either printer, turn off the partner
printer first, then, turn off the primary printer. When turning
on the Smart Relay Printing System always turn on the
primary printer first, then wait until you see "Smart Relay
Ready," before turning on the partner printer.
Using the Smart Relay System 5-1
Page 86

Initial Smart Relay Setup Procedures
Follow these steps as listed or errors may occur.
1. Connect the printers. See “Connecting the Printers,” for more
information.
2. Turn on the partner printer.
3. Configure the Partner Printer. See “Configuring the Partner
Printer,” for more information.
4. Turn off the partner printer.
5. Turn on the primary printer.
6. Configure the Primary Printer. See “Using the Smart Relay Telnet
Commands,” for more information.
7. Turn off both printers.
8. Turn on the primary printer. Wait until you see "Smart Relay
Ready," then turn on the partner printer.
9. Send your data.
About the Primary Printer
The primary printer
♦ must be a 9855 printer using MonarchNet2 software
♦ can have only one partner
♦ connects to the partner printer using a serial cable. You cannot
use the optional external keyboard with the primary printer.
Note: There is no bi-directional communication between the primary
and partner printers.
For maximum efficiency, the primary printer should print the majority
of the supplies. If you print more RFID supplies than non-RFID
supplies, make the RFID printer the primary printer. This reduces the
amount of data transferred to the partner printer and requires less
processing by the primary printer.
5-2 MonarchNet2 Operating Instructions
Page 87

All formats, graphics, fonts, or check digits used with the Smart Relay
system must be sent to the primary printer. See “Connecting the
Printers” and “Configuring the Partner Printer” for more information.
The primary printer does not forward any of the following to the
partner printer:
♦ online configuration packets
♦ immediate commands
♦ status polling (ENQ) requests
♦ ADK scripts
If an XOFF character is received, the primary printer stops processing
MPCL data, until an XON character is received. The primary printer
displays “Please Wait… Partner Printer” while it tries to resend data
to the partner printer.
Pressing Escape/Clear on the primary printer exits Smart Relay mode
for the current batch, so the primary printer does not send the current
batch to the partner printer.
When the primary printer is in Smart Relay mode, you see “Smart
Relay Ready.” If you print a Network Test label, Smart Relay
information appears on the bottom of the label, indicating this printer
is a primary printer.
About the Partner Printer
The partner printer can be a 9855 or 9860 printer. The partner printer
is unaware that it is a “partner printer.” It can accept data from other
sources besides the primary printer. Since the partner printer can
accept data from multiple sources, formats/batches can be
overwritten.
Note: Use unique format numbers. If you do not have a unique
format number, always precede the batch with the format you
want to print. For example, send the data to the printer in
this order: {Format} {Batch} {Format} {Batch}.
Otherwise, unexpected results or errors may occur.
The partner printer must be configured to specific communication
settings. See “Configuring the Partner Printer” for more information.
Formats, fonts, graphics, and batches are limited to the amount of
available memory in the partner printer. If you send a batch that does
not print, check the available memory in the partner printer.
Using the Smart Relay System 5-3
Page 88

Note: The display and test label for the partner printer do not
indicate that it is a partner printer.
For the primary printer, you see a line of data for “Smart Relay.” The
#number indicates the next number in sequence for collation. The r/c
numbers indicate the row and column location for the collation
number. See Chapter 6, “Troubleshooting,” for more information
about the test label.
Connecting the Printers
Connect the serial cable 126089 from the 9-pin auxiliary serial port on
the primary printer to the 25-pin serial port on the partner printer.
Primary Printer
Partner Printer
Use this serial port
Use this serial port
5-4 MonarchNet2 Operating Instructions
Page 89

Configuring the Partner Printer
The partner printer must be configured to 115200 Baud, No parity,
8-bit word length, 1 stop bit, and XON/XOFF flow control.
1. Select Setup, Port Settings, Serial Comm from the partner
printer’s Main Menu. If password protection in enabled, press
Feed/Cut three times, then press Enter/Pause before you see the
Setup Menu options.
2. Select Baud Rate and press or to scroll until you see
115200. Press Enter/Pause.
3. Press or to select Word Length. Scroll until you see 8.
Press Enter/Pause.
4. Press or to select Stop Bits. Scroll until you see 1.
Press Enter/Pause.
5. Press or to select Parity. Scroll until you see None.
Press Enter/Pause.
6. Press or to select Flow Control. Scroll until you see XON-
XOFF. Press Enter/Pause.
Using the Smart Relay Telnet Commands
See the following list of commands to configure the printers.
SET PRN RELay PORt [None/S2]
Sets the Smart Relay Partner Identification (port) number to None (no
partner printer) or S2 (partner printer connected to serial port 2). The
default is None.
Using the Smart Relay System 5-5
Page 90

SET PRN RELay FILter [OFF/NONE/RFID/NONRFID]
Sets the Smart Relay Filter to
OFF Does not forward any data - primary printer prints all
batches.
NONE Forwards ALL data to primary AND partner printer – batches
print on both the primary and partner printers.
RFID Forwards RFID batches to the partner printer.
NON-RFID Forwards non-RFID batches to the partner printer.
The default is None.
Setting the Smart Relay Filter to None causes the batch to print on BOTH
the primary and partner printers. To use this option, you may need a
custom script (application) to perform additional filtering. For example, a
custom application filters which format is printed between two printers
loaded with different-sized supplies: 4x2 and 4x6. Our Professional
Services group can develop custom RFID scripts (applications) or other
types of data manipulation scripts. Call Customer Service for more
information.
SET PRN RELay COUNTer [NONE|0-9999]
Sets the Smart Relay Counter Number to None (no counter is used) or 0 to
9999 (beginning value for counter). The default is None.
SET PRN RELay POS [0-2400] [0-2400]
Sets the Smart Relay Field position (collation field) in graphic dot row and
column values. The default is 0,0.
The CLear and SHow commands can also be used on these commands.
Using CLear sets the values back to their defaults.
Example SET PRN REL POR S2
Sets the Smart Relay port to serial port 2 (enables the Smart Relay
system).
Note: After sending this command, turn off the printer. Wait several
seconds and then turn on the printer for the command to take
effect.
Example SET PRN REL FIL NONRFID
Sets the Smart Relay filter to non-RFID, so batches with no RFID Data Field
are sent to the partner printer.
5-6 MonarchNet2 Operating Instructions
Page 91

Example SET PRN REL COUNT 1
Sets the Smart Relay counter (collation) to one. For more information
about the counter, see “About the Smart Relay Counter.”
Example SET PRN REL POS 10 5
Sets the Smart Relay counter (collation) field position on the label to 10 (for
the row) and 5 (for the column).
The usable maximum values are dependent on printhead density (203 dpi or
300 dpi). The maximum label size is four inches wide by eight inches tall.
Printhead Density Row Column
203 0-812 0-1624
300 0-1200 0-2400
Note: The Smart Relay Counter Field overwrites any format data in
the same location. Make sure your format is designed with
the Smart Relay Counter Field’s height and width in mind, so
data is not overwritten.
About the Smart Relay Counter
The Smart Relay counter keeps your
batches in order. Use the collation
number to put printed labels back into
the order they were sent to the
primary printer. To use the Smart
Relay counter, enable the counter and
then set the row and column
positions.
The collation number prints on each
batch printed on both the primary and
partner printers. Batches are
numbered in the order they are
received, not in the order they are
printed. The collation number refers
to the batch, not the individual labels
in a batch. For example, a batch of
ten labels would have the same
collation number on them, so they
could be kept together. We
recommend only sending batches of one.
Using the Smart Relay System 5-7
Page 92

To stop printing the collation number on formats, use this command:
SET PRN REL COUNT NONE.
♦ The counter field appears in Bold, Reversed type - design formats
with the counter field’s height and width in mind, so data is not
overwritten.
♦ The counter always counts to 9999 and then starts back at 0.
The value entered with the console command
(SET PRN REL COUNT 10) is the value used for the next label.
♦ The counter value is saved when you turn off the printer.
♦ Repeating a canceled batch uses the next number in sequence.
There is no way to decrement the counter.
♦ Batches sent to the partner printer from other sources (besides the
primary printer) are not incremented and have no
Smart Relay collation field.
Note: If using the Smart Relay counter, do not use the Repeat
Batch, Cancel All, or Cancel Batch menu items. These items
cause the counter number to be incorrect. To set the counter
to the correct number, use the console command: SET PRN
REL COUNT xxxx, where xxxx is the correct number.
After you specify the row and column locations, the Smart Relay
counter field is automatically appended to your format. If you view
the MPCL data for the format, the Smart Relay counter field appears
like this text field:
T,750,4,V,10,5,0,2,2,2,R,L,0,0,0¦
Note: Do not add field 750 to your formats. It is reserved for the
Row Column values
Smart Relay Counter Field
Smart Relay Field Position and automatically added to the
format by the primary printer.
5-8 MonarchNet2 Operating Instructions
Page 93

TROUBLESHOOTING
This chapter contains information about printing a test label and
correcting some problems that may occur.
6
Printing a Test Label
If you have difficulty communicating with the print server or printer:
1. Verify that the printer is operating properly, is online, and supplies
are loaded correctly.
2. If the printer is working correctly, test the connection between the
printer and the print server by pushing the test button on the back
of the printer for less than five seconds. A sample configuration
label should print. See Chapter 1, “Getting Started” for more
information.
3. Press and hold and at the same time one second and
release. A series of test labels print. The third test label contains
wireless and network settings. If the test labels do not print, call
Service.
IP Address
Boot Tries
SSID
WEP
Network/Wireless Test Label
The third test label displays the settings for the IP address,
subnet address, IP gateway, boot tries, boot method, SSID,
wireless mode, WiFi WEP, WiFi signal, packets received, bad
packets received, and packet collisions. It also lists Smart
Relay information. See Chapter 2 or 3 if you need to change
any of the IP or wireless settings.
Boot Method
Wireless Mode
Signal Strength
Troubleshooting 6-1
Page 94

Use this table to solve some common printer/network problems.
Problem Action
Printer does not appear
to save IP, subnet, or
gateway address.
Printer does not
communicate with
network card or access
point.
The printer does not
communicate with your
network.
Cannot see print server
on network.
Configuration/test label
shows “searching” or
“set manually” for boot
method/DHCP.
The value for each segment must be
less than 255 in these addresses.
If you have reset network or wireless
settings, allow time for the printer to
reset and connect to an access point.
This may take a minute or more,
depending on network traffic.
The network settings must match the
print server’s settings for:
♦ IP address, gateway, and subnet
mask
♦ SSID
♦ Ad-Hoc or infrastructure mode
♦ Security
The devices must be on the same
logical network and the subnet masks
should be the same.
The message “searching” indicates the
print server has not connected to the
network yet.
The message “set manually” indicates
the boot method is Static. If the boot
method is not Static, the print server
was not able to connect to the network.
6-2 MonarchNet2 Operating Instructions
Page 95

Use this table to solve some common MonarchNet2 Web browser
problems.
Problem Action
Verifier does not
appear as an
installed/enabled option
through your Web
browser.
“Error sending the
discovery request”
message on your
computer/Web browser.
MonarchNet2 does not
appear to be working.
“Authorization Failure”
message from
MonarchNet2 on our
computer/Web browser.
The optional verifier must be enabled
and properly connected. For more
information, see your verifier’s
Operating Instructions.
The print server is not communicating
on the network. Verify network and
print server settings, including IP
address, etc.
Turn off the printer and turn it back on.
Print a configuration label (press the
test button on the back of the print
server) to confirm the IP address, etc.
Enter the correct IP address in your
Web browser.
Enter the correct password when
logging in to MonarchNet2.
Troubleshooting 6-3
Page 96

General Troubleshooting Information
Use the following information if your print server is not operating
properly.
1. Verify that the printer is turned on.
If the printer is used on a Monarch Mobile Work Station (MWS),
the MWS unit’s power AND the printer must be turned on. The
print server does not function when the printer is turned off.
2. Verify the print server is functioning.
When the printer is turned on, the print server runs through a set
of power-up diagnostics for a few seconds. All three LEDs blink
momentarily. Then, the LEDs indicate the following activity:
LED Indicators Status
solid printer is on
Orange
Yellow
Green
Yellow & Green
blinking error
off printer is off
solid Ethernet link (wired 10baseT)
blinking network activity
off no Ethernet connection
solid Ethernet link (wired 100baseTX)
blinking network activity
off no Ethernet connection
solid wireless link
blinking network activity
off no wireless connection
3. Print a configuration label (see Chapter 1).
Press the test button on the print server for about a second and a
label prints.
6-4 MonarchNet2 Operating Instructions
Page 97

Use four-inch supply. If you are using supply that is shorter
than four inches long, temporarily change your supply type to
“continuous” to print the entire test label. After printing the
test label, change your supply type to your previous setting.
Once you see “Print Mode Ready” on the display, print a test
label. If this does not print or the printer does not display
“Print Mode Ready,” the printer is locked up. Turn off the
printer, wait 15 seconds and then turn it back on.
If the printer displays “Print Mode Ready,” but is not printing,
verify that the parallel port settings did not change. The
Parallel Port setting should be “Internal” and the Mode setting
should be “IEEE1284”. (From the Main Menu, select Setup,
Port Settings, Parallel Comm., Port and Mode.)
4. On the test label, verify your IP and WiFi settings. the
“wired/wireless:” value should be “WIRED” for Ethernet cable and
“WIRELESS” for RF.
Check the “WiFi SSID” and the “signal strength.” Is the SSID
correct? Is the signal strength greater than zero? If the
signal strength is 0, there is no connection with the access
point; 30 (or less) indicates you may be experiencing
interference or close to being out of the access point’s range,
and below 50, printing performance could be affected. If the
signal strength is low, increase the number of retries. To
improve the signal strength, try moving the printer closer to
the access point and away from other radio devices such as
Bluetooth wireless devices, microwave ovens, or 2.4-GHz
cordless phones.
5. Telnet to the printer.
Note: After the print server has been reset, you may need to re-
enable Telnet.
Once you have verified connectivity, Telnet to the printer.
(i.e. telnet aa.bb.cc.dd)
You see “Welcome to MonarchNet2 Enter Password:”
Type access as the password and press Enter.
(access is the default password.)
The password is case-sensitive. Depending on your printer’s
firmware version, you may not be prompted for a user name.
Once here, you have verified operation to the print server.
Troubleshooting 6-5
Page 98

6. Ping the printer.
Pinging the printer tells you if it is "seen" on the network. If you
cannot ping the printer, turn the printer off and then on. Then
ping every device in the path to the printer – access points,
routers, etc. Any device you cannot ping needs attention.
ping ip address (i.e. ping 192.0.0.192)
7. Verify connection to the data port by starting a Telnet session to
the printer using Port 9100 (i.e. telnet aa.bb.cc.dd 9100).
Press Ctrl-E on your keyboard. This sends an ENQ request.
The printer responds with three characters. Depending upon
the Telnet being used, you may not see the first character, as
it is a hex 05 value. The other two characters are ASCII
characters. You will see
A@
which means the printer is online and waiting. Alternatively,
you can type
{J,2}
Note: The J must be capital.
The printer responds with {J,0,0,””,””}.
No response means that the printer may have an open session
to some other connection. Either terminate the other
connection or turn off the printer and turn it back on.
6-6 MonarchNet2 Operating Instructions
Page 99

Troubleshooting Wireless Configuration Problems
1. Your computer’s wireless adapter and/or access point should be
configured to match your print server.
2. The printer should be within range (90 meters or 300 feet) of your
computer and away from metal objects and other devices with
radio signals (Bluetooth, 2.4 GHz cordless phones, and
microwaves).
3. Use infrastructure mode to connect through an access point. Use
Ad-Hoc mode to connect without an access point.
4. To use encryption or password protect your wireless network, and
your wireless adapter or access point normally uses a password
or pass-phrase instead of WEP, it should allow you to enter 0x
followed by a ten digit (for 40-bit or 64-bit WEP) or twenty-six digit
(for 128-bit WEP) key in hexadecimal format (0-9 or A-F).
5. Change the RF channel (Ad-Hoc mode only) to correct
intermittent connection problems or slow performance. Change it
to at least three channels lower or higher than any other wireless
networks within range.
Technical Support
If these solutions do not work, call Service at the number listed on the
back of this manual.
Troubleshooting 6-7
Page 100

6-8 MonarchNet2 Operating Instructions
 Loading...