

Page 1

SmartNode™ 10200 Series
TDM+VoIP Smart Media Gateway
User Manual
Important
This is a Class A device and is not intended for use in a residential environment.
Sales Office: +1 (301) 975-1000
Technical Support: +1 (301) 975-1007
E-mail: support@patton.com
www.patton.com
Part Number: 07MSN10200, Rev. A
Revised: April 3, 2012
Page 2

Patton Electronics Company, Inc.
7622 Rickenbacker Drive
Gaithersburg, MD 20879 USA
Tel: +1 (301) 975-1000
Fax: +1 (301) 869-9293
Support: +1 (301) 975-1007
Web: www.patton.com
E-mail: support@patton.com
Trademark Statement
The term SmartNode is a trademark of Patton Electronics Company. All other trademarks presented in this document are the property of their respective owners.
Copyright © 2012, Patton Electronics Company. All rights reserved.
The information in this document is subject to change without notice. Patton Electronics assumes no liability for errors that may appear in this document.
Warranty Information
The software described in this document is furnished under a license and may be used
or copied only in accordance with the terms of such license.
Patton Electronics warrants all SN10200 components to be free from defects, and
will—at our option—repair or replace the product should it fail within one year from
the first date of the shipment.
This warranty is limited to defects in workmanship or materials, and does not cover
customer damage, abuse or unauthorized modification. If the product fails to perform
as warranted, your sole recourse shall be repair or replacement as described above.
Under no condition shall Patton Electronics be liable for any damages incurred by the
use of this product. These damages include, but are not limited to, the following: lost
profits, lost savings and incidental or consequential damages arising from the use of or
inability to use this product. Patton Electronics specifically disclaims all other warranties, expressed or implied, and the installation or use of this product shall be deemed
an acceptance of these terms by the user.
Page 3

Summary Table of Contents
1 General Information...................................................................................................................................... 13
2 Hardware Installation.................................................................................................................................... 16
3 Initial Setup and Web Management.............................................................................................................. 29
4 Contacting Patton ......................................................................................................................................... 49
A Compliance information .............................................................................................................................. 52
B Specifications ................................................................................................................................................ 54
3
Page 4

Table of Contents
Summary Table of Contents ........................................................................................................................... 3
Table of Contents ........................................................................................................................................... 4
List of Figures ................................................................................................................................................. 7
List of Tables .................................................................................................................................................. 8
About this guide ............................................................................................................................................. 9
Audience................................................................................................................................................................. 9
Structure................................................................................................................................................................. 9
Precautions........................................................................................................................................................... 10
Safety when working with electricity ...............................................................................................................11
General observations .......................................................................................................................................12
Typographical conventions used in this document................................................................................................ 12
General conventions .......................................................................................................................................12
1 General Information...................................................................................................................................... 13
SN10200 overview ................................................................................................................................................14
Features ..........................................................................................................................................................14
SN10200 model codes ....................................................................................................................................15
2 Hardware Installation.................................................................................................................................... 16
Planning the installation ........................................................................................................................................17
Supplies ..........................................................................................................................................................17
Procedures ......................................................................................................................................................17
Mounting the SN10200 to a rack..........................................................................................................................18
Connecting the management interface...................................................................................................................19
Connecting to the console serial port.....................................................................................................................20
Connecting to a VoIP network..............................................................................................................................21
Connecting to the PSTN.......................................................................................................................................22
SCSI Interface (T1/E1) ...................................................................................................................................23
Dual BNC Interface (DS3) .............................................................................................................................24
Optical Interface (OC3/STM-1) .....................................................................................................................25
Connecting power .................................................................................................................................................26
Connecting to AC Power ................................................................................................................................26
Connecting to DC Power ...............................................................................................................................27
Powering Down ..............................................................................................................................................28
3 Initial Setup and Web Management.............................................................................................................. 29
Overview ...............................................................................................................................................................30
Accessing the SN10200.........................................................................................................................................30
Accessing the SmartNode via the Console Management port
Logging into the SmartNode Console .......................................................................................................30
Changing the IP address ............................................................................................................................31
Setting the IP address to DHCP ................................................................................................................32
..........................................................................30
4
Page 5

SmartNode 10200 Series User Manual
Accessing the SmartNode via the Ethernet Management port .........................................................................33
Accessing and Navigating the Web Interface .........................................................................................................34
Connecting to the web server and logging on to the Web Portal .....................................................................34
Connecting to the web server ....................................................................................................................34
Logging on to the Web Portal ...................................................................................................................34
Navigating the Web Portal ..............................................................................................................................34
Navigation and Information Panels ...........................................................................................................34
Knowing Your Location ............................................................................................................................35
Managing Users.....................................................................................................................................................36
Understanding User Access Levels ...................................................................................................................36
Viewing the User List ......................................................................................................................................36
Creating a New User .......................................................................................................................................37
Deleting a User ...............................................................................................................................................38
Logging Off ....................................................................................................................................................38
Managing the Database Backup.............................................................................................................................39
Carrying out a First Database Backup .............................................................................................................39
Downloading a Database Backup ....................................................................................................................40
Uploading a Database Backup ........................................................................................................................40
Restoring a Database Backup ..........................................................................................................................40
Working with Configurations................................................................................................................................41
Managing Applications ...................................................................................................................................41
Viewing the List of Installed Applications .................................................................................................41
Starting an Application .............................................................................................................................42
Verifying that an Application is Operating ................................................................................................43
Verifying the Application Path ..................................................................................................................43
Activating the Configuration ..........................................................................................................................44
Verifying status .........................................................................................................................................45
Configuring IP Interfaces ................................................................................................................................47
List of Parameters ......................................................................................................................................48
4 Contacting Patton ......................................................................................................................................... 49
Introduction..........................................................................................................................................................50
Contact information..............................................................................................................................................50
Patton support headquarters in the USA .........................................................................................................50
Alternate Patton support for Europe, Middle East, and Africa (EMEA) ..........................................................50
Warranty Service and Returned Merchandise Authorizations (RMAs)...................................................................50
Warranty coverage ..........................................................................................................................................50
Out-of-warranty service .............................................................................................................................51
Returns for credit ......................................................................................................................................51
Return for credit policy .............................................................................................................................51
RMA numbers ................................................................................................................................................51
Shipping instructions ................................................................................................................................51
A Compliance information .............................................................................................................................. 52
Compliance ...........................................................................................................................................................53
5
Page 6

SmartNode 10200 Series User Manual
EMC ...............................................................................................................................................................53
Low Voltage Directive (Safety) ........................................................................................................................53
Radio and TV Interference (FCC Part 15) ............................................................................................................53
CE Declaration of Conformity..............................................................................................................................53
Authorized European Representative.....................................................................................................................53
B Specifications ................................................................................................................................................ 54
Capacity and voice processing................................................................................................................................55
Simultaneous signaling support .............................................................................................................................55
SmartNode-CONTROL.......................................................................................................................................55
OAM&P...............................................................................................................................................................56
Operating environment .........................................................................................................................................56
Physical characteristics...........................................................................................................................................56
Electrical characteristics .........................................................................................................................................56
6
Page 7

List of Figures
1 Mounting the SN10200 to a rack . . . . . . . . . . . . . . . . . . . . . . . . . . . . . . . . . . . . . . . . . . . . . . . . . . . . . . . . . . . 18
2 Connecting the management interface . . . . . . . . . . . . . . . . . . . . . . . . . . . . . . . . . . . . . . . . . . . . . . . . . . . . . . . 19
3 Computer to SN10200 Serial Port Connection . . . . . . . . . . . . . . . . . . . . . . . . . . . . . . . . . . . . . . . . . . . . . . . . 20
4 Console pinout . . . . . . . . . . . . . . . . . . . . . . . . . . . . . . . . . . . . . . . . . . . . . . . . . . . . . . . . . . . . . . . . . . . . . . . . . 20
5 Connecting to a VoIP network . . . . . . . . . . . . . . . . . . . . . . . . . . . . . . . . . . . . . . . . . . . . . . . . . . . . . . . . . . . . . 21
6 SCSI interface to the PSTN . . . . . . . . . . . . . . . . . . . . . . . . . . . . . . . . . . . . . . . . . . . . . . . . . . . . . . . . . . . . . . . 23
7 DS3 interface to the PSTN . . . . . . . . . . . . . . . . . . . . . . . . . . . . . . . . . . . . . . . . . . . . . . . . . . . . . . . . . . . . . . . . 24
8 Optical interface to the PSTN . . . . . . . . . . . . . . . . . . . . . . . . . . . . . . . . . . . . . . . . . . . . . . . . . . . . . . . . . . . . . 25
9 AC Power Connection . . . . . . . . . . . . . . . . . . . . . . . . . . . . . . . . . . . . . . . . . . . . . . . . . . . . . . . . . . . . . . . . . . . 26
10 DC Power Connection . . . . . . . . . . . . . . . . . . . . . . . . . . . . . . . . . . . . . . . . . . . . . . . . . . . . . . . . . . . . . . . . . . . 27
11 SN10200 Ethernet Management Interface . . . . . . . . . . . . . . . . . . . . . . . . . . . . . . . . . . . . . . . . . . . . . . . . . . . . 33
12 SN10200 Web Portal Navigation . . . . . . . . . . . . . . . . . . . . . . . . . . . . . . . . . . . . . . . . . . . . . . . . . . . . . . . . . . . 35
13 SN10200 Web Portal Menus . . . . . . . . . . . . . . . . . . . . . . . . . . . . . . . . . . . . . . . . . . . . . . . . . . . . . . . . . . . . . . 35
14 SN10200 User Access Levels . . . . . . . . . . . . . . . . . . . . . . . . . . . . . . . . . . . . . . . . . . . . . . . . . . . . . . . . . . . . . . . 36
15 Global > Users . . . . . . . . . . . . . . . . . . . . . . . . . . . . . . . . . . . . . . . . . . . . . . . . . . . . . . . . . . . . . . . . . . . . . . . . . 36
16 User List . . . . . . . . . . . . . . . . . . . . . . . . . . . . . . . . . . . . . . . . . . . . . . . . . . . . . . . . . . . . . . . . . . . . . . . . . . . . . . 37
17 User List > Create New User . . . . . . . . . . . . . . . . . . . . . . . . . . . . . . . . . . . . . . . . . . . . . . . . . . . . . . . . . . . . . . 37
18 User List > Delete User . . . . . . . . . . . . . . . . . . . . . . . . . . . . . . . . . . . . . . . . . . . . . . . . . . . . . . . . . . . . . . . . . . . 38
19 Navigation Menu: Logout . . . . . . . . . . . . . . . . . . . . . . . . . . . . . . . . . . . . . . . . . . . . . . . . . . . . . . . . . . . . . . . . 38
20 Global > Backups . . . . . . . . . . . . . . . . . . . . . . . . . . . . . . . . . . . . . . . . . . . . . . . . . . . . . . . . . . . . . . . . . . . . . . . 39
21 Backups > Create new database backup . . . . . . . . . . . . . . . . . . . . . . . . . . . . . . . . . . . . . . . . . . . . . . . . . . . . . . 39
22 Database Backup Message . . . . . . . . . . . . . . . . . . . . . . . . . . . . . . . . . . . . . . . . . . . . . . . . . . . . . . . . . . . . . . . . . 39
23 Database Backup List . . . . . . . . . . . . . . . . . . . . . . . . . . . . . . . . . . . . . . . . . . . . . . . . . . . . . . . . . . . . . . . . . . . . 39
24 Download Database Backup . . . . . . . . . . . . . . . . . . . . . . . . . . . . . . . . . . . . . . . . . . . . . . . . . . . . . . . . . . . . . . . 40
25 Upload Database Backup File . . . . . . . . . . . . . . . . . . . . . . . . . . . . . . . . . . . . . . . . . . . . . . . . . . . . . . . . . . . . . . 40
26 Restore Database Backup File . . . . . . . . . . . . . . . . . . . . . . . . . . . . . . . . . . . . . . . . . . . . . . . . . . . . . . . . . . . . . . 40
27 Applications > Instances . . . . . . . . . . . . . . . . . . . . . . . . . . . . . . . . . . . . . . . . . . . . . . . . . . . . . . . . . . . . . . . . . . 41
28 Application Instance List . . . . . . . . . . . . . . . . . . . . . . . . . . . . . . . . . . . . . . . . . . . . . . . . . . . . . . . . . . . . . . . . . 41
29 Application Instance List > Edit . . . . . . . . . . . . . . . . . . . . . . . . . . . . . . . . . . . . . . . . . . . . . . . . . . . . . . . . . . . . 42
30 Application Status . . . . . . . . . . . . . . . . . . . . . . . . . . . . . . . . . . . . . . . . . . . . . . . . . . . . . . . . . . . . . . . . . . . . . . . 42
31 Apply States . . . . . . . . . . . . . . . . . . . . . . . . . . . . . . . . . . . . . . . . . . . . . . . . . . . . . . . . . . . . . . . . . . . . . . . . . . . 42
32 SN10200 Interfaces . . . . . . . . . . . . . . . . . . . . . . . . . . . . . . . . . . . . . . . . . . . . . . . . . . . . . . . . . . . . . . . . . . . . . 43
33 Application Status List . . . . . . . . . . . . . . . . . . . . . . . . . . . . . . . . . . . . . . . . . . . . . . . . . . . . . . . . . . . . . . . . . . . 43
34 Global > Systems . . . . . . . . . . . . . . . . . . . . . . . . . . . . . . . . . . . . . . . . . . . . . . . . . . . . . . . . . . . . . . . . . . . . . . . 44
35 System List . . . . . . . . . . . . . . . . . . . . . . . . . . . . . . . . . . . . . . . . . . . . . . . . . . . . . . . . . . . . . . . . . . . . . . . . . . . . 44
36 Name and Activate Configuration . . . . . . . . . . . . . . . . . . . . . . . . . . . . . . . . . . . . . . . . . . . . . . . . . . . . . . . . . . 44
37 Successful Activation . . . . . . . . . . . . . . . . . . . . . . . . . . . . . . . . . . . . . . . . . . . . . . . . . . . . . . . . . . . . . . . . . . . . . 45
38 Global > Status . . . . . . . . . . . . . . . . . . . . . . . . . . . . . . . . . . . . . . . . . . . . . . . . . . . . . . . . . . . . . . . . . . . . . . . . . 45
39 Status: General View . . . . . . . . . . . . . . . . . . . . . . . . . . . . . . . . . . . . . . . . . . . . . . . . . . . . . . . . . . . . . . . . . . . . . 46
40 Status: Detailed View . . . . . . . . . . . . . . . . . . . . . . . . . . . . . . . . . . . . . . . . . . . . . . . . . . . . . . . . . . . . . . . . . . . . 46
41 Menu > IP Interfaces . . . . . . . . . . . . . . . . . . . . . . . . . . . . . . . . . . . . . . . . . . . . . . . . . . . . . . . . . . . . . . . . . . . . 47
42 IP Interface List . . . . . . . . . . . . . . . . . . . . . . . . . . . . . . . . . . . . . . . . . . . . . . . . . . . . . . . . . . . . . . . . . . . . . . . . 47
43 Editing an IP Interface . . . . . . . . . . . . . . . . . . . . . . . . . . . . . . . . . . . . . . . . . . . . . . . . . . . . . . . . . . . . . . . . . . . 48
7
Page 8

List of Tables
1 General conventions . . . . . . . . . . . . . . . . . . . . . . . . . . . . . . . . . . . . . . . . . . . . . . . . . . . . . . . . . . . . . . . . . . . . . 12
2 SmartNode 10200 PSTN Ports and Voice Channels . . . . . . . . . . . . . . . . . . . . . . . . . . . . . . . . . . . . . . . . . . . . 15
3 SmartNode 10200 Height Requirements . . . . . . . . . . . . . . . . . . . . . . . . . . . . . . . . . . . . . . . . . . . . . . . . . . . . . 18
4 Optical Interfaces . . . . . . . . . . . . . . . . . . . . . . . . . . . . . . . . . . . . . . . . . . . . . . . . . . . . . . . . . . . . . . . . . . . . . . . 25
5 DC Power Cables . . . . . . . . . . . . . . . . . . . . . . . . . . . . . . . . . . . . . . . . . . . . . . . . . . . . . . . . . . . . . . . . . . . . . . . 27
6 Configuration Parameters for IP Interfaces . . . . . . . . . . . . . . . . . . . . . . . . . . . . . . . . . . . . . . . . . . . . . . . . . . . . 48
8
Page 9

About this guide
This guide describes the SmartNode 10200 hardware, installation and basic configuration. For detailed software configuration information refer to the Smart Media Software Configuration Guide located online at http:/
/www.patton.com/manuals/Smart Media-scg.pdf.
Audience
This guide is intended for the following users:
• Operators
• Installers
• Maintenance technicians
Structure
This guide contains the following chapters and appendices:
• Chapter 1 on page 13 provides information about the SN10200’s features and capabilities
• Chapter 2 on page 16 provides hardware installation procedures
• Chapter 3 on page 29 provides information on setting up the network and logging into the SN10200
• Chapter 4 on page 49 contains information on contacting Patton technical support for assistance
• Appendix A on page 52 contains compliance information for the SN10200
• Appendix B on page 54 contains specifications for the SN10200
For best results, read the contents of this guide before you install the SN10200.
9
Page 10
SmartNode 10200 Series User Manual About this guide
Precautions
Notes, cautions, and warnings, which have the following meanings, are used throughout this guide to help you
become aware of potential problems. Warnings are intended to prevent safety hazards that could result in personal injury. Cautions are intended to prevent situations that could result in property damage or
impaired functioning.
Note
A note presents additional information or interesting sidelights.
The alert symbol and IMPORTANT heading calls attention to
important information.
The alert symbol and CAUTION heading indicate a potential hazard. Strictly follow the instructions to avoid property damage.
The shock hazard symbol and CAUTION heading indicate a
potential electric shock hazard. Strictly follow the instructions to
avoid property damage caused by electric shock.
The alert symbol and WARNING heading indicate a potential safety hazard.
Strictly follow the warning instructions to avoid personal injury.
The shock hazard symbol and WARNING heading indicate a potential electric
shock hazard. Strictly follow the warning instructions to avoid injury caused
by electric shock.
10
Page 11

SmartNode 10200 Series User Manual About this guide
Safety when working with electricity
•
Do not open the device when the power cord is connected. For systems
without a power switch and without an external power adapter, line voltages are present within the device when the power cord is connected.
•
For devices with an external power adapter, the power adapter shall be a
listed Limited Power Source The mains outlet that is utilized to power the
device shall be within 10 feet (3 meters) of the device, shall be easily
accessible, and protected by a circuit breaker in compliance with local regulatory requirements.
•
For AC powered devices, ensure that the power cable used meets all applicable standards for the country in which it is to be installed.
•
For AC powered devices which have 3 conductor power plugs (L1, L2 &
GND or Hot, Neutral & Safety/Protective Ground), the wall outlet (or
socket) must have an earth ground.
•
For DC powered devices, ensure that the interconnecting cables are rated
for proper voltage, current, anticipated temperature, flammability, and
mechanical serviceability.
•
WAN, LAN & PSTN ports (connections) may have hazardous voltages
present regardless of whether the device is powered ON or OFF. PSTN
relates to interfaces such as telephone lines, FXS, FXO, DSL, xDSL, T1, E1,
ISDN, Voice, etc. These are known as “hazardous network voltages” and
to avoid electric shock use caution when working near these ports. When
disconnecting cables for these ports, detach the far end connection first.
•
Do not work on the device or connect or disconnect cables during periods of
lightning activity
•
This device contains no user serviceable parts. This device can only be
repaired by qualified service personnel.
•
If one has reason to open the chassis or case, then the precautions mentioned above shall be followed. This includes both the warnings relating to
disconnection of the input power, and the warnings relating to the disconnection of WAN, LAN & PSTN ports.
In accordance with the requirements of council directive 2002/
96/EC on Waste of Electrical and Electronic Equipment (WEEE),
ensure that at end-of-life you separate this product from other
waste and scrap and deliver to the WEEE collection system in
your country for recycling.
This device is NOT intended nor approved for connection to the PSTN. It is
intended only for connection to customer premise equipment.
11
Page 12

SmartNode 10200 Series User Manual About this guide
Always follow ESD prevention procedures when removing and
replacing cards.
Wear an ESD-preventive wrist strap, ensuring that it makes good
skin contact. Connect the clip to an unpainted surface of the
chassis frame to safely channel unwanted ESD voltages
to ground.
To properly guard against ESD damage and shocks, the wrist
strap and cord must operate effectively. If no wrist strap is available, ground yourself by touching the metal part of the chassis.
General observations
• Clean the case with a soft slightly moist anti-static cloth
• Place the unit on a flat surface and ensure free air circulation
• Avoid exposing the unit to direct sunlight and other heat sources
• Protect the unit from moisture, vapors, and corrosive liquids
Typographical conventions used in this document
This section describes the typographical conventions and terms used in this guide.
General conventions
The procedures described in this manual use the following text conventions:
Table 1. General conventions
Convention Meaning
Garamond blue type
Futura bold type Commands and keywords are in boldface font.
Futura bold-italic type Parts of commands, which are related to elements already named by the user, are
Italicized Futura type Variables for which you supply values are in italic font
Futura type Indicates the names of fields or windows.
Garamond bold type Indicates the names of command buttons that execute an action.
< > Angle brackets indicate function and keyboard keys, such as <SHIFT>, <CTRL>,
[ ] Elements in square brackets are optional.
{a | b | c} Alternative but required keywords are grouped in braces ({ }) and are separated
node The leading IP address or nodename of a SN10200 is substituted with node in
SN The leading SN on a command line represents the nodename of the SN10200
# An hash sign at the beginning of a line indicates a comment line.
Indicates a cross-reference hyperlink that points to a figure, graphic, table, or section heading. Clicking on the hyperlink jumps you to the reference.
in boldface italic font.
<C>, and so on.
by vertical bars ( | )
boldface italic font.
12
Page 13

Chapter 1 General Information
Chapter contents
SN10200 overview ................................................................................................................................................14
Features ..........................................................................................................................................................14
SN10200 model codes ....................................................................................................................................15
13
Page 14
SmartNode 10200 Series User Manual 1 • General Information
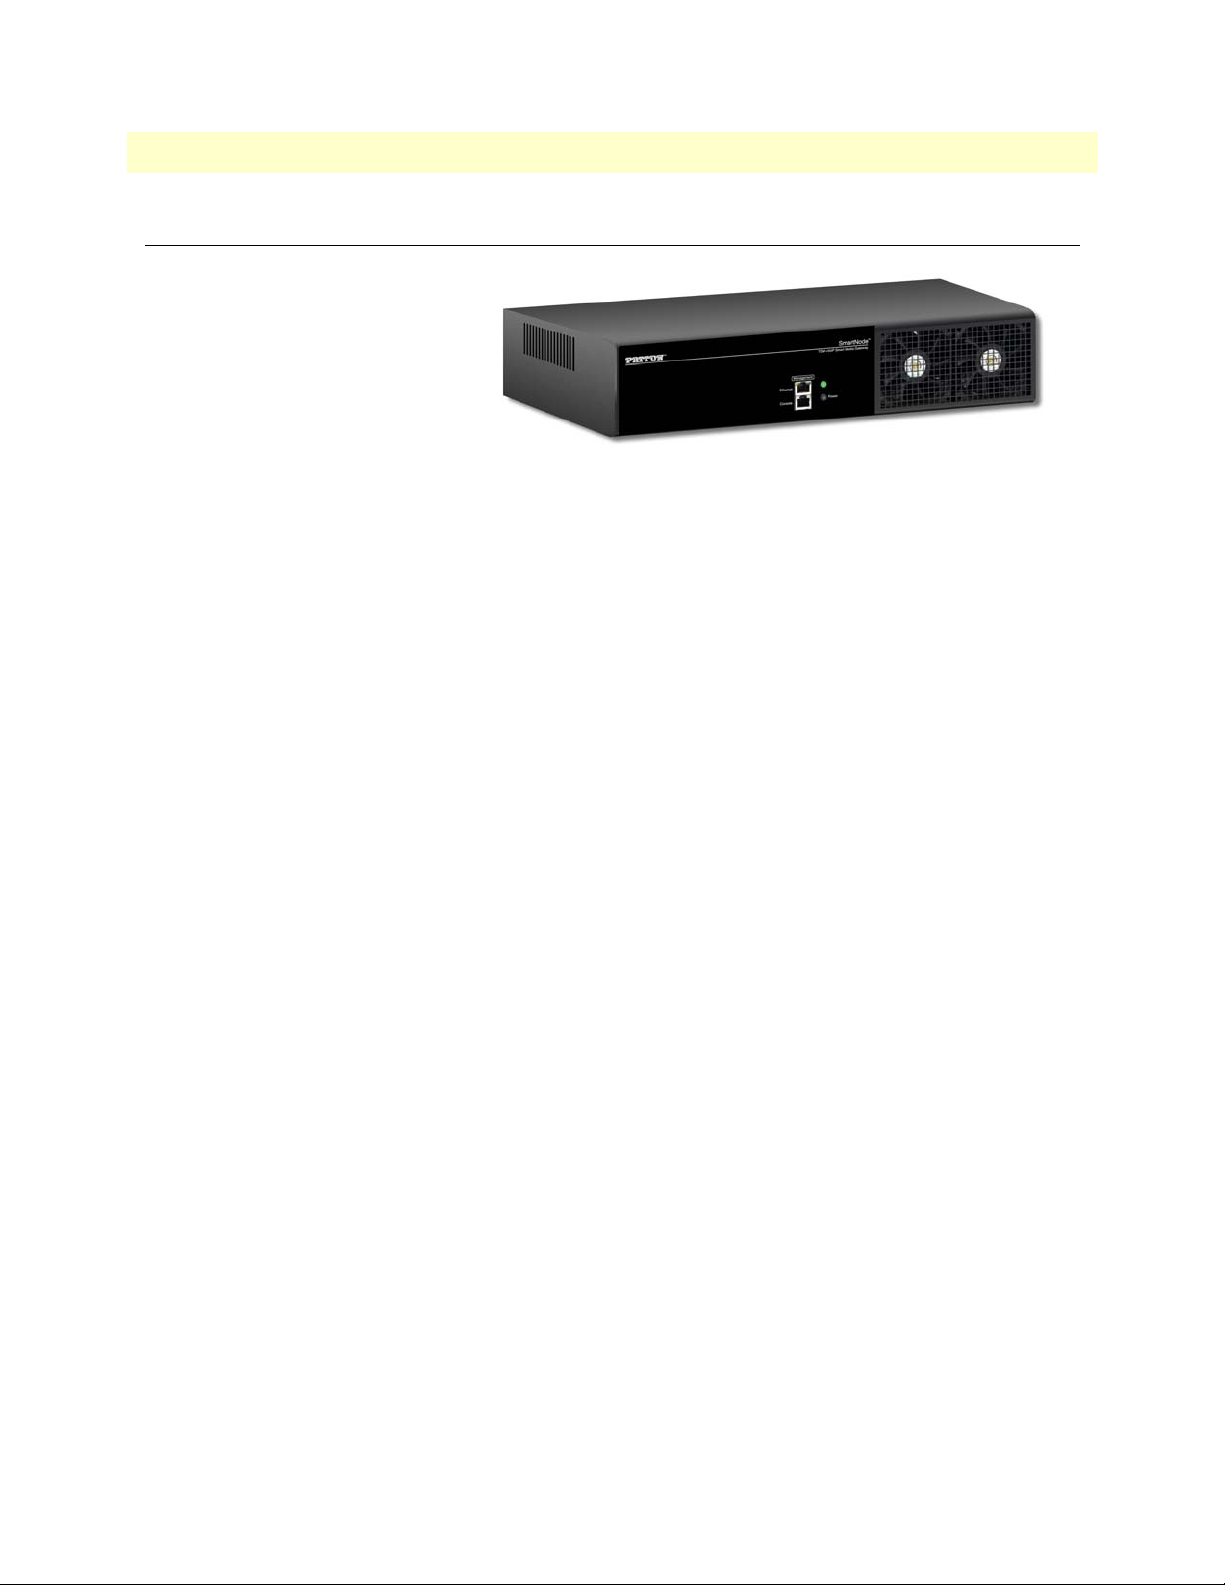
SN10200 overview
Service providers are adding VoIP
capabilities to their networks,
whether to reduce costs when interconnecting with other carriers, to
cost-effectively build out their network footprints, or simply to transport voice traffic across their IP
backbones. This can be best accomplished using a 16 to 64 E1/T1
SmartNode 10200 Series media gateway, which enables the delivery of VoIP services by bridging voice traffic
between the public switched telephone network (PSTN)—based on time-division multiplexing (TDM)—and
IP networks such as the Internet. Whether sitting at the network core or at the edge, SmartNode media gateways enable service providers to introduce VoIP into their networks while maintaining the quality and the reliability of traditional TDM networks.
Features
• TDM Interfaces
Service providers, whether providing local, long-distance or international voice services, are interconnected
with a multitude of other providers using T1/E1, DS3 or STM-1 links. It is critical for service providers to
be able to rapidly establish new interconnections without having to always deploy new devices. SmartNode
10200 Series media gateways therefore offer flexibility and can be configured to support T1/E1, DS-3 or
STM-1 interfaces.
• Signaling and Control Protocols:
Just as flexibility in the selection and deployment of TDM links is a key requirement for service providers,
the need to support multiple signaling protocols across various carrier partners is just as important. Each
SN10200 media gateway provides support for the concurrent use of ISDN, SS7/C7, CAS (R2), SIP, and
SIGTRAN signaling in the same device. The ability to provide both switching and conversion across multiple TDM and IP signaling protocols at once is paramount to enabling the operational flexibility and cost
savings that drive service providers to expand their carrier relationships and converge their networks.
In parallel with the TDM and IP signaling protocols mentioned above, SN10200 devices also support the
H.248 media gateway control protocol, which enables any H.248-compliant 3-party softswitch to control a
media gateway. While the softswitch manages call control interactions, the SN10200 handles transmission
of call media as well as any required transcoding.
• Media Handling
Service providers will use one or more codecs on their VoIP networks according to their desire to save bandwidth, to provide a certain level of voice quality, or simply to interoperate with other VoIP devices or providers. The ability to support multiple different concurrent codecs and to allocate them in real time based
on traffic is the key to delivering true network convergence.
SmartNode 10200 gateways feature extensive support for various wireline, mobile and IP telephony audio
formats, delivering seamless transcoding in real-time. The media gateways ship with support for G.711,
G723.1, G.726, and G.729ab right out of the box, with no additional license fee required. They also offer
optional support for mobile and IP vocoders such as AMR, AMR-WB (G.722.2), GSM-FR/GSM-EFR,
SN10200 overview 14
Page 15

SmartNode 10200 Series User Manual 1 • General Information
EVRC/QCELP, G.728, G.729eg, and iLBC. SN10200 gateways offer independent dynamic codec selection per channel. This means that it is possible to assign different vocoders to different channels, on a channel-by-channel basis. The devices can then run all of these codecs concurrently and do so with no impact on
system performance.
SN10200 gateways also provide unparalleled support for Internet-based fax, also known as Fax over IP or
Fax relay, using the T.38 protocol, which is used to carry fax communications over an IP network. (They
also support the T.30 protocol for fax over the PSTN.)
• System Density
SN10200 gateways feature the industry’s highest system density in a 2U form factor. Beside the capital savings achieved by purchasing less units of equipment, system density also provides operational cost savings in
the form of reduced co-location fees as well as lower power and cooling costs.
• Energy Efficiency
For many, if not most, service providers, the payoff from reducing energy use can be particularly impressive;
typically, for every watt of power required to operate a device, another watt is required to cool it. The
SN10200 media gateways can play a major role in reducing energy costs, with an average two-thirds less
power consumption than competing products of similar capacity.
• Provisioning and Maintenance
For network convergence efforts to contribute positively to revenue and profitability, service providers must
maintain their reputation for uptime and availability during the introduction, operation, and maintenance
of new services. The SN10200 offers OAM&P, an operations, administration, maintenance, provisioning
(OAM&P) solution. OAM&P enables the service provider to perform the initial set-up of the SN10200
media gateway and any subsequent maintenance operations. These range from the simple, such as the collection of statistics and alarms, to the more complex, such as system configuration changes, the addition of
new hardware or software components, and the application of software patches or software upgrades.
SN10200 model codes
The SmartNode 10200 series consists of several models. They differ in the type and number of PSTN interfaces and voice channels supported. All models come equipped with one serial console management port, one
Ethernet management port, two 100/1000/Base-T VoIP ports and two 100/1000/Base-T Ethernet ports.
The SN10200 models are listed in table 2.
Table 2. SmartNode 10200 PSTN Ports and Voice Channels
Model
SN10200/16E/UI 16 - - 512
SN10200/32E/UI 32 - - 1024
SN10200/48E/UI 48 - - 1536
SN10200/64E/UI 64 - - 2048
SN10200/1DS3/UI - 1 - 672
SN10200/2DS3/UI - 2 - 1344
SN10200/3DS3/UI - 3 - 2016
SN10200/STM1/UI - - 1 2016
SN10200 overview 15
E1/T1
Interfaces
DS3
Interfaces
OC3/STM-1
Interfaces
Voice
Channels
Page 16

Chapter 2 Hardware Installation
Chapter contents
Planning the installation ........................................................................................................................................17
Supplies ..........................................................................................................................................................17
Procedures ......................................................................................................................................................17
Mounting the SN10200 to a rack..........................................................................................................................18
Connecting the management interface...................................................................................................................19
Connecting to the console serial port.....................................................................................................................20
Connecting to a VoIP network..............................................................................................................................21
Connecting to the PSTN.......................................................................................................................................22
SCSI Interface (T1/E1) ...................................................................................................................................23
Dual BNC Interface (DS3) .............................................................................................................................24
Optical Interface (OC3/STM-1) .....................................................................................................................25
Connecting power .................................................................................................................................................26
Connecting to AC Power ................................................................................................................................26
Connecting to DC Power ...............................................................................................................................27
Powering Down ..............................................................................................................................................28
16
Page 17

SmartNode 10200 Series User Manual 2 • Hardware Installation
Planning the installation
Supplies
In the SN10200 box, you will find:
• One SN10200
• One set of mounting brackets with screws. These are used for mounting a SN10200 on a 19” rack.
• One DB-9 to RJ-45 adapter. Allows you to interface the serial port of your computer with the RJ-45 con-
sole port of the SN10200.
• SCSI cables and patch panels. This is optional and only provided for the SN10200-xxE models, which fea-
ture SCSI connectors.
• Three CAT5 Ethernet straight cables (male-male), three meters in length.
• One warranty sheet
• One packing slip
• One SN10200 Quick Start guide
Not included with the SN10200:
• No power cords are supplied for AC units. Two DC power cables are included with DC units.
• A 19” equipment rack. You must use a standard 19” wide equipment rack to install the SN10200.
Procedures
To install the SmartNode 10200, follow these steps:
1. Mount the SmartNode 10200 on an equipment rack (See “Mounting the SN10200 to a rack” on page 18)
2. Connect the management interface (See “Connecting the management interface” on page 19)
3. Connect the VoIP ports to the network (See “Connecting to a VoIP network” on page 21)
4. Connect the correct interfaces to the PSTN (See “Connecting to the PSTN” on page 22)
5. Connect to the power source (See “Connecting power” on page 26)
Planning the installation 17
Page 18

SmartNode 10200 Series User Manual 2 • Hardware Installation
Mounting the SN10200 to a rack
The SN10200 is mounted on a customer provided equipment rack using the mounting hardware packaged in
the box. To rack mount the SN10200, you will need:
• One 19” customer provided equipment racks. The rack must be solidly anchored to the floor with appro-
priate support at the top of the racks.
• Climate controlled room: 0 to +50 Celsius, 0 to 95% non-condensing humidity.
The SN10200 is housed in a 2U chassis, as described in table 3. It is important that you provide for enough
room on the equipment rack to allow for the installation of the SN10200. Consider the available space on your
equipment rack and the height of the SN10200. Due to the rear-exhaust, heat vents and the efficient heat dissipation design, there is no need to leave any physical vertical space above or below the placement of the
SN10200 on the equipment rack.
Table 3. SmartNode 10200 Height Requirements
Model Vertica l Height
SmartNode 10200 2U (3.5 inches or 89.10 mm)
Patch Panels
a
1U (1.75 inches or 44.45 mm
a. SN10200 models configured with a 32 to 64 T1/E1 TDM mod-
ule require one patch panel for each 32 E1/T1 line grouping.
The SN10200 is mounted on the 19” equipment rack using the angle brackets and screws provided in the box.
To mount the SN10200, follow these steps:
1. Using two metal screws, attach one angle bracket to the front, left-hand side of the SN10200 when viewed
from the front, as shown in figure 2.1 on page 8. Do the same for the angle bracket on the right-hand side.
2. Start mounting equipment at the top-most position of the rack, keeping in mind the space required on the
equipment rack (table 3).
™
S
m
art
Nod
e
T
D
M
+
V
o
I
P
S
m
a
r
t
M
e
d
i
a
G
a
t
e
w
a
y
m
e
n
t
P
o
w
er
Attach the bracket
to the SmartNode
Attach the SmartNode
to the equipment rack
M
a
n
a
g
e
E
t
h
e
r
n
e
t
C
o
n
s
o
l
e
Figure 1. Mounting the SN10200 to a rack
Mounting the SN10200 to a rack 18
Page 19

SmartNode 10200 Series User Manual 2 • Hardware Installation
Connecting the management interface
The SmartNode 10200 Management Interface enables administrators to perform management tasks on the
SN10200. To communicate with the Smart Media Management Interface for a SN10200, you will need a
CAT5 Ethernet cable with RJ45 male-male terminations.
The SN10200 provides a Management Interface, using one Gigabit Ethernet network link, as shown in
Figure 2. To communicate with the Management Interface:
1. Connect the supplied CAT5 Ethernet cable to the management port labeled Ethernet on the front of the
SmartNode 10200.
2. Log into the SmartNode using the specific credentials included on the sheet that shipped with your unit.
Note
SmartNode
TDM+VoIP Smart Media Gateway
Management
Ethernet
Console
Power
Ethernet
Management Port
Figure 2. Connecting the management interface
The management port is configured using DHCP by default. Refer to “Con-
necting to the console serial port” on page 20 to change the IP address.
™
Connecting the management interface 19
Page 20

SmartNode 10200 Series User Manual 2 • Hardware Installation
Connecting to the console serial port
The serial port interface enables administrators to perform management tasks on the SN10200. To connect to
the serial port of a SN10200:
1. Connect a CAT5 RJ-45 (male-male) cable (supplied with unit) between the COM port of your computer
and the serial port (labelled 1010) of the SN10200 as shown in Figure 3.
2. If your computer’s serial port features a DB9 connector, use the DB9 to RJ-45 adapter supplied with your
SN10200. If your computer's serial port features a USB connector, you will need to provide a USB to
DB9 adapter.
™
S
m
a
rtNo
de
T
D
M
+VoIP S
m
art
M
e
di
a
G
a
t
e
w
ay
Managem
e
nt
E
th
ern
e
t
P
ow
e
r
C
o
ns
o
le
Serial Console
Management Port
Note A Patton Model 16F-561 RJ45 to DB-9 adapter is included with
each SmartNode 10200 Series device
Serial Terminal (PC)
Figure 3. Computer to SN10200 Serial Port Connection
Figure 4. Console pinout
3. You must configure a terminal emulator or console application (such as HyperTerminal or Putty) to com-
municate with the SN10200 in order to configure initial settings. Configure the terminal emulator with
the following settings:
Baud rate Data rate Parity Stop bits Flow control
9600 8 bits None 1 None
4. To log into the console, use the specific credentials included on the sheet that shipped with your unit. For
details about how to change the IP address via the console, see “Accessing the SmartNode via the Console
Management port” on page 30.
Connecting to the console serial port 20
Page 21

SmartNode 10200 Series User Manual 2 • Hardware Installation
Connecting to a VoIP network
The SN10200 features dual GigE ports for connection to different VoIP networks. This provides an access
point to manage VoIP traffic. Should one of the IP networks fail, the SN10200 will continue to manage VoIP
traffic using the alternate network.
Note
Certain configurations of the SN10200 will exceed 100 Mbps, therefore
1000 Mbps is recommended.
To connect the SN10200 to the VoIP network, you will need:
• Gigabit Ethernet switch. A second one is required to support redundancy of the VoIP interface
• One or two CAT5 Ethernet cables with RJ45 male-male terminations.
The SN10200 is connected to the VoIP network by one or optionally two Ethernet GigE network links, as
shown in Figure 5. To connect the SN10200 to the VoIP network:
1. Connect a CAT5 Ethernet cable to VoIP0 at the rear of the SN10200. Connect the other end of the same
CAT5 cable to the Gigabit Ethernet switch.
2. If your system employs a second Gigabit Ethernet switch for redundancy, connect a second CAT5 Ether-
net cable to VoIP1 at the rear of the SN10200. Connect the other end of the same CAT5 cable to the second Gigabit Ethernet switch.
49-64
17-32
0/0 0/1 0/0 0/1 0/0 0/1
33-48
1-16
ETH VoIP SMP
VoIP
VoIP Network 1
VoIP Network 2
Figure 5. Connecting to a VoIP network
Connecting to a VoIP network 21
Page 22

SmartNode 10200 Series User Manual 2 • Hardware Installation
Connecting to the PSTN
The SN10200 features a variety of interfaces to the PSTN network. To connect the SN10200 to the PSTN
network, you must comply with one of the following:
• The SN10200-xxE features SCSI connectors for connection to T1/E1 lines. You will require one patch
panel for each 32 line grouping of T1/E1 line interfaces on the SN10200.
• The SN10200-DS3 features BNC connectors for connection to DS3 lines. You will require two coaxial
cables for each DS3 interface.
• The SN10200-STM1 features electrical or optical STM-1 connectors. You will require two fibre optic
cables for the STM-1 interface of the SN10200.
Connecting to the PSTN 22
Page 23

SmartNode 10200 Series User Manual 2 • Hardware Installation
SCSI Interface (T1/E1)
A SN10200-xxE with 4 SCSI connectors enables the connection to T1/E1 lines. The termination impedance is
set at 120 ohms. It is possible to connect an external balun in order to convert to 75 ohms (Figure 6).
Note
All ports may not be active. T1/E1 ports are activated by software license;
the number of active ports depends on the licenses purchased.
To connect the SN10200 (SCSI) to the PSTN:
1. Start with the SCSI ports 0-15 located at the bottom right as shown in Figure 6. Connect one SCSI cable
between this port and SCSI patch panel number 1, ports 0-15. Connect SCSI ports 16-31 to patch panel
number 1, ports 16-31.
2. Repeat step 1, using lines 32-63 and a second patch panel. Connect lines 32-47 to patch panel 2, ports 0-
15. Connect lines 48-63 to patch panel 2, ports 16-31
48-63
32-47
16-31
0-15
0/0 0/1 0/0 0/1 0/0 0/1
ETH VoIP SMP
SCSI Patch Panel 1 (Rear)
16-31
0-15
SCSI Patch Panel 2 (Rear)
16-31
0-15
Figure 6. SCSI interface to the PSTN
Connecting to the PSTN 23
Page 24

SmartNode 10200 Series User Manual 2 • Hardware Installation
Dual BNC Interface (DS3)
A SN10200-DS3 with 3 sets of BNC connectors enables the connection to DS3 lines (Figure 7).
Note
All ports may not be active. DS3 ports are activated by software license; the
number of active ports depends on the licenses purchased.
To connect the SN10200-DS3 to the PSTN:
1. Start with the Dual BNC port pair #0 (right-most) as shown inFigure 7. Connect one pair of BNC cables
between this port and the DS3 line.
2. Repeat step 1, using the next available pair of BNC PSTN interface ports.
BIT2
1
0/0 0/1 0/0 0/1 0/0 0/1
RxTxRxTx
ETH VoIP SMP
BIT1
32
RxTx
DS3
Dual BNC connectors
Figure 7. DS3 interface to the PSTN
Connecting to the PSTN 24
Page 25

SmartNode 10200 Series User Manual 2 • Hardware Installation
Optical Interface (OC3/STM-1)
A SN10200-STM-1, with one main and one backup OC3 or STM1 port enables connection to OC3/STM1
lines (Figure 8). Refer to table 4 for a listing of optical interfaces. The default SFP module for OC3/STM1
connection is SMF, intermediate reach, (SFP-OC3-IR1) 1310 nm with LC type connectors.
Note
Please make certain that the correct SFP model is selected at the time of
ordering. If your installation requires a different model from the one that has
been provided, you must replace it.
Automatic Protection Switching: The APS port is used for OC3/STM1 redundancy. Switchover occurs
automatically based on configurable parameters. It is recommended that APS be used if the installation provides this feature.
To connect the SN10200-STM1 (Optical Interface) to the PSTN:
1. Connect a fiber optic cable between the Port 0 (Main) port and OC3/STM1 line.
2. Connect a fiber optic cable between the Port 1 (APS) port and OC3/STM1 line.
BIT2
0/0 0/1 0/0 0/1 0/0 0/1
BIT1
APS
MAIN
ETH VoIP SMP
OC3/STM-1
Optical Interface
Figure 8. Optical interface to the PSTN
Table 4. Optical Interfaces
Tranceiver
Model
SFP-OC3-IR1 OC3/STM1 Hot Pluggable Single-mode Intermediate
SFP-STM1E STM1
Connecting to the PSTN 25
Description Spec Mode Type
reach
(Electrical)
Hot Pluggable 75 ohms
Copper
Max 180m Variable range N/A DIN (mini-coax)
Range
(km)
15 1310 LC
Wavelength Connection
Page 26

SmartNode 10200 Series User Manual 2 • Hardware Installation
Connecting power
The SN10200 is furnished with two AC or DC power connections. Only once all other equipment installation
work has been completed should the SN10200 be powered up.
To power the SN10200, you will need:
• A power source
• Two power cables for the SN10200
Refer to the following sections for information about power:
• “Connecting to AC Power” on page 26
• “Connecting to DC Power” on page 27
• “Powering Down” on page 28
Connecting to AC Power
The SN10200 AC model is furnished with two AC power connectors.
To connect the SN10200 to AC Power:
1. Connect an AC power cable between the AC connector of the SN10200 and an AC supply (Figure 9).
Note
If the SN10200 features a second power supply and it is not connected to an
AC power source, press the green button located at the rear of the unit to
disable the audible alarm.
2. Power up the SN10200 by turning on its power switch(es).
49-64
33-48
17-32
1-16
0/0 0/1 0/0 0/1 0/0 0/1
ETH VoIP SM P
Connect to power
Connect to power
Figure 9. AC Power Connection
Power switch
Power socket
Audible
alarm button
Connecting power 26
Page 27

SmartNode 10200 Series User Manual 2 • Hardware Installation
V
V
Connecting to DC Power
The SN10200 DC models are furnished with two DC power connection ports. In addition, each DC powered
SN10200 is supplied with two DC power cables.
To connect the SN10200 to DC power:
1. Connect one DC cable, supplied with the SN10200, as shown in Figure 10, to the DC outlet at the rear of
the SN10200.
2. Connect one lead of the DC power cable to the positive terminal of the DC power source, as shown in
Figure 10.
3. Connect the other lead of the DC power cable to the negative side of the DC power source.
4. Repeat steps 1-3 for the second power DC power source.
/Ground
–48V
/Ground
–48V
49-64
33-48
Note A DC power cable is included with the SmartNode.
(Two types: Black/Red or Yellow/Black)
17-32
1-16
0/0 0/1 0/0 0/1 0/0 0/1
ETH VoIP SM P
Figure 10. DC Power Connection
Table 5. DC Power Cables
Voltage
Cable Type
OV/Ground -48V
Yellow/Black Black Yellow
Red/Black Red Black
Connecting power 27
Page 28

SmartNode 10200 Series User Manual 2 • Hardware Installation
Powering Down
Powering down the SN10200 requires that the Linux embedded host be shut down. In order to do this, you
must connect to the management interface using SSH, and enter:
shutdown -hp now
DO NOT TURN OFF the power to the SN10200 using the
power switch located at the rear, unless the Linux host has been
properly shut down beforehand, using the reset button display, or
manually using the shutdown command.
Allow enough time for the Linux host to shut down before turning
the power to the SN10200 off (e.g. 1 min). Be aware that the
shutdown procedure of the unit is logged and traceable for support and warranty purposes.
Connecting power 28
Page 29

Chapter 3 Initial Setup and Web Management
Chapter contents
Overview ...............................................................................................................................................................30
Accessing the SN10200.........................................................................................................................................30
Accessing the SmartNode via the Console Management port ..........................................................................30
Logging into the SmartNode Console .......................................................................................................30
Changing the IP address ............................................................................................................................31
Setting the IP address to DHCP ................................................................................................................32
Accessing the SmartNode via the Ethernet Management port .........................................................................33
Accessing and Navigating the Web Interface .........................................................................................................34
Connecting to the web server and logging on to the Web Portal .....................................................................34
Connecting to the web server ....................................................................................................................34
Logging on to the Web Portal ...................................................................................................................34
Navigating the Web Portal ..............................................................................................................................34
Navigation and Information Panels ...........................................................................................................34
Knowing Your Location ............................................................................................................................35
Managing Users.....................................................................................................................................................36
Understanding User Access Levels ...................................................................................................................36
Viewing the User List ......................................................................................................................................36
Creating a New User .......................................................................................................................................37
Deleting a User ...............................................................................................................................................38
Logging Off ....................................................................................................................................................38
Managing the Database Backup.............................................................................................................................39
Carrying out a First Database Backup .............................................................................................................39
Downloading a Database Backup ....................................................................................................................40
Uploading a Database Backup ........................................................................................................................40
Restoring a Database Backup ..........................................................................................................................40
Working with Configurations................................................................................................................................41
Managing Applications ...................................................................................................................................41
Viewing the List of Installed Applications .................................................................................................41
Starting an Application .............................................................................................................................42
Verifying that an Application is Operating ................................................................................................43
Verifying the Application Path ..................................................................................................................43
Activating the Configuration ..........................................................................................................................44
Verifying status .........................................................................................................................................45
Configuring IP Interfaces ................................................................................................................................47
List of Parameters ......................................................................................................................................48
29
Page 30

SmartNode 10200 Series User Manual 3 • Initial Setup and Web Management
Overview
This chapter explains how to connect the SmartNode 10200 to the network, and how to access and manage
the SmartNode Web Interface. Refer to the following sections for more details on:
• “Accessing the SN10200” on page 30
• “Accessing and Navigating the Web Interface” on page 34
• “Managing Users” on page 36
• “Managing the Database Backup” on page 39
• “Working with Configurations” on page 41
Note
For more detailed information about working with specific applications and
configurations, refer to the Smart Media Software Configuration Guide
located online at www.patton.com/manuals/SmartMedia_SCG.pdf
.
Accessing the SN10200
You may access the SmartNode through the console management port, or through the Ethernet management
port. Refer to the following sections for more information:
• “Accessing the SmartNode via the Console Management port” on page 30
• “Accessing the SmartNode via the Ethernet Management port” on page 33
Accessing the SmartNode via the Console Management port
Logging into the SmartNode Console
1. To physically connect the console serial port, follow the instructions in “Connecting to the console serial
port” on page 20.
2. To communicate with the SN10200 through the console port, you must first configure a terminal emula-
tor or console application (such as HyperTerminal or Putty) in order to configure initial settings. Configure the terminal emulator with the following settings:
Baud rate Data rate Parity Stop bits Flow control
9600 8 bits None 1 None
3. Log into the console using the specific credentials included on the sheet that shipped with your unit. The
factory default configuration for the Ethernet interface IP addresses and network masks are listed below.
IP Address Network Mask
Ethernet Management (ETH 0/0) DHCP 255.255.255.0
DHCP address range 192.168.1.10–192.168.1.19 255.255.255.0
Overview 30
Page 31

SmartNode 10200 Series User Manual 3 • Initial Setup and Web Management
Changing the IP address
1. After logging into the console port, enter the following command to view the eth0 configuration:
vi /etc/sysconfig/network-scripts/ifcfg-eth0
Note
You must remove the line DHCP_HOSTNAME. The eth1 interface must
remain as 172.31.1.2.
Example:
DEVICE=eth0
BOOTPROTO=static
IPADDR=192.168.1.10
NETMASK=255.255.255.0
IPV6ADDR=
IPV6PREFIX=
IPV6_AUTOCONF=yes
ONBOOT=yes
2. Add the default gateway address to the network configuration file:
vi /etc/sysconfig/network
Example:
HOSTNAME=TB005376
NETWORKING=yes
GATEWAY=192.168.1.1
3. Modify the DHCP client configuration:
Note
If you don't have a nameserver, remove it from the file. If you have a
nameserver, set it to a valid DNS.
vi /etc/resolv.conf
Example (DNS configuration file without DNS server):
; generated by /sbin/dhclient-script
Example (DNS configuration file containing a DNS server):
; generated by /sbin/dhclient-script
nameserver 4.2.2.2
4. Restart the network interfaces:
/etc/init.d/network restart
Accessing the SN10200 31
Page 32

SmartNode 10200 Series User Manual 3 • Initial Setup and Web Management
Setting the IP address to DHCP
1. To change the IP address from static to DHCP, enter the following command to modify the eth0 config-
uration:
vi /etc/sysconfig/network-scripts/ifcfg-eth0
Note
You must remove the IPADDR and NETMASK lines. The eth1 interface
must remain as 172.31.1.2.
Example:
DEVICE=eth0
BOOTPROTO=dhcp
IPV6ADDR=
IPV6PREFIX=
IPV6_AUTOCONF=yes
ONBOOT=yes
DHCP_HOSTNAME=TB005376
2. Remove the default gateway address in the network configuration file:
vi /etc/sysconfig/network
Example:
HOSTNAME=TB005376
NETWORKING=yes
3. Modify the DHCP client configuration:
Note
If you don't have a nameserver, remove it from the file. If you have a
nameserver, set it to a valid DNS.
vi /etc/resolv.conf
Example (DNS configuration file without DNS server):
; generated by /sbin/dhclient-script
Example (DNS configuration file containing a DNS server):
; generated by /sbin/dhclient-script
nameserver 4.2.2.2
Accessing the SN10200 32
Page 33

SmartNode 10200 Series User Manual 3 • Initial Setup and Web Management
Accessing the SmartNode via the Ethernet Management port
The SN10200 is shipped with the SN-CTRL pre-installed. In order to make changes to the system configuration, you must connect to the Management port labeled Ethernet on the front of the SN10200 to a terminal.
To access the SN10200, you must use an SSH connection. The password is set at the factory and is indicated
on the shipment sheet.
TDM+VoIP Smart Media Gateway
Management
Ethernet
Console
Ethernet
Management Port
Figure 11. SN10200 Ethernet Management Interface
SmartNode
Power
™
Accessing the SN10200 33
Page 34

SmartNode 10200 Series User Manual 3 • Initial Setup and Web Management
Accessing and Navigating the Web Interface
This section describes how to login and navigate the SmartNode 10200 Web Portal.
Connecting to the web server and logging on to the Web Portal
The first step involved in initially configuring any Smart Media system involves logging on to the Web Portal.
This can be divided into two distinct tasks: Connecting to the web server, and logging on to the Web Portal.
Connecting to the web server
Using a web browser, connect to the Web Portal by typing the following in your address bar:
– http://[DEVICE HOST NAME]:12358
or, alternately,
– http://[DEVICE IP ADDRESS]:12358
Logging on to the Web Portal
In order to log on to the Web Portal configuration tool, enter the root user ID and password. The default values for these
parameters are:
– User ID: root
– Default password: root
Navigating the Web Portal
Effective use of the Web Portal requires a basic understanding of the physical elements of the tool, how to
access its various components and knowing your current location in the Web Portal display. The following
topics are covered: Navigation and Information Panels and Knowing Your Location.
Navigation and Information Panels
The Web Portal has been designed with a consistent streamlined approach for the presentation of Smart Media
configuration data. Information related to the hierarchy of data is displayed in the left-hand navigation panel,
while information related to a selected category is displayed in the information panel found on the right side of
the window.
Selecting a category in the navigation panel causes related configuration and status information to be dynamically displayed. The navigation panel displays information in a tree-like structure enabling you to understand
how configuration parameters are contained by others.
Note
Figure 12 on page 35 shows the SmartNode 10200 Web Portal. The naviga-
tion panel is located to the left of the screen. The infomation panel is located
to the right.
Accessing and Navigating the Web Interface 34
Page 35

SmartNode 10200 Series User Manual 3 • Initial Setup and Web Management
Figure 12. SN10200 Web Portal Navigation
Knowing Your Location
As you navigate the Web Portal, it is important that you understand how to determine your current location.
The Web Portal has been designed to make this easy for you. When you browse through the navigation panel,
your current selection is always indicated by a graphical highlight. In addition, the system configuration that
you are using and the specific Smart Media unit that is being configured is always displayed, as shown in the
figure below.
Figure 13. SN10200 Web Portal Menus
• 1: Indicates status Global sub-menu.
• 2: Indicates a configuration named Student is selected.
• 3: Indicates the Smart Media hardware device that is selected.
• 4: Displays information concerning the system.
Accessing and Navigating the Web Interface 35
Page 36

SmartNode 10200 Series User Manual 3 • Initial Setup and Web Management
Managing Users
This section describes how to mange user access levels in the SN10200 Web Portal. (Refer to “Connecting to
the web server and logging on to the Web Portal” on page 34 for information about how to login to the Web
Portal).
Understanding User Access Levels
The Web Portal is designed to provide varying degrees of write and read privileges to users. By default, the root
user is given full read and write access. This is required so that the root user can function as the system administrator without any restrictions imposed. Subsequent users can be created with the ability to read and write, or
just to read. An integer value from 0 - 9 is assigned to each user.
Figure 14. SN10200 User Access Levels
• A user with an access level of 0 has access to configurations created with levels 0 - 9.
• A user with an access level of 4, will have access to configurations created with user levels 4 - 9.
• Configurations created with user levels 0 -3 will be invisible to user levels 4-9.
Viewing the User List
It is possible to create an unlimited list of users, each with an assignment from 0-9. Any user can view the entire
list of users, however only a root user with an access level of 0 can modify the access rights of other users.
To view the user list:
1. Select Users from the navigation panel.
Figure 15. Global > Users
Managing Users 36
Page 37

SmartNode 10200 Series User Manual 3 • Initial Setup and Web Management
2. The User List is displayed.
Figure 16. User List
Creating a New User
1. Select Users from the navigation panel.
2. Click Create New User.
Figure 17. User List > Create New User
3. Enter a User Name and Password.
4. Select a Read Privilege Level (from 0-9).
5. Select a Write Privilege Level (from 0-9).
6. Press Create to save your changes. The User List window is displayed with the newly added user.
Managing Users 37
Page 38

SmartNode 10200 Series User Manual 3 • Initial Setup and Web Management
Deleting a User
1. Select Users from the navigation panel.
2. Click Delete in the information panel, next to the user account that you wish to delete.
Figure 18. User List > Delete User
3. Click OK to confirm the deletion.
4. The modified User List is displayed.
Logging Off
When you are finished working in the Web Portal, it is recommended that you log out from your session. If
you do not log out, the session between the Web Browser on your PC and the Web Portal remains active.
To log out from the Web Portal, select Logout from the navigation panel.
Figure 19. Navigation Menu: Logout
Managing Users 38
Page 39

SmartNode 10200 Series User Manual 3 • Initial Setup and Web Management
Managing the Database Backup
After carrying out system modifications, it is recommended that you back up the SQL database. This section
describes how to back up the database for the first time, retrieve a saved backup file, upload a new backup file,
and restore the database from a backup file.
Carrying out a First Database Backup
To create a backup file of the database:
1. Click Backups in the navigation panel.
Figure 20. Global > Backups
2. Click Create, under Create New Database Backup.
Figure 21. Backups > Create new database backup
3. Verify that the “Database backup dump was successfully started. Refresh this page when it is done”
message appears. Then, refresh your Internet browser page.
Figure 22. Database Backup Message
4. Verify that your new backup appears in the Database Backup List.
Figure 23. Database Backup List
Managing the Database Backup 39
Page 40

SmartNode 10200 Series User Manual 3 • Initial Setup and Web Management
Downloading a Database Backup
Once you have created a backup of your database, it is recommended that you download it to store it to an
external storage device.
1. Click the Download link to store your backup externally.
Figure 24. Download Database Backup
2. Click Save in the pop-up window to store the backup.
Uploading a Database Backup
An external backup of your database can be uploaded to your SmartNode 10200.
1. Click the Choose File tab, under Upload Database Backup, and select your external database backup.
Figure 25. Upload Database Backup File
2. Click the Upload tab, under Backup File.
Restoring a Database Backup
The configuration settings of your system can be restored from a local or remote copy of your database.
1. Click the Recover link, under Database Backup List, to overwrite the current database and restore your file
backups.
Figure 26. Restore Database Backup File
2. After a few minutes, the Web Portal will come back online and the new configuration will be available.You
need to activate the configuration to apply the changes.
Managing the Database Backup 40
Page 41

SmartNode 10200 Series User Manual 3 • Initial Setup and Web Management
Working with Configurations
This section explains how to manage applications and instances on the SN10200 Web Portal, how to activate a
configuration, and how to configure IP interfaces. Refer to the following sections for information on:
• “Managing Applications” on page 41
• “Activating the Configuration” on page 44
• “Configuring IP Interfaces” on page 47
Note
For more detailed information about working with specific applications and
configurations, refer to the Smart Media Software Configuration Guide
located online at www.patton.com/manuals/SmartMedia_SCG.pdf
.
Managing Applications
This section explains how to start up and verify applications and instances on the Smart Media application
server.
Viewing the List of Installed Applications
The Smart Media application server is designed to run a large variety of applications. Before you can run an
application, you must first be able to view it from a list of applications. To view the selection of applications:
1. Select Instances from the navigation panel.
Figure 27. Applications > Instances
2. The Application Instance List is displayed in the information panel.
Figure 28. Application Instance List
Applications are displayed in one of three states:
– Run (application is operating)
– Management (application is installed but not in operation)
– Fault (application has an operation fault)
Working with Configurations 41
Page 42

SmartNode 10200 Series User Manual 3 • Initial Setup and Web Management
Starting an Application
In order to be able to load and start an application, it will need to have been installed on the Smart Media
application server. In addition, at least one Smart Media unit must have been configured on the Smart Media
application server so that you are able to connect to it.
When you first log on to the Web Portal, your system application will have been installed on the Smart Media
application server, and it will be in a management state. This means that the application is not yet operating
and controlling your system. In order to start an application, its state must be changed from Management to
Run. To start an application:
1. Select Instances from the navigation panel.
2. Select the application that you wish to run and click Edit.
Figure 29. Application Instance List > Edit
3. Click the Status tab to activate the application.
Figure 30. Application Status
4. Set the Oam target state to Run.
5. Click Apply States.
Figure 31. Apply States
Working with Configurations 42
Page 43

SmartNode 10200 Series User Manual 3 • Initial Setup and Web Management
Verifying that an Application is Operating
When an application’s target state is set to run, there are a number of crucial verifications that you should conduct in order to know that an application is running properly. These verifications are as follows:
• Verify the application’s current path. It is important that once the application has been set to run, a path
is displayed.
• Verify the TDM interface. If you are running a TDM application on your Smart Media unit then you can
verify the TDM interface. Although, you most likely have not yet configured the TDM interface of the
Smart Media unit, certain status LEDS will indicate that your application is operational.
• Verify the IP Interfaces. Your Smart Media unit is furnished with two IP interfaces for access to a VoIP
network. Although you have not as of yet configured the interfaces, certain LED indications will be displayed. See Figure 32 below.
Figure 32. SN10200 Interfaces
Verifying the Application Path
One important indication of the normal operation of an application is when the application path is displayed
in the hardware status window. To verify that the application path is displayed:
1. Select Instances from the navigation panel.
2. Click the Status tab, in the Application Instances window, to view the application path
3. Verify that the application path is displayed. Verify that the target state is set to Run, the current state dis-
plays Ready, and the current HA state displays Active.
Figure 33. Application Status List
Working with Configurations 43
Page 44

SmartNode 10200 Series User Manual 3 • Initial Setup and Web Management
Activating the Configuration
Changes made to the configuration of the Smart Media units are stored on the OAM&P Configuration and
Logging database. In order for changes to be used by the system, they must first be activated. This is done at
the system level and accessed from the Navigation panel.
Note
To activate a configuration, you must be the Root user or have a user access
level of 0.
1. Select Systems from the navigation panel.
Figure 34. Global > Systems
2. Click Edit next to the system you wish to activate,in order to access the System Configuration screen.
Figure 35. System List
3. Activate the configuration. Enter a name for the system. Under Activate Configuration: Select a Config-
uration on which to run the system. Click Activate.
Note
Make certain that Lock Active Configuration box (located at the top of the
page) is 'unchecked.’ Failure to do so will prevent the configuration from
being saved.
Figure 36. Name and Activate Configuration
Working with Configurations 44
Page 45

SmartNode 10200 Series User Manual 3 • Initial Setup and Web Management
4. Verify that an activation confirmation message is displayed. The system will remind you to back up your
database when you are done configuring (at top of screen, in yellow).
Figure 37. Successful Activation
Verifying status
General and detailed status information about the applications that are run by one or more host machine(s) is
accessible from the Applications tab of the Global-->Status menu.
Figure 38. Global > Status
You may view the status in General View or Detailed View.
Working with Configurations 45
Page 46

SmartNode 10200 Series User Manual 3 • Initial Setup and Web Management
General View: The general view, shown below, lists the applications, and their current general status (ready,
fault, not running. This window also provides a count of all applications with ready or fault status.
Figure 39. Status: General View
Detailed View: A more detailed description of each application can be viewed by following the appropriate
link in the general window (shown above). The detailed status screen, shown below, lists the states of the application, its name, the host machine and the location of the application on the host.
From this detailed view, the Oam target state may be changed.
To modify the Oam target state of an application: Select a state from the Oam target state combo box. Click
Apply States to change the states.
Figure 40. Status: Detailed View
Working with Configurations 46
Page 47

SmartNode 10200 Series User Manual 3 • Initial Setup and Web Management
Configuring IP Interfaces
The IP interface of the VoIP0 and VoIP1 ports can be configured by setting the following:
• IP Address
• Netmask
• Gateway
To configure a VoIP0 or VoIP1 port:
1. Select IP Interfaces from the navigation pane:
Figure 41. Menu > IP Interfaces
2. Click Edit from the IP Interfaces Information panel.
Figure 42. IP Interface List
3. Configure the IP port:
– Indicate whether or not to use DHCP on this port
–Enter an IP address
–Enter a Netmask
–Enter a gateway address
–Click Save
Working with Configurations 47
Page 48

SmartNode 10200 Series User Manual 3 • Initial Setup and Web Management
Note
The IP addresses of ETH0, ETH1, VOIP0 and VOIP1 must be on different
subnets.
Figure 43. Editing an IP Interface
4. The changes are displayed in the IP interfaces information panel.
The system will display the following notice, describing steps to apply your new configuration:
5. Activate the configuration: Systems -> Edit -> Activate
6. Reboot the adapter (will drop active calls): Status -> Adapters -> Click on the adapter Serial Number ->
Reboot adapter. It will take about 1.5 minutes to restart the unit.
List of Parameters
Table 6. Configuration Parameters for IP Interfaces
Parameter Description
Use DHCP Indicates that the DHCP autoconfiguration protocol is to be used on an IP port.
IP Address Sets an address for accessing a new media gateway controller (MGC).
Netmask Sets a subnetwork mask number on an IP port.
Gateway Associates the address of a TCP/IP network gateway with an IP port.
Working with Configurations 48
Page 49

Chapter 4 Contacting Patton
Chapter contents
Introduction..........................................................................................................................................................50
Contact information..............................................................................................................................................50
Patton support headquarters in the USA .........................................................................................................50
Alternate Patton support for Europe, Middle East, and Africa (EMEA) ..........................................................50
Warranty Service and Returned Merchandise Authorizations (RMAs)...................................................................50
Warranty coverage ..........................................................................................................................................50
Out-of-warranty service .............................................................................................................................51
Returns for credit ......................................................................................................................................51
Return for credit policy .............................................................................................................................51
RMA numbers ................................................................................................................................................51
Shipping instructions ................................................................................................................................51
49
Page 50

SmartNode 10200 Series User Manual 4 • Contacting Patton
Introduction
This chapter contains the following information:
• “Contact information”—describes how to contact Patton technical support for assistance.
• “Warranty Service and Returned Merchandise Authorizations (RMAs)”—contains information about the
RAS warranty and obtaining a return merchandise authorization (RMA).
Contact information
Patton Electronics offers a wide array of free technical services. If you have questions about any of our other
products we recommend you begin your search for answers by using our technical knowledge base. Here, we
have gathered together many of the more commonly asked questions and compiled them into a searchable
database to help you quickly solve your problems.
Patton support headquarters in the USA
• Online support: available at www.patton.com
• E-mail support: e-mail sent to support@patton.com will be answered within 1 business day
• Telephone support: standard telephone support is available five days a week—from 8:00 am to
5:00 pm EST (1300 to 2200 UTC/GMT)—by calling +1 (301) 975-1007
• Fax: +1 (253) 663-5693
Alternate Patton support for Europe, Middle East, and Africa (EMEA)
• Online support: available at www.patton.com
• E-mail support: e-mail sent to support@patton.com will be answered within 1 business day
• Telephone support: standard telephone support is available five days a week—from 9:00 am to
5:30 pm CET (0800 to 1630 UTC/GMT)—by calling +41 (0)31 985 25 55
• Fax: +41 (0)31 985 25 26
Warranty Service and Returned Merchandise Authorizations (RMAs)
Patton Electronics is an ISO-9001 certified manufacturer and our products are carefully tested before shipment. All of our products are backed by a comprehensive warranty program.
Note
Warranty coverage
Our products are under warranty to be free from defects, and we will, at our option, repair or replace the product should it fail within one year from the first date of shipment. Our warranty is limited to defects in workmanship or materials, and does not cover customer damage, lightning or power surge damage, abuse, or
unauthorized modification.
If you purchased your equipment from a Patton Electronics reseller, ask your
reseller how you should proceed with warranty service. It is often more convenient for you to work with your local reseller to obtain a replacement.
Patton services our products no matter how you acquired them.
Introduction 50
Page 51

SmartNode 10200 Series User Manual 4 • Contacting Patton
Out-of-warranty service
Patton services what we sell, no matter how you acquired it, including malfunctioning products that are no
longer under warranty. Our products have a flat fee for repairs. Units damaged by lightning or other catastrophes may require replacement.
Returns for credit
Customer satisfaction is important to us, therefore any product may be returned with authorization within 30
days from the shipment date for a full credit of the purchase price. If you have ordered the wrong equipment or
you are dissatisfied in any way, please contact us to request an RMA number to accept your return. Patton is
not responsible for equipment returned without a Return Authorization.
Return for credit policy
• Less than 30 days: No Charge. Your credit will be issued upon receipt and inspection of the equipment.
• 30 to 60 days: We will add a 20% restocking charge (crediting your account with 80% of the purchase price).
• Over 60 days: Products will be accepted for repairs only.
RMA numbers
RMA numbers are required for all product returns. You can obtain an RMA by doing one of the following:
• Completing a request on the RMA Request page in the Support section at www.patton.com
• By calling +1 (301) 975-1007 and speaking to a Technical Support Engineer
• By sending an e-mail to returns@patton.com
All returned units must have the RMA number clearly visible on the outside of the shipping container. Please use
the original packing material that the device came in or pack the unit securely to avoid damage during shipping.
Shipping instructions
The RMA number should be clearly visible on the address label. Our shipping address is as follows:
Patton Electronics Company
RMA#: xxxx
7622 Rickenbacker Dr.
Gaithersburg, MD 20879-4773 USA
Patton will ship the equipment back to you in the same manner you ship it to us. Patton will pay the return
shipping costs.
Warranty Service and Returned Merchandise Authorizations (RMAs) 51
Page 52

Appendix A Compliance information
Chapter contents
Compliance ...........................................................................................................................................................53
EMC ...............................................................................................................................................................53
Low Voltage Directive (Safety) ........................................................................................................................53
Radio and TV Interference (FCC Part 15) ............................................................................................................53
CE Declaration of Conformity..............................................................................................................................53
Authorized European Representative.....................................................................................................................53
52
Page 53

SmartNode 10200 Series User Manual A • Compliance information
Compliance
EMC
• FCC Part 15, Class A
• EN55022, Class A
• EN ETSI 300 386 V1.3.3
Low Voltage Directive (Safety)
• UL 60950-1/CSA C22.2 No. 60950-1
• IEC/EN60950-1
Radio and TV Interference (FCC Part 15)
This device generates and uses radio frequency energy, and if not installed and used properly-that is, in strict
accordance with the manufacturer’s instructions-may cause interference to radio and television reception. The
device has been tested and found to comply with the limits for a Class A computing device in accordance with
specifications in Subpart B of Part 15 of FCC rules, which are designed to provide reasonable protection from
such interference in a commercial installation. However, there is no guarantee that interference will not occur
in a particular installation. If the device does cause interference to radio or television reception, which can be
determined by disconnecting the unit, the user is encouraged to try to correct the interference by one or more
of the following measures: moving the computing equipment away from the receiver, re-orienting the receiving
antenna and/or plugging the receiving equipment into a different AC outlet (such that the computing equipment and receiver are on different branches).
CE Declaration of Conformity
Patton Electronics, Inc declares that this device is in compliance with the essential requirements and other relevant provisions of Directive 1999/5/EC. The Declaration of Conformity may be obtained from Patton Electronics, Inc at www.patton.com/certifications
The safety advice in the documentation accompanying this device shall be obeyed. The conformity to the
above directive is indicated by CE mark on the device.
.
Authorized European Representative
D R M Green
European Compliance Services Limited.
Avalon House, Marcham Road
Abingdon,
Oxon OX14 1UD, UK
Compliance 53
Page 54

Appendix B Specifications
Chapter contents
Capacity and voice processing................................................................................................................................55
Simultaneous signaling support .............................................................................................................................55
SmartNode-CONTROL.......................................................................................................................................55
OAM&P...............................................................................................................................................................56
Operating environment .........................................................................................................................................56
Physical characteristics...........................................................................................................................................56
Electrical characteristics .........................................................................................................................................56
54
Page 55

SmartNode 10200 Series User Manual B • Specifications
Capacity and voice processing
VoIP channels—512 to 2,016
PSTN interfaces—1 OC3/STM1 with APS (automatic protection switching) • 1 or 2 DS3 • Dual RJ48C for
BITS or T1/E1 for signaling
VoIP interfaces—Dual 100/1000Base-T • RJ45 connectors on rear of unit
Vocoding—Universal codecs: G.711, G.723.1, G.726, G.729ab, T.38 • Other codecs: G.722.2 (AMR-WB),
G.728, G.729eg, iLBC, clear mode (RFC 4040)
Fax/Modem/Data—T.38 fax relay (V.17 and V.34) • Automatic G.711 fallback • Modem and data passthrough DTMF relay—RFC 2833, SIP INFO Method, In-band
Echo cancellation—G.168 echo cancel•lation • 128 ms echo tail on all channels simultaneously
Voice processing—Dynamic and pro•grammable jitter buffer (20 to 200 ms) • Voice activity detection
(VAD) • Comfort noise generation (CNG)
Management interfaces—Dual 100/1000Base-T for OAM&P
Simultaneous signaling support
SIP—Supported RFCs: 2327, 2976, 3261, 3262, 3263, 3264, 3311*, 3323*, 3325*, 3398, 3515*, 3578*,
3764, 3891, 4028 (*partial compliance)
SIGTRAN—M2PA, M2UA, M3UA, IUA • SS7 termination and/or relay supported
SS7—Up to 64 x MTP2 links (56, 64, n x 56/64 kbps, HSL) • Multiple redundant MTP2 links • Up to 64
MTP3 originating point codes and linksets • ISUP variants: ITU 92, ITU 97, ANSI 88, ANSI 92, ANSI 95,
Telcordia 97, ETSIv2, ETSIv3, China, Singapore, UK Brazil
ISDN PRI—Q.931 ISDN PRI: NI-2, 4ESS, 5ESS, DMS-100, DMS-250, Euro ISDN ETSI NET5 (France,
Germany, UK, China, Hong Kong, Korea), NTT (Japan), Australia
CAS—MFC R2 (standard ITU, Brazil) • Customizable protocol script files
SmartNode-CONTROL
Standalone call control—Any to any call routing (TDM-VoIP, TDM-TDM, VoIP-VoIP with transcoding) •
Call routing based on: trunk group, calling/called numbers, nature of address, ASR, time of day, load-based,
cost-based, TO:, FROM: Request URI, redirect numbers, and other parameters • NPA-NXX routing (100k+
table entries, Excel or CVS file upload) • Route retries • Call transfer (REFER, AT&T TR 50075)
H.248 (MEGACO) call control—ITU-T H.248 versions 1 and 2 • UDP, SCTP, IPsec transport • DTMF
and fax detection • DTMF, announcements and call progress tone generation • Call quality and inactivity
alerts
Session management and billing—SIP peer availability polling • RTP inactivity monitoring • CDR generation (RADIUS and text file)
Capacity and voice processing 55
Page 56

SmartNode 10200 Series User Manual B • Specifications
OAM&P
Operation & Administration—Web•based system status and operations • SNMP v2/v3 GET, TRAPs and
alarms • Dynamic configuration changes
Maintenance—Web-based interface for maintenance • Automated system upgrade • System backup, restore
and copy
Provisioning—Web-based interface for configuration • Dynamic activation
Troubleshooting—Per-call tracing (history and/or live) • Signalling capture tools • SSH command-line inter-
face
Operating environment
Operating temperature—32–131°F (0–55°C)
Operating humidity—95% (non condensing)
Physical characteristics
Dimensions—2U, 3.5H x 17.4W x 16D in. (88.9H x 442W x 406D mm)
Weight—20 lbs (9.1 kg)
Electrical characteristics
Power input—90 to 260 VAC, 47 to 63 Hz • -40 to -60 VDC • Redundant power supply with dual power
inputs • Maximum 138 W power consumption
OAM&P 56
 Loading...