

Page 1
Instruction Manual and
Experiment Guide for
the PASCO scientific
Model SF-9214
Precision 2.0 Meter
Air Track
012-02149B
9/91
Copyright © January 1988 $5.00
Page 2

Table of Contents
Section Page
Copyright, Warranty, and Equipment Return................................................... ii
Introduction ...................................................................................................... 1
Equipment......................................................................................................... 1
The Accessory Tray.......................................................................................... 2
Equipment Setup............................................................................................... 3
Accessories ....................................................................................................... 4
Maintenance...................................................................................................... 6
Experiments ...................................................................................................... 6
012-02149B
Replacement Parts ............................................................................................ 7
Recommended Equipment................................................................................ 8
i
scientific
Page 3
012-02149B
Copyright Notice
Copyright and Warranty
Please—Feel free to duplicate this manual
subject to the copyright restrictions below.
The PASCO scientific Model SF-9214 Precision 2.0
Meter Air Track manual is copyrighted and all rights
reserved. However, permission is granted to nonprofit educational institutions for reproduction of any
part of this manual providing the reproductions are
used only for their laboratories and are not sold for
profit. Reproduction under any other circumstances,
without the written consent of PASCO scientific, is
prohibited.
Limited Warranty
PASCO scientific warrants this product to be free from
defects in materials and workmanship for a period of
one year from the date of shipment to the customer.
Equipment Return
PASCO will repair or replace, at its option, any part of
the product which is deemed to be defective in material or workmanship. This warranty does not cover
damage to the product caused by abuse or improper
use. Determination of whether a product failure is the
result of a manufacturing defect or improper use by the
customer shall be made solely by PASCO scientific.
Responsibility for the return of equipment for warranty
repair belongs to the customer. Equipment must be
properly packed to prevent damage and shipped
postage or freight prepaid. (Damage caused by
improper packing of the equipment for return shipment
will not be covered by the warranty.) Shipping costs
for returning the equipment, after repair, will be paid
by PASCO scientific.
Should this product have to be returned to PASCO
scientific, for whatever reason, notify PASCO scientific by letter or phone BEFORE returning the product.
Upon notification, the return authorization and shipping instructions will be promptly issued.
NOTE: NO EQUIPMENT WILL BE
ACCEPTED FOR RETURN WITHOUT AN
AUTHORIZATION.
scientific
When returning equipment for repair, the units must be
packed properly. Carriers will not accept responsibility for damage caused by improper packing. To be
certain the unit will not be damaged in shipment, observe the following rules:
➀ The carton must be strong enough for the item
shipped.
➁ Make certain there is at least two inches of packing
material between any point on the apparatus and
the inside walls of the carton.
➂ Make certain that the packing material can not shift
in the box, or become compressed, thus letting the
instrument come in contact with the edge of the
box.
ii
Page 4

Page 5
012-02149B
Equipment
Introduction
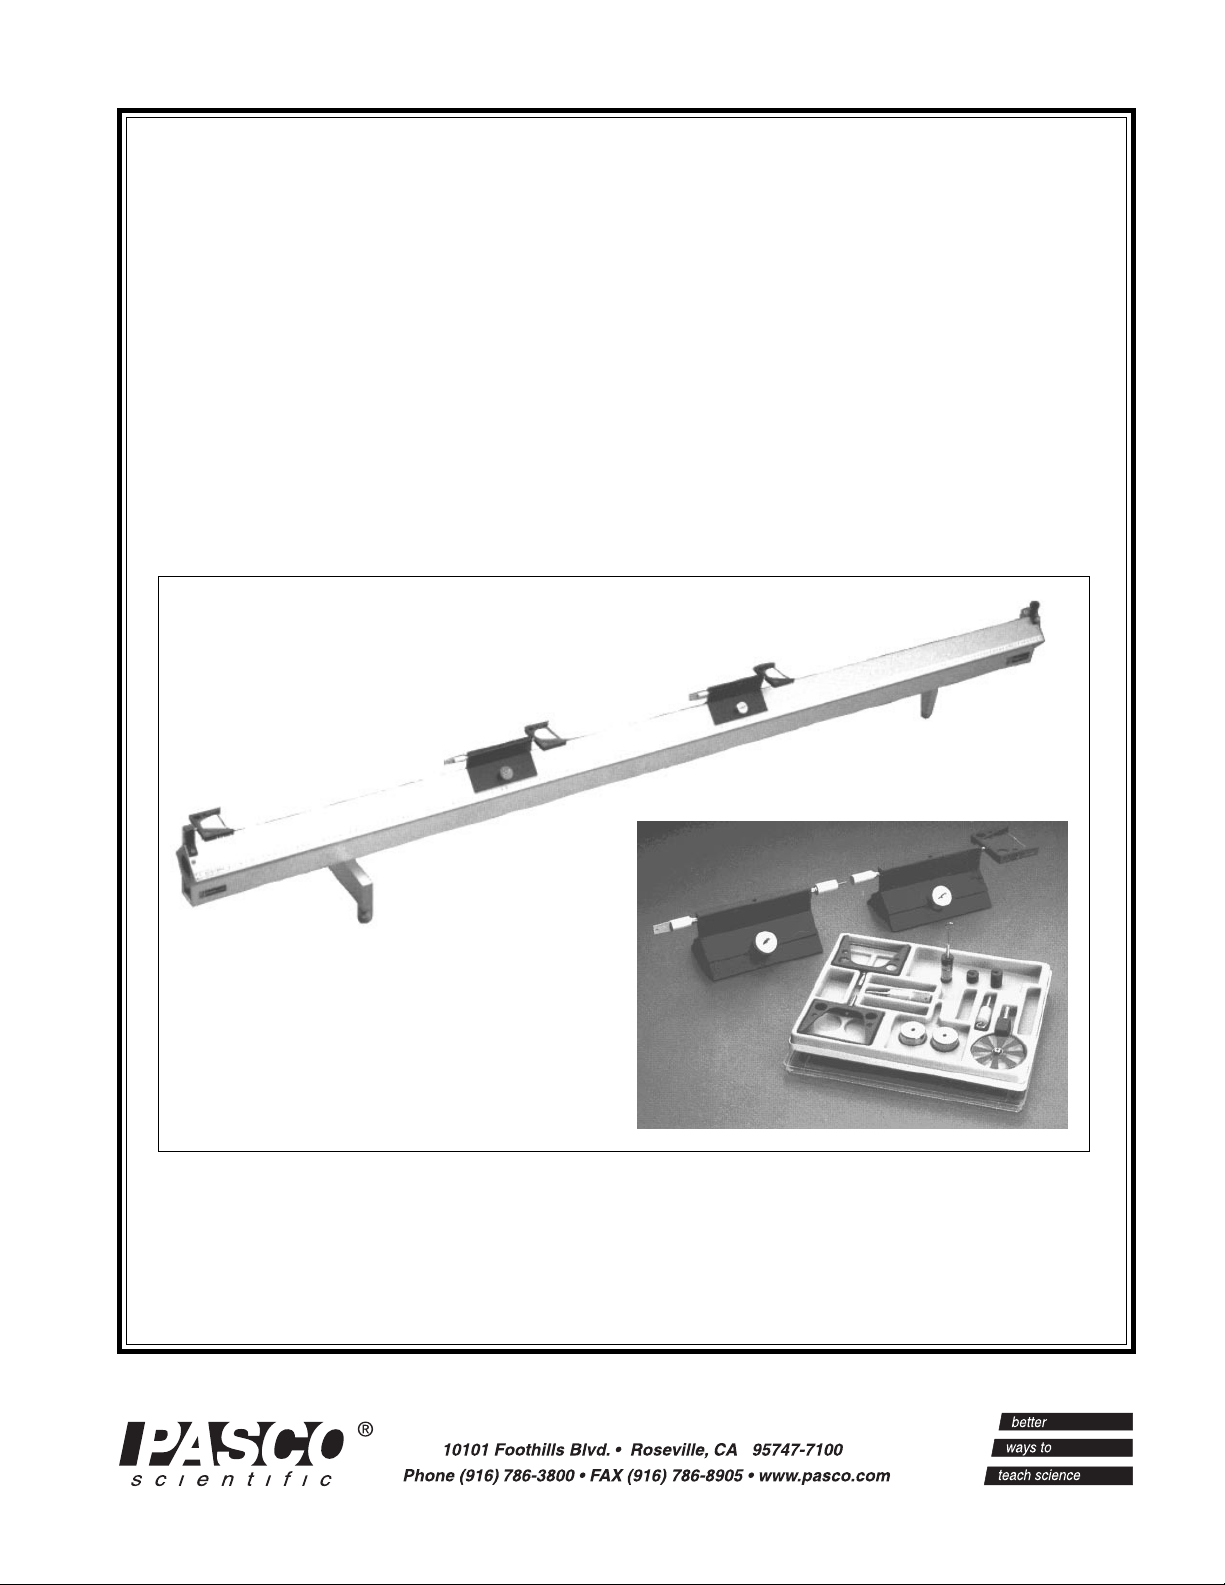
The PASCO Model SF-9214 Air Track is 2.0 meters
long with a guaranteed straightness to within .04 mm
over its entire length. The track construction is a large
square aluminum extrusion of 3 mm thick walls that
are further strengthened by a supporting U-channel.
A single foot support at one end and a double foot at
the other end allows for lengthwise and sideways
leveling.
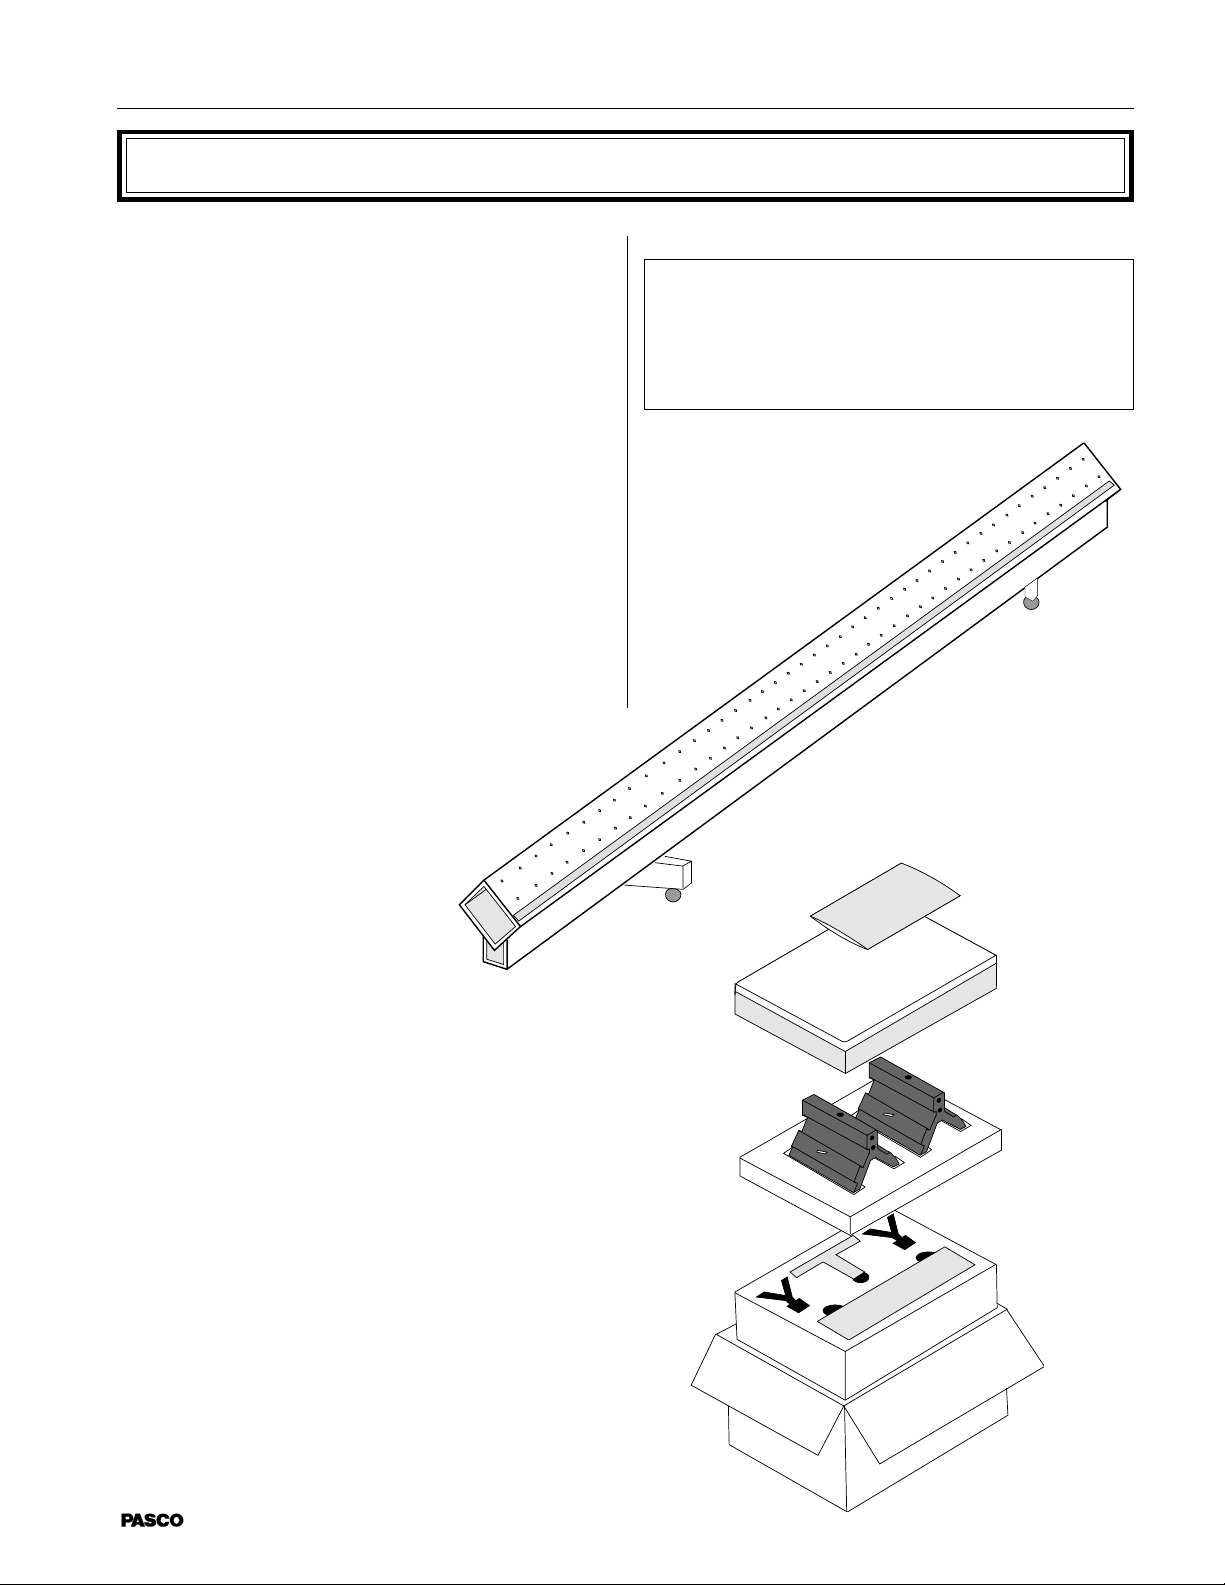
Unpacking and Setup
The SF-9214 Air Track is shipped in two containers, a
large tube (containing the track) and a cardboard box
(containing the accessories).
➧ CAUTION: Use care not to scratch or nick the
upper surfaces of the track. (Those containing the
airholes.) Any protrusion on this surface may
impede the motion of the glider.
Air Track
Gently remove one end from the air track shipping tube
and carefully pull the track, with the alignment beam
attached, from the tube.
Equipment included:
• 2 m Air Track
Accessories:
Envelope:
• 2 (100 mm) Flags
Top Layer:
• 1 Accessory tray
Middle Layer:
• 2 Gliders
• Mounting hardware (2 single leg screws, 2 double
leg screws, (1) 4 mm wrench, (1) 5 mm wrench)
Bottom Layer:
Envelope
Top Layer
Middle Layer
Bottom Layer
• 1 Single leg
• 1 Double leg w/adjustable feet
• 2 End Stops
Additional Equipment Required:
• Air Supply (Model SF-9416)
scientific
Accessories Box
1
Page 6

The Accessory Tray
1 Pulley
w/banana plug
012-02149B
50 g Additional Mass for
gliders (4PL)
Rubber Band Bumpers
w/banana plug (3PL)
Mounting Screw for
End Stops (4PL)
1 Mass hanger
and Mass set
Hook attachment
w/banana plug
Bumper Blade on
cylinder w/banana
plug (2PL)
1 Wax filled cylinder
w/banana plug
Needle on cylinder
w/banana plug
2
scientific
Page 7

012-02149B
Equipment Setup
Assembling the Air Track
1. Use the screws and Allen wrenches provided and
attach the single and double leveling foot to the Air
Track U-channel as shown in Figure 2.
Adjusting
4 mm Allen
wrench
Single foot
Figure 2 Attaching the Leveling Feet
2. Install one end stop at
each end of the Air Track
using the mounting
screws included in the
accessory tray.
feet
5 mm Allen
wrench
Bracket
End stop
Leveling the Air Track
Place the Air Track on a stable, level table and rotate
the two adjustable feet until the Air Track is as level as
possible. A bubble level may be used to approximately
level the track.
The final leveling, however, must be accomplished in
the following manner:
➀ Connect the Air Track to the Air Supply and turn
the Air Supply on.
➁ Place a glider in the middle of the track without
initial velocity.
➂ Adjust the leveling screws until the glider remains
at its initial position, not accelerating in either
direction.
➦ NOTE: The glider may oscillate slightly
about its position. This movement is caused by
air currents from the air holes in the track and
should be considered normal.
Adjusting the Air Supply
The Air Supply PASCO Model SF-9216 is connected
to the Air Track by the air fitting on one end of the
track. The output of the blower should be adjusted so
that the glider just floats on the track. Excessive air
pressure may cause the glider to wander on the track,
even in the absence of an accelerating force.
scientific
Figure 3 Installing
End Stops
The Air Supply will slightly heat the Air Track,
causing it to expand. The adjustment beam under the
track has been set such that the track will be straight to
+/- .04 mm when warm, or after 5 minutes of operation
with the Air Supply.
3
Page 8

Accessories
Glider
The black anodized aluminum glider has a mass of
180 g ± 1 g and a length of 129 mm ±1 mm.
To increase the mass of the glider simply place the
supplied masses on the steel pins protruding from each
side of the glider.
012-02149B
Flags
When using photogates to measure the velocity of the
glider, insert the 100 mm flags in the top surface of
each glider to interrupt the photogate beam.
The glider itself may also be used as a "flag". If a flag
of different length is required, simply cut a piece of
thin cardboard or aluminum to the desired length and
tape it to the top of the glider.
Additional Masses
50 g each
➦ NOTE: Masses must always be added sym-
metrically (the same number on each side), or the
glider will not function properly.
Glider accessories, such as the rubber band bumpers,
are mounted in one of the holes located at each end of
the glider.
➦ NOTE: In most cases the accessories should
be mounted in the lower hole, so as not to interfere with any photogate operation.
These accessories will increase the mass of the glider
and must be taken into account in all calculations.
➧ IMPORTANT: If an accessory (such as the
bumper plate) is placed on one end of the glider,
then an accessory of equal mass (such as a
bumper or the bumper plate) should be
placed at the opposite end.
This way the glider
will remain
level on the
Air Track
and will not
tend to propel
itself in one
direction.
➦ NOTE: The following accessories mount to
the Air Track End Stop or the Glider via standard
4 mm plugs. Except for the Pulley, each accessory weighs approximately 10 grams.
Always load a glider symmetrically, one accessory on each end
Rubber Band Bumpers
These bumpers provide a soft collision, eliminating any
vibration of the glider as it collides with another glider
or an end stop.
4
scientific
Page 9

012-02149B
When mounted on the End Stops,
these bumpers may also be used
as glider launchers:
– Pull the glider
back until it
touches the nut
on the end of the
bumper.
– Release the
glider.
– Change the
impulse imparted to the glider by moving the
rubber band to a different groove in the bumper.
Bumper Plate
This plate mounts on the end of the glider and is
designed to collide with the rubber band bumper.
Hook
The hook may be mounted to the end or top of the
glider. It is used to attach a string to the glider.
Pulley
The pulley is mounted in the
bottom hole of the end stop,
opposite the air input. A string
attached to the glider, passed over
the pulley and attached to a
hanging mass on the other end
can be used to accelerate the glider.
➦ NOTE: To protect the glider,
do not let it hit the End Stop.
Rubber Band Bumper
here OR here
Wax Tube and Needle
The wax tube is mounted on the end of a glider for an
inelastic collision. After a number of collisions the wax
should be pressed into the tube to maintain adequate
adhesion with the needle.
The needle is mounted on the end of the second glider.
It needs to be positioned so the needle will stick into
the wax tube of the other glider once the two gliders
collide, causing the gliders to stick together.
➦ NOTE: The needle is covered by a small cork
for protection . When the needle is stored in the
accessory tray, replace the cork on the needle.
Air Track Mass/Hanger Set
2 g mass hanger
2 g mass (plastic )
10 g mass (metal)
5 g mass (metal)
scientific
1 g mass (plastic)
5
Page 10

Maintenance
012-02149B
Air Track
The only maintenance required is to keep the Air Track
surface clean and free of scratches or nicks. When the
unit is stored make sure that nothing can damage the
Air Track surface. If the track becomes nicked, such
that a protrusion on the surface hinders the free motion
of the glider, gently file or sand down the protrusion.
The PASCO Air Track is factory aligned so the deviation from linearity is less than ±.04 mm. The construction of the unit is designed that the track should remain
within these specifications for many years. However,
through excessive stress on the track it is possible that
it may get out of alignment. This condition produces an
uneven velocity of the glider as it travels along the
track. The glider will speed up and slow down as it
traverses the slight curves in the track.
Should uneven motion of the glider make use of the
product objectionable, the Air Track should then be
realigned. This procedure requires a special test tool
and we recommend that the unit be returned to
PASCO for adjustment. Please contact PASCO scientific for information on returning your Air Track for
alignment.
Glider
Gliders must be handled with care to maintain a
friction-free motion the Air Track. If any scratches or
nicks develop on those surfaces that float on the track
they must be removed with a file or sandpaper. If the
glider is dropped or bent out of alignment, it must be
straightened so its profile matches that of the Air
Track. If the angle between the two sides of the glider
is too small the glider will stick to the track. If the
angle is too large the glider will wobble as it moves on
the track.
Rubber Band Bumper
The rubber bands may deteriorate with time. They may
be replaced with any elastic band that produces the
desired launch and "bounce" characteristics.
➦ NOTE: To extend the life of the rubber
bands, remove them from the rubber band
bumpers when not in use. Also, excessive handling of the rubber bands may remove the
protective powder used to coat the rubber.
Experiments
The specifics of the experiments performed on the Air
Track are a function of the timing system used.
Therefore, the experiments are included with the
various timing systems available from PASCO.
Please reference the manuals provided with the following PASCO products:
• ME-9218 Air Track and Self-contained Photogate
System
• ME-9394 Air Track and Computer Photogate
System (Apple II)
• ME-9363A Air Track and Computer Photogate
System (IBM PC and compatible)
• ME-9336 Air Track and Computer Sonic Ranger
System (Apple II)
• ME-9391 Air Track and Computer Sonic Ranger
System (IBM PC and compatible)
• ME-9226 Air Track and Spark Timer System
• ME-9206A Photogate Timer
• ME-9215A Photogate Timer with Memory
• PI-8025 Counter/Timer/Frequency Meter
• SF-9297 Coupled Harmonic Oscillators
6
scientific
Page 11

012-02149B
Replacement Parts
Air Track Accessories (included):
Description Part No.
Mass/hanger set 655-001
Bumper with holder 655-002
Bumper blade 655-003
Needle 655-004
Wax tube 655-005
Glider hook 655-006
Glider 655-007
Additional glider mass 655-008
Pulley 655-009
100 mm Flag 655-011
End stop, fixed 655-014
Accessory Kit SF-9295
(in molded case)
Accessories available (not included):
Description Part No.
End stop, adjustable 655-010
25 mm Flag 655-012
U-shaped flag 655-013
2 m Hose SF-9298
scientific
7
Page 12

Recommended Equipment
012-02149B
Model SF-9216 Air Supply –
A variable speed air supply suitable to power one or
two Model SF-9214 Air Tracks.
Model SF-9217 T-Adaptor and Hose –
Permits operating two Air Tracks from one air supply.
Model SF-9224 Additional Glider Kit –
This kit includes one glider with two additional 50 g
masses, a bumper plate and a rubber band bumper.
ME-9239 Riser Block Kit –
This set of four aluminum riser blocks (.25 to 2 cm
thickness) tilt the Air Track to precise and repeatable
angles.
Model SF-9296 Electric Launcher –
This launcher, designed for use only with the PASCO
Air Track, launches the glider repeatedly with the same
impulse and velocity.
➦ Note: Requires a power supply. Refer to the
PASCO catalog.
SF-9297 Coupled Harmonic Oscillators –
The kit includes three gliders, six 50 g masses, springs
and connecting plugs, allowing experiments with up to
five gliders in coupled harmonic motion.
ME-9356 Force Transducer to Air Track Mounting
Kit –
Mounting the PASCO Force Transducer to the Air
Track enables measuring the impulse in an air track
collision.
ME-9206A Basic Photogate Timer –
A self-contained timer with resolution to 1.0 mS and
1% accuracy
ME-9215A Photogate Timer with Memory –
A self-contained timer with resolution to .1 mS, 1%
accuracy and a memory feature for taking collision
measurements.
ME-9204A Accessory Photogate –
Plugs into any PASCO Photogate Timer or Counter/
Timer for taking "pulse" or timing measurements over
longer distances.
PI-8025 Counter/Timer/Frequency Meter –
The capability of operating as two independent timers
with memory, provides a total of four measurements in
a single experiment.
8
scientific
Page 13

Technical Support
Feedback
If you have any comments about the product or
manual, please let us know. If you have any suggestions on alternate experiments or find a problem in the
manual, please tell us. PASCO appreciates any
customer feedback. Your input helps us evaluate and
improve our product.
To Reach PASCO
For technical support, call us at 1-800-772-8700
(toll-free within the U.S.) or (916) 786-3800.
fax: (916) 786-3292
e-mail: techsupp@PASCO.com
web: www.pasco.com
Contacting Technical Support
Before you call the PASCO Technical Support staff,
it would be helpful to prepare the following information:
➤ If your problem is with the PASCO apparatus,
note:
- Title and model number (usually listed on the
label);
- Approximate age of apparatus;
- A detailed description of the problem/sequence
of events. (In case you can’t call PASCO right
away, you won’t lose valuable data.);
- If possible, have the apparatus within reach
when calling to facilitate description of individual parts.
➤ If your problem relates to the instruction manual,
note:
- Part number and revision (listed by month and
year on the front cover);
- Have the manual at hand to discuss your ques-
tions.
Page 14

 Loading...