

Page 1

Instruction Sheet
for the PASCO
Model ME-8952
Centripetal Force Accessory
clamp-on
pulley
012-05294B
10/94
$1.00
side post
50g masses
plastic
indicator disk
spring
Introduction
The ME-8952 Centripetal Force Accessory is comprised
of two vertical posts which can be mounted to the
Rotating Platform with thumbscrews. These posts are
adjustable and can be positioned virtually anywhere along
the length of the platform. The radius indicator is at the
center of the apparatus so it can be clearly seen while the
apparatus is rotating. The PASCO Centripetal Force
Accessory can be used to experiment with centripetal
force and conservation of angular momentum. For the
centripetal force experiments it is possible to vary the
mass and radius to see the resulting change in the centripetal force. The force can also be held constant while other
quantities are varied. The Centripetal Force Accessory is
powered by hand and the rate of rotation can be counted
manually or read by a computer. Variable hanging masses
are included. This accessory requires the Rotating
Platform (ME-8951) to operate.
center post
rivet
100g mass with 3
open hooks
Equipment
The ME-8952 Centripetal Force Accessory includes:
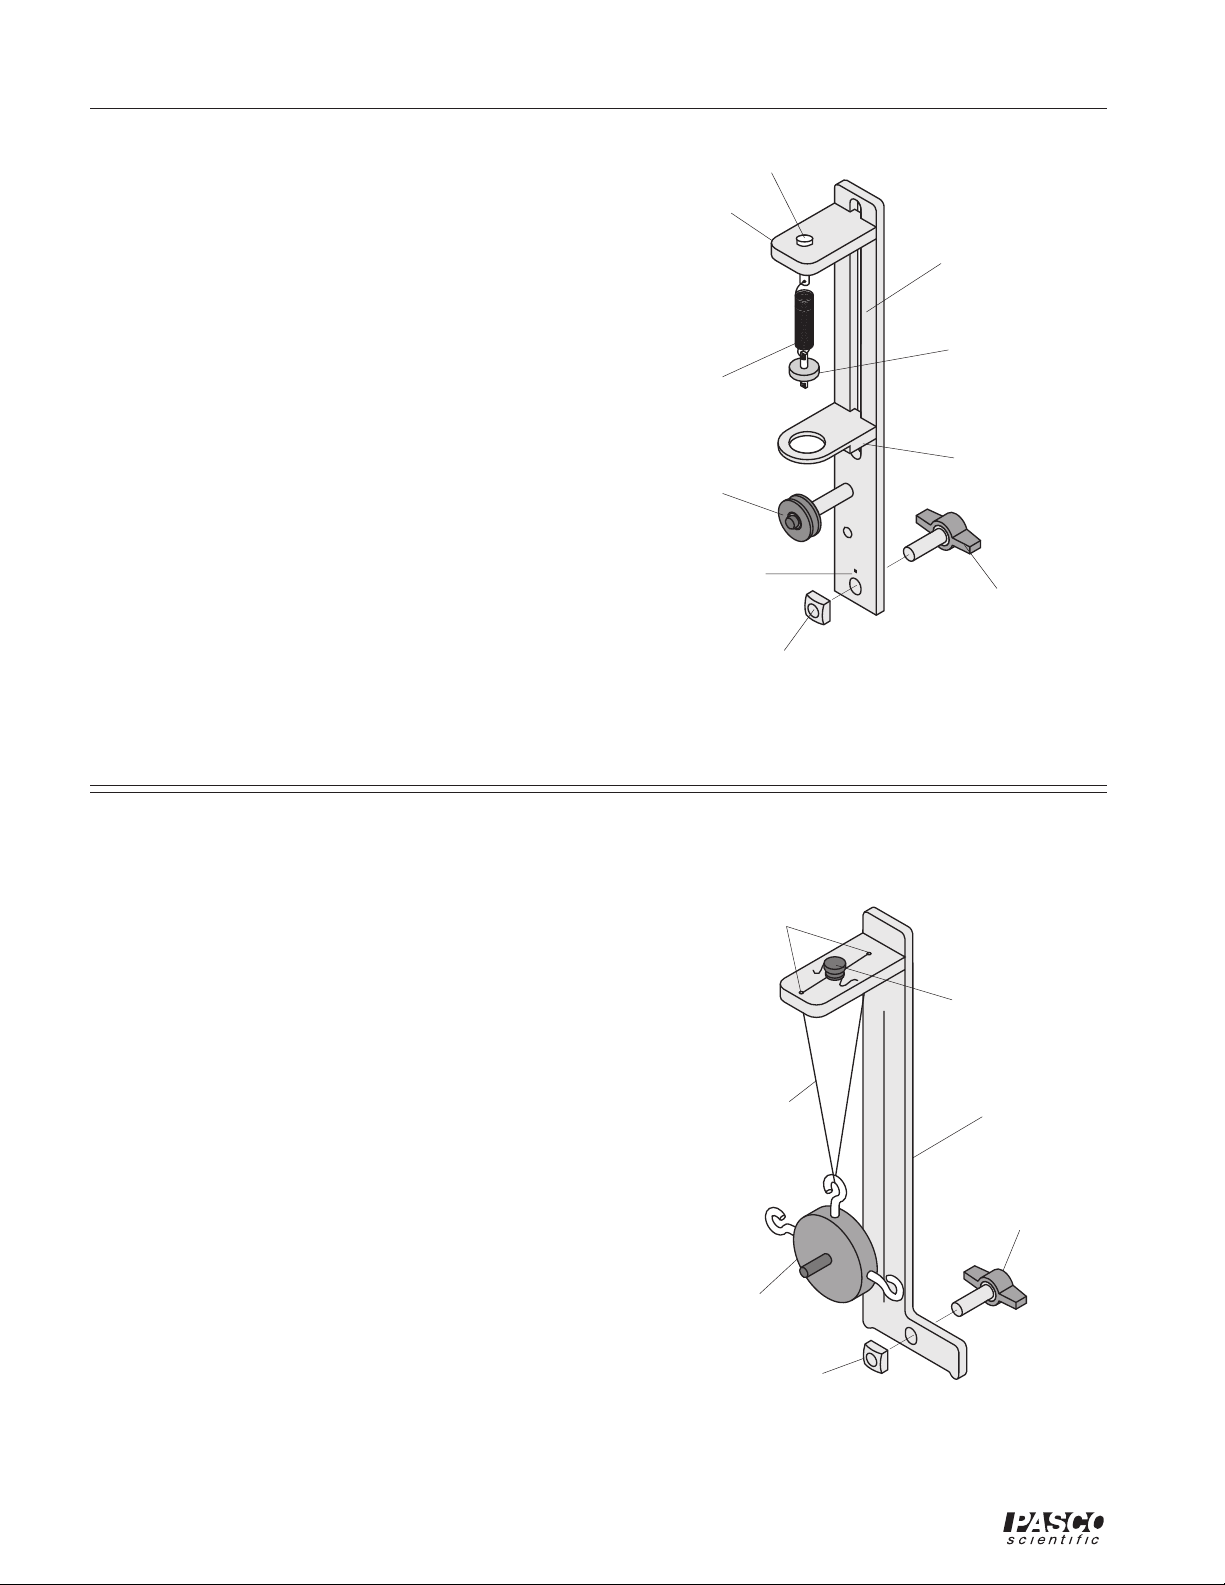
- center post that supports an indicator mechanism
which consists of a small pulley, a movable
spring holder, a movable indicator, a rivet, a
spring, and a plastic indicator disk
- side post for hanging hooked mass
- mass (100 g) with 3 open hooks
- 2 additional 50 gram masses
- clamp-on pulley
See the Complete Rotational Manual for experiment
guide.
10101 Foothills Blvd. • P.O. Box 619011 • Roseville, CA 95678-9011 USA
Phone (916) 786-3800 • FAX (916) 786-8905 • TWX 910-383-2040
© 1994 PASCO scientific
This instruction sheet written by: Ann and Jon Hanks and
edited by: Eric Ayars
better
ways to
teach physics
Page 2
Centripetal Force Accessory 012-05294B
rivet
Center Post Assembly
Assemble the center post as shown in Figure 1:
➀ Drop the rivet through the hole in the top of the spring
bracket. Connect one end of the spring to the hole in
the end of the rivet. Connect the plastic indicator disk
to the other end of the spring.
➁ Tie one end of a string (about 30 cm long) to the bot-
tom of the plastic indicator disk and tie a loop in the
other end of the string.
➂ Insert the indicator bracket into the slot on the center
post, placing it below the spring bracket. Tighten the
thumb screw.
spring
bracket
spring
pulley
center post
plastic
indicator
disk
indicator
bracket
➃ Attach the pulley in the higher of the two holes on the
center bracket.
➄ Insert the thumbscrew at the bottom of the center post
and attach the square nut.
Side Post Assembly
Assemble the side post as shown in Figure 2:
➀ Insert the thumb screw at the bottom of the side post
and attach the square nut.
➁ Using a string about 30 cm long, tie the string around
the screw head on the top of the side post. Then thread
the other end of the string down through one of the
holes in the top of the side post and then back up
through the other hole. Do not pull the string taut.
reference mark
(center of post)
square nut
Figure 1: Center Post Assembly
holes for
thread
single length of
thread (30cm long)
thumbscrew
nylon
thumbscrew
side post
➂ Loosen the screw on the top of the side post and wrap
the loose end of the string around the threads of the
screw and tighten the screw.
thumbscrew
100g mass
square nut
Figure 2: Side Post Assembly
2
Page 3
012-05294B Centripetal Force Accessory
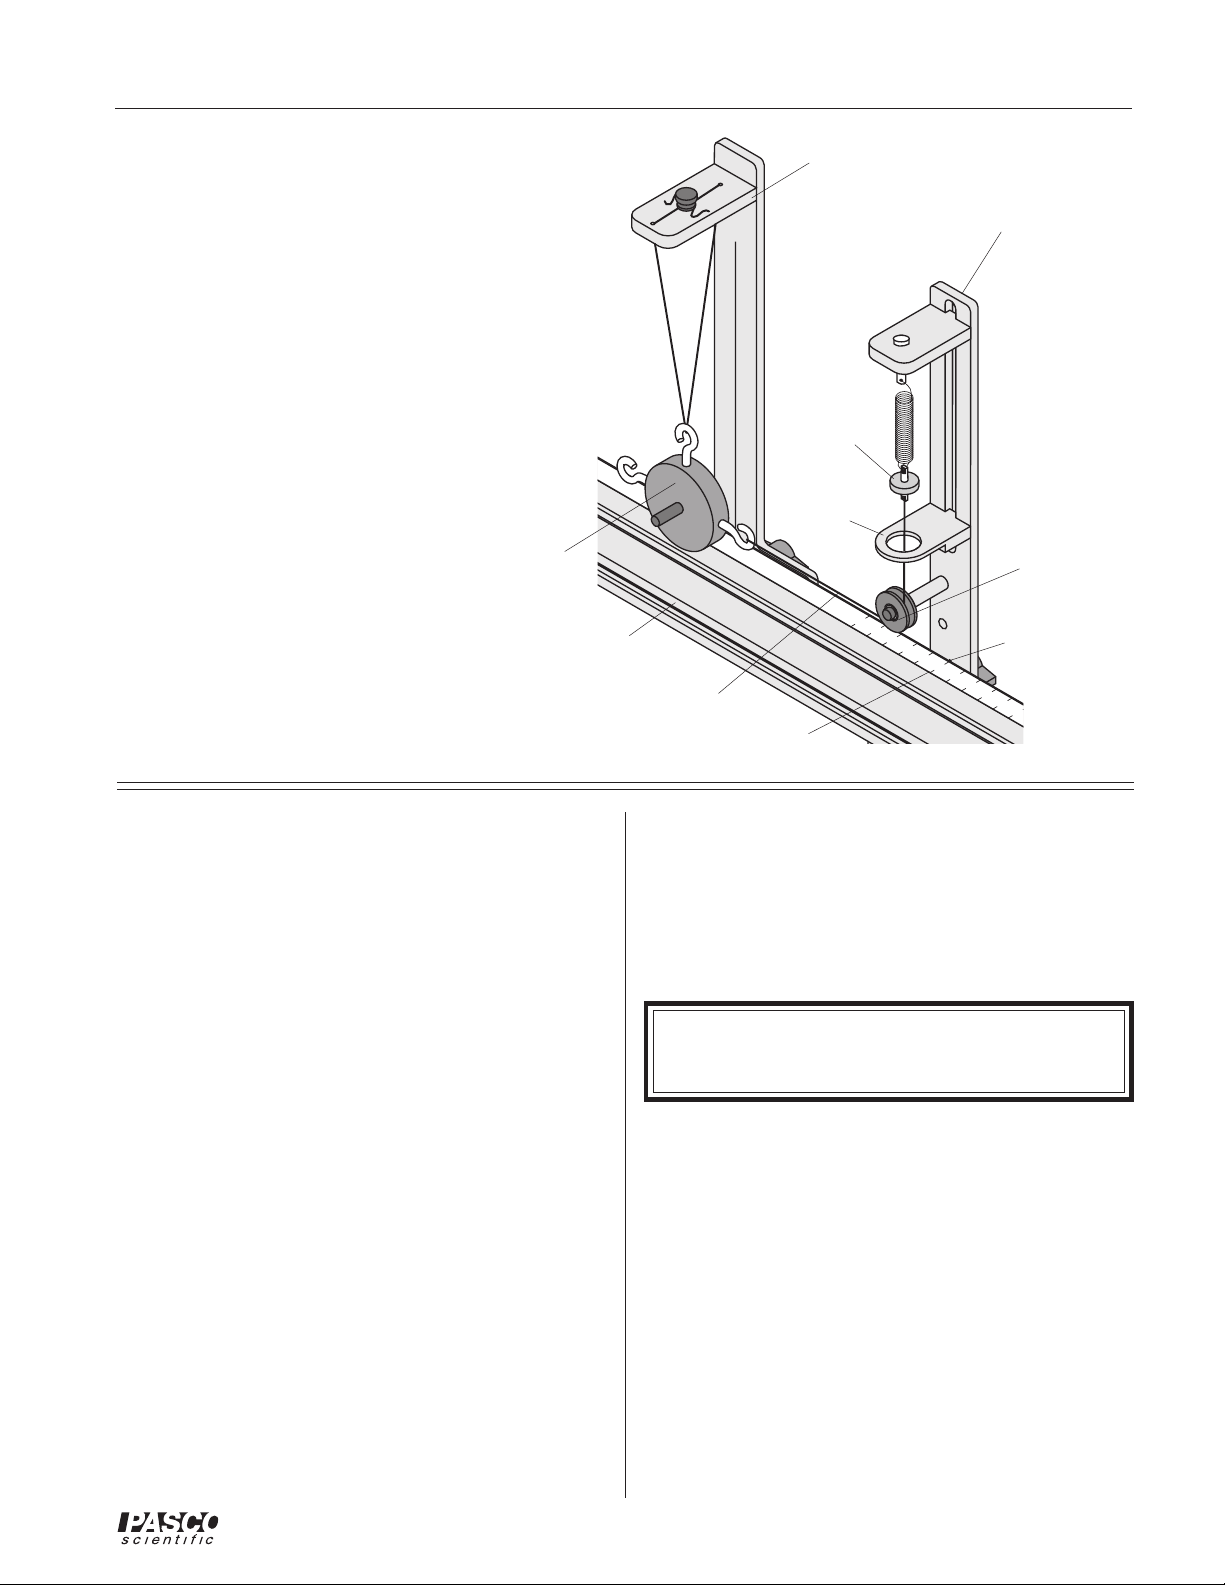
Threading the Centripetal Force
Accessory
➀ Mount the center post in the T-slot on the side of the
track that has the rule. Align the line on the center post
with the zero mark on the rule and tighten the thumb
screw to secure it in place. Then mount the side post
on the same side of the track. See Figure 3.
➁ Hang the object from the string on the side post and
adjust the height of the object so the string coming
from the center post will be level.
100g mass
rotating
platform
Figure 3: Threading the
Centripetal Force Accessory
thread
zero mark
of rule
side post
plastic
indicator
disk
indicator
bracket
center post
pulley
5
4
3
2
1
0
1
2
3
4
reference mark
(center of post)
5
Limited Warranty
PASCO scientific warrants this product to be free from
defects in materials and workmanship for a period of one
year from the date of shipment to the customer. PASCO
will repair or replace, at its option, any part of the product
which is deemed to be defective in material or workmanship. This warranty does not cover damage to the product
caused by abuse or improper use. Determination of
whether a product failure is the result of a manufacturing
defect or improper use by the customer shall be made
solely by PASCO scientific. Responsibility for the return
of equipment for warranty repair belongs to the customer.
Equipment must be properly packed to prevent damage
and shipped postage or freight prepaid. (Damage caused
by improper packing of the equipment for return shipment will not be covered by the warranty.) Shipping
costs for returning the equipment, after repair, will be
paid by PASCO scientific.
Equipment Return
Should this product have to be returned to PASCO
scientific, for whatever reason, notify PASCO scientific
by letter or telephone BEFORE returning the product.
Upon notification, the return authorization and shipping
instructions will be promptly issued.
➤ NOTE: NO EQUIPMENT WILL BE AC-
CEPTED FOR RETURN WITHOUT AN AUTHORIZATION.
When returning equipment for repair, the unit must be
packed properly. Carriers will not accept responsibility
for damage caused by improper packing. To be certain
the unit will not be damaged in shipment, observe the
following rules:
➀ The carton must be strong enough for the item
shipped.
➁ Make certain there is at least two inches of packing
material between any point on the apparatus and the
inside walls of the carton.
➂ Make certain that packing material cannot shift in the
box, or become compressed, thus letting the instrument come in contact with the edge of the box.
3
Page 4

Centripetal Force Accessory 012-05294B
Technical Support
Feed-Back
If you have any comments about this product or this
manual please let us know. If you have any suggestions
on alternate experiments or find a problem in the manual
please tell us. PASCO appreciates any customer feedback. Your input helps us evaluate and improve our
product.
To Reach PASCO
For Technical Support call us at 1-800-772-8700 (tollfree within the U.S.) or (916) 786-3800.
Internet: techsupp@PASCO.com
Contacting Technical Support
Before you call the PASCO Technical Support staff it
would be helpful to prepare the following information:
• If your problem is computer/software related, note:
Title and Revision Date of software.
Type of Computer (Make, Model, Speed).
Type of external Cables/Peripherals.
• If your problem is with the PASCO apparatus, note:
Title and Model number (usually listed on the label).
Approximate age of apparatus.
A detailed description of the problem/sequence of
events. (In case you can't call PASCO right away,
you won't lose valuable data.)
If possible, have the apparatus within reach when
calling. This makes descriptions of individual parts
much easier.
• If your problem relates to the instruction manual,
note:
Part number and Revision (listed by month and
year on the front cover).
Have the manual at hand to discuss your questions.
4
 Loading...