

Page 1
®
Instruction Sheet
012-10384A
PAStrack
ME-6960
1
2
3
4
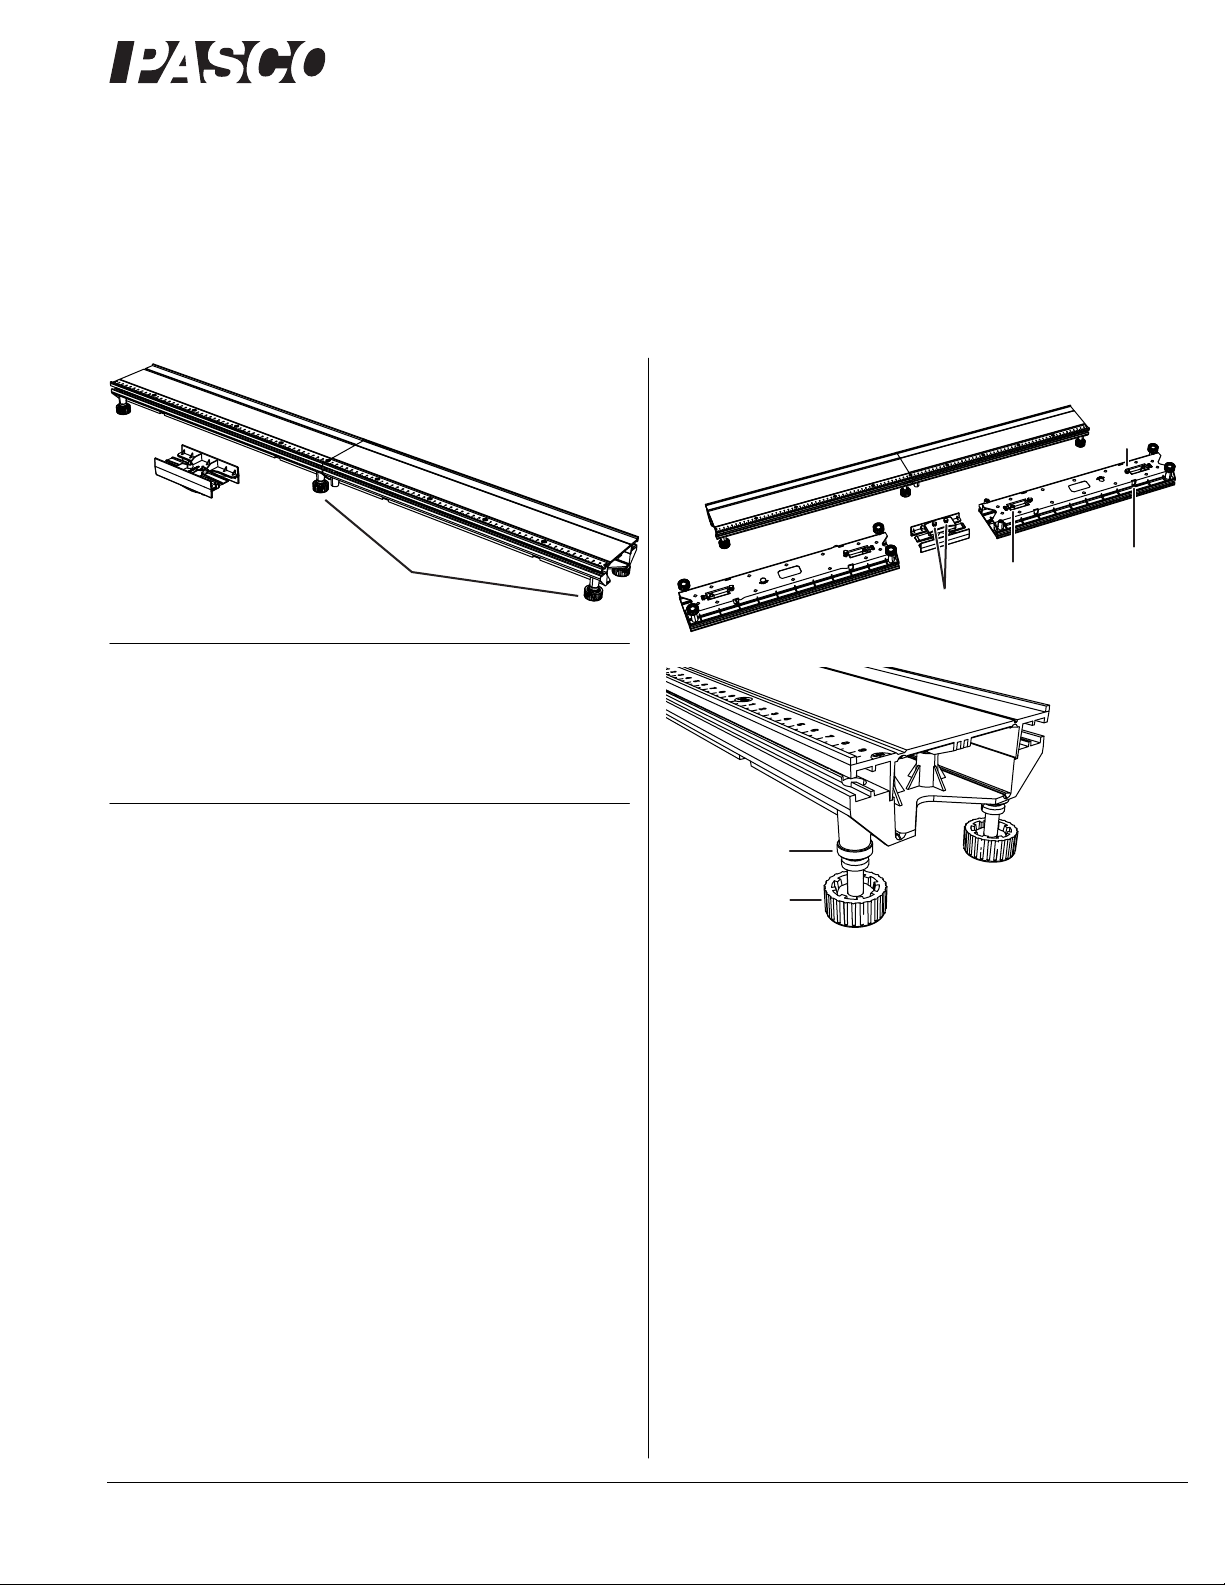
Included Equipment
1. 0 cm to 50 cm section
2. 50 cm to 100 cm section
3. Connectors (2 pieces)
4. Leveling Feet with locknuts (6 pieces)
Quick Start
1. Connect the track sections using one of the connector pieces.
Parts of the PAStrack
a
e
f
Figure 1
c
b
d
2. Tighten the screws on the connector.
Introduction
The PAStrack is designed for use with PASCO carts, dynamics
system accessories, and optics carriages.
The model ME-6960 track consists of two sections that can be
joined together with the included connector and split apart for
storage. Together the two sections form a 1 m track. Each
PAStrack kit includes an extra connector, allowing any number of
tracks to be joined together.
You can use the PAStrack on a level surface or elevate one end to
make an inclined plane.
800-772-8700 www.pasco.com
a. Connector screws
b. Release tab
c. Rod clamp screw
d. Rod clamp hole
e. lock nut
f. foot
Assembly
1. Slide a connector piece into the “50 cm” end of one track
section. Push it hard until you hear it snap.
Page 2
PAStrack ME-6960
2. Slide the other track section onto the connector piece. Push it
until it snaps.
3. Turn the track upside down and tighten the screws on the
connector (part a in figure 1).
Leveling
1. Set the track upright on a level surface.
2. Place a cart on the track to test it for level.
3. Adjust the feet to make the track straight and level.
4. Tighten the locknut of each foot (part e in figure 1).
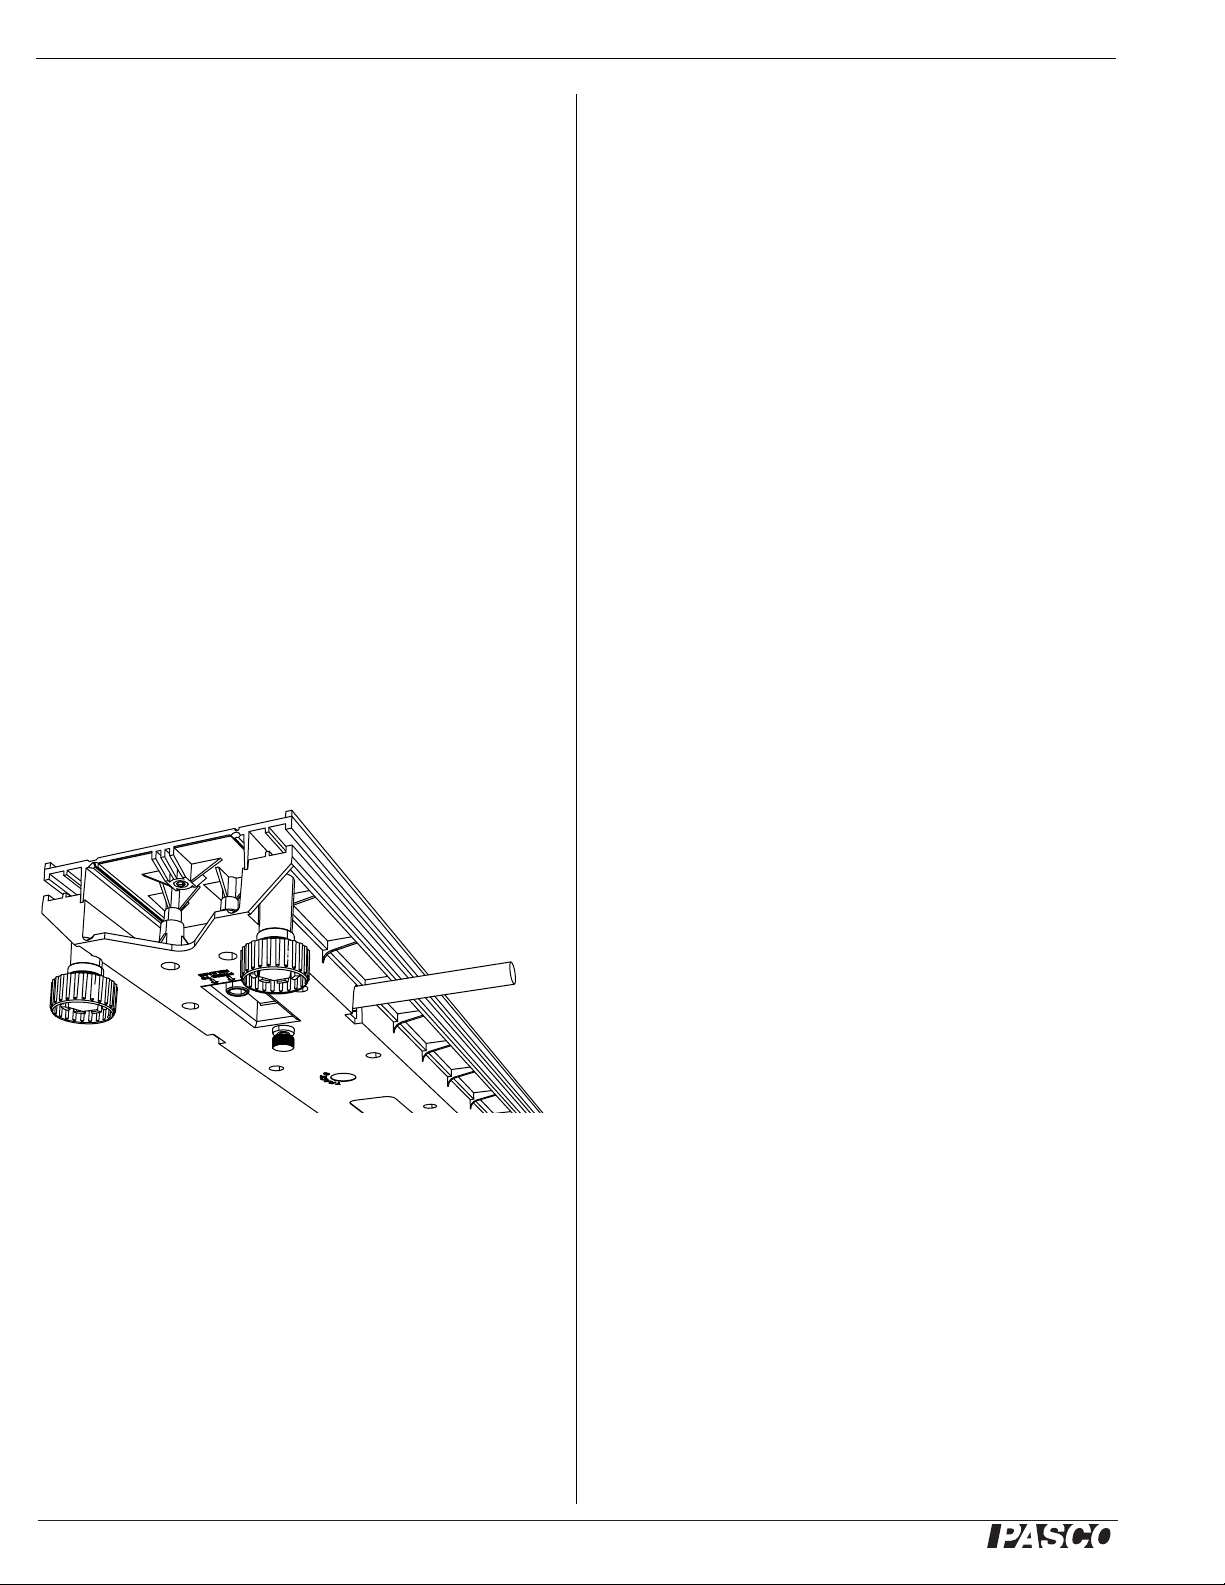
Rod Mounting
You can use a horizontal rod to elevate one end of the PAStrack
to incline it or two horizontal rods to raise the entire track for display. The PAStrack accepts rods up to 9.5 mm in diameter (such
as PASCO part SA-9242).
Insert a rod into one of the rod clamp holes (figure 2) and secure
it by tightening the rod clamp screw (part c in figure 1). Clamp
the horizontal rod to a vertical rod.
For Best Results
• Engage and disengage each new connector several times to
break it in and make subsequent assembly easier.
• If one end of the PAStrack is elevated, ensure that the connector screws are tightened to prevent the track from bowing.
• If you are using multiple PAStracks joined together on a
level surface, leave the connector screws loose. This will
make each joint slightly flexible and allow you to use the
feet to level each section separately.
• To protect your PAStrack during storage, disassemble it and
keep it in its original box.
Technical Support
For assistance with any PASCO product, contact PASCO at:
Address: PASCO scientific
10101 Foothills Blvd.
Roseville, CA 95747-7100
Phone: 916-786-3800 (worldwide)
800-772-8700 (U.S.)
Fax: (916) 786-7565
Web: www.pasco.com
Email: support@pasco.com
Figure 2
Disassembly
1. Loosen the connector screws.
2. Press and hold the release tabs on the bottom of the track
(part b in figure 1).
3. Pull the track sections apart.
Limited Warranty For a description of the product warranty, see the
PASCO catalog.
Copyright The PASCO scientific 012-10384A
Sheet
is copyrighted with all rights reserved. Permission is granted to
non-profit educational institutions for reproduction of any part of this manual, providing the reproductions are used only in their laboratories and
classrooms, and are not sold for profit. Reproduction under any other circumstances, without the written consent of PASCO scientific, is prohibited.
Trademarks PASCO and PASCO scientific are trademarks or registered
trademarks of PASCO scientific, in the United States and/or in other countries. All other brands, products, or service names are or may be trademarks or service marks of, and are used to identify, products or services
of, their respective owners. For more information visit
www.pasco.com/legal.
PAStrack Instruction
2
®
 Loading...