

Page 1

Parallels Remote
Application Server
Parallels Client for Android User's Guide
v15.5
Page 2

Parallels International GmbH
Vordergasse 59
8200 Schaffhausen
Switzerland
Tel: + 41 52 672 20 30
www.parallels.com
Copyright © 1999-2016 Parallels International GmbH or its affiliates. All rights reserved.
This product is protected by United States and international copyright laws. The product’s underlying technology,
patents, and trademarks are listed at http://www.parallels.com/about/legal/.
Microsoft, Windows, Windows Server, Windows Vista are registered trademarks of Microsoft Corporation.
Apple, Mac, the Mac logo, OS X, macOS, iPad, iPhone, iPod touch are trademarks of Apple Inc., registered in the US
and other countries.
Linux is a registered trademark of Linus Torvalds.
All other marks and names mentioned herein may be trademarks of their respective owners.
Page 3

Contents
Introduction ...............................................................................................................5
Install Parallels Client for Android
Create a Connection
Create a Connection Manually .......................................................................................... 7
Create a Remote Application Server Connection..................................................................... 7
Create a Standard RDP Connection........................................................................................ 9
Import Existing Connections............................................................................................ 10
.................................................................................................7
.............................................................................6
Work With a Remote Server....................................................................................11
Remote Application Server Connection ........................................................................... 12
Application Toolbar................................................................................................................ 14
Standard RDP Connection.............................................................................................. 17
Launch Published Apps from Android Device.................................................................. 18
Edit Connection Settings ........................................................................................19
Connection Settings........................................................................................................ 22
Advanced Settings.......................................................................................................... 24
Display .................................................................................................................................. 26
Printing.................................................................................................................................. 28
Local Resources.................................................................................................................... 30
Sound redirection .................................................................................................................. 31
Experience ............................................................................................................................ 32
Other..................................................................................................................................... 34
Remove a Connection..................................................................................................... 35
Edit Parallels Client Settings
General Settings ............................................................................................................. 37
Remote Screen Settings .................................................................................................38
Security Settings ............................................................................................................. 38
User Input Settings ......................................................................................................... 39
Other Settings................................................................................................................. 39
About Parallels Client ...................................................................................................... 40
Troubleshootin
g ......................................................................................................41
...................................................................................36
Page 4

Contents
Index ........................................................................................................................42
Page 5

C HAPTER 1
Introduction
About Parallels Client for Android
Parallels Client for Android is an app that allows you to connect to Remote Application Server from
Android devices.
About This Guide
Read this guide to learn how to:
• install Parallels Client for Android (p. 6);
• establish
• work with re
• edit connecti
• edit Parallels Client settings (p. 36);
• get help with Parallels Client (p. 41).
a connection to Remote Application Server (p. 7);
mote servers from Android devices (p. 11);
on settings (p. 19);
Page 6

C HAPTER 2
Install Parallels Client for Android
System Requirements
To install Parallels Client, you must have an Android device with Android version 4.0.3 or later.
Note: To learn how to check the version of Android on your device, please refer to the device
manufacturer's documentation.
Installation Procedure
The preferred way to install Parallels Client is to follow the instructions from the invitation email.
Your Parallels Remote Application Server administrator should send you this email.
Another way to install Parallels Client is to install it from Google Play. Do the following:
1 On your Android device, open Google Play.
Note: If you don't have Google Play on your Android device, you can install Parallels Client from
http://www.parallels.com/products/ras/download/links/#android. However, before installing the client,
allow Android to install from unknown sources in the Android security settings.
2 Search for Parallels Client.
3 Tap Install and follow the onscreen instructions.
Page 7

C HAPTER 3
Create a Connection
Once Parallels Client for Android is installed on your mobile device, you need to connect to Remote
Application Server. You can do one of the following to establish a connection:
• The easiest way to create a connection is to use an invitation email from your system
administrator. Open the email on your Android device, tap the download link, install Parallels
Client, and tap the "Configure" link. Parallels Client will open and configure connection to
Remote Application Server automatically.
• If you know the remote server IP address or host name and user's credentials, you can create a
connection manually (p. 7).
• If you have a
connections (p. 10).
n older version of Parallels Client on your Android device, you can import existing
In This Chapter
Create a Connection Manually .................................................................................. 7
Import Existing Connections .....................................................................................10
Create a Connection Manually
If you know the remote server IP address or host name and user's credentials, you can create a
connection manually. There are two types of connections:
• Remote Application Server. If you establish this type of connection, you will see the
applications and desktops published on the Parallels Remote Application Server. You can
launch and work with these applications.
• Standard RDP. If you choose this type of connection, you will be able to work with the remote
server desktop the same way you would if connected via the Microsoft RDP client.
Read on the following topics for more details.
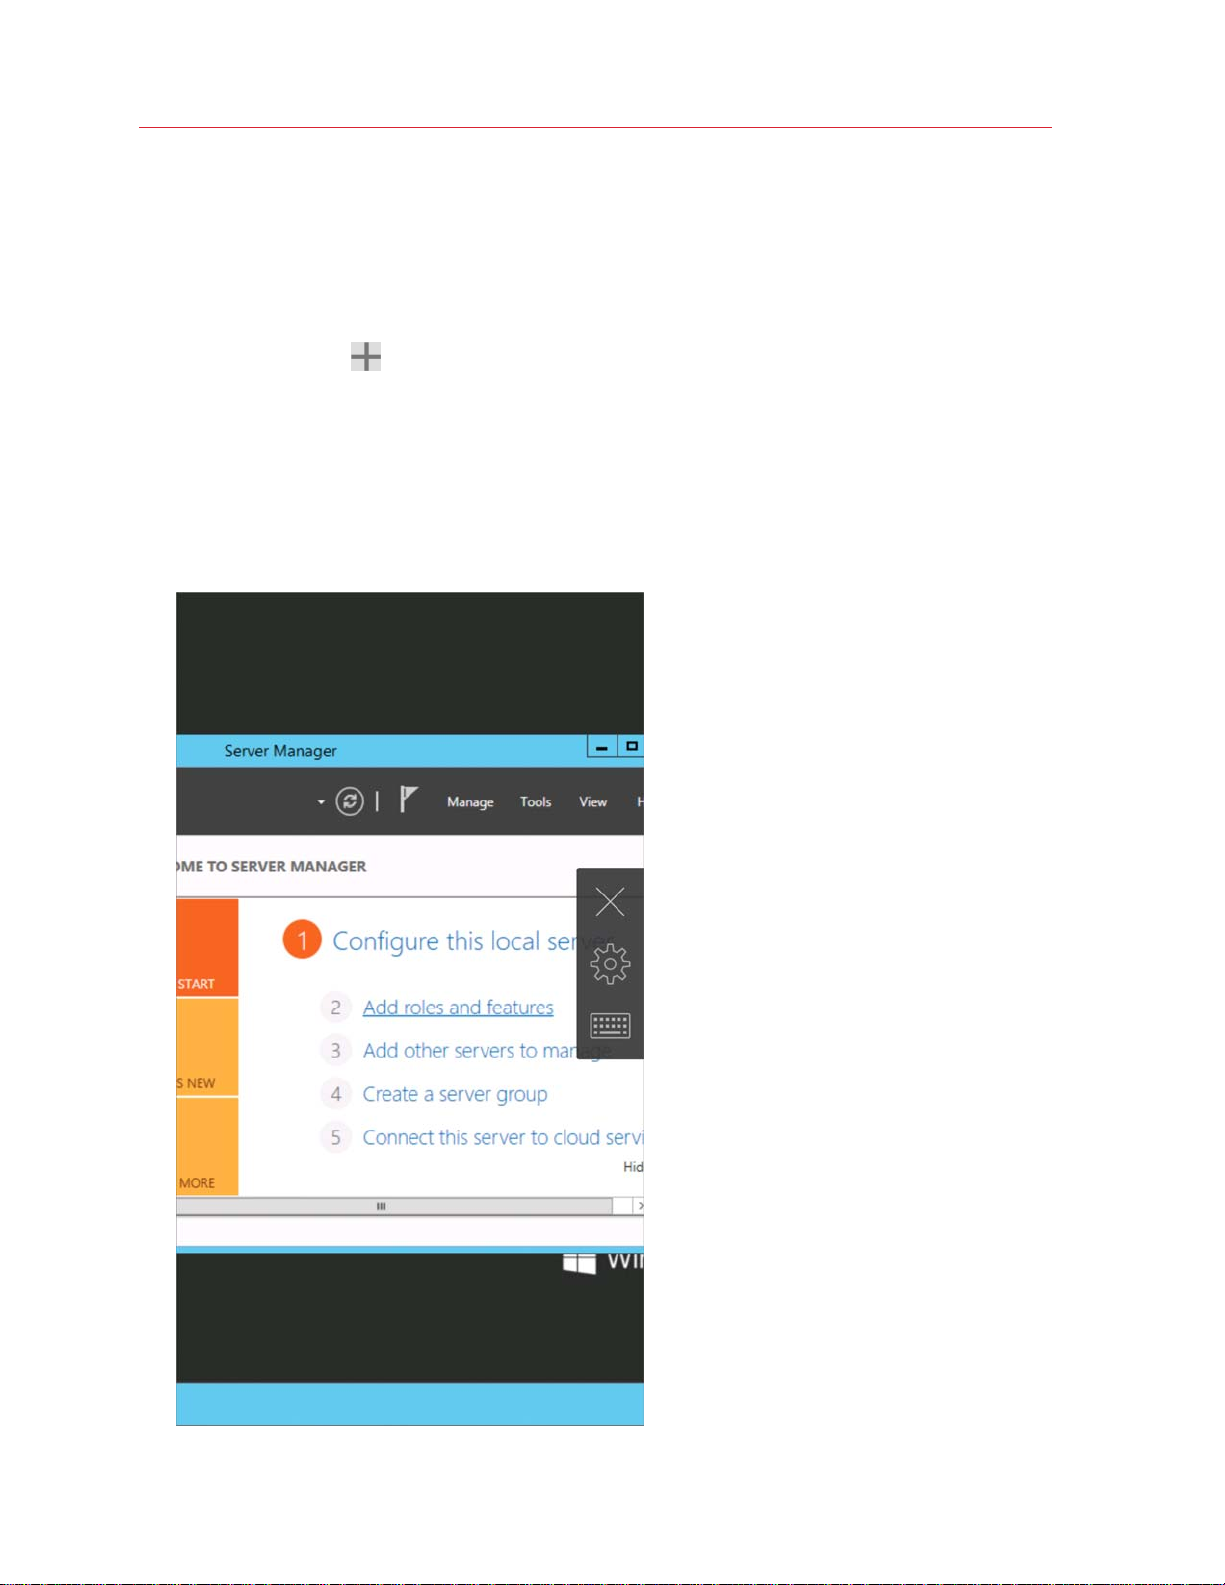
Create a Remote Application Server Connection
To create a Remote Application Server connection, do the following:
1 Open Parallels Client.
2 Tap the Plus icon
in the top right corner.
Page 8
Create a Connection
3 Tap Remote Application Server.
4 Specify the Server address and User name settings and tap Connect.
5 Enter the user's password and tap OK.
6 If the connection was successful, you will see the published applications that you can use. If
you receive an error, verify that the connection and logon information is entered correctly and
try again.
8
Page 9
Create a Standard RDP Connection
To create an RDP connection, do the following:
1 Open Parallels Client.
Create a Connection
2 Tap the Plus icon
in the top right corner.
3 Tap Standard RDP.
4 Specify the server address and tap Connect.
5 Enter the user's credentials and tap OK.
6 If the connection was successful, you will see the remote desktop and be able to start working
with the server. If you receive an error, verify that the connection and logon information is
entered correctly and try again.
9
Page 10

Create a Connection
Import Existing Connections
If you have Parallels Client v15.0 with configured connections on your Android device, you can
import these connections into a newer version. Do the following:
1 Open Parallels Client.
2 Tap the
icon in the top right corner and choose Migrate settings.
10
Page 11

C HAPTER 4
Work With a Remote Server
To connect to a remote server, just tap a connection in the Connections list. Read this chapter to
learn what you can do when connected to a remote server via a Remote Application Server
connection (p. 12) and via an RDP connection (p. 17).
In This Chapter
Remote Application Server Connection .................................................................... 12
Standard RDP Connection ....................................................................................... 17
Launch Published Apps from Android Device ........................................................... 18
Page 12
Work With a Remote Server
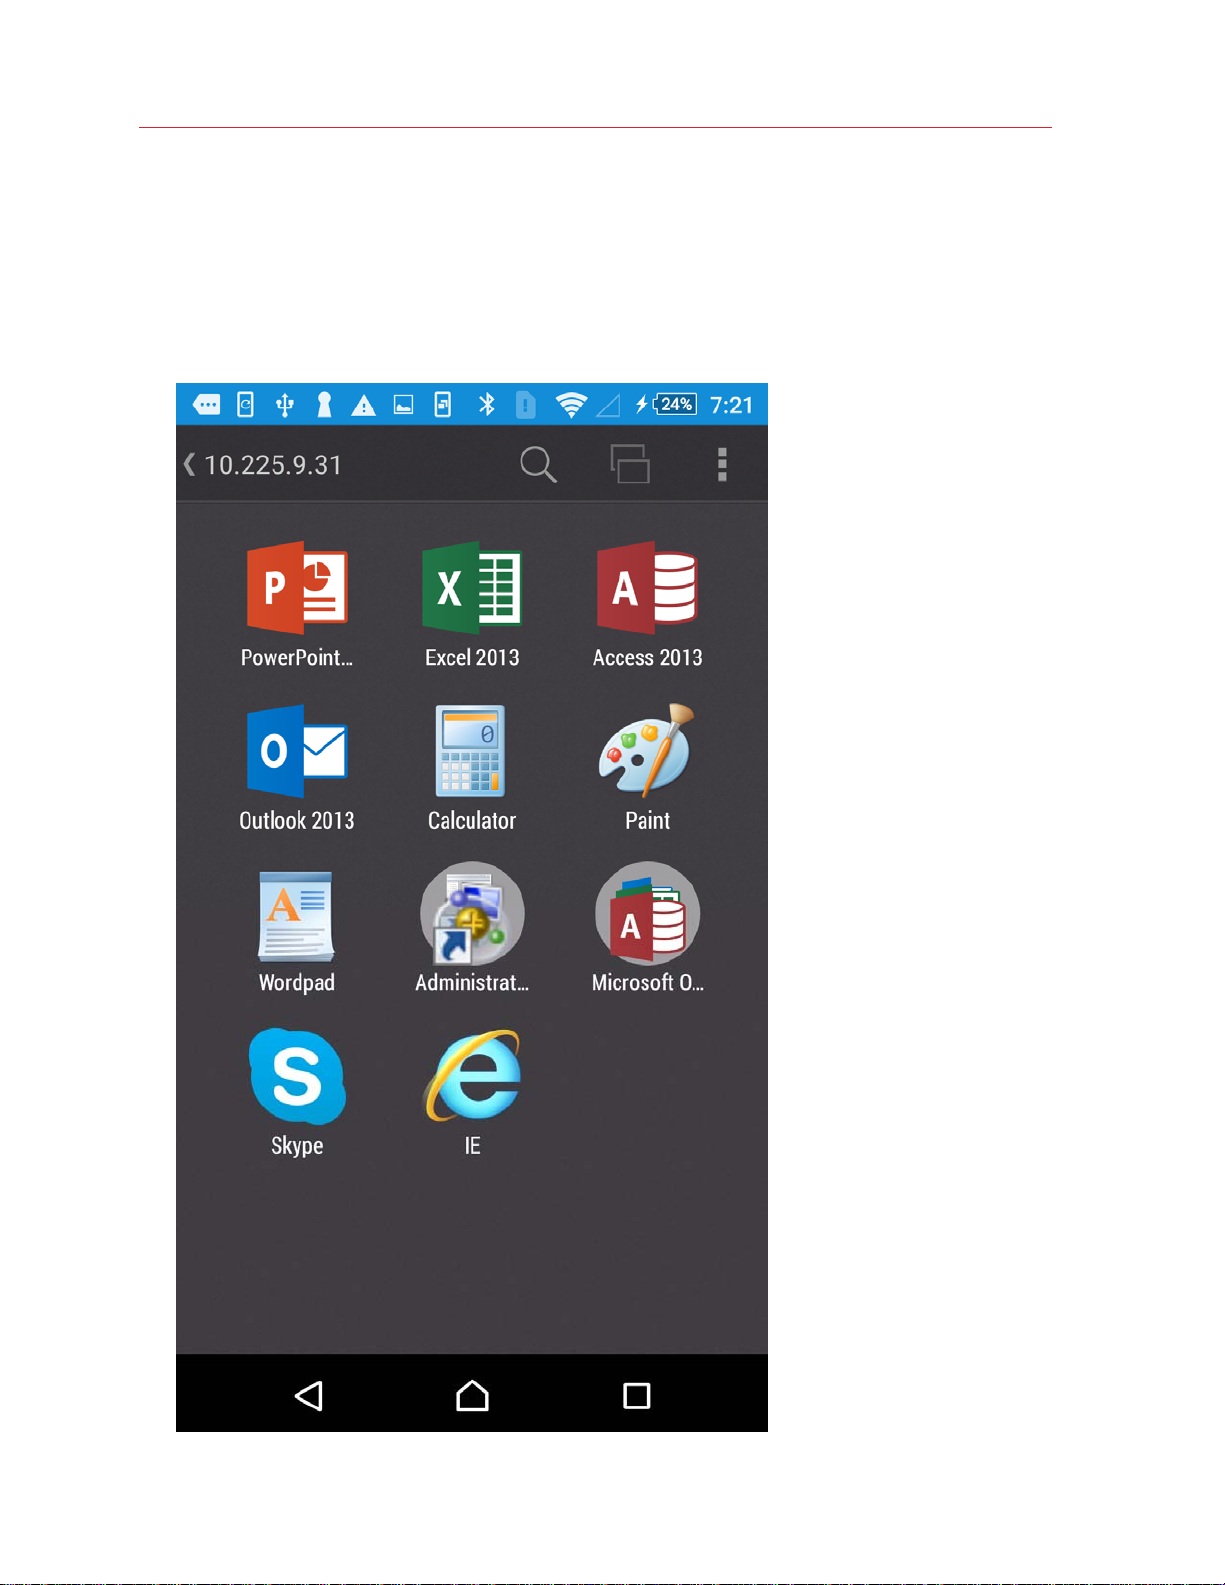
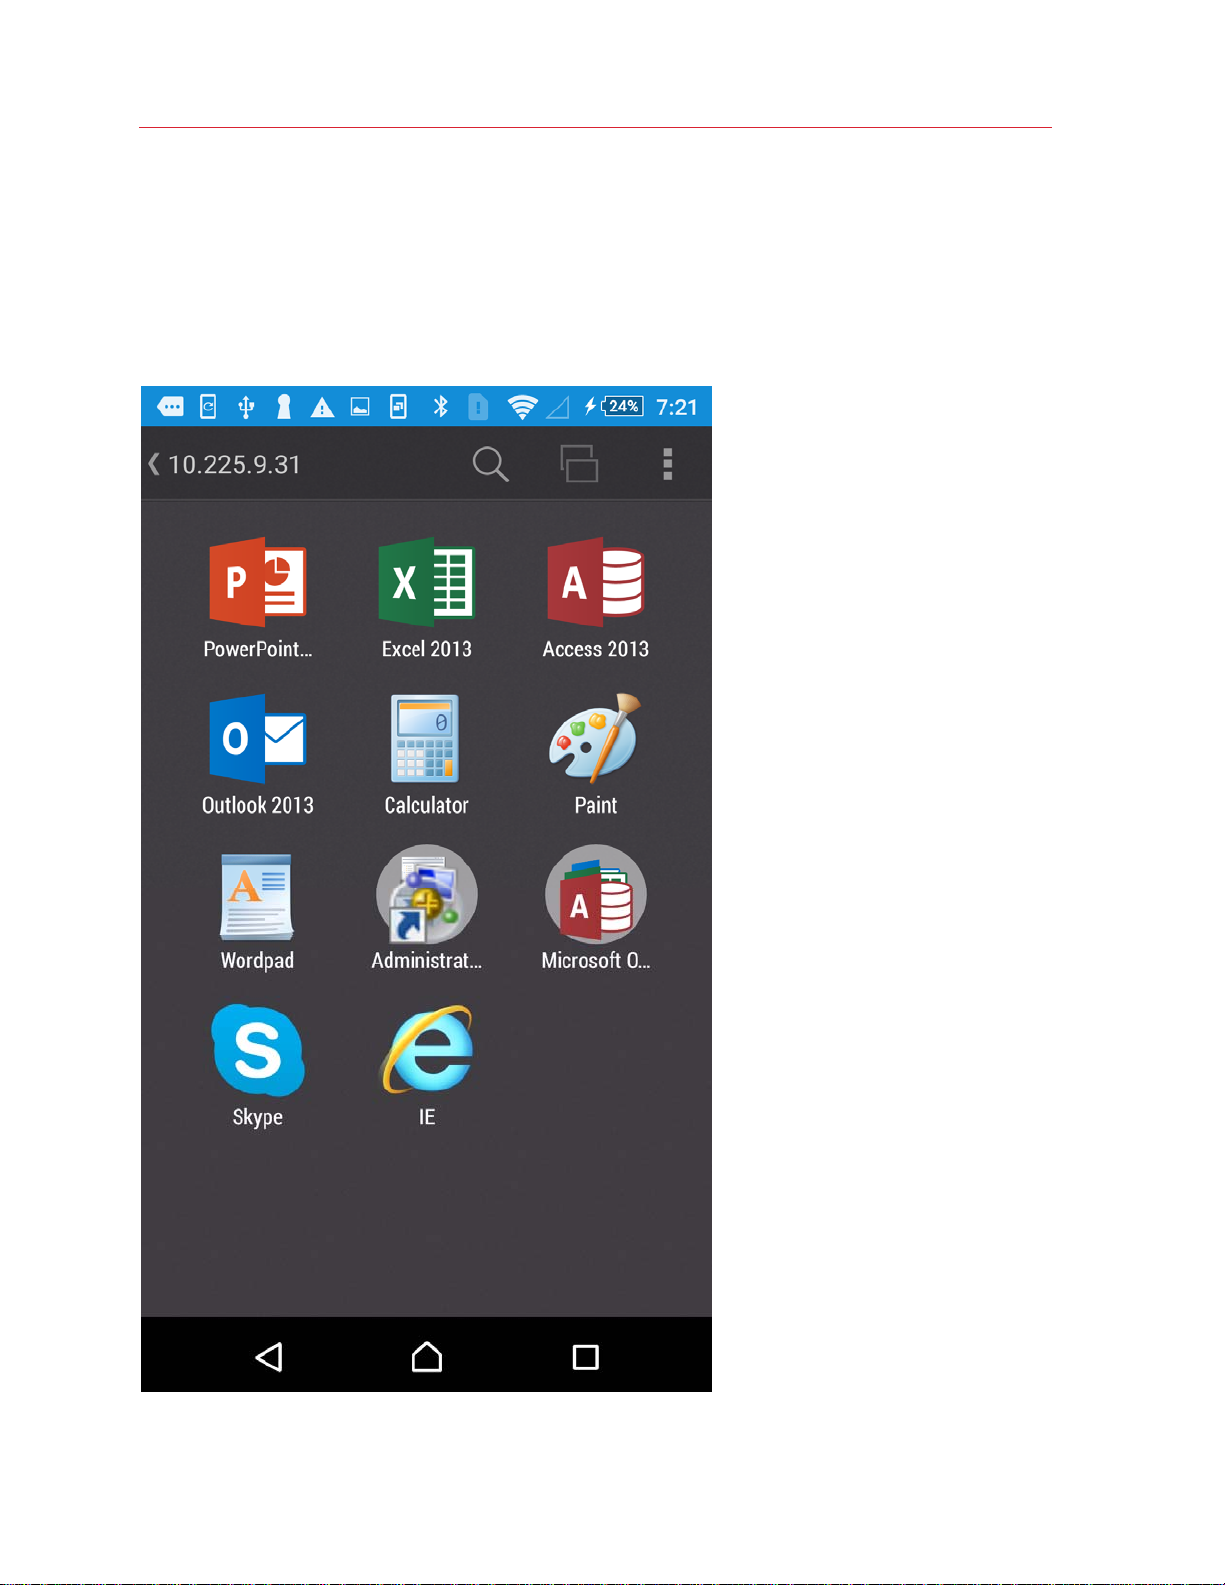
Remote Application Server Connection
When connected to a remote server via a Remote Application Server connection, Parallels Client
shows the App Launcher screen. On this screen, you can find all the applications published for the
user you used to connect to the remote server.
12
Page 13
Work With a Remote Server
Here's what you can do on the App Launcher screen:
Launch an application
To launch an application, just tap its icon. If you launched an app, read this topic (p. 14) to learn
how to use Application Toolbar.
Search for applications
If there's a lot of applications, use the Looking glass icon at the top of the screen to find the
application you need.
Switch between applications
If you have two or more applications running at the same time, tap App Switcher to easily
switch between the application windows.
Close applications
To close a running application, tap App Switcher and tap Close on the application you want to
close.
Additional actions
Tap the icon in the top right corner to open the menu that allows you to perform the following
actions:
Note: This icon may be absent if your Android device has a physical or virtual menu button. Use this
button instead.
13
Page 14

Work With a Remote Server
• Refresh. Tap this item to refresh the list of published applications and connection settings.
• Change domain password. Tap this item to change the user's domain password. To be able
to change this password, you must know the current password.
• Settings. Tap this item to display and edit the Parallels Client settings (p. 36).
• Troubleshooting. Tap this item to g
• Log off. Tap this ite
m to terminate your session and return to the list of connections.
et help with Parallels Client (p. 41).
Return to the Connections list without terminating your session
To return to the list of your connections without terminating your current connection, tap the left
arrow in the top left corner of the screen.
Application Toolbar
When you tap an app icon in App Launcher (p. 12), the application opens. Application Toolbar is
displayed on the right side of the screen:
This toolbar has essential system functions and is always there when you need it. You can move
the toolbar on the right side of the screen by dragging it up or down.
14
Page 15

Work With a Remote Server
Tap
continue to run on the remote server.
Tap to display or hide the keyboard.
Tap
App Switcher displays remote applications that you have currently running on your device and the
App Launcher (p. 12) (the rocket) icon. To switch to an application, tap it i
display App Launcher, tap the rocket icon. When in App Launcher, you can open App Switcher by
clicking the same double-window icon at the top of the screen. You can then tap an application to
switch to.
Tap
more menu items if needed.
to hide the remote application screen and return to App Launcher. Your session will
to display App Switcher at the bottom of the screen.
n App Switcher. To
to open the menu bar at the bottom of the screen. You can swipe it left or right to see
The menu bar extends the toolbar with more system functions. Please note that some of the menu
bar items function as a switch, which means that if you tap an item, the corresponding feature is
turned on and the menu item is displayed in red. To turn it off, you have to open the menu bar
again and tap the item one more time.
The menu bar contains the following:
• Additional keys. When enabled, additional keyboard keys are displayed at the bottom of the
screen.
• Mouse pointer. Tap this icon to display or hide the mouse pointer. Once the pointer is visible,
swipe the screen to move the pointer and tap the buttons at the bottom to imitate a left or right
click.
• Desktop resolution. Tap this icon to choose the screen resolution that best fits your needs.
You can choose between Best for your device, More space, or set a custom resolution.
• Microphone. Tap this icon to mute or unmute the device microphone.
• Printing. Tap this icon to modify printing settings (p. 28).
• Session information. T
ap this icon to see the detailed information about your session.
15
Page 16

Work With a Remote Server
• Help. Tap Help to get help (p. 41) with Parallels Client or open
gestures.
the tutorial about using
16
Page 17

Work With a Remote Server
Standard RDP Connection
When connected to a remote server via a standard RDP connection, Parallels Client shows the
remote desktop:
17
Page 18

Work With a Remote Server
You can start working with the remote computer the same way you would as if you were sitting in
front of it. Application Toolbar (p. 14) will make your working process more comfortable.
Launch Published Apps from Android Device
When a Parallels Remote Application Server administrator publishes any applications for your user
account, he or she can select the following 2 options:
• Create shortcut on Desktop. If this option is selected for a published app, the app shortcut
will appear on the desktop of your Android device after the first connection to Remote
Application Server. When you need to launch this application, just tap its shortcut on the
Android desktop - Parallels Client will start, connect to Remote Application Server and the app
will open.
• Create shortcut in Auto Start Folder. If this option is selected for a published app, the
application will be added to autostart after the first connection to Remote Application Server. If
you restart your Android device, Parallels Client will start automatically once the device boots
up, connect to Remote Application Server and open the application.
18
Page 19

C HAPTER 5
Edit Connection Settings
To edit your Remote Application Server or RDP connection parameters, do the following:
1 Open Parallels Client.
2 Swipe left or right to the connection which parameters you want to modify.
3 Tap the
Note: This icon may be absent if your Android device has a physical or virtual menu button. Use this
button instead.
4 Tap the Gear icon at the bottom of the screen. The following screen appears:
icon in the top right corner and choose Edit.
Page 20

Edit Connection Settings
You can edit the following parameters:
• Friendly name. In this field, you can change the name of your connection.
• Server address. In this field, you can change the remote server IP address or host name.
• User name. In this field, you can edit the user name.
• Password. In this field, you can edit the user's password.
• Connection settings. Tap this field to access the group of connection-related settings (p.
22).
• Advanced settings. Tap
20
this field to access the group of advanced settings (p. 24).
Page 21

Edit Connection Settings
In This Chapter
Connection Settings ................................................................................................. 22
Advanced Settings ................................................................................................... 24
Remove a Connection .............................................................................................. 35
21
Page 22

Edit Connection Settings
Connection Settings
On the Connection settings tab, you can modify the following connection settings:
• Connection mode. In this menu, you can edit the connection mode:
• Gateway. This mode is ideal for Terminal servers, VDI desktops and remote PCs that are
only reachable via Parallels Secure Client Gateway.
22
Page 23

Edit Connection Settings
• Direct. Parallels Client connects directly to the remote server. This option can be used when
both Parallels Client and the server are connected to the same network.
• Secure connection. This option defines whether Parallels Client is using an SSL certificate to
establish a connection to Parallels Secure Client Gateway. You should change this setting only
if your system administrator told you to do so.
• Port. In this field, you can modify the port. You should do this only if your system administrator
told you to do so.
• Secondary server address. In this field, you can specify the remote server secondary address.
• Proxy. If you have to use a proxy server to connect to Parallels Remote Application Server, tap
this field and specify the proxy server parameters.
23
Page 24

Edit Connection Settings
Advanced Settings
On the Advanced settings tab, you can modify the following settings:
• Display. Tap this option to open the display-related settings (p. 26).
• Printi
24
ng. Tap this option to open the printing settings (p. 28).
Page 25

Edit Connection Settings
• Local resources. Tap this option to open the local and drive redirection settings (p. 30).
• Sound redirection. Tap this option
• Experience.
• Other. Tap
Tap this option to open the connection speed and performance settings (p. 32).
this option to open additional settings (p. 34).
to open the sound settings (p. 31).
25
Page 26

Edit Connection Settings
Display
On the Display tab, you can edit the following settings:
• Acceleration. In this menu, choose the graphics acceleration type. The more advanced the
acceleration, the better will be the quality of the graphics. Please keep in mind that higher
quality accelerations require more processing power and faster network.
26
Page 27

Edit Connection Settings
Note: The acceleration setting does not affect connections with color depth less than 32 bit.
• None. No graphics acceleration.
• Basic. Basic acceleration.
• RemoteFX. More powerful graphics acceleration using the RemoteFX codec.
• RemoteFX Adaptive. Best graphics acceleration using RemoteFX Adaptive and H.264
codecs.
Note: If you select RemoteFX or RemoteFX Adaptive, the color depth is forced to 32 bit.
• Color depth. Use this menu to select the color depth.
• Resolution. In this menu, select the remote server screen resolution.
27
Page 28

Edit Connection Settings
Printing
On the Printing tab, you can edit the printing-related settings:
Local Printer
In the Local Printer section, you can specify the printing mode. Choose one of the following:
28
Page 29

Edit Connection Settings
• Disabled. Select this option to disable printing.
• Print. Select this option to print documents.
• View as PDF. Select this option to print documents to PDF.
Default Printer Settings
In the Default Printer Settings section, specify which printer to use to print documents. Choose
one of the following:
• None. When this option is selected, default printer is chosen depending on the remote server
settings.
• Local printer. Choose this option to use the printer specified on your Android device.
• Remote printer. Choose this option to use the printer specified on the remote server.
If Remote printer is selected, specify the following additional options:
• If there are 2 or more printers configured on the remote server, type the name of the printer
you want to use in the Remote printer name field. Parallels Client will use the first printer
which name partially or fully matches the name specified in this field.
• If you select Match exact printer name, Parallels Client will use the printer which name
exactly matches the name specified in the Remote printer name field.
29
Page 30

Edit Connection Settings
Local Resources
On the Local resources tab, you can edit the following settings:
• Drive redirection. Select this option to enable redirection of your Android device storage to the
remote server.
30
Page 31

Edit Connection Settings
• Set custom redirection path. If you enabled drive redirection, tap this option to specify which
directory will be redirected to the remote server and mounted as a share. Select a directory and
tap Set path. Tap Reset to apply the default setting (i.e. redirect the SD card). Tap Cancel to
leave these settings intact.
• Open URLs on. Tap this menu to specify where you want to open "http:" links - on your
Android device or remote server.
• Open mail links on. Tap this menu to specify where you want to open "mailto:" links - on your
Android device or remote server.
Sound redirection
Tap Sound redirection to specify how the sound should be handled. You can choose one of the
following:
• Do not play. Select this option to disable sound.
• Play on device. Select this option to redirect sound from the remote server and play it on your
Android device.
• Play on remote computer. Select this option to play sound on the remote server.
31
Page 32

Edit Connection Settings
Experience
On the Experience tab, you can edit the following settings:
• Connection speed. Tap this menu to select the suitable connection speed for the most fluid
experience. Depending on what you choose, Parallels Client will select or deselect other options
on this tab. If the options get deselected and then you choose them manually, please keep in
mind that additional visual effects may slow down your connection speed.
32
Page 33

Edit Connection Settings
• Desktop background. Enable this option to show the remote computer desktop background.
• Font smoothing. This option makes all fonts smooth for improved readability.
• Menu animation. If menus and windows on the remote computer have visual effects and this
option is enabled, these effects are also shown on your Android device.
• Desktop composition. Desktop composition changes the way windows are depicted on the
screen.
• Window dragging. Enable this option to show window contents when dragging windows.
• Themes. Enable this option to use the remote desktop themes when connected.
33
Page 34

Edit Connection Settings
Other
On the Other tab, you can edit the following settings:
• Network level authentication. Select this option to enable network level authentication, which
will require the client to authenticate before connecting to the server.
34
Page 35

Edit Connection Settings
• Use pre-Windows 2000 login format. Select this option to use domain\user as the login
format to log in to remote computer.
• Override device name. Tap this option to set another name under which your Android device
will be displayed on the remote server.
Remove a Connection
To remove a connection, do the following:
1 Open Parallels Client.
2 Swipe left or right to the connection you want to remove.
3 Tap the
Note: This icon may be absent if your Android device has a physical or virtual menu button. Use this
button instead.
icon in the top right corner and choose Edit.
4 Tap the Recycle Bin icon at the bottom of the screen and tap Remove.
5 Once ready, tap the tick in the top left corner.
35
Page 36

C HAPTER 6
Edit Parallels Client Settings
While working with Parallels Client, you can edit its settings the way you need. To open Parallels
Client settings, do the following:
1 Open Parallels Client.
2 Tap the
Note: This icon may be absent if your Android device has a physical or virtual menu button. Use this
button instead.
Read this chapter to learn which settings can be modified and how.
icon in the top right corner and choose Settings.
In This Chapter
General Settings....................................................................................................... 37
Remote Screen Settings........................................................................................... 38
Security Settings ...................................................................................................... 38
User Input Settings................................................................................................... 39
Other Settings .......................................................................................................... 39
About Parallels Client................................................................................................ 40
Page 37

General Settings
The General section allows you to modify the following settings:
Edit Parallels Client Settings
• Keep device awake. If you're connected to a remote server and this option is enabled, your
mobile device won't switch to sleep mode after some interval of user inactivity.
• Show keyboard automatically. When this option is on, the keyboard will pop up automatically
every time you tap a text field.
• Run in background. When you switch to another application after working with Parallels Client,
Android suspends inactive app and your connection with the remote server is lost. In this menu,
you can configure how long Parallels Client remains active when it is running in the background.
• Report statistics. Check this option if you agree to participate in the customer experience
program (p. 40). Parallels collects statistical information to improve the product. No personal
data is colle
cted.
37
Page 38

Edit Parallels Client Settings
• Use detailed log messages. If you have any issues with Parallels Client and decided to send
technical data (p. 41) to your Remote Application Server administrator, select Use detailed log
messages before sendi
spend less time to fix the issue. You're not recommended to have this option enabled all the
time - Parallels Client may start working slower.
ng the data. The administrator will receive a more detailed log file and
Remote Screen Settings
The Remote Screen section allows you to modify the following settings:
• Orientation. Choose the preferred screen orientation between Portrait, Landscape, and Auto.
• Change resolution. If Orientation is set to Auto, choose whether to change the screen
resolution when the orientation changes.
Security Settings
The Security section allows you to modify the following settings:
38
Page 39

Edit Parallels Client Settings
• Server authentication. Tap this field to choose what to do when an untrusted certificate is
used to establish connection to the remote server.
• Clear all saved security certificates. Tap this field to remove all saved security certificates.
User Input Settings
The User Input section allows you to modify the following settings:
• Send Unicode characters. Enable this option if you want the keyboard to send characters as
unicode instead of scancode.
• Swap mouse buttons. Enable this option to swap the mouse buttons on the remote server.
Other Settings
The Other section allows you to modify the following settings:
• Reset all hidden messages. Some of the Parallels Client messages have the Don't show
again checkbox. If you tap this checkbox, the message won't show again. Tap Reset all
hidden messages to restore such messages.
39
Page 40

Edit Parallels Client Settings
About Parallels Client
The About Parallels Client section allows you to get the following information:
• Version. This field allows you to check the Parallels Client version.
• Customer experience program. Tap this field to read more about the customer experience
program.
• Copyright information. Tap this field to see the copyright information.
• Technical support. Tap this field to learn how to get technical support.
40
Page 41

C HAPTER 7
Troubleshooting
If you have any problems with Parallels Client or experienced a crash, check our help resources. Do
the following:
1 Open Parallels Client.
2 Tap the
Note: This icon may be absent if your Android device has a physical or virtual menu button. Use this
button instead.
You can read the most popular knowledgebase articles or tap Knowledge base index for
more articles. If you still have a problem, contact the Parallels support team or send technical
data to Parallels.
Note: Please note that Parallels collects technical data to analyze the issue and work out a solution.
Parallels doesn't answer the messages with tech data.
icon in the top right corner and choose Troubleshooting.
Page 42

Index
Index
A
About Parallels Client - 40
Advanced Settings - 24
Application Toolbar - 14
C
Connection Settings - 22
Create a Connection - 7
Create a Connection Manually - 7
Create a Remote Application Server
Connection - 7
Create a Standard RDP Connection - 9
D
Display - 26
E
Edit Connection Settings - 19
Edit Parallels Client Settings - 36
Experience - 32
G
R
Remote Application Server Connection - 12
Remote Screen Settings - 38
Remove a Connection - 35
S
Security Settings - 38
Sound redirection - 31
Standard RDP Connection - 17
T
Troubleshooting - 41
U
User Input Settings - 39
W
Work With a Remote Server - 11
General Settings - 37
I
Import Existing Connections - 10
Install Parallels Client for Android - 6
Introduction - 5
L
Launch Published Apps from Android Device
- 18
Local Resources - 30
O
Other - 34
Other Settings - 39
P
Printing - 28
 Loading...