

Page 1
Parallels® Plesk Control Panel
Page 2

Copyright Notice
ISBN: N/A
Parallels
660 SW 39th Street
Suite 205
Renton, Washington 98057
USA
Phone: +1 (425) 282 6400
Fax: +1 (425) 282 6444
© Copyright 1999-2008,
Parallels, Inc.
All rights reserved
Distribution of this work or derivative of this work in any form is prohibited unless prior written
permission is obtained from the copyright holder.
Patented technology protected by U.S.Patents 7,328,225; 7,325,017; 7,293,033; 7,099,948;
7,076,633.
Patents pending in the U.S.
Product and service names mentioned herein are the trademarks of their respective owners.
Page 3

Contents
Preface 5
About This Guide ........................................................................................................................... 5
Who Should Read This Document ................................................................................................ 5
Typographical Conventions ........................................................................................................... 6
Feedback ....................................................................................................................................... 6
History of Changes in CL Utilities 7
Overview 9
Getting Started with Command Line Utilities 11
Using Command Line Utilities 12
Administrator's Server Preferences: admin Utility ....................................................................... 14
Anonymous FTP Access: anonftp Utility ..................................................................................... 17
Client Accounts: client Utility ....................................................................................................... 20
Client Limits, Permissions, and Interface Settings: client_pref Utility ......................................... 25
Client Templates: client_template Utility ..................................................................................... 33
ColdFusion Service on Plesk Server: cfsetting Utility ................................................................. 41
Custom Buttons: custombutton Utility ......................................................................................... 42
Database Servers: database-server Utility .................................................................................. 49
Databases: database Utility ......................................................................................................... 52
Desktop Presets: desktop Utility .................................................................................................. 57
DNS Zone Template: server_dns Utility ...................................................................................... 60
DNS Zones on Domains: dns Utility ............................................................................................ 66
Domain Accounts: domain Utility ................................................................................................. 73
Domain Administrator Accounts: domadmin Utility ..................................................................... 84
Domain Aliases: domalias Utility ................................................................................................. 91
Domain Limits and Preferences: domain_pref Utility .................................................................. 94
Domain Templates: domain_template Utility ............................................................................... 98
Interface and System Preferences: server_pref Utility .............................................................. 107
Interface Templates: interface_template Utility ......................................................................... 111
IP Addresses: ipmanage Utility ................................................................................................. 114
Mail Accounts: mail Utility .......................................................................................................... 117
Mail Autoresponders: autoresponder Utility .............................................................................. 123
Mail Server Settings: mailserver Utility ...................................................................................... 129
Mailing Lists: maillist Utility ........................................................................................................ 134
OS Update Sources: ai_prefs Utility .......................................................................................... 138
Plesk Services: service Utility .................................................................................................... 140
Server Configuration: init_conf Utility ........................................................................................ 143
Single Sign-On Configuration: sso Utility .................................................................................. 148
Site Applications: siteapp Utility ................................................................................................ 152
Site Application Items: siteapp-item Utility ................................................................................ 155
Site Application Licenses: siteapp-license Utility ...................................................................... 159
Site Directories Protection: protdir Utility ................................................................................... 161
Page 4

Preface 4
Site Skeletons: skeleton Utility .................................................................................................. 165
Spam Filtering: spamassassin Utility ......................................................................................... 167
SSL Certificates: certificate Utility ............................................................................................. 171
Subdomains: subdomain Utility ................................................................................................. 175
Tomcat Service and Java Applications on Domains: tomcat Utility .......................................... 180
Web Statistics: webstat Utility ................................................................................................... 183
Web Users: webuser Utility ....................................................................................................... 185
Page 5

Preface 5
In this section:
About This Guide ............................................................................................... 5
Who Should Read This Document .................................................................... 5
Typographical Conventions ............................................................................... 6
Feedback .......................................................................................................... 6
Preface
About This Guide
This document contains a complete description of command line utilities, commands, and
options for Plesk for Linux/Unix.
Who Should Read This Document
This document is intended for Plesk administrators who want to manage the Plesk server
and its configuration locally using command line utilities. The document can also be used by
third-party developers to integrate Plesk with other products installed on the same server.
Page 6

6 Preface
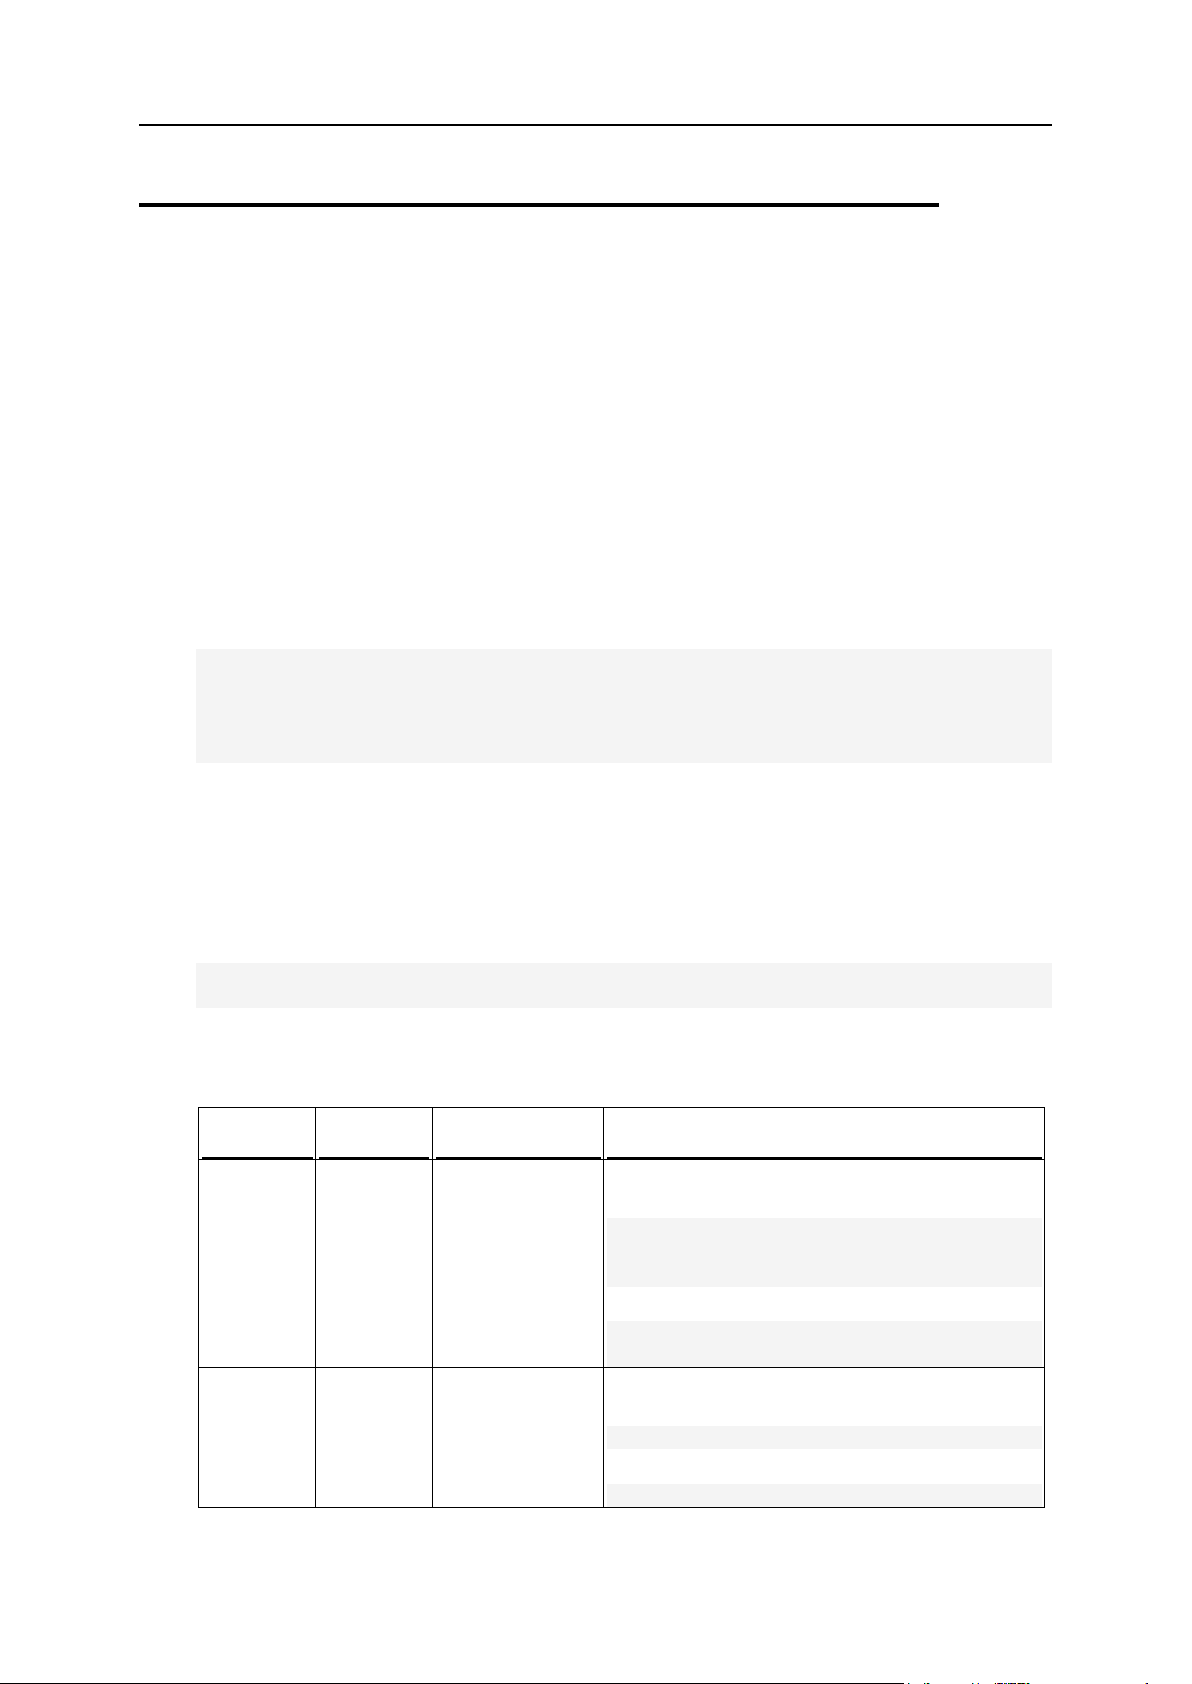
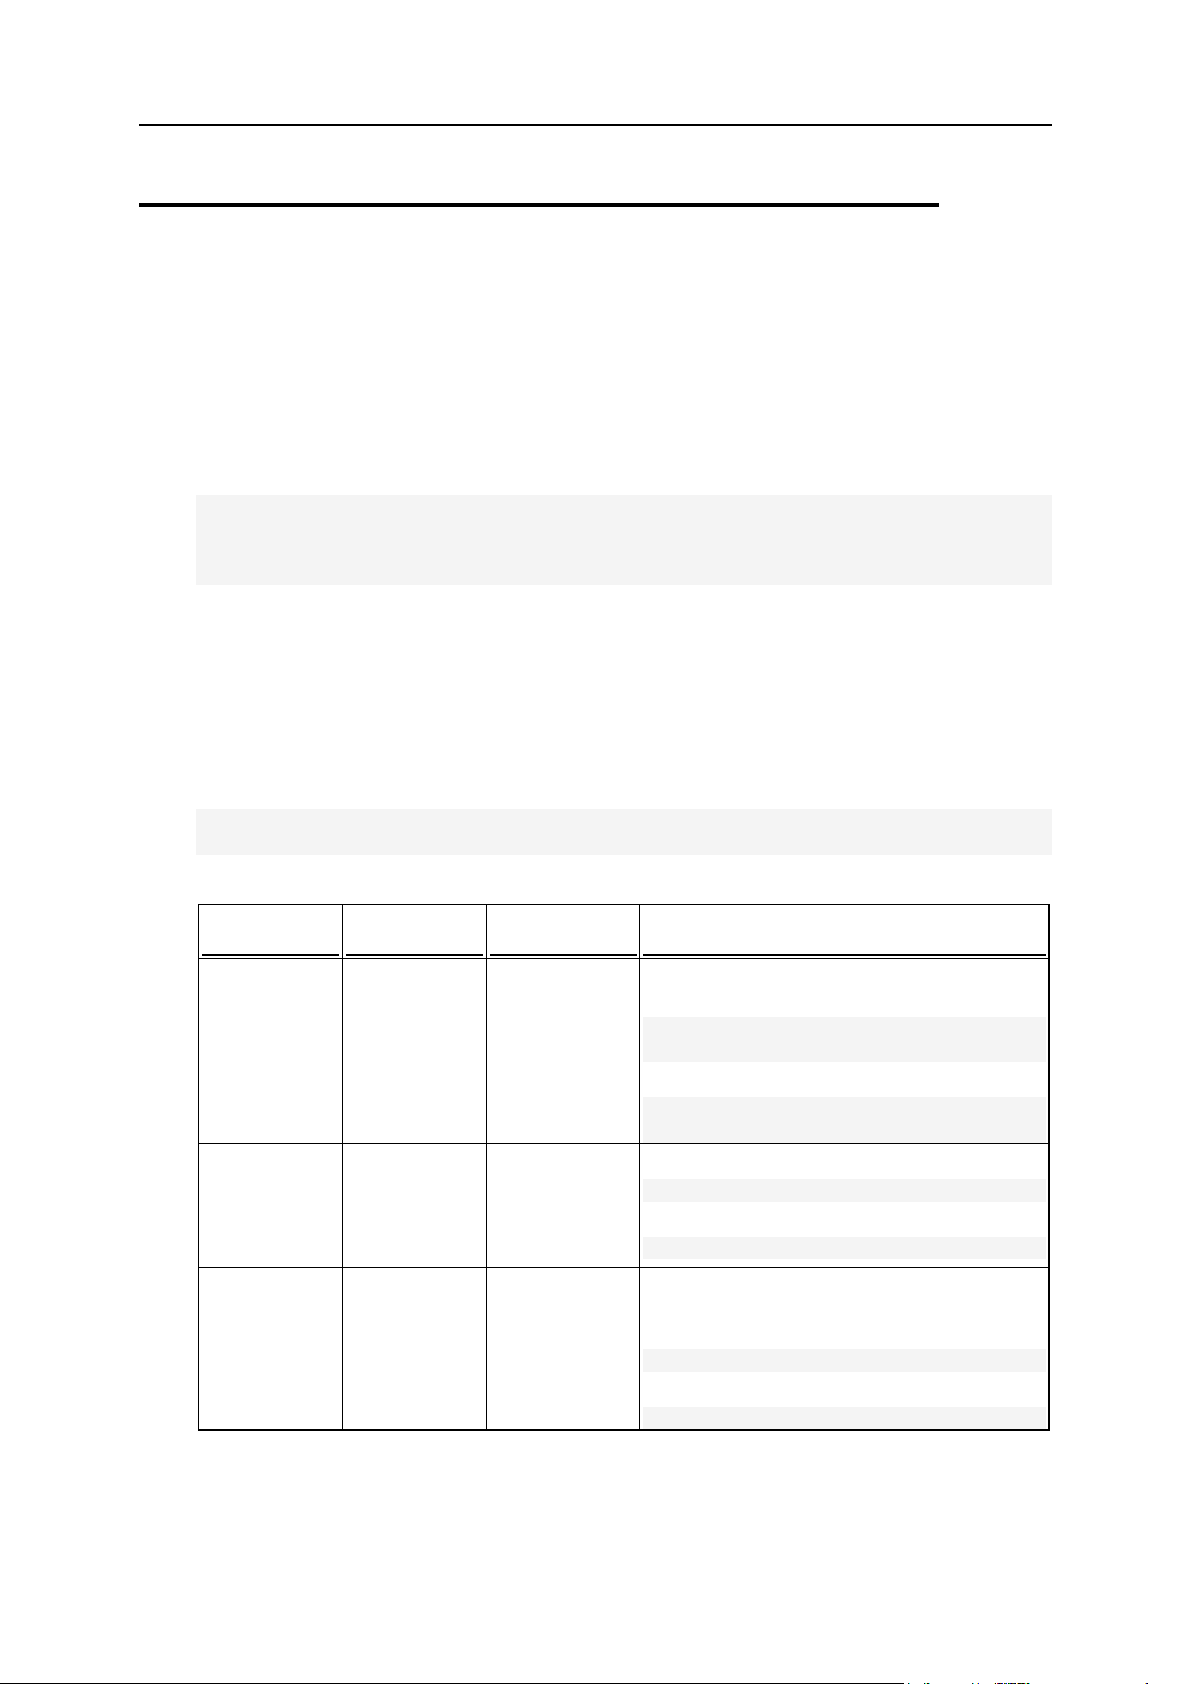
Typographical Conventions
Formatting convention
Type of Information
Example
Special Bold
Items you must select, such as
menu options, command
buttons, or items in a list.
Go to the QoS tab.
Titles of chapters, sections,
and subsections.
Read the Basic Administration chapter.
Italics
Used to emphasize the
importance of a point, to
introduce a term or to
designate a command line
placeholder, which is to be
replaced with a real name or
value.
The system supports the so called
wildcard character search.
Monospace
The names of style sheet
selectors, files and directories,
and CSS fragments.
The license file is located in the
httpdocs/common/license
directory.
Preformatted
On-screen computer output in
your command-line sessions;
source code in XML, C++, or
other programming languages.
# ls –al /files
total 14470
Preformatted Bold
What you type, contrasted with
on-screen computer output.
# cd /root/rpms/php
The following kinds of formatting in the text identify special information.
Feedback
If you have found a mistake in this guide, or if you have suggestions or ideas on how to
improve this guide, please send your feedback using the online form at
http://www.parallels.com/en/support/usersdoc/. Please include in your report the guide's title,
chapter and section titles, and the fragment of text in which you have found an error.
Page 7

This chapter describes the version-specific changes in the CL utilities. The changes are
C H A P T E R 1
History of Changes in CL Utilities
grouped by new features in CLI. To describe a particular change in CLI, we use the
following notation:
(+) - the defined utility or command or option is added
(-) - the defined utility or command or option is deprecated
(*) - the defined utility or command or option is modified
Plesk 8.6
Added managing permission on selecting database server on which a database is to
be created.
(+) client_pref utility: -select_db_server option
(+) client_template utility: -select-db-server option
(+) domadmin utility: -select_db_server option
Plesk 8.4
Added support for DomainKeys spam protection used to sign outgoing email
messages and verify incoming email messages.
(+) domain_pref utility: -sign_outgoing_mail option
(+) mailserver utility: --sign-outgoing-mail command
(+) mailserver utility: --verify-incoming-mail command
Added managing Plesk user permission on creating DNS subzones in other users'
DNS superzones.
(+) server_pref utility: -forbid-create-dns-subzone option
Page 8

8 History of Changes in CL Utilities
Plesk 8.3
Added managing limit on maximum number of available connections.
(+) domain utility: -max-connections option
Added managing opportunity to publish sites with Sitebuilder.
(+) domain utility: -publish-sb-site option
Added managing limit on network use.
(+) domain utility: -traffic-bandwidth option
Dropped the <webuser_name>@<domain_name> format of access to Plesk
Control Panel.
(-) domain_pref utility: -at-access option
Added managing the SSO service, which allows Plesk to participate in single sign-
on, and SSO branding in Plesk.
(+) sso utility
Modified managing site applications and site application licenses.
(-) siteapp utility: --add-to-vault command
Use siteapp-item utility instead.
(-) siteapp utility: -release option
Use -sapp-release option instead.
(-) siteapp utility: -sapp option
Use -sapp-name option instead.
(-) siteapp utility: -version option
Use -sapp-version option instead.
(+) siteapp utility: -sapp-name option
(+) siteapp utility: -sapp-release option
(+) siteapp utility: -sapp-version option
(+) siteapp-item utility
(+) siteapp-license utility
Page 9

Plesk Command Line Interface (CLI) is designed for integration of Plesk Server
Utility
Affected Object(s)
admin (on page 14)
Plesk administrator control panel interface preferences
and personal information.
ai_prefs (on page 138)
Operating System update sources.
anonftp (on page 17)
Anonymous FTP access on domains with physical
hosting on a Plesk server.
autoresponder (on page 123)
Mail autoresponders.
certificate (on page 171)
SSL certificates.
cfsetting (on page 41)
ColdFusion service on the Plesk server.
client (on page 20)
Client accounts.
client_pref (on page 25)
Client limits and permissions, IP pool, and Plesk
interface preferences (for example, the default
language and skin) for Plesk clients.
client_template (on page 33)
Client templates.
custombutton (on page 42)
Custom buttons.
database (on page 52)
Databases and database users.
database-server (on page 49)
Database servers.
C H A P T E R 2
Overview
Administrator with third-party applications. It can also be used for managing Plesk
installations by administrators experienced in using Plesk. This feature provides the
command line interface to the majority of management tasks that can be performed by
Plesk administrator. The CLI provides the alternative means of control for various
business objects in Plesk. Plesk command line utilities use the Plesk core functionality
to create, manage, and delete clients, domains, services and other Plesk objects.
Plesk CL utilities may be used by the root user from the console or script. The utilities
require "root" or "psaadm" privileges to operate.
Plesk CLI supports localized names of business objects in the same manner as Plesk
does. Therefore, you can create clients with contact names using a locale of your
choice. Use the LANG environment variable to set up a particular locale.
Plesk CLI does not require the Web interface of Plesk Server Administrator to run.
Plesk CLI is commonly included in the Plesk distribution kit and is also available as the
separate plesk-api-cli package.
The table below presents the command utilities provided by the current version of
Plesk (in alphabetical order).
Page 10

10 Overview
Utility
Affected Object(s)
desktop (on page 57)
Desktop presets.
dns (on page 66)
DNS zones on domains and domain aliases.
domadmin (on page 84)
Domain administrator accounts.
domain (on page 73)
Domain accounts.
domain_pref (on page 94)
Domain limits and preferences for applications,
scripting support, e-mail, and other services.
domain_template (on page 98)
Domain templates.
domalias (on page 91)
Domain aliases.
init_conf (on page 143)
Initial configuration of the Plesk server; Plesk
administrator personal info.
interface_template (on page
111)
Control panel interface templates.
ipmanage (on page 114)
IP addresses on Plesk server.
mail (on page 117)
Domain-level mail service, and mail names (e-mail
accounts).
maillist (on page 134)
Mailing lists.
mailserver (on page 129)
Server-wide mail server settings.
protdir (on page 161)
Password protection of Web directories on domains.
server_dns (on page 60)
Server-wide DNS zone template.
server_pref (on page 107)
Plesk default interface preferences, and Plesk server
system preferences.
service (on page 140)
Services on the Plesk server.
siteapp (on page 152)
Site application packages.
siteapp-item (on page 155)
Site application items.
siteapp-license (on page
159)
Site application licenses.
skeleton (on page 165)
Site skeletons (directory structure).
spamassassin (on page 167)
Spamassassin spam filter.
sso (on page 148)
Single sign-on configuration.
subdomain (on page 175)
Subdomains.
tomcat (on page 180)
Tomcat service and the Java-based Web applications
on domains.
webstat (on page 183)
Webalizer preferences.
webuser (on page 185)
Web users on domains.
The Plesk for Linux/Unix command line utilities must be run from the directory in which
they are stored. For general instructions on executing command line utilities on Plesk
server, consult the Getting Started with Command-Line Utilities (on page 11) section.
Page 11

Command line utilities for Plesk for Linux/Unix are located in the
C H A P T E R 3
Getting Started with Command Line
Utilities
/usr/local/psa/bin directory on the Plesk server.
To run command line utilities:
1 Log in to the Plesk server via SSH.
2 Use one of the following options to run a utility:
To run a utility from any directory, use the following command line format:
# /usr/local/psa/bin/<utility name> [parameters] [options]
To run a utility when the /usr/local/psa/bin/ is your current directory, use
the following format:
# ./<utility name> [parameters] [options]
Upon successful execution, utilities return the 0 code. If an error occurs, utilities return
code 1 and display the description of the encountered problem on stderr.
For exact command syntax for each utility, consult the corresponding sections in the
Chapter "Using Command Line Utilities (on page 12)".
Warning: Passing passwords through CLI as parameters of the -passwd option
may potentially compromise the system's security as command line can be observed
by other users of the system. It is more secure to pass passwords through the
environment variables. You can transfer non-encrypted passwords by using
environment variable PSA_PASSWORD while using single quotes to specify the empty
values in the command line for the arguments of the -passwd - -passwd_type
options. Similarly, you can transfer encrypted passwords through the environment
variable PSA_CRYPTED_PASSWORD while using single quotes to specify the empty
values in the command line for the arguments of the -passwd and -passwd_type
options.
Page 12

Plesk for Linux/Unix command line utilities enable Plesk administrators to manage the
C H A P T E R 4
Using Command Line Utilities
Plesk server and its configuration, client accounts, domains, and various services. The
utilities can be used for integration of third-party products with Plesk and for routine
management of Plesk servers by system administrators.
This chapter describes in detail the commands and options currently available for the
command-line utilities. Each command and option is accompanied by a description and
a usage example.
Page 13

Using Command Line Utilities 13
In this chapter:
Administrator's Server Preferences: admin Utility .............................................. 14
Anonymous FTP Access: anonftp Utility ............................................................ 17
Client Accounts: client Utility ............................................................................. 20
Client Limits, Permissions, and Interface Settings: client_pref Utility ................. 25
Client Templates: client_template Utility ............................................................ 33
ColdFusion Service on Plesk Server: cfsetting Utility ......................................... 41
Custom Buttons: custombutton Utility ................................................................ 42
Database Servers: database-server Utility ........................................................ 49
Databases: database Utility ............................................................................... 52
Desktop Presets: desktop Utility ........................................................................ 57
DNS Zone Template: server_dns Utility ............................................................. 60
DNS Zones on Domains: dns Utility .................................................................. 66
Domain Accounts: domain Utility ....................................................................... 73
Domain Administrator Accounts: domadmin Utility ............................................ 84
Domain Aliases: domalias Utility ........................................................................ 91
Domain Limits and Preferences: domain_pref Utility ......................................... 94
Domain Templates: domain_template Utility...................................................... 98
Interface and System Preferences: server_pref Utility ....................................... 107
Interface Templates: interface_template Utility .................................................. 111
IP Addresses: ipmanage Utility .......................................................................... 114
Mail Accounts: mail Utility .................................................................................. 117
Mail Autoresponders: autoresponder Utility ....................................................... 123
Mail Server Settings: mailserver Utility .............................................................. 129
Mailing Lists: maillist Utility ................................................................................ 134
OS Update Sources: ai_prefs Utility .................................................................. 138
Plesk Services: service Utility ............................................................................ 140
Server Configuration: init_conf Utility ................................................................. 143
Single Sign-On Configuration: sso Utility ........................................................... 148
Site Applications: siteapp Utility ......................................................................... 152
Site Application Items: siteapp-item Utility ......................................................... 155
Site Application Licenses: siteapp-license Utility ............................................... 159
Site Directories Protection: protdir Utility ........................................................... 161
Site Skeletons: skeleton Utility .......................................................................... 165
Spam Filtering: spamassassin Utility ................................................................. 167
SSL Certificates: certificate Utility ...................................................................... 171
Subdomains: subdomain Utility ......................................................................... 175
Tomcat Service and Java Applications on Domains: tomcat Utility .................... 180
Web Statistics: webstat Utility ............................................................................ 183
Web Users: webuser Utility ............................................................................... 185
Page 14

14 Using Command Line Utilities
Administrator's Server Preferences:
Command
Parameter
Description
Example
-update
or -u
Updates Plesk
administrator's
server
preferences.
To set the WinXP Olivegreen skin as the default
interface skin:
# ./admin --update -skin "WinXP
Olivegreen"
or
# ./admin -u -skin "WinXP Olivegreen"
--info or
-i
Displays Plesk
administrator’s
personal
information and
preferences.
To view Plesk administrator’s personal information
and preferences:
# ./admin --info
or
# ./admin -i
--xml-
info or -
xi
Displays Plesk
administrator’s
personal
information and
preferences in the
XML format.
To view Plesk administrator’s personal information
and preferences in the XML format:
# ./admin --xml-info
or
# ./admin -xi
admin Utility
The admin utility is used to manage Plesk administrator control panel interface
preferences and view the administrator's personal information and interface
preferences through CLI.
Usage
admin <command> [
<option_1> [<param>]
[<option_2> [<param>]]
… [<option_N> [<param>]]
Example
The following command sets the default interface skin to WinXP Olivegreen, the default
interface language to Russian, and applies interface customization template
CustomTemplate to the administrator's control panel interface.
# ./admin --update -skin "WinXP Olivegreen" -locale -ru-RU -template
CustomTemplate
Commands
Page 15

Using Command Line Utilities 15
Command
Parameter
Description
Example
--help or
-h
Displays help on
the use of the
utility.
To view help on the use of the admin utility:
# ./admin --help
or
# ./admin -h
Option
Parameter
Description
Example
-locale
<language_code>
Sets the default interface
language for Plesk
administrator's control panel
interface.
The argument of the
command must be a valid
four-letter language code
derived from the language
code described in ISO-639-2
and the corresponding country
code described in ISO-3166.
For example, the Plesk code
for the Italian language code
is it-IT; the Plesk code for
the American variant of
English is en-US; the Plesk
code for the British variant of
English is en-GB.
To set the default interface
language to Russian:
# ./admin -u -locale
ru-RU
-skin
<skin_name>
Sets the default interface skin
for Plesk administrator's
control panel interface.
To set the default interface
skin to WinXP Olivegreen:
# ./admin -u -skin
"WinXP Olivegreen"
template
<template_name>
Applies an interface
customization template to
Plesk administrator's control
panel interface.
To apply the customization
template CustomTemplate
to administrator's control
panel interface:
# ./admin -u template
CustomTemplate
multiple
sessions
true|false
Allows/Prohibits having
several simultaneous sessions
under administrator's login.
To allow multiple sessions
to run simultaneously under
administrator's login:
# ./admin -u multiple-sessions
true
Options
Page 16

16 Using Command Line Utilities
Option
Parameter
Description
Example
-maxbuttonlength
<number>
Limits button label length for
the Plesk administrator's
control panel interface.
To restrict the maximum
button label length for the
Plesk administrator's
control panel interface to
10:
# ./admin -u -maxbutton-length 10
-lockscreen
true|false
Prevents/Allows working with
Plesk until page is completely
loaded.
To allow Plesk
administrator to work with
the control panel even if
control panel screens are
not completely loaded:
# ./admin -u -lockscreen false
Page 17
Using Command Line Utilities 17
Anonymous FTP Access: anonftp Utility
Command
Parameter
Description
Example
--update
or -u
<domain_
name>
Updates the
anonymous FTP
settings on a
specified domain.
To enable downloading files from the incoming
directory by users on the domain example.com:
# ./anonftp --update example.com status true -incoming-downloads
true
or
# ./anonftp -u example.com -status
true -incoming-downloads true
--info or
-i
<domain_
name>
Displays
information about
the anonymous
FTP settings on a
specified domain.
To view information about anonymous FTP
settings on the domain example.com:
# ./anonftp --info example.com
or
# ./anonftp -i example.com
The anonftp utility is used to manage anonymous FTP access on domains with
physical hosting on a Plesk server. By using this utility, you can perform the following
tasks:
enabling/disabling the anonymous FTP access on a domain
restricting download bandwidth and the maximum number of simultaneous FTP
connections
managing the incoming directory properties
configuring welcome message displayed upon anonymous FTP user login
Usage
anonftp <command> <domain_name> [
<option_1> [<param>]
[<option_2> [<param>]]
… [<option_N> [<param>]]
]
Example
The following command enables the anonymous FTP service on the domain
example.com and enables displaying the login message with the text "Welcome to FTP
service" upon the anonymous FTP user login.
# ./anonftp --update example.com -status true -message true -messagetext "Welcome to FTP service"
Commands
Page 18

18 Using Command Line Utilities
Command
Parameter
Description
Example
--help or
-h
Displays help on
the use of the
utility.
To view help on the use of the anonftp utility:
# ./anonftp --help
or
# ./anonftp -h
Option
Parameter
Description
Example
-status
true|fals
e
Enables/Disables the
anonymous FTP service
on a domain.
To enable the anonymous FTP service
on the domain example.com:
# ./anonftp -u example.com status true
-message
true|fals
e
Enables/Disables
displaying a login
message upon
anonymous FTP user
login.
To enable displaying a login message
upon the anonymous FTP user login on
the domain example.com:
# ./anonftp -u example.com status true
messagetext
<string>
Specifies a login
message text.
To display the 'Welcome to FTP
service' login message when logging to
the anonymous FTP service on the
domain example.com:
# ./anonftp -u example.com status true -message true message-text "Welcome to FTP
service"
incoming
true|fals
e
Enables/Disables
uploading to the incoming
directory.
Is false by default.
To enable uploading files to the
incoming directory on the domain
example.com:
# ./anonftp -u example.com status true -incoming true
incoming
-dirs
true|fals
e
Allows/Prohibit creating
directories in the
incoming directory.
To allow creating directories in the
incoming directory on the domain
example.com:
# ./anonftp -u example.com status true -incoming-dirs
true
incoming
download
s
true|fals
e
Enables/Disables
downloading from the
incoming directory.
Is false by default.
To enable downloading files from the
incoming directory on the domain
example.com:
# ./anonftp -u example.com status true -incomingdownloads true
Options
Page 19

Using Command Line Utilities 19
Option
Parameter
Description
Example
incoming
-limit
<number>[
K|M|G]
Limits the disk space
used by the incoming
directory.
Unlimited if set to -1.
A number without a letter
is interpreted as the
number of bytes.
To restrict the disk space for the
incoming directory on the domain
example.com to 10 MB:
# ./anonftp -u example.com status true -incoming-limit
10M
-maxconnects
<number>
Limits the number of
available simultaneous
FTP connections.
Unlimited if set to -1.
To restrict the maximum number of
simultaneous FTP connections to 40:
# ./anonftp -u example.com status true -max-connects 40
bandwidt
h
<number>[
K|M|G]
Restricts the download
bandwidth.
Unlimited if set to -1.
A number without a letter
is interpreted as the
number of bytes.
To restrict the download bandwidth to
500 KB:
# ./anonftp -u example.com status true -bandwidth 500K
Page 20

20 Using Command Line Utilities
Client Accounts: client Utility
Command
Parameter
Description
Example
--create
or -c
<login_name>
Creates a new
client account.
The argument of
the command
must begin with
an alphabetic
symbol.
To create a client account named John Doe
with client login name JDoe and password
sample:
# ./client --create JDoe -name
"John Doe" -passwd sample
or
# ./client -c JDoe -name "John
Doe" -passwd sample
--update
or -u
<login_name>
Updates settings
of an existing
client account.
To change client login name to John and
set password to mypass for the client with
current login name JDoe :
# ./client --update JDoe -login
John -passwd mypass
or
# ./client -u JDoe -login John passwd mypass
The client utility is used to manage Plesk client accounts through CLI. By using this
utility, you can perform the following tasks:
creating, renaming, and removing client accounts
enabling and disabling existing client accounts
edit client's login name and password
edit client's personal information
Usage
client <command> <client_login_name> [
<option_1> [<param>]
[<option_2> [<param>]]
… [<option_N> [<param>]]
Example
The following command creates the client account with the contact name John Doe,
Plesk control panel login name JDoe, and password sample, specifies the Unites
States as the client’s country, and prevents automatic sending of standard Plesk mail
notifications (if they are enabled) about the account creation.
# ./client --create JDoe -name "John Doe" -passwd sample -country US notify false
Commands
Page 21

Using Command Line Utilities 21
Command
Parameter
Description
Example
--remove
or -r
<login_name>
Deletes a client
account.
To remove the client account with the login
name JDoe:
# ./client --remove JDoe
or
# ./client -r JDoe
--info or
-i
<login_name>
Displays
information about
client account
settings.
To view information about the client
account with the login name John:
# ./client --info John
or
# ./client -i John
--on
<login_name>
Enables a client
account.
To enable the client account with the login
name John:
# ./client --on John
--off
<login_name>
Disables a client
account.
To disable the client account with the login
name John:
# ./client --off John
--help or
-h
Displays help on
the use of the
utility.
To view help on the client utility:
# ./client --help
or
# ./client -h
Option
Parameter
Description
Example
-status
enabled|di
sabled|adm
in,expired
Enables/Disables a
client account (the
enabled or disabled
parameters,
respectively).
Disables a client
account and sets the
account status to
"Account is disabled by
administrator" (admin),
or "Account is expired"
(expired).
Is enabled by default.
To disable the client account with the
login name JDoe and assign status
"Account is disabled by
administrator" to the account:
# ./client -u JDoe -status
admin
-company
<string>
Specifies client's
company name.
To set the company name in the
personal info of the client with the
login name John to MegaCompany
Inc.:
# ./client -u John -company
"MegaCompany Inc."
Options
Page 22

22 Using Command Line Utilities
Option
Parameter
Description
Example
-name
<string>
Specifies client's
contact name.
Required with -create.
To create the John Doe client
account with the client login name
JDoe and password sample:
# ./client -c JDoe -name
"John Doe" -passwd sample
-login
<client_lo
gin_name>
Specifies client's login
name used to entering
Plesk control panel.
Used with --update
only.
To set client login name to John for
the client account with current login
name JDoe:
# ./client -u JDoe -login
John
-passwd
<password>
Specifies client's
password used to
entering Plesk control
panel.
Required with -create.
Required with passwd_type option.
For additional
comments, see the
Note below.
To create the John Doe client
account with the login name JDoe
and password sample:
# ./client -c JDoe -name
"John Doe" -passwd sample
passwd_typ
e
plain|encr
ypted
Specifies the type of
client password.
Requires -passwd
option.
Is plain by default.
For additional
comments, see the
Note below.
To set the type of the password for
the client account with the login
name JDoe and password sample to
encrypted:
# ./client -u JDoe passwd_type encrypted passwd sample
-phone
<number>
Specifies client's phone
number.
To set the phone number for the
client with the login name JDoe to
5552345:
# ./client -u JDoe -phone
5552345
-fax
<number>
Specifies client's fax
number.
To set the fax number for the client
with the login name JDoe to
5552337:
# ./client -u JDoe -fax
5552337
-email
<string>
Specifies client's email
address.
To set the email address for the
client with login name JDoe to
JDoe@example.com:
# ./client -u JDoe -email
JDoe@example.com
Page 23

Using Command Line Utilities 23
Option
Parameter
Description
Example
-addr
<string>
Specifies client's postal
address.
Deprecated since Plesk
8.1. Use the -address
option instead.
To set the postal address for the
client with the login name JDoe to 8
Main street:
# ./client -u JDoe -addr "8
Main street"
-address
<string>
Specifies client's postal
address.
To set the postal address for the
client with the login name JDoe to 8
Main street:
# ./client -u JDoe -address
"8 Main street"
-city
<string>
Specifies client's city.
To set the city address for the client
with login name JDoe to New York:
# ./client -u JDoe -city
"New York"
-state
<string>
Specifies client's
state/province.
To set the state for the client with
login name JDoe to NY:
# ./client -u JDoe -state
NY
-pcode
<string>
Specifies client's
zip/postal code.
Deprecated since Plesk
8.1. Use the -zip
option instead.
To set the postal code for the client
with login name JDoe to 52345:
# ./client -u JDoe -pcode
52345
-zip
<string>
Specifies client's
zip/postal code.
To set the postal code for the client
with login name JDoe to 52345:
# ./client -u JDoe -zip
52345
-country
<country_c
ode>
Specifies client's
country: a two-letters
upper-case code in
compliance with ISO
3166.
To set the country for the client with
login name JDoe to United States:
# ./client -u JDoe -country
US
-notify
true|false
Allows/Prevents
standard email
notifications on client
account creation.
Used with the -create only.
To prevent sending standard email
notifications on creation of John Doe
client account with the login name
JDoe and password sample:
# ./client -c JDoe -name
"John Doe" -passwd sample notify false
-template
<template_
name>
Specifies a client
template to be used for
a client creation.
Used with the -create only.
To specify the template Client
Template to create the John Doe
client account with the login name
JDoe and password sample:
# ./client -c JDoe -name
"John Doe" -passwd sample template "Client Template"
Page 24

24 Using Command Line Utilities
Option
Parameter
Description
Example
-force
Forces the use of a
client template to create
a client account even if
some of the template
options cannot be
implemented.
Used only with the -create command.
To force the use of the template
Client Template to create the John
Doe client account with the login
name JDoe and password sample:
# ./client -c JDoe -name
"John Doe" -passwd sample template "Client Template"
-force
-creationdate
<YYYY-MMDD>
Sets the client account
creation date (can be
arbitrary).
Used only with the -create command.
To set the creation date for the new
John Doe client account with the
login name JDoe and password
sample to 2006-12-30:
# ./client -c JDoe -name
"John Doe" -passwd sample creation-date 2006-12-30
Note: Use of this option is not recommended. Passing passwords through CLI as
parameters of the -passwd option may potentially compromise the system's security
as command line can be observed by other users of the system. It is more secure to
pass passwords through the environment variables. You can transfer non-encrypted
passwords by using environment variable PSA_PASSWORD while using single quotes to
specify the empty values in the command line for the argument of the -passwd - passwd_type options.
Similarly, you can transfer encrypted passwords through the environment variable
PSA_CRYPTED_PASSWORD while using single quotes to specify the empty values in the
command line for the argument of the -passwd and -passwd_type options.
Page 25
Using Command Line Utilities 25
Client Limits, Permissions, and Interface
Command
Parameter
Description
Example
--update or
-u
<login_nam
e>
Updates
preferences
and limits for
an existing
client account.
To disable changing domain limits for the
client account with the login name JDoe:
# ./client_pref --update JDoe change_limits false
or
# ./client_pref -u JDoe change_limits false
--skin-
list or -sl
Displays the list
of available
control panel
interface skins.
To view the list of available interface skins:
# ./client_pref --skin-list
or
# ./client_pref -sl
--info or -i
<login_nam
e>
Displays
information
about client
account
preferences
and limits.
To view information about preferences and
limits set on the client account with login
name JDoe:
# ./client_pref --info JDoe
or
# ./client_pref -i JDoe
Settings: client_pref Utility
The client_pref utility enables the administrator to set and edit the client's limits
and permissions, to manage the client's IP pool, and to define Plesk interface
preferences (e.g. the default language and skin) for the client through CLI.
Usage
client_pref <command> <client_login_name> [
<option_1> [<param>]
[<option_2> [<param>]]
… [<option_N> [<param>]]
Example
The following command updates the client account with the login name JDoe as
follows: the client is allowed to manage log rotation and mailing lists and to create up to
20 subdomains. The use of disk space allotted for the client is restricted to 20 GB, and
the expiration date of the client account is set to 2008-12-31.
# ./client_pref --update JDoe -manage_log true -manage_maillists true
-max_subdom 20 -disk_space 20G -expiration 2008-12-31
Commands
Page 26

26 Using Command Line Utilities
Command
Parameter
Description
Example
--help or -h
Displays help
on the use of
the utility.
To view help on the use of the
client_pref utility:
# ./client_pref --help
or
# ./client_pref -h
Option
Parameter
Description
Example
create_domain
s
true|fal
se
Allows/Prohibits creation
domains.
Is false by default.
To allow the client with the login
name JDoe to create domains:
# ./client_pref -u JDoe create_domains true
manage_phosti
ng
true|fal
se
Allows/Prohibits
managing physical
hosting.
Is false by default.
To allow the client with the login
name JDoe to manage physical
hosting:
# ./client_pref -u JDoe manage_phosting true
manage_php_sa
fe_mode
true|fal
se
Allows/Prohibits
managing PHP safe
mode.
Is false by default.
Available since Plesk
8.1.1.
To allow the client with login name
JDoe to manage PHP safe mode:
# ./client_pref -u JDoe manage_php_safe_mode true
change_limits
true|fal
se
Allows/Prohibits
changing domain limits.
Is false by default.
To allow the client with the login
name JDoe to change domain
limits:
# ./client_pref -u JDoe change_limits true
-manage_dns
true|fal
se
Allows/Prohibits
managing DNS.
Is false by default.
To allow the client with the login
name JDoe to manage DNS:
# ./client_pref -u JDoe manage_dns true
-manage_log
true|fal
se
Allows/Prohibits
managing log rotation.
Is false by default.
To allow the client with the login
name JDoe to manage log
rotation:
# ./client_pref -u JDoe manage_log true
manage_cronta
b
true|fal
se
Allows/Prohibits
managing task
scheduler.
Is false by default.
To allow the client with the login
name JDoe to manage task
scheduler:
# ./client_pref -u JDoe manage_crontab true
Options
Page 27

Using Command Line Utilities 27
Option
Parameter
Description
Example
manage_anonft
p
true|fal
se
Allows/Prohibits
managing anonymous
FTP.
Is false by default.
To allow the client with the login
name JDoe to manage
anonymous FTP:
# ./client_pref -u JDoe manage_anonftp true
manage_webapp
s
true|fal
se
Allows/Prohibits
managing Java
applications.
Is false by default.
To allow the client with the login
name JDoe to manage Java
applications:
# ./client_pref -u JDoe manage_webapps true
manage_mailli
sts
true|fal
se
Allows/Prohibits
managing mailing lists.
Is false by default.
To allow the client with the login
name JDoe to manage mailing
lists:
# ./client_pref -u JDoe manage_maillists true
manage_sh_acc
ess
true|fal
se
Allows/Prohibits
managing system
access.
Is false by default.
To allow the client with the login
name JDoe to manage system
access:
# ./client_pref -u JDoe manage_sh_access true
manage_not_ch
root_shell
true|fal
se
Allows/Prohibits
managing non-chrooted
environment.
Is false by default.
To allow the client with the login
name JDoe to manage nonchrooted environment:
# ./client_pref -u JDoe manage_not_chroot_shell
true
manage_subdom
ains
true|fal
se
Allows/Prohibits
managing subdomains.
Is false by default.
To allow the client with the login
name JDoe to manage
subdomains:
# ./client_pref -u JDoe manage_subdomains true
-manage_quota
true|fal
se
Allows/Prohibits
managing hard disk
quota.
Is false by default.
To allow the client with login name
JDoe to manage hard disk quota:
# ./client_pref -u JDoe manage_quota true
-make_dumps
true|fal
se
Allows/Prohibits backing
up and restoring data.
Deprecated.
Is false by default.
To allow the client with the login
name JDoe to backup and restore
data:
# ./client_pref -u JDoe make_dumps true
allow_local_b
ackups
true|fal
se
Allows/Prohibits backing
up and restoring data
using the Plesk
repository.
Is false by default.
To allow the client with the login
name JDoe to backup and restore
data using the Plesk repository:
# ./client_pref -u JDoe allow_local_backups true
Page 28

28 Using Command Line Utilities
Option
Parameter
Description
Example
allow_ftp_bac
kups
true|fal
se
Allows/Prohibits backing
up and restoring data
using the FTP
repository.
Is false by default.
To allow the client with the login
name JDoe to backup and restore
data using the FTP repository:
# ./client_pref -u JDoe allow_ftp_backups true
-manage_drweb
true|fal
se
Allows/Prohibits
managing Dr.Web
antivirus application
used on client's
domains.
Deprecated since Plesk
8.1.1. Use the manage_virusfilter
option instead.
To allow the client with the login
name JDoe to manage the
Dr.Web antivirus application:
# ./client_pref -u JDoe manage_drweb true
manage_virusf
ilter
true|fal
se
Allows/Prohibits
managing antivirus tool
used on client's
domains.
Is false by default.
To allow the client with the login
name JDoe to manage antivirus
tool:
# ./client_pref -u JDoe manage_virusfilter true
remote_access
_interface
true|fal
se
Allows/Prohibits using
Plesk API.
Is false by default.
To allow the client with the login
name JDoe to use Plesk API:
# ./client_pref -u JDoe remote_access_interface
true
manage_domain
_aliases
true|fal
se
Allows/Prohibits
managing domain
aliases.
Is false by default.
To allow the client with the login
name JDoe to manage domain
aliases:
# ./client_pref -u JDoe manage_domain_aliases
true
-cp_access
true|fal
se
Allows/Prohibits
accessing Plesk GUI (as
opposite to using Plesk
API).
Is true by default.
To prohibit the client with login
name JDoe from accessing Plesk
GUI:
# ./client_pref -u JDoe cp_access false
manage_dashbo
ard
true|fal
se
Allows/Prohibits
managing desktop view.
Can be set to true only
if the -dashboard
option is set to true.
Is true by default.
To prohibit the client with login
name JDoe from managing
desktop view:
# ./client_pref -u JDoe manage_dashboard true
-stdgui
true|fal
se
Allows/Prohibits using
standard view.
Can be set to false
only if the -dashboard
option is set to true.
Is true by default.
To prohibit the client with the login
name JDoe from using standard
view:
# ./client_pref -u JDoe stdgui false
Page 29

Using Command Line Utilities 29
Option
Parameter
Description
Example
manage_spamfi
lter
true|fal
se
Allows/Prohibits
managing spam filter.
Is false by default.
To allow the client with the login
name JDoe to manage spam filter:
# ./client_pref -u JDoe manage_spamfilter true
manage_websta
t
true|fal
se
Allows/Prohibits
managing web statistics.
Is false by default.
Available since Plesk
8.2.
To allow the client with the login
name JDoe to manage web
statistics:
# ./client_pref -u JDoe manage_webstat true
-max_dom
<number>
Limits the number of
available domains.
Unlimited if set to-1.
To restrict maximum number of
domains available to the client
with the login name JDoe to 10:
# ./client_pref -u JDoe max_dom 10
max_dom_alias
es
<number>
Limits the number of
available domain
aliases.
Unlimited if set to -1.
To restrict the maximum number
of domain aliases available to the
client with the login name JDoe to
5:
# ./client_pref -u JDoe max_dom_aliases 5
-disk_space
<number>
[K|M|G]
Limits the amount of
available disk space.
A number without a
letter is interpreted as
the number of bytes.
Unlimited if set to -1.
To restrict the maximum amount
of disk space available to the
client with the login name JDoe to
100 MB:
# ./client_pref -u JDoe disk_space 100M
-max_traffic
<number>
[K|M|G]
Limits the monthly traffic
usage.
A number without a
letter is interpreted as
the number of bytes.
Unlimited if set to -1.
To restrict the maximum amount
of traffic available to the client with
the login name JDoe to 10
GB/month:
# ./client_pref -u JDoe max_traffic 10G
-max_box
<number>
Limits the number of
available mailboxes.
Unlimited if set to -1.
To restrict the maximum number
of mailboxes available to the client
with the login name JDoe to 100:
# ./client_pref -u JDoe max_box 100
-mbox_quota
<number>
[K|M|G]
Limits the amount of disk
space that a single
mailbox can occupy.
A number without a
letter is interpreted as
the number of bytes.
Unlimited if set to -1.
To set the mailbox quota for the
client with login name JDoe to 10
MB:
# ./client_pref -u JDoe mbox_quota 10M
Page 30

30 Using Command Line Utilities
Option
Parameter
Description
Example
-max_redir
<number>
Limits the number of
available mail redirects.
Unlimited if set to -1.
To restrict the maximum number
of mail redirects available to the
client with the login name JDoe to
10:
# ./client_pref -u JDoe max_redir 10
-max_mg
<number>
Limits the number of
available mail groups.
Unlimited if set to -1.
To set the number of mail groups
available to the client with the
login name JDoe to unlimited:
# ./client_pref -u JDoe max_mg -1
-max_resp
<number>
Limits the number of
available mail
autoresponders.
Unlimited if set to -1.
To restrict the maximum number
of mail autoresponders available
to the client with the login name
JDoe to 5:
# ./client_pref -u JDoe max_resp 5
-max_wu
<number>
Limits the number of
available web users.
Unlimited if set to -1.
To restrict the maximum number
of web users available to the client
with the login name JDoe to 50:
# ./client_pref -u JDoe max_wu 50
max_maillists
<number>
Limits the number of
available mailing lists.
Unlimited if set to -1.
To restrict the maximum number
of mailing lists available to the
client with the login name JDoe to
30:
# ./client_pref -u JDoe max_maillists 30
-max_db
<number>
Limits the number of
available databases.
Unlimited if set to -1.
To restrict the maximum number
of databases available to the client
with the login name JDoe to 20:
# ./client_pref -u JDoe max_db 2
-max_webapps
<number>
Limits the number of
available Java
applications.
Unlimited if set to -1.
To restrict the maximum number
of Java applications available to
the client with the login name
JDoe to 50:
# ./client_pref -u JDoe max_webapps 50
-max_subdom
<number>
Limits the number of
available subdomains.
Unlimited if set to -1.
To restrict the maximum number
of subdomains available to the
client with the login name JDoe to
40:
# ./client_pref -u JDoe max_subdom 40
-expiration
<YYYYMM-DD>
Limits the validity period
of a client account.
Unlimited if set to -1.
To set the validity period of the
client account with the login name
JDoe to February 29, 2008:
# ./client_pref -u JDoe expiration 2008-2-29
Page 31

Using Command Line Utilities 31
Option
Parameter
Description
Example
-ip_pool
add|del:
<ip1>,<i
p2>,..,<
ipN>
Adds/Deletes IP
addresses to/from a
client's IP address pool.
To add IP addresses 192.0.2.78
and 192.0.2.89 to the IP address
pool of the client account with
login name JDoe:
# ./client_pref -u JDoe ip_pool
add:192.0.2.78,192.0.2.89
-locale
<languag
e_code>
Sets the default interface
language for client's
control panel interface.
The argument of the
command must be a
valid four-letter language
code derived from the
language code
described in ISO-639-2
and the corresponding
country code described
in ISO-3166.
For example, the Plesk
code for the Italian
language code is it-
IT; the Plesk code for
the American variant of
English is en-US; the
Plesk code for the British
variant of English is en-
GB.
To set the default interface
language for the client with the
login name JDoe to Russian:
# ./client_pref -u JDoe locale ru-RU
-language
<languag
e_code>
Sets the default interface
language for client's
control panel interface.
Deprecated since Plesk
8.0. Use the -locale
option instead.
To set the default interface
language for the client with the
login name JDoe to Russian:
# ./client_pref -u JDoe language ru-RU
-skin
<skin_na
me>
Sets the default interface
skin for a client's control
panel interface.
To set the skin WinXP Olivegreen
as the default interface skin for the
client with the login name JDoe:
# ./client_pref -u JDoe skin "WinXP Olivegreen"
-multiplesessions
true|fal
se
Allows/Prohibits having
several simultaneous
sessions under client's
login.
Is true by default.
To prohibit multiple sessions to
run simultaneously under login of
the client with the login name
JDoe:
# ./client_pref -u JDoe multiple-sessions false
-max-buttonlength
<number>
Limits button label length
for the client's control
panel interface.
To restrict the maximum button
label length for the control panel
interface of the client with the login
name JDoe to 10:
# ./client_pref -u JDoe max-button-length 10
Page 32

32 Using Command Line Utilities
Option
Parameter
Description
Example
-lock-screen
true|fal
se
Prevents/Allows working
with Plesk until page is
completely loaded.
Is true by default.
To prevent client with login name
JDoe from working with the control
panel until control panel screens
are completely loaded:
# ./client_pref -u JDoe lock-screen true
-desktoppreset
<preset_
name>
Sets the default desktop
preset for client's control
panel interface.
To set the preset Custom Desktop
as the default interface skin for the
client with the login name JDoe:
# ./client_pref -u JDoe skin "Custom Desktop"
select_db_ser
ver
true|fal
se
Allows/Prohibits
choosing a DB server
from the servers
registered in Plesk,
when creating a
database.
Is false by default.
Available since Plesk
8.6.
To allow the client with the
login name JDoe to choose DB
server on which a database is
to be created:
# ./client_pref -u JDoe select_db_server true
Page 33

Using Command Line Utilities 33
Client Templates: client_template Utility
Command
Parameter
Description
Example
--create
or -c
<client_templat
e_name>
Creates a new
client template.
To create the template named Client
Template:
# ./client_template --create
"Client Template"
or
# ./client_template -c "Client
Template"
The client_template utility enables the administrator to manage client templates
through CLI. By using this utility, you can perform the following tasks:
creating, renaming, and deleting client templates
editing client account limits and preferences for clients creating with a client
templates
managing various domain hosting parameters - log file management, mail
preferences, and others
Usage
client_template <command> <template_name> [
<option_1> [<param>]
[<option_2> [<param>]]
… [<option_N> [<param>]]
Example
The following command updates the client template Client Template as follows: the
client is allowed to manage log rotation and mailing lists and to create up to 20
subdomains. The use of disk space allotted for the client is restricted to 20 GB, and the
expiration date of the client account is set to 2008-12-31.
# ./client_template --update "Client Template" -manage-log true manage-mailllists true -max-subdom 20 -disk_space 20GB -expiration
2007-12-31
Commands
Page 34

34 Using Command Line Utilities
Command
Parameter
Description
Example
--update
or -u
<client_templat
e_name>
Updates an
existing client
template.
To allow clients created with the template
Client template to create domains:
# ./client_template --update
"Client Template" -createdomains true
or
# ./client_template -u "Client
Template" -create-domains true
--remove
or -r
<client_templat
e_name>
Deletes a client
template.
To remove the template Client Template:
# ./client_template --remove
"Client Template"
or
# ./client_template -r "Client
Template"
--xml-
info or -i
<client_templat
e_name>
Displays
information
about a client
template in the
XML format.
To view information about the template
Client Template in the XML format:
# ./client_template --xml-info
"Client Template"
or
# ./client_template -x
ClientTemplate
--help or
-h
Displays help on
the use of the
utility.
To view help on the use of the utility:
# ./client_template --help
or
# ./client_template -h
Option
Parameter
Description
Example
-new-name
<string>
Sets a new name for
an existing client
template.
To rename the template from Client
Template 1 to Client Template 2:
# ./client_template -u
"Client Template 1" -new-name
"Client Template 2"
-cp-access
true|false
Allows/Prohibits
accessing Plesk GUI
(as opposite to using
Plesk API).
Is true by default.
To prohibit the client created with the
template Client Template from
accessing Plesk GUI:
# ./client_template -u
"Client Template" -cp-access
false
-createdomains
true|false
Allows/Prohibits
creating domains.
Is false by default.
To allow clients created with the
template Client Template to create
domains:
# ./client_template -u
"Client Template" -createdomains true
Options
Page 35

Using Command Line Utilities 35
Option
Parameter
Description
Example
-managephosting
true|false
Allows/Prohibits
managing physical
hosting.
Is false by default.
To allow clients created with the
template Client Template to manage
physical hosting:
# ./client_template -u
"Client Template" -managephosting true
manage_php_
safe_mode
true|false
Allows/Prohibits
managing PHP safe
mode.
Is false by default.
Available since Plesk
8.1.1.
To allow clients created with the
template Client Template to manage
php safe mode:
# ./client_template -u
"Client Template" -managephp-safe-mode true
-managequota
true|false
Allows/Prohibits
managing hard disk
quota.
Is false by default.
To allow clients created with the
template Client Template to manage
hard disk quota:
# ./client_template -u
"Client Template" -managequota true
-changelimits
true|false
Allows/Prohibits
changing domain
limits.
Is false by default.
To allow clients created with the
template Client Template to change
domain limits:
# ./client_template -u
"Client Template" -changelimits true
-manage-dns
true|false
Allows/Prohibits
managing DNS.
Is false by default.
To allow clients created with the
template Client Template to manage
DNS:
# ./client_template -u
"Client Template" -manage-dns
true
-manage-log
true|false
Allows/Prohibits
managing log
rotation.
Is false by default.
To allow clients created with the
template Client Template to manage
log rotation:
# ./client_template -u
"Client Template" -manage-log
true
-managecrontab
true|false
Allows/Prohibits
managing task
scheduler.
Is false by default.
To allow clients created with the
template Client Template to manage
task scheduler:
# ./client_template -u
"Client Template" -managecrontab true
-manageanonftp
true|false
Allows/Prohibits
managing
anonymous FTP.
Is false by default.
To allow clients created with the
template Client Template to manage
anonymous FTP:
# ./client_template -u
"Client Template" -manageanonftp true
Page 36

36 Using Command Line Utilities
Option
Parameter
Description
Example
-managewebapps
true|false
Allows/Prohibits
managing Java
applications.
Is false by default.
To allow clients created with the
template Client Template to manage
Java applications:
# ./client_template -u
"Client Template" -managewebapps true
-managemaillists
true|false
Allows/Prohibits
managing mailing
lists.
Is false by default.
To allow clients created with the
template Client Template to manage
mailing lists:
# ./client_template -u
"Client Template" -managemaillists true
-manage-shaccess
true|false
Allows/Prohibits
managing system
access.
Is false by default.
To allow clients created with the
template Client Template to manage
system access:
# ./client_template -u
"Client Template" -manage-shaccess true
-managenot-chrootshell
true|false
Allows/Prohibits
managing nonchrooted
environment.
Is false by default.
To allow clients created with the
template Client Template to manage
non-chrooted environment:
# ./client_template -u
"Client Template" -managenot-chroot-shell true
-managesubdomains
true|false
Allow/Prohibits
managing
subdomains.
Is false by default.
To allow clients created with the
template Client Template to manage
subdomains:
# ./client_template -u
"Client Template" -managesubdomains true
-allowlocalbackups
true|false
Allows/Prohibits
backing up and
restoring data using
the Plesk repository.
Is false by default.
To allow clients created with the
template Client Template to back up
and restoring data using the Plesk
repository:
# ./client_template -u
"Client Template" -allowlocal-backups true
-allow-ftpbackups
true|false
Allows/Prohibits
backing up and
restoring data using
the FTP repository.
Is false by default.
To allow clients created with the
template Client Template to back up
and restoring data using the FTP
repository:
# ./client_template -u
"Client Template" -allow-ftpbackups true
Page 37

Using Command Line Utilities 37
Option
Parameter
Description
Example
-managedrweb
true|false
Allows/Prohibits
managing Dr.Web
antivirus application.
Is false by default.
Deprecated since
Plesk 8.1.1. Use the
manage_virusfilt
er option instead.
To allow clients created with the
template Client Template to manage
the Dr.Web antivirus application:
# ./client_template -u
"Client Template" -managedrweb true
-managevirusfilter
true|false
Allows/Prohibits
managing antivirus
tool.
Is false by default.
To allow clients created with the
template Client Template to manage
antivirus tool:
# ./client_template -u
"Client Template" -managevirusfilter true
-remoteaccessinterface
true|false
Allows/Prohibits
using Plesk API.
Is false by default.
To allow clients created with the
template Client Template to use Plesk
API:
# ./client_template -u
"Client Template" -remoteaccess-interface true
-managedomainaliases
true|false
Allows/Prohibits
managing domain
aliases.
Is false by default.
To allow clients created with the
template Client Template to manage
domain aliases:
# ./client_template -u
"Client Template" -managedomain-aliases true
-managedashboard
true|false
Allows/Prohibits
managing desktop
view.
Can be set to true
only if the dashboard option is
set to true.
Is true by default.
To prohibit clients created with the
template Client Template from
managing desktop view:
# ./client_template -u
"Client Template" -managedashboard true
-dashboard
true|false
Allows/Prohibits
using desktop view.
Can be set to false
only if the -stdgui
option is set to true.
Is true by default.
To prohibit clients created with the
template Client Template from using
desktop view:
# ./client_template -u
"Client Template" -dashboard
false
-stdgui
true|false
Allows/Prohibits
using standard view.
Can be set to false
only if the dashboard option is
set to true.
Is true by default.
To prohibit clients created with the
template Client Template from using
standard view:
# ./client_template -u
"Client Template" -stdgui
false
Page 38

38 Using Command Line Utilities
Option
Parameter
Description
Example
-managewebstat
true|false
Allows/Prohibits
managing web
statistics.
Is false by default.
Available since Plesk
8.2.
To allow clients created with the
template Client Template to manage
web statistics:
# ./client_template -u
"Client Template" -managewebstat true
-managespamfilter
true|false
Allows/Prohibits
managing spam filter.
Is false by default.
To allow clients created with the
template Client Template to manage
spam filter:
# ./client_template -u
"Client Template" -managespamfilter true
-max-dom
<number>
Limits the number of
available domains.
Unlimited if set to -1.
To restrict the maximum number of
domains available to clients created
with the template Client Template to
10:
# ./client_template -u
"Client Template" -max-dom 10
-max-domaliases
<number>
Limits the number of
availble domain
aliases.
Unlimited if set to -1.
To restrict the maximum number of
domain aliases available to clients
created with the template Client
Template to 5:
# ./client_template -u
"Client Template" -max-domaliases 5
-disk-space
<number>[K
|M|G]
Limits the amount of
available disk space.
A number without a
letter is interpreted as
the number of bytes.
Unlimited if set to -1.
To restrict the maximum amount of the
disk space available to clients created
with the template Client Template to
100 MB:
# ./client_template -u
"Client Template" -disk-space
100M
-maxtraffic
<number>[K
|M|G]
Limits the monthly
traffic usage.
A number without a
letter is interpreted as
the number of bytes.
Unlimited if set to -1.
To restrict the maximum amount of
traffic available to clients created with
the template Client Template to 10
GB/month:
# ./client_template -u
"Client Template" -maxtraffic 10G
-max-box
<number>
Limits the number of
available mailboxes.
Unlimited if set to -1.
To restrict the maximum number of
mailboxes available to clients created
with the template Client Template to
100:
# ./client_template -u
"Client Template" -max-box
100
Page 39

Using Command Line Utilities 39
Option
Parameter
Description
Example
-mbox-quota
<number>[K
|M|G]
Limits the amount of
disk space that a
single mailbox can
occupy.
A number without a
letter is interpreted as
the number of bytes.
Unlimited if set to -1
To set the mailbox quota available to
clients created with the template Client
Template to 10 MB:
# ./client_template -u
"Client Template" -mbox-quota
10M
-max-redir
<number>
Limits the number of
available mail
redirects.
Unlimited if set to -1.
To restrict the maximum number of
mail redirects available to clients
created with the template Client
Template to 10:
# ./client_template -u
"Client Template" -max-redir
10
-max-mg
<number>
Limits the number of
available mail
groups.
Unlimited if set to -1.
To restrict the maximum number of
mail groups available to clients created
with the template Client Template to 5:
# ./client_template -u
"Client Template" -max-mg 5
-max-resp
<number>
Limits the number of
available mail
autoresponders.
Unlimited if set to -1.
To restrict the maximum number of
mail autoresponders available to
clients created with the template Client
Template to 15:
# ./client_template -u
"Client Template" -max-resp
15
-max-wu
<number>
Limits the number of
available mail users.
Unlimited if set to -1.
To restrict the maximum number of
mail users available to clients created
with the template Client Template to
50:
# ./client_template -u
"Client Template" -max-wu 50
-maxmaillists
<number>
Limits the number of
available mailing
lists.
Unlimited if set to -1.
To restrict the maximum number of
mailing lists available to clients created
with the template Client Template to
30:
# ./client_template -u
"Client Template" -maxmaillists 30
-max-db
<number>
Limits the number of
available databases.
Unlimited if set to -1.
To restrict the maximum number of
databases available to clients created
with the template Client Template to 2:
# ./client_template -u
"Client Template" -max-db 2
Page 40

40 Using Command Line Utilities
Option
Parameter
Description
Example
-maxwebapps
<number>
Limits the number of
available Java
applications.
Unlimited if set to -1.
To restrict the maximum number of
Java applications available to clients
created with the template Client
Template to 50:
# ./client_template -u
"Client Template" -maxwebapps 50
-max-subdom
<number>
Limits the number of
available
subdomains.
Unlimited if set to -1.
To set the number of subdomains
available to clients created with the
template Client Template to unlimited:
# ./client_template -u
"Client Template" -max-subdom
-1
-expiration
<YYYY-MMDD>
Sets validity period
for client accounts
created with a
template.
Unlimited if set to -1.
To restrict the validity period to clients
created with the template Client
Template to 20 days:
# ./client_template -u
"Client Template" -expiration
20D
-ip-pool
add|del:<i
p1>,<ip2>,
..,<ipN>
Adds/Deletes shared
IP addresses to/from
IP address pool.
To add shared IP addresses
192.0.2.78 and 192.0.2.89 to the IP
address pool for clients created with
the template Client Template:
# ./client_template -u
"Client Template" -ip-pool
add:192.0.2.78,192.0.2.89
-excl-ipnum
<number>
Limits the number of
available exclusive IP
addresses that can
be assigned to a
client.
To restrict the maximum number of
exclusive IP addresses available to
clients created with the template Client
Template to 4:
# ./client_template -u
"Client Template" -excl-ipnum 4
-select-dbserver
true|false
Allows/Prohibits
choosing a DB server
from the servers
registered in Plesk,
when creating a
database.
Is false by default.
Available since Plesk
8.6.
To allow clients created with the
template Client Template to choose
a DB server on which a database is
to be created:
# ./client_template -u
"Client Template" -select-dbserver true
Page 41

Using Command Line Utilities 41
ColdFusion Service on Plesk Server:
Command
Parameter
Description
Example
--server
or -s
<path>
Enables the ColdFusion
application to work in
the server mode.
To enable the ColdFusion software
installed in the
/usr/local/software/coldfusion
directory on the Plesk server to work in the
server mode:
# ./cfsetting --server
/usr/local/software/coldfusion
or
# ./cfsetting -s
/usr/local/software/coldfusion
--j2ee or
-j
<path>
Enables the ColdFusion
application to work in
the J2EE mode.
To enable the ColdFusion software
installed in the
/usr/local/software/coldfusion
directory on the Plesk server to work in the
J2EE mode:
# ./cfsetting --j2ee
/usr/local/software/coldfusion
or
# ./cfsetting -j
/usr/local/software/coldfusion
--help or
-h
Displays help on the
use of the utility.
To view help on the use of the utility:
# ./cfsetting --help
or
# ./cfsetting -h
cfsetting Utility
The cfsetting utility is used to manage the ColdFusion Service. By using this utility,
you can configure the ColdFusion service on the Plesk server.
Usage
cfsetting <command> [<path>]
Example
The following command enables the ColdFusion software installed in the
/usr/local/software/coldfusion directory on the Plesk server to work in the
server mode:
# ./cfsetting --server /usr/local/software/coldfusion
Commands
Page 42

42 Using Command Line Utilities
Custom Buttons: custombutton Utility
The custombutton utility is used to create custom buttons and manage their
properties (interface location, button names, URLs, context help messages, and other
parameters) through CLI.
Custom buttons of the following types can be created and managed by using this utility:
custom buttons pointing to a URL
custom buttons linked to site applications
Usage
custombutton <command> [
<option_1> [<param>]
[<option_2> [<param>]]
… [<option_N> [<param>]]
]
Example 1
The following command creates the custom button Statistics that opens URL
http://example.com/site-statistics, places the custom button on domain administration
pages, includes domain ID#, domain name, and client ID# in browser requests
generated by clicking on the button, sets the context help message for the button as
Click to go to site-statistics, and makes the button available in control panels of all
domain users.
# ./custombutton --create -text Statistics -url
http://example.com/site-statistics -place domain -url_comp
dom_id,dom_name,cl_id -conhelp "Click to go site-statistics" -public
true
Example 2
The following command creates custom button named osCom linked to site application
osCommerce installed on domain example.com, and accessible at URL
http://example.com/osCommerce, and sets the context help message for the button as
Click to open osCommerce.
# ./custombutton --create -text osCom -url
http://example.com/osCommerce -siteapp-link -siteapp-domain
example.com -siteapp-name osCommerce -conhelp "Click to open
osCommerce"
Page 43

Using Command Line Utilities 43
Commands
Command
Parameter
Description
Example
--create
or -c
Creates a new
custom button.
Requires the text and -url
options.
To create the new custom button Statistics
(pointing to URL http://example.com/sitestatistics) and print its Plesk database ID:
# ./custombutton --create -text
Statistics -url
http://example.com/site-statistics
-print-id
or
# ./custombutton -c -text
Statistics -url
http://example.com/site-statistics
-print-id
--info or
-i
<id#>
Displays
properties of a
custom button with
the specified ID
number.
To view properties of a custom button which
Plesk database ID is 14:
# ./custombutton --info 14
or
# ./custombutton -i 14
--remove
or -r
<id#,id#,
...>
Deletes one or
more custom
buttons with the
specified ID
numbers.
To delete the custom buttons which ID
numbers are 4 and 5::
# ./custombutton --remove 4,5
or
# ./custombutton -r 4,5
--help or
-h
Displays help on
the use of the
utility
To view help on the use of the utility:
# ./custombutton --help
or
# ./custombutton -h
--man or -
m
Displays detailed
help on the use of
the utility with
examples
To view detailed help with examples on the
use of the utility:
# ./custombutton --man
or
# ./custombutton -m
Option
Parameter
Description
Example
-owner
admin|<user_
login_name>|
<domain_name
>
Assigns ownership
of a custom button
to a Plesk client.
Is admin by
default.
To set the client with login name JDoe
the owner of custom button Statistics to
be created:
# ./custombutton -c -text
Statistics -url
http://example.com/sitestatistics -owner JDoe
Options
Page 44

44 Using Command Line Utilities
Option
Parameter
Description
Example
-sort_key
<int>
Sets the custom
button appearance
priority.
(The lower is the
number - the
higher is priority.)
Is 100 by default.
To set the Statistics appearance priority
on a Plesk page to 3:
# ./custombutton -c -text
Statistics -url
http://example.com/sitestatistics -sort_key 3
-place
client|domai
n|admin|navi
gation
Sets a custom
button location.
The following
locations are
available: Client's
home page
(client), Domain
administrator's
home page
(domain), Plesk
administrator's
home page
(admin),
Navigation pane
(navigation).
Is client by
default.
To set the custom button Statistics
location to administrator desktop:
# ./custombutton -c -text
Statistics -url
http://example.com/sitestatistics -place admin
-text
<button_labe
l>
Specifies the text
accompanying a
custom button.
Required with the
--create.
To set text accompanying the custom
button to Statistics:
# ./custombutton -c -text
Statistics -url
http://example.com/sitestatistics
-url
<URL>
Specifies the URL
to which a custom
button to be
created will point.
Required with the
--create when
custom buttons
pointing to URLs
are created.
Requires -text
option.
To set the URL to which a custom button
Statistics will point to example.com/sitestatistics:
# ./custombutton -c -text
Statistics -url
http://example.com/sitestatistics
Page 45

Using Command Line Utilities 45
Option
Parameter
Description
Example
-url_comp
dom_id|dom_n
ame|ftp_user
|ftp_pass|cl
_id|cname|pn
ame|email
Specifies various
parameters to be
included with the
custom button's
URL in browser
requests.
The following
parameters can be
included:
dom_id - domain
ID
dom_name -
domain name
ftp_user - FTP
user name
ftp_pass - FTP
user password
cl_id - client ID
cname - client's
company name
pname - client's
contact name
email - client's
email
To include domain ID, domain name, and
client ID in the browser requests
generated by using custom button
Statistics:
# ./custombutton -c -text
Statistics -url
http://example.com/sitestatistics -url_comp
dom_id,dom_name,cl_id
-conhelp
<text>
Specifies text of a
contextual help
message
associated with a
custom button.
To set the context help tip for the custom
button Statistics to "Click to go to site-
statistics":
# ./custombutton -c -text
Statistics -url
http://example.com/sitestatistics -conhelp "Click to
go to example.com/sitestatistics"
-file
<path>
Specifies path to
the image file that
will be used as a
custom button
icon.
To set file Stat.gif as the custom button
Statistics icon:
# ./custombutton -c -text
CustomButton -url
http://example.com -file
/usr/local/psa/Images/PleskInt
erface/ButtonImage.gif"
-public
true|false
Specifies whether
a custom button
appears in control
panel interfaces of
users subordinate
to the custom
button's owner.
Is false by
default.
To display custom button Statistics that
has domain administrator home page
location in control panel interfaces of all
users on this domain:
# ./custombutton -c -text
Statistics -url
http://example.com/sitestatistics -place domain public true
Page 46

46 Using Command Line Utilities
Option
Parameter
Description
Example
-internal
true|false
Specifies whether
a custom button's
URL is opened in
Plesk own frame or
in the new window.
Is false by
default.
To enable opening the custom button
Statistics URL in Plesk own frame:
# ./custombutton -c -text
Statistics -url
http://example.com/sitestatistics -place domain internal true
-print-id
Prints the Plesk
database ID of a
created custom
button.
To create the custom button Statistics to
open example.com/site-statistics and
print its Plesk database ID:
# ./custombutton -c -text
Statistics -url
http://example.com/sitestatistics -print-id
-siteapplink
Links a custom
button with a site
application
installed on a
domain.
Required with -create when
custom button
linked to site
applications is
created.
Requires siteapp-domain
option.
Also requires -
siteapp-name, -
siteapp-
version -
siteapp-
release or -
siteapp-id
options.
To create a custom button osCom linked
to a site application (which ID in the
database of Plesk is 24) installed on the
domain example.com:
# ./custombutton -c -siteapplink -siteapp-domain
example.com -siteapp-id 24
-siteappdomain
<domain>
Specifies a domain
on which a site
application to be
linked to a custom
button is installed.
Required with the
-siteapp-link
option.
To create a custom button osCom linked
to a site application (which ID in the
database of Plesk is 24) installed on the
domain example.com and accessible:
# ./custombutton -c -siteapplink -siteapp-domain
example.com -siteapp-id 24
Page 47

Using Command Line Utilities 47
Option
Parameter
Description
Example
-siteappid
<int>
Specifies the Plesk
database ID of a
site application to
be linked to a
custom button.
To create a custom button osCom linked
to a site application (which ID in the
database of Plesk is 24) installed on the
domain example.com and accessible:
# ./custombutton -c -text
osCom -siteapp-link -siteappdomain example.com -siteapp-id
24
-siteappname
<name>
Specifies the name
of a site application
to be linked to a
custom button.
To create a custom button osCom linked
to a site application osCommerce v.2.2
release 51 installed on the domain
example.com:
# ./custombutton -c -text
osCom -siteapp-link -siteappdomain example.com -siteappname osCommerce -siteappversion 2.2 -siteapp-release
51
-siteappversion
<string>
Specifies the
version of a site
application to be
linked to a custom
button.
To create a custom button osCom linked
to a site application osCommerce v.2.2
release 51 installed on the domain
example.com:
# ./custombutton -c -text
osCom -siteapp-link -siteappdomain example.com -siteappname osCommerce -siteappversion 2.2 -siteapp-release
51
-siteapprelease
<string>
Specifies the
release number of
a site application to
be linked to a
custom button.
To create a custom button osCom linked
to a site application osCommerce v.2.2
release 51 installed on the domain
example.com:
# ./custombutton -c -text
osCom -siteapp-link -siteappdomain example.com -siteappname osCommerce -siteappversion 2.2 -siteapp-release
51
-siteappprefix
<directory>
Specifies a path to
directory where the
application is
installed relatively
to httpdocs
directory.
To create a custom button linked to the
site application osCommerce v.2.2
release 51 which is installed in directory
/httpdocs/osCommerce/v2.2 on the
domain example.com:
# ./custombutton -c -siteapplink -siteapp-domain
example.com -siteapp-name
osCommerce -siteapp-prefix
osCommerce/v2.2
Page 48

48 Using Command Line Utilities
Option
Parameter
Description
Example
-siteappssl
true|false
Specifies whether
a custom button is
linked to a site
application
installed in the
/httpsdocs
directory, that is,
accessible only
through the HTTPS
protocol.
To create a custom button linked to a site
application (which ID in the database of
Plesk is 24) installed in the httpsdocs
directory on the domain example.com:
# ./custombutton -siteapp-link
-siteapp-domain example.com siteapp-id 24 -siteapp-ssl
true
-siteappsubdomain
<name>
Specifies the name
of a subdomain if a
site application is
installed on a
subdomain.
To create a custom button osCom linked
to a site application osCommerce v.2.2
release 51 which is installed on the
subdomain sample of the domain
example.com:
# ./custombutton -c -text
osCom -sitepp-link -siteappdomain example.com -siteappname osCommerce -siteappsubdomain sample -siteappversion 2.2 -siteapp-release
51
Page 49

Using Command Line Utilities 49
Database Servers: database-server Utility
Command
Parameter
Description
Example
--createserver
<host>:<p
ort>
Creates a database server
entry in Plesk.
Requires -type option.
To create the database server
entry in Plesk for the MySQL server
available at IP address and port
number 192.0.2.78:3838 and set
the server administrator's login
name dbadmin and password
dbpass:
# ./database-server -create-server
192.0.2.78:3838 -type
mysql -admin dbadmin passwd dbpass
The database-server utility is used to manage database server entries in Plesk
through CLI. By using this utility, you can perform the following tasks:
creating database server entries in Plesk
setting and editing database server connection parameters in the entries
Usage
database-server <command> [
<option_1> [<param>]
[<option_2> [<param>]]
… [<option_N> [<param>]]
]
Example
The following command sets the new login name dbadmin and the new password
dbpass for the database server administrator on a remote database server previously
available at 192.0.2.78:3838 (as recorded in the database server entry in Plesk) and
sets the IP address and port number for the entry to 192.0.2.89:3636.
# ./database-server --update-server 192.0.2.78:67.78 -set
192.0.2.89:3636 -admin dbadmin -passwd dbpass
Commands
Page 50

50 Using Command Line Utilities
Command
Parameter
Description
Example
--updateserver
<host>:<p
ort>
Updates the following
database server connection
settings in the database
server entry in Plesk: type,
host address, port number.
The database server entry
must exist in Plesk before
executing this command.
The changes made by this
command may adversely
affect performance of site
applications and user scripts.
Cannot be used to change
the local MySQL database
server entry settings.
To change the database server
administrator's login name to
newadmin and password to
newpass on the remote MySQL
server available at IP address and
port number 192.0.2.78:3838:
# ./database-server -update-server
192.0.2.78:3838 -admin
newadmin -passwd newpass
--removeserver
<host>:<p
ort>
Deletes a database server
entry from Plesk.
Only remote database
servers that have no hosted
databases on it can be
deleted from Plesk. A default
database server cannot be
deleted.
To remove the database server
entry from Plesk for the database
server available at IP address and
port number 192.0.2.78:3838:
# ./database-server -remove-server
192.0.2.78:3838
--setdefaultserver
<host>:<p
ort>
Assigns a remote database
server entry as the default
server for the database type.
Only remote database
servers can be set as default
servers by using this
command.
To set the database server
available at 192.0.2.78:3838 for
databases of its type:
# ./database-server --setdefault-server
192.0.2.78:3838
--setdefaultserverlocal
Assigns a local database
server as the default server
for the database type.
Requires -type option.
To set the local MySQL server as
the default server for MySQL
databases:
# ./database-server --setdefault-server-local -type
mysql
--help or -
h
Displays help on the use of
the utility.
To view help on the use of the
utility:
# ./database-server --help
or
# ./database-server -h
Page 51

Using Command Line Utilities 51
Options
Option
Parameter
Description
Example
-set
<host>:<p
ort>
Specifies a database server
host and port number.
Used only with the -update-server.
To change the IP address and port
number to 192.0.2.89:3636 for the
remote database server previously
available at 192.0.2.16:3838 as
recorded in the database server
entry in Plesk:
# ./database-server -update-server
192.0.2.16:3838 -type mysql
-set 192.0.2.89:3636
-type
mysql|pos
tgresql
Specifies the type of a
database server.
Required with --create-
server and --setdefault-server-local.
To create a database server entry in
Plesk for a MySQL server available
at 192.0.2.78:3838 and set the
server administrator's login name
dbadmin and password dbpass:
# ./database-server -create-server
192.0.2.78:3838 -type mysql
-admin dbadmin -passwd
dbpass
-admin
<login_na
me>
Specifies database server
administrator's login name.
-passwd
<password
>
Specifies database server
administrator's password.
For additional comments, see
the Note below the table.
Note: Use of this option is not recommended. Passing passwords through CLI as
parameters of the -passwd option may potentially compromise the system's security
as command line can be observed by other users of the system. It is more secure to
pass passwords through the environment variables. You can transfer non-encrypted
passwords by using environment variable PSA_PASSWORD while using single quotes to
specify the empty values in the command line for the argument of the -passwd - passwd_type options.
Page 52

52 Using Command Line Utilities
Databases: database Utility
Command
Parameter
Description
Example
--create
or -c
<database
_name>
Creates a database on a
database server.
Requires the -domain
option.
In addition, either the type option is required if
the database is to be
created on a local database
server, or the -server
option is required if the
database is to be created
on a remote database
server.
To create the database jdoe-gallery
for the domain example.com on the
local MySQL server:
# ./database --create jdoegallery -domain example.com
-type mysql
or
# ./database -c jdoegallery -domain example.com
-type mysql
The database utility is used to manage databases and database users in Plesk
through CLI. By using this utility, you can perform the following tasks:
creating or deleting databases
adding and removing database users
adding or removing database access records for database users
editing database user credentials
setting charset for PostgreSQL databases
Usage
database <command> [<database name>] [
<option_1> [<param>]
[<option_2> [<param>]]
… [<option_N> [<param>]]
]
Example
The following command creates database jdoe-gallery on a database server accessible
at the IP address and port number 192.0.2.78:3838 and prints the created Plesk
database ID:
# ./database --create jdoe-gallery -domain example.com -server
192.0.2.78:3838 -print-id
Commands
Page 53

Using Command Line Utilities 53
Command
Parameter
Description
Example
--update
or -u
<database
_name>
Updates database settings.
Adds, edits, or removes a
database user.
To add the user Jane to the database
jdoe-gallery:
# ./database --update jdoegallery -add_user Jane
or
# ./database –u jdoegallery -add_user Jane
--remove
or -r
<database
_name>
Deletes a database.
To delete database jdoe-gallery from
the database server:
# ./database --remove jdoegallery
or
# ./database -r jdoegallery
-removedbs
<ID,ID,..
.>
Deletes multiple databases
specified with their ID from
respective databases
servers.
Parameter ID is the unique
Plesk database ID.
To delete databases which Plesk ID
are 14 and 56:
# ./database --remove-dbs
14,56
-removedbus
<ID,ID,..
.>
Deletes multiple database
users.
Parameter ID is the unique
Plesk database ID.
To delete database users whose
Plesk ID are 22 and 34:
# ./database --remove-dbus
22,34
--help or
-h
Displays help on the use of
the utility.
To view the help info on the use of
this utility:
# ./database --help
or
# ./database –h
Option
Parameter
Description
Example
-domain
<domain_na
me>
Specifies a domain name.
Required with --create.
To create database jdoe-
gallery for the domain
example.com on the local
MySQL server:
# ./database -c jdoegallery -domain
example.com -type
mysql
-type
postgresql
|mysql
Specifies the type of the
database.
Used only with the -create.
Options
Page 54

54 Using Command Line Utilities
Option
Parameter
Description
Example
-passwd
<password>
Sets the database user
password for accessing the
database.
Is required with -
passwd_type and -
add_user options.
For additional comments,
see the Note below the
table.
To set the password to
access database jdoe-gallery
for the user with the login
name JDoe to sample:
# ./database -u jdoegallery -update_user
JDoe -passwd sample
-passwd_type
plain|encr
ypted
Specifies the type of a
database user password.
Is plain by default.
Requires -passwd option.
For additional comments,
see the Note below the
table.
To set type of password for
the database jdoe-gallery
user with the login name
JDoe and the password
sample to encrypted:
# ./database -u jdoegallery -update_user
JDoe -passwd_type
encrypted -passwd
sample
-add_user
<database_
user_login
_name>
Adds a database user to the
database.
Requires -passwd option.
To add the user with the login
name JDoe and password
sample to database jdoegallery:
# ./database -u jdoegallery -add_user JDoe
-passwd sample
-update_user
<login_nam
e>
Updates database user
settings.
To set the password for user
with the login name JDoe to
access database jdoe-gallery
to sample:
# ./database -u jdoegallery -update_user
JDoe -passwd sample
-remove_user
<user_logi
n_name>
Removes a database user
from the database.
To remove the user with the
login name JDoe from the
database jdoe-gallery:
# ./database -u jdoegallery -remove_user
JDoe
-user_name
<user_logi
n_name>
Sets a login name for a
database user.
To change the jdoe-gallery
user login name from JDoe to
Jane:
# ./database -u jdoegallery -update_user
JDoe -user_name Jane
Page 55

Using Command Line Utilities 55
Option
Parameter
Description
Example
-add-access
<host>
Adds an access record for a
database user: IP address or
name of a host from which a
database user can remotely
access the database.
Host may be specified by
either its host name or IP
address. A subnet mask can
be specified, too. MySQL
wildcard characters (_ and
%) are allowed; for more
information, consult
http://dev.mysql.com/doc/ref
man/5.0/en/connectionaccess.html).
To enable remote access to
the database jdoe-gallery
from the host with IP address
192.0.2.78 for the database
user with the login name
Jane:
# ./database -u jdoegallery -update_user
Jane -passwd sample add-access 192.0.2.78
-removeaccess
<host>
Removes an access record
for a database user: IP
address or name of a host
from which a database user
can remotely access the
database.
Host may be specified by
either its host name or IP
address. A subnet mask can
be specified, too. MySQL
wildcard characters (_ and
%) are allowed; for more
information, consult
http://dev.mysql.com/doc/ref
man/5.0/en/connectionaccess.html).
To disable remote access to
database jdoe-gallery from
the host with IP address
192.0.2.78 for the database
user Jane:
# ./database -u
DataStoreDB update_user db_user passwd dbuserpass remove-access
192.0.2.78
-server
host[:port
]
Specifies the host name or
IP address and port number
for the machine on which a
database server is hosted.
Used only with the -create command.
To create database jdoe-
gallery for the domain
example.com on the
database server accessible at
192.0.2.78:3838 and print the
Plesk database ID:
# ./database --create
jdoe-gallery -domain
example.com -server
192.0.2.78:3838 print-id
-print-id
Prints the created database
or database user ID number.
Used only with the --
create command or the -
add_user option.
Page 56

56 Using Command Line Utilities
Option
Parameter
Description
Example
-charset
<charset>
Specifies a character set for
a PostgreSQL database to
be created.
To create database jdoe-
gallery for the domain
example.com on the
PostgreSQL server available
at 192.0.2.78:3838 and set
the database's charset to
UTF-8:
# ./database -c jdoegallery -domain
example.com -charset
UTF-8 -server
192.0.2.78:3838
Note: Use of this option is not recommended. Passing passwords through CLI as
parameters of the -passwd option may potentially compromise the system's security
as command line can be observed by other users of the system. It is more secure to
pass passwords through the environment variables. You can transfer non-encrypted
passwords by using environment variable PSA_PASSWORD while using single quotes to
specify the empty values in the command line for the argument of the -passwd - passwd_type options.
Similarly, you can transfer encrypted passwords through the environment variable
PSA_CRYPTED_PASSWORD while using single quotes to specify the empty values in the
command line for the argument of the -passwd and -passwd_type options.
Page 57

Using Command Line Utilities 57
Desktop Presets: desktop Utility
Command
Parameter
Description
Example
--set-admin or
-sa
Changes type of
an existing
desktop preset to
the
Administrator's
desktop preset.
Requires -
desktop-
preset option.
To set existing desktop preset named
AdminDesktop as an administrator's
desktop preset:
# ./desktop --set-admin desktop-preset AdminDesktop
or
# ./desktop -sa -desktoppreset AdminDesktop
The desktop utility enables managing desktop presets through CLI. By using this
utility, you can perform the following tasks:
creating or deleting desktop presets
changing desktop preset type
setting default desktop presets
displaying a list of a available desktop presets
Usage
desktop <command> [
<option_1> [<param>]
[<option_2> [<param>]]
… [<option_N> [<param>]]
]
Example
The following command adds desktop preset AdminDesktop to the administrator's
repository of desktop presets and allows overwriting of the preexisting desktop with the
same name.
# ./desktop --add-preset /usr/local/presets/AdminDesktop.xml overwrite true
Commands
Page 58

58 Using Command Line Utilities
Command
Parameter
Description
Example
--update-
preset or -up **
<preset_na
me>
Updates
properties of a
desktop preset.
Requires -type
option.
To set the type of the desktop preset
named AdminDesktop to Domain
owner's desktop preset:
# ./desktop --update-preset desktop-preset AdminDesktop type domain
or
# ./desktop -up AdminDesktop
-type domain
--preset-
lists or -pl
Displays the list of
existing desktop
presets.
To view the list of available desktops:
# ./desktop --preset-lists
or
# ./desktop -pl
--add-preset
or -ap
<file_name
>
Adds a preset to
administrator's
repository of
desktop presets.
To add a desktop preset AdminDesktop
to the administrator's repository of
desktop presets from a desktop preset
file AdminDesktop.xml:
# ./desktop --add-preset
/usr/local/presets/AdminDeskt
op.xml
or
# ./desktop -ap
/usr/local/presets/AdminDeskt
op.xml
--remove-
preset or -rp
<preset_na
me>
Deletes a desktop
preset from
administrator's
repository of
desktop presets.
To remove a desktop preset from the
administrator's repository:
# ./desktop --remove-preset
AdminDesktop
or
# ./desktop -rp AdminDesktop
--help or -h
Displays help on
the use of the
utility.
To view help on the use of the utility:
# ./desktop --help
or
# ./desktop -h
Option
Parameter
Description
Example
desktop-
preset
<preset_nam
e>
Sets desktop preset.
To set existing desktop preset named
AdminDesktop as an administrator's
desktop preset:
# ./desktop -sa -desktoppreset AdminDesktop
Options
Page 59

Using Command Line Utilities 59
Option
Parameter
Description
Example
-default
true|false
Renders desktop
preset the default
preset for the Plesk
users category
specified by the type option.
To set desktop preset AdminDesktop
as the default administrator's desktop
preset:
# ./desktop -up AdminDesktop
-default true -type admin
overwrit
e
true|false
Allows/Prohibits
overwriting of a
desktop preset with
another desktop of the
same name.
Used with --add-
preset only.
To add a desktop preset AdminDesktop
to the administrator's repository of
desktop presets from desktop preset
file
/usr/local/presets/AdminDeskt
op.xml and replace existing desktop
with the same name in Plesk:
# ./desktop -ap
/usr/local/presets/AdminDeskt
op.xml -overwrite true
-type
admin|clien
t|domain
Sets desktop preset
type:
admin - Default
Administrator's
desktop, domain Default domain owner
desktop, client Default client desktop.
To change the type of desktop preset
named AdminDesktop to Domain
owner's desktop preset:
# ./desktop -up -desktoppreset AdminDesktop -type
domain
Page 60

60 Using Command Line Utilities
DNS Zone Template: server_dns Utility
The server_dns utility is used to manage the Plesk server's DNS zone template
through CLI. By using this utility, you can perform the following tasks:
adding resource records to or deleting them from the Plesk server's DNS zone
template
specifying the status to be set for a domain's DNS zone upon creation of a domain
updating the Start-of-Authority (SOA) record for the DNS zone template
setting the Plesk name server DNS zone preferences regarding recursive DNS
queries from different types of hosts
managing the Access control list (ACL records)
Usage
server_dns <command> [
<option_1> [<param>]
[<option_2> [<param>]]
… [<option_N> [<param>]]
]
Example
The following command adds the following two resource records to the domain DNS
zone template, while removing all pre-existing resource records from the domain DNS
zone template:
new MX resource record <domain> specifying mail.<domain> as the mail exchanger
for the record, and setting the mail exchanger's priority to 15.
new NS resource record <domain> setting domain ns.<domain> as the name
server.
# ./server_dns --set "MX,"",mail.<domain>,15;NS,"",ns.<domain>"
Page 61

Using Command Line Utilities 61
Commands
Command
Parameter
Description
Example
--add or -
a
Adds a resource
record to the Plesk
server's domain DNS
zone template.
If a record already
exists, the command
returns code 2.
To add new MX resource record
mail.<domain> to the domain DNS
zone template and specify mail
exchanger mail.<domain> and set
the mail exchanger priority to 35 for
the record:
# ./server_dns --add -mx
"" -mailexchanger
"mail.<domain>" -priority
35
or
# ./server_dns -a -mx "" mailexchanger
"mail.<domain>" -priority
35
--set or -
s
"<record_1>;<r
ecord_2>;...<r
ecord_N>"
where <record>
=
MX,"<subdomain
_name>",<mail_
exchanger_name
>."<domain>"|
NS,"<subdomain
_name>",<serve
r_name>."<doma
in>"|
A,<subdomain_n
ame>,<IP_addre
ss>|"<ip>"|
PTR,<IP_addres
s/subnet_mask>
,<subdomain_na
me>|
CNAME,<subdoma
in_name>,<cano
nical_domain_n
ame>|"<domain>
"|
TXT,<subdomain
_name>,<text>
Adds specified
resource records to
and removes all preexisting resource
records from the Plesk
server's domain DNS
zone template.
For more details,
consult descriptions of
the options in the
following table for
adding resource
records of respective
types individually.
To add the following two resource
records to the domain DNS zone
template, while removing all preexisting resource records from the
DNS zone:
new MX resource record
<domain> specifying
subdomain name
mail.<domain> as the mail
exchanger for the record, and
setting the mail exchanger's
priority to 15:
new NS resource record
<domain> setting domain
ns.<domain> as the name
server:
# ./server_dns --set
"MX,"",mail.<domain>,15;NS
,"",ns.<domain>"
or
# ./server_dns -s
"MX,"",<domain>,15;NS,"",n
s.<domain>"
-update-
server or
-u
Updates the Plesk
server's domain DNS
zone template.
To enable support for recursive
DNS queries for hosts on the local
network only:
# ./server_dns -u recursion localnets
Page 62

62 Using Command Line Utilities
Command
Parameter
Description
Example
-updatesoa
Updates the SOA
record settings the
Plesk server's domain
DNS zone template.
To set the TTL parameter to 5
hours for the SOA record for the
domain DNS zone template:
# ./server_dns --updatesoa -soa-ttl 5H
--info
Displays the list of
resource records for
the Plesk server's
domain DNS zone
template.
To view the list of resource records
in the domain DNS zone template:
# ./server_dns --info
--help or
-h
Displays help on the
use of the utility.
To view help on the use of the dns
utility:
# ./server_dns --help
or
# ./server_dns –h
Option
Parameter
Description
Example
recursion
any|localnet
s|localhost
Sets the Plesk name server
DNS zone preferences:
any - will support
recursive DNS queries for
any requesting host.
localnets - will support
recursive DNS queries for
any host on the local
network only.
localhost - will support
recursive DNS queries for
the local host only
Used with the --update-
server command only.
To enable support for
recursive DNS queries for
hosts on the local network
only:
# ./server_dns -u recursion localnets
-status
enabled|disa
bled
Sets the status of a domain's
DNS zone when the domain
DNS zone is created during
domain creation.
Only newly created domains
will inherit the DNS zone
status.
Used with the --update-
server command only.
To disable domain DNS
zones for newly created
domains:
# ./server_dns -u status disabled
Options
Page 63

Using Command Line Utilities 63
Option
Parameter
Description
Example
-add-acl
<IP_address_
1>[[/<subnet
_mask>],<IP_
address_2>[/
<subnet_mask
>],...<IP
address_N>[/
<subnet_mask
>]]
Adds host or network IP
addresses to the Access
Control list (ACL).
To add records 192.0.2.78
and 192.0.2.0/24 to the ACL:
# ./server_dns -u add-acl
192.0.2.78,192.0.2.0/2
4
-a
<subdomain_n
ame>
Specifies the A type resource
record for a subdomain in the
Plesk server's domain DNS
zone template.
Used with the --add.
Requires the -ip option.
To add new A resource record
sample.<domain> (specifying
a placeholder for a domain IP
address for the record) to the
domain DNS zone template:
# ./server_dns -a -a
sample -ip "<ip>"
-ip
<IP_address>
|"<ip>"
Specifies an IP address or a
placeholder for a domain's IP
address for creating an A type
resource record in the Plesk
server's domain DNS zone
template.
Used only with the --add
command.
-ns
<subdomain_n
ame>|""
Specifies the NS type resource
record in the Plesk server's
domain DNS zone template.
Used only with the --add
command.
Requires the -nameserver
option.
To add a new NS resource
record <domain> specifying
domain name <domain> as
the name server to the DNS
zone template:
# ./server_dns -a -ns
"" -nameserver
"ns.<domain>"
nameserve
r
<domain_name
>|"[<subdoma
in_name>.]<d
omain>"
Specifies the name of a
nameserver or a placeholder
for creating an NS type
resource record in the Plesk
server's domain DNS zone
template.
-mx
<subdomain_n
ame>|""
Specifies the MX type resource
record in the Plesk server's
domain DNS zone template.
Used with the --add
command only.
Requires the mailexchanger option.
To add new MX resource
record <domain> specifying
domain name mail.<domain>
as the mail exchanger for the
record, and setting the mail
exchanger's priority to 15 to
the domain DNS zone
template:
Page 64

64 Using Command Line Utilities
Option
Parameter
Description
Example
mailexcha
nger
<domain_name
>|"[<subdoma
in_name>.]<d
omain>"
Specifies the name of a
mailexchanger or a
placeholder for creating an MX
type DNS record in the Plesk
server's domain DNS zone
template.
# ./server_dns -a -mx
"" -mailexchanger
"mail.<domain>" priority 15
-priority
<number>
Specifies the mail exchanger
priority for creating an MX type
DNS record in the Plesk
server's domain DNS zone
template.
-cname
<subdomain_n
ame>|""
Specifies the CNAME type
resource record in the Plesk
server's domain DNS zone
template.
Used with the --add
command only.
Requires concomitant use of
the -canonical option.
To add new CNAME type
resource record
subdom.<domain> for a
canonical name <domain> to
the domain DNS zone
template:
# ./server_dns -a cname subdom canonical "<domain>"
canonical
<domain_name
>|[<subdomai
n_name>.]<do
main>"
Specifies a canonical name or
a placeholder for creating a
CNAME type DNS record in the
Plesk server's domain DNS
zone template.
-ptr
<subdomain_n
ame>|""
Specifies the PTR type
resource record in the Plesk
server's domain DNS zone
template.
Used with the --add and -del commands only.
Requires concomitant use of
the -subnet option.
To add new PTR type DNS
record "<ip>"/16 for <domain>
to the domain DNS zone
template:
# ./server_dns -a -ptr
"" -subnet "<ip>"/16
-subnet
<IP_address>
/<subnet_mas
k>|"<ip>"/<s
ubnet_mask>
Specifies an IP address and a
subnet mask or a placeholder
for creating a PTR type DNS
record in the Plesk server's
domain DNS zone template.
-txt
<text>|""
Specifies the TXT type
resource record in the Plesk
server's domain DNS zone
template.
Used with the --add only.
Requires the -domain option
if the record is created for a
specific subdomain name.
To specify the TXT type DNS
record "This record is used to
implement the Senders Policy
Framework and DomainKeys
specifications" for the specific
subdomain name subdom in
the domain DNS zone
template:
# ./server_dns -a -txt
Page 65

Using Command Line Utilities 65
Option
Parameter
Description
Example
-domain
<subdomain_n
ame>|""
Specifies a subdomain name
for creating a TXT type
resource record in the Plesk
server's domain DNS zone
template.
Used with the --add
command only.
"This record is used
to implement the
Senders Policy
Framework and
DomainKeys
specifications" domain subdom
-soa-ttl
<number>[S|M
|H|D|W]
Specifies the TTL value for the
SOA record in the Plesk
server's domain DNS zone
template.
Used with the--update-soa
command only.
To set the TTL value to 5
hours, the Refresh value to 4
hours, the Retry value to 10
seconds, the Expire value to 2
weeks, and the Minimum
value to 2 days for the SOA
record in the domain DNS
zone template:
# ./server_dns -update-soa -soa-ttl 5H
-soa-refresh 4H -soaretry 10S -soa-expire
2W -soa-minimum 2D
-soarefresh
<number>[S|M
|H|D|W]
Specifies the Refresh value for
the SOA record in the Plesk
server's domain DNS zone
template.
Used with the --update-soa
command only.
-soaretry
<number>[S|M
|H|D|W]
Specifies the Retry value for
the SOA record in the Plesk
server's domain DNS zone
template.
Used with the --update-soa
command only.
-soaexpire
<number>[S|M
|H|D|W]
Specifies the Expire value for
the SOA record in the Plesk
server's domain DNS zone
template.
Used with the --update-soa
command only.
-soaminimum
<number>[S|M
|H|D|W]
Specifies the Minimum value
for the SOA record in the
Plesk server's domain DNS
zone template.
Used with the --update-soa
command only.
Page 66

66 Using Command Line Utilities
DNS Zones on Domains: dns Utility
The dns utility is used to manage DNS zones on domains and domain aliases through
CLI. By using this utility, you can perform the following tasks:
adding resource records to or deleting them from a domain's or domain alias' DNS
zone
enabling or disabling a local DNS service on a domain or domain alias
setting Plesk name server as the master or slave server for a DNS zone
assigning external master DNS servers for a DNS zone
enabling or disabling the www-prefixed alias (in the Error! Hyperlink
reference not valid. name> form) support for canonical domain names
updating the Start-of-Authority (SOA) record for a DNS zone
Usage
dns <command> [<domain_name>|<domain_alias>] [
<option_1> [<param>]
[<option_2> [<param>]]
… [<option_N> [<param>]]
]
Example
The following command removes all pre-existing resource records from the DNS zone
on the domain example.com and adds the following two records to the DNS zone:
new MX resource record mail3.example.com specifying domain name
mail.example.com as the mail exchanger and setting the mail exchanger's priority to
15
new NS resource record ns2.example.com setting domain ns.example.com as the
name server
# ./dns --set example.com -list
"MX,mail3,mail.example.com,15;NS,ns2,ns.example.com"
Page 67

Using Command Line Utilities 67
Commands
Command
Parameter
Description
Example
--add or -
a
<domain_
name>|<d
omain_al
ias>
Аdds a resource
record to a
domain's DNS
zone.
If a record already
exists, the
command returns
code 2.
To add new MX resource record
mail3.example.com to the DNS zone on the
domain example.com and specify mail
exchanger mail.example.com for the record:
# ./dns --add example.com -mx
mail3 -mailexchanger
mail.example.com
or
# ./dns -a example.com -mx mail3 mailexchanger mail.example.com
--set or -
s
<domain_
name>|<d
omain_al
ias>
Adds specified
resource records to
and removes all
pre-existing
resource records
from a domain's
DNS zone.
Requires the list option.
To add the following two resource records to
the DNS zone of domain example.com, while
removing all pre-existing resource records
from the DNS zone:
new MX resource record
mail3.example.com specifying domain
name mail.example.com as the mail
exchanger for the record, and setting the
mail exchanger's priority to 15:
new NS resource record ns2.example.com
setting domain ns.example.com as the
name server:
# ./dns --set example.com -list
"MX,mail3,example.com,15;NS,ns2,ns
.example.com"
or
# ./dns -s example.com -list
"MX,mail3,example.com,15;NS,ns2,ns
.example.com"
--del or -
d
<domain_
name>|<d
omain_al
ias>
Deletes a resource
record from a
domain's DNS
zone.
To delete an existing MX resource record
mail3.example.com (for which mail exchanger
mail.example.com is specified) from the DNS
zone for the domain example.com:
# ./dns --del example.com -mx
mail3 -mailexchanger
mail.example.com
or
# ./dns -d example.com -mx mail3 mailexchanger mail.example.com
--del-
all or -da
<domain_
name>|<d
omain_al
ias>
Deletes all resource
records from a
domain's DNS
zone.
To delete all existing resource records from
the DNS zone for the domain example.com:
# ./dns --del-all example.com
or
# ./dns -da example.com
Page 68

68 Using Command Line Utilities
Command
Parameter
Description
Example
--reset
or -res
<domain_
name>|<d
omain_al
ias>
Restores the
default resource
records for a
domain's zone
based on the Plesk
server DNS zone
template.
Requires the -ip
option.
To restore the default resource records for a
domain's zone based on the Plesk server DNS
zone template:
# ./dns --reset example.com -ip
192.0.2.9
or
# ./dns -res example.com -ip
192.0.2.9
--on
<domain_
name>|<d
omain_al
ias>
Enables DNS
service on a
domain or domain
alias.
To enable DNS service on the domain
example.com:
# ./dns --on example.com
--off
<domain_
name>|<d
omain_al
ias>
Disables DNS
service on a
domain or domain
alias.
To disable DNS service on the domain
example.com:
# ./dns --off example.com
--setmaster
<domain_
name>|<d
omain_al
ias>
Sets the Plesk
name server as the
master server for
domain's or domain
alias' DNS zone.
To set the Plesk name server as the master
server for DNS zone on the domain
example.com:
# ./dns --set-master example.com
--setslave
<domain_
name>|<d
omain_al
ias>
Sets the Plesk
name server as the
slave server for
domain's or domain
alias' DNS zone.
To set the Plesk name server as the slave
server for DNS zone on the domain
example.com:
# ./dns --set-slave example.com
-updatesoa
<domain_
name>|<d
omain_al
ias>
Updates the SOA
record settings for
domain's or domain
alias' DNS zone.
To set the TTL value for the SOA record of the
DNS zone on the domain example.com to 5
hours:
# ./dns --update-soa example.com soa-ttl 5H
--info
<domain_
name>|<d
omain_al
ias>
Displays the list of
resource records
for a domain's or
domain alias' DNS
zone.
To view the list of resource records in the DNS
zone for the domain example.com:
# ./dns --info example.com
--help or
-h
Displays help on
the use of the
utility.
To view help on the use of the dns utility:
# ./dns --help
or
# ./dns –h
Page 69

Using Command Line Utilities 69
Options
Option
Parameter
Description
Example
-a
<subdomain_na
me>
Specifies the A type resource
record for a subdomain in a
domain's DNS zone.
Used with the --add and -del commands only.
Requires the -ip option.
To add new A resource record
sample.example.com
specifying IP address
192.0.2.78 for the subdomain
to the DNS zone on the domain
example.com:
# ./dns -a example.com
-a sample -ip
192.0.2.78
-ip
<IP_address>
Specifies an IP address for
creating an A type resource
record in a domain's DNS
zone.
Used with the --add and --
del commands only.
-ns
<subdomain_na
me>
Specifies the NS type
resource record in a
domain's DNS zone.
Used with the --add and -del commands only.
Requires the -nameserver
option.
To add a new NS resource
record ns2.example.com
specifying domain name
example.net as the name
server to the DNS zone on
domain name example.com:
# ./dns -a example.com
-ns ns2 -nameserver
example.net
nameserv
er
<domain_name>
Specifies the name of a
nameserver for creating an
NS type resource record in a
domain's DNS zone.
-mx
<subdomain_na
me>
Specifies the MX type
resource record in a
domain's DNS zone.
Used with the --add and -del commands only.
Requires the mailexchanger option.
To add new MX resource record
mail3.example.com specifying
domain name
mail.example.com as the mail
exchanger for the record, and
setting the mail exchanger's
priority to the DNS zone on the
domain example.com to 15:
# ./dns -a example.com
-mx mail3 mailexchanger
mail.example.com priority 15
mailexch
anger
<domain_name>
Specifies the name of a mail
exchanger for creating an MX
type DNS record in a
domain's DNS zone.
priority
<number>
Specifies the mail exchanger
priority for creating an MX
type DNS record in a
domain's DNS zone.
Page 70

70 Using Command Line Utilities
Option
Parameter
Description
Example
-cname
<subdomain_na
me>
Specifies the CNAME type
resource record in a
domain's DNS zone.
Used with the --add and -del commands only.
Requires the -canonical
option.
To add new CNAME type
resource record
sample.example.com for a
canonical name example.org to
the DNS zone on domain
example.com:
# ./dns --add
example.com -cname
sample -canonical
example.org
canonica
l
<domain_name>
Specifies a canonical name
for creating a CNAME type
DNS record in a domain's
DNS zone.
-ptr
<subdomain_na
me>
Specifies the PTR type
resource record in a
domain's DNS zone.
Used with the --add and -del commands only.
Requires the -subnet
option.
To add new PTR type DNS
record 192.0.2.1/16 for the
subdomain sample to the DNS
zone for the domain
example.com:
# ./dns -a example.com
-ptr sample -subnet
192.0.2.1/16
-subnet
<IP_address>|
<subnet_mask>
Specifies an IP address and
a subnet mask for creating a
PTR type DNS record in a
domain's DNS zone.
-txt
<text>
Specifies the TXT type
resource record in a
domain's DNS zone.
Used with the --add and -del commands only.
Requires the -domain
option if the record is created
for a subdomain of a domain.
To specify the TXT type DNS
record "This record is used to
implement the Senders Policy
Framework and DomainKeys
specifications" for the
subdomain name sample in the
DNS zone for the domain
example.com:
# ./dns -a example.com
-txt "This record is
used to implement the
Senders Policy
Framework and
DomainKeys
specifications" -domain
sample
-domain
<subdomain_na
me>
Specifies a subdomain name
for creating a TXT type
resource record in a
domain's DNS zone.
Used with the --add and -del commands only.
Page 71

Using Command Line Utilities 71
Option
Parameter
Description
Example
-www
true|false
Enables/Disables support of
the www-prefixed alias for a
canonical domain name in a
domain's DNS zone.
Used with the --reset
command only.
Creates/Deletes a CNAME
type resource record in the
Error! Hyperlink
reference not valid.>
form.
To enable support of the wwwprefixed alias
www.example.com (pointing to
domain example.com) in the
DNS zone on the domain
example.com:
# ./dns -res
example.com -www true
-primary
<IP_address>
Adds an IP address of a
primary DNS server for a
domain's DNS zone.
Used with the --add --del
and --reset commands
only.
To add the IP address
192.0.2.78 of the primary DNS
server for DNS zone on the
domain example.com:
# ./dns -a example.com
-primary 192.0.2.78
-soa-ttl
<number>[S|M|
H|D|W]
Sets the TTL value for the
SOA record of a domain' or
domain alias' DNS zone.
Used with the--update-
soa command only.
To set the TTL value to 5
hours, the Refresh value to 4
hours, the Retry value to 10
seconds, the Expire value to 2
weeks, and the Minimum value
to 2 days for the SOA record in
the DNS zone on the domain
example.com:
# ./dns --update-soa
example.com -soa-ttl 5H
-soa-refresh 4H -soaretry 10S -soa-expire
2W -soa-minimum 2D
-soarefresh
<number>[S|M|
H|D|W]
Sets the Refresh value for
the SOA record of a domain'
or domain alias' DNS zone.
Used with the --update-
soa command only.
-soaretry
<number>[S|M|
H|D|W]
Sets the Retry value for the
SOA record of a domain' or
domain alias' DNS zone.
Used with the --update-
soa command only.
-soaexpire
<number>[S|M|
H|D|W]
Sets the Expire value for the
SOA record of a domain' or
domain alias' DNS zone.
Used with the --update-
soa command only.
-soaminimum
<number>[S|M|
H|D|W]
Sets the Minimum value for
the SOA record of a domain'
or domain alias' DNS zone.
Used with the --update-
soa command only.
Page 72

72 Using Command Line Utilities
Option
Parameter
Description
Example
-list
"<record_1>;<
record_2>;...
<record_N>"
where the
<record>
parameter is
composed
according to the
following rules:
for MX record:
MX,<subdom
ain_name>,
<mail_exch
anger_name
>,<priorit
y>
for NS record:
NS,<subdom
ain_name>,
<name_serv
er_name>
for A record:
A,<subdoma
in_name>,<
IP_address
>
for PTR
record:
PTR,<IP_ad
dress/subn
et_mask>,<
subdomain_
name>
for CNAME
record:
CNAME,<sub
domain_nam
e>,<canoni
cal_domain
_name>
for TXT
record:
TXT,<subdo
main_name>
,<text>
Consult
descriptions of
the options in this
table for adding
resource records
of respective
types individually.
Specifies resource records to
be included in a domain's
DNS zone.
Used with the --update-
soa command only.
To add the following two
resource records to the DNS
zone of the domain
example.com, while removing
all pre-existing resource
records from the DNS zone:
new MX resource record
mail3.example.com
specifying domain name
mail.example.com as the
mail exchanger for the
record, and setting the mail
exchanger's priority to 15:
new NS resource record
ns2.example.com setting
domain ns.example.com as
the name server:
# ./dns -s example.com
-list
"MX,mail3,mail.example.
com,15;NS,ns2,ns.exampl
e.com"
Page 73

Using Command Line Utilities 73
Domain Accounts: domain Utility
Сommand
Parameter
Description
Example
--create or -
-c
<domain_nam
e>
Creates a new
domain.
Requires -clogin
option.
To create the domain example.com
for the client with the login name
JDoe:
# ./domain --create
example.com -clogin JDoe
or
# ./domain -c example.com clogin JDoe
--update or -
-u
<domain_nam
e>
Updates configuration
of an existing domain.
To enable the domain example.com:
# ./domain -u example.com status enabled
The domain utility is used to manage domains through CLI. By using this utility, you
can perform the following tasks:
creating, renaming, and removing domains
enabling/disabling the existing domains
managing domain user accounts
managing domain hosting parameters such as support of various scripting
languages, log settings, hard disk limits, etc.
Usage
domain <command> <domain name> [
<option_1> [<param>]
[<option_2> [<param>]]
… [<option_N> [<param>]]
Example
The following command creates and enables domain example.com, assigns the
ownership of the domain to an existing Plesk client with the login name JDoe, assigns
IP address 192.0.2.78 to the domain, enables physical hosting and DNS zone on the
domain, sets login name John and password ftppass for the FTP user, and enables
CGI and PHP support on the domain.
# ./domain --create example.com -clogin JDoe -ip 192.0.2.78 -status
enabled -hosting true -hst_type phys -dns true -login John -passwd
ftppass -cgi true -php true
Commands
Page 74

74 Using Command Line Utilities
Сommand
Parameter
Description
Example
--remove or -
-r
<domain_nam
e>
Deletes an existing
domain.
To delete the domain example.com:
# ./domain --remove
example.com
or
# ./domain -r example.com
--info or -i
<domain_nam
e>
Displays information
about configuration of
a domain.
To view configuration information on
the domain example.com:
# ./domain --info
example.com
or
# ./domain --i example.com
--on
<domain_nam
e>
Enables a domain.
To enable the domain example.com:
# ./domain --on example.com
--off
<domain_nam
e>
Disables a domain.
To disable the domain example.com:
# ./domain --off
example.com
--changeowner
<domain_nam
e>
Changes the owner
of a domain.
Requires the clogin option.
To make the client with the login
name JDoe the owner of domain
example.com:
# ./domain --change-owner
example.com -clogin JDoe
--shells or -
s
<domain_nam
e>
Displays the list of
available shells on a
domain.
To view the list of shells available on
the Plesk server:
# ./domain --shells
--help or -h
Displays help on the
use of the utility.
To view help on the use of the
domain utility:
# ./domain --help
or
# ./domain -h
Page 75

Using Command Line Utilities 75
Options
Option
Parameter
Description
Example
-status
enabled|disa
bled|admin,d
omadm,parent
,client,expi
red
Enables/Disables a
domain (the enabled or
disabled parameters,
respectively). Disables
domain and sets the
domain status to Domain
is disabled by
administrator (admin),
Domain is disabled by
client (client), Domain
is expired (expired).
Sets the domain status
to the status of the client
account that owns the
domain (parent). The
use of the domadm
parameter is restricted;
the parameter should
not be used for changing
the domain status.
To enable the domain
example.com:
# ./domain -u example.com
-status enabled
To assign the status of domain
example.com to the status of the
client account that owns it:
# ./domain -u example.com
-status parent
-new_name
<domain_name
>
Renames a domain.
Used with the --
update only.
To rename the domain
example.com to sample.net:
# ./domain -u example.com
-new_name sample.net
-dns
true|false
Enables/Disables DNS
zone for a domain.
To enable DNS zone for the
domain example.com:
# ./domain -u example.com
-dns true
To disable a DNS zone for the
domain example.com:
# ./domain -u example.com
-dns false
-www
true|false
Enables/Disables the
www prefix for a domain.
Is true by default.
To disable the www prefix for the
domain example.com:
# ./domain -u example.com
-www false
-hosting
true|false
Enables/Disables
hosting for a domain.
Is false by default.
Requires -ip option.
To enable hosting for the domain
example.com with the IP address
192.0.2.87:
# ./domain -u example.com
-hosting true -ip
192.0.2.87
Page 76

76 Using Command Line Utilities
Option
Parameter
Description
Example
-hst_type
phys|std|frm
Sets the type of hosting
on a domain.
The following types are
available: physical
hosting (phys), standard
forwarding (std), and
frame forwarding (frm).
Is phys by default.
Requires -ip option,
when the phys
parameter is specified.
Requires the target_url option,
when the std or frm
parameters are
specified.
To set up the standard forwarding
hosting (with forwarding to
sample.org) for the existing
domain example.com:
# ./domain -u example.com
-hst_type std -target_url
sample.org
target_url
<URL>
Sets a target URL for the
Standard forwarding and
Frame forwarding types
of hosting.
Required with -
hst_type option when
the std or frm
parameters are
specified.
To set up a target URL for the
domain example.com with the
standard forwarding hosting
(forwarding to sample.org):
# ./domain -u example.com
-target_url sample.org hst_type std
-ip
<ip_address>
Specifies the IP address
of a domain that is
created or updated.
For domains with
physical hosting, the
option also specifies the
IP address at which
domain content is
hosted.
Requires with hosting option and
with -hst_type option
when phys parameter is
specified.
To specify an IP address for
domain example.com when
creating it to 192.0.2.87:
# ./domain -c example.com
-clogin JDoe -ip
192.0.2.87
To indicate IP address of the
domain example.com, where
physical hosting configured:
#./domain -u example.com
-hst_type phys -login
jdoe -passwd sample hosting true -ip
192.0.2.1
Page 77

Using Command Line Utilities 77
Option
Parameter
Description
Example
-login
<login_name>
Specifies FTP user login
name, for example,
while creating a new
domain with physical
hosting or changing
hosting type for an
existing domain.
Updates current FTP
user login name.
To create FTP user with the login
name john and password sample
when creating domain
example.com with physical
hosting for the client JDoe:
# ./domain -c example.com
-hosting true -hst_type
phys -clogin JDoe -login
john -passwd sample
To change the FTP user login
name to jane on domain
example.com with physical
hosting:
# ./domain -u example.com
-login jane
-passwd
<password>
Specifies the FTP user
password on a domain
with physical hosting.
Required with passwd_type option.
No password is set by
default.
To change the FTP user
password on the domain
example.com to sample:
# ./domain --update
example.com -passwd
sample
passwd_typ
e
plain|encryp
ted
Specifies the type of the
FTP user password.
Requires -passwd
option.
Is plain by default.
To set the FTP user on
example.com password to
qweqwe and password type to
encrypted:
# ./domain -u example.com
-passwd "as9C3ml08ncCE" passwd_type encrypted
-shell
<shell_name>
|forbidden
Enables/Disables shell
access for FTP user,
and sets the OS system
shell for FTP user
access.
To enable shell access for FTP
user on the domain example.com,
and to set the shell to /bin/sh:
# ./domain -u example.com
-shell /bin/sh
hard_quota
<number>[K|M
|G]
Limits the FTP user hard
disk quota.
Unlimited if set to 0.
A number without a
letter is interpreted as
the number of bytes.
To set a 100 MB hard disk quota
for the domain example.com:
# ./domain -u example.com
-hard_quota 100M
-fp
true|false
Enables/Disables
FrontPage support on a
domain.
Is false by default.
Deprecated since Plesk
v.8.1 due to the stop of
FrontPage support in
Plesk for Linux/Unix.
To enable Microsoft FrontPage
support for the domain
example.com:
# ./domain -u example.com
-fp true
Page 78

78 Using Command Line Utilities
Option
Parameter
Description
Example
-fp_ssl
true|false
Enables/Disables
FrontPage Over SSL
support on a domain.
Is false by default.
Deprecated since Plesk
v.8.1 due to the stop of
FrontPage support in
Plesk for Linux/Unix.
To enable Microsoft FrontPage
Over SSL support on the domain
example.com:
# ./domain -u example.com
-fp_ssl true
-fpauth
true|false
Enables/Disables
FrontPage authoring on
a domain.
Is false by default.
Deprecated since Plesk
v.8.1 due to the stop of
FrontPage support in
Plesk for Linux/Unix.
To enable Microsoft FrontPage
authoring on domain
example.com:
# ./domain -u example.com
-fpauth true
-fplogin
<login_name>
Sets the login name for
the FrontPage user.
Deprecated since Plesk
v.8.1 due to the stop of
FrontPage support in
Plesk for Linux/Unix.
To set the FrontPage user login
name on the domain
example.com to john:
# ./domain -u example.com
-fplogin john
-fppasswd
<password>
Sets the password for
the FrontPage user.
Deprecated since Plesk
v.8.1 due to the stop of
FrontPage support in
Plesk for Linux/Unix.
To set the FrontPage user
password on the domain
example.com to sample:
# ./domain -u example.com
-fppasswd sample
-creationdate
<YYYY-MM-DD>
Sets the domain creation
date.
Used with the -create only.
To set the creation date for
domain example.com to 2008-12-
30:
# ./domain -c example.com
-clogin JDoe -creationdate 2008-12-30
-ssi
true|false
Enables/Disables SSI
support.
Is false by default.
To enable SSI support on the
domain example.com:
# ./domain -u example.com
-ssi true
-php
true|false
Enables/Disables PHP
support.
Is false by default.
To enable PHP support on the
domain example.com:
# ./domain -u example.com
-php true
php_safe_m
ode
true|false
Enables/Disables safe
mode for PHP support.
Is true by default.
To disable safe mode for PHP
support on the domain
example.com:
# ./domain -u example.com
-php true -php_safe_mode
false
Page 79

Using Command Line Utilities 79
Option
Parameter
Description
Example
-cgi
true|false
Enables/Disables CGI
support.
Is false by default.
To enable CGI support on the
domain example.com:
# ./domain -u example.com
-cgi true
-perl
true|false
Enables/Disables Perl
support.
Is false by default.
To enable Perl support on the
domain example.com:
# ./domain -u example.com
-perl true
-asp
true|false
Enables/Disables
Apache ASP support.
Is false by default.
To enable Apache ASP support
on the domain example.com:
# ./domain -u example.com
-asp true
-python
true|false
Enables/Disables
Python support.
Is false by default.
To enable Python support on the
domain example.com:
# ./domain -u example.com
-python true
-fastcgi
true|false
Enables/Disables
FastCGI support.
Is false by default.
To enable FastCGI support on the
domain example.com:
# ./domain -u example.com
-fastcgi true
coldfusion
true|false
Enables/Disables
ColdFusion support.
Is false by default.
To enable ColdFusion support on
the domain example.com:
# ./domain -u example.com
-coldfusion true
-miva
true|false
Enables/Disables Miva
support.
Is false by default.
To enable Miva support on the
domain example.com:
# ./domain -u example.com
-miva true
-ssl
true|false
Enables/Disables SSL
support.
Is false by default.
To enable SSL support on the
domain example.com:
# ./domain -u example.com
-ssl true
-same_ssl
true|false
Enables/Disables using
a single directory for
storing content
accessible through SSL
and non-SSL
connection.
Is false by default.
To enable using a single directory
for storing content accessible
through SSL and non-SSL
connection on the domain
example.com:
# ./domain -u example.com
-same_ssl true
-webstat
none|awstats
|webalizer
Enables/Disables Web
statistic support; selects
Web statistics
application (Awstats or
Webalizer).
Is none by default.
To enable Webalizer support on
the domain example.com:
# ./domain -u example.com
-webstat webalizer
Page 80

80 Using Command Line Utilities
Option
Parameter
Description
Example
-webstatprotdiraccess
true|false
Enables/Disables
access to web statistics
data through passwordprotected directory
/plesk-stat.
Is false by default.
To enable access to web
statistics data through passwordprotected directory /plesk-
stat on the domain
example.com:
# ./domain -u example.com
-webstat-protdir-access
true
-err_docs
true|false
Enables/Disables
custom server error
messages.
Is false by default.
To enable custom error
messages support on the domain
example.com:
# ./domain -u example.com
-err_docs true
log_rotate
true|false
Enables/Disables log
rotation.
Is false by default.
To enable log rotation on the
domain example.com:
# ./domain -u example.com
-log_rotate true
log_bysize
<number>[K|M
|G]
Enables/Disables log
rotation based on the
current log file size.
To enable log rotation on the
domain example.com once the
current log file reaches the 200
KB size:
# ./domain -u example.com
-log_bysize 200
log_bytime
daily|weekly
|monthly
Enables/Disables log
rotation by time.
Is daily by default.
To enable weekly log rotation on
the domain example.com:
# ./domain -u example.com
-log_bytime weekly
log_max_nu
m
<number>
Limits the number of log
files parameter.
Is 3 by default.
To restrict the maximum number
of log files (current and rotated)
on the domain example.com to
10:
# ./domain -u example.com
-log_max_num 10
log_compre
ss
true|false
Enables/Disables log file
compression.
Is true by default.
To disable log file compression on
the domain example.com:
# ./domain -u example.com
-log_compress false
-log_email
<email>
Enables/Disables
automatic sending of
rotated log files to the
specified email address.
To enable automatic sending of
rotated log files on the domain
example.com to email address
admin@example.com:
# ./domain -u example.com
-log_email
admin@example.com
-clogin
<client_logi
n_name>
Specifies the login name
of an existing Plesk
client who will own the
domain.
Used with the --
create or --changeowner commands only.
To create the domain
example.com and assign
ownership of the domain to a
Plesk client with the login name
JDoe:
# ./domain -c example.com
-clogin JDoe
Page 81

Using Command Line Utilities 81
Option
Parameter
Description
Example
mail_servi
ce
true|false
Enables/Disables mail
service.
Is true by default.
To disable mail service on the
domain example.com:
# ./domain -u example.com
-mail_service false
maillist_s
ervice
true|false
Enables/Disables the
mailing list service.
Is false by default.
To enable mailing list service on
the domain example.com:
# ./domain -u example.com
-maillist_service true
-map_ip
<IP_address>
Sets a new IP address
for a domain.
Used with --change-
owner only.
Required with -change-owner.
To set the IP address 192.0.2.87
for the domain example.com
when changing the owner of the
domain to Plesk client with the
login name JaneDoe:
# ./domain --change-owner
example.com -clogin
JaneDoe -map_ip
192.0.2.87
-publishsb-site
true|false
Allows/Prohibits
publishing site with
Sitebuilder.
Is false by default.
Available since Plesk
8.3.
To allow publishing site with
Sitebuilder on the domain
example.com:
# ./domain -u example.com
-publish-sb-site true
-maxconnection
s
<number>
Limits the number of
available connections.
Unlimited is set to -1.
Available since Plesk
8.3.
To limit the maximum number of
connections available for the
domain example.com to 10:
# ./domain -u example.com
-max-connections 10
-trafficbandwidth
<number>
Limits the network use.
Unlimited is set to -1.
Available since Plesk
8.3.
To limit the maximum network
use on the domain example.com
to 500 KB/S:
# ./domain -u example.com
-traffic-bandwidth 500
-aftp
true|false
Enables/Disables the
anonymous ftp service.
Is false by default.
Deprecated since Plesk
8.1. Use the anonftp
utility instead.
To enable the anonymous FTP
service on the domain
example.com:
# ./domain -u example.com
-aftp true
or
./anonftp -u example.com
-status true
-aftp_inc
true|false
Enables/Disables
uploading to the
incoming directory.
Is false by default.
Deprecated since Plesk
8.1. Use the anonftp
utility instead.
To allow uploading files to the
incoming directory:
# ./domain -u example.com
-aftp_inc true
or
./anonftp -u example.com
-incoming true
Page 82

82 Using Command Line Utilities
Option
Parameter
Description
Example
aftp_inc_d
isk_limit
<number>[K|M
|G]
Limits the amount of disk
space for the incoming
directory.
A number without a
letter is interpreted as
the number of bytes.
Unlimited if set to -1.
Deprecated since Plesk
8.1. Use the anonftp
utility instead.
To restrict the amount of disk
space available for the incoming
directory to 10 MB:
./anonftp -u example.com
-aftp_inc_disk_limit 10M
-dom_user
true|false
Enables/Disables a
domain administrator
account.
Is false by default.
Deprecated since Plesk
version 8.1. Use the
domadmin utility
instead.
To enable the domain
administrator account on the
domain example.com, set the
domain administrator's password
to adminpass, make the
password encrypted, set the
personal name as John Doe, set
the email address to
admin@example.com, set the
default Plesk interface language
for domain administrator to Italian,
and enable multiple simultaneous
domain administrator sessions:
# ./domain -u example.com
-dom_user true du_passwd_type encrypted
-du_passwd adminpass du_pname "John Doe" du_email
admin@example.com du_language it-IT -dumultiple-sessions true
du_passwd_
type
plain|encryp
ted
Sets the type of the user
password for domain
administrator.
Is plain by default.
Deprecated since Plesk
8.1. Use the domadmin
utility instead.
-du_passwd
<string>
Sets the user password
for domain administrator.
Deprecated since Plesk
8.1. Use the domadmin
utility instead.
-du_pname
<string>
Sets the domain
administrator personal
name.
Deprecated since Plesk
8.1. Use the domadmin
utility instead.
-du_email
<string>
Sets the Email address
for domain administrator.
Deprecated since Plesk
8.1. Use the domadmin
utility instead.
Page 83

Using Command Line Utilities 83
Option
Parameter
Description
Example
du_languag
e
<string>
Sets the default interface
language for domain
administrator.
The argument of the
command must be a
valid two letter language
code and two-letter
country code as
described in ISO-3166
(for example, "it-IT"
stands for Italian).
Deprecated since Plesk
8.1. Use the domadmin
utility instead.
-dumultiplesessions
true|false
Enables/Disables
multiple network
simultaneous sessions
for a domain
administrator.
Deprecated since Plesk
8.1. Use the domadmin
utility instead.
-notify
true|false
Allows/Prohibits
standard email
notifications on a domain
creation (Plesk domain
administrators and
clients).
Used with --create
only.
To prevent email notifications
about domain creation:
# ./domain --create
example.com -clogin JDoe
-notify false
Page 84

84 Using Command Line Utilities
Domain Administrator Accounts:
Command
Parameter
Description
Example
--update
or -u
<domain_
name>
Updates
configuration of
an existing
domain
administrator's
account with data
specified in the
options.
To set a password for the domain administrator's
account on the domain example.com to sample:
# ./domadmin --update example.com passwd sample
or
# ./domadmin -u example.com -passwd
sample
--info or
-i
<domain_
name>
Displays
information about
a domain
administrator's
account.
To view the information about the example.com
administrator's account:
# ./domadmin --info example.com
or
# ./domadmin -i example.com
domadmin Utility
The domadmin utility is used to manage domain administrator accounts through CLI.
The utility allows the following operations:
editing domain administrator's personal information
viewing the information about a domain
changing the domain management preferences (control panel access and interface
features) and permissions
Usage
domadmin <command> <domain_name> [
<option_1> [<param>]
[<option_2> [<param>]]
… [<option_N> [<param>]]
Example
The following command sets the personal name for the administrator of the domain
example.com to John Doe, allows the use of the standard view only for the
administrator, sets the administrator's password to mypass, sets the interface language
to Russian, and allows the domain content management by the domain administrator.
# ./domadmin --update example.com -pname "John Doe" -dashboard false stdgui true -passwd mypass -locale ru-RU -manage_phosting true
Commands
Page 85

Using Command Line Utilities 85
Command
Parameter
Description
Example
--help or
-h
Displays help on
the use of the
utility.
To view help on the use of this utility:
# ./domadmin --help
or
# ./domadmin -h
Option
Parameter
Description
Example
-status
true|false
Enables/Disables
domain administrator's
account.
Is true by default.
To disable example.com administrator's
account:
# ./domadmin --update
example.com -status false
-passwd
<password>
Sets the domain
administrator's
password.
Required with passwd_type option.
See additional
comments in the Note
below the table.
To set the example.com administrator's
password to sample :
# ./domadmin -u example.com passwd sample
passwd_ty
pe
plain|encr
ypted
Specifies the type of
the domain
administrator's
password.
Requires -passwd
option.
Is plain by default.
See additional
comments in the Note
below the table.
To set the example.com administrator's
password to qweqwe and password
type to encrypted:
# ./domadmin -u example.com passwd_type encrypted -passwd
"as9C3ml08ncCE"
-pname
<string>
Sets a domain
administrator's personal
name.
To set the example.com administrator's
personal name to John Doe:
# ./domadmin -u example.com pname "John Doe"
-company
<string>
Sets domain
administrator's
company name.
To set the example.com administrator's
company name to Network Solutions:
# ./domadmin -u example.com company "Network Solutions"
-phone
<number>
Sets a domain
administrator's phone
number.
To set the example.com administrator's
phone number to (112)112-2211:
# ./domadmin -u example.com phone "(112)112-2211"
Options
Page 86

86 Using Command Line Utilities
Option
Parameter
Description
Example
-fax
<number>
Sets a domain
administrator's fax
number.
To set the example.com administrator's
fax number to (112)112-2212:
# ./domadmin -u example.com fax "(112)112-2212"
-email
<string>
Sets a domain
administrator's email
address.
To set the example.com administrator's
email to admin@example.com:
# ./domadmin -u example.com email admin@for.example.com
-address
<string>
Sets a domain
administrator's street
address.
To set the example.com administrator's
street address to 22 Drury lane:
# ./domadmin -u example.com address "22 Drury lane"
-city
<string>
Sets a domain
administrator's city.
To set the example.com administrator's
city to New York:
# ./domadmin -u example.com address "New York"
-state
<string>
Sets a domain
administrator's state or
province.
To set the example.com administrator's
state to NY:
# ./domadmin -u example.com state NY
-zip
<string>
Sets a domain
administrator's
ZIP/postal code.
To set the example.com administrator's
postal code to 64023-1920:
# ./domadmin -u example.com zip 64023-1920
-country
<country_c
ode>
Sets a domain
administrator's country.
The option's argument
must be a valid twoletter code as described
in ISO-3166).
To set the domain administrator's
country to United States:
# ./domadmin -u example.com country US
-language
<language_
code>
Specifies which
language is used in a
client's control panel
interface.
Deprecated. Use locale option instead.
To set Italian language as default for
the example.com administrator's
account:
# ./domadmin -u example.com language it-IT
-locale
<language_
code>
Specifies which
language is used in a
client's control panel
interface.
The option's argument
must be a valid fourletter language code
derived from the
language code
described in ISO-639-2
and the corresponding
country code described
in ISO-3166.
To set Italian language as default for
the example.com administrator's
account:
# ./domadmin -u example.com locale it-IT
Page 87

Using Command Line Utilities 87
Option
Parameter
Description
Example
multiplesessions
true|false
Allows/Prohibits having
several simultaneous
sessions in the control
panel.
Is false by default.
To allow example.com administrator to
have several simultaneous sessions in
the control panel:
# ./domadmin -u example.com multiple-sessions true
-maxbuttonlength
<number>
Limits button label
length for the domain
administrator's control
panel interface.
To restrict the maximum button label
length for the example.com
administrator's control panel interface
to 10:
# ./domadmin -u example.com max-button-length 10
-skin
<string>
Specifies which skin is
used in a domain
administrator's control
panel interface.
To set the example.com administrator's
control panel interface skin to WinXP
Reloaded:
# ./domadmin -u example.com skin "WinXP Reloaded"
-lockscreen
true|false
Prevents/Allows
working with Plesk until
page is completely
loaded.
Is true by default.
To allow example.com administrator to
work with the control panel even if
control panel screens are not
completely loaded:
# ./domadmin -u example.com lock-screen false
-desktoppreset
<string>
Specifies the desktop
preset for the domain
administrator's control
panel interface.
To preset the example.com
administrator's desktop to the New
Domain Owner Desktop:
# ./domadmin -u example.com desktop-preset "New Domain
Owner Desktop"
manage_ph
osting
true|false
Allows/Prohibits
managing physical
hosting.
Is false by default.
To allow example.com administrator to
manage physical hosting:
# ./domadmin -u example.com manage_phosting true
manage_ft
p_passwor
d
true|false
Allows/Prohibits
managing FTP account
password.
Is false by default.
To allow example.com administrator to
manage the FTP user password:
# ./domadmin -u example.com manage_ftp_password true
manage_sh
_access
true|false
Allows/Prohibits
managing access to
server shell with FTP
user's credentials.
Is false by default.
To enable shell access to the domain
example.com by the example.com
administrator using the ftp user's
credentials:
# ./domadmin -u example.com manage_sh_access true
manage_no
t_chroot_
shell
true|false
Enables/Disables
managing of server
shell access to the
chrooted environment
by a domain
administrator.
To enable access to shells of any type
on domain example.com by the domain
administrator using the ftp user
credentials:
# ./domadmin -u example.com manage_not_chroot_shell true
-manage_sh_access true
Page 88

88 Using Command Line Utilities
Option
Parameter
Description
Example
manage_qu
ota
true|false
Allows/Prohibits
changing limits on
using disk space.
Is false by default.
To allow example.com administrator to
set hard disk quota:
# ./domadmin -u example.com manage_quota true
manage_su
bdomains
true|false
Allows/Prohibits
managing subdomains.
Is false by default.
To allow example.com administrator to
manage subdomains:
# ./domadmin -u example.com manage_subdomains true
manage_do
main_alia
ses
true|false
Allows/Prohibits
managing domain
aliases.
Is false by default.
To allow example.com administrator to
manage domain aliases:
# ./domadmin -u example.com manage_domain_aliases true
manage_lo
g
true|false
Allows/Prohibits
managing log rotation,
namely, to adjust the
cleanup and recycling
of processed log files.
Is false by default.
To allow example.com administrator to
manage log rotation:
# ./domadmin -u example.com manage_log true
manage_an
onftp
true|false
Allows/Prohibits
managing Anonymous
FTP.
Is false by default.
To allow example.com administrator to
manage Anonymous FTP:
# ./domadmin -u example.com manage_anonftp true
manage_cr
ontab
true|false
Allows/Prohibits
managing task
scheduler.
Is false by default.
To allow example.com administrator to
manage task scheduler:
# ./domadmin -u example.com manage_crontab true
manage_dn
s
true|false
Allows/Prohibits
managing DNS.
Is false by default.
To allow example.com administrator to
manage DNS:
# ./domadmin -u example.com manage_dns true
manage_we
bapps
true|false
Allows/Prohibits
managing Tomcat web
applications.
Is false by default.
To allow example.com administrator to
manage Tomcat web applications:
# ./domadmin -u example.com manage_webapps true
manage_ma
illists
true|false
Allows/Prohibits
managing mailing lists.
Is false by default.
To allow example.com administrator to
manage mailing lists:
# ./domadmin -u example.com manage_maillists true
make_dump
s
true|false
Allows/Prohibits
backing up and
restoring data.
Deprecated. Use -
allow_local_backu
ps or -
allow_ftp_backups
instead.
To allow the example.com
administrator to backup and restore
data :
# ./domadmin -u example.com make_dumps true
Page 89

Using Command Line Utilities 89
Option
Parameter
Description
Example
allow_loc
al_backup
s
true|false
Allows/Prohibits
backing up and
restoring data using the
control panel
repository.
Is false by default.
To allow the example.com
administrator to backup and restore
data using the control panel's
repository:
# ./domadmin -u example.com allow_local_backups true
allow_ftp
_backups
true|false
Allows/Prohibits
backing up and
restoring data using the
FTP repository.
Is false by default.
To allow the example.com
administrator to backup and restore
data using the FTP repository:
# ./domadmin -u example.com allow_ftp_backups true
manage_dr
web
true|false
Allows/Prohibits
managing antivirus
protection.
Is false by default.
Deprecated. Use the -
manage_virusfilte
r option instead.
To allow the example.com
administrator to manage antivirus
applications:
# ./domadmin -u example.com manage_drweb true
manage_vi
rusfilter
true|false
Allows/Prohibits
managing antivirus
protection.
Is false by default.
To allow the example.com
administrator to manage antivirus
applications:
# ./domadmin -u example.com manage_virusfilter true
manage_da
shboard
true|false
Allows/Prohibits
managing desktop
view.
Can be set to true
only if the -dashboard
option is set to true.
Is true by default.
To prohibit example.com administrator
from managing desktop view:
# ./domadmin -u example.com manage_dashboard false
dashboard
true|false
Allows/Prohibits using
desktop view.
Can be set to false
only if the -stdgui
option is set to true.
Is true by default.
To prohibit example.com administrator
from using desktop view:
# ./domadmin -u example.com dashboard false
-stdgui
true|false
Allows/Prohibits using
standard view.
Can be set to false
only if the -dashboard
option is set to true.
Is true by default.
To prohibit example.com administrator
from using standard view:
# ./domadmin -u example.com stdgui false
Page 90

90 Using Command Line Utilities
Option
Parameter
Description
Example
manage_sp
amfilter
true|false
Allows/Prohibits
managing spam filter.
Is false by default.
To allow example.com administrator to
manage spam filter:
# ./domadmin -u example.com manage_spamfilter true
select_db
_server
true|false
Allows/Prohibits
choosing a DB server
from the servers
registered in Plesk,
when creating a
database.
Is false by default.
Available since Plesk
8.6.
To allow example.com administrator
to choose a DB server on which a
database is to be created:
# ./domadmin -u example.com select_db_server true
Note: Use of this option is not recommended. Passing passwords through CLI as
parameters of the -passwd option may potentially compromise the system's security
as command line can be observed by other users of the system. It is more secure to
pass passwords through the environment variables. You can transfer non-encrypted
passwords by using environment variable PSA_PASSWORD while using single quotes to
specify the empty values in the command line for the argument of the -passwd - passwd_type options.
Similarly, you can transfer encrypted passwords through the environment variable
PSA_CRYPTED_PASSWORD while using single quotes to specify the empty values in the
command line for the argument of the -passwd and -passwd_type options.
Page 91

Using Command Line Utilities 91
Domain Aliases: domalias Utility
Command
Parameter
Description
Example
--create
or -c
<alias_n
ame>
Creates a new
domain alias.
Requires domain option.
To create a new domain alias example.net for the
domain example.com:
# ./domalias --create example.net domain example.com
or
# ./domalias -c example.net -domain
example.com
--update
or -u
<alias_n
ame>
Updates
configuration of
an existing
domain alias
with the data
specified in the
options.
To enable mail service on the domain alias
example.net:
# ./domalias --update example.net mail true
or
# ./domalias -u example.net -mail
true
--delete
or -d
<alias_n
ame>
Deletes a
domain alias.
To delete the domain alias example.net:
# ./domalias --delete example.net
or
# ./domalias -d example.net
The domalias utility is used to manage domain aliases through CLI. By using this
utility, you can perform the following tasks:
creating or deleting domain aliases
viewing the information about domain aliases
enabling and disabling Web, Tomcat, and mail services on domain aliases
Usage
domalias <command> [
<option_1> [<param>]
[<option_2> [<param>]]
… [<option_N> [<param>]]
]
Example
The following command creates domain alias example.net for the domain
example.com, enables the domain alias, and enables mail service on the domain alias.
# ./domalias --create example.net -domain example.com -status enabled
-mail true
Commands
Page 92

92 Using Command Line Utilities
Command
Parameter
Description
Example
--delete-
all or -da
<domain_
name>
Deletes all
domain aliases
for the specified
domain.
To delete all domain aliases for the domain
example.com:
# ./domalias --delete-all example.com
or
# ./domalias -da example.com
--info or -
i
<alias_n
ame>
Displays
information
about a domain
alias.
To view information about the domain alias
example.net:
# ./domalias --info example.net
or
# ./domalias -i example.net
--on
<alias_n
ame>
Enables a
domain alias.
To enable domain alias example.net:
# ./domalias --on example.net
--off
<alias_n
ame>
Disables a
domain alias.
To disable domain alias example.net:
# ./domalias --off example.net
--rename
or -r
<alias_n
ame>
Renames a
domain alias.
Requires -new-
name option.
To rename the domain alias from example.net to
example.org:
# ./domalias --rename example.net new-name example.org
or
# ./domalias -r example.net -new-name
example.org
--help or –
h
<alias_n
ame>
Displays help on
the use of the
utility.
To view help on the use of this utility:
# ./domalias --help
or
# ./domalias -h
Option
Parameter
Description
Example
-newname
<FQDN>
Sets a new name
for an existing
domain alias.
Required with -rename.
To rename the domain alias from
example.net to example.org:
# ./domalias -r example.net new-name example.org
-mail
true|false
Enables/Disables
mail service on a
domain alias.
Is true by default.
To disable mail service on the domain alias
example.net:
# ./domalias -u example.net mail false
-web
true|false
Enables/Disables
web service on a
domain alias.
Is true by default.
To disable web service on the domain alias
example.net:
# ./domalias -u example.net -web
false
Options
Page 93

Using Command Line Utilities 93
Option
Parameter
Description
Example
-domain
<FQDN>
Specifies the name
of the domain for
which domain alias
is to be created.
Required with -create.
To create a new domain alias example.net
for the domain example.com
# ./domalias -c example.net domain example.com
-status
enabled|disa
bled
Enables/Disables
domain alias.
Is enabled by
default.
To disable domain alias example.net:
# ./domalias -u example.net status disabled
-tomcat
true|false
Enables/Disables
the Tomcat service
on a domain alias.
Is false by
default.
To enable the Tomcat service on the
domain alias example.net:
# ./domalias -u example.net tomcat true
-dns
true|false
Enables/Disables
DNS zone on a
domain alias.
To enable the DNS zone on the domain
alias example.net:
# ./domalias -u example.net -dns
true
Page 94

94 Using Command Line Utilities
Domain Limits and Preferences:
Command
Parameter
Description
Example
--update
or -u
<domain_
name>
Updates
preferences of an
existing domain.
To restrict the amount of disk space available for
the domain example.com to 1 GB:
# ./domain_pref --update example.com
-disk_space 1G
or
# ./domain_pref -u example.com disk_space 1G
--info or
-i
<domain_
name>
Displays
information about
domain
preferences.
To view information about preferences set on
the domain example.com:
# ./domain_pref --info example.com
or
# ./domain_pref -i example.com
--set-
default
or -d
<domain_
name>
Sets a domain as
the default
domain for the IP
address that is
assigned to the
domain.
To set the domain example.com as the default
domain for the IP address to which it is
assigned:
# ./domain_pref --set-default
example.com
or
# ./domain_pref -d example.com
domain_pref Utility
The domain_pref utility is used to manage domains through CLI. By using this utility,
you can edit individual domain limits and preferences for applications, scripting support,
email, and other services.
Usage
domain_pref <command> <domain_name> [
<option_1> [<param>]
[<option_2> [<param>]]
… [<option_N> [<param>]]
Example
The following command sets the following limits and preferences for the domain
example.com: the available disk space to 1GB, the maximum traffic limit to 500 MB, the
available number of web users to 50, the available number of subdomains to 10, and
enables the Webmail service.
# ./domain_pref --update example.com -disk_space 1G -max_traffic 500M
-max_wu 50 -max_subdom 10 -webmail true
Commands
Page 95

Using Command Line Utilities 95
Command
Parameter
Description
Example
--help or
-h
Displays help on
the use of the
utility.
To view help on the use of the domain utility:
# ./domain_pref --help
or
# ./domain_pref -h
Option
Parameter
Description
Example
disk_space
<number>[K
|M|G]
Limits the amount of
available disk space.
A number without a
letter is interpreted as
the number of bytes.
Unlimited if set to -1.
To restrict the amount of disk
space available for domain
example.com to 10 GB:
# ./domain_pref -u
example.com -disk_space
10G
max_traffi
c
<number>[K
|M|G]
Limits the monthly traffic
usage.
A number without a
letter is interpreted as
the number of bytes.
Unlimited if set to -1.
To restrict the maximum amount of
traffic available for the domain
example.com to 1 GB/month:
# ./domain_pref -u
example.com -max_traffic
1G
-max_box
<number>
Limits the number of
available mailboxes.
Unlimited if set to -1.
To restrict the maximum number of
mailboxes available for the domain
example.com to 50:
# ./domain_pref -u
example.com -max_box 50
mbox_quota
<number>[K
|M|G]
Limits the amount of disk
space that a single
mailbox can occupy.
A number without a
letter is interpreted as
the number of bytes.
Unlimited if set to -1.
To set the mailbox quota for the
domain example.com to 100 MB:
# ./domain_pref -u
example.com -mbox_quota
100M
-max_redir
<number>
Limits the number of
available mail redirects.
Unlimited if set to -1.
To restrict the maximum number of
mail redirects available for the
domain example.com to 5:
# ./domain_pref -u
example.com -max_redir 5
-max_mg
<number>
Limits the number of
available mail groups.
Unlimited if set to -1.
To restrict the maximum number of
mail groups available for the
domain example.com to 7:
# ./domain_pref -u
example.com -max_mg 7
Options
Page 96

96 Using Command Line Utilities
Option
Parameter
Description
Example
-max_resp
<number>
Limits the number of
available mail
autoresponders.
Unlimited if set to -1.
To restrict the maximum number of
mail autoresponders available for
the domain example.com to 10:
# ./domain_pref -u
example.com -max_resp 10
-max_wu
<number>
Limits the number of
available web users.
Unlimited if set to -1.
To restrict the maximum number of
web users available for the domain
example.com to 50:
# ./domain_pref -u
example.com -max_wu 50
-max_db
<number>
Limits the number of
available databases.
Unlimited if set to -1.
To set the number of databases
available for the domain
example.com to unlimited:
# ./domain_pref -u
example.com -max_db -1
max_mailli
sts
<number>
Limits the number of
available mailing lists.
Unlimited if set to -1.
To restrict the maximum number of
mailing lists available for the
domain example.com to 3:
# ./domain_pref -u
example.com -max_maillists
3
max_webapp
s
<number>
Limits the number of
available Java
applications.
Unlimited if set to -1.
To restrict the maximum number of
Java applications available for the
domain example.com to 10:
# ./domain_pref -u
example.com -max_webapps
10
max_subdom
<number>
Limits the number of
available subdomains.
Unlimited if set to -1.
To restrict the maximum number of
subdomains available for the
domain example.com to 15:
# ./domain_pref -u
example.com -max_subdom 15
expiration
<YYYY-MMDD>
Limits the validity period
of a domain.
Unlimited if set to -1.
To set the validity period for the
domain example.com to 2009-11-
30:
# ./domain_pref -u
example.com -expiration
2009-11-30
-www
true|false
Enables/Disables the
www prefix.
Is true by default.
To disable the www prefix for the
domain name example.com:
# ./domain_pref -u
example.com -www false
-wuscripts
true|false
Enables/Disables
scripting support for web
users.
Is false by default.
To enable scripting support for web
users on the domain example.com:
# ./domain_pref -u
example.com -wuscripts
true
-webmail
true|false
Enables/Disables using
Webmail.
Is true by default.
To disable Webmail support on the
domain example.com:
# ./domain_pref -u
example.com -webmail false
Page 97

Using Command Line Utilities 97
Option
Parameter
Description
Example
-no_usr
bounce:txt
|email|rej
ect
Sets the mode of
automatic action toward
mail messages
addressed to nonexistent users.
Is reject by default.
To have messages addressed to
non-existent users bounced back
with text No such mailbox on the
server on the domain
example.com:
# ./domain_pref -u
example.com -no_usr
bounce:"No such mailbox on
the server"
To have messages addressed to
non-existent users forwarded to
mail address admin@example.com
on the domain example.com:
# ./domain_pref -u
example.com -no_usr
admin@example.com
max_dom_al
iases
<number>
Limits the number of
available domain
aliases.
Unlimited if set to -1.
To set the maximum number of
domain aliases available for the
domain example.com to 10:
# ./domain_pref -u
example.com max_dom_aliases 10
-at-access
true|false
Enables/Disables
<webuser_name>@<do
main_name> access
format.
Deprecated since Plesk
8.3.
To enable authorized web user
access to control panel using the
<webuser_name>@<domain_nam
e> login name format on the
domain example.com:
# ./domain_pref -u
example.com -at-access
true
keep_traf_
stat
<number>
Defines the number of
months during which the
system keeps traffic
usage statistics.
Keeping statistics during
unlimited period if set to
-0.
To make the system retain
example.com traffic statistics
during 5 months:
# ./domain_pref -u
example.com keep_traf_stat 5
sign_outg
oing_mail
true|fals
e
Allows/Prohibits using
DomainKeys spam
protection on a domain.
Is false by default.
Available since Plesk
8.4.
To use DomainKeys spam
protection on the domain
example.com:
# ./domain_pref -u
example.com sign_outgoing_mail true
Page 98

98 Using Command Line Utilities
Domain Templates: domain_template
Command
Parameter
Description
Example
--create or
-c
<templat
e_name>
Creates a new
domain
template.
To create a domain template named Domain
Template:
# ./domain_template --create
"Domain Template"
or
# ./domain_template -c "Domain
Template"
Utility
The domain_template utility is used to create and edit domain templates through
CLI. The utility allows the following operations:
creating, renaming, and deleting domain templates
managing domain limits and preferences
managing various domain hosting parameters: scripting languages support, ftp user
access, log file management, mail preferences, and other parameters.
Usage
domain_template <command> [<template_name>] [
<option_1> [<param>]
[<option_2> [<param>]]
… [<option_N> [<param>]]]
Example
The following command creates new domain template named Domain Template;
enables physical hosting and allocates 500 MB of disk space for domains to be created
using this template; sets the domain validity period to one year starting from the
domain creation date; sets the monthly domain traffic limit to 500 MB/month; enables
Python, PHP, and Apache PHP support; enables forwarding of email messages
addressed to non-existing users to email address admin@example.com.
# ./domain_template -c "Domain Template" -hosting true -disk_space
500M -expiration 1Y -max_traffic 500 -python true -asp true -php true
-no_usr admin@example.com
Commands
Page 99

Using Command Line Utilities 99
Command
Parameter
Description
Example
--update or
-u
<templat
e_name>
Updates an
existing domain
template.
To rename the template from Domain Template
1 to Domain Template 2:
# ./domain_template --update
"Domain Template 1" -new-name
"Domain Template 2"
or
# ./domain_template -u "Domain
Template 1" -new-name "Domain
Template 2"
--remove or
-r
<templat
e_name>
Deletes a
domain
template.
To remove the template Domain Template:
# ./domain_template --remove
"Domain Template"
or
# ./domain_template -r "Domain
Template"
--xml-info
or -x
<templat
e_name>
Displays
information
about a domain
template in the
XML format.
To view information about template Domain
Template in the XML format:
# ./domain_template --xml-info
"Domain Template"
or
# ./domain_template -x "Domain
Template"
--help or -h
Displays help
on the use of
the utility.
To view help on the use of the utility:
# ./domain_template --help
or
# ./domain_template -h
Option
Parameter
Description
Example
-new-name
<string>
Sets a new name for
an existing domain
template.
To rename the template from Domain
Template 1 to Domain Template 2:
# ./domain_template -u
"Domain Template 1" -newname "Domain Template 2"
-clogin
<client_log
in_name>
Assigns a domain
template to a client
account
To assign the template Domain
Template to a client with login name
JDoe:
# ./domain_template -u
"Domain Template" -clogin
JDoe
Options
Page 100

100 Using Command Line Utilities
Option
Parameter
Description
Example
-no_usr
bounce:txt|
email|rejec
t
Sets the mode of
automatic action
toward mail
messages
addressed to nonexistent users.
Is bounce:"This
address no
longer accepts
mail" by default.
To have messages addressed to nonexistent users forwarded to mail
address admin@example.com on
domains created with the template
Domain Template:
# ./domain_template -u
"Domain Template" -no_usr
admin@example.com
To have messages addressed to nonexistent users rejected without
accepting on domains created with the
template Domain Template:
# ./domain_template -u
"Domain Template" -no_usr
reject
-webmail
true|false
Enables/Disables
using Webmail.
Is false by default.
To enable Webmail support on
domains created with the template
Domain Template:
# ./domain_template -u
"Domain Template" -webmail
true
max_dom_al
iases
<number>
Limits the number of
available domain
aliases.
Unlimited if set to -
1.
Is unlimited by
default.
To restrict the maximum number of
domain aliases available for domains
created with the template Domain
Template to 10:
# ./domain_template -u
"Domain Template" max_dom_aliases 10
disk_space
<number>[K|
M|G]
Limits the amount of
available disk space.
Unlimited if set to -
1.
Is unlimited by
default.
A number without a
letter is interpreted
as the number of
bytes.
To restrict the amount of disk space
available for domains created with the
template Domain Template to 100 MB:
# ./domain_template -u
"Domain Template" disk_space 100M
max_traffi
c
<number>[K|
M|G]
Restricts the
monthly traffic
usage.
Unlimited if set to -
1.
Is unlimited by
default.
A number without a
letter is interpreted
as the number of
bytes.
To allow domains created with the
template Domain Template to use up
to 1 Gb per month:
# ./domain_template -u
"Domain Template" max_traffic 1G
 Loading...