

Page 1
Parallels® Panel
Page 2

Copyright Notice
Parallels IP Holdings GmbH
Vordergasse 59
CH-Schaffhausen
Switzerland
Phone: +41 526320 411
Fax: +41 52672 2010
Global Headquarters
500 SW 39th Street, Suite 200
Renton, WA 98057
USA
Phone: +1 (425) 282 6400
Fax: +1 (425) 282 6445
EMEA Sales Headquarters
Willy-Brandt-Platz 3
81829 Munich, DE
Phone: +49 (89) 450 80 86 0
Fax:+49 (89) 450 80 86 0
APAC Sales Headquarters
3 Anson Road, #36-01
Springleaf Tower, 079909
Singapore
Phone: +65 6645 32 90
Copyright © 1999-2014 Parallels IP Holdings GmbH. All rights reserved.
This product is protected by United States and international copyright laws. The product’s
underlying technology, patents, and trademarks are listed at http://www.parallels.com/trademarks.
Microsoft, Windows, Windows Server, Windows NT, Windows Vista, and MS-DOS are registered
trademarks of Microsoft Corporation.
Linux is a registered trademark of Linus Torvalds.
Mac is a registered trademark of Apple, Inc.
All other marks and names mentioned herein may be trademarks of their respective owners.
Page 3

Contents
Get Started 5
Installing Panel 7
Before Installing Panel ................................................................................................................ 11
1. Check Installation Requirements .................................................................................. 12
2. Choose a Release Tier ................................................................................................. 14
3. Choose Panel Components .......................................................................................... 15
4. (Advanced) Use Alternative Package Repositories ...................................................... 19
Manual Installation....................................................................................................................... 20
Installation from the Web Interface ................................................................................... 21
Installation from the Command Line ................................................................................. 22
Typical Installation with One-Click Installer ....................................................................... 22
(Advanced) Automated Installation ............................................................................................. 23
Running Automated Installations ...................................................................................... 25
Installation Script Examples (Linux) .................................................................................. 27
(Advanced) Installation to Parallels Virtuozzo Containers .......................................................... 27
Linux PVC Templates ....................................................................................................... 29
Installation on PVC for Linux ............................................................................................. 32
Windows PVC Templates ................................................................................................. 35
Installation on PVC for Windows ....................................................................................... 36
(Advanced) Cloning Panel in Virtual Environment ...................................................................... 39
After Installing Panel.................................................................................................................... 42
Initialize Panel ................................................................................................................... 43
Install a License Key ......................................................................................................... 44
(Optional) Define Panel View ............................................................................................ 45
(Optional) Specify Administrator's Password .................................................................... 47
(Optional) Set Up Panel Locale......................................................................................... 48
(Optional) Optimize Panel for Operation in VPS ............................................................... 49
(Optional) Hide Power Panel Controls for PVC Installations ............................................ 51
(Optional) Set Up Upgrade Notifications ........................................................................... 52
(Optional) Change or Hide Web Interface Elements......................................................... 52
Upgrading Panel 53
In-Place Panel Upgrading ........................................................................................................... 55
Before Upgrading Panel .................................................................................................... 57
Manual Upgrade ................................................................................................................ 61
(Advanced) Automated Upgrade....................................................................................... 66
(Advanced) Upgrade in Parallels Virtuozzo Containers .................................................... 71
After Upgrading Panel ....................................................................................................... 74
Upgrading Panel by Transfer ...................................................................................................... 78
Upgrading with Migration & Transfer Manager ................................................................. 81
Upgrading Through Backup Files...................................................................................... 92
Completing Upgrade from Panel 9 and Earlier Versions ............................................................ 96
Conversion Schemes and Recommended Steps ............................................................. 97
Completing the Transition ............................................................................................... 101
Associating New Accounts and Subscriptions with Plans .............................................. 103
Execution of Scripts via Cron Task Scheduler (Linux Hosting) ...................................... 103
Page 4

Get Started 4
Transferring Data Between Panels 104
Transferring Data with Migration & Transfer Manager .............................................................. 106
Preparing for Transfer ..................................................................................................... 107
Performing Transfer ........................................................................................................ 116
Transferring Subscriptions with Remote Databases ....................................................... 118
Transferring Data Through Backup Files .................................................................................. 121
Migrating from Other Panels 124
Preparing for Migration .............................................................................................................. 126
cPanel ............................................................................................................................. 127
Confixx ............................................................................................................................ 132
Parallels Pro Control Panel for Linux .............................................................................. 138
Helm ................................................................................................................................ 142
Performing Migration ................................................................................................................. 157
Migrating from Parallels Small Business Panel ......................................................................... 160
Important Facts about Migration ..................................................................................... 160
Migration Scenarios ........................................................................................................ 162
Preparing for Migration from SBP ................................................................................... 162
Performing Migration from SBP ...................................................................................... 164
Troubleshooting 168
Troubleshooting Installation and Upgrade Issues ..................................................................... 169
Troubleshooting Migration and Transfer Issues ........................................................................ 170
Troubleshooting on Linux Systems ................................................................................. 172
Troubleshooting on Windows Systems ........................................................................... 174
Appendix A: Installing Third-Party Services 176
Web Deploy 3.0 ......................................................................................................................... 177
Adobe ColdFusion (Linux) ......................................................................................................... 179
Google Services for Websites ................................................................................................... 180
Providing Access to Google Services on Websites ........................................................ 182
UNITY Mobile Services for Mobile Sites ................................................................................... 184
Miva E-commerce Applications (Windows) ............................................................................... 185
Miva E-commerce Applications (Linux) ..................................................................................... 185
Appendix B: Installing Panel Extensions (Linux) 187
Appendix C: Mirroring Parallels Updates Server 188
Appendix D: Parallels Installer Options 189
Appendix E: Configuring Panel for Linux to Access Vendor Updates 192
Appendix F: Enabling Support for SecureLVE 193
Page 5
There are four ways to perform Panel deployment described in this guide: installation,
C H A P T E R 1
Get Started
upgrade, transfer, and migration.
Installation
Panel installation can be performed either manually (suits best for single installation) or
in an automated, unattended, manner. The latter way is recommended for installing
Panel on multiple servers. For mass Panel deployments, we also recommend that you
install Panel instances to Parallels Virtuozzo Containers.
Learn more in the chapter Installing Panel (on page 7).
Upgrade
If you use an earlier Panel version, you can upgrade it to a later version when it is
available. There are two ways of upgrading Panel: in-place upgrade and upgrade by
transfer. While in-place upgrade is the updating of Panel components within one
server, upgrade by transfer implies moving of data from the server with earlier Panel
version (source) to the server with a later Panel version (destination).
Learn more in the chapter Upgrading Panel (on page 53).
Page 6

6 Get Started
Transfer
Panel supports transferring hosting data (service plans, subscriptions, and so on) from
one Panel server to another. This allows you, for example, to seamlessly move your
Panel to a more productive server.
Learn more in the chapter Transferring Data Between Panels (on page 104).
Migration
Migration is the only way to switch to Panel from other hosting solutions (CPanel,
Confixx, and other). This is done by transferring hosting data from a source server to
Panel.
Learn more in the chapter Migrating from Other Panels (on page 124).
Page 7
There are a number of installation scenarios depending on your environment:
Dedicated server
Manual or automated installation.
Virtual server
Manual or automated installation.
Cloning Panel from server to server.
Installation using Virtuozzo templates (only for Parallels Virtuozzo
Containers).
Cloud Platform
Deployment in Amazon Web Services and Windows Azure.
Cloning Panel from server to server.
C H A P T E R 2
Installing Panel
Manual Installation
This is the best way if you want a new single installation of Panel. Manual means that
the installation requires user input. The wizard will prompt you to enter various
installation settings such as Panel version, installed components, and so on. Manual
installation is performed by the Parallels Installer utility that you should download from
the official Parallels website and run either in the GUI or in the command-line mode.
For those who want to quickly install Panel in the most typical configuration, we offer
the One-Click Installer utility. Learn more in the section Manual Installation (on page 20).
Page 8

8 Installing Panel
Automated Installation
A manual Panel installation is time-consuming when it comes to handling a large
number of servers. To facilitate these complex deployments, we offer the automated
type of installation. The main idea is to run the installation without any user input. This
is done by setting up all installation parameters with the help of Parallels Installer
command-line options. Moreover, on Linux systems we suggest that you write a script
that copies and simultaneously runs the Installer utility on a number of servers. Learn
more in the section (Advanced) Automated Installation (on page 23).
Note that automated installations can be significantly speeded up if you create a local
mirror of the Parallels updates server. Learn more in Appendix C: Mirroring Parallels
Updates Server (on page 188).
Installation on Cloud Platforms
Page 9
Installing Panel 9
Panel fully supports installation on cloud platforms such as Amazon Web Services and
Windows Azure. To deploy Panel on these platforms, use the following guidelines:
Amazon Web Services
Instructions for Linux (http://kb.parallels.com/en/114216) and Windows
(http://kb.parallels.com/114947).
Video tutorial.
Windows Azure
Instructions (http://kb.parallels.com/en/114648).
Video tutorial (http://www.youtube.com/watch?v=PVfzE1_6I0A).
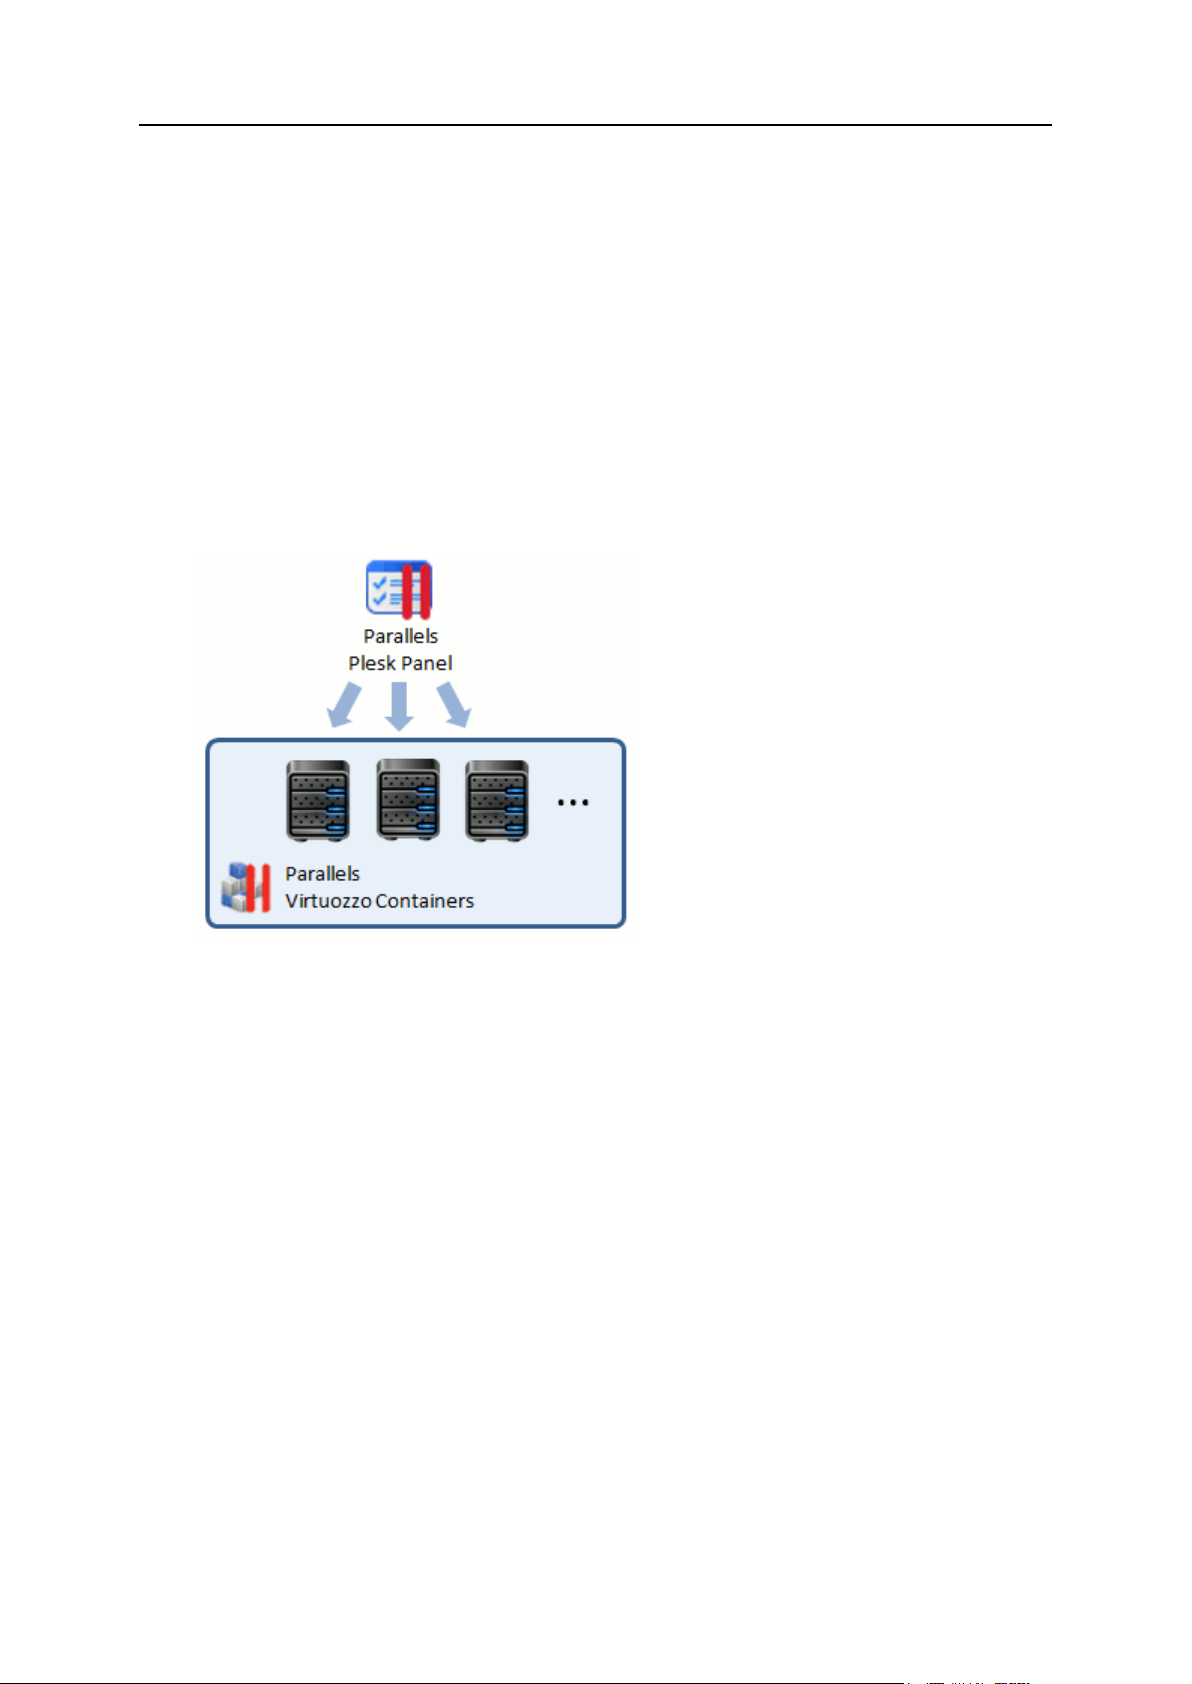
Installation to Parallels Virtuozzo Containers
Parallels Virtuozzo Containers (PVC) is a virtualization solution employed by a large
number of service providers. You can install Panel to Virtuozzo Containers using either
the manual or automated installation way described above but the best way to do it is
to use PVC app templates. A PVC app template is a package containing app data and
configuration scripts that are necessary for installation. The main benefit of PVC
templates is that you install an app template to your server just once, and then install
the app from the template to a number of containers simultaneously. Further app
upgrades are also applied through templates.
When installing Panel with a PVC template, you do not need to use the Installer utility.
You just apply a certain template to a container (or a number of containers) using the
Virtuozzo commands. If you need a number of containers with Panel, you can clone the
container with the installed template as many times as you need. Learn more in the
section (Advanced) Installation to Parallels Virtuozzo Containers (on page 27).
Page 10

10 Installing Panel
Cloning Panel from Server to Server
In this chapter:
Before Installing Panel ...................................................................................... 11
Manual Installation ............................................................................................ 20
(Advanced) Automated Installation .................................................................... 23
(Advanced) Installation to Parallels Virtuozzo Containers .................................. 27
(Advanced) Cloning Panel in Virtual Environment ............................................. 39
After Installing Panel ......................................................................................... 42
Panel cloning is the copying of the same Panel instance to different virtual machines
without compromising Panel operability. This scenario is applicable in case you already
have a working Panel instance in some virtual environment and want to get a new
Panel server by simply cloning the virtual server image. Learn more about cloning in
(Advanced) Cloning Panel in Virtual Environment (on page 39).
Installation Steps
Typical installation begins with some preliminary steps (on page 11) (checking
requirements, choosing the proper Panel version, and so on) and ends with some postinstallation configuration (on page 42) (initializing Panel, installing a license key, and so
on). Most of these steps are the same for all installation types. The only difference is
that in manual installations, post-installation steps should be performed through the
GUI, while for automated installations we suggest using Panel API or command-line
interface to automatically perform the post-installation configuration.
Note that Panel supports many third-party services that are not installed by default
(such as support for Google Services, UNITY Mobile Services, Microsoft Web Deploy,
and others). If you want Panel to provide such services, you must install them after all
post-installation steps are finished. Learn more in Appendix A: Installing Third-Party
Services (on page 176).
Moreover, you can significantly extend Panel functionality on Linux systems by
installing Panel extensions. You can access such extensions directly from the Panel
GUI and gain control over many additional and handy features, such as a file server,
firewall, and others. Learn how to install additional Panel extensions in Appendix B:
Installing Panel Extensions (Linux) (on page 187).
Page 11

Installing Panel 11
Before Installing Panel
Next in this section:
1. Check Installation Requirements ................................................................... 12
2. Choose a Release Tier .................................................................................. 14
3. Choose Panel Components ........................................................................... 15
4. (Advanced) Use Alternative Package Repositories ........................................ 19
There are a few preliminary steps that you might need to perform before installing
Panel. These steps apply to all installation scenarios.
Page 12

12 Installing Panel
1. Check Installation Requirements
Before you install Panel on a server, make sure you meet the following requirements.
Requirements for Linux Systems
We recommend that you install Panel on a clean operating system. Before installing
Parallels Plesk Panel for Linux, make sure that the following requirements are met:
Your server meets the requirements described in the Panel release notes.
A static IPv4 address is preliminarily configured. If you have an environment that
uses only IPv6 addresses, ensure the proper address translation to the IPv4
segment of the Internet.
Certain ports should be open. For details, see http://kb.parallels.com/en/391.
PHP 5 is required for the Presence Builder component.
The AppArmor app is disabled. For details, see http://kb.parallels.com/en/112903.
The disk space allocated to the /tmp directory exceeds three gigabytes.
A user who runs the installer can execute files in the /tmp directory. This makes it
possible to install the system packages required for Panel. When the installation is
completed, we recommend that you mount /tmp with the noexec option. For
details on how to do it, see http://kb.parallels.com/en/1410
(http://kb.parallels.com/en/1410).
If you run Debian, CloudLinux, or Ubuntu, add updates and security repositories to
your apt (package manager) configuration.
Your hard drive must be properly partitioned. For instructions, see the article on
partitioning tips at http://kb.parallels.com/article_17_819_en.html.
On Debian and Ubuntu operating systems, the path /usr/local/psa is reserved
for system needs. We highly recommend that you neither manually create this
directory nor mount a separate partition to this location. Instead, if you want to use
a separate partition for Panel, mount the partition to /opt/psa/, the commonly
used path for Debian and Ubuntu installations. If you do not follow this
recommendation, Panel will not be able to apply updates.
If you wish to install Panel with the Business Manager component, you should first
check that the MySQL server configuration option sort_buffer_size is set to 2
megabytes (sort_buffer_size=2M) or more. This option is set in the /etc/my.cnf file.
After the configuration change, restart the mysqld service:
service mysqld restart
Requirements for Windows Systems
Before installing Parallels Plesk Panel for Windows, back up all your server data and
make sure that the following requirements are met:
Your server meets the requirements described in the Panel release notes.
Page 13

Installing Panel 13
Your server is not working as a Windows Domain Controller (neither primary nor
backup). If this requirement is not fulfilled, a system crash may occur during the
creation of domains with certain names.
Internet Information Services (IIS) should be installed on the server. The default
components of the Web Server Role are required.
A static IPv4 address should be configured in the OS prior to the Panel installation.
If you have an environment that uses only IPv6 addresses, ensure the proper
address translation to the IPv4 segment of the Internet.
Certain ports should be open. For details, see http://kb.parallels.com/en/391.
The installation path of the Panel must contain only ASCII symbols.
Panel can be installed only on NTFS partitions.
If you plan to use Microsoft SQL Server support in the Panel, the SQL Server
should be installed and configured to use standard or mixed security mode. If the
SQL Server is not installed, you can select it to be installed with the Panel and
configured with administrator name 'sa' and a random password.
Prior to upgrading Panel, ensure that you have the latest version of the Microsoft
Visual C++ Redistributable Package.
Note: To install Microsoft SQL Server 2008 as a part of Plesk installation, preliminarily
install Microsoft Installer 4.5 and .NET Framework 2.0 SP 2.
If you want to install Panel with the Business Manager component, you should first
check that the MySQL server configuration option sort_buffer_size is set to 2
megabytes (sort_buffer_size=2M) or more. This option is set in the
%plesk_dir%\Databases\MySQL\Data\my.ini file. After the configuration
change, restart the mysqld service by running these two commands from shell:
net stop mysql
net start mysql
Page 14

14 Installing Panel
2. Choose a Release Tier
One more step before installing Panel is to choose the proper Panel version depending on its
release tier.
Each major version of Panel passes through a number of development stages. It is natural
that on earlier stages, some of newly implemented features may not be in their final state and
may require some further modification. The functionality of suсh features in subsequent
Panel versions is improved as they receive more customer feedback over time. To indicate
the stage of the current Panel version, we assign one of the following release tiers to it:
Testing release, Early Adopter release, General release, and Late Adopter release. The
decision on what tier to use is absolutely up to you. For example, consider installing the early
adopter release if you want to try new features before the general availability of Panel. On
the other hand, if you want to get the solution that received all major updates and is
successfully used by a number of service providers, wait until Panel gets the late adopter
release status (it may be a couple of months after the general release).
Choose one of the following:
Testing release.
We start each release cycle with publishing a number of testing releases for preview
purposes and let you sequentially upgrade from the first one to the last, and then upgrade
to higher release tiers. We do not provide technical support for such builds even if they
were upgraded to higher tiers. Thus, avoid using this build in a production environment.
Notes:
1. By default, testing builds are not shown as available for installation. You can install the
testing Panel version only by running Parallels Installer with one of the special options.
Learn more in Manual Installation.
2. Upgrade to the next testing release is available only to the users of a testing build.
Subsequent Panel builds do not have the corresponding option in the GUI.
Early Adopter release.
An early adopter release has all claimed features and previous versions successfully
upgrade to it. The quality of this version is eventually improved by updates. By selecting
the early adopter release you become the first to see the new features and receive the
freshest updates.
General release.
A general release has passed all quality tests. Minor issues are promptly fixed by
updates. We recommend that you always upgrade Panel to general release versions.
Late Adopter release.
A late adopter release has received all major updates issued for the current Panel
version, and a number of service providers have successfully used it for some time.
During the manual installation, selection of a release tier is one of the installation wizard
steps. If an installation is automated by a script, you should specify a certain tier using
Installer options. For users of PVC templates, the general release is the only option.
Page 15

Installing Panel 15
3. Choose Panel Components
Panel employs a number of interchangeable components for providing its services. For
example, mail services on Linux can be provided by either Postfix or Qmail. The decision
about what component to choose is made during Panel installation. Also, some components
that you may find useful are not installed by default. Before installing Panel, acquaint yourself
with available Panel components and choose the ones to include in your final Panel
configuration. Next in this section, we will give recommendations on which components to
choose under various circumstances. The components from the list below are not installed
by default unless explicitly stated.
Note: Some components may be unavailable to you due to the limitations of your Panel
license key.
Billing Automation
Customer & Business Manager
Customer & Business Manager is a billing automation solution available with Panel out of
the box. This automates the subscribing of customers to hosting services, along with all
attendant business operations. Do not install the component if you want to use a thirdparty solution or if you do not need billing automation at all.
Payment gateway and registrar modules adapted to Business Manager
Install this component if you want to connect your Business Manager to online payment
systems and domain name registrars. On Windows, these modules are installed
automatically when you install Business Manager.
Web Hosting
Web hosting components are used to switch the support for a certain web hosting service.
For example, support for a certain scripting language or support for FTP connections.
Plesk Web hosting
(Installed by default). Install this component if you want to use your Panel for web
hosting.
Apache mod_fcgid module
(Installed by default). Install this component if you want to turn on FastCGI support for the
Apache web server.
Apache mod_perl module
(Installed by default). Install this component if you want to turn on support for Perl scripts
by the Apache web server.
ProFTPD FTP server
(Installed by default). Install this component if you want to allow users to connect to Panel
using FTP.
Bandwidth Limiter for Apache support (mod_bw)
Install this component if you want to manage bandwidth limiting for incoming connections.
Apache ASP support
Install this component if you want to turn on support for ASP scripts by the Apache web
server.
Page 16

16 Installing Panel
Tomcat Java Servlets support
Install this component if you want to turn on support for Java servlets.
Apache mod_python module
Install this component if you want to turn on support for Python scripts by the Apache web
server.
Ruby on Rails support
Install this component if you want to turn on support for Ruby on Rails scripts.
ColdFusion support for Plesk
Install this component if you want to turn on support for ColdFusion scripts.
MIVA Empresa support
Install this component if you want to turn on support for MIVA scripts.
Webalizer web statistics package
(Installed by default). This component allows users to collect site visit statistics by means
of the Webalizer software.
AWStats web statistics package
(Installed by default). This component allows users to collect site visit statistics by means
of the AWStats software.
Cloudflare Apache Module
This component allows improving performance of websites hosted in the server using the
Cloudflare service.
Apache Web Server Versions (Linux Hosting)
If you use RHEL 5 of CentOS 5, you can choose one of the following options:
Apache web server support
Typical Apache web server used to deliver websites to Internet users.
Apache web server with SNI support
(Installed by default). Server Name Indication (SNI) is a feature that extends the SSL
protocol. Install this component if you want to use separate SSL certificates for websites
with a shared IP address.
Nginx Web Server and Reverse Proxy Support
Nginx reverse proxy support
(Installed by default).
php-fpm support for nginx
On Linux systems other than SuSE, Debian 7, and Ubuntu 12.04, installing this
component requires enabling third-party repositories (on page 19).
Plesk Webmail Support
Specify the webmail software that allows Panel users to access their mail accounts through a
browser:
Horde webmail support
Roundcube webmail support
Page 17

Installing Panel 17
Mail (Linux Hosting)
Select the mail services Panel should provide:
Kaspersky antivirus
Install this component if you want to use Kaspersky antivirus software for checking mail.
Parallels Premium antivirus
(Installed by default). Install this component if you want to use Parallels Premium antivirus
software for checking mail.
Mailman mailing list manager support
This component adds mailing list functionality to Panel.
SpamAssassin support
Install this component if you want to use SpamAssassin software to effectively stop email
spam.
Choose one of the following mail servers that best suits your needs:
Postfix mail server
(Installed by default).
Qmail mail server
MSMTP relay only mailserver (SMTP client)
Select this option if you do not want to install mail server. When you log in to Panel with
no mail server installed, it will offer you to specify an external SMTP server for sending
outgoing mail.
Databases
The default database server in Panel is MySQL. It it installed by default. However, since
version 11.5, on Linux you can replace it with MariaDB or Percona Server. For instructions
on replacing MySQL server with these alternatives, refer to the Advanced Administration Guide,
section Using MariaDB or Percona Server as the Default Database Server.
PostgreSQL server support
If you require support for PostgreSQL databases (for example, this may be a requirement
of certain web apps), select this option to install PostgreSQL to your Panel server.
MS SQL Server 2008 (on Windows)
MS SQL Server 2012 (on Windows)
Important: If MS SQL server is already installed on your server, you should exclude this
component from your Panel installation. Otherwise, Panel will perform a clean installation of
MS SQL server and data stored in your MS SQL server will be lost. To let Panel use your MS
SQL server, connect it to Panel once you complete the installation. To learn how to connect
a database to Panel, refer to the Administrator's Guide, section Adding and Removing Database
Servers.
Page 18

18 Installing Panel
DNS Server
BIND DNS server support
(Installed by default on Linux). On Linux, deselect this component if you do not want to
run the DNS service on the server. On Windows, select this component if you want to use
BIND instead of the Microsoft DNS.
Microsoft DNS server
(Installed by default on Windows). Deselect this component if you do not want to run the
DNS service on the server or if you want to use BIND instead.
Important: If you exclude the DNS server from your installation, the DNS service will not
work for websites hosted on your server. Excluding the DNS server makes sense only if you
are going to use an external DNS server. Learn more in the section Using External DNS Servers
of the Administrator's Guide.
System Monitoring
Health monitor
Install this component if you want to track all main server health parameters, such as
memory and CPU usage by different services, hard disk utilization, number of running
processes, and so on.
Backup and Migration
Plesk Migration & Transfer Manager
Install this component if you want to perform data transfer from another Panel or
migration from another hosting platform. Install this component to a destination server.
Extensions (Linux Hosting)
You can extend Panel functionality by installing additional extensions. Note that these
extensions require post-installation configuration. Learn more in the chapter Appendix B:
Installing Panel Extensions (Linux) (on page 187).
Plesk Firewall extension
Install this component if you want to protect a Panel server and private network from
unauthorized access with a firewall.
Plesk VPN extension
Install this component if you want to set up a VPN connection between a Panel server
and a remote host through the Panel GUI.
Plesk File Server extension and SMB file server package
Install this component if you want to share files on your Panel server.
Watchdog (System monitoring extension)
Install this component if you want to use the Watchdog software to monitor your system.
This ensures that your server is clean from malware, that all services are up and running,
and that there is enough free disk space on the server.
Page 19

Installing Panel 19
4. (Advanced) Use Alternative Package Repositories
By default, Parallels Installer fetches the packages required for Panel installation or upgrade
from the standard repository of your operating system. However, if you want to have a latest
package version that is not yet available in the standard repository, you can install this
version from an alternative repository. To do this, enable this repository on your server. The
instructions on enabling alternative repositories are available on the websites of these
repositories.
If you enable alternative repositories in your system, Parallels Installer uses the latest
versions of packages it finds in all available repositories when installing or upgrading Panel.
For example, if Parallels Updates contains MySQL v.5.5.30, and another repository enabled
on your server (for example, IUS) contains MySQL v.5.5.34, the most current version
(5.5.34) will be installed.
Important: If you upgraded to Panel 11.5 from an earlier version and configured alternative
repositories according to the instructions in previous version of this guide, we strongly
recommend that you revert all changes you made according to this instruction and use
alternative repositories according to this document.
Page 20

20 Installing Panel
Manual Installation
Next in this section:
Installation from the Web Interface .................................................................... 21
Installation from the Command Line .................................................................. 22
Typical Installation with One-Click Installer ........................................................ 22
Once you have completed the steps described in the section Before Installing Panel (on page
11), you can proceed directly to the Panel installation.
To install Panel on Linux- or Windows-based servers, use the Parallels Installer utility. The
Parallels Installer utility is available for download from
http://www.parallels.com/products/plesk/download/. There are several distributions of
Parallels Installer created for different operating systems and platforms, so be sure to obtain
the Parallels Installer version that matches your host's operating system. Parallels Installer
can be used either via a browser-based user interface or the command line.
If you run Linux and want to quickly install the latest version of Panel in the typical
configuration, we recommend that you use our separate utility called One-Click Installer. It is
available at http://autoinstall.plesk.com/one-click-installer.
Once the installation is finished, complete the post-installation setup. This includes Panel
initialization and installation of a license key. See the section After Installing Panel (on page 42)
for details.
Page 21

Installing Panel 21
Installation from the Web Interface
To install Panel through the web interface:
1. Download the Parallels Installer utility that suits your operating system from
http://www.parallels.com/products/plesk/download/.
2. (Only for Linux) Set the execution permission for Parallels Installer:
chmod +x parallels_products_installer_file_name
3. Run the Parallels Installer.
On a Linux/Unix server: ./parallels_products_installer_file_name --web-
interface
On a Windows server: parallels_products_installer_file_name
(Only for Linux) Open your browser and enter https://host-name:8447/ or
https://IP-address:8447/ in the address bar. The Parallels Installer Web interface
opens.
(Only for Windows) Parallels Installer wizard opens in a new browser window. When the
installer starts, an additional console window opens. This window displays the operations
performed by the utility. It is closed upon the successful installation, or after 30 minutes of
inactivity.
Note: As described in the section Before Installing Panel (on page 11), you can select what
Panel build to install depending on its release tier. By default, Installer shows you only the
latest general and late adopter releases as available for installation. To be able to install
other Panel releases, use the following Installer options:
--all-versions to view all available Panel versions.
--tier <release_tier> to view the latest available versions with the specified
release tier.
4. Log in to the web interface.
If you are running Windows, type the administrator's username ("Administrator"),
administrator's password, and click Log In.
If you are running Linux, type the root username and password, and click Log In.
5. Follow the installation steps.
Page 22

22 Installing Panel
Installation from the Command Line
To install Panel from the command line:
1. Download the Parallels Installer utility that suits your operating system from
http://www.parallels.com/products/plesk/download/.
2. (Only for Linux) Set the execution permission for Parallels Installer:
chmod +x parallels_products_installer_file_name
3. Run the Parallels Installer.
On a Linux/Unix server:
./parallels_products_installer_file_name
On a Windows server:
parallels_products_installer_file_name --console
Note: As described in the section Before Installing Panel (on page 11), you can select what
Panel build to install depending on its release tier. By default, Installer shows you only the
latest general and late adopter releases as available for installation. To install other Panel
releases, use the following Installer options:
--all-versions to view all available Panel versions.
--tier <release_tier> to view the latest available versions with the specified
release tier.
4. Follow the installation steps.
Typical Installation with One-Click Installer
Use the One-Click Installer utility to perform a clean installation of Panel in one step. The
utility automatically determines your operating system and installs the latest version of an
appropriate distribution package in the typical configuration. One-Click Installer works only on
Linux operating systems.
To install Panel, run one of the following commands on behalf of the root user.
If you have the wget utility, run
wget -O - http://autoinstall.plesk.com/one-click-installer | sh
If you have the curl utility, run
curl http://autoinstall.plesk.com/one-click-installer | sh
If you have the fetch utility, run
fetch -o - http://autoinstall.plesk.com/one-click-installer | sh
Page 23

Installing Panel 23
(Advanced) Automated Installation
Once you have completed the steps described in the section Before Installing Panel (on page
11), you can proceed directly to the Panel installation.
To install Panel on Linux- or Windows-based servers, use the Parallels Installer utility. The
Parallels Installer utility is available for download from
http://www.parallels.com/products/plesk/download/. There are several distributions of
Parallels Installer created for different operating systems and platforms, so be sure to obtain
the Parallels Installer that matches your host's operating system. Normally, Parallels Installer
binaries are distributed under names in the following format:
parallels_installer_v<installer version>_os_<operating system
version>_<platform>.
How to Automate Panel Installation
The typical manual installation takes a long time when it comes to mass deployment of
Panel, so we recommend that you automate this process. The automatic process is based
on using the command line options of the Parallels Installer utility that allow you to predefine
all installation parameters. Thus, you can run an installation that does not require any user
input. To learn how to run such installations, refer to the section Running Automated Installations
(on page 25).
Moreover, if you are going to perform mass deployment of Panels for Linux, you can write a
script that automatically copies and runs Installer on a specified group of servers. See the
script examples in the section Installation Script Examples (Linux) (on page 27). On Windows
systems, scripts with the remote commands execution are also possible but require
additional tools such as PsExec. Thus, we do not give examples of such scripts for Windows.
Automating Post-Installation Steps
After a typical manual installation is finished, you should log in to Panel to perform some
post-installation operations (initialize Panel, install a license key, and so on). If you have
multiple Panels, this process can be automated as well. If you want to avoid user input in the
Panel interface, the best approach is to perform the same operations either from the
command-line interface or with the remote API (also known as API RPC). To learn more
about how to complete Panel installation in an automated manner, refer to the corresponding
sub-sections of After Installing Panel (on page 42).
Speeding Up Automated Installations
Note that you can significantly speed up multiple installations if you create a local mirror of
the Parallels Updates server. This will allow you to save time and bandwidth, and to secure
your installations. Learn how to set up a custom mirror in Appendix C: Mirroring Parallels Updates
Server (on page 188).
Page 24

24 Installing Panel
Next in this section:
Running Automated Installations ....................................................................... 25
Installation Script Examples (Linux) ................................................................... 27
Page 25

Installing Panel 25
Running Automated Installations
To install Parallels Plesk Panel without requiring any user input, run the command:
parallels_installer <packages source options> --select-release-id <ID>
<components installation options> [other options]
where
packages source options define the location where the installer should obtain the Panel
packages for installation
<packages source options> =
--source <URL>
if using a mirror of the Parallels Updates server
OR
--source <path>
if using local file system
OR
none
if installing from the Parallels Updates server
--select-release-ID option define what Panel version should be installed. <ID> is
a unique Panel version identifier, like PLESK_11_0_9.
You can get the list of available Panel version IDs by running Installer with the --show-
releases option. Note that by default, Installer shows you only IDs of the publicly
released production versions (learn more about Panel release tiers in the section Before
Installing Panel (on page 11)). If you want to obtain a full list of available Panel versions
including those intended for product preview and testing purposes, add the --skip-
branch-filter option.
components installation options define what Panel components should be installed
<components installation options> =
--installation-type
The installation type can be Full or Typical.
OR
--install-component component1 [--install-component component2
[... [--install-component componentN]]]
You can get the full list of components available for a certain release by running Installer
with the following options: --select-release-id <ID> --show-components
other options include those that define proxy settings, installation logging and so on. For
full details, please refer to the Appendix D: Parallels Installer Options (on page 189).
Modifying Default Installation Paths (Windows)
Panel provides extra flexibility for installations on Windows: It lets users modify its default
installation paths from command-line. The customization is granted by the --set-option
key. The --set-option value should be a "key=value", where key is a constant that
specifies one of the parts of Panel's data, and the value is the path where you want these
data to be located. Currently, the following keys are available:
PLESK_INSTALLDIR. This key designates the part of Panel data that insignificantly
change over time. This includes the application code, configuration files, utilities, and so
on.
Page 26

26 Installing Panel
PLESK_DATADIR. This key designates the part of Panel data that significantly change
over time. This includes customer databases, APS packages, log files, and so on.
PLESK_VHOSTSDIR. This key designates the path where the content of all your
customers' domains will be stored. This is typically the largest part of the Panel content.
This sample demonstrates how to use the --set-option key:
ai.exe --select-product-id panel --select-release-id PANEL_11_0_9_WIN -install-component base --install-component management --install-component
spamassassin --install-component webalizer --install-component drweb -set-option "PLESK_INSTALLDIR=C:\Plesk Dir" --set-option
"PLESK_DATADIR=C:\Plesk Data" --set-option "PLESK_VHOSTSDIR=C:\Plesk
Vhosts"
Examples, Linux/Unix
1. The following command installs Parallels Plesk Panel 11 (release ID is PLESK_11_0_9)
from the mirror set up on the server mirror.example.com available via HTTP. Installation
files will temporarily be stored at /tmp/panel, and the installation status will be reported to the
email admin@example.com. The installed components are base Panel packages,
PostgreSQL server, and SpamAssassin spam filter.
./parallels_installer --source http://mirror.example.com/ --target
/tmp/panel --select-release-id PLESK_11_0_9 --install-component base -install-component postgresql --install-component spamassassin --notifyemail admin@example.com
2. The following command performs the complete installation (all available product
components are installed) of Parallels Plesk Panel 11 (release ID is PLESK_11_0_9) from
the Parallels Update server. All installer output will be redirected to an XML file.
./parallels_installer --select-release-id PLESK_11_0_9 --install-everything
--enable-xml-output
Examples, Windows
1. The following command installs Parallels Plesk Panel 11 (release ID is
PANEL_11_0_9_WIN) from the mirror set up on the server mirror.example.com
available via HTTP. Installation files will temporarily be stored at the
%SystemDrive%\Parallels\ folder, and the installation status will be reported to the
email admin@example.com. The installed components are base Panel packages, Bind name
server, MailEnable mail server, PHP scripting engine, Presence Builder, and Horde Webmail.
parallels_installer.exe --source http://mirror.example.com/ --target
%SystemDrive%\Parallels --select-release-id PANEL_11_0_9_WIN --installcomponent base --install-component dns --install-component mailenable -install-component php5 --install-component sitebuilder --install-component
webmail --notify-email admin@example.com
2. The following command performs the complete installation (all available product
components are installed) of Parallels Plesk Panel 11 (release ID is PANEL_11_0_9_WIN)
from the Parallels Update server. All installer output will be redirected to an XML file.
parallels_installer.exe --select-release-id PANEL_11_0_9_WIN --installeverything --enable-xml-output
Page 27

Installing Panel 27
Installation Script Examples (Linux)
This section provides notes on implementation and execution of an installation script, and
also presents a couple of installation script samples.
Implementation and Execution Notes
To avoid being prompted for password each time you connect via SSH to the servers
where the Panel should be installed, place your public key to the list of authorized keys of
a user on whose behalf the script is run on each server (see SSH documentation for
details on the procedure).
If you have a local mirror of the Panel updates server (as described in Appendix C:
Mirroring Parallels Updates Server), use the following option:
--source <mirror URL>
By default, all downloaded packages are stored under the /root directory. To use
another directory, use the following option:
--target <directory-name>
Example
This script performs a typical installation of the latest Panel version on the specified servers.
#!/bin/sh
SERVERS_LIST="node1.example.com node2.example.com"
for current_server in $SERVERS_LIST; do
ssh -f root@$current_server 'wget http://autoinstall.plesk.com/pleskinstaller -O - | sh /dev/stdin --source http://autoinstall.plesk.com/ -target /tmp/plesk-installation --select-product-id plesk --select-releaselatest --installation-type "Typical" --notify-email admin@example.com'
done
(Advanced) Installation to Parallels Virtuozzo Containers
Parallels Virtuozzo Containers is a container-based virtualization solution that is employed by
a large number of service providers. Each Virtuozzo container is a separate virtual server
that acts exactly like a stand-alone one. Parallels Virtuozzo Containers exist in both Linux
and Windows versions.
If you want to deploy Panel on Virtuozzo containers, we recommend that you follow the
workflow:
1. Create a container.
Page 28

28 Installing Panel
2. Install Panel into the container.
Next in this section:
Linux PVC Templates ........................................................................................ 29
Installation on PVC for Linux ............................................................................. 32
Windows PVC Templates .................................................................................. 35
Installation on PVC for Windows ....................................................................... 36
Though you can perform a typical manual or automated installation, we recommend that
you use PVC templates for this purpose. A PVC app template is a package containing
everything an app needs to be installed to a server. The main benefit of PVC templates is
that you install an app template to your physical server just once and then add the app
from the template to a number of containers simultaneously.
3. Clone the container as many times as you need.
This step is optional. If you have a number of already created containers where Panel
should be installed, the best option is to deploy Panel there using a Panel PVC template.
4. Perform post-installation setup.
The post-installation setup for Panel in a Virtuozzo container is absolutely the same as
for other types of installation. It includes Panel initialization, installation of a license key,
and so on. You can either perform it manually or automate the process using the Panel
API. Learn more in the section After Installing Panel (on page 42).
Details on how to perform these operations are provided next in this section.
Page 29

Installing Panel 29
Linux PVC Templates
PVC application templates are RPM packages which, when installed on a node, allow easy
deployment of an application in as many Containers as required, saving a lot of critical
system resources like disk space. You may obtain the Panel templates at the Parallels
website, or download them using the PVC command-line utility call "vzup2date -z" (PVC 4
and later) or by means of yum on Parallels Cloud Server.
Versioned and version-free templates
Starting with Parallels Plesk Panel 10.4, Parallels ships two sets of EZ templates for each
Panel release: major-version templates, and version-free templates. Both provide the same
software components, the only difference between them is that template updates are
installed when a Container is updated:
Provider-controlled versioned templates automatically get all the latest updates and
upgrades released for the major version of the Panel.
For example, if the versioned template of the Panel 10 (pp10) is installed in a Container,
the vzpkg update <CT_ID> command will update it to the latest released version of
the Panel 10.x.x, be it 10.0.1 or 10.1.0.
More specifically, versioned templates perform upgrades allowed by a typical Panel
license. This license allows you to perform upgrades within the second major version
number. For example, from 10.1 to 10.2, but not from 10.4 to 11.0.
Version-free auto-upgrade templates get all updates and upgrades regardless of the
Panel license key. In other words, such templates automatically update to the last
available Panel version regardless of its number once this version in released. For
example, this can be an upgrade from 10.3 to 10.4 or from 10.4 to 11.0. Note that if your
Panel license does not allow complex upgrades, you will need to obtain a new license key
after each such upgrade.
For example, if the version-free base template of the Panel (pp) is installed in a Container
(for example, 10.x.x), the vzpkg update <CT_ID> command will update it to the latest
released version of the Panel x.x.x, be it 10.x.x or 11.x.x.
You can tell versioned templates and version-free ones apart from their names: The name
prefix of the first type contains the major version (pp11.5), while the latter does not contain
any version numbers (pp).
Toggling auto detection of EZ templates
PVC 4.0 and later versions can discover EZ templates in a container and perform automatic
actions depending on the templates. This feature provides opportunities for business
automation software (like PBAs) to automatically find products installed in a container and
start billing the container owner.
Page 30

30 Installing Panel
The discovery algorithm is straightforward: If the system finds all packages included in an EZ
pp11.5
The Panel core template. Contains base components, backup
manager, and Presence Builder.
pp11.5-antivirus
Parallels Premium Antivirus.
pp11.5-bind
BIND DNS server support. If you do not install this template,
DNS server will not be installed on Panel nodes.
pp11.5-cf-support
ColdFusion support: libraries necessary to run ColdFusion with
the Panel.
pp11.5-kav
Kaspersky Antivirus extension.
pp11.5-mailman
Mailman mailing list manager.
pp11.5-migration
The Panel Migration & Transfer Manager, allows transferring
hosting data from other Panels and migrating from other
hosting platforms.
pp11.5-modcloudflare
CloudFlare Apache module support.
pp11.5-msmtp
msmtp relay only mail server (SMTP client). Install it if you plan
to use external mail servers.
pp11.5-mysql5.5
MySQL 5.5 support. Available only on RHEL 5 and CentOS 5.
pp11.5-nginx
nginx reverse proxy support.
template, it considers the template to be installed. The major drawback of this approach is
that Panel 9.x and SMB are very close to each other in terms of packages, so the autodetection engine can make incorrect decisions. For example, if only one of the applications is
present in a container, the system considers that both templates are installed. The most
noticeable outcome of this detection problem is that the system fails to update both
applications and set proper billing for them.
It is possible to stop the auto-detection if you use the billing automation software or if you
want to install tightly bound Parallels products. To do this, modify the
/etc/vztt/vztt.conf file by setting APP_TEMPLATE_AUTODETECTION=no.
Shipped templates
Since both versioned and version-free sets of templates provide the same components, we
will list only the versioned ones for the simplicity sake.
The following EZ templates are shipped for Parallels Plesk Panel 11:
Page 31

Installing Panel 31
pp11.5-panel-addons
The Panel extensions: Firewall, VPN and File Server.
pp11.5-php5
PHP5 support
pp11.5-php53
PHP5.3 support. Available only on RHEL 5 and CentOS 5.
pp11.5-postfix
Postfix mail server. Alternate to Qmail and msmtp.
pp11.5-qmail
Qmail mail server. Alternate to Postfix and msmtp.
pp11.5-spamassassin
SpamAssassin spam filtering tool.
pp11.5-tomcat
Tomcat support.
pp11.5-vpsoptimized
VPS-optimized configuration. Configures Container to consume
the minimum resources. Note that some hosting features will
be disabled. For details, refer to the section (Optional) Optimize
Panel for Operation in VPS (on page 49).
pp11.5-watchdog
Watchdog system monitoring extension.
pp11.5-webhostingaddons
Hosting features support: mod_bw, MIVA, perl-Apache-ASP,
and Ruby on Rails.
pp11.5-webmail
Horde and Roundcube webmail tools.
Page 32

32 Installing Panel
Installation on PVC for Linux
Deploying Parallels Plesk Panel in a Parallels Containers environment implies the following
two stages:
1. Installing the Panel application template on a hardware node.
2. Creating a Container and deploying the application from the template.
For further details on Parallels Container CLI, or the Parallels Containers API (XML or
SOAP) functionality, refer to the Parallels Containers developer documentation
(http://www.parallels.com/ptn/documentation/virtuozzo/).
The first stage is performed on each hardware node only once: As soon as an application
template is installed on a hardware node, it can be deployed to as many Containers as
required. Instead of creating a new Container every time you need to deploy a Container with
the Panel, you can clone an existing Container where the Panel is installed, which acts as a
sort of Template Container.
When the template is being installed on a hardware node, the core set of files is deployed,
which includes defining of the application packages repository. Then, when the application is
installed in a container, Parallels Containers communicates with the repository (the default
one resides at http://autoinstall.plesk.com), retrieves the application packages, and installs
them in the container. The packages are stored in the node cache until it is cleaned up, and
then the packages are retrieved from the repository again when the application is installed in
the Container.To save time and bandwidth, you may want to use a custom mirror of the
Panel repository. For details, see (Advanced) Mirroring Parallels Updates Server.
To install a Panel template on a Parallels Containers hardware node using the
vzup2date utility:
1. Connect to the target Parallels Containers hardware node over SSH.
2. Install the application template by running a command in the following
format:
vzup2date -z
3. Select the required operating system and application templates and click Next
to start installation.
Note: On Parallels Could Server, the vzup2date utility is deprecated. You should use yum
instead.
To install a Panel template on a Parallels Containers hardware node manually:
1. Obtain the template from the Parallels website and upload it to the target
Parallels Containers hardware node.
2. Install the application template by running a command in the following
format:
rpm -Uvh <absolute path to the template>
Page 33

Installing Panel 33
For example, the following command installs Qmail:
rpm -Uvh pp11.5-centos-5-x86_64-ez-3.0.0-35.prl.293476.noarch.rpm
To use a custom mirror:
1. Set up a mirror as explained in the section (Advanced) Mirroring Parallels
Updates Server.
2. On the hardware node, edit the file defining the repository URL.
The file for editing is /vz/template/<os>/<os-
version>/<platform>/config/app/<app-templatename>/default/repositories. For example: /vz/template/<os>/<osversion>/<platform>/config/app/pp10/default/repositories.
3. Replace the Parallels Updates server URLs with the corresponding ones of
your mirror and save the file.
4. Clean or re-fetch the packages metadata.
You can do this, for example, with the vzpkg clean command. For details, refer to the
Parallels Containers for Linux Reference Guide located at the Parallels Technology
Network (http://www.parallels.com/ptn/documentation/virtuozzo/).
To create a new Container and install Panel to it:
1. Create a container and configure it.
Issue the following commands:
vzctl create <CTID> [options]
vzctl set <CTID> <setting_name> <value> [--save]
where
<CTID> defines an arbitrary container ID number higher than 100, which is unique on
the hardware node
--save switch tells vzctl whether to save changes into the Container configuration
file
Note: For details on the Container creation and configuration options, refer to the
Parallels Containers for Linux Reference Guide located at the Parallels Technology
Network (http://www.parallels.com/ptn/documentation/virtuozzo/).
The commands below do the following:
1. Create a Container with ID 444 and IP 10.100.1.2, based on the Debian 5 operating
system template.
2. Set a barrier and limit for unswappable kernel memory, private (or potentially private)
memory, number of files opened by all Container processes, disk space and the total
number of disk inodes (files, directories, symbolic links) a Container can allocate.
3. Save the barrier/limit values to the Container configuration file.
4. Enable Power Panel on the vzpp port with the "--offline_management yes --
offline_service vzpp" options.
# vzctl create 444 --ostemplate debian-5.0-x86_64
# vzctl set 444 --ipadd 10.100.1.2 --hostname example.com --save
Page 34

34 Installing Panel
# vzctl set 444 --save --kmemsize 24299200:26429120 --privvmpages
362144:392912 --numfile
12000:12000 --diskspace 5117880:5242880 --diskinodes 350000:370000
# vzctl set 444 --save --offline_management yes --offline_service
vzpp
Important: It is mandatory to use exactly these values for the options to ensure the Panel
compatibility with the Virtuozzo environment.
Important: The Panel needs the container to be configured with an IPv4 address in order
to work properly.
2. Start the newly created Container:
# vzctl start <CTID>
3. Install the Panel template into the container:
with EZ templates:
vzpkg install <CTID> <ppp_template_name> ...
For example, the following command installs the Panel base components, BIND DNS
server, and Kaspersky antivirus:
# vzpkg install 444 pp11.5 pp11.5-bind pp11.5-kav
To clone a Container:
Issue a command in the following format:
vzmlocal -C {CT List}
{CT List} = <source_CTID>:<dst_CTID>[:[<dstCT_private>][:<dstCT_root>]]
[...]
You should specify the source Container ID (<source_CTID>) and the destination
Container ID (<dst_CTID>). Specifying the destination Container private area path
(<dstCT_private>) and root path (<dstCT_root>) is optional allowing you to override the
default paths - /vz/private/<dst_CTID> and /vz/root/<dst_CTID>, respectively.
For details on the command options, refer to the Parallels Containers for Linux Reference
Guide located at the Parallels Technology Network
(http://www.parallels.com/ptn/documentation/virtuozzo/).
For example, to clone the Container with the Panel created during the previous procedure,
run the following command:
# vzmlocal -C 444:445
Page 35

Installing Panel 35
Windows PVC Templates
PVC application templates are packages which, when installed on a node, allow easy
deployment of the application in as many containers as required, saving a lot of critical
system resources like disk space. You may obtain the Panel templates at the Parallels
website.
Shipped Templates
The following templates are shipped for Parallels Plesk Panel 11:
PANEL_11.5.30
The main template, includes the essential set of components:
Base: the Panel core components, such as Control Panel, Backup Manager, MySQL
admin, and so on.
Presence Builder
Migration Manager
SpamAssassin
AWStats, Webalizer
BIND DNS Server
Parallels Premium Antivirus 5
FastCGI
MailEnable mail server, Atmail Open, webmail tools
MySQL Client, MySQL ODBC
Microsoft SQL Web Admin, myLittleAdmin, phpMyAdmin,
Perl, Python, PHP4, PHP5
Stunnel
Page 36

36 Installing Panel
Installation on PVC for Windows
This section covers only the essential steps that must be taken to deploy Parallels Plesk
Panel inside Parallels Containers for Windows. Before proceeding with installation, please
familiarize yourself with Parallels Containers documentation available at
http://www.parallels.com/products/virtuozzo/docs/.
Deploying Parallels Plesk Panel in a Parallels Containers environment implies the following
two stages:
1. Installing the Panel application template on a hardware node.
2. Creating a Container and deploying the application from the template.
The first stage is performed on each hardware node only once: As soon as an application
template is installed on a hardware node, it can be deployed to as many Containers as
required.
Instead of creating a new Container every time you need to deploy a Container with the
Panel, you can clone an existing Container where the Panel is installed, which acts as a sort
of Template Container.
Note: If your operating system is Microsoft Windows 2008 and the container offline
management is turned on, you can log in to the Panel by visiting https://host-name:8443/ or
https://IP-address:8443/ and providing your local administrator credentials, or by visiting
http://host-name:8880/ or http://IP-address:8880/ and providing global administrator
credentials.
To install Panel in Parallels Containers for Windows:
1. Obtain the Panel template from the Parallels website and upload it to the
target Parallels Containers hardware node.
2. Install application templates of the Panel by issuing a command of the
following format:
vzpkgdeploy [-q|-v] -i <template-file>
where
-q disables logging to the display and to the log file
-v sets the log level to the maximum possible value for this vzpkgdeploy session
For example,
vzpkgdeploy -i PANEL_10.0.0/20100804.10
To create a new Container and install Panel into it:
1. Create a container and configure it according to your needs.
Issue the following commands:
vzctl create <CT_ID> --pkgset name [options]
Page 37

Installing Panel 37
vzctl set <CT_ID> <setting_name> <value> [--save]
where
<CT_ID> defines an arbitrary container ID number higher than 100, which is unique
on the hardware node
--pkgset name denotes the operating system template to be used for Container
creation
--save switch tells vzctl whether to save changes into the Container configuration
file
Note: For details on the Container creation and configuration options, refer to the
Parallels Containers for Windows Reference Guide located at the Parallels Technology
Network (http://www.parallels.com/ptn/documentation/virtuozzo/).
The commands below do the following:
Create a Container with ID 444 and IP 192.0.2.44, based on the OS template w2k3.
Set a disk space limit to 4+ gigabytes, private memory limit to 1 gigabyte and
Administrator's password to "P4$$w0rd".
Enable Power Panel on the vzpp port with the "--offline_management yes --
offline_service vzpp" options.
Important: It is mandatory to use exactly these values for the options to ensure the Panel
compatibility with the Virtuozzo environment.
Important: The Panel needs the container to be configured with an IPv4 address in order
to work properly.
vzctl create 444 --pkgset w2k3 --ipadd 192.0.2.44
vzctl set 444 --save --diskspace 4500000 --vprvmem 1024 -userpasswd Administrator:P4$$w0rd
vzctl set 444 --save --offline_management yes --offline_service
vzpp
2. Start the newly created Container:
vzctl start <CT_ID>
3. Install the Microsoft .NET framework version 2.0 or later into your Container:
vzpkgadd <CT_ID> <dotnet_template_name>
For example,
vzpkgadd 444 dotnet2.0_frmwk-2.0.50727.42/20070613
4. Install the Panel template into the Container:
vzpkgadd <CT_ID> <plesk_template_name>
For example,
vzpkgadd 444 PANEL_10.0.0/20100804.10
To clone a Container:
Issue a command in the following format:
vzmlocal -C <CT_List>
<CT_List> = <source_CTID>:<dest_CTID>[:<dest_private>] [options]
Page 38

38 Installing Panel
You should specify the source Container ID (<source_CTID>) and the destination
Container ID (<dest_CTID>). Specifying the destination Container private area path
(<dest_private>) is optional; it allows you to override the default path of
X:\vz\private\<CT_ID>. For details on the command options, refer to the Parallels
Containers for Windows Reference Guide located at the Parallels Technology Network
(http://www.parallels.com/ptn/documentation/virtuozzo/).
For example, to clone the Container with the Panel created during the previous procedure,
issue the following command:
vzmlocal -C 444:445
Page 39

Installing Panel 39
(Advanced) Cloning Panel in Virtual Environment
Why Do I Need Panel Cloning?
The popular and efficient way to start offering Panel services is to install Panel in a cloud and
then seamlessly scale your infrastructure and install more Panel instances as your business
grows. The challenge in this approach is that it is not possible just to copy the same Panel
again and again to different virtual machines because of the following:
Some clouds constantly change allocated IP addresses pools. If a Panel service was
bound to an IP address which was later removed from the system, the service will not be
operable.
Each new Panel should have unique entities, for example, an SSL certificate, and if you
simply keep copying Panel, all the instances will share the same certificate.
The Panel cloning technology solves these and other scaling problems.
What Is Panel Cloning?
Panel cloning is the technology of copying the same Panel instance to different virtual
machines without compromising Panel operability. Two prevailing usage scenarios of the
cloning are:
Fast Panel setup. If you wish to create virtual machines (Amazon Web Services, KVM,
Xen, and so on) with Panel on demand, the easiest way to streamline this process is to
create an image of a virtual machine with specifically prepared Panel and then create
new machines from this preset as many times as needed.
Full backup. Cloning is a recovery solution too because almost all Panel data remain in
cloned instances. Thus, you can first copy a prepared Panel to another virtual machine
and then start the machine if your original machine becomes inoperable.
The application scope of Panel cloning is wider: For example, you can clone Panel and then
safely test new features or configurations on it, but in this section, we will consider only the
given scenarios because others are their extensions or combinations.
Cloning and Panel Licensing
Before you start cloning Panel, please contact our sales representatives and provide the
range of IP addresses within which your Panel instances will be installed. Our licensing
system will activate Panel servers from this range only.
Page 40

40 Installing Panel
Preparing a Panel Instance for Cloning
If you want to use Panel cloning, you should start with preparing your Panel instance. The
following preparatory steps help you reset all environment- and initialization-specific settings
(like the IP addresses pool) to prevent copying of unique information to other virtual
machines. Omit steps 2 and 3 if your scenario is full backup.
1. (Fast setup, full backup) Instruct Panel to reconfigure its IP pool after restart. After
running the following command, a Panel instance will discover actual IP addresses and
reconfigure its IP pool each time you restart the corresponding virtual machine.
On Linux:
# /usr/local/psa/bin/ipmanage --auto-remap-ip-addresses true
On Windows:
%plesk_cli%\ipmanage --auto-remap-ip-addresses true
Note: This step is not mandatory if a virtual machine to which you want to copy Panel
uses a static IP address. Moreover, omitting this option will make Panel start faster
because Panel will not reconfigure its IP pool on each startup. However, we highly
recommend to complete this step if you deploy Panel to a cloud.
2. (Fast setup only, optional) Initialize the instance programmatically or from the Panel GUI.
Specify the administrator's information, locale, and other initialization settings using the
init_conf command-line utility or the Panel GUI. Read more about the initialization in
After Installing Panel (on page 42).
3. (Fast setup only) Prepare Panel for cloning by resetting some of its data (for example, the
administrator's password, see the full list below) and remove the license key on the next
start. Note that this utility does not perform cloning, it only modifies Panel settings.
On Linux:
# /usr/local/psa/bin/cloning --update -prepare-public-image true reset-license true
On Windows:
%plesk_cli%\cloning --update -prepare-public-image true -resetlicense true
Important: By default, the cloning command resets the customized configuration of the
source Panel instance to default: You may need to additionally configure cloned
instances. To preserve the configuration of the source Panel instance in new instances,
use the option -reset-init-conf with the false value. The true value resets the
Panel configuration to default .
To preserve a custom Panel configuration in images of your Panel server, use the
cloning command with the following options:
On Linux:
# /usr/local/psa/bin/cloning --update -prepare-public-image true reset-init-conf false
On Windows:
%plesk_cli%\cloning --update -prepare-public-image true -resetinit-conf false
Page 41

Installing Panel 41
When preparing a Panel instance for cloning, avoid restarting the psa service and shutting
down the virtual machine on which the instance is installed.
How to Clone Panel on Linux
We assume that you have a virtual machine with Panel and you wish to clone this machine.
The cloning procedure consists of three steps:
1. Prepare the Panel instance for cloning using the instructions we provided earlier.
2. Stop (shut down) the virtual machine.
3. Create a virtual machine image (snapshot) by means of virtual machines management
software you use. Refer to the software vendors' documentation for respective
instructions.
Once you have the virtual machine image, you can use it as a preset for new virtual
machines or as a Panel snapshot.
How to Clone Panel on Windows
We assume that you have a virtual machine with Panel and you wish to clone this machine.
The cloning procedure consists of three steps:
1. Prepare the Panel instance for cloning using the instructions we provided earlier.
2. If your software for managing virtual machines supports creating copies of virtual
machines, which is normally true, stop (shut down) the virtual machine and create the
image copy. Otherwise, if images copying is unavailable, you should use a special
shutdown call that resets some instance data and then copy the machine by available
means. The shutdown is performed by the following command from the command prompt
(Cmd.exe):
sysprep /oobe /generalize /shutdown
Once you have the virtual machine image, use it as a preset for new virtual machines or as a
Panel snapshot.
What Data Are Reset by the cloning Utility?
The following list contains the items that are reset by the cloning utility:
IP pool
Panel GUIDs
Administrator's password
SSL certificates (only the default certificate, cloning does not change user-defined
certificates)
(Optionally) License key
The rest of the data remain intact.
Page 42

42 Installing Panel
After Installing Panel
Next in this section:
Initialize Panel ................................................................................................... 43
Install a License Key ......................................................................................... 44
(Optional) Define Panel View............................................................................. 44
(Optional) Specify Administrator's Password ..................................................... 47
(Optional) Set Up Panel Locale ......................................................................... 48
(Optional) Optimize Panel for Operation in VPS ................................................ 49
(Optional) Hide Power Panel Controls for PVC Installations .............................. 51
(Optional) Set Up Upgrade Notifications ............................................................ 52
(Optional) Change or Hide Web Interface Elements .......................................... 52
The post-installation setup is an obligatory sequence of steps that is required to prepare
Panel for work. As well as the installation, this setup can be performed either manually (the
administrator should do it through the GUI) or automatically in an unattended manner. The
manual type of setup should be performed in the case of a single Panel deployment. The
automated setup is recommended for multiple Panel deployments as this can save
significant time.
There are only two obligatory post-installation steps: Panel initialization and installation of a
license key. All other steps described in this section are optional.
Page 43

Installing Panel 43
Initialize Panel
The Panel initialization - also known as initial configuration - is the first thing you need to do
in Panel after installing it. Until Panel is initialized, any other operations are prohibited.
Initialization sets the Panel administrator password, email, and contact information.
To initialize Panel:
1. Log in to Panel at https://<host-name-or-IP>:8443 using the server power user
(root on Linux, Administrator on Windows) credentials.
2. Specify email, new password, contact info and click OK.
(Advanced) To initialize Panel via API RPC:
Send to the server a request packet that satisfies the following conditions:
1. The server power user credentials are specified as the HTTP_AUTH_LOGIN and
HTTP_AUTH_PASSWD values in HTTP header of the packet.
2. The packet content is as follows:
<packet version="1.6.3.0">
<server>
<initial_setup>
<admin>
<admin_cname>JohnDoe BV.</admin_cname>
<admin_pname>John Doe</admin_pname>
<admin_phone>+49 89333333</admin_phone>
<admin_fax>+49 893333303</admin_fax>
<admin_email>john@example.com</admin_email>
<admin_address>Theatinerstrasse 96</admin_address>
<admin_city>Muenchen</admin_city>
<admin_state>Bavaria</admin_state>
<admin_pcode>80333</admin_pcode>
<admin_country>DE</admin_country>
<send_announce>true</send_announce>
</admin>
<password>Qwerty1234</password>
<server_name>example.com</server_name>
</initial_setup>
</server>
</packet>
(Advanced) To initialize Panel via CLI:
Run the following command (you should have the power user privileges):
On Linux/Unix:
/usr/local/psa/bin/init_conf --init -passwd jskekekHTD -email
johndoe@example.com
Page 44

44 Installing Panel
On Windows:
%plesk_cli%\init_conf.exe --init -passwd jskekekHTD -email
johndoe@example.com
Install a License Key
Right after the installation, Panel uses a trial license key. To get a new license key, proceed
to the Parallels online store (Tools & Settings > License Management > Order New Key).
Once you purchase the key, you will receive an activation email with your activation code
and a license key file. You can install a Panel license key either by entering the activation
code or by uploading the file from this email.
To install a license key using an activation code:
1. Go to Tools & Settings > License Management > Parallels Panel License Key and click
Install Key.
2. Enter the code you received in the email to the Enter an activation code field and
click OK.
To install a license key using a license key file:
1. Go to Tools & Settings > License Management > Parallels Panel License Key and click
Install Key.
2. Choose Upload a license key file.
3. Specify the path to the key file you received in the email and click OK.
If you experience any problems, please contact sales@parallels.com.
(Advanced) To install a license key through the command-line interface:
license <--install|-i> <path-to-key-file | activation-code>
For example,
On Linux using a key file:
./license -i /tmp/pp11.5key.xml
On Linux using an activation code:
./license -i AB1C23-4DEF56-7GHI89-JK1L23-MNP456
On Windows using a key file:
license.exe -i "D:\keys\pp11.5key.xml"
On Windows using an activation code:
license.exe -i AB1C23-4DEF56-7GHI89-JK1L23-MNP456
Page 45

Installing Panel 45
(Optional) Define Panel View
Right after installation, you can choose what Parallels Panel view to use, depending on what
tasks the prospective Panel administrator is going to accomplish. The following views are
available to choose from: Service Provider and Power User. The first view, Service Provider,
is the best for reselling hosting accounts. In this view, you are able to manage service plans,
subscriptions, and customer accounts. Power User view is convenient when you use Panel
for personal purposes (run a portal, a mail server, and so on).
Power User view has a subtype, Custom View, which allows you to simplify the GUI by
hiding the tools that may seem too complex for inexperienced administrators. In addition, you
can prohibit such administrators to switch Panel back to Power User view or make any
changes in Custom view settings. In means of Panel, this is called to lock Custom view.
To define administrator permissions in Custom view and the list of available Panel tools, use
the admin utility. Learn more about the utility options in Parallels Plesk Panel 11.5 for Linux
(Windows): Reference for Command Line Utilities.
Note: To switch from Service Provider to Power User, Panel should not have customer or
reseller accounts.
For more information on Panel views, see Administrator's Guide, section The Panel GUI.
To switch Panel to Power User view via Panel command line utility:
On Linux systems, run the command:
/usr/local/psa/bin/poweruser --on -ip <ip-address> -domain <domain_name>
On Windows systems, run the command:
"%plesk_dir%\bin\poweruser.exe" --on -ip <ip-address> -domain <domain_name>
where
<ip-address> is the IP address allocated to administrator's default hosting account.
This option is required in case there are no subscriptions belonging to administrator.
<domain_name> is the domain name to be linked to the specified IP address. If the -
domain option is not specified, the server's host name will be used. The option makes
sense only when used together with the -ip option.
To switch Panel in Power User view to Custom view and lock it via Panel
command line utility:
On Linux systems, run the command:
/usr/local/psa/bin/poweruser --on -simple true -lock true
On Windows systems, run the command:
"%plesk_dir%\bin\poweruser.exe" --on -simple true -lock true
If you do not want to lock Custom view, do not use the -lock option.
To switch Panel to Service Provider view via the command line utility:
On Linux systems, run the command:
/usr/local/psa/bin/poweruser --off
Page 46

46 Installing Panel
On Windows systems, run the command:
"%plesk_dir%\bin\poweruser.exe" --off
For details, see the section Using Command Line Utilities > Power User View: poweruser Utility of
Panel command line reference.
To switch Panel to Power User view through API RPC:
Send the following request packet to the server:
<packet version="1.6.3.0">
<server>
<set>
<mode>poweruser</mode>
</set>
</server>
</packet>
Note that the poweruser command of API RPC does not create a default webspace. To
be able to switch Panel to the Power User view through API RPC, create the default
webspace first.
To switch Panel back to Service Provider view through API RPC:
Send the following request packet to the server:
<packet version="1.6.3.0">
<server>
<set>
<mode>standard</mode>
</set>
</server>
</packet>
For details, see the section Supported Operations > Managing Plesk Server of API RPC Manual.
Page 47

Installing Panel 47
(Optional) Specify Administrator's Password
When Parallels Plesk Panel is installed, a random password is generated for the user admin,
which replaces the old scheme when the same default password was used on all
installations. This change was done to protect servers with freshly installed Panel from
hacking by bots that use the default password.
After the installation is finished, you can set the admin's password being authenticated in the
Panel with credentials of the server system power user, which is "root" on Linux systems,
and "Administrator" on Windows systems. Such authentication with administrator's system
account works in both cases of logging in to the Panel GUI and using API RPC.
The admin's password can be set up during the Panel initialization (this is the best way) or
afterwards.
Specify Password During the Panel Initialization
Setting up administrator's password is an essential part of the Panel initialization. For details
on setting up the password during the Panel initialization, refer to the section Initialize Panel.
In case your Panel instance has already been initialized, refer to the following section for
instructions on how to set up the administrator's password.
Specify Password After the Panel Initialization
In case your Panel instance has already been initialized, it is still possible to set the
administrator's password being authenticated as the server power user.
To set up the administrator's password using API RPC:
Send to the server a request packet satisfying the following conditions:
1. The server power user credentials specified as the HTTP_AUTH_LOGIN and
HTTP_AUTH_PASSWD values in HTTP header of the packet.
2. The packet content is as follows:
<packet version="1.6.3.0">
<server>
<set>
<password>gogo4ward</password>
</set>
</server>
</packet>
To set up the administrator's password using CLI:
Issue the following command (you should have the power user privileges):
On Linux/Unix:
PSA_PASSWORD=<new_password> /usr/local/psa/bin/init_conf --set-adminpassword -passwd "
Page 48

48 Installing Panel
On Windows:
%plesk_cli%\init_conf.exe --set-admin-password -passwd <new_password>
To set up the administrator's password using GUI if you do not know the
current administrator's password:
1. Log in to the Panel using the server power user credentials.
2. If you have at least one own subscription, skip this step. Otherwise, create a
subscription:
a. In the left frame, click Hosting Services > Subscriptions.
b. Click Add New Subscription.
c. Specify a domain name and subscription info and click OK.
3. Go to the Control Panel: click the Control Panel link next to your subscription.
4. Go to the Users tab.
5. Click the 'Admin' link in the list of user account.
6. Under Panel Preferences, type in the new password, confirm it, and click OK.
(Optional) Set Up Panel Locale
To change the default en-US locale:
1. Log in to the Parallels Plesk Panel server via SSH.
2. Change the locale by running the utility:
On Linux:
/usr/local/psa/bin/admin --update -locale en-US
On Windows:
%plesk_cli%\admin --update -locale en-US
Page 49

Installing Panel 49
(Optional) Optimize Panel for Operation in VPS
If you deploy Parallels Plesk Panel in Parallels Virtuozzo Containers for Linux, consider
switching the Panel to a special mode of operation - optimized for virtual environments. The
mode switches off InnoDB engine in MySQL database server, and Apache web server
modules that are not critical for hosting services. This makes the Panel use less memory
than other control panels available on the market, which ensures better utilization of
hardware resources and increased density of virtual environments per server.
The only disadvantages of using the optimized mode are as follows:
Web applications requiring InnoDB will not work.
Perl, python and ASP scripts will not work because the required Apache modules will be
switched off (see the list below).
PHP will be available only through CGI.
Note: The optimized mode can be switched on only on the clean Panel installations. It is not
applicable to the Panel installations upgraded from earlier versions.
To switch to the VPS-optimized mode:
Install the pp11.5-vps-optimized EZ template. The template applies the necessary
configuration.
Important: The optimized mode can only be enabled on fresh installations of the Panel
which have not yet been initialized, or, in other words, have not undergone the initial
configuration.
If you need to switch the Panel back to the normal mode of operation, perform
the following steps:
1. Switch on the InnoDB engine.
a. Open for editing the file /etc/my.cnf.
b. Locate the lines containing entries skip-innodb and remove them,
or comment them out.
c. Save the file.
d. Restart MySQL server.
2. Switch on the required Apache modules.
On Debian Linux, use the a2enmod utility to switch on all required modules. For
example, if you want to switch on the PHP module, issue the following command:
a2enmod php5
On other distributions of Linux, edit the main Apache configuration file, which, in most
Linux installations, is located in /etc/httpd/conf/.
a. Open for editing the file /etc/httpd/conf/httpd.conf.
Page 50

50 Installing Panel
b. Locate the lines LoadModule <module_name> corresponding to
the modules that you want to switch on, and uncomment the lines.
c. Save the file.
d. Restart Apache.
3. Switch the Panel back to normal operation mode by issuing the following
SQL query:
mysql -uadmin -p`cat /etc/psa/.psa.shadow` psa -e "update misc set val='0'
where param='vps_optimized_mode_status';"
Apache Modules Switched Off in VPS-Optimized Mode
The following Apache modules are switched off in the optimized mode:
authn_alias
authn_anon
authn_dbm
authn_default
authz_user
authz_owner
authz_groupfile
authz_dbm
authz_default
ldap
authnz_ldap
ext_filter
mime_magic
deflate
usertrack
dav_fs
vhost_alias
speling
proxy_balancer
cache
disk_cache
file_cache
mem_cache
version
asis
bw
proxy_ajp
auth_ldap
perl
Page 51

Installing Panel 51
python
php5
php4
The list of the modules can vary depending on the operating system distribution and
architecture. When Parallels Plesk Panel is installed and the optimized mode is switched on,
you can check the list in the following files:
On 32-bit operating systems - /usr/lib/plesk-
9.0/vps_optimized_aspects/apache-modules-all
On 64-bit operating systems - /usr/lib64/plesk-
9.0/vps_optimized_aspects/apache-modules-all
(Optional) Hide Power Panel Controls for PVC Installations
When Panel is installed to PVC, administrators refer to Panel when performing web hosting
operations and to Parallels Power Panel (PPP) when managing their container. The PPP
becomes available when the administrators turn on offline-management mode. When this
mode is on and Panel is installed, some controls and menus of PPP become available on top
and left navigation panes of Panel. In other words, PPP partially builds into Panel in offlinemanagement mode.
Since Panel 10, the integration between panels leads to unexpected results. For example,
some icons in Panel might not be displayed or layout might be broken when the offline
management is on. To resolve these problems, we recommend that you do not use the
integration and access the panels on different ports (4643 and 8443).
To make PPP and Panel operate on different ports, do the following:
On Linux servers, connect to the hardware node over SSH and run the following
command:
vzctl set CT_ID --offline_management yes --offline_service vzpp -save
On Windows servers, connect to the hardware node over Remote Desktop and run the
following commands:
vzctl set CT_ID --offline_management yes --save
vzcfgt set CT_ID offlineservices vzpp
Page 52

52 Installing Panel
(Optional) Set Up Upgrade Notifications
Each new Panel build is given one of the four release tiers - testing release, early adopter
release, general release, late adopter stable. The purpose of these tiers is to notify Panel
administrators when the next version of the desired quality is released so that they can
schedule an upgrade to this version. To prevent Panel administrators from upgrading to
unstable Panel versions, you can make Panel show only releases or updates complying with
the desired quality levels. If you are new to release tiers, read Before Installing Panel (on page
11).
Hiding Release Tiers
You can explicitly configure Panel to show only upgrades that are of equal or higher quality
than a certain tier (from testing to stable). To do this, add the following lines to the
panel.ini file:
[updates]
releaseTier = <release-tier>
where <release-tier> is one of the following:
testing for testing release.
current for early adopter release.
release for general release.
stable for late adopter release.
On Linux, panel.ini is located in $PRODUCT_ROOT/admin/conf.
On Windows, panel.ini is located in %plesk_dir%\admin\conf\ (%plesk_dir% is an
environment variable denoting the Panel installation directory).
(Optional) Change or Hide Web Interface Elements
A freshly installed Panel may include promotional items, for example, an invitation to install
Presence Builder or a link to the Parallels store where customers can order domain names
and SSL certificates. If, for some reason, you do not want to display these options to Panel
users (for example, if you use competitive software and alternative partner programs to resell
domain names), Panel provides means for changing or hiding these promotional items. To
know which items are customizable and how to manage them, refer to the Advanced
Administration Guide for Linux and for Windows.
Page 53

If you are using one of the earlier Panel versions, you can choose between two ways of
C H A P T E R 3
Upgrading Panel
upgrading to Panel 11.5: in-place upgrade or upgrade by transfer. Choosing the
upgrade way is up to you. Next in this section we will provide basic considerations on
both ways.
Important: If you upgrade from Panel 9 or earlier, you should perform additional
steps to complete transition to the new business model used since Panel 10. The
instructions on what to do after upgrading from Panel 9 and earlier are provided in
the chapter Completing Upgrade from Panel 9 and Earlier Versions (on page 96).
In-Place Panel Upgrading
In-place upgrading implies updating Panel components within one server. This way of
upgrading has the following pros and cons:
Supports the following Panel versions: Panel 8.x and later.
Does not support operating system (OS) upgrading. Thus, if your current OS is not
supported by the Panel version you want to upgrade to, it is not possible to upgrade
the OS first and then upgrade Panel.
Can be automated for a number of Panel servers.
Preserves all custom configurations of system services. All third-party services and
Panel extensions remain intact.
Issues arising during an in-place upgrade (for example, a hardware failure) may
lead to Panel inoperability.
Learn how to perform in-place upgrade in In-Place Panel Upgrading (on page 55).
Page 54

54 Upgrading Panel
Upgrading Panel by Transfer
In this chapter:
In-Place Panel Upgrading.................................................................................. 55
Upgrading Panel by Transfer ............................................................................. 78
Completing Upgrade from Panel 9 and Earlier Versions .................................... 96
Upgrade by transfer means moving Panel data (subscriptions, accounts, and so on)
from a server with an earlier Panel version (source) to the server with a clean Panel
11.5 installation (destination). This way of upgrading has the following pros and cons:
Supports the following Panel versions: Panel 7.5 and later.
Allows you to move Panel from a server with currently unsupported OS to the
server with a later (supported) OS version.
Cannot be automated for a number of Panel servers.
Does not preserve custom configurations of system services, third-party services,
and Panel extensions. They are not transferred to the destination server.
The source server is not affected by the upgrade in any way. Even if the upgrade is
unsuccessful, the source server continues working.
Learn how to perform upgrade by transfer in Upgrading Panel by Transfer (on page 78).
Page 55

In-Place Panel Upgrading
Panel Version
Upgrade Through...
8.x, 9.x
Parallels Installer
10.x, 11.x
Panel GUI (Tools & Settings > Updates and Upgrades),
Parallels Installer
Note: Since 10.4, you can set up Panel to apply
upgrades automatically once they become available.
Learn more in the Administrator's Guide, section Panel
Updates and Upgrades.
C H A P T E R 4
Note: Before you proceed, we recommend that you acquaint with Panel versioning.
In-place upgrade is a process of updating Panel components on a server. After an
upgrade, Panel increases its major or minor version, for example, from 10.3 to 10.4 or
from 10.4 to 11.5.
There are three main scenarios of in-place upgrade: Manual, automated, and upgrade
in Parallels Virtuozzo Containers. In this chapter, you will learn which of them to
choose depending on your environment and how to perform in-place upgrades.
Manual Upgrade
This is a typical scenario if you want to upgrade a single Panel installation. Manual
means that user input is required during the upgrade. The wizard prompts you to enter
various upgrade settings such as the Panel version, select the components to be
upgraded, and so on. If you use Panel 10 and later, you can start an upgrade directly
from Panel. Users of earlier Panel versions should download and use the Parallels
Installer utility. The table below shows the possible ways of upgrading a particular
Panel version to the latest one.
Learn how to manually upgrade Panel in the section Manual Upgrade (on page 61).
Important: If you upgrade from earlier Panel versions (7.x, 8.x, or 9.x), you should
perform additional Panel configuration steps once data transfer is finished. These steps
are required for successful switching of all your Panel objects to the new business
model. Learn more in the chapter Completing Upgrade from Panel 9 and Earlier Versions (on
page 96).
Page 56

56 Upgrading Panel
Automated Upgrade
If you maintain a large number of Panel installations, we recommend that you use the
Parallels Installer utility ran in an unattended manner. This utility accepts all upgrade
parameters as command-line options, so you can fully automate Panel upgrades by
writing custom upgrade scripts. Learn more in the section (Advanced) Automated Upgrade
(on page 66). On Linux systems, you can upgrade all Panels at the same time by
running a script that copies and simultaneously runs the Installer utility on a number of
servers. See the script examples in the section Upgrade Script Examples (Linux) (on page
70). On Windows systems, scripts with remote command execution are also possible
but require additional tools such as PsExec. Thus, we do not give examples of such
scripts for Windows.
Note that automated upgrades can be significantly speeded up if you create a local
mirror of the Parallels updates server. Learn more in Appendix C: Mirroring Parallels
Updates Server.
Upgrade in Parallels Virtuozzo Containers
Panels that run in Parallels Virtuozzo Containers can be upgraded using the manual or
automated upgrade ways described above. Nevertheless, if Panel was installed to a
container via a PVC template, we strongly recommend that you perform all further
Panel upgrades via templates. In this case, the upgrade is performed by running
Virtuozzo commands.
Learn more in the section (Advanced) Upgrade in Parallels Virtuozzo Containers (on page
71).
In-Place Upgrade Steps
Before upgrading a Panel installation, you should perform a number of preliminary
steps. Learn more in the section Before Upgrading Panel (on page 57).
Page 57

Upgrading Panel 57
Note that after the upgrade is completed, it may be required to perform some post-
In this chapter:
Before Upgrading Panel .................................................................................... 57
Manual Upgrade ................................................................................................ 61
(Advanced) Automated Upgrade ....................................................................... 66
(Advanced) Upgrade in Parallels Virtuozzo Containers ..................................... 71
After Upgrading Panel ....................................................................................... 74
Next in this section:
1. Check Requirements ..................................................................................... 58
2. Perform Pre-Upgrade Check-Up ................................................................... 59
3. Choose a Release Tier .................................................................................. 60
upgrade steps, for example, to provide a new license key. Learn more in the section
After Upgrading Panel (on page 74).
Note: In-place Panel upgrades do not remove or upgrade PHP currently installed on
your server. All installed PHP versions remain unchanged. On Windows, Panel
additionally installs the newest PHP version available in its installation package. If you
need newer PHP versions on Linux, install them manually as described in the
Administrator's Guide, section Multiple PHP Versions.
Before Upgrading Panel
There are a few preliminary steps that you might need to perform before upgrading
Panel. These steps apply to all in-place upgrade scenarios.
Page 58

58 Upgrading Panel
1. Check Requirements
Before you start in-place upgrading, make sure you meet the following requirements.
Requirements for Linux Systems
Before upgrading Parallels Plesk Panel for Linux, back up your server data and make
sure that the following requirements are met:
PHP 5 is required for the Presence Builder component.
The disk space allocated to the /tmp directory exceeds three gigabytes.
A user who runs the installer can execute files in the /tmp directory. This makes it
possible to install the system packages required for Panel.
If you run Debian, CloudLinux, or Ubuntu, add updates and security repositories to
your apt package manager configuration.
If you wish to install the Business Manager component during the Panel upgrade, you
should first check that the MySQL server configuration option sort_buffer_size is set to
two megabytes (sort_buffer_size=2M) or more. This option is set in the /etc/my.cnf
file. After the configuration change, restart the mysqld service by using the following
command:
service mysqld restart
Requirements for Windows Systems
Before upgrading Parallels Plesk Panel for Windows, back up your server data and
make sure that the following requirements are met:
If you plan to use Microsoft SQL Server support in the Panel, the SQL Server
should be installed and configured to use standard or mixed security mode. If the
SQL Server is not installed, you can select it to be installed with the Panel upgrade
and configured with administrator name 'sa' and a random password.
Prior to upgrading Panel, ensure that you have the latest version of the Microsoft
Visual C++ Redistributable Package.
Note: To install Microsoft SQL Server 2008 during the Panel upgrade, first install
Microsoft Installer 4.5 and .NET Framework 2.0 SP 2.
If you wish to install the Business Manager component during the Panel upgrade, you
should first check that the MySQL server configuration option sort_buffer_size is set to
2 megabytes (sort_buffer_size=2M) or more. This option is set in the
%plesk_dir%\Databases\MySQL\Data\my.ini file. After the configuration
change, restart the mysqld service by running these two commands from shell:
net stop mysql
net start mysql
Page 59

Upgrading Panel 59
2. Perform Pre-Upgrade Check-Up
The pre-upgrade checker tool checks for potential business logic issues and other problems
of upgrading to Panel 11.5, and returns recommendations that will help you solve the
problems. It runs automatically as part of Parallels Installer when you upgrade Parallels
Panel. You can also download and run the checker manually before you start the upgrade
operation. We strongly recommend that you run this tool.
You can download the pre-upgrade checker and find the descriptions of the report messages
at http://kb.parallels.com/9436.
Note: When you upgrade Parallels Panel from PVC templates, no pre-upgrade checker
report appears. However, the upgrade issues might exist.
Page 60

60 Upgrading Panel
3. Choose a Release Tier
One more step before upgrading a Panel installation is to choose a proper Panel version
depending on its release tier.
Each major version of Panel passes through a number of development stages. It is natural
that on earlier stages, some of newly implemented features may not be in their final state and
may require some further modification. The functionality of such features in subsequent
Panel versions is improved as they receive more customer feedback over time. To indicate
the stage of the current Panel version, we assign one of the following release tiers to it:
Testing release, Early Adopter release, General release, and Late Adopter release. The
decision about what tier to use is absolutely up to you. For example, consider upgrading to
the early adopter release if you want to try new features before the general availability of
Panel. On the other hand, if you want to have the solution that received all major updates
and is successfully used by a number of service providers, wait until Panel achieves the late
adopter release status (it may be a couple of months after the general release).
Choose one of the following:
Testing release.
We start each release cycle with publishing a number of testing releases for preview
purposes and let you sequentially upgrade from the first one to the last, and then upgrade
to higher release tiers. We do not provide technical support for such builds even if they
were upgraded to higher tiers. Thus, avoid using this build in a production environment.
Notes:
1. By default, testing builds are not shown as available for installation. You can install the
testing Panel version only by running Parallels Installer with one of the special options.
Learn more in the chapter Manual Upgrade (on page 61).
2. Upgrade to the next testing release is available only to the users of a testing build.
Subsequent Panel builds do not have the corresponding option in the GUI.
Early Adopter release.
An early adopter release has all claimed features and previous versions successfully
upgrade to it. The quality of this version is eventually improved by updates. By selecting
the early adopter release you become the first to see the new features and receive the
freshest updates.
General release.
A general release has passed all quality tests. Minor issues are promptly fixed by
updates. We recommend that you always upgrade Panel to general release versions.
Late Adopter release.
A late adopter release has received all major updates issued for the current Panel
version, and a number of service providers have successfully used it for some time.
During the manual in-place upgrade, selection of a Panel version is one of the installation
wizard steps. If an upgrade is automated by a script, you should specify a certain Panel
version using Installer options. For users of PVC templates, a release Panel version is the
only option.
Page 61

Upgrading Panel 61
Manual Upgrade
Next in this section:
Upgrade from the Panel GUI (Panel 10 and later) ............................................. 62
Upgrade from the Web Interface ....................................................................... 62
Upgrade from the Command Line ..................................................................... 65
Once you have completed the steps described in the section Before Upgrading Panel (on page
57), you can proceed directly to the Panel upgrade.
If you use Panel 10 or later, you can perform the upgrade directly from Panel. Details on how
to do this are provided later in this section.
If you want to upgrade from earlier Panel versions, use the Parallels Installer utility. The
Parallels Installer utility is available for download from
http://www.parallels.com/products/plesk/download/. Several distributions of Parallels Installer
have been created for different operating systems and platforms, so be sure to obtain the
Parallels Installer version that matches your host operating system. Parallels Installer
binaries are usually distributed under names in the following format:
parallels_installer_v<installer version>_os_<operating system
version>_<platform>. Parallels Installer can be used either via a browser-based user
interface or command line. Learn more in the corresponding sections below.
Some Panel licenses do not grant permission to perform complex upgrades (upgrades that
change a major version number: for example, from 10.3.1 to 10.4.0). On attempting to
perform such an upgrade, Panel will warn you about license limitations. Nevertheless, you
will still be able to perform the upgrade. When it is finished, you will need to obtain and install
a license key for the new Panel version. For more information about installing a license key
after upgrade, refer to the section Installing a License Key (on page 76).
Page 62

62 Upgrading Panel
Upgrade from the Panel GUI (Panel 10 and later)
Starting from Panel 10, you can apply upgrades directly from Panel in Tools & Settings >
Updates and Upgrades.
We recommend that you set up Panel to notify you when upgrades to the chosen version
(early adopter, general, or late adopter release) become available. After you select the
desired release tier in Tools & Settings > Update and Upgrade Settings, Panel will check for
upgrades once a day. When an upgrade with the selected release tier becomes available,
Panel will notify you on the Home > System Overview.
Upgrade from the Web Interface
To upgrade 8.x or 9.x versions of Parallels Plesk Panel to the latest version via the Web
interface, follow the instructions given below.
Important:
1. Parallels Plesk Sitebuilder 4.5 is not upgraded. Alternatively, the new version of Presence
Builder (former Sitebuilder) installs beside the previous one. Hence, you have the opportunity
to manage existing sites in Sitebuilder 4.5 and create new sites either in Web Presence
Builder or in Sitebuilder 4.5. The upgrade of existing sites to the new format is performed
manually.
2. If you used Parallels Plesk Billing, add the Customer & Business Manager component to
the list of components to upgrade.
To upgrade Panel from the Web interface:
1. Download the Parallels Installer utility that suits your operating system from
http://www.parallels.com/products/plesk/download/.
2. (Only for Linux) Set the execution permission for Parallels Installer.
chmod +x parallels_products_installer_file_name
3. Run Parallels Installer.
On a Linux/Unix server:
./parallels_products_installer_file_name --web-interface
On a Windows server:
parallels_products_installer_file_name
(Only for Linux) Open your browser and enter https://your-host-name-or-IP-address:8447/
in the address bar. The Parallels Installer Web interface opens.
(Only for Windows) Parallels Installer wizard opens in a new browser window. When the
installer starts, an additional console window opens. This window displays the operations
performed by the utility. It is closed upon the successful installation, or after 30 minutes of
inactivity.
Page 63

Upgrading Panel 63
Note: As described in the section Before Upgrading Panel (on page 57), you can select a
Panel build for an upgrade depending on its release tier. By default, Installer shows you
only the latest general and late adopter releases. To be able to upgrade to other Panel
releases, use the following Installer options:
--all-versions to view all available Panel versions.
--tier <release_tier> to view the latest available versions with the specified
release tier.
4. (Only for Windows) Select the language for the installation wizard.
5. Log in to the web interface.
If you are running Windows, type the administrator's username ("Administrator"),
administrator's password, and click Log In.
If you are running Linux, type the system root user and password, and click Log In.
6. Click Updates source and installation settings and specify the source of Parallels
Plesk Panel distribution package:
By default, the Official Parallels Updates server is selected. Specify the location where the
installation files will be stored.
If you select Mirror server, specify the .inf3 file location in the URL to the directory with .inf3
file field. Specify the location where the installation files will be stored.
If you select Local media, specify the .inf3 file location in the Absolute path to the .inf3 file
field.
7. If you use a proxy server, select the Connect using a proxy checkbox and
specify the following settings:
Specify proxy host name and port number in the Proxy address and port fields.
If this proxy server requires authentication, select the Require authentication checkbox
and specify username and password.
8. (Only for Linux) Select the installation language and click Save to save the
installation preferences and proceed to installation.
9. Click Install or Upgrade Product. You are taken to the products list.
10. Select the checkbox corresponding to Parallels Plesk Panel and the Parallels
Plesk Panel product versions to which you want to upgrade. By default, the
latest product versions are selected.
11. To review the components that will be installed, select the Preview components
selection checkbox and click Continue. You can see the list of available
components. To select or deselect a component, select or clear the
corresponding checkbox. To select or deselect all the components, click
Select all or None respectively.
12. To start the upgrade, click Continue.
The packages will be downloaded and installed. When the upgrade is finished, you will
see a notification saying "All products and components have been successfully installed
and upgraded." Click OK.
Page 64

64 Upgrading Panel
Forcing integration with Business Manager
If you upgrade Panel with Business Manager, the components require some time (not more
than five minutes) to set up integration after the upgrade is completed. During this period,
you may not see Business Manager links in Panel, Business Manager may require your
password to log in, and you may see a message about invalid credentials when logging in.
If you want to force the integration, log in to Business Manager and reconnect Panel
manually. To do this, go to Home, group Sync Statistics, click the corresponding link, select
Panel ID, and click Reconnect.
Page 65

Upgrading Panel 65
Upgrade from the Command Line
To upgrade 8.x or 9.x versions of Parallels Plesk Panel to the latest version via the command
line, follow the instructions given below.
Important:
1. Parallels Plesk Sitebuilder 4.5 is not upgraded. Alternatively, the new version of Presence
Builder (former SiteBuilder) installs beside the previous one. Hence, you have the
opportunity to manage existing sites in Sitebuilder 4.5 and create new sites either in
Presence Builder or in SiteBuilder 4.5. The upgrade of existing sites to the new format is
performed manually.
2. If you used Parallels Plesk Billing, add the Customer & Business Manager component to
the list of components to upgrade.
To update or upgrade your Panel through the command line:
1. Download the Parallels Installer utility that suits your operating system from
http://www.parallels.com/products/plesk/download/ and save it on your
server’s hard drive.
2. (Only for Linux) Set the execution permission for Parallels Installer:
chmod +x parallels_products_installer_file_name
3. Run Parallels Installer.
On a Linux/Unix server:
./parallels_products_installer_file_name
On a Windows server:
parallels_products_installer_file_name --console
Note: As described in the section Before Upgrading Panel (on page 57), you can select a
Panel build for an upgrade depending on its release tier. By default, Installer shows you
only the latest general and late adopter releases. To be able to upgrade to other Panel
releases, use the following Installer options:
--all-versions to view all available Panel versions.
--tier <release_tier> to view the latest available versions with the specified
release tier.
4. To confirm upgrade, type 'y' and press ENTER.
5. Specify the source of Parallels Plesk Panel distribution package.
You can choose to upgrade from a local medium, the official Parallels Updates server, or
another site. By default, the official server is selected. If you wish to retrieve installation
files from a local medium or network storage:
a Type 's' and press ENTER.
b To choose a local medium, type 1. To choose a network storage device, type 3. Press
ENTER.
c If you chose a local medium, specify the location of psa.inf configuration file. If you
chose a network storage, specify the address. For example, http://example.com,
http://192.168.10.10, ftp://192.168.10.10.
Page 66

66 Upgrading Panel
Note: If you are running Windows, it is possible to use local system paths when
specifying the source. Network shares cannot be used directly, only if you preliminarily
map a network drive to a local drive.
6. If you use a proxy server, specify the following settings:
a Proxy host name and port number. To specify them, type 's', type the host name, type the
port number, and press ENTER to continue.
b User name and password. If this proxy server requires authentication, type 'a', press
ENTER, specify username and press ENTER, type password and press ENTER.
c When finished with specifying proxy settings, type 'n' and press ENTER to continue.
7. Select the product version to which you want to upgrade: type the number
corresponding to the product version you need and press ENTER, then type
'n' and press ENTER to continue.
8. Select the components that you want to install or upgrade.
Tip: The selected packages are marked with [*] symbols. The packages that are already
installed and do not require updating are marked with [=] symbols. The component
groups that contain selected components are marked with [.]. To select or deselect a
package, type the corresponding number and press ENTER..
9. To continue with the upgrade, type 'n' and press ENTER. When prompted,
confirm upgrading: type 'n' and press ENTER again.
The packages will be downloaded and installed.
Forcing integration with Business Manager
If you upgrade Panel with Business Manager, the components require some time (not more
than five minutes) to set up integration after the upgrade is completed. During this period,
you may not see Business Manager links in Panel, Business Manager may require your
password to log in, and you may see a message about invalid credentials when logging in.
If you want to force the integration, log in to Business Manager and reconnect Panel
manually. To do this, go to Home, group Sync Statistics, click the corresponding link, select
Panel ID, and click Reconnect.
(Advanced) Automated Upgrade
Once you have completed the steps described in the section Before Upgrading Panel (on page
57), you can proceed directly to the Panel upgrade.
Page 67

Upgrading Panel 67
To upgrade Panel on Linux- or Windows-based servers, use the Parallels Installer utility. The
Next in this section:
Running Automated Upgrades .......................................................................... 68
Upgrade Script Examples (Linux) ...................................................................... 70
Parallels Installer utility is available for download from
http://www.parallels.com/products/plesk/download/. Several distributions of Parallels Installer
have been created for different operating systems and platforms, so be sure to obtain the
Parallels Installer that matches your host operating system. Normally, Parallels Installer
binaries are distributed under names in the following format:
parallels_installer_v<installer version>_os_<operating system
version>_<platform>.
How to Automate Panel Upgrade
If you need to simultaneously upgrade a large number of Panel servers, we recommend that
you automate this process. The automation is based on using the command-line options of
the Parallels Installer utility that allows you to predefine all upgrade parameters. Thus, the
upgrade can be carried out without user input. To learn how to perform such upgrades, refer
to the section Running Automated Upgrades (on page 68).
Moreover, if you plan to upgrade a number of Panels for Linux, you can write a script that
automatically copies and runs Installer on a specified group of servers. See the script
examples in the section Upgrade Script Examples (Linux) (on page 70). On Windows systems,
scripts with remote command execution are also possible but require additional tools such as
PsExec. For this reason, we do not give examples of such scripts for Windows.
Note that after an upgrade, you may be asked to install a new license key. This may happen
with those Panel license keys that do not grant permission to perform complex upgrades
(upgrades that change the major version number, for example, from 10.3.1 to 10.4.0). For
this reason, when the upgrade is finished, you will need to obtain and install a license key for
the new Panel version. You can automate this process as well. For more information about
installing a license key after upgrade, refer to the section Installing a License Key (on page 76).
Speeding Up Automated Upgrades
You can significantly speed up multiple upgrades if you create a local mirror of the Parallels
Updates server. This will save time and bandwidth. Learn how to set up a custom mirror in
Appendix C: Mirroring Parallels Updates Server.
Page 68

68 Upgrading Panel
Running Automated Upgrades
To upgrade Panel without needing to supply any information in the process, run the
command:
parallels_installer <packages source options> --select-release-id <ID> -upgrade-installed-components <components installation options> [other
options]
where
packages source options define the location where Installer should obtain the Panel
packages for upgrade
<packages source options> =
--source <URL>
if using a mirror of the Parallels Updates server
OR
--source <path>
if using a local file system
OR
none
if installing from the Parallels Updates server
--select-release-ID option defines Panel version for the upgrade. <ID> is a
unique Panel version identifier, like PLESK_11_0_9.
You can get the list of available Panel version IDs by running Installer with the --show-
releases option. Note that by default, Installer shows you only IDs of the publicly
released production versions (learn more about Panel release tiers in the section Before
Installing Panel (on page 11)). If you want to obtain the full list of available Panel versions
including those intended for the product preview and testing purposes, add the --skip-
branch-filter option.
components installation options define which Panel components should be additionally
installed during an upgrade
<components installation options> =
--installation-type
The installation type can be Full or Typical.
OR
--install-component component1 [--install-component component2
[... [--install-component componentN]]]
You can get the full list of components available for a certain release by running Installer
with the following options: --select-release-id <ID> --show-components
other options include those that define proxy settings, installation logging and so on. For
full details, please refer to the Appendix D: Parallels Installer Options (on page 189).
Examples, Linux/Unix
1. The following command upgrades Panel to the 11.0.9 release version (ID is
PLESK_11_0_9) from the mirror set up on the server mirror.example.com available via
HTTP. Installation files will temporarily be stored at /tmp/panel, and the installation status will
be reported to the email admin@example.com. The PostgreSQL server component is
additionally installed.
Page 69

Upgrading Panel 69
./parallels_installer --source http://mirror.example.com/ --target
/tmp/panel --select-release-id PLESK_11_0_9 --upgrade-installed-components
--install-component postgresql --notify-email admin@example.com
2. The following command performs the upgrade to the Panel 11.0.9 release version (ID is
PLESK_11_0_9) from the Parallels Updates server. All Installer's output is redirected to an
XML file.
./parallels_installer --select-release-id PLESK_11_0_9 --upgrade-installedcomponents --enable-xml-output
Examples, Windows
1. The following command upgrades Panel to the 11.0.9 release version (ID is
PANEL_11_0_9_WIN) from the mirror set up on the server mirror.example.com
available via HTTP. Installation files will temporarily be stored in the
%SystemDrive%\Parallels\ folder, and the installation status will be reported to the
email admin@example.com. The Bind name server component is additionally installed.
parallels_installer.exe --source http://mirror.example.com/ --target
%SystemDrive%\Parallels --select-release-id PANEL_11_0_9_WIN --upgradeinstalled-components --install-component dns --notify-email
admin@example.com
2. The following command performs the upgrade to the Panel 11.0.9 release version (ID is
PANEL_11_0_9) from the Parallels Updates server. All installer output is redirected to an
XML file.
parallels_installer.exe --select-release-id PANEL_11_0_9_WIN --upgradeinstalled-components --enable-xml-output
Page 70

70 Upgrading Panel
Upgrade Script Examples (Linux)
This section provides notes on implementation and execution of an upgrade script, and also
presents a couple of script samples.
Implementation and Executions Notes
To avoid being prompted for password each time you connect via SSH to the servers
where the Panel should be installed, place your public key to the list of authorized keys of
a user on whose behalf the script is run on each server (see SSH documentation for
details on the procedure).
If you have a local mirror of the Panel updates server (as described in the chapter
(Advanced) Mirroring Parallels Updates Server), use the following option:
--source <mirror URL>
Example
This script upgrades Panel installed on the specified servers to the latest available version.
#!/bin/sh
SERVERS_LIST="node1.example.com node2.example.com"
for current_server in $SERVERS_LIST; do
ssh -f root@$current_server 'plesk installer --select-release-latest -upgrade-installed-components --notify-email admin@example.com'
done
Page 71

Upgrading Panel 71
(Advanced) Upgrade in Parallels Virtuozzo Containers
Next in this section:
Upgrading Panel on PVC for Linux .................................................................... 72
Upgrading Panel on PVC for Windows .............................................................. 74
Parallels Virtuozzo Containers is a container-based virtualization solution employed by a
large number of service providers. Each Virtuozzo container is a separate virtual server that
acts exactly like a stand-alone one.
The main way of installing an app to Virtuozzo Containers is to use a PVC template. A PVC
app template is a package containing everything an app needs to be installed to a server.
You install an app template to your server just once and then install the app from the
template to a number of containers simultaneously. The main benefit of using PVC templates
is that the software installed in containers is unified - you have one PVC template that is
applied to all containers on your hardware node. If Panel was installed to a container via a
PVC template, we strongly recommend that you perform all further Panel upgrades via
templates. If you have a number of Panel containers, this will allow you to keep all Panels
consistent within your hardware node.
Upgrade via PVC templates is performed in two steps: you install the latest available Panel
template to your hardware node and then start an upgrade on each container with the help of
Virtuozzo commands.
As well as in the other upgrade scenarios, after the upgrade in Virtuozzo Containers, Panel
may require the installation of a new license key. You can do this either manually or
automatically. For more information about installing a license key after upgrade, refer to the
section Installing a License Key (on page 76).
In this section, we will describe how to perform an upgrade of Panel installed to a Virtuozzo
container via a PVC template on both Linux and Windows platforms.
Page 72

72 Upgrading Panel
Upgrading Panel on PVC for Linux
When you upgrade Panel operating in Parallels Virtuozzo Containers for Linux, please note
the following:
You should not remove Panel PVC templates from containers before upgrading.
During upgrade to a newer version of Parallels Plesk Panel, ensure that you upgrade all
installed components. This is required to avoid conflicts caused by outdated components.
To upgrade Panel installed with versioned EZ templates in Parallels Virtuozzo
Containers environment:
1. Obtain the new templates from the Parallels website and install them using
the following command:
vzup2date -m batch -z install <list of templates>
Note: On Parallels Could Server, the vzup2date utility is deprecated. You should use yum
instead.
For more information about shipped templates, refer to the section Linux PVC Templates
(on page 29).
To learn what Panel templates are currently installed on the server, run vzpkg list and
find the ones with names starting with pp.
2. Install the latest versions of the Panel templates to each container by
running the commands like this:
vzpkg install <CTID> <list of templates>
Where <CTID> is the ID of the container on which you install the templates and <list of
templates> lists templates upgraded or installed during step 1.
For example:
vzpkg install 444 pp11.5 pp11.5-kav
Note: Mail server templates pp11.5-qmail and pp11.5-postfix must not be
installed at the same time.
Important: We strongly recommend that you add the new template pp11.5-bind after
installing new versions of templates that were already installed. Otherwise, all new Panel
containters deployed on this hardware node will not have the DNS server installed. To
learn more about how Panel works without a DNS server, refer to the Administrator's Guide,
section Panel Without a DNS Server.
3. If you used versioned templates before upgrading, remove them from each
container by running the command like this:
vzpkg remove <CTID> <list of old templates>
For example:
vzpkg remove 444 pp10 pp10-kav
Page 73

Upgrading Panel 73
To upgrade Panel installed with version-free EZ templates in Parallels Virtuozzo
Containers environment:
1. Upgrade Panel templates installed on the server to the latest available
version and add new templates that you need. To do this, run the following
command:
vzup2date -m batch -z install <list of templates>
Note: On Parallels Could Server, the vzup2date utility is deprecated. You should use yum
instead.
For more information about shipped templates, refer to the section Linux PVC Templates
(on page 29).
To learn what Panel templates are currently installed on the server, run vzpkg list and
find the ones with names starting with pp.
2. Install the latest versions of the Panel templates to each container by
running the commands like this:
vzpkg install -f <CTID> <container's list of templates>
vzpkg update <CTID>
Where <CTID> is the ID of the container on which you install the templates and <container's
list of templates> is a consistent list of all templates installed on the container as well as
new templates that you want to install on it during the upgrade.
For example:
vzpkg install -f 444 pp pp-kav
Note: Mail server templates pp-qmail and pp-postfix must not be installed at the
same time.
Important: We strongly recommend that you add the new template pp-bind after
installing new versions of templates that were already installed. Otherwise, all new Panel
containters deployed on this hardware node will not have the DNS server installed. To
learn more about how Panel works without a DNS server, refer to the Administrator's Guide,
section Panel Without a DNS Server.
For more information about operating in a PVC environment, refer to Parallels Virtuozzo
Containers documentation available at the PVC page of the Parallels website.
Page 74

74 Upgrading Panel
Upgrading Panel on PVC for Windows
To upgrade Panel installed with standard templates in Parallels Virtuozzo
Containers environment:
1. Obtain new templates from the Parallels website and upload them to your
server.
Note: For more information about shipped templates, refer to the section Windows PVC
Templates (on page 35).
2. Deploy the new templates on the server
3. Install the templates to containers.
For details on performing these operations and other administrative actions in a PVC
environment, refer to Parallels Virtuozzo Containers documentation available at the PVC
page of the Parallels website.
After Upgrading Panel
Post-upgrade setup includes some steps that may be required after an upgrade:
Installing a Panel license key (on page 76).
Some Panel licenses do not grant the permission to perform complex upgrades
(upgrades that change a major version number: for example, from 10.3.1 to 10.4.0). On
attempt to perform such an upgrade, Panel will warn you about license limitations.
Nevertheless, you will still be able to perform the upgrade. When it is finished, you will
need to obtain and install a license key for the new Panel version.
Configuring Business Manager Connections to Remote Panels of earlier versions (on
page 77).
Parallels Customer and Business Manager 11.5 uses the new improved protocol for
communications with remote Panels. Therefore, if you have upgraded Business Manager
to the 11 version, we strongly recommend that you upgrade all connected Panels to the
11 version as well. Nevertheless, if for some reason you wish to continue using earlier
versions of Panel with your Business Manager 11.5, you should manually configure
connections to them to use the new improved protocol. Note that in this case, some
Business Manager features will not work on these Panels.
Complete switching to the new business model after upgrading from Panel 9 or earlier.
(on page 96)
Due to changes in Panel business model introduced in version 10, if you upgrade from
Panel 9 or earlier, you should perform additional configuration steps to complete the
upgrade.
Page 75

Upgrading Panel 75
Next in this section:
Installing a License Key ..................................................................................... 76
Configuring Business Manager Connections to Remote Panels of Earlier Versions 77
Page 76

76 Upgrading Panel
Installing a License Key
Once the upgrade is finished, Panel may ask you to install a new license key. This may
happen with those Panel license keys that do not grant the permission to perform complex
upgrades (upgrades that change the major version number: such as, for example, from
10.3.1 to 10.4.0).
You can install an existing license key either manually from the GUI or remotely from the
command-line interface. The latter way is recommended when upgrading multiple Panel
installations.
To get a new license key, proceed to the Parallels online store (Tools & Settings > License
Management > Order New Key). Once you purchase the key, you will receive an activation email
with your activation code and a license key file. You can install a Panel license key either by
entering the activation code or by uploading the file from this email.
To install a license key using an activation code:
1. Go to Tools & Settings > License Management > Parallels Panel License Key and click
Install Key.
2. Enter the code you received in the email to the Enter an activation code field and
click OK.
To install a license key using a license key file:
1. Go to Tools & Settings > License Management > Parallels Panel License Key and click
Install Key.
2. Choose Upload a license key file.
3. Specify the path to the key file you received in the email and click OK.
To install a license key through the command-line interface:
To install a Panel license key, use the license utility:
license <--install|-i> <path-to-key-file | activation-code>
For example,
On Linux using a key file:
/usr/local/psa/bin/license -i /tmp/pp11.5key.xml
On Linux using an activation code:
/usr/local/psa/bin/license -i AB1C23-4DEF56-7GHI89-JK1L23-MNP456
On Windows using a key file:
"%plesk_dir%\bin\license.exe" -i "D:\keys\pp11.5key.xml"
On Windows using an activation code:
Page 77

Upgrading Panel 77
"%plesk_dir%\bin\license.exe" -i AB1C23-4DEF56-7GHI89-JK1L23-MNP456
Configuring Business Manager Connections to Remote Panels of Earlier Versions
In order to improve Panel security, in version 11.0, we changed the protocol of interaction
between Business Manager and connected Panels. By default, after upgrading to this
version, Business Manager continues using the old protocol for interaction with connected
Panels of version 10.4 and earlier. To switch the connections between Business Manager
and such Panels to the new improved protocol, you should perform the additional
configuration steps described below.
To restore the connection between Business Manager 11.5 and a remote Panel
10.4 or earlier:
1. Go to Business Setup > All Settings > Hosting Panels.
2. Find the remote Panel in Panel Groups. This Panel will have a warning icon (
) near its name. Click Edit.
3. Re-enter the administrator's password.
4. Specify the Business Manager IP address - an IP address that Panel will use to
communicate with Business Manager. Usually, this address is the IP address
of Business Manager server in its local network. However, the address may
be different, for example, if Business Manager communicates with this Panel
through a firewall or a NAT router.
5. Click OK.
Page 78

Upgrading Panel by Transfer
Source
Destination
Plesk for Unix 7.5 and later
Parallels Plesk Panel for Linux 10.0 or later
Plesk for Windows 7.5.6 and later
Parallels Plesk Panel for Windows 10.0 or later
C H A P T E R 5
Upgrade by transfer is a process of switching to the latest Panel version by moving all
hosting data (service plans, accounts, subscriptions with content, and so on) from your
current Panel server (source) to a server with a later Panel version (destination server).
This upgrade method is appropriate, for example, if the latest Panel version does not
support in-place upgrade from your Panel or does not support the operating system
you use on the server. In addition, you can use this type of upgrade if you want not only
to update your Panel, but also to move it to a more productive server or a new
operating system. You can perform upgrade by transfer in the following ways: using the
Migration & Transfer Manager utility or using the backup files.
Supported Upgrades
Page 79

Upgrading Panel 79
Important: If you upgrade from earlier Panel versions (7.x, 8.x, or 9.x), you should
perform additional Panel configuration steps once the data transfer is finished. These
steps are required for successful switching of all your Panel objects to the new
business model. Learn more in the chapter Completing Upgrade from Panel 9 and Earlier
Versions (on page 96).
Upgrade Using the Migration & Transfer Manager Utility (Recommended)
We recommend that you perform upgrade by transfer using the Migration & Transfer
Manager utility. This utility runs on a destination server and automatically copies
hosting data from your source Panel. Learn how to upgrade your Panel using Migration
& Transfer Manager in the section Upgrading with Migration & Transfer Manager (on page
81).
Upgrade Through Backup Files
If for some reason, Migration & Transfer Manager cannot connect to the source server
(for example, due to firewall restrictions), you can transfer data from the source to the
destination server using backup files. To perform such an upgrade, you should back up
the data on the source server, transfer the resulting archive file to the destination
server manually, and restore the data on this server. You can back up and restore
Panel data either through the Panel GUI, or by means of the command-line utilities
pleskbackup and pleskrestore. Learn how to perform upgrade using backup files
in the section Upgrading Through Backup Files (on page 92).
What Is Transferred
After you perform an upgrade by transfer, the destination Panel will contain service
plans, add-ons, customer accounts, and subscriptions that existed on the source server
before the upgrade. The majority of Panel settings will be transferred as well. However,
some objects and settings are not transferred to the destination Panel, namely:
Page 80

80 Upgrading Panel
Panel settings from the list below:
In this chapter:
Upgrading with Migration & Transfer Manager ...................................................81
Upgrading Through Backup Files .......................................................................92
The list of connected database servers and their settings (Tools & Settings >
Database Servers)
Important: If a database server connected to the source server is not
connected to the destination server, all databases from this database server
will be transferred to the destination server's default database server of the
same type.
The settings of Apache modules (Tools & Settings > Apache Modules)
Backup settings (Tools & Settings > Backup Settings)
Customers' backup files and FTP repository settings (Control Panel > Websites &
Domains > Backup Manager > Personal FTP Repository Settings).
Panel extensions.
Third-party software and services, for example, Adobe ColdFusion or Google
services.
Administrators and customers should configure these settings and add missing objects
manually.
Best Practices
You might find useful the following Parallels Knowledge Base articles:
Parallels Plesk Panel for Linux: Migration Best Practices and Usecases
(http://kb.parallels.com/en/113586#different).
Parallels Plesk Panel for Windows: Migration Best Practices and Usecases
(http://kb.parallels.com/en/113590).
Page 81

Upgrading Panel 81
Upgrading with Migration & Transfer Manager
Next in this section:
Preparing for Upgrade ....................................................................................... 81
Performing Upgrade .......................................................................................... 90
Next in this section:
Preparing to Transfer Data from Panel for Windows .......................................... 82
The steps of transferring Panel data using the Migration & Transfer Manager utility are
the following:
1. Install Migration & Transfer Manager on the destination server and prepare both
servers to transfer according to instructions in the section Preparing for Upgrade (on
page 81).
2. Run the Migration & Transfer Manager tool and go through the wizard steps. See
the section Performing Upgrade (on page 90) for details on how to do it.
Preparing for Upgrade
Before you can transfer data to Parallels Plesk Panel, you need to do the following:
1. Install Migration & Transfer Manager on the destination server. You can do this in
one of the following ways:
Through the Server Administration Panel.
To install it through the Server Administration Panel, go to Tools & Settings >
Updates and Upgrades. The Parallels Installer web interface will open in a new
window or tab. In the Installer window, click Add Components, select the checkbox
corresponding to the Migration & Transfer Manager component, and click Continue.
From the command line.
To install Migration & Transfer Manager from the command line, run the
Parallels Installer on the destination server as described in the section Upgrade
from the Command Line (on page 65) and add this component.
2. If a source or a destination server is protected by a firewall, configure the firewall to
allow the data exchange between the servers.
When migrating from Windows platforms, allow TCP connections to the ports 6489
(Migration & Transfer Manager). When migrating from Linux, allow TCP
connections to the port 22 (SSH).
3. If you are going to migrate from Windows-based platforms, install the Migration &
Transfer Agent utility on the source server, as described in the section Preparing to
Transfer Data from Panel for Windows (on page 82).
Page 82

82 Upgrading Panel
Preparing to Transfer Data from Panel for Windows
Next in this section:
Installing Migration & Transfer Agent ................................................................. 83
Configuring Migration & Transfer Agent on the Source Server .......................... 84
Configuring Migration & Transfer Manager on the Destination Server ............... 88
Automatic transfer of data from one Windows server to another is possible only when a
specific connection is established between the servers. The connection is established
by Migration & Transfer Manager installed on a destination server and the Migration &
Transfer Agent utility on a source server, provided that they are configured identically.
Migration & Transfer Agent is a utility which transfers data from a source to a
destination server. To learn how to install Migration & Transfer Agent on the server,
see the section Installing Migration & Transfer Agent (on page 83). If the default settings of
Migration & Transfer Agent conflict with your network configuration (for example, you
already use the default utility's port for some other purposes), you can change them as
described in the section Configuring Migration & Transfer Agent on the Source Server (on
page 84). If you change the Migration & Transfer Agent settings, you should do the
corresponding changes to the Migration & Transfer Manager configuration as
described in the section Configuring Migration & Transfer Manager on the Destination Server
(on page 88).
The following settings are used by Migration & Transfer Agent by default:
Port - number of the port that is used by the Panel for connecting to Migration &
Transfer Agent. (The default is 6489.)
When changing the port, consider the following:
It can be any number from 1 to 65535.
It must be free on the server from which data will be migrated, that is, this port
should not be used by any other programs or services on both servers.
It must be allowed by firewall on the source server.
Channel type - protocol communication between Migration & Transfer Manager
and Migration & Transfer Agent. (The default is HTTP.)
When selecting the channel type, consider the following characteristics:
TCP provides better performance than HTTP.
HTTP is more public as it uses HTTP protocol, which is allowed by most
firewalls.
Note: If these connection parameters are not the same in Migration & Transfer
Manager and Migration & Transfer Agent configurations, migrations will fail.
Page 83

Upgrading Panel 83
Installing Migration & Transfer Agent
To install Migration & Transfer Agent:
1. Log in to Server Administration Panel on the destination server.
2. Go to Tools & Settings > Migration & Transfer Manager (in the Tools & Resources
group).
3. To obtain the latest version of the Migration & Transfer Agent, click
Download Migration & Transfer Agent.
4. Upload the file to the source server.
5. Log in to the source server over Remote Desktop, and run the
installation file.
6. Click Next several times to complete installation.
Once you have installed Migration & Transfer Agent, it starts automatically with the
default settings. So, you can proceed to transferring data.
Page 84

84 Upgrading Panel
Configuring Migration & Transfer Agent on the Source Server
Migration & Transfer Agent is fully operable with the default settings, so there is no
need to change them. However, if you want to change the port or protocol used by the
agent, you can do so by following the instructions provided in this section.
Changing Migration & Transfer Agent configuration includes the following:
Changing parameters of the Migration & Transfer Agent connection with Migration
& Transfer Manager (port and channel type).
This can be done using either Migration & Transfer Agent interface or Migration &
Transfer Agent configuration file.
Changing the location of data files on the source server.
This is necessary if, for example, there is not enough space on the disk where
Migration & Transfer Agent is installed.
To change the connection parameters using Migration & Transfer Agent
GUI:
1. Run the WINAgentMng.exe file. If Migration & Transfer Agent was
installed in the default location, you can access it by clicking Start >
Programs > Parallels > Panel > Plesk Migration & Transfer Agent, or browsing to
C:\Program Files\Parallels\Plesk Migration
Agent\WINAgentMng.exe.
The Migration & Transfer Agent window opens.
2. Click Stop.
This makes changing Migration & Transfer Agent settings available.
Page 85

Upgrading Panel 85
3. Enter the desirable value next to Port to change the port number.
4. To change Migration & Transfer Agent channel type:
a. Click Advanced.
The advanced options window opens.
b. Select an appropriate item in the Channel Type menu to set up a
channel type.
c. Click OK.
This applies the changes made to advanced options and closes the advanced
options window.
5. Click Start.
This applies changes made to the port number and starts Migration & Transfer
Agent with new settings.
Editing Migration & Transfer Agent Configuration File
You can edit the Migration & Transfer Agent configuration settings manually. For the
changes to take effect after manual editing, restart Migration & Transfer Agent.
To change the connection parameters by editing configuration file:
1. Open for editing the <migration-agent-installation-
directory>\WINAgentMng.exe.config file and locate the
"/configuration/appSettings" element.
By default, Migration & Transfer Agent is installed in C:\Program
Files\Parallels\PleskMigrationAgent.
Warning: It is strongly recommended that you do not change anything beyond the
contents of the <appSettings> node, as doing this will most probably crash
Migration & Transfer Manager and make migrations impossible.
2. To change port number, enter a desired value in the <add
key="Port" value="6489" /> string instead of 6489.
Page 86

86 Upgrading Panel
For example, if you want port 7788 to be used, this string should be <add
key="Port" value="7788" />.
3. To change channel type, enter a desired value in the <add
key="ChannelType" value="HTTP" /> instead of HTTP.
For example, if you want to use TCP, this string should be <add
key="ChannelType" value="TCP" />.
4. To change the Migration & Transfer Agent's IP address, enter the IP
address value in the string <add key="IPAddress" value="" />.
This will allow Migration & Transfer Manager to connect to Migration & Transfer
Agent through the specified IP address only. Type 0.0.0.0 or remove the string
from the file altogether to allow Migration & Transfer Manager to connect to
Migration & Transfer Agent through any IP address available on the source server.
5. Save file.
6. Restart Migration & Transfer Agent.
To change the location of data files gathered by Migration & Transfer
Agent:
1. Open for editing the <migration-agent-installation-
directory>\WINAgentMng.exe.config file and locate the
"/configuration/appSettings" element.
By default, Migration & Transfer Agent is installed in C:\Program
Files\Parallels\PleskMigrationAgent.
Warning: It is strongly recommended that you do not change anything beyond the
contents of the <appSettings> node, as doing this will most probably crash the
Migration & Transfer Manager and make migrations impossible.
2. Add the full path (starting with the drive root) to folder where the file
should be stored into the <add key="DumpDirectory" value=""
/> string.
For example, if you want the migration dump to be stored in folder
H:\Store\Plesk_migration, this string should be <add
key="DumpDirectory" value="H:\Store\Plesk_migration" />. If such
directory does not exist on disk H, it will be created.
3. Save file.
4. Restart Migration & Transfer Agent.
The default content of the configuration file
<?xml version="1.0" encoding="utf-8"?>
<configuration>
<startup>
<supportedRuntime version="v2.0.50727" />
<supportedRuntime version="v1.1.4322" />
</startup>
Page 87

Upgrading Panel 87
<system.runtime.remoting>
<customErrors mode="off" />
<application name="Parallels Foreign Migration Agent" />
</system.runtime.remoting>
<runtime>
<assemblyBinding xmlns="urn:schemas-microsoft-com:asm.v1">
<probing privatePath="BackupUtils" />
</assemblyBinding>
</runtime>
<appSettings>
<add key="Port" value="6489" />
<add key="ObjectUri" value="WinAgentURI" />
<add key="ChannelType" value="HTTP" />
<add key="IPAddress" value="" />
<add key="DumpDirectory" value="" />
<add key="UseWebserver" value="false" />
<add key="WebServerPort" value="6490" />
<add key="LogUseDefaultCulture" value="false" />
</appSettings>
</configuration>
Page 88

88 Upgrading Panel
Configuring Migration & Transfer Manager on the Destination Server
Important: Change settings of Migration & Transfer Manager connection to Migration
& Transfer Agent only if you did the same changes to the Migration & Transfer Agent
configuration.
To change parameters of Migration & Transfer Manager connection to
Migration & Transfer Agent:
1. Open for editing the
%plesk_dir%\PMM\Migration\migrmng.exe.config file and
locate the "/configuration/appSettings" element.
%plesk_dir% is the system variable defining the folder where PPP is installed.
2. To change the port number, enter the required value in the string <add
key="Port" value="6489" /> instead of 6489.
For example, if you want port 7788 to be used, this string should be <add
key="Port" value="7788" />.
3. To change Migration & Transfer Agent URI, enter the required value in
the string <add key="ObjectUri" value="WinAgentURI" />
instead of WinAgentURI.
For example, if you want "MigrationAgent325" to be used as the Migration URI, the
string should be <add key="ObjectUri" value="MigrationAgent325" />.
4. To change channel type, enter the required value in the string <add
key="ChannelType" value="HTTP" /> instead of HTTP.
For example, if you want to use TCP, this string should be <add
key="ChannelType" value="TCP" />.
5. Save the file.
The default content of the migrmng.exe configuration file
<?xml version="1.0" encoding="utf-8" ?>
<configuration>
<configSections>
<section name="Platforms"
type="ForeignMigratorEngineCore.Configuration.PlatformsSectionHandler,
ForeignMigratorEngineCore"/>
</configSections>
<startup>
<supportedRuntime version = "v2.0.50727" />
<supportedRuntime version = "v1.1.4322" />
</startup>
<!-- These are the settings you may reconfigure -->
<appSettings>
<add key="Port" value="6489" />
<add key="ObjectUri" value="WinAgentURI" />
<add key="ChannelType" value="HTTP" />
Page 89

Upgrading Panel 89
<!-- The dump file location and file name defined in Panel
GUI override settings in this configuration file -->
<add key="DumpDirectory" value="" />
<add key="DumpName" value="" />
<add key="UnixDumpDirectory" value="/usr/local" />
<add key="LogUseDefaultCulture" value="false" />
</appSettings>
<!-- End of the settings you may reconfigure -->
<Platforms>
...
</Platforms>
</configuration>
Page 90

90 Upgrading Panel
Performing Upgrade
To transfer accounts and websites with applications from other hosting
servers:
1. Log in to Parallels Plesk Panel on the destination server.
2. Go to Tools & Settings > Migration & Transfer Manager (in the Tools & Resources
group).
3. Click Synchronize to check if there are any updates for Migration &
Transfer Manager components.
4. Click Start New Migration.
5. Leave the Transfer data from another server option selected, and specify the
following:
The source server's address and port number (on Linux/Unix systems). Specify
either the IP address or the host name of the server, from which you want to
transfer data.
If the source server is on an IPv6 address, then you should specify the server's
host name instead of IP address.
The username and password of the administrator of the source server.
Note: The option Transfer data already processed by the Migration & Transfer Agent
and located on the local host can be used to import data from a file, as
described in the section Troubleshooting Migration and Transfer Issues (on page
170). This is another way to transfer data, which can be used in cases when
the source server is offline, and you have previously gathered data from it.
6. If you use Parallels Plesk Panel for Linux, you can also specify the
directory on the source server where the Migration & Transfer Agent
should be uploaded.
7. Specify the path to the directory where temporary files will be stored.
8. Specify whether you want to transfer all data related to user accounts,
domains, and services configuration from the source server, or only
specific items.
In case you choose to perform the full server transfer, you can
configure Migration & Transfer Manager to transfer a license key from
the source server. The option is useful if the license key suits the Panel
version installed on the destination server and you want to use it
instead of the current one.
9. If some of Panel objects from the source server (such as user accounts,
domains, and so on) are already present on the destination server, you
can replace them by choosing the Replace existing objects checkbox.
10. Click Next. Migration & Transfer Manager will connect to the specified
server and gather information about the business objects of the source
hosting platform.
Page 91

Upgrading Panel 91
11. If you have chosen to transfer only specific items, at this step, select
the checkboxes corresponding to the user accounts and domains that
you want to transfer. Also, specify what types of data should be
transferred:
All settings and content.
All settings and content except mail.
Only mail accounts with email messages.
12. Click Next.
13. If the system detects potential transfer issues, such as missing required
components, you will see the list of these issues. We recommend that
you resolve all these issues using the links available on this page and
and then proceed by clicking Next.
14. Specify the new IP addresses that should be used. If you have a great
number of IP addresses, at this step, you can download the current IP
mapping file, correct it in a text editor or by running a custom find -andreplace script, and then upload it back to the server.
The syntax of the IP mapping file is shown in the following example:
10.10.10.10 192.168.1.2
Where 10.10.10.10 is an IP address used on the source server and
192.168.1.2 is a new IP address that should be used on the destination server.
There is a white space between the two IP addresses. When compiling the list of
addresses, place each mapping entry on a separate line.
15. Click Next. The data transfer process will start immediately.
Page 92

92 Upgrading Panel
Upgrading Through Backup Files
In addition to using Migration & Transfer Manager, you can back up data on a source
server, transfer the resulting archive file to the destination server, and restore the data
there. Backing up and restoring can be performed through the Panel user interface or
by means of command-line utilities pleskbackup and pleskrestore. The utilities
are located in the /usr/local/psa/bin/ directory on Linux systems, and
%plesk_cli% on Windows systems.
Important: The backup and restore utilities and the corresponding functions in Panel
are available only if you install the optional Panel components that are not included
in typical installations. You can install these components by using the web-based
installation and update wizard: in Server Administration Panel, go to Tools & Settings >
Updates and Upgrades > Add Components, and select Plesk Backup Manager in the Server
backup solutions group.
The backup format changes from version to version, so it may be impossible to restore
data from a backup through command line due to compatibility problems. Therefore, if
you want to transfer data from earlier Panel versions, do it through the Panel user
interface: In this case, the destination Panel will automatically convert the backup file to
the appropriate format.
To back up data on a source server by means of Parallels Plesk Panel
user interface:
Follow the instructions in the Administrator's Guide for your Plesk version:
Parallels Plesk Panel 11: http://download1.parallels.com/Plesk/PP11/11.5/Doc/en-
US/online/plesk-administrator-guide/59256.htm.
Parallels Plesk Panel 10:
http://download1.parallels.com/Plesk/PP10/10.4.4/Doc/en-US/online/pleskadministrator-guide/59256.htm.
Plesk 9.5: http://download1.parallels.com/Plesk/PPP9/Doc/en-US/plesk-9.5-
administrators-guide/59256.htm.
Plesk 8.6: http://download1.parallels.com/Plesk/Plesk8.6/Doc/en-US/plesk-8.6-unix-
administrators-guide/17391.htm.
If you have a Plesk version earlier than 8.6, use the Help link in the navigation pane to
access the Administrator's Guide.
To back up all data on a source server by means of command-line utilities,
issue the following command:
On a Linux-based server - /usr/local/psa/bin/pleskbackup all
<backup_file_name>.
On a Windows-based server running Plesk 9 and 10 -
"%plesk_cli%\pleskbackup.exe" all <backup_file_name>.
Page 93

Upgrading Panel 93
On a Windows-based server running Plesk 8.6 and earlier -
"%plesk_cli%\backup.exe" all <backup_file_name>.
If you want to save backup files to an FTP server, specify a URL like
ftp://[<login>[:<password>]@]<server>/<file_path> instead of
<backup_file_name>.
If you want to improve backup security, encrypt the backup by adding the -backuppassword <your_password> option. Learn more about password-protected backups in
the Administrator's Guide, section Backup and Restoration.
If you want to perform a selective backup by means of command-line tools, follow the
instructions for your Plesk version:
Parallels Plesk Panel 10 and 11: http://download1.parallels.com/Plesk/Doc/en-
US/online/plesk-linux-advanced-administration-guide/68837.htm (for Linux) and
http://download1.parallels.com/Plesk/Doc/en-US/online/plesk-win-advancedadministration-guide/68481.htm (for Windows).
Plesk 9.5: http://download1.parallels.com/Plesk/PPP9/Doc/en-US/plesk-9.5-
backup-cli-guide/62004.htm.
Plesk 8.6 for Windows: http://download1.parallels.com/Plesk/Plesk8.6/Doc/en-
US/plesk-8.6-win-backup-restore-guide/22876.htm.
Plesk 8.6 for Linux/Unix: http://download1.parallels.com/Plesk/Plesk8.6/Doc/en-
US/plesk-8.6-unix-backup-restore-guide/18900.htm.
After the data you want to transfer are backed up, upload the backup file to the server
and restore the data it contains.
To upload backup file to the destination server and restore data by means
of the GUI:
1. Log in to Server Administration Panel on the destination server.
2. Go to Tools & Settings > Backup Manager (in the Tools group).
3. Click Upload Files to Server Repository.
4. Click Browse and select the backup file you want to upload.
5. If the backup was encrypted, specify the password that you used for
encryption.
6. Click OK. The file is uploaded to the server repository.
7. On the Server Repository tab, click the link corresponding to the backup
file you have just uploaded.
8. Select the types of data you want to restore and specify restoring
options.
9. Click Restore and follow the on-screen instructions to complete restoring.
Page 94

94 Upgrading Panel
To restore all data on the destination server by means of the pleskrestore
command-line utility:
1. Upload a backup file to the server.
2. Prepare a mapping file, so that you could specify which IP addresses
should be used on the server:
a. To create a mapping file, issue the following command.
On a Linux-based server - /usr/local/psa/bin/pleskrestore --
create-map <path to backup file> -map <path to mapping
file>
On a Windows-based server - "%plesk_cli%\pleskrestore.exe" --
create-map <path to backup file> -map <path to mapping
file>
a. Open the created mapping file with a text editor.
b. Locate the section starting with [ip-map]. It should contain
entries like in the following example:
[ip-map]
# Unchanged IP addresses:
# Please review default IP addresses mapping below:
10.52.30.170 shared -> 10.52.30.170 shared # ip address does
not exist 10.52.30.170
10.52.120.243 exclusive -> 10.52.120.243 exclusive # ip
address does not exist 10.52.120.243
c. In the right part of each line after the -> characters, replace the
present IP addresses with those that should be used on the
destination server, and make sure that the allocation scheme
for the new addresses is correctly indicated by the words
shared and exclusive. Shared indicates a shared IP
address, and exclusive, a dedicated IP address.
d. Save the file.
3. Restore the data from backup by issuing the following command:
On a Linux-based server - /usr/local/psa/bin/pleskrestore --
restore <path_to_backup_file> -level server -map <path to
mapping file>
On a Windows-based server - "%plesk_cli%\pleskrestore.exe"
<path_to_backup_file> -level server -map <path to mapping
file>
If the backup was protected by password, use the -backup-password option to
specify the password that you used for encryption.
If the restoration fails with the error message Unable to resolve all
conflicts, refer to the section Troubleshooting Migration & Transfer Issues.
Note: If you want to perform a selective restoration by means of command-line tools,
follow the instructions in the Advanced Administration Guide for Linux and for Windows.
Page 95

Upgrading Panel 95
After data are restored, each migrated website is associated with a separate hosting
service subscription not linked to any particular hosting plan. To simplify further
maintenance, you can now review properties of all new subscriptions and associate
them with hosting plans.
Important: If you upgrade from Panel 9 or earlier, you should complete the transfer
according to instructions provided in the chapter Completing Upgrade from Panel 9 and
Earlier Versions (on page 96).
Page 96

Completing Upgrade from Panel 9 and
In this chapter:
Conversion Schemes and Recommended Steps .............................................. 97
Completing the Transition.................................................................................. 101
Associating New Accounts and Subscriptions with Plans .................................. 103
Execution of Scripts via Cron Task Scheduler (Linux Hosting) .......................... 103
C H A P T E R 6
Earlier Versions
Compared to the earlier versions of Plesk software (Plesk 9 and earlier), Parallels
Plesk Panel 10 and later versions introduce a number of significant changes in the
business model, for example, services are offered by means of service plans and
subscriptions instead of templates and domains, and domain administrators are
replaced with auxiliary users. Learn more about the changes in the Administrator's Guide,
section After Upgrading to Panel 11.5.
This chapter describes the steps required to complete the transition to the new
business model.
During upgrade or transfer to Parallels Plesk Panel 11.5, most of the user accounts
and domains are transformed automatically to comply with the new business model.
However, because of changes in the resource allocation scheme, you need to carry out
several actions and decide how the resources should be allocated in your new system.
These actions are as follows:
1. Complete the accounts and resources transition using the transition assistant in the
Panel. Learn how to do this in the section Completing the Transition (on page 101).
For details on how objects are converted, refer to the section Conversion Schemes
and Recommended Steps (on page 97).
2. Set up hosting (reseller) plans corresponding to your service offerings and
associate the transferred accounts and subscriptions with the plans. Learn more in
the section Associating New Accounts and Subscriptions with Plans (on page 103).
For detailed information about service plans and subscriptions, refer to the
Administrator's Guide, chapter Customers and Resellers.
Page 97

Upgrading Panel 97
Conversion Schemes and Recommended Steps
Next in this section:
Reseller Accounts ............................................................................................. 97
Administrator's Clients and Their Domains ........................................................ 98
Resellers' Clients and Their Domains ................................................................ 99
Domains Belonging to Administrator ................................................................. 100
Domains Belonging to Resellers........................................................................ 100
Reseller Accounts
Conversion made: Reseller accounts from earlier Plesk versions become reseller
accounts with custom subscriptions, not tied to any existing reseller plan.
Further recommended action: To simplify account management, subscribe the
resellers to reseller plans.
Page 98

98 Upgrading Panel
Administrator's Clients and Their Domains
Conversions made:
Administrator's client accounts became customer accounts belonging to the
administrator.
All domains were converted to individual subscriptions, one subscription per each
domain. All subscriptions were assigned to the customers who owned the
corresponding domains.
The former client limits and permissions were converted to a subscription-like entity
called My Resources. The entity is not tied to any existing hosting plan, but only
keeps the information about the resources that were allocated to the user before
transition.
Domain administrators were converted to customers' users whose accounts have
access only to the subscription that contains their domain.
Further recommended actions:
1. Complete transition of the customer accounts by using the following schemes:
Clients who had one domain are converted to customers with a custom
subscription. The subscription is allocated the minimal amount of resources from
the former client or domain limits. Domain administrators become users who can
access the Panel.
Clients who had several domains and who were not allowed to adjust resource
usage allotments, are converted to customers with custom subscriptions.
Each subscription inherits resource allotments from the former domain limits.
Former domain administrators become users with suspended accounts, so that
they cannot log in to the Panel and view all domains and subscriptions of the
customer.
Clients who had several domains and who were allowed to adjust resource
usage allotments and create new domains, can be converted to:
Reseller. A former client is upgraded to reseller. Reseller subscription
resources are inherited from the former client’s limits. If domain administrator
account was enabled for a former domain, it is upgraded to a customer
account and corresponding subscription is associated with it. Otherwise,
subscriptions belong directly to reseller.
Customer. A former client remains customer. The client’s resources are
shared among all subscriptions of the client. Domain administrator accounts
remain users with access only to the subscription that contains their domain.
2. To simplify account management, associate the new subscriptions with your
hosting plans.
Page 99

Upgrading Panel 99
Resellers' Clients and Their Domains
Conversions made:
All client accounts that belonged to a reseller in the previous version of Plesk are
converted to customer accounts owned by the respective resellers.
Resources of each client are converted to a subscription-like entity called My
Resources, which will be removed once the transition is complete.
All the clients' domains are converted to subscriptions (one new subscription per
each domain).
Domain administrators are converted to customers' users whose accounts have
access only to the subscription that contains their domain.
Further recommended steps:
1. Complete transition of the customer accounts by using the following schemes:
Clients who had one domain and were not allowed to adjust resource allotments
are converted to customers. New subscription resources are equal to the
minimum from the former client or domain limits.
Clients who had one domain and were allowed to adjust resource allotments are
converted to customers. New subscription resources are equal to the former
client limits.
Clients who had several domains and who were not allowed to adjust resource
usage allotments, are converted to customers.
Each subscription inherits resource allotments from the former domain limits.
Clients who had several domains and who were allowed to adjust resource
usage allotments and create new domains, are converted to customers.
The client’s resources are shared among all subscriptions of the client.
2. To simplify account management, associate the new subscriptions with your
hosting plans.
Page 100

100 Upgrading Panel
Domains Belonging to Administrator
Conversions made:
All domains belonging to administrator in previous versions of Plesk are converted
to administrator’s own subscriptions.
Domain administrators are converted to administrator's users whose accounts have
access only to the subscription that contains their domain.
Further recommended steps:
1. For domains that had domain administrator accounts configured, you can keep the
automatic conversion results or choose to use any of the following schemes:
Upgrade the former domain administrators to customers and assign the
domains to them.
Convert to subscription with users. Domain administrator accounts remain users
with access only to that subscription.
Convert to subscription without users. The former domain administrator account
is removed.
2. To simplify management of subscriptions, associate the new subscriptions with
your hosting plans.
Domains Belonging to Resellers
Conversions made: All domains that belonged to resellers in a previous version of
Plesk are converted to the resellers’ own subscriptions preserving the ownership.
Domain administrators are converted to resellers' users whose accounts have access
only to the subscription that contains their domain.
Further recommended steps:
For domains that had domain administrator accounts configured, you can keep the
automatic conversion results or choose to use any of the following schemes:
Upgrade the former domain administrators to resellers' customers and assign
the domains to them.
Convert to subscription with users. Domain administrator accounts remain users
with access only to that subscription.
Convert to subscription without users. The former domain administrator account
is removed.
 Loading...