

Page 1

User Guide
Page 2

2
Register your
pandigital
novel
Qualify to win a FREE
digital photo frame!*
(valid in USA only)
Register your FREE
1-year warranty!**
*For details, go to our website:
www.pandigital.net
**The online signup is for the purpose of user and product registration.
Failure to register does not in any way diminish any of your standard
warranty rights, as described in the document ation included with your
product.
NOTE: If you must mail your 1-year registration, please send your name,
address, phone number, model, serial number, and when and where
purchased to: Pandigital, P.O. Box 2969, Dublin, CA 94568-2969 USA
Note: Your device st yle an d fe at ures m ay dif f er f rom t hose d ocume nt ed i n this User G ui de .
UG-E_ PRD07T10WWH7_PRD07T20WBL7_v1.1_05-10
1
year
Register now at www.pandigital.net
Page 3

3
Table of Contents
Package Contents .................................................................................................... 7
Device Overview ....................................................................................................... 8
Power Button Usage ................................................................................................ 8
Touch-Screen Navigation ........................................................................................ 9
Reset Device ............................................................................................................. 9
Getting Started ......................................................................................................... 9
Home Screen .......................................................................................................... 12
Application Quick Launch Bar .............................................................................. 13
BOOKSTORE (Barnes & Noble) ............................................................................ 14
Bookstore Row ....................................................................................................................... 14
Downloading Purchased Media ............................................................................................. 14
MY LIBRARY ........................................................................................................... 15
Quick Jump to another Bookshelf .......................................................................................... 16
Get Books .............................................................................................................................. 16
Manage Books ....................................................................................................................... 16
Lend/Return Books ................................................................................................................ 17
Loan a Book ....................................................................................................................... 17
Check for Offers ................................................................................................................. 18
Opening Lent/Borrowed Books .......................................................................................... 18
Return a Borrowed Book .................................................................................................... 18
Bookshelves ........................................................................................................................... 18
Add New Bookshelf ............................................................................................................ 18
Display Shelf ...................................................................................................................... 19
Manage Bookshelf ............................................................................................................. 19
Quick Open another Bookshelf .......................................................................................... 19
Delete Shelf ........................................................................................................................ 19
Check Subscriptions .............................................................................................................. 19
READER .................................................................................................................. 20
Play Music in Background while Reading .............................................................................. 21
Reader Function Menu ........................................................................................................... 21
My Library .............................................................................................................................. 21
Dictionary ............................................................................................................................... 21
Automatic Lookup .............................................................................................................. 22
Bookmarks ............................................................................................................................. 22
Bookmarks ......................................................................................................................... 22
Notes .................................................................................................................................. 22
Add Note ........................................................................................................................ 22
View Notes ..................................................................................................................... 23
Delete Multiple Notes ..................................................................................................... 23
Page 4

4
Highlights ........................................................................................................................... 23
Create Highlights ........................................................................................................... 23
View Highlights............................................................................................................... 23
Hide all Highlights .......................................................................................................... 24
Delete Multiple Highlights .............................................................................................. 24
Go To ..................................................................................................................................... 24
Display Table of Contents .................................................................................................. 24
Jump to Page ..................................................................................................................... 24
Search for Specific Text ..................................................................................................... 24
Last Read ........................................................................................................................... 25
Font Size ................................................................................................................................ 25
Night Read ............................................................................................................................. 25
Screen Orientation - Lock ...................................................................................................... 25
ACCESS MEDIA ON SD CARD .............................................................................. 26
WEB ......................................................................................................................... 27
Go to a Web Site .................................................................................................................... 27
Browser Menu ........................................................................................................................ 28
Bookmarks ............................................................................................................................. 29
Bookmark a Web Page ...................................................................................................... 29
Go to Bookmarked Web Page ........................................................................................... 29
Delete Bookmarks .............................................................................................................. 29
Windows ................................................................................................................................. 29
Open New Window ............................................................................................................ 29
Switch Windows ................................................................................................................. 29
Close Windows .................................................................................................................. 30
Find on Page .......................................................................................................................... 30
Select Text ............................................................................................................................. 30
Settings .................................................................................................................................. 30
Page Content ..................................................................................................................... 30
Privacy ............................................................................................................................... 31
Security .............................................................................................................................. 31
Advanced Settings ............................................................................................................. 31
MUSIC ...................................................................................................................... 32
Play Music .............................................................................................................................. 32
Return to Music List ........................................................................................................... 33
Delete Audio Files .............................................................................................................. 33
Playlist .................................................................................................................................... 33
Add songs to Playlist .......................................................................................................... 33
Play songs in Playlist ......................................................................................................... 34
Remove songs from Playlist............................................................................................... 34
Return to Music List ........................................................................................................... 34
Page 5

5
VIDEOS .................................................................................................................... 34
Play Video .............................................................................................................................. 34
Video Navigation Bar ............................................................................................................. 35
Delete from Video Library ...................................................................................................... 35
PHOTOS .................................................................................................................. 36
Photo Gallery ......................................................................................................................... 36
Function Menu Options ...................................................................................................... 36
Play Slideshow ....................................................................................................................... 37
Play Music in Background ...................................................................................................... 37
Wallpaper ............................................................................................................................... 38
Import Photos ......................................................................................................................... 38
EMAIL ...................................................................................................................... 39
Email Inbox ............................................................................................................................ 39
Open Email Message ............................................................................................................. 39
Compose New Email Message .............................................................................................. 40
Add Senders to Contacts ....................................................................................................... 40
Folders ................................................................................................................................... 40
Move Single Email to Folder .............................................................................................. 40
Move Multiple Emails to Folder .......................................................................................... 40
Add Accounts ......................................................................................................................... 40
Edit Email Information ........................................................................................................ 41
Delete Email Accounts ........................................................................................................... 41
Set Default Account ............................................................................................................... 41
SHOP B&N .............................................................................................................. 42
Downloading Purchased Media ............................................................................................. 42
ALARM .................................................................................................................... 42
Add Alarm .......................................................................................................................... 42
Set Alarm Volume .............................................................................................................. 43
Shut Off Alarm Alert ........................................................................................................... 43
De-Activate Alarms ............................................................................................................ 43
Edit Alarm ........................................................................................................................... 43
Delete Alarm ...................................................................................................................... 43
CALENDAR ............................................................................................................. 43
Add Event ............................................................................................................................... 44
Edit Event ............................................................................................................................... 44
Snooze or Cancel Event Alert ................................................................................................ 44
Delete Event ........................................................................................................................... 45
Delete Single Event ............................................................................................................ 45
Delete Multiple Events ....................................................................................................... 45
SEARCH .................................................................................................................. 45
IMPORT SD CARD .................................................................................................. 45
Page 6

6
STOCKS .................................................................................................................. 46
Add Company ........................................................................................................................ 46
Delete Company .................................................................................................................... 46
FACEBOOK ............................................................................................................. 46
CONTACTS ............................................................................................................. 46
Add New Contacts ................................................................................................................. 46
Edit Contacts .......................................................................................................................... 47
Delete Contacts ...................................................................................................................... 47
WEATHER ............................................................................................................... 47
Add Location .......................................................................................................................... 47
Delete Location ...................................................................................................................... 48
GAMES .................................................................................................................... 48
SETTINGS ............................................................................................................... 48
Settings>General ................................................................................................................... 48
Settings>Photos ..................................................................................................................... 48
Settings>Subscriptions .......................................................................................................... 49
Settings>Network ................................................................................................................... 49
Turn Wi-Fi Off ..................................................................................................................... 50
Settings>Reset Defaults ........................................................................................................ 50
Settings>Calibrate Touch Screen .......................................................................................... 50
Settings>Support ................................................................................................................... 50
USER GUIDE ........................................................................................................... 51
Connect to Computer ............................................................................................. 51
Connect to Windows PC ........................................................................................................ 51
Disconnect ......................................................................................................................... 52
Connect to Macintosh Computer ............................................................................................ 53
Disconnect ......................................................................................................................... 53
Frequently Asked Questions ................................................................................. 53
Battery Management .............................................................................................. 57
Charge Battery ....................................................................................................................... 57
Important Safety Precautions ................................................................................ 57
Cleaning the device ................................................................................................................ 57
Technical Specifications ........................................................................................ 58
UPGRADE ............................................................................................................... 59
Limited Warranty .................................................................................................... 59
FCC Notices ........................................................................................................................... 61
FCC Radiation Exposure Statement: ................................................................................. 61
Disclaimers ............................................................................................................. 61
License Agreement and Terms of Use ................................................................. 62
Page 7
7
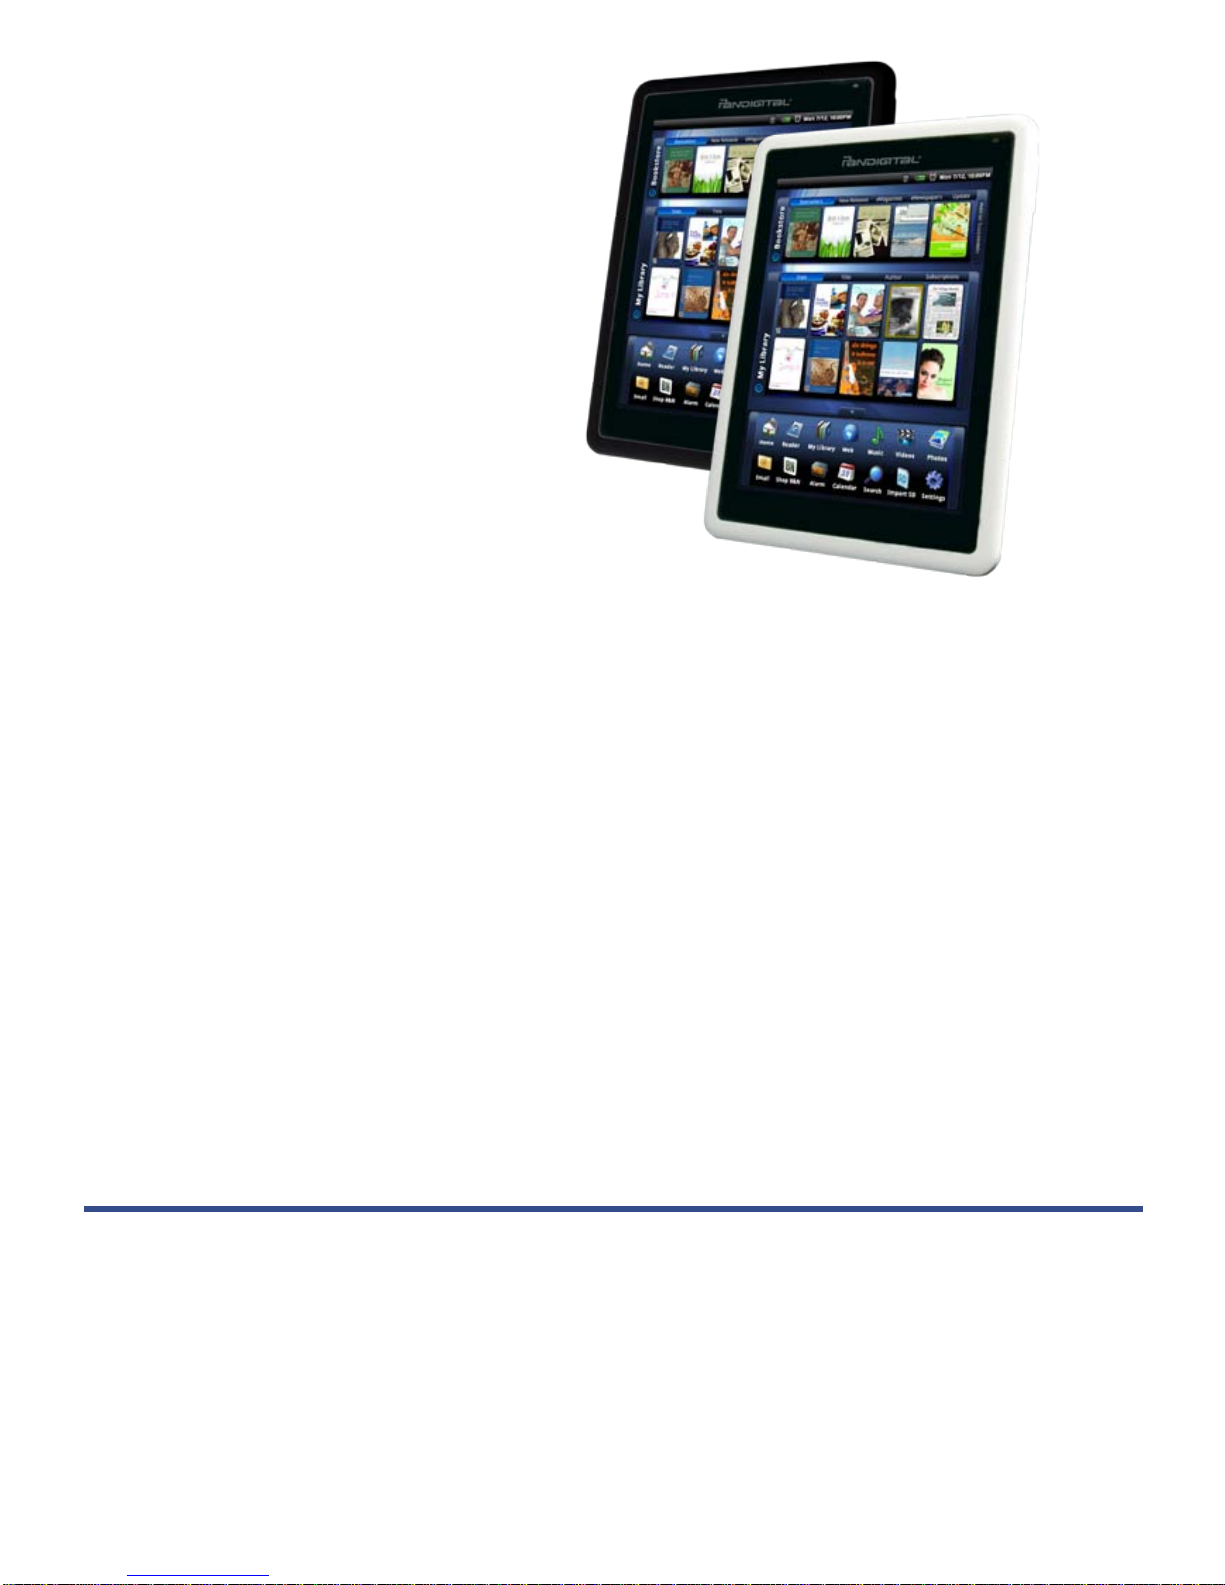
pandigital novel
A contemporary multimedia device designed for straightforward functionality, featuring a
full color TFT LCD display and convenient touch-screen navigation.
Your pandigital novel is a light and stylish electronic multimedia eReader
which allows you to quickly and easily download and read digital printed material (eBooks,
eMagazines, and eNewspapers) anytime and anywhere.
Also, you can view photo slidesho ws, watch videos, and liste n to music through the built -in
speakers or with headphones (not included).
When connected to a Wi-Fi network, you can browse the web, send/receive email,
download media files from the Barnes & Nobel’s website, and much more!
READ. SURF. PLAY.
Your pandigital novel is a step up in multimedia devices.
Congratulations on your choice!
Package Contents
pandigital novel
Power Adapter
Tabletop Stand
Quick Start Guide
User Guide (loaded in device)
Page 8

8
Device Overview
Power Button Usage
Turn On: Slide the power button on and release.
Turn Off: Slide and hold the power button for 3 seconds.
Sleep Mode On/Off (energy saver): While unit is on, slide & release the power
button quickly.
Mini USB
2 in 1 card slot
Reset
Power button
Earphone jack Speaker holes
Volume
button
Light
sensor
DC
jack
4.2”
5.6”
7.5” 5.6”
Page 9

9
Touch-Screen Navigation
The touch-screen allows for quick, easy and conve ni ent navigation for all
applications.
Throughout the User Guide, you will be instructed to use the following touch
navigation methods:
Tap = quick touch and release your finger on an item on the screen (i.e.,
selecting items)
Touch & hold = touch your finger and hold in place until a response by
application. (i.e., display dictionary, add n ote to book page, paste selected text
onto web page)
Finger slide = quick touch & slide your finger across the screen, and then
release (i.e., turning pages of your book)
Touch, hold & slide = touch your finger, hold & slide your finger acr oss the
screen, and then release (i.e., highlighting text, selecting text to paste)
Reset Device
In the event that your device does not respond to your touch, you can reboot/restart it
by poking a straightened paper clip into the small reset hole on the top of your device.
Getting Started
1. Charge your device
Plug the power adapter i nto an electrical wall outlet, and then connect to your
device to fully charge the battery before use (approx. 4 hours).
While charging, the bat tery icon will display as:
. When fully charged, t he
battery icon will displ ay as:
.
2. Turn device on
Slide the power button and release to turn on.
You can use the device whi le the battery is charging.
Page 10

10
3. Select Language
1. Tap next to the desired language.
2. Tap Save.
4. Wi-Fi Network Setup
The pandigital novel will automatically scan and list local Wi-Fi
Networks found. A
indicates secure networks that require login
name/password to connect.
Page 11

11
1. Tap the desired network to which you want to connect.
2. In the pop-up window, enter the Network Password.
3. Tap Save.
If your Wi-Fi network broadcast is set as hidden, it will not be found by t he
auto scan. Tap
Other… and then enter the network name an d key,
tap
Save.
(Advanced) After saving the Wi-Fi network, you can change your network
settings by selecting
Manual Setup, and then follow the prompts.
4. Email Setup
POP3, SMTP, IMAP and Exchange accounts are supported.
1. Enter your Email Address and Password, tap Next.
This will be your default account unless you add oth er email addresses later ,
and then you can select a different address as the default account (pg. 49).
2. (optional) To select the account type, tap Manual Setup and then select the
account type.
6. Setup Complete
After the initial setup is co mplete, the HOME screen is displayed.
Page 12

12
Home Screen
Wi-Fi connection status
(orange = Wi-Fi sleep mode)
Battery charge level
Alarm(s) are activated
Date & Time
Bookstore row shows latest books
from Barnes & Noble (scrollable).
Tap
Bookstore to launch web
browser and go to Barnes & Noble’s
website.
Tap to hide/show row contents.
My Library rows show your recently
viewed media (scrollable).
Tap
My Library for quick access to
your
My Library screen.
Application Quick Launch Bar
(scrollable)
Hide & open the Application Quick
Launch Bar
Indicates last B&N bookstore update
Sort media by
Date, Title or
Author
Check your Barnes
& Noble eMagazine
or eNewspaper
subscription updates
Page 13

13
Application Quick Launch Bar
HOME
Displays the Home screen
READER
Display your digital media for reading (PDF, EPUB)
MY LIBRARY
Stores your digital media (eBooks, eMagazines and
eNewspapers).
WEB
Access the Internet and ‘sur f the web’ whenever
desired.
MUSIC
Play and manage audio f i les (MP3, WAV, AAC, OGG)
VIDEOS
Play and manage video files (MPEG4)
PHOTOS
View and manage photo files (JPG, JPEG, BMP, PNG, GIF)
EMAIL
Send/Receive email using your existin g emai l
addresses.
SHOP B&N
Shop the Barnes & Noble website.
ALARM
Use as alarm clock with scheduled alarms.
CALENDAR
Display monthly calendar and schedule events.
SEARCH
Search for specific strings of text in media f ile names.
STOCKS
Check the status of specif i c company’s stock offerings.
FACEBOOK
Quick access to the Facebook website.
CONTACTS
Create a list of personal contacts.
WEATHER
Check the weather forecast s of locations of your choi ce.
GAMES
Play pre-loaded games for entertainment.
IMPORT SD
Import media files into the internal memory.
SETTINGS
Multiple settings for personalizing and enhan cing your
device.
UPGRADE
Download firmware from our website to upgrade your
device.
Page 14

14
BOOKSTORE (Barnes & Noble)
You must be connected to a Wi-Fi network i n or der to use the Barnes & Nobl e
Bookstore feature.
Tap Bookstore to launch the browser and display the Barnes & Noble stor e locator
page.
Bookstore Row
The top row on the Home screen d i sp lays the current Barnes & Noble bestselling
books which can be purchased directly from the Bar nes & Nobel online
bookstore.
When you are connected to your Wi-Fi network, the Bookstore contents will
automatically get updated once a day from the Barnes & Noble website.
Tap on a book icon in the Bookstore row to display the book’s descriptive
information and synopsis.
If you tap on the
Buy Now button, a pop-up window
appears.
If you select “
I have a B&N account”, the Barnes &
Noble login screen will a ppear. Enter your login
information so it can be st ored in your
pandigital novel. The Internet browser
will then launch and go to the Barnes & Noble online
store. All future Shop B&N selections will result in
being logged into your Barnes & Noble account
automatically.
If you select “Sign up for an account”, the Internet browser will launch and
display the Barnes & Noble registration page. S et up a new account and
purchase media through their online store.
Downloading Purchased Media
After purchasing medi a from the Barnes & Noble online store, you can download
it to your pandigital novel using the Get Books feature (pg. 16).
Page 15

15
MY LIBRARY
Select My Library from the Application Quick Launch Bar to display the main Library
bookshelf screen and manage your downloaded media.
Top Function Menu
Top row - last 2 eBooks eMagazines,
and 1 eNewspaper read (non scrollable)
Rows 2 -4 additional media st ored in
device (scrollable)
Hide & open the Application Quick
Launch Bar
Tap for list of other Books helves
If you have downloaded a book that does not have a book co ve r, a blank book
icon with only the book title will be displayed.
Sort media by
Date, Title or
Author
As you add media
to the Library, the
blank media
placeholder icons
will be replaced
with the actual
cover images
Simply tap on
any media
icon to open
and display
that media in
the Reader
Page 16

16
While viewing media, turn your device to rotate the orientat ion of the screen
from vertical to horizontal. When desired, you can lock the screen orientation
to prevent the auto-rotation (Reader only. pg. 25).
The Application Quick Launch Bar must be closed before selecting a top
menu item or book.
Quick Jump to another Bookshelf
In the My Library bookshelf screen, tap My Library in the upper right of screen
to display the list of all available bookshelves,
tap the desired bookshelf to
open. Tap
Bookshelves from top function menu to create new bookshelves
(pg. 18).
Get Books
To use the Get Books feature, you must have an account with Barnes &
Noble, and already purchas ed media online from th ei r site. If you have not yet
registered an account with them, do so now by goin g to the Barnes & Noble
website:
www.bn.com.
You must be connected to a Wi-Fi network i n or der to connect to and
download media from the Barnes & Noble website.
1. In the My Library screen, tap Get Books.
2. Enter your Barnes & Noble account
User ID and Password, tap Login.
Your login information will be saved for f uture downloads.
3. To download all purchased media, tap Download All.
To download specific
items, tap next to the items you want to download
now, tap Download Selected.
The media will be downloa ded and added to your Library.
4. The first time you tap on the d ownloaded media to open it, you will be
presented with an ‘unlock’ message; enter the requir ed information to unloc k
the media file.
Manage Books
Use this feature to delete media from your My Library bookshelf.
1. In the
My Library screen, tap Manage Books to display a complete list of all
media you have added to your
My Library bookshelf.
Page 17

17
2. Media is sorted by date; if desired, tap Title or Author to re-sort your media
accordingly.
3. Tap
next to the media you want to delete, tap Delete Selected.
Lend/Return Books
There are some books that Barnes & Noble classifies as “lendable”, which
means that those books can be loaned to others who also have a Barn es &
Noble account.
Please be aware of the fol lowing considerations before loaning or borrowing any
books:
To loan or borrow a book, the recipient must have a Barnes & Noble
account with a registered credit card number.
In order to unlock and open a loaned book, the recipient must use their
name and credit card number that is registered with their Barnes & Noble
account.
The book can only be loaned for 14 days.
Only one copy of a book ca n be read at a time. Therefore, you won’t have
access to the book until af ter it has been returned f rom the recipient.
You must be connected to a Wi-Fi network before you can use the
Lend/Return Books functi on.
A number appearing with the Lend/Return icon indicates ne w activity within
this feature.
After launching the Lend/Return featur e, a pop-up window appears. A number
behind
Return books indicates books expiri ng in 3 days or less. A number
behind
Check for offers indicates new offers pending.
Loan a Book
1. In the My Library screen, tap Lend/Return.
2. Tap
Lend books in the pop-up windo w.
3. Tap next to a book that you want to lend, tap Lend.
4. Tap in the email address ent ry field to enter the email address of your
recipient.
5. Tap in the message window to enter a personal message to accompany
the media. The recipient will receive the message when they log into their
B&N account.
6. Tap
Lend Book.
7. The media will now be listed as ‘Pending’.
Page 18

18
Check for Offers
Use this function to check for book loan offers that you have not yet
accepted or declined.
1. In the
My Library screen, tap Lend/Return.
2. Tap Check for offers in the pop-up window.
3. Tap next to the offers you want to accept or decline, tap Accept
or
Decline accordingly.
Use the Get Books feature to add the loaned book to your
My Library
bookshelf.
Declined books will be permanently rem oved from the
Book Offers
screen.
Opening Lent/Borrowed Books
After the recipient downloads the book, it will appear in the recipient’s My
Library
in a locked status.
To unlock and open the book for the first time, the recipient must provide
their name and credit car d number that is registered with their Barnes &
Noble account.
Return a Borrowed Book
1. In the My Library screen, tap Lend/Return.
2. Tap
Return books in the pop-up window.
3. Tap next to the borrowed book that you want to retur n, tap Return.
Bookshelves
Use Bookshelves to create and manage pers onalized bookshelves into which
you want to save your downloaded media (i.e., Short S tories, Drama, etc.).
The number of books within a bookshelf will be displayed in the rig ht column.
Add New Bookshelf
1. In the My Library screen, tap Bookshelves.
2. Tap
Add Shelf.
3. Enter the desired bookshelf name (i.e., Short St ories, Drama, etc.).
4. Tap
to create the new bookshelf. (Use Manage Bookshelf to add
media to the new bookshelf.)
Page 19

19
Display Shelf
1. In the My Library screen, tap Bookshelves.
2. Tap next to the bookshelf you want to display, tap Display Shelf.
3. The screen’s layout will resemble the My Library scr ee n, wit h your last
read media in the top row and other downloaded media in rows 2-4.
4. Media is sorted by date; if desired, tap Title or Author to re-sort your
media accordingly.
Manage Bookshelf
Use Manage Bookshelf to add to and remove media from bookshelves.
1. In the My Library screen, tap Bookshelves.
2. Tap
next to the bookshelf you want to add or remove media, tap
Manage Bookshelf.
3. Media is sorted by date; if desired, tap Title or Author to re-sort your
media accordingly.
4. Tap next to the media you want to add to the bookshelf, or tap to
delete from the bookshelf.
5. Tap
Save to update your bookshelf.
Quick Open another Bookshelf
Tap the bookshelf name in the upper right of an y bookshelf screen to display
the list of all bookshelves,
tap the desired bookshelf to open.
Delete Shelf
1. In the My Library screen, tap Bookshelves.
2. Tap next to the bookshelf you want to delete.
3. Tap
Delete.
Check Subscriptions
You can check for ne w releases or updates to your Barnes & Noble eMagaine or
eNewspaper subscriptions whenever desired.
You must be connected to a Wi-Fi network befor e you can perform the Check
Subscriptions
function.
If you want to set a time for automatic daily checks, see Settings>
Subscriptions on page 49.
Page 20

20
In the My Library screen, tap Check Subscriptions.
If new releases or updates are found, they will be reflected in your
My Library
bookshelf accordingly (row 1, spot 3, 4 and 5).
READER
The Reader application is for displ ayi ng your digital media (eBooks, eMagazines,
and eNewspapers).
eBook supported formats: PDF, EPUB
Methods that can be used to launch the
Reader:
Select Reader from the Application Quick Launch Bar; the last read media file
will open.
Tap on a media icon in the Home or any Bookshelf screen.
The Function Menu appears at the top of the screen for 3 seconds and then auto
hides. Tap anywhere on the screen (except
) to re-display it.
Finger slide left or right to turn pages.
Touch, hold & slide across text to Highlight text.
Touch & hold on a word to add a Note or display the Dictionary.
Tap to display the Application Quick Launch Bar.
To turn Sleep Mode On/Off, slide & release the power button quickly.
Tap corner to
bookmark page
Page 21

21
Play Music in Background while Reading
You can play music in the background as you read me dia files.
1. Tap Music in the Applica tion Quick Launch Bar, and then select the d esired
audio files to play.
2. Tap to minimize the Music Play screen; the music will continue to play as
background music.
3. Open the desired media file in the Reader.
4. While reading, you can tap
in the upper left corner of the reader screen to
display the music navigation bar.
Use the controls to pause/ play, play previous/next, and adjust the volume.
You can also use the volume buttons on the side of your device to adjust
the volume.
5. Tap
again to close the navigation bar and leave m usic playing.
6. Tap
to stop the music and close the navigation bar.
To return to the
Music List screen, se lect Music again from the Application
Quick Launch Bar.
Reader Function Menu
When the Reader application is launched, the Function Menu i s di sp l ayed at the
top of the screen for 3 seconds, and then auto hides.
To re-display the Function Menu, tap anywhere on the scr een (except ).
My Library
To access the main Library bookshelf while viewing a media page, display the
top function menu,
tap My Library.
Dictionary
The built-in dictionary allows you to quickly and conveniently look up t he
definition of words, either within the media you are viewing or any other words.
Page 22

22
1. While viewing a media page, display the top function menu, tap Dictionary.
2. Tap in the word entry field. As you begin to enter t ext, matching words will
appear.
3. Tap the desired word from the matching word list; the definition will ap pear
and the keyboard will disappear.
4. Tap
New Search to clear the entry field and disp lay the keyboard again.
Automatic Lookup
1. While viewing a media page, touch & hold on the word you want to
look up.
2. Tap
Dictionary in the Reader Options pop-up wind ow.
3. The dictionary will aut om atically search for the selected word, and will
display the results in the dictionary dialog window.
Bookmarks
When desired, you can bookmark pages, add notes t o pages, and highlight t ext
on pages, and then later quickly return to those pages.
Bookmarks
1. To bookmark a page, tap the upper right corner of the page. A
symbol will be displaye d, indicating the page has been bookmarked.
2. To display the list of all bookmarks you have created i n the media you
are currently viewing, display the top function menu,
tap Bookmarks.
3. To return to a bookmarked page, tap
next to desired bookmark,
tap View.
4. To delete bookmarks, tap on
while displaying a bookmarked page,
or while in the
Bookmarks screen, tap next to the desired
bookmark,
tap Delete Selected.
Notes
As you read your media, you can quickly and easily make notes on pages
for later reference.
Add Note
1. On a page, touch & hold on any word to open the Reader opti ons pop-up
window.
2. Tap
Add Note. The Notes dialog window will open.
3. Tap into the note entry area and enter the desired text.
4. Tap
Save.
Page 23

23
5. The word related to the note will be highlighted in bl ue, and a blue
bookmark symbol
will be added to the upper right corner of the page.
View Notes
1. To display a list of all notes you have added to a media f il e, display the
top function menu,
tap Bookmarks.
2. Tap Notes.
3. Tap
next to the notes you want to view, tap View.
4. The
Notes dialog box displays the fi r st note you selected.
5. To scroll through selected notes, tap
.
6. To jump to the page associated with a note, tap
View Page.
7. To delete the currently vi ewed note, tap
Delete.
Delete Multiple Notes
1. Display the top function m enu, tap Bookmarks.
2. Tap Notes.
3. Tap next to the notes you want to delete, tap Delete Selected.
Highlights
As you read your media, you may want to highlight points of interest for later
reference.
Create Highlights
1. On a page, touch, hold & sli de your finger across the text that you want
to highlight.
2. The Reader options pop-up window will appear.
3. Tap
Highlight; your text will be highlighted in yellow (normal view) or
orange (night read).
View Highlights
1. To display the list of all hi ghlights you have creat ed in the media you are
currently viewing, display the top function menu, tap Bookmarks.
2. Tap Highlights.
3. Tap
next to the highlights you want to view, tap View.
4. To scroll through the selected highlights, tap .
5. To jump to the page associated with a highlight, tap
View Page.
6. To delete the currently vi ewed highlight, tap Delete.
Page 24

24
Hide all Highlights
1. To turn all highlights of f in the currently open media file, display the top
function menu,
tap Bookmarks.
2. Tap
Highlights.
3. Tap Highlights Off ( = highlights are hidden).
Delete Multiple Highlights
1. Display the top function m enu, tap Bookmarks.
2. Tap
Highlights.
3. Tap next to the highlights you want to delete, tap Delete Selected.
Go To
Use the Go To function for qui ck access to the Table of Con tents, a particular
page, chapter, or string of text (word or phrase) within the document you are
viewing.
Display Table of Contents
1. While viewing a media page, display the top function menu,
tap Go To.
2. Tap Contents to display the Table of Contents.
3. Tap on a chapter title to jump to that chapter.
Jump to Page
1. While viewing a media page, display the top function menu,
tap Go To.
2. Tap Page.
3. Enter the page or chapter n umber you want to view, tap GO.
Search for Specific Text
1. While viewing a media page, display the top function menu,
tap Go To.
2. Enter the desired text, tap Word, tap GO.
3. All instances of the found text will be highlighted throughout the
document.
Page 25

25
4. You can scroll through t he pages for all highlighte d text, tap Cancel
Find
to return to the original page you were viewing.
OR
You can touch any of the highlighted text to automatically cancel the
find mode, and then that page becomes the current page.
Last Read
After performing searches, you can quickly retur n to the last page you were
reading.
1. Tap top area of screen to display the top menu,
tap Go To.
2. Tap Last Read.
Font Size
For optimal viewing, you can adjust the size of the onscreen text by changing the
Font Size.
1. While viewing a media page, display the top function menu,
tap Font Size
to change the text size.
2. Continue to tap
Font Size multiple times to change the font size from small,
medium, large, and X-lar ge, until you achieve the desired size.
Night Read
Night Read switches the background to bl ack with white text, al lowing you to
view media without emitti ng as much light as the normal view mode.
1. While viewing a media page, display the top function menu, tap Night
Read
.
2. To switch back to normal view mode, tap Day Read.
Screen Orientation - Lock
For optimal viewing while reading, the orientat ion of the screen automatically
rotates from vertical to hor izontal depending on how you hold your device.
When desired, you can lock the screen in the desired orientation to prevent the
auto-rotation (in Reader only).
Normal view mode is white
background with black text.
Night Read view mode is black
background with white text.
Page 26

26
To lock, while viewing a me dia page in the desired orientation, display the top
function menu,
tap Lock.
To unlock, display the top function menu,
tap Unlock.
ACCESS MEDIA ON SD CARD
If desired, you can access your media directly on a SD card without importing the
media into the internal mem ory.
1. Insert your SD card into your device.
2. Your device will autom atically scan the SD card to find digital printed me dia f iles
(eBooks, eMagazines, and eNewspapers).
3. If appropriate files are found, the
My Library screen will display the additional
media icons.
4. Tap on the desired media icon to launch the Reader application.
If you remove the SD card while reading the media, an alert appears asking you to
reinsert the SD card that contains the referenced file.
If you re-insert the correct SD card, you will be given the opportunity to import the
media file immediatel y so you won’t need the SD card in the future to view that
file.
If you no longer have the SD ca r d containing that media file, tap No.
The
My Library screen will then refresh so that only available media will be list ed.
Page 27

27
WEB
Use the Web feature to access the Internet and ‘surf the web’ and visit your favorite
web sites.
The Web feature requires a connection to a Wi-Fi network. If you have not set up
your Wi-Fi network, do so now using the instructions on page 49.
While viewing the browser, you can turn your device to rotate the orientation of the
screen from vertical to hor izontal.
Go to a Web Site
1. Select Web from the Application Quick Launch Bar to launch the internet
browser.
2. Tap in the top entry field; the keypad will appear so you can enter the desired
web site address.
3. Tap
Done on keypad to go to the web site address.
Page 28

28
Browser Menu
In the browser screen, tap Menu to display the Options Menu. Tap Menu again
to hide the
Options Menu.
Menu page 1:
Back
Displays previously displayed web page
Forward
Returns to web page that was displayed before tapping
Back to
display the previous web page.
Refresh
Refreshes the screen by re-loading the current web page
Bookmarks
Bookmark currently displayed web page, access list of all
bookmarks, or delete bookmarks
Windows
List of open browser windows
You can have up to 8 browser windows open at a time
Find on page
Search for string of text on the current web page
More
Displays
Menu page 2
Menu page 2:
Back
Displays previously displayed web page
Forward
Returns to web page that was displayed before tapping
Back to
display the previous web page.
Select text
Select text on the current web page and paste into browser entry
fields (i.e., URL address field, form fields)
Settings
Set multiple browser settings:
Page Content
Privacy
Security
Advanced
More
Returns to
Menu page 1
Page 29

29
Bookmarks
You can bookmark web pages that you visit and want quick access to later.
Bookmark a Web Page
1. In an open browser window, tap in upper left corner.
OR
In an open browser window, tap
Menu, tap Bookmarks, tap Add
Boomark
.
2. If you want to rename the bookmark, tap in the Name field and enter the
desired name.
3. Tap
Save.
Go to Bookmarked Web Page
1. On the browser windo w, tap Menu, tap Bookmarks.
2. In the Bookmarks window, tap on the desired web page.
3. The browser will go to the selected web page.
Delete Bookmarks
1. On the browser windo w, tap Menu, tap Bookmarks.
2. In the Bookmarks, tap next to the bookmarks you want to delete,
tap Delete Selected.
3. Tap to close the window and return to t he web page.
Windows
Up to the last 8 websites yo u have visited are cached and listed in the Windows
screen allowing you to quickly return to them.
Open New Window
1. In an open browser window, tap Menu, tap Windows.
2. Tap
Go to and then enter the new web site addr ess.
Switch Windows
1. In an open browser window, tap Menu, tap Windows.
2. Tap
next to the window you want to view.
Page 30

30
Close Windows
1. In an open browser window, tap Menu, tap Windows.
2. In the
Windows screen, tap next to the desired windows and then
tap
Close Selected.
OR
In an open browser window, tap
to close..
Find on Page
You can search for a string of text within the currently displayed web page.
1. On the browser windo w, tap
Menu, tap Find on page.
2. The keypad appears allowing you to enter the desired string of text (word,
phrase, etc.).
3. Tap Done on keypad to initiate the search.
4. All matching text will be highlighted. If you want to scroll through multiple
matches, tap
or .
5. Tap
to close the entry box and resume nor m al viewing.
Select Text
You can select the text of a web page address on the web pag e you’re viewing,
and then you can paste the text into the browser entry field.
1. On the browser windo w, tap
Menu, tap Select Text.
2. Touch, hold & slide your finger across the text you want to cop y.
3. Touch and hold in the top URL entr y fi el d; the text will be pasted.
4. If you’ve pasted a URL addr ess, tap
Done on keypad to go to the ne w web
page.
Settings
You can set browser settings to enhance your Internet browsing.
On the browser windo w, tap Menu, tap Settings.
Page Content
Set the following options pertaining to viewing web pages:
Text size (display text as Tiny, Small, Normal, Large, Huge)
Zoom (display page size Far, Medium, Close)
Page 31

31
Text Encoding (Latin, Unicode, Japanese)
Block pop-up windows (prevents pop-up windows from automatically
displaying when web pages include them)
Load images (display images if included on web pages)
Auto-fit pages (automatically fit the webpage to the screen)
Enable JavaScript (allows JavaScripts to run if included on web page)
Open in background (open ne w window when you select a link on a web
page, rather than replace the current web page)
Set home page (desired web page to be displayed w hen browser opens)
Privacy
Set the following options pertaining to your privacy level when viewing web
pages:
Clear cache (delete all cached information from visited web pages)
Clear history (clear the browser navigation history)
Accept cookies (allow websites to save and read “cookie” data from your
device whenever you visit their site)
Clear all cookie data (clears all browser cookies that have been saved)
Remember form data (remembers data you entered into forms for later
use)
Clear form data
Security
Set the following options pertaining to the securi ty level when logging into
secure web pages:
Remember passwords (saves your user names and passwords for all
websites that require that information when establishing accounts wit h
them)
Clear passwords (clears all the saved usernames and passwords)
Show security warning (a l er ts you of a problem with website’s security)
Advanced Settings
Set the following advanced options:
Enable Gears (set for appli cations that extend browser functionality)
Gears Settings (settings for applications that extend browser
functionality)
Reset to default (clears all browser data and resets to default settings)
Page 32

32
MUSIC
These audio file form ats are supported: MP3, WAV, AAC, OGG
Methods that can be used to add audio files to your Music List:
Import audio files from an SD card
Save audio files from email attachments
Download audio files from online music websites
Play Music
1. Select Music from the Applicat i on Quick Launch Bar.
2. If you have an SD card inserted, a
Select Media Source pop-up windo w
will appear. Select the desired media source from which you want to play
your audio files.
3. The Music List screen will be displayed.
4. When
Shuffle is off, audio files will play in the order listed in the Music List.
To play audio files in random order, tap
Shuffle to turn on ( = on).
5. When Repeat is off, selected audio files will play once and then stop. To play
audio files continuously, tap
Repeat to turn on ( = on).
6. If you want the songs sorted by song title rather than artist, tap Title.
7. To play all songs listed, tap Play without selecting any songs.
To play one
song, tap on the song listing.
To play selected songs, tap next to the desired song files, tap Play.
8. The
Music Play screen will be displayed.
Page 33

33
Use the control panel to pause/pla y, play previous/next audio file,
and use the volume control panel
to adjust t he volume.
You can also use the volume buttons on the side of your device to adjust the
volume.
Tap to minimize the Music Play screen. The music will continue to play as
background music for the
Reader and photo slideshows if you have selected
Enable Music with Slideshow (pg. 48).
Return to Music List
To return to the Music List screen, tap Menu.
Delete Audio Files
In the Music List screen, tap next to the desired audio files to delete,
tap Delete Selected.
Playlist
If desired, you can build a separate pl aylist of selected aud io files from your
Music List, allowing you to play the selected list at any time (i.e., your favorites,
specific genre, specific artist, etc.).
Add songs to Playlist
1. In the Music List screen tap next to the song titles you want to add.
Page 34

34
2. Tap Add to Playlist.
Play songs in Playlist
1. In the Music List screen, tap Playlist.
2. To play all songs listed, tap Play without selecting any songs.
To play one song, tap on the so ng listing.
To play selected songs, tap
next to the desired song files, tap Play.
Remove songs from Playlist
In the Playlist screen, t ap next to the desired audio files to you want to
remove from the Playlist.
Removing audio files from the Playlist does not delete the m f rom the
main Music List.
Return to Music List
In the Playlist screen, tap Menu to return to the Music List screen.
VIDEOS
The video file format suppor ted: MPEG4
Methods that can be used to add videos to the internal memory:
Import video files from an SD card
Save video files f rom email attachments
Download videos from online video websites
Play Video
1. Select Videos from the Application Quick Launch Bar.
2. If you have an SD card inserted, a
Select Media Source pop-up window will
appear; select the desired media source from which you want to play your
video files.
Page 35

35
3. The Video Gallery screen will be displayed.
4. Tap on a video to play it.
While viewing your video, you can turn your device to rotate the orientation of
the screen from vertical to horizontal.
Video Navigation Bar
While your video is playing, tap anywhere on the screen to display the video
navigation bar.
Use the controls to pause/ play, play previous/next video, and adjust t he volume.
You can also use the volume buttons on the side of your device to adjust the
volume.
Tap
to close the navigation bar.
Delete from Video Library
In the Video Gallery screen:
1. To delete all videos, tap Select All, and then Delete Selected.
2. To delete selected videos, tap Multi-Select, tap on the desired video files
you want to delete,
tap Delete Selected.
Page 36

36
PHOTOS
These photo file formats are supported: JPEG, BMP, PNG, and GIF (non-animated)
The following methods can be used to add photos to the internal memory:
Import photos from an SD card (pg. 45)
Save photos files from email attach ment s
Download photos f rom your favorite online photo sharing websites
Photo Gallery
While viewing your photos, you can turn your device to rotate t he or i entation
of the screen from vertical t o horizontal.
1. Select
Photos from the Application Quick L aunch Bar.
2. If you have an SD card inserted, a Select Media Source pop-up window will
appear; select the desired media source from which you want to view your
photos.
3. The Photo Gallery screen will be displayed.
4. To view a single photo, t ap on the desired photo, tap View.
To view selected photos, tap Multi-Select, tap on each photo you want to
view,
tap View.
5. When a photo is displayed in full-screen mode, the function menu appears at
the top of the screen.
Function Menu Options
Back
Return to Photo Gallery
Zoom
Enlarge the photo up to 4X
Rotate
Rotate photo 90 degrees clockwise; tap multiple times until desired
orientation is achieved. Rotated version will be saved.
Dim
Switch the screen brightness from normal brightness to very dim
Previous
Display previous photo listed in Photo Gallery
Next
Display next photo listed in Photo Gallery
Page 37

37
Wallpaper
Assign a photo as your wallpaper (background image) (pg. 38)
Import
(SD Card only)
Import photo into the internal memory (pg. 38)
Play Slideshow
You can set photo slideshow display functions through Settings> Photos
(pg.48).
To play a slideshow of all photos, in the Photo Gallery screen, tap Slideshow.
To play a slideshow of selected photos, tap Multi-Select, tap on each photo
you want to include,
tap Slideshow.
When a slideshow begins, the top function menu will appear for 4 seconds, and
then disappear. To re-displ ay the top function menu during a slideshow, simply
tap anywhere in the upper screen area.
Tap
to display the Ap pli cation Quick Launch B ar during a slidesho w.
Play Music in Background
You can play music in the background as you play a slideshow.
1. Tap Music in the App li ca tion Quick Launch Bar , and then select the desire d
audio files to play.
2. Tap to minimi ze the Music Play screen; the music will conti nue to play as
background music.
3. Start your slidesho w.
4. While the slideshow is playing, you can tap
in the upper left corner of the
screen to display the music navigation bar.
Use the controls to pause/play, play previous/next, and adjust the vol um e.
You can also use the volume buttons on the side of your device to adjust
the volume.
5. Tap
again to close the navigation bar and leave music playing.
6. Tap to stop the music and close the naviga tion bar.
To return to the Music List screen, select Music again from the Application
Quick Launch Bar.
Page 38

38
Wallpaper
You can assign any photo from t he internal memory or SD card as your display
wallpaper.
Even though you can use a photo from your SD card, it will only be available
while the SD card is inserted. If you want the photo to be your permanent
wallpaper, import it into the internal memory before selecting it as the
wallpaper (pg.38).
1. Select
Photos from the Application Quick L aunch Bar.
2. If you have an SD card inserted, a
Select Media Source pop-up window will
appear; select the desired media source containing the photo you want as
your wallpaper.
3. In the
Photo Gallery screen, tap Set Wallpaper.
4. In the
Set Wallpaper screen, tap on the desir ed photo that you want as yo ur
wallpaper.
5. Tap to return to the Photo Gallery screen.
Import Photos
You can import individu al photos from your SD card int o the internal memory
when desired.
1. Insert your SD card.
2. Select
Photos from the Application Quick Launch Bar.
Indicates
selected as
wallpaper
Page 39

39
3. Tap SD Card in the Select Media Source pop-up window.
4. In the
Photo Gallery screen, tap on the photo that you want t o import, tap
View to display the photo in full-screen mode.
5. Tap Import in the top function menu.
EMAIL
POP3, SMTP, IMAP and Exchange accounts are supported.
While viewing your email, you can turn your device to rotate the orie ntation of the
screen from vertical to horizontal.
Email Inbox
1. Select Email from the Application Quick Launch Bar.
2. If you set up an email account during the initial setup, it will be listed in the
Email Accounts screen.
If you did not set up an email account during the initial setup, or would like to
set up a new account, tap
Settings,
tap Add Account.
3. Tap directly on the email acc ount, or tap ne xt to the email account,
tap Inbox.
Open Email Message
1. In the Inbox screen, tap on an email to open it.
2. Tap
Reply to reveal and select the repl y opt ions:
Reply
Reply all
Forward
Save Attachments
Attachment files must be of a supported format in order to be saved in
your
pandigital novel. Save file s i nto the respective folders
(i.e., photo files into Phot os folder, etc.)
3. To display the previous or next email message listed in t he Inbox, tap
Previous or Next.
4. If you want to add this message to a folder, tap Folders, tap the desi red
folder name.
5. If you want to delete the mess age, tap
Delete.
Page 40

40
Compose New Email Message
1. In the Inbox screen, tap Compose.
2. Tap in the To/CC/BCC entry field a nd then enter the recipient’s email address.
OR
Tap
Add Contacts to select the recipient(s) from your Contacts list.
3. Tap in the
Subject entry field to enter your desired subject title.
4. Tap in the message ar ea to enter your personal mess age.
5. If desired, tap Add Attachment to attach a file.
6. Tap Send when ready to send your email.
7. You can save your message without sending it by tapping
Save Draft.
8. If you do not want to send or sa ve the message, tap Discard.
Add Senders to Contacts
1. If you want to add senders’ email addresses to your Contacts list, tap next
to the desired email messages, tap Add to Contacts.
2. The email address will be saved. If you want to add additional contact
information (i.e., name, phone, address, etc.) to this contact, use the
Contacts
feature (pg. 46).
Folders
To help you keep your email messages organized, you can create personalized
folders into which you can move your emails.
1. In the
Inbox screen, tap Folders.
2. Enter your desired fold er name,
tap .
Move Single Email to Folder
1. In Inbox screen, tap an email to open it.
2. Tap
Folders, tap the desired folder name.
Move Multiple Emails to Folder
1. In the Inbox screen, tap next to the desired emails, tap Folders.
2. In the Folders screen, tap the desired folder name into which you want
to move the selected emails.
Add Accounts
You can enter multiple per sonal email addresses that you would like to access
through your
pandigital novel.
Page 41

41
1. Select Email from the Application Quick Launch Bar.
2. On the Email Accounts screen, tap Settings.
3. On the Email Settings screen, tap Add Account.
4. Enter your
Name, Email Address, and Password.
5. Manual Setup (optional): The server settings will automatically be populated
based on your email account provider (i.e., Gmail, yahoo, etc.). However, if
you need to change the server settings tap
Manual Setup and make
necessary changes.
6. Tap
Save.
Edit Email Information
1. On the Add Account screen, tap Manual Setup to edit the email
account information.
2. The server settings will automatically be populat ed based on your email
account provider (i.e., Gmail, yahoo, etc.). However, if necessary, make
changes to the server settings as desired.
3. Tap Save.
Delete Email Accounts
If you have multiple accounts, and you delete the account designated as the
default account, the next email listed will automatically be set as the default.
1. Select
Email from the Applica tion Quick Launch Bar.
2. On the Email Accounts screen, tap Settings.
3. Tap next to the desi r ed accounts to delete, tap Delete Account.
Set Default Account
One email address must be designated as the default account, so if you have
multiple email accounts you can designate an y one as the default.
1. Select
Email from the Applica tion Quick Launch Bar.
2. On the Email Accounts screen, tap Settings.
3. Tap next to the desired account to set as default, tap Set as Default.
If you delete the account that was designated as the default account, the next
email listed will automatically be designated as the default.
Page 42

42
SHOP B&N
Select Shop B&N from the Application Quick Launch Bar to go to the Barnes & Noble
store locator webpage.
Downloading Purchased Media
After purchasing medi a through the Barnes & Noble online store, you can
download it to your pandigital novel using the Get Books feature
(pg. 16).
ALARM
This clock icon displayed at the top of screens indicates that one or more
alarms have been set and are active.
Add Alarm
1. Select Alarm from the Application Quick Launch B ar .
2. Tap
Add Alarm.
3. Tap in the Label entry field to enter the desired descriptive label f or the
alert (i.e., Lunch Meeting).
4. Tap in the
Time entry field to enter the time.
5. Tap Tone or Music for desired alert so und as follows:
Tone = default tone
Music = plays the last song found in the internal memory or on your
SD card.
If you select Music but the t here are no audio files in the internal
memory or on your SD card, the default tone will be used instead.
6. If you want the alarm to alert repeatedly on specific days, tap above
the desired days.
7. Tap
Save.
8. Repeat steps 2-6 to set up mor e al ar ms now, or tap
to close the Add
Alarm
screen.
Page 43

43
Set Alarm Volume
The alarm volume only affects the default tone alert. If you select Music
the volume is controlled through the Music settings (see pg 28).
In the
Alarm screen, tap to adjust the volume of the tone.
Shut Off Alarm Alert
When a scheduled alarm is a ctivated, a pop-up window with the alarm
information appears.
Tap
Snooze if you want to be reminded again in 10 minutes.
Tap
to cancel the alert.
De-Activate Alarms
You may have instances where you want to temporarily de-activate alarms
rather than delete them.
1. In the
Alarm screen, tap next to the alarm(s) you want to de-activate.
2. Tap
to re-activate.
Edit Alarm
1. In the Alarm screen, tap on the alarm you want to edit.
2. In the
Edit Alarm screen, make desired edits tap Save.
Delete Alarm
1. In the Alarm screen, tap on the alarm you want to delete.
2. In the
Delete Alarm screen, tap Delete.
CALENDAR
Select Calendar from t he Application Quick Launch Bar.
Page 44

44
The blue colored date is curr ent date.
Dates with a colored triangle in corner have scheduled events.
Add Event
1. On the Calendar screen, tap on the date to which you want to add an event.
2. In the
Add Event screen, tap in each entry field to enter the desired event
information
tap Save.
3. Tap
to return t o the Calendar screen.
Edit Event
1. On the Calendar screen, tap on the date with the event you want to edit.
2. In the
Edit Event screen, tap in entry fields that you want to change, tap
Save.
3. Tap
to return t o the Calendar screen.
Snooze or Cancel Event Alert
When a scheduled event is activated, a pop-up window with the event
information appears.
Tap
Snooze if you want to be reminded again in 10 minutes.
Tap
to cancel the alert.
Page 45

45
Delete Event
Delete Single Event
1. On the Calendar screen, tap on the d ate with the event you want t o
delete.
2. In the Edit Events screen, tap Delete.
3. Tap
to return t o the Calendar screen.
Delete Multiple Events
1. On the Calendar screen, tap Manage Events.
2. Tap next to each event you want to delete tap Delete Selected.
3. Tap to return to the Calendar screen.
SEARCH
You can search for a specific string of text in media file names.
1. Select Search from the Applicat ion Quick Launch Bar.
2. Tap into the search entry field and enter the desir ed text.
3. Tap
Search.
4. The search results will be displayed, sorted by Books, Photos, Music, and V i deos.
5. Tap on a listed file to access it.
IMPORT SD CARD
You can quickly and easi ly import all media files of selected media types from your
SD card.
1. Insert your SD card.
2. Open the Application Quick Launch Bar and then select
Import SD.
3. In the Import Media window:
Tap
All to import all files of all media types, or tap next t o only the desired
media type(s).
4. Tap
Import.
Page 46

46
STOCKS
You can quickly check t he status of specific company’s stock offerings.
Select Stocks from the Application Quick Launch Bar.
Add Company
1. Tap Add Company.
2. Tap in the top entry field and begin entering the desired company.
3. As you enter text, matching names will be displayed; tap on a company name
to select from the list.
4. Tap
Save.
5. Tap on a company listing to display its stock information.
Delete Company
To delete companies from t he li st, tap next to the company names you want
to delete, tap Delete Selected.
FACEBOOK
Select Facebook from the Application Quick Launch Bar to launc h the internet
browser and immediately go to the Facebook website.
CONTACTS
You can create an address book of your personal contacts, including personal notes
as desired.
Select
Contacts from the Application Quick Launch Bar.
Add New Contacts
1. In the Contacts screen, tap Add Contact.
Page 47

47
2. In the Add Contact screen, tap in each entry field to enter the following
contact information:
Name
Email address
Phone number
Address
Notes pertaining to contact
3. Tap Save.
You can also add contact email addresses directly from received emails
(pg. 40).
Edit Contacts
1. In the Contacts screen, tap on the desired contact name that you want to
edit.
2. In the
Edit Contact screen, tap in the entry fields to change or add
information.
3. Tap
Save.
Delete Contacts
1. In the Contacts screen, tap the desired contact name that you want to
delete.
2. In the Edit Contact screen, tap Delete.
WEATHER
You can quickly check t he weather forecasts of specific locations.
Select Weather from the Application Quick Launch Bar.
Add Location
1. Tap Add Location.
2. Tap in the top entry field and begin entering the desired location. As you enter
text, matching names will be displayed; tap on a location name to select it
from the list.
3. Tap
Add.
4. The location’s weather forecast will be displayed below the location.
5. You can select
o
F to display in Fahrenheit, or oC to display in Celsius.
Page 48

48
Delete Location
To delete locations from the list, tap next to the location name(s) you want to
delete, tap Delete Selected.
GAMES
The following pre-loaded games are provided f or your entertainment:
Solitaire*
Link Up
*To view the Solitaire rules and instructions, launc h the desired game, tap Help.
SETTINGS
Settings>General
1. Select Settings from the Application Qui ck Launch Bar, tap General.
2. Tap in the Registered to field to enter your name as the owner of this device.
3. Tap in the Date and Time fields to set the current date and time.
4. Select your desired time format:
12HR = 12:00am-12:00pm (default)
24HR = 12:00-24:00
5. Tap in the Language field to select desired languag e from the drop-down list.
6. Tap to adjust the screen brightness. When Auto Brightness is
selected, your device senses the light exposure and will automatically adjust
the screen’s brightness accordingly (i.e., i n dark environments the screen will
automatically brighten).
7. Tap
next to Keyboard and System Sounds if you want to turn the keypad
click and system sounds (i.e., end of row din g, warning ding, etc.) OFF.
Settings>Photos
Use these functions to se t your Slideshow preferences.
1. Select Settings from the Application Quick Launch Bar, tap Photos.
2. Tap the desired Slideshow Interval to set the speed at which the slideshow
photos transition from one to another (default = 5 seconds).
Page 49

49
3. Tap the desired Slideshow Transition to set the special effects as slideshow
photos transition from one to another (default = Random).
4. Tap
Enable Music with Slideshow if you want to play background music
with your slideshows.
5. Tap
Display Current Date and Time if you want to display the current tim e
with your photos during your slideshows.
6. Tap desired order in which you want your photos displayed in the
Photo
Gallery
screen, by Date or by Name.
Settings>Subscriptions
You can check for ne w releases or updates to your Barn es & Noble subscriptions
whenever desired, or you can set a time for automatic da i ly checks.
You can also check your subscriptions f r om the My Library> Check
Subscriptions (pg.19).
Schedule Automatic Checks
1. Select Settings from the Application Quick Launch Bar, tap
Subscriptions.
2. Tap next to Subscription Auto Check.
3. Tap
next to 1
st
check, and then into the time entr y field to set the time
for daily checks to be perf ormed.
4. If you want two daily checks, r epeat step 3 for
2nd check.
Settings>Network
In order to connect to the Internet, you must have a Wi-F i network set up on your
pandigital novel. If you did not set up a network during the initial
setup, do so now.
1. Select
Settings from the Application Quick Launch Bar, tap Network.
2. If your Wi-Fi network is not listed, tap Scan.
3. The device will scan and list all local Wi-Fi Networks found. A indicates
secure networks that r equire login name/pass word t o connect.
4. Tap the desire d network to which you want t o connect,
enter the Network
Password.
5. Tap Save.
If your Wi-Fi network is set as hidden, it will not be found by the auto scan.
Tap
Other… and then enter the network name and key,
tap Save.
Page 50

50
(Advanced): After saving the Wi-Fi networ k, you can change your network
settings by selecting
Manual Setup, and then follow the prompts.
Turn Wi-Fi Off
There may be times when you want to prevent your device fr om connecting
to a Wi-Fi network, even if you’ve set the network up on your device.
On the
Select a Wi-Fi Network screen, tap Turn Wi-Fi ON/OFF.
The Wi-Fi icon on the top of screens indicates the status as follows:
= ON = OFF
When the Network is turned off, you will not be able to launch
applications that require a Wi-Fi connection (i.e., Web, Email, etc.).
Settings>Reset Defaults
Resetting the defaults will change general settings back to the factory pre-set
defaults (i.e., slideshow preferences). Your media will not be affected.
1. Select
Settings from the Application Quick Launch Bar, tap Reset Defaults.
2. Tap
Reset.
3. Tap YES to confirm the reset, or tap NO to cancel reset .
Settings>Calibrate Touch Screen
If you notice that the touch screen is not responding accurately, you may need to
re-calibrate the touch screen sensors.
1. Select
Settings from the Application Quick Launch Bar, tap Calibrate.
2. Tap
Calibrate to perform the calibratio n.
3. When the pop-up window appears, tap the “+” in the designat ed spot on the
screen. Three more pop-up windows will appear with the “+” in different spot s;
tap each one.
4. If calibratio n is successful, you can resume normal use. If unsuccessful,
repeat the calibration again.
Settings>Support
Select Settings from the Application Quick Launch Bar, tap Support.
The information listed on the
Technical Support Information screen may be
required if you contact Tech nical Support.
Page 51

51
USER GUIDE
The full pandigital novel User Guide is included as a book in your My
Library
bookshelf. You can view it by tapping on the User Gui de book cover.
Once open, you can use the standard Reader functions to search and navigate
through the document in the same manner as your downlo aded media files.
The User Guide is also posted on our website: www.pandigital.net/support. Click
the Downloads tab on the Support page.
Connect to Computer
You can connect your pandigital novel to a Windows or Macintosh
computer via a USB cable to copy files between the two devices.
Compatible with operating systems: W i ndows 2000/XP/Vista/7, Mac OSX
Connect to Windows PC
1. Connect the small end of the USB cable to the pandigital novel
mini USB port, and the larger end to an available USB port on your computer.
Windows Explorer will open listing all drives connected to your computer; the
pandigital novel drive will be listed as PD_Novel.
2. There will be 4 pre-assign ed folders listed:
EBooks (PDF, EPUB)
Photos (JPG, JPEG, BMP, PNG, GIF)
Music (MP3, WAV, AAC, OGG)
Videos (MPEG4)
3. To copy files into your pandigital novel, select and drag the
desired files into the appr opriate pre-assigned folder based on file type.
Page 52

52
The device will only recognize files t hat are of a supported format and
resides in the appropriate pre-assigned folder (i.e., photo files must be in
Photos folder, etc.). If you create any other folders or sub folders under the
pre-assigned folders, the files will not be recognized.
4. To copy files from your pandigital novel into your computer,
select and drag the desired files to any desired location on your computer .
Disconnect
It is important to alwa ys per form a safe PC ‘release’ before disconnecting
the USB cable from the
pandigital novel and computer.
Windows 7
1. On the Windows System Tray, click the hardware rem oval icon.
2. Click the
Eject Removable Disk message corresponding with t he
pandigital novel device drive.
3. When the message “Safe to R em ove Hardware” appears, you can
disconnect the USB cabl e from your
pandigital novel and
computer.
Windows VISTA
1. On the Windows System Tray, click the hard ware removal icon.
2. Click the
Safely remove USB mass Storage device message
corresponding with the
pandigital novel device dr i ve .
3. When the message “This device can now be safely removed from the
computer” appears, you can disconnect the USB cable from your
pandigital novel and computer.
Windows XP
1. On the Windows System Tray, click the hardware rem oval icon.
2. Click
Remove Hardware Safely.
3. Select the storage device corresponding wit h the
pandigital
novel
, and then click Stop to disconnect . A final dialog box opens.
4. Click
Close.
5. When the message “It is now Safe to Disconnect Hardware” appears,
you can disconnect the US B cable from your pandigital
novel
and computer.
Page 53

53
Connect to Macintosh Computer
1. Connect the small end of the USB cable to the pandigital novel
mini USB port, and the larger end to an available USB port on your computer.
2. Macintosh will recognize the pandigital novel as an external
storage device titled
PD_Novel.
3. Drag and drop files between the two devices as you normally move files.
Disconnect
1. To safely disconnect the DPF from your Macintosh, select the PD_Novel icon
on your desktop and press Command-e to eject t he di sk.
2. When the icon is no longer on the desktop, it is safe to unplug the USB cable.
Frequently Asked Questions
BASIC FUNCTIONALITY
Q: Do I have to charge the battery before use?
A: Yes. Charge the battery for at least 4 hours (pg. 9).
Q: Is it easy to set up my
pandigital novel?
A: Yes! Plug in the device to charge the battery, turn the device on, and follow
the prompts for the initial setup. (You can use the device while the battery
is charging.)
Q: How do I contact Customer Support?
A: If this FAQ secton doesn’t answer your questions, you can contact
Customer Support at 1-800-715-5354.
MY LIBRARY
Q: How do I add media to My Library?
A: You can download media from Barnes & Noble, import m edi a from your SD
card, or copy media files from your computer.
Q: Can I create personal bookshelves for organizing my media?
A: Yes. On the
My Library screen, tap Bookshelves (pg. 18).
Q: Do I need an account with Barnes & Noble to download from their site?
A: Yes. You will need an acco unt and purchase media from t heir site before
you can download into your device.
Q: When it’s not visible, how do I display the Application Quick Launch
Bar?
A: Simply tap
at the bottom of the screen.
Page 54

54
READER
Q: Can I view media files in either vertical or horizontal orientation?
A: Yes, digital media (eBooks, eMagazines, eNewspapers) or photos. To
automatically switch viewing orientation, simply turn your device while
viewing t hese types of media.
Q: Can I change the size of the displayed text?
A: Yes. Tap anywhere the top screen area to display the top function menu,
tap Font Size multiple times to toggle between small to X-large text as
desired.
Q: Can I easily jump to a specific page?
A: Yes. Use either Bookmarks (pg. 22) or the Go To function (pg. 25).
Q: Can I play music and read at the same time?
A: Yes. Simple play your music, tap to minimize the Music play screen,
and then open a media file in the Reader. You can tap the icon in the
upper left corner to display the music navigation bar.
Q: How do I display the top function menu while reading?
A: Simply tap anywhere in the top screen area.
Q: How do I display the Application Quick Launch Bar while reading?
A: Simply tap at the bottom of the screen.
Q: How do I bookmark a page?
A: Tap the upper right corner of the page. A
symbol will b e displayed,
indicating the page has been bookmarked (pg. 22).
Q: Can I highlight text on a page?
A: Yes. On a page, touch, hold & slide yo ur finger across the text t hat you
want to highlight. Tap Highlight in the Reader options pop-up window that
appears (pg. 23).
Q: Can I add a note to a page?
A: Yes. On a page, touch & hold on a word that will be related to the note. Use
the Reader options pop-up window that appears (pg. 22).
Q: Does the Reader have a built-in Dictionary?
A: Yes. On a page, touch & hold on the word you want to look up. Tap
Dictionary in the Reader options pop-up window that appears (pg. 21).
Q: Can I read books stored on my SD card?
A: Yes, however, it’s recommended that you import the book into your
pandigital novel so it will be ava i lable after you remove the SD
card.
Page 55

55
WEB
Q: Do I need a Wi-Fi adapter to connect to the Internet?
A: No. The Wi-Fi adapter is built-in to your
pandigital novel.
Q: Can I have multiple browser windows open at the same time?
A: Yes, up to 8 windows (pg. 29).
Q: Can I change browser settings?
A: Yes. Ther e ar e multiple settings you can set as desired, including privacy &
security options (pg. 30).
Q: Can I search a web page for specific text?
A: Yes. Use the
Find on Page function (pg. 30).
Q: Can I bookmark web pages?
A: Yes. Use the browser
Bookmarks function (pg.28).
MUSIC
Q: What type of audio files can I play on my pandigital novel?
A: MP3, WAV, AAC, and OGG
Q: How do I add audio files to my
pandigital novel?
A: You can download audio fi les from your favorit e online music/video store,
import audio files from your SD card (pg. 45), or cop y audio files from your
computer (pg. 51).
Q: Can I create a separate l ist of my favorite songs?
A: Yes. Use t he Playlist feature (pg. 33).
VIDEO
Q: What type of video files can I play on my
pandigital novel?
A: MPEG4
Q: How do I add video files to my
pandigital novel?
A: You can download video files from your favorite online music/video st or e,
import video files from your SD card (pg. 45), or copy video files from your
computer (pg. 51).
PHOTOS
Q: What type of photo files can I view on my pandigital novel?
A: JPG, JPEG, BMP, PNG, GIF (non-animated)
Q: How do I add photo files to my
pandigital novel?
A: You can download photo files from your favorite online photo sharing
websites, import photo files from your SD card (pg. 45), or copy photo files
from your computer (pg. 51).
Page 56

56
Q: Can I view individual photos as well as slideshows?
A: Yes. On the
Photo Gallery screen you can select individual photos to view
or tap
Slideshow to play a slideshow (pg. 36).
Q: Can I set preferences for how my slideshow displays?
A: Yes. Slideshow options ar e available through
Settings> Photos (pg. 48).
EMAIL
Q: Can I use any of my perso nal email addresses to send/receive email?
A: Your
pandigital novel supports POP3, SMTP, IMAP and
Exchange accounts.
Q: Can I organize my emails into categories or personal folders?
A: Yes. Use
Email > Folders function (pg. 40).
Q: Can I add my email contacts into my Contact list?
A: Yes. Use
Email > Add Senders to Contacts function (pg. 40).
DIGITAL PRINTED MEDIA (eBooks, eMagazines, eNewspapers)
Q: What types of media files are compatible with my pandigital
novel
?
A: PDF, EPUB
Q: How does the Lend/Return Books feature work?
A: You can lend “lendable” books to your friends and family that have been
purchased from Barnes & Noble. Barnes & Noble determines which books
are “lendable”. Use
Lend/Return Books function (pg. 17).
Q: Can I receive books f rom my friends & family?
A: Yes. Refer to t he
Lend/Return Books function to return books that have
been lent to you (pg. 17).
Q: How long can I lend or keep a borrowed book?
A: Two (2) weeks.
COMPUTER COMPATIBILITY
Q: Which media cards are compatible with my
pandigital novel?
A: SD/MMC Cards.
Q: Which Operating Systems are compatible with my
pandigital
novel
?
A: Microsoft Windows XP, VISTA, 7, MAC OS.
Q: How do I connect m y pandigital novel with my computer?
A: Use a stand ar d USB cable. Refer to the
Connect to Computer function
(pg. 51).
Page 57

57
Battery Management
The pandigital novel battery is not fully charged out of the box, so it is
recommended that you charge the battery for at least 4 hours before you st art to use
your device.
The rechargeable battery is designed and manufact ured to be used and rechar ged for
500+ complete charge/discharge cycles. The capacity of the battery will reduce each
time it is charged/depl eted. However, you can still try to prolong the bat tery’s lifetime
by following the suggest ions below:
Use your device at least once a week.
Charge the battery regularl y a nd fully. Never leave the batt ery fully discharged
for a long period of time.
Always keep your device and the battery away from heat.
Charge Battery
Plug the power adapter i nto an electrical wall outlet, and then connect to your
device to fully charge the battery before use (approx. 4 hours). While charging,
the battery icon will display as: . When fully char ged, the battery icon will
display as:
A fully discharged battery will take approxima tely 5 hours to fully charge, but you
can use your device while plugged in when desi red.
Important Safety Precautions
Always follow these basic safety precautions when using your pandigital
novel
. This will reduce the risk of fire, electric shock, and injury.
Do not expose this product to rain or moisture.
Keep your
pandigital novel out of direct su nlight and heat sources.
Protect the power cord. Route power cords so that they are not likely to be walked
on or pinched by items placed on or against them. P ay particular attention t o the
point where the cord attaches to your device.
Only use the AC adapter included with the
pandigital novel. Using any
other power adapter will void your warranty.
Cleaning the device
Treat the screen gently. To clean fingerprints or dust from the screen, we
recommend using a soft, non-abrasive cloth such as a ca mera lens cloth.
Page 58

58
Technical Specifications
Product Specs
7” Digital TFT LCD Display 600x800 pixels, 220 nits
outer unit 7.5” x 5.6”
White or Black case (depending on model)
Compatible Media
Sources
Secure Digital™ (SD), MMC
Features
Display digital printed media (eBooks, eMagazines, eNewspapers)
Play digital Audio files
Play digital Video files
Display digital Photo files
Alarm Clock and Calendar
Connect to Wi-Fi networks
Web – check your social networks, stocks or the weather
Send/Receive Email
Games for fun and entertainment
Display and import directly from SD Card
Automatic rotation of screen orientation
Earphone jack included
Tabletop stand included for convenient hands-free viewing
Compatible File
Formats
eBooks PDF, EPUB
Photo JPG, JPEG, BMP, PNG, GIF (non-animated)
Audio MP3, WAV, AAC, OGG
Video MPEG4
USB Ports Mini USB 2.0
Internal Memory 1GB or 2GB (depending on model)
Wi-Fi Compatible Yes, built-in Wi-Fi adapter
Audio output
Built-in stereo speakers
2.5mm stereo earphone jack
Power Adapter 12V, 1.5A
Battery Rechargeable Li-ion 1600mAh, 7.4V
Page 59

59
UPGRADE
Use the Upgrade feature if yo u are advised to upgrade your unit’s firmware.
1. Select Upgrade from the Application Quick Launch Bar. The browser will
launch and display the Download page on the Pandigital website.
2. Look for the eReader Firmware download link and follow the prompts to
download the file.
3. After download is compl ete, insert a SD card into a card reader connected to
your computer.
4. Connect your
pandigital novel to your comput er via USB cable.
5. Locate the
Download folder in your pandigital novel and copy
the
[version#].dist file onto the SD card.
6. Turn your pandigital novel off.
7. Insert the SD card (with [version#].dist file) into the
pandigital
novel
.
8. Press the
Volume + key and slide the power key at the same time; hold for 5
seconds.
The
pandigital novel will recognize the upgrade file on the SD ca rd
as it boots up. Upgrade screens will be displa yed as the device is upgraded.
When complete, the device will automatically restart.
Limited Warranty
The limited warranty set forth below is given by Pandigital with respect to Pandigital
brand electronics products purchased and used in the United States of America .
Pandigital warrants t hi s product against defects in material or workmanship as
follows:
LABOR: For a period of one (1) year from the date of purch ase , if this product is
found to be defective, Pandigital will repair or replace the product, at its option, at no
charge. After this one (1) year, labor charges will be charged on a case by case
basis.
PARTS: For a period of one (1) year from the date of purchase, if this product is
found to be defective, Pandigital will supply at no cost, new or rebuilt repl acement
parts, at its option, at no charge. After this one (1) year period, parts will be ch ar ged
for on a case by case basis. M odi fications not approved by the party responsible for
compliance could void user’s authority to oper ate the equipment.
Page 60

60
This warranty does not co ve r: (1) customer instruction, installation or setu p; (2)
cosmetic damage or damage due to accident, misuse, abuse or negligence; (3)
commercial use of the product; (4) modificati on of any part of the product; (5) damage
due to improper operati on, improper maintenance, or connection to an improper
power supply; (6) loss of data, regardless of value or f or mat, that may result through
proper and/or improper use of the product; (7) damage due to an attempted r epair of
the product by anyone other than a facility authorized by Pandigital to service the
product; (8) consumables (such as fuses and batteries ). This warranty is valid only in
the United States.
The product must be accompanied by a copy of the original retail purchase recei pt. If
no proof of purchase is attached, the warranty will not be honored and repai r costs
will be charged. This warranty is only valid with written documentation detailing the
complaint attached to the outside or inside of the car ton. This warranty is in va l id i f the
factory applied serial num ber has been altered and or removed from the product. This
warranty does not provi de protection for the loss of data, regardless of form at.
Pandigital reserves t he right to modify and design this product without prior notice,
written or otherwise.
To obtain warranty service, you must deliver the product freight prepai d in either its
original packaging or p ackaging affording an equ al degree of protection, plus proof of
purchase.
Repair or replacement as provided under this warranty is the exclusive re medy of the
consumer. Pandigital, its parent company, af filiates or subsidiaries, shall not be liable
for any incidental or consequential damages for br each of any expressed or implied
warranty on this product. Except to the extent prohibited by applicable law, any
implied warranty of merchantability or fitness for a particular purpose o n this product
is limited in duration to the duration of this war r anty.
Some states do not allow the exclusion or limitation of incidental or consequential
damages, or allow limit ation on how long an implied warranty lasts, so the above
limitations or exclusions may not apply. This warranty gives you specific legal rights,
and you may have other rights, which vary from stat e to state.
All content included on the Pandigital website as well as Pandigital products,
including pre-loaded demonstration images, d i gital media, digital co okbooks, text,
graphics, logos, designs, photographs, butt on icons, images, audio/video clips, digital
downloads, data compi lations, and software, is the property of Pandigita l or its
suppliers and is protect ed by United States and international copyright la ws or other
intellectual property laws and treaties. Said content shall not be reproduced or used
without express written permission from Pandigital and its suppliers respectively.
Use of this product constitutes acceptance of these terms and conditions o f warranty.
Technical support tel ephone number: 1-800-715-5354.
Page 61

61
FCC Notices
FCC ID: TLZ-NU706
This device complies with Part 15 of the FCC Rules. Operation is subject t o the
following two conditions: (1) this device may not cause harmful interference, and (2)
this device must accept any interference received, including interf erence that may
cause undesired operation.
Federal Communications Commission (FCC) Statement Information to the User
WARNING: Changes or modifications to this device not expressly approved by
the party responsible for compliance could voi d the user’s
authority to operate the equipment.
This equipment has been tested and found to comply with the limits for a Class B
digital device, pursuant to Part 15 of the Federal Communication Commiss i on (FCC)
Rules. These limits are designed to provide reasonable protection against harmful
interference in a residential installation. This equipment generates, uses, and can
radiate radio frequenc y energy and if not installed and used in accordance with the
instructions, may cause harmful interference to radio communications. However,
there is no guarantee that i nterference will not occur in a particular installation. If this
equipment does cause harmful interference to radio or television reception, which can
be determined by turning the equipment off and o n, the user is encouraged to try to
correct the interference by one or more of the following measures:
Reorient or relocate the receiving antenna.
Increase the separation between the equipment and r eceiver.
Connect the equipment t o an outlet on a circuit differ ent from that to which t he
receiver is connected.
Consult the dealer or an e xperienced radio/TV technician for help.
FCC Radiation Exposure Statement:
This equipment complies with FCC radiation exp osure limits set fort h for an
uncontrolled environm ent. This device is design ed for hand-held operation only. The
antenna(s) used for this transmitter must not be collocated or operating in conjunction
with any other antenna or transmitter within a host device, except in accordance with
FCC multi-transmitter product procedures.
Disclaimers
Linksys is a registered trademark or trademark of Cisco Systems, Inc. and/or its
affiliates in the U.S. and certain other countries. Copyright © 2005 Cisc o Systems,
Inc. All rights reserved.
Page 62

62
Barnes & Noble and the “BN” l ogo are registered trademarks of Barnesandnoble.com
LLC. All rights reserved.
Facebook and the “f” logo are registered trademarks of Facebook Inc. All rights
reserved.
License Agreement and Terms of Use
By activating and using the pandigital novel, you hereby consent and
agree to our License Agreement and Terms of Use.
The Device and Related Services
The Pandigital Novel (the "Device") is a portabl e electronic reading device that utilizes
wireless connectivity to enable users to shop for, download, browse, and r ead books,
newspapers, magazines, blogs, access web sites, e-mail and other materi als, all
subject to the terms and conditions of this Agreement. The "Service" means the
wireless connectivity, provision of digital co ntent, software and support, and other
services and support that Pandigital provide s D evice users.
Wireless Connectivity
Coverage and Service Inter ruptions: You ackn owledge that if your Device is located
in any area without applica ble wireless connecti vity, you may not be able to use some
or all elements of the wireless services. We are not responsible for the unava i lability
of wireless service or an y interruptions of wireless connectivity.
Digital Content
The Barnes & Noble Store: The Barnes & Noble Store enables you to download,
display and use on your Device a variety of digitized e l ectronic content, such as
books, subscriptions t o magazines, newspapers, journals and other peri odicals,
blogs, RSS feeds, and other digital content, as determined by Barnes & Noble from
time to time (individually and collectivel y, " Digital Content").
Use of Digital Content: Upon your payment of the applicable fees set by Barnes &
Noble, Barnes & Noble gra nts you the non-exclusive right to keep a permanent copy
of the applicable Digit al Content and to view, use, and display such Digital Content an
unlimited number of tim es, solely on the Device or as authorized by Barnes & Noble
as part of the Service and sol ely for your personal, non-commercial use. Digital
Content will be deemed licensed to you by Barnes & Noble under this Agreement
unless otherwise expressly provided by Barnes & Noble.
Restrictions: Unless specifica lly indicated otherwise, you may not sell, rent , lease,
distribute, broadcast , sublicense or other wise assign any rights to the Di gital Content
or any portion of it to an y third party, and you may not remove any proprietary notices
or labels on the Digital Content. In addition, you may not, and you will not encourage,
Page 63

63
assist or authorize any oth er person to, bypass, modify, defeat or circumv ent security
features that protect the Digital Content.
Software
Definitions: The foll owing terms apply to the Device and to (a) all software (and the
media on which such software is distributed) of P andi gital or third parties that is preinstalled on the Device at time of purchase or that Pandigital provides as
updates/upgrades to the pre-installed software (collectively, the "Device Software"),
unless you agree to other t erms as part of an update/upgrade process; and (b) any
printed, on-line or other electronic documentation for such software (the
"Documentation"). A s used in this Agreement, "Software" means, collect ively, the
Device Software and Documentation.
Use of the Device Software: You may use the Device S oftware only on the Device.
You may not separate any individual component of the Device Software for use on
another device or computer, may not transfer it for use on another device or use it, or
any portion of it, over a network and may not sell, rent , lease, lend, distribute or
sublicense or otherwise assign any rights to the S oftware in whole or in part.
No Reverse Engineering, D ecompilation, Dis assembly or Circumvention: You may
not, and you will not encourage, assist or authoriz e any other person to, modify,
reverse engineer, decompile or disassemble the Device or the Software, whether in
whole or in part, creat e any derivative works from or of the Software, or bypass,
modify, defeat or tamper with or circumvent any of the functions or protect ions of the
Device or Software or an y mechanisms operativel y linked to the Software, including,
but not limited to, augmenting or substituting any di gi tal rights management
functionality of the Device or Software.
Automatic Updates: In order to keep your Software up-to-date, Pandigital may
automatically provide your Device with updates/ upgrades to the Software.
Export Regulations: Y ou agree to comply with all export and re-export rest r i ctions and
regulations of the Department of Commerce and oth er United States agencies and
authorities, and not to t ransfer, or encourage, assist or authorize the transfer of the
Software to a prohibited country or otherwise in violation of any such restrictions or
regulations.
General
No Illegal Use and Reservation of Rights: You may not use the Device, the Service or
the Digital Content f or any illegal purpose. You acknowledge that the sale of the
Device to you does not transfer to you title to or ownersh ip of any intellectual property
rights of Pandigital or it s suppliers. All of the S oftware is licensed, not sold, and such
license is non-exclusive.
Information Receive d: The Device Soft ware wil l provide Pandigital with data about
your Device and its interaction with the Service ( such as available memory, up-time,
log files and signal strength) and information relat ed to the content on your Devi ce
and your use of it (such as aut om atic bookmarking of the last page read and content
Page 64

64
deletions from the Device). Information we rece ive is subject to the Pandi gital Privacy
Notice.
Patents: The Device and/or methods used in association with the Device may be
covered by one or more patents or pending patent applications.
Termination: Your rig hts under this Agreement will automatically terminate without
notice from Pandigital if you fail to comply with any term of this Agreement. A mazon's
failure to insist upon or enforce your strict complia nce with this Agreement wil l not
constitute a waiver of any of its rights.
Disclaimer of Warranties: YOU EXPRESSLY ACKNOWLEDGE AND AGREE THAT
USE OF THE SERVICE, DEVICE, DIGITAL CONTENT AND SOFTWARE IS AT
YOUR SOLE RISK. EXCEPT FOR THE ONE-YEAR LIMITED WARRANTY, THE
SERVICE, DEVICE, DIGITAL CONTENT AND SOFTWARE ARE PROVIDED "AS IS"
WITH ALL FAULTS AND WITHOUT WARRANTY OF ANY KIND AND PANDIGITAL
AND ITS SUPPLIERS AND LICENSORS DISCLAIM ALL WARRANTIES, EXPRESS
OR IMPLIED, INCLUDING, BUT NOT LIMITED TO, THE IMPLIED WARRANTIES
OF MERCHANTABILITY, FITNESS FOR A PARTICULAR PURPOSE, ACCURACY,
QUIET ENJOYMENT AND NON-INFRINGEMENT OF THIRD-PARTY RIGHTS. NO
ORAL OR WRITTEN INFORMATION OR ADVICE GIVEN BY PANDIGITAL OR AN
AUTHORIZED REPRESENTATIVE OF PANDIGITAL SHALL CREATE A
WARRANTY. THE LAWS OF CERTAIN JURISDICTIONS DO NOT ALLOW THE
DISCLAIMER OF IMPLIED WARRANTIES. IF THESE LAWS APPLY TO YOU,
SOME OR ALL OF THE ABOVE DISCLAIMERS, EXCLUSIONS OR LIMITATIONS
MAY NOT APPLY TO YOU, AND YOU MAY HAVE ADDITIONAL RIGHTS.
Limitation of Liability: TO THE EXTENT NOT PROHIBITED BY LAW, NEITHER
PANDIGITAL NOR ITS SUPPLIERS OR LICENSORS SHALL BE LIABLE TO YOU
FOR ANY INCIDENTAL OR CONSEQUENTIAL DAMAGES FOR BREACH OF ANY
EXPRESS OR IMPLIED WARRANTY, BREACH OF CONTRACT, NEGLIGENCE,
STRICT LIABILITY OR ANY OTHER LEGAL THEORY RELATED TO THE
SERVICE, DEVICE, DIGITAL CONTENT OR SOFTWARE, INCLUDING, BUT NOT
LIMITED TO, ANY DAMAGES ARISING OUT OF LOSS OF PROFITS, REVENUE,
DATA OR USE OF THE DEVICE OR SOFTWARE OR ANY ASSOCIATED
PRODUCT, EVEN IF PANDIGITAL HAS BEEN ADVISED OF THE POSSIBILITY OF
SUCH DAMAGES. IN ANY CASE, PANDIGITAL'S AGGREGATE LIABILITY UNDER
THIS AGREEMENT SHALL BE LIMITED TO THE AMOUNT ACTUALLY PAID FOR
THE DEVICE. THE LAWS OF CERTAIN JURISDICTIONS DO NOT ALLOW THE
EXCLUSION OR LIMITATION OF INCIDENTAL OR CONSEQUENTIAL DAMAGES.
IF THESE LAWS APPLY TO YOU, SOME OR ALL OF THE ABOVE EXCLUSIONS
OR LIMITATIONS MAY NOT APPLY TO YOU, AND YOU MAY HAVE ADDITIONAL
RIGHTS.
Disputes: ANY DISPUTE ARISING OUT OF OR RELATING IN ANYWAY TO THIS
AGREEMENT SHALL BE SUBMITTED TO CONFIDENTIAL ARBITRATION IN
ALAMEDA COUNTY, EXCEPT THAT, TO THE EXTENT YOU HAVE IN ANY
MANNER VIOLATED OR THREATENED TO VIOLATE PANDIGITAL'S
INTELLECTUAL PROPERTY RIGHTS, PANDIGITAL MAY SEEK INJUNCTIVE OR
Page 65

65
OTHER APPROPRIATE RELIEF IN A NY STATE OR FEDERAL COURT IN THE
COUNTY OF ALAMEDA, AND YOU CONSENT TO EXCLUSIVE JURISDICTION
AND VENUE IN SUCH COURTS. The arbitrator's award s hall be binding and may be
entered as a judgment in any court of competent jurisd iction. To the fullest ext ent
permitted by applicable law, no arbitration u nder this Agreement shall be joined to an
arbitration involving any other party subject to this Agreement, whether through class
arbitration proceedings or otherwise.
Severability: If an y t er m or condition of this A gr eement shall be deemed inva lid, void,
or for any reason unenforceable, that part shall be deemed severable and shall not
affect the validity and enforceability of any remaining term or condit ion.
Amendment: Pandigital r eserves the right to amend an y of the terms of this
Agreement at its sole discretion by posting the r evised terms on the Pandigital.net
website. Your continue d use of the Device and Software after the effective date of
any such amendment shall be deemed your agreement to be bound by such
amendment.
Contact Information: For communications conce rning this Agreement, you may
contact Pandigital by writing to Pandigital, At tn: Legal Department, 6375 Clark
Avenue, Suite 100, Dublin, CA 95468.
© 2010 Pandigital, Inc. or its affiliates. All rights reserved. Pandigital, the Pandigital
logo, Pandigital Novel, are trademarks of Pandigital Inc. Barnes&Noble and the “BN”
logo are registered tradem ar ks of Barnesandnoble. co m LLC. All rights reserved.
Facebook and the “f” logo are registered trademarks of Facebook Inc. All rights
reserved. Java and all Java based trademarks and logos are tr ademarks or registered
trademarks of Sun Microsystems, Inc. in the U.S . and other countries.
Contains Reader
®
Mobile technology by Adobe Systems Incorporat ed
 Loading...