

Page 1

v1.1
7” Color Multimedia eReader
Powered by Android
TM
Page 2

2
Register your product
Qualify to win a FREE
digital photo frame!*
(valid in USA only)
Register your FREE
1-year warranty!**
*For details, go to our website:
www.pandigital.net
**The online signup is for the purpose of user and product registration.
Failure to register does not in any way diminish any of your standard
warranty rights, as described in the document ation included with your
product.
NOTE: If you must mail your registration, please send yo ur name, address,
phone number, model, serial number, and when and where purchased to:
Pandigital, P.O. Box 2969, Dublin, CA 94568-2969 USA
Note: The device style and features may differ from those documented in this User Guide.
UG-DUT_PRD07T10WWH70P1_v1.1_11-10
1
year
Register now at www.pandigital.net
Page 3

3
Table of Contents
Package Contents .................................................................................................... 8
Covers for your eReader .......................................................................................... 8
Device Overview ....................................................................................................... 9
Power Button Usage ................................................................................................ 9
Touch-Screen Navigation ...................................................................................... 10
Reset Device ........................................................................................................... 10
Getting Started ....................................................................................................... 11
Connecting to Public Wi-Fi Hotspot ....................................................................................... 12
Home Screen .......................................................................................................... 13
Pre-loaded Applications ........................................................................................ 14
Application Function Menu ................................................................................... 15
ADOBE ACCOUNT ................................................................................................. 17
ALARM CLOCK ....................................................................................................... 18
Add Alarm .............................................................................................................................. 18
Shut Off Alarm Alert ........................................................................................................... 18
De-Activate Alarms ............................................................................................................ 18
Edit Alarm ........................................................................................................................... 18
Delete Alarm ...................................................................................................................... 19
BROWSER ............................................................................................................... 19
Go to a Website ..................................................................................................................... 19
Browser Function Menu ......................................................................................................... 20
Browser Bookmarks ............................................................................................................... 21
Bookmark a Web Page ...................................................................................................... 21
Go to Bookmarked Web Page ........................................................................................... 21
Manage Bookmarks ........................................................................................................... 21
Open Bookmarked page ................................................................................................ 21
Edit Bookmark ................................................................................................................ 21
Add Shortcut to Home Screen ....................................................................................... 21
Share Link ...................................................................................................................... 21
Copy & Paste URL ......................................................................................................... 22
Delete Bookmark ........................................................................................................... 22
Set as homepage ........................................................................................................... 22
Windows ................................................................................................................................. 22
Refresh ................................................................................................................................... 22
More ....................................................................................................................................... 22
Add bookmark ........................................................................................................................ 22
Find on Page .......................................................................................................................... 23
Select Text ............................................................................................................................. 23
Page info ................................................................................................................................ 23
Page 4

4
Downloads ............................................................................................................................. 23
Settings .................................................................................................................................. 23
Page content settings......................................................................................................... 23
Privacy settings .................................................................................................................. 24
Security settings ................................................................................................................. 24
Advanced settings .............................................................................................................. 24
CALCULATOR ........................................................................................................ 24
CALENDAR ............................................................................................................. 24
Add Event ............................................................................................................................... 25
Edit Event ............................................................................................................................... 25
Event Reminder Alerts ........................................................................................................... 25
Delete Events ......................................................................................................................... 25
CONTACTS ............................................................................................................. 26
Add New Contacts ................................................................................................................. 26
Import/Export Contacts .......................................................................................................... 26
Add Contact to Favorites ........................................................................................................ 26
Edit Contacts .......................................................................................................................... 26
Email Contacts ....................................................................................................................... 27
Delete Contacts ...................................................................................................................... 27
DICTIONARY ........................................................................................................... 27
EMAIL ...................................................................................................................... 28
Add Email Accounts ............................................................................................................... 28
Set up Yahoo! Plus Account .............................................................................................. 28
Set up Juno Platinum or Turbo Account ............................................................................ 29
Email Inbox ............................................................................................................................ 29
Open Email Message ......................................................................................................... 29
Compose New Email Message .......................................................................................... 29
Edit Email Account ................................................................................................................. 30
Delete Email Accounts ........................................................................................................... 30
Set Default Email Account ..................................................................................................... 30
ES FILE EXPLORER ............................................................................................... 31
View the ES File Explorer User Manual ................................................................................. 31
Manage Media files ................................................................................................................ 31
ES Function Menu .................................................................................................................. 32
Import (copy) Media files from SD card into Internal Memory ................................................ 34
Install AndroidTM Applications using ES File Explorer ............................................................ 35
Download AndroidTM Applications direct from a Website ....................................................... 35
Uninstalling AndroidTM Applications ....................................................................................... 35
ES TASK MANAGER .............................................................................................. 36
Stopping AndroidTM Applications ............................................................................................ 36
GAMES .................................................................................................................... 36
MUSIC ...................................................................................................................... 36
Page 5

5
Play Music .............................................................................................................................. 37
Music Play Screen ............................................................................................................. 37
Music Control Options ........................................................................................................ 38
Delete Music Files .............................................................................................................. 38
Playlist .................................................................................................................................... 39
Create New Playlist ............................................................................................................ 39
Add Songs to Playlist ......................................................................................................... 39
Play songs in Playlist ......................................................................................................... 39
Remove songs from Playlist............................................................................................... 39
Rename or Delete a Playlist............................................................................................... 39
PanReader ............................................................................................................... 40
MY LIBRARY ......................................................................................................................... 40
Bookshelves ....................................................................................................................... 40
Add New Bookshelf ........................................................................................................ 40
Add eBooks to Bookshelf ............................................................................................... 40
Display Shelf .................................................................................................................. 41
Search for eBooks .............................................................................................................. 41
Sort eBooks ........................................................................................................................ 41
Display in Cover or List Layout .......................................................................................... 41
BOOKSTORE ........................................................................................................................ 41
PURCHASED ......................................................................................................................... 42
READER ................................................................................................................................ 42
Highlight Text ..................................................................................................................... 43
Google Search ................................................................................................................... 43
Reader Function Menu ........................................................................................................... 44
Screen Orientation Lock ..................................................................................................... 44
Night Mode ......................................................................................................................... 44
Table of Contents ............................................................................................................... 44
Font Size ............................................................................................................................ 44
Search ................................................................................................................................ 45
Bookmark Page .................................................................................................................. 45
PHOTOS .................................................................................................................. 45
Play Slideshow ....................................................................................................................... 46
Photo Function Menu ............................................................................................................. 46
Delete Photos ......................................................................................................................... 47
SETTINGS ............................................................................................................... 47
Wireless & networks ............................................................................................................... 51
Connecting to Public Wi-Fi Hotspot ................................................................................... 52
‘Forget’ remembered Wi-Fi Network .................................................................................. 52
STOCKS .................................................................................................................. 52
VIDEOS .................................................................................................................... 53
Delete Videos ......................................................................................................................... 54
Page 6

6
WEATHER ............................................................................................................... 54
Connect to Computer ............................................................................................. 54
Connect to Windows PC ........................................................................................................ 54
Connect to Macintosh Computer ............................................................................................ 56
UPDATE FIRMWARE .............................................................................................. 56
Frequently Asked Questions ................................................................................. 57
Battery Management .............................................................................................. 59
Important Safety Precautions ................................................................................ 59
Cleaning your eReader .......................................................................................................... 60
Technical Specifications ........................................................................................ 60
Limited Warranty .................................................................................................... 60
FCC Notices ........................................................................................................................... 62
License Agreement and Terms of Use ................................................................. 63
European Community Compliance Statement ..................................................... 65
Page 7
7
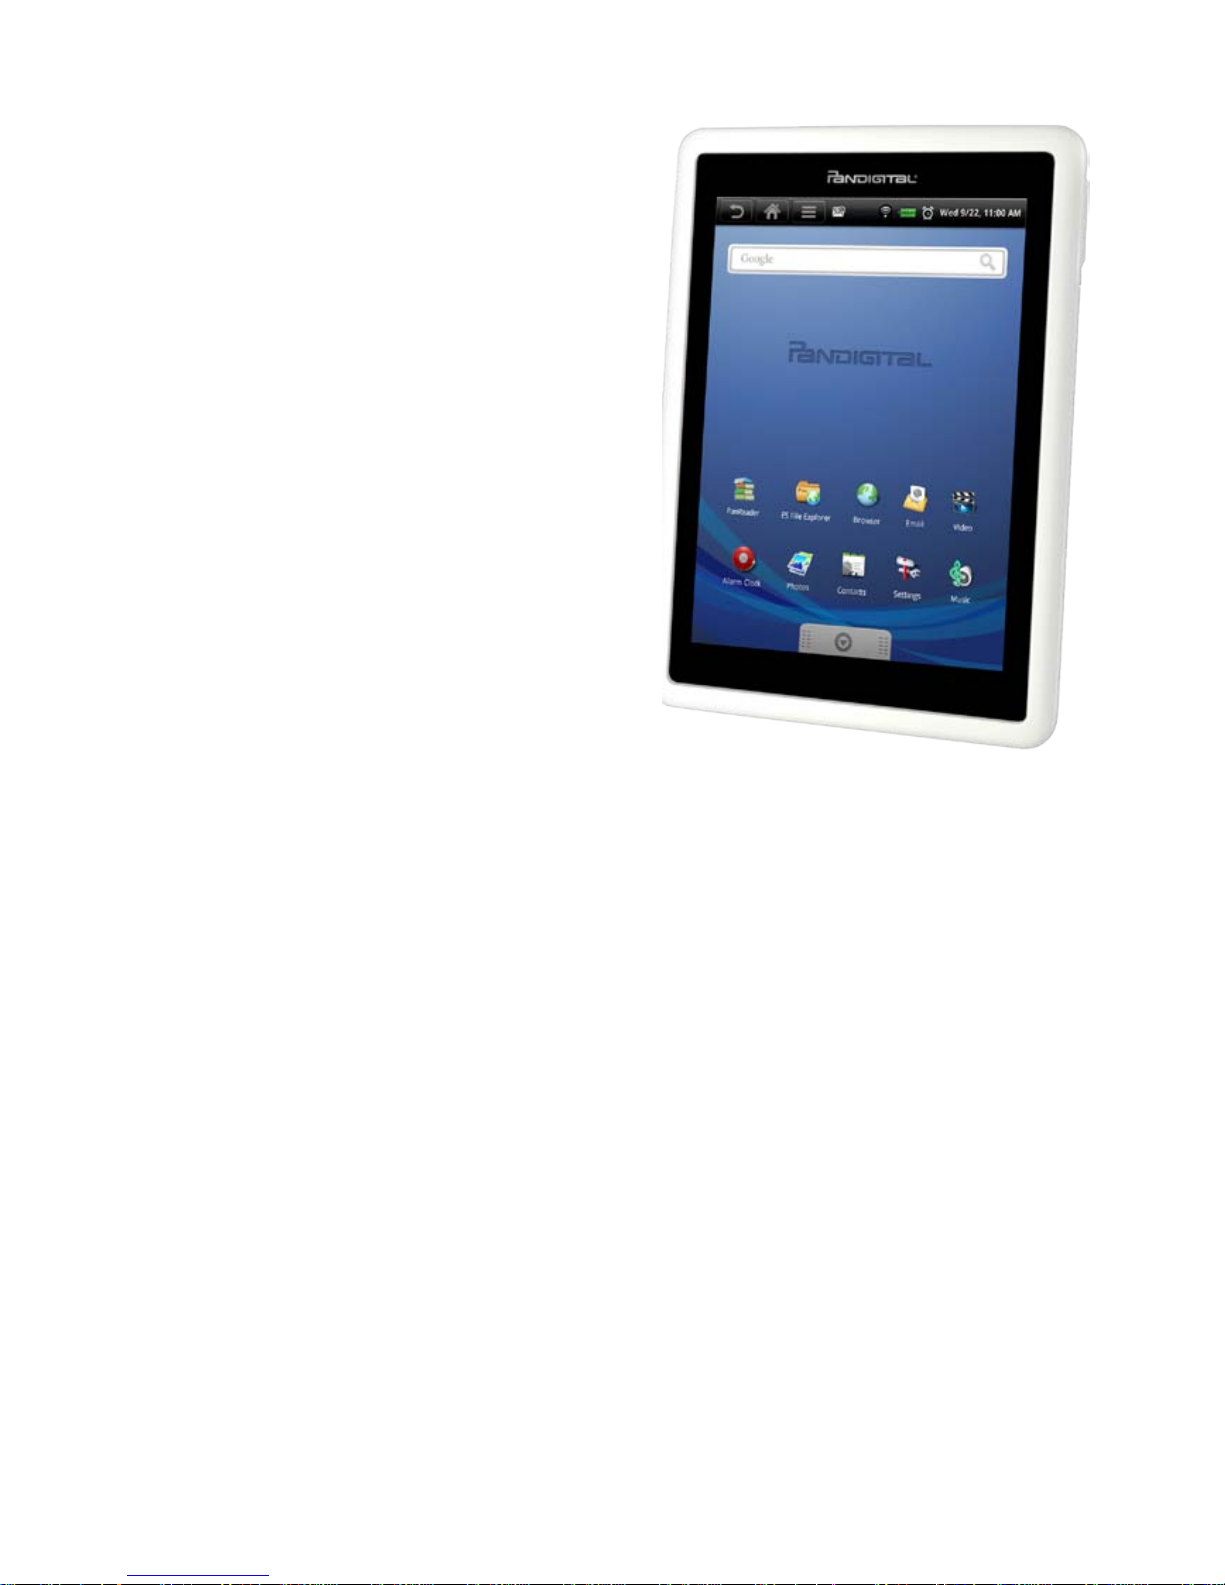
7” Color Multimedia eReader
A contemporary multimedia device designed for straightforward
functionality, featuring a full color TFT LCD disp la y and convenient
touch-screen navigation.
Your eReader is an AndroidTM open platform device, allowing you to
download third party Android
TM
applications as desired.
It comes pre-bundled with an eBook reader, web browser, email program,
photo viewer, video player, music player, and much more!
FUN. EASY. EXPANDABLE.
Your eReader is a step up in multimedia devices.
Congratulations on your choice!
Page 8

8
Package Contents
7” Color Multimedia eReader
Power Adapter
Tabletop Stand
USB Cable
Quick Start Guide
User Guide (loaded in device )
Covers for your eReader
Dress up your eReader and keep it safe at the sam e time. Designed for p rotection,
these stylish covers saf eguard the device while still letting you use it.
Available in multiple c ol or s. Sold separately wherever Pandigital eReaders are sold,
or on our website:
www.pandigital.net.
Portfolio Case
Gel Cover
Note: The application layo ut on screen shown here is f or example only and may differ
from your device.
with
magnetic
closure
Page 9
9
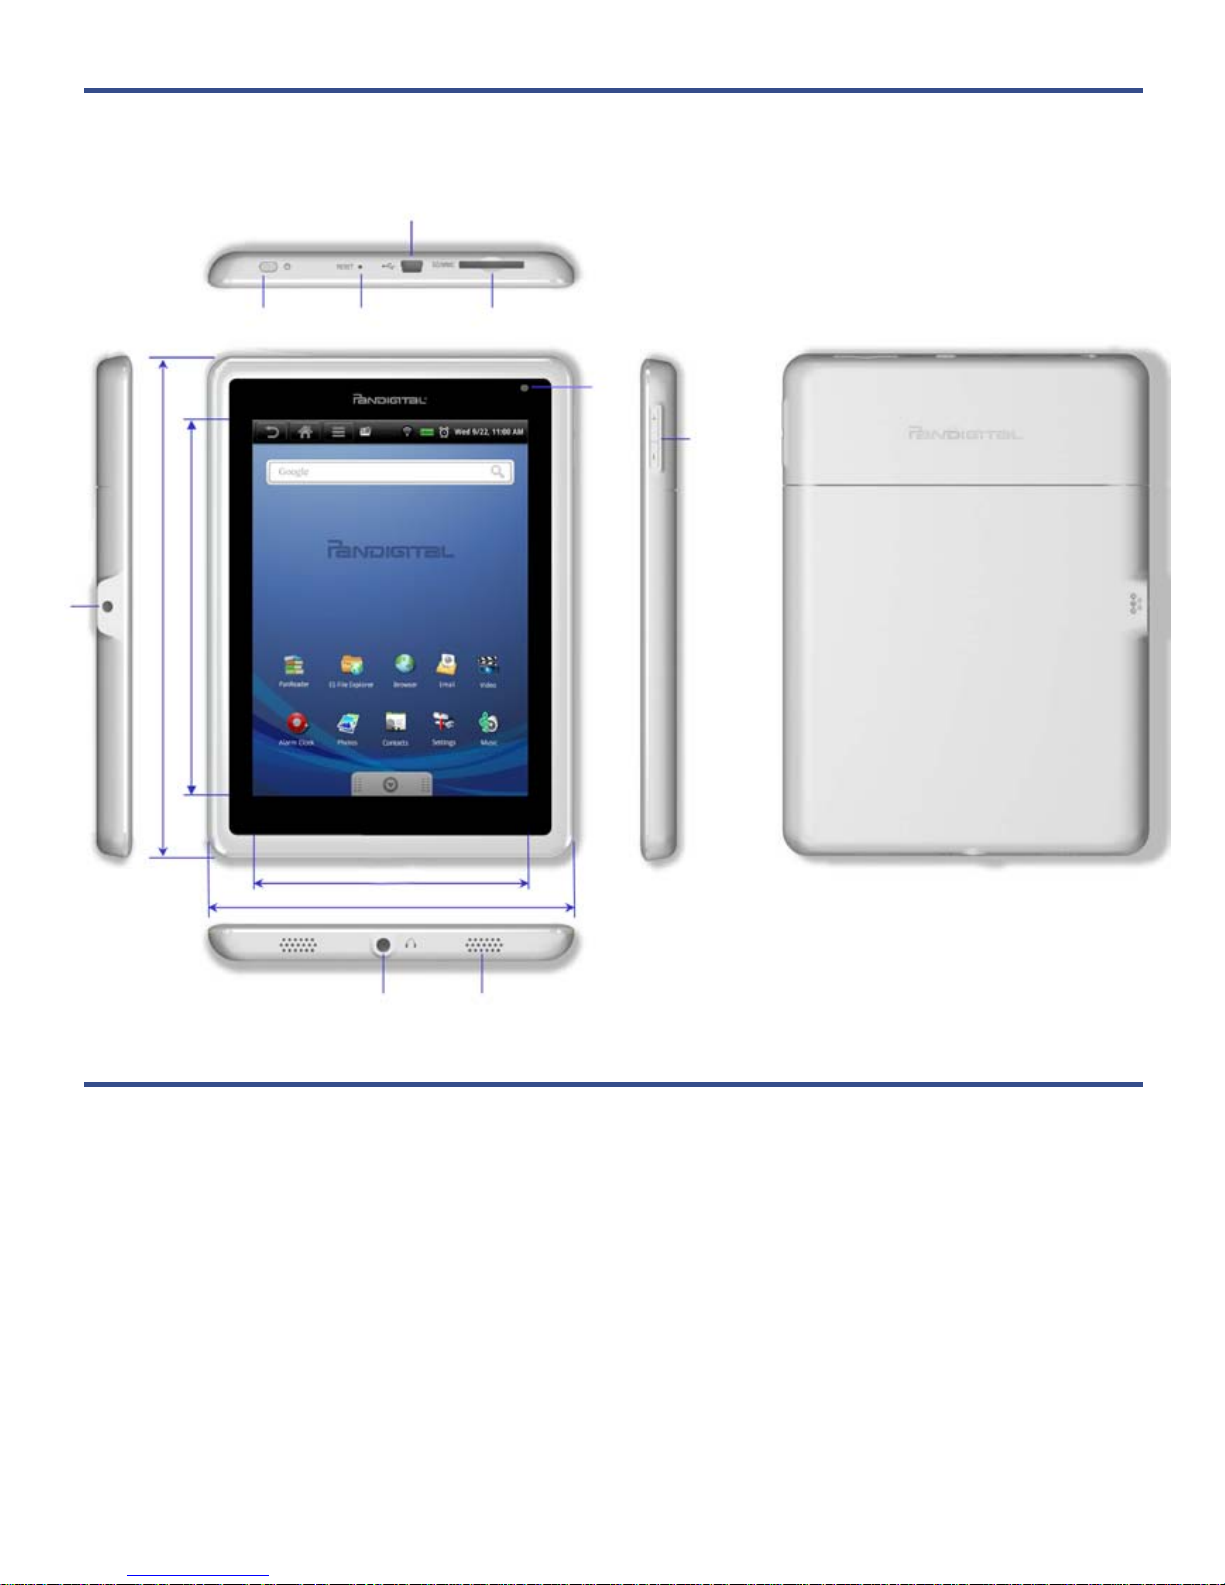
Device Overview
Power Button Usage
Turn On: Slide the power button on and rele ase .
Turn Off: Slide and hold the power button for 3 seconds.
Sleep Mode On/Off (energy saver): Slide & release the power button quickly to turn
sleep mode on and off. When in sleep mode, the Wi-Fi disconnects from the
local network, but will automatically reconnect when out of sleep mode (may
take up to 30 seconds to reconnect).
Mini USB
2 in 1 card slot
Reset
Power button
Earphone jack Speaker holes
Volume
button
Light
sensor
DC
jack
4.2”
5.6”
7.5” 5.6”
Page 10
10
Touch-Screen Navigation
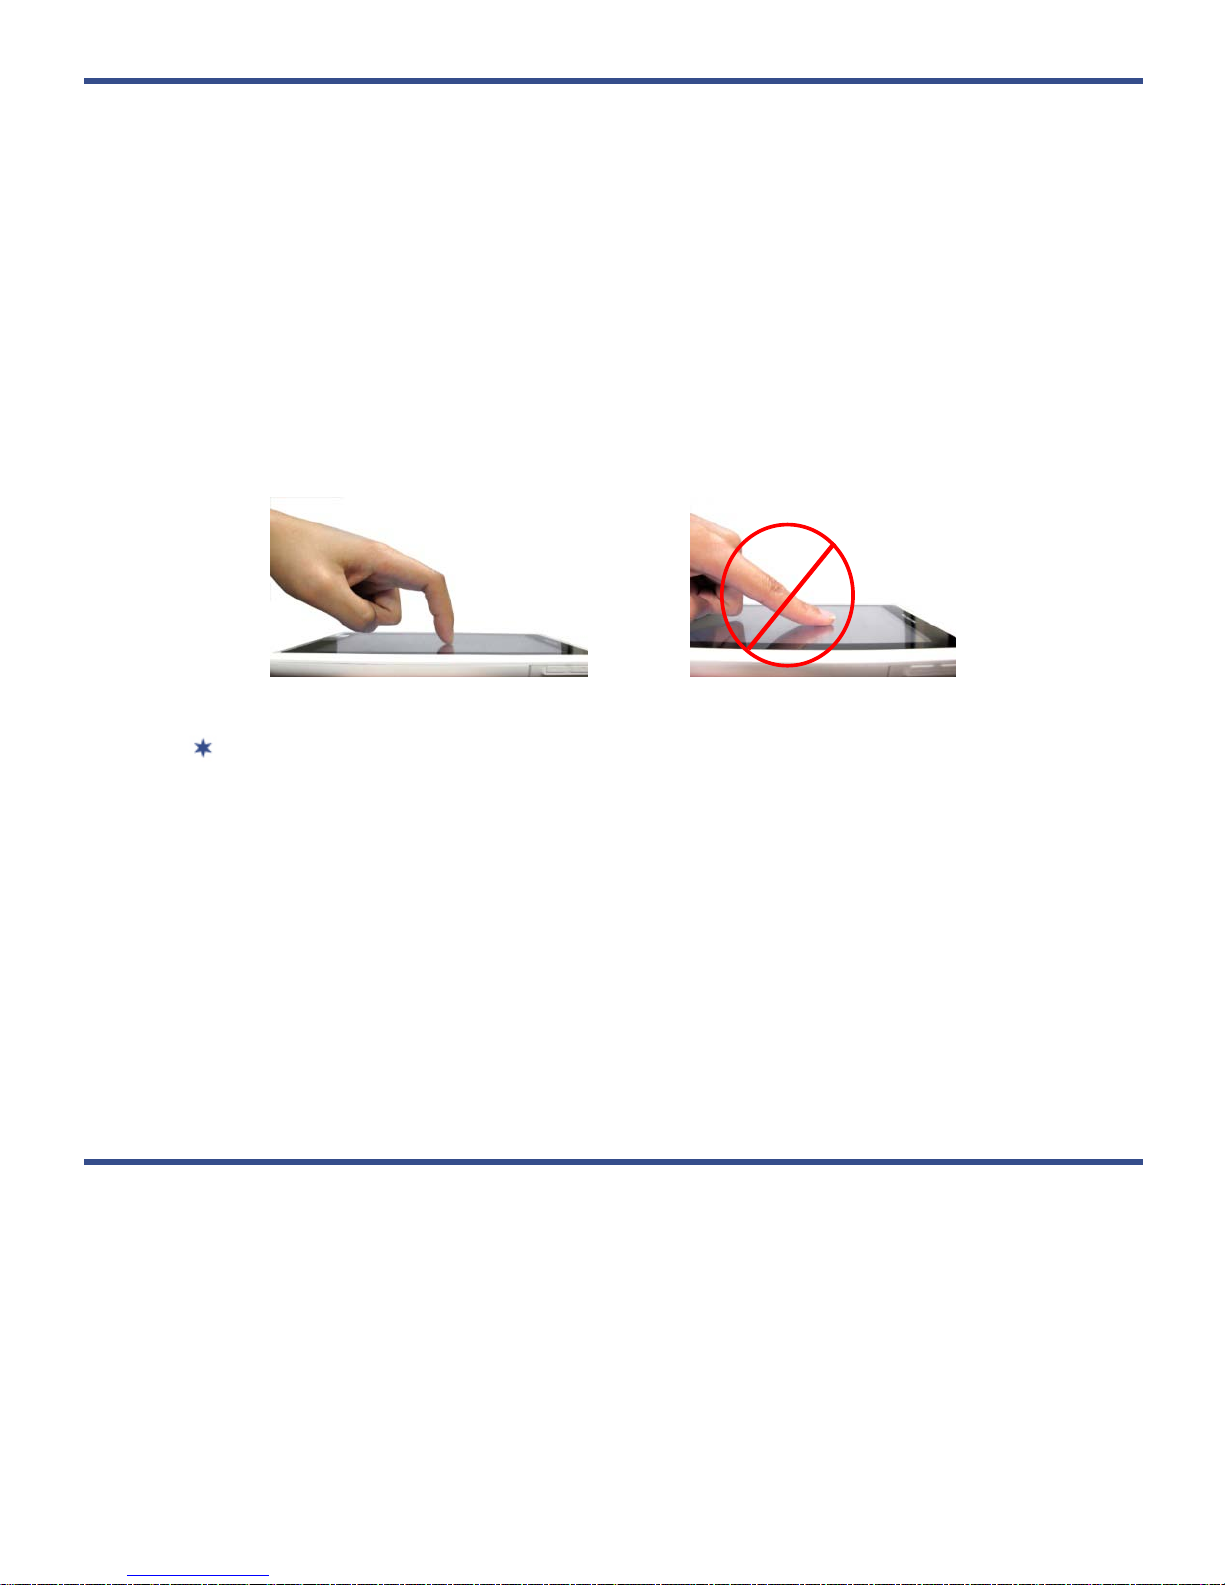
The touch-screen allows for quick, easy and conve ni ent navigation for all applications.
The eReader has a “resi stive touch” screen which responds best to a hard pointed
object or the tip of your fingernail, as opposed t o a tap of the soft skin of an
outstretched fingertip. Curl your finger over so that the tip of your fingernai l is used.
The fingernail's hard, cur ved surface contacts t he screen at one small point.
Therefore, much less finger pressure is needed, much greater precision is possible
(approaching that of a stylus, with a little exp er i ence), much less skin oil i s smeared
onto the screen, and the fingernail can be silently moved across the screen with very
little resistance.
The smaller the point that comes in contact with the screen , the more precise
object selection can be. If you do not have long enough finger nails to be
used for precise tapping, we recommend using a styl us or non-sharp pointed
instrument to increase the precision of navigation.
Throughout the User Guide, you are instructed to use the following tap or touch
navigation methods:
Tap - quick tap & release on a n item on the screen.
Finger slide - touch & slide your finger across the screen and then release.
Touch & hold = touch and hold in place approx 2 seconds, and then relea se to
display an options window.
Reset Device
If the device freezes and does not respond to your touch, reset by inserting a paper
clip into the reset hole at t he top of the device.
Page 11

11
Getting Started
NOTE: If you tap an applicat ion icon or a function but ton multiple times without
waiting for the process to fi nish, a message may appear stating the application is
busy now. Select
Force close to stop the process, or select Wait to allow the
process to finish.
1. Charge the device
You cannot charge the battery using the the USB cable.
You can use the device while the battery is charging.
Plug the power adapter i nto an electrical wall outlet, and then connect to t he
device to fully charge the battery before use (approx. 4 hours).
While charging, the bat tery icon displays as:
. When fully charged, t he battery
icon displays as:
.
2. Turn the device on
Slide the power button and release to turn on.
3. Select Language
Select your desired language.
4. Set Date & Time
1. Tap Select time zone select the correct time zone for yo ur location.
(Finger slide vertically to scroll the list.) The date and time should
automatically update to t he correct setting, but if they do not, tap
Set date
and/or Set time to update accordingl y.
2. Tap to display the Home screen.
5. Wi-Fi Network Setup
Since many features requir e a Wi-Fi connection, we recommend you set up your
Wi-Fi network now.
1. Tap the Settings application icon.
2. Tap
Wireless & networks.
3. Make sure Wi-Fi is on.
The device automatically scans and lists all local Wi-Fi Networks foun d. A
indicates secure networks that require login name and password to connect.
Page 12

12
4. Tap the desired network to which you want to connect enter the Network
Password if applicable tap Connect.
5. Tap
to return to the Home screen.
If your Wi-Fi network is set as hidden, it won’t be found by the auto scan. Tap
Add Wi-Fi network and follow the prompts to add your network.
The Wi-Fi icon on the top of screens i ndicates the status as f oll ows:
= Connected = Not connected, Wi-Fi turned ON
= Not connected and Wi-Fi turned OFF (power saver)
When the device goes into sleep mode, the Wi-Fi disconnects from the
local network, but will automatically reconnect when out of sleep mode
(may take up to 30 seconds to reconnect).
Connecting to Public Wi-Fi Hotspot
If you are connecting via a public Wi-Fi hotspot, it may be necessary to
immediately launch the browser and provide t he hotspot login information prior
to having an active internet connection.
1. Follow steps 1-5 above to select the hotspot Wi-Fi network.
2. Tap the
Browser application icon.
3. Enter the hotspot login information.
Page 13

13
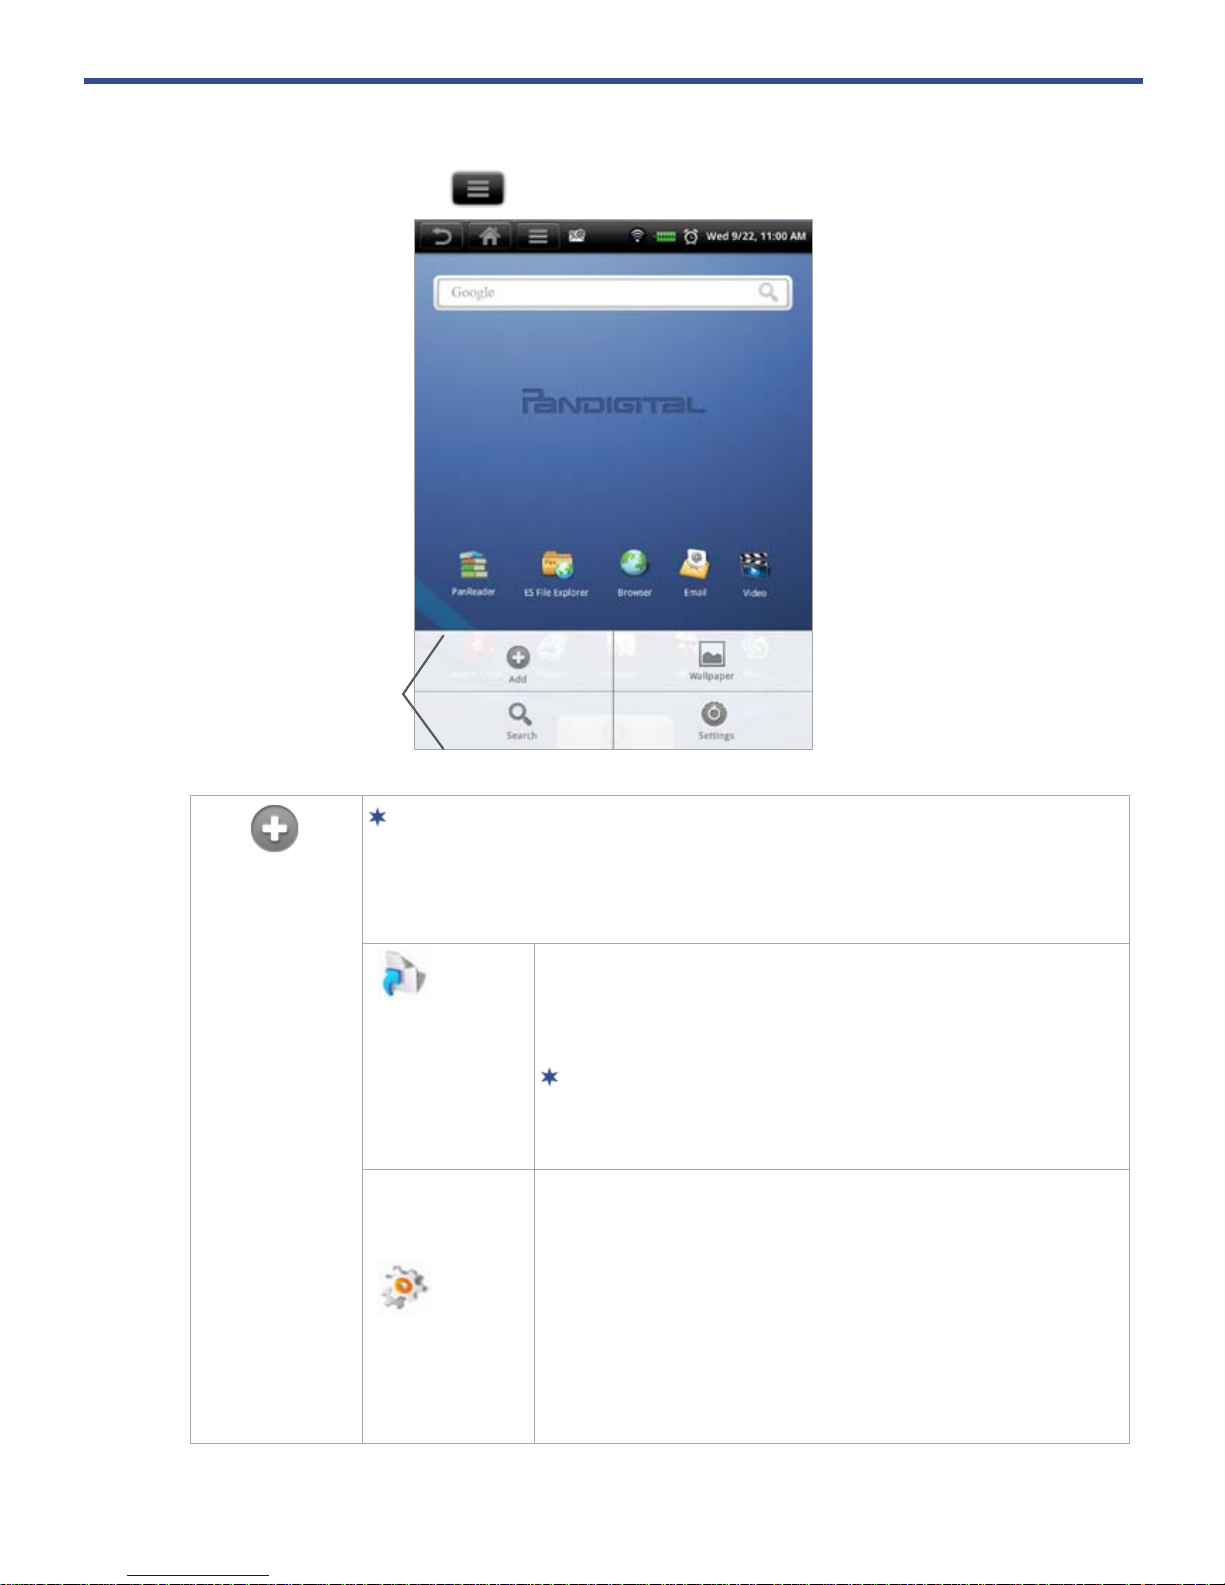
Home Screen
Return t o pr evious screens or
close pop-up windows.
Return t o Home screen at any
time, in any application.
Display Application Function
Menu
(available options are
based on active application).
Nofification icons
(i.e., Email, SD card)
Wi-Fi connection status
Battery charge level status
Alarm(s) are activated
Current Date & Time
W i dgets and Shortcuts can be
added to the Home screen.
Touch & hold in an empty spot
to display the menu for ad ding
application shortcuts, widgets,
and so on. (Tap
to close
the option pop-up window.).
Tap or finger slide up to view all applications.
Tap on any application ic on to launch it.
Touch, hold and slide icons to reposition them on the screen.
Touch, hold and slide icons onto to remove them from the
Home
screen.
To view extensions of the Home screen, finger slide the screen horizontally.
Page 14
14
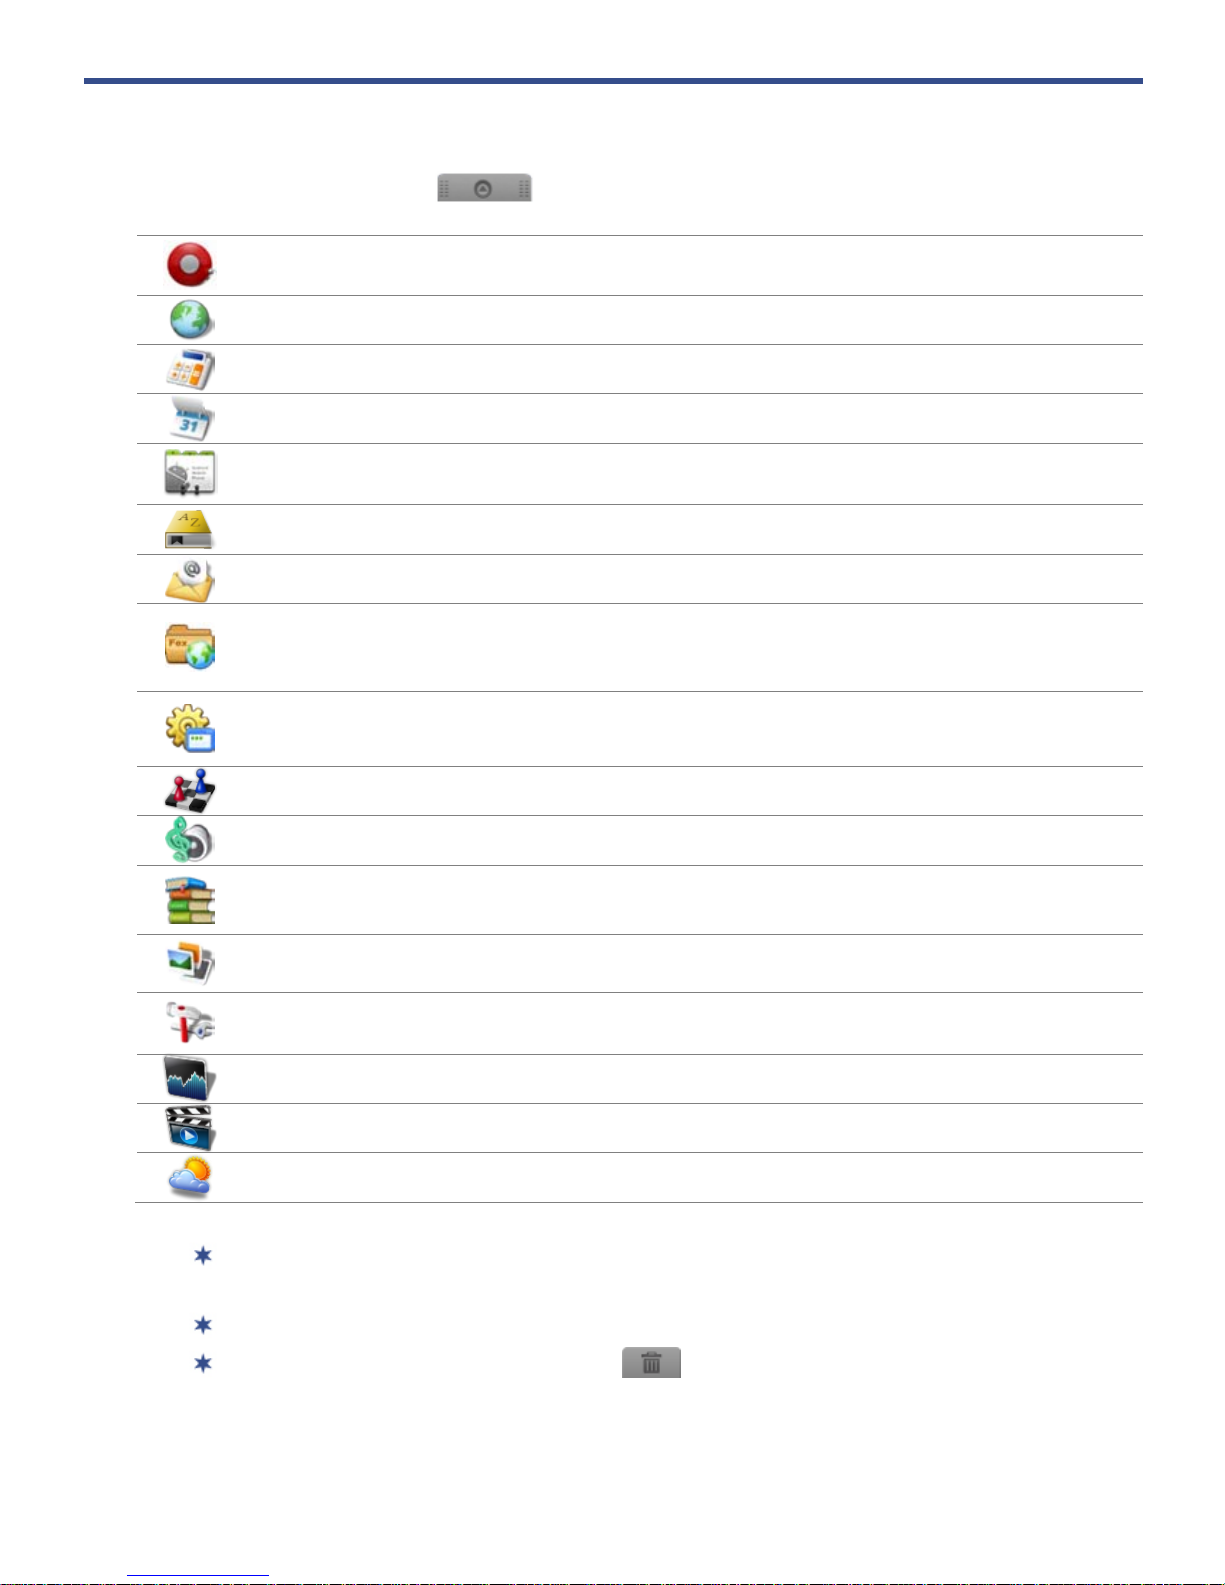
Pre-loaded Applications
Tap or finger slide up on to access all applications.
Alarm
Clock
Use as alarm clock with scheduled alarms.
Browser
Access the Internet and ‘sur f the web’ whenever desired.
Calculator
Use the calculator for basi c math equations.
Calendar
Display monthly calendar and schedule events.
Contacts
Create a list of personal contacts, which can be linked with
your email.
Dictionary
Quick access to the built-i n dictionary.
Email
Send/Receive email using your existing emai l addresses.
ES File
Explorer
Use to install AndroidTM apps, view and manage f i les and
apps, and to backup files to your SD card.
ES Task
Manager
Use ES Task Manager to kill applications after you exit
them to free up resources.
Games
Play pre-loaded games for entertainment.
Music
Play and manage audio f i les (MP3, WAV and AAC).
PanReader
Use to access Bookstores, download eBooks, and view
eBooks in
My Library (EPUB and PDF).
Photos
View and manage photo files (JPG, JPEG, BMP, PNG and
non-animated GIF).
Settings
Multiple settings for personalizing and enhan cing the
device.
Stocks
Check the status of specif i c company’s stock offerings.
Video
Play and manage video files (MPEG4).
Weather
Check the weather forecasts of locations of your choi ce .
To move an icon to the Home screen, touch & hold on the icon, and then
release it when it appears on the
Home screen.
Touch, hold, and then slide i cons to reposition them on the screen.
Touch, hold and slide icons onto to remove them from the
Home
screen.
Page 15
15
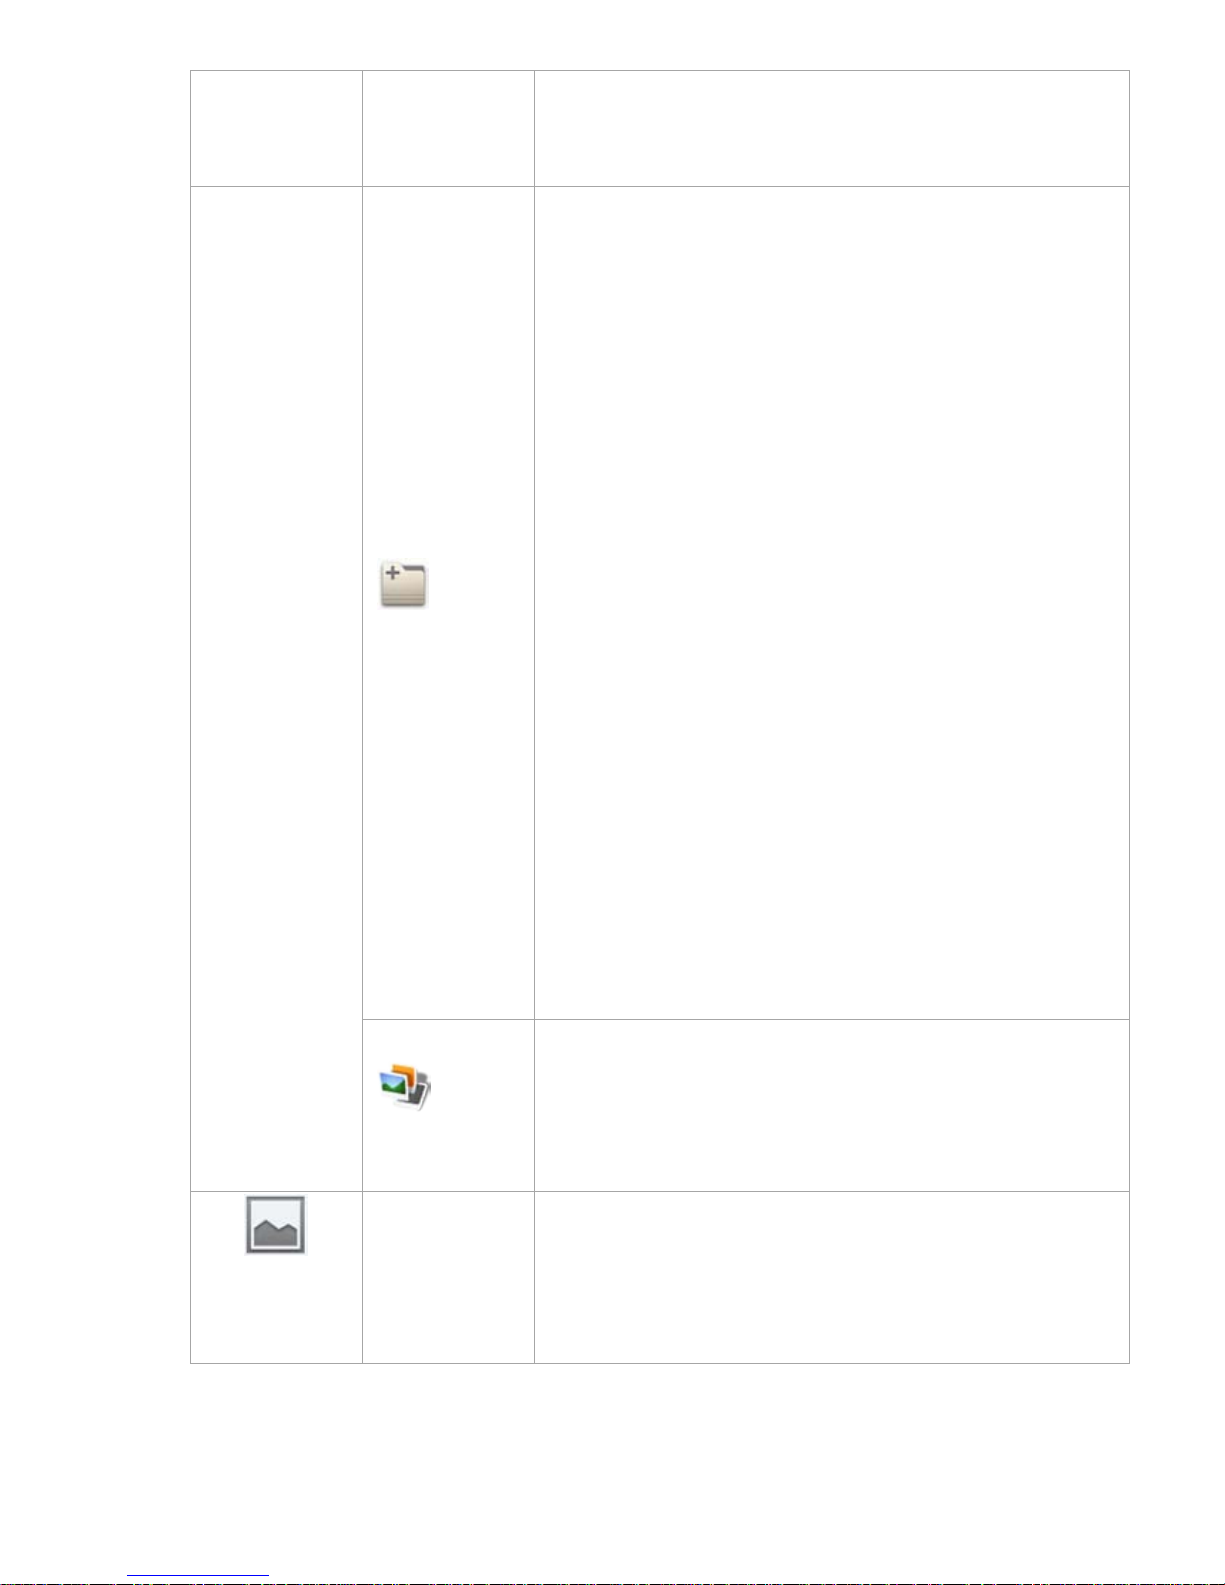
Application Function Menu
On the Home screen, tap to display the Application Function Menu.
Add
The viewable portion of the Home screen allows only 20
icons. In order to add more items, finger slide the screen
horizontally to expose available space, and then tap the
Add button again.
Shortcuts
Add quick launch shortcuts on the Home
screen to applications , bo okmarks, contacts, or
music playlist.
If you select items that are shortcuts already
on the Home screen, they will be duplicated,
resulting in multiple icons for the same item.
Widgets
Analog clock
Add a round analog clock.
Music Add a music widget to quickly begin
playing music without launching the music
application.
Power Control Add control panels for quickly
connecting to your Wi-F i network and screen
brightness.
Application Function Menu
Page 16
16
Search Add a Google Search widget for
performing quick Google searches without
launching the Web application.
Folders
New folder
Add a folder into which you can
add applications as desir ed. To move
applications on the
Home screen into the
folder, touch, hold & drag the icons directly on
top of the folder icon.
To add applications from the
Launcher screen,
first tap on the folder to open it, open the
Launcher, and then touch & hold on an
application icon. It is copied into the folder.
When you close the folder the first time, you are
prompted to rename the folder as desired (i.e.,
Favorites). If you want t o rename the folder
later, open the folder and touch & hold on the
folder name at the top. The
Rename folder
window appears.
All contacts Add a folder containing the
complete contact list from the
Contacts
application.
Contacts with phone numbers Add a folder
containing a list of your contacts that include
phone numbers.
Starred contacts Add a folder containing the
list of contacts you’ve m ar ked as favorites.
Wallpapers
Assign a different photo as your background
image.
Select desired photo from pr eloaded photos,
tap Set wallpaper.
Wallpaper
Assign a different photo as your background
image.
Select desired photo from pr eloaded photos,
tap Set wallpaper.
Page 17
17
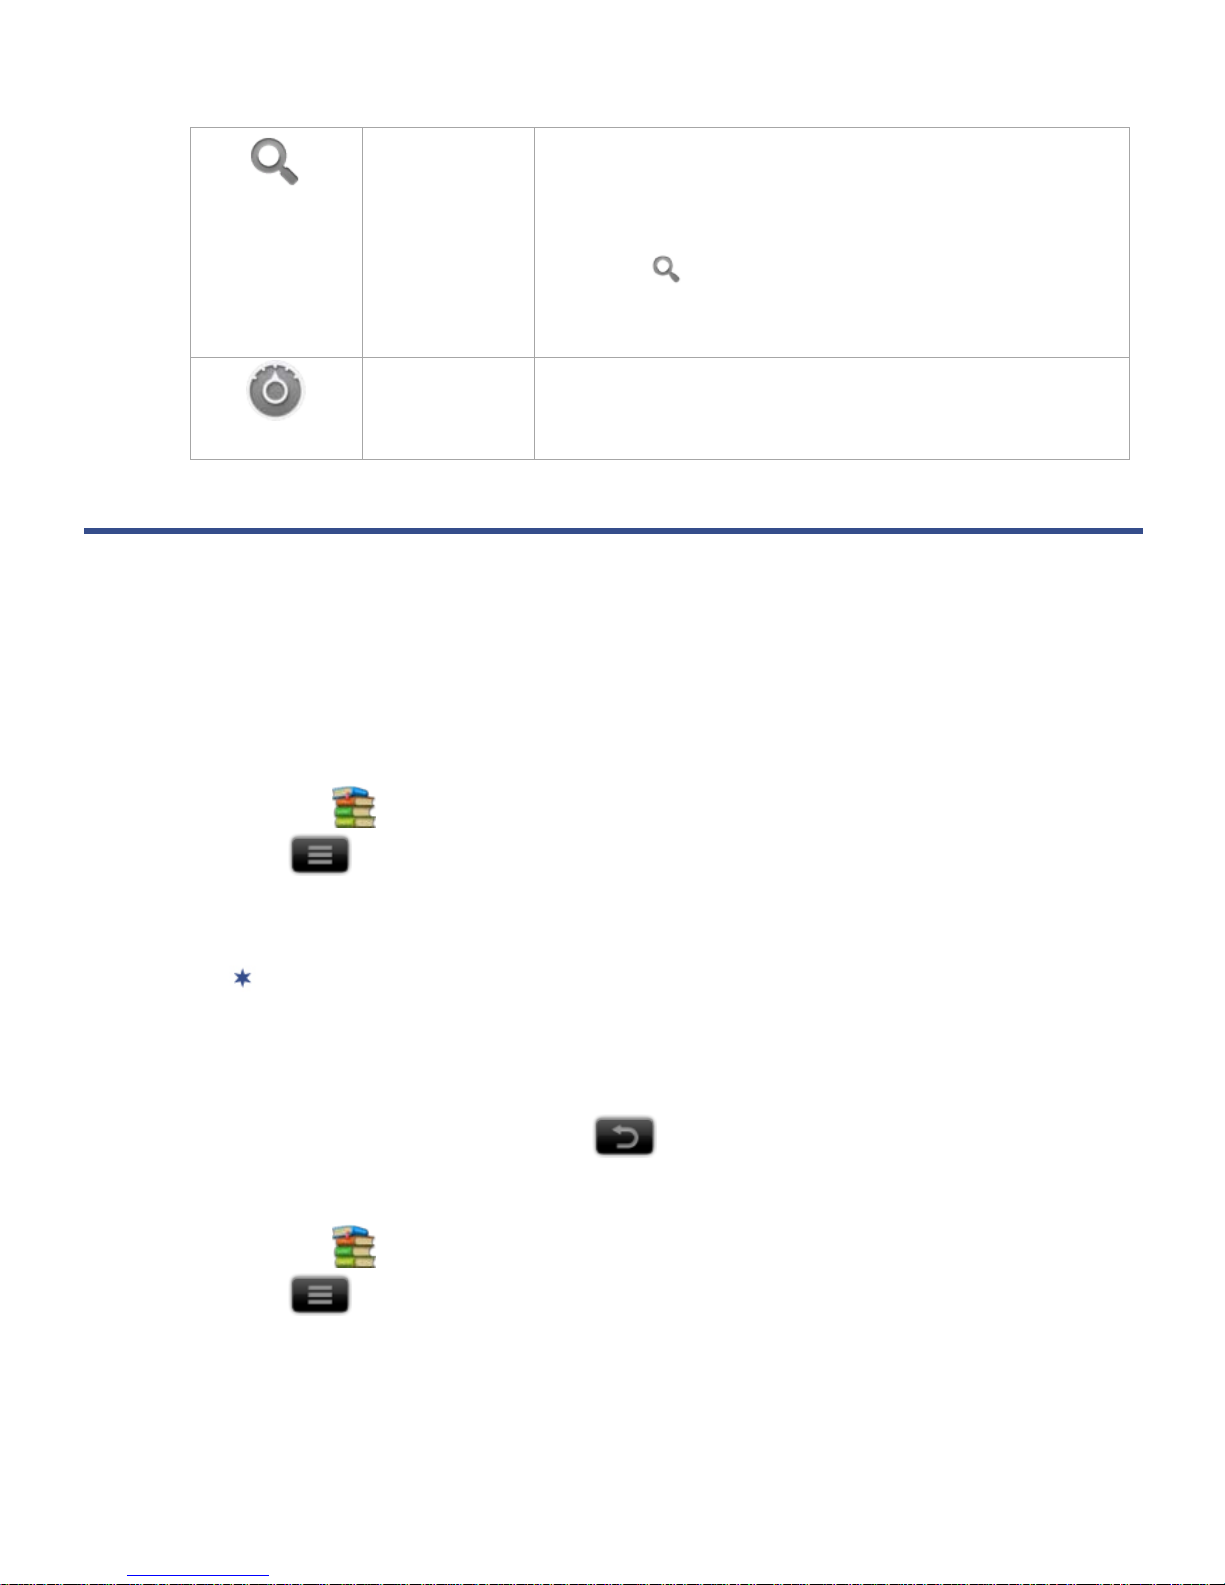
Search
Perform a quick Google search.
1. Tap in the entry field
enter the desired
search text.
2. Tap .
The browser launches an d displays your search
results
Settings
See “Settings” on page 47.
ADOBE ACCOUNT
In order to purchase, download and open Libris eBooks, you must regist er an account
with Adobe, and then activate your device with your Adobe account.
If you already have an Adobe account, skip to
Activate your Device with Adobe.
Register New Adobe Account
1. Tap the PanReader application icon.
2. Tap Settings tap Register Adobe ID.
3. Tap
Continue on the “Security warning” pop-up messa ge.
4. The browser launches and opens the
Adobe Sign In web page.
To zoom in on the page, finger slide o n the screen to display the zoom
buttons.
5. Tap
Create an Adobe Account.
6. Enter your information to create a new account.
7. When finished registering, tap
to retur n to previous screens.
Activate your Device with Adobe
1. Tap the PanReader application icon.
2. Tap
Settings tap Device activation.
3. Tap in the
Adobe ID entry field enter your ID tap Next.
4. Enter your Password
tap Activate.
5. Tap Close on the Activation successful message.
Page 18

18
If you attempt to open a book but an error message states the book cannot be
opened, it may be an expired book or the activation recor d has been erased.
Re-start your eReader and t hen re-activate the author ization.
ALARM CLOCK
You can use your eReader as an alarm clock by setting multiple alarms.
This clock icon displayed at the top of screens indicates that one or more
alarms have been set and are active.
Add Alarm
1. Tap the Alarm Clock application icon.
2. Tap
Add Alarm.
3. Set up your alarm as desire d.
If you don’t select a repeat, the alarm is automatically deleted after it is
activated.
4. Tap
Done.
Shut Off Alarm Alert
When a scheduled alarm is a ctivated, a pop-up window with the alarm title
appears.
Tap
Snooze if you want to be reminded again in 10 mi nutes.
Tap Dismiss to cancel t he alert.
De-Activate Alarms
On alarms that you have set to repeat, you may want to temporarily deactivate alarms rather than delete them.
1. In the Alarm screen, tap on the alar m (s) you want to de-activate.
2. Tap
to re-activate.
Edit Alarm
1. Tap the Alarm Clock application icon.
2. Tap on the alarm you want to edit ,
make desired edits.
3. Tap Done.
Page 19

19
Delete Alarm
1. Tap the Alarm Clock application icon.
2. Tap on the alarm you want to delete.
3. Tap Delete Alarm.
BROWSER
Use the web browser to ‘surf the web’ and visit your favorite websites.
The Browser feature requires a connection to a Wi-Fi network. If you have not set
up your Wi-Fi network, do so now using the instructions on page 51.
Go to a Website
1. Tap the Browser application icon to launch the internet browser.
2. To go to a new website, tap in the URL entry field, and then enter the desired
website.
If t he U RL entry field isn’t visible, tap to display it.
3. Tap Go.
Browser
Function Menu
Page 20
20
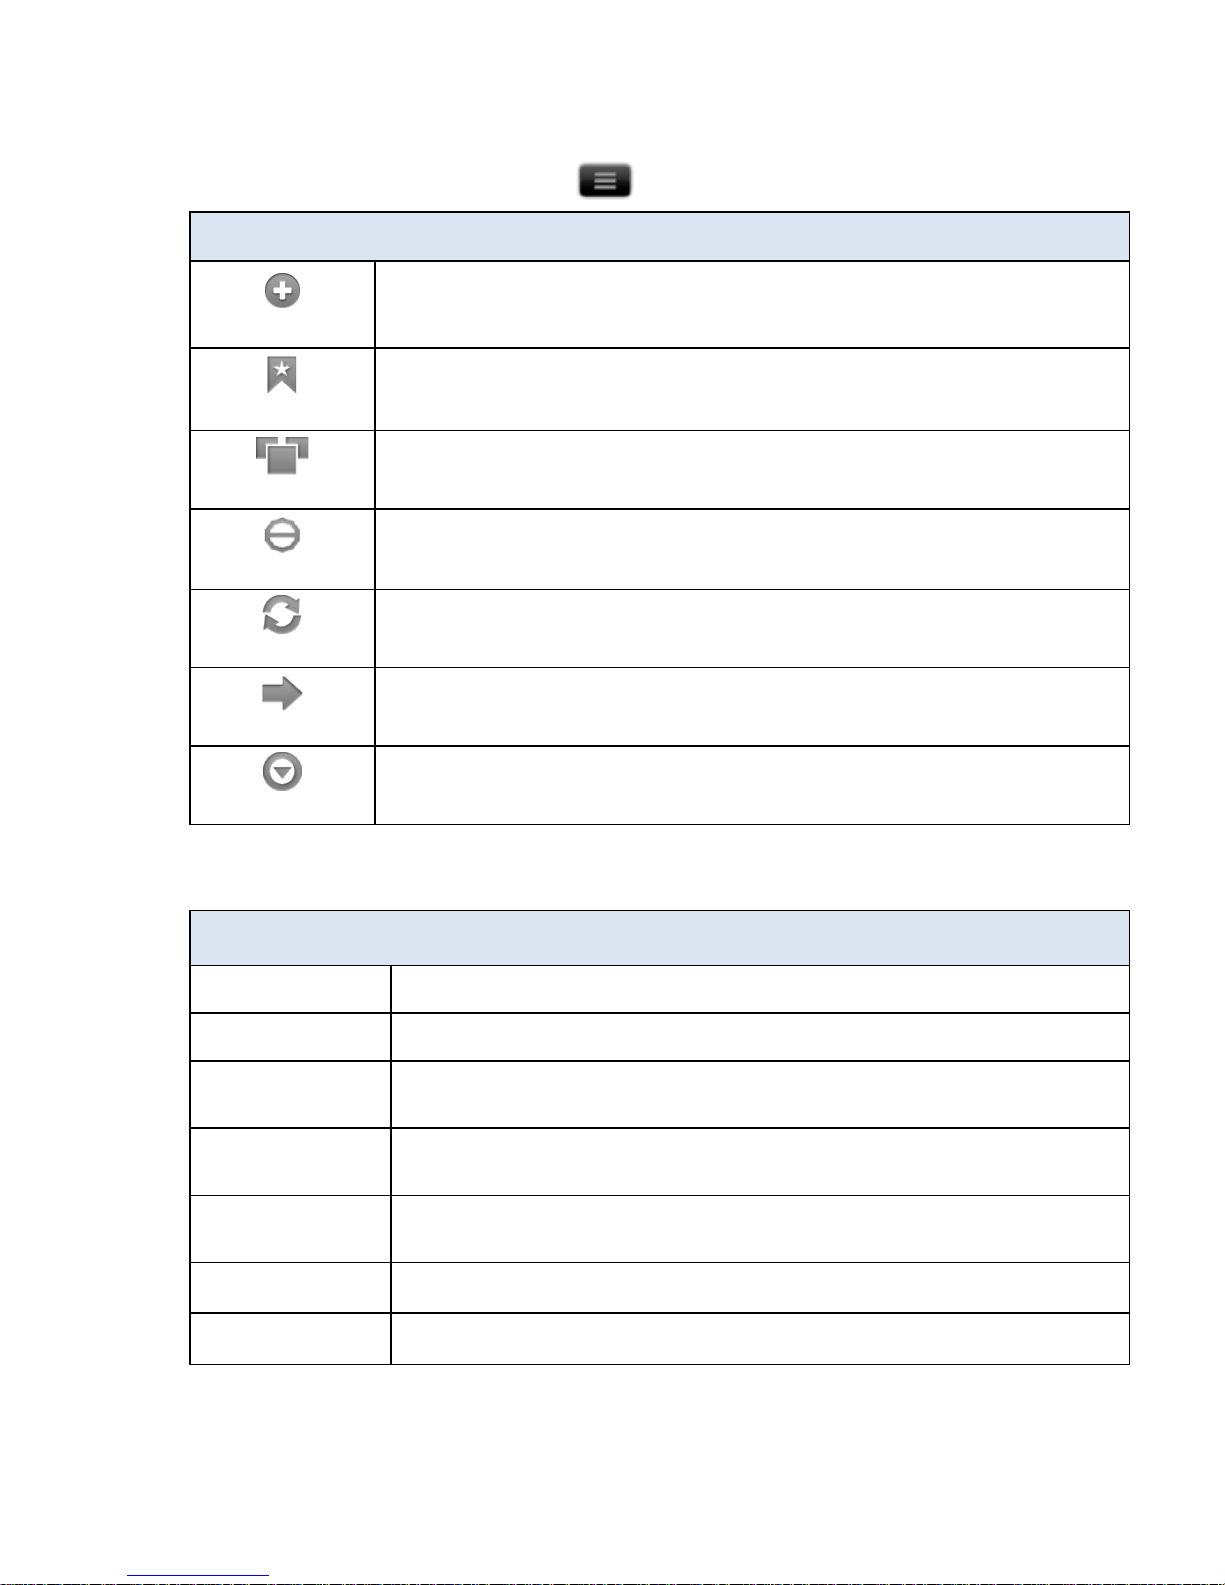
Browser Function Menu
In an open browser window, tap to display the Browser Function Menu.
Functions
New Window
Open a new browser window.
Bookmarks
Bookmark currently displayed web page, access list of all
bookmarks, and manage bookmarks.
Windows
View open browser windows. You can have up to 8 browser
windows open at a time.
Stop
(Displays only when web page is in process of loading into browser)
Refreshes the screen by re-loading the current web page.
Refresh
(Displays only after web page is completely loaded in browser)
Tap to refresh the screen by re-loading the current web page.
Forward
Re-display previously viewed web page.
More
Display
Menu page 2.
Menu page 2
Functions
Add bookmark Bookmark currently open webpage.
Find on page Search for string of text on the current web page.
Select text
Select text on the current web page and paste into web or other
application entry fields.
Page info
View information including the web address of currently viewed
page.
Share page
Send the URL address of the webpage you are viewing to others
via email.
Downloads Cancel or clear browser download history.
Settings Set multiple browser settings as desired.
Page 21

21
Browser Bookmarks
Bookmarked web pages can be quickly launched to re-visit at any time.
Bookmark a Web Page
1. In an open browser window, tap Bookmarks.
2. The existing pre-bookmarked web pages are listed.
3. Tap
Add.
4. If you want to rename the bookmark, tap in the
Name field and enter the
desired name.
5. Tap
OK.
Go to Bookmarked Web Page
1. In an open browser window, tap tap Bookmarks.
2. In the Bookmarks window, tap on the desired web p age. The browser
displays the selected web page.
Manage Bookmarks
1. In an open browser window, tap Bookmarks.
2. In the
Bookmarks window, touch & hold on a bookmark to display a
Bookmark options menu.
Open Bookmarked page
1. To open web page in same browser window, tap Open.
2. To open web page in new browser window, tap Open in new window.
Edit Bookmark
Tap
Edit bookmark make desired edits to the Name and Location
address OK.
Add Shortcut to Home Screen
Tap
Add shortcut to Home to quickly add a shortcut to the bookmarked web
page on the Home screen.
Share Link
Tap
Share link to email a bookmarked web page’s URL address to
someone. The email Compose window immediately opens with the URL
already listed in the bo dy of the message.
Page 22

22
Copy & Paste URL
Tap
Copy link URL to copy the bookmarked web page’s URL so you can
paste it into an applicati on’ s entry field. To past e, touch & hold in the entry
field to display a pop-up menu
tap Paste.
Delete Bookmark
1. Tap Delete bookmark.
2. Tap
OK to confirm deletion.
Set as homepage
When selected, the web pa ge that you touched & held to launch the
Bookmark options menu is set as the browser homepage.
Windows
Up to the last 8 websites yo u have visited are cached and shown in the
Windows screen allowing you t o qui ckly return to them.
1. In an open browser window, tap
tap Windows to display the l ist
of open windows.
2. To display an existing open window, simply tap on it.
3. To open a new window, tap New window; the ne w wind ow opens
immediately.
4.
To close a window, tap .
When you’re in the Browser application, at least one wind ow must be
open, so if you close all windows, a new window automati ca lly opens to
your designated home web page.
Refresh
In an open browser window, tap tap Refresh to reload the current web
page.
More
Tap to display Menu page 2.
Add bookmark
See “Bookmark a Web Page” on page 21.
Page 23

23
Find on Page
You can search for a string of text within the currently displayed web page.
1. In an open browser window, tap
Find on page.
2. Tap in the entry field and begin entering character s. All matching text is
highlighted as you enter characters.
3. If you want to scroll thro ugh the matches, tap
.
4. Tap
to close the entry box and resume normal viewing.
Select Text
You can select the text of a webpage address on the web p age you’re viewing,
and then you can paste the text into web or other application entry fields.
1. On the browser window, tap
Select Text.
2. Touch, hold & slide your finger across the text you want to copy. The text is
copied to the clipboard.
3. Open an application wit h entry fields (i.e., emai l), touch & hold in the desired
entry field Paste from the pop-up win d o w.
Page info
1. On the browser window, tap Page info. The web page
information is displaye d in a pop-up wi n d ow.
2. Tap OK to close the pop-up window.
Downloads
As you download files fr om websites, the downlo ad history is recorded. You can
cancel downloads or clear the history through t his feature.
1. On the browser window, tap Downloads. If you’ve
downloaded files, t hey are listed.
2. Tap
for Download options:
Clear list and Cancel all downloads.
Settings
You can set browser settings to enhance your Internet br owsing.
On the browser window, tap
Settings.
Finger slide vertically to view all browser setting options.
Page content settings
Settings pertaining to viewing web pages.
Page 24

24
Privacy settings
Settings pertaining to your privacy level when viewing web pages.
Security settings
Settings pertaining to the security level when logging into secure web p ages.
Advanced settings
Reset to default (clears al l browser data and reset s to default settings)
CALCULATOR
Tap the
Calculator application icon to use for basic math equations (+, -, x,
÷)
.
CALENDAR
Tap the
Calendar application ico n.
The calendar screen is displayed in full month view. To change to a differe nt view, tap
and select desired view (Day, Week, Today).
Finger slide
vertically from
top or bottom to display
other months.
Green tabs in
dicate
scheduled events.
The shaded date
is current date.
Page 25

25
Add Event
1. On the Calendar screen, tap .
2. Tap
New Event.
3. Tap in each entry field to enter the desi r ed event informatio n tap Done.
4. Tap
to retur n to the Calendar screen or to return to the Home
screen.
Edit Event
1. On the Calendar screen, tap on the date with t he event you want to edit.
2. Tap on the event you want to change tap Edit event.
3. Make desired changes
tap Done.
4. Tap
or to return t o the Home screen.
Event Reminder Alerts
Single Reminder
If you assigned one event reminder, a pop-up alert appears before the eve nt
by the number of minutes you selected.
Tap
Snooze if you want t o be r eminded again in 5 minutes, or tap Dismiss to
cancel the alert.
Multiple Reminders
If you assigned multiple event reminders, the fi r st pop-up alert appears
before the event by the number of minutes you selected for the first
reminder.
Tap Dismiss to cancel t he first alert.
Subsequent pop-up alerts appear before the event by the number of minutes
you selected for each reminder.
Tap
Dismiss to cancel the alert.
If you tap Snooze, mul tiple alerts appear ever y 5 minutes until you tap
Dismiss.
Delete Events
1. On the Calendar screen, tap on the date with t he event you want to delete.
2. Tap on the event you want to delete tap Delete event.
3. Tap
OK to confirm delete.
Page 26

26
4. Tap or to return to the Home screen.
CONTACTS
You can create an address bo ok of your personal contacts, including personal notes
as desired.
Add New Contacts
1. Tap the Contacts application ico n.
2. Tap
New Contact.
3. Tap in the name fields to enter the contact’s first & last name.
4. Tap
at the right of options to reveal a ddi tional choices.
5. Tap on the option name to reveal choices.
6. Tap in the option entry fields to enter the contact’s information.
7. Tap Done.
Import/Export Contacts
You can import contacts from or export to a SD card.
The file format must be vCard.
1. Tap the Contacts application ico n.
2. Tap
Import/Export.
3. Select
Import or Export as desired.
4. If importing and multiple vCard files exist on the SD card, you’re prompted to
import all or select desired file.
Add Contact to Favorites
1. In the Contacts screen, tap on the desired contact name.
2. Tap
in the upper right corner.
3. Tap to return to the Contacts screen.
4. Tap
Favorites to view list of favorite contacts.
Edit Contacts
1. In the Contacts screen, tap on the desired contact name that you want to
edit.
Page 27

27
2. Tap Edit contact.
3. Make desired changes
tap Done.
Email Contacts
You must have a default email account set up before using this feature. If you
have not yet set up your account, do so now (pg. 28).
1. In the
Contacts screen, tap on the contact that you want to email.
2. Touch & hold on the contact
Send email.
3. Tap in the Subject and Compose Mail fields to enter your message.
4. Optionally, if you want to add Cc or B cc recipients
tap Add Cc/Bcc
enter the recipient’s email address.
5. Tap Send.
Delete Contacts
1. In the Contacts screen, touch & hold on the contact tap Delete contact.
OR
In the Contacts screen, tap on the contact you want to delete tap
tap Delete contact.
2. Tap OK to confirm the deletion.
DICTIONARY
The built-in dictionary allows you to quickly and conveniently look up the definition of
words, either within the media you are viewing or any other words.
1. Tap the
Dictionary application icon.
2. Tap in the word entry field. As you begi n to enter text, matching words appear.
3. Tap the desired word from the matchi ng word list; the definition appears and the
keyboard disappears.
4. Tap
New Search to clear the entry field and disp lay the keyboard again.
Page 28

28
EMAIL
POP3, SMTP and IMAP accounts are supported.
Add Email Accounts
You can enter one or more pe r sonal email addresses that you would like to
access through your eReader.
1. Tap the
Email application icon.
2. On the
Your Accounts screen, tap Next.
3. Tap in the Email address entry field enter your email address.
4. Tap in the Password entry field enter your email password.
5. Tap
Done.
6. Manual Setup (optional): The server settings are automatically populat ed
based on your email account provider (i.e., gmail.com, etc.). However, if
you need to change the server settings tap
Manual Setup and make
necessary changes.
7. Tap
Next.
8. Optional: Enter a name for the account.
9. Enter name for outgoing messages
tap Done.
After setup, if you are unable to connect to a free email account, check with
your email provider to make sure their servers suppor t free accounts on Post
Office Protocol (POP) or Simple Mail Transfer Protocol (SMTP).
Set up Yahoo! Plus Account
The eReader does not support free Yahoo email accounts.
Yahoo! Plus accounts must use the following data when setting up your
email account.
Incoming Mail Server Settings
POP server: plus.pop.mail.yahoo.com
Use SSL
Port: 995
Outgoing Mail Server Set tings
SMTP server: plus.smtp.mail.yahoo.com
Use SSL
Port: 465
Page 29

29
Use Authentication
Account Name/Login Nam e: Your Yahoo! Mail ID (your email address
without the “@yahoo.com” , for example “testing80” )
Email Address: Your Yahoo! Mail address (for example,
testing80@yahoo.com)
Password: Your Yahoo! Mail password
Set up Juno Platinum or Turbo Account
The eReader does not support free Juno email accounts.
Platinum or Turbo Juno accounts must use the following data when setting
up your email account.
Incoming Mail Server Settings
POP server: pop.juno.co mnovel
Outgoing Mail Server Set tings
SMTP server: authsmtp.juno.com
Email Inbox
1. Tap the Email application icon.
2. If you set up only one email account, it opens immediately. If you set up
multiple accounts, they are listed in the
Accounts screen.
3. Tap on the desired email account
tap Inbox.
Open Email Message
1. On the Inbox screen, tap on an email to open it.
2. For attachments, tap
Open to launch appropriate application, or tap Save
to save attachment to a SD ca r d.
Attachments can only be saved directly to a SD card.
Attachments must be of a supported format in order to be opened in
your eReader.
3. To reply, tap
Reply or Reply all.
a. Tap in the Compose Mail entry field to enter your reply message.
b. Tap
Send to send immediately, Save as draft to save without sending,
or Discard to discard without sa ving or sending.
4. To delete the email immediately, tap Delete.
Compose New Email Message
1. On the Inbox screen, tap tap Compose.
2. Tap in the
To entry field and then enter the recipient’s email address.
Page 30

30
3. Optionally, if you want to add Cc or Bcc recipients, tap tap Add
Cc/Bcc
enter the recipient’s emai l address.
4. Tap in the Subject entry field to enter your desi r ed subject title.
5. Tap in the Compose Mail area to enter your personal message.
6. If desired, tap
tap Add Attachment to attach a file.
7. When ready to send the emai l, tap
Send.
Edit Email Account
1. Tap the Email application icon.
2. On the Inbox screen, tap Account settings.
3. Set your desired preferences to customize your email account.
4. Tap to return to the Inbox screen.
Delete Email Accounts
If you have multiple accounts, and you delete the account designated as the
default account, the next email listed is automatica l ly set as the default.
1. Tap the
Email application icon.
2. On the
Inbox screen, tap Accounts.
3. Touch & hold on the account you want to del ete.
4. In the pop-up Account options window, tap Remove account.
5. Tap OK to confirm the deletion.
Set Default Email Account
You must always have one account designated as the default account, so if you
have multiple email accounts, you can select an y one as the default.
1. Tap the Email application icon.
2. On the
Inbox screen, tap Account Settings.
3. Tap
Default Account to select it.
If you delete the account that was designated as the default account, the next
email listed is automatically designated as the def ault.
Page 31

31
ES FILE EXPLORER
Use the ES File Explorer to view the files in the internal memory or on your SD card,
and to quickly & easily install AndroidTM application on your eReader.
There are many interesting and free Android applications that can be found on
the web. Just launch your web browser and do a search for “Android
applications”.
If your third par ty application causes the top function menu buttons
to disappear, press the
Volume button on the side of the devic e to re-
display them. However, some applications may d esignate the volume button for
other functions, and you may need to shut the devic e off in order to exit the
application.
ES File Explorer is a third party application designed for phones. References to
phones and multiple features are not applicable to this device.
View the ES File Explorer User Manual
1. Tap to launch the ES File Explorer application.
2. Tap on the system status bar to display option buttons.
3. Tap t o di splay the User Manual.
Manage Media files
1. Insert a SD card containing m edia f iles (i.e., eBooks, photos, music or videos).
2. Tap the
ES File Explorer application icon; the folder and file structure on
your SD card is listed.
3. To view contents of a f older, tap on the folder.
4. Tap on a file to launch the applicable application.
System status bar
Page 32

32
5. Touch & hold on a folder or fil e to launch option menus:
Paste
Paste copied folder/file.
Open As
Open file as Text / Audio / Video / Image.
Cut
Cuts item and places on cli pboard so you can paste
elsewhere.
Copy
Copy selected item.
Rename
Rename selected item.
Delete
Delete selected item.
Select All
Selects all listed items.
Bookmark
Add shortcut or bookmark o n Home screen to
selected item.
Shortcut
Add shortcut on Home screen t o selected item.
Compress
Create Zip file for the selected item.
Send
Email item to desired email address.
Set As Home
Sets selected folder as the default location when
launching applicati on.
Properties
Lists properties of it ems.
ES Function Menu
While in an ES File Explor er screen, tap to display these functions:
Operations Paste
Paste copied folder/file.
Open As
Open 1st listed file as Text / Audio /
Video / Image.
Cut
Cuts item and places on cli pboard
so you can paste elsewhere.
Copy
Copy 1st listed item.
Rename
Rename 1st listed item.
Delete
Delete 1st listed item.
Select All
Selects all listed items.
Send
Email 1st listed item to desired em ail
address.
Properties
Lists properties of it ems.
Page 33

33
New
File
Add new text file in current folder.
a) Tap on file, open as
Text
b) Select ES Edit note
c) Tap in file body to enter text
d) Tap
e) Tap
Save
Folder
Add new empty folder into which
you can copy or add files.
Search
Search all Video/Audi o files, all
Image files, Runnable apps, and
.zip files. Tap
Search any file by
Name
to specify a name and
search through all file types.
Manager
Task Manager
Used to manually stop (kill)
applications.
App Manager
Lists applications on device.
Tap on application to launch it.
Tap
for application function
options.
Security
Manager
Used to set application pr otection
and a backup feature. (You must
install the Security M anager
module.)
SD Card
Analyst
Analyzes storage usage on SD
card.
Show/Hide Tabs
Shows Local/LAN/FTP tabs across
top of screen (unless removed in
Settings>Layout Settings).
Settings
Theme
Settings
Choose a theme or color for yo ur UI
& background.
Layout
Settings
Hide/show some UI compon ents
(i.e.,non-applicable LAN, FTP).
File Settings
Hide files, Thumbview (use
thumbnail as image icons) , SD
capacity.
View
Choose desired view of item s as
Icons, List, or list with Details (date
& attributes).
Size
Select desired size of item icons.
Page 34

34
Sort By
Name, Type, Size, Modifi ed,
Random> Ascending/Descending.
Home
Directory
Set desired default Hom e directory
which displays when ES File
Explorer is launched.
App Backup
Directory
Set desired default Backup
directory for backed up apps.
Bluetooth
options
N/A for this device.
Root options
N/A for this device.
More
Display the following options
Refresh
Refreshes the screen.
Flip orientation
Flips between Landscape/Portrait
orientations.
Bookmark
N/A for this device.
Help Center
Tap Help to view the complete E S
File Explorer User Manu al.
About us
ES File Explorer version, EStrong’s
website & Copyright notice.
Exit
Closes ES File Explorer app.
Import (copy) Media files from SD card into Internal Memory
1. Insert a SD card containing medi a files (i.e., eBooks, photos, music, or
videos).
2. Tap the ES File Explorer application icon; the folder and file structure on
your SD card is listed.
3. Tap on a folder, touch & hol d on the file you want to copy tap Copy.
4. Tap the folder UP icon and then the ‘/’ icon to display the i nternal memory
folders.
5. Tap
PD_Novel tap on appropriate folder for fi le type (i.e., eBooks, Photos,
etc.).
6. Tap
Operations Paste.
Page 35

35
Install AndroidTM Applications using ES File Explorer
There are many interesting and free Android applicati ons that can be found
on the web. Just launch your web browser and do a search for “Android
applications”.
If your third party applicatio n causes the top function menu buttons
to disappear, press the
Volume button on the side of the devic e
to re-display them. However, some applications may designate the volum e
button for other functions, and you may need to shut the device off in order
to exit the application.
Purchased or free AndroidTM applications that you have downloaded to your
computer can be installed quickly & easily on your eReader using the ES File
Explorer application.
1. Copy the .apk files that you want to install onto a SD card, insert SD card
into your eReader.
2. Tap the
ES File Explorer application icon.
3. Locate the folder on your SD card in which the .apk applicati on files were
saved.
4. Tap on the
.apk file Install. The application is installed and the application
icon is added to the
Applications screen.
5. Tap
Done.
Download AndroidTM Applications direct from a Website
There are many interesting and free Android applications that can be found
on the web. Just launch your web browser and do a search for “Android
applications”.
You can download Androi d
TM
applications directly from websites, and then
quickly and easily install them on your device.
1. Tap the
Browser application icon to launch the internet browser.
2. Enter the desired website URL, and tap the download li nk for the application
you want to install on your device.
3. After the download is complete, touch & hold on the download file (in the
Download history screen) tap Open Install.
Uninstalling AndroidTM Applications
You can also quickly and easily uninstall the AndroidTM applications that you
have installed.
1. Tap
Settings Applications Manage applications.
2. Tap the application you want to uninst all
Uninstall.
Page 36

36
3. Tap OK to confirm the uninstall.
ES TASK MANAGER
Stopping AndroidTM Applications
AndroidTM does not automatically stop applications after they are loaded, so you
can manually stop (kill) t he applications as desired.
1. Tap the
ES Task Manager application icon. The li st of applications is
displayed.
2. Tap on the applications you want to stop and then tap Kill Selected.
GAMES
Tap the appli ca tion icon to play the following pre-loaded games:
Solitaire
Link Up
To view the game rules and instructions, launch the desired game tap Help.
MUSIC
Music f i le formats supported: MP 3, WAV and AAC
Music files can be played from the internal memory or from SD card.
Music f i les must reside in a /Music folder on your S D ca rd. If you copy music files
from your computer into the internal memory, be sur e to copy them into the
/Music folder.
Page 37

37
Play Music
1. Tap the Music application icon.
2. Select the desired sort format:
Artists Lists all artists. Tap individual ar tist tap on an album to display
songs on album
tap on song to play it.
Albums Lists all albums. Tap individual album to displa y songs from that
album
tap on a song to play it.
Songs Lists all songs. Simply tap on a son g to play it.
Playlists Lists all songs that you’ve added t o the Playlist (pg. 39).
3. To leave the music playing and return to previous screens, tap
, or tap
to return to the Home screen.
4. To stop the music, tap the
Pause icon.
Music Play Screen
When you select a song to play, the Music Play screen is displayed:
Page 38

38
List view View currently selected song list. Tap on any song to
play it immediately.
Shuffle Play songs in random order. When off, songs play in th e
order listed in the
Music Library.
Repeat Play songs continuously until you stop them. When off,
songs play through once and then stop.
Restart song Restart currently playing song.
Pause/Stop Pause or stop song. Tap to play.
Skip to next song Play next song in song library.
Use the volume button on the side of your eReader to adju st the volume.
Music Control Options
When the Music Play screen is displayed, tap to display music
control options.
Library Return t o the main Music screen.
Party Shuffle Play songs from your SD card in ran dom order, until
you turn
Party Shuffle off.
Add to playlist Add the current ly playing song to a playlist.
Delete Permanently delete the current ly playing song from the
media source (internal memory or SD card).
Delete Music Files
You can delete music files using the following methods.
A. In a Music Library screen, touch & hold on an i tem tap Delete.
Page 39

39
B. When the Music Play screen is displayed, tap Delete.
Playlist
You can create individu al playlists of selected audio files from your Music Library,
allowing you to play a selected list at any time (i.e., your favorites, specific genr e,
specific artist, etc.).
Create New Playlist
1. When viewing songs in the library, touch & hold on the song you want to
add to a playlist.
2. Tap
Add to Playlist New.
3. Tap in the Playlist name entry field enter desired name tap Save.
The new playlist is added to the Playlist library.
You can also add the song th at is playing by tapping
Add to
playlist
.
Add Songs to Playlist
1. When viewing a list of songs in the library, touch & hold on a list ing you
want to add to a playlist.
2. Tap
Add to Playlist.
3. Tap the name of the desired playlist.
The song is added to the pla ylist.
You can also add the song th at is playing in the
Playback screen by
tapping
Add to playlist.
Play songs in Playlist
1. In the Music Library screen, tap Playlists desired playlist.
2. Tap on desired song title to play.
Remove songs from Playlist
1. In a Playlist screen, touch & hol d on a song you want to remove.
2. Tap
Delete OK to confirm deletion.
Deleting songs from a pl aylist does not delete them from the main Music
Library.
Rename or Delete a Playlist
1. Open the Playlist library.
2. Touch & hold on the playlist name
tap Rename or Delete.
Page 40

40
3. If renaming, tap in the Playlist name entry field ent er desired name
change
tap Save.
Deleti ng playlists does not delete songs from the main Music Library.
PanReader
Use PanReader to access Bookstores, download purchased eBooks, access My
Library
to manage and read eBooks. Your eBooks must be stored in the /eBooks
folder of the internal memory or in a /eBooks folder of a SD card.
eBooks folder must be cr eated at the root of the SD card, not a sub folder of
another folder.
eBook formats support ed: EPUB and PDF
MY LIBRARY
1. Tap the PanReader application icon. The application opens to the My
Library
screen.
2. Tap on an eBook to open it in the
Reader.
3. If the eBook is DRM protected, you are prompted to enter the credit card
information that was used to purchase the eBook.
Book cover s are created from the fi r st page in the eBook file. Free eBook
covers are displayed right away, but DRM protected eBooks do not
display covers until yo u have unlocked the file by entering your credit
card information.
Bookshelves
You can create personal b ookshelves into which yo u ca n save your
downloaded media (i.e., Short Stories, Drama, etc.).
Add New Bookshelf
1. In the My Library screen, tap .
2. Tap in the title entry bo x enter the desired bookshelf name
(i.e., Short Stories, Drama, etc.)
tap Yes.
Add eBooks to Bookshelf
1. In the
My Library screen, with “All” bookshelf displayed, touch & hold on
an eBook that you want to ad d to a different bookshelf.
2. Tap Assign book to other bookshelves tap next to the desired
bookshelf
OK.
Page 41

41
3. Tap in the title entry bo x enter the desired bookshelf name
(i.e., Short Stories, Drama, etc.)
tap Yes.
Display Shelf
1. In the My Library screen, tap on Bookshelf in the left above the top row
of eBooks.
2. Tap on the bookshelf you wan t to display.
Search for eBooks
1. Tap to search for a specific eBook by title or author’s name.
2. Enter the string of text tap .
3. Only the matching eBook(s) are displayed in rows 2-4.
4. Tap on Bookshelf, All to display all eBooks again.
Sort eBooks
You can sort your eBooks in My Library by Date, Title or Author.
1. In the
My Library screen, tap the Sort By icon ( =date, =Title,
=Author).
2. Tap
Date, Title or Author as desired. The eBooks are re-arranged
based on your selection.
Display in Cover or List Layout
Tap t o di splay eBooks in List layout.
Tap t o di splay eBooks in Cover layout.
BOOKSTORE
You can log into multiple Bookstores to purchase and download eBooks.
You must register accounts with the bookstores from whom you want to
purchase and download eBooks.
1. Tap the PanReader application icon.
2. Tap the
Bookstore tab.
3. Tap on an existing bookstore, or tap
to add a different bookstore.
4. Shop, purchase, and download eBooks.
The fir st time, you may be prompted for your bookstore account login
information.
Page 42

42
Libris downloads require an A dobe account as well, so if yo u haven’t
already activated your d evice with your Adobe account, you are prompted
to do so.
Delete bookstore
If you want to delete a bookstor e, touch & hold on the bookstore tap
Delete This Store, Yes to confirm the deletion.
PURCHASED
Tap the Purchased tab to see all eBooks that you have added to your Libris
account. You can also re-download your Libris eBooks if needed.
1. Tap the
PanReader application icon.
2. Tap the
Purchased tab.
3. Tap on the Download button for the eBook yo u want to download or redownload.
READER
The Reader displays your eBooks (EPUB or PDF).
4. Tap the PanReader application icon.
5. In My Library, tap on an eBook to open it in the Reader.
6. If the eBook is DRM protected, you are prompted to enter the credi t card
information that was used to purchase the eBook.
Book cover s are created from the fi r st page in the eBook file. Free eBook
covers are displayed right away, but DRM protected eBooks do not
display covers until yo u have unlocked the file by entering your credit
card information.
Page 43

43
Highlight Text
As you read your media, you may want to highlight points of interest for later
reference.
1. On a page, double tap on the beginning word and single tap on the last
word of the section you want to highlight tap .
2. To display the list of all hi ghlights in the eBook, tap
,
tap Highlights.
3. Tap on a highlight to jump to that page.
Tap
to close the options box without highlighting text.
Google Search
As you read your media, you can quickly do a Google search for a word or
string of text.
On a page, either single tap on a word or double tap on t he beginning word
and single
tap on the last word of the se ction you want to include in your
search tap .
The browser launches imm ediately with the search r esults of your selected
text.
Tap
to close the options box without doing a Google search.
Reader Function Menu
Return to My Library
Page 44

44
Reader Function Menu
The Reader Function Menu is displayed at the top of the screen.
Screen Orientation Lock
For optimal viewing whi l e r eading, the orientation of the screen automatically
rotates from vertical to hor izontal depending on how you hold your device.
When desired, you can lock the screen in the desire d orientation to prevent
the auto-rotation while r eading.
To lock, while viewing a page, tap
.
To unlock, tap
.
Night Mode
Night Mode
switches the background t o black with white text, al lowing you
to view media without em itting as much light as the normal view mode.
While viewing a page, tap .
To switch back to normal view mode, tap
.
Table of Contents
Display the Table of Contents of the currently open eBook, allowing you to
quickly jump to a desired ch apter.
1. While viewing a media page, tap
.
2. The
Table of Contents is displayed; tap on a chapter t o j ump to it.
Font Size
For optimal viewing, you can adjust the size of the onscreen text by
changing the Font Size.
1. While viewing a page, tap
tap desi r ed font size.
Normal view mode is white
background with black text.
Night Read view mode is black
background with white text.
Page 45

45
2. Tap ‘X’ to close the options box.
Search
You can search the eBook f i le for a string of text.
1. While viewing a media page, tap .
2. Enter the string of text you want to find tap .
3. The matching finds are hig hlighted throughout the file. Use the arrows to
jump to next/previous match finds.
4. Tap t o close the search mode.
Bookmark Page
You can bookmark pages so you can quickly return to those pages later.
1. While viewing a media page, tap
. A bookmark icon is added on the
page indicating the pag e has been bookmarked.
2. To display the list of all bookmarks i n the eBook, tap tap
Bookmarks.
3. Tap on a bookmark to go to the page.
PHOTOS
Photo fi le formats supported: JP EG, BMP, PNG and non-animated GIF
Photo files can be played f r om the internal memory or from SD card.
Photo fi les must reside in a /Photos folder on your SD ca rd. If you copy photo
files from your computer into the internal memory, be sure to copy them into the
/Photos folder.
Scroll through multiple pages of photos by finger slidi ng vertically from t op or
bottom of screen.
1. Tap the Photos icon.
2. Tap on a photo to display it in full screen mode.
3. Tap on the screen to display zoom in/out icons.
Page 46

46
4. To exit the photo view, tap on a photo or press the Volume button on the side of
the device to display the top menu buttons.
Play Slideshow
You can use the followin g methods for starting a phot o slideshow.
A. From Photo Gallery
1. Tap the
Photos icon.
2. Tap Slideshow.
3. To exit the slideshow, tap on a photo
tap to return to the Photo
Gallery
screen, or tap to return to the Home screen.
B. From individually displayed photo
1. With a photo displayed in full screen mode, tap on the photo tap
to display the
Photo Function Menu.
2. Tap More Slideshow.
4. To exit the slideshow, tap on a photo tap to return to the Photo
Gallery
screen, or tap to return to the Home screen.
Photo Function Menu
When a photo is displayed i ndi vidu al l y or during a slideshow, tap on the phot o
tap to display the Photo Function Menu.
Rotate
Rotate photo 90 degrees clockwise; tap multiple times until
desired orientation is achieved. Rotated version is saved.
Delete
Delete the displayed photo
Crop
Crop the photo as desired
Set as
Set the displayed photo as a Contact icon or Wallpaper
Details
View photo file name, size, and resolution
Page 47

47
More
Display additional opt ions
Show on
Maps
Not applicable for this device
Slideshow
View photos as slideshow
Settings
Access the photo and slideshow settings (i.e., display size,
interval time, transit ion style, shuffle, etc.)
In the Photo Gallery screen, touch & hold on a photo to display similar
function options.
Delete Photos
1. Tap the Photos icon.
2. Touch & hold on the photo you want to delete
tap Delete tap OK to
confirm the deletion.
SETTINGS
Set multiple functions that affect the normal usage of your eReader. You can also set
your personal preferences for some functions.
Tap the Settings application icon to access all setti ng functions:
Wireless &
networks
Wi-Fi
See “Wireless & networks” section, pg. 51.
Network
notifiation
Wi-Fi
Networks
Sound &
display
Media
Volume
To adjust the music and video volume, tap
& slide
and then t ap OK.
Audible
selection
When selected, a sound is p layed when
making screen selections.
SD card
notifications
When selected, a tone soun ds when a SD
card is inserted or removed from the
device.
Page 48

48
Orientation
When selected, the orient ation of the
screen switches between Portrait (vertical)
and Landscape (horizontal) automatically
when you rotate the device.
Animation
When selected, animations are shown
when opening and closin g windows.
Brightness
Tap & slide to adjust the
screen brightness as desired
tap OK.
Touch
Calibrate
If you notice that the touch screen is not
responding accurately, you may need to recalibrate the touch screen sensors.
When
Touch Calibrate is selected, the
screen displays a blank screen with “+” in a
specific location. Use a blunt pointed
device to accurately tap the “
+” in the
designated spot. Repeat in 3 more screens
that appear.
If calibration is successful, you can resume
normal use. If unsuccessful, repeat the
calibration again.
Screen
timeout
Adjust the delay before t he screen
automatically turns of f (default = 10
minutes).
Location &
security
Use wireless
networks
Select if you want your location to be seen
in applications (such as M aps) using
wireless networks.
Use My
Location
Select if you want to use M y Location for
Google search results an d other Google
services.
Visible
passwords
When selected, the password shows as
you enter it.
Install from
SD card
Install encrypted certificates from SD card.
Set Password
Set or change the credenti al storage
password.
Clear storage
N/A for this device.
Applications
Unknown
sources
When selected, you are permitted to install
other Android
TM
applications that you
obtain from web sites, email, or other
locations. Otherwise the
Install blocked
message appears.
Page 49

49
Manage
applications
Manage and remove install ed applications.
WARNING! Making changes to
applications can result i n er rors and failed
launches. If you aren’t su re of what each
setting is/does, we rec om mend not making
changes.
Running
services
View and control currently running services
(i.e., Android keyboard, applications).
Development
Set options for application development.
USB
debugging
When selected the device is in debug
mode when USB is connected.
Stay awake
When selected the screen never goes into
sleep mode while charging.
Allow mock
locations
N/A for this device.
Privacy
Factory data
reset
Tap to reset the eReader to i ts initial
factory state, erasin g al l data and
downloaded applications. Tap
Reset
Device
to proceed with reset, or t ap
to cancel and return to previous screen.
WARNING! The following are erased
during the factory reset:
~ Google account
~ System and application data and settings
~ Downloaded applications
~ Your Adobe ID
The factory reset does NOT erase:
~ Current system software and bundled
applications
~ SD card files, such as music or photos
SD card &
device storage
Total space,
Available
space
Values appear when a SD card is inserted
in device.
Unmount SD
card
Tap to safely remove the SD ca r d.
Format SD
card
N/A for this device.
Page 50

50
Internal
storage –
Available
space
Amount of internal memory available.
Search
(Google
search
settings)
Show web
suggestions
When selected, suggestions are shown
from Google as you enter te xt.
Searchable
items
Select if you want to choos e what you want
to search on the device when you use the
Search feature (pg. 17).
Contacts
When selected, you can search for contact
names.
Browser
When selected, you can search
bookmarked web pages and we b history.
Apps
When selected, you can search names of
installed applications.
Music
When selected, you can search names of
artists, albums and music tracts.
Language &
keyboard
Select locale
Select the language and region according
to your location.
Android
keyboard
Select to use the AndroidTM keyboard for
entering application data. If not selected,
no keypad is presented for entering data.
Android
keyboard
settings
Select multiple setti ngs to customize your
keyboard behavior.
User
dictionary
You can add words to a perso nal
dictionary, words that may not be included
in the default dictionar y.
Date & time Automatic
Select to use the network-provided values
for the date, time zone and time.
Set date
Tap to set the current date; use the + or –
to set the current date and then tap Set.
Select time
zone
Tap to select the correct time zone for your
location. (Finger slide vertically to scroll the
list.)
Set time
Tap to set the correct time for your location;
use the
+ or – to set the correct time
according to your locati on and then tap
Set.
Page 51

51
Use 24-hour
format
When selected, the tim e displays in 24-
hour format instead of 12-hour.
12 = 12:00am-12:00pm (default)
24 = 12:00-24:00
Select date
format
Tap to select the desired date format for
displaying your date at the top of the
screen.
Normal (2010-12-31)
12/31/2010
31/12/2010
2010/12/31
Device
Information
Status
Check the battery and Wi-Fi status.
Battery use
View battery usage by appl ication use.
Legal
Information
View the Open source lic enses.
Technical
information
The Model number, Firmware version,
Kernel version, and Build number is
information that ma y be asked for if you
contact Customer Suppor t.
Wireless & networks
In order to connect to the Internet, you must have a Wi-F i network set up on your
eReader.
Wi-Fi On/Off
Tap Wi-Fi to turn on so you can connect to Wi-Fi networks.
Network notification
When selected, you are notified when an open network i s available.
Wi-Fi networks
When you select Wireless & networks, the device automatically scans and
lists all local Wi-Fi networks found.
A
indicat es secure networks that require login name/key t o co nnect.
1. Tap the desired network to which you want to connect .
2. If the network is secure, t ap in the password entry field to enter the
Network Password.
3. Tap Connect.
Page 52

52
If your Wi-Fi broadcast is set as hid den, it won’t be found by the auto
scan. Tap
Add Network and then enter the network name and password
tap Save.
(Advanced): After saving t he Wi-Fi network, you can change your
network settings by selecting
Manual Setup, and then follow the
prompts.
The Wi-Fi icon on the top of screens indicates the status as f oll ows:
= Connected = Not connected, Wi-Fi turned ON
= Not connected and Wi-Fi turned OFF (power saver)
When the device goes into sleep mode, the Wi-Fi disconnects from the
local network, but wil l automatically reconnect when out of sleep mode
(may take up to 30 seconds t o r econnect).
Connecting to Public Wi-Fi Hotspot
If you are connecting via a public Wi-Fi hotspot, it may be necessary to
immediately launch t he browser and provide the hotspot login information
prior to having an active internet connection.
1. Follow step 1-3 above to select the hotspot Wi-Fi network.
2. Tap the
Browser application icon.
3. Enter the hotspot login inf or mation.
‘Forget’ remembered Wi-Fi Network
When you connect to a Wi-Fi network, the device remembers the settings for
future connections. I f you have previously connected to networks that you no
longer want “remembered”, tap on the network and select
Forget.
If t he network you “forget” is s ecure, future connections require you to
enter the network password again.
STOCKS
Tap the Stocks application icon. The browser l aunches and displays a popular
Finance webpage so you can check the status of st ock offerings.
Page 53

53
VIDEOS
Video fi le formats: H.264 AVC and Mp 4 S P
Video files can be played from the internal memory or from SD card.
Video files must reside in a /Videos folder on your SD ca rd. If you copy video
files from your computer into the internal memory, be sure to copy them into the
/Videos folder.
Scroll through multiple pages of videos by finger slidi ng vertically fr om t op or
bottom of screen.
1. Tap the
Videos icon.
2. Tap on a video to play it.
3. The first time, select the desired vi deo player you want to use.
Tap Use by default for this action if you want to always use the chosen
player.
ES Video Player – Tap on the screen to display the vide o controls.
Press the
Volume up/down once to display the top function menu buttons
and twice to adjust the volume.
Movies – Tap on the screen to display the video controls and the top function
menu buttons
. Press the Volume up/down to adjust the
volume.
Pause, Play, play previous video play next video
4. To exit the video, press the Volume button to redisplay the top menu butt ons.
Page 54

54
Delete Videos
1. Tap the Videos icon.
2. Touch & hold on the video you want to del ete
tap Delete tap OK to
confirm the deletion.
WEATHER
Tap the Weather application icon. The browser launches and displa ys a popular
Weather webpage so you can check the weather forecasts of desired locations.
Connect to Computer
You can connect your eReader to a Windows or Maci ntosh computer via a USB cable
to copy files between the two devices.
Compatible with operating systems: Windows 2000/XP/Vista/7, Mac OSX
The Android partition where apps are installed is not visi ble in a Windows
Explorer or Macintosh Finder window.
Connect to Windows PC
1. Connect the small end of the USB cabl e to the eReader mini USB port, and
the larger end to an available USB port on your computer.
If a message appears advising you to install a Driver for your device,
simply click Cancel
. Example of Window s Vista message:
2. In Windows Explorer, PD_NOVEL is listed as one of the drives connected to
your computer.
Click Cancel
Page 55

55
3. There are 4 pre-assigned folders list ed under PD_NOVEL:
eBooks (PDF, EPUB)
Photos (JPG, JPEG, BMP, PNG, non-animated GIF)
Music (MP3, WAV, AAC, OGG)
Videos (MPEG4)
5. To copy files into your eReader, select and drag the desired files into the
appropriate pre-assigned folder based on file type.
The device only recognizes files that are of a supported format and
resides in the appropriate pre-assigned folder (i.e., photo files must be in
Photos folder, etc.). If you create any other folder s or sub folders under
the pre-assigned folders, the files are not recognized.
File na m es may NOT include special ch aracters; otherwise they are not
recognized by the device.
6. To copy files from your eReader into your computer, select and drag the
desired files to any desired location on your computer.
Disconnect from PC
It is important to alwa ys per form a safe PC ‘release’ before disconnecting
the USB cable from the eReader and computer.
Windows 7
1. On the Windows System Tray, click the hardware rem oval icon.
2. Click the
Eject Removable Disk message corresponding with t he
eReader device drive.
3. When the message “Safe to R em ove Hardware” appears, you can
disconnect the USB cabl e from your eReader and computer.
Windows VISTA
1. On the Windows System Tray, click the hardware rem oval icon.
2. Click the
Safely remove USB mass Storage device message
corresponding with the eReader device drive.
3. When the message “This device can now be safely removed from the
computer” appears, you can disconnect the USB cable from your
eReader and computer.
Windows XP
1. On the Windows System Tray, click the hardware rem oval icon.
2. Click
Remove Hardware Safely.
3. Select the storage device corresponding wit h your eReader, and then
click
Stop to disconnect. A final dialo g box opens.
4. Click
Close.
Page 56

56
5. When the message “It is now Safe to Disconnect Hardware” appears,
you can disconnect the US B cable from your eReader a nd computer.
Connect to Macintosh Computer
1. Connect the small end of the USB cable to the eReader mini USB port, and
the larger end to an available USB port on your computer.
2. Macintosh recognizes the eReader as an ext ernal storage device tit led
PD_NOVEL.
3. Drag and drop files between the two devices as you normally move files.
Disconnect from Macintosh
1. To safely disconnect from your Macintosh, select the PD_NOVEL icon on
your desktop and press
Command-e to eject the disk.
2. When the icon is no longer on the desktop, it is safe to unplug the USB
cable.
UPDATE FIRMWARE
Before yo u perform a firmware upgr ade, make sure the device is fully charged or
connected to the power adaptor.
Personal settings will be deleted during the upgrade process (i.e., email ac co unt
setup, Wi-Fi network setup, etc.).
IMPORTANT: This firmware update procedure is onl y available for Windows PC
users at this time. We recom mend Mac users to locate a Windows PC
that can be used for the firmwar e update at this time. Mac based
update procedures will be available in future.
1. On your computer, go to www.pandigital.net/downloads.
2. Select the correct locati on and product model.
3. Choose the “
Update with Your PC” option.
4. When prompted, you can ei ther Save the program or Run it from the website. (The
Run method may result in a slower process than saving & running the program
directly from your computer).
5. Follow the prompts in the
Upgrader window to connect your device and install the
firmware into your device.
6. After the download is complete, turn t he device off.
7. Press the
Volume + key plus slide the power key on simultaneously for
5 seconds, and then release both.
Page 57

57
8. The device is upgraded and r estarts automatically; wait for the HOME screen to
be displayed.
Frequently Asked Questions
ANDROIDTM
Q: What Android
TM
OS version is on my eReader?
A: 2.0
Q: What Android
TM
applications are compatible with my eReader?
A: Applications which are compati ble with AndroidTM OS 2.0. However, as of
the writing of this document, many third part y Andr oid
TM
applications have
been designed for phones, so even though they are com patible with OS
2.0, all functions may not be available on your eReader.
Q: How do I install Android
TM
applications on my eReader?
A: The quickest and easiest method is to use the included ES File Explorer
application. You can also download & install applications direct ly from a
website. See
Install Android
TM
Applications on page 35.
Q: When trying to install Android
TM
applications, I get “Install blocked”
message. What do I do?
A: Tap the
Settings button in the message or tap the Settings application
icon, and select
Unknown sources.
BASIC DEVICE FUNCTIONALITY
Q: Do I have to charge the battery before use?
A: You should charge the battery for at least 4 hours, but you can use the
device while it’s charging. Use the included power adapter to charge; this
device does not charge via t he USB cable.
Q: My unit seems to be frozen and is un-responsive. What do I do?
A: Reset the device by inserting a paper clip int o the reset hole at the top of
the device.
Q: I have attempted to p erform a firmware update but it consi stently fails.
A: If the device has a low battery charge, you may not be able to perform a
successful update. Connect the device to the power adapter and then try
again.
Q: How do I contact Customer Support?
A: If this FAQ section doesn’t answer your questions, you can contact
Customer Support at 1-800-715-5354.
EMAIL
Q: Can I use any of my personal email addresses to send/receive email?
A: The eReader supports POP3, SMTP and IMAP accounts. Some free email
Page 58

58
accounts are not supported on mobile devices. Check with your email
provider to see if your account is supported.
MEDIA CARDS
Q: Which media cards are compatible with my eReader?
A: SD/MMC Cards.
MUSIC
Q: What type of music files can I play on my eReader?
A: MP3, W AV and AAC
Q: How do I add music files to my eReader?
A: Use the “Conn ect to Computer section (pg. 54) to copy your music files into
the eReader’s internal memory.
Q: Can I create a separate list of my favorite songs?
A: Yes. Use the
Playlist feature (pg. 39).
PHOTOS
Q: What type of photo files can I view on my eReader?
A: JPG , JPEG, BMP, PNG, and non-animated GIF
Q: How do I add photo files to my eReader?
A: Use the “Conn ect to Computer section (pg. 54) to copy your photo files int o
the eReader’s internal memory.
VIDEO
Q: What type of video files can I play on my eReader?
A: H .264 AVC and Mp4 SP
Q: Can I stream videos on my eReader?
A: No, the file format is not supported.
Q: Can I play YouTube videos on my eReader?
A: No, the file format is not supported.
Q: How do I add video files to my eReader?
A: Use the “Conn ect to Computer section (pg. 54) to copy your video files int o
the eReader’s internal memory.
WEB
Q: Do I need a Wi-Fi adapter to connect to the Internet?
A: N o. The Wi-Fi adapter is built-in to the device.
Q: Can I have multiple browser windows open at the same t ime?
A: Yes, up to 8 windows (pg. 22).
Q: Can I change browser settings?
A: Yes. There are multiple settings you can set as desired (pg. 23).
Q: Can I search a web page for specific text?
A: Yes. Use the
Find on Page function (pg. 23).
Page 59

59
Q: Can I bookmark web pages?
A: Yes. Use the browser Bookmarks function (pg.21).
Battery Management
The battery is not fully charged out of the box, so it is r ecommended that you charge
the battery for at least 4 hours before you start to use the device.
The rechargeable battery is designed and manufact ured to be used and rechar ged
frequently. As with all batteries, the capacity of the battery reduces each ti m e i t is
charged/depleted. However, you can still try to prolong the battery’s lifetime by
following the suggestions below:
Use your eReader at least once a week.
Char ge the battery regularly and fully.
Never leave the battery fully discharged for a long perio d of time.
Always keep the device and the battery away from heat.
Charge Battery
Plug the power adapter i nto an electrical wall outlet, and then connect to the
device to fully charge t he battery before use (approx. 4 hours).
You cannot use the USB cable t o charge the battery.
While charging, the bat tery icon displays as: .
When fully charged, the battery icon displays as:
A fully discharged battery takes approximately 5 hours to fully charge, but yo u
can use the device while plugged in when desired.
Important Safety Precautions
Always follow these basic safety precautions when using your eReader. This reduces
the risk of fire, electric shock, and injury.
Do not expose this product to rai n or moisture.
Keep t he devic e out of direct sunlight and he at sources.
Protect the power cord. Route power cords so that they are not likely to be
walked on or pinched by items placed on or against t hem. Pay particular
attention to the point where the cord attaches to the device.
Only use the AC adapter inclu ded with the device. Usin g any other power
adapter voids your warranty.
Do not r em ove the cover. There are no user-serviceable parts inside.
Page 60

60
Cleaning your eReader
Treat the screen gently. To clean fingerprints or dust from the screen, we
recommend using a soft, non-abrasive cloth such as a camera lens cloth.
Tec h nica l Spec i fi ca ons
Product Specs
7” Digital TFT LCD Display 600x800 pixels
Compatible Media
Sources
Secure Digital™ (SD), MMC
Features
Shop/purchase/download/read eBooks
Play Audio and Video files
Display digital Photo files individually or as slideshow
Alarm Clock
Create a personal Contacts list
Connect to Wi-Fi networks
Browse and “surf the web”
Send and Receive Email
Automatic rotation of screen orientation
Earphone jack included
Compatible File
Formats
eBooks EPUB, PDF
Photo JPG, JPEG, BMP, PNG, non-animated GIF
Audio MP3, WAV, AAC
Video H.264 AVC and Mp4 SP
USB Ports Mini USB 2.0
Internal Memory 4GB
Wi-Fi Compatible Yes, built-in Wi-Fi adapter
Audio output
Built-in stereo speakers
Stereo-mini earphone jack
Power Adapter 5V, 2A
Battery Rechargeable 2800mAh, 3.7V
Lim i ted Warra n ty
The limited warranty set forth below is given by Pandigital with respect to the Pandigital™ line of
products (the “Device”) purchased and used in the United States of America. Pandigital warrants
this product as follows:
Page 61

61
LABOR: For a period of one (1) year from the date of purchase, if this Device is found to be
defective, Pandigital will repair or replace the Device, at its sole option, at no charge. After this one
(1) year period, labor charges will be charged on a case by case basis. If your Device is repaired or
replaced during the Warranty Period, it will be covered by this Limited Warranty for the remainder
of the original Warranty Period or ninety (90) days from the date of shipment of the replaced
Device, whichever is longer.
PARTS: For a period of one (1) year from the date of purchase, if this Device is found to be
defective, Pandigital will supply at no cost, new or rebuilt replacement parts, at its option, at no
charge. After this one (1) year period, parts will be charged for on a case by case basis.
Modifications not approved by the party responsible for compliance will void user’s authority to
operate the equipment. If your Device is repaired or replaced during the Warranty Period, it will be
covered by this Limited Warranty for the remainder of the original Warranty Period or ninety (90)
days from the date of shipment of the replaced Device, whichever is longer.
This Limited Warranty does not cover damage or malfunctions caused by accident, disaster,
misuse, abuse, negligence or other external causes; third-party products; Internet or
telecommunications failures; commercial use; unauthorized opening, use, service, tampering,
alteration, repair or modification; or inadequate packing or shipping procedures. This Limited
Warranty also does not cover cosmetic damage or normal wear and tear. This Limited Warranty
does not apply to Devices sold as used, refurbished or reconditioned. This Limited Warranty does
not cover damage caused by third party applications such as viruses, malware or other software.
This Limited Warranty will be void if the Serial Number on your Device has been removed,
tampered with or defaced or if your Device has been opened or serviced without authorization,
tampered with, altered or modified. This Limited Warranty applies to your Device only (i.e., the
hardware), and not to the software within your device. Similarly, this Limited Warranty does not
cover downloaded data or materials, or accessories and peripherals, except as expressly provided
above. This warranty is valid only in the United States.
The Device must be accompanied by a copy of the original retail purchase receipt for the warranty
to be valid. If no proof of purchase is attached, the warranty will not be honored and repair costs
incurred will be the responsibility of the end user. This warranty is only valid with written
documentation detailing the complaint attached to the outside or inside of the carton. This
warranty does not provide protection for the loss of data, regardless of format or cause. Pandigital
reserves the right to modify and change the design of this Device without prior notice, written or
otherwise.
Limitations. TO THE EXTENT PERMITTED BY LAW, THE WARRANTY AND REMEDIES SET FORTH
ABOVE ARE EXCLUSIVE AND IN LIEU OF ALL OTHER WARRANTIES AND REMEDIES, AND WE
SPECIFICALLY DISCLAIM ALL STATUTORY OR IMPLIED WARRANTIES, INCLUDING, BUT NOT LIMITED
TO, WARRANTIES OF MERCHANTABILITY, FITNESS FOR A PARTICULAR PURPOSE AND AGAINST
HIDDEN OR LATENT DEFECTS. IF WE CANNOT LAWFULLY DISCLAIM STATUTORY OR IMPLIED
WARRANTIES, THEN TO THE EXTENT PERMITTED BY LAW, ALL SUCH WARRANTIES SHALL BE
LIMITED IN DURATION TO THE DURATION OF THIS EXPRESS LIMITED WARRANTY AND TO REPAIR
OR REPLACEMENT SERVICE.
SOME JURISDICTIONS DO NOT ALLOW LIMITATIONS ON HOW LONG A STATUTORY OR IMPLIED
WARRANTY LASTS, SO THE ABOVE LIMITATION MAY NOT APPLY TO YOU. WE ARE NOT
RESPONSIBLE FOR DIRECT, SPECIAL, INCIDENTAL OR CONSEQUENTIAL DAMAGES RESULTING FROM
ANY BREACH OF WARRANTY OR UNDER ANY OTHER LEGAL THEORY. IN SOME JURISDICTIONS THE
FOREGOING LIMITATION DOES NOT APPLY TO DEATH OR PERSONAL INJURY CLAIMS, OR ANY
Page 62

62
STATUTORY LIABILITY FOR INTENTIONAL AND GROSS NEGLIGENT ACTS AND/OR OMISSIONS, SO
THE ABOVE EXCLUSION OR LIMITATION MAY NOT APPLY TO YOU. SOME JURISDICTIONS DO NOT
ALLOW THE EXCLUSION OR LIMITATION OF DIRECT, INCIDENTAL OR CONSEQUENTIAL DAMAGES,
SO THE ABOVE EXCLUSION OR LIMITATION MAY NOT APPLY TO YOU.
All content included on the Pandigital website as well as Pandigital Devices, including pre-loaded
demonstration images, digital media, digital cookbooks, text, graphics, logos, designs, photographs,
button icons, images, audio/video clips, digital downloads, data compilations, and software, are the
property of Pandigital or its suppliers and is protected by United States and international copyright
laws or other intellectual property laws and treaties. Said content shall not be reproduced or used
without express written permission from Pandigital and its suppliers respectively.
Use of this product constitutes acceptance of these terms and conditions of warranty.
To obtain warranty service, refer to the Customer Support section at www.pandigital.net.
Technical support telephone number: 1-800-715-5354.
FCC Notices
FCC ID: TLZ-NU706
This device complies with Part 15 of the FCC Rules. Operation is subject to the following two
conditions: (1) this device may not cause harmful interference, and (2) this device must accept any
interference received, including interference that may cause undesired operation.
Federal Communications Commission (FCC) Statement Information to the User
WARNING: Changes or modifications to this device not expressly approved by the party
responsible for compliance could void the user’s authority to operate the
equipment.
This equipment has been tested and found to comply with the limits for a Class B digital device,
pursuant to Part 15 of the Federal Communication Commission (FCC) Rules. These limits are
designed to provide reasonable protection against harmful interference in a residential installation.
This equipment generates, uses, and can radiate radio frequency energy and if not installed and
used in accordance with the instructions, may cause harmful interference to radio
communications. However, there is no guarantee that interference will not occur in a particular
installation. If this equipment does cause harmful interference to radio or television reception,
which can be determined by turning the equipment off and on, the user is encouraged to try to
correct the interference by one or more of the following measures:
Reorient or relocate the receiving antenna.
Increase the separation between the equipment and receiver.
Connect the equipment to an outlet on a circuit different from that to which the
receiver is connected.
Consult the dealer or an experienced radio/TV technician for help.
FCC Radiation Exposure Statement:
This equipment complies with FCC radiation exposure limits set forth for an uncontrolled
environment. This device is designed for hand-held operation only. The antenna(s) used for this
transmitter must not be collocated or operating in conjunction with any other antenna or
transmitter within a host device, except in accordance with FCC multi-transmitter product
procedures.
Page 63

63
License Agreement and Terms of Use
By activating and using the Device, you hereby consent and agree to our License Agreement and
Terms of Use.
The Device and Related Services
The Device is a portable electronic reading device that utilizes wireless connectivity to enable users
to shop for, download, browse, and read books, newspapers, magazines, blogs, access websites, email and other materials, all subject to the terms and conditions of this Agreement. The "Service"
means the wireless connectivity, provision of digital content, software and support, and other
services and support that Pandigital provides Device users.
Wireless Connectivity
Coverage and Service Interruptions: You acknowledge that if your Device is located in any area
without applicable wireless connectivity, you may not be able to use some or all elements of the
wireless services. Pandigital is not responsible for the unavailability of wireless service or any
interruptions of wireless connectivity.
Digital Content
Unless specifically indicated otherwise, you may not sell, rent, lease, distribute, broadcast,
sublicense or otherwise assign any rights to the Digital Content or any portion of it to any third
party, and you may not remove any proprietary notices or labels on the Digital Content. In addition,
you may not, and you will not encourage, assist or authorize any other person to, bypass, modify,
defeat or circumvent security features that protect the Digital Content.
Software
Definitions: The following terms apply to the Device and to (a) all software (and the media on
which such software is distributed) of Pandigital or third parties that are pre-installed on the Device
at time of purchase or that Pandigital provides as updates/upgrades to the pre-installed software
(collectively, the "Device Software"), unless you agree to other terms as part of an update/upgrade
process; and (b) any printed, on-line or other electronic documentation for such software (the
"Documentation"). As used in this Agreement, "Software" means, collectively, the Device Software
and Documentation.
Use of the Device Software: You may use the Device Software only on the Device. You may not
separate any individual component of the Device Software for use on another device or computer,
may not transfer it for use on another device or use it, or any portion of it, over a network and may
not sell, rent, lease, lend, distribute or sublicense or otherwise assign any rights to the Software in
whole or in part.
No Reverse Engineering, Decompilation, Disassembly or Circumvention: You may not, and you will
not encourage, assist or authorize any other person to, modify, reverse engineer, decompile or
disassemble the Device or the Software, whether in whole or in part, create any derivative works
from or of the Software, or bypass, modify, defeat or tamper with or circumvent any of the
functions or protections of the Device or Software or any mechanisms operatively linked to the
Software, including, but not limited to, augmenting or substituting any digital rights management
functionality of the Device or Software.
Automatic Updates: In order to keep your Software up-to-date, Pandigital may automatically
provide your Device with updates/upgrades to the Software.
Page 64

64
Export Regulations: You agree to comply with all export and re-export restrictions and regulations
of the Department of Commerce and other United States agencies and authorities, and not to
transfer, or encourage, assist or authorize the transfer of the Software to a prohibited country or
otherwise in violation of any such restrictions or regulations.
General
No Illegal Use and Reservation of Rights: You may not use the Device, the Service or the Digital
Content for any illegal purpose. You acknowledge that the sale of the Device to you does not
transfer to you title to or ownership of any intellectual property rights of Pandigital or its suppliers.
All of the Software is licensed, not sold, and such license is non-exclusive.
Information Received: The Device Software may provide Pandigital with data about your Device
and its interaction with the Service (such as available memory, up-time, log files and signal
strength) and information related to the content on your Device and your use of it. Information we
receive is subject to the Pandigital Privacy Notice.
Patents: The Device and/or methods used in association with the Device may be covered by one or
more patents or pending patent applications.
Termination: Your rights under this Agreement will automatically terminate without notice from
Pandigital if you fail to comply with any term of this Agreement. Pandigital's failure to insist upon
or enforce your strict compliance with this Agreement will not constitute a waiver of any of its
rights.
Disclaimer of Warranties: YOU EXPRESSLY ACKNOWLEDGE AND AGREE THAT USE OF THE SERVICE,
DEVICE, DIGITAL CONTENT AND SOFTWARE IS AT YOUR SOLE RISK. EXCEPT FOR THE ONE-YEAR
LIMITED WARRANTY, THE SERVICE, DEVICE, DIGITAL CONTENT AND SOFTWARE ARE PROVIDED "AS
IS" WITH ALL FAULTS AND WITHOUT WARRANTY OF ANY KIND AND PANDIGITAL AND ITS
SUPPLIERS AND LICENSORS DISCLAIM ALL WARRANTIES, EXPRESS OR IMPLIED, INCLUDING, BUT
NOT LIMITED TO, THE IMPLIED WARRANTIES OF MERCHANTABILITY, FITNESS FOR A PARTICULAR
PURPOSE, ACCURACY, QUIET ENJOYMENT AND NON-INFRINGEMENT OF THIRD-PARTY RIGHTS. NO
ORAL OR WRITTEN INFORMATION OR ADVICE GIVEN BY PANDIGITAL OR AN AUTHORIZED
REPRESENTATIVE OF PANDIGITAL SHALL CREATE A WARRANTY. THE LAWS OF CERTAIN
JURISDICTIONS DO NOT ALLOW THE DISCLAIMER OF IMPLIED WARRANTIES. IF THESE LAWS APPLY
TO YOU, SOME OR ALL OF THE ABOVE DISCLAIMERS, EXCLUSIONS OR LIMITATIONS MAY NOT
APPLY TO YOU, AND YOU MAY HAVE ADDITIONAL RIGHTS.
Limitation of Liability: TO THE EXTENT NOT PROHIBITED BY LAW, NEITHER PANDIGITAL NOR ITS
SUPPLIERS OR LICENSORS SHALL BE LIABLE TO YOU FOR ANY INCIDENTAL OR CONSEQUENTIAL
DAMAGES FOR BREACH OF ANY EXPRESS OR IMPLIED WARRANTY, BREACH OF CONTRACT,
NEGLIGENCE, STRICT LIABILITY OR ANY OTHER LEGAL THEORY RELATED TO THE SERVICE, DEVICE,
DIGITAL CONTENT OR SOFTWARE, INCLUDING, BUT NOT LIMITED TO, ANY DAMAGES ARISING OUT
OF LOSS OF PROFITS, REVENUE, DATA OR USE OF THE DEVICE OR SOFTWARE OR ANY ASSOCIATED
PRODUCT, EVEN IF PANDIGITAL HAS BEEN ADVISED OF THE POSSIBILITY OF SUCH DAMAGES. IN
ANY CASE, PANDIGITAL'S AGGREGATE LIABILITY UNDER THIS AGREEMENT SHALL BE LIMITED TO
THE AMOUNT ACTUALLY PAID FOR THE DEVICE. THE LAWS OF CERTAIN JURISDICTIONS DO NOT
ALLOW THE EXCLUSION OR LIMITATION OF INCIDENTAL OR CONSEQUENTIAL DAMAGES. IF THESE
LAWS APPLY TO YOU, SOME OR ALL OF THE ABOVE EXCLUSIONS OR LIMITATIONS MAY NOT APPLY
TO YOU, AND YOU MAY HAVE ADDITIONAL RIGHTS.
Disputes: ANY DISPUTE ARISING OUT OF OR RELATING IN ANYWAY TO THIS AGREEMENT SHALL BE
SUBMITTED TO CONFIDENTIAL ARBITRATION IN ALAMEDA COUNTY, EXCEPT THAT, TO THE EXTENT
YOU HAVE IN ANY MANNER VIOLATED OR THREATENED TO VIOLATE PANDIGITAL'S INTELLECTUAL
Page 65

65
PROPERTY RIGHTS, PANDIGITAL MAY SEEK INJUNCTIVE OR OTHER APPROPRIATE RELIEF IN ANY
STATE OR FEDERAL COURT IN THE COUNTY OF ALAMEDA, AND YOU CONSENT TO EXCLUSIVE
JURISDICTION AND VENUE IN SUCH COURTS. The arbitrator's award shall be binding and may be
entered as a judgment in any court of competent jurisdiction. To the fullest extent permitted by
applicable law, no arbitration under this Agreement shall be joined to an arbitration involving any
other party subject to this Agreement, whether through class arbitration proceedings or otherwise.
Severability: If any term or condition of this Agreement shall be deemed invalid, void, or for any
reason unenforceable, that part shall be deemed severable and shall not affect the validity and
enforceability of any remaining term or condition.
Amendment: Pandigital reserves the right to amend any of the terms of this Agreement at its sole
discretion by posting the revised terms on the Pandigital.net website. Your continued use of the
Device and Software after the effective date of any such amendment shall be deemed your
agreement to be bound by such amendment.
Contact Information: For communications concerning this Agreement, you may contact Pandigital
by writing to Pandigital, Attn: Legal Department, 6375 Clark Avenue, Suite 100, Dublin, CA 95468.
© 2010 Pandigital, Inc. or its affiliates. All rights reserved. Pandigital, the Pandigital logo, Pandigital
Novel, are trademarks of Pandigital Inc. All rights reserved. Java and all Java based trademarks and
logos are trademarks or registered trademarks of Sun Microsystems, Inc. in the U.S. and other
countries.
European Community Compliance Statement
European community.
This indicates compliance with the R&TTE Directive 1999/5/EC and meets the relevant parts of
following technical specifications:
EN 300 328 – Electromagnetic compatibility and Radio spectrum Matters (ERM); Wideband
Transmission Systems; Data transmission equipment operating in the 2,4GHz ISM band and using
spread spectrum modulation techniques; Harmonized EN covering essential requirements under
article 3.2 of the R&TTE directive.
EN 301 489-17 - Electromagnetic Compatibility and Radio Spectrum Matters (ERM);
Electromagnetic Compatibility (EMC) standard for radio equipment and services; Part 17 Specific
Conditions for Wideband Data and HIPERLAN Equipment.
EN 60950 - Safety of Information Technology Equipment.
EN 62311: 2008– Assessment of electronic and electrical equipment related to human exposure
restrictions for electromagnetic fields (0 Hz - 300 GHz)
Marking by the symbol indicates that usage restrictions apply.
France - 2.4GHz for Metropolitan France :
In all Metropolitan departments, wireless LAN frequencies can be used under the following
conditions, either for public or private use:
Page 66

66
· Indoor use: maximum power (EIRP*) of 100 mW for the entire 2400-2483.5 MHz frequency band
· Outdoor use: maximum power (EIRP*) of 100 mW for the 2400-2454 MHz band and with
maximum power (EIRP*) of 10 mW for the 2454-2483 MHz band
Certification information (SAR) The device meets guidelines for exposure to radio waves.
Your device is a radio transmitter and receiver. It is designed not to exceed the limits for exposure
to radio waves recommended by international guidelines. These guidelines were developed by the
independent scientific organization ICNIRP and include safety margins designed to assure the
protection of all persons, regardless of age and health.
The exposure guidelines for devices employ a unit of measurement known as the Specific
Absorption Rate or SAR. The SAR limit stated in the ICNIRP guidelines is 2.0 watts/kilogram (W/kg)
averaged over 10 grams of tissue. Tests for SAR are conducted using standard operating positions
with the device transmitting at its highest certified power level in all tested frequency bands.
This equipment complies with the European Council Recommendation of 12 July 1999 on the
Limitation of Exposure of the General Public to Electromagnetic Fields [1999/519/EC].
 Loading...