

Panasonic of North America 96NKX TGA640 User Manual
Temporary Confidential
Installation Manual
Additional Digital Cordless Handset
Model No.
Thank you for purchasing a Panasonic digital cordless phone.
This unit is an additional handset compatible with the following
Panasonic Digital Cordless Phones:
KX-TG6401/KX-TG6411/KX-TG6421/KX-TG6431/
KX-TG6440/KX-TG6471/KX-TG7431
You must register this handset with your base unit before it can
be used. This installation manual describes only the steps
needed to register and begin using the handset. Please read
the base unit’s operating instructions for further details.
Charge the batteries for about 7 hours before initial use.
Please read this installation manual before using the unit and
save it for future reference.
For assistance, visit our website:
http://www.panasonic.com/help
for customers in the U.S.A. or
Puerto Rico.
KX-TGA640
PNQX1634 ZA DC10 08DM0
Temporary Confidential
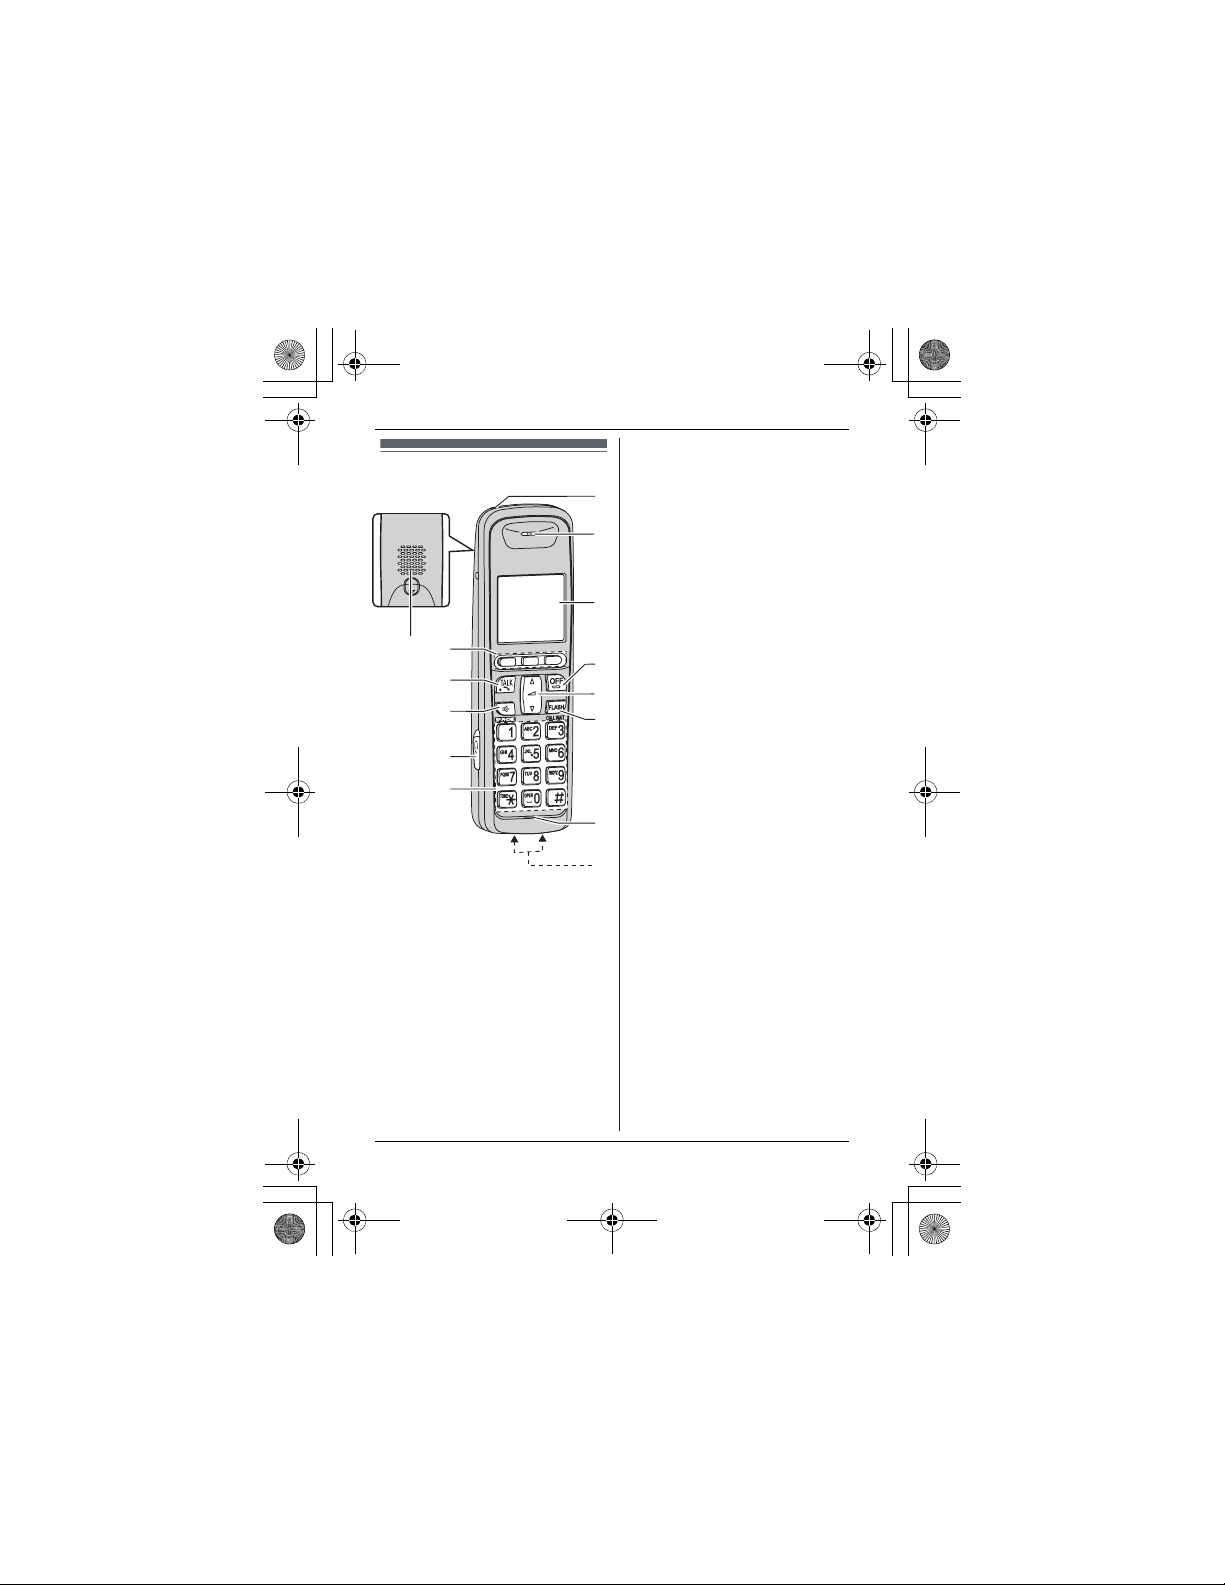
Controls
A
B
C
D
E
F
{OFF}
J
K
Navigator key
{FLASH}{CALL WAIT}
L
G
M
H
I
J
K
L
M
Microphone
N
Charge contacts
A Speaker
B Soft keys
C {C} (TALK)
D {s} (SP-PHONE:
(Speakerphone)
E Headset jack
F Dial keypad
({*}:TONE)
G
Charge indicator
Ringer indicator
H
Receiver
I Display
2
N
Temporary Confidential
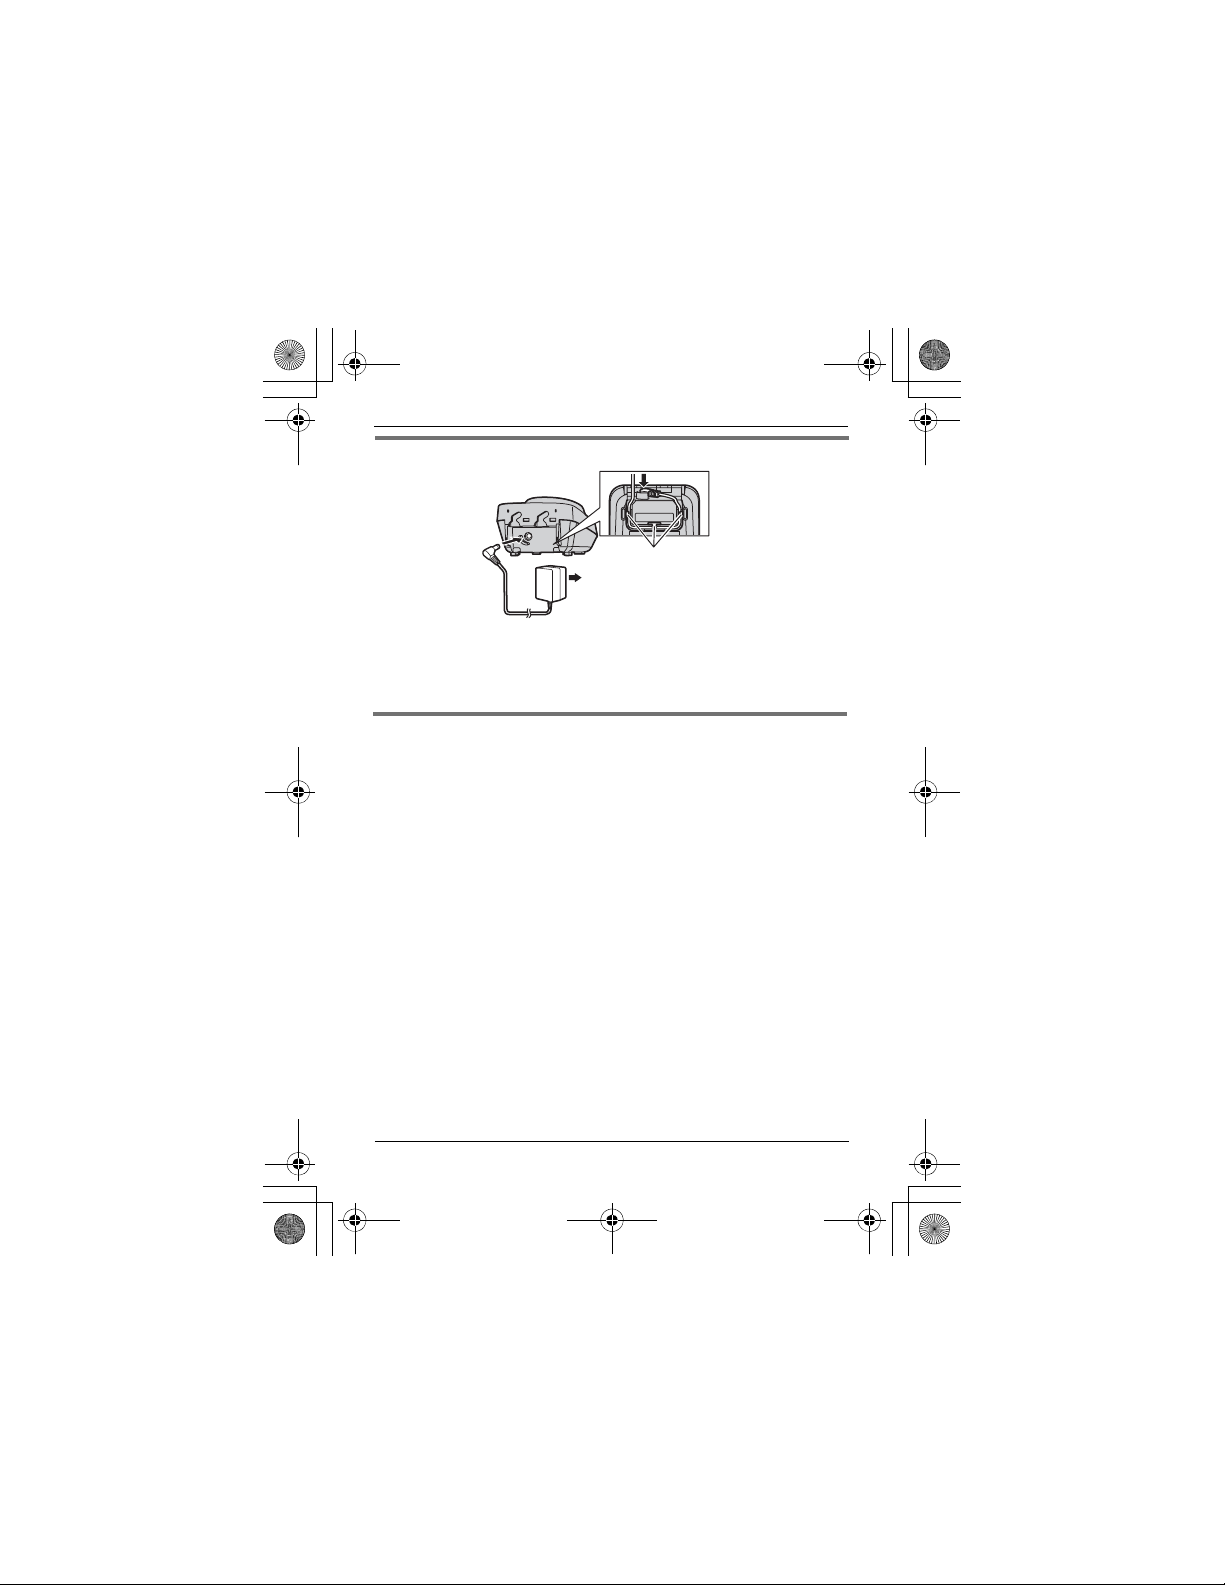
Connection
Hooks
(120 V AC, 60 Hz)
Note:
LUse only the supplied Panasonic AC adaptor PQLV209 or PQLV219.
LThe AC adaptor must remain connected at all times. (It is normal for
the adaptor to feel warm during use.)
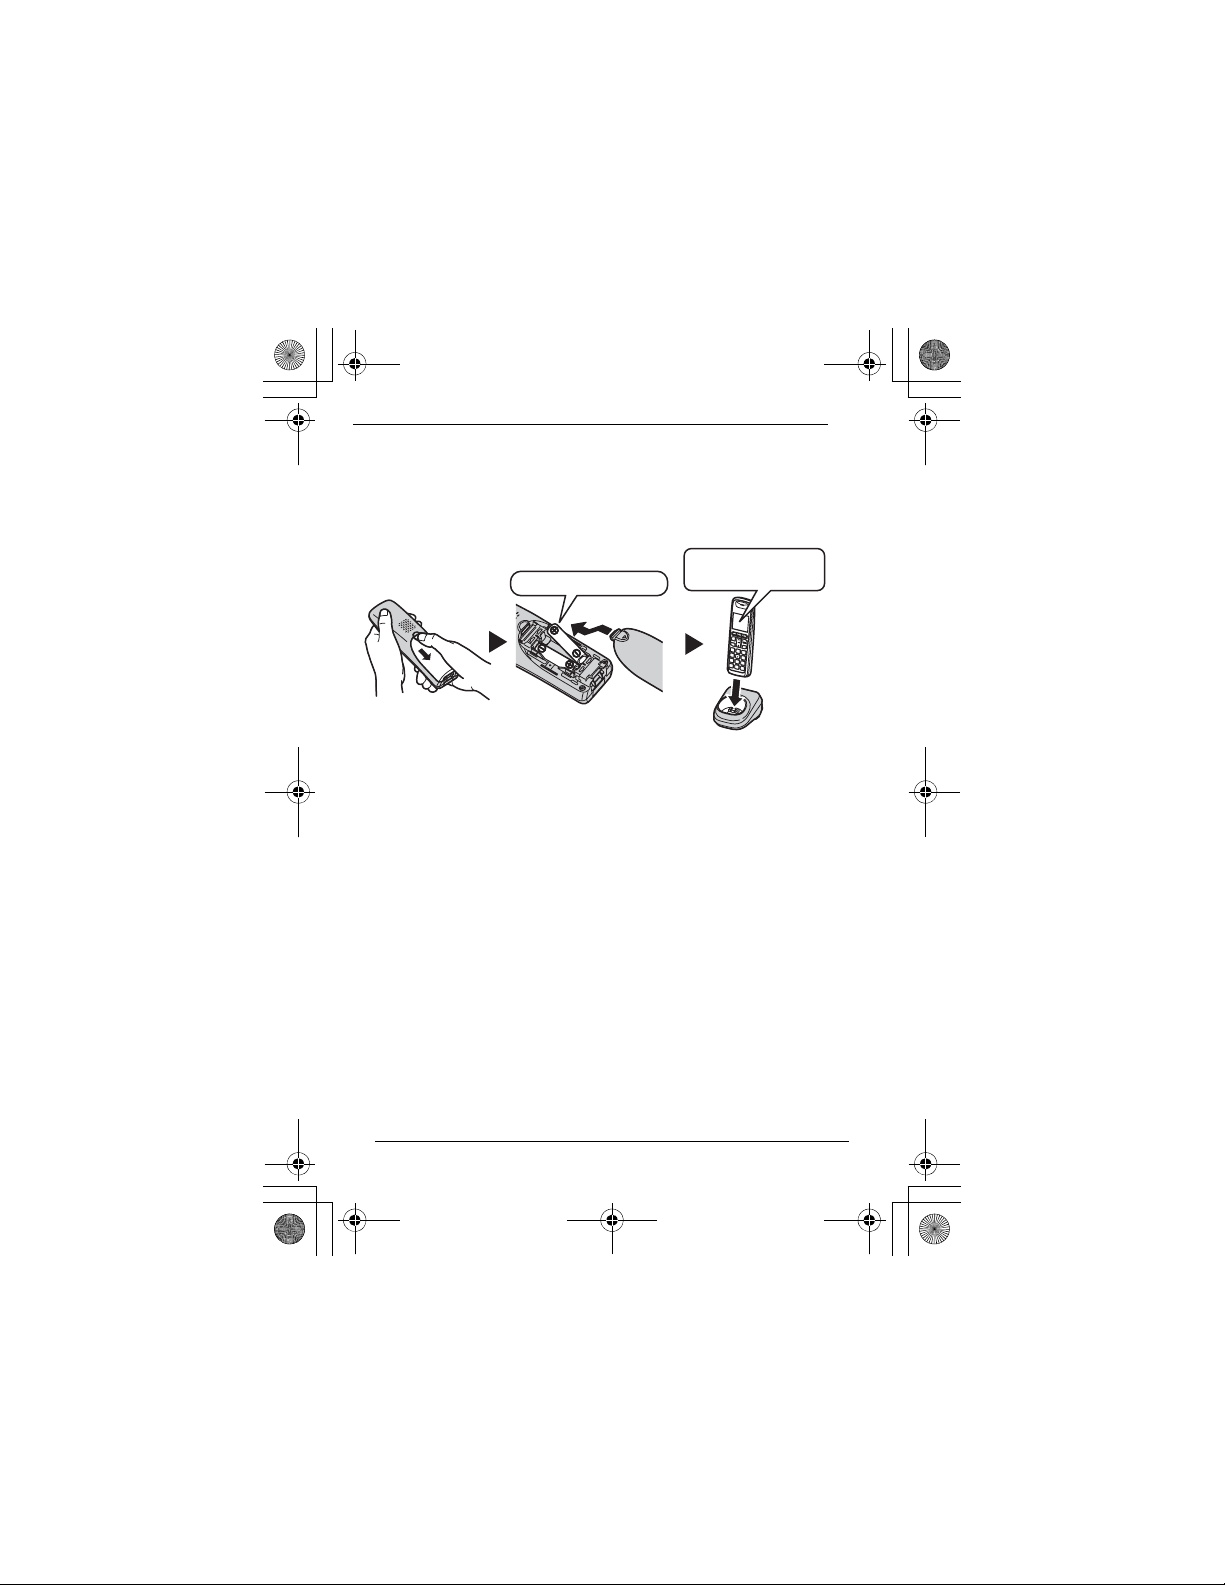
Battery installation and battery charge
Important:
LUse the supplied rechargeable batteries (Part No. HHR-55AAABU).
LWhen installing the batteries:
– Wipe the battery ends (S, T) with a dry cloth.
– Avoid touching the battery ends (S, T) or the unit contacts.
– Confirm correct polarities (S, T).
LWhen replacing the batteries:
– USE ONLY rechargeable Ni-MH batteries AAA (R03) size.
– Do NOT use Alkaline/Manganese/Ni-Cd batteries.
– We recommend using the Panasonic rechargeable batteries noted
in the base unit’s operating instructions for replacement battery
information.
3
Temporary Confidential
1 Press the notch on the handset cover firmly, and slide it in the
direction of the arrow.
2 Insert the batteries negative (T) end first. Close the handset cover.
3 Place the handset on the charger for about 7 hours before initial
use.
Confirm "Charging"
Rechargeable Ni-MH ONLY
Note:
LIf the batteries are fully charged, but the operating time seems to be
shorter, clean the battery ends (S, T) and the charge contacts with a
dry cloth.
is dislayed.
4
 Loading...