

Panasonic WV-7110AE Operating Instruction
Before attempting to connect or operate this product,
please read these instructions completely.
Indoor Camera Housing
WV-7110AE
FRANÇAIS
DEUTSCH
ENGLISH
-2-
WARNING:
TO PREVENT FIRE OR SHOCK HAZARD, DO NOT EXPOSE THIS APPLIANCE TO RAIN OR MOISTURE.
The serial number of this product may be found on the bottom of the unit.
You should note the serial number of this unit in the space
provided and retain this book as a permanent record of your
purchase to aid identification in the event of theft.
Model No. WV-7110AE
Serial No.
ENGLISH VERSION

-3-
CONTENTS
PREFACE .................................................................... 3
PRECAUTI0NS ............................................................ 3
INSTALLATION ........................................................... 4
LENS FOCUS ADJUSTMENT .................................... 10
SPECIFICATIONS ...................................................... 11
ACCESSORIES .......................................................... 11
PREF ACE
The Panasonic's WV-7110A Camera Housing is
designed to be used for indoor applications. This housing can easily be installed after the camera adjustment
and installation had been completed.
PRECAUTIONS
• It is designed for indoor use. Avoid using it in the
extreme environment where the rain falls directly,
extremely high temperature and humidity generate.
• Do not use the housing in the condition where the
sunlight directly falls to the housing. It may
increase interior temperature of the housing
extremely high.
• Use a dry cloth to clean the housing if it is dirty. If
the dirt is formidable, it is advisable to use a mild
detergent and wipe gently.
ENGLISH
-4-
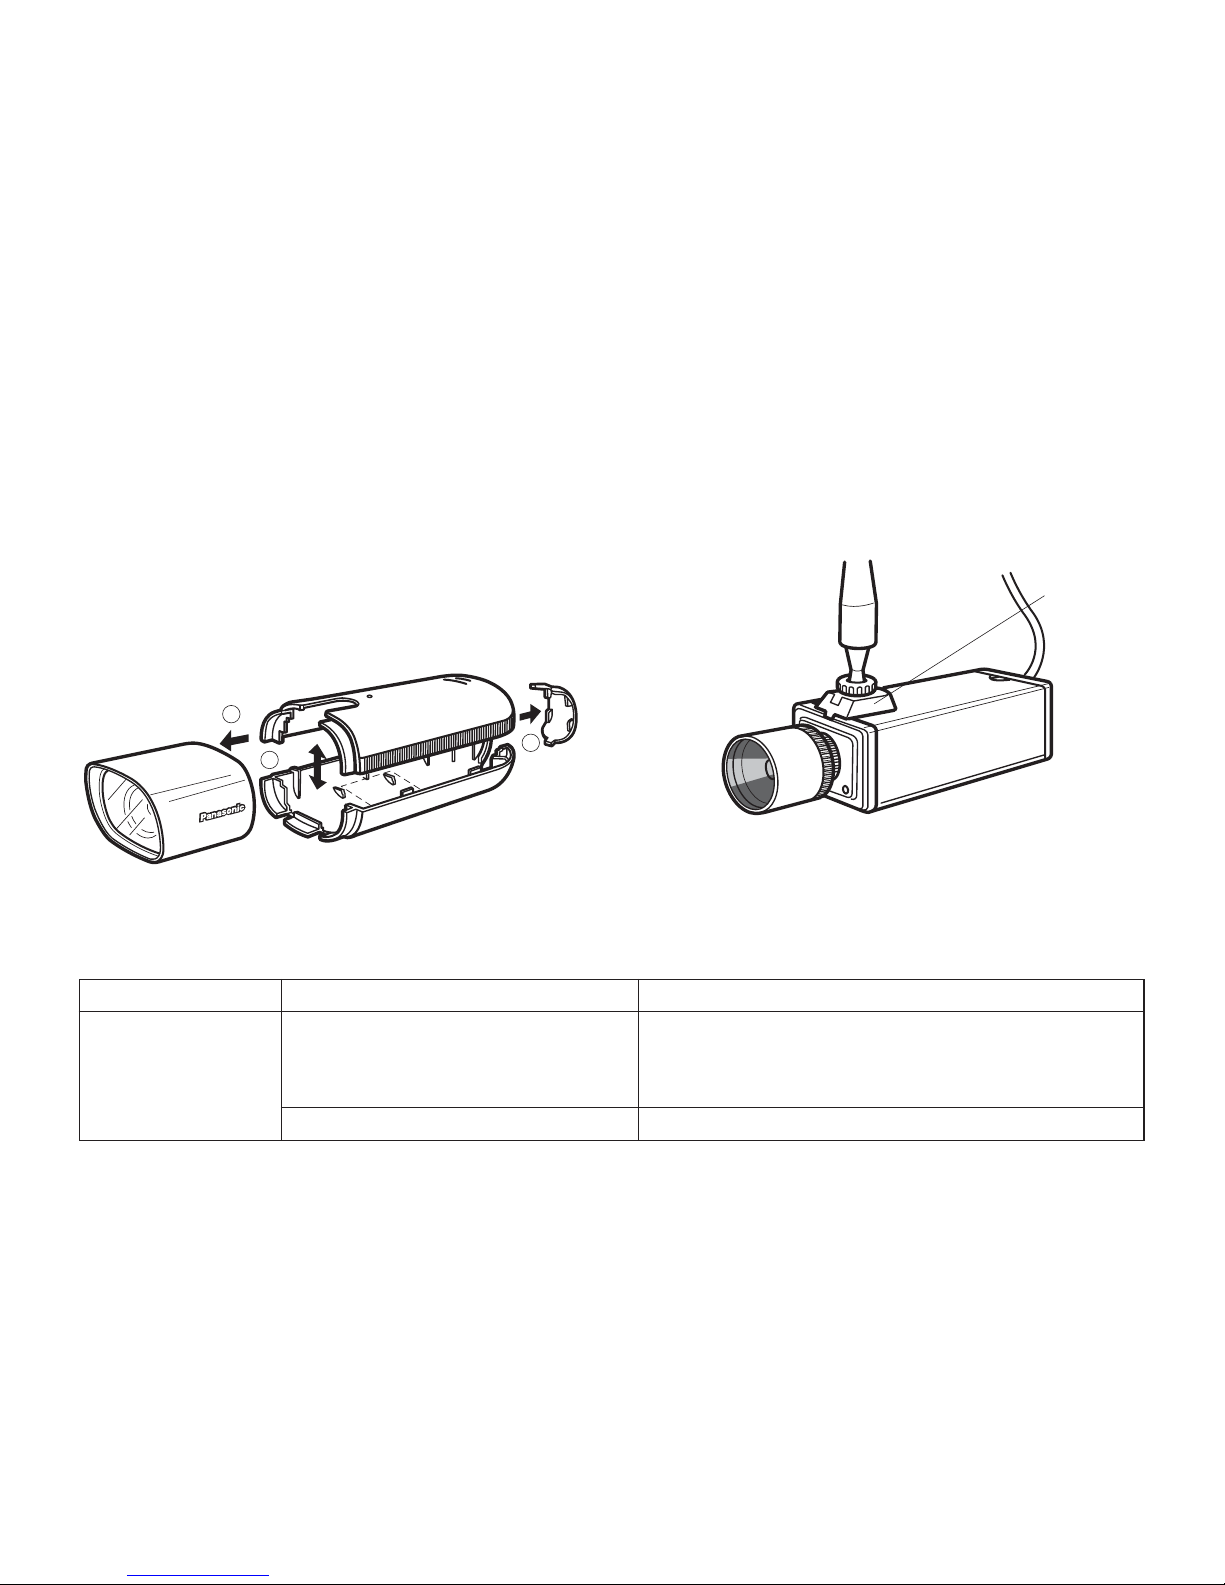
2. Mounting of the Camera
2-1. Mount the camera mounting bracket or the pan/tilt
mechanism onto the mounting adaptor of the camera.
When the cameras and lenses shown below are
installed into this housing, choose the suitable angle
according to the following tables.
Mounting
Adaptor
INSTALLATION
A. Mounting from top
1. Disassembling of camera housing
Remove the Front Case, Rear Cover and Upper/
Lower Covers as shown in the following.
Front Case
Upper Cover
Rear Cove
r
Lower Cover
1
2
3
WV-LA6/LA12
WV-LA4.5/LA6B2/LA12B2
WV-LA8B/LA16B/LA25B/LA50B
WV-LM6B2/LM12B2
Lens
WV-BL200 Series
WV-BL600 Series
Camera
Mounting Adaptor
WV-LA2.8 Angle-B
Use Angle
APPLICABLE MODELS AND MOUNTING
 Loading...