

Panasonic DP-1810P, WORKIO DP-1810F, WORKIO DP-2010, WORKIO DP-1810 Operating Instructions Manual
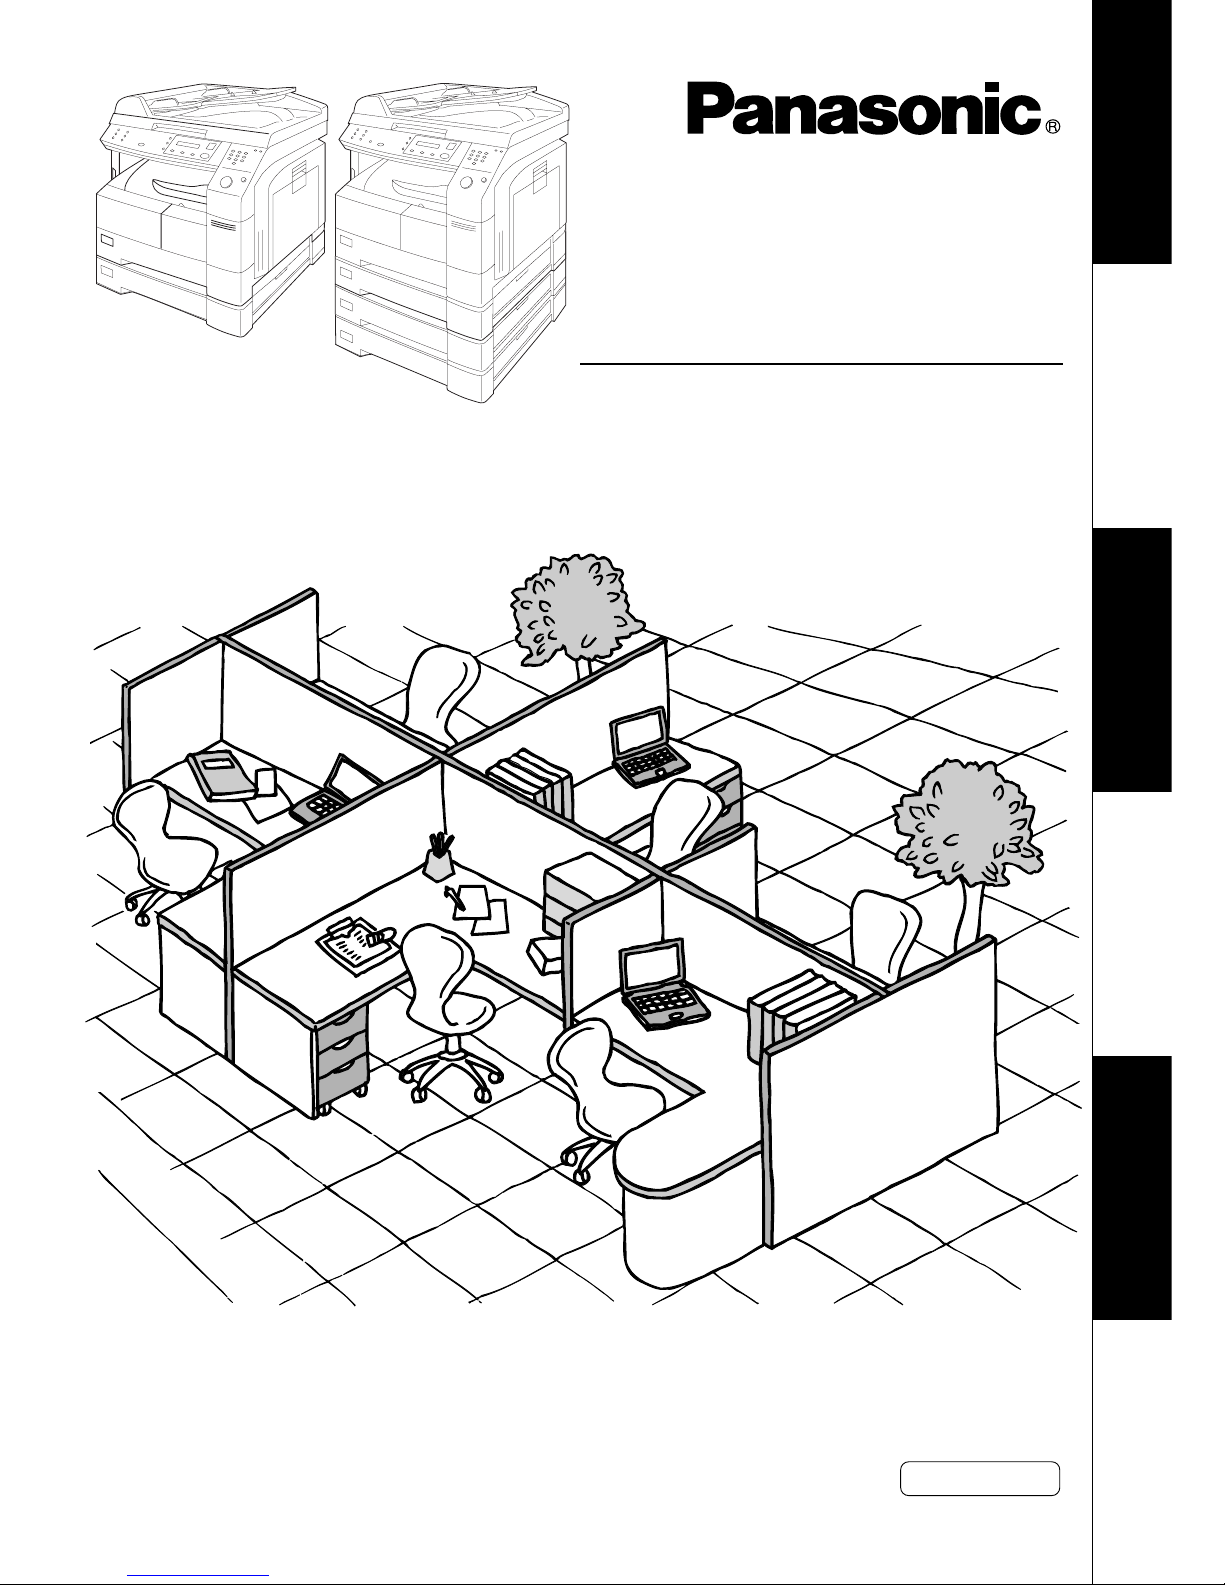
Digital Imaging Systems
Before operating this equipment, please read these instructions completely and keep these operating
instructions for future reference.
Getting To Know Your
Machine
J
?
I
Before StartingMaking CopiesOptionsOthers
Model No. DP-1810P/2010E
Operating Instructions
(For Copier)
English
DP-2010E
with Options
DP-1810P
with Options
2
IMPORTANT INFORMATION
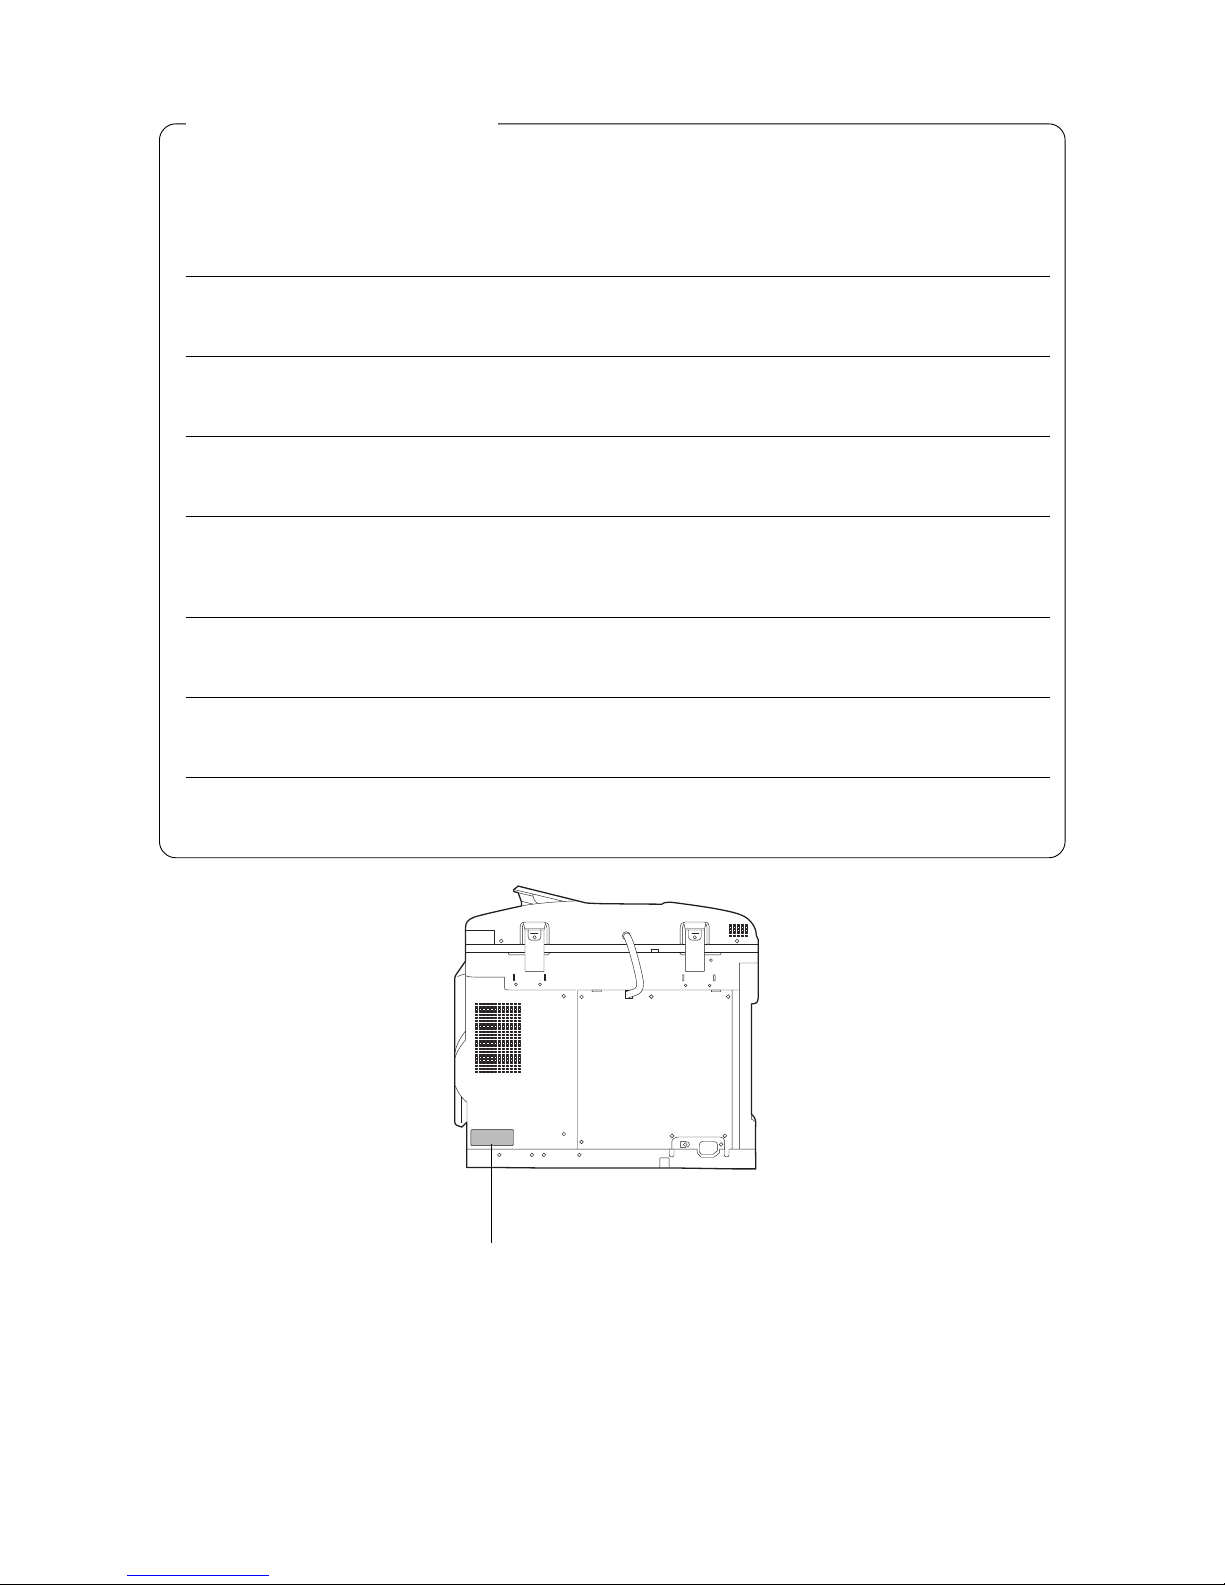
When requesting information, supplies or service always refer to the model and serial number of your
machine. The model and serial number plate (Main Name Plate) is located on the rear side of machine.
For your convenience, space is provided below to record information you may need in the future.
Model No.
Serial No.
Date of Purchase
Dealer
Address
Telephone Number
()
Supplies Telephone Number
()
Service Telephone Number
()
Model and Serial Number
Copyright 2002 by Matsushita Graphic Communication Systems, Inc.
All rights reserved. Unauthorized copying and distribution is a violation of law. Printed in Japan.
The contents of these Operating Instructions are subject to change without notice.
(Digital copier with ADF option)
3
Operation Chart
Common Features and Usage
■■
■■
■ Basic Operation
Original
1
Place the
Original
2
Original Size
(Reduction/
Enlargement
Only)
3
Copy Size
(Reduction/
Enlargement
Only)
4
Number
of Copies
5
Press
START
■■
■■
■ Position of the Original
Load Paper
Turn the Power
Switch On
C Place originals face down on the
platen or face up on the ADF.
C If the original is not positioned
properly, a portion of the original
may not be copied.
C For originals smaller than invoice
size, position the original within the
area of INVOICE and select invoice.
■■
■■
■ Commonly Used Functions and Operating Procedures
Full Size
Makes a copy that is the same
size as the original
145
Reduction or Enlargement
Copies the original at a fixed
reduction or enlargement ratio
13425
■■
■■
■ Memory Capacity
When the memory becomes full during original scanning, the message “OUT OF MEMORY”
“CONTINUE? 1: YES 2: NO” will be displayed in the message display. In this case, follow the
operating instruction in the message display.
When additional memory is required, consult with an authorized servicing dealer.
(See page 12)
(See page 13)
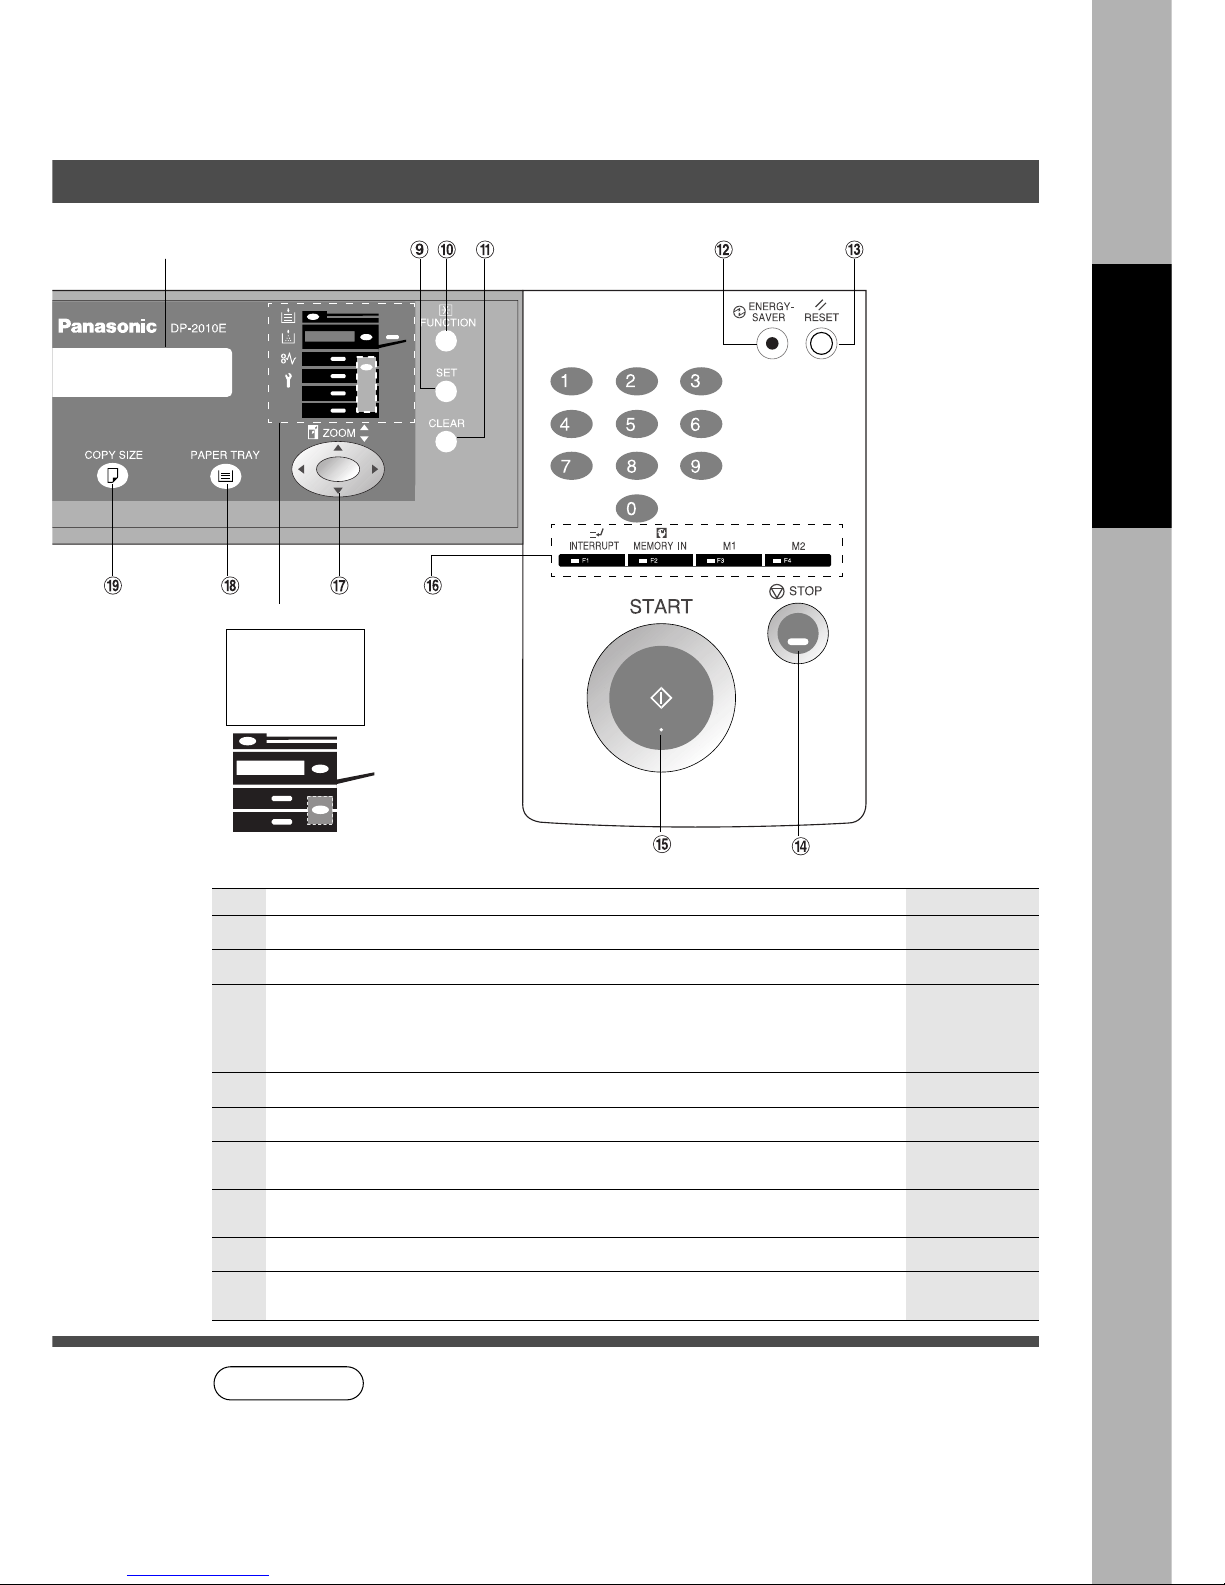
Getting To Know Your
Machine
INV
INV
LTR
LGL
LDR
LTR
LDR
INV
LTR
LGL
INV
INVOICE
INVOICE R
LETTER R
LEGAL
LEDGER
LETTER
Original Guide
Original Guides
Adjust to the original’s width
ADF Tray
From PlatenFrom ADF (or i-ADF)
4
Energy Star
As an ENERGY STAR® Partner, Panasonic has determined that this product meets the
ENERGY STAR
®
guidelines for energy efficiency.
This voluntary program specifies certain energy consumption and usage standards. This
product will automatically “power down” after a specified period of non-use. The use of this
ENERGY STAR
®
compliant product will reduce energy consumption and ultimately benefit the
environment.
The default functions can be adjusted depending on your office requirements.
Please ask your authorized Panasonic dealer for more details.

5
Table of Contents
Getting To Know Your Machine
Operation Chart .............................................................................................................................. 3
■ Common Features and Usage..............................................................3
Before Starting
Precautions ..................................................................................................................................... 7
Control Panel ................................................................................................................................10
Making Copies
Basic Copy .................................................................................................................................... 12
■ Full Size Copying................................................................................12
■ Reduction or Enlargement Copying ....................................................13
■ Zoom Copying .................................................................................... 14
■ Using the Sheet Bypass ..................................................................... 15
Creative Features ......................................................................................................................... 16
■ 2 in 1 Copy ......................................................................................... 16
■ 2 Page Copy .......................................................................................17
■ Book/Edge/Margin ..............................................................................18
■ 2-Sided/1-Sided Copy.........................................................................19
■ 1 \ 2/2 \ 1/2 \ 2 Copy.................................................................... 20
■ Book \ 2 Copy .................................................................................. 21
■ Job Memory ....................................................................................... 22
■ Sort Copy ........................................................................................... 23
Other Features .............................................................................................................................. 24
■ Energy Saver/Interrupt Mode..............................................................24
■ Skyshot Mode..................................................................................... 25
Combined Function Table ............................................................................................................ 27
Function ........................................................................................................................................ 28
■ Checking the Copier’s Total Counter ................................................... 28
■ General Functions .............................................................................. 29
■ Copier Settings ...................................................................................30
■ General Functions for Key Operator ................................................... 31
■ Copier Settings for Key Operator ........................................................32
■ Function Setting..................................................................................33
■ Function Setting for Key Operator....................................................... 34
■ For Your Safety ..................................................................................... 8
■ Handling ...............................................................................................8
■ Toner and Paper ................................................................................... 8
■ Ventilation .............................................................................................8
■ Installation ............................................................................................9
Table of Contents
Energy Star ..................................................................................................................................... 4

6
Table of Contents
Options
Accessories .................................................................................................................................. 39
■ Components .......................................................................................39
■ Automatic Document Feeder ..............................................................40
Problem Solving
Problem Solving ........................................................................................................................... 42
■ Adding Paper (J) ............................................................................... 42
■ Adding the Toner and Replacing Toner Waste Container (?) ............. 43
■ Removing a Misfed Paper................................................................... 45
Troubleshooting ........................................................................................................................... 52
■ Before Calling Service ........................................................................ 52
■ User Error Codes (U Code) ................................................................54
Others
Specifications ............................................................................................................................... 55
Options and Supplies................................................................................................................... 57
7
Precautions
For Your Safety
■■
■■
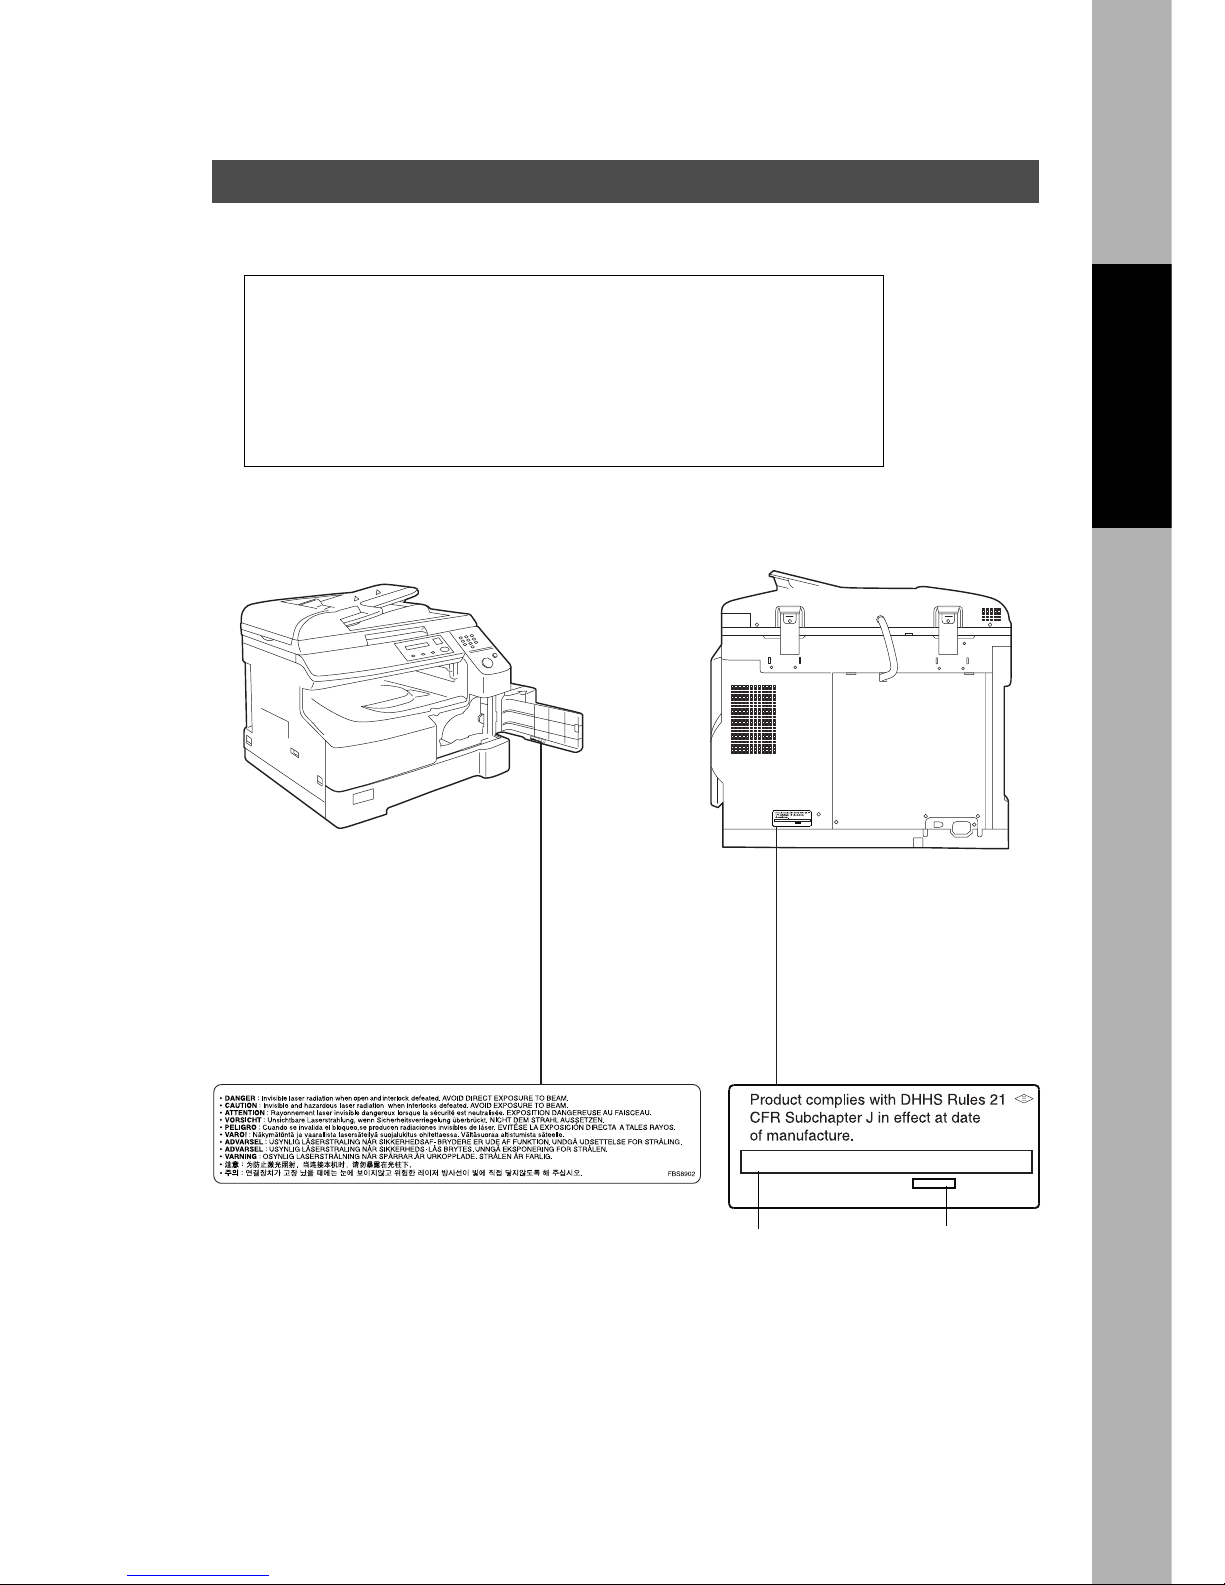
■ Laser Safety
LASER SAFETY
This unit employs a laser. Only qualified service personnel should
attempt to service this device due to possible eye injury.
CAUTION:
USE OF CONTROLS, ADJUSTMENTS OR PERFORMANCE
PROCEDURES OTHER THAN THOSE SPECIFIED HEREIN MAY
RESULT IN HAZARDOUS RADIATION EXPOSURE.
■■
■■
■ Caution Labels
Manufacturer’s name and address Factory ID
Before Starting
(Digital copier with ADF option)
(Digital copier with ADF option)
8
Precautions
Handling
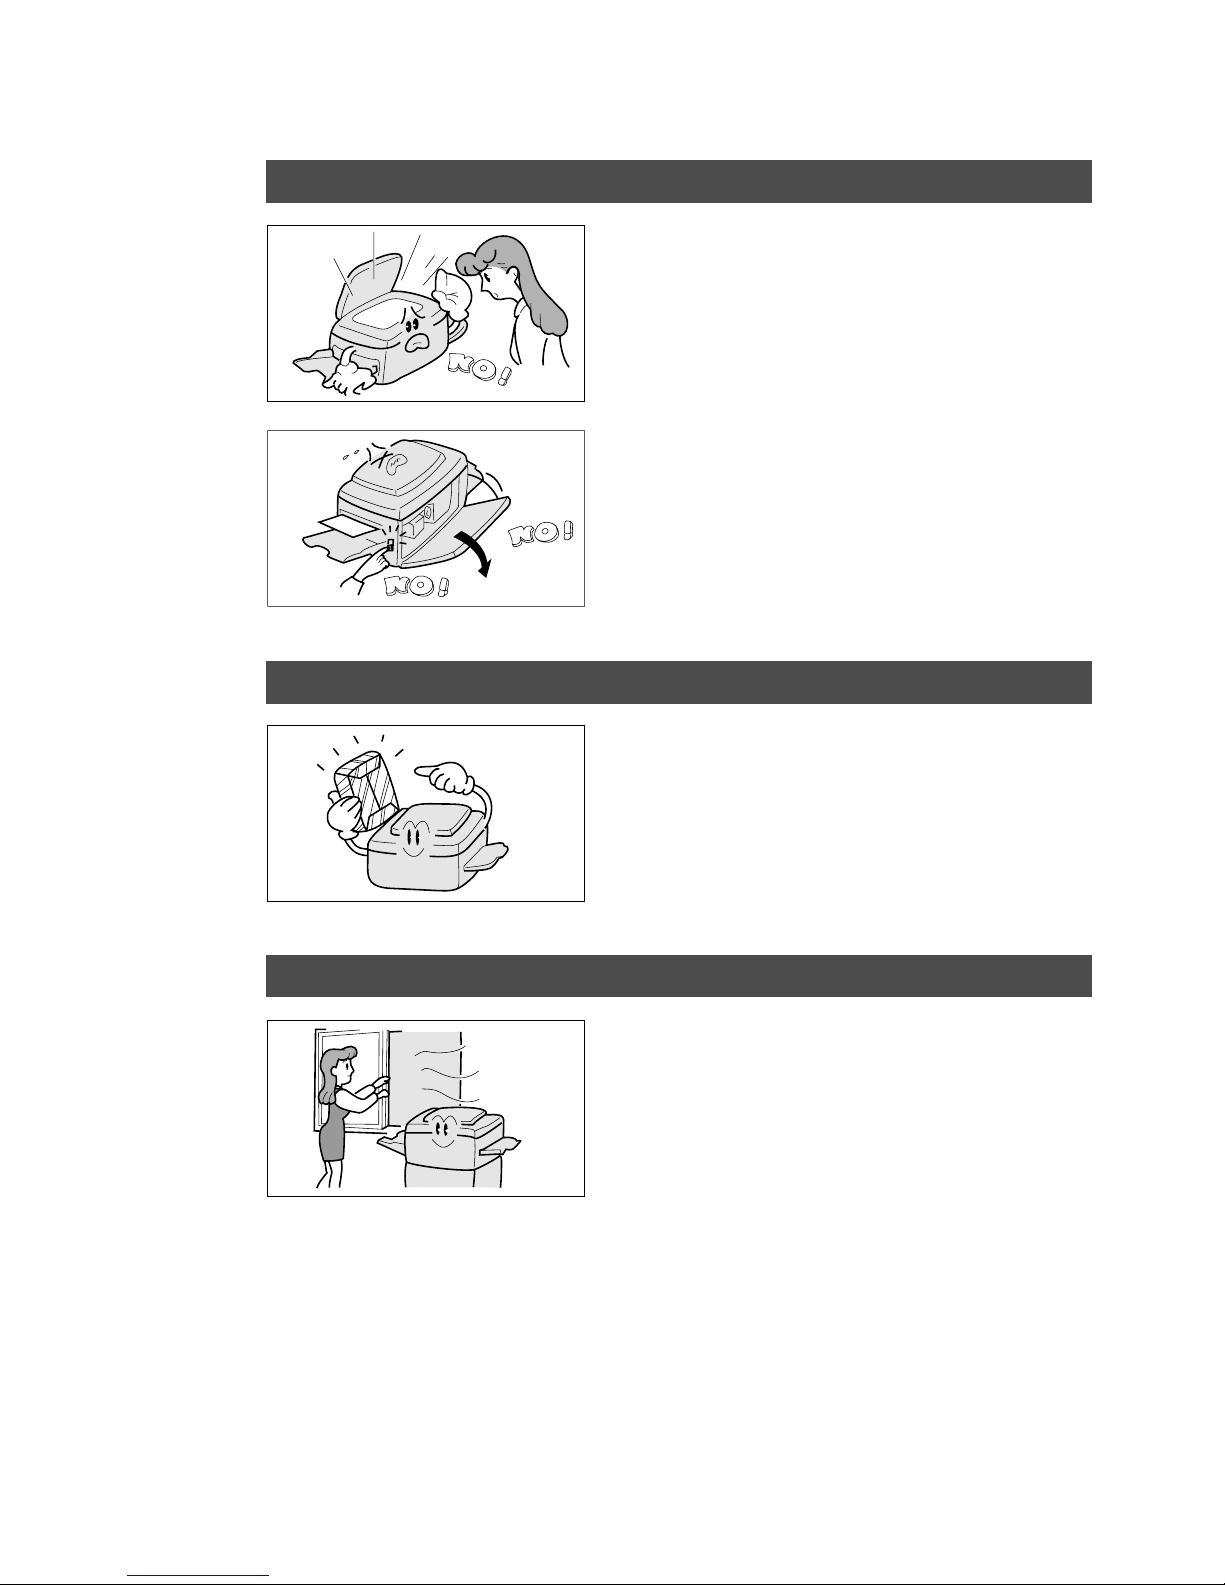
■ Do not look directly at the exposure lamp when
copying.
■ Do not turn the power switch Off or open the front
panel during copying.
C Do not drop paper clips or other metal objects into
the copier.
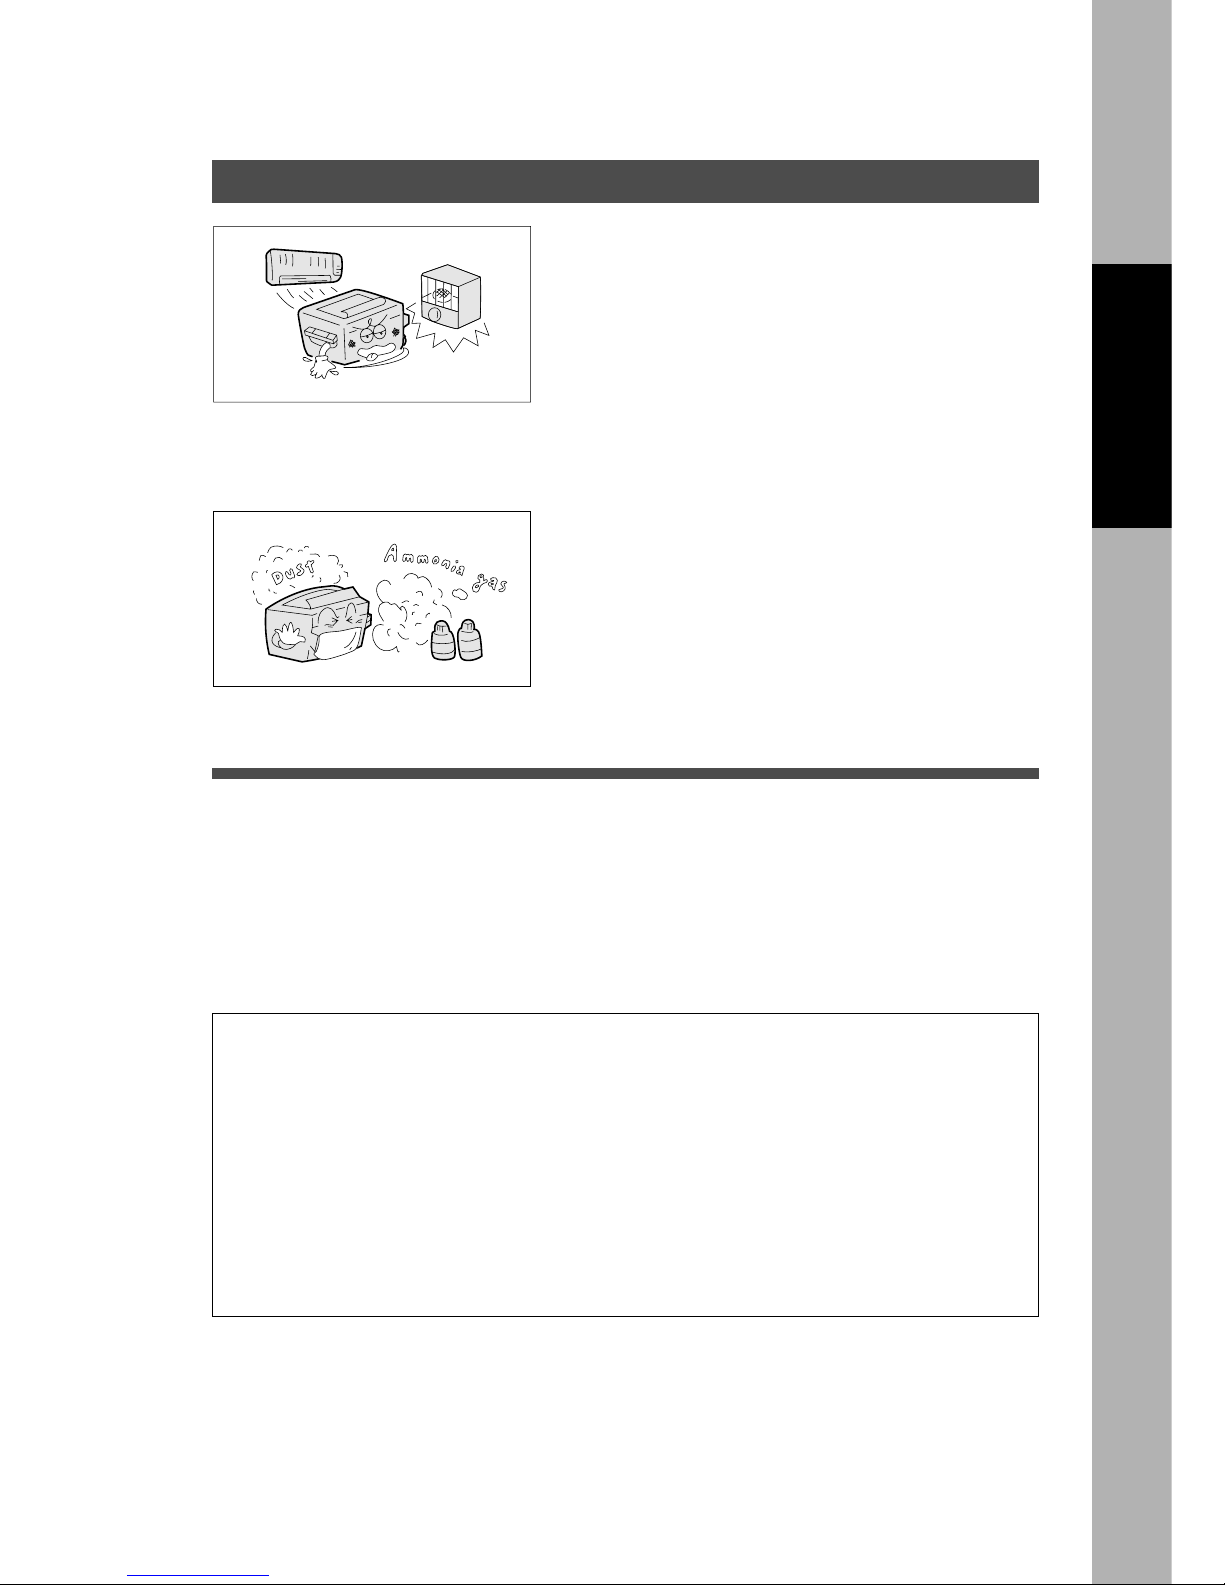
Toner and Paper
■ Store toner, drum and paper in cool areas with low
humidity.
C Use high quality 16 – 24 lb (60 – 90 g/m2) [Sheet
Bypass: 15 – 34 lb (56 – 128 g/m2)] paper.
C For optimum performance, it is recommended that
only Panasonic Brand supplies are used in the
copier.
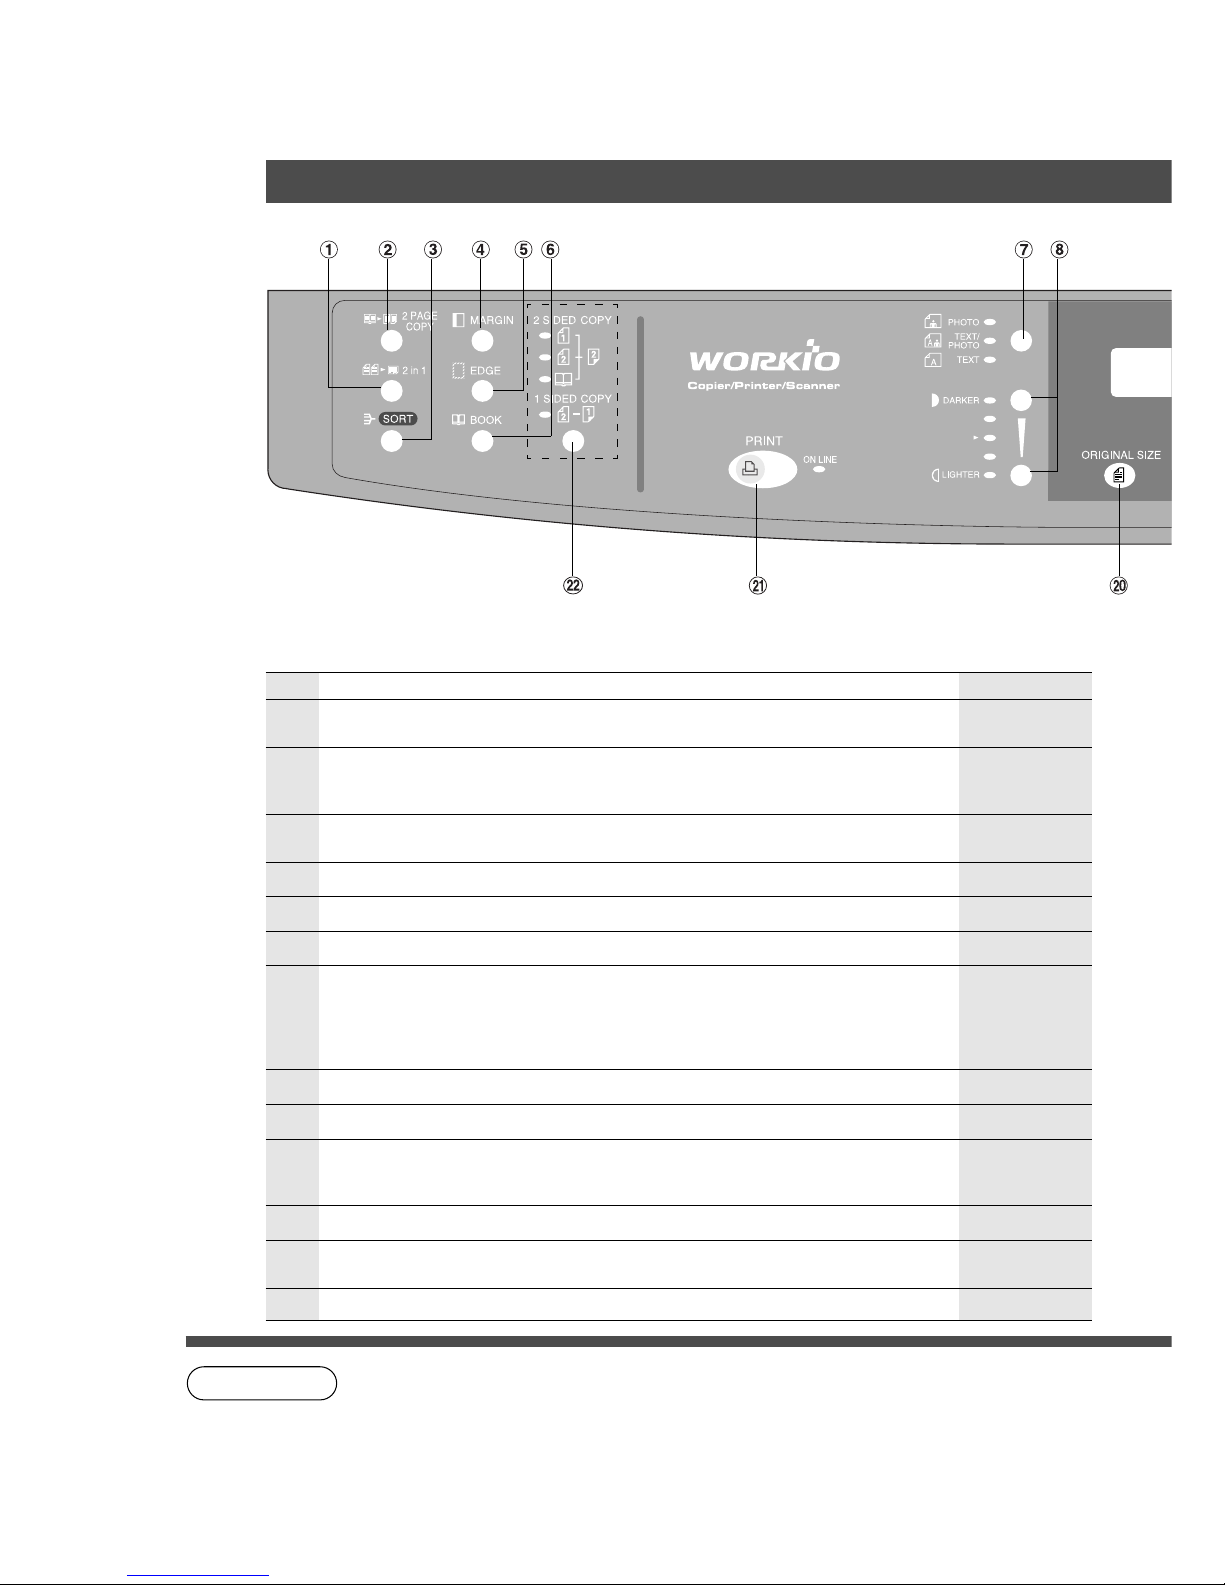
Ventilation
■ The copier should be installed in a well-ventilated
area to minimize the ozone density in the air.
9
■ The copier should not be installed in areas with the
following conditions:
C Extremely high or low temperature and humidity.
Ambient conditions
Temperature: 50 – 86°F (10 – 30°C)
Relative humidity: 30 – 80 %
C Where temperature and humidity can change
rapidly, causing condensation.
C Direct exposure to sunlight.
C Directly in the air conditioning flow.
C In areas of high dust concentration.
C In areas of poor ventilation.
C In areas with chemical fume concentration.
C In areas with extreme vibration.
C With unstable or uneven conditions (floors, etc.).
■ The maximum power consumption is 1.2 kW.
A properly wired (grounded), dedicated, 15 A, 120 VAC outlet is required.
Do not use an extension cord.
The power cord on this equipment must be used to disconnect the main power.
Please ensure that the socket outlet is installed near the equipment and is easily accessible.
FCC WARNING For U.S.A.
FCC WARNING:
This equipment has been tested and found to comply with the limits for a Class A digital device,
pursuant to part 15 of the FCC Rules. These limits are designed to provide reasonable
protection against harmful interference when the equipment is operated in a commercial
environment. This equipment generates, uses, and can radiate radio frequency energy and, if
not installed and used in accordance with the instruction manual, may cause harmful
interference to radio communications. Operation of this equipment in a residential area is likely
to cause harmful interference in which case the user will be required to correct the interference
at his/her own expense.
The user could lose the authority to operate this equipment if any unauthorized changes or
modifications are made to this equipment.
Installation
Precautions
Before Starting
10
No Contents Refer to
#
2 in 1 Key
C From two 1-sided originals, side by side, to 1-sided copies.
Page 16
$
2 Page Copy Key
C Copying two facing pages on a ledger size original on two separate
letter size sheets.
Page 17
%
Sort Key
C When using Electric Sorting Mode. Optional memory is required.
Page 23
& MARGIN Key C Shifts the image to the right or left. Page 18
( EDGE Key C Creates a blank edge. Page 18
) BOOK Key C Eliminates dark inner binding shadows. Page 18
*
Photo; Text/Photo; Text Keys
C Select the type of original(s) for image density adjustment.
PHOTO : Originals are mainly composed of photo.
TEXT/PHOTO: Combined originals with text and photo.
TEXT : Originals are mainly composed of text.
Page 12
+ Exposure Keys (DARKER, LIGHTER) Page 12
.
FUNCTION Key
C Use when changing the paper size, initial values for functions (default
values) and key operator settings.
Pages 28 – 37
- SET Key C Set the present selection. ——
Control Panel
NOTE
C The Control Panel displayed above shows only copier functions. Please refer to the
appropriate operating instructions for other control panel functions or in the Panasonic
Document Management System CD-ROM for the Printer control panel functions.
C The illustration above shows the DP-2010E control panel.
/ CLEAR Key C Clears the copy count in the display. ——
0
ENERGY-SAVER Key
C Can save power while the copier is not in use.
Page 24
1 RESET Key C Resets all features to the initial power-on state. ——
(For DP-2010E only)
11
For DP-1810E
Control Panel
LCD Display
Warning Indications
J Add Paper
? Add Toner
I Misfeed
2 Call Service
No Contents Refer to
2 STOP Key C Stops the copy run. ——
3 START Key C Used to start an operation. ——
4
INTERRUPT Key, MEMORY IN Key, M1/M2 Keys
C Interrupt Key interrupts other copy or print jobs while making copies.
C Memory In Key registers two copy jobs for recall at a later time.
C
M1/M2 Keys are used to store a Job in Memory or to recall a Job stores in Memory.
Pages 22, 24
5
Cursor Keys
CC
CC
C Select copy ratio and function modes using (G or F).
——
6 PAPER TRAY Key
CC
CC
C Used to select the paper tray manually. ——
7
COPY SIZE Key
C
Used to select Reduction/Enlargement only. For additional details, see page 13.
——
8
ORIGINAL SIZE Key
C
Used to select the original size manually. For additional details, see page 13.
——
9 PRINT Key
CC
CC
C When selecting the Printer ON/OFF Line. ——
NOTE
C The Control Panel displayed above shows only copier functions. Please refer
to the appropriate operating instructions for other control panel functions or in
the Panasonic Document Management System CD-ROM for the Printer
control panel functions.
Before Starting
:
2-Sided/1-Sided Copy Key
C Used to select 1 \ 2, 2 \ 2 and 2 \ 1, Book \ 2 copying
——
12
Basic Copy
Full Size Copying
■■
■■
■ Copying the Same Size Originals (1:1)
Copy size is automatically selected.
1
Place the Original
LCD Display (Sample)
ORIGINAL SIZE Key
Select the Original Size on units
without the ADF/i-ADF Option.
NOTE
CLEAR Key
2
Number of Copies*
Up to 999
3
Press START**
# Select the Original Type
PHOTO : Originals are mainly composed of photo.
TEXT/PHOTO: Combined originals with text and photo.
TEXT :Originals are mainly composed of text.
$ Select Exposure Control
Press the DARKER/LIGHTER keys to adjust the exposure.
■■
■■
■ Manually Selecting Exposure Control or Original Type
∗
Use Clear key when canceling the copy count.
∗∗
While the copier is warming up, you may position your original on the copier, enter
your copy job selections and press the Start key. The COPY JOB RESERVED
indicator displays until the warm up cycle is completed and the copy job is
automatically started.
READY TO COPY
COPIES:001

13
■■
■■
■ Copying with Preset Ratios
Basic Copy
100 77 65 50
121 100 79 61
129 100 100 65
200 155 129 100
Reduction or Enlargement Copying
LDR ->LTRB [LTRB ]
ZOOM: 65% COPIES:001
RESET
Making Copies
1
Place the
Original
2
Select the
ORIGINAL SIZE
3
Select the COPY
SIZE
4
Number of
Copies
C If the desired copy size is different from the paper size loaded in the paper
tray, use the sheet bypass. (See page 15)
C Press the RESET key to cancel all job settings.
5
Press
START
Example: Reduction
Original size Copy size
LEDGER LETTER
The correct ratio is automatically selected.
Reduction and enlargement ratios (%)
Original
Size
Copy Size
Ledger Legal Letter Invoice
Ledger
Legal
Letter
Invoice
C When changing the paper tray, press the
Paper Tray key.
NOTE
14
NOTE
ATTENTION
■■
■■
■ Zoom
Copies with variable zoom ratios from 50 % to 200 % in 1 % increments.
LTR ->LTRB [LTRB ]
ZOOM:125% COPIES:001
B
RESET
Zoom Copying
Basic Copy
(Example: 125 % Zoom)
1
Place the
Original
2
Press Cursor (G or F)
keys to select Zoom Ratio
4
Number
of Copies
5
Press
START
C When changing the paper size after setting the zoom ratio, please use the paper tray
key.
C Press the RESET key to cancel all job settings.
3
Select ORIGINAL
SIZE
(without using
ADF/i-ADF)
15
NOTE
ATTENTION
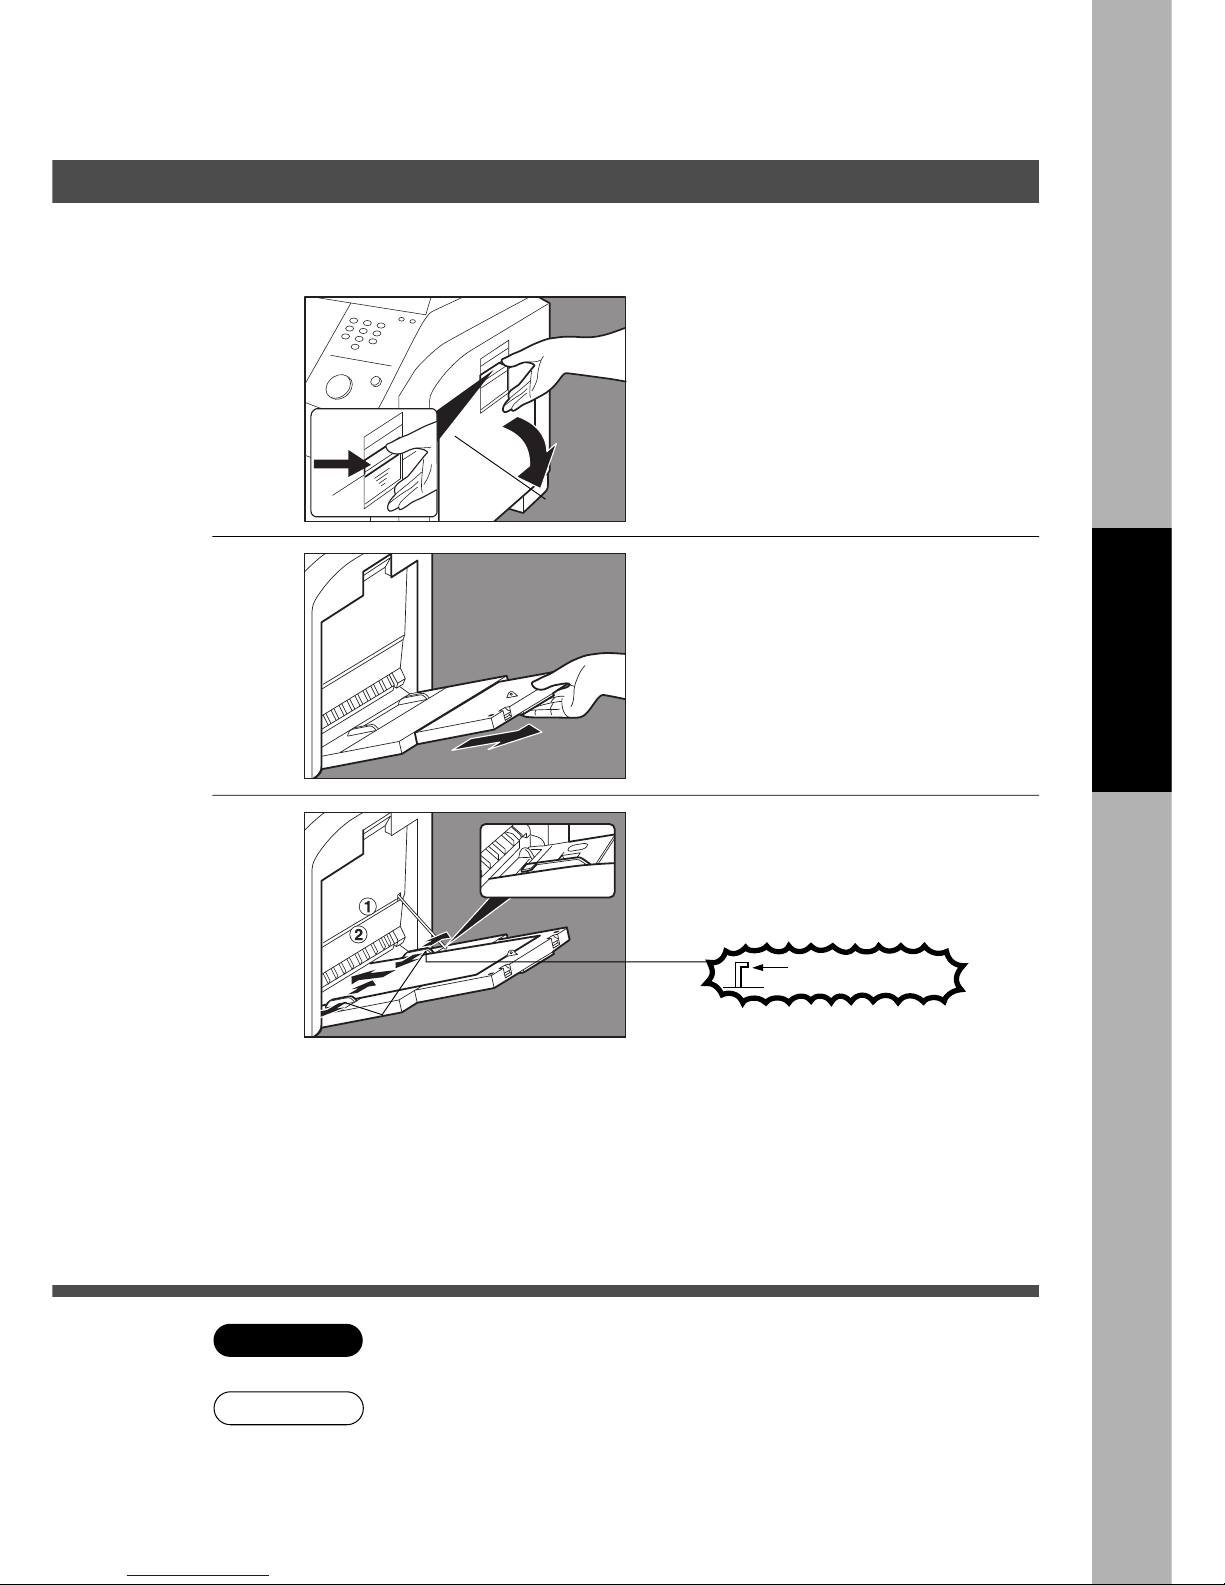
Sheet
Bypass
# Place the sheets of paper into
the tray. (approximately up to
50 Letter size sheets/20 lb)
Basic Copy
Using the Sheet Bypass
■■
■■
■ Copying on Special Paper, etc.
1
Place the original.
Open the sheet bypass.
2
Pull out the sheet bypass tray
until it stops.
(For Ledger size only)
3
Insert the paper until it stops.
$ Adjust the side guides.
Incorrect adjustment may cause the
paper to wrinkle, misfeed or skew.
Press START.
Side Guides
C Adjust the side guides properly to avoid skewing, wrinkling or misfeeding.
C Do not feed curled paper through the sheet bypass to avoid misfeed.
Do not fill above.
Making Copies
16
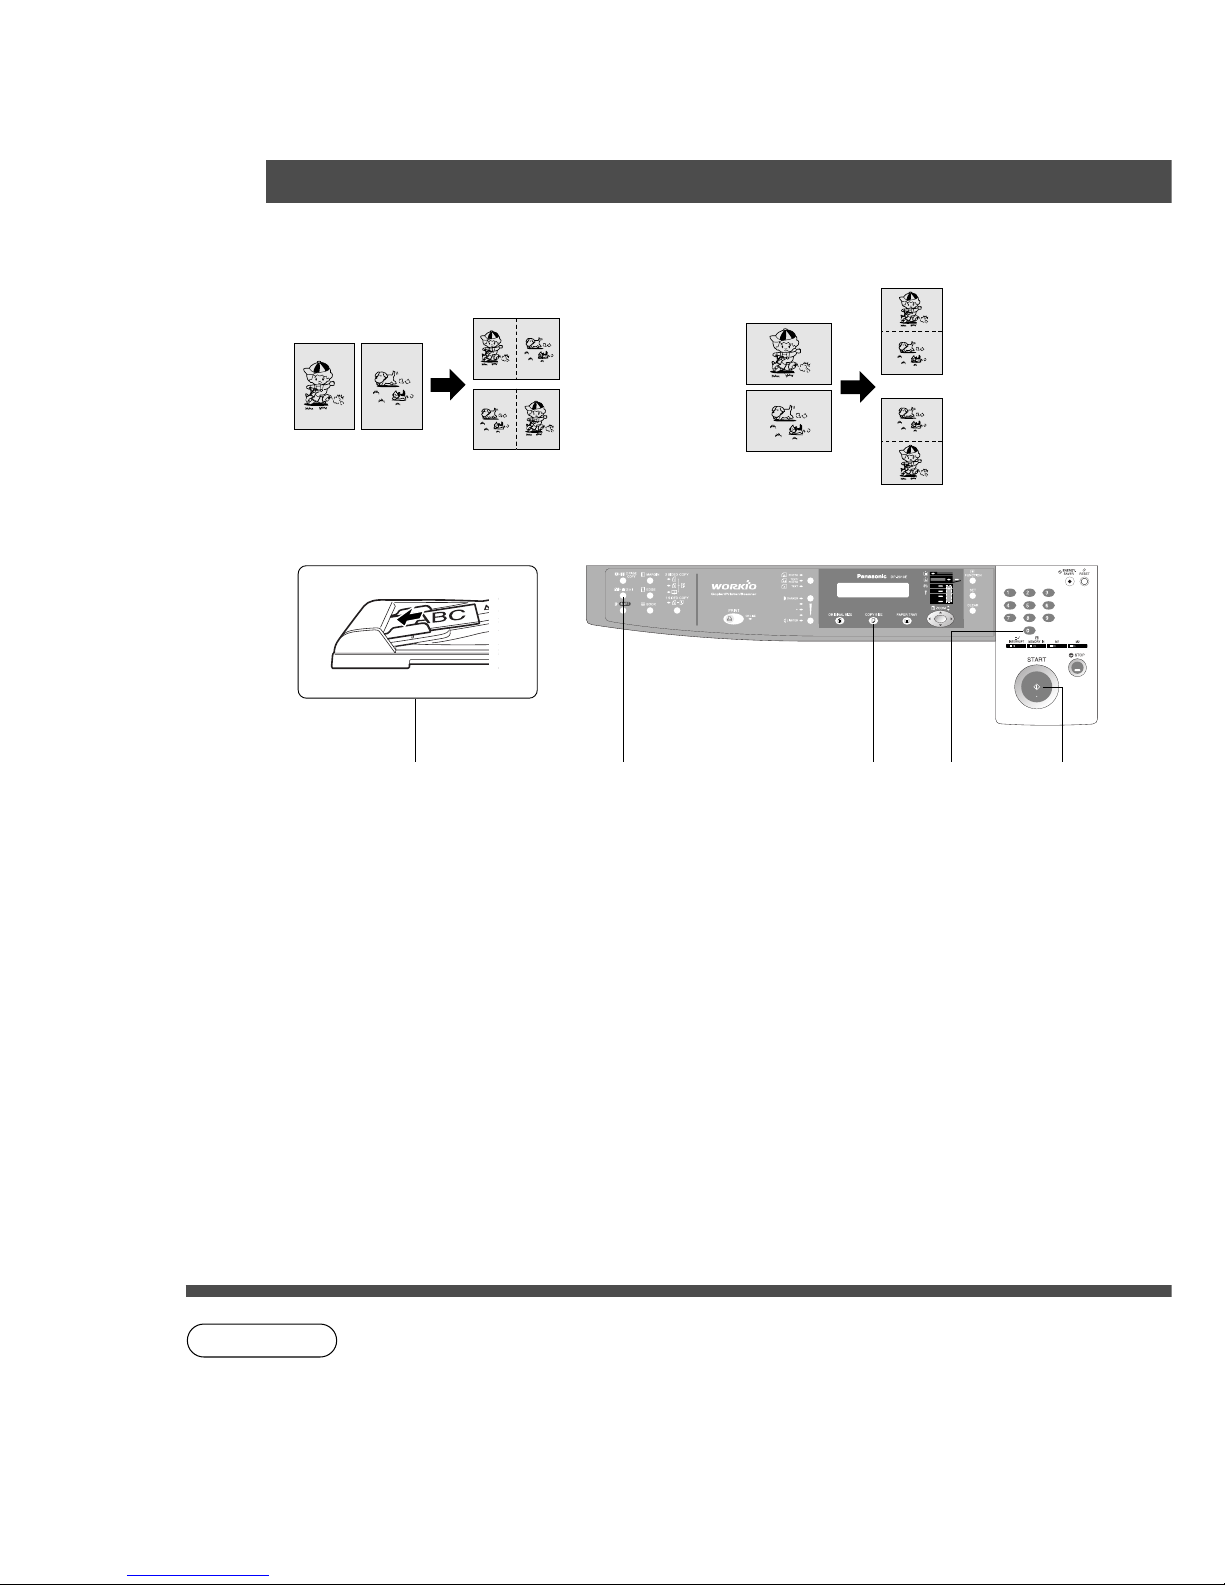
2 in 1 Copy
■ 2 in 1 Copy
From two 1-Sided originals, side by side, to 1-Sided pages.
Creative Features
1 \ 2 (Layout)*
2 \ 1 (Layout)*
Portrait (Orientation)*
Landscape (Orientation)*
1 \ 2 (Layout)*
2 \ 1 (Layout)*
4
Number of
Copies
■■
■■
■ Procedure
ADF/i-ADF
Face-Up
1
Place the
Originals
2
Press 2
in 1 key
(
3
)
COPY SIZE
(Reduction/
Enlargement
Only)
5
Press
START
C The ADF/i-ADF is required for 2 in 1 copy.
CPress the RESET key to cancel all job settings.
CNumbers in parenthesis “ ( ) ” represent that, an additional step is required to
activate the feature.
∗
The Orientation and Layout can be set in the Copier Settings function mode.
(See page 27)
NOTE
17
NOTE
C To reset all job settings, press the RESET key.
3
ORIGINAL SIZE
(Letter or Ledger
size Only)
4
Number of
Copies
5
Press
START
Platen Ledger size original
Letter
Book Mark
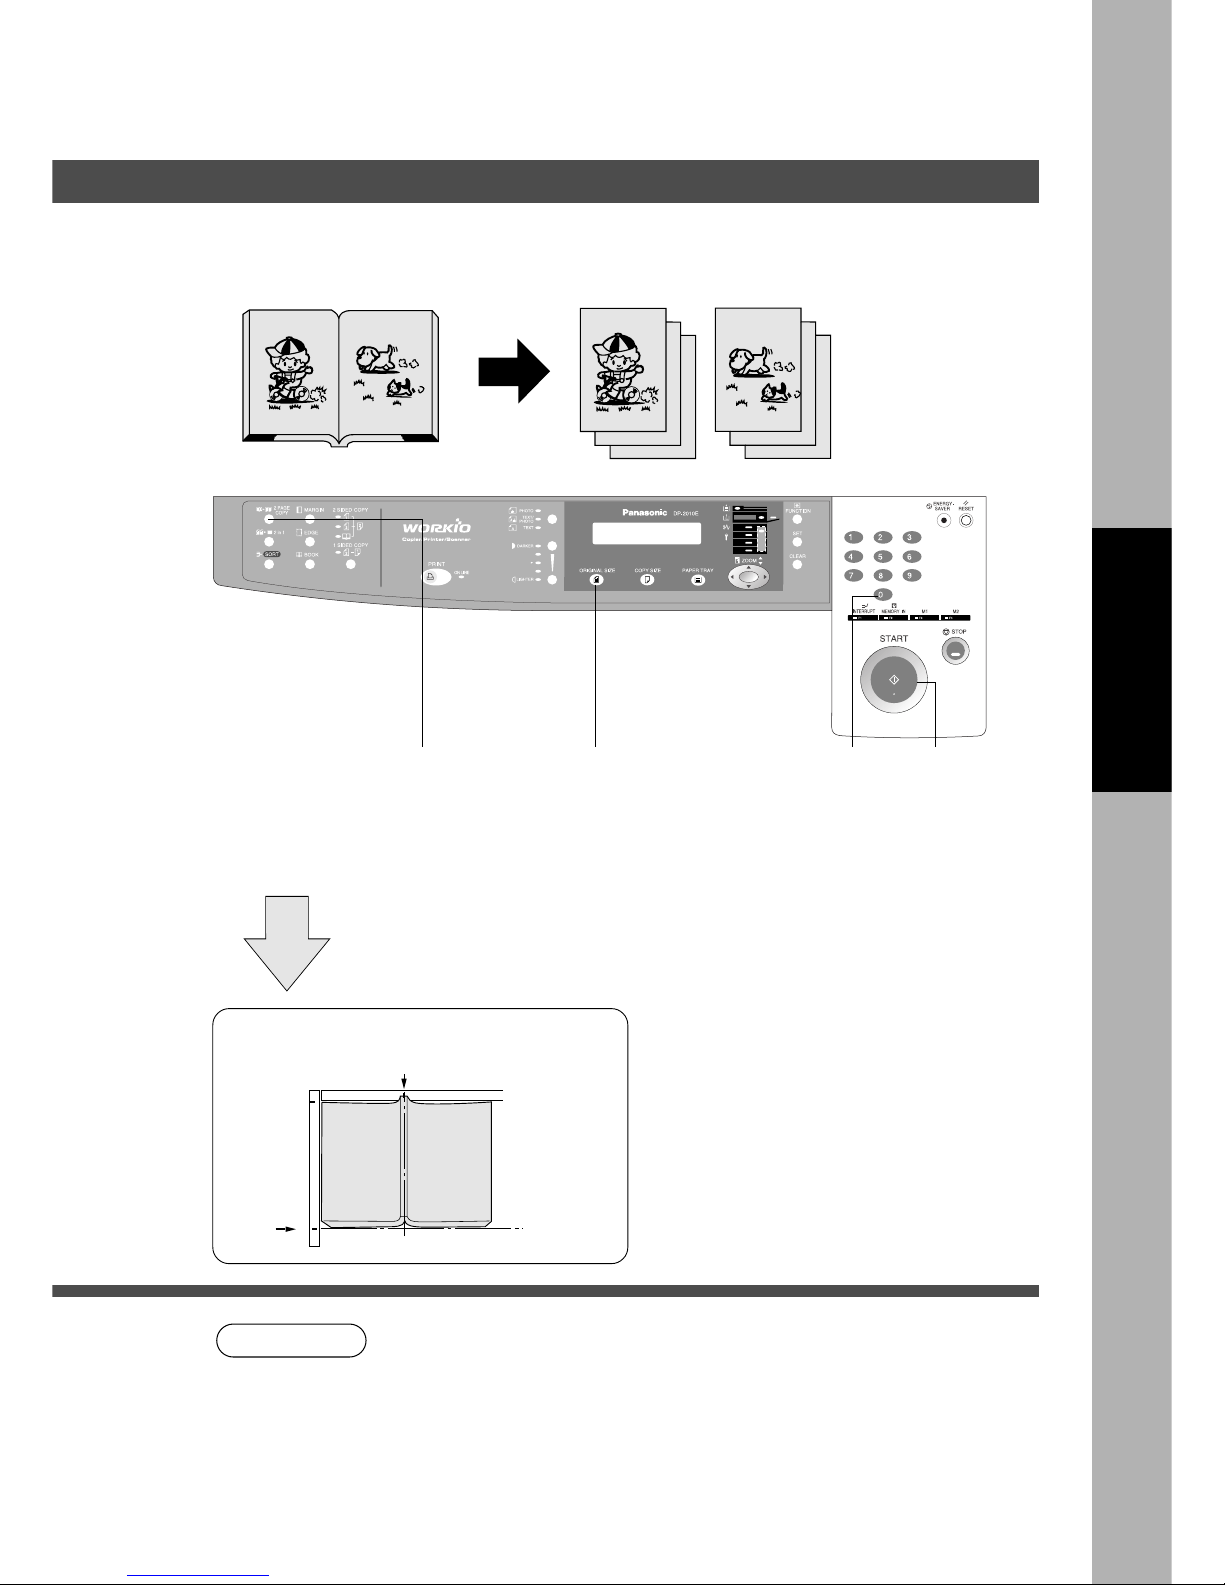
■ 2 PAGE Copy
Copying two facing pages on a ledger size original on two separate Letter size sheets.
■■
■■
■ Procedure
1
Place the
Originals
2
Press the 2
PAGE COPY
key
2 PAGE COPY
Creative Features
Making Copies
Center book
by length
and width
according
to center
marks.
18
NOTE
BOOK/EDGE/MARGIN
Creative Features
■ BOOK Key
Eliminates dark inner binding shadows when copying from a book.
■ EDGE Key
Creates a blank edge.
■ MARGIN Key
Shifts the image to the right or left.
■■
■■
■ Procedure
∗
Initial setting (Factory setting) can be changed in the Copier Settings function mode.
(See page 30)
∗∗
If a part of the copied image is missing when using the Margin mode, change the
Frame Reduction setting to ON.
(See page 30)
CPress the RESET key to cancel all job settings.
Book
∗
Initial Book Margin setting (Factory setting): 20 mm
∗
Initial Equal Rate setting (Factory setting): 5 mm
∗
Initial Left Margin setting (Factory setting): 10 mm
Edge
Margin**
1
Place the
Original
2
Press BOOK, EDGE
or MARGIN key
5
Press
START
4
Number
of Copies
BOOK MARGIN
CENTER VOID = 20mm ∨∧
EQUAL RATE
VOID MARGIN = 5mm ∧
LEFT MARGIN
10mm ∨∧
3
Press Cursor (G or F) keys to adjust
the void width while the button is
blinking. (approx. 5 sec.)
CVoid/Margin width: 5-99 mm
 Loading...