Without the inclusion of lens cap and step up ring: Width: 78mm, Height: 59mm and Depth: 97mm [3.07” x 2.32” x 3.82”]
Step up ring excluding Final lens cap: Width: 78mm, Height: 59mm, and finally Depth: 111mm [3.07” x 2.32” x 4.37”]
Mass (Weight):
Step up ring excluding Final lens cap: Approximately 195 g (Approx. 0.429 lbs)
Step up ring with Final lens cap excluded: approximately weight 219 g (Approx. 0.482 lbs)
Frequently Asked Questions
Compatible Video Cameras: HDC-SD800, HDC-TM900, HDC-SD90, HDC-TM90
F3.2 for (HDC-SD800)/(HDC-TM900) (f=2.5mm) and F3.3 (f=2.3mm) intervHDC-SD90)/(HDC-TM90)
35 mm Equivalent: 58 mm
The closest distance for Recording: Approximately 1.2 meters (or alternatively, 3.9 feet)
Stereo Base: 12.4 mm (0.49 inches)
3D Video Format side by side type of format (Movie built with 2 screens)
Distant Recommendation While Watching TV:
--42 “ : A distance roughly equal to about 1.6 m (5.2 feet)
--46 “ : A distance roughly equal to about 1.7 -1.8 m (5.6 -5.9 feet)
--50 “ : A distance roughly equal to about 1.9 m (6.2 feet)
--54 “ : A distance approximately equal to about 2 meters (or about 6.6 feet)
2) Состояние чехлов учебные материалы
Q: What is the function of the 3D Conversion Lens?
A: When placed on the appropriate Panasonic High Definition video camera, this lens will be able to deliver effective and focused 3D videos.
Q: What is the procedure of attaching the 3D Conversion lens to the video camera?
A: There is a screw attached that helps to fix the lens onto the camera but make sure that the lens is not fixed too tightly.
Q: What if the lens has an obstruction of condensation on it?
A: Keep the lens in a plastic bag, this will allow the lens to equalize with room temperature and the condensation will go away.
Q: Which other cameras can work with this 3D Conversion Lens?
A: It works with Panasonic High Definition Video Cameras with a filter size of 46 mm, an adapter ring for 41.5 mm cameras is also offered.
Q: For how much distance am I to refrain from the object while recording the 3D?
A: Staying 1.2 m (3.9 feet) away from the object is ideal.
Q: Is usage of 3D Conversion Lens in wet conditions possible?
A: No, always make sure that the 3D Conversion Lens is dry as its nor175911569 waterproof.
Q: What is the consequence of incorrect positioning of the lens?
A: Wrong Positioning Of The Lens If the lens positioning is not aligned properly the eyes may feel eye strain or discomfort and for this reason it is important to do an adjustment on convergence before recording.
User Manual
Page 1
Panasonic
Owner's Manual
Instrucciones
Before connecting, operating or adjusting this product, please read the instructions completely.
de
3D
funcionamiento
ConversionLens
Model
No.
VW-CL
T1
Antes del uso, lea completamente estas instrucciones.
[EJ
For Canadian assistance, please call: 1-800-561-5505 or visit us at www.panasonic.ca
• This 3D Conversion Lens can record realistic and
on
powerful 3D videos by mounting it
High Definition Video Camera compatible with
Conversion Lens for filter diameter 46 mm.
• By attaching the supplied step
3D
used on
diameter of 41.5 mm.
• In
the
video
side-by-side
•
To
view 3D video, a television that supports 3D is
required.
• Illustrations
manual are explained using the (HDC-TM900j .
• Panasonic will not be liable for any damages
sustained directly or indirectly from the use
of
this product.
compatible video cameras with a filter
camera,
format
of
the video camera
the
(2-screen structure).
up
recordable
in
a Panasonic
3D
ring, this can be
3D
videos
this owner's
or
failure
are
2
VQT3A68(ENG)
• Panasonic will also not be liable for any losses
data caused by this product.
of
Page 3
lO~VQid···Malfunctions
•About Condensation (When the 3D
is
Conversion Lens
Fogged Up)
English
•About the Handling
of
the
3D
Conversion
Lens
• Sand or dust will cause malfunctions
Conversion Lens. Be careful not to allow sand or
dust to get inside the 3D Conversion Lens when
using at the beach or similar.
is
• The 3D Conversion Lens
with a dry cloth
Contact the retailer or the service center when
does not operate properly.
• Image may be affected when the surface of the
protective glass is contaminated
fingerprints, etc. Wipe the surface of the protective
glass gently with a dry soft cloth before and after the
recording.
• Remove the 3D Conversion Lens from the video
camera and place it
if
any water gets
in
the lens storage bag when
not waterproof. Wipe
on
by
water, oil,
it.
in
the 3D
• Condensation occurs when thereisa differenceinthe
temperature or humidity as
careful since it may cause contamination, mold,
malfunction
- When it
environment
- When carried out from a cool, air-conditioned car,
etc.
it
- When cool wind from
blown onto the lens
-
In
an
•
To
prevent condensation, place
allow it to warm up to the ambient temperature. If any
condensation occurs, leave it as it
approximately 1 hour. Condensation will disappear
its own once it is warmed up to the ambient
temperature.
of
the
3D
Conversion Lens.
is
carried indoors from a cold outdoor
area with high humidity
in
the following cases. Be
an
air conditioner is directly
in
a plastic bag and
is
for
or
on
carrying.
3
(ENG)VQT3A68
Page 4
Do
not
drop
or
strike
the
3D
Conversion
Lens
when
Do
not
use
or
store
the
3D
Conversion
Lens in the
carrying
Also,
Conversion
• Be careful that no shock is applied to the 3D
Conversion Lens by dropping or striking the bag with
the 3D Conversion Lens stored within. It may cause a
malfunction or stop images from being recorded.
may also damage the 3D Conversion Lens.
• Do not carry the video camera with the 3D
Conversion Lens attached by holding onto the 3D
Conversion Lens only.
it.
be careful
Lens.
not
to
apply
strong
force
to
the
3D
It
following
places
sinceitmay
cause
a failure
or
malfunction.
-
In
direct sunlight or at the beach
- Areas with high temperature and/or humidity, or
where there
humidity
- Areas with a lot of sand and dust
- Areas close to fire
- Close to air-conditioners and/or humidifiers
- Areas where it may get wet
- Areas with vibration
- inside a car
•
Do
not disassemble or modify.
• When the 3D Conversion Lens has not been used for
a long period of time, check to see ifthere is any
looseness
is
rapid change
in
the attachment of the 3D Conversion
in
summer, etc.
in
temperature and/or
4
VQT3A68(ENG)
Lens and adjust the attachment position before use.
• When not
the lens storage bag, and store
humidity.
• Also read the operating instructions
camera.
in
use, put the lens caps on, placeitinside
in
a place with low
(-+ 13)
of
the video
Page 5
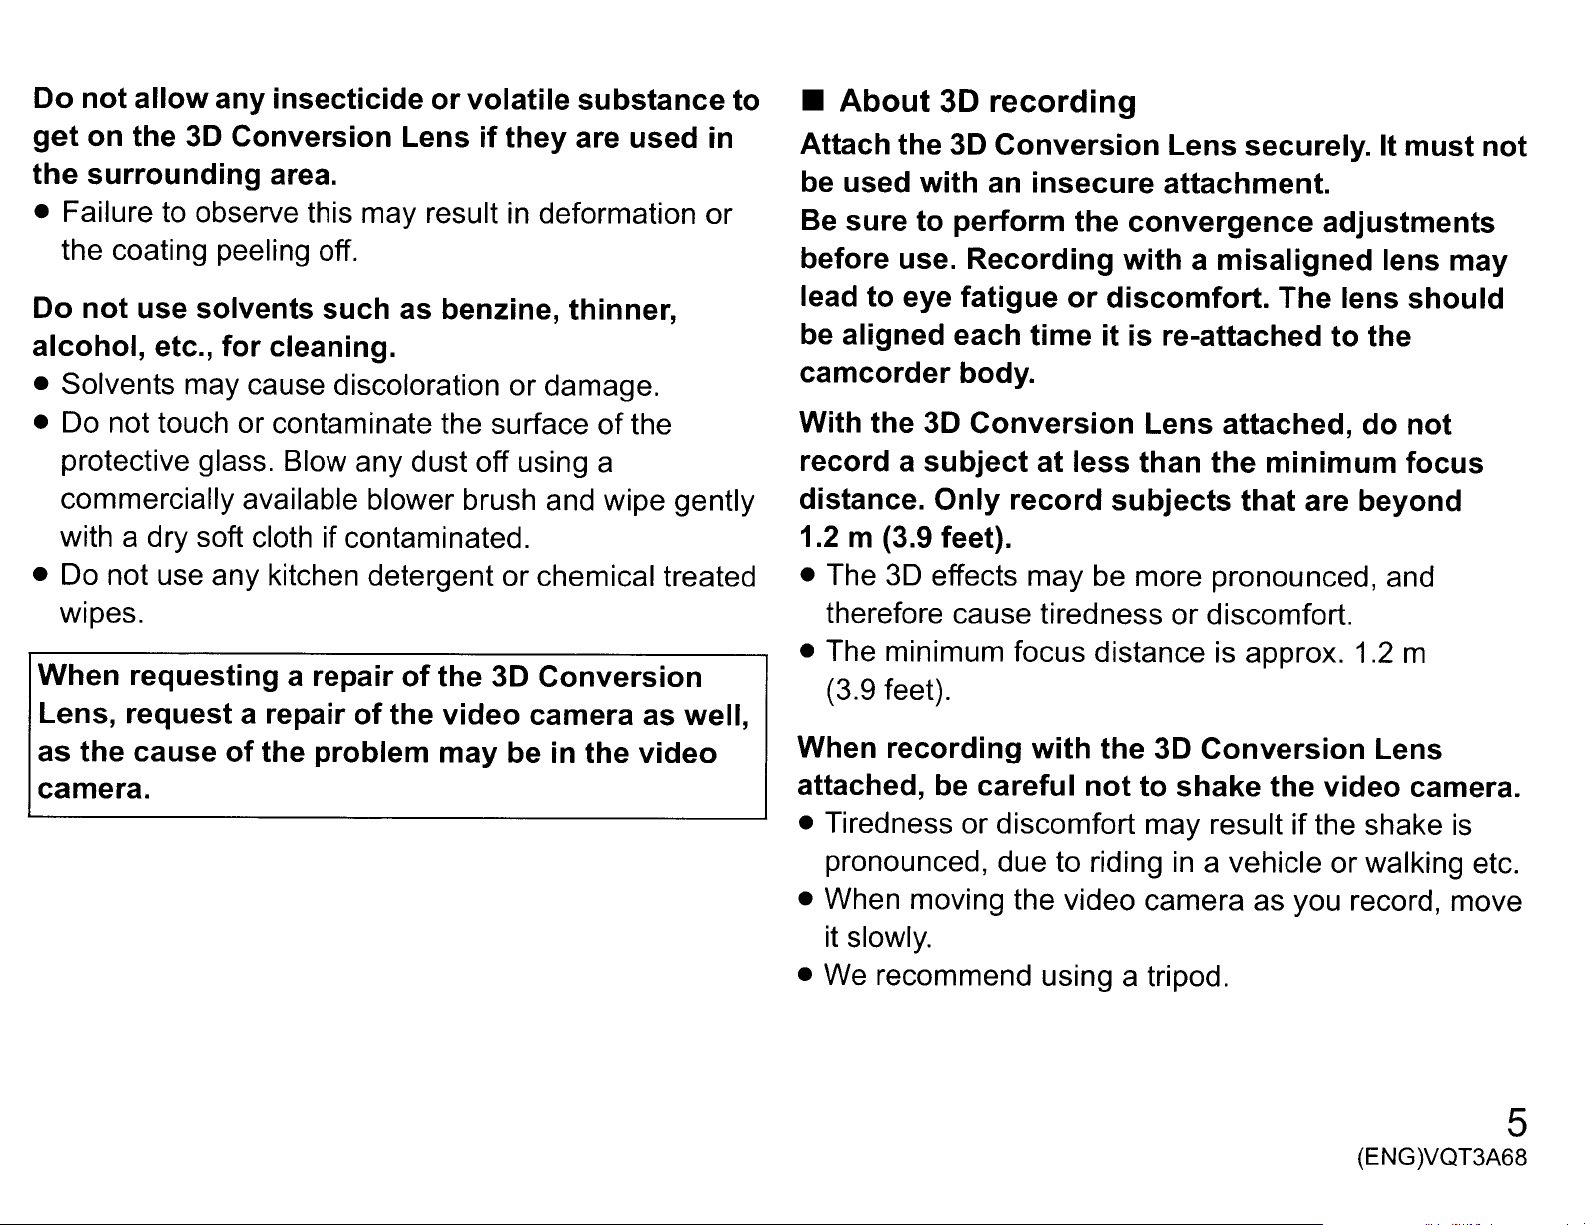
Do
not
allow
get
on
the
the
surrounding
• Failure
the coating peeling off.
any
insecticide
3D
Conversion Lensifthey
area.
to
observe this may result
or
volatile
substance
are
in
deformation
used
in
or
to
•
About
3D
Attach the 3D
be used
Be sure
before use.
with
to
perform
Recording
recording
Conversion
an
insecure
the
convergence
withamisaligned
Lens
securely. It
attachment.
must
adjustments
lens
may
not
Do
not
use solvents
alcohol,
• Solvents may cause discoloration or damage.
• Do not touch or contaminate the surface
protective glass. Blow any dust off using a
commercially available blower brush and wipe gently
with a dry soft cloth if contaminated.
• Do not use any kitchen detergent or chemical treated
wipes.
When
etc.,
for
requesting a repair
Lens, request a repair
the
as
cause
of
the
such
cleaning.
of
problem
as benzine, thinner,
of
the
of
the
3D
Conversion
the
video
may
camera as well,
be in the
video
camera.
lead
be aligned each
camcorder
With the
record a
distance.
to
eye
fatigue
body.
3D
subject
Only
or
discomfort.
timeitis
Conversion
at
less
record
subjects
re-attached
Lens
than
attached,
the
that
The lens
to
the
do
minimum
are beyond
should
not
focus
1.2 m (3.9 feet).
• The
• The minimum focus distance is approx. 1.2 m
When
attached, be
• Tiredness or discomfort may resultifthe shake
3D
effects may be more pronounced, and
therefore cause tiredness or discomfort.
(3.9 feet).
recording
pronounced, due to riding
with
careful
the
not
3D
to
in
Conversion
shake
a vehicle or walking etc.
the
video
Lens
camera.
is
• When moving the video camera as you record, move
it
slowly.
•
We
recommend using a tripod.
(ENG)VQT3A68
5
Page 6
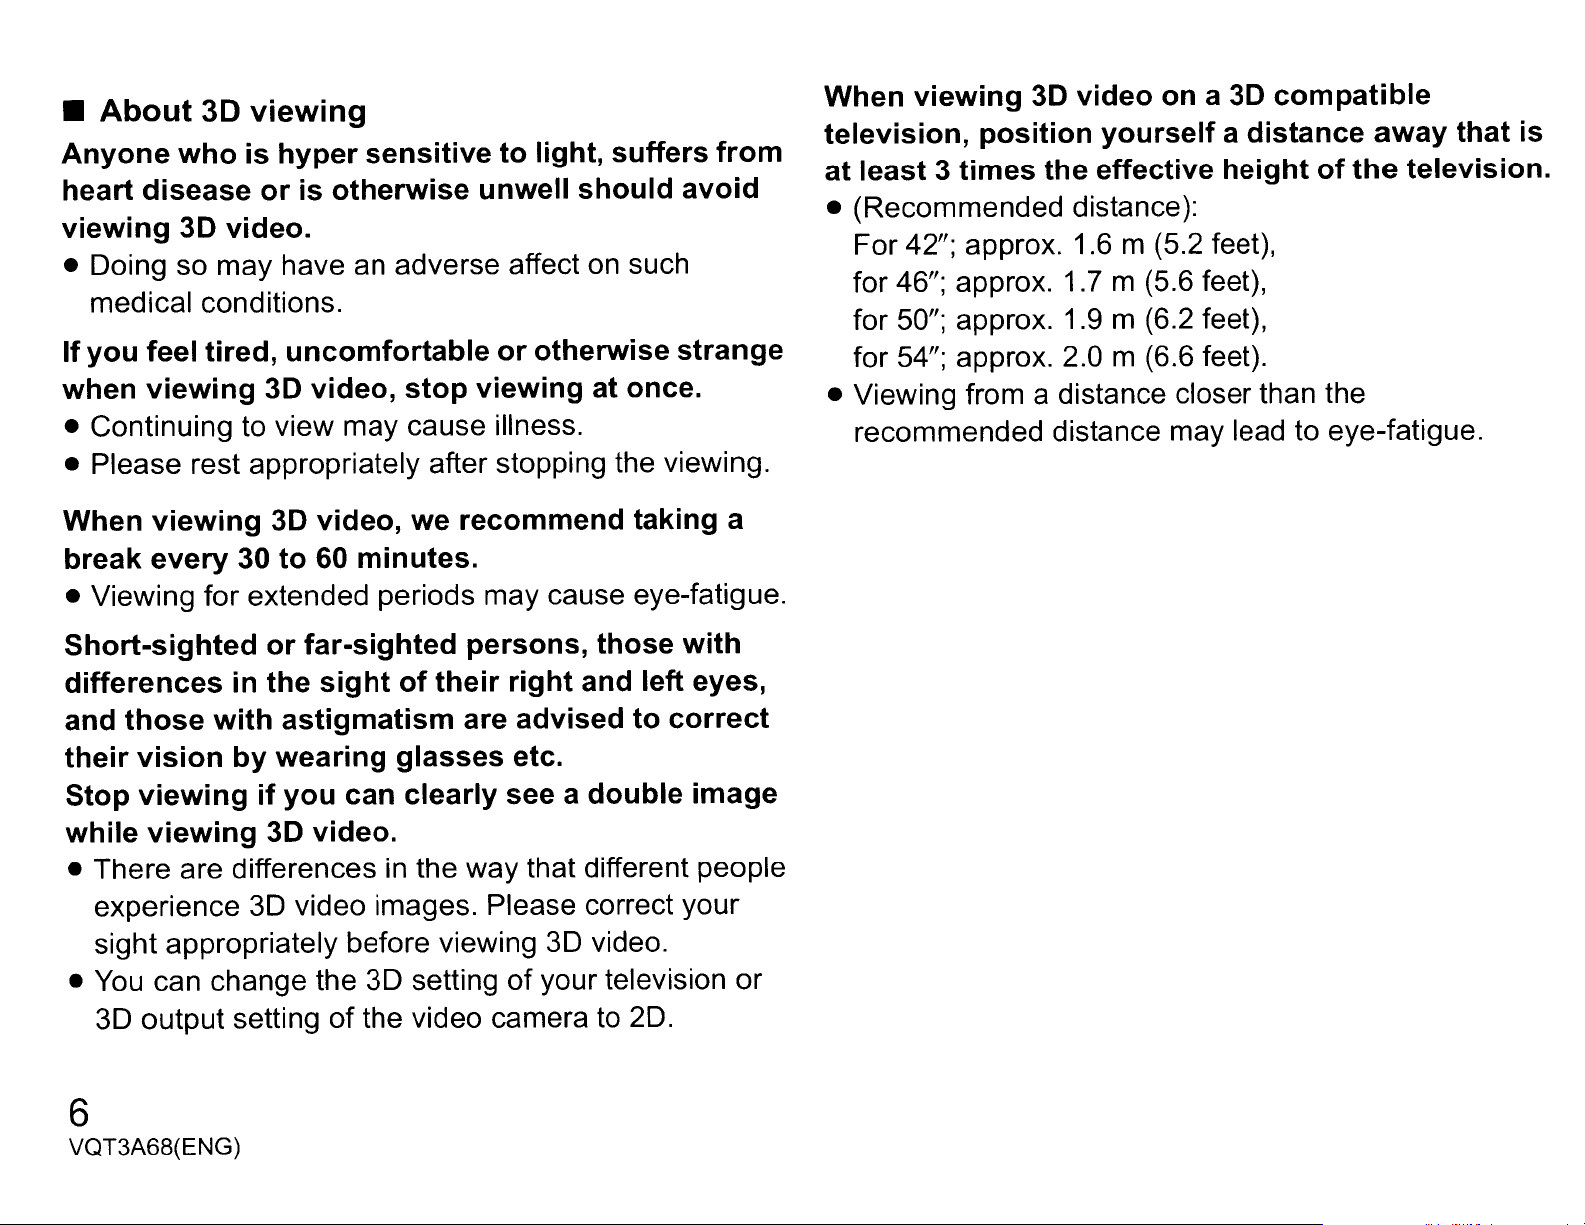
•About
Anyone who is hyper sensitive to light, suffers from
heart disease
viewing 3D video.
• Doing so may have an adverse affect
3D
viewing
or
is otherwise unwell should avoid
on
such
medical conditions.
If you feel tired, uncomfortable
when viewing 3D video, stop viewing at once.
or
otherwise strange
• Continuing to view may cause illness.
• Please rest appropriately after stopping the viewing.
When viewing 3D video, we recommend taking a
break every 30 to 60 minutes.
• Viewing for extended periods may cause eye-fatigue.
Short-sighted or far-sighted persons, those with
When viewing 3D video
television, position yourself a distance
at least 3 times the effective height of
on
a 3D compatible
away
the
television.
• (Recommended distance):
For 42"; approx. 1.6 m (5.2 feet),
for 46"; approx. 1.7 m (5.6 feet),
for 50"; approx. 1.9 m (6.2 feet),
for 54"; approx. 2.0 m (6.6 feet).
• Viewing from a distance closer than the
recommended distance may lead to eye-fatigue.
that is
differences
and those with astigmatism are advised to correct
their vision by wearing glasses etc.
Stop viewing if you can clearly see a double image
while viewing 3D video.
• There are differences
experience
in
the sight
3D
video images. Please correct your
of
their right and left eyes,
in
the way that different people
sight appropriately before viewing 3D video.
•
You
can change the 3D setting
3D output setting
of
the video camera to 20.
of
your television or
6
VQT3A68(ENG)
Page 7
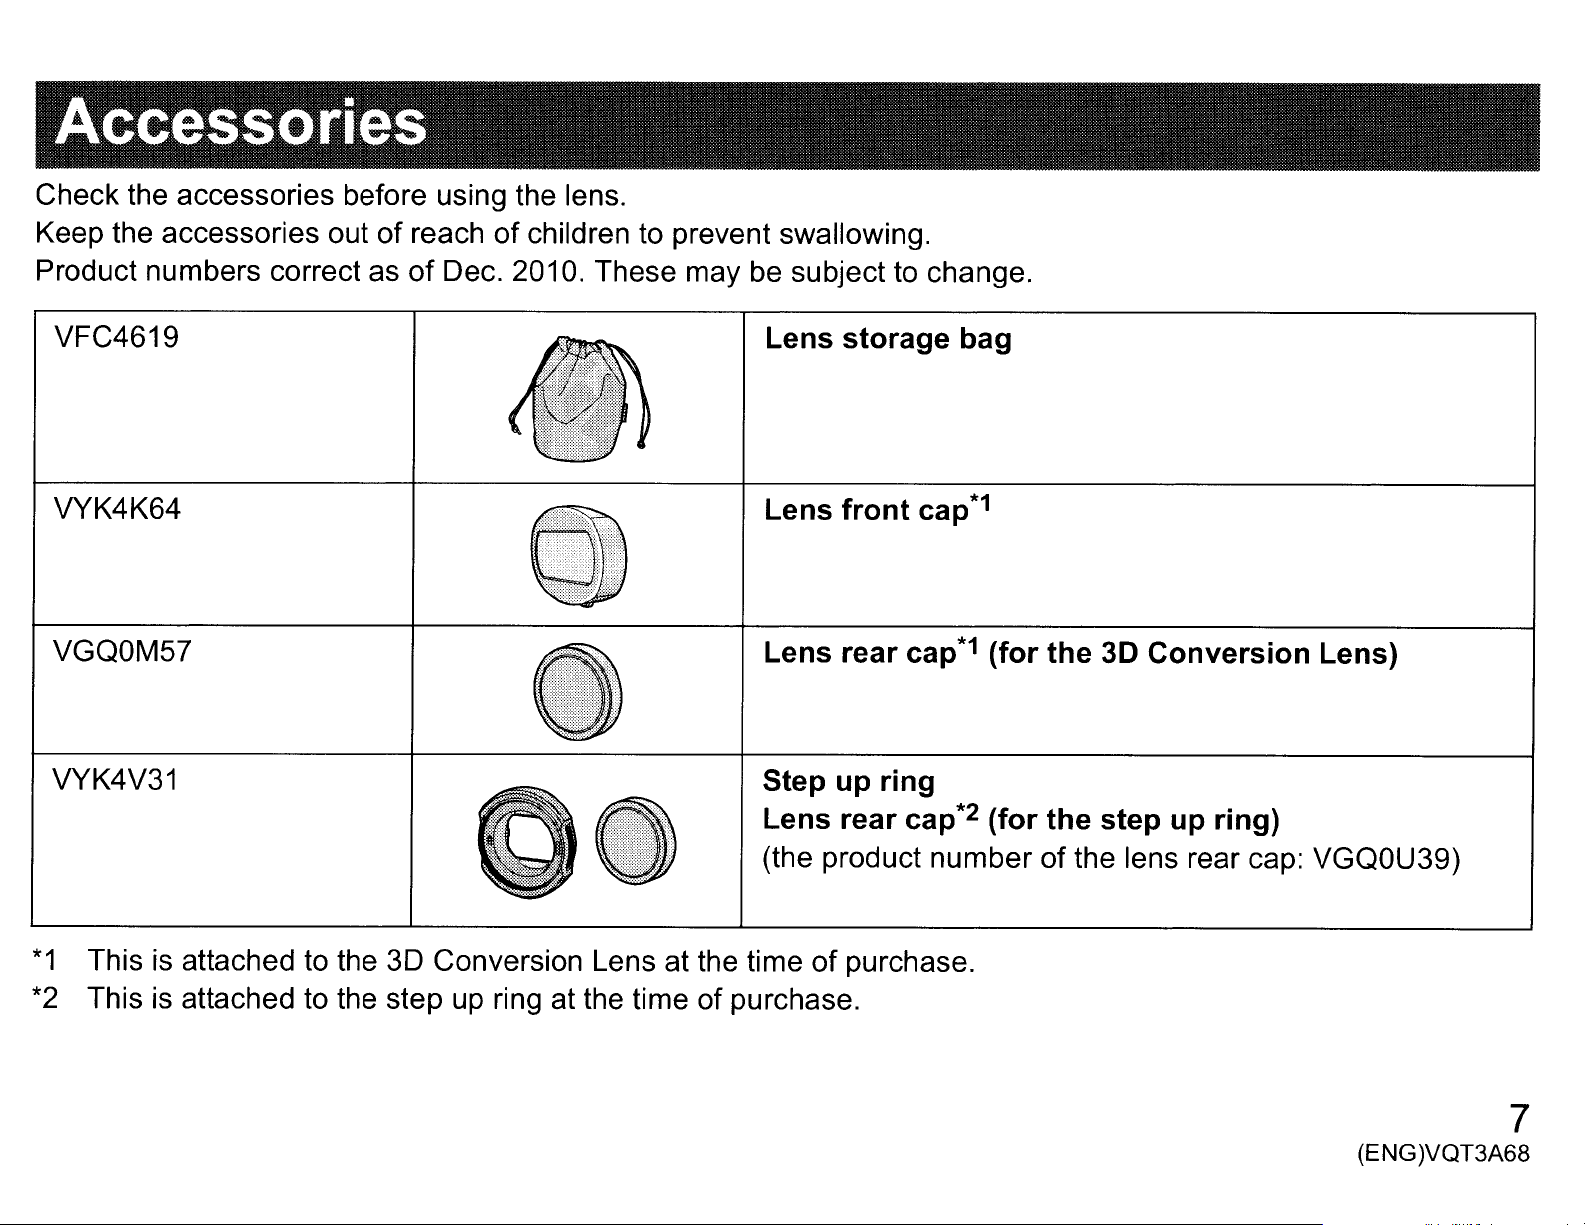
·lllssories
Check the accessories before using the lens.
of
Keep the accessories out of reach
of
Product numbers correct as
Dec. 2010. These may be subject to change.
children to prevent swallowing.
VFC4619
VYK4K64
VGOOM57
Lens storage bag
Lens front
Lens rear
cap*1
•
VYK4V31Step up ring
Lens rear cap*2 (for the step up ring)
(the product number of the lens rear cap: VGOOU39)
cap*1
(for the 3D Conversion Lens)
*1
*2
This
This
is
attached to the 3D Conversion Lens at the time
is
attached to the step up ring at the time of purchase.
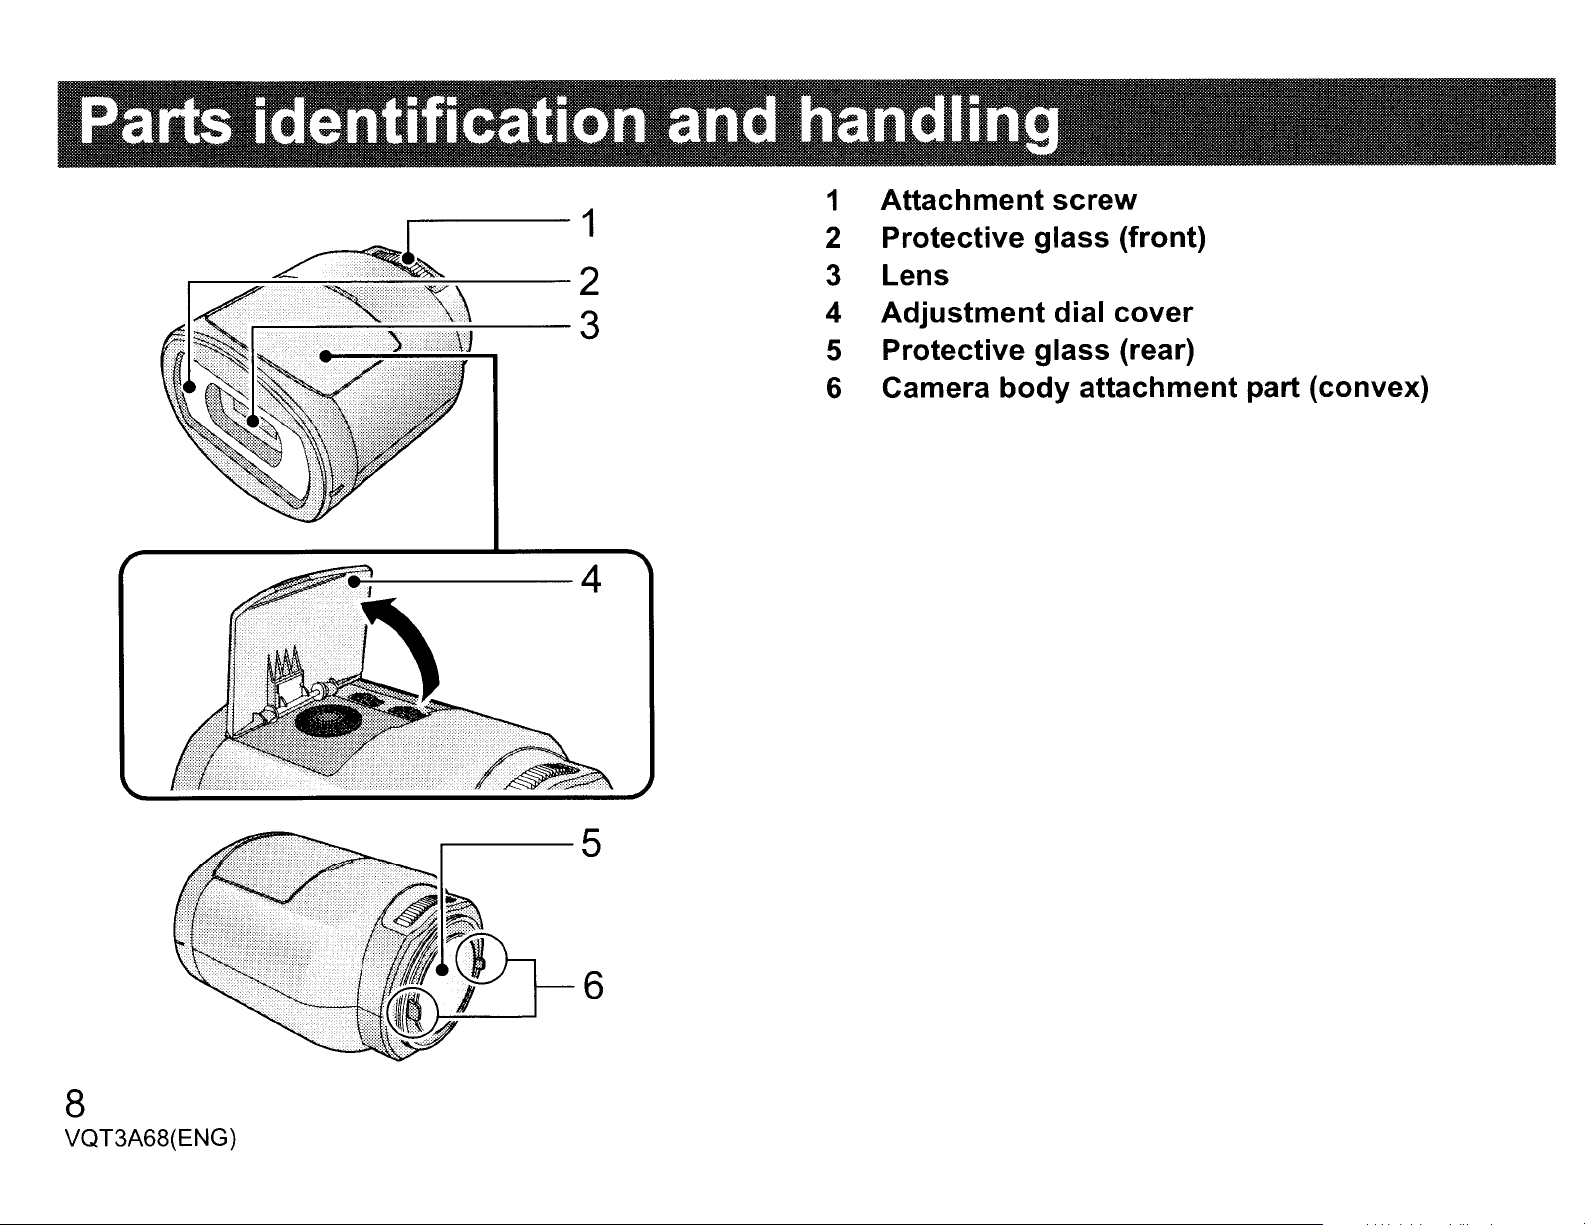
5Protective glass (rear)
6Camera body attachment part (convex)
8
VQT3A68(ENG)
~_
4
I5
6
Page 9
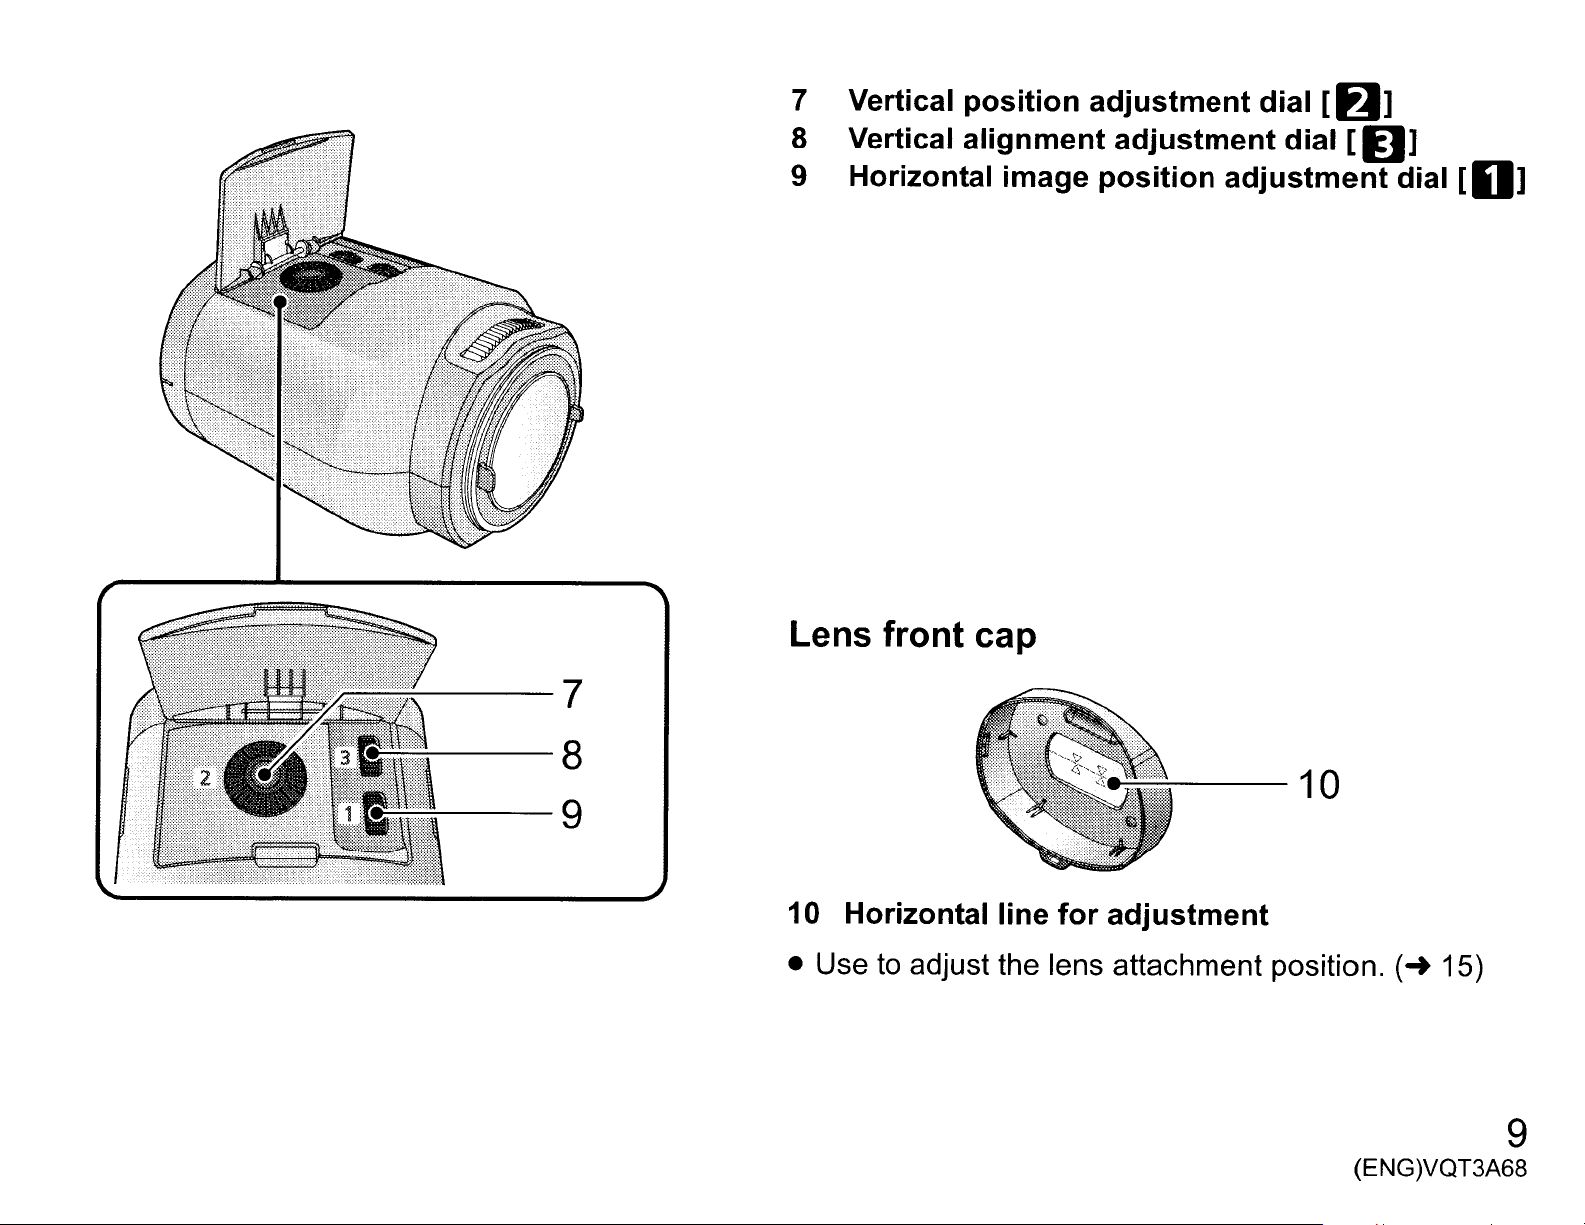
7Vertical position adjustment dial
[fJ]
-
-7
8Vertical alignment adjustment dial
[I)]
9Horizontal image position adjustment dial
Lens front cap
[0]
~
~-~
8
9
-•._.
.w..
....
'_
..
,
.......
,
..•
10Horizontal line for adjustment
• Use
to
adjust the lens attachment position.
10
(~
(ENG)VQT3A68
15)
9
Page 10
•
To
attach the 3D Conversion Lens
to
[HDC-SD90]/[HDC-TM90], a supplied step up ring
is
required.
1Rotate the lens rear cap (for the 3D Conversion Lens)
in
the direction indicated by the arrow.
• Rotate the lens rear cap while pushing on the attachment screw with your
fingers.
• For users who have
to step
3.
[HDC-SD800]/[HDC-TM900]/
1IIBmmIO,
proceed
10
VQT3A68(ENG)
Page 11
2For users who have [HDC-SD90]/[HDC-TM90]
Remove the lens rear cap from the step up ring and attach the step up ring to the 3D
Conversion Lens.
• Attach the step up ring to the 3D Conversion Lens first, and then attach the step up ring part to the video camera.
• Video is not recorded properly when only the step up ring is attached to the video camera.
• Attach the step up ring
to
othe convex
othe concave
3Match the position
concave
e
in
the video camera.
the 3D Conversion Lens with the [..UP] mark side up.
• Tighten the attachment screw
the 3D Conversion Lens by
rotating to LOCK.
~
of
the convex e with the
of
• Attach with the adjustment dial cover e
Lens facing upwards.
•
You
cannot attach the 3D Conversion Lens together with the
lens hood or a filter etc.
of
the 3D Conversion
11
(ENG)VQT3A68
Page 12
4Tighten the attachment screw by
rotating to LOCK.
• Be careful not to overtighten. Ifthe 3D Conversion
Lens is overtightened, you may not be able to
it
remove
from the video camera.
•
[H
DC-SDBOOj/[H
Rotate the attachment screw
DC-TM900jI
III!I!1mmml
of
the 3D Conversion Lens.
• Attach the
not tilt
or
3D
move.
Conversion Lens securely so it will
•Removing the 3D Conversion Lens
Rotate the attachment screw to UNLOCK to loosen
and then remove.
• Place the video camera on a stable location such
as a table, and be careful not to drop the
Conversion Lens.
3D
LOCK
• [HDC-SD9oj/[HDC-TM90j
Rotate the attachment screw
of
the step up ring.
12
VQT3A68(ENG)
LOCK
(
UNLOCK)
Page 13
•When not using the 3D Conversion Lens
Attach the lens rear cap to the 3D Conversion Lens
~
• Rotate the lens rear cap holding the attachment screw with your fingers.
• (HDC-SD90]/(HDC-TM90]
• It can be stored inside the supplied
storage bag.
3D Conversion Lens
can
be
stored
in
the supplied storage bag with the step up ring attached.
13
(ENG)VQT3A68
Page 14
•Attaching/Detaching the lens front cap
•
If
you use the lens front cap as a stand as shown below, you can leave the video camera with the 3D Conversion
Lens attached.
• Be careful not to lose the lens caps.
• When storing, always attach the lens caps to avoid scratching the protective glass.
14
VQT3A68(ENG)
Page 15
When using for the first time, be sure to adjust the
3D
Conversion Lens attachment position.
• Change the mode
1Attach the
video camera. (
2Turn on the
• Turn
• The 3D Conversion Lens adjustment mode screen
will appear automatically after performing the initial
setting.
•
If
screen does
the menu on the
([SETUP]
the
on
with the video camera in a horizontal state.
3D
Conversion Lens
not
~
[3D CONV. LENS SETUP])
to
.;;
3D
Conversion
..
10)
video
appear
video
camera.
camera.
on
the
video
Lens
adjustment
automatically,
camera.
to
the
mode
set
from
3Attach the lens
Conversion
'·,·."·."
..
,,.AQ~9~T
...
,·,·,
front
Lens. (
..
cap
14)
to
the
3D
oGuide Line
• 2 screens will appear.
• The horizontal line for adjustment
cap is displayed on the screen.
on
the lens front
4Touch [ADJUST].
• If the black vertical line and the black horizontal line
are within the red guidelines
required, touch [EXIT] and proceed to Step
• Perform the adjustment in a bright location where the
horizontal line for adjustment will
0 and adjustment is not
11.
be
clearly visible.
15
(ENG)VQT3A68
Page 16
5Open the adjustment dial cover.
• When turning the adjustment dials, hold the video
6(After checking the operation description, touch
[NEXT].)
Adjust the horizontal position by
rotating the horizontal image position
adjustment dial D to place the black
vertical line between the images at right
in
and left
between the red guidelines O.
camera
operate with the fingers
applying too much force from above. When checking
the adjustment, check with your fingers off the
adjustment dials.
in
the palm
of
your hand from the bottom and
of
your other hand without
•
• The black vertical line may look thick or blurred, but
so
adjust it
• Touch [NEXT].
it goesinbetween the guidelines.
16
VQT3A68(ENG)
Page 17
7(After checking the operation description, touch
9(After
checking
the
operation
description,
touch
[NEXT].)
[NEXT].)
To
adjust
the
so
right
red guidelines
vertical position adjustment dial
that
of
the vertical position, rotate
the
the
black horizontal line
screen is in the
f).
•
at
center
the
of
fJ
the
Adjust
D
to
subject
the
align
shown
vertical alignment adjustment
the
vertical position of the
duplicated.
:.)~.e:
r;::~:...
~:.
2::":
a:.J::::":S:
•
dial
• Touch [NEXT].
8
Removing
• Touch [NEXT].
the lens front cap.
• The vertical position
adjusted with
displayed only when the 3D Conversion Lens is
attached.
• Aim the video camera at a subject from a distance of
approximately 1.2 m (3.9 feet) to 2 m (6.6 feet),
keep the image shown level by using the guidelines O.
• Difference
3D video.
I~Dxl
in
horizontal direction is characteristic
of
the 3D image can also be
in
the Touch Menu.
l~xl
is
and
of
(ENG)VQT3A68
17
Page 18
•
Itisrecommended to stabilize the video camera using
the lens front cap as a platform when performing the
(~
adjustment.
• Touch [COMPLETE].
10
Touch [EXIT]
• After adjustment, a single screen appears.
•
When
after
perform
11
Press
start
• When the 3D Conversion Lens is attached, the zoom
position
• When recording
gray frame around
in
re-attaching
an
impact
the
the
recording.
is
fixed, and the zoom operation
the video.
14)
to
end the
the
etc.,itis
adjustment
recording
in
3D, the image will appear with
it.
The gray frame will be recorded
adjustment.
3D
Conversion
recommended
again.
start/stop
Lens
that
or
you
button
is
disabled.
to
is
• Use of a tripod
stable picture.
• The reception range for the remote control might
become narrow at the upper side
camera, so operate from the lower side.
• The LCD monitor of the video camera will not display
in
3D.
•
You
will hear a sound when the video camera
moved rapidly with the 3D Conversion Lens attached,
but this is not a malfunction.
• When the adjustment dial is rotated too much, you will
hear a "clapping" sound and the adjustment screen
will stop moving.
adjustment dial
adjustment screen starts moving.
• The functions that can be used are limited depending
on
the video camera that is being used. For details,
recommended for recording with a
of
the video
is
In
such a case, rotate the
in
the opposite direction until the
refer to the operating instructions
camera.
To
ensure
• Where possible, record with the video camera
• Do not get too close to the subject. (record from a distance
• When moving the video camera as you record, move it slowly.
• Try to hold the video camera as steady
that
the
3D
video
can be
safely
as
viewed,
in
possible when recording while riding
pay
attention
a horizontal state.
18
VQT3A68(ENG)
to
the
following
of
at least 1.2 m (3.9 feet).)
in
of
the video
points
a vehicle or walking.
when
recording.
Page 19
•3D Conversion Lens
Dimensions:
78
mm
(W)X59
ring]
mm
78
(W)X59
(front/rear)]
Mass (Weight):
Approx. 195 g (Approx. 0.429 Ibs.) [Without Lens Cap (front/rear) and step up ring]
Approx. 219 g (Approx. 0.482 Ibs.) [With the step
Lens (when attached to the video camera):
IHDC-SD800)/(HDC-TM900)/~
F3.2 (f = 2.5 mm)
(H
DC-SD90) /
l'--H
D-C--
mm
mm
T-M-9---'O
(H)x97
(H)x
111
)
mm
mm
(0)
(0)
[3.07"
[3.07"
(W)x2.32"
(W)x2.32"
up
ring, without Lens Cap (front/rear)]
(H)x3.82"
(H)x4.37"
(0)]
[Without Lens Cap (front/rear) and step up
(0)] [With the step up ring, without Lens Cap
F3.3 (f = 2.3 mm)
mm
35
equivalent;
58
mm
Minimum recording distance; Approx. 1.2 m (3.9 feet)
Stereo base:
12.4
mm
(0.49 ")
19
(ENG)VQT3A68
Page 20
Panasonic Consumer Electronics Company,
Division of Panasonic Corporation
One Panasonic Way, Secaucus, New Jersey 07094
of
North America
Panasonic Camcorder 3D Conversion Lens
Limited Warranty
Limited Warranty Coverage (For USA and Puerto Rico Only)
in
If your product does not work properly because of a defect
Electronics Company (referred to as "the warrantor") will, for the length
which starts with the date of original purchase ("warranty period"), at its option either (a) repair your product with
new or refurbished parts, (b) replace it with a new or a refurbished equivalent value product, or (c) refund your
purchase price. The decision to repair, replace or refund will be made by the warrantor.
Product or Part Name
Camcorder3D Conversion Lens
Accessory
materials or workmanship, Panasonic Consumer
of
the period indicated on the chart below,
PartsLabor
1 year
90
days
be
During the "Labor" warranty period there will
no
be
antennas, and cosmetic parts (cabinet). This warranty only applies to products purchased and serviced
United States or Puerto Rico. This warranty
not sold "as is".
charge for parts. This Limited Warranty excludes both parts and labor for non-rechargeable batteries,
no charge for labor. During the "Parts" warranty period, there will
is
extended only to the original purchaser of a new product which was
20
VQT3A68(ENG)
in
the
Page 21
Carry-In or Mail-In Service
To
find a service center please visit http://www.panasonic.com/help or call 1-800-211-PANA (7262).
When shipping the unit, carefully pack, include all accessories, and send it prepaid, adequately insured and
in
preferably
the original carton. When shipping Lithium Ion batteries please visit our Web Site at
www.panasonic.com/BatteryHandling as Panasonic
Include a letter detailing the complaint, a return address and provide a daytime phone number where you can
reached. A valid registered receiptisrequired under the Limited Warranty.
IF REPAIR
FURNISH A SALES RECEIPT/PROOF OF PURCHASE INDICATING DATE OF PURCHASE. AMOUNT PAID
AND PLACE OF PURCHASE. CUSTOMER WILL
WITHOUT SUCH PROOF OF PURCHASE.
Limited Warranty Limits and Exclusions
This warranty ONLY COVERS failures due to defects
normal wear and tear or cosmetic damage. The warranty ALSO DOES NOT COVER damages which occurred
shipment, or failures which are caused by products not supplied by the warrantor, or failures which result from
accidents, misuse, abuse, neglect, mishandling, misapplication, alteration, faulty installation, set-up adjustments,
misadjustment of consumer controls, improper maintenance, power line surge, lightning damage, modification,
introduction of sand, humidity or liquids, commercial use such as hotel, office, restaurant, or other business
IS
NEEDED DURING THE WARRANTY PERIOD. THE PURCHASER WILL BE REQUIRED TO
is
committed to providing the most
BE
CHARGED FOR THE REPAIR OF ANY UNIT RECEIVED
in
materials or workmanship, and DOES NOT COVER
up
to date information.
be
or
in
rental use
damage that
THERE ARE NO EXPRESS WARRANTIES EXCEPT AS LISTED UNDER "LIMITED WARRANTY
COVERAGE" .
THE WARRANTOR
THE USE OF THIS PRODUCT, OR ARISING OUT
of
the product, or service by anyone other than a Factory Service Center orother Authorized Servicer, or
is
attributable to acts of God.
IS
NOT LIABLE FOR INCIDENTAL OR CONSEQUENTIAL DAMAGES RESULTING FROM
OF
ANY BREACH OF THIS WARRANTY.
21
(ENG)VQT3A68
Page 22
(As examples, this excludes damages for lost time, travel
images, data or other memory or recorded content. The items listed are not exclusive, but for illustration only.)
to
and from the servicer, loss
of
or damage to media or
ALL
LIMITED TO THE PERIOD OF THE LIMITED WARRANTY.
Some states do not allow the exclusion or limitation
long an implied warranty lasts, so the exclusions may not apply to you.
This warranty gives you specific legal rights and you may also have other rights which vary from state to state. If a
problem with this product develops during
Center. If the problem
Department at the addresses listed for the warrantor.
PARTS AND SERIVCE, WHICH ARE NOT COVERED BY THIS LIMITED WARRANTY, ARE YOUR
RESPONSIBILITY.
EXPRESS AND IMPLIED WARRANTIES, INCLUDING THE WARRANTY OF MERCHANTABILITY, ARE
of
incidental or consequential damages, or limitations
or
after the warranty period, you may contact your dealer or Service
is
not handled to your satisfaction, then write to the warrantor's Consumer Affairs
Customer
Obtain
purchase
Web
http://www.panasonic.com/help
Site at:
Services
Product
Parts and
Directory
Information
Accessories;
(United States and Puerto Rico)
and
Operating
or
make
Assistance;
Customer
locate
Service and Literature
your
nearest Dealer
requests
or
Service Center;
by
visiting
on
our
how
or,
contact
http://www.panasonic.com/contactinfo
You
may also contact us directly at:
1-800-211-PANA (7262)
Monday-Friday 9am-9pm, Saturday-Sunday 10am-7pm EST
I
For
hearing
us
or
via
the
speech
web
at:
impaired
TTY
users,
TTY: 1-877-833-8855I
22
VQT3A68( ENG)
Page 23
Accessory
Purchase Parts, Accessories and Instruction Books online for all Panasonic Products by visiting our Web Site
at:
http://www.pstc.panasonic.com
Or,
send your request by E-mail to:
npcparts@us.panasonic.com
Purchases (United States and Puerto Rico)
You
20421 84th Avenue South, Kent, WA 98032
(We accept Visa, MasterCard, Discover Card, American Express, and Personal Checks)
I
For
may also contact us directly at:
1-800-332-5368 (Phone) 1-800-237-9080 (Fax Only)
(Monday-Friday 9am-9pm EST)
Panasonic Service and Technology Company
hearing
or
speech
impaired
TTY
users,
TTY: 1-866-605-1277I
As
of
Dec. 2010
23
(ENG)VQT3A68
Page 24
War,.ant!(~~~i~~_itJ~.us~~~~~)
Panasonic Canada Inc.
5770 Ambler Drive, Mississauga, Ontario L4W 2T3
PANASONIC PRODUCT -LIMITED WARRANTY
Panasonic Canada Inc. warrants this product to be free from defects
use and for a period as stated below from the date oforiginal purchase agrees to, at its option either (a) repair your
product with new or refurbished parts, (b) replace it with a new or a refurbished equivalent value product, or (c)
refund your purchase price. The decision to repair, replace or refund will be made
in
material and workmanship under normal
by
Panasonic Canada Inc.
Camcorder Accessory 3D Lens - One (1) year, parts and labour
This warranty is given only to the original purchaser, or the person for whom it was purchased as a gift,
Panasonic brand product mentioned above sold by
used
original packaging.
IN
OTHER PROOF OF DATE OF ORIGINAL PURCHASE, SHOWING AMOUNT PAID AND PLACE OF
PURCHASE
LIMITATIONS AND EXCLUSIONS
in
Canada, which product was not sold "as
ORDER TO BE ELIGIBLE TO RECEIVE WARRANTY SERVICE HEREUNDER, A PURCHASE RECEIPT OR
IS
REQUIRED
an
authorized Panasonic dealerinCanada and purchased and
is",
and which product was delivered to you
in
new condition
of
a
in
the
This warranty ONLY COVERS failures due to defects
normal wear and tear or cosmetic damage. The warranty ALSO DOES NOT COVER damages which occurred
shipment, or failures which are caused by products not supplied by Panasonic Canada Inc., or failures which result
adjustments, misadjustment of consumer controls, improper maintenance, improper batteries, power line surge,
of
lightning damage, modification, introduction
or
restaurant, or other business
or
damage that is attributable to acts
Dry cell batteries are also excluded from coverage under this warranty. Rechargeable batteries are warranted for
ninety (90) days from date of original purchase.
THIS EXPRESS, LIMITED WARRANTY
INCLUDING ANY IMPLIED WARRANTIES OF MERCHANTABILITY AND FITNESS FOR A PARTICULAR
IN
PURPOSE.
NO EVENT WILL PANASONIC CANADA INC. BE LIABLE FOR ANY SPECIAL, INDIRECT
rental use
of
God.
IS
sand, humidity
of
the product, or service by anyone other than an Authorized Servicer,
IN
LIEU OF ALL OTHER WARRANTIES, EXPRESS OR IMPLIED,
or
liquids, commercial use such as hotel, office,
OR
CONSEQUENTIAL DAMAGES RESULTING FROM THE USE OF THIS PRODUCT OR ARISING
BREACH OF ANY EXPRESS OR IMPLIED WARRANTY. (As examples, this warranty excludes damages for lost
of
time, travel to and from the Authorized Servicer, loss
recorded content. This list
In
certain instances, some jurisdictions do not allow the exclusion or limitation of incidental or consequential damages,
or the exclusion of implied warranties, so the above limitations and exclusions may not
gives you specific legal rights and
WARRANTY SERVICE
For
product
Our Customer Care Centre:Telephone:1-800-995-8649
For defective product exchange within the warranty period, please contact the original dealer
operation
of
and
items is not exhaustive, but for illustration only.)
you
may have other rights which vary depending
information
assistance, please contact:
or damage to media or images, data
be
applicable. This warranty
on
your province or territory.
#:
Fax
Email linkcamcorderconcierge@ca.panasonic.com
(905) 238-2360
or
or
OUT
other memory
our Customer
OF
ANY
or
Care Centre.
25
(ENG)VQT3A68
Page 26
Customer Service
Customer Services Directory
Obtain product information and operative assistant; localize the closer distributor or
Service Center; buy spare parts and accessories by our web site to Latin American:


 Loading...