

Page 1
English
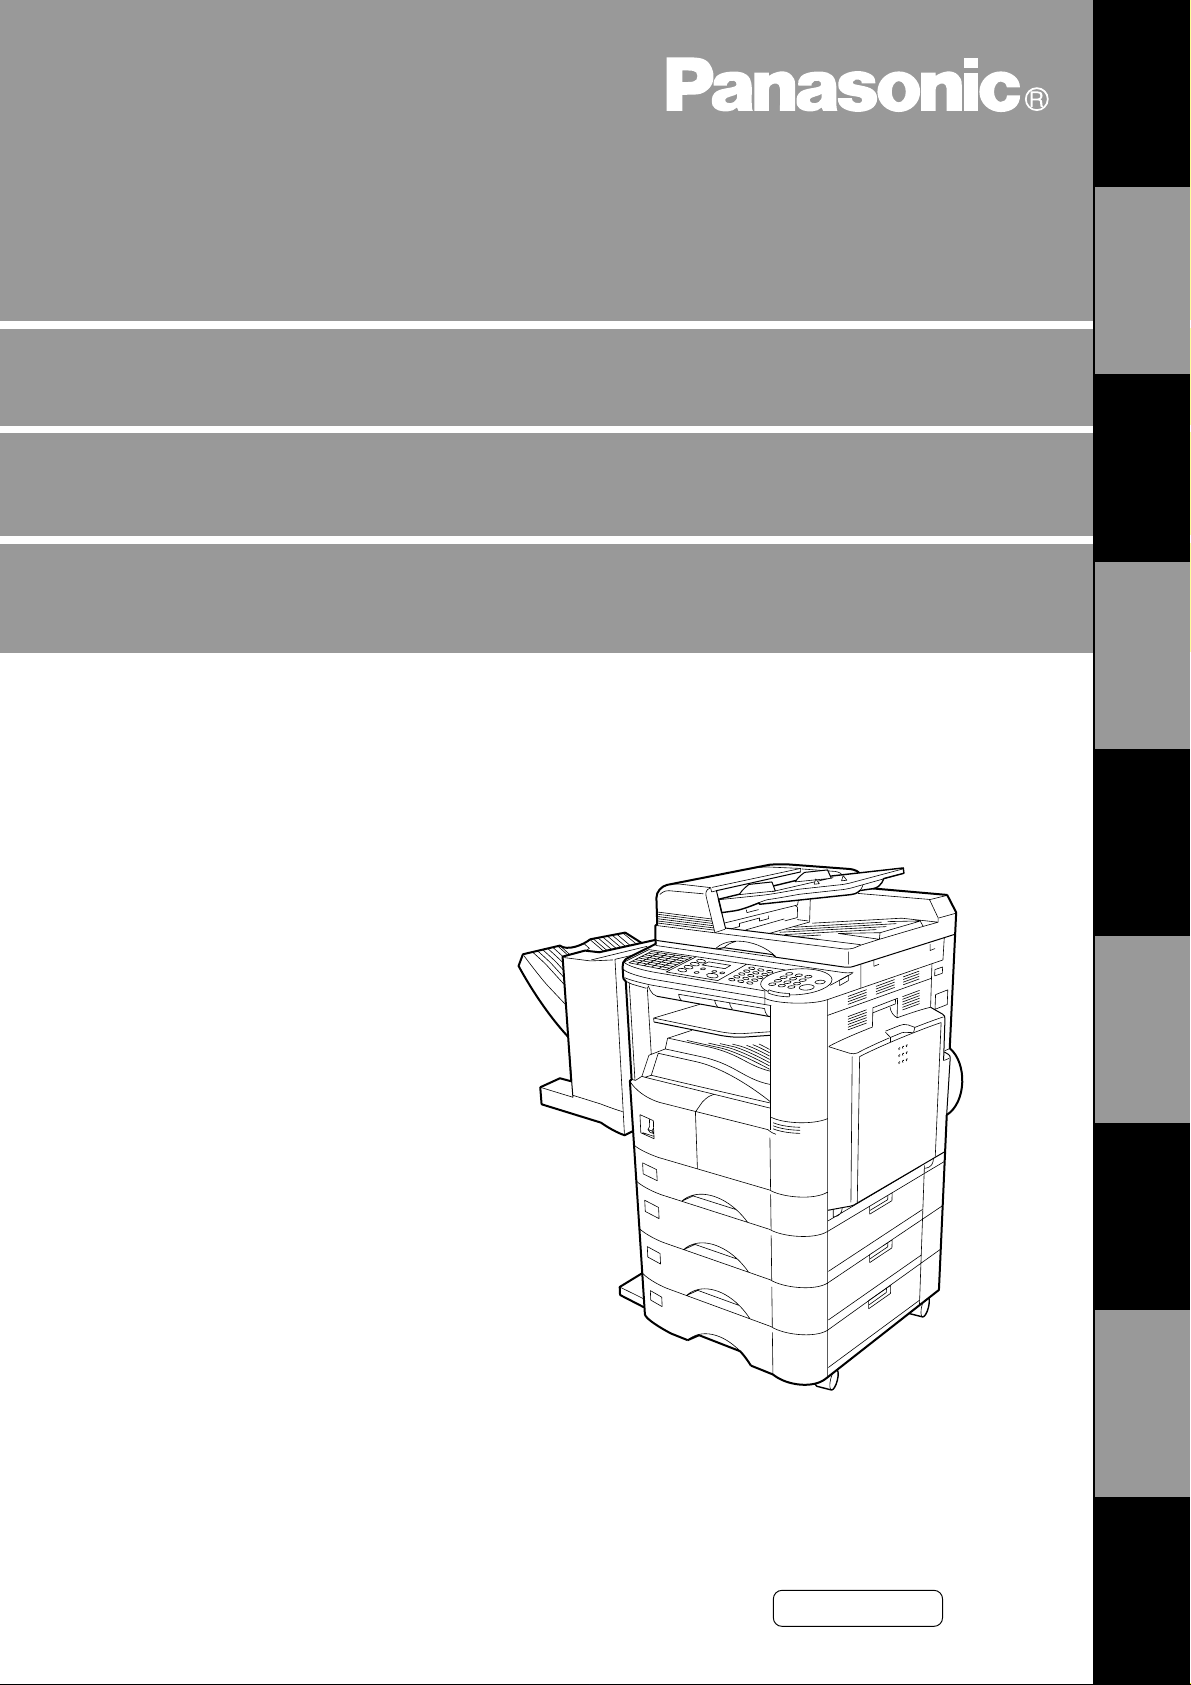
Digital Copier
Operating Instructions (For Facsimile)
DP-2000
Options
DA-AR250/AS200/DS200/DS210/FG230/FG231/FK200/FK210/FS200/MD200
D A-NE 200/PC 200/PC21 0/SM 08B /SM 16B /SM 28B/UC 200/X N200/X T200; UE-4100 47/410048/4 03171
GETTING TO
KNOW YOUR
MACHINE
INSTALLING
YOUR MACHINE
PROGRAMMING
YOUR MACHINE
BASIC
OPERATIONS
ADVANCED
FEATURES
NETWORK
FEATURES
PRINTOUT
JOURNALS AND
PROBLEM
SOLVING
LISTS
Before operating this equipment, please read
these instructions c omple t ely and kee p the se
operating instructions for future reference.
APPENDIX
Page 2
IMPORTANT INFORMATION
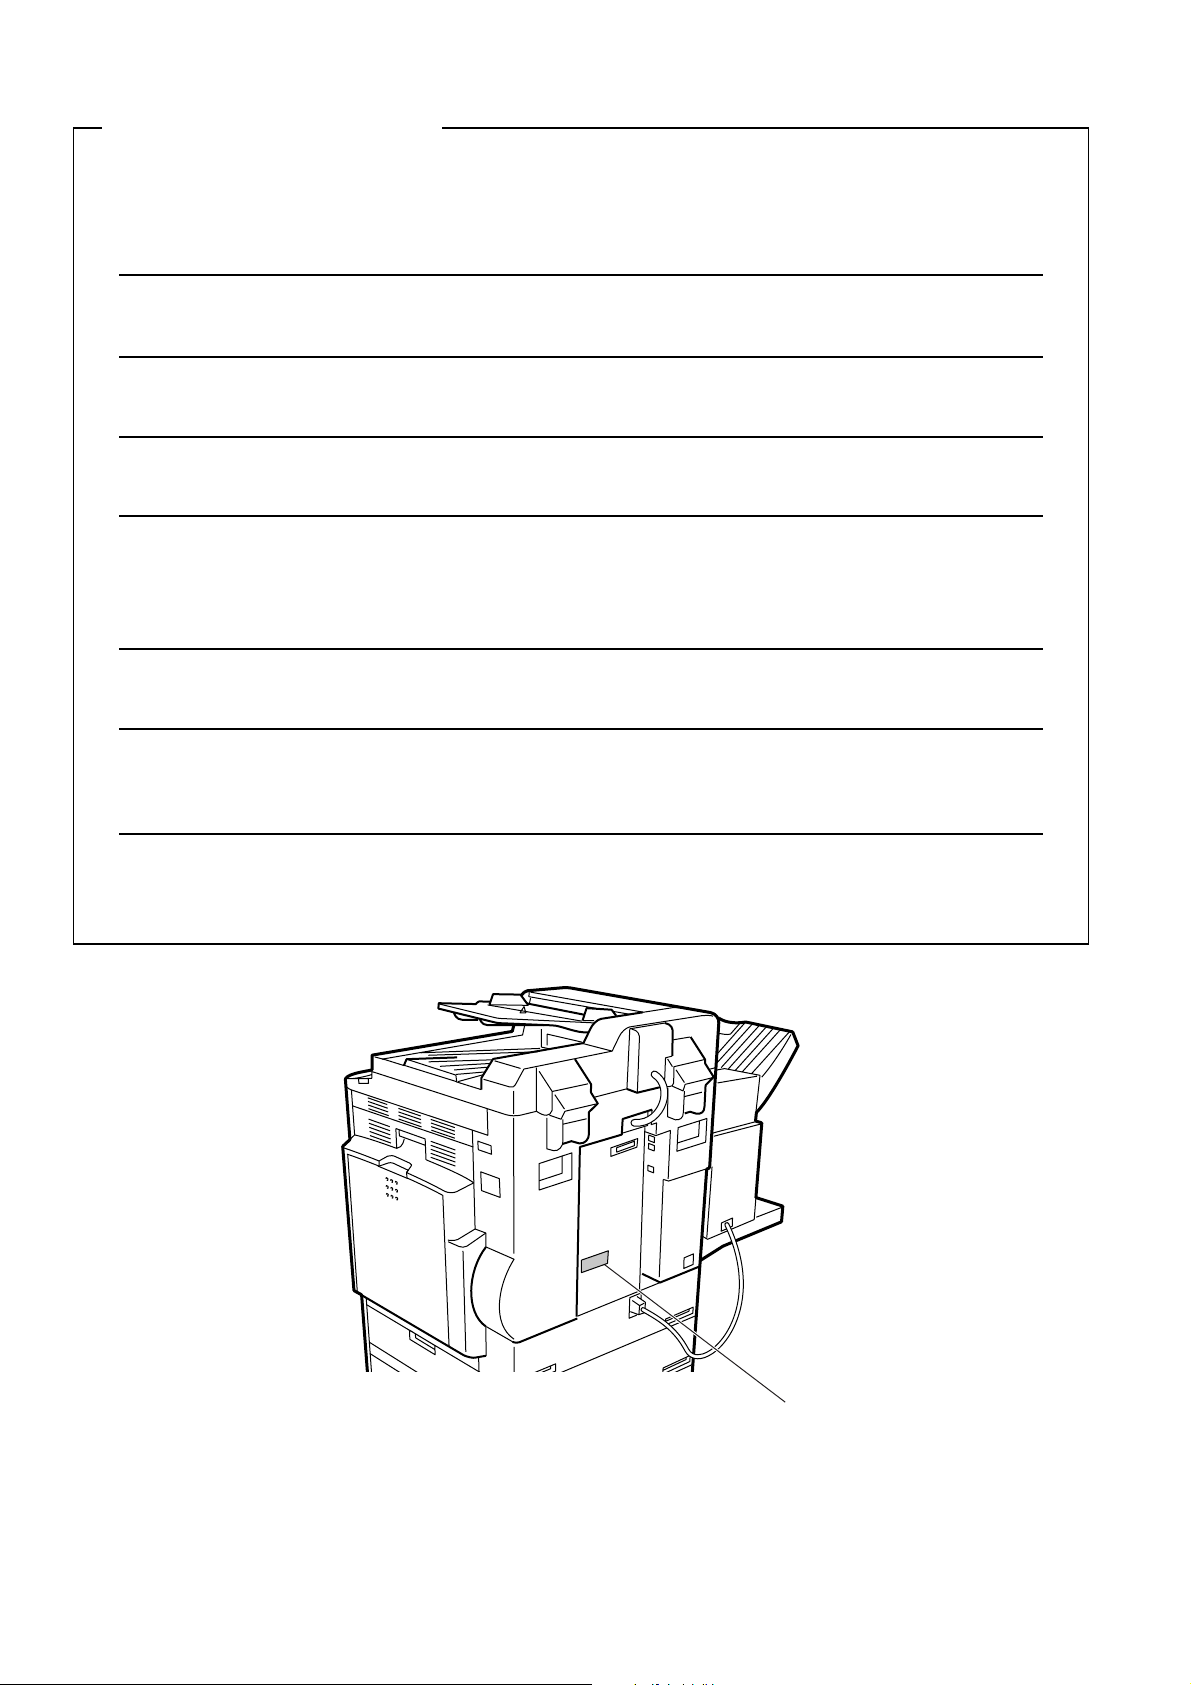
When requesting information, supplies or service always refer to the model and serial number of your
machine. The model and serial number plate (Main Name Plate) is located on the machine as shown below.
For your convenience, space is provided below to record information you may need in the future.
Model No.
Serial No.
Date of Purchase
Dealer
Address
Telephone Number
() -
Supplies Telephone Num ber
() -
Service Telephone Number
() -
Model and Serial
Number
Copyright © 2000 by Matsushita Graphic Communication Systems, Inc.
All rights reserved. Unauthorized copying and distribution is a violation of law. Printed in Japan.
The contents of these Operating Instructions are subject to change without notice.
Page 3

Table of Contents
Getting to Know Your Machine
Safety Information ..................................................................................................................................... 5
Function Key ............................................................................................................................................. 8
External View ............................................................................................................................................. 9
Control Panel ............................................................................................................................................. 10
Installing your Machine
Adjusting the Volume ............................................................................................................................... 13
User Parameters ........................................................................................................................................ 15
■ Setting the Monitor Volume ........................................................................... 13
■ Setting the Ringer Volume ............................................................................ 14
■ Setting the Date and Time .......... ....... ...... ...... ....... ...... ....... ...... ....... ...... ....... . 15
■ Setting Your LOGO .................................................................. ....... ...... ....... . 1 6
■ Setting Your Character ID ............................................................................. 17
■ Setting Your ID Number (Fax Telephone Number) ....................................... 18
Programming Your Machine
One-Touch/Abbreviated Dialling Numbers ............................................................................................. 19
Customizing Your Machine ...................................................................................................................... 27
■ Entering One-Touch/Abbreviated Dialling Numbers ..................................... 19
■ Changing or Erasing One-Touch/Abbreviated Dialling Numbers .................. 23
■ Printing Out a Directory Sheet .................. ...... ....... ...... ....... ...... ..................... 26
■ Setting the Fax Parameters ........................................................................... 27
■ Fax Parameter Table ..................................................................................... 28
Basic Operations
Loading Originals ...................................................................................................................................... 33
■ How To Load Originals .................................................................................. 33
■ Sending Non-Standard Size Originals ........................................................... 33
■ Flatbed Scanning .......................................................................................... 33
Basic Transmission Settings ................................................................................................................... 34
Sending Documents ................................................................................................................................. 37
■ Contrast .......................... .......................... .......................... .......................... . 34
■ Resolution ..................................................................................................... 34
■ Original (Text/Photo) ..................................................................................... 35
■ Verification Stamp ......................................................................................... 35
■ Communication Journal (COMM. JOURNAL) ............................................... 36
■ Memory Transmission ................................................................................... 37
■ Manual Number Dialling ................................................................................ 39
■ One-Touch Dialling ........................................................................................ 41
■ Abbreviated Dialling ...................................................................................... 42
■ Directory Search Dialling ............................................................................... 43
■ Multi-Station Transmission (Broadcasting) .................................................... 45
■ Direct Transmission ....................................................................................... 47
■ Manual Number Dialling (Direct Transmission) ............................................. 47
■ One-Touch Dialling (Direct Transmission) .................................................... 48
■ Abbreviated Dialling (Direct Transmission) ................................................... 49
■ Directory Search Dialling (Direct Transmission) ............................................ 50
■ Rotated Transmission ................................................................................... 51
■ Rotation XMT Fax Parameter set to: ............................................................. 51
■ Double-Sided Transmission (Receiving) ....................................................... 51
■ Duplex Scan Select Mode set to: .................................................................. 51
■ Duplex Print Fax Parameter set to: ............................................................... 51
1
Page 4

Basic Operations (Cont inued)
■ Setting Rotation Transmission ...................................................................... 52
■ Duplex Scan .................................................................................................. 53
■ Sending Document(s) Using Duplex Scan .................................................... 53
■ Setting Duplex Print ...................................................................................... 55
■ Voice Mode Transmission ............................................................................. 56
■ Off-Hook Dialling ........................................................................................... 56
■ On-Hook Dialling ........................................................................................... 57
■ Transmission Reservation ............................................................................. 58
■ Memory Transmission Reservation (Multi-tasking) ....................................... 58
■ Direct Transmission Reservation (Priority Transmission Reservation) ......... 60
■ Redialling ...................................................................................................... 62
■ Automatic Redialling ..................................................................................... 62
■ Manual Redialling .......................................................................................... 62
Receiving Documents .............................................................................................................................. 64
■ Automatic Reception ..................................................................................... 64
■ Manual Reception ......................................................................................... 64
■ Print Reduction .............................................................................................. 65
■ Selecting the Print Reduction Mode .............................................................. 65
■ Receiving Oversize Documents ............................................. ...... ....... ...... .... 66
■ Substitute Memory Reception ....................................................................... 67
Advanced Features
Batch Transmission .................................................................................................................................. 69
Timer Controlled Communications ......................................................................................................... 70
Polling ........................................................................................................................................................ 73
Program Keys ............................................................................................................................................ 76
Edit File Mode ............................................................................................................................................ 85
Receive To Memory .................................................................................................................................. 93
Fax Cover Sheet ........................................................................................................................................ 96
■ Real-Time Batch Transmission ..................................................................... 69
■ Delayed Batch Transmission ........................................................................ 69
■ Deferred Transmission .................................................................................. 70
■ Deferred Polling ............................................................................................ 71
■ Setting the Polling Password ........................................................................ 73
■ Preparing to be Polled ................................................................................... 74
■ To Poll Documents from Another Station ...................................................... 75
■ Setting for Group Dialling .............................................................................. 76
■ Setting for Deferred Transmission ................................................................ 77
■ Setting for Deferred Polling ........................................................................... 79
■ Setting for Normal Polling ............................................................................. 81
■ Setting for One-Touch Key ............................................................................ 83
■ Changing or Erasing the Program Key Settings ........................................... 84
■ Printing a File List .......................................................................................... 85
■ Viewing the Contents of a File List ................................................................ 86
■ Changing the Start Time or the Station of a File ........................................... 87
■ Deleting a File ............................................................................................... 89
■ Printing a File ................................................................................................ 90
■ Adding Documents into a File ....................................................................... 91
■ Retry an Incomplete File ............................................................................... 92
■ Setting the RCV To Memory Password ........................................................ 93
■ Setting RCV To Memory ............................................................................... 94
■ Printing Documents ....................................................................................... 95
■ General Description ...................................................................................... 96
■ Using the Fax Cover Sheet ........................................................................... 96
2
Page 5

Advanced Feat ures (Continue d)
Department Code ...................................................................................................................................... 99
■ General Description ............... ...... ....... ...... ...... ....................................... ....... . 9 9
■ Setting the Department Code ........................................................................ 99
■ Changing or Erasing the Department Code .................................................. 101
■ Sending a Document with Department Code ................................................ 103
■ Sending a Document with Department Code (Voice Mode Transmission) ... 104
■ Printing a Department Code List ................................................................... 105
■ Printing a Department Code Journal ............................................................. 106
Network Features
Selective Reception .................................................................................................................................. 109
Password Communications ..................................................................................................................... 110
Confidential Mailbox ................................................................................................................................. 115
Sub-Addressing ........................................................................................................................................ 124
■ Setting the Selective Reception. ........................... ....................................... . 10 9
■ General Description ............... ...... ....... ...... ...... ....................................... ....... . 11 0
■ Compatibility with Other Machines ................................................................ 110
■ Setting Password Transmission .................................................................... 111
■ Setting Password Reception ......................................................................... 112
■ Using Password Transmission ...................................................................... 113
■ Using Password Reception ........................................................................... 114
■ Confidential Mailbox ...................................................................................... 115
■ Compatibility with Other Machines ................................................................ 115
■ Sending a Confidential Document to a Remote Station's Mailbox ................ 116
■ Polling a Confidential Document from a Remote Station's Mailbox .............. 118
■ Receiving a Confidential Document to Your Machine's Mailbox ................... 119
■ Storing a Confidential Document in Your Machine's Mailbox ........................ 120
■ Printing a Confidential Document from Your Machine's Mailbox .................. 121
■ Deleting a Confidential Document Stored in Your Machine's Mailbox .......... 122
■ General Description ............... ...... ....... ...... ...... ....................................... ....... . 12 4
■ To set the Sub-Address into a One-Touch/ABBR. dialling Numbers ............ 125
■ To send a Document with Sub-Address ........................................................ 126
Printout Journals and Lists
Journals and Lists .................................................................................................................................... 129
■ Transaction Journal ....................................................................................... 129
■ Individual Transmission Journal (IND. XMT JOURNAL) ............................... 131
■ Communication Journal (COMM. JOURNAL) .............................................. 135
■ One-Touch/Abbrevia ted and Direc tor y Sear ch List .................. ....... .............. 137
■ Program List ............. ...... ....... ...... ....................................... ...... ....... ...... ....... . 140
■ FAX Parameter List ....................................................................................... 141
Problem Solving
Troubleshooting ........................................................................................................................................ 143
■ If You Have Any of These Problems ............................................................. 143
■ Information Codes ......................................................................................... 145
■ Verification Stamp ......................................................................................... 147
■ Checking the Telephone Line ....................................................................... 148
Appendix
Specifications ............................................................................................................................................ 149
Options and Supplies ............................................................................................................................... 151
Glossary ..................................................................................................................................................... 152
INDEX ......................................................................................................................................................... 156
3
Page 6

This page is intentionally left blank.
4
Page 7
Getting to Know Your Machine
Safety Information
Declaration of Conformity (DoC)
"Hereby Matsushita Gr aphic Commun ication S ystems, Inc . / Panason ic Testin g Centre (Europ e)
GmbH (PTC), declares that this G3 Facsimile equipment is in compliance with the essential
requirements and other relevant provisions of the Directive 1999/5/EC"
Hint:
If you want to get a c op y of th e o ri ginal DoC of our products whi ch rela tes to the R&T TE , pl ease co ntac t o ur web
address: http://doc.panasonic-tc.de
Network Compatibility
This product, Mod el DP-2000 with DA- FG230/FG231-* * (** means countr y suffixes as ta ble below), is des igned
as to work with an analogue Public Switched Telephone Network (PSTN) in the each country.
** Country ** Country ** Country ** Country
AA Austria AJ Spain AQ Ireland EE Itary
AD Denmark AM Switzerland AR Belgium YG Greece
AF Finland AN Norway AS Sweden AB UK
AH The Netherlands AP Portugal AV France AG Germany
GETTING TO
KNOW YOUR
MACHINE
!
WARNING
• TO PREVENT FIRE OR SHOCK, DO NOT EXPOSE THIS PRODUCT TO RAIN OR ANY TYPE OF
MOISTURE.
• TO MINIMIZE THE POSSIBILITY OF SHOCK OR DAMAGE TO THE MACHINE, IT MUST BE PROPERLY
GROUNDED.
• THIS PRODUCT CONTAINS HAZARDOUS RADIATION. IF YOU DO NOT FOLLOW THESE INSTRUCTIONS
OR USE CONTROLS, MAKE ADJUSTMENTS OR PROCEDURES OTHER THAN THOSE SPECIFIED HEREIN,
YOU MAY EXPOSE YOURSELF TO HAZARDOUS RADIATION.
• WHEN YOU OPERATE THIS EQUIPMENT, THE SOCKET-OUTLET SHOULD BE NEAR THE EQUIPMENT
AND BE EASILY ACCESSIBLE.
• MAKE SURE THAT THE MACHINE IS INSTALLED IN A SPACIOUS OR WELL-VENTILATED ROOM SO AS
NOT TO INCREASE THE AMOUNT OF OZONE IN THE AIR. SINCE OZONE IS HEAVIER THAN AIR, IT IS
RECOMMENDED THAT AIR AT FLOOR LEVEL BE VENTILATED.
• PLUG POWER SUPPLY CORD INTO ORDINARY AC OUTLET BEFORE CONNECTING TELEPHONE LINE CORD.
DISCONNECT TELEPHONE LINE CORD BEFORE UNPLUGGING POW ER SUP PLY CORD FROM AC OUTLET.
• DISCONNECT THE EQUIPMENT IMMEDIATELY SHOULD IT EVER SUFFER PHYSICAL DAMAGE WHICH
RESULTS IN THE INTERNAL PARTS BECOMING ACCESSIBLE IN NORMAL USE. IN THIS INSTANCE
USERS SHOULD HAVE THE EQUIPMENT REPAIRED OR DISPOSE OF.
• IF THE POWER SUPPLY CORD AND/OR TELEPHONE LINE CORD OF THIS EQUIPMENT ARE DAMAGED,
THEY MUST BE REPLACED BY THE SPECIAL CORDS SUPPLIED BY AN AUTHORIZED PANASONIC
SERVICE CENTRE.
CAUTION
!
denotes a potential hazard that could result in serious injury or death.
denotes hazards that could result in minor injury or damage to the machine.
• THIS PRODUCT CONTAINS A LITHIUM BATTERY. DANGER OF EXPLOSION IF BATTERY IS INCORRECTLY
REPLACED OR DISPOSED IN A FIRE.
REPLACE ONLY WITH T HE SAME OR EQUIVAL ENT TYPE. DISP OSE OF USED BATTE RIES ACCORDING
TO THE INSTRUCTIONS OF YOUR LOCAL SOLID WASTE OFFICIALS.
1 When you know that a thunderstorm is coming, we recommend that you:
(1) Unplug the telephone line cord from the phone jack.
(2) Turn off the power and unplug the power supply cord from AC outlet.
5
Page 8

GETTING TO KNOW YOUR MACHINE
Safety Information
2 This equipment may not necessarily provide for the effective hand-over of a call to or from a telephone
connected to the same line.
3 The operation of this equipment on the same line as telephones or other equipment with audible warning
devices or autom atic rin g detectors will giv e rise to bell tink le or noi se and m ay cause false trip ping o f the ring
detector. Should such problem occur, the user is not to contact telecom (telephone company) faults service.
• TO REDUCE THE RISK OF SHOCK OR FIRE, USE ONLY NO. 26 AWG OR LARGER TELEPHONE LINE
CABLE.
• DISCONNECT ALL POWER TO THE MACHINE BEFORE COVER(S) ARE REMOVED. REPLACE THE
COVER(S) BEFORE THE UNIT IS RE-ENERGIZED.
IMPORTANT SAFETY INSTRUCTIONS
!
When using your telephone equipment, basic safety precautions should always be followed to reduce the risk of
fire, electric shock and injury to persons, including the following:
• DO NOT USE THIS PRODUCT NEAR WATER, FOR EXAMPLE, NEAR A BATH TUB, WASH BOWL,
KITCHEN SINK OR LAUNDRY TUB, IN A WET BASEMENT OR NEAR A SWIMMING POOL.
• AVOID USING A TELEPHONE (OTHER THAN A CORDLESS TYPE) DURING AN ELECTRICAL STORM.
THERE MAY BE A REMOTE RISK OF ELECTRIC SHOCK FROM LIGHTNING.
• DO NOT USE THE TELEPHONE TO REPORT A GAS LEAK IN THE VICINITY OF THE LEAK.
6
Page 9
Safety Information
GETTING TO KNOW YOUR MACHINE
GETTING TO
KNOW YOUR
MACHINE
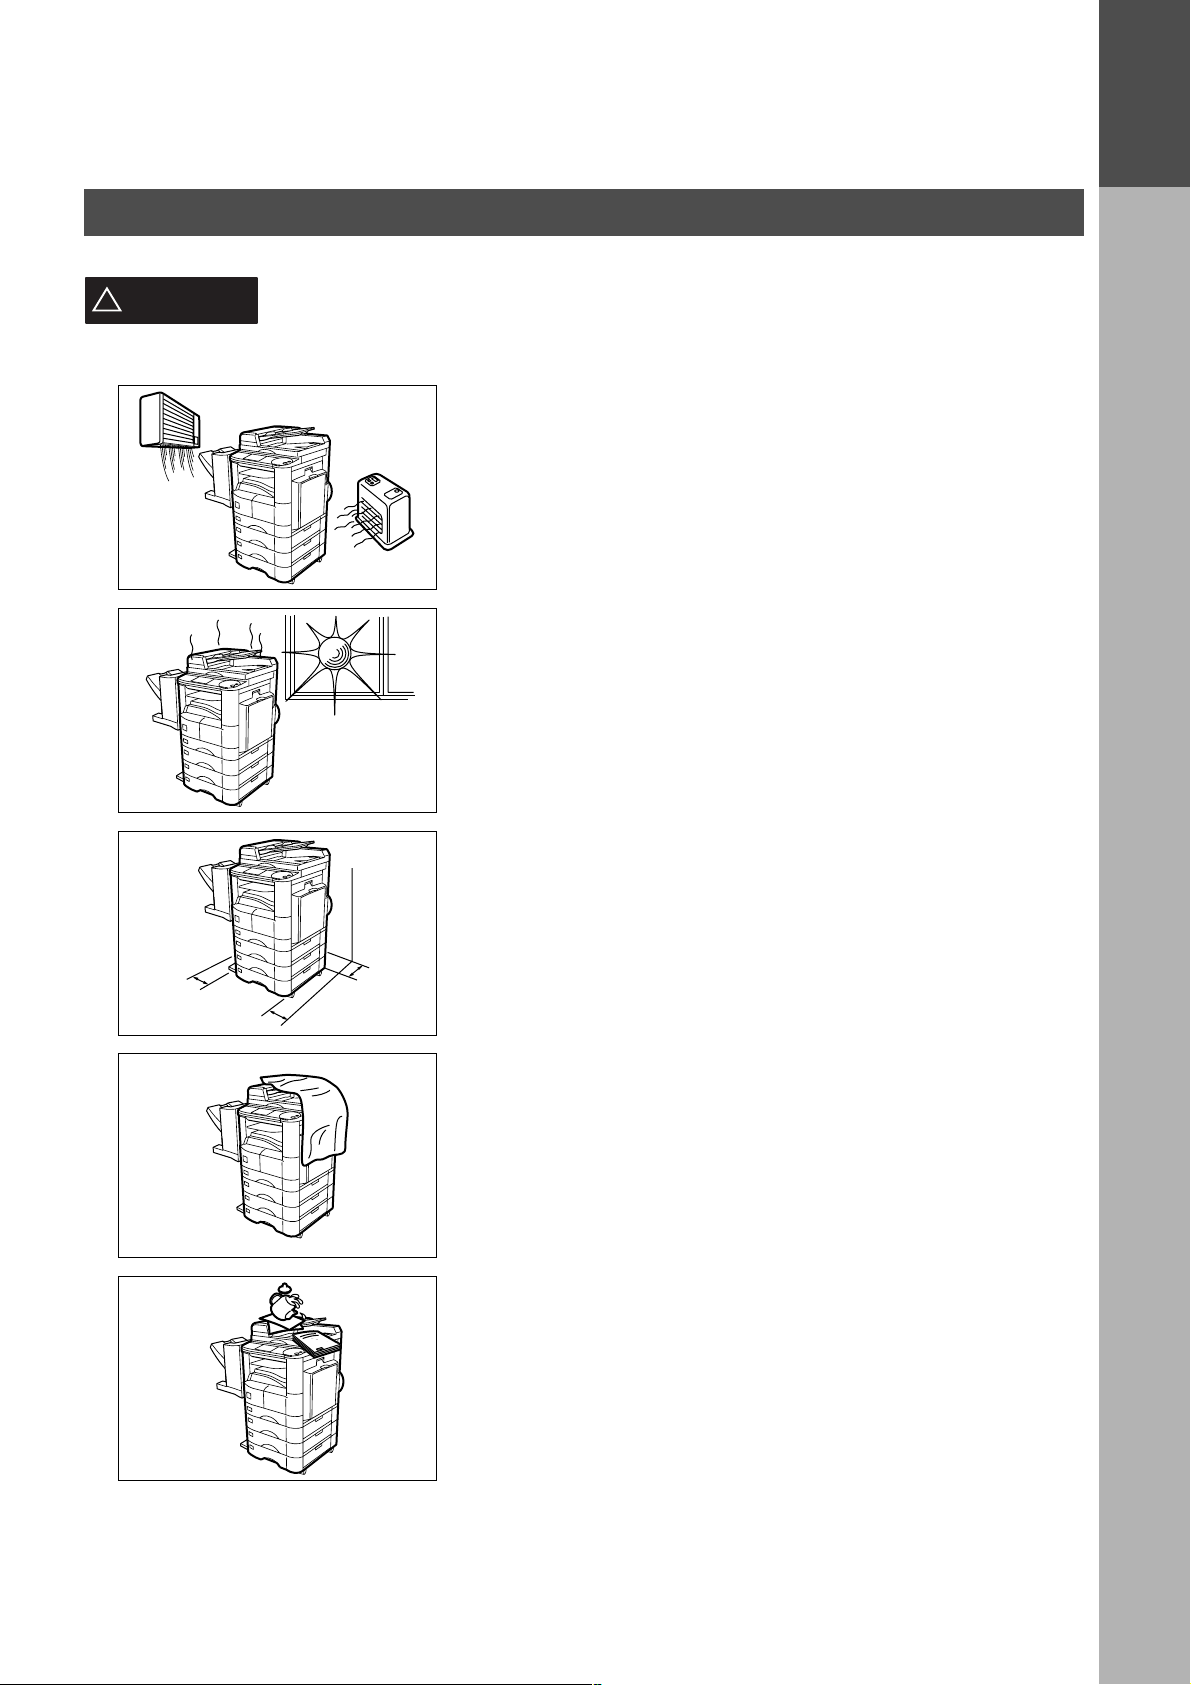
CAUTION
!
denotes hazards that could result in minor injury or damage to the machine.
Do not install the machine near heating or an air conditioning unit.
Avoid exposure to direct sunlight.
Install the machine on a flat surface, leave at least 10 cm of space
between the machine and other objects.
Do not block the ventilation openings.
Do not place heavy objects or spill liquids on the machine.
7
Page 10
GETTING TO KNOW YOUR MACHINE
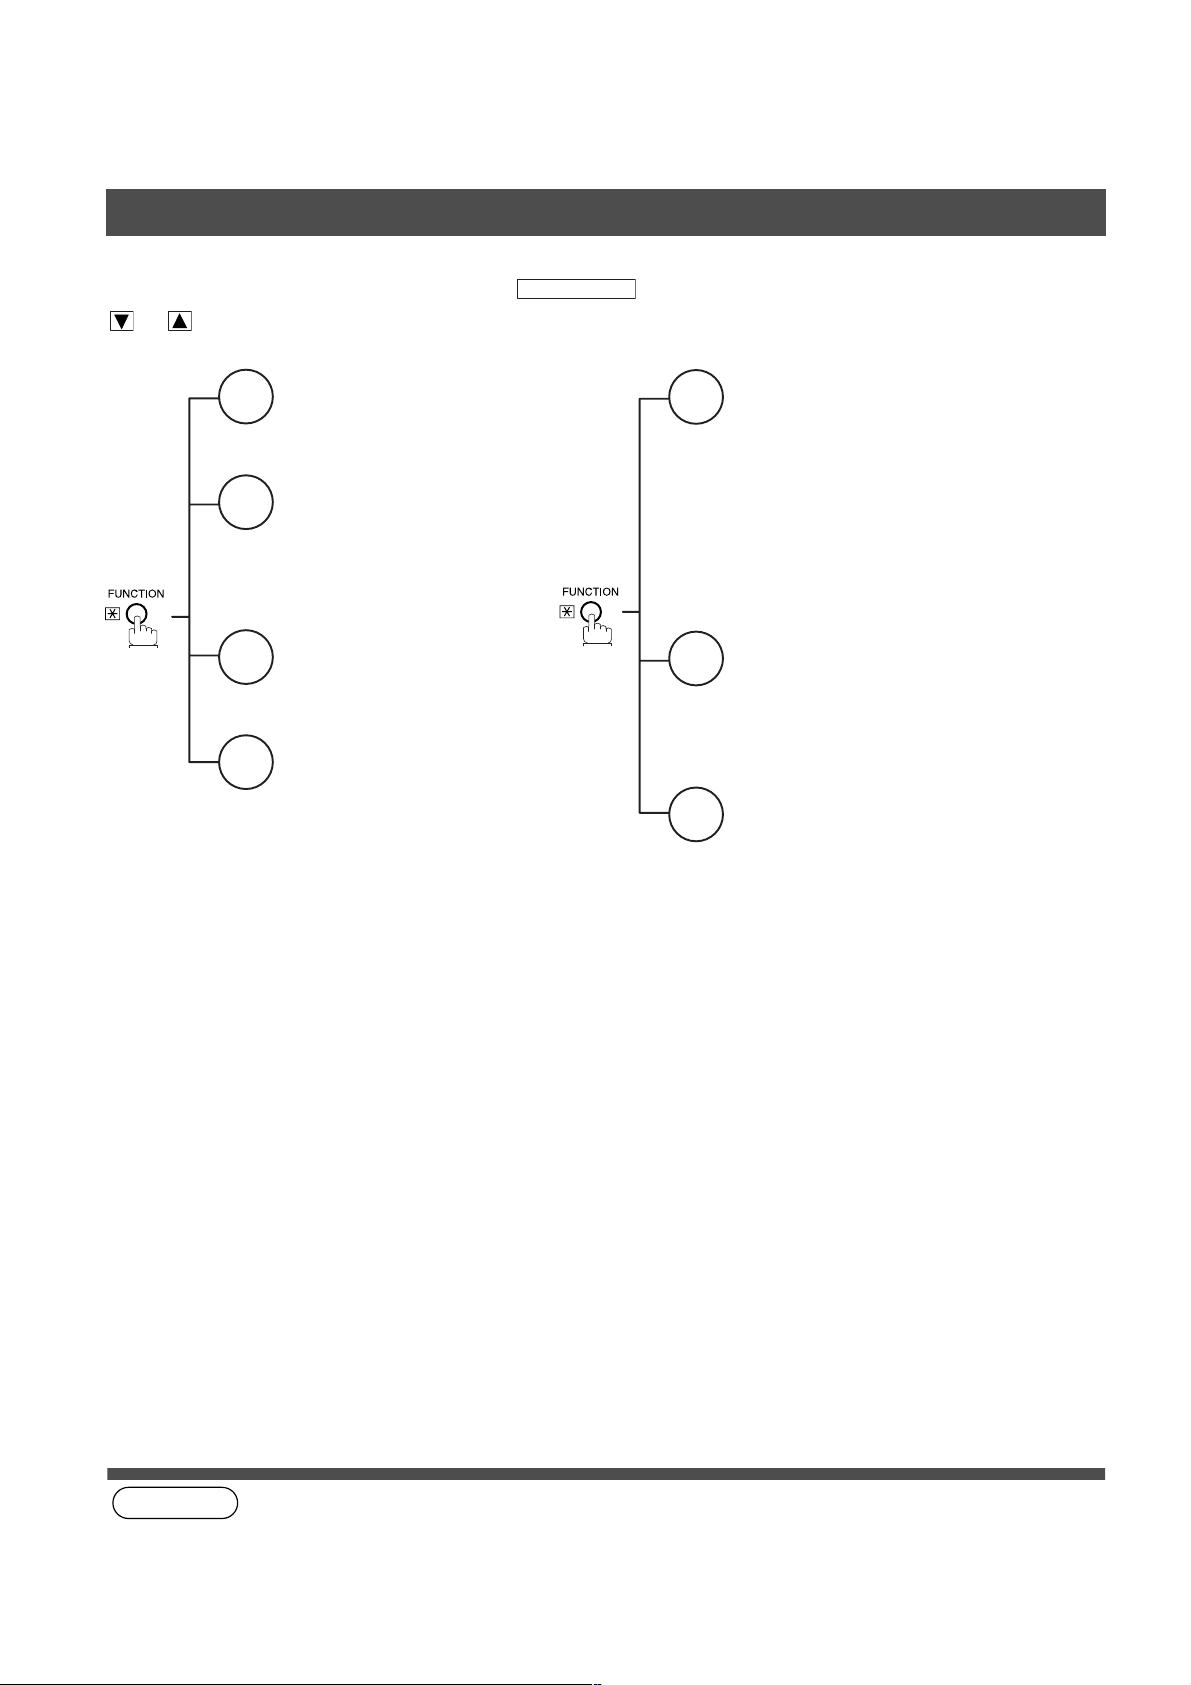
Function Key
Any function can be started by first pressing and then enter the function number, or by pressing
or scroll key repeatedly until the desired function appears on the display.
Deferred Communication
1
1 = XMT
2 = Polling
3 = Advanced Communication
Advanced Communication
2
2 = Confidential Communication
4 = Sub-Address XMT
Polling
3
1 = Polling
2 = Polled
Printout
6
1 = Journal (Print/View)
2 = One-Touch/Abbreviated /
Directory Search List
3 = Program List
4 = Fax Parameter List
5 = Not used
6 = Individual XMT Journal
7 = Directory Sheet
FUNCTION
Set Mode
7
1 = User Parameters
• Date & Time
• Logo
• Character ID
• ID Number (Fax Telephone Number)
2 = One-Touch/Abbreviated Numbers
3 = Program Keys
4 = Fax Parameters
Select Mode
8
1 = Communication Journal = OFF/ON/INC
2 = Duplex Scan = OFF/ON
3 = Cover Sheet = OFF/ON
4 = Password-XMT = OFF/ON (See Note 1)
5 = RCV to Memory = OFF/ON/PRINT
Edit File Mode
9
1 = File List (Print/View)
2 = Change Time/Station
3 = Delete File
4 = Print File
5 = Add Document
6 = Retry Incomplete File
8
(see Note 1)
NOTE
1. If Fax Parameter i s not p res et to a Vali d pos ition, which enab les y ou to use the f unctio n, the disp lay will not show
the function.
Page 11
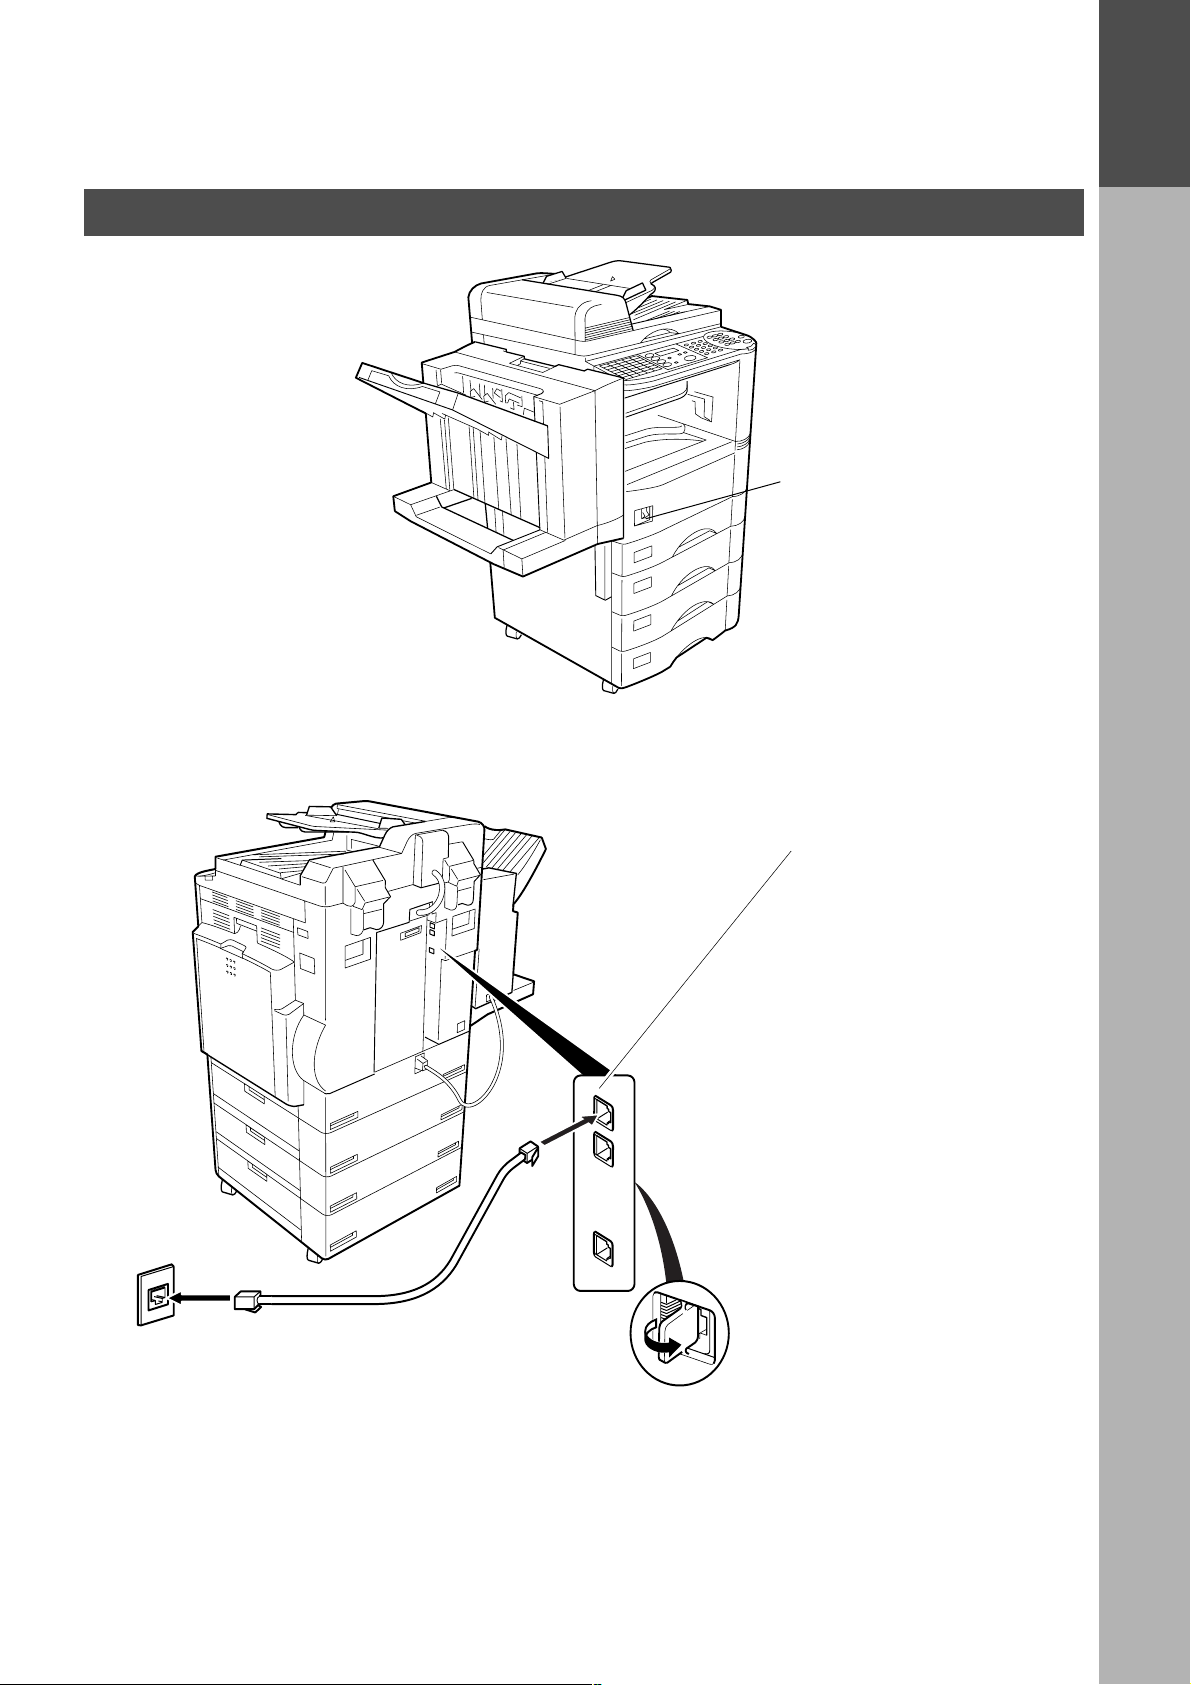
External View
GETTING TO KNOW YOUR MACHINE
Power switch
• After connecting all cables
and the Power Cord, turn the
power switch ON.
GETTING TO
KNOW YOUR
MACHINE
Telephone Jack
Telephone Line Jack
• Plug one end of the
telephone line cable into
the telephone jack supplied
by the telephone company
and the other end into the
LINE jack on the back of
the machine.
9
Page 12
GETTING TO KNOW YOUR MACHINE
REDIAL/
PAUSE
ABBR
FLASH/
SUB-ADDR
SET
ORIGINAL COPY
SIZE SIZE
MONITOR
ENERGY SAVER
INTERRUPT
FUNCTION
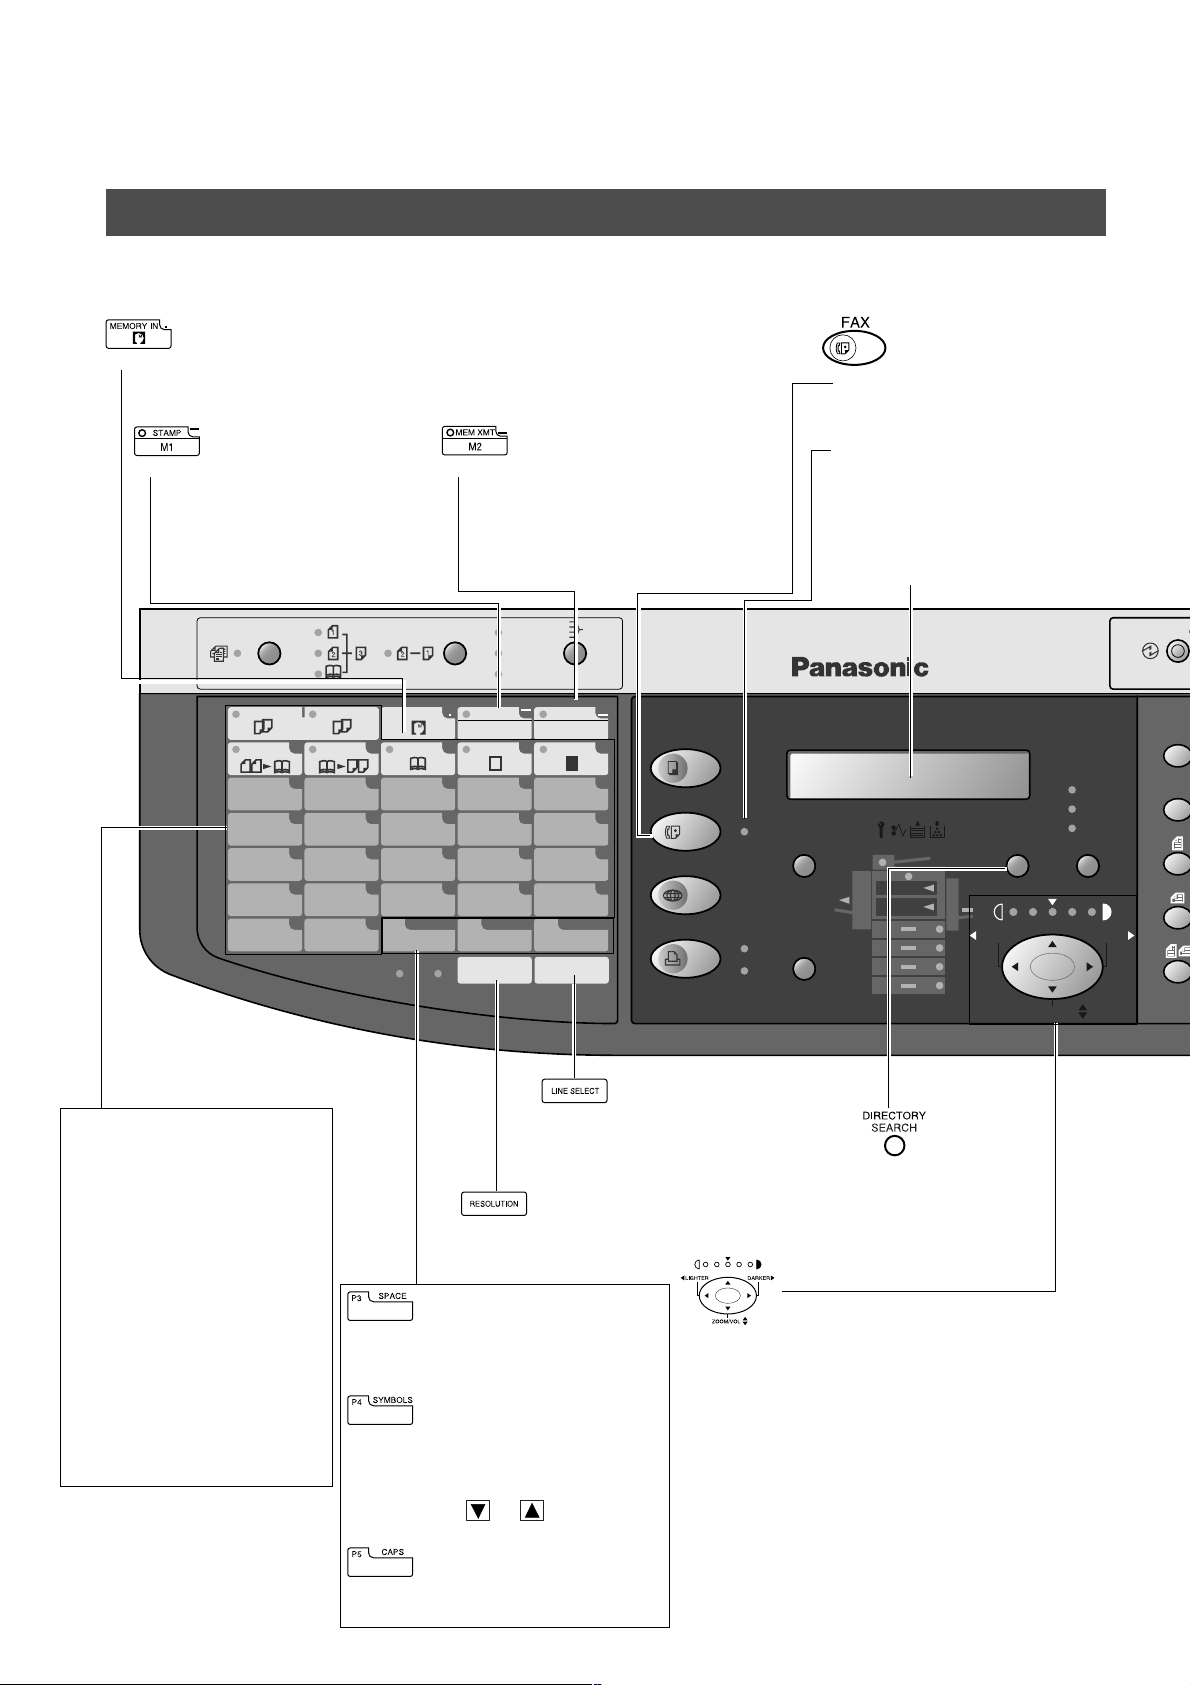
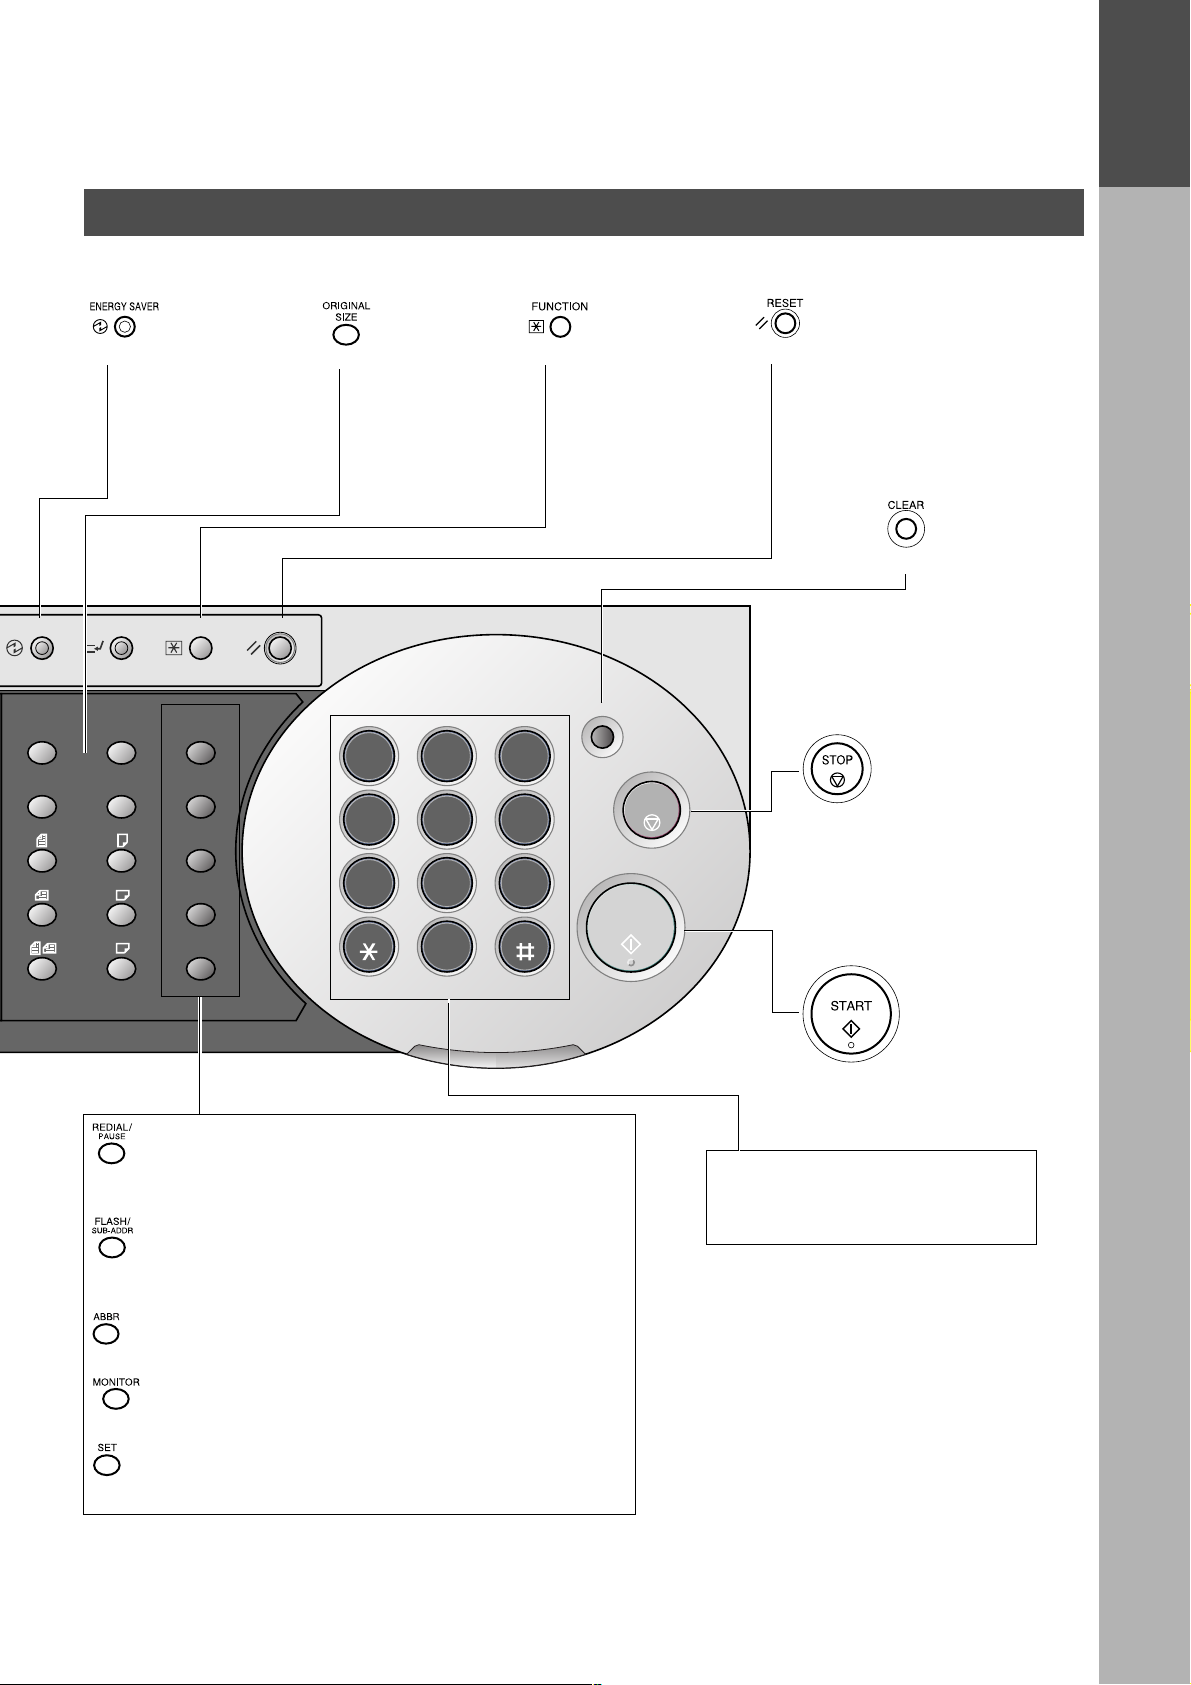
Control Panel
Control Pane
• Used to store a job in memory (See operating Instructions For Copier, page 25)
Also used to enter “.” (period) while entering LOGO, character ID and station name.
• Used to turn the verification
stamp ON or OFF .
(See page 35)
Also used to enter “-” (dash)
while entering LOGO,
character ID and station name.
MULTI-SIZE FEED
COPIED
2 in 1 BOOK EDGE MARGIN
01
06
11
16
P1
2SIDED
COPY
BLANK
OHP
2PAGE
abcde
COPY
f
02
k
07
p
12
u
17
z
P2 P3
MEMORY IN
g
03
l
08
q
13
v
18
@
FINE
• Used to select either memory or direct
communication.
(See page 37 to 43)
Also used to enter “_” (underscore)
while entering LOGO, character ID and
station name.
1SIDED
COPY
SPACE
S-FINE
SORT
STAPLE
SHIFT
STAMP
M1
h
04
m
09
r
14
w
19
SYMBOLS
P4
RESOLUTION LINE SELECT
i
n
s
x
MEM XMT
05
10
15
20
P5
M2
j
o
t
y
CAPS
COPY
FAX
INTERNET
PRINTER
ON LINE
ON LINE
DATA
• Used to select the FAX
mode.
ON LINE Indicator
Blinks : When send ing or
receiving faxes.
LCD Display
Indicates date and time, or
the current operation.
DP-2000
OUTPUT
TRAY
PAPER
TRAY
PHOTO
TEXT/
PHOTO
DIRECTORY
SEARCH
LIGHTER DARKER
TEXT
ENERGY SA
ORIGIN
SIZE
One-Touch Keys (01-20)
• Used for One-Touch Diall ing.
(See page 41 and 48)
Program Keys (P1-P5)
• Used to record long dialling
procedures or Group Dial ling
Number keys.
(See page 76 to 84)
Character key
• One-Touch Keys and
Program Keys also serve as
character and symbol input
keys which are used to
record your LOGO, character
ID and station name. The
character key templa te is
printed on the panel under
the directory sheet cover.
10
• Used to manually select the
communications port for each
transmission. Available when the
Optional 2nd G3 Fax Communication
Port Kit has been installed. (See
Operating Instructions (For Copier))
• Used to set Standard,
Fine, Super-Fine.
(See page 34)
• Used to insert a space while
entering LOGO, character ID and
station name.
• Used to enter a symbol (, ’ & ( ) : + /
% Å å Ä ä Ö ö Ü ü È è É é Æ æ Ñ)
for LOGO, character ID and station
name. Use or to select the
symbols.
• Used to switch between upper and
lower character set.
ZOOM/VOL
• Used to search for
a station na me.
(See page 43 and
50)
Used for the following:
• Adjust the CONTRAST.
• Adjust the monitor and ringer volume. (See
page 13 to 14)
• Move the cursor while ent ering numbers and
characters.
• Search the station name for Directory
Search Dialling.
• Confirm the entered station for multi-station
communication.
• Select functions.
• Confirm the current communication modes
(e.g. Page number, ID, Dialed Telephone
number, File number) when the unit is ON
LINE.
Page 13
Control Panel
GETTING TO KNOW YOUR MACHINE
GETTING TO
KNOW YOUR
MACHINE
ENERGY SAVER
ORIGINAL COPY
INTERRUPT
SIZE SIZE
LEDGER
LEGAL
LETTER
LETTER
INVOICE
• Used to switch the
machine into energy
saving mode.
For more details, see
page 24 of the O pe rat in g
Instructions (For Copier.)
FUNCTION
REDIAL/
PAUSE
FLASH/
SUB-ADDR
ABBR
MONITOR
SET
RESET
• Used to select the
original size
manually.
ABC
1 2 3
GHI
JKL
4 5 6
PQRS
TUV
7 8 9
0
• Used to start or select
the function and subfunctions. These
functions are
explained in detail on
page 8.
CLEAR
DEF
MNO
WXYZ
STOP
START
• Use this button when
resetting all the
previously set functions.
• Use this button when
correcting entered
numbers or
characters.
• Press this button when
you want to stop
telecommunication,
registration operation, or
audible tone.
ALARM ACTIVE
• Used to enter a pause when recording or dialling a telephone
number, or to redial the last dialed number.
• Used to separate the Sub-Address from the telephone number
when dialling, or to access some features of your PBX.
• Used to start Abbreviated Dialling. (See page 42 and 49)
• Used to start On-Hook Dialling. (See page 57)
• Used to set operations.
• Press this button to start
transmitting or receiving a
fax.
Keypad
• Used for manual number dialling,
recording phone numbers, and
numerical entries.
11
Page 14

GETTING TO KNOW YOUR MACHINE
This page is intentionally left blank.
12
Page 15
Installing your Machine
Adjusting the Volume
You can adjust the m oni tor and ringe r vo lume on your machine. T he b uil t- in sp eak er ena ble s y ou to hea r the di al
tone, dialling signals, and busy tone. The ringer sounds when your machine receives a call.
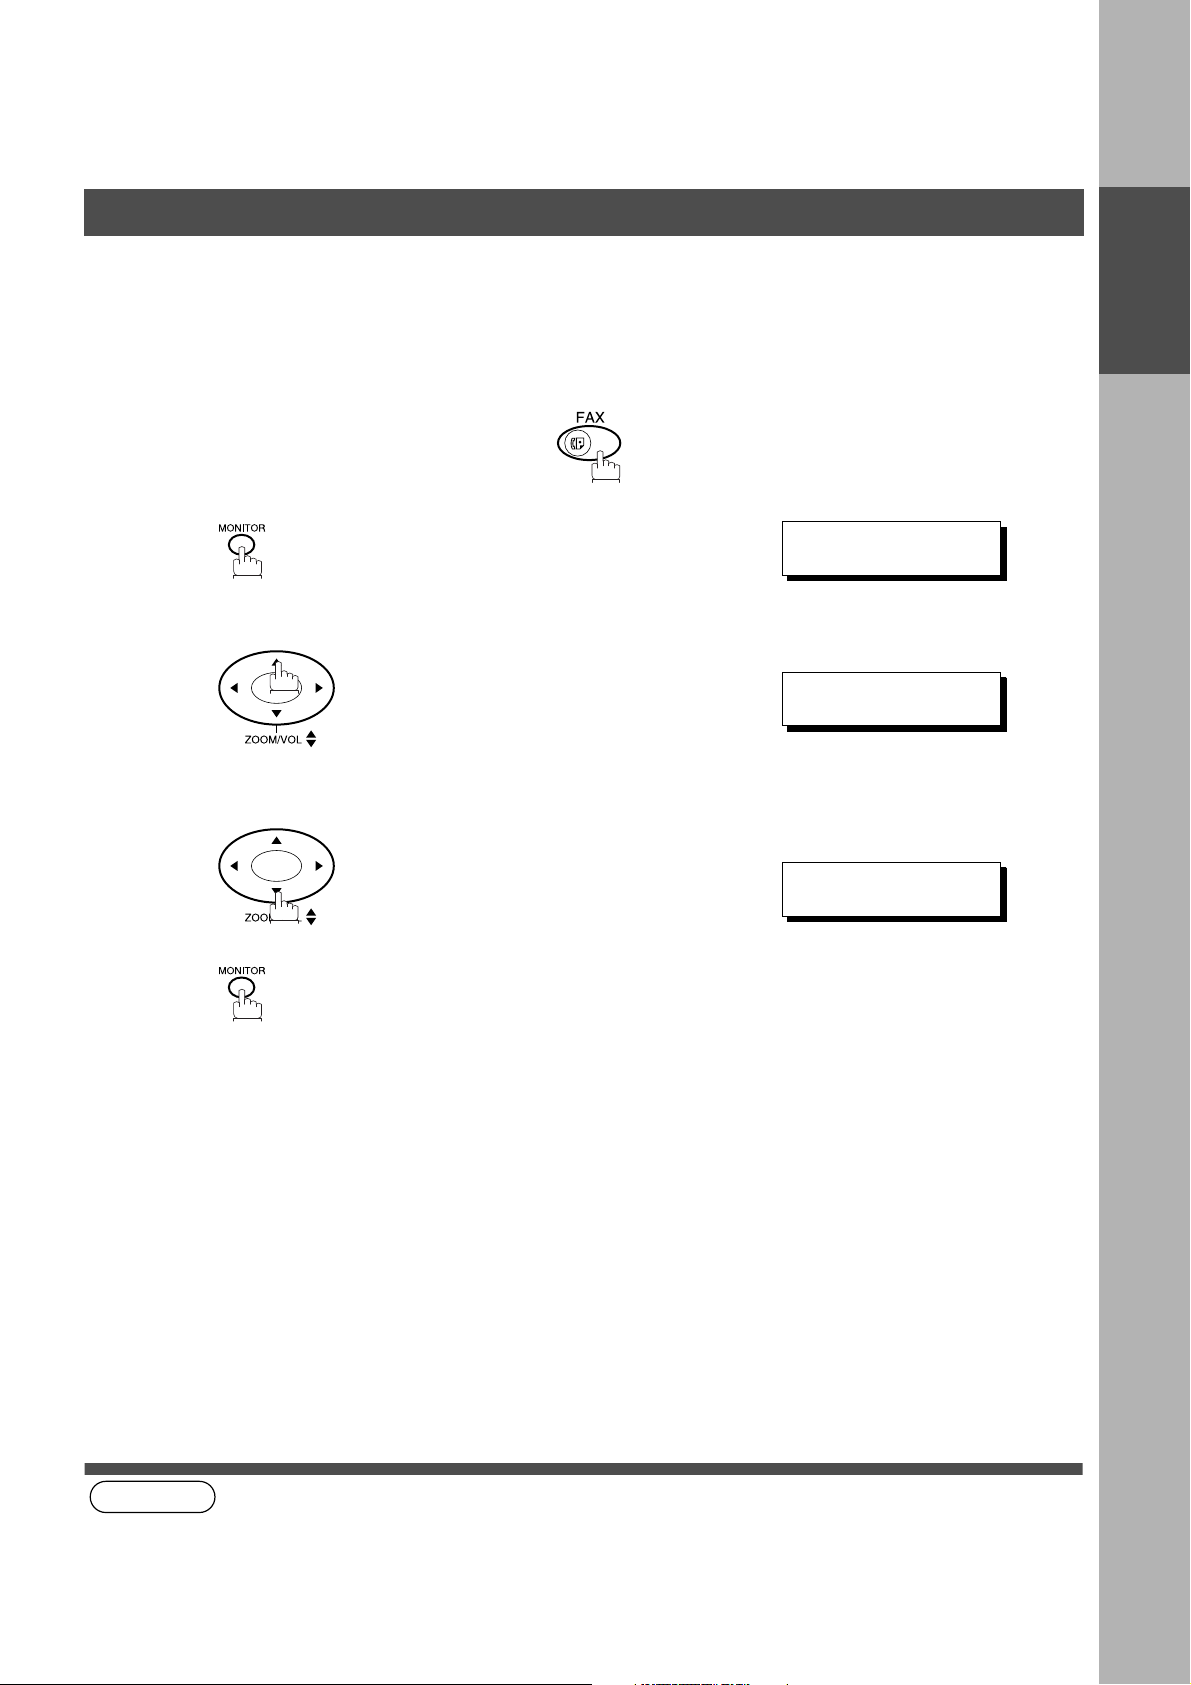
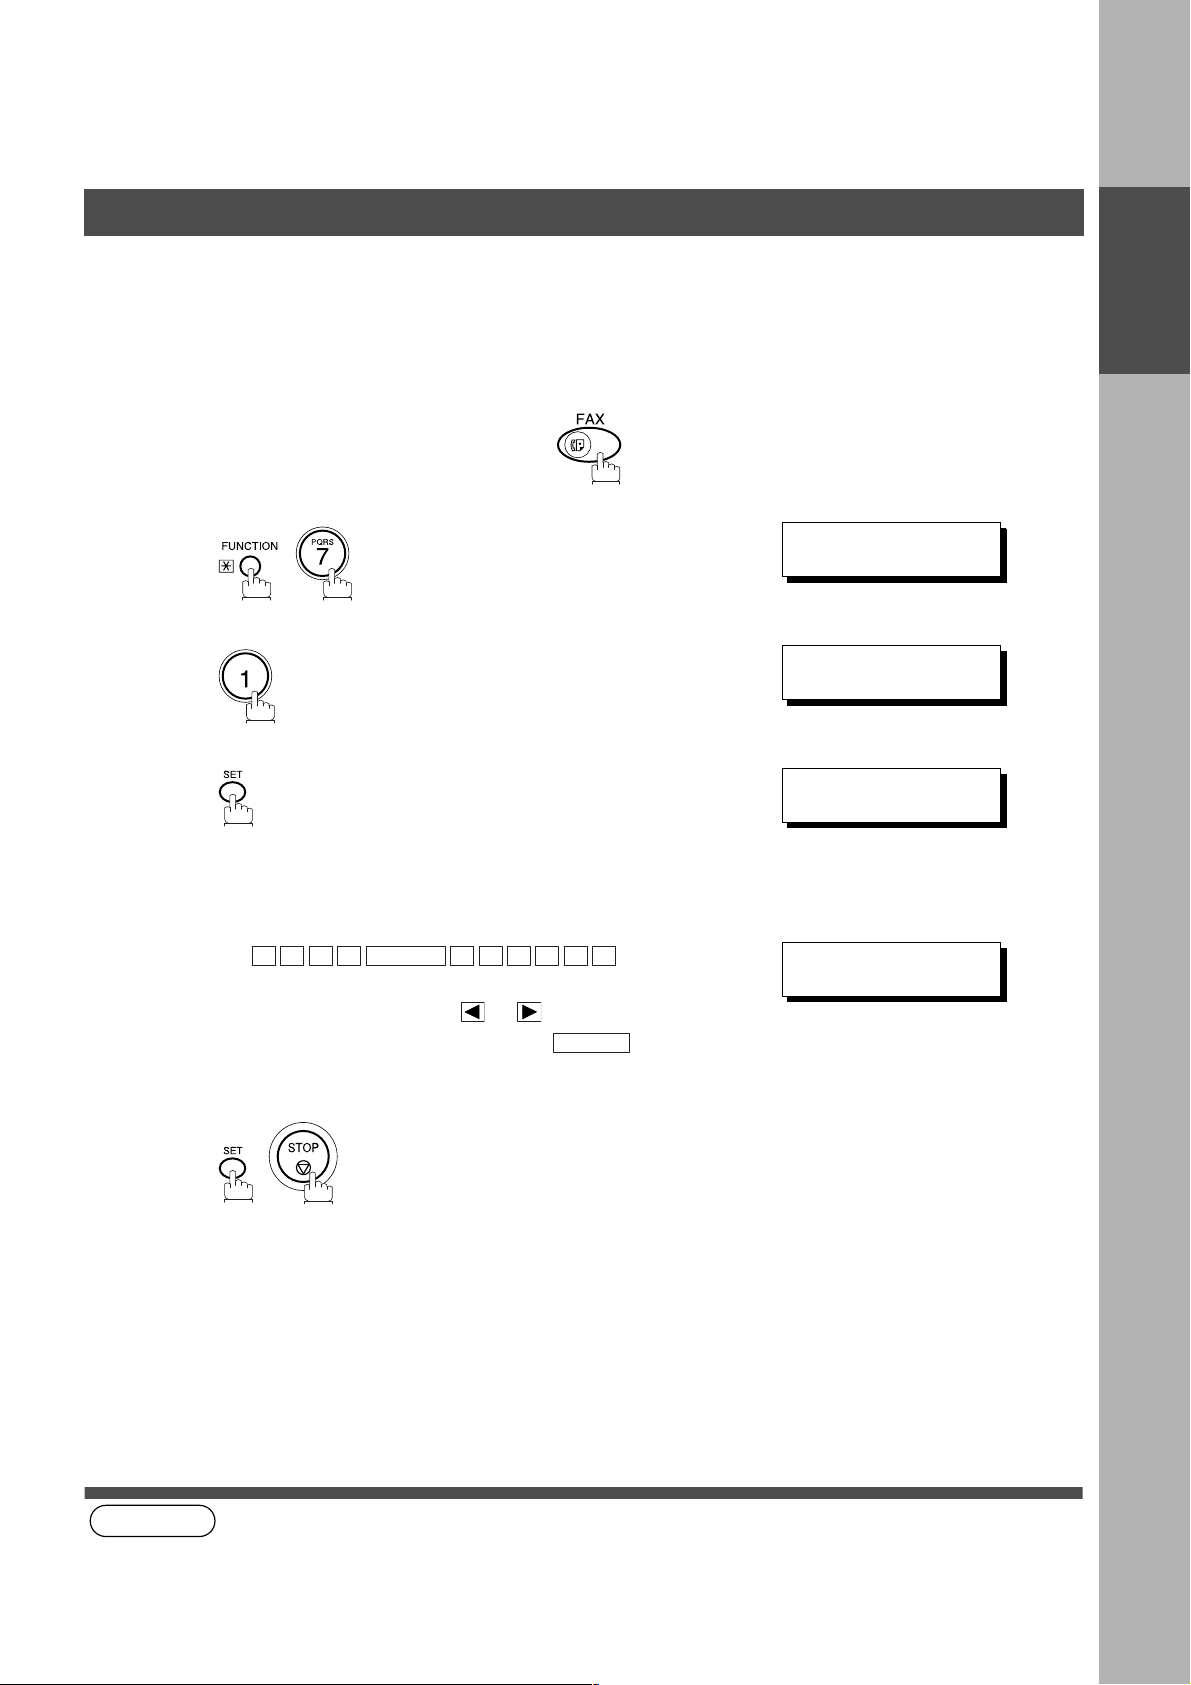
Setting the Monitor Volume
Make sure that the FAX lamp is ON. If not, press to select the "FAX MODE".
* MONITOR *
1
You will hear the dial tone through the speaker.
❚
INSTALLING
YOUR MACHINE
2
3
(see Note 1)
or
repeatedly to raise the volume.
repeatedly to lower the volume.
MONITOR VOLUME
LOW [
MONITOR VOLUME
LOW [ ] HIGH
❚❚❚❚❚❚❚❚
] HIGH
NOTE
1. You can also adju st the volu me of the k ey touch tone and the vol ume of the b uzzer in t he Fax Param eter No. 010
(KEY/BUZZER VOLUME). (See page 28)
13
Page 16
INSTALLING YOUR MACHINE
Adjusting the Volume
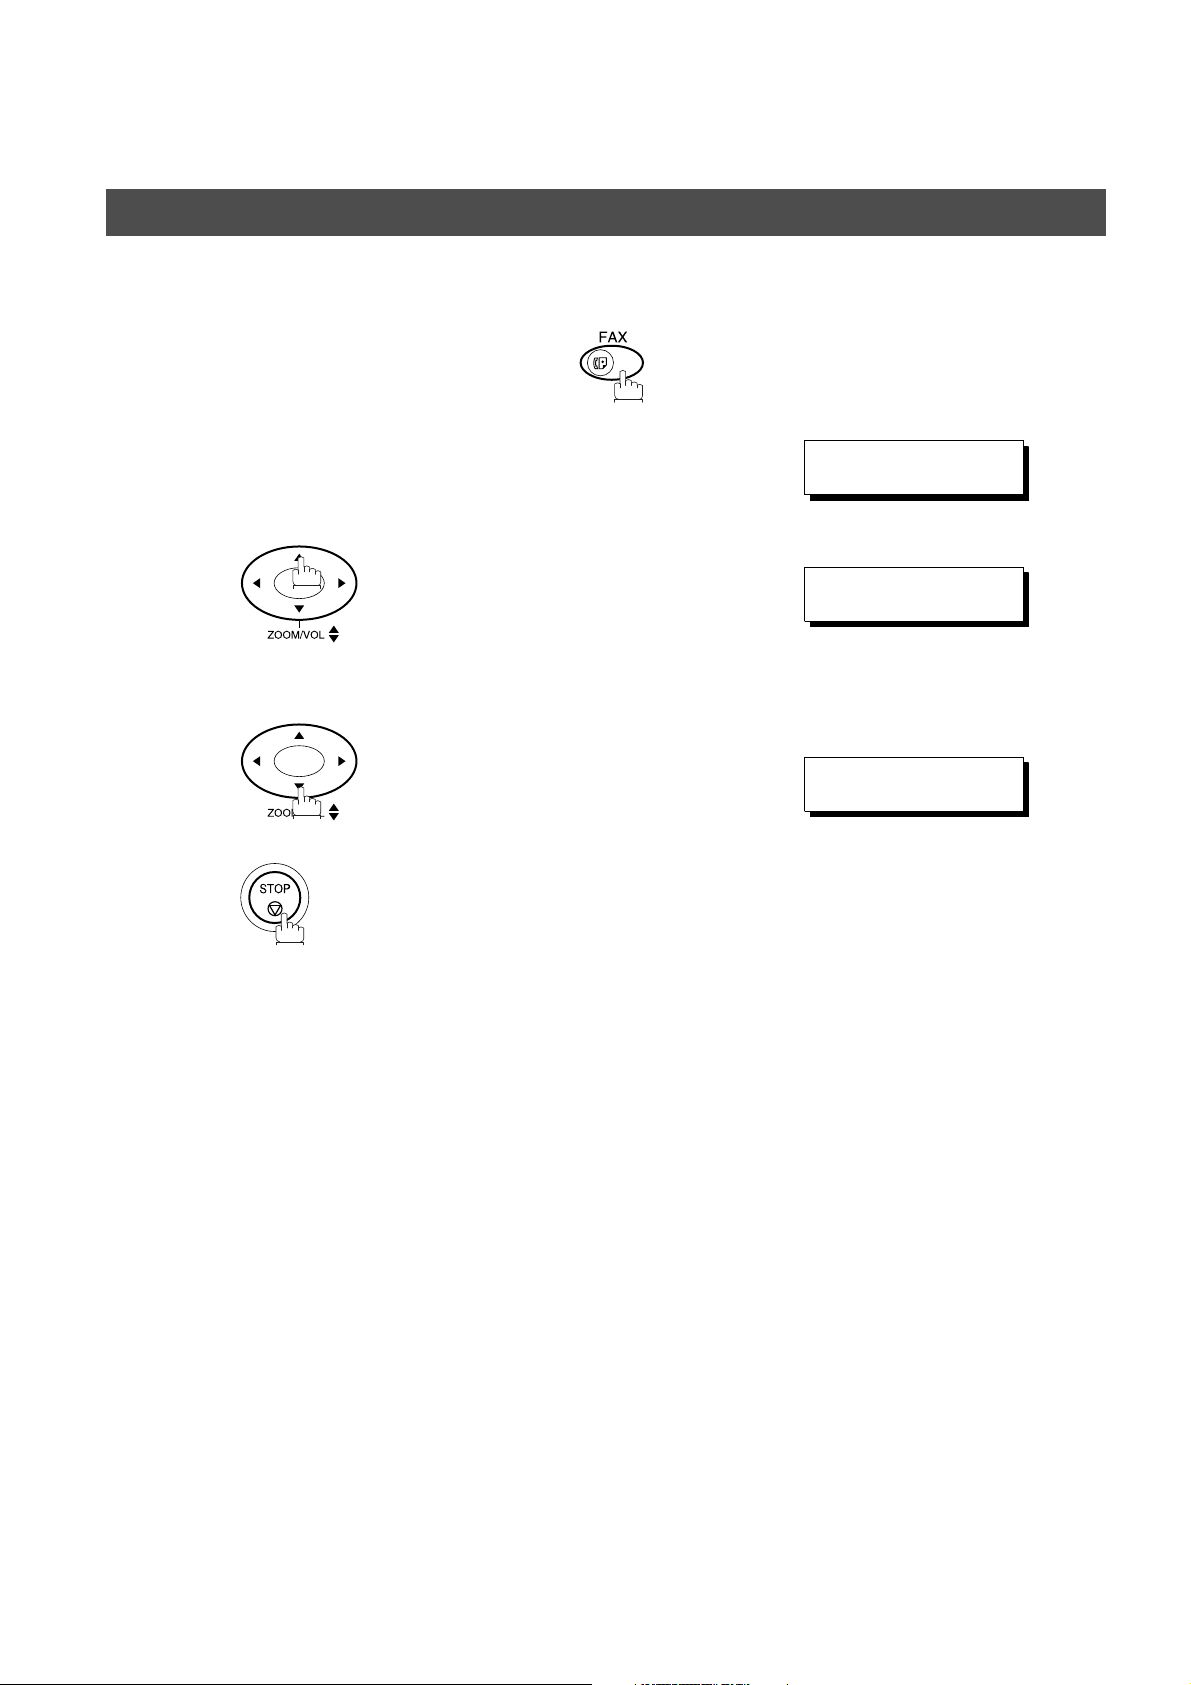
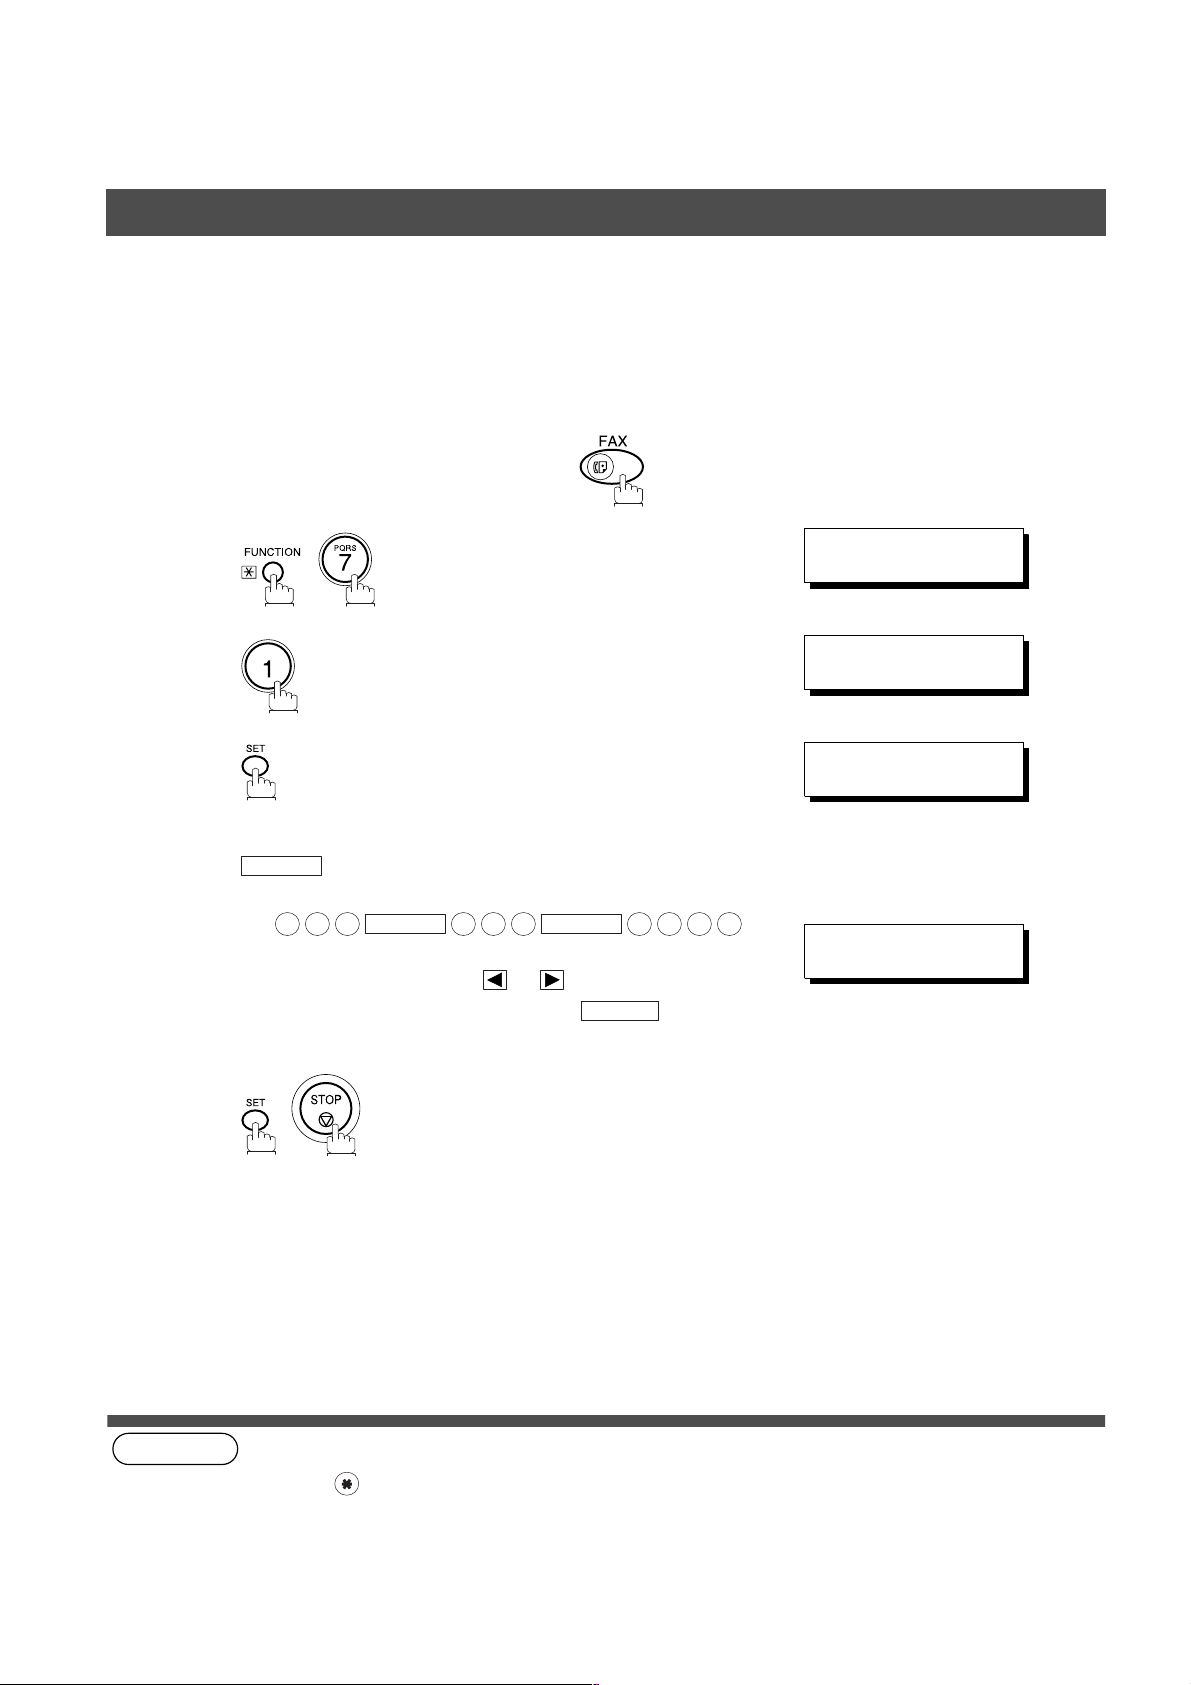
Setting the Ringer Volume
Make sure that the FAX lamp is ON. If not, press to select the "FAX MODE".
1
2
3
Standby
or
repeatedly to raise the volume.
repeatedly to lower the volume.
12-NOV-2000 15:00
00%
RINGER VOLUME
((((
RINGER VOLUME
☎
☎
))))
14
Page 17
INSTALLING YOUR MACHINE
User Parameters
Your facsimile ma ch in e has several basic s etti ng s (U ser P ar ame ters) to hel p y ou ke ep rec or ds of the d oc ume nts
you send or receive . For example, the built-in cloc k keeps the current date an d time, and your LOGO and ID
Number help to identify you when you send or receive documents.
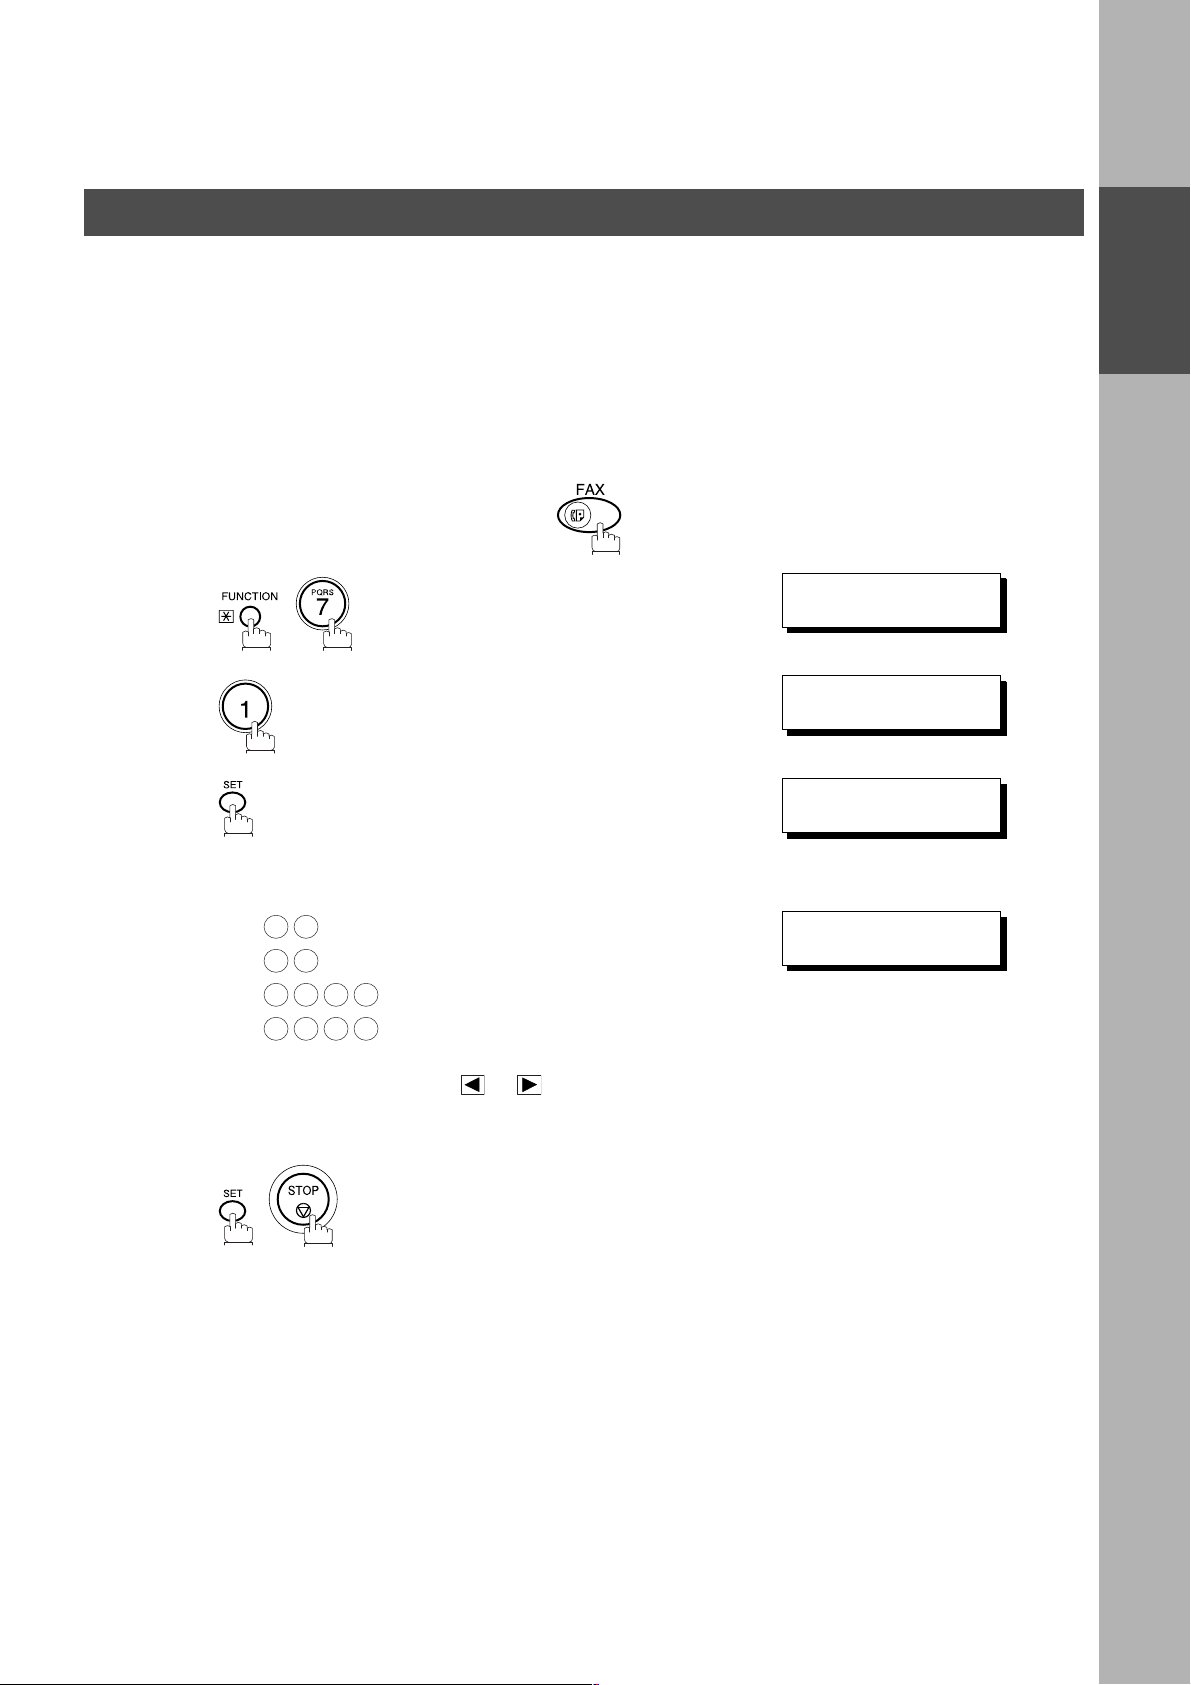
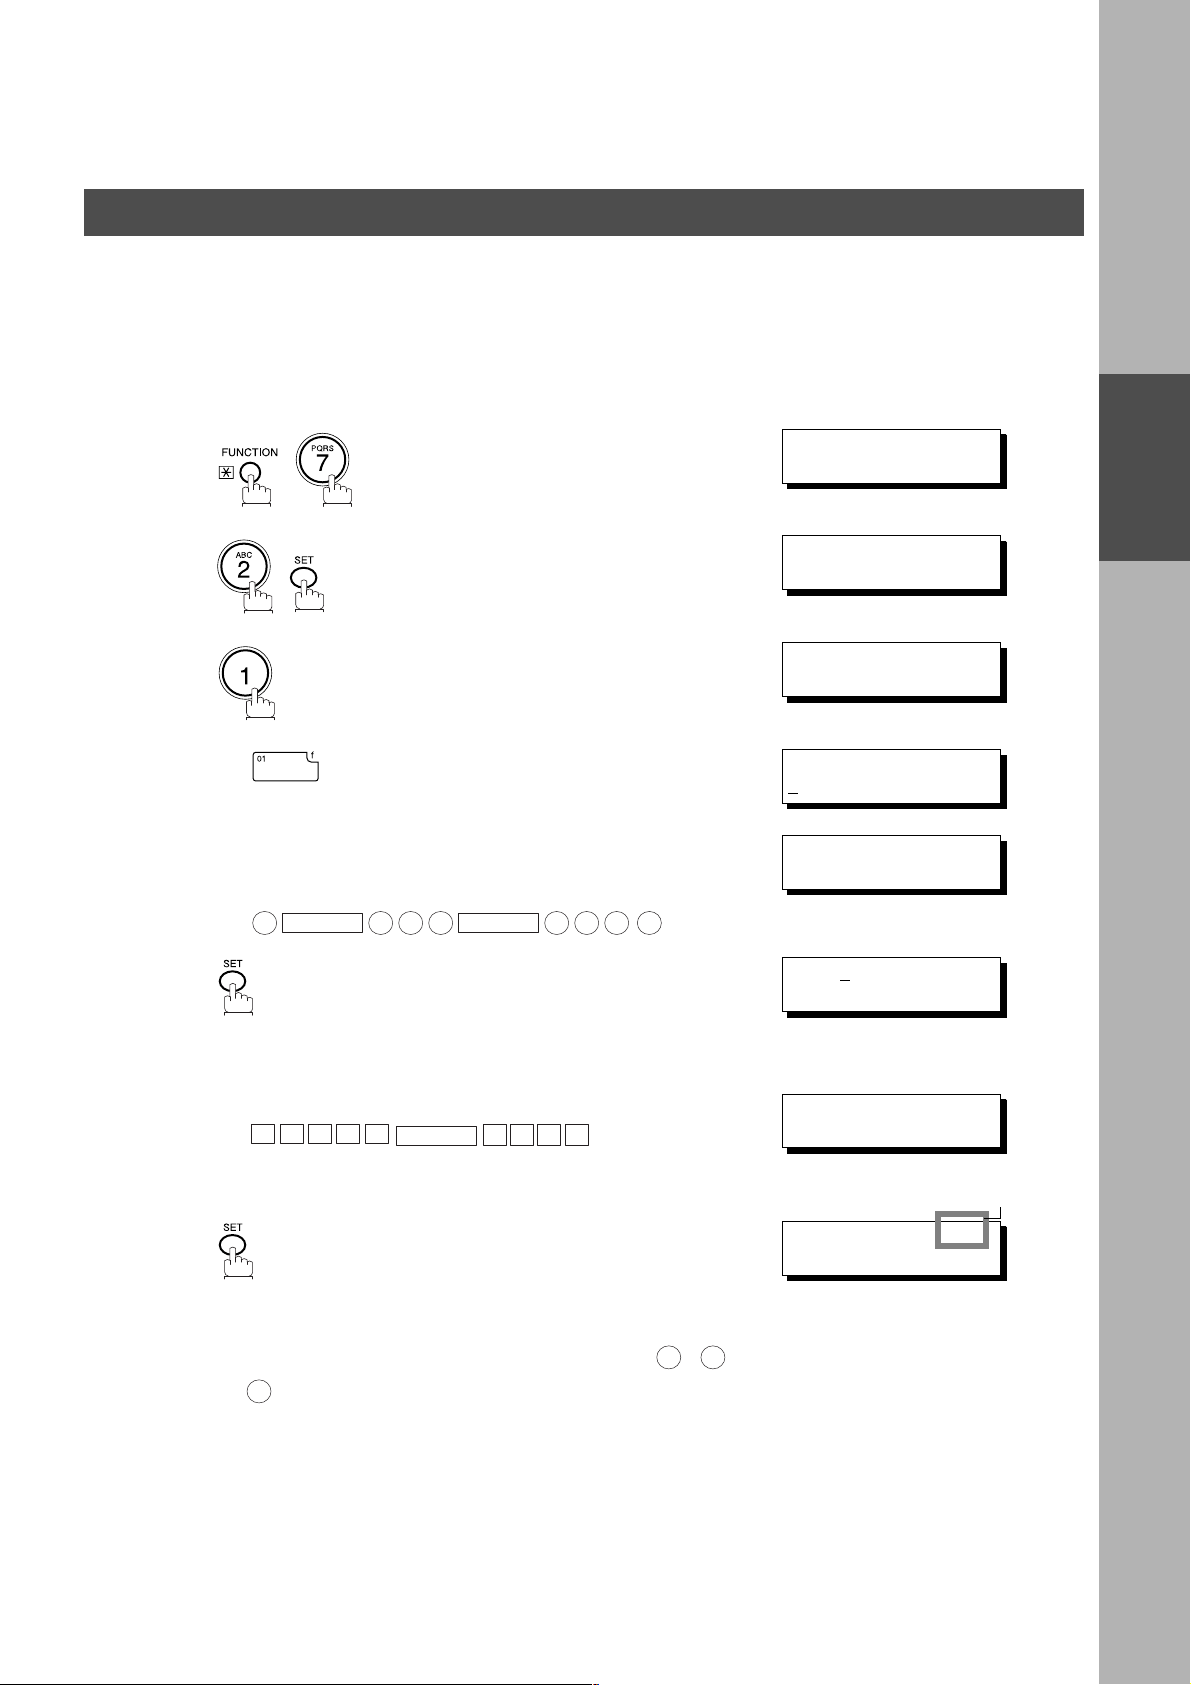
Setting the Date and Time
At standby the displa y will show the date and time. Once the st andby display is set, it wil l automatically be
updated.
Make sure that the FAX lamp is ON. If not, press to select the "FAX MODE".
SET M O D E ( 1 -4)
1
2
ENTER NO. OR
1:USER PARAMETERS?
PRESS SET TO SELECT
∨ ∧
INSTALLING
YOUR MACHINE
3
4
5
Enter the new date and time.
Ex: Date : 12th
1 2
1 1
2 0 0 0
1 5 0 0
If you make a mistake, use or to move the cursor
over the incorrect number, then overwrite it with a correct
one.
Month : November
Year : 2000
Time : 3:00 PM
DATE & TIME
❚
1-01-2000 00:00
DATE & TIME
12-11-2000 15:00
15
Page 18
INSTALLING YOUR MACHINE
User Parameters
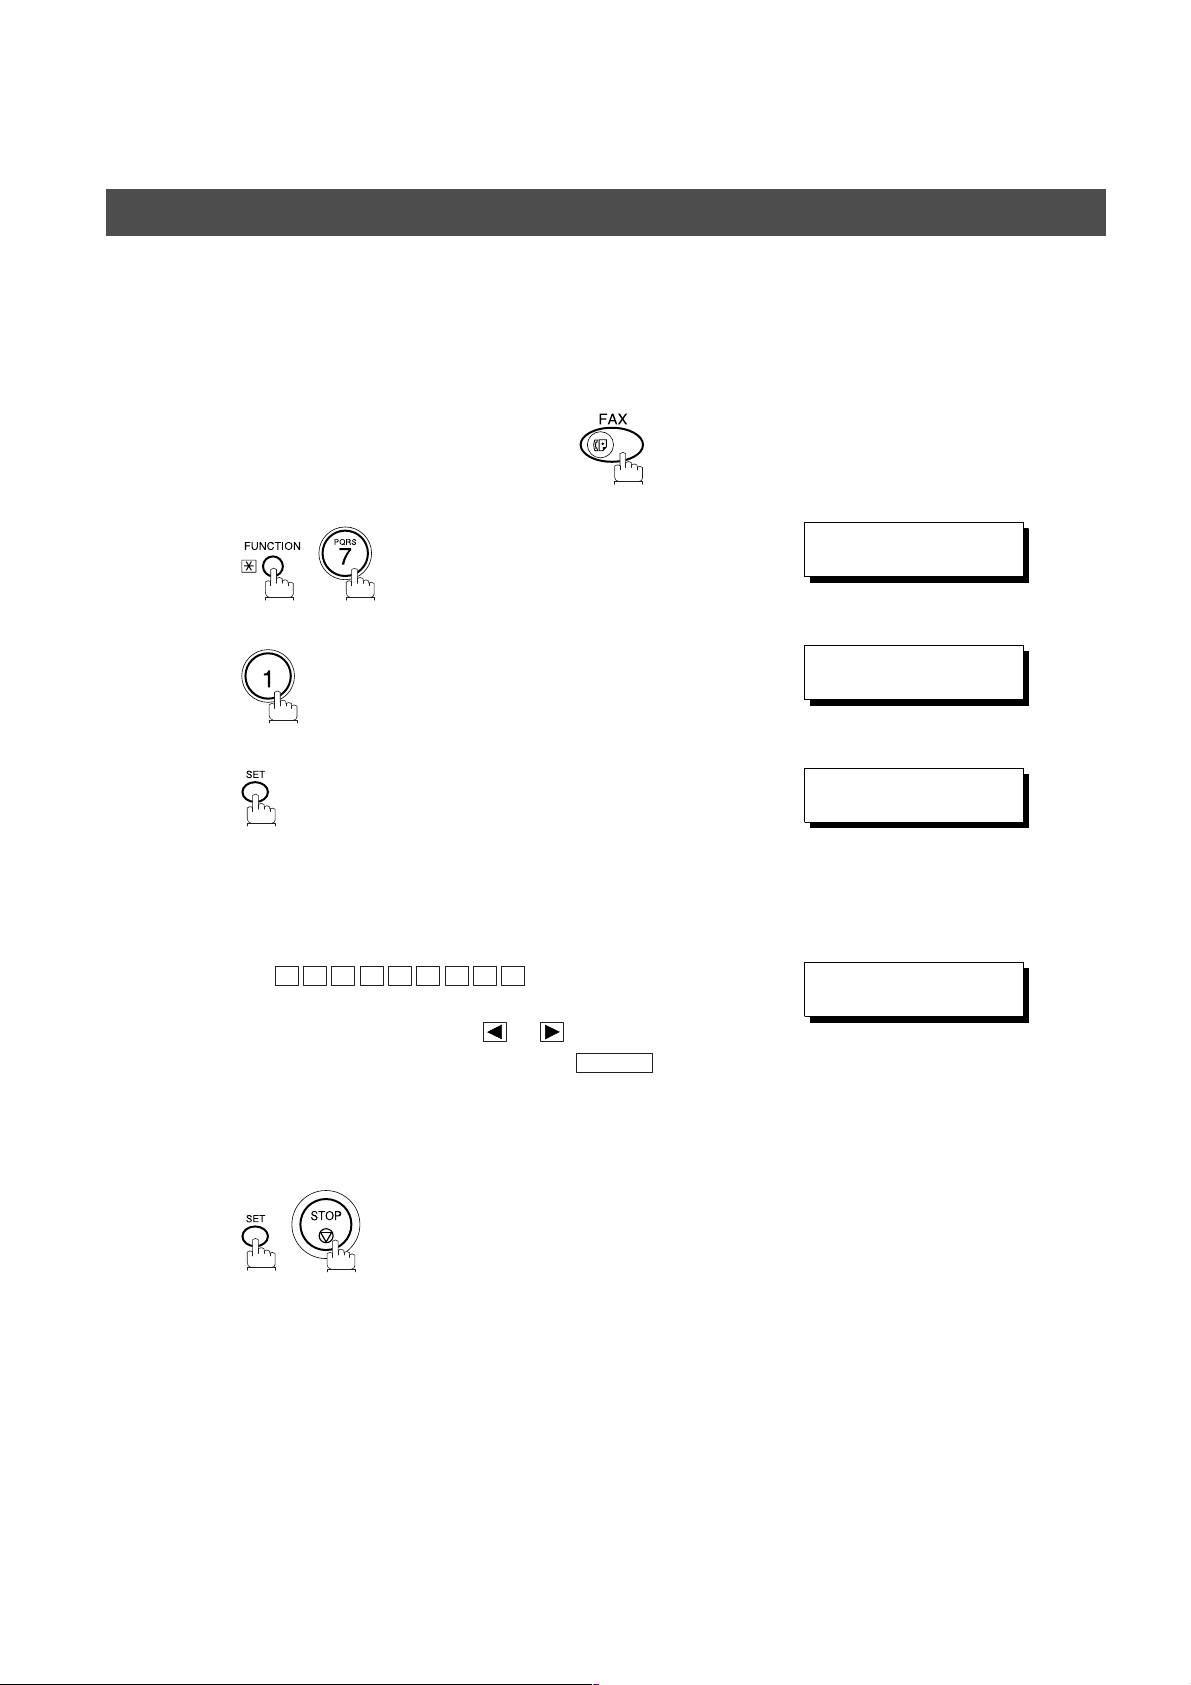
Setting Your LOGO
When you send a docume nt, your LOGO appears on the top of the copy printed out at the other station.
The LOGO helps to identify you to someone who receives your document.
Make sure that the FAX lamp is ON. If not, press to select the "FAX MODE".
SET M O D E ( 1 -4)
1
2
ENTER NO. OR
1:USER PARAMETERS?
PRESS SET TO SELECT
∨ ∧
3
4
5
repeatedly until display shows;
Enter your LOGO (max. 25 characters and digits) by using
the Character keys (See page 10).
Ex:
If you make a mistake, use or to move the cursor
beyond the incorrect character, press then re-
enter the new character.
If more than 19 characters are entered, the left side
characters will scroll off the display.
A N A S O N I C
P
CLEAR
LOGO
❚
LOGO
PANASONIC
❚
16
Page 19
INSTALLING YOUR MACHINE
User Parameters
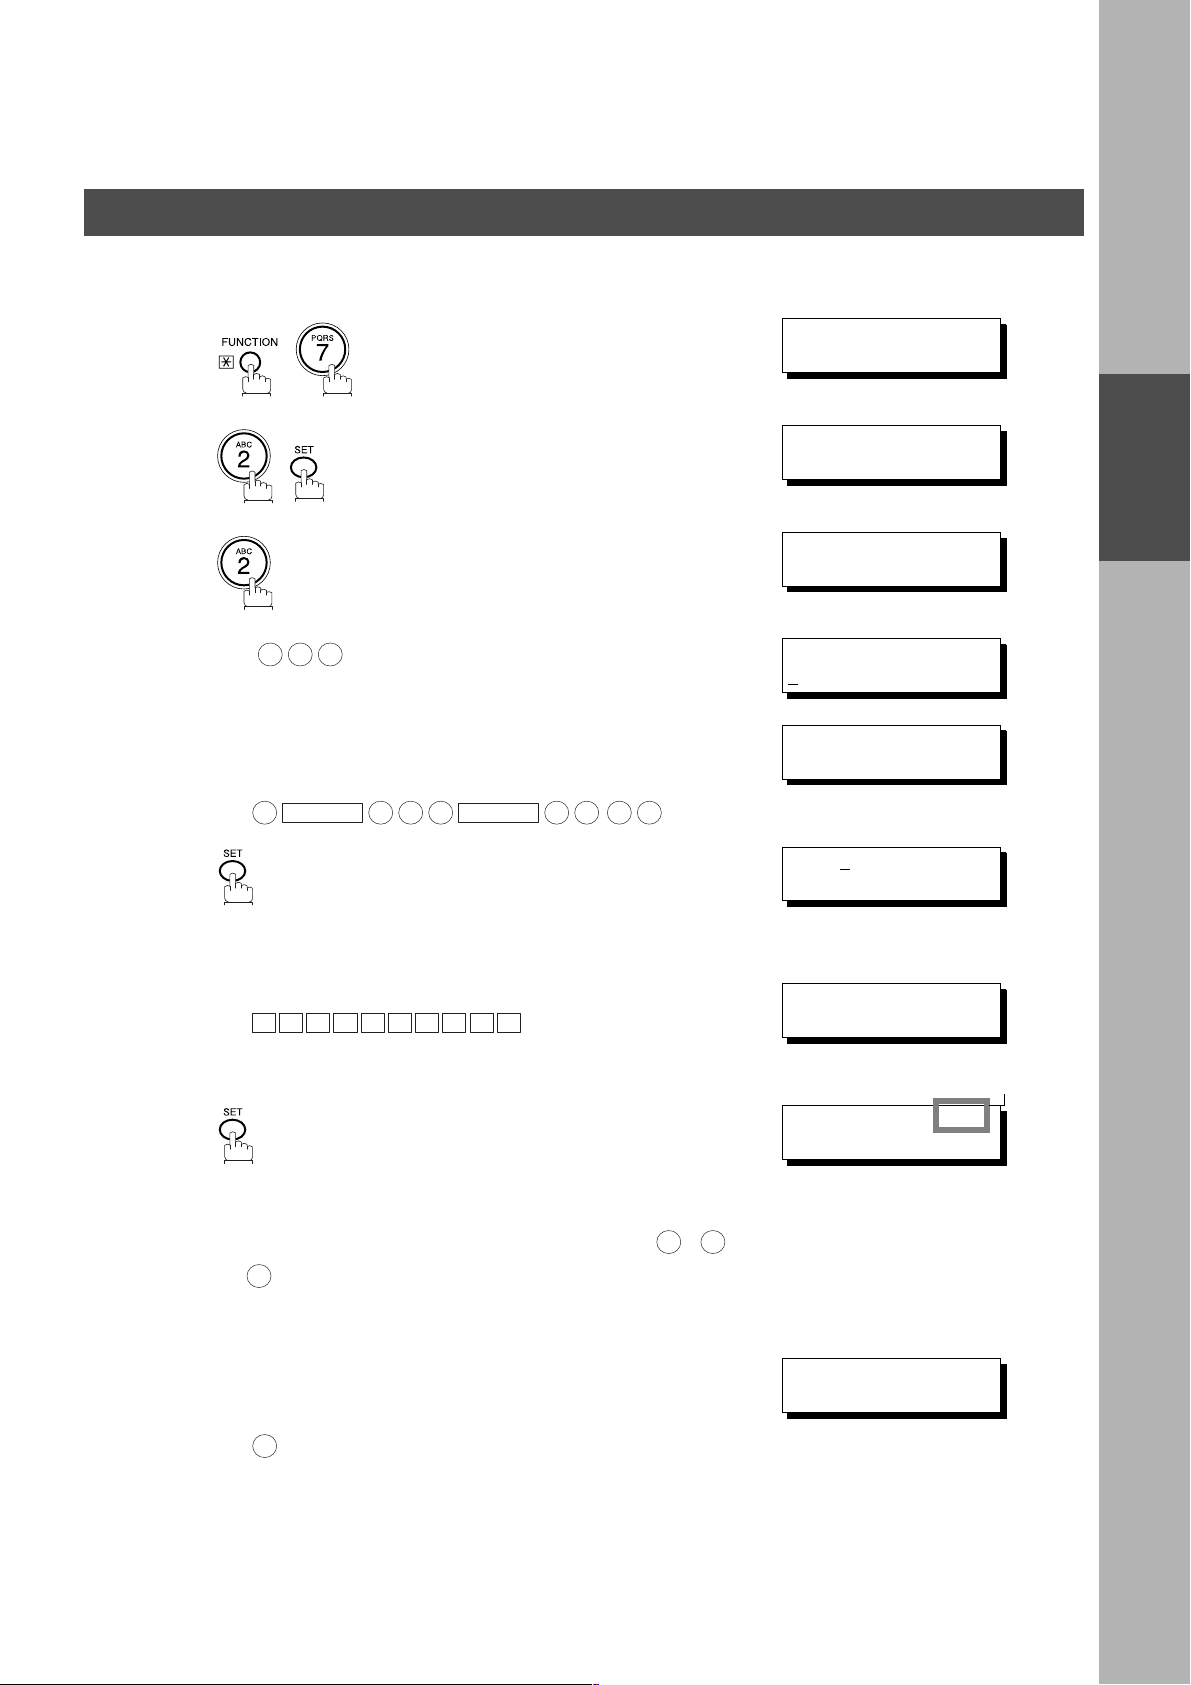
Setting Your Character ID
If the remote machine has a C haracter ID capabili ties, when you are se nding or receiv ing, your Charac ter ID
will appear on the remote machine's display and the remote machine's Character ID will appear on your
display.
Make sure that the FAX lamp is ON. If not, press to select the "FAX MODE".
SET M O D E ( 1 -4)
1
2
ENTER NO. OR
1:USER PARAMETERS?
PRESS SET TO SELECT
∨ ∧
INSTALLING
YOUR MACHINE
3
4
5
(see Note 1)20
repeatedly until display shows;
Enter your Character ID (max. 16 characters and digits)
by using the Character keys (See page 10).
Ex:
If you make a mistake, use or to move the cursor
beyond the incorrect character, press then re-
enter the new character.
E A D SPACE O F F I C E
H
CLEAR
CHARACTER ID
❚
CHARACTER ID
HEAD OFFICE
❚
NOTE
1. The special characters of Å, å, Ä, ä, Ö, ö, Ü, ü, È, è, É, é, Æ, æ and Ñ cannot be used for Character ID.
17
Page 20
INSTALLING YOUR MACHINE
User Parameters
Setting Your ID Number (Fax Telephone Number)
If the remote machine does not have a Character ID but it has an ID Number, when sending or receiving, your
ID Number will appear on the remote machine's display and their ID Number will appear on your display.
We suggest you use your facsimile telephone number as your ID number. (max. 20 digits)
Make sure that the FAX lamp is ON. If not, press to select the "FAX MODE".
SET M O D E ( 1 -4)
1
2
ENTER NO. OR
1:USER PARAMETERS?
PRESS SET TO SELECT
∨ ∧
3
4
5
(see Note 1)
repeatedly until display shows;
Enter your ID (max. 20 digits) by using the key pad and
SPACE
Ex:
If you make a mistake, use or to move the cursor
beyond the incorrect number, press then re-
enter the new number.
.
2 0 1
SPACE
5 5 5
SPACE
CLEAR
1 2 1 2
ID NO.
❚
ID NO.
201 555 1212
❚
18
NOTE
1. You may use to enter a "+" character at the beginning of the ID number to indicate the following digit(s) for
your country code.
Ex :+1 201 555 1212 +1 for U.S.A. country code.
+81 3 111 2345 +81 for Japan country code.
Page 21
Programming Your Machine
One-Touch/Abbreviated Dialling Numbers
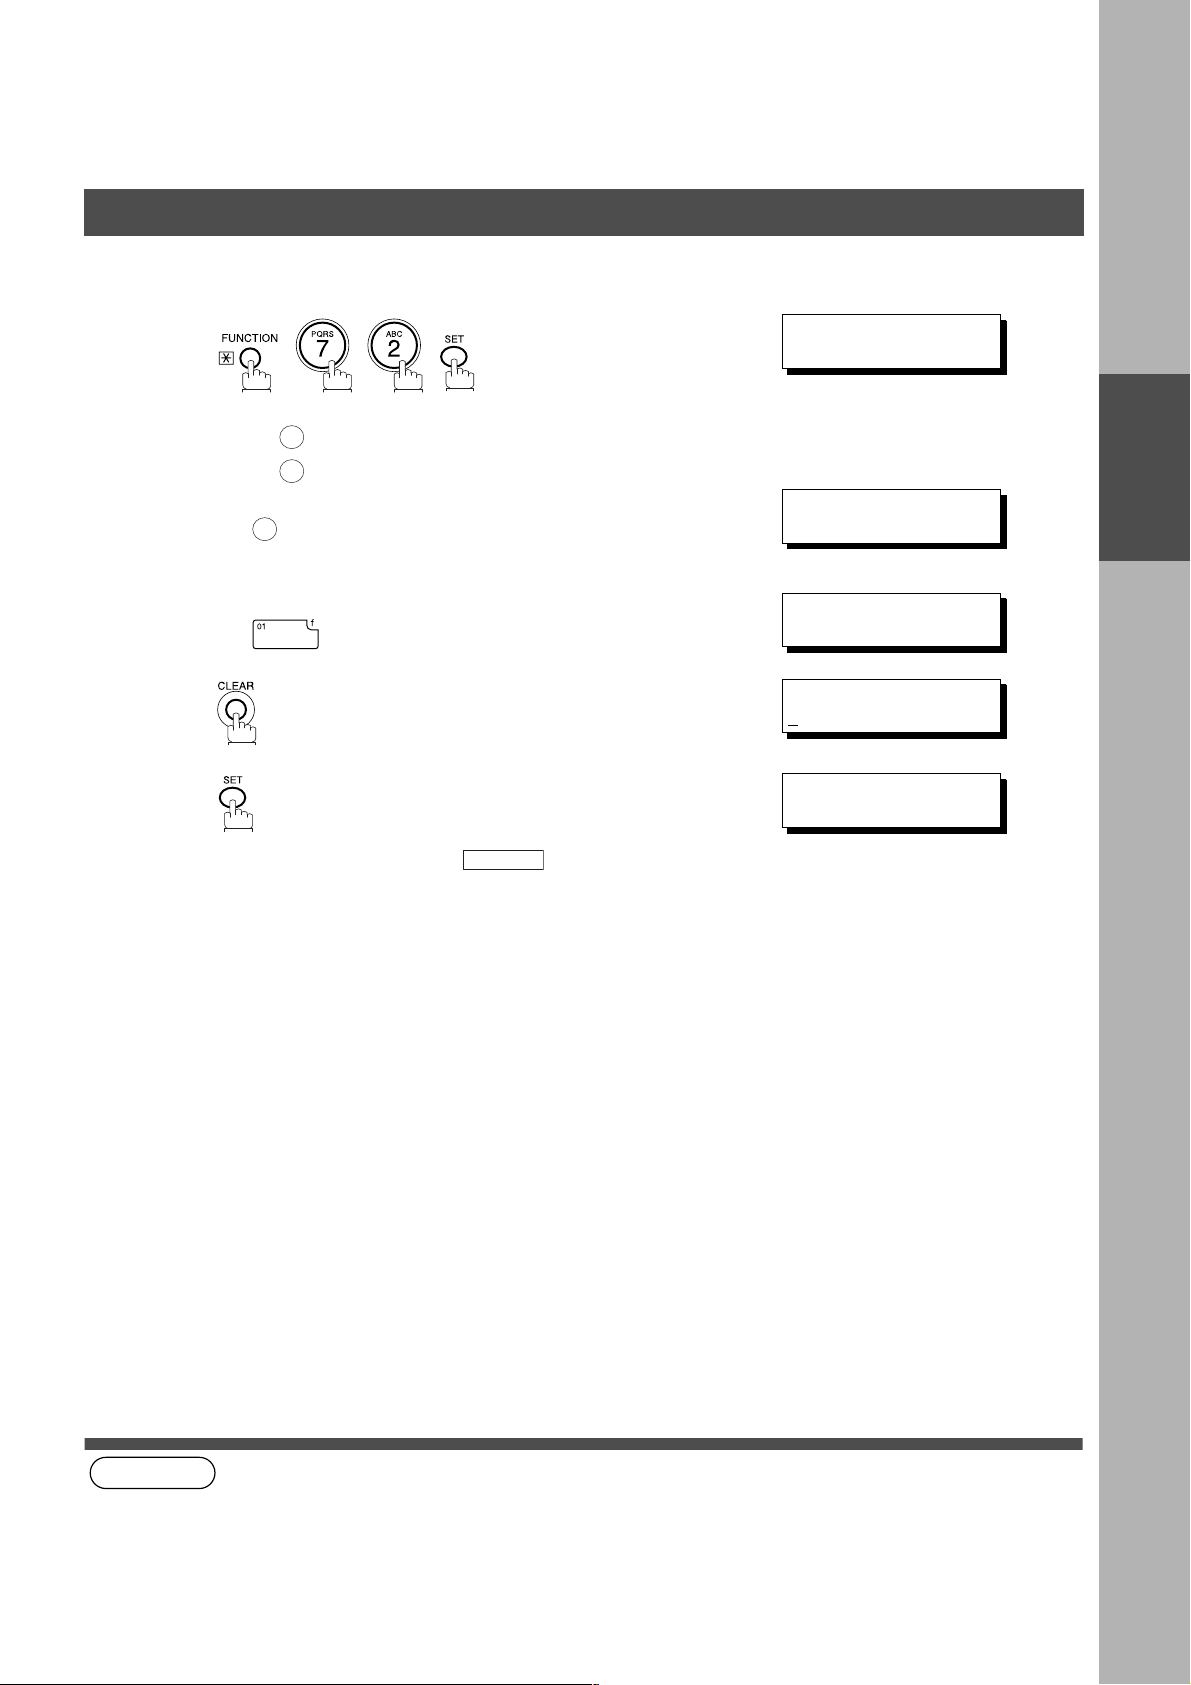
Entering One-Touch/Abbreviated Dialling Numbers
One-Touch and Abbreviated Dialling are two fast ways of dialling full telephone numbers. To use these dialling
methods, you must first store the telephone number using the following procedure.
To enter a One-Touch key, follow the steps below
SET M O D E ( 1 -4)
1
2
3
ENTER NO. OR
1:ONE-TOUCH
2:ABBR NO.
ONE-TOUCH< >
PRESS ONE-TCH OR
∨ ∧
∨ ∧
PROGRAMMING
YOUR MACHINE
4
5
6
7
8
Ex:
Enter the telephone number
(up to 36 digits including pauses and spaces).
Ex:
9
PAUSE
Enter the station name using ch arac ter key s
(up to 15 characters).
A L E S
S
Ex:
• If your machine does not have the 2nd G3 Fax
Communication Port Kit installed, proceed to Step 10.
• If your machi ne has the 2n d G3 Fax Communica tion Port
Kit installed, you can pre-select which telephone line
should be used for this station by pressing “ , or
“.
3
• If “AUTO” (default) is selected, the machine will
automatically select the available telephone line.
5 5 5
SPACE
SPACE
1 2 3 4
E P TD
1 2
<01>
NTER TEL. NO.
E
<01>
9-555 1234
<01> ENTER NAME
9-555 1234
<01> SALES DEPT
9-555 1234
LINE SELECTION=AUTO
1:L-1 2:L-2 3:AUTO
❚
❚
Note1
Continued on the next page...
19
Page 22

PROGRAMMING YOUR MACHINE
One-Touch/Abbreviated Dialling Nu mbers
9
10
(see Note 1)
Select the telephone line to be used for the
communication.
Ex: for “L-2” (Line 2, Second Telephone line)
2
To record another number, repeat step 4 to 10.
To return to standby, press .
STOP
LINE SELECTION=L-2
1:L-1 2:L-2 3:AUTO
ONE-TOUCH< >
PRESS ONE-TCH OR
∨ ∧
20
NOTE
1. This field (AUTO, Line-1 or Line-2) appears only when the 2nd G3 Fax Communication Port Kit is installed.
Page 23
PROGRAMMING YOUR MACHINE
One-Touch/Abbreviated Dialling Numbers
To set an Abbreviated Dialling Number, follow the steps below
1
2
3
SET M O D E ( 1 -4)
ENTER NO. OR
1:ONE-TOUCH
2:ABBR NO.
ABBR.[
ENTER NO. OR
❚
∨ ∧
]
∨ ∧
PROGRAMMING
YOUR MACHINE
4
5
6
7
8
Ex: (001 to 175)
0 2 2
Enter the telephone number
(up to 36 digits including pauses and spaces).
Ex:
9
PAUSE
Enter the station name using ch arac ter key s
(up to 15 characters).
Ex:
A C C O U N T I N G
• If your machine does not have the 2nd G3 Fax
Communication Port Kit installed, proceed to Step 10.
• If your machi ne has the 2n d G3 Fax Communica tion Port
Kit installed, you can pre-select which telephone line
should be used for this station by pressing “ , or
“.
3
• If “AUTO” (default) is selected, the machine will
automatically select the available telephone line.
5 5 5
SPACE
2 3 4
5
1 2
[022]
E
NTER TEL. NO.
[022]
9-555 2345
[022]ENTER NAME
9-555 2345
[022]ACCOUNTING
9-555 2345
LINE SELECTION=AUTO
1:L-1 2:L-2 3:AUTO
❚
❚
Note4
Select the telephone line to be used for the
9
Continued on the next page...
communication.
Ex: for “L-2” (Line 2, Second Telephone line)
2
LINE SELECTION=L-2
1:L-1 2:L-2 3:AUTO
21
Page 24

PROGRAMMING YOUR MACHINE
One-Touch/Abbreviated Dialling Nu mbers
10
To record another number, repeat step 4 to 10.
To return to standby, press .
(see Note 1) (see Note 2) (see Note 3) (see Note 4)
STOP
ABBR.[
ENTER NO. OR
❚
]
∨ ∧
22
NOTE
1. If you require a special access number to get an outside line, enter it first and then press .
A hyphen "-" is displayed for pause.
2. Use or to enter a space between the numbers to make it easier to read.
3. You can search for an unused One-Touch key or ABBR. number by pressing or in step 3 or 4.
4. This field (AUTO, Line-1 or Line-2) appears only when the 2nd G3 Fax Communication Port Kit is installed.
SPACE
MONITOR
PAUSE
Page 25

PROGRAMMING YOUR MACHINE
One-Touch/Abbreviated Dialling Numbers
Changing or Erasing One-Touch/Abbreviated Dialling Numbers
If you have to change or erase any of the One-Touch/Abbreviated dialling numbers, follow the steps below.
To change the settings of a One-Touch/ABBR. dialling number
1:ONE-TOUCH
1
2:ABBR NO.
2
3
4
5
6
7
Select for One-Touch Dialling number
Select for ABBR. Dialling Number
Ex:
Ex:
then enter a new telephone number. (See Note 1)
Ex:
Ex:
1
2
1
9
PAUSE
P A N A F A X
5 5 5
SPACE
3 4
6
5
ONE-TOUCH< >
PRESS ONE-TCH OR
<01> SALES DEPT
9-555 1234
<01> SALES DEPT
E
NTER TEL. NO.
<01> SALES DEPT
9-555 3456
<01> SALES DEPT
9-555 3456
<01> ENTER NAME
9-555 3456
<01> PANAFAX
9-555 3456
LINE SELECTION=AUTO
1:L-1 2:L-2 3:AUTO
❚
∨ ∧
❚
Note3
PROGRAMMING
YOUR MACHINE
• If your machi ne has the 2n d G3 Fax Communica tion Port
Kit installed, you can pre-select which telephone line
should be used for this station by pressing “ , or
“.
3
• If “AUTO” (default) is selected, the machine will
automatically select the available telephone line.
Select the telephone line to be used for the
8
Continued on the next page...
communication.
Ex: for “L-2” (Line 2, Second Telephone line)
2
1 2
LINE SELECTION=L-2
1:L-1 2:L-2 3:AUTO
23
Page 26

PROGRAMMING YOUR MACHINE
One-Touch/Abbreviated Dialling Nu mbers
9
To record another number, repeat step 3 to 9.
To return to standby, press .
(see Note 1)
(see Note 2) (see Note 3)
STOP
ONE-TOUCH< >
PRESS ONE-TCH OR
∨ ∧
24
NOTE
1. If you make a mistake, use or to move the cursor beyond the incorrect number, press then
re-enter the new number.
2. If the One-Touch/Abbreviated dialling number has been used for a communication reservation, the settings
cannot be changed or erased until the communication has finished.
To change or erase the settings, cancel the communication first by Edit File Mode. (See page 85)
3. This field (AUTO, Line-1 or Line-2) appears only when the 2nd G3 Fax Communication Port Kit is installed.
CLEAR
Page 27
PROGRAMMING YOUR MACHINE
One-Touch/Abbreviated Dialling Numbers
To erase the settings of One-Touch/ABBR. Dialling number
1
1:ONE-TOUCH
2:ABBR NO.
2
3
4
5
(see Note 1)
Select for One-Touch Dialling number
Select for ABBR. Dialling Number
Ex:
Enter the station you wish to erase.
Ex:
To return to standby, press .
1
2
1
STOP
ONE-TOUCH< >
PRESS ONE-TCH OR
<01> SALES DEPT
9-555 1234
<01> SALES DEPT
E
NTER TEL. NO.
ONE-TOUCH< >
PRESS ONE-TCH OR
∨ ∧
∨ ∧
PROGRAMMING
YOUR MACHINE
NOTE
1. If the One-Touch/Abbreviated dialling number has been used for a communication reservation, the settings
cannot be changed or erased until the communication has finished.
To change or erase the settings, cancel the communication first by Edit File Mode. (See page 89)
25
Page 28
PROGRAMMING YOUR MACHINE
One-Touch/Abbreviated Dialling Nu mbers
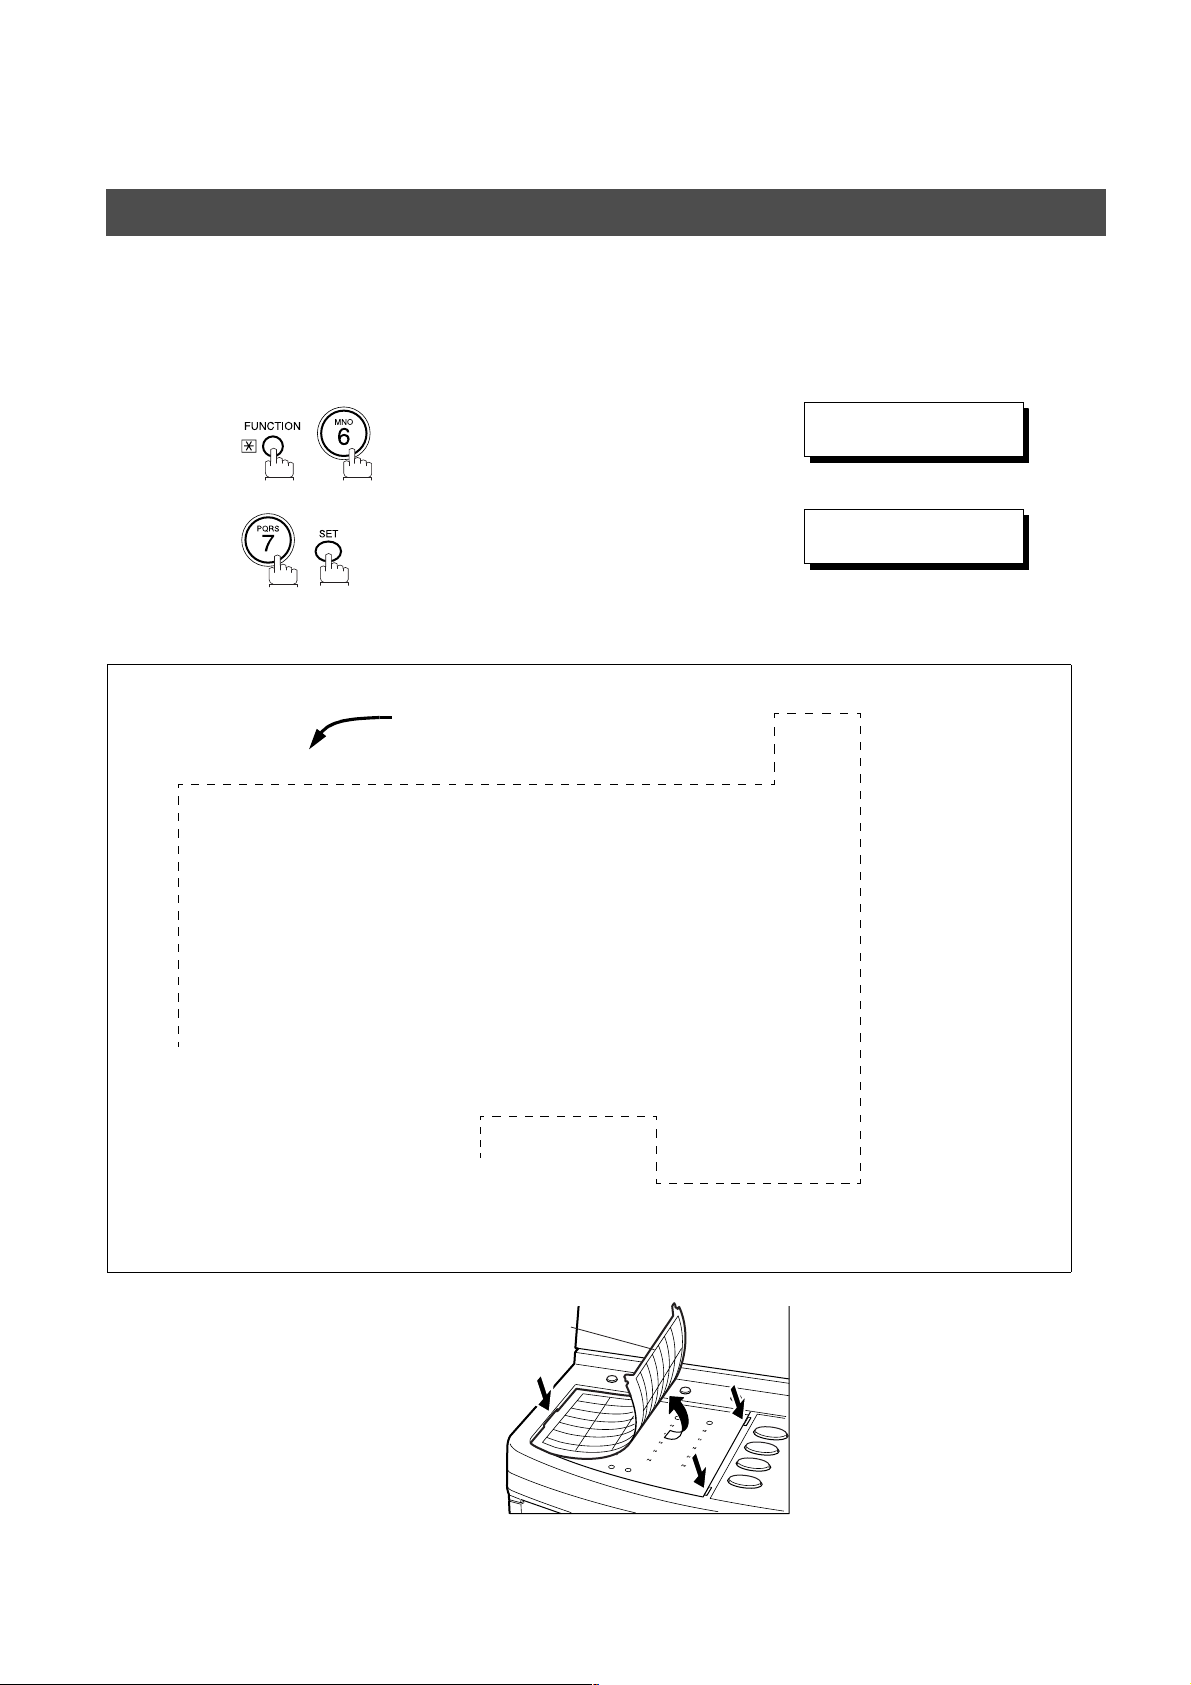
Printing Out a Directory Sheet
After programming a one-touch d ialling nu mber, you ca n print out the direct ory sheet whi ch includ es the first
12 characters of eac h s tation name. Cut along th e dotted line and pl ace i t o ve r the One- Tou ch k ey un der t he
Directory Sheet Cover. To print out a directory sheet, follow the steps below.
PRINT OUT (1-7)
1
2
Your machine prints out the directory sheet.
****************** -DIRECTORY SHEET- ******************* DATE 12-NOV-2000 ***** TIME 15:00 *****
dotted line
ENTER NO. OR
* PRINTING *
DIRECTORY SHEET
∨ ∧
01 02 03 04 05
SALES DEPT ENG. DEPT ACCT. DEPT EXPORT DEPT
06 07 08 09 10
11 12 13 14 15
16 17 18 19 20
P1 P2 P3 P4 P5
*
*
*
*
-PANASONIC ********************************************* -HEAD OFFICE - ****** - 201 555 1212- *******
*
Directory Sheet Cover
26
Page 29
PROGRAMMING YOUR MACHINE
Customizing Your Machine
Your facsimile m achine has a variety of adj ustable Fax Parameters. These parameter s, listed in the Parame ter
Table, are preset for you an d do not need to be changed. If you do want to make a change, r ead the table
carefully. Some parameters, such as the Resolution, Contrast, and Verification Stamp parameters, can be
temporarily chang ed by simple key ope ration just before a transmission is made. When the trans mission ends,
however, these parameters return to their preset values (Home position). Other parameters can only be changed
by the procedure described below.
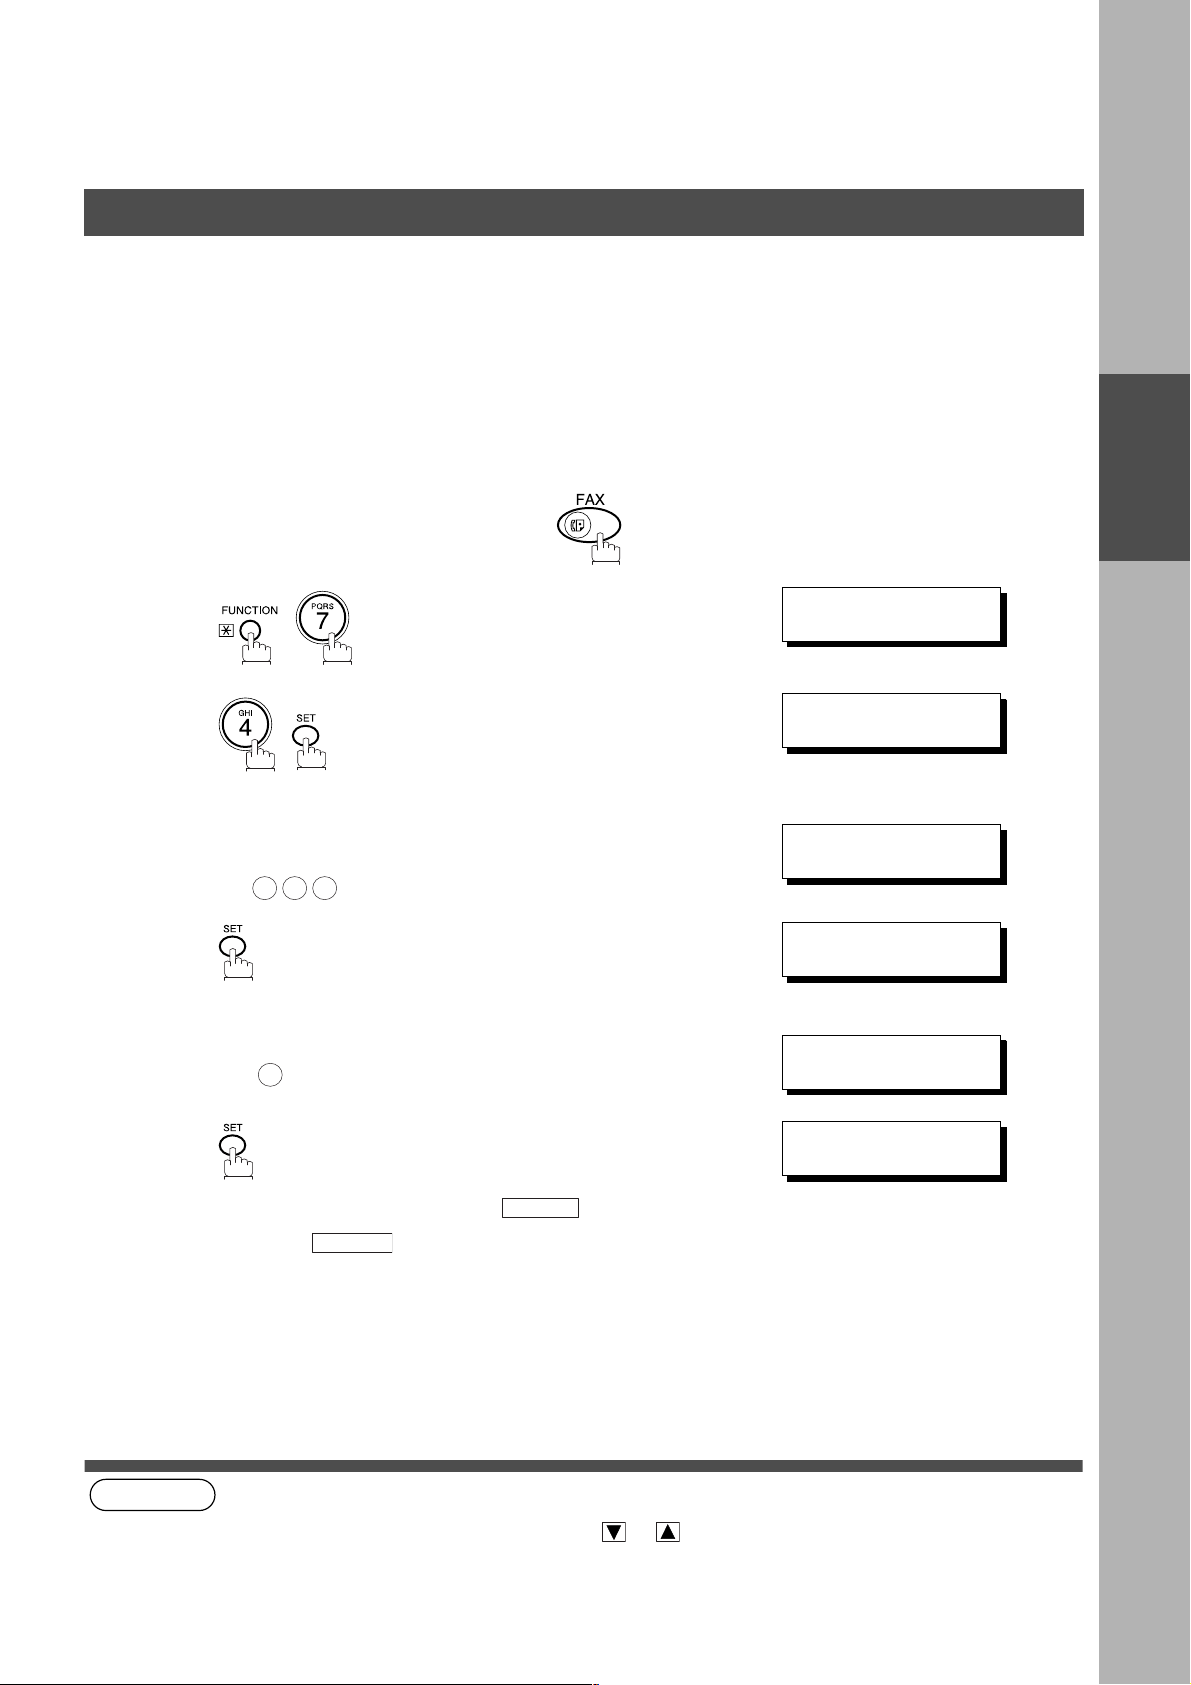
Setting the Fax Parameters
Make sure that the FAX lamp is ON. If not, press to select the "FAX MODE".
SET M O D E ( 1 -4)
1
2
3
4
5
Enter Fax Parameter number from the Parameter Table.
(See page 28 to 31)
Ex: for STAMP
0 0 4
Enter the new setting value.
Ex: for ON
2
ENTER NO. OR
FAX PARAMETER(1-99)
NO.=
FAX PARAMETER(1-99)
NO.=004
04 STAMP(HOME)
1:OFF
04 STAMP(HOME)
2:ON
❚
∨ ∧
PROGRAMMING
YOUR MACHINE
6
To set another parameter, press to return to step
3 or press to return to standby.
(see Note 1) (see Note 2)
NOTE
1. To scroll the Fax Parameters in Step 2 or 4, press or .
2. To print a Fax Parameter List, see page 141.
05 MEMORY(HOME)
2:ON
CLEAR
STOP
27
Page 30

PROGRAMMING YOUR MACHINE
Customizing Your Machine
Fax Parameter Table
No. Parameter
001 CONTRAST 1 Lightest Setting the home position for the CONTRAST.
002 RESOLUTION 1 Standard Setting the home position for the RESOLUTION.
003 ORIGINAL 1 TEXT Setting the home position for the ORIGINAL.
004 STAMP 1 Off Setting the home position of the STAMP.
005 MEMORY 1 Off Setting the home position for the MEMORY.
007 HEADER PRINT 1 Inside Selecting the printing position of the header.
008 HEADER FORMAT 1 Logo, ID No. Selecting the header format.
Setting
Number
2 Lighter
3Normal
4 Darker
5Darkest
2Fine
3S-Fine
2TEXT/PHOTO
3PHOTO
2On
2On
2 Outside
3No Print
Setting Comments
To select the stamp function when the document is stored in
memory, see Fax Parameter No. 28.
Inside : Inside TX copy area.
Outside : Outside TX copy area.
No Print : Header does not printed.
2 From To
009 RCV'D TIME PRINT 1 Invalid Selecting whether the machine prints the received date & time,
2 Valid
010 KEY/BUZZER VOLUME 1 Off Selecting the volume of the Key/Buzzer tone.
2Soft
3 Medium
4 Loud
012 COMM. JOURNAL 1 Off Selecting the home position for the printing mode of the COMM.
2Always
3 Inc. Only
013 AUTO JOURNAL PRINT 1 Invalid Selecting whether the machine prints the journal automatically
2 Valid
014 FILE ACCEPTANCE
REPORT
1 Invalid Selecting whether the machine prints the file acceptance journal.
2 Valid
remote ID, percentage of reduction and page number on the
bottom of each received page.
Journal Off/Always/INC.
Off : Does not print
Always : Always prints
Inc. Only: When communication has failed.
after every 100 transactions.
If you set this parameter to valid, a report will print after the
document is stored into memory.
Continued on the next page...
28
Page 31

Customizing Your Machine
PROGRAMMING YOUR MACHINE
No. Parameter
017 RECEIVE MODE 1 Manual Setting the reception mode to automatic or manual.
022 SUBSTITUTE RCV 1 Invalid Selecting whether the machine receives to memory when the
024 PRINT REDUCTION 1 Fixed Selecting the print reduction mode.
025 REDUCTION RA TIO 70 70% Selecting the fixed print reduction ratio from 70% to 100%. This
026 POLLING PASSWORD (----) Setting a 4-digit password for secured polling. (See page 73)
027 POLLED FILE SAVE 1 Invalid Selecting whether the machine retains the polled document(s) in
028 STAMP AT MEM. XMT 1 Invalid Selecting whether the machine stamps the originals when storing
031 INCOMPLETE FILE
SAVE
Setting
Number
2Auto
2Valid
2Auto
---- ----
100 100%
2Valid
2Valid
1 Invalid S electing whether the m achine retains the document in mem ory if
2Valid
Setting Comments
recording paper runs out, toner runs out or the recording paper is
jammed.
Fixed: Reduce received document according to setting of
Parameter No. 25.
Auto: Reduce received document according to the length of
received originals.
parameter functions only when the fixed print reduction is selected
on Fax Parameter No. 24.
memory even after the document(s) is polled once.
into memory.
(depending on the Stamp setting on the Control Panel)
it is not successfully transmitted.
PROGRAMMING
YOUR MACHINE
033 XMT REDUCTION 1 Invalid Selecting whether the machine performs reduction when the
2Valid
037 RCV TO MEMORY
(----)
042 CONF. POLLED FILE
SAVE
043 PASSWORD-XMT 1 Off Setting a 4-digit XMT-Password and selecting whether the
044 PASSWORD-RCV 1 Off Setting a 4-digit RCV-Password and selecting whether the
046 SELECT RCV 1 Invalid Selecting whether the machine performs selective reception.
048 TELEPHONE LINE 1 PSTN Selecting the type of line connected.
049 PSTN ACCESS
CODE
1 Invalid S electing whether the machine saves the confidential polled file
2Valid
2On
2On
2Valid
2 PBX
(----) Setting PSTN Access Code. (max. 4 digits)
transmitting original is wider than the recording paper used at the
receiving machine.
Enter a 4-digit password for printing the received document(s) in
memory by using F8-5 (RCV TO MEMORY).
When F8-5 (RCV TO MEMORY) is set to ON, this parameter is not
selectable on the LCD display. (See page 93)
even after the file is polled once.
machine performs and checks the XMT-Password of the receiving
station when transmitting. (See page 111)
machine performs and checks the RCV-Password of the
transmitting station when receiving. (See page 112)
(See page 109)
Continued on the next page...
29
Page 32

PROGRAMMING YOUR MACHINE
Customizing Your Machine
No. Parameter
052 DIAGNOSTIC
PASSWORD
053 SUB-ADDRESS
PASSWORD
056 COVER SHEET 1 Off Setting the home position for the Cover Sheet parameter in the
063 PC-FAX RCV MODE
[See Note 2]
077 DEPARTMENT CODE 1 Invalid Selecting whether the machine performs the Department Code
078 ROTATION XMT 1 Invalid Selecting whether the machine performs rotation transmission.
082 QUICK MEMORY XMT 1 Invalid Selecting whether the machine performs Quick Memory
Setting
Number
2On
1 Print Selecting how the machine will execute the receiving Fax
2 Upload & Print
3 Upload
2 Valid
2 Valid
2 Valid
Setting Comments
(----)
(----)
Setting the password for Remote Diagnostic Mode. Please ask
your Panasonic Authorized Dealer for details.
Setting a 20-digit password for secured sub-address
communication.
Select Mode. (See page 96)
document(s).
Print : Print the received document(s).
Upload & Print : Print the received document(s) and upload it’s
file.
Upload : Upload the received document file.
operation. (See page 99)
Transmission. (See page 39 to 43)
Invalid: Stores all documents into memory first before dialling the
telephone number.
Valid: Starts dialling the telephone number immediately after
storing the first page.
085 FAX OUTPUT TRAY 1 Inner 1 Selecting the Output Tray home position for received document(s).
2 Inner 2
3 Outer
088 LINE SELECTION
[See Note 3]
089 LIST OUTP UT TRAY 1 In ner 1 Selecting the Output Tray home position for List printout.
095 DUPLEX PRINT 1 Invalid Selecting whether the machine performs duplex print.
097 SPEC IAL TRAY
NO.1 - 3
1 Auto Setting the home position for the Telephone Line selection.
2 Line-1
3 Line-2
2 Inner 2
3 Outer
2 Valid
1 None Select up to 3 Special Trays that will not be used for printing
2Tray 1
3Tray 2
4Tray 3
Inner 1 : Received document(s) exit to the Bottom Output Tray.
Inner 2 : Received document(s) exit to the Upper Output Tray
(Blue).
Auto: Selects the available telephone line for transmission
automatically.
Line-1: Selects this as the default telephone line, unless manually
selecting an alternate phone line.
Line-2: Selects this as the default telephone line, unless manually
selecting an alternate phone line.
Inner 1 : The List printout exits to the Bottom Output Tray.
Inner 2 : The List printout exits to the Upper Output Tray (Blue).
received faxes (4-Tray configuration). One Tray must always be
available for receiving Faxes.
(You can specify one Tray (1 ~ 4) for each selection No. 1, No. 2
and/or No. 3)
30
5Tray 4
Page 33

Customizing Your Machine
PROGRAMMING YOUR MACHINE
No. Parameter
099 MEMORY SIZE
(Flash Memo ry)
(see Note 1)
(see Note 2)
(see Note 3)
(see Note 4)
Setting
Number
- - Displays the amount of base and optional memory installed.
Setting Comments
(Base Memory + Optional Memory)
PROGRAMMING
YOUR MACHINE
NOTE
1. The standard settings are printed on the Fax Parameter List. To print out Fax Parameter List, (See page 141).
2. This parameter is available only when the Parallel Port Interface Option is installed.
3. This parameter is available only when the G3 Communication Port Option is installed.
4. The contents of Fax Parameter may differ depending on the each country’s regulation or specification.
31
Page 34

PROGRAMMING YOUR MACHINE
This page is intentionally left blank.
32
Page 35

Basic Operations
Loading Originals
How To Load Originals
1. On the ADF / Inverting ADF 2. On the Platen Glass
Face Up
Original Size
Guide
• Place the or iginal(s) Face Up on the A DF un til th e
leading edge placed into the machine stops.
Sending Non-Standard Size Originals
When transmitting non-standard size
document(s), the machine may perform
Rotate Transmission automati cally and not
transmit the portion of the document that
exceeds the standard size ("P" portion).
(See Note 1)
Face Down
Original Size
Guide
• Place a book or a n original Face Down on the
Platen Glass, alignin g it with the arrow mark on
the original size guides.
Rotation XMT
P
The part which
Direction
protrudes from the
Fixed size is not sent.
BASIC
OPERATIONS
Flatbed Scanning
When a book or an original is placed on the Platen Glass, the message “ANOTHER ORIGINAL?” is shown
on the LCD display when is pressed and t he scanning is completed.
• If you wish to store another page, press and place another original, then press .
• If is pressed, the machine starts to dial the telephone number.
NO
(see Note 1)
START
YES
START
NOTE
1. When an oversized original is sent to another machine, sometimes, it is reduced in accordance with the other
party’s recording paper size.
EX:
A3 size A4 size
33
Page 36

BASIC OPERATIONS
Basic Transmissi on Set tin g s
You can temporarily change the transmission settings either before or after you place the original on the ADF.
These settings are as follows:
• Contrast • Communication Journal
• Resolution • Duplex Scan
• Original (Text/Photo) • Cover Sheet
• Stamp • Password-XMT
After the document(s) have been sent, your machine will automatically return to the preset settings.
Contrast (see Note 1)
Your machine i s preset to Normal c ontrast. If you wish to send an original with light er contrast, change the
setting to Lighter. If you wish to send a original with darker contrast, change the setting to Darker.
Press to:
CONTRAST
Resolution (see Note 2)
Your machine is prese t to Stand ard res olutio n, whic h is su itable for most o riginal s. If you wan t to send it with
more detail, change the setting to Fine or Super-Fine.
Press to:
(see Note 3)
RESOLUTION
for standard originals
for detailed originals
for finer detailed originals
34
NOTE
1. To change the preset Contrast position, change the setting of Fax Parameter No. 001. (See page 28)
2. To change the preset Resolution position, change the setting of Fax Parameter No. 002. (See page 28)
3. If you send a photographic original with gray tones, set the Resolution to Fine or S-Fine (406 x 391 dpi) and the
Original setting to Text/Photo or Photo. The reproduction of the received document will be determined by the
capability of the remote station.
Page 37

BASIC OPERATIONS
Basic Transmission Settings
Original (Text/Photo)
The Original sett ing is useful when sending photogr aphs or illustrations with gray ton es. Your machine is
preset to "TEXT". You can select either "TEXT/PHOTO" or "PHOTO" mode.
for text only originals
for text and photo originals
for photo or illustration originals
BASIC
OPERATIONS
Verification Stamp
The Verification Stamp helps you to confirm successful transmissions by stamping the bottom of each
successfully transmitted page with a small mark.
(see Note 1) (see Note 2) (see Note 3)
STAMP=OFF STAMP=ON
NOTE
1. When you select TEXT/PHOTO, or PHOTO, you machine will automatically select Fine Resolution.
2. When you store document(s) into memory, the Verification Stamp will stamp on the original if it is successfully
stored into mem ory. In thi s ca se th e Verifi catio n Stam p is not a confi rma tion t hat the docu ment was succ essf ully
transmitted. If you wish to disable the use of the Verification Stamp when storing document(s) into memory,
change the setting of Fax Parameter No. 028. (See page 29)
3. To change the preset Verification Stamp setting, change the Fax Parameter No. 004. (See page 28)
35
Page 38

BASIC OPERATIONS
Basic Transmissi on Set tin g s
Communication Journal (COMM. JOURNAL)
A Communication Jo urnal lets y ou verify i f the trans mission was success ful. You can select the condition to
print the Communication Journal as follows.
When you set COMM. JOURNAL = OFF: a Communication Journal will not be printed out.
When you set COMM. JOURNAL = ON: a Commu nicatio n Journal is printed out automatica lly
after every communication.
When you set COMM. JOURNAL = INC.: a Commu nicatio n Journal is printed out automatica lly
only if the communication has failed.
Make sure that the FAX lamp is ON. If not, press to select the "FAX MODE".
SELECT MODE (1-5)
1
ENTER NO. OR
∨ ∧
2
3
4
or
or
for “OFF”.
for “ON” (Always print out).
for “INCOMPLETE” only.
COMM. JOURNAL=INC
1:OFF 2:ON 3:INC
COMM. JOURNAL=OFF
1:OFF 2:ON 3:INC
or
COMM. JOURNAL=ON
1:OFF 2:ON 3:INC
or
COMM. JOURNAL=INC
1:OFF 2:ON 3:INC
36
(see Note 1)
NOTE
1. To change the preset Comm.Jornal condition, change the setting of Fax Parameter No. 012. (See page 28)
Page 39

Sending Docu m en ts
You can choose either Memory or Direct Transmission.
Use Memory Transmission if:
• You want to send the document to multiple stations.
• You have to retrieve the document immediately.
• You want to take advantage of the Dual Operation design.
• You want to take advantage of Batch Transmission.
Use Direct Transmission if:
• The memory is full.
• You want to send the document immediately.
Use Voice Mode Transmit if:
• You want to send the document after talking with the other party.
• You want to send the document after listening to a voice prompting.
Memory Transmission
BASIC OPERATIONS
Your machine quickly stores the document into the machine's memory.
Then, starts to dial the telephone number.
If the transmission fails, your machine will re-transmit the remaining unsuccessful page(s) automatically.
1
Store document
in memory
A
2
Transmit Receive
Destination A
Destination B
3
A
A
BASIC
OPERATIONS
Continued on the next page...
37
Page 40

BASIC OPERATIONS
Sending Documents
(see Note 1)Å (see Note 2)Å@ (see Note 3)Å@Å@ (see Note 4) (see Note 5)
NOTE
1. While storing the Fil e Numbe r of the docu ment be ing stored is shown at the uppe r right
corner of the display while storing the document. It is also printed on the
Communication Journal (COMM. JOURNAL), Transaction Journal and File L ist. The
percentage of mem ory used is show n on the lower ri ght corner of the display afte r each
page is store d.
2. If memory overflow occurs while storing documents, the current and remaining
documents on th e ADF wil l be ej ecte d. The mac hine will show “O UT OF MEM ORY”
on the display and prompt you whether to transmit the successfully stored documents
or to cancel the transmission. Pr es s to cancel or pres s to transmit.
If Fax Parameter No. 082 (Quick Memory XMT) is set to "Invalid", the machine stores
all the docume nts i nt o m e mo ry fi rs t b ef ore transmitting.
After storing each document, the machine checks the available memory to prevent
memory overflow and stops storing additional document(s) if the stored data
approaches a c ert ai n p er ce nta ge * (a ro und 8 0% ).
Then the machin e d ia ls and s en ds th e mem ory s to r ed do cu men t s fir st and co nt in ues
the transmission of the remaining document(s) from the ADF during the same phone
call.
If transmitting to multi ple stat ions or i f memory overflo ws whil e storin g a docum ent, the
machine prompts yo u whether to transmit the su ccessfully stored documents or to
cancel the transmission. Press to cancel or press to transmit.
See the Specif ications on page (See page 150 .) for th e i m ag e m e mo ry c ap ac it y.
If no action is taken within 10 seconds, the machine will start transmitting the stored
documents.
* The percentage varies and its dependent on the type of documents you are storing,
machine settings or whether an optional memory card is installed.
3. An Information Code will be dis played if t he trans missio n has faile d or no answ er at
the receiving side after the last automatic redial.
The document stored for this transmission will be erased from the memory
automatically and the information code is printed for the transmission on the
Communication Journal (COMM. JOURNAL).
If you need to retain the incomplete documents even after the last redial, change
Fax Parameter No. 031 (INC. FILE SAVE) to "Valid" in advanc e. (See page 29) To
retry the incomplete documents, refer to page 92.
4. To stop the transmission, press .
The display shows:
COMMUNICATION STOP?
1:YES 2:NO
1 2
1 2
STOP
* STORE * NO.003
PAGES=002 10%
* STORE * COMPLETED
TOTAL PAGES=005 30%
OUT OF MEMORY
INFO. CODE=870
15 PAGES COMPLETED
DELETE? 1:YES 2:NO
INCOMPLETE
INFO. CODE=XXX
38
Press to stop the transmission. The document you stored will be erased automatically.
If you do not want to erase the documents, change the setting of Fax Parameter No. 031 (INC. FILE SAVE) to
"Valid" in advance. (See page 29)
Then the following disp lay w ill appea r and you c an s elect whet her to save the fi le as an i ncom plete file f or edi ting
and retry, or delete the file manually.
5. If you would like to pri nt a C om munic ati on Journal (COMM. JOURNAL ) af ter s top pin g a tran sm is si on, press
when the display shows:
1
SAVE AS INCOMP.FILE?
1:YES 2:NO
PRINT COMM. JOURNAL?
1:YES 2:NO
1
Page 41

BASIC OPERATIONS
Sending Docu m en ts
Manual Number Dialling
To dial the telephone number manually, follow the steps below. (see Note 1) (see Note 2) (see Note 3)
Make sure that the FAX lamp is ON. If not, press to select the "FAX MODE".
ENTER STATION(S)
1
1
a
Place original(s) face up on the ADF.
or
b
THEN PRESS START 00%
BASIC
OPERATIONS
2
3
Place a book or an original face down on the Platen
Glass.
Make sure that the MEMORY lamp is on.
If not, press to set “On”.
Enter a telephone number from the keypad.
Ex:
5 5 5 1 2 3 4
• If your machine does have the 2nd G3 Fax
Communication Port Kit installed, the machine will
automatically select the available telephone line for
transmission (indicated by “AUTO” on the LCD display).
• If you wish, you can change which telephone line the
machine should use by se lecting Line-1 or Line- 2 wi th the
LINE SELECT
MEM XMT
key on the Control Panel.
Note3
TEL. NO. (AUTO)
5551234
❚
Continued on the next page...
39
Page 42

BASIC OPERATIONS
Sending Documents
4
The document(s) begin to store into memory with a file
number.
Then starts dialling the telephone number immediately
after storing the first page. (See Note 3)
The remaining page(s) continue to store into memory.
* STORE * NO.002
PAGES=001 05%
* DIALLING * NO.002
5551234
40
NOTE
1. If you need a special access number to get an outside line, dial it first then press to enter a pause
(represented by a "-") before dialling the full number.
: 9 PAUSE 5551234
Ex
2. This fe ature is called “Quick Memory Transmission”. If you wish to store All the document(s) into memory first
before transmitting, change the Fax Parameter No. 082 (QUICK MEMORY XMT) to “ Invalid”. (See page 30)
3. This field (AUTO, Line-1 or Line-2) appears only when the 2nd G3 Fax Communication Port Kit is installed.
PAUSE
Page 43

BASIC OPERATIONS
Sending Docu m en ts
One-Touch Dialling
One-Touch Diallin g allows you to di al a full telepho ne number by press ing a single key. T o set up the On eTouch keys, see page 21.
Make sure that the FAX lamp is ON. If not, press to select the "FAX MODE".
ENTER STATION(S)
1
1
a
Place original(s) face up on the ADF.
or
b
Place a book or an original face down on the Platen
Glass.
THEN PRESS START 00%
BASIC
OPERATIONS
2
3
4
(see Note 1)
Make sure that the MEMORY lamp is on.
If not, press to set “On”.
Press a One-Touch key.
Ex:
The document(s) begin to store into memory with a file
number.
Then starts dialling the telephone number immediately
after storing the first page. (See Note 1)
The remaining page(s) continue to store into memory.
MEM XMT
<01>(Station name)
5551234
* STORE * NO.002
PAGES=001 05%
* DIALLING * NO.002
(Station name)
NOTE
1. This feature is called “Qui ck Me mory Transmission”. If you wish to store All the document(s) into memory first
before transmitting, change the Fax Parameter No. 082 (QUICK MEMORY XMT) to “Invalid”. (See page 30)
41
Page 44

BASIC OPERATIONS
Sending Documents
Abbreviated Dialling
Abbreviated dialling is a speedy way to dial a frequently dialed telephone number by preprogramming the
telephone number into the built-in auto-dialer with a 3-digit abbreviated code. To program an abbreviated
dialling number, see page 21.
Make sure that the FAX lamp is ON. If not, press to select the "FAX MODE".
ENTER STATION(S)
1
1
a
Place original(s) face up on the ADF.
or
b
THEN PRESS START 00%
2
3
4
Place a book or an original face down on the Platen
Glass.
Make sure that the MEMORY lamp is on.
If not, press to set “On”.
Press then enter a 3-digi t code.
Ex:
The document(s) begin to store into memory with a file
number.
Then starts dialling the telephone number immediately
after storing the first page. (See Note 1)
The remaining page(s) continue to store into memory.
MEM XMT
ABBR
[010](Station name)
5553456
* STORE * NO.002
PAGES=001 05%
* DIALLING * NO.002
(Station name)
42
(see Note 1)
NOTE
1. This fe ature is called “Quick Memory Transmission”. If you wish to store All the document(s) into memory first
before transmitting, change the Fax Parameter No. 082 (QUICK MEMORY XMT) to “Invalid”. (See page 30)
Page 45

BASIC OPERATIONS
Sending Docu m en ts
Directory Search Dialling
Directory Search dia lling allows you to di al a full telephon e number by searchin g the station name en tered in
One-Touch keys or Abbreviated dialling numbers.
Make sure that the FAX lamp is ON. If not, press to select the "FAX MODE".
ENTER STATION(S)
1
1
a
Place original(s) face up on the ADF.
or
b
THEN PRESS START 00%
BASIC
OPERATIONS
2
3
4
5
Place a book or an original face down on the Platen
Glass.
Make sure that the MEMORY lamp is on.
If not, press to set “On”.
Enter the full station name or part of a station name by
using the Character keys. (See page 10)
Ex: for searching PANASONIC
P
MEM XMT
A N A
ENTER LETTER(S)
❚
ENTER LETTER(S)
❚
PANA
[010] PANASONIC
5553456
repeatedly until the display shows the station name you
want to send to.
Continued on the next page...
or
43
Page 46

BASIC OPERATIONS
Sending Documents
6
(see Note 1)
The document(s) begin to store into memory with a file
number.
Then starts dialling the telephone number immediately
after storing the first page. (See Note 1)
The remaining page(s) continue to store into memory.
* STORE * NO.002
PAGES=001 05%
* DIALLING * NO.002
PANASONIC
44
NOTE
1. This fe ature is called “Quick Memory Transmission”. If you wish to store All the document(s) into memory first
before transmitting, change the Fax Parameter No. 082 (QUICK MEMORY XMT) to “Invalid”. (See page 30)
Page 47

BASIC OPERATIONS
Sending Docu m en ts
Multi-Station Transmission (Broadcasting)
If you have to sen d the same docu ment( s) to multi ple s tation s, you can save time in feedin g t he do cument (s)
by using memory transmission. Th at is, you can sto re the documen t(s) into memory a nd then send it to the
station(s) automatically. (see Note 1)
Make sure that the FAX lamp is ON. If not, press to select the "FAX MODE".
ENTER STATION(S)
1
1
a
Place original(s) face up on the ADF.
or
b
THEN PRESS START 00%
BASIC
OPERATIONS
2
3
Place a book or an original face down on the Platen
Glass.
Make sure that the MEMORY lamp is on.
If not, press to set “On”.
Dial by any combination of the following methods:
• One-Touch Dialling
• Abbreviated Dia lling
• Manual Number Dialling, press after each
station is entered (Up to 70 stations)
• Directory Search Dialling, press after each
station is entered
(For details, see page 39 to 43.)
Ex:
If you want to confirm the number of stations you have
entered, press .
MEM XMT
SET
SET
SET
<01>(Station name)
5551234
[010](Station name)
5553456
2 STN(S) ARE SET
ADD MORE OR START
Continued on the next page...
45
Page 48

BASIC OPERATIONS
Sending Documents
4
(see Note 1)
All document(s) are stored into memory with a file
number. (See Note 2)
Then starts dialling the telephone numbers in sequence.
* STORE * NO.001
PAGES=001 01%
* STORE * COMPLETED
TOTAL PAGE=005 25%
* DIALLING * NO.002
(Station name)
46
NOTE
1. You can review the stations you entered in step 3 before storing your document into memory by pressing or
. Press to clear an entered station or group shown on the display if needed.
1. The “Quick Memory Transmission” is disabled if multiple stations are set.
CLEAR
Page 49

BASIC OPERATIONS
Sending Docu m en ts
Direct Transmission
If your machine's memory is full or you wish to send the document immediately, use Direct Transmission.
Manual Number Dialling (Direct Transmission)
To dial the telephone number manually, follow the steps below.
Make sure that the FAX lamp is ON. If not, press to select the "FAX MODE".
ENTER STATION(S)
1
1
a
Place original(s) face up on the ADF.
or
b
THEN PRESS START 00%
Place a book or an original face down on the
Platen Glass.
2
Make sure that the lamp goes off.
Enter a telephone number from the keypad.
3
Ex:
5 5 5 1 2 3 4
4
Your machine starts to dial the telephone number.
(see Note 1) (see Note 2) (see Note 3)
NOTE
1. If you need a special access number to get an outside line, dial it first then press to enter a pause
(represented by a "-") before dialling the full number.
: 9 PAUSE 5551234
Ex
2. To stop the transmission, press .
The display shows:
COMMUNICATION STOP?
1:YES 2:NO
STOP
ENTER STATION
THEN PRESS START 00%
TEL NO. (AUTO)
5551234
* DIALLING *
5551234
❚
PAUSE
Note3
BASIC
OPERATIONS
Press to stop the transmission. The C ommunicati on Journal wil l not print out regar dless of the pri ntout mode
1
setting of the Communication Journal.
3. This field (AUTO, Line-1 or Line-2) appears only when the 2nd G3 Fax Communication Port Kit is installed.
47
Page 50

BASIC OPERATIONS
Sending Documents
One-Touch Dialling (Direct Transmission)
One-Touch Dialling allows you to dial a full telephon e number by pres sing a single ke y. To set up the O neTouch keys, see page 19.
Make sure that the FAX lamp is ON. If not, press to select the "FAX MODE".
ENTER STATION(S)
1
1
a
Place original(s) face up on the ADF.
or
b
THEN PRESS START 00%
2
3
Place a book or an original face down on the Platen
Glass.
Make sure that the lamp goes off.
Press a One-Touch key.
Ex:
The display will show the One-Touch number and station
name. The full number (e.g. 5551234) will then be dialed.
ENTER STATION
THEN PRESS START 00%
<01>(Station name)
5551234
* DIALLING *
(Station name)
48
Page 51

BASIC OPERATIONS
Sending Docu m en ts
Abbreviated Dialling (Direct Transmission)
Abbreviated dialli ng is a speedy way to dial a freq uently dialed telephone number by preprogramming the
telephone number into th e built-in auto-dialer with a 3-digit abbreviate d code. To program an abbreviated
dialling number, see page 21.
Make sure that the FAX lamp is ON. If not, press to select the "FAX MODE".
ENTER STATION(S)
1
1
a
Place original(s) face up on the ADF.
or
b
THEN PRESS START 00%
BASIC
OPERATIONS
2
3
Place a book or an original face down on the Platen
Glass.
Make sure that the lamp goes off.
Press then enter a 3-digit code.
The display will show the ABBR number and station
name. The full number (e.g. 5553456) will then be dialed.
ABBR
ENTER STATION
THEN PRESS START 00%
[010](Station name)
5553456
* DIALLING *
(Station name)
49
Page 52

BASIC OPERATIONS
Sending Documents
Directory Search Dialling (Direct Transmission)
Directory Search diallin g allows you to dia l a full telephone numbe r by searching the station name enter ed in
One-Touch keys or Abbreviated dialling numbers.
Make sure that the FAX lamp is ON. If not, press to select the "FAX MODE".
ENTER STATION(S)
1
1
a
Place original(s) face up on the ADF.
or
b
Place a book or an original face down on the Platen
Glass.
THEN PRESS START 00%
2
3
4
5
6
Make sure that the lamp goes off.
Enter the full station name or part of a station name by
using the Character keys.
Ex: for searching PANASONIC
repeatedly until display shows the station name you want
to send to.
A N A
P
or
(See page 10)
ENTER STATION
THEN PRESS START 00%
ENTER LETTER(S)
❚
ENTER LETTER(S)
❚
PANA
[010]PANASONIC
5553456
* DIALLING *
PANASONIC
50
The full number (e.g. 5553456) will be dialed.
Page 53

BASIC OPERATIONS
Sending Docu m en ts
Rotated Transmission
Letter or A 4 Ori gin al(s ) ar e pla ce d in a Port rait ( ) direction, the doc ume nt(s ) wi ll be ro tat ed b y 90° and then
transmitted in a Landscape ( ) direction. The document(s) will be printed the same size as the transmitted
originals at the Receiving Station.
→
Rotation XMT Fax Parameter set to:
• Invalid
Letter or A4 Original
• Valid
Letter or A4 Original
→
Receiving Station:
Letter or A4 Paper
Sends with
70% reduction
Receiving Station:
Letter or A4 Paper
BASIC
OPERATIONS
Sends with
Rotated Transmission
Double-Sided Transmission (Receiving)
This machine has duplex SCAN & PRINT capabilities. (see Note 1) (see Note 2)
Duplex Scan Select Mode set to:
• Duplex Scan = ON
Duplex Scan
DP-2000
Duplex Print Fax Parameter set to:
• Duplex Print = Valid
Sending Station
Receiving Station
Duplex Print
DP-2000
NOTE
1. Rotation XMT requires the use of Memory Transmission.
2. Verification Stamp is disabled during Duplex Scan.
51
Page 54

BASIC OPERATIONS
Sending Documents
Setting Rotation Transmission
Make sure that the FAX lamp is ON. If not, press to select the "FAX MODE".
SET MODE (1-4)
1
2
3
ENTER NO. OR
FAX PARAMETER 1-99
NO.=
078 ROTATION XMT
1:INVALID
∨ ∧
❚
4
5
078 ROTATION XMT
2:VALID
52
Page 55

BASIC OPERATIONS
Sending Docu m en ts
Duplex Scan
Sending Document(s) Using Duplex Scan
Make sure that the FAX lamp is ON. If not, press to select the "FAX MODE".
1
a
Place original(s) face up on the ADF.
or
1
b
BASIC
OPERATIONS
2
3
4
5
Place a book or an original face down on the Platen
Glass.
Dial by any combination of the following methods:
• One-Touch Dialling
• Abbreviated Dia lling
• Manual Number Dialling, press after each
station is entered
(Up to 70 stations)
• Directory Search Dialling, press after each
station is entered
(For details, see page 39 to 43.)
SET
SET
SELECT MODE (1-5)
ENTER NO. OR
DUPLEX SCAN=OFF
1:OFF 2:ON
ENTER STATION(S)
THEN PRESS START 00%
∨ ∧
Continued on the next page...
53
Page 56

BASIC OPERATIONS
Sending Documents
6
(see Note 1) (see Note 2)
54
NOTE
1. The Duplex Scan function will reset back to OFF after the communication is completed.
2. Duplex Scan is only available with the inverting ADF option.
Page 57

BASIC OPERATIONS
Sending Docu m en ts
Setting Duplex Print
Make sure that the FAX lamp is ON. If not, press to select the "FAX MODE".
SET MODE (1-4)
1
2
3
4
ENTER NO. OR
FAX PARAMETER(1-99)
NO.=
095 DUPLEX PRINT
1:INVALID
095 DUPLEX PRINT
2:VALID
❚
∨ ∧
BASIC
OPERATIONS
5
55
Page 58

BASIC OPERATIONS
Sending Documents
Voice Mode Transmission
If you wish to send the document after talk ing with other party, us e Voice Mode Transmiss ion. Your machine
requires an external telephone.
Off-Hook Dialling
For Off-Hook Dialling, follow the steps below.
Make sure that the FAX lamp is ON. If not, press to select the "FAX MODE".
ENTER STATION(S)
1
a
Place original(s) face up on the ADF.
or
THEN PRESS START 00%
1
b
Place a book or an original face down on the Platen
Glass.
Lift the external telephone and dial the telephone number
2
3
(see Note 1) (see Note 2)
from the keypad.
Ex:
5 5 5 1 2 3 4
When you hear the voice of the other party, tell the other
party to prepare to receive a document.
Then, when you hear a beep,
and hang up the handset.
ON LINE * XMT *
56
NOTE
1. To stop the transmission, press .
The display shows:
COMMUNICATION STOP?
1:YES 2:NO
Press to stop the transmission. The Communication Journal will not print out regardless of the printout mode
setting of the Communication Journal.
2. The second Telephone Line (L-2) is not available for Off-Hook Dialling.
1
STOP
Page 59

BASIC OPERATIONS
Sending Docu m en ts
On-Hook Dialling
For On-Hook Dialling, follow the steps below.
Make sure that the FAX lamp is ON. If not, press to select the "FAX MODE".
ENTER STATION(S)
1
1
a
Place original(s) face up on the ADF.
or
b
Place a book or an original face down on the Platen
Glass.
THEN PRESS START 00%
BASIC
OPERATIONS
2
You will hear dial tone through the monitor speaker.
Dial the telephone number from the keypad.
3
Ex:
5 5 5 1 2 3 4
When you hear a beep,
4
(see Note 1) (see Note 2)
* MONITOR *
❚
* DIALLING *
5551234
ON LINE * XMT *
❚
NOTE
1. If you need a special access number to get an outside line, dial it first then press to enter a pause
(represented by a "-") before dialling the full number.
: 9 PAUSE 5551234
Ex
2. The second Telephone Line (L-2) is not available for On-Hook Dialling.
PAUSEPAUSE
57
Page 60

BASIC OPERATIONS
Sending Documents
Transmission Reservation
You can do the following while sending a document from memory or receiving a document.
• Reserve the next transmission into memory for up to 70 different files.
• Reserve a priority transmission.
Memory Transmission Reservation (Multi-tasking)
If your machine is on-line busy transmitting from memory, receiving or printing received doc uments, you can
reserve a transmission by the follow ing procedu re .
1
2
2
Your machine is on-line, the ON LINE lamp is blinking or
printing received documents.
a
Place original(s) face up on the ADF.
or
b
ON LINE * MEM.XMT *
ID:(Identification)
ON LINE * RCV *
ID:(Identification)
ON LINE
PC MODE
* PRINTING *
MEMORY RCV’D DOC
ENTER STATION(S)
THEN PRESS START 00%
58
Place a book or an original face down on the Platen
Glass.
3
Make sure that the MEMORY lamp is on.
If not, press to set “On”.
Continued on the next page...
MEM XMT
Page 61

Sending Docu m en ts
Dial by any combination of the following methods:
4
• One-Touch Dialling
• Abbreviated Dia lling
BASIC OPERATIONS
• Manual Number Dialling, press after each station is
entered
(Up to 70 stations)
• Directory Search Dialling, press after each station is
entered
(For details, see page 39 to 43.)
Ex:
5
Your machine will store the document(s) into memory.
(see Note 1) (see Note 2)
SET
SET
<01>(Station name)
5551234
* STORE * NO.005
PAGES=001 01%
* STORE * COMPLETED
TOTAL PAGES=005 25%
BASIC
OPERATIONS
NOTE
1. To cancel the memory transmission reservation, see page 89.
2. If the same st ation has be en reserv ed with different fi les, the f iles wi ll be execu ted in a single tran smissi on (Batch
Transmission). (See page 69)
59
Page 62

BASIC OPERATIONS
Sending Documents
Direct Transmission Reservation (Priority Transmission Reservation)
If you are in a rush to send an urgent document, however th ere are many files in the memory , use Direct
Transmission Reserva tion to send the urgent docu ment. The ur gent document will be sen t immediate ly after
the current communication is finished.
Note that you cannot send documents to multiple stations.
To reserve your machine for sending urgent documents
1
2
2
Your machine is on-line, the ON LINE lamp is blinking or
printing received documents.
a
Place original(s) face up on the ADF.
or
b
ON LINE * MEM.XMT *
ID:(Identification)
ON LINE * RCV *
ID:(Identification)
ON LINE * PC MODE *
* PRINTING *
MEMORY RCV’D DOC
ENTER STATION(S)
THEN PRESS START 00%
60
Place a book or an original face down on the Platen
Glass.
3
Make sure that the lamp goes off.
Continued on the next page...
ENTER STATION
THEN PRESS START 00%
Page 63

Sending Docu m en ts
Dial by using any one of the following methods:
4
• One-Touch Dialling
• Abbreviated Dia lling
BASIC OPERATIONS
• Manual Number Dialling and press
• Directory Sea rch Dia ll ing and press
(For details, see pages 39 to 43.)
Ex:
You can reserve sending an urgent document to a single
station onl y.
A message “DIRECT XMT RESERVED” will be shown on
the display.
To cancel the direct transmission reservation
Make sure the document is on the ADF.
1
2
START
START
<01>(Station name)
5551234
DIRECT XMT RESERVED
<01>(Station name)
DIRECT XMT RESERVED
<01>(Station name)
CANCEL XMT RESERVE?
1:YES 2:NO
BASIC
OPERATIONS
3
and then remove the document from ADF.
61
Page 64

BASIC OPERATIONS
Sending Documents
Redialling
Automatic Redialling
If a busy line is detected , the machine wil l redial the number up
to 5 times at 3 m inutes interval. Howev er, if a busy line is not
detected, the machine will redial only one time. During that time,
a message will appear as shown to the right.
A file number is shown in the upper right hand corner of the
display if it is a memory transmission file.
Manual Redialling
You can also redial the last dialed number manually by pressing key.
To redial the last dialed number through memory
Make sure that the FAX lamp is ON. If not, press to select the "FAX MODE".
REDIAL
1
Set document(s) face down.
Make sure that the MEMORY lamp is on.
WAIT TO DIAL NO.001
(Telephone number)
ENTER STATION(S)
THEN PRESS START 00%
2
3
The document is stored into memory with a file number.
Then dials the last dialed number.
(see Note 1)
NOTE
1. While the unit is displaying "WAIT TO DIAL", you can press
TEL. NO.
5551234
* STORE * NO.002
PAGES=001 01%
* DIALLING * NO.002
5551234
REDIAL
to start redialling immediately.
62
Page 65

Sending Docu m en ts
To redial the last dialed number through the ADF
1
Set document(s) face down.
BASIC OPERATIONS
ENTER STATION(S)
THEN PRESS START 00%
2
3
(see Note 1)
Make sure that the lamp goes off.
Your machine starts to dial the last dialed number.
ENTER STATION
THEN PRESS START 00%
TEL NO.
5551234
* DIALLING *
5551234
BASIC
OPERATIONS
NOTE
1. While the unit is displaying "WAIT TO DIAL", you can press
REDIAL
to start redialling immediately.
63
Page 66

BASIC OPERATIONS
Receiving Documents
Your machine is provi ded with both automatic and ma nual reception modes. The sel ection of either reception
mode is made with Fax Parameter No. 017 (RECEIVE MODE).
Automatic Reception
Your machine wi ll rec eive do cu ments automat ical ly if th e Fax Par amete r No. 017 (REC EIV E MODE ) is s et to
“Auto”. (See page 29)
Manual Reception
You may wish to receive documents manually if you use the telephone line in your office primarily as a
personal telephone and occasionally for your facsimile machine.
To receive documents manually, change the Fax Parame ter No. 017 (RECEIVE MODE) to “Manual” (See
page 29) and the following message will be shown on the display.
NOV-12-2000 15:00
MANUAL RCV 00%
To receive documents manually
1
2
3
4
(see Note 1)
(see Note 2)
When the telephone rings, lift the handset. (See Note 1)
If you hear a beep, the sound tells you that someone
wants to send a document.
Remove any documents from the ADF.
Your machine starts receiving the document.
Hang up the telephone.
* PHONE OFF HOOK *
00%
ON LINE * RCV *
64
NOTE
1. Your machine requires an external telephone connected to the TEL jack on the left rear cover of the machine.
2. If you receive a document with Super Fine resolution (406 pels/inch x 391 lines/inch), it might be divided into
multiple pages with no reduction.
Page 67

BASIC OPERATIONS
Receiving Documents
Print Reduction
This machine c an use L etter, Le gal, Ledger, A3 or A4 size p lain pap er for re cordin g. Some times, o versized
documents sent to you by the other parties cannot be printed within a single page. When this o ccurs, the
document will be divided into separate pages.
This machine is equ ipped with a Print Reduction function to solve this problem. You may se lect the most
appropriate setting from the selections described below.
• 1.Automatic Reduction
Each page of a received document is first stored in memory. Based on the document length, your machine will
automatically calculate the suitable reduc tion ratio (70% to 100%) to prin t the entire document on a s ingle
page. If the r eceived d ocument is extrem ely lo ng (over 39% lon ger than the recor ding p aper), the documen t
will be divided into separate pages and print without reduction.
• 2. Fixed Reduction
You can pre-determi ne the red uction rati o from 70 % to 100% in 1 % steps. Th e documen t(s) you receive wi ll
be reduced to the fixed ratio regardless of size.
Selecting the Print Reduction Mode
Set Fax Parameters as shown below. (See page 28)
1. To set Automatic Reduction mode.
(1) No. 24 Print Reduction set to “Auto”.
2. To set Fixed Reduction mode.
(1) No. 24 Print Reduction set to “Fixed”.
(2) No. 25 Reduction Ratio set to any number between 70% through 100%. (See Note 1)
EX: A4 to A4 - 96%
A4 to Letter - 90%
Letter to Letter - 96%
Legal to Letter - 75%
(see Note 1)
BASIC
OPERATIONS
NOTE
1. If the sendi ng si de is set to prin t the header on the outs ide o f the c opy area, m ore re duction r atio will be req uired.
65
Page 68

BASIC OPERATIONS
Receiving Documents
Receiving Oversize Documents
If the received document is extr emely long (ov er 39% longer than the re cording paper) , the document wil l be
divided into separate pages. When printing on separate pages, the bottom 13 mm of first page will be
overlapped on top of the next page.
(see Note 1)
Transmitted Document Received Document
Overlap print.
13 mm
The receiving document is divided
into two sheets with overlap printing.
NOTE
1. If the reduction method is set to the Automatic Reduction mode, the document is printed out with no reduction
when printing out separate pages. If the reduction method is set to Fixed Reduction mode, the document is
printed by the ratio you set in Fax Parameter No. 025.
66
Page 69

BASIC OPERATIONS
Receiving Documents
Substitute Memory Reception
If the recording pap er runs out or jams or if the toner r uns out during reception, the mach ine automatically
starts receiving documents into its image data memory. Stored documents are printed automatically after
replacing the recording paper or the toner cartridge. (See Note 1 and 2)
When the machine finishes the memory reception and
1
there is no recording paper or toner, an Information Code
appears on the display.
Install the recording paper or replace the toner cartridge.
2
The machine will automatically start printing the
document stored in the memory.
(see Note 1) (see Note 2)
ADD PAPER
OUT OF TONER
REPLACE CARTRIDGE
* PRINTING *
MEMORY RCV’D DOC
BASIC
OPERATIONS
NOTE
1. If the memory overflows, the machine will stop receiving and release the communication line. The document(s)
stored in memory up to that moment will be printed.
2. If you wish to turn off the substitute reception function, change the setting of Fax Parameter No.022 to “Invalid”.
67
Page 70

BASIC OPERATIONS
This page is intentionally left blank.
68
Page 71

Advanced Features
Batch Transmission
To reduce transmission time and cost, this feature allows your machine to accumulate different documents for the
same destination(s) to be transmitted in a single phone call.
Real-Time Batch Transmission
During memory transmission, your machine searches its memory for reserved files (up to 5 files) to transmit to
the same destination, automatically batching and transmitting them in a single phone call.
The following is an example of Real-time Batch Transmission. (See Note 1)
Delayed Batch Transmission
Assign a time for batch trans mi ss ion to a Pr og ra m Ke y in adv anc e. Al l tran smission(s) using the Progr am Key
are batched and transmitted at t he reserved time.
The following is an example of Delayed Batch Transmission.
(see Note 1)
ADVANCED
FEATURES
NOTE
1. The machine can not Batch to a file(s) that is/are Waiting to Redial or is currently being sent, but it will Batch to
files that are pending to dial.
69
Page 72

ADVANCED FEATURES
Timer Controlled Commun ications
You can send a document to one or multiple stations at any preset time within the next 24 hours. Up to 50 built-in
timers can be set for deferred transmission and deferred polling.
Deferred Transmission (see Note 1) (see Note 2) (see Note 3)
Make sure that the FAX lamp is ON. If not, press to select the "FAX MODE".
ENTER STATION(S)
1
a
Place original(s) face up on the ADF.
or
THEN PRESS START 00%
1
2
3
4
b
Place a book or an original face down on the Platen
Glass.
Enter the start time from the keypad.
(Use a 4-digit, 24-hour clock)
Ex: (11:30 p.m.) and
2 3 3 0
DEFERRED COMM. (1-3)
ENTER NO. OR
DEFERRED XMT
START TIME
ENTER STATION(S)
THEN PRESS START
∨ ∧
❚
:
70
Page 73

Timer Controlled Communications
Dial by any combination of the following methods:
5
• One-Touch Dialling
• Abbreviated Dia lling
ADVANCED FEATURES
• Manual Number Dialling, press after each station is
entered
(Up to 70 stations)
• Directory Search Dialling, press after each station is
entered
(For details, see page 39 to 43.)
Ex:
6
to store documents into the memory.
SET
SET
<01>(Station name)
5551234
* STORE * NO.002
PAGES=001 05%
* STORE * COMPLETED
TOTAL PAGES=005 30%
Deferred Polling
Make sure that the FAX lamp is ON. If not, press to select the "FAX MODE".
ADVANCED
FEATURES
1
2
Continued on the next page...
NOTE
1. If you enter a wrong number in Step 4, press then re-enter the right number.
2. To change or cancel the Deferred Communication settings, see page 87 and 89.
3. When you reserv e a deferred transm issi on withou t storing docum ent into memory , the foll owing me ssag e will be
shown on the display after pressing in the last step.
DEF DIRECT XMT RSV’D
<01>(Station name)
START
CLEAR
DEFERRED COMM. (1-3)
ENTER NO. OR
DEFERRED POLLING
START TIME
∨ ∧
❚
:
71
Page 74

ADVANCED FEATURES
Timer Controlled Commun ications
Enter the start time from the keypad.
3
(Use a 4-digit, 24-hour clock)
Ex: (3:30 a.m.) and
0 3 3 0
SET
DEFERRED POLLING
PASSWORD=
❚❚❚❚
4
5
6
Enter a 4-digit polling password.
Ex: and
9 8 7 6
Dial by any combination of the following methods:
• One-Touch Dialli ng
• Abbreviated Dialling
• Manual Number Dialling, press after each station is
entered
(Up to 70 stations)
• Directory Search Dialling, press after each station is
entered
(For details, see page 39 to 43.)
Ex:
SET
SET
SET
ENTER STATION(S)
THEN PRESS START
<01>(Station name)
5551234
* STORE * NO.001
(see Note 1) (see Note 2)
NOTE
1. If you enter a wrong number in Step 3, press , then re-enter the right number.
2. To change or cancel the Deferred Communication settings, see page 87 and 89.
CLEAR
72
Page 75

ADVANCED FEATURES
Polling
Polling means calling other station(s) to retrieve a document. The other station must know in advance that you will
call and must have a document set on the ADF or stored in the memory. You may need to set a polling password,
shared by the other station, to ensure security.
Setting the Polling Password
If the polling password does not match with the polled station, your polling request will be refused
automatically.
To set the polling password, follow the steps below.
Make sure that the FAX lamp is ON. If not, press to select the "FAX MODE".
SET M O D E ( 1 -4)
1
ENTER NO. OR
∨ ∧
2
3
Enter a 4-digit polling password.
4
Ex:
1 2 3 4
5
(see Note 1) (see Note 2)
FAX PARAMETER(1-99)
NO.=
26 POLLING PASSWORD
26 POLLING PASSWORD
1234
❚
❚❚❚❚
ADVANCED
FEATURES
NOTE
1. Polling might not function with all fax machines. We suggest you attempt a trial polling before you actually poll
important documents.
2. If a password is not set in the polled station, you may poll the other station even though your machine has a
password.
73
Page 76

ADVANCED FEATURES
Polling
Preparing to be Polled
In order to let other s tations poll your machine, yo u must prepare your machine with a document stored in
memory. Be sure to set the pollin g password befor e storing the docu ment into memor y. After being polled,
the documents stored in the memory will be erased automatically. To retain the documents in memory so that
they can be polled repeatedly change Fax Parameter No. 027 (POLLED FILE SAVE) to "Valid".
Make sure that the FAX lamp is ON. If not, press to select the "FAX MODE".
ENTER STATION(S)
1
1
a
Place original(s) face up on the ADF.
or
b
THEN PRESS START 00%
Place a book or an original face down on the Platen
Glass.
2
3
Enter a 4-digit polling password. (See Note 3)
4
Ex:
4 3 2 1
5
The document(s) will be stored into memory.
(see Note 1) (see Note 2) (see Note 3)
POLLING NO.=
1:POLLING 2:POLLED
POLLED
PASSWORD=1234
POLLED
PASSWORD=4321
* STORE * NO.015
PAGES=001 01%
* STORE * COMPLETED
TOTAL PAGES=005 24%
❚
74
NOTE
1. You can still send or receive documents even when set to be po lled.
2. Only 1 polled file can be store d in memory. If you nee d to add document( s) into the same poll ed file, see page 91 .
3. If you have set the polling password in Fax Parameter No. 026, the password will appear on the display.
You can still change the password temporarily by overwriting it with a new one.
Page 77

ADVANCED FEATURES
Polling
To Poll Documents from Another Station
The following p rocedure lets you poll a document from one or multipl e stations. Be sure to set the polling
password before polling. (See page 73)
1
2
3
4
5
Enter a 4-digit polling password. (See Note 2)
Ex:
1 1 1 1
Dial by any combination of the following methods:
• One-Touch Dialling
• Abbreviated Dia lling
• Manual Number Dialling, press after each station is
entered
(Up to 70 stations)
SET
POLLING NO.=
1:POLLING 2:POLLED
POLLING
PASSWORD=1234
POLLING
PASSWORD=1111
ENTER STATION(S)
THEN PRESS START
❚
ADVANCED
FEATURES
• Directory Search Dialling, press after each station is
entered
(For details, see page 39 to 43.)
Ex:
6
(see Note 1) (see Note 2)
NOTE
1. You can review the entered stat ions in ste p 5 by pressin g or key, press to erase the displayed
station or group as needed.
2. If you have set the polling password in Fax Parameter No. 026, the password will appear on the display.
You can still change the password temporarily by overwriting it with a new one.
SET
<01>(Station name)
5551234
* STORE * NO.001
CLEAR
75
Page 78

ADVANCED FEATURES
Program Keys
Your fax machine has special Program Keys. These ke ys are useful if you frequently need to send or poll the
same group of stations. You c an use these keys to store a One-To uch group key, a se quence of stations to be
polled, a deferred transmission or polling sequence or an additional One-Touch key.
Setting for Group Dialling
To set a Program Key for Group Dialling
Make sure that the FAX lamp is ON. If not, press to select the "FAX MODE".
P R OG R A M ( 1 -4 )
1
2
ENTER NO. OR
PROGRAM[P ]
PRESS PROGRAM KEY
∨ ∧
3
4
5
Ex:
Enter the station name (up to 15 characters) by using the
Character keys. (See page 10)
Ex: PROG.A and
Enter the station numbers by using One-Touch Key or
ABBR
Ex: and
You may use the or keys to review the entered
station(s) before going to next step. If you find an error,
press to erase the displayed station.
and 3-digit code.
CLEAR
SET
PROGRAM[P1] NAME
ENTER NAME
ENTER STATION(S)
THEN PRESS START
<01>(Station name)
5551234
[010](Station name)
5553456
76
6
You can now set other Program Keys by repeating the
procedures from Step 3, or return to standby by pressing
STOP
.
PROGRAM[P ]
PRESS PROGRAM KEY
Page 79

ADVANCED FEATURES
Program Keys
Setting for Deferred Transmission
To set a Program Key for deferred transmission
Make sure that the FAX lamp is ON. If not, press to select the "FAX MODE".
P R OG R A M ( 1 -4 )
1
2
ENTER NO. OR
PROGRAM[P ]
PRESS PROGRAM KEY
∨ ∧
3
4
5
6
Ex:
Enter the station name (up to 15 characters) by using the
Character keys. (See page 10)
Ex: PROG.A and
Enter the starting time using 4 digits.
Ex: (11:30 p.m.) and
2 3 3 0
SET
SET
PROGRAM[P1] NAME
ENTER NAME
PROGRAM[P1]
PRESS FUNCTION KEY
DEFERRED XMT
❚
START TIME
ENTER STATION(S)
THEN PRESS START
:
ADVANCED
FEATURES
Continued on the next page...
77
Page 80

ADVANCED FEATURES
Program Keys
Enter the stations by any combination of the following
7
methods:
• One-Touch Dialli ng
• Abbreviated Dialling
8
• Directory Search Dialling, press after each station is
entered
(For details, see page 39 to 43.)
Ex:
You can now set other Program Keys by repeating the
procedures from Step 3, or return to standby by pressing
STOP
.
SET
<01>(Station name)
5551234
PROGRAM[P ]
PRESS PROGRAM KEY
78
Page 81

ADVANCED FEATURES
Program Keys
Setting for Deferred Polling
To set a program Key for deferred polling
Make sure that the FAX lamp is ON. If not, press to select the "FAX MODE".
P R OG R A M ( 1 -4 )
1
2
ENTER NO. OR
PROGRAM[P ]
PRESS PROGRAM KEY
∨ ∧
3
4
5
6
7
Ex:
Enter the station name (up to 15 characters) by using the
Character keys. (See page 10)
Ex: PROG.A and
Enter the starting time.
Ex: (10:00 p.m.) and
2 2 0 0
Enter a 4-digit polling password.
Ex: and
1 1 1 1
The polling password appears if it has been previously
set.
SET
SET
SET
PROGRAM[P1] NAME
ENTER NAME
PROGRAM[P1]
PRESS FUNCTION KEY
DEFERRED POLLING
❚❚❚❚
❚
:
START TIME
DEFERRED POLLING
PASSWORD=
ENTER STATION(S)
THEN PRESS START
ADVANCED
FEATURES
Continued on the next page...
79
Page 82

ADVANCED FEATURES
Program Keys
Enter the station(s) by any combination of the following
8
methods:
• One-Touch Dialli ng
• Abbreviated Dialling
9
• Directory Search Dialling, press after each station is
entered
(For details, see page 39 to 43.)
Ex:
You can now set other Program Keys by repeating the
procedures from Step 3, or return to standby by pressing
STOP
.
SET
<01>(Station name)
5551234
PROGRAM[P ]
PRESS PROGRAM KEY
80
Page 83

ADVANCED FEATURES
Program Keys
Setting for Normal Polling
To set a program Key for normal polling
Make sure that the FAX lamp is ON. If not, press to select the "FAX MODE".
P R OG R A M ( 1 -4 )
1
2
ENTER NO. OR
PROGRAM[P ]
PRESS PROGRAM KEY
∨ ∧
3
4
5
6
Ex:
Enter the station name (up to 15 characters) by using the
Character keys. (See page 10)
Ex: PROG.A and
Enter a 4-digit polling password.
Ex: and
1 1 1 1
The polling password appears if it has been previously
set.
SET
SET
PROGRAM[P1] NAME
ENTER NAME
PROGRAM[P1]
PRESS FUNCTION KEY
POLLING
PASSWORD=
ENTER STATION(S)
THEN PRESS START
❚❚❚❚
ADVANCED
FEATURES
Continued on the next page...
81
Page 84

ADVANCED FEATURES
Program Keys
7
8
Enter the station(s) by any combination of the following
methods:
• One-Touch Dialli ng
• Abbreviated Dialling
• Directory Search Dialling, press after each station is
entered
(For details, see page 39 to 43.)
Ex:
You can now set other Program Keys by repeating the
procedures from Step 3, or return to standby by pressing
STOP
.
SET
<01>(Station name)
5551234
PROGRAM[P ]
PRESS PROGRAM KEY
82
Page 85

ADVANCED FEATURES
Program Keys
Setting for One-Touch Key
To set a program key for one-touch key
Make sure that the FAX lamp is ON. If not, press to select the "FAX MODE".
P R OG R A M ( 1 -4 )
1
2
ENTER NO. OR
PROGRAM[P ]
PRESS PROGRAM KEY
∨ ∧
3
4
5
6
Ex:
Enter the station name (up to 15 characters) by using the
Character keys. (See page 10)
Ex: PROG.A and
Enter a telephone number (up to 36 digits including
pauses and spaces).
Ex:
9
PAUSE
You can now set other Program Keys by repeating the
procedures from Step 3, or return to standby by pressing
STOP
.
SET
5 5 5
SPACE
1 2 3 4
PROGRAM[P1] NAME
ENTER NAME
[P1] PROG.A
ENTER TEL. NO.
[P1] PROG.A
9-555 1234
PROGRAM[P ]
PRESS PROGRAM KEY
❚
ADVANCED
FEATURES
83
Page 86

ADVANCED FEATURES
Program Keys
Changing or Erasing the Program Key Settings
To change the settings in a Program Key, follow the procedure on setting a Program Key on pages 76 to 83.
• Start time or station(s) for deferred transmission
• Station(s ) for norm al pol li ng
• Start time or station(s) for deferred polling
• Station(s) for group dialling
• Telephone number and station name for One-Touch key
To erase the settings in a program key
P R OG R A M ( 1 -4 )
1
2
ENTER NO. OR
PROGRAM[P ]
PRESS PROGRAM KEY
∨ ∧
3
4
5
Press the Program key you want to erase.
Ex:
You can now erase other Program Keys by repeating the
procedures from Step 3, or return to standby by pressing
STOP
.
PROGRAM[P1]
DELETE? 1:YES 2:NO.
* DELETING *
PROGRAM[P1]
PROGRAM[P ]
PRESS PROGRAM KEY
84
Page 87

ADVANCED FEATURES
Edit File Mode
Your machine has a document image memory which enables you to reserve memory transmission, memory
deferred transmission, memory polling and so on.
After reserving the communications in me mory, you may need to change the settings of the commu nication(s)
while it is still in memory. This section describes how to use the file editing features.
Printing a File List
The contents of the communication settings may have to be modified or deleted. To verify the contents, follow
the steps below to print a file list.
Make sure that the FAX lamp is ON. If not, press to select the "FAX MODE".
EDIT FILE MODE (1-6)
1
2
ENTER NO. OR
1:FILE LIST?
PRESS SET TO SELECT
∨ ∧
FILE LIST
3
4
Sample File List
*************** -FILE LIST- *********************** DATE 12-NOV-2000 ***** TIME 15:00 *********
(1) (2) (3) (4) (5) (6)
FILE COMM. TYPE CREATED TIME START TIME PAGES DESTINATION(S)
No.
001 DEFERRED XMT 12-NOV 13:20 20:30 [001]
002 MEM. DEF. XMT 12-NOV 13:20 22:30 003 [011] [012] [013] [016] [017]
-PANASONIC -
************************************ -HEAD OFFICE - ***** - 201 555 1212- *********
Explanation of Contents
(1) File number : If the file is now being executed, a "*" is indicated on the left of the file number.
(2) Communication type :
(3) Stored date/time : Date/time that these files were stored.
1:PRINT 2:VIEW
* PRINTING *
FILE LIST
ADVANCED
FEATURES
(4) Executing time : If the file is a Timer Controlled Communication, the start time is printed in this
column.
If the file is an incomplete file, "INCOMP" is printed in this column.
(5) Number of stored page(s) :
(6) Destination : ABBR. No./One-Touch No./Manual Dialling No.
85
Page 88

ADVANCED FEATURES
Edit File Mode
Viewing the Contents of a File List
To view the contents of a file list on the display without printing it, follow the steps below.
EDIT FILE MODE (1-6)
1
2
3
ENTER NO. OR
1:FILE LIST?
PRESS SET TO SELECT
FILE LIST
1:PRINT 2:VIEW
∨ ∧
4
5
or repeatedly until the display shows a file you want to edit.
Sample display
T ype of File
XMT: Transmission
POLL: Polling
POLLED: Polled
RCV TO MEM: Receive to Memory
CONF . MAIL: Conf. RCV / Conf. Polled
PC JOB: PC Interface Job (Option)
FILE XMT: File Transmission
JOURNAL: Journal / Report
001 XMT 10:00 P010
<01>(Station name)
USE THE
SCROLL EACH FILE
Status
nn:nn: Start time
IN PRG: In progress
REDIAL: Waiting to redial
INCOMP: Incomplete file
∨ ∧
KEYS TO
86
File Number Entered station Number of pages
6
Page 89

ADVANCED FEATURES
Edit File Mode
Changing the Start Time or the Station of a File
To change the start time and/or stations in a communication file, follow the steps below.
EDIT FILE MODE (1-6)
1
ENTER NO. OR
∨ ∧
2
3
4
5
6
Enter the file number or use or to select the file
that you want to change.
Ex:
0 0 1
(See Note 2)
Enter a new start time.
Ex: (6:00 a.m.)
0 6 0 0
(If you do not have to change the time, skip to step 6.)
ENTER FILE NO.OR ∨
FILE NO.=
ENTER FILE NO.OR ∨
FILE NO.=001
DEFERRED XMT
START TIME 22:30
DEFERRED XMT
START TIME 06:00
TEL. NO.
5551234
❚❚❚
∧
∧
ADVANCED
FEATURES
Continued on the next page...
87
Page 90

ADVANCED FEATURES
Edit File Mode
To delete the station(s), press or key until the
7
station you want to delete appears. Then press .
or
Enter the station(s) you want to add.
Ex:
8
(see Note 1) (see Note 2) (see Note 3)
CLEAR
ENTER STATION(S)
THEN PRESS START
1 STN(S) ARE SET
ADD MORE OR START
88
NOTE
1. Your machine cannot change the start time and/or stations in the file while it is being sent or waiting to redial.
2. If the file is not a Deferred Communication File, the following message is shown on the display.
SET DEFERRED COMM.?
1:YES 2:NO
Press to change the type of the file for deferred communication file.
3. If you edit the file that is save d as an inco mplete file, a fter pressing in step 8, your mach ine will pro mpt
you whether to execute the file immediately.
The display shows:
Press to execute the file immediately.
1
RETRY INCOMP. FILE?
1:YES 2:NO
1
START
Page 91

ADVANCED FEATURES
Edit File Mode
Deleting a File
To delete the file in memory, follow the steps below.
Make sure that the FAX lamp is ON. If not, press to select the "FAX MODE".
EDIT FILE MODE (1-6)
1
ENTER NO. OR
∨ ∧
2
3
4
5
(see Note 1)
(see Note 2)
Enter the file number or use or to select the file
that you want to change.
Ex: (See Note 2)
0 0 1
Enter the next file number you want to delete or press
STOP
to return to standby.
ENTER FILE NO.OR ∨
FILE NO.=
ENTER FILE NO.OR ∨
FILE NO.=001
DELETE FILE NO.001?
1:YES 2:NO
* DELETING *
FILE NO.=001
ENTER FILE NO.OR ∨
FILE NO.=
❚❚❚
❚❚❚
∧
∧
ADVANCED
FEATURES
∧
NOTE
1. Your machine cannot delete the file while it is being sent.
2. Enter as the file number and press to delete all files (except the file in progress).
The following message is shown on the display.
DELETE ALL FILES?
1:YES 2:NO
Press to delete all files.
1
SET
89
Page 92

ADVANCED FEATURES
Edit File Mode
Printing a File
To print the contents of the communication file, follow the steps below.
Make sure that the FAX lamp is ON. If not, press to select the "FAX MODE".
EDIT FILE MODE (1-6)
1
ENTER NO. OR
∨ ∧
2
3
4
(see Note 1)
Enter the file number or use or to select the file
that you want to change.
Ex: (See Note 2)
0 0 1
Your machine will print the file. The document(s) will
remain in memory even after printing the file.
ENTER FILE NO.OR ∨
FILE NO.=
ENTER FILE NO.OR ∨
FILE NO.=001
* PRINTING *
PAGE=001/003
❚❚❚
∧
∧
90
NOTE
1. Your machine cannot print the file while it is being sent.
Page 93

ADVANCED FEATURES
Edit File Mode
Adding Documents into a File
To add documents into the file, follow the steps bellow.
Make sure that the FAX lamp is ON. If not, press to select the "FAX MODE".
ENTER STATION(S)
1
1
a
Place original(s) face up on the ADF.
or
b
THEN PRESS START 00%
2
3
4
Place a book or an original face down on the Platen
Glass.
Enter the file number or use or to select the file
that you want to add.
Ex:
0 0 1
Your machine will start storing the document(s) into a file.
EDIT FILE MODE (1-6)
ENTER NO. OR
ENTER FILE NO.OR ∨
FILE NO.=
ENTER FILE NO.OR ∨
FILE NO.=001
* STORE * NO.001
PAGES=001 10%
∨ ∧
❚❚❚
ADVANCED
FEATURES
∧
∧
(see Note 1)
NOTE
1. Your machine cannot add the document into the file while it is being sent or waiting to redial.
91
Page 94

ADVANCED FEATURES
Edit File Mode
Retry an Incomplete File
If a memory communication has been unsuccessful due to a busy line or no answer, the document you stored
is automatically erased from memory after the last redial.
If you need to retain the d oc ume nt e ven if the c om mun ic ati on fail ed , ch ang e th e s etti ng o f Fax Pa ra met er No.
031 (INC. FILE SAVE) to Valid in advance. (See page 29)
To retry the incomplete file, print a File List first to verify the file number. (See page 85)
Then, follow the steps below.
Make sure that the FAX lamp is ON. If not, press to select the "FAX MODE".
EDIT FILE MODE (1-6)
1
ENTER NO. OR
∨ ∧
2
Enter the file number or use or to select the file that you
3
want to change.
Ex:
0 0 1
4
Your machine will retry the file and start dialling immediately.
(see Note 1) (see Note 2)
ENTER FILE NO.OR ∨
FILE NO.=
ENTER FILE NO.OR ∨
FILE NO.=001
* STORE * NO.001
* DIALLING * NO.001
PANASONIC
❚❚❚
∧
∧
92
NOTE
1. To confirm or change the entered telephone number for the file, see page 85 and 87.
2. If you set Fax Parameter No.031 to Valid, all incomplete files will remain in the memory. To avoid memory
overflow, please check the memory content frequently. We recommend that optional flash memory card is
installed when this function is used. See the Operating Instructions (For Copier).
Page 95

ADVANCED FEATURES
Receive To Memory
This feature is used to secure all receiv ed document s by stor ing them int o the me mory. To p rint the doc uments
from memory, the authorized operator must enter the correct password.
Setting the RCV To Memory Password
Make sure that the FAX lamp is ON. If not, press to select the "FAX MODE".
SET M O D E ( 1 -4)
1
2
ENTER NO. OR
FAX PARAMETER (1-99)
NO.=
∨ ∧
❚
3
4
5
Enter a 4-digit RCV to Memory Password.
Ex:
1 2 3 4
37 RCV TO MEMORY
37 RCV TO MEMORY
1234
❚❚❚❚
ADVANCED
FEATURES
93
Page 96

ADVANCED FEATURES
Receive To Memory
Setting RCV To Memory
Make sure that the FAX lamp is ON. If not, press to select the "FAX MODE".
SELECT MODE (1-5)
1
2
3
ENTER NO. OR
RCV TO MEMORY=OFF
1:OFF 2:ON 3:PRINT
RCV TO MEMORY=ON
1:OFF 2:ON 3:PRINT
∨ ∧
4
(see Note 1) (see Note 2)
12-NOV-2000 15:00
< RCV TO MEMORY >
94
NOTE
1. When the memory overflows, the machine will stop receiving and release the line. The machine will not answer
the next incoming call until there is space available in the memory.
2. We recommend that optional flash memory card is installed when this function is used. See the Operating
Instructions (For Copier).
Page 97

ADVANCED FEATURES
Receive To Memory
Printing Documents
After receiving a docum ent with the Receive To Memory fe ature, the following message will ap pear on the
display.
MESSAGE IN MEMORY
< RCV TO MEMORY >
To print the documents, follow the steps below.
Make sure that the FAX lamp is ON. If not, press to select the "FAX MODE".
SELECT MODE (1-5)
1
2
ENTER NO. OR
RCV TO MEMORY=ON
1:OFF 2:ON 3:PRINT
∨ ∧
3
4
Enter the password to print the documents.
5
(See Note 1)
Ex:
1 2 3 4
6
Machine will start to print the documents.
(see Note 1) (see Note 2)
RCV TO MEMORY=PRINT
1:OFF 2:ON 3:PRINT
INPUT PASSWORD
INPUT PASSWORD
1234
* PRINTING *
MEMORY RCV’D DOC
❚❚❚❚
ADVANCED
FEATURES
NOTE
1. If the password has not been set, your machine will not prompt you to enter the password.
The documents will be printed immediately after pressing in step 4.
2. Once the RCV TO MEMORY feature is set to "On", the password cannot be changed (Fax Parameter No. 037
will not be shown on the LCD display). If you wish to change the password, set RCV TO MEMORY feature to
“Off” first. Then change the password. (See page 94)
SET
95
Page 98

ADVANCED FEATURES
Fax Cover Sheet
General Description
A Fax Cover Sheet can be automatically attached to your transmit document(s) that shows the recipient's
name, originator's name and the number of pages attached.
Received as:Transmitted as:
Header P.01 Header P.02
Fax
Page 1 Page 2 Page 1
Using the Fax Cover Sheet
To attach a Fax Cover Sheet to a transmission, follow the procedure below.
Make sure that the FAX lamp is ON. If not, press to select the "FAX MODE".
Cover
Sheet
Page 2
Total P.02
1
1
2
3
a
Place original(s) face up on the ADF.
or
b
Place a book or an original face down on the Platen
Glass.
ENTER STATION(S)
THEN PRESS START 00%
SELECT MODE (1-5)
ENTER NO. OR
COVER SHEET=OFF
1:OFF 2:ON
∨ ∧
96
Page 99

Fax Cover Sheet
ADVANCED FEATURES
4
5
6
or “OFF” (Cover Sheet is not attached)
or
for “ON” (Cover Sheet is attached)
Dial by any combination of the following methods:
• One-Touch Dialling
• Abbreviated Dia lling
• Manual Number Dialling, press after each station is
entered
(Up to 70 stations)
• Directory Search Dialling, press after each station is
entered
(For details, see page 39 to 43.)
Ex:
SET
SET
COVER SHEET=OFF
1:OFF 2:ON
or
COVER SHEET=ON
1:OFF 2:ON
ENTER STATION(S)
THEN PRESS START 00%
<01>(Station name)
5551234
ADVANCED
FEATURES
7
(see Note 1) (see Note 2) (see Note 3) (see Note 4)
NOTE
1. To change the preset Fax Cover Sheet Setting, change the setting of Fax Parameter No. 056, see page 30.
2. This function is available for memory or direct transmission modes.
3. The Fax Cover Sheet is not counted in the number of pages column of the journals.
4. When the Fax Cover Sheet setting is set to On, the Quick Memory XMT feature is disabled.
97
Page 100

ADVANCED FEATURES
Fax Cover Sheet
Fax Cover Sheet Sample
***** FACSIMILE COVER SHEET *****
12-NOV-2000 15:00
Following This Cover Page
(1)
(2)
Message To:
SALES DEPT.
(3)
Message From:
PANASONIC
201 555 1212
(4)
02
Page(s)
98
Explanation of contents
(1) Starting time of communication.
(2) Recorded name in the One-Touch, ABBR. No. or dialed telephone number.
(3) Your LOGO (up to 25 characters) and ID Number. (Up to 20 digits)
(4) The number of pages to follow. This information is not shown when transmitting by Direct Transmission Mode.
 Loading...