

Page 1
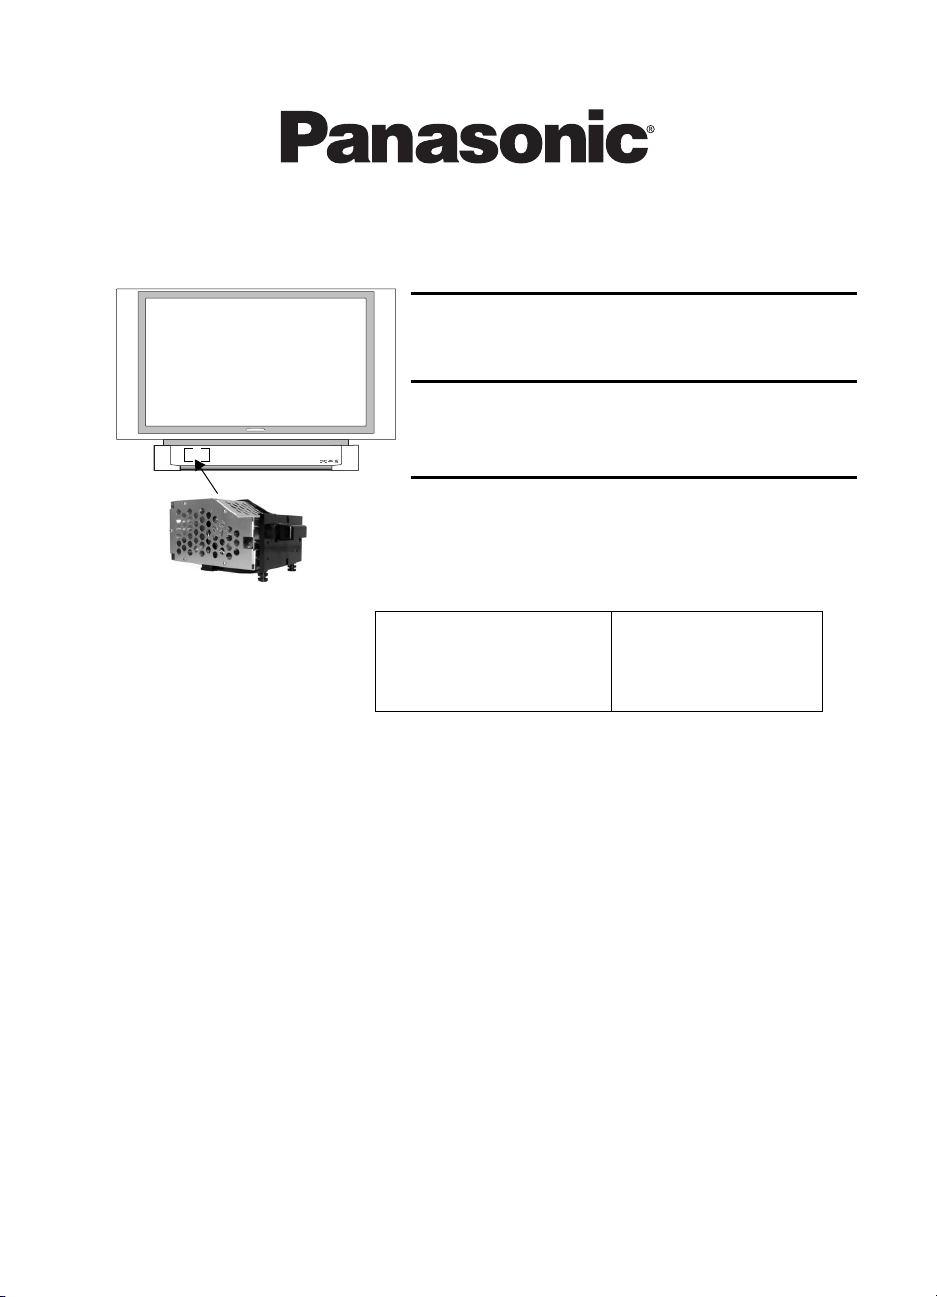
Table of contents
Tabla de contenido
Lamp unit
replacement instructions
Instrucciones para el
reemplazo de la lámpara
Directives de remplace-
ment de la lampe
Lamp unit for projection monitor
Lámpara para monitor de proyección
Lampe pour écran de projection
Model number
Número de modelo
Numéro de modèle
TY-LA2004
Table des matières
English instructions.............. 2~5
Instrucciones en español..... 6~9
Directives en français ......... 10~13
Garantie pour le Canada .... 14
Warranty for Canada .......... 15
US Warranty ....................... 16
TQB2AA0518-1 40501
PRINTED IN USA
IMPRESO EN EE.UU
IMPRIMÉ AUX ÉTATS-UNIS
Page 2

ENGLISH
For Lamp Recycling
Hg - LAMP CONTAINS MERCURY,
MANAGE IN ACCORDANCE WITH
DISPOSAL LAWS.
SEE: WWW.LAMPRECYCLE.ORG OR
1-888-843-9788
Customer Record:
The serial number of this product can be
found on the lamp carton. You should note
this serial number in the space provided
below and retain this book, plus your
purchase receipt, as a permanent record of
your purchase to aid in identification in the
event of theft or loss, and for Warranty
Service purposes.
Model Number TY-LA2004
Serial Number ____________
Troubleshooting
Before you call for service, determine the
symptoms and make a few simple checks
as shown below.
Symptoms Checks
For assistance, please call:
1-888-843-9788 or send e-mail to:
http://www.panasonic.com/contactinfo
or visit us at www.panasonic.com
(U.S.A.)
For assistance, please call:
787-750-4300 or visit us at
ww w.pan ason ic.c om
(Puerto Rico)
For assistance, please call:
(905) 624-5505. or visit us at
www.panasonic.ca
(Canada)
Power does
not turn ON
Lamp monitor
display is
blinking
• Is the lamp unit cover
fully installed?
• Is the lamp monitor
display blinking?
• The lamp circuit has
detected a malfunction.
• Was the power turned
on immediately after
the power had been
turned off?
• Wait until the lamp
cools off and then
turn on the power
again.
• There is a malfunction
in the lamp circuit.
• Turn off the power and
consult your sales
dealer.
2
Page 3

ENGLISH
Replacing the lamp unit
Front View
Lamp location
Tem p
Lamp
Lamp unit replacement period
The lamp unit for the projection monitor
should be replaced after approximately
10,000 hours of use in the normal usage
mode.
Warning Display
When the power has been turned off after
over 10,000 hours of continued use,
REPLACE LAMP will be displayed for
approx. 1 min. the next time the power is
turned on.
A warning message to urge the
replacement of the lamp will be displayed
in red at the center of the screen.
REPLACE LAMP
POWER
VOL
CH
TV/VIDEO
Lamp Unit replacement
Important Information
When replacing the lamp unit with a new
one, pay attention to the following points.
Warning: Because the temperature of
the lamp unit is elevated
immediately after its use, a
direct touch to it may cause
burns. Please allow the
lamp to cool (for at least 1
hour) before handling or
replacing the lamp unit.
Cautions:
• Handle the removed old lamp unit
carefully. If it is mishandled, there may
be a risk of explosion.
• Wear gloves when replacing the lamp
unit.
• When replacing the lamp unit
becomes necessary during the operation of the TV, follow the procedure
below to turn off the power and wait
until the lamp unit cools completely.
Procedure
• Press the POWER button on the
remote control unit or the TV
operating panel to turn off the power.
• Wait for about one minute until the
cooling fan stops.
Note: The lamp cooling fan will continue
to operate for about one minute
after turning off the power. During
the operation of the cooling fan, do
not unplug the power cord from the
outlet and avoid a cutoff in the
power lines such as the opening of
a circuit breaker.
• After making sure that the cooling fan
stops, unplug the power cord from the
wall outlet.
3
Page 4

ENGLISH
Lamp Unit replacement (Cont.)
Procedure for removing old lamp
• Remove the Front cover. Place your
fingertips under the front cover and
pull it from the projection display.
Front Cover
• First read caution and warning labels.
Then, loosen the lamp cover screw by
using a screwdriver.
Lamp Cover handle
Lamp Cover screw
Cautions:
• Under no circumstance should you
touch the actual bulb.
• At this high operating temperature the natural oil on your finger
can cause the glass to weaken
where touched and the bulb can
crack or explode.
• Loosen the lamp unit screw with a
screwdriver. Then, grasp the lamp unit
by the lamp unit handle indicated in
the following diagram, and slowly
remove from the projection display.
Note: Do not drop, as the impact of
dropping may cause the lamp to
explode.
Screwdriver
Lamp unit screw
Lamp unit handle
Warning:
• The lamp may be hot.
• Be careful when handling.
Cautions:
• High-pressure lamp may
explode, if improperly handled.
• Danger of injury due to glass
fragments.
Procedure for installing new
lamp
• Handle the Lamp unit only by the
Lamp unit handle.
Cautions:
• Do not touch the Lamp surface.
If touched, wipe clean with a dry
soft cloth.
• Do not use any type of liquid to
clean the lamp; it will create a
stain in the image.
• Insert the new lamp unit being careful
of the insertion direction.
Note: Press on the arrow mark making
sure insertion is done correctly.
Arrow mark
4
Page 5

ENGLISH
Procedure for installing new lamp (cont.)
• Replace the Lamp unit and cover
screws.
• Tighten the lamp unit cover screw with
a screwdriver (make sure it is screwed
tight).
Notes:
• Properly dispose of old lamp.
• Attach the lamp unit and lamp
unit housing door securely. If
the lamp unit housing door is
not attached securely, the protective circuit will be activated
and the lamp will not turn on.
• Replace the front cover.
Resetting the counter
After replacing lamp, please make sure to
perform the procedure below in order to
reset the lamp lifetime counter.
Procedure
• Press down both VOLUME DOWN
button on the unit and MUTE button
on the Remote Control at the same
time for 3 seconds.
Tem p Lam p
Lamp LED
POWER
Power LED
Front Cover
• Plug the power cord back into the wall
outlet.
• Press Power button to turn set on.
Note: Whenever the lamp cover is
removed the set will shut down.
E
T
U
M
VOL Down
VOL
CH
TV/VIDEO
MUTE button on remote
• When successful, the 2 LED’s on the
front of the unit (Power and Lamp) will
flash for 5 seconds.
Note: If LED’s do not flash, repeat the
procedure above.
5
Page 6

ESPAÑOL
Para reciclaje de la lámpara
(solo EE.UU. y Canada)
La lámpara Hg contiene mercurio,
manejese de acorde con las leyes de
disposición.
Vea: WWW.LAMPRECYCLE.ORG ó
llame al 1-888-843-9788.
Registro del usuario:
El número de serie de este producto se
unidad se encuentra lacalizado en la caja
de cartón. Se recomienda que anote dicho
número en el espacio que se proporciona y
conserve este manual, asi como su recibo
de compra, como registro permanente de
su compra. Esto le ayudará a identificarlo
en caso de robo o pérdida y en custiones
de servicio en garantía.
Número de modelo TY-LA2004
Número de serie_____________
Localización de fallas
Antes de solicitar servicio, determine los
síntomas y lleve a cabo las siguientes
posibles soluciones.
Síntoma Solución
No enciende • La cubierta de la
lámpara está colocada
correctamente?
• El indicador de la
lámpara está
destellando?
El indicador de
la lámpara está
destellando
• Hay una falla en el
circuito de la lámpara.
• Trató de encender el
televisor inmediatame
nte después de
apagarlo?
• Espere a que la
lámpara se enfríe y
trate de encender el
televisor.
• Apague el televisor y
consulte a su agente
de ventas.
Para asistencia, llame al:
1-888-843-9788 ó envíe un correo
electrónico a:
http://www.panasonic.com/contactinfo
ó visitenos en la página
www.panasonic.com
(EE.UU.)
Para asistencia, llame al:
787-750-4300
ó visitenos en la página
ww w.pan ason ic.c om
(Puerto Rico)
6
Page 7

ESPAÑOL
Reemplazando la lámpara
Vista frontal
Localización de
la lámpara
Tem p
Lamp
POWER
VOL
CH
TV/VIDEO
Período de reemplazo de la
lámpara
La lámpara para el monitor de proyección
debe ser reemplazado después de
aproximadamente 10,000 horas de uso
normal.
Mensaje de precaución
Cuando el televisor a sido apagado
después de más de 10,000 horas de uso,
REEMPLAZAR LAMPARA será mostrado
en pantalla aproximadamente 1 min. la
siguiente vez que se encienda el televisor.
REEMPLAZAR LAMPARA
Reemplazo de la lámpara
Información importante
Cuando reemplaze la lámpara con una
nueva, tenga en cuenta los siguientes
puntos.
Precauciones:
• Debido a que la temperatura de la
lámpara es alta inmediatamente
después de su uso, el tocarla
directamente puede causar quemaduras. Permita que la lámpara se
enfríe (por al menos una (1) hora)
antes de manejarla ó reemplazarla.
• Maneje la lámpara con cuidado. El
mal manejo trae el riesgo de que
explote.
• Utilice guantes cuando este reemplazando la lámpara.
• Cuando sea necesario reemplazar la
lámpara durante operación del televisor, siga el procedimiento a continuación para apagar el televisor y
esperar a que la lámpara se enfríe por
completo.
Procedimiento
• Presione el botón POWER para
apagar el televisor.
• Espere aproximadamente cinco (5)
minutos para que el abanico se
apague.
Nota: El abanico de la lámpara seguirá
operando por aproximadamente
cinco (5) minutos después de apagar el televisor. Mientras el abanico
este operando, no desconecte el
cable de CA y evite el descontinuar
el suministro de energía, tal como
abrir un fusible.
• Después de asegurarse que el abanico se detuvo, apague el televisor
con el botón que se encuentra en la
parte frontal del televisor.
7
Page 8

ESPAÑOL
Procedimiento para quitar la lámpara
• Remueva el panel frontal. Coloque
sus dedos debajo del panel frontal y
jale para quitarlo del televisor.
Panel frontal
• Antes lea las etiquetas de cuidado y
precaución. Luego remueva la cubierta con ayuda de un desarmador.
Agarradera de la cubierta
Tornillo de la cubierta
Precauciones:
• Bajo ninguna circunstancia debe
tocar el bulbo de la lámpara.
• A la temperatura de operación que
trabaja, el aceite natural de sus
dedos puede causar que el vidrio
se debilite donde fué tocado y el
bulbo puede rajarse o explotar.
• Desatornille el tornillo de la lámpara
con un desarmador. Después, tome la
lámpara por el asa como se muestra
en la siguiente figura y saquela lentamente del televisor de proyección.
Nota: No tire la lámpara, al hacerlo el
impacto puede causar que esta
explote.
Desarmador
Tornillo de la lámpara
Asa de la lámpara
Advertencia:
• La lámpara puede estar caliente.
• Tenga cuidado en su manejo.
Precauciones:
• Esta lámpara de alta presión
puede explotar si se le da un
mal manejo.
• Existe el riesgo de lesionarse
debido a fragmentos de vidrio.
Procedimiento para instalar la
nueva lámpara
• Maneje la lámpara tomandola del asa
solamente.
Precauciones:
• No toque la superficie de la
lámpara. Si la toca, limpie con
una toalla suave y seca.
• No utilize ningún tipo de liquido
para limpiar la lámpara; esto
provocará una mancha en la
imágen.
• Introduzca la nueva lámpara teniendo
cuidado de hacerlo en la dirección
correcta.
Nota: Presione como se indica en la
siguiente ilustración.
8
Page 9

ESPAÑOL
Procedimiento para instalar la
nueva lámpara (cont.)
Reiniciando el contador
Después de reemplazar la lámpara,
asegurese de llevar a cabo el siguiente
procedimiento para reinicializar el contador
de uso de la lámpara.
Procedimiento
• Presione el botón de VOLUMEN
MENOS en el televisor y el de MUTE
en el Control Remoto al mismo tiempo
por tres (3) segundos.
Flecha indicadora
• Apriete el tornillo de la lámpara.
• Coloque la cubierta y fijela con su
tornillo (asegurese de fijarlo
firmemente).
Notas:
• Disponga correctamente de la
lámpara que removió.
• Asegurese de colocar bien la
lámpara y su cubierta. De no
ser asi, el circuito de protección de la lámpara se activará
y esta no encenderá.
• Coloque el panel frontal.
Panel frontal
• Conecte el cable de CA al tomacorrientes.
• Presione el botón POWER para
encender el televisor.
Nota: Cuando la cubierta de la lámpara
sea removida el aparato se
apagará.
Tem p Lam p
Indicador
Lamp
POWER
Indicador
Power
E
T
U
M
VOL Menos
VOL
CH
TV/VIDEO
Botón MUTE en control remoto
• Si el procedimiento fue exitoso, los 2
indicadores en la parte frontal del
televisor (Power y Lamp) destellarán
por 5 segundos.
Nota: Si los indicadores no destellean,
repita el procedimiento.
9
Page 10

FRANÇAIS
Recyclage de la lampe
Hg – Cette lampe contient du mercure.
Veuillez en faire l’élimination en
respectant les lois applicables.
Pour de plus amples renseignements:
WWW.LAMPRECYCLE.ORG
Homologation:
Le numéro de série de ce produit se trouve
sur l’emballage de la lampe. Il est conseillé
de le noter dans l’espace prévu ci-dessous.
Conservez ce manuel et la facture comme
preuve d’achat en cas de vol ou pour toute
réparation sous garantie.
Numéro de modèle TY-LA2004
Numéro de série__________
Avant de contacter un centre de service,
déterminez le problème et effectuez les
vérifications de base indiquées ci-dessous.
Problème Vérification
Pour de l’aide au Canada, contacter
notre service à la clientèle au
(905) 624-5505 ou visiter notre site
web à www.panasonic.ca
Pas d’alimentation
Le témoin de
la lampe
clignote.
• Vérifiez si le couvercle de la lampe est
bien installé.
• Vérifiez si le témoin
de la lampe clignote.
• Le circuit de la lampe
a détecté un
problème.
• Le contact a été établi
immédiatement après
avoir été coupé.
• Attendez que la
lampe refroidisse puis
rétablissez le contact.
• Mauvais fonctionne-
ment du circuit de la
lampe.
• Coupez le contact et
consultez un détaillant.
10
Page 11

FRANÇAIS
Remplacement de la lampe
Vue avant
Emplacement
de la lampe
Tem p
Lamp
Autonomie de la lampe
La lampe du téléprojecteur devrait être
remplacée après environ 10 000 heures de
fonctionnement lors d’une utilisation
normale.
Affichage d’avertissement
Lors de la coupure du contact après 10 000
heures d’utilisation continue, le message
REMPLACE LAMPE apparaît pendant
environ 1 minute lorsque le contact est
rétabli de nouveau.
Un message d’avertissement pour le
remplacement de la lampe apparaît en
rouge au centre de l’écran.
REMPLACE LAMPE
POWER
VOL
CH
TV/VIDEO
Remplacement de la lampe
Renseignements importants
Lors du remplacement de la lampe avec
une nouvelle, suivez les mises en garde qui
suivent.
Mise en garde:La température de lampe
étant très élevée après
son fonctionnement, un
contact direct avec celleci pourrait entraîner des
brûlures. Attendez que la
lampe refroidisse avant
de la remplacer.
Attention :
• Procédez avec soin lors du remplacement de la lampe. Une mauvaise manipulation pourrait engendrer un risque
d’explosion.
• Portez des gants lors du remplacement
de la lampe.
• Si la lampe doit être remplacée lors du
fonctionnement du téléviseur, observez
la marche à suivre ci-dessous pour
mettre l’appareil hors contact et attendez
que la lampe refroidisse complètement.
Marche à suivre
• Appuyez sur l’interrupteur de la
télécommande ou du panneau de
commande du téléviseur pour couper
le contact sur l’appareil.
• Attendez environ une minute jusqu’à
ce que le ventilateur cesse de fonctionner.
Nota: Le ventilateur continue de fonction-
ner pendant environ une minute
après la mise hors contact. Durant
son fonctionnement, ne débranchez
pas le téléviseur et évitez toute coupure d’alimentation telle l’ouverture
du disjoncteur.
• Une fois que le ventilateur est arrêté,
débranchez le cordon d’alimentation
de la prise secteur.
11
Page 12

FRANÇAIS
Marche à suivre pour retirer l’ancienne lampe
• Retirez le couvercle avant. Insérez les
doigts sous le couvercle avant puis
retirez-le de l’écran de projection.
Vis du bloc de la lampe
Couvercle avant
• Lisez d’abord les mises en garde
apposées sur le couvercle. Ensuite,
au moyen d’un tournevis, desserrez la
vis de fixation du couvercle.
Poignée du couvercle
Vis de fixation du couvercle de la lampe
ATTENTION:
• Ne touchez jamais l’ampoule.
• En raison de la haute température
de fonctionnement de l’ampoule,
les huiles naturelles sur vos doigts
pourraient atténuer la résistance du
verre de l’ampoule et ainsi
provoquer une fissure ou une
explosion.
• Avec un tournevis, desserrez la vis du
bloc de la lampe. Ensuite, tenez la
lampe par sa poignée tel qu'illustré et
retirez-la lentement du téléprojecteur.
Nota: Évitez d’échapper ou de heurter
la lampe ; celle-ci pourrait
exploser.
Tournevis
Poignée du bloc de la lampe
MISE EN GARDE:
• La lampe pourrait être très
chaude.
• Manipulez-la avec le plus grand
soin.
ATTENTION:
• La manipulation impropre de la
lampe à haute pression pourrait
en provoquer sa cassure.
• Les fragments de verre pourraient entraîner des blessures
graves.
Marche à suivre pour installer la
lampe de rechange
• Ne manipuler la lampe qu’au moyen
de la poignée.
ATT ENTIO N:
• Ne pas toucher la surface de la
lampe. Si elle est touchée,
l’essuyer avec un chiffon doux et
sec.
• N’utiliser aucun liquide pour
nettoyer la lampe; cela créera
une tache sur l’image.
• Introduisez la lampe de rechange en
prenant soin de l’insérer dans le bon
sens.
Nota: Appuyez sur la pièce identifiée par
la flèche pour vous assurer que
l’insertion est faite convenablement.
12
Page 13

FRANÇAIS
Marche à suivre pour installer la
lampe de rechange (suite)
Remise à zéro du compteur
Après le remplacement de la lampe,
assurez-vous d’effectuer la marche à
suivre qui suit afin de remettre le compteur
à zéro.
Marche à suivre
• Maintenez une pression simultanée
sur la touche de diminution du
VOLUME sur l’appareil et sur la
touche MUTE de la télécommande
pendant 3 secondes.
Flèche
• Remettez en place le couvercle avant.
• Resserrez les vis avec un tournevis
(s’assurer que les vis sont bien
serrées).
Nota:
• Disposez de la lampe usée de
la manière appropriée.
• Fixez solidement le bloc de la
lampe et la porte du boîtier de
la lampe. Autrement, le circuit
de protection s’activera et la
lampe ne pourra être mise
sous tension.
• Remettez en place le couvercle arant.
Couvercle avant
• Rebranchez le cordon d’alimentation
dans la prise secteur.
• Appuyez sur l’interrupteur pour établir
le contact.
Nota: L’appareil se met hors contact à
chaque fois le couvercle retiré.
Tem p Lam p
Témoin de
la lampe
POWER
Témoin
d’alimentation
E
T
U
M
Diminution
du volume
VOL
CH
TV/VIDEO
Touche MUTE sur
la télécommande
• Si tout a bien fonctionné, les 2
témoins sur l’avant de l’appareil
(alimentation et lampe) clignotent
pendant 5 secondes.
Nota: Si les témoins ne clignotent pas,
répéter la marche à suivre
ci-dessus.
13
Page 14

Garantie limitée (pour les lampes vendues au Canada seulement)
Panasonic Canada Inc.
5770 Ambler Drive, Mississauga, Ontario L4W 2T3
Certificat de garantie limitée Panasonic
Panasonic Canada Inc. garantit cet appareil contre tout vice de fabrication et accepte, le cas échéant,
de remédier à toute défectuosité pendant la période indiquée ci-dessous et commençant à partir
de la date d’achat original.
Lampe de rechange - quatre-vingt-dix (90) jours
LIMITATIONS ET EXCLUSIONS
Cette garantie n’est valide que pour les appareils achetés au Canada et ne couvre pas les dommages
résultant d’une installation incorrecte, d’un usage abusif ou impropre ainsi que ceux découlant d’un accident en transit ou de manipulation. De plus, si l’appareil a été altéré ou transformé de façon à modifier
l’usage pour lequel il a été conçu ou utilisé à des fins commerciales, cette garantie devient nulle et sans
effet. Les piles sèches ne sont pas couvertes sous cette garantie.
Cette garantie est octroyée à l’utilisateur original seulement.
La facture ou autre preuve de la date d’achat original sera exigée pour toute réparation sous le couvert de
cette garantie.
CETTE GARANTIE LIMITÉE ET EXPRESSE REMPLACE TOUTE AUTRE GARANTIE,
EXPRESSE OU IMPLICITE, EXCLUANT LES GARANTIES IMPLICITES DU CARACTÈRE
ADÉQUAT POUR LA COMMERCIALISATION OU UN USAGE PARTICULIER.
PANASONIC N’AURA D’OBLIGATION EN AUCUNE CIRCONSTANCE POUR TOUT DOMMAGE
DIRECT, INDIRECT OU CONSÉCUTIF.
Certaines juridictions ne reconnaissent pas les exclusions ou limitations de dommages indirects ou consécutifs, ou les exclusions de garanties implicites. Dans de tels cas, les limitations stipulées ci-dessus
peuvent ne pas être applicables.
RÉPARATION SOUS GARANTIE
Pour de l’aide sur le fonctionnement de l’appareil ou pour toute demande d’information,
veuillez contacter votre détaillant ou notre service à la clientèle au :
N° de téléphone : N° de télécopieur : Site Internet :
(905) 624-5505 (905) 238-2360 www.panasonic.ca
Pour la réparation des appareils, veuillez consulter :
• votre détaillant, lequel pourra vous renseigner sur le centre de service agréé le plus près de
votre domicile;
• notre service à la clientèle au (905) 624-5505 ou www.panasonic.ca;
• un de nos centres de service de la liste ci-dessous :
Richmond, ColombieBritannique
Panasonic Canada Inc.
12111 Riverside Way
Richmond, BC V6W 1K8
Tél. : (604) 278-4211
Téléc. : (604) 278-5627
Emballer soigneusement l’appareil, de préférence dans le carton d’origine, et l’expédier port payé et
assuré au centre de service. Inclure la description détaillée de la panne et la preuve de la date d’achat
original.
Calgary, Alberta
Panasonic Canada Inc.
6835-8th St. N.E.
Calgary, AB T2E 7H7
Tél. : (403) 295-3955
Téléc. : (403) 274-5493
Mississauga, Ontario
Panasonic Canada Inc.
5770 Ambler Dr.
Mississauga, ON L4W 2T3
Tél. : (905) 624-8447
Téléc. : (905) 238-2418
Expédition de l’appareil à un centre de service
Lachine, Québec
Panasonic Canada Inc.
3075, rue Louis A.
Amos
Lachine, QC H8T 1C4
Tél. : (514) 633-8684
Téléc. : (514) 633-8020
14
Page 15

LIMITED WARRANTY (FOR LAMP UNIT SOLD IN CANADA ONLY)
Panasonic Canada Inc.
5770 Ambler Drive, Mississauga, Ontario L4W 2T3
PANASONIC PRODUCT – LIMITED WARRANTY
Panasonic Canada Inc. warrants this product to be free from defects in material and workmanship
and agrees to remedy any such defect for a period as stated below from the date of original
purchase.
Replacement Lamp Unit – ninety (90) days
LIMITATIONS AND EXCLUSIONS
This warranty does not apply to products purchased outside Canada or to any product which has been
improperly installed, subjected to usage for which the product was not designed, misused or abused, damaged
during shipping, or which has been altered or repaired in any way that affects the reliability or detracts from the
performance, nor does it cover any product which is used commercially. Dry cell batteries are also excluded from
coverage under this warranty.
This warranty is extended to the original end user purchaser only. A purchase receipt or other proof of date of
original purchase is required before warranty service is performed.
THIS EXPRESS, LIMITED WARRANTY IS IN LIEU OF ALL OTHER WARRANTIES, EXPRESS
OR IMPLIED, EXCLUDING ANY IMPLIED WARRANTIES OF MERCHANTABILITY OR FITNESS
FOR A PARTICULAR PURPOSE.
IN NO EVENT WILL PANASONIC CANADA INC. BE LIABLE FOR ANY SPECIAL, INDIRECT OR
CONSEQUENTIAL DAMAGES.
In certain instances, some jurisdictions do not allow the exclusion or limitation of incidental or consequential
damages, or the exclusion of implied warranties, so the above limitations and exclusions may not be applicable.
WARRANTY SERVICE
For product operation and information assistance, please contact your Dealer or our Customer Care Centre
at: Telephone #: (905) 624-5505 Fax #: (905) 238-2360 Web: www.panasonic.ca
For product repairs, please contact one of the following:
• Your Dealer who will inform you of an authorized Servicentre nearest you.
• Our Customer Care Centre at (905) 624-5505 or www.panasonic.ca
• A Panasonic Factory Servicentre listed below:
Richmond, British Columbia
Calgary, Alberta
Mississauga, Ontario
Lachine, Québec
Panasonic Canada Inc.
12111 Riverside Way
Richmond, BC V6W 1K8
Tel: (604) 278-4211
Fax: (604) 278-5627
Panasonic Canada Inc.
6835-8th St. N. E.
Calgary, AB T2E 7H7
Tel: (403) 295-3955
Fax: (403) 274-5493
Panasonic Canada Inc.
5770 Ambler Dr.
Mississauga, ON L4W 2T3
Tel: (905) 624-8447
Fax: (905) 238-2418
Panasonic Canada Inc.
3075, rue Louis A. Amos
Lachine, QC H8T 1C4
Tel: (514) 633-8684
Fax: (514) 633-8020
IF YOU SHIP THE PRODUCT TO A SERVICENTRE
Carefully pack and send prepaid, adequately insured and preferably in the original carton. Include
details of the defect claimed, and proof of date of original purchase.
15
Page 16

LIMITED WARRANTY (FOR LAMP UNIT SOLD IN USA ONLY)
PANASONIC CONSUMER ELECTRONICS COMPANY, PANASONIC SALES COMPANY, DIVISION OF:
DIVISION OF:MATSUSHITA ELECTRIC CORPORATIONMATSUSHITA ELECTRIC OF PUERTO RICO, INC.
OF AMERICA
One Panasonic Way San Gabriel Industrial Park
Secaucus, New Jersey 07094 Carolina, Puerto Rico 00985
Ave. 65 de Infanteria, Km. 9.5
Panasonic®Lamp Unit Limited Warranty
Limited Warranty Coverage
If your Lamp unit does not work properly because of a defect in materials or workmanship, Panasonic
Consumer Electronics Company or Panasonic Sales Company (collectively referred to as “the warrantor”)
will, for the length of the period indicated below, which starts with the date of original purchase (“warranty
period”), replace it with a new lamp unit.
For ninety (90) days – In exchange for defective Lamp Unit
You must Mail-In your Lamp unit during the warranty period. This warranty only applies to products purchased and serviced in the United States or Puerto Rico. This warranty is extended only to the original
purchaser of a new product which was not sold “as is”.
Mail-In Service
For assistance in obtaining service in the United States please contact:
Panasonic Services Company Panasonic Plus Department
20421 84
If a Lamp unit defect occurs during the warranty period the purchaser will be required to furnish a sales
receipt/proof of purchase indicating date of purchase. Also, purchaser will be responsible for shipping the
Lamp unit to the above address.
For assistance in Puerto Rico call Panasonic Sales Company
(787)-750-4300 or fax (787)-768-2910.
th
Avenue South, Kent, Washington 98032
Tel: 1-800-833-9626 Fax:1-800-237-9080
Limited Warranty Limits And Exclusions
This warranty ONLY COVERS failures due to defects in materials or workmanship, and DOES NOT
COVER normal wear and tear or cosmetic damage. The warranty ALSO DOES NOT COVER damages
which occurred in shipment, or failures which are caused by products not supplied by the warrantor, or failures which result from accidents, misuse, abuse, neglect, mishandling, misapplication, alteration, faulty
installation, set-up adjustments, misadjustment of consumer controls, improper maintenance, power line
surge, lightning damage, modification, or commercial use (such as in a hotel, office, restaurant, or other
business), rental use of the product, service by anyone other than a Factory Servicenter or other Authorized Servicer, or damage that is attributable to acts of God.
THERE ARE NO EXPRESS WARRANTIES EXCEPT AS LISTED UNDER “LIMITED WARRANTY
COVERAGE”. THE WARRANTOR IS NOT LIABLE FOR INCIDENTAL OR CONSEQUENTIAL
DAMAGES RESULTING FROM THE USE OF THIS PRODUCT, OR ARISING OUT OF ANY BREACH
OF THIS WARRANTY.
servicer. The items listed are not exclusive, but are for illustration only.)
IMPLIED WARRANTIES, INCLUDING THE WARRANTY OF MERCHANTABILITY, ARE LIMITED TO
THE PERIOD OF THE LIMITED WARRANTY.
Some states do not allow the exclusion or limitation of incidental or consequential damages, or
limitations on how long an implied warranty lasts, so the exclusions may not apply to you.
This warranty gives you specific legal rights and you may also have others rights which vary from
state to state. If a problem with this product develops during or after the warranty period, you may
contact your dealer or Servicenter. If the problem is not handled to your satisfaction, then write to the
warrantor’s Consumer Affairs Department at the addresses listed for the warrantor.
PARTS AND SERVICE WHICH ARE NOT COVERED BY THIS LIMITED WARRANTY ARE YOUR
RESPONSIBILITY.
(As examples, this excludes damages for lost time, travel to and from the
ALL EXPRESS AND
16
 Loading...