

Panasonic tc-xxps14, tc-xxpx14, tc-xxs1, tc-pxxu1, tc-pxxx1_c1 installation
Firmware Installation Instructions
NOTE: Items in [ ] are buttons on the TV remote.
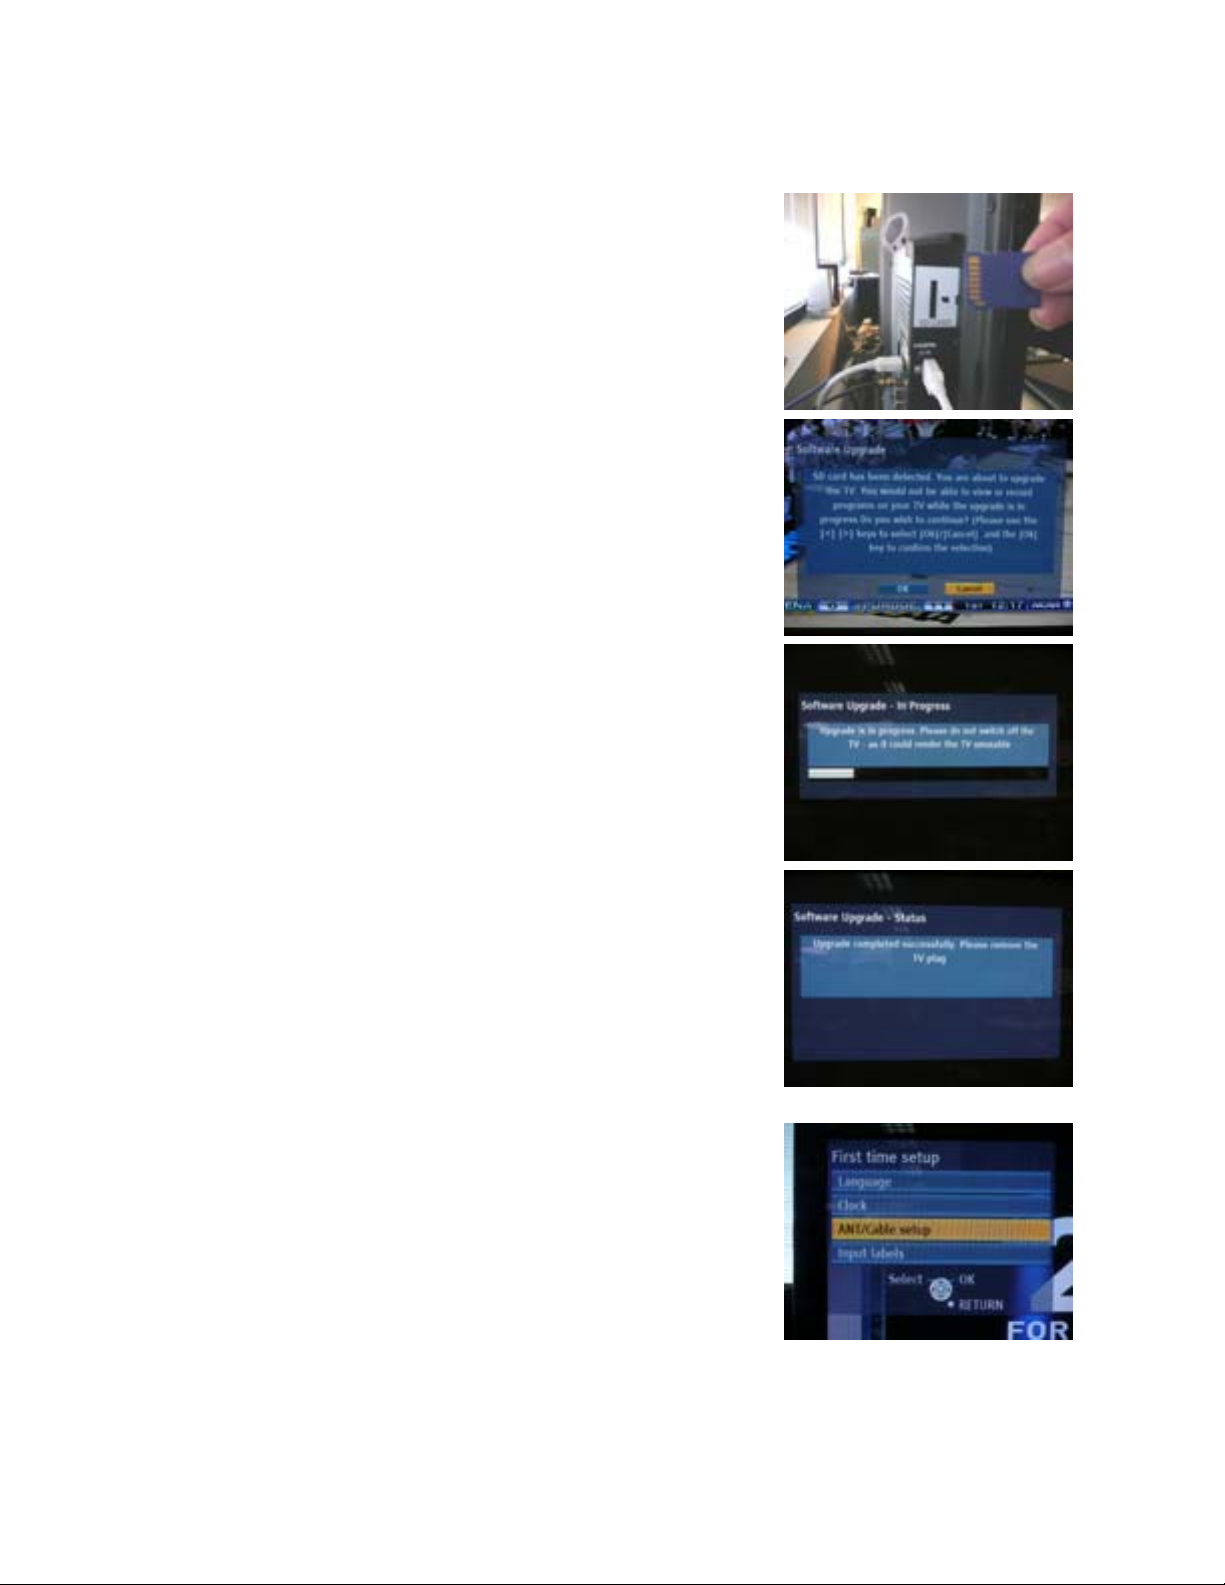
1. Power the TV on.
2. • Ensure the LOCK switch on the SD Card is in the
UNLOCKED (up) position.
• Ensure the beveled corner on the SD Card is facing
down and the pins on the SD Card are facing the
rear of the TV.
• Insert the SD Card into the SD Card Slot until a
click is heard.
3. • The screen at right will be displayed after several
moments.
• Press the [LEFT ARROW] to highlight OK then
press [OK].
4. “Software Upgrade – In Progress” will be displayed.
CAUTIONS:
• Do not press any buttons on the TV or the
remote control during the firmware update.
• Do not unplug the power cord during the
firmware update.
5. “Software Upgrade – Status” will be displayed w it h the
message “Upgrade completed successfully. Please
remove the TV plug.”
When this message is displayed:
• Unplug the TV’s power cord (either from the back
of the TV or the electrical outlet).
• Remove the SD Card from the SD Card Slot.
• Wait a minimum of 2 minutes.
• Plug the TV’s power cord back in.
• Power the TV back on.
6. • The First Time Setup screen should be displayed.
• Press the [DOWN ARROW] to highlight
ANT/CABLE SETUP then press [OK].
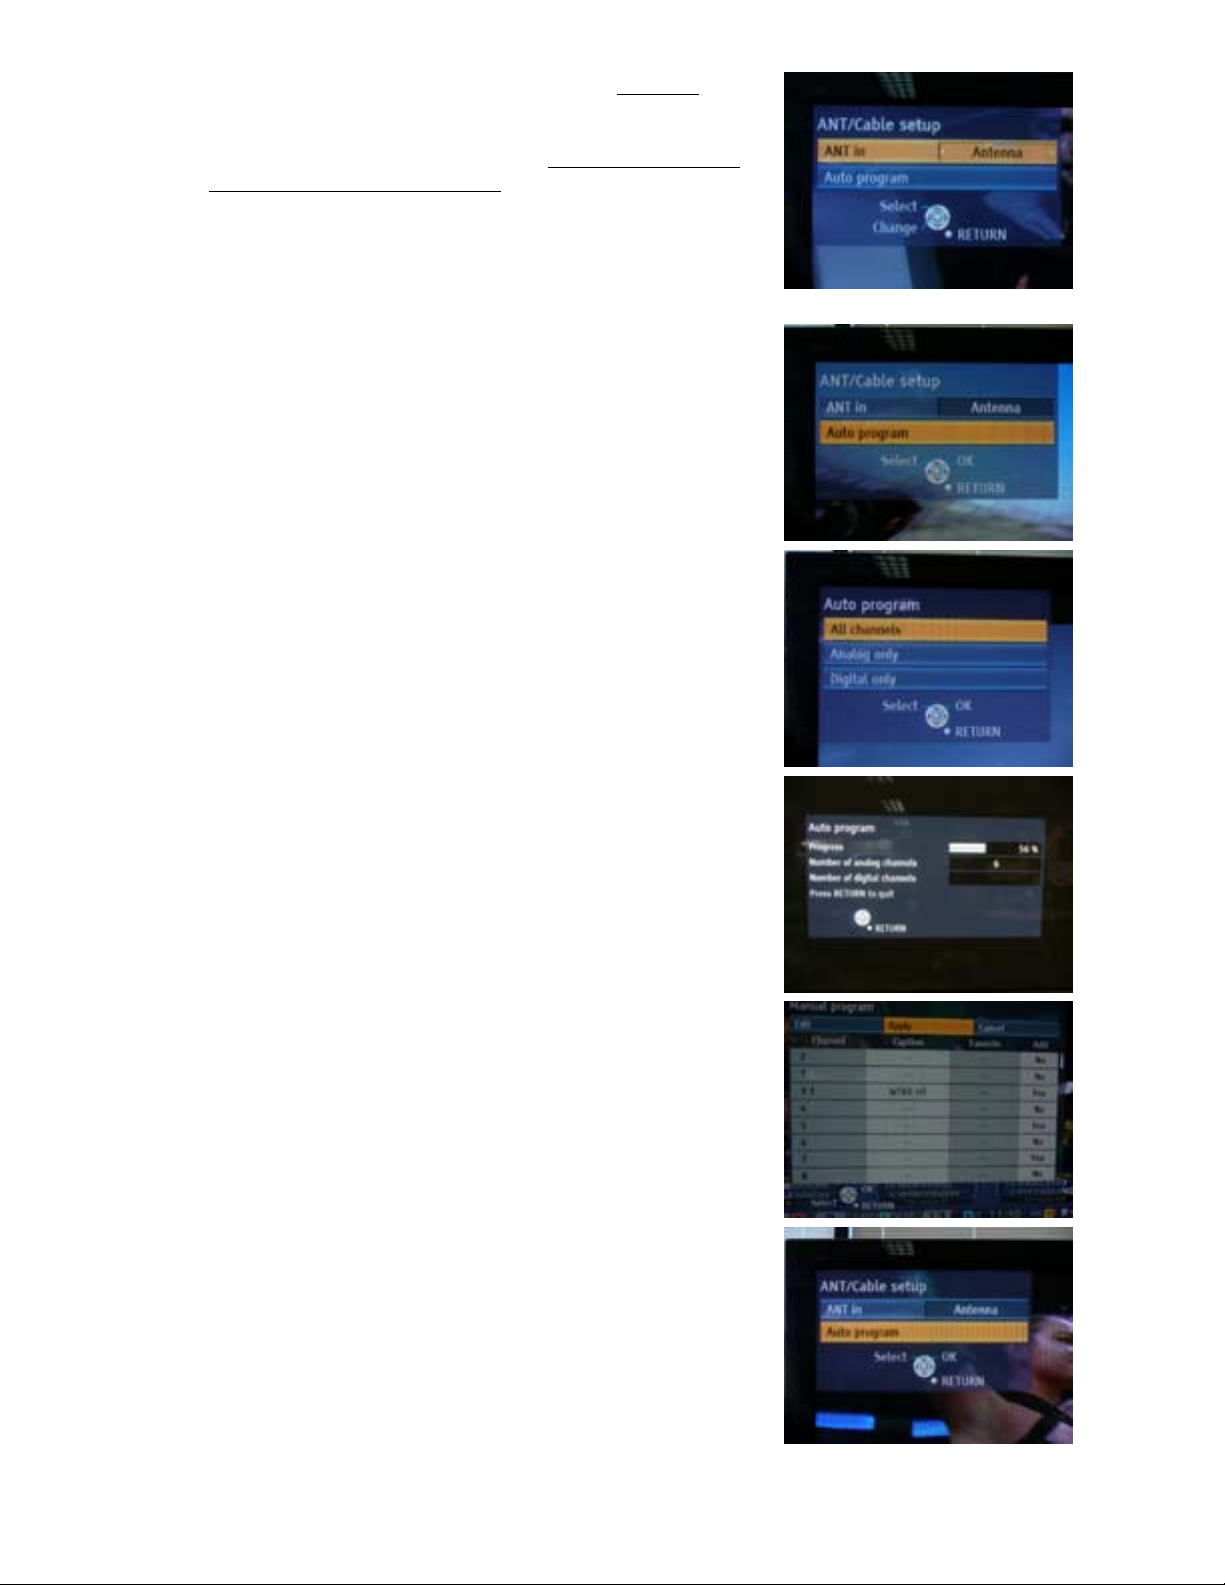
7. Verify ANT IN is set to ANTENNA if an antenna is
connected to the ANT/CABLE IN connector.
Verify ANT IN is set to CABLE if
direct (basic) cable
service (without a cable box) is connected to the
ANT/CABLE IN connector.
Pressing the [LEFT ARROW] or [RIGHT ARROW]
will cycle between ANTENNA, CABLE, and NOT
USED.
8. Press the [DOWN ARROW] to highlight AUTO
PROGRAM then press [OK].
9. Verify ALL CHANNELS is highlighted then press
[OK].
10. The screen at right will be displayed as the TV scans
for analog then digital channels.
11. • The screen at right will be displayed once the
channel scan is complete.
• Verify APPLY is highlighted then press [OK].
12. • The screen at right will be displayed.
• Press [EXIT] to exit the menu.
13. Verify the issue reported has been resolved.
 Loading...