

Page 1

VT60 series
M0413-0M0413-0
Page 2

Watching TV
my Home Screen
Features 12
Features 12Features 12
How to use 13
How to use 13How to use 13
Settings 14
Settings 14Settings 14
Cable / Satellite / Fiber Optic box
Initial setting 16
Initial setting 16Initial setting 16
Antenna / Cable service without a box
Initial setting 17
Initial setting 17Initial setting 17
Select channels 18
Select channels 18Select channels 18
Favorite channels 19
Favorite channels 19Favorite channels 19
Closed caption 20
Closed caption 20Closed caption 20
SAP 21
SAP 21SAP 21
Other 22
Other 22Other 22
Blu-ray, DVD, Game Console, etc.
Connecting and viewing 23
Connecting and viewing 23Connecting and viewing 23
HDMI connection notice 26
HDMI connection notice 26HDMI connection notice 26
HDMI connection caution 27
HDMI connection caution 27HDMI connection caution 27
Input signal 28
Input signal 28Input signal 28
Useful features
Eco navigation 29
Eco navigation 29Eco navigation 29
Voice guidance 30
Voice guidance 30Voice guidance 30
Voice guidance features 31
Voice guidance features 31Voice guidance features 31
Voice guidance settings 32
Voice guidance settings 32Voice guidance settings 32
Voice control 33
Voice control 33Voice control 33
How to use the voice control 34
How to use the voice control 34How to use the voice control 34
2
Page 3

Voice control settings 35
Voice control settings 35Voice control settings 35
Built-in camera 36
Built-in camera 36Built-in camera 36
For best picture
Picture mode 37
Picture mode 37Picture mode 37
Auto brightness (ECO) 39
Auto brightness (ECO) 39Auto brightness (ECO) 39
Aspect 40
Aspect 40Aspect 40
Aspect info. 42
Aspect info. 42Aspect info. 42
Lock settings 43
Lock settings 43Lock settings 43
Copy adjustments 44
Copy adjustments 44Copy adjustments 44
Pro settings 45
Pro settings 45Pro settings 45
For best audio
Basic settings 49
Basic settings 49Basic settings 49
Advanced settings 51
Advanced settings 51Advanced settings 51
3D
Notice 53
Notice 53Notice 53
Parts name and functions 54
Parts name and functions 54Parts name and functions 54
Registration 56
Registration 56Registration 56
Replacing the battery 57
Replacing the battery 57Replacing the battery 57
Viewing 3D 58
Viewing 3D 58Viewing 3D 58
Change 3D ⇔ 2D 59
Change 3D ⇔ 2D 59Change 3D ⇔ 2D 59
Adjust 3D images 60
Adjust 3D images 60Adjust 3D images 60
3D settings 61
3D settings 613D settings 61
Using Internet services
Connect to network
Network connections 63
Network connections 63Network connections 63
Network settings
3
Page 4

Setting menu 65
Setting menu 65Setting menu 65
Network connection/Network status 66
Network connection/Network status 66Network connection/Network status 66
VIERA remote settings 67
VIERA remote settings 67VIERA remote settings 67
Network link 68
Network link 68Network link 68
Software update 69
Software update 69Software update 69
New software notice 70
New software notice 70New software notice 70
How to use
Operate 71
Operate 71Operate 71
Home network "DLNA"
Get started
Information 72
Information 72Information 72
Connect to network
Network connections 73
Network connections 73Network connections 73
Network settings
Setting menu 76
Setting menu 76Setting menu 76
Network connection/Network status 77
Network connection/Network status 77Network connection/Network status 77
VIERA remote settings 78
VIERA remote settings 78VIERA remote settings 78
Network link 79
Network link 79Network link 79
Software update 80
Software update 80Software update 80
New software notice 81
New software notice 81New software notice 81
Photos
Viewing Photos 82
Viewing Photos 82Viewing Photos 82
Photo view 83
Photo view 83Photo view 83
Options menu 84
Options menu 84Options menu 84
Using slideshow 85
Using slideshow 85Using slideshow 85
Slideshow settings 86
Slideshow settings 86Slideshow settings 86
4
Page 5

Videos
Viewing Videos 87
Viewing Videos 87Viewing Videos 87
Video view 88
Video view 88Video view 88
Options menu 89
Options menu 89Options menu 89
Music
Playing Music 90
Playing Music 90Playing Music 90
Music view 91
Music view 91Music view 91
Options menu 92
Options menu 92Options menu 92
Data information
Compatible Data format 93
Compatible Data format 93Compatible Data format 93
Notice 95
Notice 95Notice 95
Media player
Get started
Information 96
Information 96Information 96
Media warning messages 97
Media warning messages 97Media warning messages 97
SD card handling cautions 98
SD card handling cautions 98SD card handling cautions 98
Photos
Viewing Photos 99
Viewing Photos 99Viewing Photos 99
Photo view 100
Photo view 100Photo view 100
Sort the photos 101
Sort the photos 101Sort the photos 101
Options menu 102
Options menu 102Options menu 102
Multi shot 3D 103
Multi shot 3D 103Multi shot 3D 103
Thumbnails size 104
Thumbnails size 104Thumbnails size 104
Using slideshow 105
Using slideshow 105Using slideshow 105
Slideshow settings 106
Slideshow settings 106Slideshow settings 106
Soundtrack settings 108
Soundtrack settings 108Soundtrack settings 108
5
Page 6

Videos
Viewing Videos 109
Viewing Videos 109Viewing Videos 109
Video view 110
Video view 110Video view 110
Options menu 111
Options menu 111Options menu 111
Music
Playing Music 112
Playing Music 112Playing Music 112
Music view 113
Music view 113Music view 113
Options menu 114
Options menu 114Options menu 114
Data information
Compatible Data format 115
Compatible Data format 115Compatible Data format 115
Notice 117
Notice 117Notice 117
Convenience features
Using Apps list
Features 118
Features 118Features 118
How to use 119
How to use 119How to use 119
Settings 120
Settings 120Settings 120
Timer
Setting menu 121
Setting menu 121Setting menu 121
Timer (On/Off timer) 122
Timer (On/Off timer) 122Timer (On/Off timer) 122
Sleep (Off timer) 123
Sleep (Off timer) 123Sleep (Off timer) 123
Parental control
Setting menu 124
Setting menu 124Setting menu 124
Parental control 125
Parental control 125Parental control 125
Password setting 127
Password setting 127Password setting 127
Parental control ratings 128
Parental control ratings 128Parental control ratings 128
Closed caption
6
Page 7

Setting menu 130
Setting menu 130Setting menu 130
Closed caption 131
Closed caption 131Closed caption 131
Closed caption notice 133
Closed caption notice 133Closed caption notice 133
VIERA Link ™ "HDAVI Control ™"
Basic feature 134
Basic feature 134Basic feature 134
Connecting note 135
Connecting note 135Connecting note 135
VIERA Link connections 137
VIERA Link connections 137VIERA Link connections 137
VIERA Link settings 140
VIERA Link settings 140VIERA Link settings 140
VIERA Link settings feature 141
VIERA Link settings feature 141VIERA Link settings feature 141
VIERA Link 143
VIERA Link 143VIERA Link 143
VIERA Link menu 144
VIERA Link menu 144VIERA Link menu 144
Using Voice guidance
Voice guidance 146
Voice guidance 146Voice guidance 146
Voice guidance features 147
Voice guidance features 147Voice guidance features 147
Voice guidance settings 148
Voice guidance settings 148Voice guidance settings 148
Using Voice control
Voice control 149
Voice control 149Voice control 149
How to use the voice control 150
How to use the voice control 150How to use the voice control 150
Voice control settings 151
Voice control settings 151Voice control settings 151
Using Built-in camera
Built-in camera 152
Built-in camera 152Built-in camera 152
Using Electronic Touch Pen
Information 153
Information 153Information 153
Touch Pen settings 154
Touch Pen settings 154Touch Pen settings 154
Using Touch Pen 155
Using Touch Pen 155Using Touch Pen 155
Using Touch Pad Controller
7
Page 8

Features 156
Features 156Features 156
VIERA Touch Pad settings 157
VIERA Touch Pad settings 157VIERA Touch Pad settings 157
Using Bluetooth devices
Settings 158
Settings 158Settings 158
Bluetooth settings 159
Bluetooth settings 159Bluetooth settings 159
Control by Smartphone, etc.
Smartphone remote 160
Smartphone remote 160Smartphone remote 160
Remote control via IP 161
Remote control via IP 161Remote control via IP 161
Using USB Keyboard / Gamepad
Keyboard 162
Keyboard 162Keyboard 162
Gamepad 163
Gamepad 163Gamepad 163
All settings
How to use
Setting menu 164
Setting menu 164Setting menu 164
Picture
Basic settings 165
Basic settings 165Basic settings 165
Pro settings 168
Pro settings 168Pro settings 168
Advanced picture 172
Advanced picture 172Advanced picture 172
Screen settings 174
Screen settings 174Screen settings 174
3D settings 176
3D settings 1763D settings 176
Other settings 178
Other settings 178Other settings 178
Sound
Basic settings 179
Basic settings 179Basic settings 179
Voice guidance settings 181
Voice guidance settings 181Voice guidance settings 181
Advanced settings 182
Advanced settings 182Advanced settings 182
DIGITAL AUDIO OUT terminal 184
DIGITAL AUDIO OUT terminal 184DIGITAL AUDIO OUT terminal 184
8
Page 9

Network
Network settings 185
Network settings 185Network settings 185
Timer
Setting menu 187
Setting menu 187Setting menu 187
Clock settings 188
Clock settings 188Clock settings 188
Sleep (Off timer) 189
Sleep (Off timer) 189Sleep (Off timer) 189
Auto turn off settings 190
Auto turn off settings 190Auto turn off settings 190
Timer (On/Off timer) 191
Timer (On/Off timer) 191Timer (On/Off timer) 191
Setup
Setting menu 192
Setting menu 192Setting menu 192
Eco navigation 193
Eco navigation 193Eco navigation 193
Voice control settings 194
Voice control settings 194Voice control settings 194
USB device setup 195
USB device setup 195USB device setup 195
Touch Pen setup 196
Touch Pen setup 196Touch Pen setup 196
VIERA Touch Pad settings 197
VIERA Touch Pad settings 197VIERA Touch Pad settings 197
Bluetooth settings 198
Bluetooth settings 198Bluetooth settings 198
Parental control 199
Parental control 199Parental control 199
Password setting 201
Password setting 201Password setting 201
Parental control ratings 202
Parental control ratings 202Parental control ratings 202
ANTENNA/Cable setup 204
ANTENNA/Cable setup 204ANTENNA/Cable setup 204
Language settings 206
Language settings 206Language settings 206
Display customization 207
Display customization 207Display customization 207
Closed caption 208
Closed caption 208Closed caption 208
Closed caption notice 210
Closed caption notice 210Closed caption notice 210
VIERA Link settings 211
VIERA Link settings 211VIERA Link settings 211
System settings 212
System settings 212System settings 212
9
Page 10

Other settings 213
Other settings 213Other settings 213
Useful settings 214
Useful settings 214Useful settings 214
Support / FAQ
Help menu
Using Help menu 215
Using Help menu 215Using Help menu 215
FAQ
Picture - Viewing 216
Picture - Viewing 216Picture - Viewing 216
Picture - Snowy / none 217
Picture - Snowy / none 217Picture - Snowy / none 217
Picture - Distortion 218
Picture - Distortion 218Picture - Distortion 218
Picture - Continue 219
Picture - Continue 219Picture - Continue 219
Sound - None 220
Sound - None 220Sound - None 220
Sound - Unusual 221
Sound - Unusual 221Sound - Unusual 221
Networking 222
Networking 222Networking 222
Software update 223
Software update 223Software update 223
3D - Viewing 224
3D - Viewing 2243D - Viewing 224
3D - Format 225
3D - Format 2253D - Format 225
Voice guidance 226
Voice guidance 226Voice guidance 226
Voice control 227
Voice control 227Voice control 227
Built-in camera 228
Built-in camera 228Built-in camera 228
VIERA Touch Pad Controller 229
VIERA Touch Pad Controller 229VIERA Touch Pad Controller 229
Electronic Touch Pen 230
Electronic Touch Pen 230Electronic Touch Pen 230
Eco-Navigation (Eco-Navi) 231
Eco-Navigation (Eco-Navi) 231Eco-Navigation (Eco-Navi) 231
Other 232
Other 232Other 232
Menu - Gray-out or missing items 233
Menu - Gray-out or missing items 233Menu - Gray-out or missing items 233
Factory defaults 234
Factory defaults 234Factory defaults 234
Care and Cleaning
10
Page 11
Display panel 235
Display panel 235Display panel 235
Cabinet 236
Cabinet 236Cabinet 236
Pedestal / Power cord 237
Pedestal / Power cord 237Pedestal / Power cord 237
3D Eyewear 238
3D Eyewear 2383D Eyewear 238
Back panel (Cooling fan) 239
Back panel (Cooling fan) 239Back panel (Cooling fan) 239
Meaning of signs :
Meaning of signs :
Meaning of signs :
Press the Remote control button
Press the Remote control button
Press the Remote control button
INFO Letters in box : Remote control button
INFO Letters in box : Remote control button
INFO Letters in box : Remote control button
MENU Letters in Cyan : Menus on screen display
MENU Letters in Cyan : Menus on screen display
MENU Letters in Cyan : Menus on screen display
11
Page 12
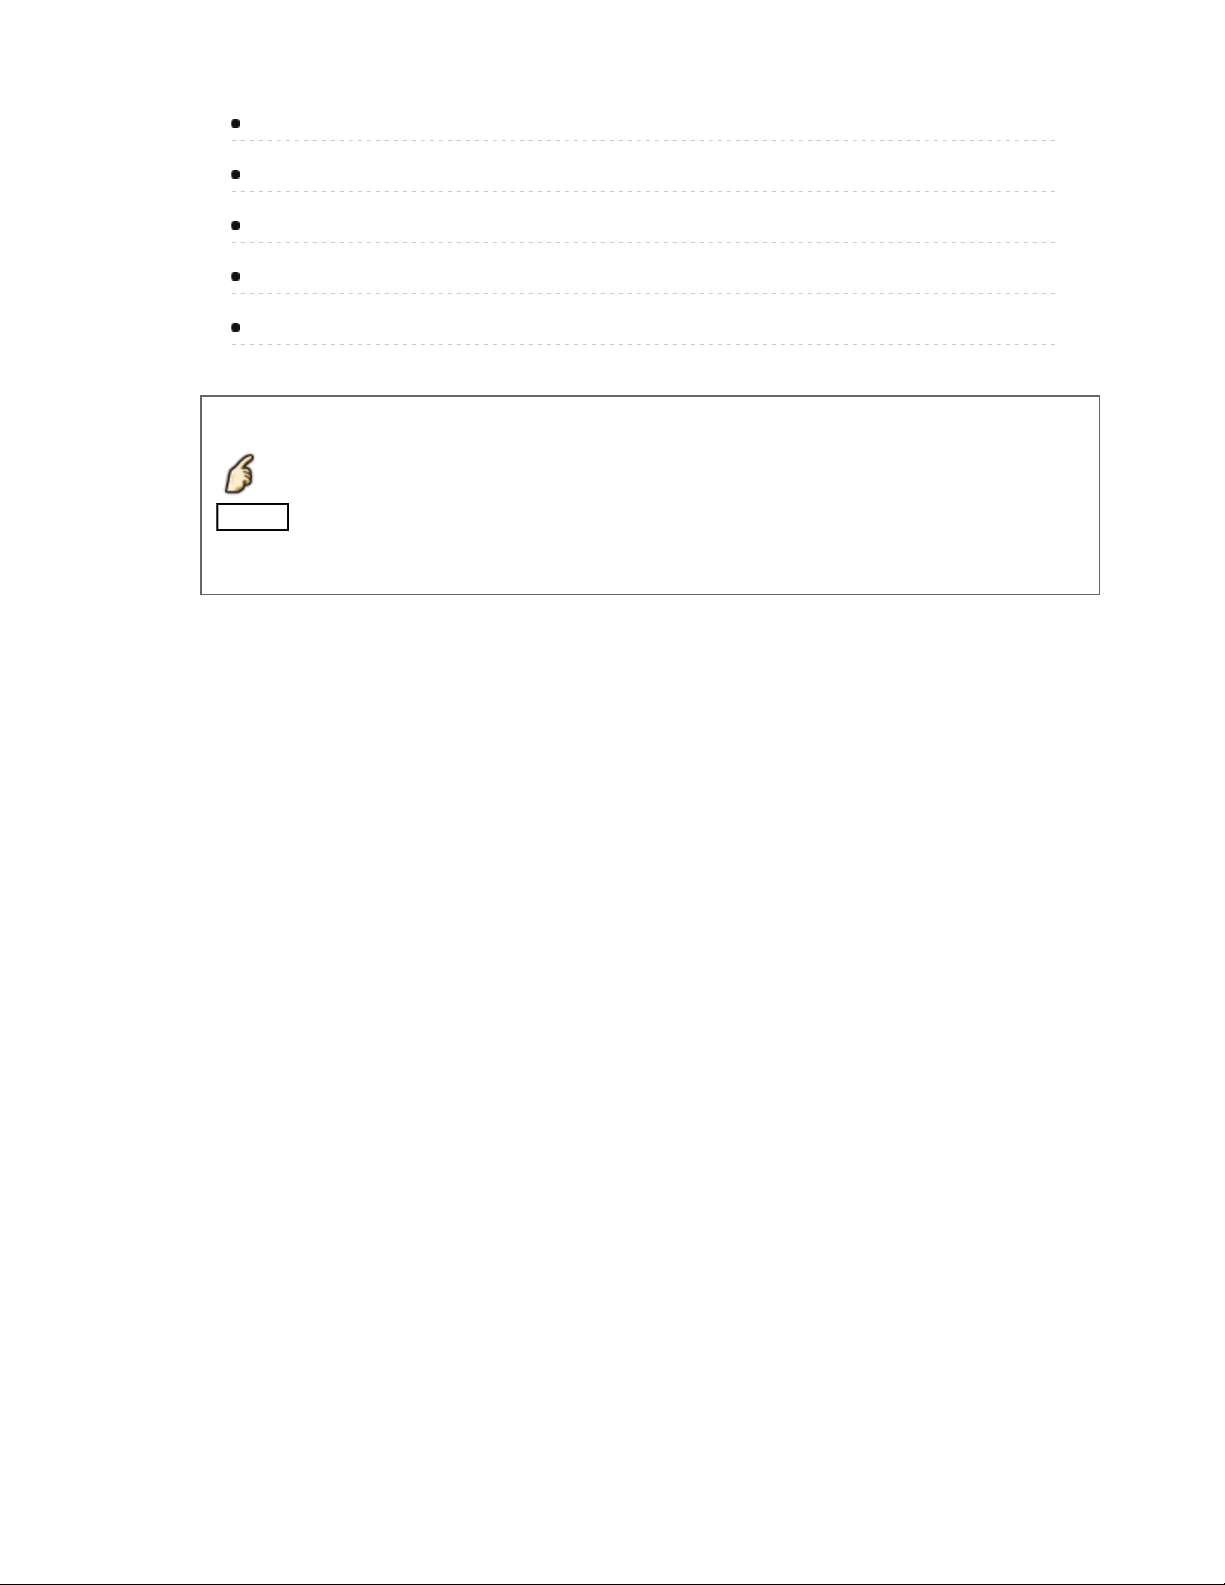
Watching TV
my Home Screen
Features
my Home Screen is a gateway to the TV, applications, and more. It provides
my Home Screen is a gateway to the TV, applications, and more. It provides
my Home Screen is a gateway to the TV, applications, and more. It provides
easy access to special features such as the Media Player, videos, games,
easy access to special features such as the Media Player, videos, games,
easy access to special features such as the Media Player, videos, games,
communication tools, etc.
communication tools, etc.
communication tools, etc.
Home Screen
Home ScreenHome ScreenHome ScreenHome Screen
(Example)
(Example)(Example)
Home Screen
Home Screen
Home Screen
Selected content screen (TV, application, etc.)
Selected content screen (TV, application, etc.)
Selected content screen (TV, application, etc.)
Home Screen Selection
Home Screen Selection
Home Screen Selection
- Choose your preferred Home Screen layout.
- Choose your preferred Home Screen layout.
- Choose your preferred Home Screen layout.
12 (0100101)
Page 13
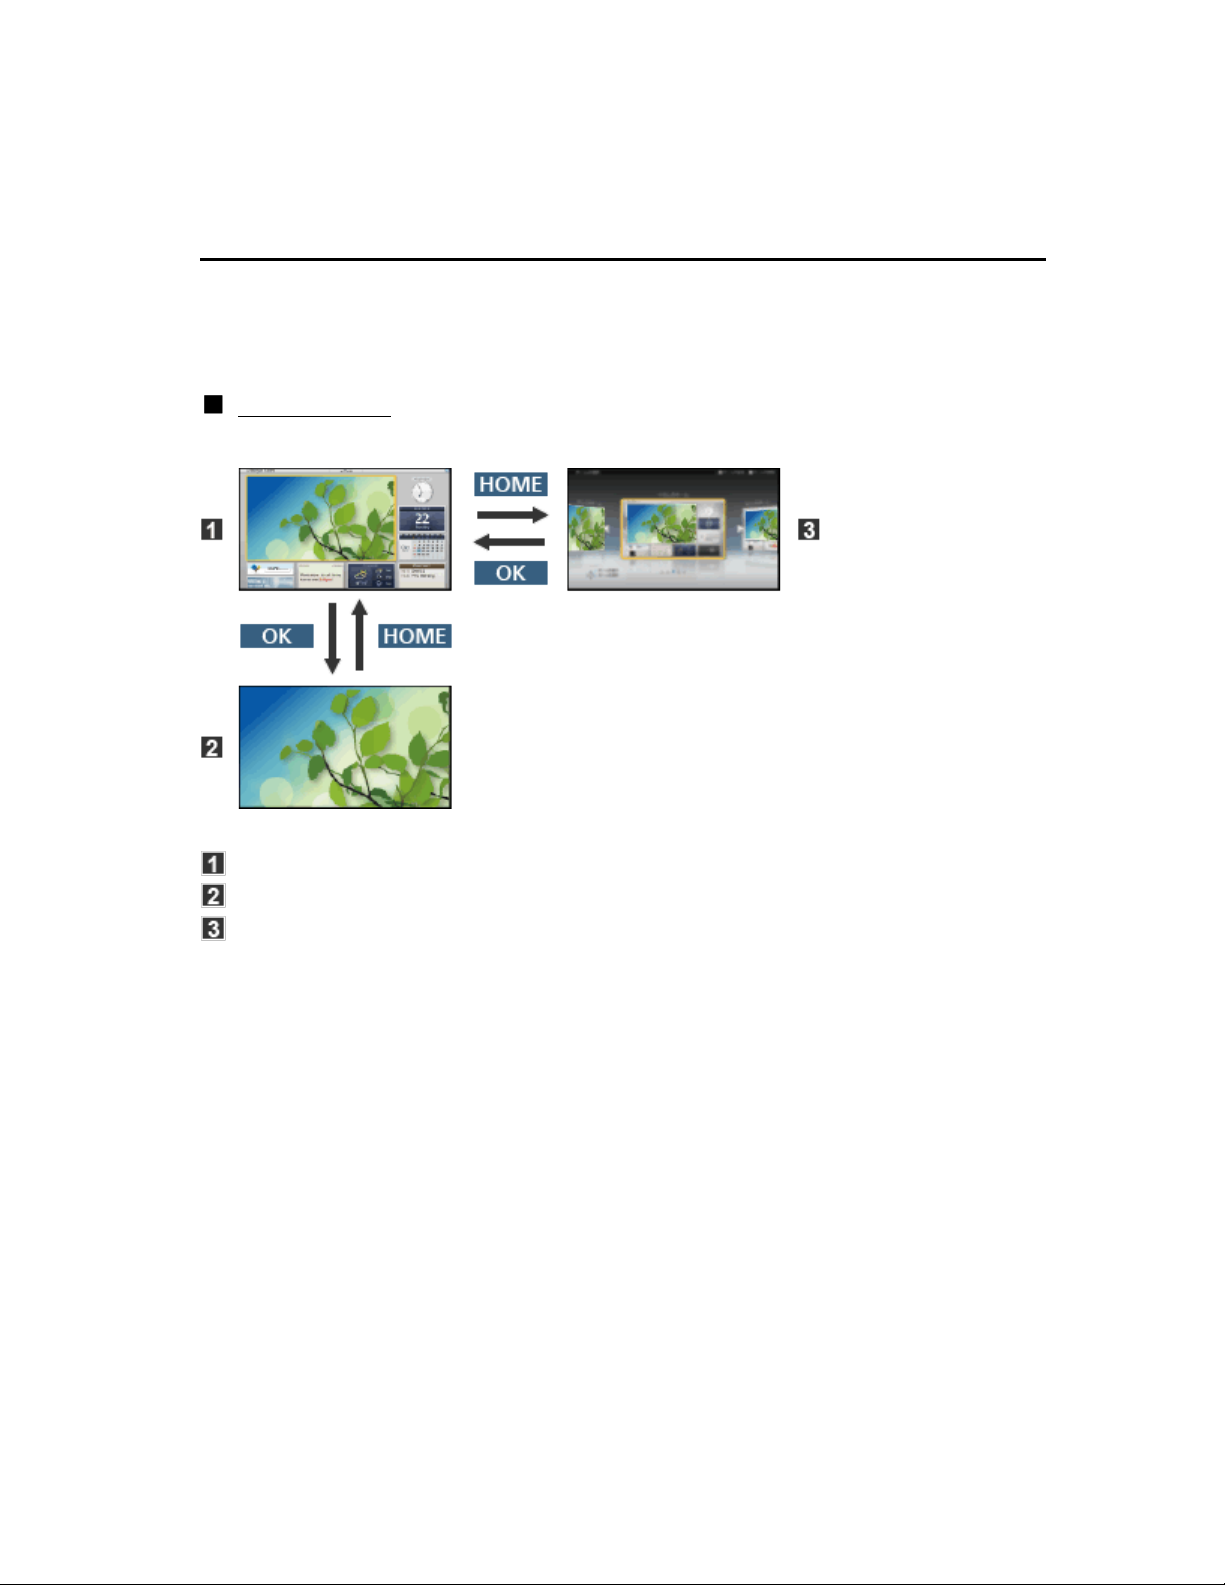
Watching TV
my Home Screen
How to use
The Home Screen provides access to special features such as the Media
The Home Screen provides access to special features such as the Media
The Home Screen provides access to special features such as the Media
Player, TV, Internet content, data services, communication tools, etc.
Player, TV, Internet content, data services, communication tools, etc.
Player, TV, Internet content, data services, communication tools, etc.
Display Home Screen
Display Home Screen
Display Home Screen
Display Home Screen
1.
1.
1.
1.
HOME
HOME
HOME
HOMEHOME
The last viewed Home Screen is displayed each time the TV is turned
The last viewed Home Screen is displayed each time the TV is turned
The last viewed Home Screen is displayed each time the TV is turned
on.
on.
on.
Press HOME again to return to Home Screen Selection.
Press HOME again to return to Home Screen Selection.
Press HOME again to return to Home Screen Selection.HOMEHOME
You can change the default Home Screen when the TV is turned on.
You can change the default Home Screen when the TV is turned on.
You can change the default Home Screen when the TV is turned on.
(Watching TV > my Home Screen > Settings)
(Watching TV > my Home Screen > Settings)
(Watching TV > my Home Screen > Settings)
Select a Home Screen icon using / / / and press to
Select a Home Screen icon using / / / and press to
Select a Home Screen icon using / / / and press to
Select a Home Screen icon using / / / and press to
2.
2.
2.
2.
access the feature.
access the feature.
access the feature.
access the feature.
To watch full-screen TV
To watch full-screen TVTo watch full-screen TV
1. Select the TV window with / / /
1. Select the TV window with / / /
1. Select the TV window with / / /1.
2. Press OK to watch
2. Press OK to watch
2. Press OK to watch2.
Also refer to Tutorial from the tool guide.
Also refer to Tutorial from the tool guide.Also refer to Tutorial from the tool guide.TutorialTutorial
13 (0100102)
Page 14
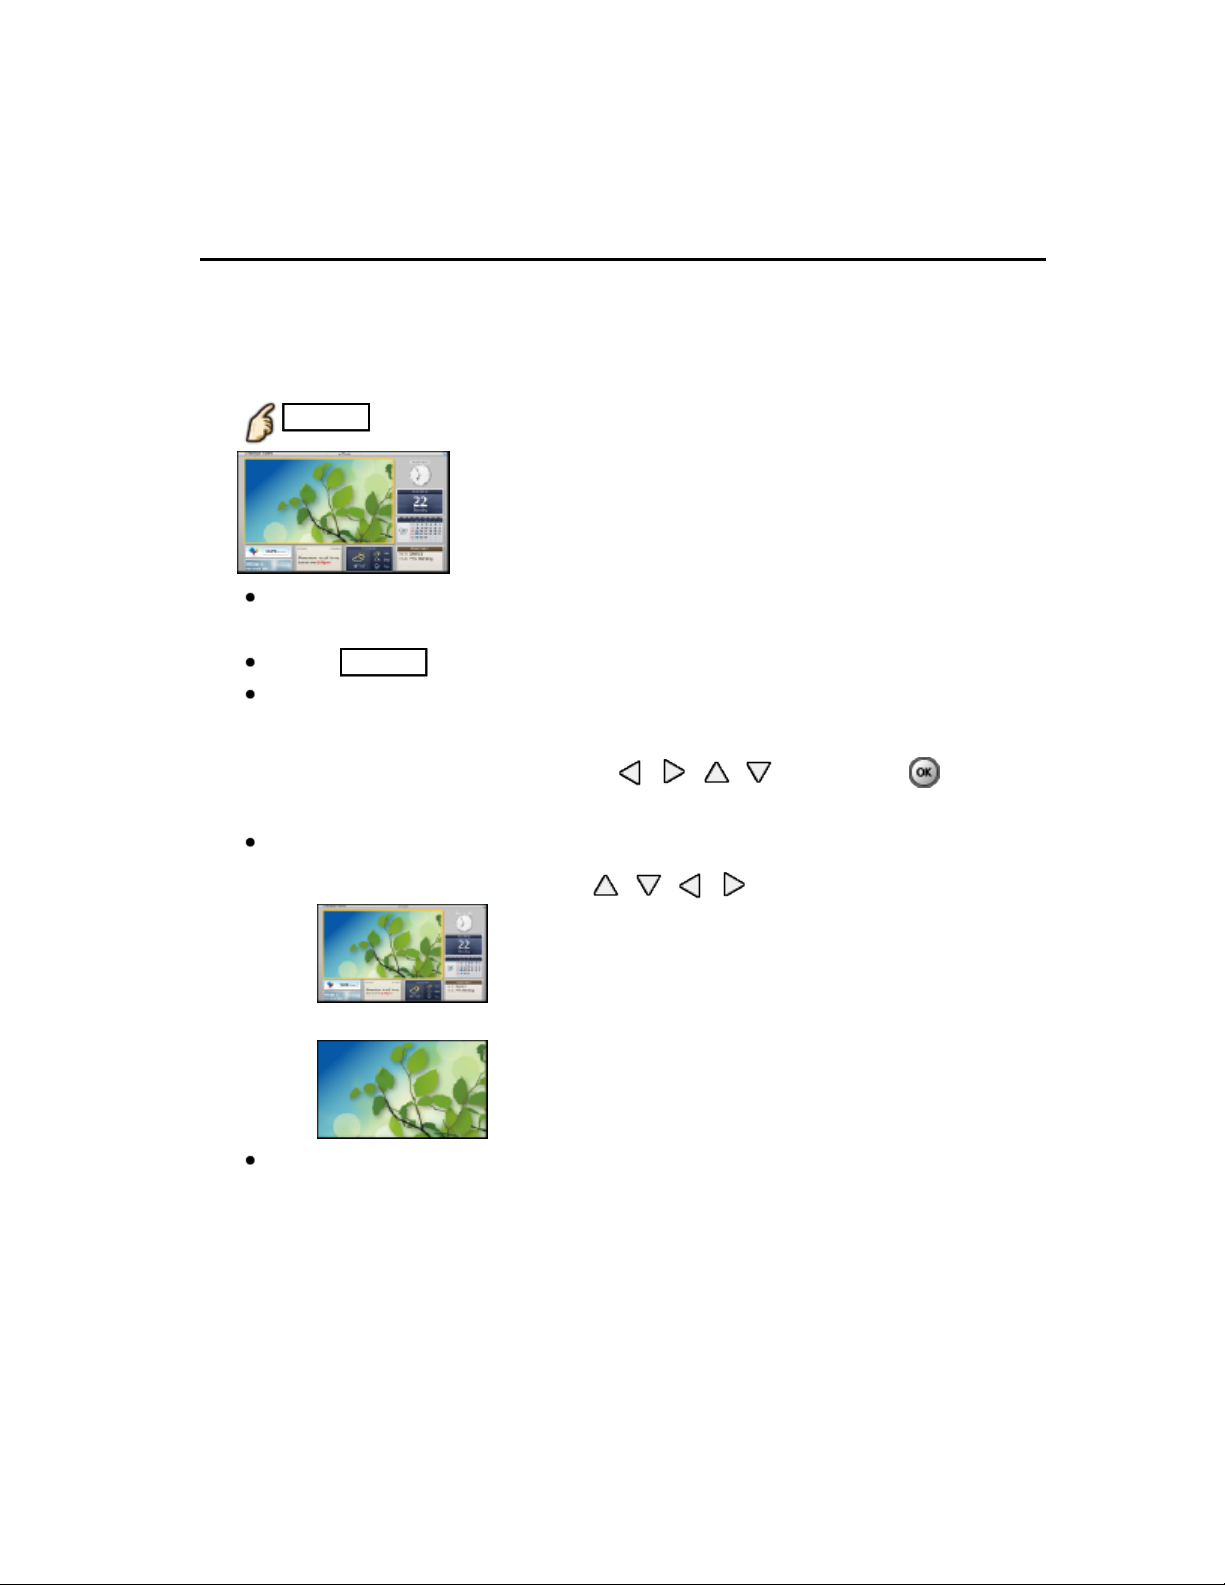
Watching TV
my Home Screen
Settings
Select the setup menu from the tool guide on the top of the screen, or use
Select the setup menu from the tool guide on the top of the screen, or use
Select the setup menu from the tool guide on the top of the screen, or use
colored button to display the setup menu.
colored button to display the setup menu.
colored button to display the setup menu.
(Example)
(Example)(Example)
Home Screen Selection
Home Screen SelectionHome Screen SelectionHome Screen SelectionHome Screen Selection
Display Home Screen Selection with HOME
Display Home Screen Selection with HOME
Display Home Screen Selection with HOME
Display Home Screen Selection with HOMEHOME
1.
1.
1.
1.
(Example)
(Example)(Example)
Select the type of Home Screen with / and press to set
Select the type of Home Screen with / and press to set
Select the type of Home Screen with / and press to set
Select the type of Home Screen with / and press to set
2.
2.
2.
2.
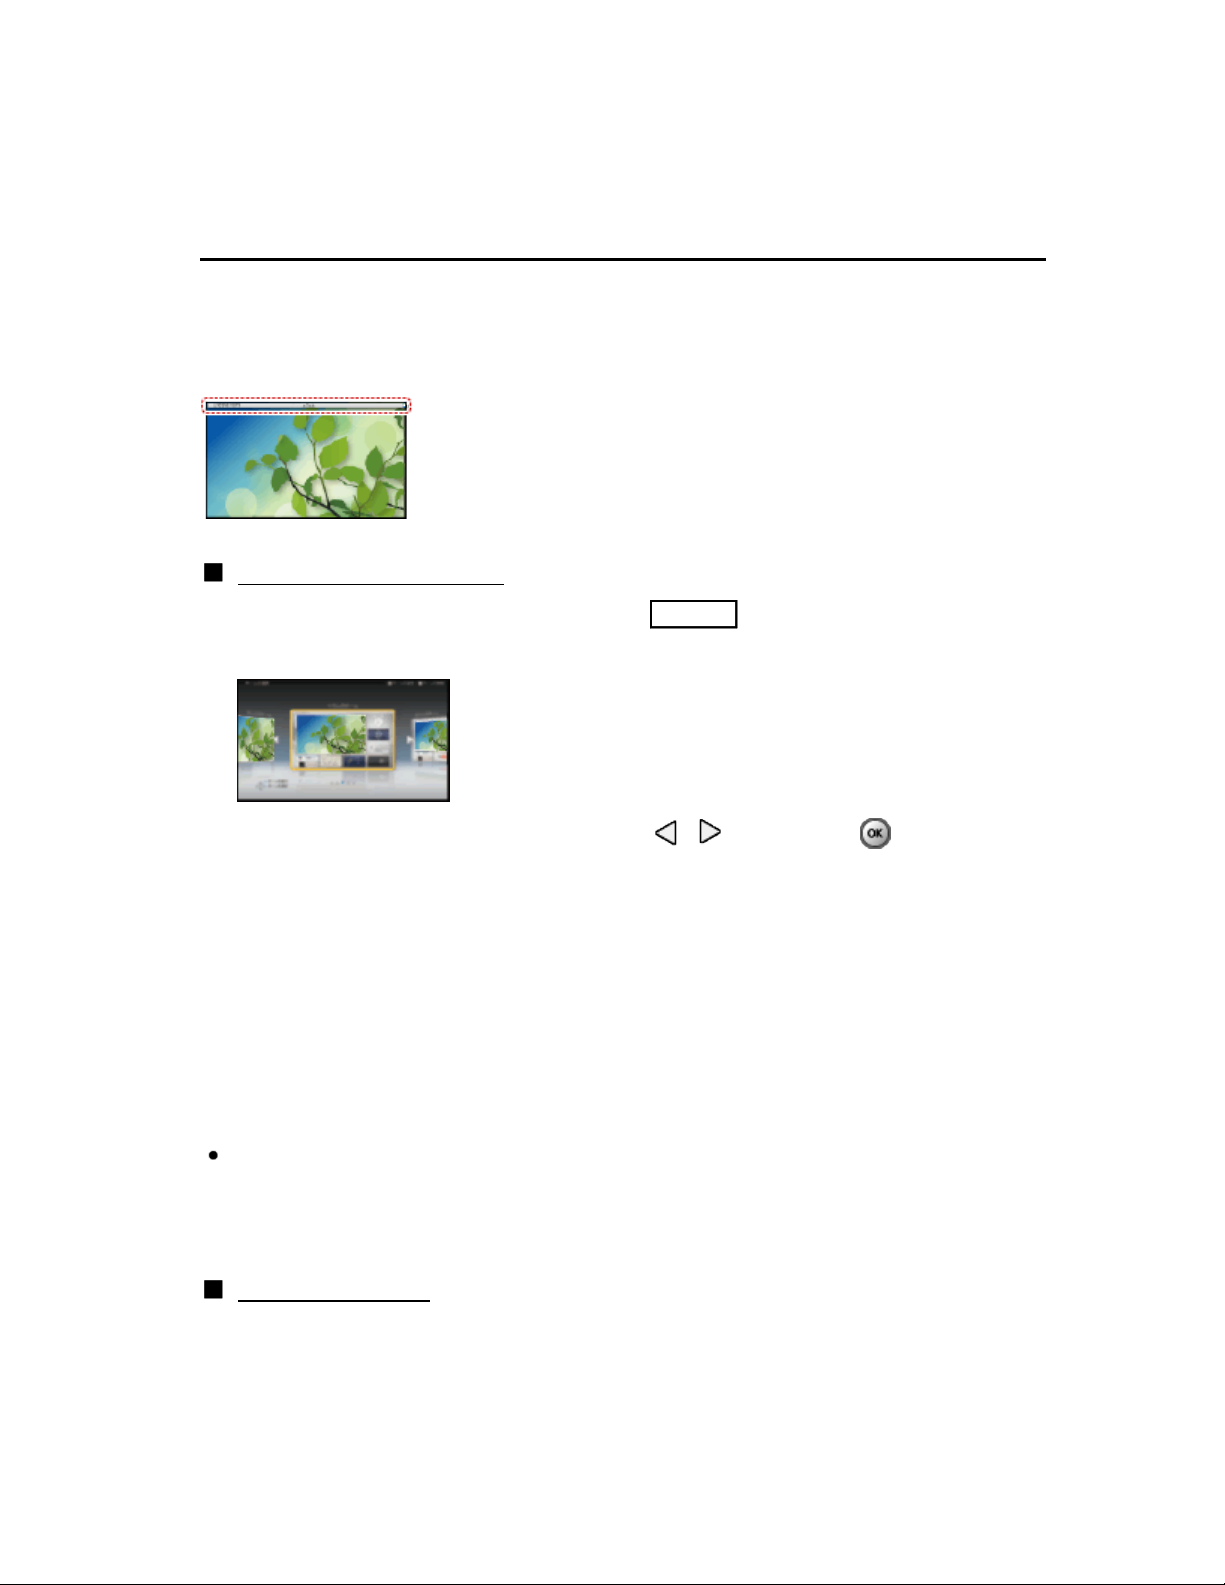
Full Screen TV
Full Screen TVFull Screen TVFull Screen TV
Exits the Home Screen and displays the TV picture in full-screen.
Exits the Home Screen and displays the TV picture in full-screen.Exits the Home Screen and displays the TV picture in full-screen.
Various Home Screens
Various Home ScreensVarious Home ScreensVarious Home Screens
You can change the layout of the Home Screen according to your
You can change the layout of the Home Screen according to your
You can change the layout of the Home Screen according to your
lifestyle and personal preferences.
lifestyle and personal preferences.
lifestyle and personal preferences.
Add New Screen
Add New ScreenAdd New ScreenAdd New Screen
You can add a new screen to personalize.
You can add a new screen to personalize.You can add a new screen to personalize.
To prevent panel "image retention", the brightness of the screen is adjusted
To prevent panel "image retention", the brightness of the screen is adjusted
To prevent panel "image retention", the brightness of the screen is adjusted
when no operation is performed on Home Screen.
when no operation is performed on Home Screen.
when no operation is performed on Home Screen.
After a certain period of time, full-screen TV is displayed automatically.
After a certain period of time, full-screen TV is displayed automatically.
After a certain period of time, full-screen TV is displayed automatically.
Face recognition
Face recognitionFace recognitionFace recognitionFace recognition
By using the built-in camera, you can select the registered Home Screen with
By using the built-in camera, you can select the registered Home Screen with
By using the built-in camera, you can select the registered Home Screen with
face recognition.
face recognition.
face recognition.
Please refer to Tutorial from the tool guide.
Please refer to Tutorial from the tool guide.
Please refer to Tutorial from the tool guide.Tutorial
14 (0100103)
Page 15

For details of the built-in camera
For details of the built-in camera
For details of the built-in camera
(Useful features > Built-in camera > Using built-in camera)
(Useful features > Built-in camera > Using built-in camera)
(Useful features > Built-in camera > Using built-in camera)Useful features Built-in camera Using built-in camera
Settings
SettingsSettingsSettingsSettings
You can customize Home Screen. For example, you can change the wallpaper,
You can customize Home Screen. For example, you can change the wallpaper,
You can customize Home Screen. For example, you can change the wallpaper,
rename the screen, add / delete or set your preferred Home screen, edit
rename the screen, add / delete or set your preferred Home screen, edit
rename the screen, add / delete or set your preferred Home screen, edit
applications, etc.
applications, etc.
applications, etc.
Select Settings from the tool guide
Select Settings from the tool guide
Select Settings from the tool guide
1.
1.
1.
1.
Follow the on-screen instructions
Follow the on-screen instructions
Follow the on-screen instructions
2.
2.
2.
2.
Search function
Search functionSearch functionSearch functionSearch function
You can search the content of various Home screen features.
You can search the content of various Home screen features.You can search the content of various Home screen features.
Select Search from the tool guide
Select Search from the tool guide
Select Search from the tool guide
1.
1.
1.
1.
Follow the on-screen instructions
Follow the on-screen instructions
Follow the on-screen instructions
2.
2.
2.
2.
SettingsSettings
SearchSearch
To use this function fully, you need a broadband network environment.
To use this function fully, you need a broadband network environment.
To use this function fully, you need a broadband network environment.
To use this function fully, you need a broadband network environment.
Ensure the network connections and network settings are completed.
Ensure the network connections and network settings are completed.
Ensure the network connections and network settings are completed.
Ensure the network connections and network settings are completed.
Be sure to update the software when a software update notice is
Be sure to update the software when a software update notice is
Be sure to update the software when a software update notice is
Be sure to update the software when a software update notice is
displayed on the TV screen. If the software is not updated, you will not
displayed on the TV screen. If the software is not updated, you will not
displayed on the TV screen. If the software is not updated, you will not
displayed on the TV screen. If the software is not updated, you will not
be able to use my Home Screen. You can update the software later
be able to use my Home Screen. You can update the software later
be able to use my Home Screen. You can update the software later
be able to use my Home Screen. You can update the software later
manually.
manually.
manually.
manually.
15 (0100103)
Page 16
Watching TV
Cable / Satellite / Fiber Optic box
Initial setting
Connecting
Connecting
Connecting
Connecting
1.
1.
1.
1.
Select the wiring method connecting your box to the TV, AV IN or
Select the wiring method connecting your box to the TV, AV IN or
Select the wiring method connecting your box to the TV, AV IN or
Antenna/Cable in.
Antenna/Cable in.
Antenna/Cable in.
Antenna/Cable in
Note: HDMI will provide the best HD picture
Note: HDMI will provide the best HD pictureNote: HDMI will provide the best HD pictureNote: HDMI will provide the best HD picture
Change INPUT
Change INPUT
Change INPUT
Change INPUT
2.
2.
2.
2.
INPUT
INPUT
INPUT
INPUTINPUT
Press the INPUT button to select the proper connection. Wait 2 seconds.
Press the INPUT button to select the proper connection. Wait 2 seconds.Press the INPUT button to select the proper connection. Wait 2 seconds.
Power on your Cable , Satellite or Fiber box
Power on your Cable , Satellite or Fiber box
Power on your Cable , Satellite or Fiber box
Power on your Cable , Satellite or Fiber box
3.
3.
3.
3.
Use the box's remote control to change channels.
Use the box's remote control to change channels.Use the box's remote control to change channels.
If the box is connected to the TV using a COAX cable (Antenna/Cable
If the box is connected to the TV using a COAX cable (Antenna/Cable
If the box is connected to the TV using a COAX cable (Antenna/Cable
If the box is connected to the TV using a COAX cable (Antenna/Cable
in), then set the TV channel to CH3 or CH4. Note that the picture will
in), then set the TV channel to CH3 or CH4. Note that the picture will
in), then set the TV channel to CH3 or CH4. Note that the picture will
in), then set the TV channel to CH3 or CH4. Note that the picture will
not be in HD.
not be in HD.
not be in HD.
not be in HD.
AV IN
CC/SAP is not available when watching TV with a Cable or Satellite box
CC/SAP is not available when watching TV with a Cable or Satellite box
CC/SAP is not available when watching TV with a Cable or Satellite box
CC/SAP is not available when watching TV with a Cable or Satellite box
connected via HDMI.
connected via HDMI.
connected via HDMI.
connected via HDMI.
If you have a High Definition box, ensure that it is outputting 720p or
If you have a High Definition box, ensure that it is outputting 720p or
If you have a High Definition box, ensure that it is outputting 720p or
If you have a High Definition box, ensure that it is outputting 720p or
1080i signal.
1080i signal.
1080i signal.
1080i signal.
Tip: press the TV's INFO button to verify.
Tip: press the TV's INFO button to verify.
Tip: press the TV's INFO button to verify.
Tip: press the TV's INFO button to verify.INFOINFO
Check your box's "aspect" or "format" settings. It should be set to 16:9,
Check your box's "aspect" or "format" settings. It should be set to 16:9,
Check your box's "aspect" or "format" settings. It should be set to 16:9,
Check your box's "aspect" or "format" settings. It should be set to 16:9,
Widescreen or FULL.
Widescreen or FULL.
Widescreen or FULL.
Widescreen or FULL.FULL
If the audio volume is too low, check the box's audio settings.
If the audio volume is too low, check the box's audio settings.
If the audio volume is too low, check the box's audio settings.
If the audio volume is too low, check the box's audio settings.
Contact your Cable or Satellite provider for instructions on any box
Contact your Cable or Satellite provider for instructions on any box
Contact your Cable or Satellite provider for instructions on any box
Contact your Cable or Satellite provider for instructions on any box
settings.
settings.
settings.
settings.
16 (0100201)
Page 17
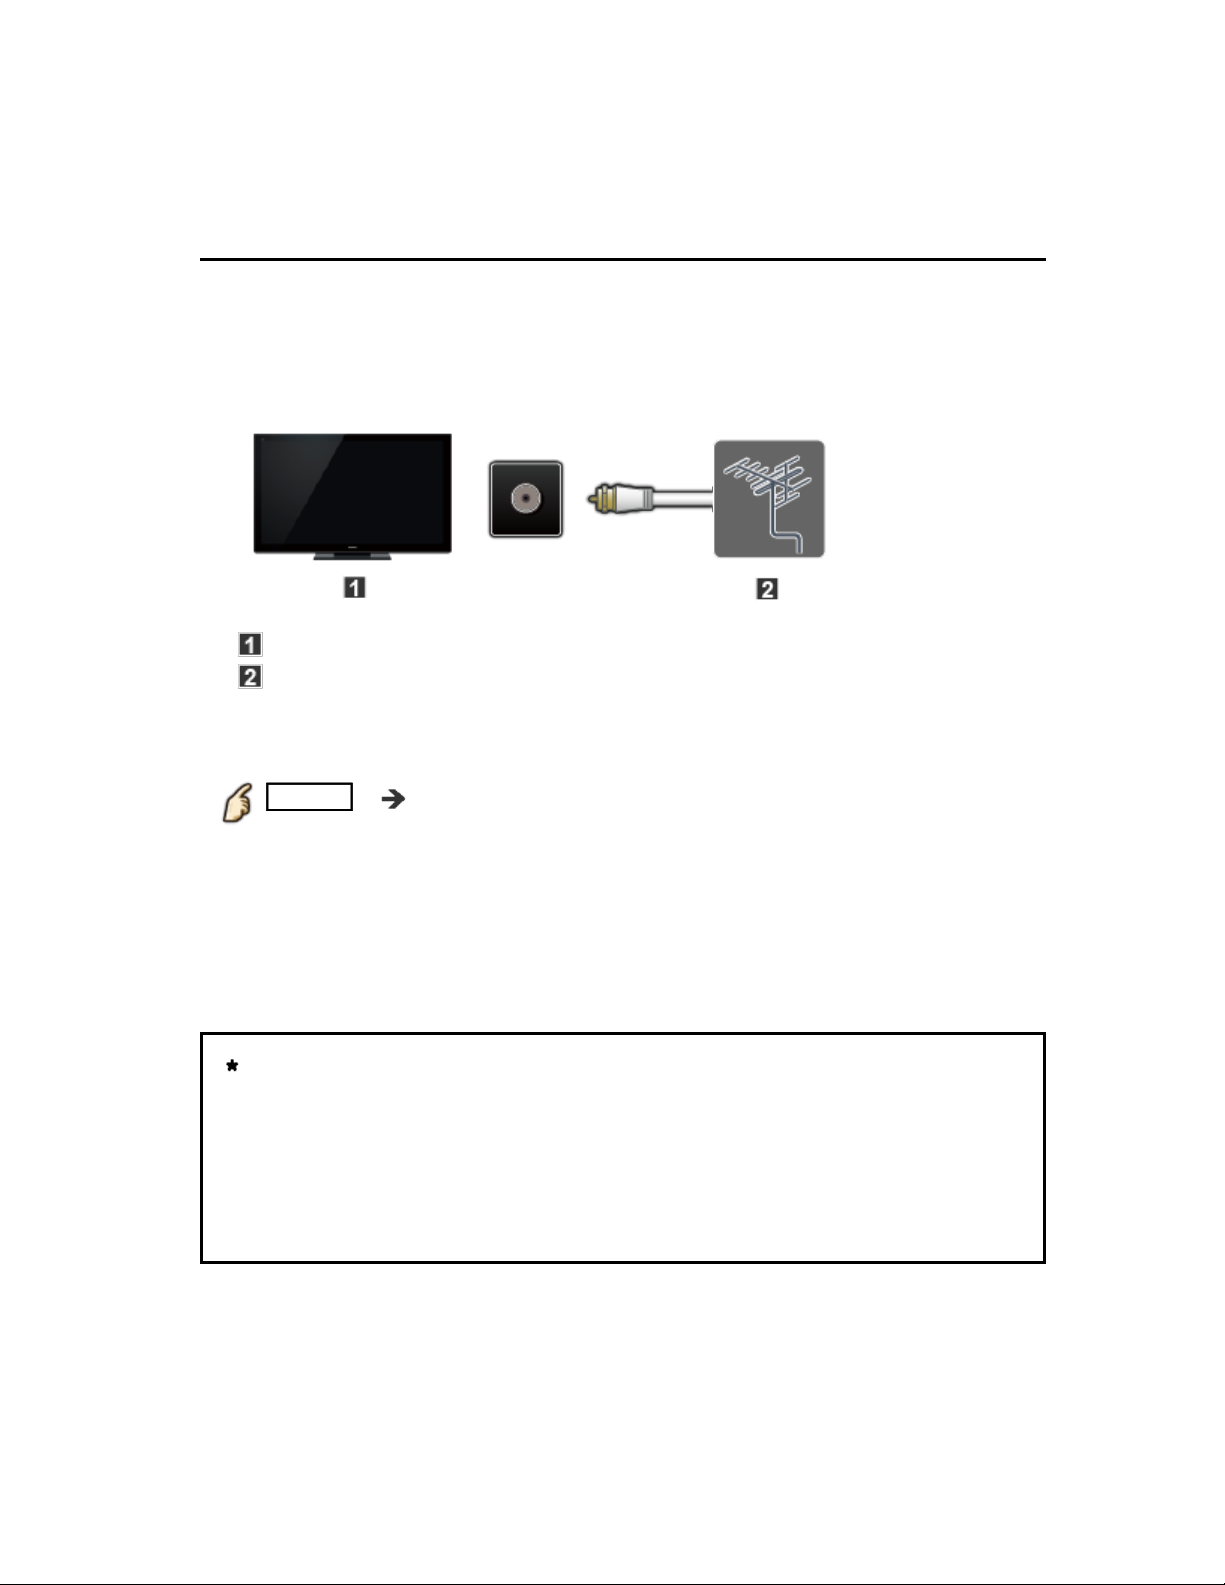
Watching TV
Antenna / Cable service without a box
Initial setting
Connect coax
Connect coax
Connect coax
Connect coax
1.
1.
1.
1.
Connect a COAX wire from either an antenna or Basic Cable service to the
Connect a COAX wire from either an antenna or Basic Cable service to the
Connect a COAX wire from either an antenna or Basic Cable service to the
TV's "ANTENNA/CABLE IN" screw terminal.
TV's "ANTENNA/CABLE IN" screw terminal.
TV's "ANTENNA/CABLE IN" screw terminal.
TV (ANTENNA/CABLE IN)
TV (ANTENNA/CABLE IN)
TV (ANTENNA/CABLE IN)
TV (ANTENNA/CABLE IN)
Antenna
Antenna
Antenna
Antenna
Scan the channel
Scan the channel
Scan the channel
Scan the channel
2.
2.
2.
2.
MENU Menu > Setup > ANTENNA/Cable setup >
MENU Menu > Setup > ANTENNA/Cable setup >
MENU Menu > Setup > ANTENNA/Cable setup >
MENU Menu > Setup > ANTENNA/Cable setup >
MENU Menu > Setup > ANTENNA/Cable setup >
ANTENNA/Cable signal, Auto program
ANTENNA/Cable signal, Auto program
ANTENNA/Cable signal, Auto program
ANTENNA/Cable signal, Auto program
ANTENNA/Cable signal, Auto program
ANTENNA/Cable signal, Auto programANTENNA/Cable signal Auto program
1. Select either Cable or Antenna programming source in
1. Select either Cable or Antenna programming source in
1. Select either Cable or Antenna programming source in
ANTENNA/Cable signal.
ANTENNA/Cable signal.
ANTENNA/Cable signal.
ANTENNA/Cable signalANTENNA/Cable signal
2. Select Auto program and then the appropriate scan mode:
2. Select Auto program and then the appropriate scan mode:
2. Select Auto program and then the appropriate scan mode:
(All channels / Analog only / Digital only).
(All channels / Analog only / Digital only).
(All channels / Analog only / Digital only).
3. Start scanning.
3. Start scanning.
3. Start scanning.
If no channels are found by the end of the scan, then check the
If no channels are found by the end of the scan, then check the
If no channels are found by the end of the scan, then check the
If no channels are found by the end of the scan, then check the
following:
following:
following:
following:
Antenna's position - or availability of Cable service.
Antenna's position - or availability of Cable service.
Antenna's position - or availability of Cable service.
Antenna's position - or availability of Cable service.
Cable, Satellite or Fiber services with a box are typically connected to
Cable, Satellite or Fiber services with a box are typically connected to
Cable, Satellite or Fiber services with a box are typically connected to
Cable, Satellite or Fiber services with a box are typically connected to
the TV's A/V inputs, preferably HDMI, for best HD picture. In such a
the TV's A/V inputs, preferably HDMI, for best HD picture. In such a
the TV's A/V inputs, preferably HDMI, for best HD picture. In such a
the TV's A/V inputs, preferably HDMI, for best HD picture. In such a
case, the channel scanning is not needed.
case, the channel scanning is not needed.
case, the channel scanning is not needed.
case, the channel scanning is not needed.
Auto programAuto program
All channelsAll channels Analog onlyAnalog only Digital onlyDigital only
Menu Setup ANTENNA/Cable setup
Cable Antenna
17 (0100301)
Page 18
Watching TV
Antenna / Cable service without a box
Select channels
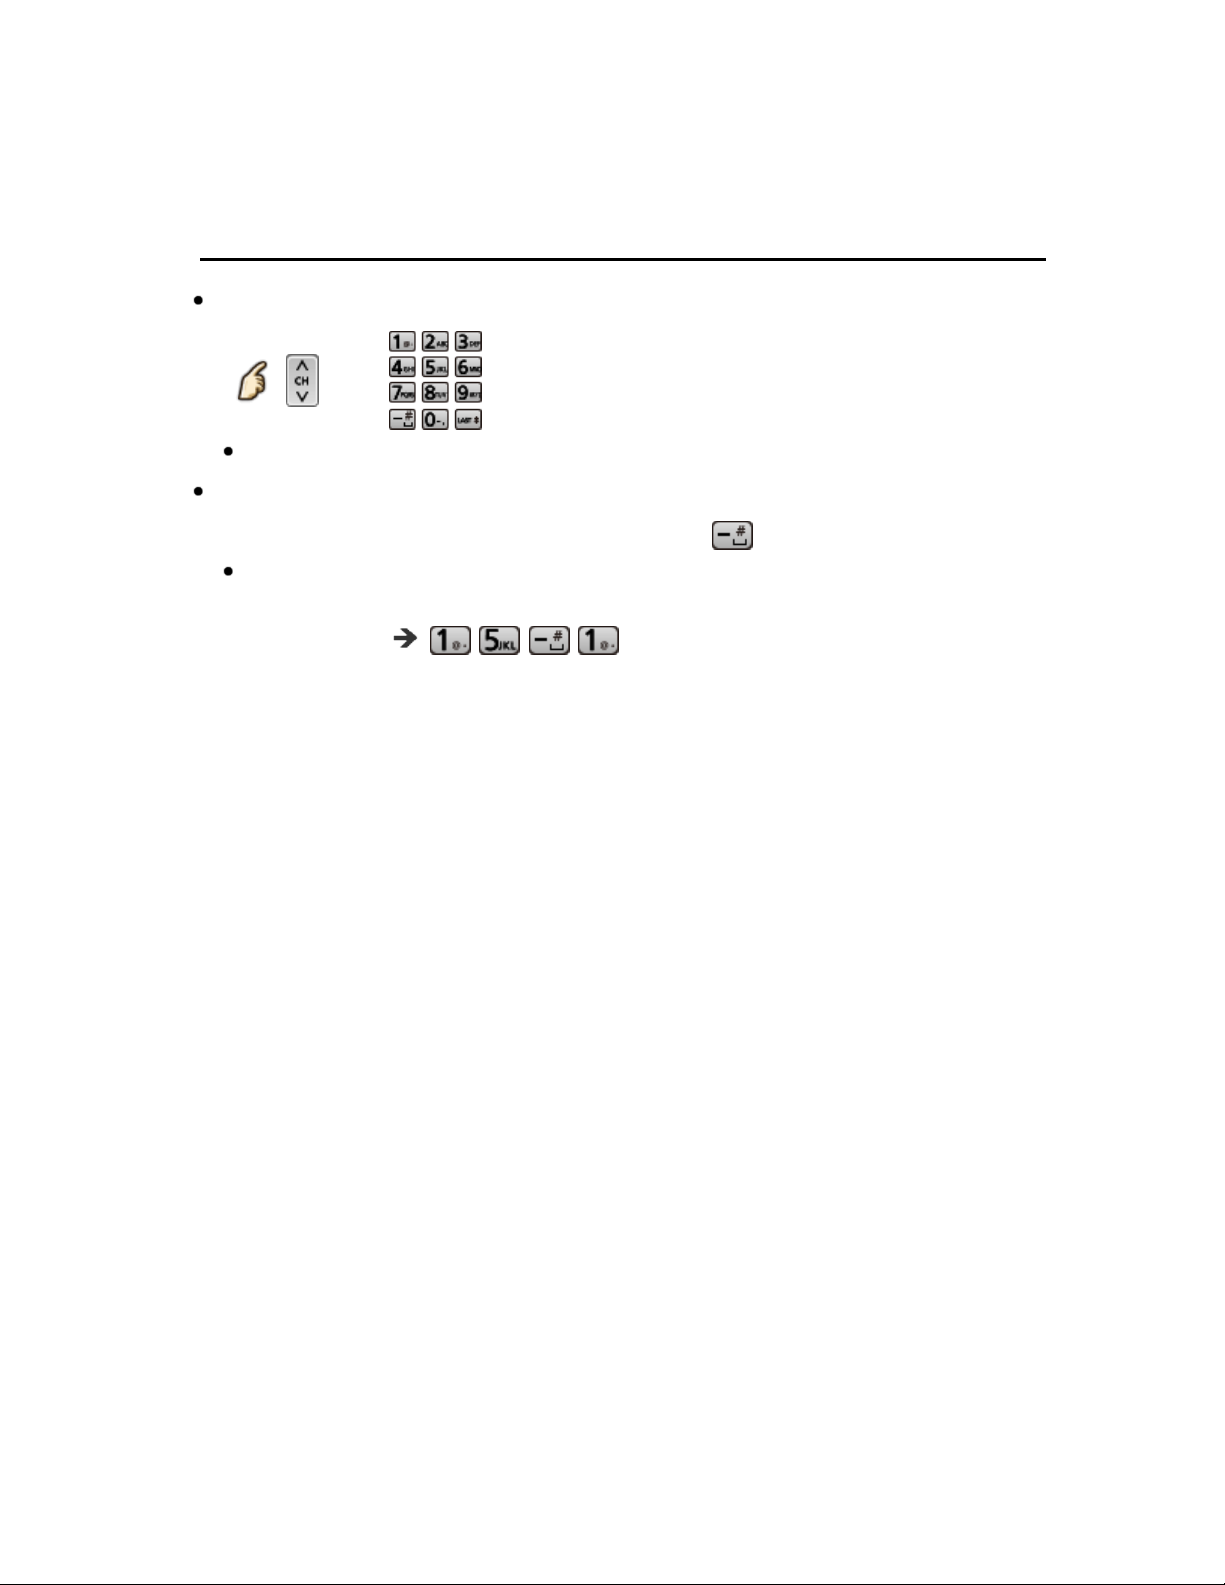
Select desired channel
Select desired channelSelect desired channelSelect desired channel
or
or or
CH buttons are also available on the TV.
CH buttons are also available on the TV.CH buttons are also available on the TV.
Select desired digital channel
Select desired digital channelSelect desired digital channelSelect desired digital channel
To directly enter a digital channel number use
To directly enter a digital channel number use To directly enter a digital channel number use
When tuning to a digital channel, press the button to enter the minor
When tuning to a digital channel, press the button to enter the minor
When tuning to a digital channel, press the button to enter the minor
number in a compound channel number.
number in a compound channel number.
number in a compound channel number.
(e.g. CH15-1 )
(e.g. CH15-1 )
(e.g. CH15-1 )
18 (0100302)
Page 19
Watching TV
Antenna / Cable service without a box
Favorite channels
Channel numbers registered in Favorite are displayed on the favorite tune
Channel numbers registered in Favorite are displayed on the favorite tune
Channel numbers registered in Favorite are displayed on the favorite tune
screen. Select the desired broadcast station with the cursor or use the number
screen. Select the desired broadcast station with the cursor or use the number
screen. Select the desired broadcast station with the cursor or use the number
buttons.
buttons.
buttons.
Favorite channels cannot be set when using Cable or Satellite box
Favorite channels cannot be set when using Cable or Satellite boxFavorite channels cannot be set when using Cable or Satellite boxFavorite channels cannot be set when using Cable or Satellite box
Set the Favorite channel
Set the Favorite channelSet the Favorite channelSet the Favorite channel
OPTION Options menu > Set favorite
OPTION Options menu > Set favorite OPTION Options menu > Set favoriteOPTION Options menu > Set favoriteOPTION Options menu Set favorite
Select the list number using / and or directly to
Select the list number using / and or directly to
Select the list number using / and or directly to
save the displayed channel.
save the displayed channel.
save the displayed channel.
Delete a Favorite channel
Delete a Favorite channelDelete a Favorite channelDelete a Favorite channel
OPTION Options menu > Set favorite
OPTION Options menu > Set favorite OPTION Options menu > Set favoriteOPTION Options menu > Set favoriteOPTION Options menu Set favorite
Select the list number using / and to delete.
Select the list number using / and to delete.Select the list number using / and to delete.
* To change the page in Set favorite
* To change the page in Set favorite
* To change the page in Set favorite
* To change the page in Set favorite
FAVORITE or / repeatedly
FAVORITE or / repeatedly
FAVORITE or / repeatedly
FAVORITE or / repeatedly
* To change the page in Favorite channels
* To change the page in Favorite channels
* To change the page in Favorite channels
* To change the page in Favorite channels
FAVORITEFAVORITE
Display a Favorite channel
Display a Favorite channelDisplay a Favorite channelDisplay a Favorite channel
FAVORITE Favorite channels
FAVORITE Favorite channels FAVORITE Favorite channelsFAVORITE Favorite channelsFAVORITE Favorite channels
Select the list number using / and or directly to
Select the list number using / and or directly to
Select the list number using / and or directly to
save the displayed channel.
save the displayed channel.
save the displayed channel.
Set favoriteSet favorite
Favorite channelsFavorite channels
FAVORITE or / repeatedly
FAVORITE or / repeatedly
FAVORITE or / repeatedly
FAVORITE or / repeatedly
FAVORITEFAVORITE
19 (0100303)
Page 20
Watching TV
Antenna / Cable service without a box
Closed caption
Viewing with Closed caption
Viewing with Closed captionViewing with Closed captionViewing with Closed caption
CC
CC
CC
CCCC
Switches the Closed caption mode.
Switches the Closed caption mode.
Switches the Closed caption mode.
( Off / On / On mute )
( Off / On / On mute )
( Off / On / On mute )
Off On On mute
CC is not available when watching TV with a Cable or Satellite box
CC is not available when watching TV with a Cable or Satellite box
CC is not available when watching TV with a Cable or Satellite box
CC is not available when watching TV with a Cable or Satellite box
connected via HDMI.
connected via HDMI.
connected via HDMI.
connected via HDMI.
Contact your Cable or Satellite operator for instructions on enabling CC
Contact your Cable or Satellite operator for instructions on enabling CC
Contact your Cable or Satellite operator for instructions on enabling CC
Contact your Cable or Satellite operator for instructions on enabling CC
with their box.
with their box.
with their box.
with their box.
The TV's CC button does not operate the Satellite or Cable box's CC
The TV's CC button does not operate the Satellite or Cable box's CC
The TV's CC button does not operate the Satellite or Cable box's CC
The TV's CC button does not operate the Satellite or Cable box's CC
function.
function.
function.
function.
For viewing the CC of digital broadcasting, set the aspect to FULL (If
For viewing the CC of digital broadcasting, set the aspect to FULL (If
For viewing the CC of digital broadcasting, set the aspect to FULL (If
For viewing the CC of digital broadcasting, set the aspect to FULL (If
viewing with H-FILL, JUST, ZOOM or 4:3; characters might be cut off).
viewing with H-FILL, JUST, ZOOM or 4:3; characters might be cut off).
viewing with H-FILL, JUST, ZOOM or 4:3; characters might be cut off).
viewing with H-FILL, JUST, ZOOM or 4:3; characters might be cut off).
If the CC is set to On on both the receiver and TV when the signal is
If the CC is set to On on both the receiver and TV when the signal is
If the CC is set to On on both the receiver and TV when the signal is
If the CC is set to On on both the receiver and TV when the signal is
480i (except for the HDMI connection), the CC may overlap on the TV.
480i (except for the HDMI connection), the CC may overlap on the TV.
480i (except for the HDMI connection), the CC may overlap on the TV.
480i (except for the HDMI connection), the CC may overlap on the TV.
If a digital program is being output in analog format, the CC data will
If a digital program is being output in analog format, the CC data will
If a digital program is being output in analog format, the CC data will
If a digital program is being output in analog format, the CC data will
also be output in analog format.
also be output in analog format.
also be output in analog format.
also be output in analog format.
If the recorder or output monitor is connected to the TV, the CC needs
If the recorder or output monitor is connected to the TV, the CC needs
If the recorder or output monitor is connected to the TV, the CC needs
If the recorder or output monitor is connected to the TV, the CC needs
to be set up on the recorder or output monitor.
to be set up on the recorder or output monitor.
to be set up on the recorder or output monitor.
to be set up on the recorder or output monitor.
20 (0100304)
Page 21
Watching TV
Antenna / Cable service without a box
SAP
Listen with SAP (Secondary Audio Programming)
Listen with SAP (Secondary Audio Programming)Listen with SAP (Secondary Audio Programming)Listen with SAP (Secondary Audio Programming)
SAP is not available when watching TV with a Cable or Satellite box
SAP is not available when watching TV with a Cable or Satellite box
SAP is not available when watching TV with a Cable or Satellite box
SAP is not available when watching TV with a Cable or Satellite box
connected via HDMI.
connected via HDMI.
connected via HDMI.
connected via HDMI.
Contact your Cable or Satellite operator for instructions on enabling
Contact your Cable or Satellite operator for instructions on enabling
Contact your Cable or Satellite operator for instructions on enabling
Contact your Cable or Satellite operator for instructions on enabling
SAP with their box.
SAP with their box.
SAP with their box.
SAP with their box.
The TV's SAP button does not operate the Satellite or Cable box's
The TV's SAP button does not operate the Satellite or Cable box's
The TV's SAP button does not operate the Satellite or Cable box's
The TV's SAP button does not operate the Satellite or Cable box's
SAP function.
SAP function.
SAP function.
SAP function.
SAPSAP
Select the Audio mode for watching TV.
Select the Audio mode for watching TV.
Select the Audio mode for watching TV.
SAP
SAP
SAPSAPSAP
Digital mode: Select available audio service when receiving a digital
Digital mode: Select available audio service when receiving a digital
Digital mode: Select available audio service when receiving a digital
channel.
channel.
channel.
Audio track is automatically selected as Preferred audio type and
Audio track is automatically selected as Preferred audio type and
Audio track is automatically selected as Preferred audio type and
Preferred SAP language settings.
Preferred SAP language settings.
Preferred SAP language settings.
Preferred SAP languagePreferred SAP language
Menu > Sound > Preferred audio type
Menu > Sound > Preferred audio type
Menu > Sound > Preferred audio type
MenuMenu SoundSound Preferred audio typePreferred audio type
Menu > Setup > Language > Preferred SAP language
Menu > Setup > Language > Preferred SAP language
Menu > Setup > Language > Preferred SAP language
MenuMenu SetupSetup LanguageLanguage Preferred SAP languagePreferred SAP language
SAPSAP
Preferred audio typePreferred audio type
If you change the audio settings with the SAP button, Preferred SAP
If you change the audio settings with the SAP button, Preferred SAP
If you change the audio settings with the SAP button, Preferred SAP
language and Preferred audio type settings will not change.
language and Preferred audio type settings will not change.
language and Preferred audio type settings will not change.
language
language Preferred audio typePreferred audio type
Track number / Number of tracks
Track number / Number of tracks
Current audio track information
Current audio track information
Audio service information
Audio service information
(example)
(example)(example)
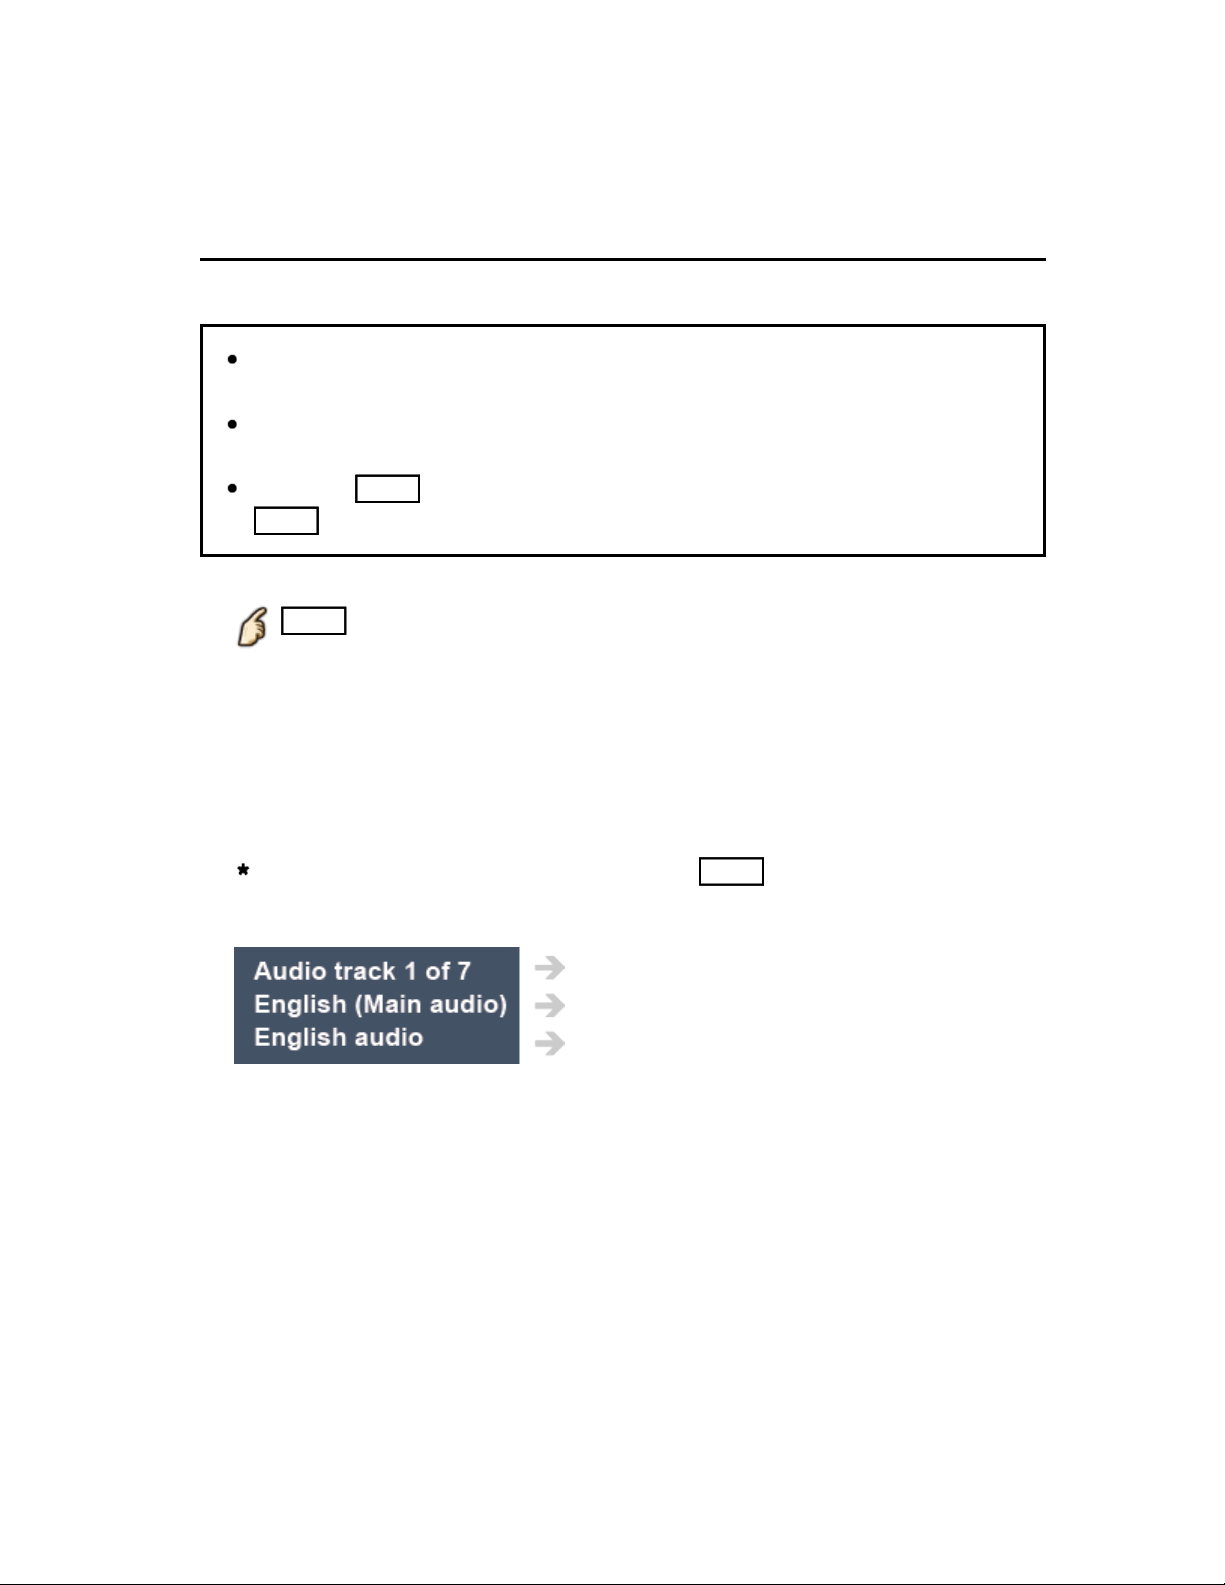
Analog mode: Select the desired Audio mode. ( Stereo / SAP / Mono )
Analog mode: Select the desired Audio mode. ( Stereo / SAP / Mono )Analog mode: Select the desired Audio mode. ( Stereo / SAP / Mono )Stereo SAP Mono
SAPSAP Preferred SAP
Preferred SAP
21 (0100305)
Page 22

Watching TV
Antenna / Cable service without a box
Other
Information banner
Information banner
Information banner
Information banner
1.
1.
1.
1.
Displays TV status information. Also, when watching programs via the
Displays TV status information. Also, when watching programs via the
Displays TV status information. Also, when watching programs via the
Antenna/Cable input, INFO will include the channel banner.
Antenna/Cable input, INFO will include the channel banner.
Antenna/Cable input, INFO will include the channel banner.
INFO
INFO INFOINFOINFO
Channel / Station identifier / Program title / Closed caption / SAP /
Channel / Station identifier / Program title / Closed caption / SAP /
Channel / Station identifier / Program title / Closed caption / SAP /
Rating level / Signal resolution / Picture mode / Aspect ratio /
Rating level / Signal resolution / Picture mode / Aspect ratio /
Rating level / Signal resolution / Picture mode / Aspect ratio /
Sleep timer remaining time / Clock
Sleep timer remaining time / Clock
Sleep timer remaining time / Clock
Options menu
Options menu
Options menu
Options menu
2.
2.
2.
2.
This menu consists of shortcuts to convenient functions.
This menu consists of shortcuts to convenient functions.
This menu consists of shortcuts to convenient functions.
OPTION
OPTION OPTIONOPTIONOPTION
Voice guidance settings: Guidance settings for visually impaired
Voice guidance settings: Guidance settings for visually impaired
Voice guidance settings: Guidance settings for visually impaired
Voice guidance settingsVoice guidance settings
users.
users.
users.
Channel surf mode: Specify favorites or type of channels to view
Channel surf mode: Specify favorites or type of channels to view
Channel surf mode: Specify favorites or type of channels to view
Channel surf modeChannel surf mode
when pressing the channel up/down button.
when pressing the channel up/down button.
when pressing the channel up/down button.
Set favorite: Set favorite channel
Set favorite: Set favorite channel
Set favorite: Set favorite channel
Set favoriteSet favorite
Edit CH caption: Edit the channel identifier
Edit CH caption: Edit the channel identifier
Edit CH caption: Edit the channel identifier
Edit CH captionEdit CH caption
Signal meter: Check the antenna's signal strength
Signal meter: Check the antenna's signal strength
Signal meter: Check the antenna's signal strength
Signal meterSignal meter
Options menu is only available when the TV is using the Antenna/Cable
Options menu is only available when the TV is using the Antenna/Cable
Options menu is only available when the TV is using the Antenna/Cable
Options menu is only available when the TV is using the Antenna/Cable
input, not when using Cable or Satellite box.
input, not when using Cable or Satellite box.
input, not when using Cable or Satellite box.
input, not when using Cable or Satellite box.
22 (0100306)
Page 23
Watching TV
Blu-ray, DVD, Game Console, etc.
Connecting and viewing
Connect device
Connect device
Connect device
Connect device
1.
1.
1.
1.
Verify that the device is connected to the TV properly and connect to
Verify that the device is connected to the TV properly and connect to
Verify that the device is connected to the TV properly and connect to
desired terminal. Note which terminal the device is connected to (HDMI 1,
desired terminal. Note which terminal the device is connected to (HDMI 1,
desired terminal. Note which terminal the device is connected to (HDMI 1,
HDMI 2,... Component or Video)
HDMI 2,... Component or Video)
HDMI 2,... Component or Video)
Component and Composite (Video) in terminals are shared.
Component and Composite (Video) in terminals are shared.
Component and Composite (Video) in terminals are shared.
Please be careful not to confuse the connection when you use Component
Please be careful not to confuse the connection when you use Component
Please be careful not to confuse the connection when you use Component
or Video.
or Video.
or Video.
Example of AV connections
Example of AV connectionsExample of AV connectionsExample of AV connectionsExample of AV connections
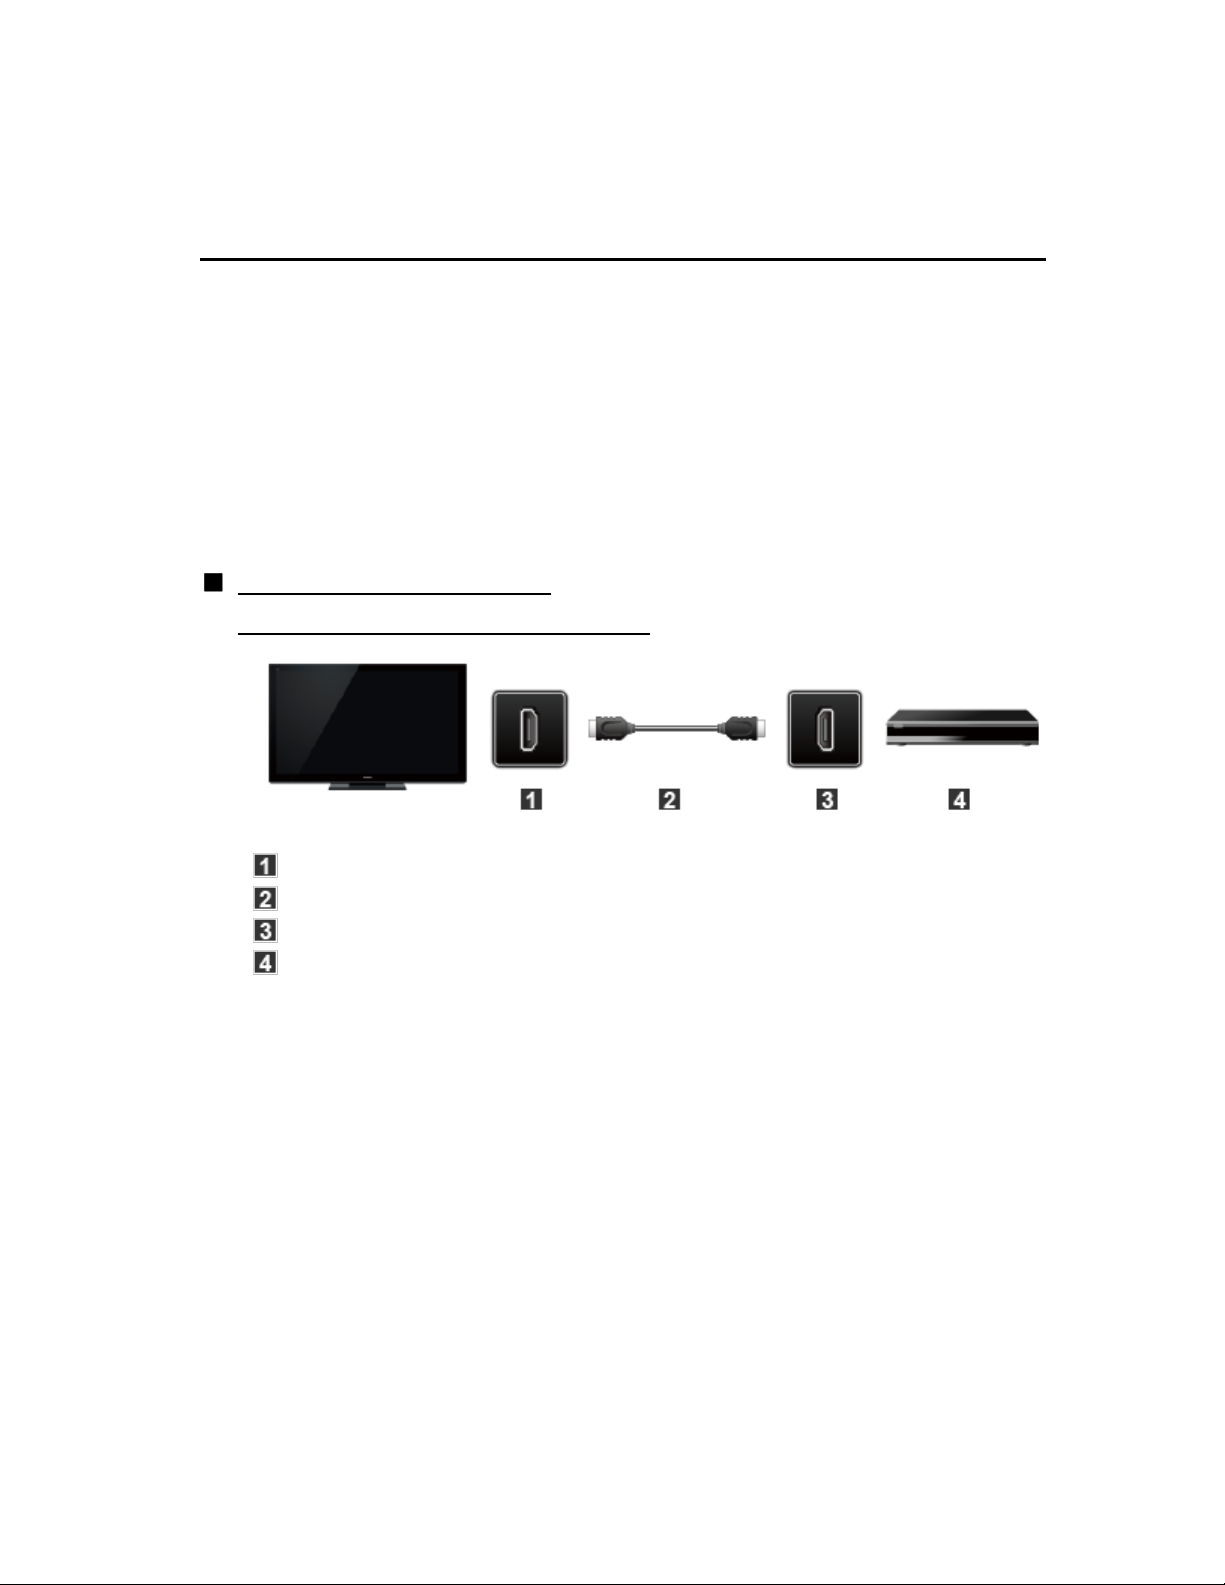
A. Connecting to the HDMI input (best)
A. Connecting to the HDMI input (best)
A. Connecting to the HDMI input (best)A. Connecting to the HDMI input (best)A. Connecting to the HDMI input (best)
HDMI IN
HDMI IN
HDMI IN
HDMI IN
HDMI cable
HDMI cable
HDMI cable
HDMI cable
HDMI OUT
HDMI OUT
HDMI OUT
HDMI OUT
AV Equipment (e.g. Blu-ray Disc player)
AV Equipment (e.g. Blu-ray Disc player)
AV Equipment (e.g. Blu-ray Disc player)
AV Equipment (e.g. Blu-ray Disc player)
23 (0100401)
Page 24
For devices with DVI output
For devices with DVI output
For devices with DVI outputFor devices with DVI outputFor devices with DVI output
HDMI IN
HDMI IN
HDMI IN
HDMI IN
HDMI-DVI Conversion cable
HDMI-DVI Conversion cable
HDMI-DVI Conversion cable
HDMI-DVI Conversion cable
DVI OUT
DVI OUT
DVI OUT
DVI OUT
AUDIO IN
AUDIO IN
AUDIO IN
AUDIO IN
Audio cable
Audio cable
Audio cable
Audio cable
AUDIO OUT
AUDIO OUT
AUDIO OUT
AUDIO OUT
AV Equipment (e.g. Blu-ray Disc player)
AV Equipment (e.g. Blu-ray Disc player)
AV Equipment (e.g. Blu-ray Disc player)
AV Equipment (e.g. Blu-ray Disc player)
B. Connecting to the COMPONENT input
B. Connecting to the COMPONENT input
B. Connecting to the COMPONENT inputB. Connecting to the COMPONENT inputB. Connecting to the COMPONENT input
COMPONENT IN
COMPONENT IN
COMPONENT IN
COMPONENT IN
Component cable
Component cable
Component cable
Component cable
COMPONENT OUT
COMPONENT OUT
COMPONENT OUT
COMPONENT OUT
AV Equipment (e.g. Blu-ray Disc player)
AV Equipment (e.g. Blu-ray Disc player)
AV Equipment (e.g. Blu-ray Disc player)
AV Equipment (e.g. Blu-ray Disc player)
24 (0100401)
Page 25
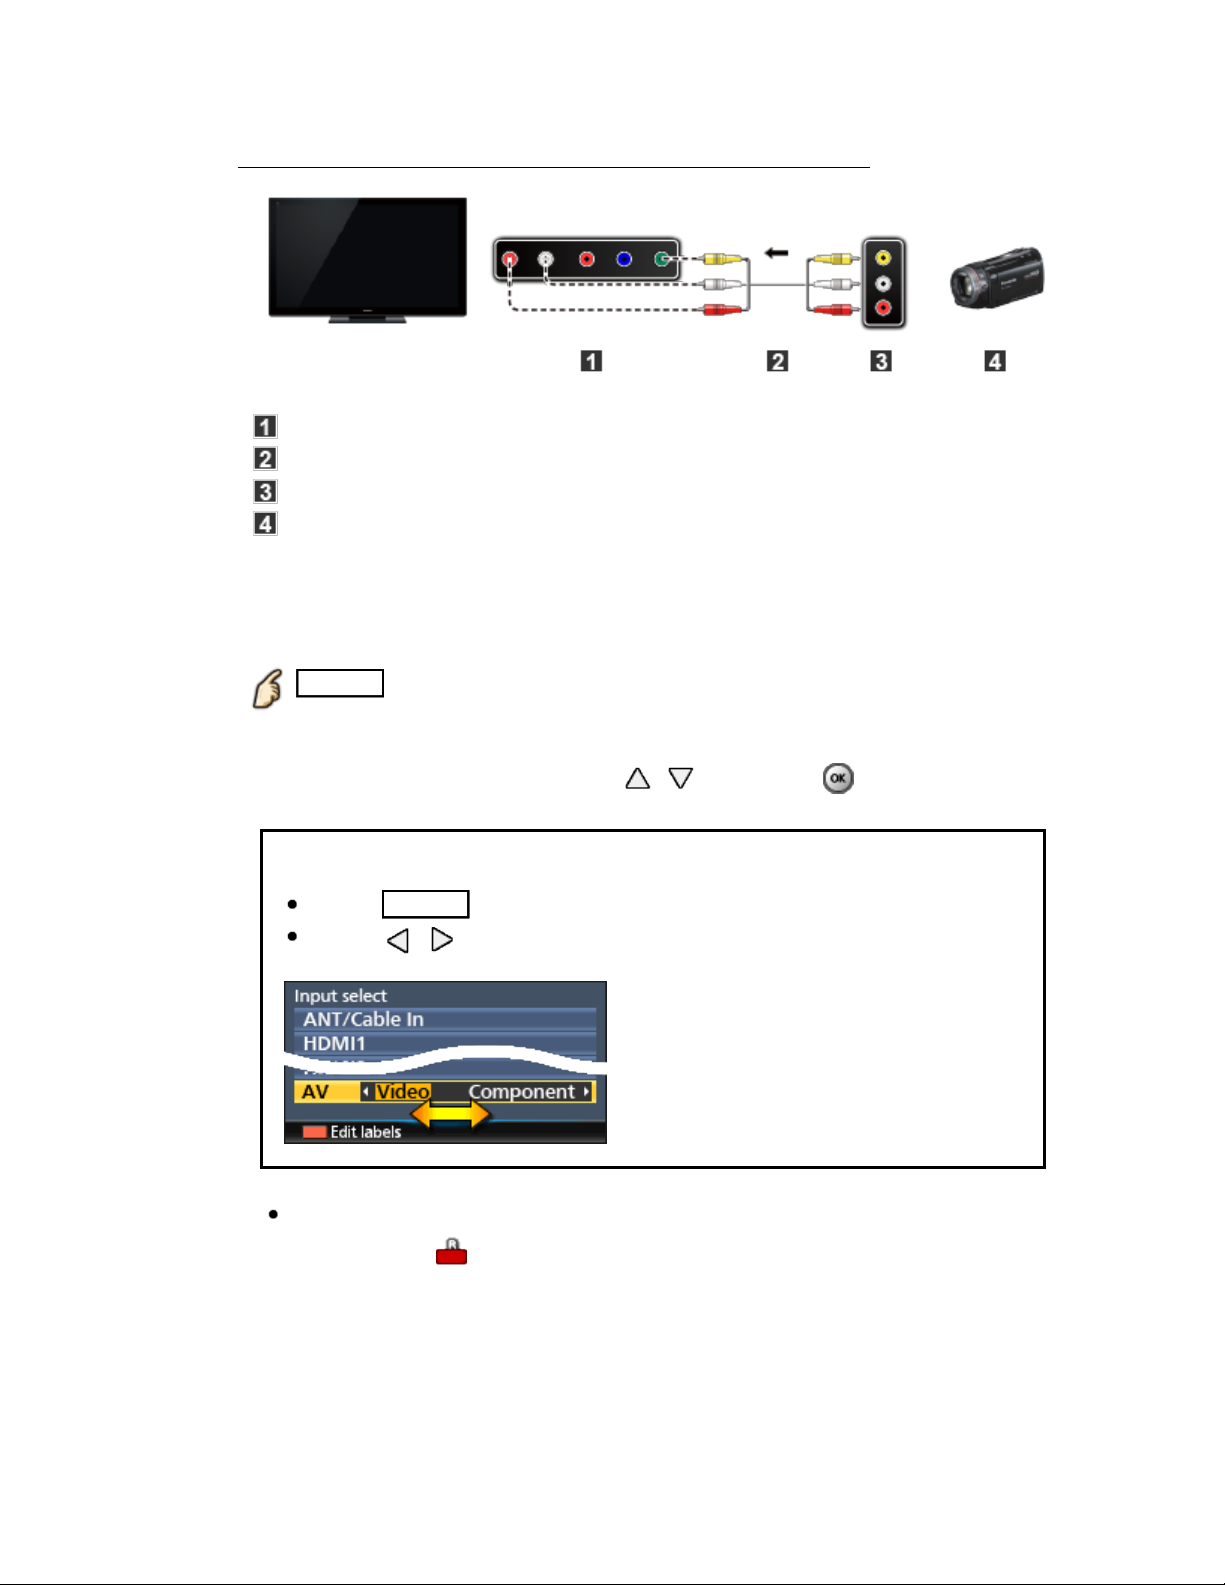
C. Connecting to the VIDEO input (Standard definition only)
C. Connecting to the VIDEO input (Standard definition only)
C. Connecting to the VIDEO input (Standard definition only)C. Connecting to the VIDEO input (Standard definition only)C. Connecting to the VIDEO input (Standard definition only)
COMPOSITE IN
COMPOSITE IN
COMPOSITE IN
COMPOSITE IN
VIDEO cable
VIDEO cable
VIDEO cable
VIDEO cable
COMPOSITE OUT
COMPOSITE OUT
COMPOSITE OUT
COMPOSITE OUT
AV Equipment (e.g. Camcorder)
AV Equipment (e.g. Camcorder)
AV Equipment (e.g. Camcorder)
AV Equipment (e.g. Camcorder)
Select Input
Select Input
Select Input
Select Input
2.
2.
2.
2.
1. Display Input select menu (With the connected equipment turned ON)
1. Display Input select menu (With the connected equipment turned ON)1. Display Input select menu (With the connected equipment turned ON)Input selectInput select
INPUT
INPUT INPUTINPUTINPUT
2. Select the input used in step 1
2. Select the input used in step 12. Select the input used in step 1
Select correct input source, using / and press
Select correct input source, using / and press Select correct input source, using / and press
You need to select Video or Component.
You need to select Video or Component.
You need to select Video or Component.
You need to select Video or Component.You need to select Video or Component.Video Component
Press INPUT and select AV: Video <-> Component.
Press INPUT and select AV: Video <-> Component.
Press INPUT and select AV: Video <-> Component.
Press INPUT and select AV: Video <-> Component.
Press INPUT and select AV: Video <-> Component.INPUTINPUT AVAV VideoVideo ComponentComponent
Press / to choose Video or Component.
Press / to choose Video or Component.
Press / to choose Video or Component.
Press / to choose Video or Component.
Press / to choose Video or Component.
You can edit and customize the TV's Inputs for easy identification by
You can edit and customize the TV's Inputs for easy identification by
You can edit and customize the TV's Inputs for easy identification by
pressing the button. If you label an input as "Not used", then it will
pressing the button. If you label an input as "Not used", then it will
pressing the button. If you label an input as "Not used", then it will
not appear in the Input select menu.
not appear in the Input select menu.
not appear in the Input select menu.
TV's Inputs
3. Operate using your device's remote control.
3. Operate using your device's remote control.3. Operate using your device's remote control.
25 (0100401)
Page 26

Watching TV
Blu-ray, DVD, Game Console, etc.
HDMI connection notice
HDMI (high-definition multimedia interface) allows you to enjoy high-definition
HDMI (high-definition multimedia interface) allows you to enjoy high-definition
HDMI (high-definition multimedia interface) allows you to enjoy high-definition
digital images and high-quality sound by connecting the TV unit and HD
digital images and high-quality sound by connecting the TV unit and HD
digital images and high-quality sound by connecting the TV unit and HD
devices.
devices.
devices.
HDMI-compatible equipment (*1) with an HDMI or DVI output terminal, such as
HDMI-compatible equipment (*1) with an HDMI or DVI output terminal, such as
HDMI-compatible equipment (*1) with an HDMI or DVI output terminal, such as
a Cable or Satellite box or a DVD player, can be connected to the HDMI
a Cable or Satellite box or a DVD player, can be connected to the HDMI
a Cable or Satellite box or a DVD player, can be connected to the HDMI
connector using an HDMI compliant (fully wired) cable.
connector using an HDMI compliant (fully wired) cable.
connector using an HDMI compliant (fully wired) cable.
HDMI is the world's first complete digital consumer AV interface complying
HDMI is the world's first complete digital consumer AV interface complying
HDMI is the world's first complete digital consumer AV interface complying
with a non-compression standard.
with a non-compression standard.
with a non-compression standard.
If the external equipment has only a DVI output, connect to the HDMI
If the external equipment has only a DVI output, connect to the HDMI
If the external equipment has only a DVI output, connect to the HDMI
terminal via a DVI to HDMI adapter cable (*2).
terminal via a DVI to HDMI adapter cable (*2).
terminal via a DVI to HDMI adapter cable (*2).
When the DVI to HDMI adapter cable is used, connect the audio cable to
When the DVI to HDMI adapter cable is used, connect the audio cable to
When the DVI to HDMI adapter cable is used, connect the audio cable to
the audio input terminal.
the audio input terminal.
the audio input terminal.
Audio settings can be made on the HDMI in menu screen. Applicable audio
Audio settings can be made on the HDMI in menu screen. Applicable audio
Audio settings can be made on the HDMI in menu screen. Applicable audio
signal sampling frequencies (L.PCM): 48 kHz, 44.1 kHz, 32 kHz
signal sampling frequencies (L.PCM): 48 kHz, 44.1 kHz, 32 kHz
signal sampling frequencies (L.PCM): 48 kHz, 44.1 kHz, 32 kHz
HDMI inHDMI in
(*1): The HDMI logo is displayed on an HDMI-compliant device.
(*1): The HDMI logo is displayed on an HDMI-compliant device.
(*1): The HDMI logo is displayed on an HDMI-compliant device.
(*1): The HDMI logo is displayed on an HDMI-compliant device.
(*2): Inquire at your local digital equipment retailer shop.
(*2): Inquire at your local digital equipment retailer shop.
(*2): Inquire at your local digital equipment retailer shop.
(*2): Inquire at your local digital equipment retailer shop.
26 (0100402)
Page 27

Watching TV
Blu-ray, DVD, Game Console, etc.
HDMI connection caution
Caution
CautionCautionCaution
If the connected device has an aspect adjustment function, set the aspect
If the connected device has an aspect adjustment function, set the aspect
If the connected device has an aspect adjustment function, set the aspect
ratio to "16:9".
ratio to "16:9".
ratio to "16:9".
The HDMI connectors are "type A".
The HDMI connectors are "type A".
The HDMI connectors are "type A".
The HDMI connectors are compatible with HDCP (High-Bandwidth Digital
The HDMI connectors are compatible with HDCP (High-Bandwidth Digital
The HDMI connectors are compatible with HDCP (High-Bandwidth Digital
Content Protection) copyright protection.
Content Protection) copyright protection.
Content Protection) copyright protection.
Devices with no digital output terminal may be connected to the input
Devices with no digital output terminal may be connected to the input
Devices with no digital output terminal may be connected to the input
terminal of either "COMPONENT IN", or "VIDEO IN" to receive analog
terminal of either "COMPONENT IN", or "VIDEO IN" to receive analog
terminal of either "COMPONENT IN", or "VIDEO IN" to receive analog
signals.
signals.
signals.
The HDMI input terminal can be used only with the following video signals:
The HDMI input terminal can be used only with the following video signals:
The HDMI input terminal can be used only with the following video signals:
480i, 480p, 720p, 1080i and 1080p. Ensure that the device being
480i, 480p, 720p, 1080i and 1080p. Ensure that the device being
480i, 480p, 720p, 1080i and 1080p. Ensure that the device being
connected to the TV can produce one of these video signals.
connected to the TV can produce one of these video signals.
connected to the TV can produce one of these video signals.
27 (0100403)
Page 28
Watching TV
Blu-ray, DVD, Game Console, etc.
Input signal
Signals other than those listed below may not be displayed properly.
Signals other than those listed below may not be displayed properly.
Signals other than those listed below may not be displayed properly.
The signals are reformatted for optimal viewing on your display.
The signals are reformatted for optimal viewing on your display.
The signals are reformatted for optimal viewing on your display.
Component and HDMI (* HDMI only)
Component and HDMI (* HDMI only)Component and HDMI (* HDMI only)Component and HDMIComponent and HDMI
Input signal Vertical frequency (Hz)
Input signal Vertical frequency (Hz)
525 (480)/60i 59.94/60.00
525 (480)/60i 59.94/60.00
525 (480)/60p 59.94/60.00
525 (480)/60p 59.94/60.00
750 (720)/60p 59.94/60.00
750 (720)/60p 59.94/60.00
1,125 (1,080)/60i 59.94/60.00
1,125 (1,080)/60i 59.94/60.00
1,125 (1,080)/60p 59.94/60.00
1,125 (1,080)/60p 59.94/60.00
1,125 (1,080)/24p * 23.98/24.00
1,125 (1,080)/24p * 23.98/24.00
28 (0100404)
Page 29

Watching TV
Useful features
Eco navigation
This setting allows you to set the TV to the most suitable energy-saving mode
This setting allows you to set the TV to the most suitable energy-saving mode
This setting allows you to set the TV to the most suitable energy-saving mode
automatically.
automatically.
automatically.
Select Eco navigation
Select Eco navigation
Select Eco navigation
Select Eco navigationEco navigation
1.
1.
1.
1.
MENU Menu > Setup > Eco navigation
MENU Menu > Setup > Eco navigation MENU Menu > Setup > Eco navigationMENUMENU Menu > Setup > Eco navigationMenu Setup Eco navigation
Press Set to ECO
Press Set to ECO
Press Set to ECO
Press Set to ECOSet to ECO
2.
2.
2.
2.
Optimizes the TV's various modes to save energy.
Optimizes the TV's various modes to save energy.
Optimizes the TV's various modes to save energy.
Note: The TV's brightness will adjust and adapt as the room lighting changes.
Note: The TV's brightness will adjust and adapt as the room lighting changes.
Note: The TV's brightness will adjust and adapt as the room lighting changes.
29 (0100502)
Page 30
Watching TV
Useful features
Voice guidance
This function provides a useful audio readout of basic features.
This function provides a useful audio readout of basic features.This function provides a useful audio readout of basic features.
Set Voice guidance to On
Set Voice guidance to On
Set Voice guidance to On
Set Voice guidance to On
1.
1.
1.
1.
MENU Menu > Sound > Voice guidance settings > Voice
MENU Menu > Sound > Voice guidance settings > Voice
MENU Menu > Sound > Voice guidance settings > Voice
MENUMENU Menu > Sound > Voice guidance settings > Voice
guidance
guidance
guidance
guidance
guidance
Select the menu using / and press
Select the menu using / and press
Select the menu using / and press
Then, switch to On using / and press
Then, switch to On using / and press
Then, switch to On using / and press On
Set other items
Set other items
Set other items
Set other items
2.
2.
2.
2.
Select the desired menu using / and press
Select the desired menu using / and press
Select the desired menu using / and press
Then, change or adjust the item using / and press
Then, change or adjust the item using / and press
Then, change or adjust the item using / and press
(Voice guidance/Speed/Volume/Language/User level/Web browser)
(Voice guidance/Speed/Volume/Language/User level/Web browser)(Voice guidance/Speed/Volume/Language/User level/Web browser)(Voice guidance/Speed/Volume/Language/User level/Web browser)Voice guidance Speed Volume Language User level Web browser
Menu Sound Voice guidance settings Voice
30 (0100503)
Page 31

Watching TV
Useful features
Voice guidance features
Web page speech
Web page speech
Web page speech
Web page speechWeb page speech
When you point to the text on the web page using the Touch Pad
When you point to the text on the web page using the Touch Pad
When you point to the text on the web page using the Touch Pad
Controller, a rectangle will appear around the framed area and speech will
Controller, a rectangle will appear around the framed area and speech will
Controller, a rectangle will appear around the framed area and speech will
begin.
begin.
begin.
Select Web browser using / and press
Select Web browser using / and press
Select Web browser using / and press Web browserWeb browser
Select On to enable this function
Select On to enable this function
Select On to enable this functionOn
Voice guidance in Home Screen
Voice guidance in Home Screen
Voice guidance in Home Screen
Voice guidance in Home ScreenVoice guidance in Home Screen
Useful information displayed on Home Screen.
Useful information displayed on Home Screen.
Useful information displayed on Home Screen.
31 (0100504)
Page 32

Watching TV
Useful features
Voice guidance settings
Settings for using voice guidance.
Settings for using voice guidance.Settings for using voice guidance.
Voice guidance
Voice guidance
Voice guidance
Voice guidance
(Off/On)
(Off/On)
(Off/On)
(Off/On)
On: Enables voice guidance of the basic features (Channel banner and input
On: Enables voice guidance of the basic features (Channel banner and input
On: Enables voice guidance of the basic features (Channel banner and input
source).
source).
source).
Speed
Speed
Speed
Speed
(Slow/Normal/Fast)
(Slow/Normal/Fast)
(Slow/Normal/Fast)
(Slow/Normal/Fast)
Adjust the readout speed of the voice guidance.
Adjust the readout speed of the voice guidance.
Adjust the readout speed of the voice guidance.
Volume
Volume
Volume
Volume
(Low/Mid/High)
(Low/Mid/High)
(Low/Mid/High)
(Low/Mid/High)
Selects the volume for voice guidance.
Selects the volume for voice guidance.
Selects the volume for voice guidance.
Language
Language
Language
Language
(English/Español/Français)
(English/Español/Français)
(English/Español/Français)
(English/Español/Français)
Selects the language for voice guidance.
Selects the language for voice guidance.
Selects the language for voice guidance.
User level
User level
User level
User level
(Expert/Beginner)
(Expert/Beginner)
(Expert/Beginner)
(Expert/Beginner)
Selects the level of complexity for voice guidance.
Selects the level of complexity for voice guidance.
Selects the level of complexity for voice guidance.
Web browser
Web browser
Web browser
Web browser
(On/Off)
(On/Off)
(On/Off)
(On/Off)
Enables voice guidance on web page.
Enables voice guidance on web page.
Enables voice guidance on web page.
32 (0600302)
Page 33
Watching TV
Useful features
Voice control
This function allows you to operate basic functions using voice control.
This function allows you to operate basic functions using voice control.This function allows you to operate basic functions using voice control.
You need a broadband network environment to use this function fully.
You need a broadband network environment to use this function fully.
You need a broadband network environment to use this function fully.
Ensure the Touch Pad Controller has been paired successfully.
Ensure the Touch Pad Controller has been paired successfully.
Ensure the Touch Pad Controller has been paired successfully.
Settings
SettingsSettingsSettingsSettings
You can set the voice control settings.
You can set the voice control settings.You can set the voice control settings.
Select voice control settings
Select voice control settings
Select voice control settings
1.
1.
1.
1.
MENU Menu > Setup > Voice control settings
MENU Menu > Setup > Voice control settings
MENU Menu > Setup > Voice control settings
MENUMENU Menu > Setup > Voice control settingsMenu Setup Voice control settings
Select item and set
Select item and set
Select item and set
2.
2.
2.
2.
Select desired item using / and adjust the settings with /
Select desired item using / and adjust the settings with /
Select desired item using / and adjust the settings with /
(Language/Speech detection level/Terms of service)
(Language/Speech detection level/Terms of service)(Language/Speech detection level/Terms of service)(Language/Speech detection level/Terms of service)Language Speech detection level Terms of service
To use voice control function, you need a broadband network
To use voice control function, you need a broadband network
To use voice control function, you need a broadband network
To use voice control function, you need a broadband network
environment, because this function accesses the speech recognition
environment, because this function accesses the speech recognition
environment, because this function accesses the speech recognition
environment, because this function accesses the speech recognition
server with the Internet connection. Even if you have the Internet
server with the Internet connection. Even if you have the Internet
server with the Internet connection. Even if you have the Internet
server with the Internet connection. Even if you have the Internet
environment, this function may not be available depending on the
environment, this function may not be available depending on the
environment, this function may not be available depending on the
environment, this function may not be available depending on the
proxy settings.
proxy settings.
proxy settings.
proxy settings.
Please connect the Internet without proxy settings. (Proxy settings are
Please connect the Internet without proxy settings. (Proxy settings are
Please connect the Internet without proxy settings. (Proxy settings are
Please connect the Internet without proxy settings. (Proxy settings are
not required for normal household use. For details of Internet
not required for normal household use. For details of Internet
not required for normal household use. For details of Internet
not required for normal household use. For details of Internet
environment, consult your Internet Service Provider (ISP) or
environment, consult your Internet Service Provider (ISP) or
environment, consult your Internet Service Provider (ISP) or
environment, consult your Internet Service Provider (ISP) or
telecommunications company.)
telecommunications company.)
telecommunications company.)
telecommunications company.)
33 (0100505)
Page 34

Watching TV
Useful features
How to use the voice control
How to use
How to useHow to useHow to useHow to use
Press on Touch Pad Controller
Press on Touch Pad Controller
Press on Touch Pad Controller
Press on Touch Pad Controller
1.
1.
1.
1.
When the confirmation screen is displayed, read carefully and start
When the confirmation screen is displayed, read carefully and start
When the confirmation screen is displayed, read carefully and start
voice control function.
voice control function.
voice control function.
When the operation guide is displayed follow the on-screen
When the operation guide is displayed follow the on-screen
When the operation guide is displayed follow the on-screen
When the operation guide is displayed follow the on-screen
2.
2.
2.
2.
instructions
instructions
instructions
instructions
OPTION Voice command list
OPTION Voice command list
OPTION Voice command list
OPTIONOPTION
RETURN Exit voice control function
RETURN Exit voice control function
RETURN Exit voice control function
RETURNRETURN
When you start voice control function, sound level of the TV
When you start voice control function, sound level of the TV
When you start voice control function, sound level of the TV
When you start voice control function, sound level of the TV
becomes low.
becomes low.
becomes low.
becomes low.
Voice control function may not work properly under the following
Voice control function may not work properly under the following
Voice control function may not work properly under the following
Voice control function may not work properly under the following
circumstances.
circumstances.
circumstances.
circumstances.
– Incorrect or unclear pronunciation.
– Incorrect or unclear pronunciation.
– Incorrect or unclear pronunciation.
– Incorrect or unclear pronunciation.
– Volume level of your voice is too loud or too soft.
– Volume level of your voice is too loud or too soft.
– Volume level of your voice is too loud or too soft.
– Volume level of your voice is too loud or too soft.
– Noisy surroundings.
– Noisy surroundings.
– Noisy surroundings.
– Noisy surroundings.
Phrases other than voice command may not be recognized.
Phrases other than voice command may not be recognized.
Phrases other than voice command may not be recognized.
Phrases other than voice command may not be recognized.
It is recommended that you speak within about 6" (15 cm) of the
It is recommended that you speak within about 6" (15 cm) of the
It is recommended that you speak within about 6" (15 cm) of the
It is recommended that you speak within about 6" (15 cm) of the
integrated microphone of Touch Pad Controller when using voice
integrated microphone of Touch Pad Controller when using voice
integrated microphone of Touch Pad Controller when using voice
integrated microphone of Touch Pad Controller when using voice
control function.
control function.
control function.
control function.
Voice control function is subject to change without notice.
Voice control function is subject to change without notice.
Voice control function is subject to change without notice.
Voice control function is subject to change without notice.
34 (0100506)
Page 35

Watching TV
Useful features
Voice control settings
Settings for using voice control function.
Settings for using voice control function.Settings for using voice control function.
Language
Language
Language
Language
(English/Español/Français)
(English/Español/Français)
(English/Español/Français)
(English/Español/Français)
Selects the language for voice control.
Selects the language for voice control.
Selects the language for voice control.
Speech detection level
Speech detection level
Speech detection level
Speech detection level
(High/Standard)
(High/Standard)
(High/Standard)
(High/Standard)
Sets sensitivity level for voice control.
Sets sensitivity level for voice control.
Sets sensitivity level for voice control.
Terms of service
Terms of service
Terms of service
Terms of service
Shows the terms of service of voice control.
Shows the terms of service of voice control.
Shows the terms of service of voice control.
35 (0100507)
Page 36

Watching TV
Useful features
Built-in camera
Built-in camera allows you to use specific application such as face recognition,
Built-in camera allows you to use specific application such as face recognition,
Built-in camera allows you to use specific application such as face recognition,
video message, etc. as a communication tool.
video message, etc. as a communication tool.
video message, etc. as a communication tool.
Note:
Note:
Note:
Please note that under certain circumstances, audio/video recording may be
Please note that under certain circumstances, audio/video recording may be
Please note that under certain circumstances, audio/video recording may be
prohibited by law.
prohibited by law.
prohibited by law.
This appliance should be used only in compliance with all applicable federal,
This appliance should be used only in compliance with all applicable federal,
This appliance should be used only in compliance with all applicable federal,
state and local statutes.
state and local statutes.
state and local statutes.
Auto pop-up
Auto pop-upAuto pop-upAuto pop-upAuto pop-up
The built-in camera will automatically pop up when the camera application
The built-in camera will automatically pop up when the camera application
The built-in camera will automatically pop up when the camera application
is activated.
is activated.
is activated.
Close manually
Close manuallyClose manuallyClose manuallyClose manually
Close manually by pushing the top of the camera.
Close manually by pushing the top of the camera.
Close manually by pushing the top of the camera.
When the camera is closed, camera application is not available.
When the camera is closed, camera application is not available.
When the camera is closed, camera application is not available.
Do not pull the built-in camera up by hand.
Do not pull the built-in camera up by hand.Do not pull the built-in camera up by hand.
Face recognition may not work properly depending on surrounding
Face recognition may not work properly depending on surrounding
Face recognition may not work properly depending on surrounding
Face recognition may not work properly depending on surrounding
environment or situation. (e.g. darkened room etc.)
environment or situation. (e.g. darkened room etc.)
environment or situation. (e.g. darkened room etc.)
environment or situation. (e.g. darkened room etc.)
You need a broadband network environment to use Internet services
You need a broadband network environment to use Internet services
You need a broadband network environment to use Internet services
You need a broadband network environment to use Internet services
fully.
fully.
fully.
fully.
Check the Network connection and Network settings.
Check the Network connection and Network settings.
Check the Network connection and Network settings.
Check the Network connection and Network settings.
(See Using Internet services)
(See Using Internet services)
(See Using Internet services)
(See Using Internet services)Using Internet services
This function is subject to change without notice.
This function is subject to change without notice.
This function is subject to change without notice.
This function is subject to change without notice.
36 (0100508)
Page 37
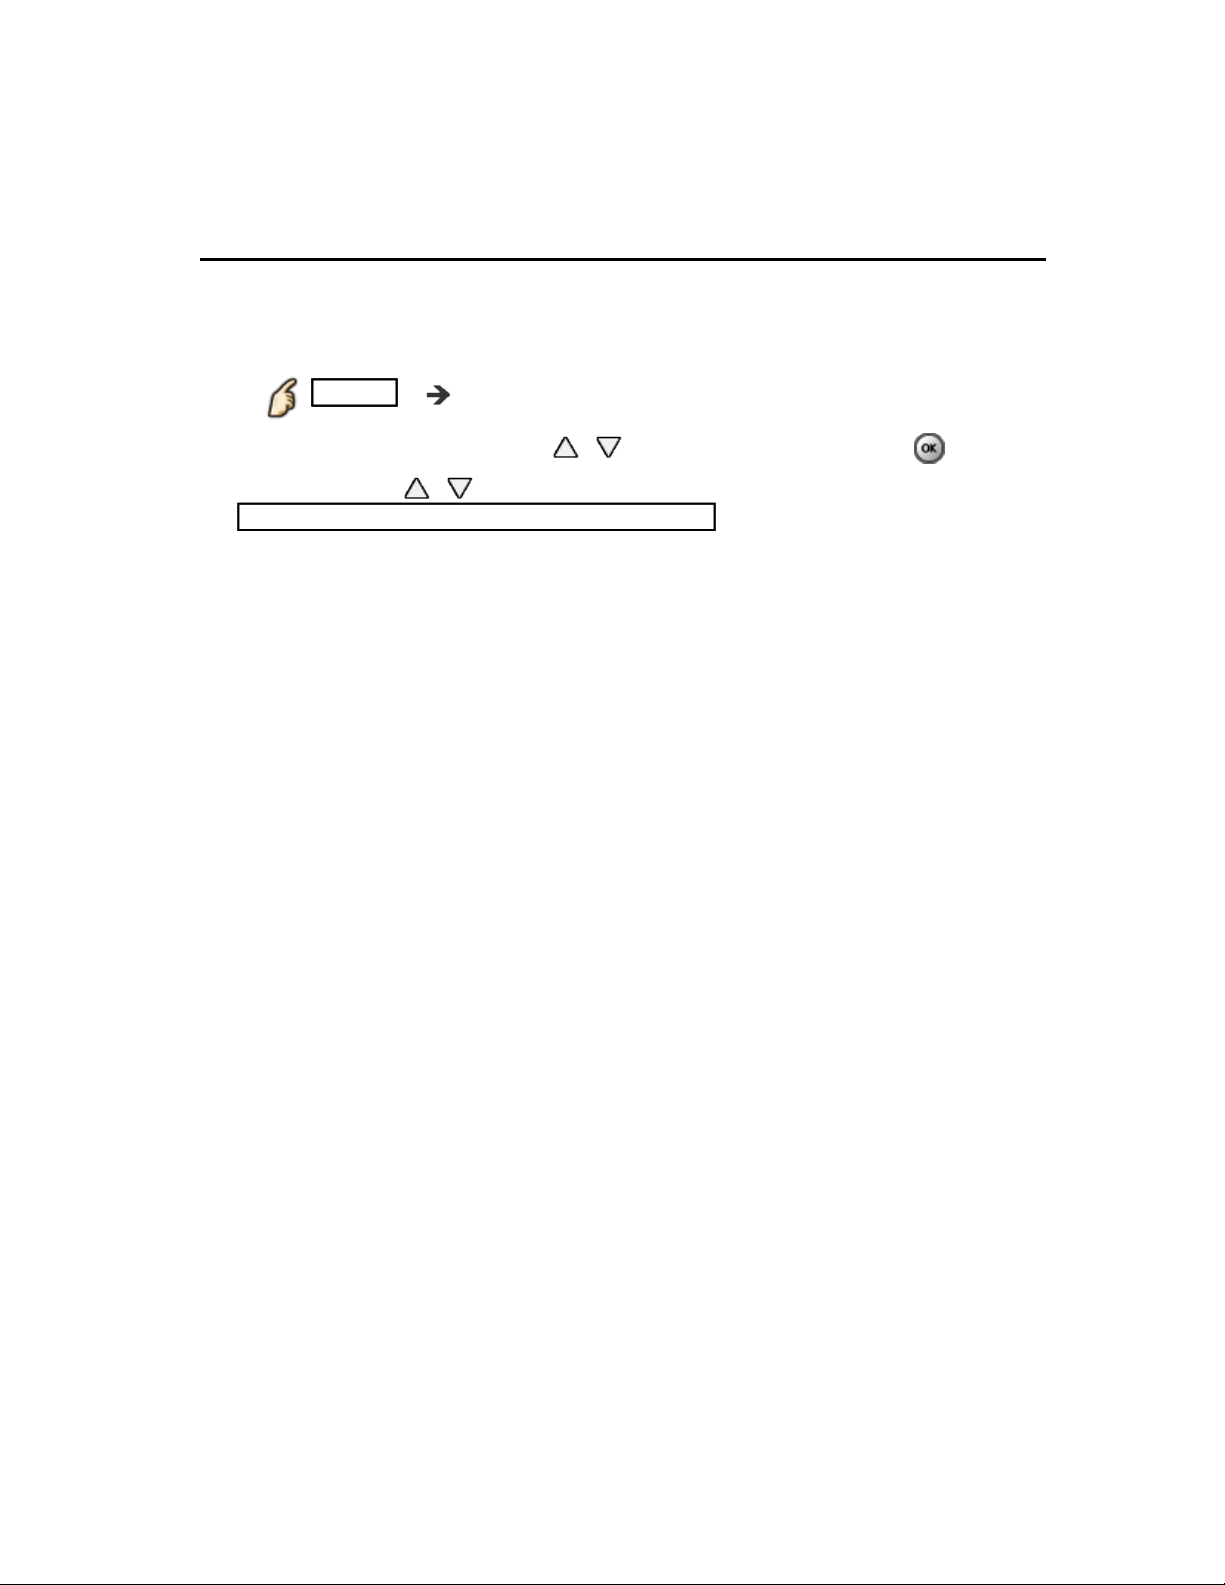
Watching TV
For best picture
Picture mode
Change picture mode to suit your settings and taste
Change picture mode to suit your settings and taste
Change picture mode to suit your settings and taste
Change picture mode to suit your settings and taste
1.
1.
1.
1.
1. Select Picture mode
1. Select Picture mode1. Select Picture modePicture modePicture mode
MENU Menu > Picture > Picture mode
MENU Menu > Picture > Picture mode MENU Menu > Picture > Picture modeMENUMENU Menu > Picture > Picture modeMenu Picture Picture mode
Select desired menu using / from menu bar and press
Select desired menu using / from menu bar and press Select desired menu using / from menu bar and press
2. Adjust using /
2. Adjust using /
2. Adjust using /
Note: HDMI will provide the best HD picture
Note: HDMI will provide the best HD picture
Note: HDMI will provide the best HD pictureNote: HDMI will provide the best HD picture
Picture mode type
Picture mode type
Picture mode type
Picture mode type
2.
2.
2.
2.
Vivid
Vivid
Vivid
Vivid
Provides enhanced picture contrast and sharpness for viewing in a well-lit
Provides enhanced picture contrast and sharpness for viewing in a well-lit
Provides enhanced picture contrast and sharpness for viewing in a well-lit
room.
room.
room.
Standard
Standard
Standard
Standard
Recommended for normal viewing conditions with subdued room lighting.
Recommended for normal viewing conditions with subdued room lighting.
Recommended for normal viewing conditions with subdued room lighting.
Home theater
Home theater
Home theater
Home theater
For watching movies in a darkened room. It provides a soft, film-like picture.
For watching movies in a darkened room. It provides a soft, film-like picture.
For watching movies in a darkened room. It provides a soft, film-like picture.
THX*
THX*
THX*
THX
THX modes are used to mirror the picture settings used by professional
THX modes are used to mirror the picture settings used by professional
THX modes are used to mirror the picture settings used by professional
filmmakers, faithfully reproducing the image quality of THX Certified
filmmakers, faithfully reproducing the image quality of THX Certified
filmmakers, faithfully reproducing the image quality of THX Certified
movies. THX Certified movies have the THX logo on the disc. THX modes
movies. THX Certified movies have the THX logo on the disc. THX modes
movies. THX Certified movies have the THX logo on the disc. THX modes
are not available for photo contents or Internet services.
are not available for photo contents or Internet services.
are not available for photo contents or Internet services.
* 2D: THX Cinema/THX Bright Room, 3D: THX3D Cinema
* 2D: THX Cinema/THX Bright Room, 3D: THX3D Cinema
* 2D: THX Cinema/THX Bright Room, 3D: THX3D Cinema
Cinema
Cinema
Cinema
Cinema
Reproduces the original image quality precisely without any revision.
Reproduces the original image quality precisely without any revision.
Reproduces the original image quality precisely without any revision.
Allows you to set the professional picture settings in Pro settings and
Allows you to set the professional picture settings in Pro settings and
Allows you to set the professional picture settings in Pro settings and
Copy adjustments.
Copy adjustments.
Copy adjustments.
Copy adjustmentsCopy adjustments
Custom
Custom
Custom
Custom
Customizes each item according to your taste.
Customizes each item according to your taste.
Customizes each item according to your taste.
Allows you to set the professional picture settings in Pro settings and
Allows you to set the professional picture settings in Pro settings and
Allows you to set the professional picture settings in Pro settings and
Copy adjustments.
Copy adjustments.
Copy adjustments.
Copy adjustmentsCopy adjustments
Pro settingsPro settings
Pro settingsPro settings
37 (0100601)
Page 38

Professional 1/2
Professional 1/2
Professional 1/2
Professional 1/2
These modes are displayed with Professional mode (isfccc) of Setup is
These modes are displayed with Professional mode (isfccc) of Setup is
These modes are displayed with Professional mode (isfccc) of Setup is
set to On.
set to On.
set to On.
Allows you to set the professional picture settings in Pro settings, Lock
Allows you to set the professional picture settings in Pro settings, Lock
Allows you to set the professional picture settings in Pro settings, Lock
settings and Copy adjustments.
settings and Copy adjustments.
settings and Copy adjustments.
settings
settings Copy adjustmentsCopy adjustments
On
If the certified professional dealer sets these modes, Professional 1
If the certified professional dealer sets these modes, Professional 1
If the certified professional dealer sets these modes, Professional 1
and Professional 2 may be displayed as isf Day and isf Night.
and Professional 2 may be displayed as isf Day and isf Night.
and Professional 2 may be displayed as isf Day and isf Night.
Professional 2 isf Day isf Night
Professional mode (isfccc)Professional mode (isfccc) SetupSetup
Pro settingsPro settings Lock
Professional 1
Lock
38 (0100601)
Page 39

Watching TV
For best picture
Auto brightness (ECO)
Contrast Automatic Tracking System (C.A.T.S.) adjusts the screen brightness
Contrast Automatic Tracking System (C.A.T.S.) adjusts the screen brightness
Contrast Automatic Tracking System (C.A.T.S.) adjusts the screen brightness
and contrast according to the room's ambient light conditions. This ECO
and contrast according to the room's ambient light conditions. This ECO
and contrast according to the room's ambient light conditions. This ECO
feature automatically dims the brightness of the screen when the room lighting
feature automatically dims the brightness of the screen when the room lighting
feature automatically dims the brightness of the screen when the room lighting
is lowered.
is lowered.
is lowered.
C.A.T.S. features a built-in delay when the lighting conditions change. The
C.A.T.S. features a built-in delay when the lighting conditions change. The
C.A.T.S. features a built-in delay when the lighting conditions change. The
adjustment happens gradually.
adjustment happens gradually.
adjustment happens gradually.
If you prefer a consistent brightness, disable C.A.T.S. by:
If you prefer a consistent brightness, disable C.A.T.S. by:
If you prefer a consistent brightness, disable C.A.T.S. by:
Menu > Picture > scroll down to C.A.T.S. and turn it off.
Menu > Picture > scroll down to C.A.T.S. and turn it off.
Menu > Picture > scroll down to C.A.T.S. and turn it off.
Menu > Picture >Menu Picture C.A.T.S.C.A.T.S.
Or
Or
Or
Menu > Picture > Picture mode then select viewing mode such as Custom
Menu > Picture > Picture mode then select viewing mode such as Custom
Menu > Picture > Picture mode then select viewing mode such as Custom
Menu > Picture > Picture modeMenu Picture Picture mode Custom
.
.
.
39 (0100602)
Page 40
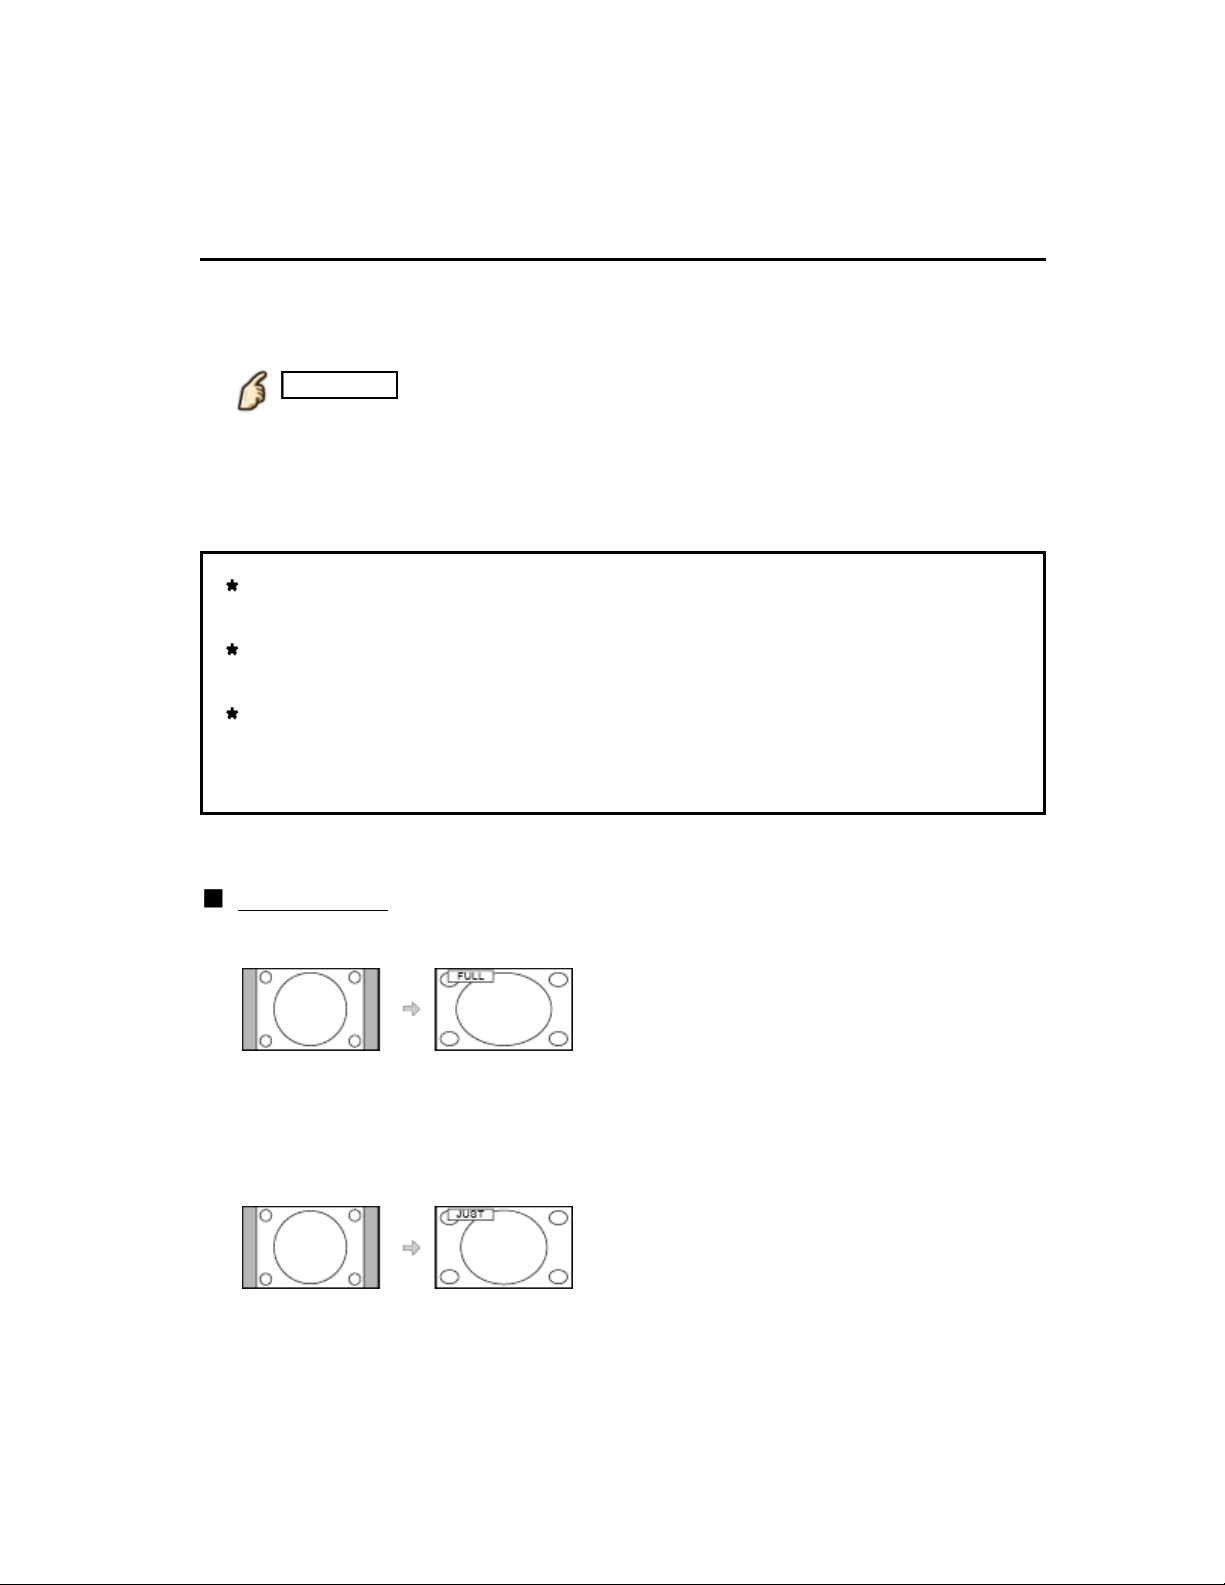
Watching TV
For best picture
Aspect
Use FORMAT button to change the aspect ratio
Use FORMAT button to change the aspect ratio
Use FORMAT button to change the aspect ratio
Use FORMAT button to change the aspect ratio
1.
1.
1.
1.
Use when the picture has bars (sides or top/bottom) and to zoom.
Use when the picture has bars (sides or top/bottom) and to zoom.
Use when the picture has bars (sides or top/bottom) and to zoom.
FORMAT ( to cycle through the aspect modes )
FORMAT ( to cycle through the aspect modes ) FORMAT ( to cycle through the aspect modes )FORMATFORMAT
480i, 480p:
480i, 480p:
480i, 480p:
480i, 480p:
1080p, 1080i, 720p:
1080p, 1080i, 720p:
1080p, 1080i, 720p:
1080p, 1080i, 720p:
Use when the picture does not fill the whole screen or portions of the
Use when the picture does not fill the whole screen or portions of the
Use when the picture does not fill the whole screen or portions of the
Use when the picture does not fill the whole screen or portions of the
picture are trimmed.
picture are trimmed.
picture are trimmed.
picture are trimmed.
Some content, such as film-based movies, are available in extra-wide
Some content, such as film-based movies, are available in extra-wide
Some content, such as film-based movies, are available in extra-wide
Some content, such as film-based movies, are available in extra-wide
format. Top and bottom bars are unavoidable.
format. Top and bottom bars are unavoidable.
format. Top and bottom bars are unavoidable.
format. Top and bottom bars are unavoidable.
Connected devices, such as Cable/Satellite box, DVD/Blu-ray players
Connected devices, such as Cable/Satellite box, DVD/Blu-ray players
Connected devices, such as Cable/Satellite box, DVD/Blu-ray players
Connected devices, such as Cable/Satellite box, DVD/Blu-ray players
and game consoles have their own aspect (format) settings. Adjust the
and game consoles have their own aspect (format) settings. Adjust the
and game consoles have their own aspect (format) settings. Adjust the
and game consoles have their own aspect (format) settings. Adjust the
device's aspect settings.
device's aspect settings.
device's aspect settings.
device's aspect settings.
Screen mode
Screen modeScreen modeScreen modeScreen mode
FULL
FULL
FULLFULLFULL
Full/Just/4:3/Zoom
Full/Just/4:3/Zoom
Full/Just/4:3/Zoom
Full/Just/4:3/Zoom
Full/H-Fill/Just/Sidecut Just/4:3/Zoom/
Full/H-Fill/Just/Sidecut Just/4:3/Zoom/
Full/H-Fill/Just/Sidecut Just/4:3/Zoom/
Full/H-Fill/Just/Sidecut Just/4:3/Zoom/
Sidecut Zoom
Sidecut Zoom
Sidecut Zoom
Sidecut Zoom
Enlarges the 4:3 image horizontally to the screen's side edges.
Enlarges the 4:3 image horizontally to the screen's side edges.
Enlarges the 4:3 image horizontally to the screen's side edges.
Enlarges the 4:3 image horizontally to the screen's side edges.
(Recommended for anamorphic picture)
(Recommended for anamorphic picture)
(Recommended for anamorphic picture)
(Recommended for anamorphic picture)
JUST
JUST
JUSTJUSTJUST
Stretches to justify the 4:3 image to the four corners of the screen.
Stretches to justify the 4:3 image to the four corners of the screen.
Stretches to justify the 4:3 image to the four corners of the screen.
Stretches to justify the 4:3 image to the four corners of the screen.
(Recommended for normal TV broadcast)
(Recommended for normal TV broadcast)
(Recommended for normal TV broadcast)
(Recommended for normal TV broadcast)
40 (0100603)
Page 41

Sidecut just
Sidecut just
Sidecut justSidecut justSidecut just
Enlarges the 4:3 image horizontally to the screen's side edges. The side
Enlarges the 4:3 image horizontally to the screen's side edges. The side
Enlarges the 4:3 image horizontally to the screen's side edges. The side
Enlarges the 4:3 image horizontally to the screen's side edges. The side
edges of the image are cut off.
edges of the image are cut off.
edges of the image are cut off.
edges of the image are cut off.
H-FILL
H-FILL
H-FILLH-FILLH-FILL
Enlarges the 4:3 image horizontally to the screen's side edges. The side
Enlarges the 4:3 image horizontally to the screen's side edges. The side
Enlarges the 4:3 image horizontally to the screen's side edges. The side
Enlarges the 4:3 image horizontally to the screen's side edges. The side
edges of the image are cut off.
edges of the image are cut off.
edges of the image are cut off.
edges of the image are cut off.
4:3
4:3
4:34:34:3
Standard
Standard
Standard
Standard
(Note that "Image retention" of the side bar may occur from displaying it for
(Note that "Image retention" of the side bar may occur from displaying it for
(Note that "Image retention" of the side bar may occur from displaying it for
(Note that "Image retention" of the side bar may occur from displaying it for
a long time.)
a long time.)
a long time.)
a long time.)
ZOOM
ZOOM
ZOOMZOOMZOOM
Enlarges the 4:3 image to the entire screen.
Enlarges the 4:3 image to the entire screen.
Enlarges the 4:3 image to the entire screen.
Enlarges the 4:3 image to the entire screen.
(Recommended for Letter Box)
(Recommended for Letter Box)
(Recommended for Letter Box)
(Recommended for Letter Box)
Sidecut zoom
Sidecut zoom
Sidecut zoomSidecut zoomSidecut zoom
Enlarges the image to the entire screen. The side edges of the image are
Enlarges the image to the entire screen. The side edges of the image are
Enlarges the image to the entire screen. The side edges of the image are
Enlarges the image to the entire screen. The side edges of the image are
cut off.
cut off.
cut off.
cut off.
41 (0100603)
Page 42

Watching TV
For best picture
Aspect info.
Zoom adjustments
Zoom adjustments
Zoom adjustments
Zoom adjustmentsZoom adjustments
Vertical image position and size can be adjusted in "ZOOM"
Vertical image position and size can be adjusted in "ZOOM"
Vertical image position and size can be adjusted in "ZOOM"
Select Zoom adjustments in the Picture menu.
Select Zoom adjustments in the Picture menu.
Select Zoom adjustments in the Picture menu.
adjustments
adjustments
adjustments
adjustments
adjustments
adjustments
V-position: Vertical position adjustment
V-position: Vertical position adjustment
V-position: Vertical position adjustment
Adjust using / to desired position.
Adjust using / to desired position.
Adjust using / to desired position.
V-size: Vertical size adjustment
V-size: Vertical size adjustment
V-size: Vertical size adjustment
Adjust using / to desired size.
Adjust using / to desired size.
Adjust using / to desired size.
Press OK to reset
Press OK to resetPress OK to reset
Zoom adjustmentsZoom adjustments PicturePicture
MENU Menu > Picture > Screen settings > Zoom
MENU Menu > Picture > Screen settings > Zoom
MENU Menu > Picture > Screen settings > Zoom
MENUMENU Menu > Picture > Screen settings > Zoom
Menu Picture > Screen settings > Zoom
Picture Screen settings Zoom
42 (0100604)
Page 43

Watching TV
For best picture
Lock settings
Lock the picture menu for Professional 1/Professional 2 and each input.
Lock the picture menu for Professional 1/Professional 2 and each input.Lock the picture menu for Professional 1/Professional 2 and each input.Professional 1 Professional 2
Settings are basic picture settings and Pro settings.
Settings are basic picture settings and Pro settings.Settings are basic picture settings and Pro settings.
Select Lock settings
Select Lock settings
Select Lock settings
Select Lock settingsLock settings
1.
1.
1.
1.
MENU Menu > Picture > Lock settings
MENU Menu > Picture > Lock settings
MENU Menu > Picture > Lock settings
MENUMENU Menu > Picture > Lock settingsMenu Picture Lock settings
Select desired menu using / and press
Select desired menu using / and press
Select desired menu using / and press
Enter the 4-digit PIN number
Enter the 4-digit PIN number
Enter the 4-digit PIN number
Enter the 4-digit PIN number
2.
2.
2.
2.
Enter the PIN number twice at first setting.
Enter the PIN number twice at first setting.
Enter the PIN number twice at first setting.
Make a note of the PIN number in case you forget it.
Make a note of the PIN number in case you forget it.
Make a note of the PIN number in case you forget it.
Select Adjustment Lock and set to On
Select Adjustment Lock and set to On
Select Adjustment Lock and set to On
Select Adjustment Lock and set to OnAdjustment Lock
3.
3.
3.
3.
Select the menu using / and press
Select the menu using / and press
Select the menu using / and press
Then, select On using / and press to set
Then, select On using / and press to set
Then, select On using / and press to set
To change the PIN number
To change the PIN numberTo change the PIN numberTo change the PIN numberTo change the PIN number
Select Change password using / and press
Select Change password using / and press
Select Change password using / and press Change passwordChange password
Enter a new PIN number twice with numeric buttons
Enter a new PIN number twice with numeric buttons
Enter a new PIN number twice with numeric buttons
On
43 (0100605)
Page 44

Watching TV
For best picture
Copy adjustments
You can copy the selected Cinema or Custom settings and apply them to all
You can copy the selected Cinema or Custom settings and apply them to all
You can copy the selected Cinema or Custom settings and apply them to all
or another input.
or another input.
or another input.
Settings are basic picture settings and Pro settings.
Settings are basic picture settings and Pro settings.
Settings are basic picture settings and Pro settings.
Select Copy adjustments
Select Copy adjustments
Select Copy adjustments
Select Copy adjustmentsCopy adjustments
1.
1.
1.
1.
MENU Menu > Picture > Copy adjustments
MENU Menu > Picture > Copy adjustments
MENU Menu > Picture > Copy adjustments
MENUMENU Menu > Picture > Copy adjustmentsMenu Picture Copy adjustments
Select the desired menu using / and press
Select the desired menu using / and press
Select the desired menu using / and press
Select Destination input and set (Default: All)
Select Destination input and set (Default: All)
Select Destination input and set (Default: All)
Select Destination input and set (Default: All)Destination input
2.
2.
2.
2.
Select the menu using / and press
Select the menu using / and press
Select the menu using / and press
Then, select the destination using / and press to set.
Then, select the destination using / and press to set.
Then, select the destination using / and press to set.
Select Copy start to copy
Select Copy start to copy
Select Copy start to copy
Select Copy start to copyCopy start
3.
3.
3.
3.
Select the menu using / and press
Select the menu using / and press
Select the menu using / and press
Cinema Custom
Select Yes to set
Select Yes to set
Select Yes to set
Select Yes to setYes
4.
4.
4.
4.
Select the item using / and press to set
Select the item using / and press to set
Select the item using / and press to set
44 (0100606)
Page 45

Watching TV
For best picture
Pro settings
Adjust the picture mode in more detail.
Adjust the picture mode in more detail.
Adjust the picture mode in more detail.
Set Picture mode to Custom/Cinema/Professional 1/Professional 2 first.
Set Picture mode to Custom/Cinema/Professional 1/Professional 2 first.
Set Picture mode to Custom/Cinema/Professional 1/Professional 2 first.Picture modePicture mode Custom Cinema Professional 1 Professional 2
MENU Menu > Picture > Pro settings
MENU Menu > Picture > Pro settings MENU Menu > Picture > Pro settingsMENUMENU Menu > Picture > Pro settingsMenu Picture Pro settings
Panel brightness
Panel brightness
Panel brightness
Panel brightness
(Low/Mid/High)
(Low/Mid/High)
(Low/Mid/High)
(Low/Mid/High)
Selects different levels of overall panel brightness.
Selects different levels of overall panel brightness.
Selects different levels of overall panel brightness.
AGC
AGC
AGC
AGC
(0-15)
(0-15)
(0-15)
(0-15)
Automatic Gamma Control. Increases automatically the brightness of a dark
Automatic Gamma Control. Increases automatically the brightness of a dark
Automatic Gamma Control. Increases automatically the brightness of a dark
signal.
signal.
signal.
Black extension
Black extension
Black extension
Black extension
(0-15)
(0-15)
(0-15)
(0-15)
Adjust the gradations in dark shades of the image.
Adjust the gradations in dark shades of the image.
Adjust the gradations in dark shades of the image.
Color gamut
Color gamut
Color gamut
Color gamut
(Native/Rec. 709/SMPTE-C/EBU)
(Native/Rec. 709/SMPTE-C/EBU)
(Native/Rec. 709/SMPTE-C/EBU)
(Native/Rec. 709/SMPTE-C/EBU)
Each color space is a matrix composed of red, green & blue colors. Select your
Each color space is a matrix composed of red, green & blue colors. Select your
Each color space is a matrix composed of red, green & blue colors. Select your
preference.
preference.
preference.
W/B detail adjustment
W/B detail adjustmentW/B detail adjustmentW/B detail adjustment
W/B high R, G, B (+/-50)
W/B high R, G, B (+/-50)
W/B high R, G, B (+/-50)
W/B high R, G, B (+/-50)
Adjusts the white balance for light red/green/blue areas.
Adjusts the white balance for light red/green/blue areas.
Adjusts the white balance for light red/green/blue areas.
W/B low R, G, B (+/-50)
W/B low R, G, B (+/-50)
W/B low R, G, B (+/-50)
W/B low R, G, B (+/-50)
Adjusts the white balance for dark red/green/blue areas.
Adjusts the white balance for dark red/green/blue areas.
Adjusts the white balance for dark red/green/blue areas.
More detail adjustment
More detail adjustment
More detail adjustment
More detail adjustment
Adjusts more detailed White Balance items.
Adjusts more detailed White Balance items.
Adjusts more detailed White Balance items.
45 (0600202)
Page 46

Input signal level
Input signal level
Input signal level
Input signal level
Input signal level
Adjusts the IRE picture level in relation to the gain of the red, green & blue
Adjusts the IRE picture level in relation to the gain of the red, green & blue
Adjusts the IRE picture level in relation to the gain of the red, green & blue
Adjusts the IRE picture level in relation to the gain of the red, green & blue
colors.
colors.
colors.
colors.
Red, Green, Blue gain
Red, Green, Blue gain
Red, Green, Blue gain
Red, Green, Blue gain
Red, Green, Blue gain
Adjusts the red/green/blue gain value of each Input signal level.
Adjusts the red/green/blue gain value of each Input signal level.
Adjusts the red/green/blue gain value of each Input signal level.
Adjusts the red/green/blue gain value of each Input signal level.
Reset to defaults
Reset to defaults
Reset to defaults
Reset to defaults
Reset to defaults
Reset all More detail adjustment to factory defaults settings.
Reset all More detail adjustment to factory defaults settings.
Reset all More detail adjustment to factory defaults settings.
Reset all More detail adjustment to factory defaults settings.
Reset to defaults
Reset to defaults
Reset to defaults
Reset to defaults
Reset W/B detail adjustment adjustments to factory defaults settings.
Reset W/B detail adjustment adjustments to factory defaults settings.
Reset W/B detail adjustment adjustments to factory defaults settings.
Color detail adjustment
Color detail adjustmentColor detail adjustmentColor detail adjustment
Red, Green, Blue hue (+/-50)
Red, Green, Blue hue (+/-50)
Red, Green, Blue hue (+/-50)
Red, Green, Blue hue (+/-50)
Adjusts the red/green/blue hue between light, pastel and vivid.
Adjusts the red/green/blue hue between light, pastel and vivid.
Adjusts the red/green/blue hue between light, pastel and vivid.
W/B detail adjustmentW/B detail adjustment
More detail adjustmentMore detail adjustment
Red, Green, Blue saturation (+/-50)
Red, Green, Blue saturation (+/-50)
Red, Green, Blue saturation (+/-50)
Red, Green, Blue saturation (+/-50)
Adjusts the difference of the red/green/blue color against its own brightness.
Adjusts the difference of the red/green/blue color against its own brightness.
Adjusts the difference of the red/green/blue color against its own brightness.
Red, Green, Blue luminance (+/-50)
Red, Green, Blue luminance (+/-50)
Red, Green, Blue luminance (+/-50)
Red, Green, Blue luminance (+/-50)
Adjusts the luminance of red/green/blue areas.
Adjusts the luminance of red/green/blue areas.
Adjusts the luminance of red/green/blue areas.
More detail adjustment
More detail adjustment
More detail adjustment
More detail adjustment
Adjusts more detailed Color management items.
Adjusts more detailed Color management items.
Adjusts more detailed Color management items.
46 (0600202)
Page 47

Yellow, Cyan, Magenta hue (+/-50)
Yellow, Cyan, Magenta hue (+/-50)
Yellow, Cyan, Magenta hue (+/-50)
Yellow, Cyan, Magenta hue (+/-50)
Yellow, Cyan, Magenta hue (+/-50)
Adjusts the yellow/cyan/magenta hue between light, pastel and vivid.
Adjusts the yellow/cyan/magenta hue between light, pastel and vivid.
Adjusts the yellow/cyan/magenta hue between light, pastel and vivid.
Adjusts the yellow/cyan/magenta hue between light, pastel and vivid.
Yellow, Cyan, Magenta saturation (+/-50)
Yellow, Cyan, Magenta saturation (+/-50)
Yellow, Cyan, Magenta saturation (+/-50)
Yellow, Cyan, Magenta saturation (+/-50)
Yellow, Cyan, Magenta saturation (+/-50)
Adjusts the difference of the yellow/cyan/magenta color against its own
Adjusts the difference of the yellow/cyan/magenta color against its own
Adjusts the difference of the yellow/cyan/magenta color against its own
Adjusts the difference of the yellow/cyan/magenta color against its own
brightness.
brightness.
brightness.
brightness.
Yellow, Cyan, Magenta luminance (+/-50)
Yellow, Cyan, Magenta luminance (+/-50)
Yellow, Cyan, Magenta luminance (+/-50)
Yellow, Cyan, Magenta luminance (+/-50)
Yellow, Cyan, Magenta luminance (+/-50)
Adjusts the luminance of red/green/blue/yellow/cyan/magenta areas.
Adjusts the luminance of red/green/blue/yellow/cyan/magenta areas.
Adjusts the luminance of red/green/blue/yellow/cyan/magenta areas.
Adjusts the luminance of red/green/blue/yellow/cyan/magenta areas.
Reset to defaults
Reset to defaults
Reset to defaults
Reset to defaults
Reset to defaults
Reset More detail adjustment to factory defaults settings.
Reset More detail adjustment to factory defaults settings.
Reset More detail adjustment to factory defaults settings.
Reset More detail adjustment to factory defaults settings.
Reset to defaults
Reset to defaults
Reset to defaults
Reset to defaults
Reset Color detail adjustment adjustments to factory defaults settings.
Reset Color detail adjustment adjustments to factory defaults settings.
Reset Color detail adjustment adjustments to factory defaults settings.
More detail adjustmentMore detail adjustment
Color detail adjustmentColor detail adjustment
Gamma detail adjustment
Gamma detail adjustmentGamma detail adjustmentGamma detail adjustment
Gamma
Gamma
Gamma
Gamma
(S-curve/1.8/2.0/2.2/2.4/2.6)
(S-curve/1.8/2.0/2.2/2.4/2.6)
(S-curve/1.8/2.0/2.2/2.4/2.6)
(S-curve/1.8/2.0/2.2/2.4/2.6)
Gamma correction. Adjusts the intermediate brightness of the image.
Gamma correction. Adjusts the intermediate brightness of the image.
Gamma correction. Adjusts the intermediate brightness of the image.
More detail adjustment
More detail adjustment
More detail adjustment
More detail adjustment
Adjusts more detailed Gamma items.
Adjusts more detailed Gamma items.
Adjusts more detailed Gamma items.
Input signal level
Input signal level
Input signal level
Input signal level
Input signal level
Adjusts the IRE picture level in relation to the gain of the red, green & blue
Adjusts the IRE picture level in relation to the gain of the red, green & blue
Adjusts the IRE picture level in relation to the gain of the red, green & blue
Adjusts the IRE picture level in relation to the gain of the red, green & blue
colors.
colors.
colors.
colors.
Gain
Gain
Gain
Gain
Gain
Adjusts the gain value of each Input signal level.
Adjusts the gain value of each Input signal level.
Adjusts the gain value of each Input signal level.
Adjusts the gain value of each Input signal level.
Reset to defaults
Reset to defaults
Reset to defaults
Reset to defaults
Reset to defaults
Reset all More detail adjustment to factory defaults settings.
Reset all More detail adjustment to factory defaults settings.
Reset all More detail adjustment to factory defaults settings.
Reset all More detail adjustment to factory defaults settings.
More detail adjustmentMore detail adjustment
Reset to defaults
Reset to defaults
Reset to defaults
Reset to defaults
Reset Gamma detail adjustment to factory defaults settings.
Reset Gamma detail adjustment to factory defaults settings.
Reset Gamma detail adjustment to factory defaults settings.
Gamma detail adjustmentGamma detail adjustment
47 (0600202)
Page 48

Reset to defaults
Reset to defaults
Reset to defaults
Reset to defaults
Resets all Pro settings adjustments to factory default settings.
Resets all Pro settings adjustments to factory default settings.
Resets all Pro settings adjustments to factory default settings.
Pro settingsPro settings
48 (0600202)
Page 49

Watching TV
For best audio
Basic settings
Adjust audio quality.
Adjust audio quality.Adjust audio quality.
MENU Menu > Sound
MENU Menu > Sound MENU Menu > SoundMENUMENU Menu > SoundMenu Sound
Sound mode
Sound mode
Sound mode
Sound mode
(Standard/Music/Ambience/User)
(Standard/Music/Ambience/User)
(Standard/Music/Ambience/User)
(Standard/Music/Ambience/User)
Selects your favorite sound mode.
Selects your favorite sound mode.
Selects your favorite sound mode.
The selected mode affects all input signals.
The selected mode affects all input signals.The selected mode affects all input signals.
Standard: Provides the suitable sound quality for all types of scenes.
Standard: Provides the suitable sound quality for all types of scenes.
Standard: Provides the suitable sound quality for all types of scenes.
Standard
Music: Improves sound quality for watching music videos, etc.
Music: Improves sound quality for watching music videos, etc.
Music: Improves sound quality for watching music videos, etc.
Music
Ambience: Improves spatial effects and provides clear sounds.
Ambience: Improves spatial effects and provides clear sounds.
Ambience: Improves spatial effects and provides clear sounds.
Ambience
User: Adjusts the sounds manually by using the equalizer to suit your favorite
User: Adjusts the sounds manually by using the equalizer to suit your favorite
User: Adjusts the sounds manually by using the equalizer to suit your favorite
User
sound quality.
sound quality.
sound quality.
For the User mode, Equalizer will appear on the Sound Menu instead of
For the User mode, Equalizer will appear on the Sound Menu instead of
For the User mode, Equalizer will appear on the Sound Menu instead of
Bass and Treble. Select Equalizer and adjust the frequency.
Bass and Treble. Select Equalizer and adjust the frequency.
Bass and Treble. Select Equalizer and adjust the frequency.
BassBass TrebleTreble EqualizerEqualizer
Gray-out when using Home Theater.
Gray-out when using Home Theater.
Gray-out when using Home Theater.
Bass
Bass
Bass
Bass
Increases or decreases the bass response.
Increases or decreases the bass response.
Increases or decreases the bass response.
Gray-out if Sound mode is set to User.
Gray-out if Sound mode is set to User.
Gray-out if Sound mode is set to User.Sound modeSound mode User
Gray-out when using Home Theater.
Gray-out when using Home Theater.
Gray-out when using Home Theater.
Treble
Treble
Treble
Treble
Increases or decreases the treble response.
Increases or decreases the treble response.
Increases or decreases the treble response.
Gray-out if Sound mode is set to User.
Gray-out if Sound mode is set to User.
Gray-out if Sound mode is set to User.Sound modeSound mode User
Gray-out when using Home Theater.
Gray-out when using Home Theater.
Gray-out when using Home Theater.
Equalizer
Equalizer
Equalizer
Equalizer
(150Hz/250Hz/500Hz/1kHz/2kHz/4kHz/8kHz/12kHz/Reset to default)
(150Hz/250Hz/500Hz/1kHz/2kHz/4kHz/8kHz/12kHz/Reset to default)
(150Hz/250Hz/500Hz/1kHz/2kHz/4kHz/8kHz/12kHz/Reset to default)
(150Hz/250Hz/500Hz/1kHz/2kHz/4kHz/8kHz/12kHz/Reset to default)
Adjusts the frequency level to suit your favorite sound quality.
Adjusts the frequency level to suit your favorite sound quality.
Adjusts the frequency level to suit your favorite sound quality.
EqualizerEqualizer
49 (0600301)
Page 50

This function is available when Sound mode is set to User.
This function is available when Sound mode is set to User.
This function is available when Sound mode is set to User.Sound modeSound mode User
Select the frequency and change the frequency level by using the cursor
Select the frequency and change the frequency level by using the cursor
Select the frequency and change the frequency level by using the cursor
button.
button.
button.
To enhance the bass sound, raise the level of the lower frequency. To
To enhance the bass sound, raise the level of the lower frequency. To
To enhance the bass sound, raise the level of the lower frequency. To
enhance the treble sound, raise the level of the higher frequency.
enhance the treble sound, raise the level of the higher frequency.
enhance the treble sound, raise the level of the higher frequency.
To reset the levels of each frequency to the default settings, select Reset to
To reset the levels of each frequency to the default settings, select Reset to
To reset the levels of each frequency to the default settings, select Reset to
defaults by using the cursor button, and then press the OK button.
defaults by using the cursor button, and then press the OK button.
defaults by using the cursor button, and then press the OK button.
defaults OK
Gray-out when using Home Theater.
Gray-out when using Home Theater.
Gray-out when using Home Theater.
Balance
Balance
Balance
Balance
Emphasizes the left/right speaker volume.
Emphasizes the left/right speaker volume.
Emphasizes the left/right speaker volume.
Gray-out when using Home Theater.
Gray-out when using Home Theater.Gray-out when using Home Theater.
Reset to
50 (0600301)
Page 51

Watching TV
For best audio
Advanced settings
Surround
Surround
Surround
Surround
(Off/Natural/Hall/Stadium)
(Off/Natural/Hall/Stadium)
(Off/Natural/Hall/Stadium)
(Off/Natural/Hall/Stadium)
Enhances audio L/R response when listening to stereo.
Enhances audio L/R response when listening to stereo.
Enhances audio L/R response when listening to stereo.
Ideal for music and action movies.
Ideal for music and action movies.
Ideal for music and action movies.
Gray-out when using Home Theater.
Gray-out when using Home Theater.Gray-out when using Home Theater.
Bass boost
Bass boost
Bass boost
Bass boost
(Off/On)
(Off/On)
(Off/On)
(Off/On)
Enhances bass sound and provides powerful sound.
Enhances bass sound and provides powerful sound.
Enhances bass sound and provides powerful sound.
Gray-out when using Home Theater.
Gray-out when using Home Theater.Gray-out when using Home Theater.
Digital remaster
Digital remaster
Digital remaster
Digital remaster
(On/Off)
(On/Off)
(On/Off)
(On/Off)
Compensates for the compressed audio signal to reproduce the original sound
Compensates for the compressed audio signal to reproduce the original sound
Compensates for the compressed audio signal to reproduce the original sound
quality.
quality.
quality.
Gray-out when using Home Theater.
Gray-out when using Home Theater.Gray-out when using Home Theater.
A.I. sound
A.I. sound
A.I. sound
A.I. sound
(Off/On)
(Off/On)
(Off/On)
(Off/On)
Equalizes overall volume levels across all channels and external inputs.
Equalizes overall volume levels across all channels and external inputs.
Equalizes overall volume levels across all channels and external inputs.
Gray-out when using Home Theater.
Gray-out when using Home Theater.Gray-out when using Home Theater.
Volume leveler
Volume leveler
Volume leveler
Volume leveler
(+/-6)
(+/-6)
(+/-6)
(+/-6)
Minimizes volume disparity after switching to external inputs.
Minimizes volume disparity after switching to external inputs.
Minimizes volume disparity after switching to external inputs.
Gray-out when using Home Theater.
Gray-out when using Home Theater.Gray-out when using Home Theater.
Distance to wall
Distance to wall
Distance to wall
Distance to wall
(Over 1ft(30cm)/Up to 1ft(30cm))
(Over 1ft(30cm)/Up to 1ft(30cm))
(Over 1ft(30cm)/Up to 1ft(30cm))
(Over 1ft(30cm)/Up to 1ft(30cm))
Over 1ft(30cm): TV is on a stand. Keeps current setup.
Over 1ft(30cm): TV is on a stand. Keeps current setup.
Over 1ft(30cm): TV is on a stand. Keeps current setup.
Up to 1ft(30cm): TV is mounted. Reduces low frequency level to prevent
Up to 1ft(30cm): TV is mounted. Reduces low frequency level to prevent
Up to 1ft(30cm): TV is mounted. Reduces low frequency level to prevent
resonance.
resonance.
resonance.
Gray-out when using Home Theater.
Gray-out when using Home Theater.Gray-out when using Home Theater.
51 (0600303)
Page 52

Preferred audio type
Preferred audio type
Preferred audio type
Preferred audio type
(Main Audio/Hearing Impaired/Visually Impaired)
(Main Audio/Hearing Impaired/Visually Impaired)
(Main Audio/Hearing Impaired/Visually Impaired)
(Main Audio/Hearing Impaired/Visually Impaired)
Allows setting of the accessible audio format when it's broadcast and the
Allows setting of the accessible audio format when it's broadcast and the
Allows setting of the accessible audio format when it's broadcast and the
language setting matches.
language setting matches.
language setting matches.
Digital audio out selection
Digital audio out selection
Digital audio out selection
Digital audio out selection
(Auto/PCM)
(Auto/PCM)
(Auto/PCM)
(Auto/PCM)
Selects the initial setting for digital audio output signal from DIGITAL AUDIO
Selects the initial setting for digital audio output signal from DIGITAL AUDIO
Selects the initial setting for digital audio output signal from DIGITAL AUDIO
OUT and HDMI 2 (ARC function) terminals.
OUT and HDMI 2 (ARC function) terminals.
OUT and HDMI 2 (ARC function) terminals.
Auto: Dolby Digital Plus, Dolby Digital and HE-AAC multi-channel are output
Auto: Dolby Digital Plus, Dolby Digital and HE-AAC multi-channel are output
Auto: Dolby Digital Plus, Dolby Digital and HE-AAC multi-channel are output
Auto
as Dolby Digital Bit stream. MPEG is output as PCM.
as Dolby Digital Bit stream. MPEG is output as PCM.
as Dolby Digital Bit stream. MPEG is output as PCM.
PCM: Digital output signal is fixed to PCM.
PCM: Digital output signal is fixed to PCM.
PCM: Digital output signal is fixed to PCM.
PCM
For video contents of Media Player / Network services.
For video contents of Media Player / Network services.
For video contents of Media Player / Network services.
ARC (Audio Return Channel): A function of digital audio output using HDMI
ARC (Audio Return Channel): A function of digital audio output using HDMI
ARC (Audio Return Channel): A function of digital audio output using HDMI
cable.
cable.
cable.
HDMI input (HDMIx in)
HDMI input (HDMIx in)
HDMI input (HDMIx in)
HDMI input (HDMIx in)
(Digital/Analog)
(Digital/Analog)
(Digital/Analog)
(Digital/Analog)
The default setting is Digital for the HDMI connection. (Digital input signal)
The default setting is Digital for the HDMI connection. (Digital input signal)
The default setting is Digital for the HDMI connection. (Digital input signal)
Select audio input terminal when a DVI cable is connected along with an
Select audio input terminal when a DVI cable is connected along with an
Select audio input terminal when a DVI cable is connected along with an
analog audio input signal.
analog audio input signal.
analog audio input signal.
Digital
Reset to defaults
Reset to defaults
Reset to defaults
Reset to defaults
Resets all Audio adjustments to factory default settings.
Resets all Audio adjustments to factory default settings.
Resets all Audio adjustments to factory default settings.
Gray-out when using Home Theater.
Gray-out when using Home Theater.Gray-out when using Home Theater.
52 (0600303)
Page 53

Watching TV
3D
Notice
The following 3D content can be enjoyed on this TV:
The following 3D content can be enjoyed on this TV:The following 3D content can be enjoyed on this TV:
A 3D Blu-ray disc, played on 3D capable Blu-ray player/recorder that is
A 3D Blu-ray disc, played on 3D capable Blu-ray player/recorder that is
A 3D Blu-ray disc, played on 3D capable Blu-ray player/recorder that is
connected via HDMI cable
connected via HDMI cable
connected via HDMI cable
3D TV broadcast (program)
3D TV broadcast (program)
3D TV broadcast (program)
3D Photo and 3D Movie taken by LUMIX/Camcorder.
3D Photo and 3D Movie taken by LUMIX/Camcorder.
3D Photo and 3D Movie taken by LUMIX/Camcorder.
3D game played on 3D capable video game console, connected via HDMI
3D game played on 3D capable video game console, connected via HDMI
3D game played on 3D capable video game console, connected via HDMI
cable.
cable.
cable.
2D 3D
2D 3D
2D 3D
About 2D 3D
About 2D 3D
About 2D 3D
About 2D 3D
* This function converts standard 2D images and displays them in 3D. For
* This function converts standard 2D images and displays them in 3D. For
* This function converts standard 2D images and displays them in 3D. For
* This function converts standard 2D images and displays them in 3D. For
this reason, the 3D images appear slightly different from the originals.
this reason, the 3D images appear slightly different from the originals.
this reason, the 3D images appear slightly different from the originals.
this reason, the 3D images appear slightly different from the originals.
Please bear this in mind when using this function.
Please bear this in mind when using this function.
Please bear this in mind when using this function.
Please bear this in mind when using this function.
* Using this function for profit-making purposes, or publically showing
* Using this function for profit-making purposes, or publically showing
* Using this function for profit-making purposes, or publically showing
* Using this function for profit-making purposes, or publically showing
images converted from 2D to 3D in places such as coffee shops or hotels
images converted from 2D to 3D in places such as coffee shops or hotels
images converted from 2D to 3D in places such as coffee shops or hotels
images converted from 2D to 3D in places such as coffee shops or hotels
etc. may infringe on the rights of the copyright holder protected under the
etc. may infringe on the rights of the copyright holder protected under the
etc. may infringe on the rights of the copyright holder protected under the
etc. may infringe on the rights of the copyright holder protected under the
Copyright Act.
Copyright Act.
Copyright Act.
Copyright Act.
53 (0100801)
Page 54
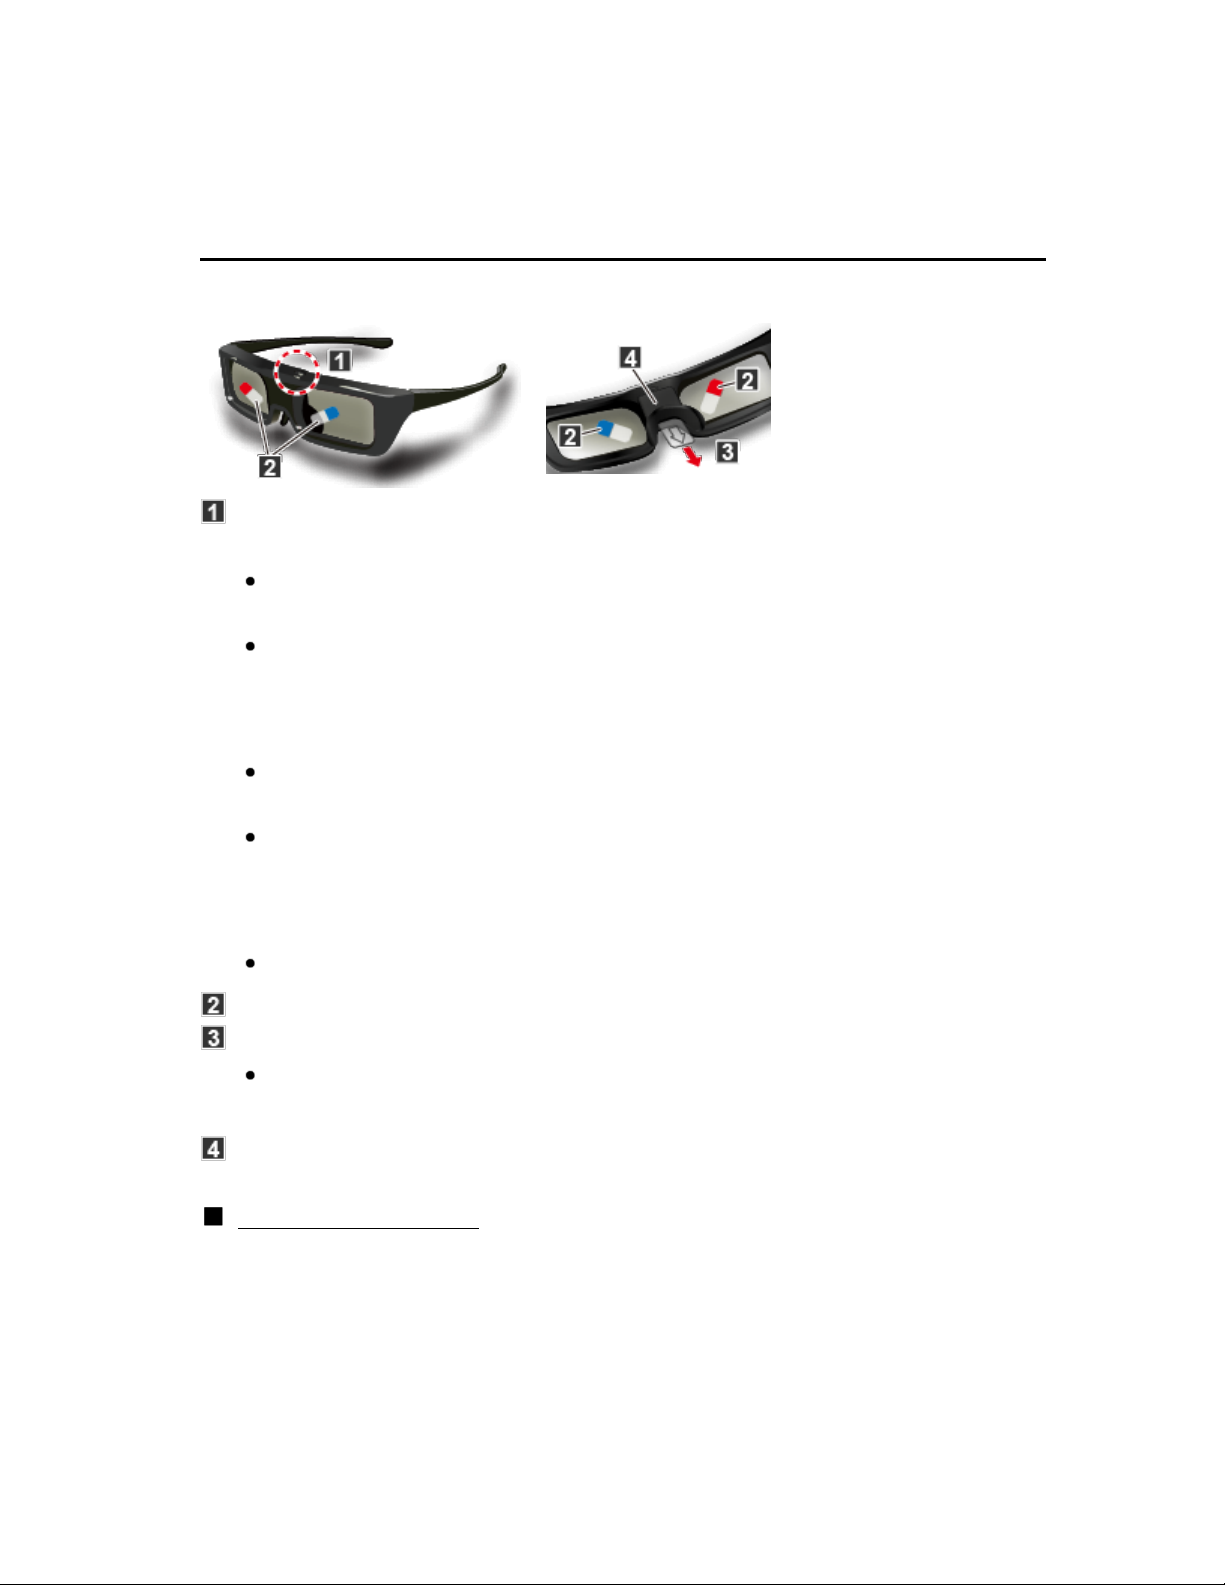
Watching TV
3D
Parts name and functions
[Front side] [Back side]
[Front side] [Back side][Front side][Front side][Front side] [Back side][Back side][Back side]
Power button/Mode change/Indicator lamp
Power button/Mode change/Indicator lamp
Power button/Mode change/Indicator lamp
Power button/Mode change/Indicator lamp
Switches the 3D Eyewear on or off.
Switches the 3D Eyewear on or off.
Switches the 3D Eyewear on or off.
Press the button for about 1 second to turn the power on. The indicator
Press the button for about 1 second to turn the power on. The indicator
Press the button for about 1 second to turn the power on. The indicator
lamp lights for about 2 seconds and then goes off.
lamp lights for about 2 seconds and then goes off.
lamp lights for about 2 seconds and then goes off.
To turn the power off, press the button for about 2 second again. The
To turn the power off, press the button for about 2 second again. The
To turn the power off, press the button for about 2 second again. The
indicator lamp flashes 3 times, then the 3D Eyewear turns off
indicator lamp flashes 3 times, then the 3D Eyewear turns off
indicator lamp flashes 3 times, then the 3D Eyewear turns off
Mode change
Mode changeMode changeMode change
Press the button for about 1 second to change the mode between 3D
Press the button for about 1 second to change the mode between 3D
Press the button for about 1 second to change the mode between 3D
and 2D (view a 3D image in 2D).
and 2D (view a 3D image in 2D).
and 2D (view a 3D image in 2D).
(When power is off) Press the button for 5 second to change to
(When power is off) Press the button for 5 second to change to
(When power is off) Press the button for 5 second to change to
registration mode.
registration mode.
registration mode.
Indicator lamp
Indicator lampIndicator lampIndicator lamp
Lights or flashes during use to show the status. (see below)
Lights or flashes during use to show the status. (see below)Lights or flashes during use to show the status. (see below)
Protection film
Protection film
Protection filmProtection film
Insulating sheet
Insulating sheet
Insulating sheetInsulating sheet
When using for the first time, peel off the protection film and pull the
When using for the first time, peel off the protection film and pull the
When using for the first time, peel off the protection film and pull the
insulating sheet.
insulating sheet.
insulating sheet.
Battery cover
Battery coverBattery coverBattery cover
Indicator lamp status
Indicator lamp statusIndicator lamp statusIndicator lamp statusIndicator lamp status
54 (0100802)
Page 55

Indicator lamp Status
Indicator lamp Status
Lights red for 2 seconds when turned onSufficient battery level
Lights red for 2 seconds when turned onSufficient battery level
Flashes red 5 times when turned on Low battery level
Flashes red 5 times when turned on Low battery level
Flashes red Under registering
Flashes red Under registering
Flashes red once every 1 seconds Under reconnecting to the TV
Flashes red once every 1 seconds Under reconnecting to the TV
Flashes red 3 times Power off
Flashes red 3 times Power off
(Press the button over 2 seconds
(Press the button over 2 seconds
when in use, or Automatically power
when in use, or Automatically power
off when registering or reconnecting
off when registering or reconnecting
fails, or connection is lost)
fails, or connection is lost)
Flashes red once every 2 seconds
Flashes red once every 2 seconds
when in use
when in use
Flashes red twice every 4 seconds
Flashes red twice every 4 seconds
when in use
when in use
3D mode is selected
3D mode is selected
2D mode is selected
2D mode is selected
55 (0100802)
Page 56

Watching TV
3D
Registration
First registration
First registration
First registration
First registrationFirst registration
Perform the first registration when the 3D Eyewear is used for the first time.
Perform the first registration when the 3D Eyewear is used for the first time.
Perform the first registration when the 3D Eyewear is used for the first time.
Turn the TV on
Turn the TV on
Turn the TV on
Turn the TV on
1.
1.
1.
1.
Press power button for about 1 second to turn the power on.
Press power button for about 1 second to turn the power on.
Press power button for about 1 second to turn the power on.
Press power button for about 1 second to turn the power on.
2.
2.
2.
2.
The lamp lights for about 2 seconds and then flashes.
The lamp lights for about 2 seconds and then flashes.
The lamp lights for about 2 seconds and then flashes.
The lamp lights for about 2 seconds and then flashes.
The 3D Eyewear will be turned on and start registration.
The 3D Eyewear will be turned on and start registration.
The 3D Eyewear will be turned on and start registration.
Place the 3D Eyewear within 1.6 ft (50 cm) from the TV while
Place the 3D Eyewear within 1.6 ft (50 cm) from the TV while
Place the 3D Eyewear within 1.6 ft (50 cm) from the TV while
registration in progress.
registration in progress.
registration in progress.
When the registration is successfully completed, the 3D Eyewear
When the registration is successfully completed, the 3D Eyewear
When the registration is successfully completed, the 3D Eyewear
When the registration is successfully completed, the 3D Eyewear
3.
3.
3.
3.
will reconnect with TV automatically when 3D Eyewear is turned
will reconnect with TV automatically when 3D Eyewear is turned
will reconnect with TV automatically when 3D Eyewear is turned
will reconnect with TV automatically when 3D Eyewear is turned
on near the TV in 3D mode.
on near the TV in 3D mode.
on near the TV in 3D mode.
on near the TV in 3D mode.
Registration again
Registration again
Registration again
Registration againRegistration again
When connection with registered TV fails, or when using with another TV,
When connection with registered TV fails, or when using with another TV,
When connection with registered TV fails, or when using with another TV,
re-register the 3D Eyewear.
re-register the 3D Eyewear.
re-register the 3D Eyewear.
Turn the TV on
Turn the TV on
Turn the TV on
Turn the TV on
1.
1.
1.
1.
Within 1.6 ft (50 cm) from the TV, press Power button until lamp
Within 1.6 ft (50 cm) from the TV, press Power button until lamp
Within 1.6 ft (50 cm) from the TV, press Power button until lamp
Within 1.6 ft (50 cm) from the TV, press Power button until lamp
2.
2.
2.
2.
lights, then release it to start registration.
lights, then release it to start registration.
lights, then release it to start registration.
lights, then release it to start registration.
When the registration is successfully completed, the 3D Eyewear
When the registration is successfully completed, the 3D Eyewear
When the registration is successfully completed, the 3D Eyewear
When the registration is successfully completed, the 3D Eyewear
3.
3.
3.
3.
will reconnect with TV automatically when 3D Eyewear is turned
will reconnect with TV automatically when 3D Eyewear is turned
will reconnect with TV automatically when 3D Eyewear is turned
will reconnect with TV automatically when 3D Eyewear is turned
on near the TV in 3D mode.
on near the TV in 3D mode.
on near the TV in 3D mode.
on near the TV in 3D mode.
If the registration failed, the 3D Eyewear will power off.
If the registration failed, the 3D Eyewear will power off.
If the registration failed, the 3D Eyewear will power off.
If the registration failed, the 3D Eyewear will power off.
In this case, power off the TV and perform from step 1.
In this case, power off the TV and perform from step 1.
In this case, power off the TV and perform from step 1.
In this case, power off the TV and perform from step 1.
56 (0100806)
Page 57

Watching TV
3D
Replacing the battery
When the battery is running low, the indicator lamp flashes 5 times on turning
When the battery is running low, the indicator lamp flashes 5 times on turning
When the battery is running low, the indicator lamp flashes 5 times on turning
the 3D Eyewear on.
the 3D Eyewear on.
the 3D Eyewear on.
In this case, early battery replacement is recommended.
In this case, early battery replacement is recommended.
In this case, early battery replacement is recommended.
Dispose of the old batteries as non-burnable rubbish, or in line with the
Dispose of the old batteries as non-burnable rubbish, or in line with the
Dispose of the old batteries as non-burnable rubbish, or in line with the
waste disposal regulations in your local area.
waste disposal regulations in your local area.
waste disposal regulations in your local area.
Open the cover using pen tip or screwdriver (minus -) etc.
Open the cover using pen tip or screwdriver (minus -) etc.
Open the cover using pen tip or screwdriver (minus -) etc.
Open the cover using pen tip or screwdriver (minus -) etc.
1.
1.
1.
1.
Replace the battery
Replace the battery
Replace the battery
Replace the battery
2.
2.
2.
2.
If difficulty, remove it with the tip of the driver.
If difficulty, remove it with the tip of the driver.
If difficulty, remove it with the tip of the driver.
Use the specified type of battery (coin-shaped lithium battery
Use the specified type of battery (coin-shaped lithium battery
Use the specified type of battery (coin-shaped lithium battery
CR2025).
CR2025).
CR2025).
Note the correct polarity (+ or -).
Note the correct polarity (+ or -).
Note the correct polarity (+ or -).
Replace and fasten the cover
Replace and fasten the cover
Replace and fasten the cover
Replace and fasten the cover
3.
3.
3.
3.
57 (0100807)
Page 58

Watching TV
3D
Viewing 3D
Turn the 3D Eyewear on and put it on
Turn the 3D Eyewear on and put it on
Turn the 3D Eyewear on and put it on
Turn the 3D Eyewear on and put it on
1.
1.
1.
1.
Make sure that registration is finished completely.
Make sure that registration is finished completely.
Make sure that registration is finished completely.
(Displays messages and information on the screen.)
(Displays messages and information on the screen.)
(Displays messages and information on the screen.)
View
View
View
View
2.
2.
2.
2.
When the TV receives a 3D signal, it also tries to detect the 3D mode
When the TV receives a 3D signal, it also tries to detect the 3D mode
When the TV receives a 3D signal, it also tries to detect the 3D mode
(format). 3D images are automatically displayed according to the signal. If
(format). 3D images are automatically displayed according to the signal. If
(format). 3D images are automatically displayed according to the signal. If
the 3D images are not displayed correctly or the images cause discomfort,
the 3D images are not displayed correctly or the images cause discomfort,
the 3D images are not displayed correctly or the images cause discomfort,
the images can be adjusted by 3D format select or 3D settings.
the images can be adjusted by 3D format select or 3D settings.
the images can be adjusted by 3D format select or 3D settings.3D format select3D format select 3D settings3D settings
Turn off the 3D Eyewear
Turn off the 3D Eyewear
Turn off the 3D Eyewear
Turn off the 3D Eyewear
3.
3.
3.
3.
The 3D Eyewear indicator lamp turns off, and the power turns off.
The 3D Eyewear indicator lamp turns off, and the power turns off.The 3D Eyewear indicator lamp turns off, and the power turns off.
It may take several seconds to display 3D image properly after you
It may take several seconds to display 3D image properly after you
It may take several seconds to display 3D image properly after you
It may take several seconds to display 3D image properly after you
switch to 3D mode.
switch to 3D mode.
switch to 3D mode.
switch to 3D mode.
58 (0100803)
Page 59

Watching TV
3D
Change 3D ⇔ 2D
Simply switches 3D 2D images (Auto mode)
Simply switches 3D 2D images (Auto mode)Simply switches 3D 2D images (Auto mode)Simply switches 3D 2D images (Auto mode)Simply switches 3D 2D images (Auto mode)
3D 3D format select
3D 3D format select 3D 3D format select3D 3D format select3D 3D format select
Switch 3D or 2D using / and press
Switch 3D or 2D using / and press Switch 3D or 2D using / and press 3D3D 2D2D
Change 3D format (Manual mode)
Change 3D format (Manual mode)Change 3D format (Manual mode)Change 3D format (Manual mode)Change 3D format (Manual mode)
Display 3D format select (Manual)
Display 3D format select (Manual)
Display 3D format select (Manual)
Display 3D format select (Manual)3D format select (Manual)
1.
1.
1.
1.
3D format select (Manual)
3D format select (Manual) 3D format select (Manual)3D format select (Manual)3D format select (Manual)
Select 3D format
Select 3D format
Select 3D format
Select 3D format
2.
2.
2.
2.
3D Cycle through the 3D format
3D Cycle through the 3D format 3D Cycle through the 3D format3D3D
(Original/Side by side (3D)/Side by side (2D)/Top and bottom (3D)/
(Original/Side by side (3D)/Side by side (2D)/Top and bottom (3D)/
(Original/Side by side (3D)/Side by side (2D)/Top and bottom (3D)/
OriginalOriginal Side by side (3D)Side by side (3D) Side by side (2D)Side by side (2D) Top and bottom (3D)Top and bottom (3D)
Top and bottom (2D)/2D 3D)
Top and bottom (2D)/2D 3D)
Top and bottom (2D)/2D 3D)
Top and bottom (2D)Top and bottom (2D) 2D 3D2D 3D
When the TV receives a 480i/576i signal from the Component or HDMI
When the TV receives a 480i/576i signal from the Component or HDMI
When the TV receives a 480i/576i signal from the Component or HDMI
terminal, manual adjustment is not available.
terminal, manual adjustment is not available.
terminal, manual adjustment is not available.
59 (0100804)
Page 60

Watching TV
3D
Adjust 3D images
Select 3D settings
Select 3D settings
Select 3D settings
Select 3D settings3D settings
1.
1.
1.
1.
MENU Menu > Picture > 3D settings
MENU Menu > Picture > 3D settings MENU Menu > Picture > 3D settingsMENU Menu > Picture > 3D settingsMENU Menu Picture 3D settings
Select the item and set
Select the item and set
Select the item and set
Select the item and set
2.
2.
2.
2.
Select desired menu using / and adjust the settings with /
Select desired menu using / and adjust the settings with /Select desired menu using / and adjust the settings with /
The perceived three dimensional effects of the 3D Eyewear differ from
The perceived three dimensional effects of the 3D Eyewear differ from
The perceived three dimensional effects of the 3D Eyewear differ from
The perceived three dimensional effects of the 3D Eyewear differ from
person-to-person.
person-to-person.
person-to-person.
person-to-person.
If a signal received from an external device is different from the 3D
If a signal received from an external device is different from the 3D
If a signal received from an external device is different from the 3D
If a signal received from an external device is different from the 3D
setting of the TV, such as 2D signal when the TV is set to 3D mode, the
setting of the TV, such as 2D signal when the TV is set to 3D mode, the
setting of the TV, such as 2D signal when the TV is set to 3D mode, the
setting of the TV, such as 2D signal when the TV is set to 3D mode, the
images may not be displayed correctly.
images may not be displayed correctly.
images may not be displayed correctly.
images may not be displayed correctly.
60 (0100805)
Page 61

Watching TV
3D
3D settings
MENU Menu > Picture > 3D settings
MENU Menu > Picture > 3D settings MENU Menu > Picture > 3D settingsMENUMENU Menu > Picture > 3D settingsMenu Picture 3D settings
Auto detect 3D
Auto detect 3D
Auto detect 3D
Auto detect 3D
(Off/Auto 1/Auto 2)
(Off/Auto 1/Auto 2)
(Off/Auto 1/Auto 2)
(Off/Auto 1/Auto 2)
Auto 1: Switches to 3D display when 3D indication is available (HDMI (3D),
Auto 1: Switches to 3D display when 3D indication is available (HDMI (3D),
Auto 1: Switches to 3D display when 3D indication is available (HDMI (3D),
Auto 1
AVCHD file, etc.)
AVCHD file, etc.)
AVCHD file, etc.)
Auto 2: Same as Auto 1. Also detects 3D signal by identifying similar image in
Auto 2: Same as Auto 1. Also detects 3D signal by identifying similar image in
Auto 2: Same as Auto 1. Also detects 3D signal by identifying similar image in
Auto 2
side-by-side or top-and-bottom 3D formats.
side-by-side or top-and-bottom 3D formats.
side-by-side or top-and-bottom 3D formats.
Note: Choose 3D mode manually when auto detection is not available.
Note: Choose 3D mode manually when auto detection is not available.
Note: Choose 3D mode manually when auto detection is not available.
3D signal notification
3D signal notification
3D signal notification
3D signal notification
(Off/On)
(Off/On)
(Off/On)
(Off/On)
On: Displays a message according to the signal received by the Auto detect
On: Displays a message according to the signal received by the Auto detect
On: Displays a message according to the signal received by the Auto detect
On Auto detect
3D.
3D.
3D.
3D
3D
Auto detect
3D refresh rate
3D refresh rate
3D refresh rate
3D refresh rate
(96Hz*/100Hz/120Hz) *24Hz only
(96Hz*/100Hz/120Hz) *24Hz only
(96Hz*/100Hz/120Hz) *24Hz only
(96Hz*/100Hz/120Hz) *24Hz only
Reduces juddering and flicker noises of the 3D images when using the 3D
Reduces juddering and flicker noises of the 3D images when using the 3D
Reduces juddering and flicker noises of the 3D images when using the 3D
Eyewear.
Eyewear.
Eyewear.
100Hz: If light appears to flicker under fluorescents (or dimmers) of 50 Hz.
100Hz: If light appears to flicker under fluorescents (or dimmers) of 50 Hz.
100Hz: If light appears to flicker under fluorescents (or dimmers) of 50 Hz.
100Hz
120Hz: If light appears to flicker under fluorescents (or dimmers) of 60 Hz.
120Hz: If light appears to flicker under fluorescents (or dimmers) of 60 Hz.
120Hz: If light appears to flicker under fluorescents (or dimmers) of 60 Hz.
120Hz
Gray-out in 2D mode
Gray-out in 2D modeGray-out in 2D mode
2D 3D depth
2D 3D depth
2D 3D depth
2D 3D depth
(High/Mid/Low)
(High/Mid/Low)
(High/Mid/Low)
(High/Mid/Low)
Adjusts the simulated 3D depth perception effect of the 2D incoming signal.
Adjusts the simulated 3D depth perception effect of the 2D incoming signal.
Adjusts the simulated 3D depth perception effect of the 2D incoming signal.
3D adjustment
3D adjustment
3D adjustment
3D adjustment
(Off/On)
(Off/On)
(Off/On)
(Off/On)
Adjust the left eye versus right eye depth effect of the image. Set to On to
Adjust the left eye versus right eye depth effect of the image. Set to On to
Adjust the left eye versus right eye depth effect of the image. Set to On to
adjust Effect (-3 to +3).
adjust Effect (-3 to +3).
adjust Effect (-3 to +3).
EffectEffect -3 +3
Gray-out in 2D mode
Gray-out in 2D modeGray-out in 2D mode
On
61 (0600205)
Page 62

Left/Right swap
Left/Right swap
Left/Right swap
Left/Right swap
(Normal/Swapped)
(Normal/Swapped)
(Normal/Swapped)
(Normal/Swapped)
Flips the phase of the image to give the correct perception of depth.
Flips the phase of the image to give the correct perception of depth.
Flips the phase of the image to give the correct perception of depth.
Gray-out in 2D mode
Gray-out in 2D modeGray-out in 2D mode
Diagonal line filter
Diagonal line filter
Diagonal line filter
Diagonal line filter
(On/Off)
(On/Off)
(On/Off)
(On/Off)
Select when diagonal lines appear jagged. Turn off when the picture looks
Select when diagonal lines appear jagged. Turn off when the picture looks
Select when diagonal lines appear jagged. Turn off when the picture looks
noisy.
noisy.
noisy.
Gray-out in 2D mode
Gray-out in 2D modeGray-out in 2D mode
Safety precautions
Safety precautions
Safety precautions
Safety precautions
Read safety notice about 3D viewing.
Read safety notice about 3D viewing.
Read safety notice about 3D viewing.
62 (0600205)
Page 63

Using Internet services
Connect to network
Network connections
Contact your Broadband service provider
Contact your Broadband service provider
Contact your Broadband service provider
Contact your Broadband service provider
1.
1.
1.
1.
Obtain Broadband Internet service:
Obtain Broadband Internet service:Obtain Broadband Internet service:
Required speed (effective): at least 1.5 Mbps for SD and 6 Mbps for HD
Required speed (effective): at least 1.5 Mbps for SD and 6 Mbps for HD
Required speed (effective): at least 1.5 Mbps for SD and 6 Mbps for HD
picture quality, respectively.
picture quality, respectively.
picture quality, respectively.
Dial-up Internet service cannot be used for Home Screen.
Dial-up Internet service cannot be used for Home Screen.
Dial-up Internet service cannot be used for Home Screen.
Select wired or wireless connection
Select wired or wireless connection
Select wired or wireless connection
Select wired or wireless connection
2.
2.
2.
2.
If a wired network connection is available near the TV, then using this LAN
If a wired network connection is available near the TV, then using this LAN
If a wired network connection is available near the TV, then using this LAN
(Ethernet) connection is recommended.
(Ethernet) connection is recommended.
(Ethernet) connection is recommended.
Connecting to the Internet
Connecting to the Internet
Connecting to the Internet
Connecting to the Internet
3.
3.
3.
3.
A. Wireless connection
A. Wireless connection
A. Wireless connectionA. Wireless connectionA. Wireless connection
Home network
Home network
Home networkHome network
TV (Built-in wireless LAN)
TV (Built-in wireless LAN)
TV (Built-in wireless LAN)
TV (Built-in wireless LAN)
Home network (modem/wireless router)
Home network (modem/wireless router)
Home network (modem/wireless router)
Home network (modem/wireless router)
Computer/DLNA Certified media server
Computer/DLNA Certified media server
Computer/DLNA Certified media server
Computer/DLNA Certified media server
To use and operate only DLNA features, a Broadband network
To use and operate only DLNA features, a Broadband network
To use and operate only DLNA features, a Broadband network
To use and operate only DLNA features, a Broadband network
environment is not needed.
environment is not needed.
environment is not needed.
environment is not needed.
63 (0200101)
Page 64

B. Wired connection (Using Router)
B. Wired connection (Using Router)
B. Wired connection (Using Router)B. Wired connection (Using Router)B. Wired connection (Using Router)
Home network
Home network
Home networkHome network
TV (Ethernet port)
TV (Ethernet port)
TV (Ethernet port)
TV (Ethernet port)
LAN (Ethernet) cable
LAN (Ethernet) cable
LAN (Ethernet) cable
LAN (Ethernet) cable
Home network (modem/router)
Home network (modem/router)
Home network (modem/router)
Home network (modem/router)
Computer/DLNA Certified media server
Computer/DLNA Certified media server
Computer/DLNA Certified media server
Computer/DLNA Certified media server
C. Wired connection (Directly connected)
C. Wired connection (Directly connected)
C. Wired connection (Directly connected)C. Wired connection (Directly connected)C. Wired connection (Directly connected)
If you are not using the network for connecting anything else but the TV,
If you are not using the network for connecting anything else but the TV,
If you are not using the network for connecting anything else but the TV,
If you are not using the network for connecting anything else but the TV,
you can just connect the TV directly to the Cable/DSL Ethernet modem with
you can just connect the TV directly to the Cable/DSL Ethernet modem with
you can just connect the TV directly to the Cable/DSL Ethernet modem with
you can just connect the TV directly to the Cable/DSL Ethernet modem with
LAN (Ethernet) cable.
LAN (Ethernet) cable.
LAN (Ethernet) cable.
LAN (Ethernet) cable.
TV (Ethernet port)
TV (Ethernet port)
TV (Ethernet port)
TV (Ethernet port)
LAN (Ethernet) cable
LAN (Ethernet) cable
LAN (Ethernet) cable
LAN (Ethernet) cable
Modem
Modem
Modem
Modem
To use and operate only DLNA features, a Broadband network
To use and operate only DLNA features, a Broadband network
To use and operate only DLNA features, a Broadband network
To use and operate only DLNA features, a Broadband network
environment is not needed.
environment is not needed.
environment is not needed.
environment is not needed.
You can simply connect the TV directly to the equipment with a LAN
You can simply connect the TV directly to the equipment with a LAN
You can simply connect the TV directly to the equipment with a LAN
You can simply connect the TV directly to the equipment with a LAN
cross cable.
cross cable.
cross cable.
cross cable.
64 (0200101)
Page 65

Using Internet services
Network settings
Setting menu
This menu is used for connecting to a Broadband environment.
This menu is used for connecting to a Broadband environment.This menu is used for connecting to a Broadband environment.
Display the Menu and select Network
Display the Menu and select Network
Display the Menu and select Network
Display the Menu and select NetworkMenu Network
1.
1.
1.
1.
MENU Menu > Network
MENU Menu > Network MENU Menu > NetworkMENU Menu > NetworkMENU Menu Network
Select Network using / from menu bar and press
Select Network using / from menu bar and press Select Network using / from menu bar and press NetworkNetwork
Select the options and set
Select the options and set
Select the options and set
Select the options and set
2.
2.
2.
2.
(Network connection/Network status/VIERA remote settings/
(Network connection/Network status/VIERA remote settings/
(Network connection/Network status/VIERA remote settings/
(Network connection/Network status/VIERA remote settings/
Network connection Network status VIERA remote settings
Network link/Software update/New software notice)
Network link/Software update/New software notice)
Network link/Software update/New software notice)
Network link/Software update/New software notice)
Network link Software update New software notice
65 (0200201)
Page 66

Using Internet services
Network settings
Network connection/Network status
Network connection/Network status
Network connection/Network statusNetwork connection/Network statusNetwork connection/Network statusNetwork connection/Network status
Select Network connection using / and press
Select Network connection using / and press Select Network connection using / and press Network connectionNetwork connection
Select Quick setup to launch Network connection setup wizard.
Select Quick setup to launch Network connection setup wizard.
Select Quick setup to launch Network connection setup wizard.
Follow the directions on the screen to complete the network connection.
Follow the directions on the screen to complete the network connection.
Follow the directions on the screen to complete the network connection.
Displays Network status
Displays Network statusDisplays Network statusNetwork statusNetwork status
Select Try again and press OK to start connection test.
Select Try again and press OK to start connection test.
Select Try again and press OK to start connection test.
Success Completion message is displayed.
Success Completion message is displayed.
Success Completion message is displayed.
Error Select Status details/Help and press OK to display solution
Error Select Status details/Help and press OK to display solution
Error Select Status details/Help and press OK to display solution
of the connection error.
of the connection error.
of the connection error.
Follow the directions on the screen to complete the network settings.
Follow the directions on the screen to complete the network settings.
Follow the directions on the screen to complete the network settings.
Quick setup
Manual settings are also available.
Manual settings are also available.
Manual settings are also available.
Select Custom and select your connection type.
Select Custom and select your connection type.
Select Custom and select your connection type.
Displays setting menu according to selected connection type.
Displays setting menu according to selected connection type.
Displays setting menu according to selected connection type.
Set the desired menu and complete the network connection.
Set the desired menu and complete the network connection.
Set the desired menu and complete the network connection.
Custom
Try again
Status details/Help
You can also display Network status from Network menu.
You can also display Network status from Network menu.
You can also display Network status from Network menu.
(Network > Network status)
(Network > Network status)
(Network > Network status)
NetworkNetwork Network statusNetwork status
Exit the screen
Exit the screen
Exit the screen
Select Done and press OK to exit from this screen.
Select Done and press OK to exit from this screen.
Select Done and press OK to exit from this screen.Done
Network statusNetwork status NetworkNetwork
66 (0200202)
Page 67

Using Internet services
Network settings
VIERA remote settings
VIERA remote settings
VIERA remote settingsVIERA remote settingsVIERA remote settingsVIERA remote settings
Select VIERA remote settings using / and press
Select VIERA remote settings using / and press
Select VIERA remote settings using / and press VIERA remote settingsVIERA remote settings
Displayed VIERA remote settings
Displayed VIERA remote settings
Displayed VIERA remote settingsVIERA remote settingsVIERA remote settings
Select the item and set
Select the item and set
Select the item and set
VIERA remote
VIERA remoteVIERA remoteVIERA remoteVIERA remote
Enables to control the TV from the network equipment (smartphone, etc.).
Enables to control the TV from the network equipment (smartphone, etc.).Enables to control the TV from the network equipment (smartphone, etc.).
Sets to On to enable below settings.
Sets to On to enable below settings.Sets to On to enable below settings.On
Select VIERA remote using / and press
Select VIERA remote using / and press
Select VIERA remote using / and press VIERA remoteVIERA remote
Switches On or Off with /
Switches On or Off with /
Switches On or Off with /On Off
Wake on LAN
Wake on LANWake on LANWake on LANWake on LAN
This function allows you to turn on the TV when you use Remote control
This function allows you to turn on the TV when you use Remote control
This function allows you to turn on the TV when you use Remote control
via IP.
via IP.
via IP.
via IP
Remote control
Select Wake on LAN using /
Select Wake on LAN using /
Select Wake on LAN using /Wake on LANWake on LAN
Switches Off or On with /
Switches Off or On with /
Switches Off or On with /Off On
Device to upload contents
Device to upload contentsDevice to upload contentsDevice to upload contentsDevice to upload contents
Selects device to upload contents from the network equipment
Selects device to upload contents from the network equipment
Selects device to upload contents from the network equipment
(smartphone,etc.).
(smartphone,etc.).
(smartphone,etc.).
Select Device to upload contents using / and press
Select Device to upload contents using / and press
Select Device to upload contents using / and press Device to upload contentsDevice to upload contents
Select device and press
Select device and press
Select device and press
67 (0200203)
Page 68
Using Internet services
Network settings
Network link
Network link
Network linkNetwork linkNetwork linkNetwork link
Setting for DLNA server.
Setting for DLNA server.Setting for DLNA server.
DLNA server
DLNA serverDLNA serverDLNA serverDLNA server
Enables use this TV as DMS for network devices (DLNA Certified VIERA)
Enables use this TV as DMS for network devices (DLNA Certified VIERA)Enables use this TV as DMS for network devices (DLNA Certified VIERA)
Sets to On to enable below settings.
Sets to On to enable below settings.Sets to On to enable below settings.On
Select DLNA server using / and press
Select DLNA server using / and press
Select DLNA server using / and press DLNA serverDLNA server
Switches On or Off with /
Switches On or Off with /
Switches On or Off with /On Off
Registration type
Registration typeRegistration typeRegistration typeRegistration type
Selects the limitation of access to this TV for each device on the home
Selects the limitation of access to this TV for each device on the home
Selects the limitation of access to this TV for each device on the home
network.
network.
network.
Select Registration type using / and press
Select Registration type using / and press
Select Registration type using / and press Registration typeRegistration type
Switches Auto or Manual with /
Switches Auto or Manual with /
Switches Auto or Manual with /Auto Manual
Auto: All the available device on the home network are
Auto: All the available device on the home network are
Auto: All the available device on the home network are
Auto
accessible.(maximum 16 equipment)
accessible.(maximum 16 equipment)
accessible.(maximum 16 equipment)
Manual: Sets the access limitation for each device in the Remote device
Manual: Sets the access limitation for each device in the Remote device
Manual: Sets the access limitation for each device in the Remote device
Manual
List.
List.
List.
Remote device list
Remote device listRemote device listRemote device listRemote device list
Lists the available device on the home network.
Lists the available device on the home network.Lists the available device on the home network.
Select Remote device list using / and press
Select Remote device list using / and press
Select Remote device list using / and press Remote device listRemote device list
Select the desired device with / and set access limitation.
Select the desired device with / and set access limitation.
Select the desired device with / and set access limitation.
68 (0200204)
Page 69

Using Internet services
Network settings
Software update
Software update
Software updateSoftware updateSoftware updateSoftware update
Select Software update using / and press
Select Software update using / and press
Select Software update using / and press Software updateSoftware update
Press OK to start the Software update screen
Press OK to start the Software update screen
Press OK to start the Software update screen
Software update
Software update Software updateSoftware updateSoftware update
Follow directions on the screen
Follow directions on the screenFollow directions on the screen
Make sure to set Clock before the update starts.
Make sure to set Clock before the update starts.Make sure to set Clock before the update starts.ClockClock
69 (0200206)
Page 70

Using Internet services
Network settings
New software notice
New software notice
New software noticeNew software noticeNew software noticeNew software notice
Displays new software update information when TV is turned on.
Displays new software update information when TV is turned on.Displays new software update information when TV is turned on.
Select New software notice using /
Select New software notice using /
Select New software notice using /New software noticeNew software notice
Switches Off or On with /
Switches Off or On with /
Switches Off or On with /Off On
70 (0200207)
Page 71

Using Internet services
How to use
Operate
You can access Internet services on Apps list (application list) via Home
You can access Internet services on Apps list (application list) via Home
You can access Internet services on Apps list (application list) via Home
Screen.
Screen.
Screen.
Display Apps list
Display Apps list
Display Apps list
Display Apps list
Display Apps list
1.
1.
1.
1.
1.
APPS Apps list
APPS Apps list
APPS Apps list
APPS Apps list
APPSAPPS Apps list
(example)
(example)
Select and Enjoy Internet Service
Select and Enjoy Internet Service
Select and Enjoy Internet Service
Select and Enjoy Internet Service
Select and Enjoy Internet Service
2.
2.
2.
2.
2.
Select desired application using / / / and press
Select desired application using / / / and press Select desired application using / / / and press
USB keyboard is available. Set Keyboard type in Setup menu.
USB keyboard is available. Set Keyboard type in Setup menu.
USB keyboard is available. Set Keyboard type in Setup menu.
(Game pad is also available.)
(Game pad is also available.)
(Game pad is also available.)
You need a Broadband environment to use this service.
You need a Broadband environment to use this service.
You need a Broadband environment to use this service.
You need a Broadband environment to use this service.
Please confirm Network connections and Network settings before using
Please confirm Network connections and Network settings before using
Please confirm Network connections and Network settings before using
Please confirm Network connections and Network settings before using
this function.
this function.
this function.
this function.
Depending on the usage conditions, it may take a while to download all
Depending on the usage conditions, it may take a while to download all
Depending on the usage conditions, it may take a while to download all
Depending on the usage conditions, it may take a while to download all
the data.
the data.
the data.
the data.
Internet services available in Home Screen are subject to change
Internet services available in Home Screen are subject to change
Internet services available in Home Screen are subject to change
Internet services available in Home Screen are subject to change
without notice.
without notice.
without notice.
without notice.
Not all contents are available depending on the country and area.
Not all contents are available depending on the country and area.
Not all contents are available depending on the country and area.
Not all contents are available depending on the country and area.
Keyboard typeKeyboard type SetupSetup
(example)(example)(example)
71 (0200301)
Page 72

Home network "DLNA"
Get started
Information
You can share the contents (Photo, Video, Music etc.) stored in DLNA Certified
You can share the contents (Photo, Video, Music etc.) stored in DLNA Certified
You can share the contents (Photo, Video, Music etc.) stored in DLNA Certified
media server with your home network system.
media server with your home network system.
media server with your home network system.
Please confirm Network connection and Network settings before using
Please confirm Network connection and Network settings before using
Please confirm Network connection and Network settings before using
this function.
this function.
this function.
This TV is a DLNA Certified product.
This TV is a DLNA Certified product.
This TV is a DLNA Certified product.
This TV is a DLNA Certified product.
DLNA (Digital Living Network Alliance) is a standard that makes DLNA
DLNA (Digital Living Network Alliance) is a standard that makes DLNA
DLNA (Digital Living Network Alliance) is a standard that makes DLNA
DLNA (Digital Living Network Alliance) is a standard that makes DLNA
Certified digital electronics easier and more convenient to use on a home
Certified digital electronics easier and more convenient to use on a home
Certified digital electronics easier and more convenient to use on a home
Certified digital electronics easier and more convenient to use on a home
network. To learn more, visit www.dlna.org. It allows you to share photos,
network. To learn more, visit www.dlna.org. It allows you to share photos,
network. To learn more, visit www.dlna.org. It allows you to share photos,
network. To learn more, visit www.dlna.org. It allows you to share photos,
videos and music stored in the DLNA Certified media server (for example,
videos and music stored in the DLNA Certified media server (for example,
videos and music stored in the DLNA Certified media server (for example,
videos and music stored in the DLNA Certified media server (for example,
PC with Windows 7/Windows 8 installed, etc.) connected to your home
PC with Windows 7/Windows 8 installed, etc.) connected to your home
PC with Windows 7/Windows 8 installed, etc.) connected to your home
PC with Windows 7/Windows 8 installed, etc.) connected to your home
network, and enjoy the contents on the TV screen.
network, and enjoy the contents on the TV screen.
network, and enjoy the contents on the TV screen.
network, and enjoy the contents on the TV screen.
Network connection
Media server
Media server
Media server
Media server
Media server
Store photos, videos or music into the DLNA Certified media server, and
Store photos, videos or music into the DLNA Certified media server, and
Store photos, videos or music into the DLNA Certified media server, and
Store photos, videos or music into the DLNA Certified media server, and
then you can enjoy them on the TV.
then you can enjoy them on the TV.
then you can enjoy them on the TV.
then you can enjoy them on the TV.
To use a PC as a media server
To use a PC as a media server
To use a PC as a media server
To use a PC as a media server
To use a PC as a media server
Prepare the PC with Windows 7/Windows 8 or ensure the server software
Prepare the PC with Windows 7/Windows 8 or ensure the server software
Prepare the PC with Windows 7/Windows 8 or ensure the server software
Prepare the PC with Windows 7/Windows 8 or ensure the server software
is installed on the PC. "Windows 7/Windows 8" is the server software that
is installed on the PC. "Windows 7/Windows 8" is the server software that
is installed on the PC. "Windows 7/Windows 8" is the server software that
is installed on the PC. "Windows 7/Windows 8" is the server software that
has been tested for compatibility with this TV (as of November, 2012). Any
has been tested for compatibility with this TV (as of November, 2012). Any
has been tested for compatibility with this TV (as of November, 2012). Any
has been tested for compatibility with this TV (as of November, 2012). Any
other server software have not been tested with this TV, therefore
other server software have not been tested with this TV, therefore
other server software have not been tested with this TV, therefore
other server software have not been tested with this TV, therefore
compatibility and performance cannot be assured.
compatibility and performance cannot be assured.
compatibility and performance cannot be assured.
compatibility and performance cannot be assured.
Windows 7/Windows 8
Windows 7/Windows 8
Windows 7/Windows 8
Windows 7/Windows 8
The setup for homegroup settings of Windows 7/Windows 8 is required.
The setup for homegroup settings of Windows 7/Windows 8 is required.
The setup for homegroup settings of Windows 7/Windows 8 is required.
The setup for homegroup settings of Windows 7/Windows 8 is required.
For details, refer to the help functions of Windows 7/Windows 8.
For details, refer to the help functions of Windows 7/Windows 8.
For details, refer to the help functions of Windows 7/Windows 8.
For details, refer to the help functions of Windows 7/Windows 8.
72 (0300101)
Page 73

Home network "DLNA"
Connect to network
Network connections
Contact your Broadband service provider
Contact your Broadband service provider
Contact your Broadband service provider
Contact your Broadband service provider
1.
1.
1.
1.
Obtain Broadband Internet service:
Obtain Broadband Internet service:Obtain Broadband Internet service:
Required speed (effective): at least 1.5 Mbps for SD and 6 Mbps for HD
Required speed (effective): at least 1.5 Mbps for SD and 6 Mbps for HD
Required speed (effective): at least 1.5 Mbps for SD and 6 Mbps for HD
picture quality, respectively.
picture quality, respectively.
picture quality, respectively.
Dial-up Internet service cannot be used for Home Screen.
Dial-up Internet service cannot be used for Home Screen.
Dial-up Internet service cannot be used for Home Screen.
Select wired or wireless connection
Select wired or wireless connection
Select wired or wireless connection
Select wired or wireless connection
2.
2.
2.
2.
If a wired network connection is available near the TV, then using this LAN
If a wired network connection is available near the TV, then using this LAN
If a wired network connection is available near the TV, then using this LAN
(Ethernet) connection is recommended.
(Ethernet) connection is recommended.
(Ethernet) connection is recommended.
Connecting to the Internet
Connecting to the Internet
Connecting to the Internet
Connecting to the Internet
3.
3.
3.
3.
73 (0300201)
Page 74

A. Wireless connection
A. Wireless connection
A. Wireless connectionA. Wireless connectionA. Wireless connection
Home network
Home network
Home networkHome network
TV (Built-in wireless LAN)
TV (Built-in wireless LAN)
TV (Built-in wireless LAN)
TV (Built-in wireless LAN)
Home network (modem/wireless router)
Home network (modem/wireless router)
Home network (modem/wireless router)
Home network (modem/wireless router)
Computer/DLNA Certified media server
Computer/DLNA Certified media server
Computer/DLNA Certified media server
Computer/DLNA Certified media server
Wireless connection (without Internet connection)
Wireless connection (without Internet connection)
Wireless connection (without Internet connection)Wireless connection (without Internet connection)
You can connect the TV as an access point to wireless equipment without
You can connect the TV as an access point to wireless equipment without
You can connect the TV as an access point to wireless equipment without
You can connect the TV as an access point to wireless equipment without
an Internet connection.
an Internet connection.
an Internet connection.
an Internet connection.
TV (as Access point)
TV (as Access point)
TV (as Access point)
TV (as Access point)
Wireless equipments (TV, Smart phone, PC etc.)
Wireless equipments (TV, Smart phone, PC etc.)
Wireless equipments (TV, Smart phone, PC etc.)
Wireless equipments (TV, Smart phone, PC etc.)
This connection can not be used for Internet services.
This connection can not be used for Internet services.This connection can not be used for Internet services.This connection can not be used for Internet services.
74 (0300201)
Page 75

B. Wired connection (Using Router)
B. Wired connection (Using Router)
B. Wired connection (Using Router)B. Wired connection (Using Router)B. Wired connection (Using Router)
Home network
Home network
Home networkHome network
TV (Ethernet port)
TV (Ethernet port)
TV (Ethernet port)
TV (Ethernet port)
LAN (Ethernet) cable
LAN (Ethernet) cable
LAN (Ethernet) cable
LAN (Ethernet) cable
Home network (modem/router)
Home network (modem/router)
Home network (modem/router)
Home network (modem/router)
Computer/DLNA Certified media server
Computer/DLNA Certified media server
Computer/DLNA Certified media server
Computer/DLNA Certified media server
C. Wired connection (Directly connected)
C. Wired connection (Directly connected)
C. Wired connection (Directly connected)C. Wired connection (Directly connected)C. Wired connection (Directly connected)
If you are not using the network for connecting anything else but the TV,
If you are not using the network for connecting anything else but the TV,
If you are not using the network for connecting anything else but the TV,
If you are not using the network for connecting anything else but the TV,
you can just connect the TV directly to the Cable/DSL Ethernet modem with
you can just connect the TV directly to the Cable/DSL Ethernet modem with
you can just connect the TV directly to the Cable/DSL Ethernet modem with
you can just connect the TV directly to the Cable/DSL Ethernet modem with
LAN (Ethernet) cable.
LAN (Ethernet) cable.
LAN (Ethernet) cable.
LAN (Ethernet) cable.
TV (Ethernet port)
TV (Ethernet port)
TV (Ethernet port)
TV (Ethernet port)
LAN (Ethernet) cable
LAN (Ethernet) cable
LAN (Ethernet) cable
LAN (Ethernet) cable
Modem
Modem
Modem
Modem
To use and operate only DLNA features, a Broadband network
To use and operate only DLNA features, a Broadband network
To use and operate only DLNA features, a Broadband network
To use and operate only DLNA features, a Broadband network
environment is not needed.
environment is not needed.
environment is not needed.
environment is not needed.
You can simply connect the TV directly to the equipment with a LAN
You can simply connect the TV directly to the equipment with a LAN
You can simply connect the TV directly to the equipment with a LAN
You can simply connect the TV directly to the equipment with a LAN
cross cable.
cross cable.
cross cable.
cross cable.
75 (0300201)
Page 76

Home network "DLNA"
Network settings
Setting menu
This menu is used for connecting to a Broadband environment.
This menu is used for connecting to a Broadband environment.This menu is used for connecting to a Broadband environment.
Display the Menu and select Network
Display the Menu and select Network
Display the Menu and select Network
Display the Menu and select NetworkMenu Network
1.
1.
1.
1.
MENU Menu > Network
MENU Menu > Network MENU Menu > NetworkMENU Menu > NetworkMENU Menu Network
Select Network using / from menu bar and press
Select Network using / from menu bar and press Select Network using / from menu bar and press NetworkNetwork
Select the options and set
Select the options and set
Select the options and set
Select the options and set
2.
2.
2.
2.
(Network connection/Network status/VIERA remote settings/
(Network connection/Network status/VIERA remote settings/
(Network connection/Network status/VIERA remote settings/
(Network connection/Network status/VIERA remote settings/
Network connection Network status VIERA remote settings
Network link/Software update/New software notice)
Network link/Software update/New software notice)
Network link/Software update/New software notice)
Network link/Software update/New software notice)
Network link Software update New software notice
76 (0200201)
Page 77

Home network "DLNA"
Network settings
Network connection/Network status
Network connection/Network status
Network connection/Network statusNetwork connection/Network statusNetwork connection/Network statusNetwork connection/Network status
Select Network connection using / and press
Select Network connection using / and press Select Network connection using / and press Network connectionNetwork connection
Select Quick setup to launch Network connection setup wizard.
Select Quick setup to launch Network connection setup wizard.
Select Quick setup to launch Network connection setup wizard.
Follow the directions on the screen to complete the network connection.
Follow the directions on the screen to complete the network connection.
Follow the directions on the screen to complete the network connection.
Displays Network status
Displays Network statusDisplays Network statusNetwork statusNetwork status
Select Try again and press OK to start connection test.
Select Try again and press OK to start connection test.
Select Try again and press OK to start connection test.
Success Completion message is displayed.
Success Completion message is displayed.
Success Completion message is displayed.
Error Select Status details/Help and press OK to display solution
Error Select Status details/Help and press OK to display solution
Error Select Status details/Help and press OK to display solution
of the connection error.
of the connection error.
of the connection error.
Follow the directions on the screen to complete the network settings.
Follow the directions on the screen to complete the network settings.
Follow the directions on the screen to complete the network settings.
Quick setup
Manual settings are also available.
Manual settings are also available.
Manual settings are also available.
Select Custom and select your connection type.
Select Custom and select your connection type.
Select Custom and select your connection type.
Displays setting menu according to selected connection type.
Displays setting menu according to selected connection type.
Displays setting menu according to selected connection type.
Set the desired menu and complete the network connection.
Set the desired menu and complete the network connection.
Set the desired menu and complete the network connection.
Custom
Try again
Status details/Help
You can also display Network status from Network menu.
You can also display Network status from Network menu.
You can also display Network status from Network menu.
(Network > Network status)
(Network > Network status)
(Network > Network status)
NetworkNetwork Network statusNetwork status
Exit the screen
Exit the screen
Exit the screen
Select Done and press OK to exit from this screen.
Select Done and press OK to exit from this screen.
Select Done and press OK to exit from this screen.Done
Network statusNetwork status NetworkNetwork
77 (0200202)
Page 78

Home network "DLNA"
Network settings
VIERA remote settings
VIERA remote settings
VIERA remote settingsVIERA remote settingsVIERA remote settingsVIERA remote settings
Select VIERA remote settings using / and press
Select VIERA remote settings using / and press
Select VIERA remote settings using / and press VIERA remote settingsVIERA remote settings
Displayed VIERA remote settings
Displayed VIERA remote settings
Displayed VIERA remote settingsVIERA remote settingsVIERA remote settings
Select the item and set
Select the item and set
Select the item and set
VIERA remote
VIERA remoteVIERA remoteVIERA remoteVIERA remote
Enables to control the TV from the network equipment (smartphone, etc.).
Enables to control the TV from the network equipment (smartphone, etc.).Enables to control the TV from the network equipment (smartphone, etc.).
Sets to On to enable below settings.
Sets to On to enable below settings.Sets to On to enable below settings.On
Select VIERA remote using / and press
Select VIERA remote using / and press
Select VIERA remote using / and press VIERA remoteVIERA remote
Switches On or Off with /
Switches On or Off with /
Switches On or Off with /On Off
Wake on LAN
Wake on LANWake on LANWake on LANWake on LAN
This function allows you to turn on the TV when you use Remote control
This function allows you to turn on the TV when you use Remote control
This function allows you to turn on the TV when you use Remote control
via IP.
via IP.
via IP.
via IP
Remote control
Select Wake on LAN using /
Select Wake on LAN using /
Select Wake on LAN using /Wake on LANWake on LAN
Switches Off or On with /
Switches Off or On with /
Switches Off or On with /Off On
Device to upload contents
Device to upload contentsDevice to upload contentsDevice to upload contentsDevice to upload contents
Selects device to upload contents from the network equipment
Selects device to upload contents from the network equipment
Selects device to upload contents from the network equipment
(smartphone,etc.).
(smartphone,etc.).
(smartphone,etc.).
Select Device to upload contents using / and press
Select Device to upload contents using / and press
Select Device to upload contents using / and press Device to upload contentsDevice to upload contents
Select device and press
Select device and press
Select device and press
78 (0200203)
Page 79

Home network "DLNA"
Network settings
Network link
Network link
Network linkNetwork linkNetwork linkNetwork link
Setting for DLNA server.
Setting for DLNA server.Setting for DLNA server.
DLNA server
DLNA serverDLNA serverDLNA serverDLNA server
Enables use this TV as DMS for network devices (DLNA Certified VIERA)
Enables use this TV as DMS for network devices (DLNA Certified VIERA)Enables use this TV as DMS for network devices (DLNA Certified VIERA)
Sets to On to enable below settings.
Sets to On to enable below settings.Sets to On to enable below settings.On
Select DLNA server using / and press
Select DLNA server using / and press
Select DLNA server using / and press DLNA serverDLNA server
Switches On or Off with /
Switches On or Off with /
Switches On or Off with /On Off
Registration type
Registration typeRegistration typeRegistration typeRegistration type
Selects the limitation of access to this TV for each device on the home
Selects the limitation of access to this TV for each device on the home
Selects the limitation of access to this TV for each device on the home
network.
network.
network.
Select Registration type using / and press
Select Registration type using / and press
Select Registration type using / and press Registration typeRegistration type
Switches Auto or Manual with /
Switches Auto or Manual with /
Switches Auto or Manual with /Auto Manual
Auto: All the available device on the home network are
Auto: All the available device on the home network are
Auto: All the available device on the home network are
Auto
accessible.(maximum 16 equipment)
accessible.(maximum 16 equipment)
accessible.(maximum 16 equipment)
Manual: Sets the access limitation for each device in the Remote device
Manual: Sets the access limitation for each device in the Remote device
Manual: Sets the access limitation for each device in the Remote device
Manual
List.
List.
List.
Remote device list
Remote device listRemote device listRemote device listRemote device list
Lists the available device on the home network.
Lists the available device on the home network.Lists the available device on the home network.
Select Remote device list using / and press
Select Remote device list using / and press
Select Remote device list using / and press Remote device listRemote device list
Select the desired device with / and set access limitation.
Select the desired device with / and set access limitation.
Select the desired device with / and set access limitation.
79 (0200204)
Page 80

Home network "DLNA"
Network settings
Software update
Software update
Software updateSoftware updateSoftware updateSoftware update
Select Software update using / and press
Select Software update using / and press
Select Software update using / and press Software updateSoftware update
Press OK to start the Software update screen
Press OK to start the Software update screen
Press OK to start the Software update screen
Software update
Software update Software updateSoftware updateSoftware update
Follow directions on the screen
Follow directions on the screenFollow directions on the screen
Make sure to set Clock before the update starts.
Make sure to set Clock before the update starts.Make sure to set Clock before the update starts.ClockClock
80 (0200206)
Page 81

Home network "DLNA"
Network settings
New software notice
New software notice
New software noticeNew software noticeNew software noticeNew software notice
Displays new software update information when TV is turned on.
Displays new software update information when TV is turned on.Displays new software update information when TV is turned on.
Select New software notice using /
Select New software notice using /
Select New software notice using /New software noticeNew software notice
Switches Off or On with /
Switches Off or On with /
Switches Off or On with /Off On
81 (0200207)
Page 82
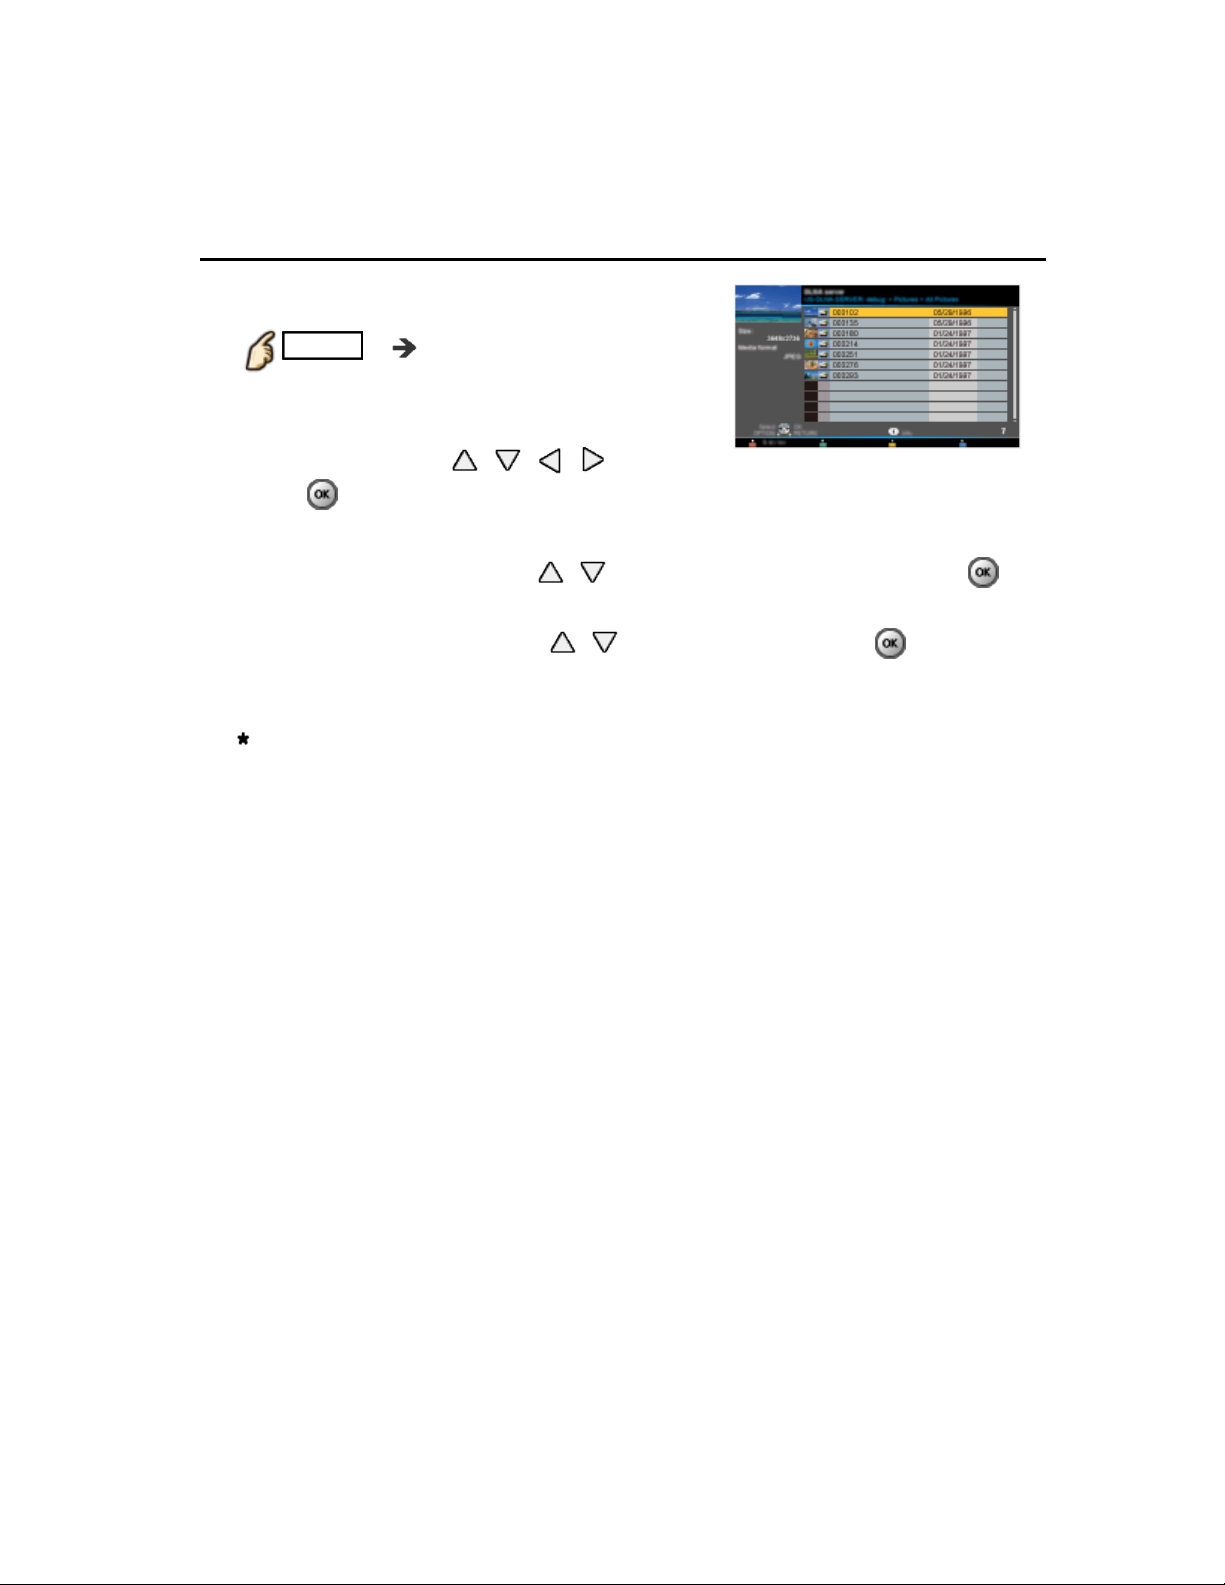
Home network "DLNA"
Photos
Viewing Photos
Display Apps (application) list
Display Apps (application) list
Display Apps (application) list
Display Apps (application) list
Display Apps (application) list
1.
1.
1.
1.
1.
APPS Apps list
APPS Apps list
APPS Apps list
APPS Apps list
APPS Apps listAPPS
Display DLNA server
Display DLNA server
Display DLNA server
Display DLNA server
Display DLNA serverDLNA server
2.
2.
2.
2.
2.
Select DLNA using / / /
Select DLNA using / / /
Select DLNA using / / /
Select DLNA using / / /
press
press
press
press
Select server (Available DLNA servers are displayed).
Select server (Available DLNA servers are displayed).
Select server (Available DLNA servers are displayed).
Select server
3.
3.
3.
3.
Select desired server using / from DLNA server list and press
Select desired server using / from DLNA server list and press
Select desired server using / from DLNA server list and press
Select photo (Thumbnails and contents are displayed).
Select photo (Thumbnails and contents are displayed).
Select photo (Thumbnails and contents are displayed).
Select photo
4.
4.
4.
4.
Select desired content using / from file list and press
Select desired content using / from file list and press
Select desired content using / from file list and press
View
View
View
View
5.
5.
5.
5.
Follow the navigation and guide to operate.
Follow the navigation and guide to operate.
Follow the navigation and guide to operate.
DLNA
Displayed navigation and guide will be different depending on data type.
Displayed navigation and guide will be different depending on data type.Displayed navigation and guide will be different depending on data type.
82 (0300401)
Page 83

Home network "DLNA"
Photos
Photo view
Thumbnail view
Thumbnail viewThumbnail viewThumbnail viewThumbnail view
Display Slideshow settings
Display Slideshow settings
INFO Information panel (File name, Date, and Size etc.)
INFO Information panel (File name, Date, and Size etc.)
* Information differs depending on selected data.
* Information differs depending on selected data.
Playback screen
Playback screenPlayback screenPlayback screenPlayback screen
INFO Display/hide Guide and Banner
INFO Display/hide Guide and Banner
Photo status: Shows current photo status
Photo status: Shows current photo statusPhoto status: Shows current photo status
or
or or
2D/3D status: Shows current 2D/3D status
2D/3D status: Shows current 2D/3D status
2D/3D status: Shows current 2D/3D status
Navigation Guide: Shows available functions.
Navigation Guide: Shows available functions.
Navigation Guide: Shows available functions.
In DMR mode, Slideshow is not available.
In DMR mode, Slideshow is not available.
In DMR mode, Slideshow is not available.
In DMR mode, Slideshow is not available.
In DMR mode, OK/Next/Prev. are not available.
In DMR mode, OK/Next/Prev. are not available.
In DMR mode, OK/Next/Prev. are not available.
In DMR mode, OK/Next/Prev. are not available.
83 (0300402)
Page 84
Home network "DLNA"
Photos
Options menu
In Photo view, some optional menus are available pressing OPTION button.
In Photo view, some optional menus are available pressing OPTION button.In Photo view, some optional menus are available pressing OPTION button.OPTIONOPTION
Display Options menu
Display Options menu
Display Options menu
Display Options menuOptions menu
1.
1.
1.
1.
OPTION Options menu
OPTION Options menuOPTION Options menuOPTION Options menuOPTION Options menu
Select the item
Select the item
Select the item
Select the item
2.
2.
2.
2.
Select the desired menu using / and press
Select the desired menu using / and press
Select the desired menu using / and press
(Slideshow settings)
(Slideshow settings)
(Slideshow settings)
(Slideshow settings)Slideshow settings
Available menus are displayed on Options menu depending on data
Available menus are displayed on Options menu depending on data
Available menus are displayed on Options menu depending on data
Available menus are displayed on Options menu depending on data
condition and situation.
condition and situation.
condition and situation.
condition and situation.
Options menuOptions menu
84 (0300403)
Page 85
Home network "DLNA"
Photos
Using slideshow
Display Slideshow settings
Display Slideshow settings
Display Slideshow settings
Display Slideshow settingsSlideshow settings
1.
1.
1.
1.
Slideshow settings
Slideshow settings Slideshow settingsSlideshow settingsSlideshow settings
Adjust items
Adjust items
Adjust items
Adjust items
2.
2.
2.
2.
Select the item by / and adjust the settings using /
Select the item by / and adjust the settings using /
Select the item by / and adjust the settings using /
Picture quality may deteriorate depending on the slideshow settings.
Picture quality may deteriorate depending on the slideshow settings.
Picture quality may deteriorate depending on the slideshow settings.
Picture quality may deteriorate depending on the slideshow settings.
Picture setting may not work depending on the slideshow settings.
Picture setting may not work depending on the slideshow settings.
Picture setting may not work depending on the slideshow settings.
Picture setting may not work depending on the slideshow settings.
Start Slideshow
Start Slideshow
Start Slideshow
Start Slideshow
3.
3.
3.
3.
After adjusting each setting, select Start slideshow with / and press
After adjusting each setting, select Start slideshow with / and press
After adjusting each setting, select Start slideshow with / and press
Start slideshowStart slideshow
RETURN Stop in mid-cycle
RETURN Stop in mid-cycle RETURN Stop in mid-cycleRETURNRETURN
85 (0300405)
Page 86

Home network "DLNA"
Photos
Slideshow settings
Transition effect
Transition effect
Transition effect
Transition effect
Transition effect
(Off/Fade in/Dissolve/Motion/Random)
(Off/Fade in/Dissolve/Motion/Random)
(Off/Fade in/Dissolve/Motion/Random)
(Off/Fade in/Dissolve/Motion/Random)
Select the Transition effect shown between photos.
Select the Transition effect shown between photos.
Select the Transition effect shown between photos.
Auto makeup
Auto makeup
Auto makeup
Auto makeup
Auto makeup
(On/Off)
(On/Off)
(On/Off)
(On/Off)
Detects a face in the photo, checks the luminance, and then retouches the
Detects a face in the photo, checks the luminance, and then retouches the
Detects a face in the photo, checks the luminance, and then retouches the
enhanced image.
enhanced image.
enhanced image.
Display interval
Display interval
Display interval
Display interval
Display interval
(Short/Normal/Long)
(Short/Normal/Long)
(Short/Normal/Long)
(Short/Normal/Long)
Display interval sets the time each image is displayed in the Slideshow mode.
Display interval sets the time each image is displayed in the Slideshow mode.
Display interval sets the time each image is displayed in the Slideshow mode.
Display intervalDisplay interval
Repeat playback
Repeat playback
Repeat playback
Repeat playback
Repeat playback
(Off/On)
(Off/On)
(Off/On)
(Off/On)
Turn the Slideshow Repeat (cycle) function on or off.
Turn the Slideshow Repeat (cycle) function on or off.
Turn the Slideshow Repeat (cycle) function on or off.
Soundtrack settings
Soundtrack settings
Soundtrack settings
Soundtrack settings
Soundtrack settings
(Off/Music 1/Music 2/Music 3/Music 4/Music 5)
(Off/Music 1/Music 2/Music 3/Music 4/Music 5)
(Off/Music 1/Music 2/Music 3/Music 4/Music 5)
(Off/Music 1/Music 2/Music 3/Music 4/Music 5)
Select the music.
Select the music.
Select the music.
86 (0300406)
Page 87
Home network "DLNA"
Videos
Viewing Videos
Display Apps list
Display Apps list
Display Apps list
Display Apps list
1.
1.
1.
1.
APPS Apps list
APPS Apps list APPS Apps listAPPS Apps listAPPS
Display DLNA server
Display DLNA server
Display DLNA server
Display DLNA serverDLNA server
2.
2.
2.
2.
Select DLNA using / / / press
Select DLNA using / / / press
Select DLNA using / / / press
Select server (Available DLNA servers are displayed).
Select server (Available DLNA servers are displayed).
Select server (Available DLNA servers are displayed).
Select server
3.
3.
3.
3.
Select desired server using / from DLNA server list and press
Select desired server using / from DLNA server list and press
Select desired server using / from DLNA server list and press
Select video (Thumbnails and contents are displayed).
Select video (Thumbnails and contents are displayed).
Select video (Thumbnails and contents are displayed).
Select video
4.
4.
4.
4.
Select desired content using / from file list and press
Select desired content using / from file list and press
Select desired content using / from file list and press
Play
Play
Play
Play
5.
5.
5.
5.
Follow the navigation and guide to operate.
Follow the navigation and guide to operate.
Follow the navigation and guide to operate.
DLNA
Displayed navigation and guide will be different depending on data type.
Displayed navigation and guide will be different depending on data type.Displayed navigation and guide will be different depending on data type.
87 (0300501)
Page 88
Home network "DLNA"
Videos
Video view
Thumbnail view
Thumbnail viewThumbnail viewThumbnail viewThumbnail view
INFO Information panel (File name, Date, and Size etc.)
INFO Information panel (File name, Date, and Size etc.)
* Information differs depending on selected data.
* Information differs depending on selected data.
Playback screen
Playback screenPlayback screenPlayback screenPlayback screen
INFO Display/hide Guide and Banner
INFO Display/hide Guide and Banner
Movie banner: Shows current Video status
Movie banner: Shows current Video statusMovie banner: Shows current Video status
(Drive type, Date and time or File name and Elapsed
(Drive type, Date and time or File name and Elapsed
(Drive type, Date and time or File name and Elapsed
time.)
time.)
time.)
2D/3D status: Shows current 2D/3D status
2D/3D status: Shows current 2D/3D status
2D/3D status: Shows current 2D/3D status
Navigation Guide: Shows available functions.
Navigation Guide: Shows available functions.
Navigation Guide: Shows available functions.
In DMR mode, Next skip/Prev. skip are not available.
In DMR mode, Next skip/Prev. skip are not available.In DMR mode, Next skip/Prev. skip are not available.
Forward/Reverse: Five levels of speed 1 to 5 are available.
Forward/Reverse: Five levels of speed 1 to 5 are available.Forward/Reverse: Five levels of speed 1 to 5 are available.
In DMR mode, Resume playback is not available
In DMR mode, Resume playback is not available
In DMR mode, Resume playback is not available
In DMR mode, Resume playback is not available
Subtitles are not supported in MKV format.
Subtitles are not supported in MKV format.
Subtitles are not supported in MKV format.
Subtitles are not supported in MKV format.
88 (0300502)
Page 89
Home network "DLNA"
Videos
Options menu
In Video view, some optional menus are available pressing OPTION button.
In Video view, some optional menus are available pressing OPTION button.In Video view, some optional menus are available pressing OPTION button.OPTIONOPTION
Display Options menu
Display Options menu
Display Options menu
Display Options menuOptions menu
1.
1.
1.
1.
OPTION Options menu
OPTION Options menuOPTION Options menuOPTION Options menuOPTION Options menu
Select the item
Select the item
Select the item
Select the item
2.
2.
2.
2.
Select the desired menu using / and press
Select the desired menu using / and press
Select the desired menu using / and press
(Video options)
(Video options)
(Video options)
(Video options)Video options
Repeat playback
Repeat playback
Repeat playback
Repeat playbackRepeat playback
Set play repeat function (Off/On)
Set play repeat function (Off/On)
Set play repeat function (Off/On)
Available menus are displayed on Options menu depending on data
Available menus are displayed on Options menu depending on data
Available menus are displayed on Options menu depending on data
Available menus are displayed on Options menu depending on data
condition and situation.
condition and situation.
condition and situation.
condition and situation.
Off On
Options menuOptions menu
89 (0300503)
Page 90

Home network "DLNA"
Music
Playing Music
Display Apps list
Display Apps list
Display Apps list
Display Apps list
1.
1.
1.
1.
APPS Apps list
APPS Apps listAPPS Apps listAPPS Apps listAPPS
Display DLNA server
Display DLNA server
Display DLNA server
Display DLNA serverDLNA server
2.
2.
2.
2.
Select DLNA using / / / press
Select DLNA using / / / press
Select DLNA using / / / press
Select server (Available DLNA servers are displayed).
Select server (Available DLNA servers are displayed).
Select server (Available DLNA servers are displayed).
Select server
3.
3.
3.
3.
Select desired server using / from DLNA server list and press
Select desired server using / from DLNA server list and press
Select desired server using / from DLNA server list and press
Select music (Thumbnails and contents are displayed).
Select music (Thumbnails and contents are displayed).
Select music (Thumbnails and contents are displayed).
Select music
4.
4.
4.
4.
Select desired content using / from file list and press
Select desired content using / from file list and press
Select desired content using / from file list and press
Play
Play
Play
Play
5.
5.
5.
5.
Follow the navigation and guide to operate.
Follow the navigation and guide to operate.
Follow the navigation and guide to operate.
DLNA
Displayed navigation and guide will be different depending on data type.
Displayed navigation and guide will be different depending on data type.Displayed navigation and guide will be different depending on data type.
90 (0300601)
Page 91

Home network "DLNA"
Music
Music view
Thumbnail view
Thumbnail viewThumbnail viewThumbnail viewThumbnail view
INFO Information panel (File name, Date, and Size etc.)
INFO Information panel (File name, Date, and Size etc.)
* Information differs depending on selected data.
* Information differs depending on selected data.
Playback screen
Playback screenPlayback screenPlayback screenPlayback screen
INFO Display/hide Guide and Banner
INFO Display/hide Guide and Banner
Music Guide: Shows current Music status
Music Guide: Shows current Music statusMusic Guide: Shows current Music status
(Artist name/Album name/Song name, Elapsed time)
(Artist name/Album name/Song name, Elapsed time)(Artist name/Album name/Song name, Elapsed time)
Navigation Guide: Shows available functions.
Navigation Guide: Shows available functions.Navigation Guide: Shows available functions.
Forward/Reverse: Five levels of speed 1 to 5 are available.
Forward/Reverse: Five levels of speed 1 to 5 are available.Forward/Reverse: Five levels of speed 1 to 5 are available.
In DMR mode, Next skip/Prev. skip/User BGM settings are not
In DMR mode, Next skip/Prev. skip/User BGM settings are not
In DMR mode, Next skip/Prev. skip/User BGM settings are not
available.
available.
available.
91 (0300602)
Page 92

Home network "DLNA"
Music
Options menu
In Music view, some optional menus are available pressing OPTION button.
In Music view, some optional menus are available pressing OPTION button.In Music view, some optional menus are available pressing OPTION button.OPTIONOPTION
Display Options menu
Display Options menu
Display Options menu
Display Options menuOptions menu
1.
1.
1.
1.
OPTION Options menu
OPTION Options menu OPTION Options menuOPTION Options menuOPTION Options menu
Select the item
Select the item
Select the item
Select the item
2.
2.
2.
2.
Select the desired menu using / and press
Select the desired menu using / and press
Select the desired menu using / and press
(Music options)
(Music options)
(Music options)
(Music options)Music options
Repeat playback
Repeat playback
Repeat playback
Repeat playbackRepeat playback
Set play repeat function (Off/Repeat folder/One song)
Set play repeat function (Off/Repeat folder/One song)
Set play repeat function (Off/Repeat folder/One song)
Available menus are displayed on Options menu depending on data
Available menus are displayed on Options menu depending on data
Available menus are displayed on Options menu depending on data
Available menus are displayed on Options menu depending on data
condition and situation.
condition and situation.
condition and situation.
condition and situation.
Off Repeat folder One song
Options menuOptions menu
92 (0300603)
Page 93

Home network "DLNA"
Data information
Compatible Data format
Compatible Data format for Media player
Compatible Data format for Media player
Compatible Data format for Media player
Compatible Data format for Media player
Compatible Data format for Media player
(SD card/USB flash memory)/DLNA
(SD card/USB flash memory)/DLNA
(SD card/USB flash memory)/DLNA
(SD card/USB flash memory)/DLNA
(SD card/USB flash memory)/DLNA
Media Compatible format
Media Compatible format
Photo JPEG files (DCF and EXIF standards)
Photo JPEG files (DCF and EXIF standards)
Sub-sampling - 4:4:4, 4:2:2 and 4:2:0
Sub-sampling - 4:4:4, 4:2:2 and 4:2:0
Image resolution - 8 x 8 to 30,719 x 17,279 pixels
Image resolution - 8 x 8 to 30,719 x 17,279 pixels
Videos SD-Video files (SD-Video Standard Ver.1.31)
Videos SD-Video files (SD-Video Standard Ver.1.31)
Modified data with a PC may not be displayed correctly.
Modified data with a PC may not be displayed correctly.
AVCHD files
AVCHD files
AVCHD Standard Ver.2.0 (AVCHD 3D, AVCHD Progressive)
AVCHD Standard Ver.2.0 (AVCHD 3D, AVCHD Progressive)
Modified data with a PC may not be displayed correctly.
Modified data with a PC may not be displayed correctly.
MP4 files
MP4 files
Video codec H.264/MPEG1/MPEG2
Video codec H.264/MPEG1/MPEG2
Audio codec MPEG Audio/MP3/AAC/HE-AAC/AC3/E-AC3
Audio codec MPEG Audio/MP3/AAC/HE-AAC/AC3/E-AC3
MKV files
MKV files
Video codec H.264/MPEG1/MPEG2
Video codec H.264/MPEG1/MPEG2
Audio codec MPEG Audio/MP3/AAC/HE-AAC/AC3/
Audio codec MPEG Audio/MP3/AAC/HE-AAC/AC3/
E-AC3/DTS core
E-AC3/DTS core
FLV files
FLV files
Video codec H.264
Video codec H.264
Audio codec MP3/AAC
Audio codec MP3/AAC
3GPP files
3GPP files
Video codec H.264
Video codec H.264
Audio codec AAC/HE-AAC
Audio codec AAC/HE-AAC
PS files
PS files
Video codec H.264*/MPEG1/MPEG2
Video codec H.264*/MPEG1/MPEG2
Audio codec MPEG Audio/MP3*/AAC*/HE-AAC*/AC3/
Audio codec MPEG Audio/MP3*/AAC*/HE-AAC*/AC3/
E-AC3*/LPCM
E-AC3*/LPCM
TS files
TS files
Video codec H.264/MPEG1/MPEG2
Video codec H.264/MPEG1/MPEG2
Audio codec MPEG Audio/MP3*/AAC/HE-AAC/AC3/
Audio codec MPEG Audio/MP3*/AAC/HE-AAC/AC3/
E-AC3/DTS core*
E-AC3/DTS core*
93 (0300701)
Page 94

Music MP3 files (MP3)
Music MP3 files (MP3)
M4A files (AAC)
M4A files (AAC)
- Copy-protected files cannot be played back.
- Copy-protected files cannot be played back.
FLAC files (FLAC)
FLAC files (FLAC)
WAV files (LPCM)
WAV files (LPCM)
for Media player only
for Media player onlyfor Media player only
Supported Subtitles formats
Supported Subtitles formatsSupported Subtitles formatsSupported Subtitles formatsSupported Subtitles formats
MicroDVD, SubRip, TMPlayer (.srt, .sub, .txt)
MicroDVD, SubRip, TMPlayer (.srt, .sub, .txt)MicroDVD, SubRip, TMPlayer (.srt, .sub, .txt)
The video file and subtitles text file are inside the same folder, and the file
The video file and subtitles text file are inside the same folder, and the file
The video file and subtitles text file are inside the same folder, and the file
names are the same except for the file extensions.
names are the same except for the file extensions.
names are the same except for the file extensions.
If there are more than one subtitles text files inside the same folder, they
If there are more than one subtitles text files inside the same folder, they
If there are more than one subtitles text files inside the same folder, they
are displayed in the following order of priority: "srt" "sub" "txt"
are displayed in the following order of priority: "srt" "sub" "txt"
are displayed in the following order of priority: "srt" "sub" "txt"
94 (0300701)
Page 95

Home network "DLNA"
Data information
Notice
The picture may not appear correctly on this TV depending on the recording
The picture may not appear correctly on this TV depending on the recording
The picture may not appear correctly on this TV depending on the recording
equipment used.
equipment used.
equipment used.
Some files may not be played back even if they fulfill these conditions.
Some files may not be played back even if they fulfill these conditions.
Some files may not be played back even if they fulfill these conditions.
Depending on how you make SD Card, USB Flash Memory or the media
Depending on how you make SD Card, USB Flash Memory or the media
Depending on how you make SD Card, USB Flash Memory or the media
server, files and folders may not be displayed in the order you numbered.
server, files and folders may not be displayed in the order you numbered.
server, files and folders may not be displayed in the order you numbered.
Depending on how you create the files and the structure of folders, the files
Depending on how you create the files and the structure of folders, the files
Depending on how you create the files and the structure of folders, the files
and folders may not be displayed.
and folders may not be displayed.
and folders may not be displayed.
When there are many files and folders, operation may take time to
When there are many files and folders, operation may take time to
When there are many files and folders, operation may take time to
complete or some files may not be displayed or playable.
complete or some files may not be displayed or playable.
complete or some files may not be displayed or playable.
The function cannot display still images that are not DCF formatted (i.e.
The function cannot display still images that are not DCF formatted (i.e.
The function cannot display still images that are not DCF formatted (i.e.
TIFF, BMP).
TIFF, BMP).
TIFF, BMP).
Data modified with a PC may not be displayed.
Data modified with a PC may not be displayed.
Data modified with a PC may not be displayed.
Images imported from a PC must be compatible with EXIF 2.0, 2.1 and 2.2.
Images imported from a PC must be compatible with EXIF 2.0, 2.1 and 2.2.
Images imported from a PC must be compatible with EXIF 2.0, 2.1 and 2.2.
Partly degraded files might be displayed at a reduced resolution.
Partly degraded files might be displayed at a reduced resolution.
Partly degraded files might be displayed at a reduced resolution.
All ".JPG" extension data in the SD card and USB flash memory will be
All ".JPG" extension data in the SD card and USB flash memory will be
All ".JPG" extension data in the SD card and USB flash memory will be
read in Photo Viewer Mode.
read in Photo Viewer Mode.
read in Photo Viewer Mode.
The folder and file names may be different depending on the digital camera
The folder and file names may be different depending on the digital camera
The folder and file names may be different depending on the digital camera
used.
used.
used.
Do not use two-byte characters or other special codes.
Do not use two-byte characters or other special codes.
Do not use two-byte characters or other special codes.
Connected devices may become unusable with this TV if file or folder
Connected devices may become unusable with this TV if file or folder
Connected devices may become unusable with this TV if file or folder
names are changed.
names are changed.
names are changed.
For the suitable SD Memory Cards, please confirm the latest information on
For the suitable SD Memory Cards, please confirm the latest information on
For the suitable SD Memory Cards, please confirm the latest information on
the following website.
the following website.
the following website.
http://panasonic.net/viera/support (This site is in English only)
http://panasonic.net/viera/support (This site is in English only)
http://panasonic.net/viera/support (This site is in English only)
95 (0300702)
Page 96
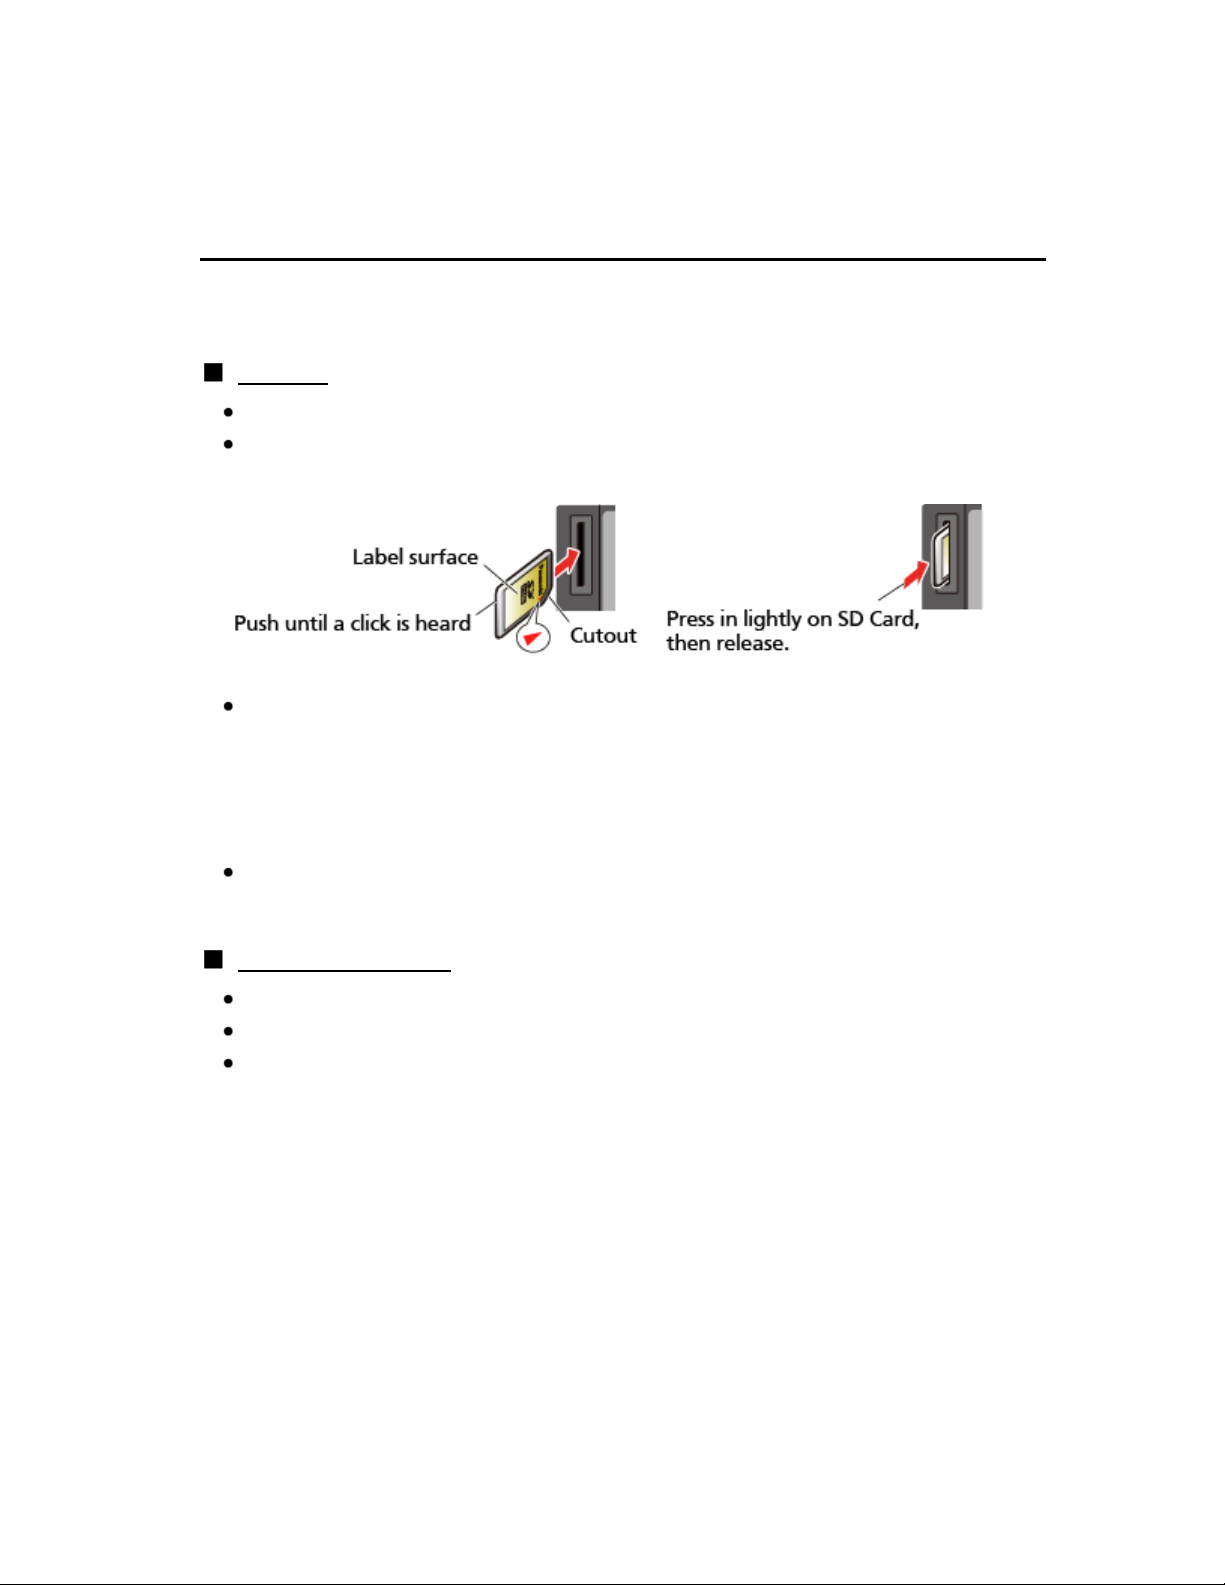
Media player
Get started
Information
You can view still and motion images and play music saved on a USB flash
You can view still and motion images and play music saved on a USB flash
You can view still and motion images and play music saved on a USB flash
memory and SD card.
memory and SD card.
memory and SD card.
SD card
SD cardSD cardSD cardSD card
When you use an SD card, gently insert with label surface facing front.
When you use an SD card, gently insert with label surface facing front.
When you use an SD card, gently insert with label surface facing front.
When you remove the SD card, press in lightly then release.
When you remove the SD card, press in lightly then release.
When you remove the SD card, press in lightly then release.
Compliant card type (maximum capacity):
Compliant card type (maximum capacity):
Compliant card type (maximum capacity):
SDXC Card (64 GB), SDHC Card (32 GB), microSDHC Card (32 GB), SD
SDXC Card (64 GB), SDHC Card (32 GB), microSDHC Card (32 GB), SD
SDXC Card (64 GB), SDHC Card (32 GB), microSDHC Card (32 GB), SD
Card (2 GB), miniSD Card (2 GB), microSD Card (2 GB)
Card (2 GB), miniSD Card (2 GB), microSD Card (2 GB)
Card (2 GB), miniSD Card (2 GB), microSD Card (2 GB)
(requiring microSDHC Card/miniSD Card/microSD Card/adapter)
(requiring microSDHC Card/miniSD Card/microSD Card/adapter)
(requiring microSDHC Card/miniSD Card/microSD Card/adapter)
If a microSDHC Card, miniSD Card or microSD Card is used, insert /
If a microSDHC Card, miniSD Card or microSD Card is used, insert /
If a microSDHC Card, miniSD Card or microSD Card is used, insert /
remove it together with the adapter.
remove it together with the adapter.
remove it together with the adapter.
USB flash memory
USB flash memoryUSB flash memoryUSB flash memoryUSB flash memory
When you use a USB device, insert straight in and pull straight out.
When you use a USB device, insert straight in and pull straight out.
When you use a USB device, insert straight in and pull straight out.
Media player only supports USB Mass storage class devices.
Media player only supports USB Mass storage class devices.
Media player only supports USB Mass storage class devices.
Remove USB devise safely with USB device setup.
Remove USB devise safely with USB device setup.
Remove USB devise safely with USB device setup.
(Setup > USB device setup)
(Setup > USB device setup)
(Setup > USB device setup)
SetupSetup USB device setupUSB device setup
USB device setupUSB device setup
96 (0400101)
Page 97

Media player
Get started
Media warning messages
Message Meaning
Message Meaning
No media. Please insert an SD
No media. Please insert an SD
memory card or USB storage device.
memory card or USB storage device.
No media. Device removed. The device is removed.
No media. Device removed. The device is removed.
No photos/No movies/
No photos/No movies/
No music files to play/
No music files to play/
No playable media
No playable media
Cannot read file The file is broken or unreadable.
Cannot read file The file is broken or unreadable.
The device is not inserted.
The device is not inserted.
The device has no data or this
The device has no data or this
type of data is not supported.
type of data is not supported.
The TV does not support the
The TV does not support the
format.
format.
97 (0400102)
Page 98
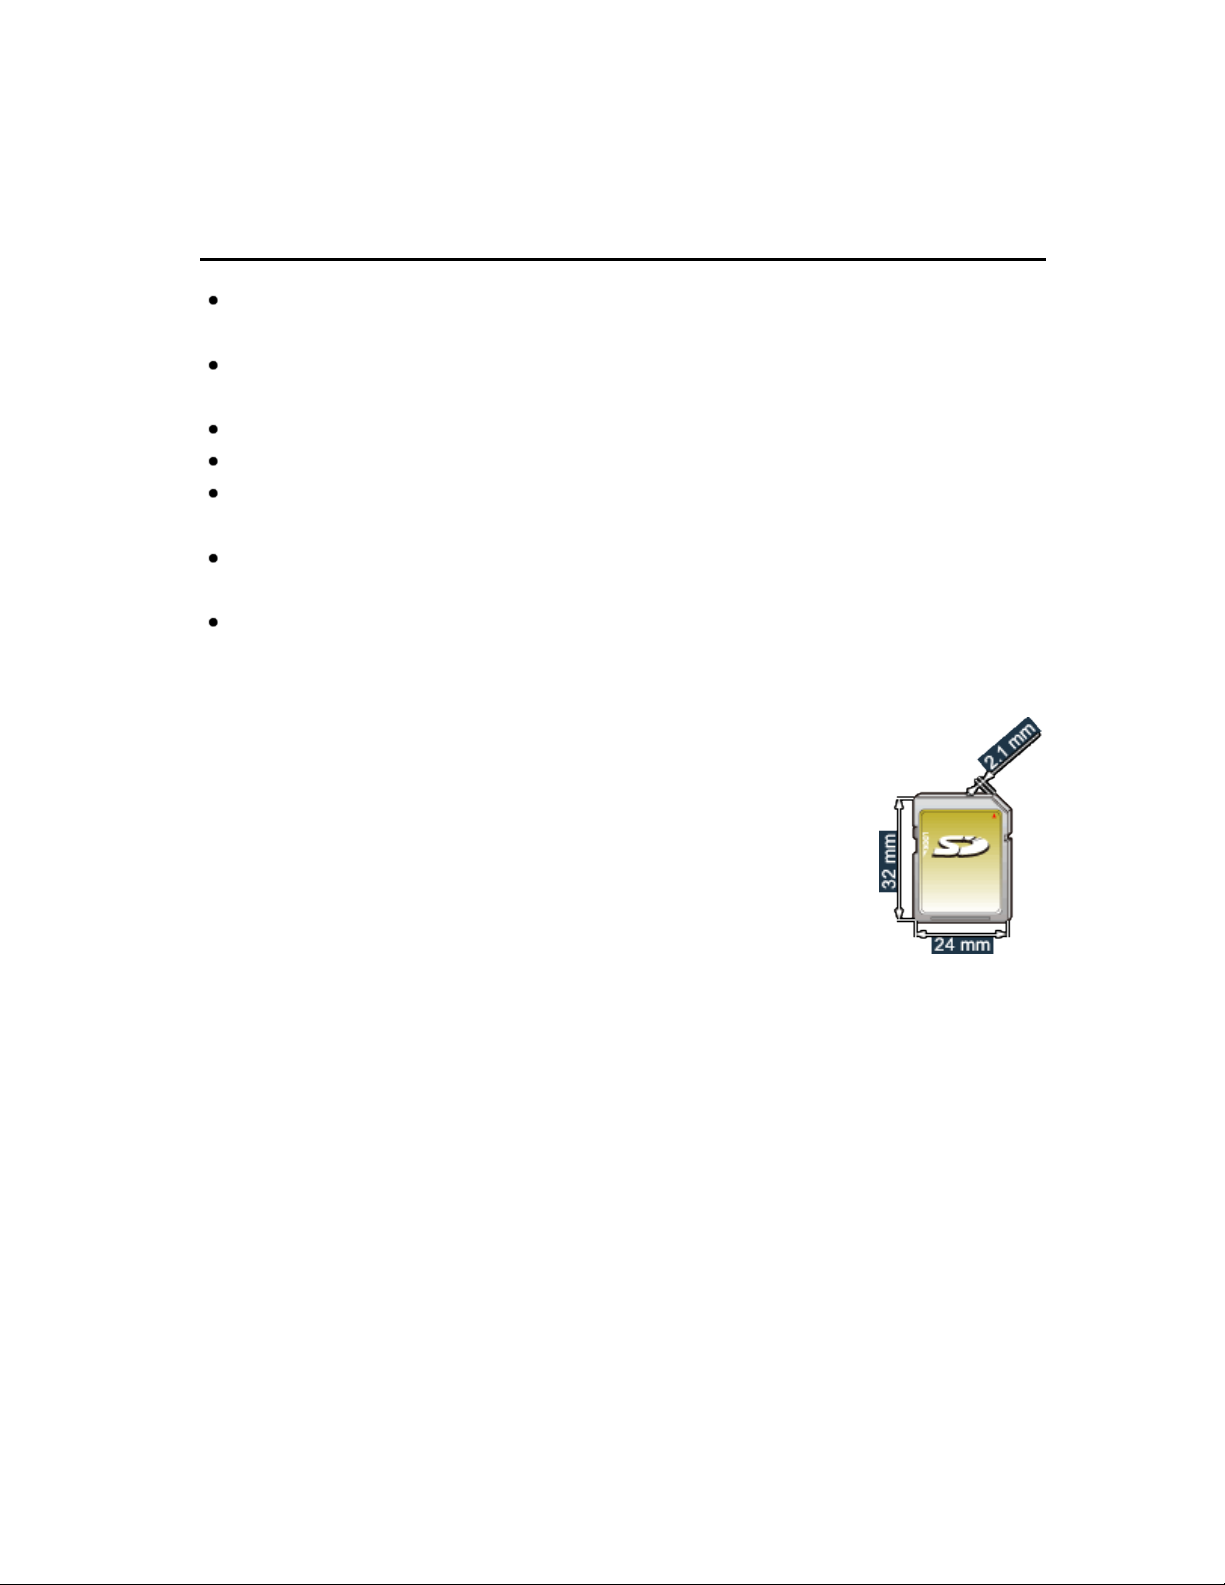
Media player
Get started
SD card handling cautions
Use an SD Card meets SD standards. Otherwise, it may cause the TV to
Use an SD Card meets SD standards. Otherwise, it may cause the TV to
Use an SD Card meets SD standards. Otherwise, it may cause the TV to
malfunction.
malfunction.
malfunction.
Do not remove the card while the unit is accessing data (this can damage
Do not remove the card while the unit is accessing data (this can damage
Do not remove the card while the unit is accessing data (this can damage
card or unit).
card or unit).
card or unit).
Do not touch the terminals on the back of the card.
Do not touch the terminals on the back of the card.
Do not touch the terminals on the back of the card.
Do not subject the card to high pressure or impact.
Do not subject the card to high pressure or impact.
Do not subject the card to high pressure or impact.
Insert the card in the correct direction (otherwise, card or unit may be
Insert the card in the correct direction (otherwise, card or unit may be
Insert the card in the correct direction (otherwise, card or unit may be
damaged).
damaged).
damaged).
Electrical interference, static electricity or erroneous operation may damage
Electrical interference, static electricity or erroneous operation may damage
Electrical interference, static electricity or erroneous operation may damage
the data or card.
the data or card.
the data or card.
Back up the recorded data at regular intervals in case of deteriorated or
Back up the recorded data at regular intervals in case of deteriorated or
Back up the recorded data at regular intervals in case of deteriorated or
damaged data or erratic operation of the unit. (Panasonic is not liable for
damaged data or erratic operation of the unit. (Panasonic is not liable for
damaged data or erratic operation of the unit. (Panasonic is not liable for
any deterioration or damage of recorded data.)
any deterioration or damage of recorded data.)
any deterioration or damage of recorded data.)
98 (0400103)
Page 99
Media player
Photos
Viewing Photos
Insert Media
Insert Media
Insert Media
Insert Media
1.
1.
1.
1.
Display Media player
Display Media player
Display Media player
Display Media player
2.
2.
2.
2.
SD/USB Media player
SD/USB Media player
SD/USB Media player
SD/USB Media playerSD/USB
You can also access from Apps list.
You can also access from Apps list.
You can also access from Apps list.
Select the SD/USB in Drive select (Displays connected drive)
Select the SD/USB in Drive select (Displays connected drive)
Select the SD/USB in Drive select (Displays connected drive)
Select the SD/USB in Drive select (Displays connected drive)Drive select
3.
3.
3.
3.
Select the drive using / and press
Select the drive using / and press
Select the drive using / and press
Select the Photos in Media select
Select the Photos in Media select
Select the Photos in Media select
Select the Photos in Media selectMedia select
4.
4.
4.
4.
Select the drive using / and press
Select the drive using / and press
Select the drive using / and press
Select the photo in thumbnail view
Select the photo in thumbnail view
Select the photo in thumbnail view
Select the photo in thumbnail view
5.
5.
5.
5.
Select the data using / / / and
Select the data using / / / and
Select the data using / / / and
How data is displayed differs depending on data storage conditions.
How data is displayed differs depending on data storage conditions.How data is displayed differs depending on data storage conditions.
View
View
View
View
6.
6.
6.
6.
Follow the Navigation and guide to operate.
Follow the Navigation and guide to operate.
Follow the Navigation and guide to operate.
Displayed navigation and guide may differ depending on data type.
Displayed navigation and guide may differ depending on data type.Displayed navigation and guide may differ depending on data type.
Other settings
Other settingsOther settingsOther settingsOther settings
Some basic menus are available after pressing the MENU button.
Some basic menus are available after pressing the MENU button.Some basic menus are available after pressing the MENU button.MENUMENU
MENU Menu > Picture/Sound/Network/Timer/Setup/Help
MENU Menu > Picture/Sound/Network/Timer/Setup/Help MENU Menu > Picture/Sound/Network/Timer/Setup/HelpMENU Menu > Picture/Sound/Network/Timer/Setup/HelpMENU Menu Picture Sound Network Timer Setup Help
99 (0400201)
Page 100

Media player
Photos
Photo view
Thumbnail view
Thumbnail viewThumbnail viewThumbnail viewThumbnail view
Display Slideshow settings
Display Slideshow settings
Display Sort
Display Sort
Display Drive select
Display Drive select
Display Media select
Display Media select
INFO Information panel (File name, Date, and Size etc.)
INFO Information panel (File name, Date, and Size etc.)
* Information differs depending on selected data.
* Information differs depending on selected data.
Playback screen
Playback screenPlayback screenPlayback screenPlayback screen
INFO Display/hide Guide and Banner
INFO Display/hide Guide and Banner
Photo status: Shows current photo status
Photo status: Shows current photo statusPhoto status: Shows current photo status
or
or or
2D/3D status: Shows current 2D/3D status
2D/3D status: Shows current 2D/3D status
2D/3D status: Shows current 2D/3D status
Navigation Guide: Shows available functions.
Navigation Guide: Shows available functions.
Navigation Guide: Shows available functions.
100 (0400202)
 Loading...