

Page 1
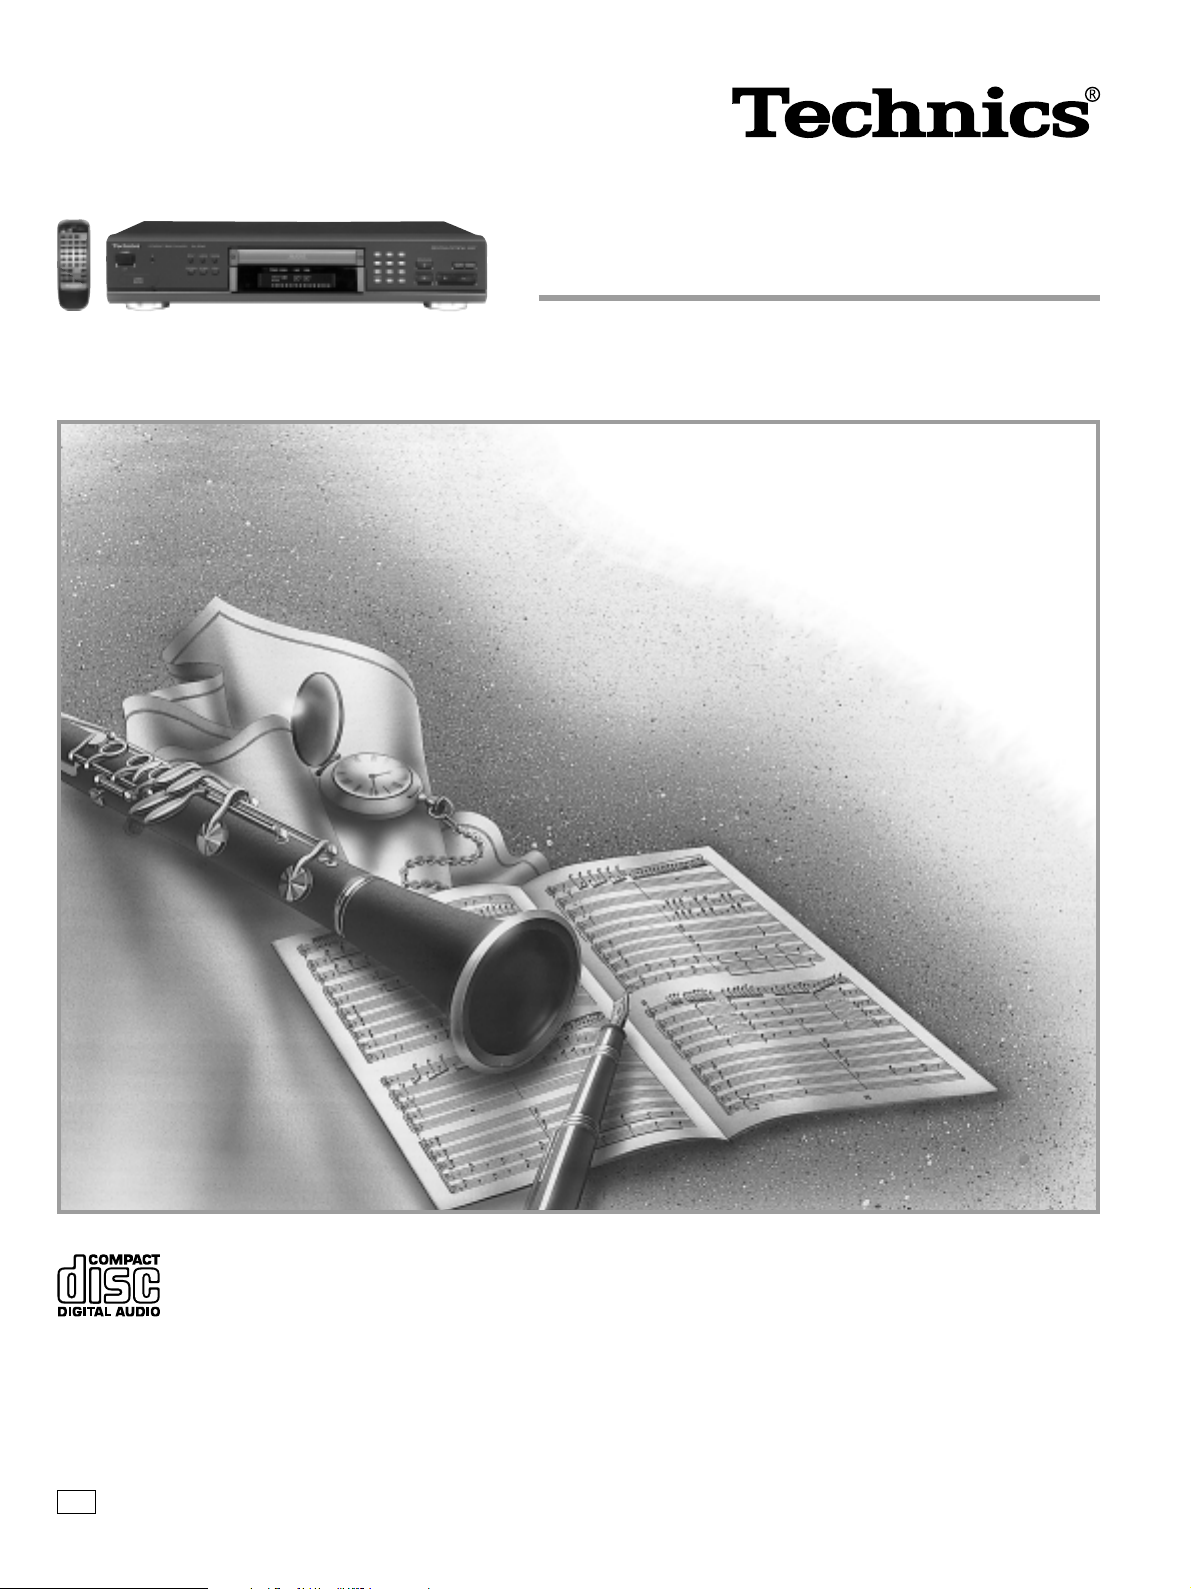
Compact Disc Player
Operating Instructions
Model No.
SL-PG4
P
Before connecting, operating or adjusting this product, please read these
instructions completely.
Please keep this manual for future reference.
RQT5701-P
Page 2
Dear customer
Thank you for purchasing this product.
For optimum performance and safety, please read these instructions
carefully.
User memo:
DATE OF PURCHASE
DEALER NAME
DEALER ADDRESS
TELEPHONE NUMBER
The model number and serial number of this product can be found
on either the back or the bottom of the unit.
Please note them in the space provided below and keep for future
reference.
MODEL NUMBER
SERIAL NUMBER
SL-PG4
Table of contents
IMPORTANT SAFETY INSTRUCTIONS . . . . . . . . . . . . 3
Connections . . . . . . . . . . . . . . . . . . . . . . . . . . . . . . . . . 4
Control reference guide . . . . . . . . . . . . . . . . . . . . . . . . 4
The remote control . . . . . . . . . . . . . . . . . . . . . . . . . . . . 5
Normal play . . . . . . . . . . . . . . . . . . . . . . . . . . . . . . . . . . 6
CD selection and care . . . . . . . . . . . . . . . . . . . . . . . . . . . . . . . 6
Other play modes . . . . . . . . . . . . . . . . . . . . . . . . . . . . . 7
Direct access play . . . . . . . . . . . . . . . . . . . . . . . . . . . . . . . . . . 7
Random play . . . . . . . . . . . . . . . . . . . . . . . . . . . . . . . . . . . . . . 7
Repeat . . . . . . . . . . . . . . . . . . . . . . . . . . . . . . . . . . . . . . . . . . . 7
A-B repeat . . . . . . . . . . . . . . . . . . . . . . . . . . . . . . . . . . . . . . . . 7
Program play . . . . . . . . . . . . . . . . . . . . . . . . . . . . . . . . . . . . . . 8
CD edit recording . . . . . . . . . . . . . . . . . . . . . . . . . . . . . 9
To add tracks to the extra space . . . . . . . . . . . . . . . . . . . . . . . 10
Other functions . . . . . . . . . . . . . . . . . . . . . . . . . . . . . . . 10
Auto cue . . . . . . . . . . . . . . . . . . . . . . . . . . . . . . . . . . . . . . . . . . 10
Output level control . . . . . . . . . . . . . . . . . . . . . . . . . . . . . . . . . 11
Time fade . . . . . . . . . . . . . . . . . . . . . . . . . . . . . . . . . . . . . . . . . 11
Time display . . . . . . . . . . . . . . . . . . . . . . . . . . . . . . . . . . . . . . . 11
Troubleshooting guide . . . . . . . . . . . . . . . . . Back cover
Specifications . . . . . . . . . . . . . . . . . . . . . . . . Back cover
Product service . . . . . . . . . . . . . . . . . . . . . . . Back cover
Maintenance . . . . . . . . . . . . . . . . . . . . . . . . . Back cover
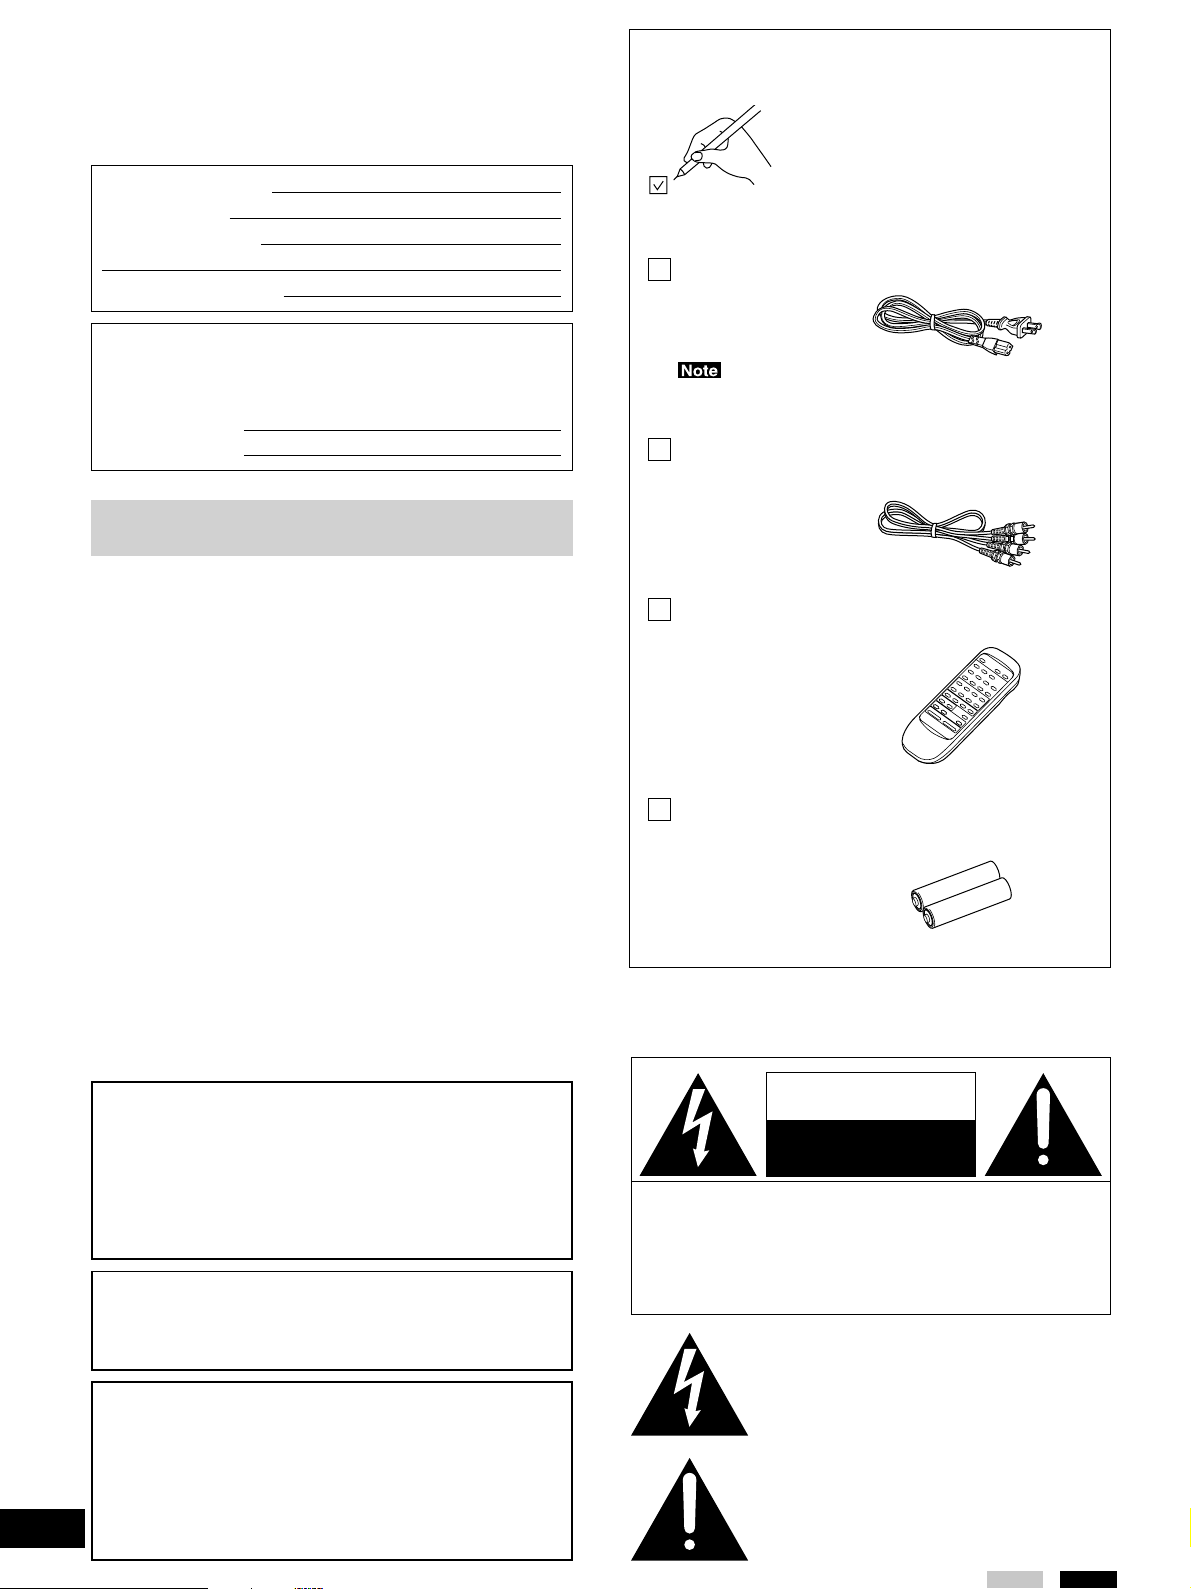
Supplied accessories
Please check and identify the supplied
accessories.
Use numbers indicated in parentheses
when asking for replacement parts.
To order accessories contact 1800-332-5368 or web site(http://
www.panasonic.com).
AC power supply cord (RJA0065-A) . . . . . . . . . . . 1 pc.
The included AC power supply cord is for use with this unit
only. Do not use it with other equipment.
Stereo connection cable (RJL2P004B08A) . . . . . 1 pc.
Remote control (EUR645275) . . . . . . . . . . . . . . . . 1 pc.
Batteries for remote control . . . . . . . . . . . . . . . . . . 2 pcs.
The laser product label has not been attached to this product.
CAUTION!
THIS PRODUCT UTILIZES A LASER.
USE OF CONTROLS OR ADJUSTMENTS OR PERFORMANCE OF PROCEDURES OTHER THAN THOSE SPECIFIED HEREIN MAY RESULT IN HAZARDOUS RADIATION
EXPOSURE.
DO NOT OPEN COVERS AND DO NOT REPAIR YOURSELF.
REFER SERVICING TO QUALIFIED PERSONNEL.
WARNING:
TO REDUCE THE RISK OF FIRE, ELECTRIC SHOCK OR
PRODUCT DAMAGE, DO NOT EXPOSE THIS APPLIANCE
TO RAIN, SPLASHING, DRIPPING OR MOISTURE.
CAUTION!
DO NOT INSTALL, OR PLACE THIS UNIT, IN A
BOOKCASE, BUILT-IN CABINET OR IN ANOTHER
CONFINED SPACE. ENSURE THE UNIT IS WELL
VENTILATED. TO PREVENT RISK OF ELECTRIC SHOCK
OR FIRE HAZARD DUE TO OVERHEATING, ENSURE
THAT CURTAINS AND ANY OTHER MATERIALS DO NOT
2
RQT5701
OBSTRUCT THE VENTILATION VENTS.
CAUTION
RISK OF ELECTRIC SHOCK
DO NOT OPEN
CAUTION: TO REDUCE THE RISK OF ELECTRIC
SHOCK, DO NOT REMOVE SCREWS.
NO USER-SERVICEABLE PARTS
INSIDE.
REFER SERVICING TO QUALIFIED
SERVICE PERSONNEL.
The lightning flash with arrowhead symbol, within
an equilateral triangle, is intended to alert the user
to the presence of uninsulated “dangerous voltage”
within the product’s enclosure that may be of sufficient magnitude to constitute a risk of electric shock
to persons.
The exclamation point within an equilateral triangle
is intended to alert the user to the presence of
important operating and maintenance (servicing)
instructions in the literature accompanying the
ap-pliance.
Page 3
IMPORTANT SAFETY INSTRUCTIONS
Read these operating instructions carefully before using the unit. Follow the safety instructions on the unit and the applicable safety instructions
listed below. Keep these operating instructions handy for future reference.
1) Read these instructions.
2) Keep these instructions.
3) Heed all warnings.
4) Follow all instructions.
5) Do not use this apparatus near water.
6) Clean only with dry cloth.
7) Do not block any ventilation openings. Install in accordance with
the manufacturer’s instructions.
8) Do not install near any heat sources such as radiators, heat registers, stoves, or other apparatus (including amplifiers) that produce heat.
9) Do not defeat the safety purpose of the polarized or groundingtype plug. A polarized plug has two blades with one wider than
the other. A grounding-type plug has two blades and a third
grounding prong. The wide blade or the third prong are provided
for your safety. If the provided plug does not fit into your outlet,
consult an electrician for replacement of the obsolete outlet.
10) Protect the power cord from being walked on or pinched particularly at plugs, convenience receptacles, and the point where
they exit from the apparatus.
11) Only use attachments/accessories specified by the manufacturer.
12) Use only with the cart, stand, tripod, bracket, or
table specified by the manufacturer, or sold with
the apparatus. When a cart is used, use caution
when moving the cart/apparatus combination to
avoid injury from tip-over.
13) Unplug this apparatus during lightning storms or when unused
for long periods of time.
14) Refer all servicing to qualified service personnel. Servicing is
required when the apparatus has been damaged in any way,
such as power-supply cord or plug is damaged, liquid has been
spilled or objects have fallen into the apparatus, the apparatus
has been exposed to rain or moisture, does not operate normally, or has been dropped.
In the U.S.A., contact the Panasonic Customer Call Center
at 1-800-211-7262, or web site (http://www.panasonic.com).
In Canada, contact Panasonic Canada Inc. Customer Care
Centre at (905) 624-5505, or web site (www.panasonic. ca),
or an authorized Servicentre nearest you.
CAUTION:
This equipment has been tested and found to comply with the
limits for a Class B digital device, pursuant to Part 15 of the
FCC Rules.
These limits are designed to provide reasonable protection
against harmful interference in a residential installation. This
equipment generates, uses and can radiate radio frequency
energy and, if not installed and used in accordance with the
instructions, may cause harmful interference to radio communications. However, there is no guarantee that interference
will not occur in a particular installation. If this equipment
does cause harmful interference to radio or television
reception, which can be determined by turning the equipment
off and on, the user is encouraged to try to correct the
interference by one or more of the following measures:
¡Reorient or relocate the receiving antenna.
¡Increase the separation between the equipment and re-
ceiver.
¡Connect the equipment into an outlet on a circuit different
from that to which the receiver is connected.
¡Consult the dealer or an experienced radio/TV technician for
help.
Any unauthorized changes or modifications to this equipment
would void the user’s authority to operate this device.
This device complies with Part 15 of the FCC Rules.
Operation is subject to the following two conditions: (1) This
device may not cause harmful interference, and (2) this
device must accept any interference received, including
interference that may cause undesired operation.
3
RQT5701
Page 4
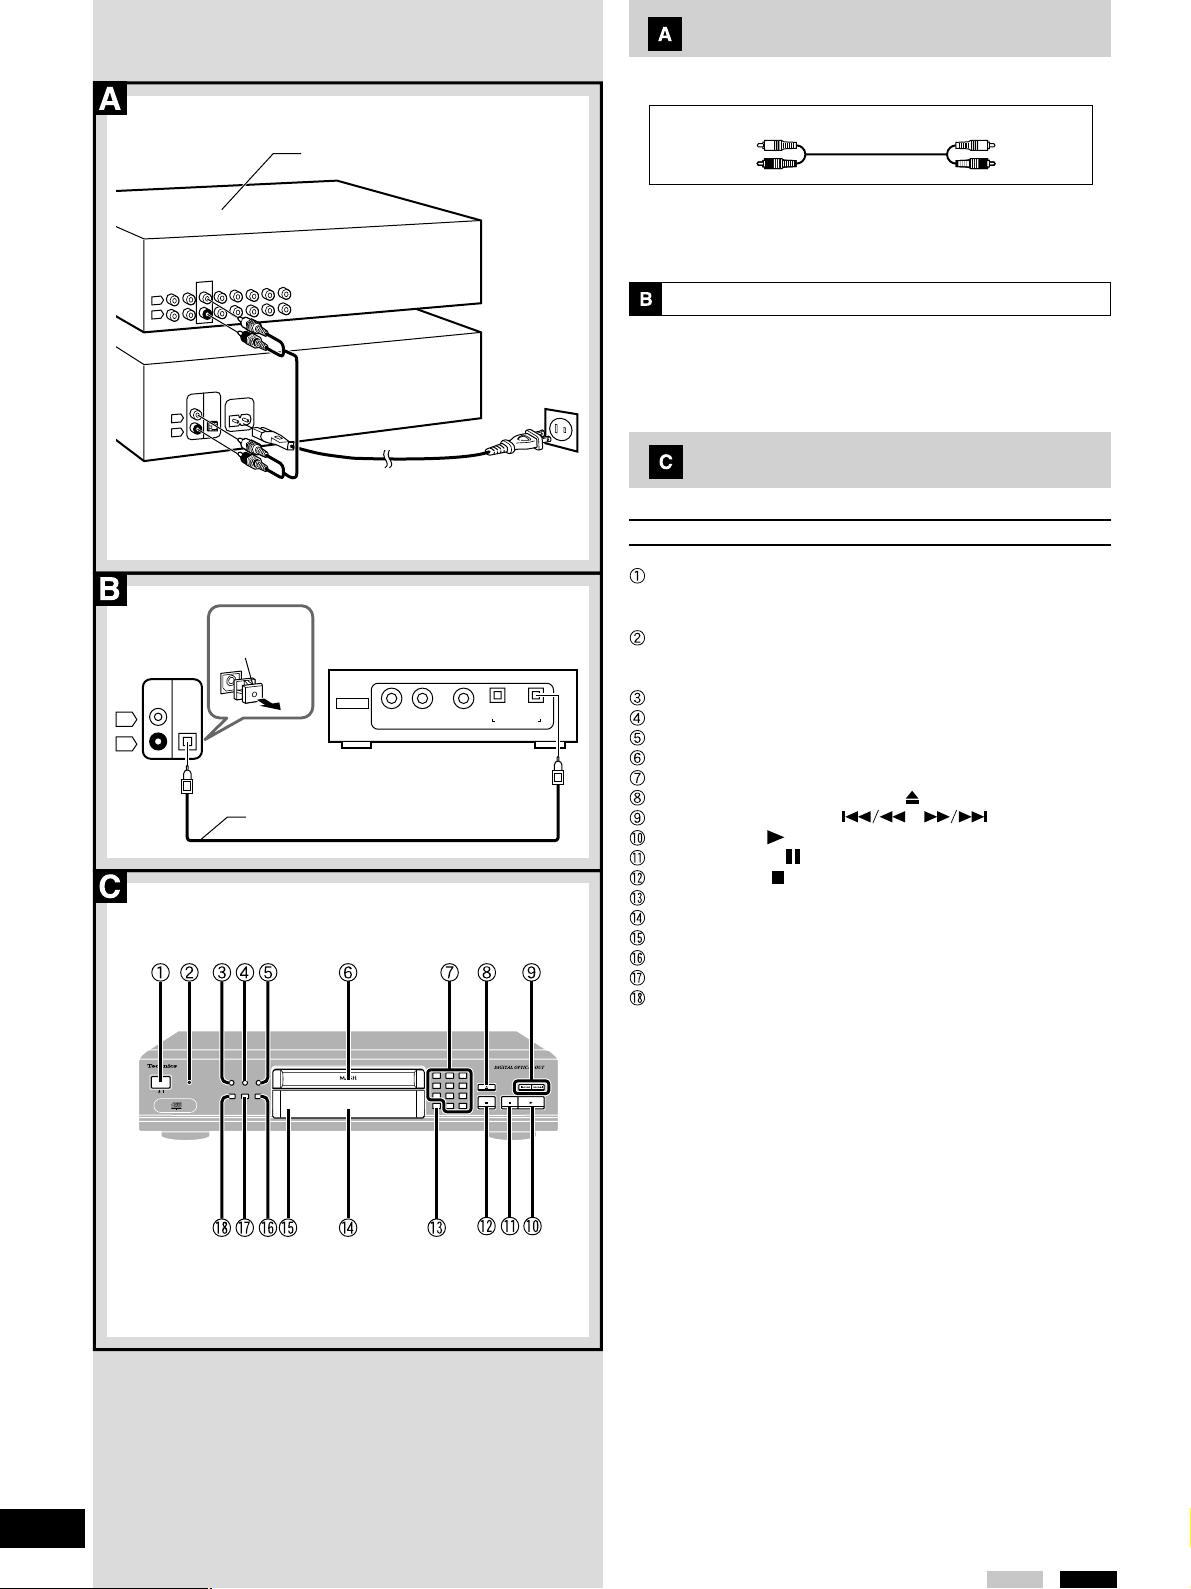
L
R
L
R
LINE OUT
D
IG
IT
A
L
A
C
IN
~
O
P
T
IC
A
L
O
U
T
CD
Connections
Turn off all components before making any connections.
This unit
LINE OUT
L
R
DIGITAL
OPTICAL
OUT
Amplifier or receiver (not included)
Dust cap
Digital amplifier, etc. (not included)
DIGITAL
Optical-fiber cable (not included)
To household
AC outlet
INPUT INPUT
OPTICAL
White (L)
Stereo connection cable
Red (R)
You can also connect the AC power supply cord to the AC outlet on a
receiver or amplifier.
Connection to a digital amplifier
Remove the dust cap before use. If the terminal is not going to be
used, reattach the dust cap to prevent exposure to dust.
Control reference guide
No. Name
Standby/on switch (
Press to switch the unit from on to standby mode or vice versa. In
standby mode, the unit is still consuming a small amount of power.
Standby indicator (
When the unit is connected to the AC power supply, this indicator
lights up in standby mode and goes out when the unit is turned on.
HH
H/ I POWER ) . . . . . . . . . . . . . . 6
HH
HH
H ) . . . . . . . . . . . . . . . . . . . . . . . . 4
HH
Repeat button ( REPEAT ) . . . . . . . . . . . . . . . . . . . . . 7
Random play button ( RANDOM ) . . . . . . . . . . . . . . . 7
Program button ( PROGRAM ) . . . . . . . . . . . . . . . . . . 8
Disc tray . . . . . . . . . . . . . . . . . . . . . . . . . . . . . . . . . . . . 6
Numbered buttons ( 1–9, 0, ≥10 ) . . . . . . . . . . . . . . . . 7
Disc tray open/close button ( OPEN/CLOSE ) . . . 6
Skip/search buttons ( , ) . . . . . . . . 6
Play button ( ) . . . . . . . . . . . . . . . . . . . . . . . . . . . . 6
Pause button ( ) . . . . . . . . . . . . . . . . . . . . . . . . . . . 6
Stop button ( ) . . . . . . . . . . . . . . . . . . . . . . . . . . . . 6
Clear button ( CLEAR ) . . . . . . . . . . . . . . . . . . . . . . . . 8
Display panel . . . . . . . . . . . . . . . . . . . . . . . . . . . . . . . . 4
Remote control signal sensor . . . . . . . . . . . . . . . . . . 5
Program recall button ( RECALL ) . . . . . . . . . . . . . . . 8
Time display mode button ( TIME MODE ) . . . . . . . 11
Peak search button ( PEAK SEARCH ) . . . . . . . . . . . 9
Reference page(s)
4
RQT5701
COMPACT DISC PLAYER
COMPACT DISC PLAYER
POWER
/
/
REPEAT
REPEAT
PEAK SEARCH
PEAK SEARCH
RANDOM
RANDOM
TIME MODE
TIME MODE
PROGRAM
PROGRAM
RECALL
RECALL
multi-stage noise shaping
multi-stage noise shaping
123
123
456
456
789
789
CLEAR
CLEAR
0 ≥10
0 ≥10
OPEN/CLOSE
OPEN/CLOSE
Page 5

The remote control
Button guide
With the exception of buttons to , the buttons on the remote
control function the same as the buttons on the main unit.
1 2 3
4 5 6
7 8 9 0
PROGRAM
A-B REPEAT
TAPE LENGTH
SEARCH
SKIP
CLEAR
REPEAT
SIDE A/B
RECALL
RANDOM
TIME FADE
LEVEL
≥10
TIME
MODE
AUTO
CUE
PEAK SEARCH
OPEN/CLOSE
No. Name
Reference page(s)
Level control ( – LEVEL + ) . . . . . . . . . . . . . . . . . . . 11
Auto cue button ( AUTO CUE ) . . . . . . . . . . . . . . . . 10
CD edit record buttons
• Tape length button ( TAPE LENGTH ) . . . . . . . . . 9
• Tape side select button ( SIDE A/B ) . . . . . . . . . . 9
• Time fade button ( TIME FADE ) . . . . . . . . . . . . . . 11
A-B repeat button ( A-B REPEAT ) . . . . . . . . . . . . . . 7
Batteries
Insert so the poles (- and +) match those in the remote control.
Do not use rechargeable type batteries.
Do not;
•mix old and new batteries.
•use different types at the same time.
•heat or expose to flame.
•take apart.
•short circuit.
•attempt to recharge manganese batteries.
Mishandling of batteries can cause electrolyte leakage which can
damage items the fluid contacts and may cause a fire.
If electrolyte leaks from the batteries, consult your dealer.
Wash thoroughly with water if electrolyte comes in contact with any
part of your body.
Remove if the remote control is not going to be used for a long period
of time. Store in a cool, dark place.
Replace if the unit does not respond to the remote control even when
held close to the front panel.
Remote control signal sensor
COMPACT DISC PLAYER
POWER
RANDOM
REPEAT
PROGRAM
multi-stage noise shaping
RECALL
TIME MODE
PEAK SEARCH
/
30˚30˚
(R6,AA,UM-3)
123
OPEN/CLOSE
456
789
CLEAR
0 ≥10
Use
Aim at the sensor, avoiding obstacles, at a maximum range of 7 meters
directly in front of the unit.
•Keep the transmission window and the unit’s sensor free from dust.
•Operation can be affected by strong light sources, such as direct
sunlight, and the glass doors on cabinets.
Do not;
•put heavy items on the remote control.
•take the remote control apart.
•spill liquids onto remote control.
5
RQT5701
Page 6

123
Normal play
POWER
POWER
OPEN/CLOSE
Label up
1 Press [
•“no diSC” indicates you haven’t inserted a CD.
•Play starts automatically if a CD is loaded.
H H
H/ I POWER] to turn the unit on.
H H
2 Press [ OPEN/CLOSE] to open the
tray.
Insert a CD label up on the tray.
Press [ OPEN/CLOSE] again to close the tray.
(If you press [ ] instead, the tray closes and play starts.)
3 Press [ ] to start play.
Play stops after all tracks have been played.
To stop play
Press [ ].
To pause play
Press [ ]. Press [ ] to resume play.
To skip tracks
Press [ ] (backward) or [ ] (forward).
Press [ ] twice to skip to the beginning of the previous track.
To search through tracks
During play
Press and hold [ ] (backward) or [ ] (forward).
Total playing time
Total number of tracks
Track currently playing Index number
Elapsed time
For your reference
“ ” is displayed if there are 17 or more tracks on the disc.
•You cannot skip to tracks already played in random play ( page 7).
•Skipping is done in the selected order in program play ( page 8).
•You can search only within a track in random and program play.
CD selection and care
Choose discs with this mark: ( )
Playing CD-R and CD-RW
This unit can play CD-DA format audio CD-R and CD-RW that
have been finalized
It may not be able to play some CD-R or CD-RW due to the
condition of the recording.
\Finalizing is a process that enables CD-R/CD-RW players to
play audio CD-R and CD-RW.
Do not:
•use irregularly shaped CDs ( ).
•attach extra labels and stickers.
•use CDs with labels and stickers that are coming off or with adhesive
exuding from under labels and stickers ( ).
•attach scratch-proof covers or any other kind of accessory.
•write anything on the CD.
•clean CDs with liquids. (Wipe with a soft, dry cloth.)
\\
\
\\
upon completion of recording.
6
RQT5701
Page 7

POWER
REPEAT
RANDOM
1
9
0 ≥10
Other play modes
Direct access play:
Starts normal play from a selected track
Press the numbered buttons.
For tracks numbered 10 and over, press [≥10] and the two digits.
For example, to select track 12, press [≥10] then [1] and [2].
Random play:
Plays all tracks or programmed tracks once each in random order
1
RANDOM
REPEAT
1,2
9
0 ≥10
Press [RANDOM].
Random play is canceled when play stops.
To cancel
Press [RANDOM]. “RANDOM” goes out.
Repeat:
Repeats all tracks or programmed tracks
Press [REPEAT] before or during play.
To cancel
Press [REPEAT]. “ ” goes out.
To repeat only one track or specific tracks
1. Start program play ( page 8).
2. Press [REPEAT].
A-B repeat:
Repeats a section between two specified points
Remote control only
LEVEL
123
456
789 0
A-B REPEAT
SEARCH
SKIP
CLEAR
REPEAT
SIDE A/B
RECALL
RANDOM
TIME FADE
MODE
PEAK SEARCH
OPEN/CLOSE
PROGRAM
A-B REPEAT
TAPE LENGTH
≥10
TIME
AUTO
CUE
1 During play
Press [A-B REPEAT] at the start point.
2 Press [A-B REPEAT] at the end point.
The segment between the two points plays repeatedly.
To cancel
Press [A-B REPEAT].
A-B REPEAT
A-B REPEAT
A-B repeat does not work during random and program play.
For your reference
You can return to point A at any time by pressing [ ]. You do not
have to specify a point B.
You can search ( page 6) beyond A and B without canceling A-B
repeat.
7
RQT5701
Page 8

POWER
REPEAT
PROGRAM
RECALL
RANDOM
1 2 3
CLEAR
Other play modes
Program play:
Select up to 20 tracks to play in the order you choose
1 Press [PROGRAM].
The track playing is programmed as the first track if you press
the button during play.
2 Press the numbered buttons to enter
the track number.
For tracks numbered 10 and over, press [≥10] and the two digits.
Press [CLEAR] if you enter a number in error (while stopped).
Repeat this step to program the tracks in the required order.
3 Press [ ].
All the tracks are played in the selected order.
To cancel program mode
Press [PROGRAM].
“ ” is displayed
You have programmed 20 tracks and cannot program any more.
1
9
0 ≥10
Total playing time of program
“ ” is displayed
Total playing time of the program exceeds 99 minutes and 59 seconds. You can still program and play tracks.
To check the contents of the program
Press [RECALL].
The track numbers and their programmed positions are displayed each
time you press the button.
Last track number
programmed
Program position
To program additional tracks
Press the numbered buttons.
To clear tracks from the program
From the last track Press [CLEAR] while stopped.
A particular track Press [RECALL] to display the track, then
press [CLEAR].
All tracks Press [ ] while stopped.
Program play is also canceled.
For your reference
•The program remains in the memory after play finishes. Press [ ]
to play the same program again.
•To play the program repeatedly
Press [REPEAT] after starting program play.
•To play the program randomly
Press [RANDOM] after programming the tracks.
8
RQT5701
Page 9

CD edit recording
1 9 0
POWER
2
1
SIDE A/B
-1.
LEVEL
123
456
789 0
A-B REPEAT
SEARCH
SKIP
CLEAR
REPEAT
SIDE A/B
SIDE A/B
RECALL
RANDOM
TIME FADE
PEAK SEARCH
PEAK SEARCH
OPEN/CLOSE
PROGRAM
TAPE LENGTH
TAPE LENGTH
TAPE LENGTH
You can specify the length of the tape and the unit divides the tracks
on the CD between the two sides so they aren’t cut off.
≥10
A four-second interval is added between tracks so that tape program
sensor functions that find the beginnings of tracks will work correctly.
TIME
MODE
AUTO
CUE
There is also a peak search feature that makes it easier to adjust the
recording level on the cassette deck.
Preparation: Prepare the cassette deck and tape.
Refer to the cassette deck’s operating instructions.
If it is a double-sided deck, set the reverse mode to single-sided recording and the play direction to “ ”.
1 Remote control only
Press [TAPE LENGTH] to specify the
tape length.
The tape length changes each time you press the button.
→ C-46 → C-60 → C-90 → C---
3
2
-3.
The unit programs the tracks to go on sides A and B.
•To select an irregular tape length, select “ C--- ”, then press
the numbered buttons to enter the total length of the tape (1
to 99 minutes). For example, for a five-minute tape, press [0][5]. Press [TAPE LENGTH] to select “ C--- ” again if you
enter the wrong time.
•To add tracks to the extra space, see below.
•To show the information for side B, press [SIDE A/B].
PEAK SEARCH
1.
3.
TAPE LENGTH
Time remaining on side A
Last track on side A Number of tracks on side A
Track numbers on side A Track numbers on side B
2 Adjust the recording level.
1. Press [PEAK SEARCH].
The search takes about one and a half minutes for a 60minute CD. The unit repeatedly reproduces a 6-second segment around the peak.
2. Adjust the recording level.
Refer to the cassette deck’s operating instructions.
3. Press [ ] to stop the CD.
3 Press [ ] at the same time you begin
recording.
•When the tracks allotted to side A finish playing
Play pauses at the beginning of the first track for side B. Allow the
cassette deck to record to the end of side A.
•To continue recording on side B
1. Eject the tape and wind on the leader.
2. For a double-sided deck
Reinsert the tape and set the play direction to “ ”.
For a single-sided deck
Turn the tape over and reinsert it.
3. Press [ ] at the same time you begin recording.
To cancel CD edit mode
Press [ ].
For your reference
•You cannot edit more than 20 tracks.
To record in these cases, start normal play and recording at the
same time.
•You can record specific tracks by programming them first ( page
8, steps 1 and 2).
•Discs have multiple peaks so a different peak may be found each
time you perform a search.
9
RQT5701
Page 10

CD edit recording
1
SIDE A/B
1 9 0 ≥10
LEVEL
123
123
RECALL
RANDOM
TIME FADE
TIME FADE
≥10
TIME
MODE
AUTO
AUTO
PEAK SEARCH
OPEN/CLOSE
456
456
7890
7890
PROGRAM
CLEAR
A-B REPEAT
REPEAT
TAPE LENGTH
SIDE A/B
SIDE A/B
SEARCH
SKIP
Minus sign
To add tracks to the extra space
≥10
CUE
CUE
2 2
1
TIME FADE
Remote control only
Before starting recording
1 Press [SIDE A/B] to select the side.
2 Press the numbered buttons to specify
3
the track number.
A minus sign appears if the track is longer than the remaining time.
To fade out at the end of the tape when the minus sign is
displayed
Press [TIME FADE].
Other functions
Auto cue
Remote control only
The unit pauses at the beginning of each track. Use this feature when
you want to play or record immediately.
1 Press [AUTO CUE].
AUTO
CUE
1 9 0 ≥10
2 Press the numbered buttons to select
the track number.
Play pauses.
Instead of selecting a track, you can program tracks ( page
8, steps 1 and 2), or start random play ( page 7).
3 Press [ ].
Sound is heard immediately.
Play pauses again at the beginning of the next track.
To cancel
Press [AUTO CUE] during play.
Auto cue may not work correctly if tracks begin softly or have a lot of
noise.
10
RQT5701
Page 11

LEVEL
CLEAR
LEVEL
LEVEL
123
123
≥10
RECALL
RANDOM
TIME FADE
TIME FADE
≥10
TIME
TIME
MODE
MODE
AUTO
CUE
PEAK SEARCH
OPEN/CLOSE
456
456
789 0
789 0
PROGRAM
CLEAR
CLEAR
A-B REPEAT
REPEAT
TAPE LENGTH
SIDE A/B
SEARCH
SKIP
2
TIME
MODE
1
3
Other functions
LEVEL
Output level control
Remote control only
This lowers the output level to temporarily reduce the volume.
Press [– LEVEL].
The output level reduces by 2 dB each time you press the button,
down to a maximum of –12 dB.
0 dB → – 2 dB → – 4 dB …→ –12 dB
To raise the level again
Press [LEVEL+].
The level returns to normal (0 dB) when you turn the unit off.
For your reference
During CD edit recording ( pages 9 and 10), in order to maintain a
constant recording level, the output level cannot be adjusted.
TIME FADE
1 9 0
POWER
TIME MODE
Output level decreased by 2 dB
Time fade
Remote control only
Volume fades out and play pauses after a selected time between 5
seconds and 99 minutes 59 seconds.
1 While stopped or paused
Press [TIME FADE].
2 Press the numbered buttons to enter
the time.
For example, to fade out after 25 minutes and 30 seconds,
press [2], [5], [3], [0].
Press [CLEAR] and start again if you enter the wrong time.
3 Press [ ].
“T.FADE” starts flashing five seconds before the set time, the
volume fades out, and play pauses. Time fade is also canceled.
To stop play and cancel time fade
Press [ ].
To check the time remaining until fade out
Press [TIME MODE] three times during play.
Time fade may not work if the disc is scratched or dirty.
Time display
While paused or playing
Press [TIME MODE].
The display changes in the order shown each time you press the button.
Elapsed time of track being played (normal display)
Time remaining on disc
Time remaining on track being played
Elapsed time of entire disc
The normal display is shown after you stop and start play again.
•During program play, shows the time remaining in the program
and shows the elapsed time of the program.
•During random play, times are not shown for and .
•During edit recording ( page 9), shows the remaining time on
the side recording.
•During time fade, the time until fade out is shown between and .
11
RQT5701
Page 12

Troubleshooting guide
Before requesting service, make the below checks. If you are in doubt about some of the check points, or if the remedies indicated in the
chart do not solve the problem:
In the U.S.A., contact the Panasonic Customer Call Center at 1-800-211-7262, or web site (http://www.panasonic.com).
In Canada, contact Panasonic Canada Inc. Customer Care Centre at 905-624-5505, or web site (www.panasonic. ca), or an authorized
Servicentre nearest you.
Reference pages are shown as black circled numbers .
The tray won’t close.
Ensure the disc is inserted correctly.
The display is wrong or play won't start.
Some parts are not played correctly.
The remote control doesn’t work.
Ensure the disc is inserted correctly.
Wipe the disc.
Replace the disc if it is scratched, warped, or nonstandard.
There may be condensation inside the player. Wait for an hour and try again.
Wipe the disc.
Check the batteries are inserted correctly.
Replace the batteries if they are flat.
Specifications
•Audio
No. of channels 2 (left and right, stereo)
Frequency response 2–20,000 Hz, ±1 dB
Output voltage 2 V (at 0 dB)
Dynamic range 94 dB
S/N 100 dB
Harmonic distortion 0.004% (1 kHz, 0 dB)
Total harmonic distortion 0.005% (1 kHz, 0 dB)
Wow and flutter Below measurable limit
DA converter MASH (1 bit)
Output impedance 1 kΩ
Load impedance More than 10 kΩ
•Pickup
Wavelength 780 nm
•General
Power supply AC 120 V, 60 Hz
Power consumption 10 W
Dimensions (W
Mass 3.2 kg(6.8 lb.)
Power consumption in standby mode: 2.6 W
X H X
D) 430
(
1615/
X 92 X
290 mm
16
" X
35/
8
" X
1113/
32
"
)
Product service
Do not attempt to remove the cover(s) or repair the unit yourself.
Refer servicing to qualified personnel only.
Product information
For product service, product information or assistance with product operation, refer to the servicenter directory.
Panasonic Consumer Electronics
Company, Division of Matsushita
Electric Corporation of America
One Panasonic Way Secaucus,
New Jersey 07094
http://www.panasonic.com
Panasonic Sales Company,
Division of Matsushita Electric of
Puerto Rico, Inc. (“PSC”)
Ave. 65 de Infantería, Km. 9.5
San Gabriel Industrial Park, Carolina,
Puerto Rico 00985
Specifications are subject to change without notice.
Mass and dimensions are approximate.
Maintenance
To clean this unit, wipe with a soft, dry cloth.
•Never use alcohol, paint thinner, or benzine to clean this unit.
•Before using chemically treated cloth, read the instructions that
came with the cloth carefully.
En
2001 Matsushita Electric Industrial Co., Ltd.
Printed in Germany
RQT5701-P
M0401TK0
 Loading...