

Page 1
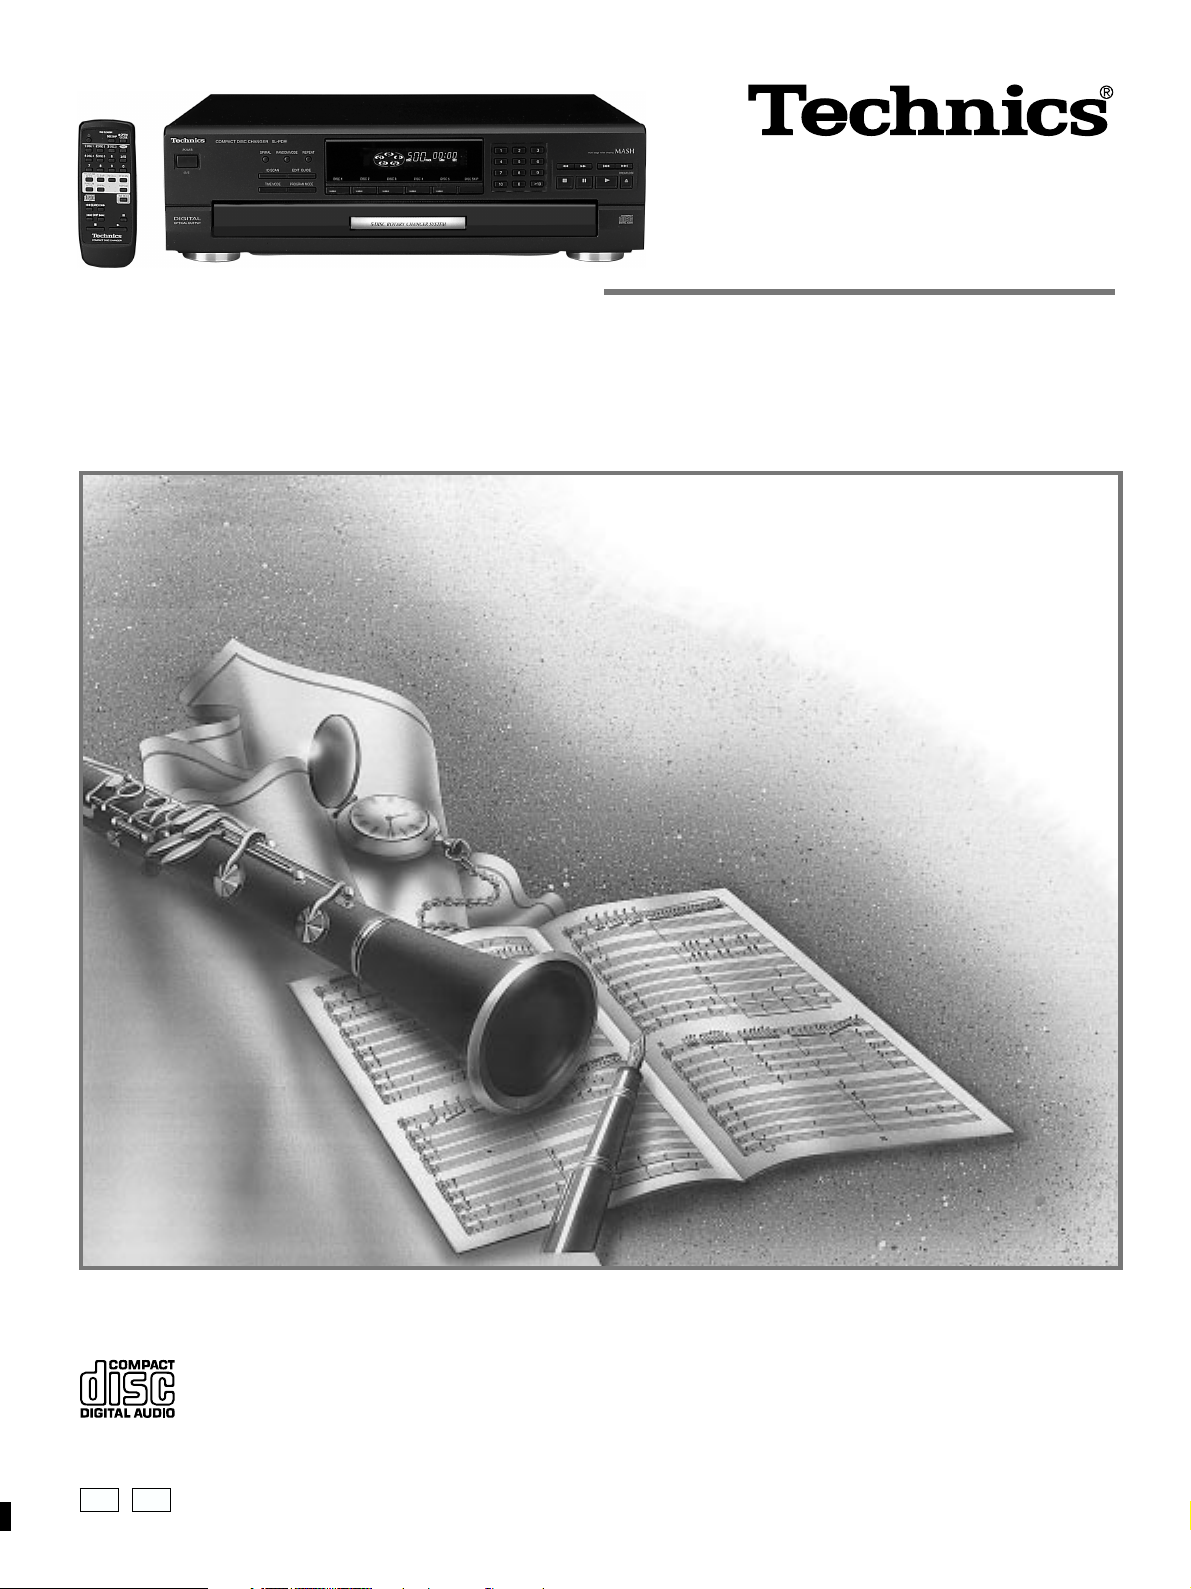
The photograph shows model SL-PD9.
Compact Disc Changer
Operating Instructions
Model No.
SL-PD9
SL-PD7A
P PC
Before connecting, operating or adjusting this product, please read these instructions
completely. Please keep this manual for future reference.
RQT5763-2P
Page 2
Dear customer
Table of Contents
Thank you for purchasing this product.
For optimum performance and safety, please read these
instructions carefully.
______________________________________________________
These operating instructions are applicable to the SL-PD9 and
SL-PD7A models.
These operating instructions, however, fundamentally explain the
operation of SL-PD9 model.
______________________________________________________
The model number and serial number of this product can be
found on either the back or the bottom of the unit.
Please note them in the space provided below and keep for
future reference.
Before use
MODEL NUMBER!
SERIAL NUMBER
User memo:
DATE OF PURCHASE ______________________________
DEALER NAME ___________________________________
DEALER ADDRESS ________________________________
_________________________________________________
TELEPHONE NUMBER _____________________________
Supplied accessories
Before use
IMPORTANT SAFETY INSTRUCTIONS............................ 3
Connections ...................................................................... 4
Preparing the remote control
SL-PD9 only
..................... 4
Front panel controls ......................................................... 5
Operations
Basic operations ............................................................... 6
Sequential play ............................................................................. 6
To directly access a desired track ................................................ 7
To exchange discs during play ..................................................... 7
Random play...................................................................... 8
One disc random play .................................................................. 8
Full random play ...........................................................................8
Spiral play ..........................................................................8
Program play ..................................................................... 9
ID scan function .............................................................. 10
Search function ............................................................... 10
Skip function ................................................................... 11
To skip discs............................................................................... 11
To skip tracks ............................................................................. 11
Repeat function ............................................................... 12
Time mode selection....................................................... 12
Edit guide function.......................................................... 13
Please check and identify the supplied accessories.
Use numbers indicated in parentheses when asking for
replacement parts.
(Only for U.S.A.)
To order accessories contact 1-800-332-5368 or web site
(http://www.panasonic.com).
AC power supply cord.................................................. 1 pc.
(RJA0065-A)
Note
The included AC power supply cord is for use with this unit
only. Do not use it with other equipment.
Stereo connection cable .............................................. 1 pc.
(RJL2P004B08A)
SL-PD9 only
Remote control transmitter .......................................... 1 pc.
(RAK-SL948WK)
Reference
Cautions concerning the moving of this unit ............... 14
Concerning CDs .............................................................. 14
Troubleshooting guide ................................................... 15
Maintenance .................................................................... 15
Product Service ............................................................... 15
Specifications ................................................... Back cover
CAUTION
RISK OF ELECTRIC SHOCK
DO NOT OPEN
CAUTION: TO REDUCE THE RISK OF ELECTRIC
SHOCK, DO NOT REMOVE SCREWS.
NO USER-SERVICEABLE PARTS
INSIDE.
REFER SERVICING TO QUALIFIED
SERVICE PERSONNEL.
The lightning flash with arrowhead symbol, within
an equilateral triangle, is intended to alert the user
to the presence of uninsulated “dangerous voltage”
within the product’s enclosure that may be of sufficient magnitude to constitute a risk of electric shock
to persons.
2
RQT5763
SL-PD9 only
Remote control batteries............................................ 2 pcs.
The exclamation point within an equilateral triangle
is intended to alert the user to the presence of
important operating and maintenance (servicing)
instructions in the literature accompanying the appliance.
Page 3

IMPORTANT SAFETY INSTRUCTIONS
Read these operating instructions carefully before using the unit. Follow the safety instructions on the unit and the safety precautions listed below.
Keep these operating instructions handy for future reference.
Safety
1. Power source—Connect the unit to a power source of the type
described in these instructions or as marked on the unit.
2. Polarization—The unit is equipped with a polarized power plug
where one blade is wider than the other. This safety feature
ensures that the plug fits into your household AC outlet only one
way. If the plug doesn’t fit one way, try reversing it. If the plug
still doesn’t fit, contact an electrician to replace the obsolete
outlet. Do not attempt to defeat the safety purpose of the plug.
3. Power cord protection—Route the AC power supply cord so
that it will not be walked on or pinched by items placed on or
against it. Never take hold of the plug or cord with wet hands.
Always grasp the plug body firmly when connecting and
disconnecting it.
4. Overloading—When connecting the AC power supply cord, be
careful not to overload the household AC outlet, extension cord,
or outlet from any other device as this can result in fire or electric
shock.
5. Nonuse periods—Turn the unit off when it is not in use. Unplug
the unit from the household AC outlet if it is not to be used for a
long time. Unplug the unit during lightning storms.
6. Attachments and accessories—Use only the attachments and
accessories recommended in these operating instructions.
Installation
Placement
Maintenance
(See page 15 for details.)
Unplug the unit from the household AC outlet before cleaning.
Clean with a damp cloth.
Do not use abrasive pads, scouring powders, or solvents.
Service
Before use
1. Damage requiring service —The unit should be serviced by
qualified service personnel if:
(a) The AC power supply cord or the plug has been damaged; or
(b) Objects or liquids have gotten into the unit; or
(c) The unit has been exposed to rain; or
(d) The unit does not operate normally or exhibits a marked
change in performance; or
(e) The unit has been dropped or the cabinet damaged.
2. Servicing —Do not attempt to service the unit beyond that
described in these operating instructions. Refer all other servicing
to authorized servicing personnel.
3. Replacement parts —When parts need replacing ensure the
servicer uses parts specified by the manufacturer or parts that
have the same characteristics as the original parts. Unauthorized
substitutes may result in fire, electric shock, or other hazards.
4. Safety check —After repairs or service, ask the servicer to
perform safety checks to confirm that the unit is in proper working
condition.
1. Ventilation—Situate the unit so that it receives proper ventilation.
Do not install in a confined space such as a bookcase or cabinet.
Allow at least 10 cm (4 inches) clearance from the rear of the
unit. To prevent the risk of electric shock or fire due to overheating
ensure curtains and other materials do not obstruct the unit’s
ventilation.
2. Foreign material—Ensure objects and liquids do not get into
the unit. Avoid exposing the unit to excessive smoke, dust,
mechanical vibration, and shock.
3. Magnetism—Situate the unit away from equipment and devices
that generate strong magnetic fields.
4. Stacking—Do not place heavy objects on top of this unit.
5. Surface—Place the unit on a flat, level surface.
6. Carts and stands—Use the unit only with carts
and stands recommended by the manufacturer.
Move carts with care. Sudden stops, excessive
force, and uneven surfaces can cause carts to
overturn.
7. Wall and ceiling mounting—Do not mount the unit on walls or
ceilings unless specified in the instructions.
Environment
1. Water and moisture—Do not use the unit near water, such as
near a bathtub or swimming pool. Avoid damp basements.
2. Heat—Situate the unit away from heat sources, such as radiators.
Do not situate where temperatures fall below 5°C (41°F) or rise
above 35°C (95°F).
CAUTION!
THIS PRODUCT UTILIZES A LASER.
USE OF CONTROLS OR ADJUSTMENTS OR PERFORMANCE OF PROCEDURES OTHER THAN THOSE SPECIFIED HEREIN MAY RESULT IN HAZARDOUS RADIATION
EXPOSURE.
DO NOT OPEN COVERS AND DO NOT REPAIR
YOURSELF. REFER SERVICING TO QUALIFIED
PERSONNEL.
CAUTION:
TO PREVENT ELECTRIC SHOCK MATCH
WIDE BLADE OF PLUG TO WIDE SLOT,
FULLY INSERT.
WARNING:
TO REDUCE THE RISK OF FIRE, ELECTRIC
SHOCK OR PRODUCT DAMAGE, DO NOT
EXPOSE THIS APPARATUS TO RAIN, MOISTURE, DRIPPING OR SPLASHING AND THAT
NO OBJECTS FILLED WITH LIQUIDS, SUCH
AS VASES, SHALL BE PLACED ON THE APPARATUS.
CAUTION!
DO NOT INSTALL, OR PLACE THIS UNIT, IN A BOOKCASE, BUILT-IN CABINET OR IN ANOTHER CONFINED
SPACE. ENSURE THE UNIT IS WELL VENTILATED. TO
PREVENT RISK OF ELECTRIC SHOCK OR FIRE
HAZARD DUE TO OVERHEATING, ENSURE THAT
CURTAINS AND ANY OTHER MATERIALS DO NOT
OBSTRUCT THE VENTILATION VENTS.
3
3
RQT5763
Page 4
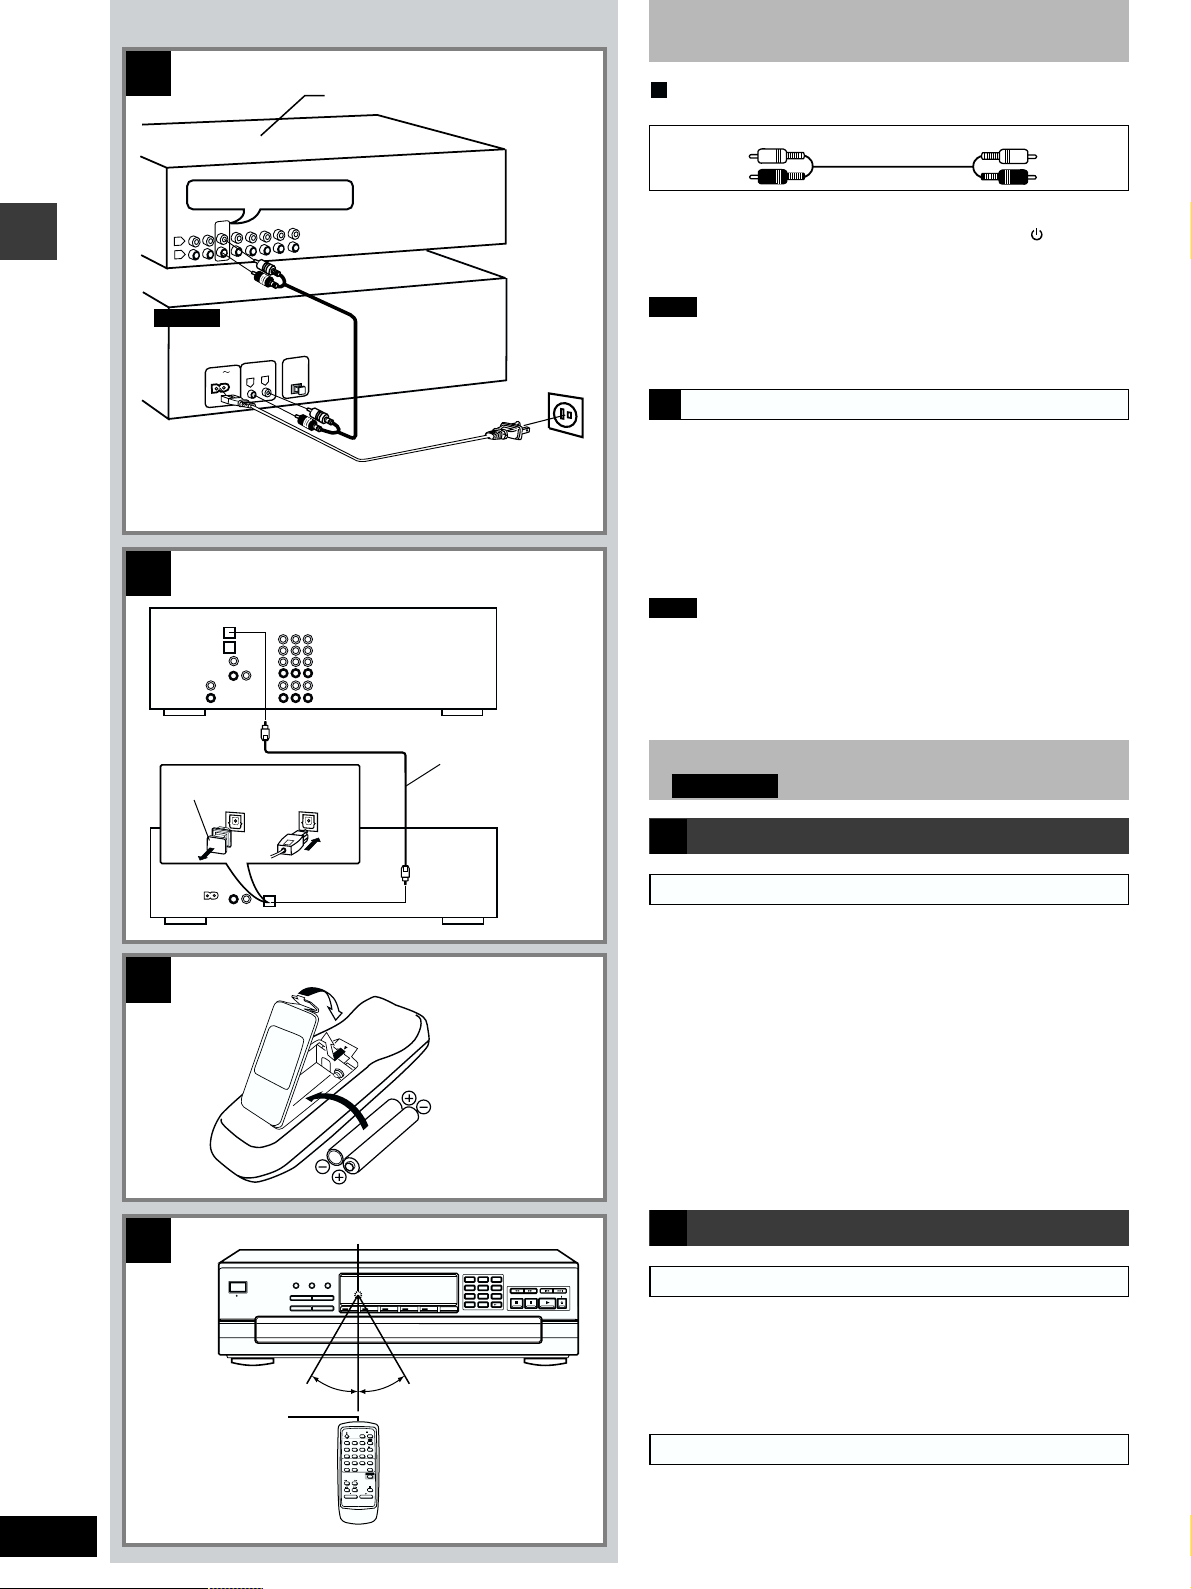
Connections
A
Before use
B
CD or AUX terminals
CD
L
R
This unit
AC IN
OPTICAL
CD
LINE OUT
R
Before making connections, be sure that the power of this unit
Amplifier or receiver (not included)
A
and all other system components is turned off.
Stereo connection cable (included)
White (L)
Red (R)
Conserving power
The unit consumes 1 W even when it is turned off with [ /I, POWER].
To save power when the unit is not to be used for a long time,
unplug it from the household AC outlet.
Note
Although the figure shows the AC power supply cord being
OPTICAL
OUT
L
connected to a household AC outlet, if the amplifier (or receiver) is
equipped with a AC outlet, connect the cord to that outlet.
Digital connection
B
Remove the dust-protection cap and connect this unit to other
To household AC
outlet
(AC 120 V, 60 Hz)
digital equipment with an optical fiber terminal, such as a receiver
or digital surround processor.
• Leave the cap attached when this terminal is not being used.
For your reference
If you have DTS format CDs, you can enjoy six channel playback
by connecting this unit to a receiver or digital surround processor
that has a DTS decoder.
Note
Receiver
(not included)
Use only the optical fiber terminal when playing back DTS format
discs. DTS signals can only be correctly output through the digital
terminal. Connection through the stereo LINE OUT terminals will
result in noise and could possibly damage your speakers.
• DTS is a trademark of Digital Theater Systems, L.P.
4
RQT5763
Dust-protection cap
C
D
Transmission
window
Preparing the remote control
SL-PD9 only
Battery installation
C
Use of batteries
OPTICAL
OUT
Optical-fiber cable
(not included)
This unit
• Align the poles (+ and –) properly when inserting the batteries.
• Do not mix old and new batteries, or different types of batteries.
3
• Do not recharge ordinary dry cell batteries.
• Do not heat or disassemble the batteries. Do not allow them to
contact flame or water.
• Remove the batteries if the unit is not to be used for a long time.
1
• Do not keep together with metallic objects such as necklaces.
• Do not use rechargeable type batteries.
2
• Do not use batteries if the covering has been peeled off.
Mishandling of batteries can cause electrolyte leakage which can
damage items the fluid contacts and may cause a fire.
R6, AA, UM-3
If electrolyte leaks from the batteries, consult your dealer.
Wash thoroughly with water if electrolyte comes in contact with any
part of your body.
Correct method of use
Remote control signal sensor
POWER
/
I
REPEATSPIRAL
RANDOM MODE
EDIT GUIDE
ID SCAN
TIME MODE
PROGRAM MODE
DISC 1 DISC 2 DISC 3 DISC 4 DISC 5 DISC SKIP
3
2
6
5
4
9
8
7
0110
10
OPEN CLOSE
D
Operation notes
• Aim the remote control’s transmission window toward the unit’s
sensor. Avoid any obstacles.
• Be sure the transmission window and the unit’s sensor are free
from dust. Excessive dust might affect performance.
• Do not expose the remote control signal sensor to direct sunlight
or to the bright light of a fluorescent light.
To prevent damage
• Never place heavy items on top of the unit.
30˚ 30˚
OPEN/
DISC SKIP
CLOSE
DISC
2
3
1
DISC 1
DISC 2 DISC 3
6
5
DISC 4
DISC 5
4
10
7
89
0
PROGRAM
CLEAR RECALL
ID SCAN
MODE
RANDOM
SPIRAL
REPEAT
MODE
TIME MODE
SEARCH
SKIP
About 7 meters in
front of the signal
sensor
• Do not disassemble or reconstruct the unit.
• Do not spill water or other liquids into the unit.
Page 5
Front panel controls
A
Main unit
A
No. Name Ref.page
AA
A Standby/on switch ( /I, POWER)..................... 6
AA
Press to switch the unit from on to standby mode or vice versa.
In standby mode, the unit is still consuming a small amount of
power.
BB
B Spiral button (SPIRAL) ...................................... 8
BB
CC
C Random mode button (RANDOM MODE) ........ 8
CC
DD
D Repeat button (REPEAT) ................................ 12
DD
POWER
/
I
ID SCAN
TIME MODE
REPEATSPIRAL
RANDOM MODE
EDIT GUIDE
DISC 1 DISC 2 DISC 3 DISC 4 DISC 5 DISC SKIP
PROGRAM MODE
3
2
6
5
4
9
8
7
0110
10
OPEN CLOSE
EE
E Remote control signal sensor .......................... 4
EE
This changer can be operated by using the remote control provided with a Technics receiver.
(This may not be possible with some models.)
FF
F Display
FF
GG
G Numeric buttons (1–10, 0, >10) ........................ 7
GG
HH
H Search buttons ( , )............................... 10
HH
II
I Skip buttons (
II
JJ
J ID scan button (ID SCAN) ............................... 10
JJ
KK
K Time mode button (TIME MODE).................... 12
KK
LL
L Program mode button
LL
, ) .................................. 11
Before use
(PROGRAM MODE)............................................ 9
MM
M Edit guide button (EDIT GUIDE) ..................... 13
MM
NN
N Disc buttons (DISC 1–DISC 5) .......................... 6
NN
OO
O Disc skip button (DISC SKIP) ..................... 6, 11
OO
PP
P Loading drawer .................................................. 6
PP
QQ
Q Stop button (
QQ
RR
R Pause button ( ) ............................................... 7
RR
SS
S Play button ( )................................................. 7
SS
TT
T Loading drawer open/close button
TT
)................................................. 7
( OPEN/CLOSE ) .............................................. 6
UU
U Disc trays (1–5) .................................................. 6
UU
B
1
DISC 1
DISC 4
4
7
PROGRAM
MODE
RANDOM
MODE
2
5
CLEAR RECALL
SPIRAL
SEARCH
SKIP
DISC 2 DISC 3
DISC 5
DISC SKIP
3
6
89
TIME MODE
OPEN/
CLOSE
DISC
10
0
ID SCAN
REPEAT
Remote control
B
SL-PD9 only
Buttons 1, 2, 3, 4, 8, 9, 0, o, p, s, u, v, w and x
have the same functions as the corresponding buttons on the main
unit.
No. Name Ref.page
VV
V Numeric buttons ................................................ 7
VV
WW
W Clear button (CLEAR)..................................... 10
WW
XX
X Disc button (
XX
YY
Y Recall button (RECALL) ................................. 10
YY
DISC
) ............................................ 6
5
5
RQT5763
Page 6

Basic operations
POWER
/
I
ID SCAN
TIME MODE
REPEATSPIRAL
RANDOM MODE
EDIT GUIDE
DISC 1 DISC 2 DISC 3 DISC 4 DISC 5 DISC SKIP
PROGRAM MODE
DISC SKIP
2
3
4
5
6
7
8
9
0110
10
OPEN CLOSE
This unit can play CD-DA format audio CD-R and CD-RW that
have been finalized* upon completion of recording.
It may not be able to play some CD-R or CD-RW due to the
condition of the recording.
*Finalizing is a process that enables CD-R/CD-RW players to play
audio CD-R and CD-RW.
1
1
. . . . . . . . . . . . . . . . . . . . . . . . . . . . . . . . . . . . . . . . . . . . . . . . . . .
2
Operations
. . . . . . . . . . . . . . . . . . . . . . . . . . . . . . . . . . . . . . . . . . . . . . . . . . .
3
. . . . . . . . . . . . . . . . . . . . . . . . . . . . . . . . . . . . . . . . . . . . . . . . . . .
4
POWER
OPEN CLOSE
OPEN CLOSE
/
I
Disc tray
3
5
2
Loading drawer
Indicates that the loading drawer
is opened.
DISC
TRACK
Numbers of the trays in which
discs are loaded.
Carousel
3
Disc number
2
2
Label must face upward.
Current play position (The numeral
illuminates with a red color.)
MIN
4
SEC
Sequential play
All of the discs will be played, beginning from track 1 on the
selected disc.
The explanation below is an example of operation in the case
where all five disc trays in the changer are holding CDs.
Press [ /I, POWER].
1
The unit will switch on.
Press [ OPEN/CLOSE] to open the loading drawer.
2
Load the disc(s) on the disc tray(s).
3
The discs can be loaded two at a time by pressing [DISC
SKIP] to rotate the carousel.
Note
• Do not load 3”(8 cm) and 5”(12 cm) discs on the same disc
tray.
• Do not use irregular shaped CDs. (See page 14.)
CAUTION
Do not touch the loading drawer and carousel while they
are in motion, and do not attempt to rotate the carousel by
hand; doing so could result in incorrect operation of the unit
and/or damage to the discs.
Press [ OPEN/CLOSE] again to close the loading
4
drawer.
Note
Do not attempt to close the drawer by hand.
6
RQT5763
DISC
TRACK
SEC
MIN
Illuminates when a disc is in the disc tray. If there
is no disc in the disc tray, the indication disappears
when the disc tray comes to the play position.
. . . . . . . . . . . . . . . . . . . . . . . . . . . . . . . . . . . . . . . . . . . . . . . . . . .
SL-PD9
5
DISC 1 DISC 2 DISC 3 DISC 4 DISC 5
Disc indicator
SL-PD7A
DISC 1 DISC 2 DISC 3 DISC 4 DISC 5
Disc number in play
DISC
Track number in
Elapsed play time
TRACK
Play indicator
play
MIN
SEC
Press the desired disc button ([DISC 1]–[DISC 5]).
5
Play will begin from the selected disc. If a disc is not on the
selected disc tray, the changer plays the disc at the next number.
SL-PD9 only
The disc indicator lights when there is a disc in the corresponding tray.
For remote control
Press [
DISC
SL-PD9 only
] and then within 7 seconds or so, press
[DISC 1]–[DISC 5] to select the disc you want.
The changer plays all the tracks on all the discs in order and stops
automatically when the last track on the last disc finishes playing.
The first disc will then be at the playing position.
Page 7

A
Basic operations
Numeric buttons
To directly access a desired track
POWER
/
I
1
4
7
10
ID SCAN
TIME MODE
REPEATSPIRAL
RANDOM MODE
EDIT GUIDE
DISC 1 DISC 2 DISC 3 DISC 4 DISC 5 DISC SKIP
PROGRAM MODE
2
3
5
6
8
9
0
10
DISC
2
3
4
5
6
7
8
9
10
0110
2
Track number
TRACK
MIN
OPEN CLOSE
3
1
,
SEC
A
Press the numeric button(s) to select the track.
To select a two-digit track number over 10
(or to select a two-digit track from the remote control for SL-PD9)
Press [>10] ([≥10] on the remote control for SL-PD9) and then the
two numbers you want within 7 seconds or so.
For example
Track no. 20: [>10] ([≥10] on the remote control for SL-PD9)
[2] [0]
To exchange discs during play
B
While playing a disc, it is possible to change the other discs without
interrupting play.
AA
A Press [ OPEN/CLOSE] to open the loading drawer.
AA
BB
B Press [DISC SKIP] to rotate the disc trays and exchange the
BB
discs.
The carousel will move by one disc tray. Pressing again moves
the carousel in the opposite direction by two disc trays.
Operations
A
B
OPEN CLOSE
Current disc
DISC
TRACK
SEC
MIN
Discs which can be changed.
. . . . . . . . . . . . . . . . . . . . . . . . . . . . . . . . . . . . . . . . . . . . . . . . . . .
B
SL-PD9
DISC SKIP
. . . . . . . . . . . . . . . . . . . . . . .
C
OPEN CLOSE
SL-PD7A
DISC SKIP
C
CC
C Press [ OPEN/CLOSE] to close the loading drawer.
CC
Note
If you play a disc with the loading drawer open, discs other than
the current disc cannot be played.
To temporarily stop play
C
Press [ ].
Press [ ] to resume play.
To stop play
D
Press [ ].
The display will show the total number of tracks and the total
playing time of the current disc.
The total playing time displayed includes the silent sections
between tracks. For this reason, it may be a few seconds longer
than the playing time indicated on the disc.
Press [ ] to re-start play.
CAUTION
Do not move this changer with a compact disc inside the unit. If
a disc comes off the disc tray, it might be scratched or the
changer might become incapable of playing.
(Refer to “Cautions concerning the moving of this unit” on page
14.)
D
DISC
Total number of tracks
Current disc
DISC
MIN
TRACK
Total playing time
MIN
TRACK
SEC
SEC
7
RQT5763
Page 8

Random play
POWER
A
Operations
B
RANDOM MODE
/
I
RANDOM MODE
RANDOM MODE
ID SCAN
TIME MODE
REPEATSPIRAL
RANDOM MODE
EDIT GUIDE
DISC 1 DISC 2 DISC 3 DISC 4 DISC 5 DISC SKIP
PROGRAM MODE
DISC
1DISC
All of the tracks will be played one time each in random order.
There are two types of random play as described below.
3
2
6
5
4
9
8
7
0110
10
OPEN CLOSE
One disc random play
A
The changer will play all tracks on the current disc in a random
order. Then it will choose a new disc randomly, excluding the discs
already played, and play all tracks on that disc in a random order.
In the stop or play mode
Press [RANDOM MODE] so that the “1 DISC RND” indicator illuminates.
Every time you press the button:
1 DISC RND FULL RND (off)
Full random play
TRACK
RND
MIN
SEC
B
Each track to be played back is selected randomly from all of the
tracks on all of the discs, excluding the tracks that have already
been played.
In the stop or play mode
Press [RANDOM MODE] so that the “FULL RND” indicator illuminates.
Every time you press the button:
1 DISC RND FULL RND (off)
SEC
MIN
SPIRAL
4
7
TRACK
FULL
TRACK
RND
2
3
5
6
8
9
10
0110
MIN
OPEN CLOSE
SEC
C
DISC
SPIRAL
POWER
/
I
SPIRAL
ID SCAN
TIME MODE
REPEATSPIRAL
RANDOM MODE
EDIT GUIDE
DISC 1 DISC 2 DISC 3 DISC 4 DISC 5 DISC SKIP
PROGRAM MODE
DISC
. . . . . . . . . . . . . . . . . . . . . . . . . . . . . . . . . . . . . . . . . . . . . . .
Example: When starting from disc 1
Track 1
Track 1
DISC 2
DISC 3
Start
Track 2
Track 1
Spiral play
DISC 5
DISC 4
Track 2
DISC 1
Track 1
Track 1
The changer will stop automatically when all the tracks on all discs
have been played once.
To cancel random play mode
Press [
The “1 DISC (or FULL) RND” indicator will go out.
C
The changer plays the first tracks on all the loaded discs in
sequence, followed by the second tracks on all the discs, and so
on.
In the stop or play mode
].
Spiral play
Press [SPIRAL].
Spiral play will begin with the first track on the disc situated at the
playing position.
The changer will stop automatically when all the tracks on all discs
have been played once.
For your reference
When a disc with fewer tracks finishes playing, that disc will be
skipped and the changer will continue playing the remaining track
on the other discs in spiral sequence.
To cancel spiral play mode
Press [SPIRAL] again.
The “SPIRAL” indicator will go out.
The changer will return to sequential play mode from the current
track on the current disc which is playing.
8
RQT5763
Page 9

1
POWER
/
I
REPEATSPIRAL
RANDOM MODE
EDIT GUIDE
ID SCAN
TIME MODE
PROGRAM MODE
1
PROGRAM MODE
DISC 1 DISC 2 DISC 3 DISC 4 DISC 5 DISC SKIP
2
DISC
PGM
DISC
DEL
DISC
4
7
3
TRACK
TRACK
TRACK
2
3
5
6
8
9
0110
10
OPEN CLOSE
5
No.
No.
SEC
MIN
. . . . . . . . . . . . . . . . . . . . . . . . . . . . . . . . . . . . . . . . . . . . . . . . . . .
2
SL-PD9
DISC 1 DISC 2 DISC 3 DISC 4 DISC 5
SL-PD7A
DISC 1 DISC 2 DISC 3 DISC 4 DISC 5
Program play
This unit has two program play modes; program (PGM) and delete
(DEL).
Program mode allows you to select and play your favorite tracks in
the order you want to hear them.
Delete mode allows you to program the unit not to play certain
tracks. This mode can be used in combination with sequential and
random play.
Up to 32 tracks can be selected for each mode.
While the unit is stopped
1
Select the mode with [PROGRAM MODE].
Every time you press the button:
PGM DEL (off)
Press [DISC (1 to 5)] to select the required disc.
2
“AL” appears on the display to indicate all the tracks on the
disc are selected.
Repeat the above if you want to make selection by disc only.
The number of programmed items increases by one each time
a [DISC] button is pressed.
Press the numeric button(s) to select a track.
3
To select a two-digit track number over 10
(or to select a two-digit track from the remote control for
SL-PD9)
Press [>10] ([≥10] on the remote control for SL-PD9) and then
the two numbers you want within 7 seconds or so.
For example
Track no. 20: [>10] ([≥10] on the remote control for SL-PD9)
Repeat steps 2 and 3 to complete the selection.
4
If a non-existing disc or track number is entered, the selection
is initially recorded but erased automatically during playback.
“-F” is displayed if you attempt to enter a 33rd item.
Press [ ] to start play.
5
Additional selections can be made during play by repeating
steps 2 and 3.
[2] [0]
Operations
No.
DISC
PGM
. . . . . . . . . . . . . . . . . . . . . . . . . . . . . . . . . . . . . . . . . . . . . . . . . . .
2
3
1
4
5
7
8
0
10
Specified disc number
3
6
9
10
Specified track number
TRACK
Program order
No.
DISC
PGM
TRACK
. . . . . . . . . . . . . . . . . . . . . . . . . . . . . . . . . . . . . . . . . . . . . . . . . . .
5
SEC
MIN
DISC
PGM
TRACK
To use random play and delete mode together
After step 4, make your random play mode selection (see page 8).
To cancel program play
While the unit is stopped
Press [PROGRAM MODE] to select “(off)” mode.
The contents of the program remain in the unit’s memory even after
the unit is turned off.
To use the program again
1. Press [PROGRAM MODE] to select the required mode.
2. Press [ ].
For your reference
The program remains in the memory for up to two weeks even if the
unit is disconnected from its power source.
9
RQT5763
Page 10

SL-PD9 only
SL-PD9 only
ID SCAN
CLEAR RECAL L
REPEAT
SPIRAL
7
DISC SKIP
DISC
TIME MODE
SKIP
SEARCH
6
89
2
3
4
5
1
DISC 1
DISC 4
DISC 2 DISC 3
DISC 5
0
10
OPEN/
CLOSE
PROGRAM
MODE
RANDOM
MODE
CLEAR
RECALL
A
Operations
B
C
RECALL
CLEAR
DISC 5 DISC SKIP
Programmed track
DISC
PGM
2
4
5
7
8
0110
TRACK
3
6
9
10
Programmed
order
No.
Program play
OPEN CLOSE
To confirm the selections
A
Press [RECALL].
Each time you press the button, the tracks and discs you
programmed appear on the display in the order they were selected.
To cancel selections
While the unit is stopped
Press [ ]. The entire program is canceled.
To clear the last item in the program
B
Press [CLEAR].
To clear a specific item
1. Press [RECALL] until the item is displayed.
2. Press [CLEAR].
C
This function is convenient to use when searching for a desired
track.
The function will search from the beginning of the track for a loud
section, and will play 10 seconds of the track centering around that
point.
The order of scanning is the same as for play mode.
(Remote control only)
(Remote control only)
ID scan function
1
POWER
/
I
ID SCAN
TIME MODE
REPEATSPIRAL
RANDOM MODE
EDIT GUIDE
DISC 1 DISC 2 DISC 3 DISC 4 DISC 5 DISC SKIP
PROGRAM MODE
1
ID SCAN
DISC
3
2
6
5
4
9
8
7
0110
10
OPEN CLOSE
2
SEC
MIN
TRACK
ID
. . . . . . . . . . . . . . . . . . . . . . . . . . . . . . . . . . . . . . . . . . . . . . .
2
D
POWER
/
I
ID SCAN
TIME MODE
REPEATSPIRAL
RANDOM MODE
EDIT GUIDE
DISC 1 DISC 2 DISC 3 DISC 4 DISC 5 DISC SKIP
PROGRAM MODE
,
3
2
6
5
4
9
8
7
0110
10
OPEN CLOSE
Press [ID SCAN].
1
ID scan will start.
When the desired track has been found:
2
Press [
].
The changer will play the track from the beginning.
To cancel ID scan
Press [ID SCAN].
The “ID” indicator will go out.
The changer will continue to play from the track being played.
Search function
D
You can search rapidly forward or backward on the disc for specific
sections.
In the play or pause mode
Press and hold [ ] or [ ].
[ ]: You can search backward.
[ ]: You can search forward.
Release the button when you reach the desired point.
The changer will return to the previous mode (play or pause).
In sequential play mode
You can search forward over discs and backward within the current
disc.
In other play modes
You can search forward or backward only within the current track.
10
RQT5763
For your reference
The search function will begin slowly, and then, if the button is held
pressed for longer than 3 seconds, it will change to high-speed
search.
Searching in the play mode will decrease the sound level by 12 dB
(1/4).
Page 11

A
Skip function
To skip discs
A
POWER
/
I
ID SCAN
TIME MODE
SL-PD9
DISC SKIP
SL-PD7A
DISC SKIP
REPEATSPIRAL
RANDOM MODE
EDIT GUIDE
DISC 1 DISC 2 DISC 3 DISC 4 DISC 5 DISC SKIP
PROGRAM MODE
2
3
4
5
6
7
8
9
10
0110
DISC SKIP
Disc number at the playing
position
SEC
MIN
DISC
TRACK
Use this function to skip discs when selecting a disc to which you
wish to listen, and when loading and unloading the discs.
OPEN CLOSE
You can use this function in stop, sequential play, one disc random
play and delete play modes.
Press [DISC SKIP] to rotate the disc tray.
In stop mode
When the loading drawer is closed, pressing [DISC SKIP] changes
the disc tray to the next one.
When the loading drawer is open, pressing [DISC SKIP] moves the
carousel by two disc trays.
In play mode
When the loading drawer is closed, pressing [DISC SKIP] changes
the disc and the changer plays the track on the next disc.
If a disc is not on the selected disc tray, the changer plays the disc
at the next number.
When the loading drawer is open, pressing [DISC SKIP] moves the
carousel by one disc tray. Pressing again moves the carousel in the
opposite direction so that you can change all discs except the one
being played.
To skip tracks
B
Use this function to skip tracks when selecting a track to which you
wish to listen.
Operations
B
Press either [ ] or [ ] until you reach the desired
track.
[ ]: You can skip backward.
,
POWER
/
I
ID SCAN
TIME MODE
REPEATSPIRAL
RANDOM MODE
EDIT GUIDE
DISC 1 DISC 2 DISC 3 DISC 4 DISC 5 DISC SKIP
PROGRAM MODE
DISC
4
7
TRACK
2
3
5
6
8
9
10
0110
MIN
OPEN CLOSE
SEC
Track number at the playing position
[ ]: You can skip forward.
In sequential/program /delete play mode
In sequential play mode, you can skip only within the current disc.
In program play mode, you can skip from one track to another in
the programmed sequence.
In delete play mode, you can skip tracks only within the current disc
excluding the tracks to be deleted.
[ ]: You can skip to the beginning of the track being played. If
you press this button again quickly, you can skip to the
beginning of the previous track.
Remember that in a backward skip, the current track is
included in the count.
[ ]: You can skip as many tracks as the number of times you
press the button.
In random play mode
[ ]: You can skip to the beginning of the current track.
[ ]: You can skip to the beginning of a next track in random
order.
In spiral play mode
[ ]: You can skip to the beginning of the current track.
[ ]: You can skip to the beginning of the track on the next disc.
You can also skip tracks when the changer is in the stop mode
(except during random play and spiral play) or pause mode.
11
RQT5763
Page 12

Repeat function
A
A
POWER
Operations
B
REPEAT
Play will continue endlessly in accordance with the specific play
mode selected.
Before or during play
3
REPEATSPIRAL
RANDOM MODE
EDIT GUIDE
/
I
ID SCAN
TIME MODE
DISC 1 DISC 2 DISC 3 DISC 4 DISC 5 DISC SKIP
PROGRAM MODE
2
6
5
4
9
8
7
0110
10
OPEN CLOSE
Press [REPEAT].
In sequential play mode
All tracks of all discs will be played repeatedly.
In program play mode
The changer plays only the programmed selections in the
programmed sequence repeatedly.
REPEAT
In delete play mode
The changer plays the discs and tracks excluding the selections to
be deleted repeatedly.
In random play mode
When the changer has played all the tracks on all the loaded discs,
it will select a new random sequence and play continuously. The
DISC
TRACK
MIN
SEC
sequence differs each time.
In spiral play mode
The changer plays all tracks of all discs repeatedly in the sequence
of spiral play.
To cancel repeat mode
Press [REPEAT] again.
The “ ” indicator will go out.
POWER
/
I
REPEATSPIRAL
RANDOM MODE
EDIT GUIDE
ID SCAN
TIME MODE
PROGRAM MODE
TIME MODE
TIME MODE
A
Track number and elapsed play time of the
current track
B
Total remaining time on the disc
C
Track number and remaining time of the
current track
DISC 1 DISC 2 DISC 3 DISC 4 DISC 5 DISC SKIP
DISC
DISC
2
3
4
5
6
7
8
9
10
0110
OPEN CLOSE
Time mode selection
B
The various time information of the current disc can be displayed.
In the play or pause mode
Press [TIME MODE].
The display changes in the order shown in the diagram.
In all play modes
When track number 21 or greater is playing, display C shows “---:--”.
A is displayed if play is stopped and then started again.
In program/delete/random/spiral mode
The displayed information will alternate between displays A and C
each time the button is pressed.
During operation of the edit guide function
TRACK
MIN
MIN
SEC
SEC
The remaining play time on side A or side B will be shown in
display B, and the elapsed play time for side A or side B will be
shown in display D.
12
RQT5763
DISC
D
Total elapsed play time on the disc
DISC
TRACK
MIN
MIN
SEC
SEC
Page 13

A
MIN
DISC
EDIT
Example: Recording from a disc containing seven tracks
onto a 60-minute tape.
Silent interval between tracks
(approx. 4 seconds)
Side A (30 min)
Track 1
Track 2
Track 3 Track 4
Side B (30 min)
Track 5
POWER
/
I
ID SCAN
TIME MODE
Track 6
REPEATSPIRAL
RANDOM MODE
EDIT GUIDE
DISC 1 DISC 2 DISC 3 DISC 4 DISC 5 DISC SKIP
PROGRAM MODE
Track 7
2
3
4
5
6
7
8
9
0110
10
Edit guide function
When recording, the changer will automatically program the
A
tracks for tape sides A and B in accordance with the length of
the tape so that none of the tracks will be interrupted before
they are completed.
In addition, the program will also include a silent interval of
approximately 4 seconds between tracks.
Press [DISC SKIP] to select the disc to be recorded.
1
Prepare the tape deck for recording.
2
Set the Dolby NR, reverse mode, recording level, etc., as in-
,
OPEN CLOSE
structed in the Operating Instructions for the tape deck.
Note
Rewind the tape so recording is possible from its beginning.
Press [EDIT GUIDE] to select the tape length.
3
Each time you press the button, the display showing the tape
length changes as follows.
C-46 C-60 C-90 C---
Choose the length of the tape you will use.
1
SL-PD9
DISC SKIP
3
1
SL-PD7A
DISC SKIP
4
Specified disc number
DISC
TRACK
SEC
MIN
. . . . . . . . . . . . . . . . . . . . . . . . . . . . . . . . . . . . . . . . . . . . . . . . . . .
3
EDIT GUIDE
Side A
Side B
Number of tracks
to be recorded
Tracks to be
recorded
TRACK
Remaining time on side A
MIN
Number of tracks
to be recorded
Tracks to be
recorded
TRACK
Remaining time on side B
MIN
EDIT
SEC
EDIT
EDIT
SEC
EDIT
. . . . . . . . . . . . . . . . . . . . . . . . . . . . . . . . . . . . . . . . . . . . . . . . . . .
More precise time settings are also possible.
(Refer to “To enter a desired recording time other than 46, 60
or 90 minutes” below.)
The data of the tracks to be recorded is displayed as shown in
the diagram.
In this example, disc 5 can be recorded with tracks 1-4 on side
A and tracks 5-7 on side B of the cassette tape.
Start recording on the tape deck and then immediately:
4
Press [ ].
When the last track set for recording on side A is finished, the
changer will enter the pause mode. Set the tape to the position
from which recording will begin on side B, and then perform
step 4 once again.
When all the programmed tracks on the specified disc finish
playing, the changer will automatically stop. The edit guide
mode will be cancelled at the same time.
To enter a desired recording time other than 46, 60 or
90 minutes
1. Select “C---” in step 3.
2. Enter the total recording time in minutes (1-99) using the
numeric buttons.
For example
To use 52-minute tape, press [5] then [2].
You can also specify the tape length by pressing [ ] or [ ]
buttons.
Press either [ ] or [ ] from each step C-46, C-60, C-90 or C---.
For example
To use 52-minute tape, select C-46 and then press and hold [ ]
until the display shows “52”.
The maximum allowable playing time for editing is 99 minutes.
To stop recording
Press [
] and then press the stop button on the tape
deck.
Note
Depending on the disc, a little of the beginning of the next track
may be recorded onto the end of the track.
Operations
4
13
RQT5763
Page 14

Cautions concerning the moving of this unit
A
B
Reference
C
D
CAUTION
Before moving the changer to another location, be sure to carry out
the “Preparations for moving the unit” described below.
Failure to do so will expose the compact discs and the changer to
the risk of severe damage.
POWER
/
I
ID SCAN
TIME MODE
REPEATSPIRAL
RANDOM MODE
EDIT GUIDE
DISC 1 DISC 2 DISC 3 DISC 4 DISC 5 DISC SKIP
PROGRAM MODE
2
3
4
5
6
7
8
9
0110
10
OPEN CLOSE
Preparations for moving the unit
A
All of the discs must be removed so that the trays are completely
empty.
Use the following procedure.
A Press [ /I, POWER] to switch off the unit.
B Press [ /I, POWER] to switch on the unit.
(If there is a disc in the play section, it will be returned to the disc
tray at this time.)
C Press [ OPEN/CLOSE] to open the loading drawer.
D Press [DISC SKIP] to rotate the disc trays and remove the discs
from all disc trays.
E Press [ OPEN/CLOSE] to close the loading drawer.
F Press [ /I, POWER] to switch off the unit.
xxxxxxx
xxxxxx
x
xxxx
xxx
If you have pressed a wrong button by mistake, return to step A.
Concerning CDs
With this changer, you can play CDs having this mark:
B
However, do not use irregular shaped CDs. CDs of the sort can
damage the unit.
X
X
X
X
X
X
X
X
X
X
X
X
X
X
X
X
X
X
X
X
X
X
X
X
X
X
X
X
X
XXXXXXXXX
XXX
XXXXX
XXXXXXX
XXX
~ Handling precautions
C E
• If you are taking the CD from a cold to a warm environment, moisture may form on the CD. Wipe this off with a soft, dry, lint-free
cloth before using the CD.
• Do not write on the label side with a ball-point pen or other writing
instrument.
• Do not use record cleaning sprays, benzine, thinner, static electricity prevention liquids or any other solvent.
• Do not attach labels or stickers to CDs. (Do not use CDs with exposed adhesive from tape or left over peeled off stickers.)
• Do not use scratch-proof protectors or covers other than those
specified for use with this system.
• Do not use CDs printed with label printers available on the market.
14
RQT5763
E
Storage precautions
Be sure to store CDs in their cases to protect them from dust,
scratches, and warping.
Do not place or store CDs in the following places
• Locations exposed to direct sunlight
• Humid or dusty locations
• Locations directly exposed to a heat vent or heating appliance
• In the glove compartment or on the rear deck of an automobile
Page 15

Troubleshooting guide
Before requesting service for this unit, check the chart below for a possible cause of the problem you are experiencing. Some simple checks or
a minor adjustment on your part may eliminate the problem and restore proper operation.
If you are in doubt about some of the check points, or if the remedies indicated in the chart do not solve the problem, refer to the directory of
Authorized Service Centers (enclosed with this unit) to locate a convenient service center, or consult your dealer for instructions.
For detailed instructions, contact an authorized servicenter in the U.S.A. and Panasonic Canada Inc. Customer Care Centre in
Canada.
In the U.S.A., call 1-800-211-7262 or visit www.panasonic.com
In Canada, call 905-624-5505 or visit www.panasonic.ca
Reference pages are shown as black circled numbers. (e.g.
Problem
Changer does not play.
The disc in the changer does not
play.
Play stops before changing to the
next disc.
A certain music passage can’t be
played correctly.
There is noise from the tuner or
disturbance on the TV screen.
When program play is started, an
error message (-E) appears on the
display.
An error message (-E) appears on
the display, and the changer stops
operating.
The loading drawer stops in the
middle of opening.
A disc(s) or other foreign object(s) has fallen
inside the changer.
Moisture has collected in the changer.
The disc is upside down.
The disc is dirty.
The disc is scratched.
The disc is warped.
The disc is not within specified standards.
The loading drawer is open.
The disc is dirty.
The disc is scratched.
Caused by high-frequency signals from this
changer.
Play was started without a track being
programmed.
The mechanism of the changer has been
improperly adjusted.
Probable cause(s)
66
6)
66
Suggested remedy
Open the loading drawer, and then remove the
object.
Allow the changer to dry out for about one hour
before using it.
Make sure the label is facing upward. 6
Wipe the disc with a soft cloth. r
Replace the disc with a new one.
Press the [ OPEN/CLOSE] button to close the
loading drawer.
Wipe the disc with a soft cloth. r
Replace the disc with a new one.
Use the changer further away from the tuner or TV.
If the tuner or TV’s antenna is the indoor type,
use an outdoor one.
Program a track. 9
Turn the unit off and then back on again.
However, if the loading drawer is fully open, take
out the compact disc(s) at the front position and
then turn the unit off and then back on again.
Reference
SL-PD9 only
The changer does not respond
correctly to remote commands.
The batteries have run out.
There is an obstruction between the remote
control and the changer.
The batteries are inserted incorrectly.
The (+) and (–) polarities are reversed.
Maintenance
To clean this unit, wipe with a soft, dry cloth.
If the surfaces are extremely dirty, use a soft cloth dipped in a
soap-and-water solution or a weak detergent solution.
• Never use alcohol, paint thinner or benzine to clean this unit.
• Before using chemically treated cloth, read the instructions that
came with the cloth carefully.
Replace batteries with new ones. 4
Remove the obstruction. 4
Reinsert batteries so that the polarities are
correct. 4
Product Service
Do not attempt to remove the cover(s) or repair the unit yourself.
Refer servicing to qualified personnel only.
Product information
For product service, product information or assistance with product
operation, refer to the servicenter directory.
In the U.S.A., contact the Panasonic Customer Call Center at
1-800-211-7262, or e-mail consumerproducts@panasonic.com,
or web site (http://www.panasonic.com).
In Canada, contact Panasonic Canada Inc. Customer Care
Centre at 905-624-5505, web site (www.panasonic.ca), or an
authorized Servicentre closest to you.
15
RQT5763
Page 16

Specifications
AUDIO
No. of channels 2 (left and right, stereo)
Frequency response 2–20000 Hz, ±1 dB
Output voltage 2 V (at 0 dB)
Dynamic range 92 dB
S/N 100 dB
Total harmonic distortion 0.007% (1 kHz, 0 dB)
Wow and flutter Below measurable limit
DA converter MASH (1 bit)
Output impedance Approx. 1 kΩ
Load impedance More than 10 kΩ
PICKUP
Wavelength 780 nm
GENERAL
Power supply AC 120 V, 60 Hz
Power consumption 9 W
Dimensions (WqHqD) 430I125I374 mm
(1615/16”I429/32”I1423/32”)
Mass 4.5 kg (9.9 lb.)
Power consumption in standby mode: 1 W
THE FOLLOWING APPLIES ONLY IN THE U.S.A.
CAUTION:
This equipment has been tested and found to comply with
the limits for a Class B digital device, pursuant to Part 15 of
the FCC Rules.
These limits are designed to provide reasonable protection
against harmful interference in a residential installation. This
equipment generates, uses and can radiate radio frequency
energy and, if not installed and used in accordance with the
instructions, may cause harmful interference to radio
communications. However, there is no guarantee that
interference will not occur in a particular installation. If this
equipment does cause harmful interference to radio or
television reception, which can be determined by turning the
equipment off and on, the user is encouraged to try to
correct the interference by one or more of the following
measures:
• Reorient or relocate the receiving antenna.
• Increase the separation between the equipment and re-
ceiver.
• Connect the equipment into an outlet on a circuit different
from that to which the receiver is connected.
• Consult the dealer or an experienced radio/TV technician
for help.
Note
Specifications are subject to change without notice.
Mass and dimensions are approximate.
Any unauthorized changes or modifications to this
equipment would void the user’s authority to operate this
device.
This device complies with Part 15 of the FCC Rules.
Operation is subject to the following two conditions: (1) This
device may not cause harmful interference, and (2) this
device must accept any interference received, including
interference that may cause undesired operation.
Panasonic Consumer Electronics
Company, Division of Matsushita
Electric Corporation of America
One Panasonic Way Secaucus,
New Jersey 07094
http://www.panasonic.com
© 2000 Matsushita Electric Industrial Co., Ltd.
Printed in Singapore
Panasonic Sales Company,
Division of Matsushita Electric of
Puerto Rico, Inc. (“PSC”)
Ave. 65 de Infantería, Km. 9.5
San Gabriel Industrial Park, Carolina,
Puerto Rico 00985
Panasonic Canada Inc.
5770 Ambler Drive
Mississauga, Ontario
L4W 2T3
www.panasonic.ca
RQT5763-2P
A1100TL2061
En
 Loading...