

Page 1
Panasonic
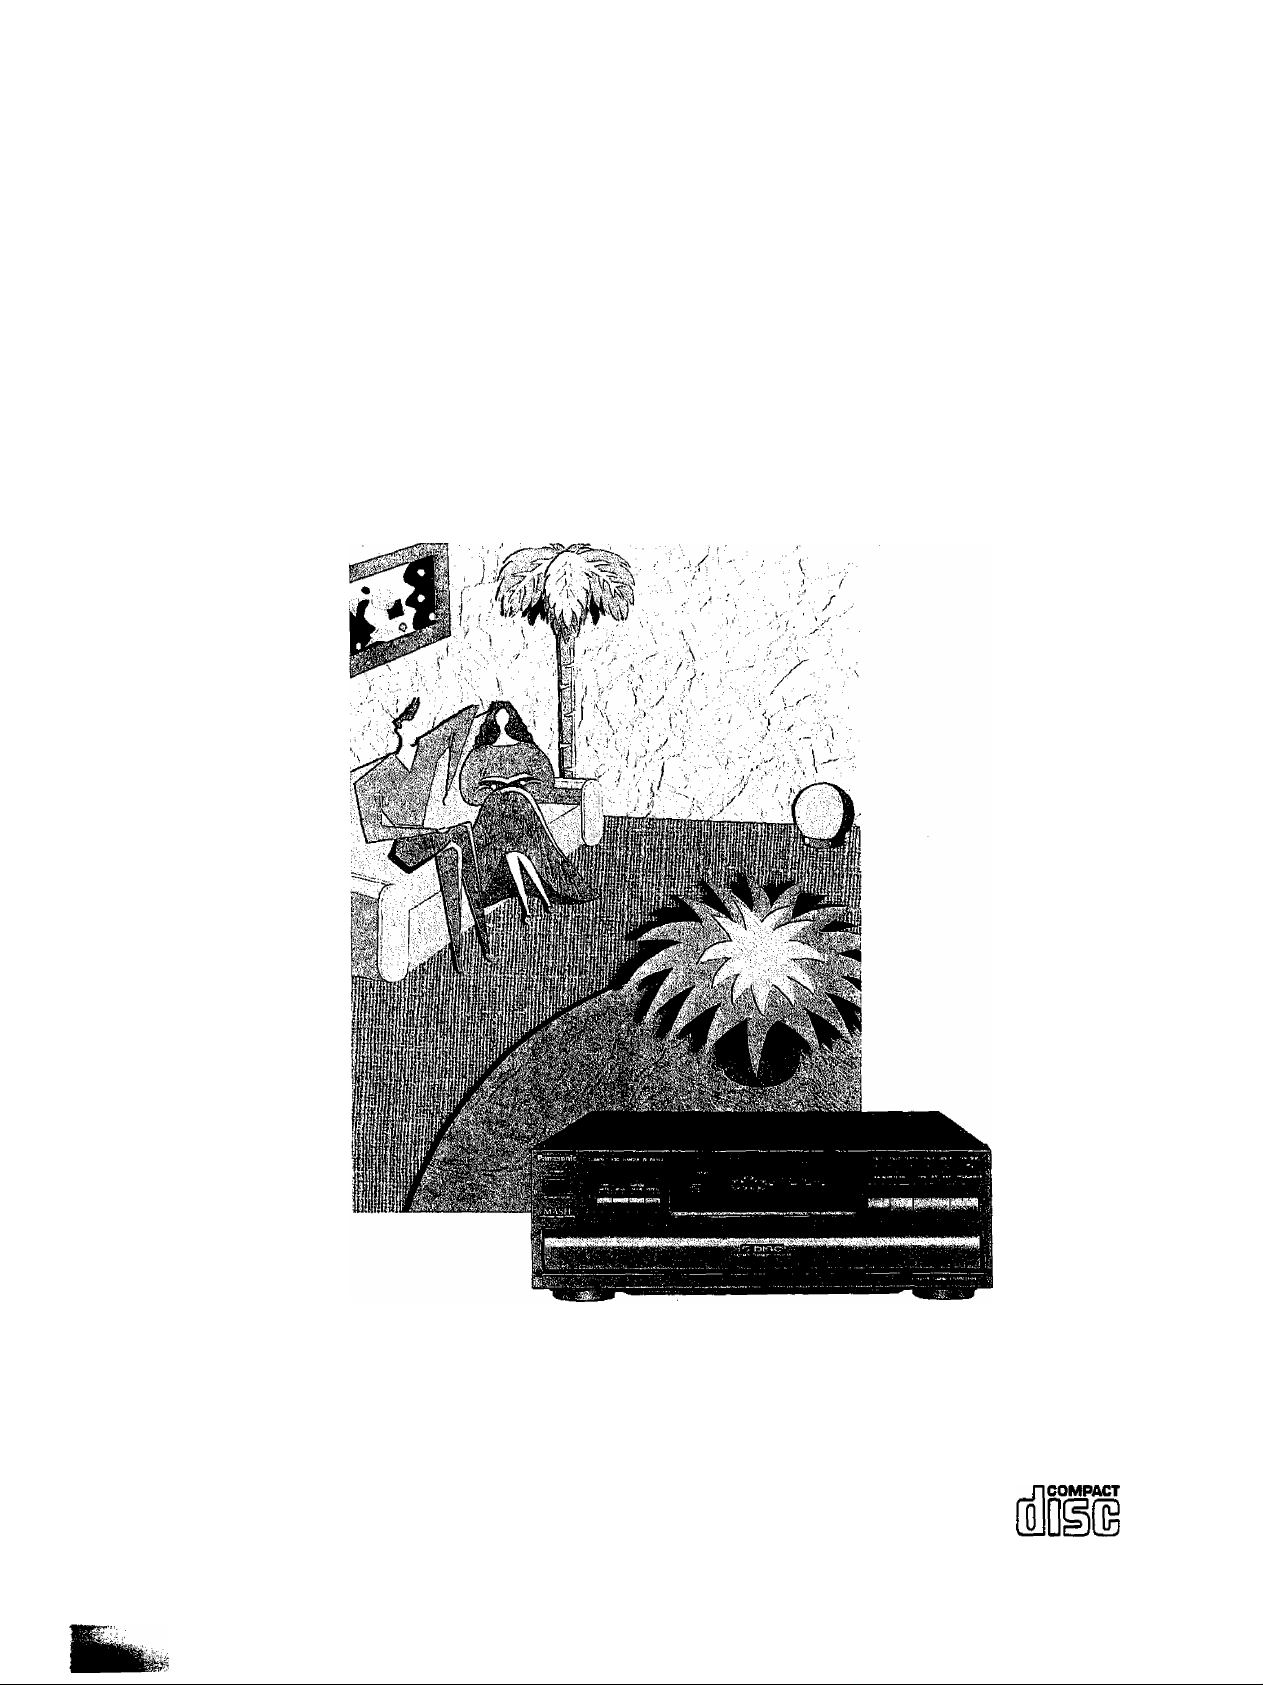
Compact Disc Changer
SL-PD349
Operating Instructions
Before connecting, operating or adjusting this product, please read
these instructions completely.
DIGITAL AUDIO
RQT2420-L
Page 2
Dear Customer
Thank you for purchasing this product.
For optimum performance and safety, please read
these operating instructions carefully.
Table of Contents
Before use
Precautions
Location of Controls.............................................. 4
Connections
Operations
Basic Operations .................................................. 6
Sequential play........................................................................... 6
To exchange discs during play................................................... 7
Skip Function ......................................................... 8
To skip discs............................................................................... 8
To skip tracks
Search Function .................................................... 9
Random Play
One disc random play
Full random play......................................................................... 9
Program Play.........................................................10
Delete Play .........................................................
Spiral Play ........................................................... 12
Repeat Function ...................................................12
Time Mode Selection ....
........................................................... 3
........................................................
..........................................................................
5
8
..........................................................
................................................................
11
.......................................13
9
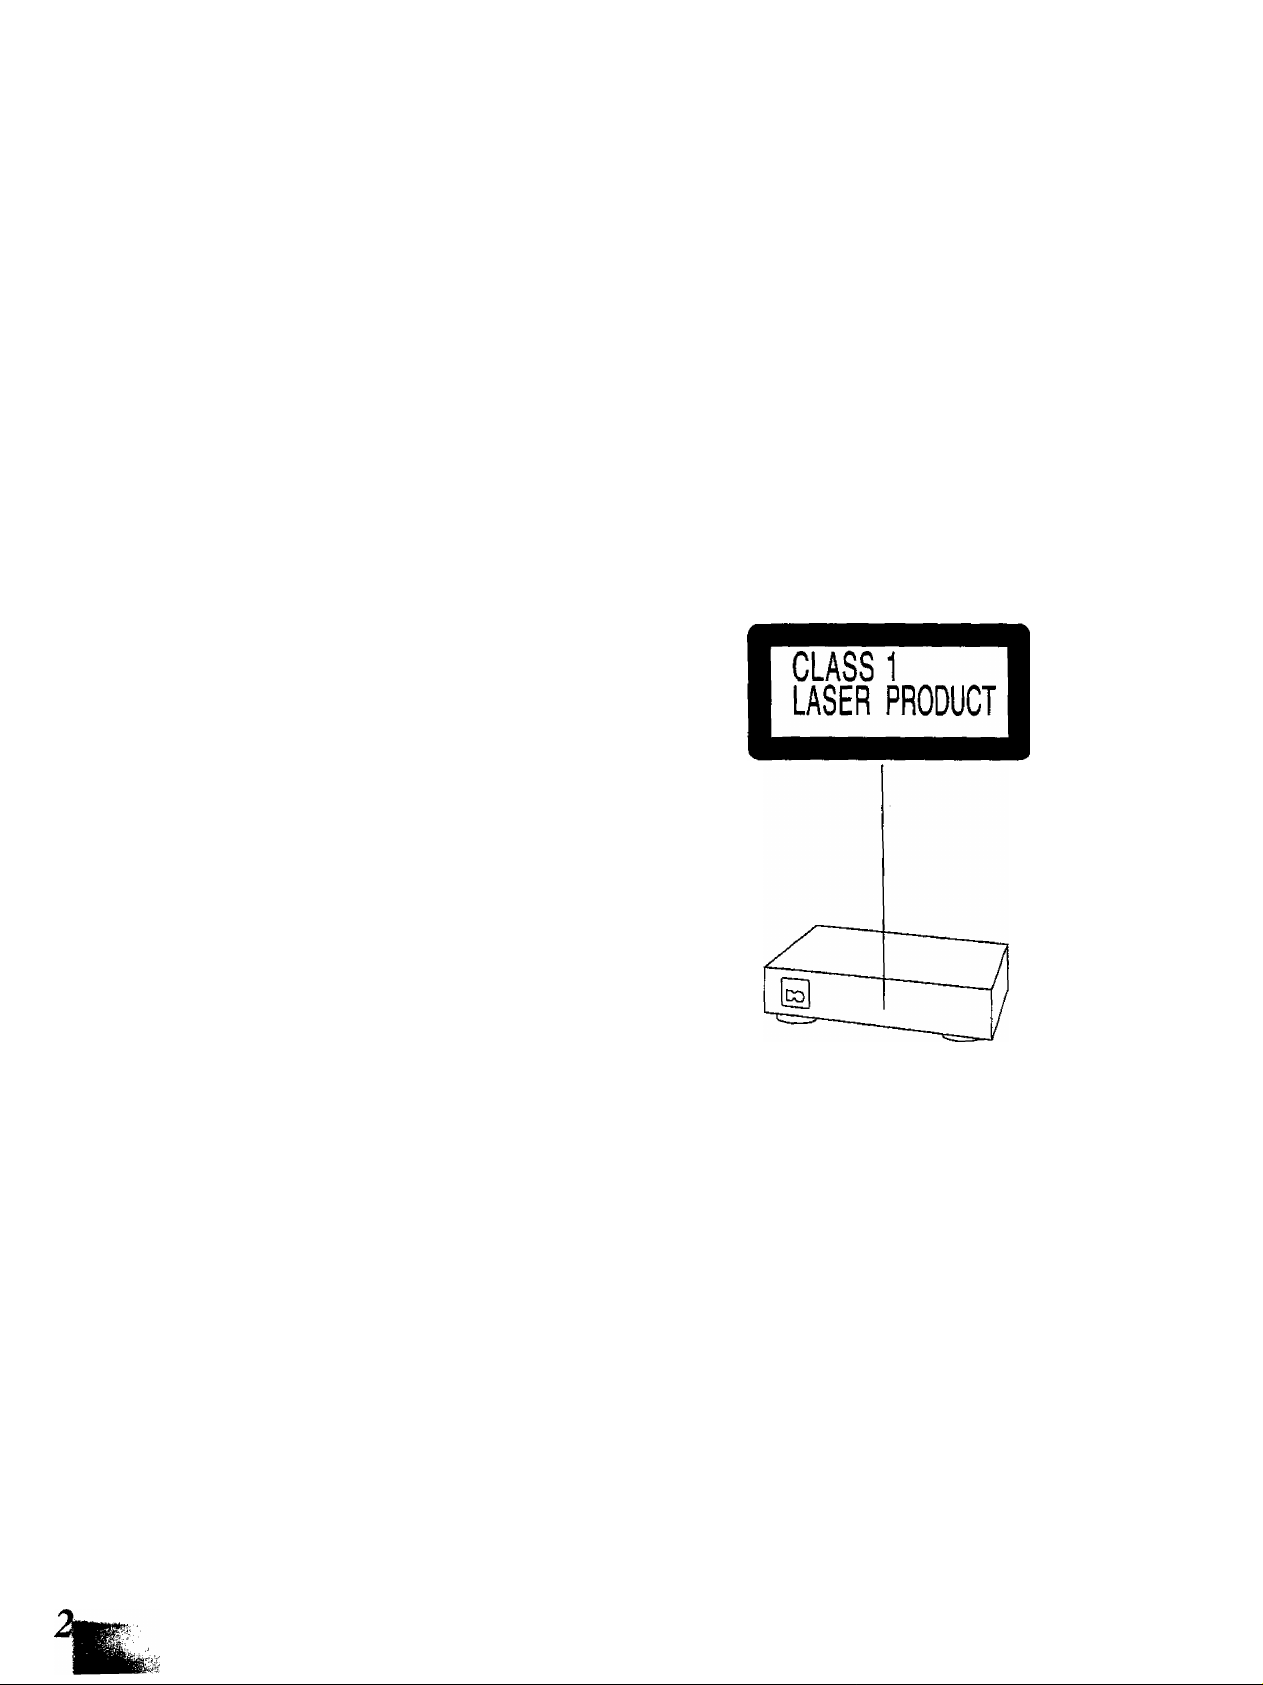
CAUTION!
THIS PRODUCT UTILIZES A LASER.
USE OF CONTROLS OR ADJUSTMENTS OR PERFORM
ANCE OF PROCEDURES OTHER THAN THOSE SPECI
FIED HEREIN MAY RESULT IN HAZARDOUS RADIATION
EXPOSURE.
DO NOT OPEN COVERS AND DO NOT REPAIR YOUR
SELF. REFER SERVICING TO QUALIFIED PERSONNEL.
ir
OANGER-Invisibl«
laser radiatkm whan
open.
AVOID DIRECT EX
POSURE TO BEAM.
(Inside of product)
9
General Information
Concerning Compact Discs
Cautions Concerning the Moving of
this Unit .............................................................14
Technical Specifications
Troubleshooting Guide ...................................... 15
Maintenance .....
........................................
................................
...................................
15
13
14
Page 3

s'''
Placement
Avoid placing the unit in areas of:
•direct sunlight
•high temperature
•high humidity
•excessive vibration
•uneven surfaces (Piace the unit on a flat level surface.)
Such conditions might damage the cabinet and/or other component
parts and thereby shorten the unit’s service life.
Ventilation
Place the unit in a well ventilated position at least 10 cms away from
wall surfaces etc.
Stacking
Never place heavy items on top of the unit or the power cord.
Voltage
•It is very dangerous to use an AC power source of high voltage
such as for an air conditioner.
A fire might be caused by such a connection.
•A DC power source can not be used.
Be sure to check the power source carefully, especially on a ship or
other place where DC is used.
Power cord protection
Foreign materials
•Ensure that no foreign objects, such as needles, coins, screwdriv
ers etc, accidentally fall into the unit.
Otherwise, a serious electric shock or malfunction could occur.
•8e extremely careful about spilling water or liquid on/into the unit,
as a fire or electric shock could occur.
(Disconnect the power plug and contact your dealer immediately if
this occurs.)
•Avoid spraying insecticides onto the unit as they contain flammable
gases which can be ignited.
•Insecticides, alcohol, paint thinner and similar chemicals should
never be used to clean the unit as they can cause flaking or
cloudiness to the cabinet finish.
Maintenance
Clean the cabinet, panel and controls with a soft cloth lightly moist
ened with mild detergent solution,
Do not use any type of abrasive pad, scouring powder or solvent
such as alcohol or benzine.
Service
•Never attempt to repair, disassemble or reconstruct the unit if there
seems to be a problem.
A serious electric shock could result if you ignore this precautionary
measure.
• If a problem occurs during operation (the sound is interrupted,
indicators fail to illuminate, smoke is detected, etc.) contact your
dealer or Authorized Service Center immediately.
•Disconnect the power supply if the unit will not be used for a long
time. Otherwise the operation life could be shortened.
•Avoid cuts, scratches or poor connection of the AC mains cord, as
this may result in fire or electric shock hazard.
Excessive bending, pulling or slicing of the cord should also be
avoided.
•Do not pull on the cord when you are disconnecting the power, as
this could cause an electric shock. Grasp the plug firmly when you
disconnect the power supply.
•Never touch the plug with wet hands or a serious electric shock
could result.
Bil
Page 4

ilifi
9
«7ANPBV(|jWN
"d
No. Name Ref. page
@ (1) (1) (7)
CMCt Dwa Boca
Q O Q
® ® ® ®
No. Name Ref. page
0^
1 J
© Power “STANDBY c!)/ON” switch
(POWER, STANDBY (|)/ON) 6
Press to switch the unit from on to standby mode or vice versa.
In standby mode, the unit is still consuming a small amount of
power.
@ Standby indicator (STANDBY)
When the unit is connected to the AC mains supply, this indica
tor lights up in standby mode and goes out when the unit is
turned on.
@ Display
—
@ Search buttons (◄◄ SEARCH ►►)
® Disc buttons (DISC 1-5) 6
(6) Skip buttons (SKIP ►>!) 8
© Disc skip button (DISC SKIP)
6, 8
(§) Time mode button (TIME MODE)
(g) Spiral button (SPIRAL) 12
13
® Random mode button (RANDOM MODE)
0 Repeat button (REPEAT)
® Loading drawer
® Stop button (■)
0 Pause button (11)
@ Play button ([>)
9
12
6
7
7
7
@ Loading drawer open/close button
9
(AOPEN/CLOSE)
6
® Program mode button
(PROGRAM MODE)
® Disc trays (1-5)
10,11
6
Page 5
■ -y- i'l :i
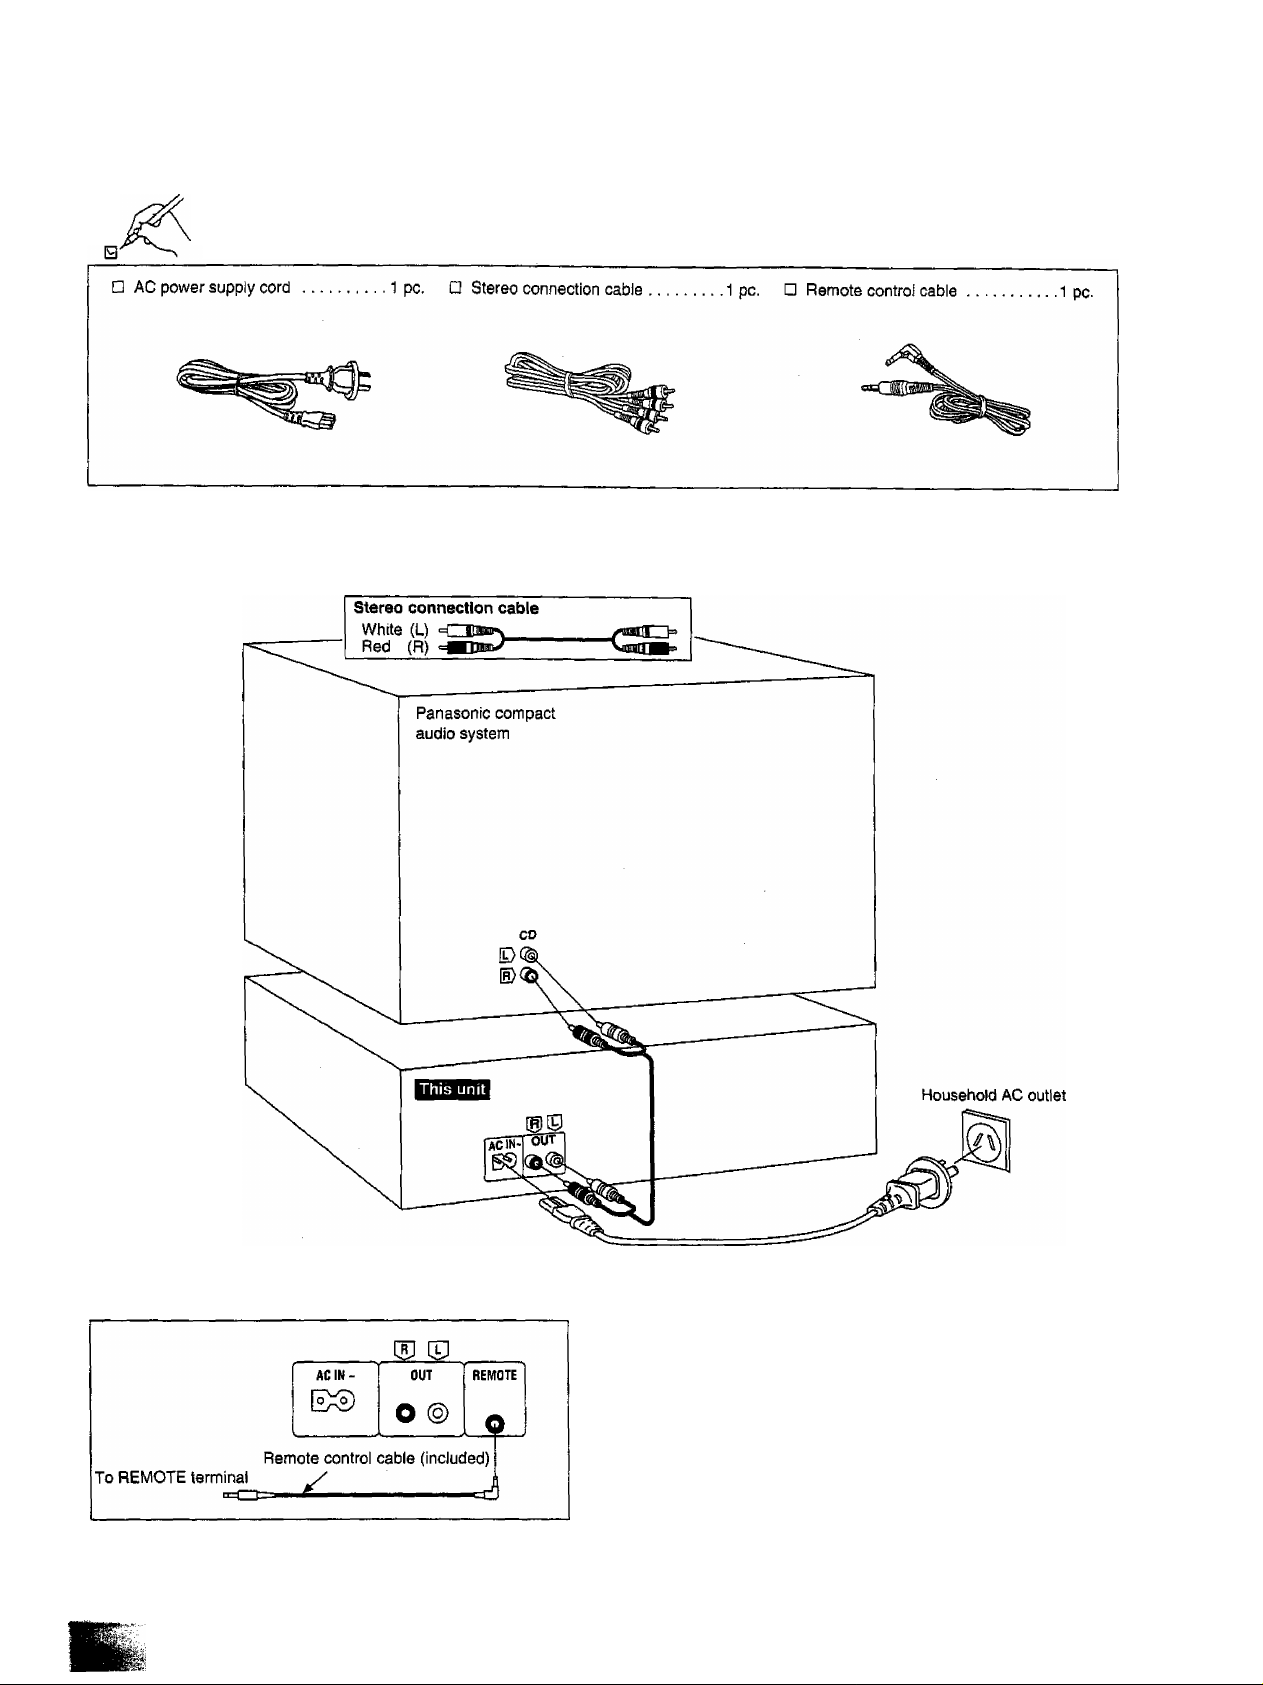
Please check and identify the supplied acces
sories.
Before connecting the changer to your audio system, make sure
that the power of the changer and all other system components
are turned off.
To operate with the remote control, connect the remote control cable (included) to the REMOTE terminal of Panasonic compact audio system.
The operations such as play, stop, skip etc. can be operated
by remote control included with Panasonic compact audio
system. For details, refer to the operating instructions of the
system to be used.
Page 6

Sequential play
All Of the discs will be played, beginning from track 1 on the selected
-, , --,L-' i, . ‘
all five disc trays in the changer are holding CDs.
Numbers of the trays in which discs
are ioaded.
Load the disc(s) on the disc tray(s).
The discs can be loaded two at a time by
pressing DISC SKIP to rotate the carou
sel.
Disc tray Carousel Disc number
4
opeicLOse
A
Press ^ OPE№CLOSE again
to close the loading drawer.
Do not attempt to close the drawer by
hand.
Current play position (The numeral
illuminates with a red color.)
H! n i
> ! ! : J
3BC !l •• >TI
Illuminates when a disc is in the disc
tray, if there is no disc in the disc tray,
the indication disappears when the disc
tray comes to the play position.
n n
u u
Press the desired disc button
5
DISC1 DIBC3 01SC3 DBC4 DISCS pi3y ^¡([ begin from the selected disc,
(1-5).
o o o o o If a disc is not on the selected disc tray,
lhe changer plays the disc at the next
b
number.
Disc number in play Elapsed play time
Label must face
upward.
Do not ioad 3" (8 cm) and 5" (12 cm)
discs on the same disc tray.
Track number in play Play indicator
The changer plays all the tracks on all the discs in order and stops
automatically when the last track on the last disc finishes playing.
The first disc will then be at the playing position.
CAUTION
Do not touch the loading drawer and carousel while they are in
motion, and do not attempt to rotate the carousel by hand: doing so
could result in incorrect operation of the unit and/or damage to the
discs.
Page 7

f.'R' '■
ii:;'-’'ûi'.' ■'"■I' 'i'':''. "KV 'i'. ■’■
rn^mM-mr
.^'1''-/'V' :'■ ' -'r' V'.'i' V :'.
To exchange discs during play
While playing a disc, it is possible to change the other discs without
interrupting play.
To temporarily stop play
Press II.
Press Oto resume play.
To stop play
Press ■.
The display will show the total number of
tracks and the total playing time of the
current disc.
Total number of tracks
Current disc I Total playing time
DISC TRACK
Bsa
The total playing time displayed includes the silent sections between
tracks. For this reason, it may be a few seconds longer than the
playing time indicated on the disc.
Discs which can be changed.
Press DISC SKIP to rotate the
<5,
OPENCLOSe
A
disc trays and exchange the
discs.
The carousel will move by one disc tray.
Pressing again moves the carousel in the
opposite direction by two disc trays.
Press ^ OPEN/CLOSE to close the loading drawer.
ITOBSI
If you play a disc with the loading drawer open, discs other than the
current disc cannot be played.
CAUTION
Do not move this changer with a compact disc inside the unit.
[f a disc comes off the disc tray, it might be scratched or the changer
might become incapable of playing.
(Refer to “Cautions Concerning the Moving of this Unit" on page 14.)
Page 8

д|^М;;Щ]|Ш||||;а|||Щ
To skip discs
Use this function to skip discs when seiscting a disc to which you
wish to listen, and when loading and unloading the discs.
You can use this function in stop, sequential play, one disc random
play and delete play modes.
Press DISC SKIP to rotate the disc tray.
//// IJU-ULI
4jS>
, I у ““
L..‘ '.„-'ТПАСК MIN SEC
To skip tracks
Use this function to skip tracks when selecting a track to which you
wish to listen,
Press either SKIP ( or
until you reach the de
sired track.
: You can skip backward,
'■ Vou can skip forward.
-----^ ----------------
1 1 DISC
€4>y
_'ШСК MIN SEC
1 0:0 i
►
Disc number at the playing position
In stop mode:
When the loading drawer is closed, pressing DISC SKIP changes
the disc tray to the next one.
When the loading drawer is open, pressing DISC SKIP moves the
carousel by two disc trays.
In play mode:
When the loading drawer is closed, pressing DISC SKIP changes
the disc and the changer plays the track on the next disc.
If a disc is not on the selected disc tray, the changer plays the disc at
the next number.
When the loading drawer is open, pressing DISC SKIP moves the
carousel by one disc tray. Pressing again moves the carousel in the
opposite direction so that you can change all discs except the one
being played.
Track number at the playing position
In sequential/program/delete play mode:
In sequential play mode, you can skip only within the current disc.
In program play mode, you can skip from one track to another in the
programmed sequence.
In delete play mode, you can skip tracks only within the current disc
excluding the tracks to be deleted.
m ; You can skip to the beginning of the track being played. If you
press this button again quickly, you can skip to the beginning
of the previous track.
Remember that in a backward skip, the current track is in
cluded in the count.
: You can skip as many tracks as the number of times you
press the button.
In random play mode:
Ь44 ; You can skip to the beginning of the current track.
»1 : You can skip to the beginning of a next track in random order.
In spiral play mode:
: You can skip to the beginning of the current track.
.■ You can skip to the beginning of the track on the next disc.
You can also skip tracks when the changer is in the stop mode
(except during random play and spiral play) or pause mode.
Page 9

¥¥ r::S> ¥:-'¥rt'^■■' >¥: :;■■:¥¥■
ÎUÉii
You can search rapidly forward or backward on the disc for specific
sections.
SEARCH •*
•*< SEARCH »•*•
[In the play or pause mode]
Press and hold « or
◄◄; You can search backward.
►►: You can search forward.
Release the button when you reach the
desired point.
The changer will return to the previous
mode (play or pause).
In sequential play mode:
You can search forward over discs and backward within the current
disc.
In other play modes:
You can search forward or backward only within the current track.
All of the tracks will be played one time each in random order. There
are two types of random play as described below.
RANDOM
One disc random play
The changer will play all tracks on the current disc in a random order.
Then it will choose a new disc randomly, excluding the discs already
played, and play ail tracks on that disc in a random order.
RANDOM
MODE
□
[in the stop or play mode]
Press RANDOM MODE so that
the “1 DISC RND” indicator
illuminates.
Each time the button is pressed, the dis
play will change in the following order:
1 DISC RND-H»FULL RIMD-.(ofO.
i____________________i
For your reference:
The search function will begin slowly, and then, if the button is held
pressed for longer than 3 seconds, it will change to high-speed
search.
in the play mode, the sound level decreases by 12 dB (Va).
Illuminates
Full random play
Each track to be played back is selected randomly from all of the
tracks on all of the discs, excluding the tracks that have already been
played.
RANDOM
MODE
The changer will stop automatically when all the tracks on all discs
have been played once.
To cancel random play mode
[In the stop or play mode]
Press RANDOM MODE so that the “FULL RND” indicator illuminates.
Each time the button is pressed, the dis
play will change in the following order:
1 DISC RND-»>FULL RND^(off).
t____________________1
"iitN sec
RILL RND ►
j_j
Illuminates
Press ■.
The "1 DISC (or FULL) RND” indicator
wil) go out.
Page 10

isisi
You can program up to 32 selections from the five discs in any order
as you desire.
mOGRAMMOOE
[In the stop mode]
Press PROGRAM MODE so
that the “PGM” indicator il
luminates.
Each time the button is pressed, the dis
play will change in the following order:
PGM-^DEL^(off).
i
___________
i
П
DSC TRACK №.
PGM
liiuminates
4
РЯОСЯАМ MODE
>
Press PROGRAM MODE.
( . J" 1 ПЭС
..............................
-‘track No.
Program order
Repeat steps 2, 3 and 4 until
you have completed the de
sired entry.
If you enter non-existing disc{s) or
track(s) soon after the loading drawer is
closed or when it is open, the corre
sponding indicator illuminates and the
entry is included in the count. In the play
mode, the changer will cancel the non
existing entry.
If you attempt a 33rd selection, the “~F"
(full) indication will be displayed.
Press |> to start play.
To enter additional selections during
play, repeat steps 2, 3 and 4.
U
:
-./THACK
Vcj> <S>y
DISC
PQM
!
'
П ' П i
и • IJ i
MW SEC
►
Press the desired disc button
2
DISC1 DISCS DISCS DISC4 DISCS
O O O O O example:
(1-5).
To select disc 3, press DISC 3.
Specified disc number
Tine “ RL" indication shows that ali the
tracks on the disc are selected.
To program by means of disc numbers
oniy. repeat the above operation. (The
count will increase by one for each oper
ation.)
Press SKIP to select
the track number.
For example:
To select track number 9, press
9 times.
To clear the entire programmed contents
[In the stop mode]
Press
The display will indicate as below.
w TRACK №.
и
To cancel program mode
PROGRAM MODE
[In the stop mode]
Press PROGRAM MODE twice.
The changer wilt return to sequential play
mode.
The programmed contents will remain stored in the memory until
they are cleared, even after the program mode is canceled.
Therefore, after using program play, it is possible to cancel the
program mode and use another play mode (except delete play) and
then still use the same program play again at a later time.
In addition, if the disc is replaced with another one, program play will
be carried out using the new disc, if non-existing entries occur at this
time, they will be canceled.
For your reference:
The program mode and the programmed contents will remain stored
in the memory even after the unit is switched off.
However, if the power cord is unplugged or the power supply is
otherwise interrupted for an extended length of time, the contents of
the memory will be erased.
Page 11

You can select up to 32 selections that you do not want to hear and
put them in the changer’s memory. Then you can enjoy sequential,
one disc random, or fuii random piay of only your favorite tracks.
PROQRAMMODE
[In the stop mode]
Press PROGRAM MODE twice so that the “DEL” indicator illuminates.
Each time the button is pressed, the dis
play will change in the foiiowing order:
PGM-»DEL-^{off).
PROQRAM MODE
Press PROGRAM MODE.
Order you have entered
Repeat steps 2, 3 and 4 until you have com
pleted the desired entry.
If you enter non-existing disc(s) or track(s) soon after the
loading drawer is closed or when it is open, the corresponding
indicator illuminates and the entry is included in the count, in
the play mode, the changer will cancel the non-existing entry.
If you attempt a 33rd selection, the "-R”
(full) indication will be displayed.
Press [> to Start play.
[>
To enter additional selections to be de
leted during play, repeat steps 2, 3 and
4.
illuminates
Press the disc button (1 -5).
DISCI disc: discs DISC4 DffiCS
Q Q Q Q Q To delete disc 3, press DISC 3.
For example:
(<b> Cc'>\ -Л
C /> 'IX
Specified disc number
The "RL" indication shows that all the
tracks on the disc are selected.
To delete by means of disc numbers
only, repeat the above operation. (The
count will increase by one for each oper
ation.)
Press \44 SKIP ») to select the track number.
For example:
To delete track number 9, press
9 times.
0 / /
2 i i ’
1 ‘ i_„ ■писк No.
For random play while deleting unwanted tracks
[Proceed through step 5 above, and then:]
To activate one disc random play, press RANDOM MODE.
To activate full random play, press RANDOM MODE twice.
To clear the entire contents to be deleted
[in the stop mode]
Press ■.
The display will indicate as below.
•■"г
To cancel delete mode
PBooRAMMore [In the stop mode]
L-^ Press PROGRAM MODE.
\J) The changer will return to sequential play
mode.
The contents to be deleted will remain stored in the memory until
they are cleared, even after the delete mode is canceled.
Therefore, after using delete play, it is possible to cancel the delete
mode and use another play mode (except program play) and then
still use the same delete play again at a later time.
In addition, if the disc is replaced with another one, delete play will be
carried out using the new disc. If non-existing entries occur at this
time, they will be canceled.
For your reference:
The delete mode and the contents to be deleted will remain stored in
the memory even after the unit is switched off.
However, if the power cord is unplugged or the power supply is
otherwise interrupted for an extended length of time, the contents of
the memory will be erased.
11
Page 12

ip:
fjy
IM'' '/r''
iiiiiiSli
Hi®li
mm
The changer plays the first tracks on alt the loaded discs in se
quence, followed by the second tracks on all the discs, and so on,
(Refer to the illustration below.)
Example:
When starting from disc 1
Play will continue endlessly in accordance with the specific play
mode selected.
[Before or during play]
Press REPEAT.
/iT.* f’r'SSv / n n °\
yc^/> <5>y
In sequential play mode;
All tracks of all discs will be played repeatedly.
/ / -■ / ' ; ? f i
U LJ * U Li
MtN sec
Illuminates
(In the stop or play mode]
Press SPIRAL.
Spiral play will begin with the first track
on the disc situated at the playing posi
tion.
/ / iVil I
me ’1MCK MiH SEC
Sim ►
Illuminates
The changer will stop automatically when all the tracks on all discs
have been played once.
To cancel spiral play mode
Press SPIRAL again.
The “SPIRAL" indicator will go out.
The changer will return to sequential play
mode from the current track on the cur
rent disc which is playing.
In program play mode:
The changer plays only the programmed selections in the pro
grammed sequence repeatedly.
In delete play mode:
The changer plays the discs and tracks excluding the selections to
be deleted repeatedly.
In random play mode:
When the changer has played all the tracks on ail the loaded discs,
it will select a new random sequence and play continuously. The
sequence differs each time.
In spiral play mode;
The changer plays all tracks of all discs repeatedly in the sequence
of spiral play.
To cancel repeat mode
REPEAT
Press REPEAT again.
The “ O ’’ indicator will go out.
For your reference;
When a disc with fewer tracks finishes playing, that disc will be
skipped and the changer will continue playing the remaining track on
the other discs in spiral sequence.
Page 13

:■ v;y
f ■Î-V":': -s -/'f ■■■■ • ■■ '■ /'■ ■■ Ï.' ■■-■'■■■
■r".f■■ y. ■ :'
■' ' ';i ^ j
The various time information of the current disc can be displayed.
TIME
MODE
□
TIME
MODE
—► ® Track number and elapsed play time
[In the play or pause mode]
Press TIME MODE.
The information will change (as de
scribed below) each time you press the
button.
(Original state)
of the current track
/ J ■■...(■ ! i
...
'TRACK MIN SEC
1 ■ i
Only compact discs having this mark can be used _nC0MRACfT
with this unit.
DIGITAL AUDIO
To remove a disc from its case
Press the center holder and lift the disc holding by the edges.
To hold the disc
Hold the disc by the edges so the surface is not soiled with finger
prints.
Fingerprints, dirt and scratches can cause skipping and distortion.
(Incorrect)
To store a disc in its case
insert the disc with label facing upwards and press downward at the
center. Label ■
@ Total remaining time on the disc
M(N SEC
(§) Track number and remaining time of
the current track
nec
________
-'TRACK MIN SEC
@ Total elapsed play time on the disc
In all play modes:
When track number 21 or greater is playing, display (D shows
In program/delete/randonVsplral mode;
The displayed information will alternate between displays ® and (f)
each time the button is pressed.
When you stop playing and then start play again, the display will
return to display ©.
■ Hi
9
If the surface is soiled
Wipe gently with a soft, damp (water only) cloth.
(Correct) (incorrect)
If the disc is brought from a cold to a
warm environment, moisture may form
on the disc
Wipe off with a soft, dry, lint-free doth before using the disc.
Improper disc storage:
You can damage discs if you store them in the following places;
•Areas exposed to direct sunlight
•Humid or dusty areas
•Areas directly exposed to a heat outlet or heating appliance
Handling precautions:
• Do not write on the label side with a batl-point pen or other writing
utensils.
• Do not use record cleaning sprays, benzine, thinner, static electric
ity prevention liquids or any other solvent.
• Do not soil with fingerprints.
13
Page 14

ïïmÊmmÊmMimm.
■ AUDIO
No. of channels
Frequency response
Output voltage
Dynamic range
S/N
Total harmonic distortion
Wow and flutter
DA converter
Output impedance
Load impedance
■ PICKUP
Wavelength
L'.-
2 (left and right, stereo)
2-20,000 Hz, ±1 dB
2 V (at 0 dB)
92 dB
100 dB
0.007% (1 kHz, 0 dB)
Below measurable limit
MASH (1 bit)
Approx. 1 kQ
More than 10 kfl
780 nm
CAUTION
Before moving the changer to another location, be sure to carry out
the “Preparations for moving the unit” described below.
Failure to do so will expose the compact discs and the changer to the
risk of severe damage.
Preparations for moving the unit
Ail of the discs must be removed so that the trays are compietely
empty.
Use the following procedure.
© Press POWER to switch off the unit.
© Press POWER to switch on the unit.
(If there is a disc in the play section, it will be returned to the disc
tray at this time.)
©Press ^ OPEN/CLOSE to open the loading
drawer.
©Press DISC SKIP to rotate the disc trays and
remove the discs from ail disc trays.
©Press ^ OPEN/CLOSE to close the loading
drawer.
© Press POWER to switch off the unit.
if you have pressed a wrong button by mistake, return to step ®.
POWER DISC SKIP
■ GENERAL
Power consumption
Power supply
Dimensions (WxHxD)
Weight
Note:
Specifications are subject to change without notice.
Weight and dimensions are approximate.
MASH is a trademarii of NTT.
AC 50/60 Hz, 230-240 V
360X125x370 mm
12 W
4.1 kg
I OPEN/CLOSE
Page 15

VJ'|- „■ r "i." ■
Before requesting service for this unit, check the chart below for a possible cause of the problem you are experiencing. Some simple checks or a
minor adjustment on your part may eliminate the problem and restore proper operation.
If you are in doubt about some of the check points, or if the remedies indicated in the chart do not solve the problem, refer to the directory of
Authorized Service Centers (enclosed with this unit) to locate a convenient service center, or consult your dealer for instructions.
Problem Probable cause(s)
Changer will not play. A disc(s) or other foreign object(s) has fallen
inside the changer.
Moisture has collected in the changer.
The disc in the changer
does not play.
Play stops before changing
to the next disc.
A certain music passage
can’t be played correctly.
There is noise from the
tuner or disturbance on the
TV screen.
When program play is
started, an error message
(-E) appears on the display.
An error message (-E)
appears on the display, and
the changer stops
operating.
The loading drawer stops
in the middle of opening.
The disc is upside down.
The disc is dirty.
The disc is scratched.
The disc is warped.
The disc is not within specified standards.
The loading drawer is open.
The disc is dirty.
The disc is scratched.
Caused by high-frequency signals from this
changer.
Play was started without a track being
programmed.
The mechanism of the changer has been
improperly adjusted.
Suggested remedy
•Open the loading drawer, and then remove the
object.
•Switch on and allow the changer to dry out for
about one hour before using it.
•Make sure the label is facing upward.
•Wipe the disc with a soft cloth.
• Replace the disc with a new one.
• Press the A OPEN/CLOSE button to close the
loading drawer.
•Wipe the disc with a soft cloth.
•Replace the disc with a new one.
•Use the changer further away from the tuner or TV.
•if the tuner or TV’s antenna is the indoor type, use
an outdoor one.
• Program a track.
•Turn the unit off and then back on again.
However, if the loading drawer is fully open, take
out the compact disc(s) at the front position and
then turn the unit off and then back on again.
IIQIS
When using the tuner with this changer;
If noise is excessive in the FM mode, turn off the power supply of this
changer.
Wipe this unit with a soft cloth.
if the surfaces are extremely dirty, wipe clean with a cloth which has
been dipped in a weak soap-and-water solution and wrung out
thoroughly, and then wipe again with a dry cloth.
•Do not use alcohol, thinners, etc.
•When using chemically treated cloths, refer to the explanations
provided with them.
About moisture
Moisture may form on the lens in the following cases...
•Immediately after a heater has been turned on.
• In a steamy or very humid room.
•When the unit is suddenly moved from a cold environment to a
warm one.
if moisture forms inside this unit, it may not work properly, in this
case, turn the unit on and wait about one hour for the moisture to
evaporate.
15
Page 16

Matsushita Electric Industrial Co., Ltd.
Central P.O. Box 288, Osaka 530-91, Japan
Printed in Japan
RQT2420-L
F0394F0
 Loading...