

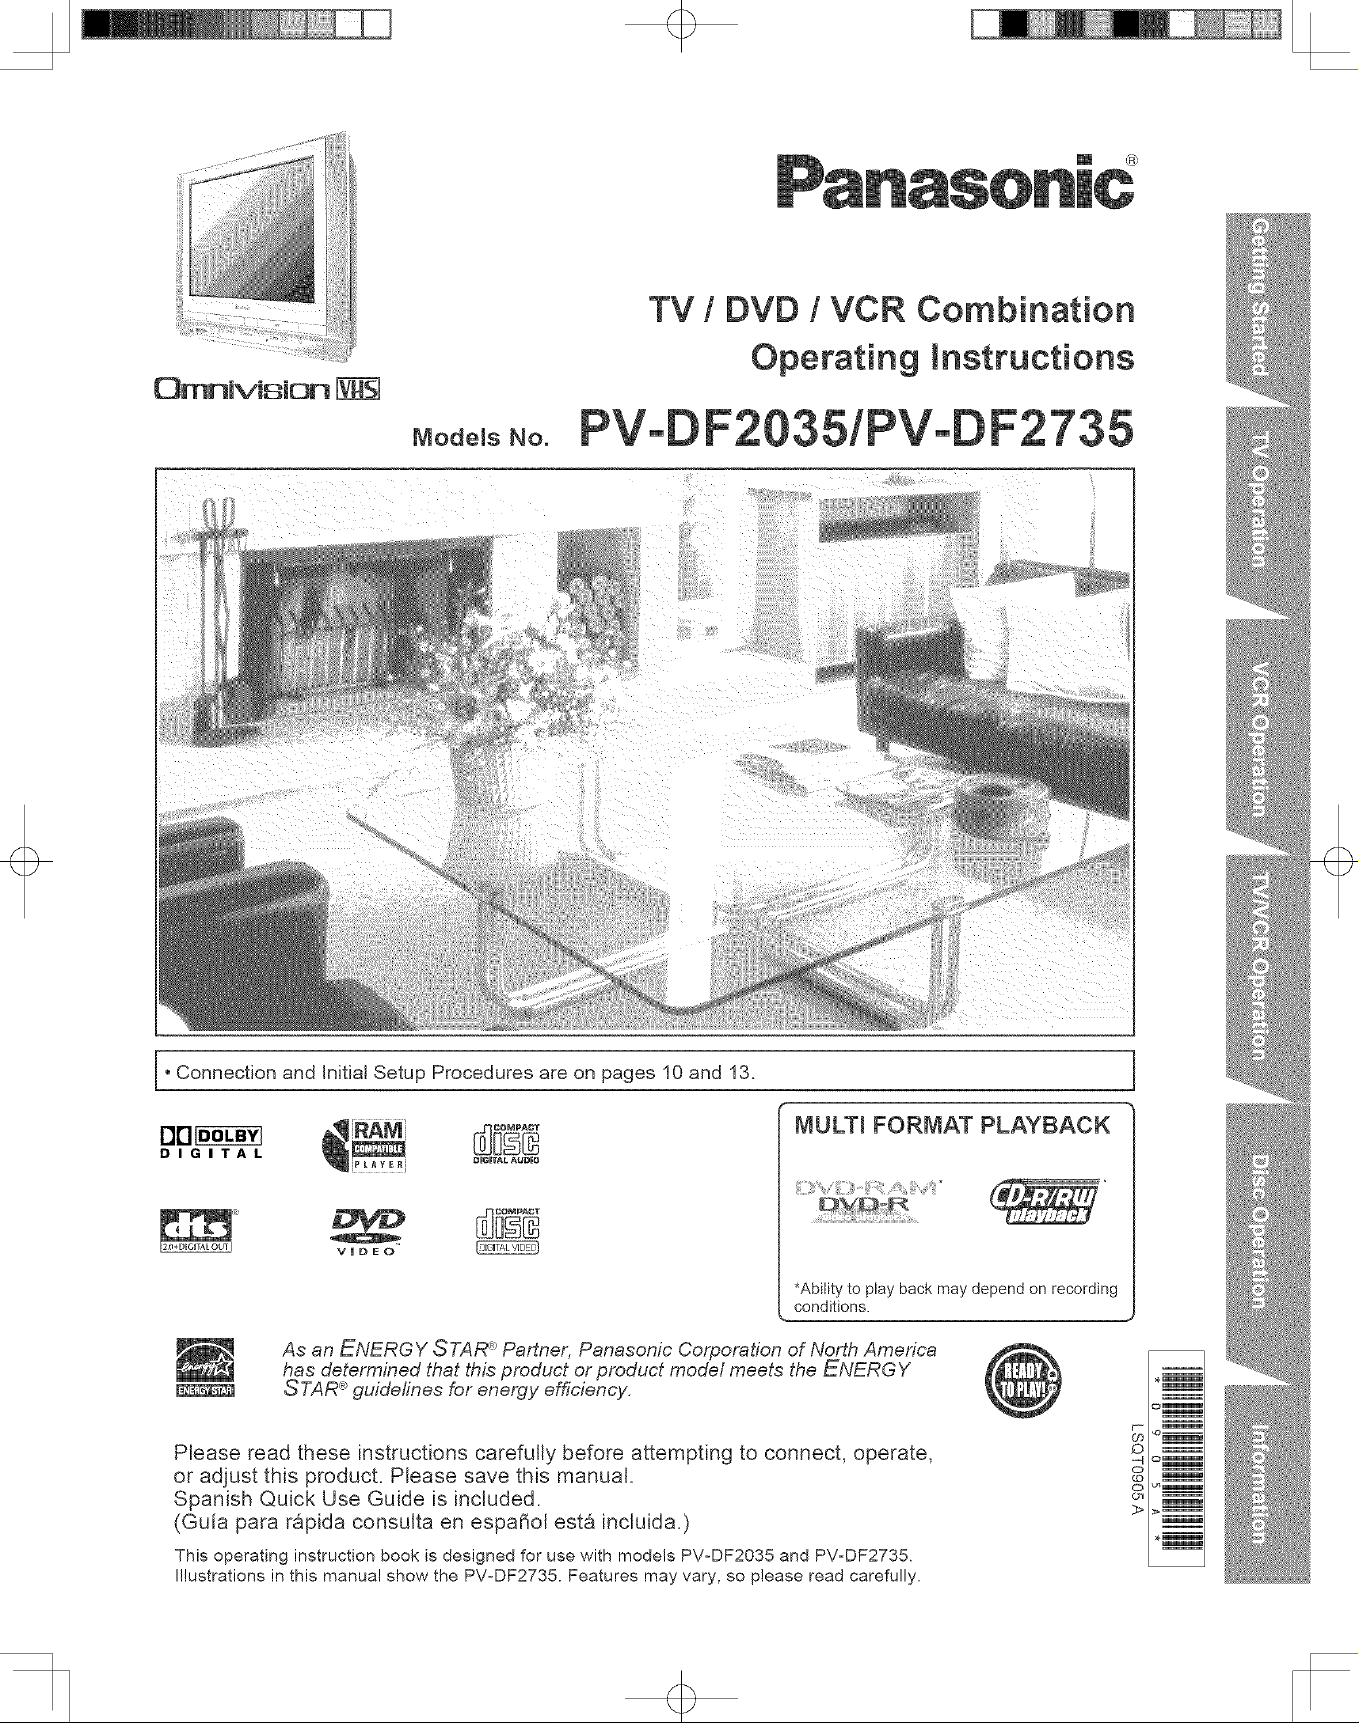
Panasonic PV-DF2735, PV-DF2035 Owner’s Manual
OmnlvJsion
+
TV / DVD / VCR Combination
Operating Instructions
PV-
Connection and Initial Setup Procedures are on pages 10 and 13.
MULTi FORMAT PLAYBACK
DIGITAL
VmDEO
As an ENERGY STAR _R_Partner, Panasonic Corporation of North America
has determined that this product or product model meets the ENERGY
STAR <e_guidefines for energy efficiency.
Please read these instructions carefully before attempting to connect, operate,
or adjust this product. Please save this manual.
Spanish Quick Use Guide is included.
(Guia para r&pida consulta en espa_ol esta incluida.)
This operating instruction book is designed for use with models PV-DF2035 and PV-DF2735.
Illustrations in this manual show the PV-DF2735. Features may vary, so please read carefully,
DB_BTALAUDBO
*Ability to play back may depend on recording
conditions.
o
+
On your purchase of one of the most sophisticated and reliable
products on the market today. Used properly, it will bring you and
your family years of enjoyment. Please fill in the information below.
The serial number is On the tag located on the back of your unit.
Date of Purchase
Dealer Purchased From
Dealer Address
Dealer Phone No.
Model No.
Serial No.
5,315,448; and 6,516,132.
U.S. Patent Nos. 4,631,603; 4,577,216; 4,819,098; 4,907,093; |
This product incorporates copyright protection technology that is
protected by U.S. patents and other intellectual property rights.
Use of this copyright protection technology must be authorized
by Macrovision, and is intended for home and other limited
viewing uses only unless otherwise authorized by Macrovision.
Reverse engineering or disassembly is prohibited.
Be sure to read the following cautions carefully.
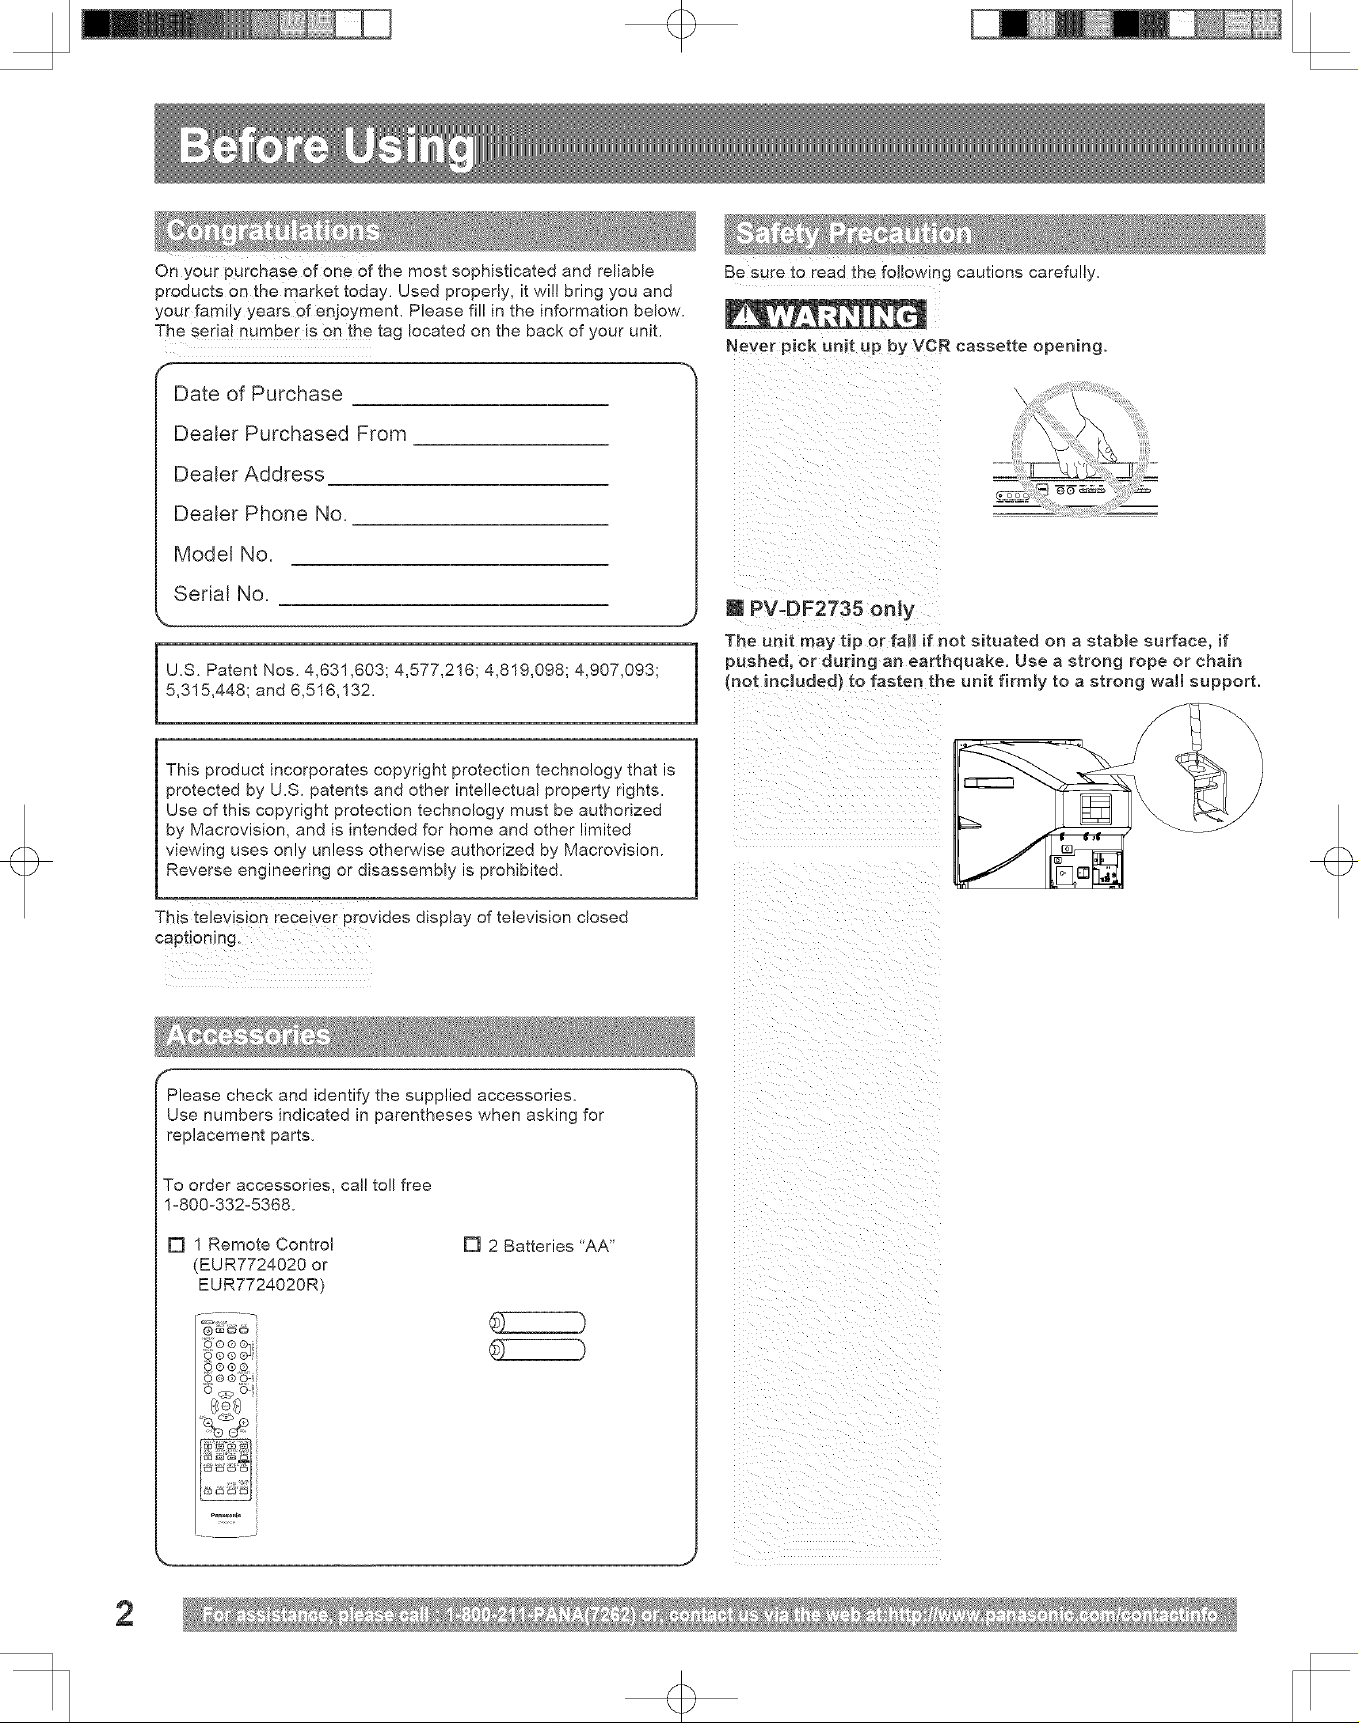
Never pick unit up by VCR cassette opening.
m PV-DF2735 onJy
The unit may tip or fall if not situated on a stabme surface, if
1
pushed, or during an earthquake. Use a strong rope or chain
(not included} to fasten the unit firmly to a strong wall support.
l
This television receiver provides display of television closed
captioning.
Please check and identify the supplied accessories.
Use numbers indicated in parentheses when asking for
replacement parts.
To order accessories, call toll free
1°800°332°5368.
[] 1 Remote Control
(EUR7724020 or
EUR7724020R)
[] 2 Batteries "AA"
2
+
+
TO PREVENT FIRE OR SHOCK HAZARD, DO NOT EXPOSE THIS EQUIPMENT TO RAIN OR
MOISTURE.
TO PREVENT ELECTRIC SHOCK, MATCH WIDE BLADE OF PLUG TO WIDE SLOT IN WALL
SOCKET. FULLY INSERT.
AVERTlSSEMENT "
AFIN DE PR#:VENIR TOUT RISQUE DqNCENDIE OU DE CHOCS ELECTRIQUES, NE PAS
EXPOSER CET APPAREIL A LA PLUIE OU A UNE HUMIDITE EXCESSIVE.
Attention •
POUR #:WTER LES CHOCS #:LECTRIQUES, INTRODUIRE LA LAME LA PLUS LARGE DE LA
FICHE DANS LA BORNE CORRESPONDANTE DE LA PRISE ET POUSSER JUSQU'AU FOND.
FCC WARNING "
ANY UNAUTHORIZED CHANGES OR MODIFICATIONS TO THIS EQUIPMENT WOULD VOID THE
USER'S AUTHORITY TO OPERATE IT.
FCC NOTICE:
This equipment has been tested and found to comply with part 15 of the FCC Rules. These limits are designed to provide reasonable
protection against harmful interference when operated in a residential environment. If this equipment does cause interference to radio or
television reception, which can be determined by turning the equipment off and on, use the equipment in another location and/or utilize
an electrical outlet different from that used by the receiver. If necessary, consult the dealer or an experienced radio/TV technician for
help. You may find the booklet, 'Something About Interference", available from FCC local regional offices, helpful.
This product utilizes both a Cathode Ray Tube (CRT) and
other components that contain lead. Disposal of these
materials may be regulated in your community due to
environmental considerations. For disposal or recycling
information please contact your local authorities, or the
Electronics Industries Alliance: <http://www.eiae.org.>
CAUTION:
UNIT IS A CLASS ][ LASER PRODUCT.
HOWEVER, THIS UNIT USES A VISIBLE LASER BEAM WHICH COULD CAUSE
HAZARDOUS RADIATION EXPOSURE IF DIRECTED. BE SURE TO OPERATE THE
UNIT CORRECTLY AS INSTRUCTED.
WHEN THIS UNIT IS PLUGGED INTO THE WALL OUTLET, DO NOT PLACE YOUR
EYES CLOSE TO THE OPENING OF THE DISC TRAY AND OTHER OPENINGS TO
LOOK INTO THE INSIDE OF THIS UNIT.
USE OF CONTROLS OR ADJUSTMENTS OR PERFORMANCE OF PROCEDURES
OTHER THAN THOSE SPECIFIED HEREIN MAY RESULT IN HAZARDOUS
RADIATION EXPOSURE.
DO NOT OPEN COVERS AND DO NOT ATTEMPT TO REPAIR THE UNIT YOURSELF.
REFER SERVICING TO QUALIFIED PERSONNEL.
This video recorder, equipped with the HQ (High Quality)
System, is compatible with existing VHS equipment. Only use
those tapes with the I_ mark. It is recommended that only
cassette tapes that have been tested and inspected for use in 2,
4, 6, and 8 hour VCR machines be used. This television receiver
provides display of television closed captioning in accordance
with §15.119 of the FCC rules.
CAUT{ON:
LASER RADIATION WHEN OPEN.
DO NOT STARE iNTO BEAM.
ATTENTION:
RAYONNEMENT LASER EN CAS
D'OUVERTURE.
NE PAS REGARDER DANS LE
FAISCEAU.
(Inside of product)
CAUTION: TO REDUCE THE RISK
OF ELECTRIC SHOCK, DO NOT
REMOVE COVER (OR BACK)
NO USER-SERVICEABLE PARTS
INSIDE REFER SERVICING TO
QUALIFIED SERVICE PERSONNEL
This symbol warns the user that uninsulated voltage within the unit may have sufficient magnitude
to cause electric shock. Therefore, it is dangerous to make any kind of contact with any inside part
of this unit.
This symbol alerts the user that important literature concerning the operation and maintenance of
this unit has been included. Therefore, it should be read carefully in order to avoid any problems.
3
q>
TO REDUCE THE R_SK OF ELECTRIC SHOCK, F_RE, _NJURY TO PERSONS OR DAMAGE TO
TH_S PRODUCT, READ AND RETAmN ALL SAFETY AND OPERATING _NSTRUCT_ONS. HEED ALL
WARNINGS _NTHE MANUAL AND ON THE PRODUCT.
m
RNSTALLATION
1
POWER SOURCE CAUTION
Operateonlyfrom powersourceindicatedonunit orin thismanual If uncertain,have
yourElectricUtility ServiceCompanyor VideoProductsDealerverify yourhome
powersource
POWERCORDPLUG
Forsafety, thisunit has apolarizedtype plug (one wideblade), ora three-wire
groundingtype plug Alwaysholdthe plugfirmly andmake sure yourhandsaredry
whenplugginginor unpluggingtheAC powercord Regularlyremovedust,dirt,etc
onthe plug
POLARIZEDPLUGCAUTION:
The plugfits intooutlet onlyone way Ifit cannot befully inserted,try reversingit If it
stillwill notfit, have anebctrician installthe properwall outlet Donot tamperwiththe
plug
GROUNDING PLUG CAUTION:
The plugrequiresa three-holegroundingoutlet If necessary,havean electrician
installthe properoutlet Do nottamperwith the plug
POWERCORD
To avoidunit malfunction,andtoprotectagainst electrical shock,fire or personal
injury:
Keeppower cord away from heating appliancesand walkingtraffic Do not rest
heavyobjects on,or rollsuch objectsoverthepowercord
Donottamper with thecord inany way
Anextensioncord shouldhavethe sametype plug(polarizedor grounding)and
mustbe securelyconnected
Overloadedwall outletsor extensioncordsare fire hazards.
Frayedcords,damagedplugs,and damagedor crackedwire insulafionare
hazardousand should bereplacedby aqualifiedelectrician
DONOT BLOCK VENTILATIONHOLES
Ventilationopenings inthe cabinetreleaseheat generatedduring operation If
blocked,heatbuild-upmay resultin a fire hazardor heat damagetocassettes or
discs
Foryour protection:
a Nevercover ventilationslotswhile unit is ON_or operateunitwhile placedona
be& sofa,rug, orother softsurface.
b Avoidbuilt-ininstallation,such as abook caseorrack unlessproperlyventilated
AVOID EXTREMELYHOT LOCATIONSOR SUDDENTEMPERATURECHANGES
Donotplace unitover ornear a heater orradiator,in directsunlight_insideclosed
vehicles,inhigh temperaturelocations [over95 °F(35 °C)]_orin over75 % humidity
Ifunit issuddenlymovedfroma coldplacetoa warmone, moisturemay condensein
unit andonthe tape causingdamage Neversubjectunit to vibration,impact,or place
it so thatthe surface is tilted asinternalparts may be seriouslydamaged
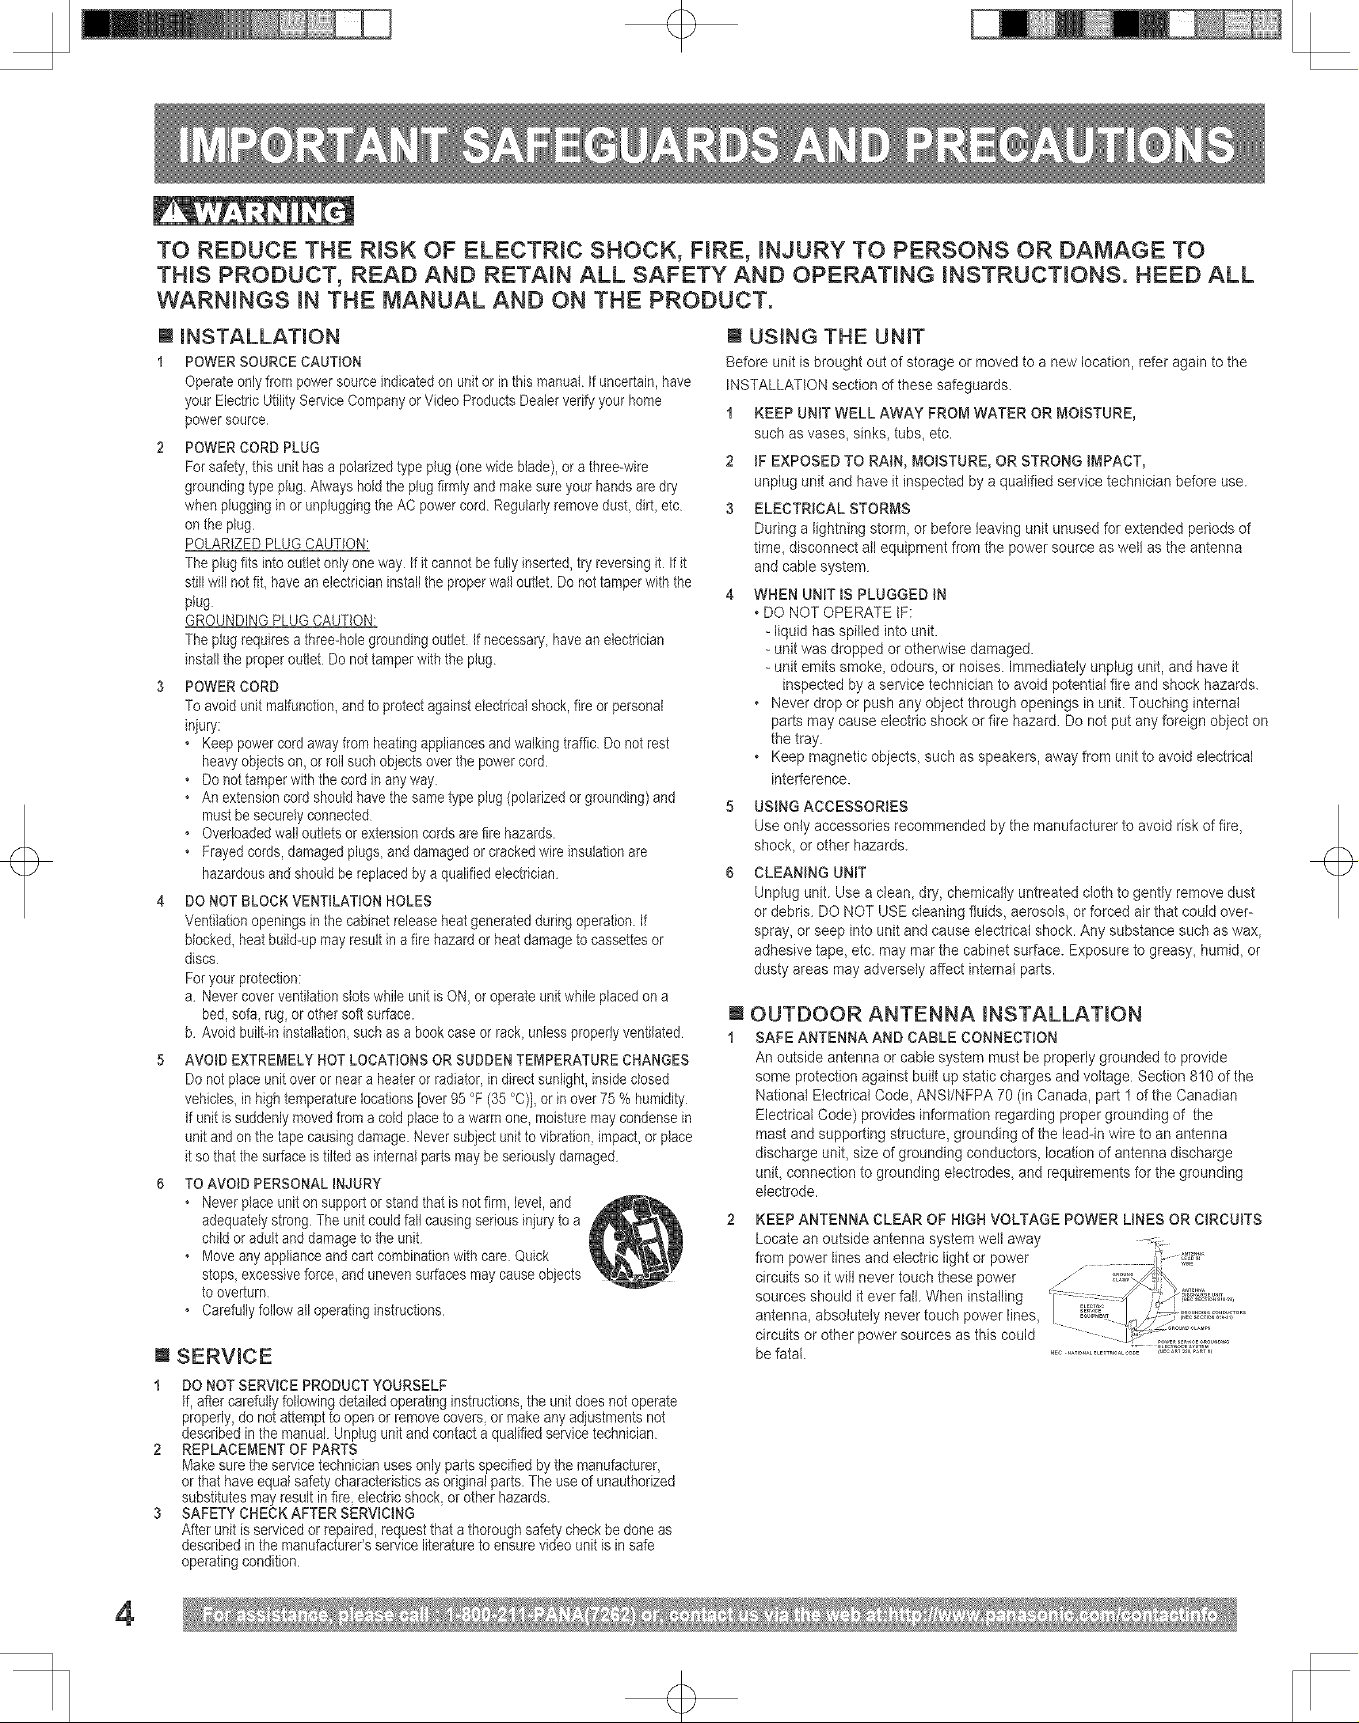
TOAVOID PERSONALINJURY
• Neverplace unitonsupport or standthatis notfirm, level, and
adequatelystrong Theunit couldfallcausingserious injurytoa
childor adult anddamagetothe unit
• Moveany applianceand cartcombinationwith care Quick
stops,excessive force, andunevensurfaces maycauseobjects
tooverturn
Carefullyfollow all operatinginstructions
m
SERVICE
1
DO NOT SERVICEPRODUCTYOURSELF
If,after carefullyfollowingdetailedoperatinginstructions,the unit doesnot operate
properly,do notattemptto openor removecovers,or make anyadjustments not
describedin the manual Unplugunit andcontact aqualified sewicetechnician
REPLACEMENTOF PARTS
_7.akesurethe servicetechnician usesonlyparts specifiedby the manufacturer,
orthat haveequal safetycharacteristicsas originalparts. The useof unauthorized
substitutesmay resultin fire, electricshock, or otherhazards.
SAFETYCHECKAFTER SERVICING
Afterunit is servicedor repaired,request that a thoroughsafety checkbe done as
describedin the manufacturer'sservice literatureto ensurevideo unitis in safe
operatingcondition
m USING THE UNmT
Before unit is brought out of storage or moved to anevv location, refer again to the
INSTALLATION section d these safeguards.
1 KEEP UNiT WELL AWAY FROM WATER OR MOISTURE,
such as vases, sinks, tubs, etc.
2 iF EXPOSED TO RAIN, MOISTURE, OR STRONG iMPACT,
unplug unit and have itinspected by a qualified service technician before use.
3 ELECTRICAL STORMS
During a lightning storm, or before leaving unit unused for extended periods of
time, disconnect all equipment from the power source as well as the antenna
and cable system
4 WHEN UNITIS PLUGGED IN
• DO NOT OPERATE IF:
- liquid has spilled into unit.
- unitwas dropped or otherwise damaged.
- unit emits smoke, odours, or noises. Immediately unplug unit, and have it
inspected by a service technician to avoid potential fire and shock hazards.
• Never drop or push any object through openings in unit. Touching internal
parts may cause electric shock or fire hazard Do not put any foreign object on
the tray.
• Keep magnetic objects, such as speakers, away from unit to avoid electrical
interference.
5 USING ACCESSORIES
Use only accessories recommended by the manufacturer to avoid risk of fire,
shocL or other hazards.
6 CLEANING UNIT
Unplugunit.Use a cleandry,chemicallyuntreatedclothtogentlyremovedust
ordebris.DO NOT USE cleaningfluids,aerosols,orforcedairthatcouldover-
spray,orseep intounitand causeelectricalshock.Any substancesuchaswax
adhesivetape,etc.may mar thecabinetsurface.Exposuretogreasy,humid,or
dusty areas may adversely affect internal parts.
m
OUTDOOR ANTENNA mNSTALLATION
1
SAFE ANTENNA AND CABLE CONNECTION
An outsideantennaorcablesystemmustbe properlygroundedtoprovide
some protectionagainstbuiltup staticchargesand voltageSection810 ofthe
NationaiElectricalCode,ANSI/NFPA 70 (inCanada,partIoftheCanadian
ElectricalCode) providesinformationregardingpropergroundingof the
mastand supportingstructure,groundingofthebad-inwiretoan antenna
dischargeunit,sizeofgroundingconductorslocationofantennadischarge
unit,connectiontogroundingelectrodes,and requirementsforthegrounding
electrode.
KEEP ANTENNA CLEAR OF HIGH VOLTAGE POWER LINES OR CIRCUITS
Locate an outside antenna system well away -: ....
from power lines and electric light or power
circuits so itwill never touch these power
sources should it ever fall. When installing b_"t'_"'_
antenna, absolutely never touch power lines,
circuits or other power sources as this could
befatal.
4
+
+
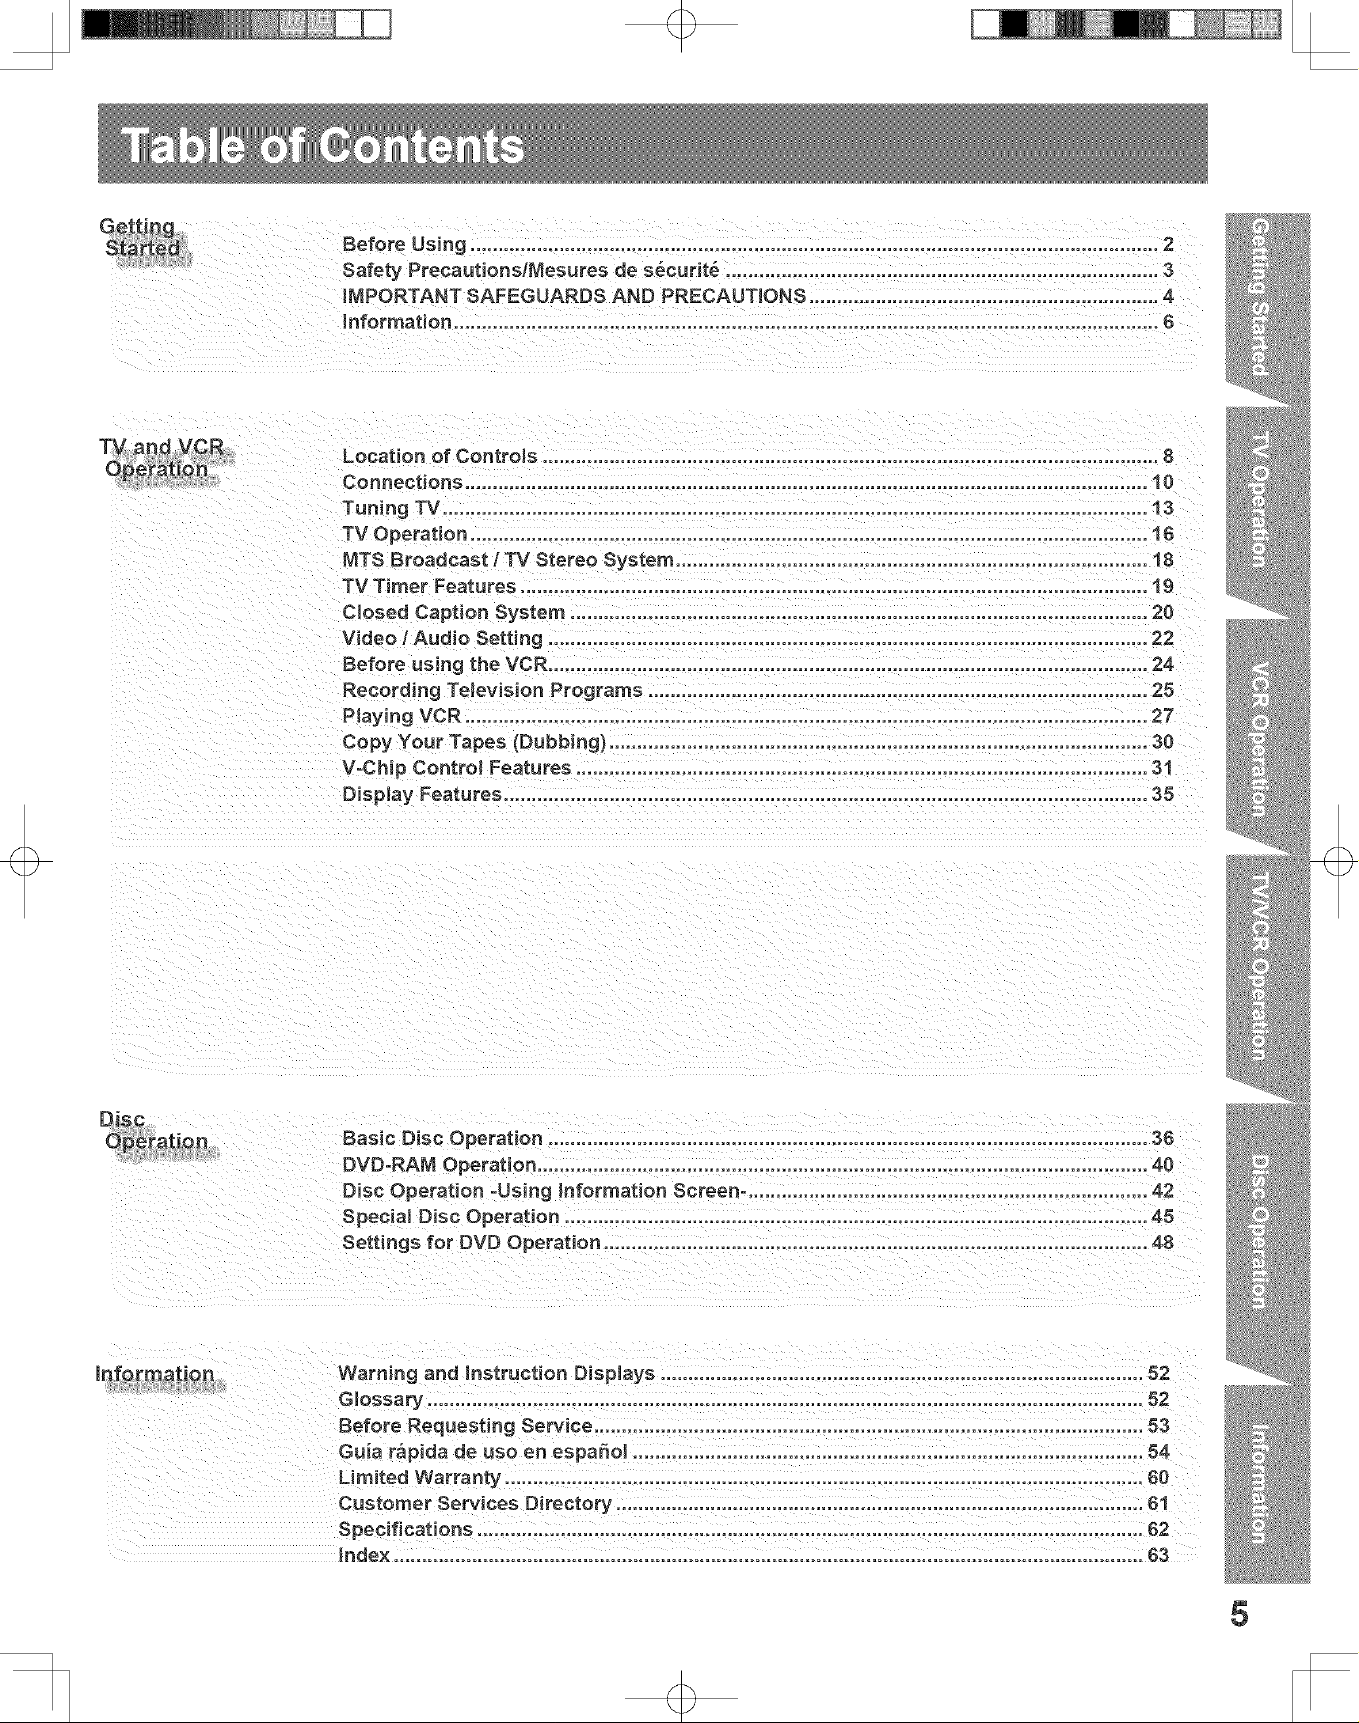
Location of ControJa ............................................................................................................... 8
Connections ........................................................................................................................... 10
Tuning TV ............................................................................................................................... 13
TV Operation ........................................................................................................................ 16
MTS Broadcast / TV Stereo System ..................................................................................... 18
TV Timer Features ................................................................................................................. lg
Closed Caption System ........................................................................................................ 20
Video / Audio Setting ............................................................................................................ 22
Before using the VCR ............................................................................................................ 24
Recording Television Programs ......................................................................................... 25
P_aying VCR ........................................................................................................................... 27
Copy Your Tapes (Dubbing) ................................................................................................. 30
V-Chip Control Features ....................................................................................................... 31
Diap|ay Features .................................................................................................................... 35
+
5
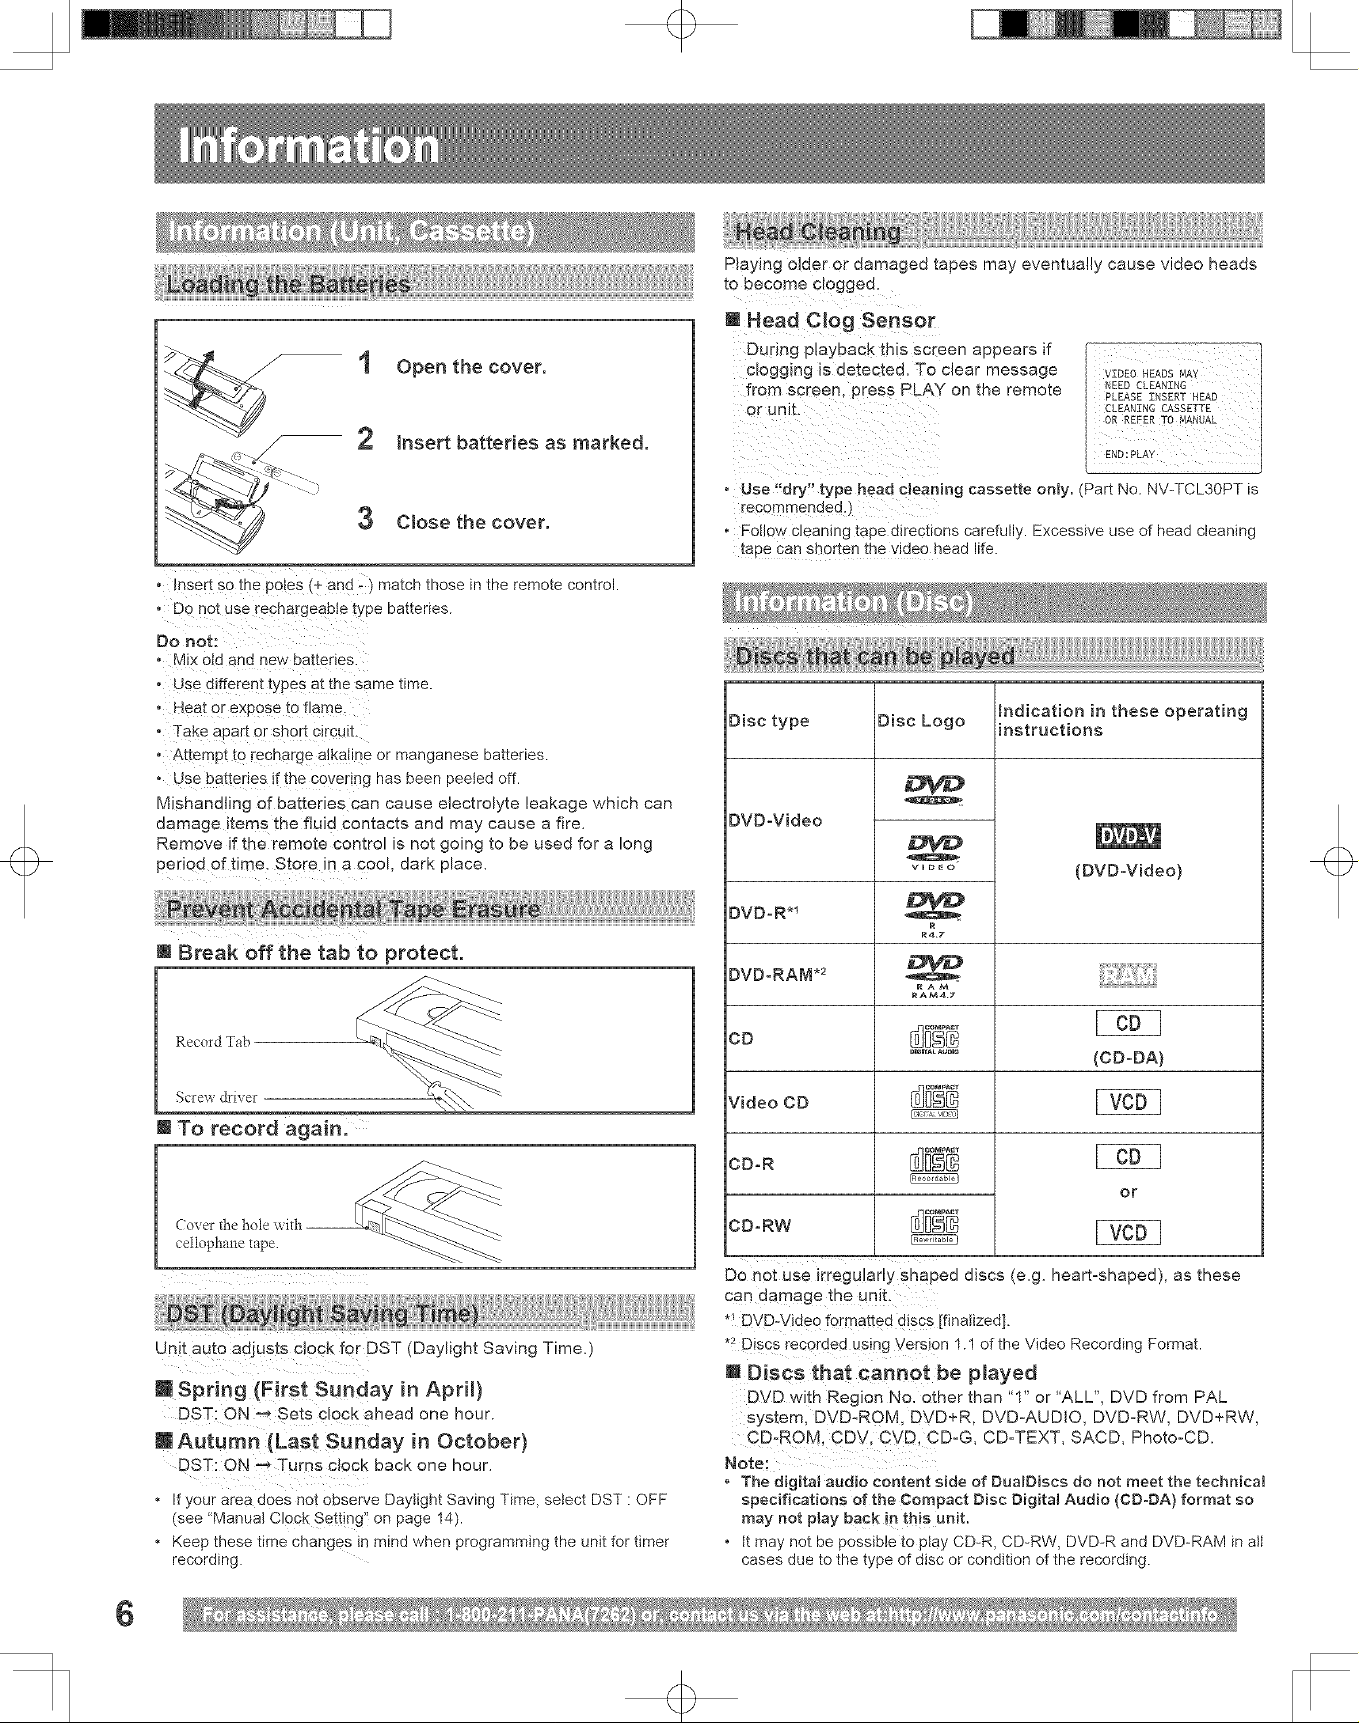
i Open the cover.
2
Insert batteries as marked.
3 Close the cover.
o insert s0 the poi;s (_and)match those in the remote control.
o Do not use rechargeab!e type batteries.
Do not:
o M!x 0Jd and new batter!es.
° Use d!fferent types atthe same time.
" Hea t °r exp°se t0 flame
o Take apart e[ short circuit.
. Attempt to recharg e a!kaiine or manganese batteries.
o Use batteries if the Covering has been peeled off.
Mishandling of batteries can cause electrolyte leakage which can
damage !terns the fluid contacts and may cause a fire.
Remove if the remote control is not going to be used for a long
per!Qd of tjrne Store !n a cool, dark place.
+
Playing o!der or damaged tapes may eventually cause video heads
tobec0mool0gged,
[] Head Clog Sensor
During playback this screen appears if
clogging is detected. To clear message
from screen, press PLAY on the remote
• Use ,dry!' type head cleaning cassette only. Part No. NV-TCL30PT is
recemmended:)
• Follow Cleaning tape directions carefully. Excessive use of head cleaning
tape can shorten the video head life.
Disc type Disc Logo [instructions
DVD°Video
vut_o
hdication in these operating
(DVD°Video)
@Break off the tab to protect.
Record Tab
Screw &i_er
[]
To record again.
Coverthe hole with --
cettopl-mlletape
Unit aUtO adjusts clock for DST (Daylight Saving Time.)
@Spring {First Sunday in April)
DST: ON-_ Sets clock ahead one hour.
@Autumn {Last Sunday in October)
DST: ON _ Turns clock back one hour.
• If your area does not observe Daylight Saving Time, select DST •OFF
(see "Manual Clock Setting'! on page 14).
• Keep these time changes in mind when programming the unit for timer
recording.
DVD.R*_
DVD-RAM .2
CD
Video CD
CD-R
CD-RW
_ e
Do
not use irregularly Shaped discs (e.g. heart-shaped), as these
can damage the un!L
*! DVD-Vjdeo formatted d!§cs [finalized].
.2 Disc s recorded usiag Versio n 1.1 of the Video Recording Format.
RA_
RAM4_7
_l_trAL _Ue
(CD-DA)
OF
[] Discs that cannot be played
DVD with Region No. ether than "1" or 'ALL", DVD from PAL
system, DVD_ROM, DVD+R, DVD-AUDIO, DVD=RW, DVD+RW,
CD-ROM, CDVt CVD, CD-G, CD=TEXT, SACD, Photo-CD.
Note:
* The digital audio content side of DualDiscs do not meet the technica_
specifications of the Compact Disc Digital Audio (CD-DA) format so
may not play back in this unit.
o it may not be possible to play CD-R, CD-RW, DVD-R and DVD-RAM in eli
cases due to the type of disc or condition of the recording.
6
+
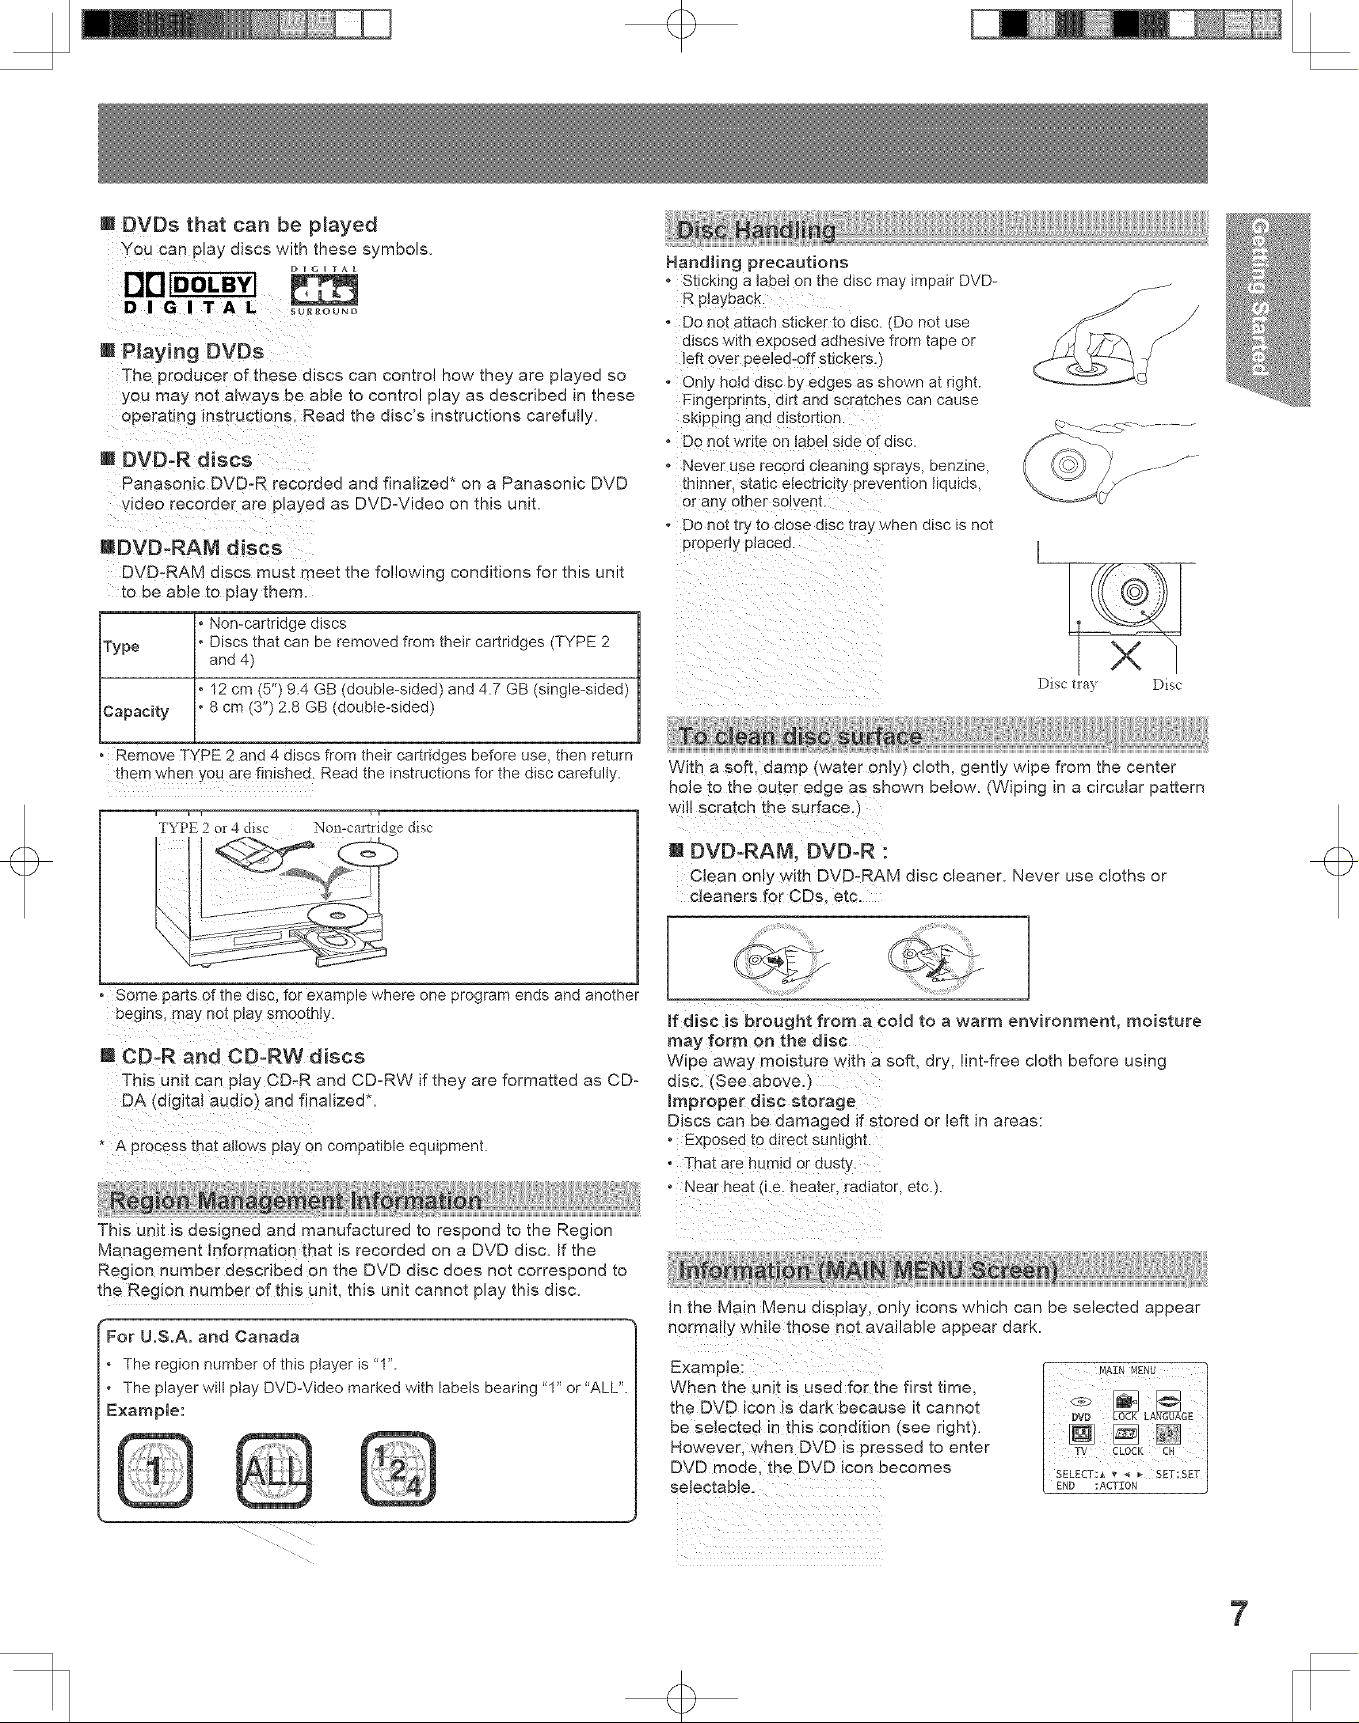
@DVDs that can be played
yo u can play discs with these symbols.
@Haying DVDs
The producer of these discs can contro! how they are played so
you may not always be able to control play as described in these
operating instructions, Road the disc's instructions carefully.
@DVD-R discs
Panasonic DVD-R recorded and finalized* on a Panasonic DVD
vide O recorder are played as DVD-Video on this unit.
mDVD- Mdiscs
DVD=RAM discs must meet the following conditions for this unit
to be aNe to play them.
Non-cartridge discs
Type Discs that can be removed from their cartridges (TYPE 2
Capacity 8 cm (3") 2.8 GB (double-sided)
and4)
12 cm (5") 9.4 GB (double-sided) and 4.7 GB (single-sided)
+
Handling precautions
• Sticking a labe ! on the disc may impair DVD-
R playback,
• Do not attach sticker to disc. (Do not use
discs with exposed adhesive from tape or
left over peo!ed-0ff stickegs,)
• Only hold disc by edges as shown at right.
Fingerprints, dirt and scratches can cause
sk!pp!ng and d!st0rt!0n ,
" Do not write on !abe! s!de Of disc.
• Never use record cieaning sprays, benzine,
thinner, static electricity prevention liquids,
orany 0the[ so!vent. :
• Do not try to close disc tray when disc is not
propedy placed.
Disc tra} Disc
• Remove TYPE 2 and 4 discs from their cartridges before use, then return
them when YOUare finished. Read the instructions for the disc carefully.
, _ T T,
TYPE 2 or 4 disc Non-cartridge disc
• Some parts of the disc, for example where one program ends and another
begins, may not play smoothly.
U CD=R and CD-RW discs
This unit Can play CD.R and CD-RW if they are formatted as CD=
DA (digital audio) and finalized*.
* A process that att0ws play on compatible equipment.
This unit is designed and manufactured to respond to the Region
Management information that is recorded on a DVD disc. If the
Region number described on the DVD disc does not correspond to
the Region number of this unit, this unit cannot play this disc.
For U.S.A. and Canada
. The region number of this player is "1".
. The player wilt play DVD-Video marked with labels bearing "1" or "ALL".
Example:
With a soft, damp (water only) cloth, gently wipe from the center
hole to the outer edge as Shown below. (Wiping in a circular pattern
w!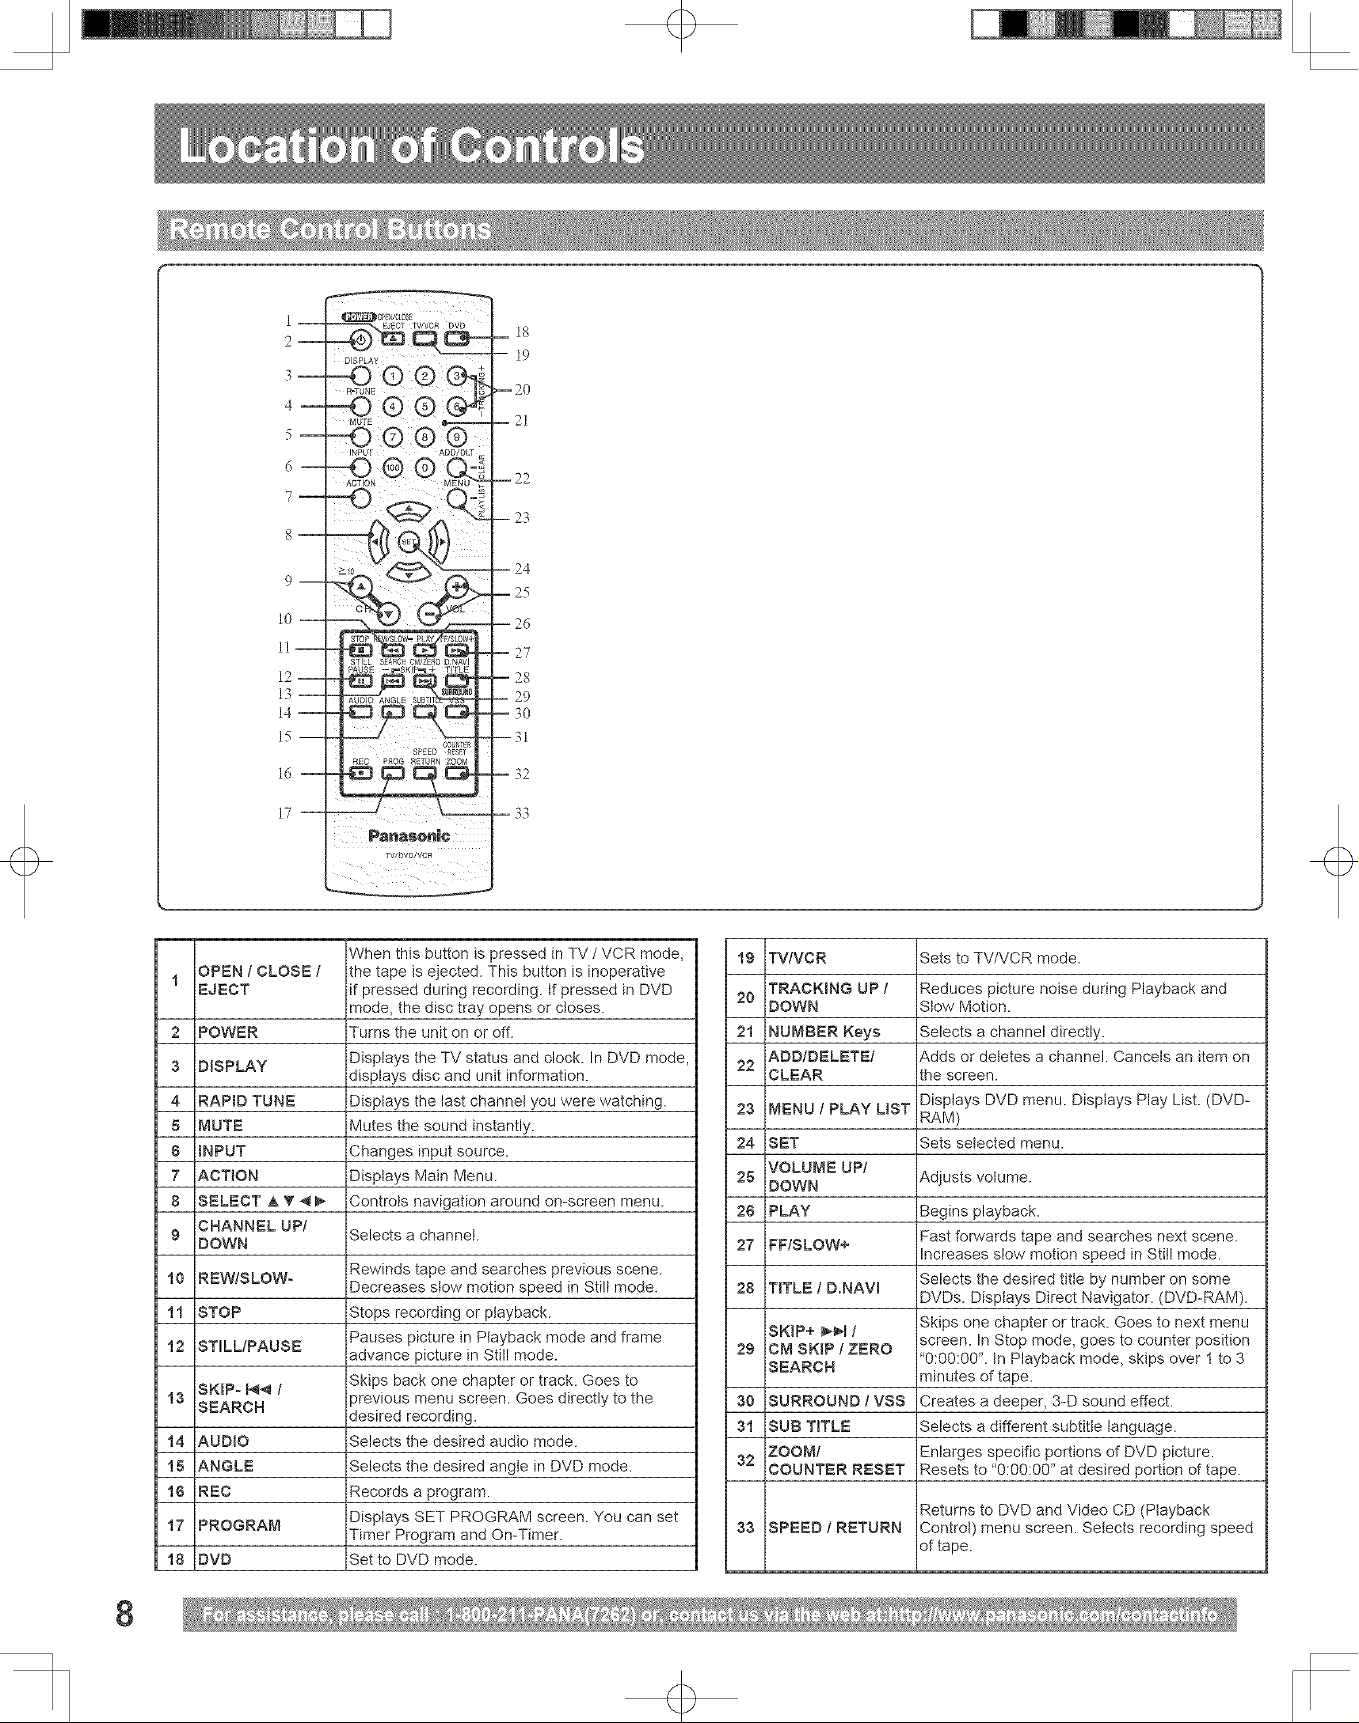
2--
3--
4--
5--
G--
7--
8--
9 m
lO-
ll-
12--
13--
14--
15--
+
1 --
--20
-- 21
-- 22
-- 23
-- 24
--25
--26
30
16--
17--
Panaso_i¢
TW_W/VC_
-- 32
-- 33
iiiii i_/_ii ii
OPEN / CLOSE / the tape is ejected. This button is inoperative
t
EJECT if pressed during recording, tf pressed in DVD
2 POWER Turns the unit on or off.
3 D_SPLAY Displays the TV status and clock. In DVD mode
4 RAPID TUNE Displays the last channet you were watching.
5 MUTE Mutes the sound instantly.
6 INPUT Changes input source.
7 ACTION Displays Main Menu.
8 SELECT _,'_ 4_ Controls navigation around on-screen menu.
CHANNEL UP/
9 Selects a channel.
DOWN
10 REW/SLOW-
11 STOP Stops recording or playback.
12 STILL/PAUSE Pauses picture in Ptayback mode and frame
SKIP- _ / Skips back one chapter or track. Goes to
13 SEARCH _revious menu screen. Goes directly to the
14 AUDIO Selects the desired audio mode.
15 ANGLE Selects the desired angte in DVD mode.
15 REC Records a program.
17 PROGRAM Displays SET PROGRAM screen. You can set
18 DVD Set to DVD mode.
When this button is pressed in TV/VCR mode,
mode, the disc tray opens or closes.
displays disc and unit information.
Rewinds tape and searches previous scene.
Decreases stow motion speed in Still mode.
advance picture in Still mode.
desired recording.
Timer Program and On-Timer.
19 TV/VCR Sets to TV/VCR mode.
TRACKBNG UP / Reduces picture noise during Playback and
25
DOWN Stow Motion.
21 NUMBER Keys Selects a channel directly.
ADD/DELETE/ Adds or deletes a channel. Cancels an item on
22
CLEAR the screen.
25 MENU / PLAY UST RAM)
24 SET Sets selected menu.
VOLUME UP/
25 DOWN Adjusts volume.
25 PLAY Begins playback.
27 FFtSLOW+ Fast forwards tape and searches next scene.
28 TITLE ID.NAVI
SKIP+ _ / Skips one chapter or track. Goes to next menu
25 CM SKIP/ZERO
SEARCH "O:OO:0O".tn Playback mode, skips over 1 to 3
30 SURROUND t VSS Creates a deeper, 3-D sound effect.
31 SUB TITLE Selects a different subtitle language.
ZOOM/ Enlarges specific portions of DVD picture.
32
COUNTER RESET Resets to "O:00:00" at desired portion of tape.
33 SPEED ! RETURN Control) menu screen. Selects recording speed
Disptays DVD menu. Displays Play List. (DVD-
Increases slow motion speed in Still mode.
Selects the desired title by number on some
DVDs. Displays Direct Navigator. (DVD-RAM).
screen. In Stop mode, goes to counter position
minutes of tape.
Returns to DVD and Video CD (Playback
of tape.
8
4
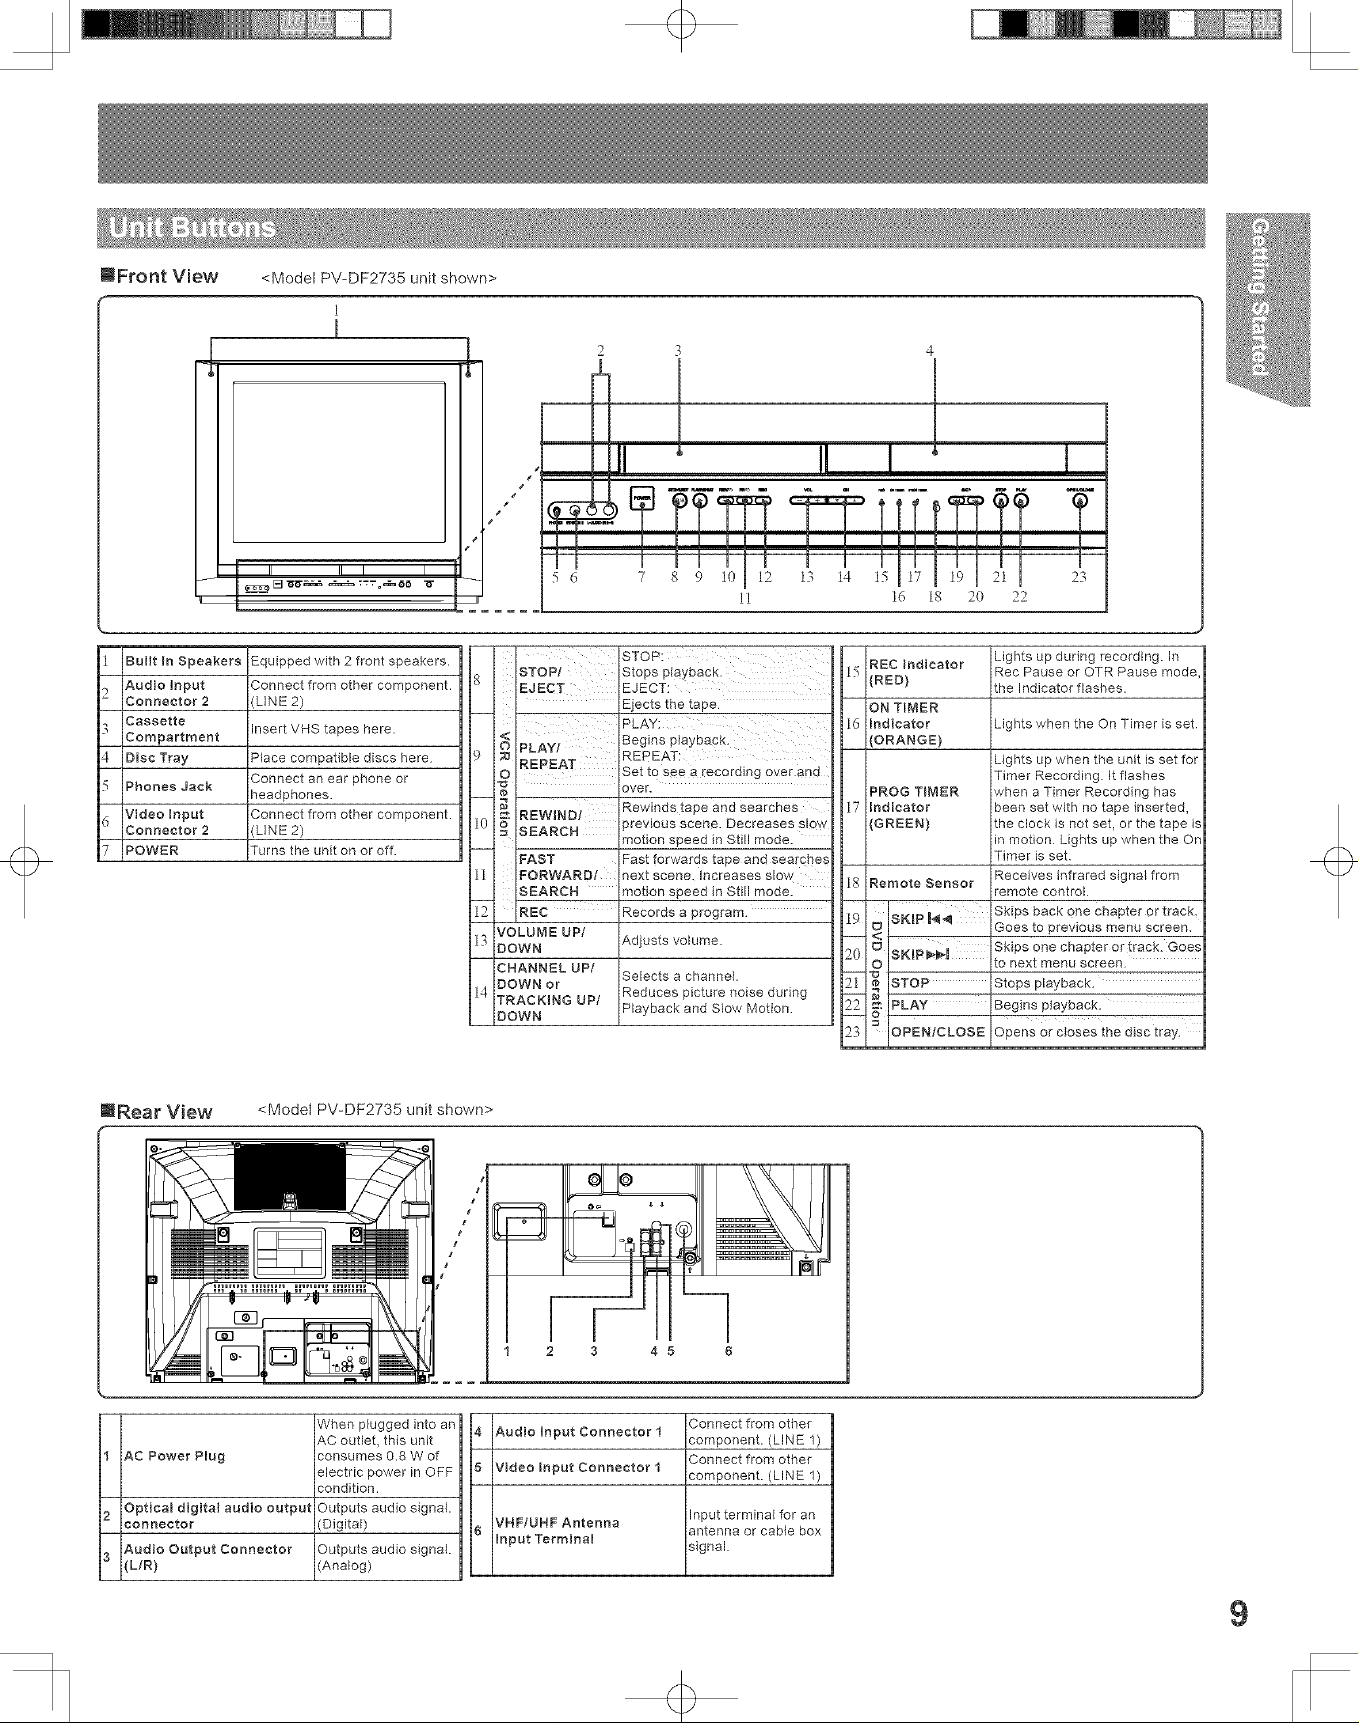
mFront View <Model PV-DF2735 unit shown>
1
1
q>
m
1
Built In Speakers Equipped with 2 front speakers.
Audio Input Connect from other component.
,)
Connector 2 (LINE 2)
Cassette
Compartment Insert VHS tapes here.
4
Disc Tray Place compatible discs here
5
Phones Jack
Video Input Connect from other component.
d
Connector 2 (LINE 2)
7
POWER Turns the unit on or off.
Connect an ear phone or
headphones.
IRear View <Model PV-DF2735 unit shown>
5 6 7 8 9 10 12 13 14 15
11 16 18 2(} 22
STOP! Stoes oiayoacK
g
EJECT EJECT
< PLAY
I PLAY! Begins p_ayoacK
.3
O REPEAT REPEAT:
10
REWIND/ previous scene. Decreases s_ow
SEARCH motion seeed in Still mode.
FAST Fast forwards tape and searches
FORWARD/ next scene, increases slow
11
SEARCH motion speed in Still mode.
REC Records a program
VOLUME UP/
13
DOWN Adjusts volume.
CHANNEL UP/
DOWN or
14
TRACKING UP/ Reduces picture noise during
DOWN Playback and Slew Motion
STOP:
Elects the tape
over.
Rewinds taee one searcnes
Set to see a recoromg over ano
Selects a channel.
23
REC Indicator
15
_RED; the Indicator flashes.
ON TIMER
ld
Mdicator Lights when the On Timer is set
(ORANGE}
PROG TIMER when a Timer Recording has
17
Mdicator been set with no tape inserted,
{GREEN) the clock is not set, or the tape is
18
Remote Sensor
19
_ IB},_.lp ,,4_ Skips back one chapter 0£ traok-
2O
_ Goes to previous menu screen.
_ Stops playback.
Beoinsplayback.
I
23
IOPENtCLOSE Opens or tray.
I
Lights up during recording. In
Rec Pause or OTR Pause mode
Lights up when the unit is set for
Timer Recording. It flashes
in motion Lights up when the On
Timer is set
Receives infrared signal from
remote control
Skips one chapter or track. Goes
_o next menu screen
closes the d_sc
w
1 AC Power Plug
2 Optical digital audio output
connector
Audio Output Connector
3 (L/R)
When plugged into an
AC outlet, this unit
consumes 0.8 W of
electric power in OFF
condition.
Outputs audio signal.
(Digital)
Outputs audio signal.
(Analog)
I
/
I
1 2 3
4 Audio Input Connector 1
5 Video Input Connector 1
VHF/UHF Antenna
6
Input Terminal
Connect from other
component. (LINE 1)
Connect from other
component. (LINE 1)
Input terminal for an
antenna or came box
signal
+
9
+
Notes on connections
* Turn off the power supply for all components before making any connections.
* If the cables necessary for connecting a component to the system are not included with the component or available as an option, you may need to
fashion a cable to suit the component concerned.
L Read the nstruct on manua for each system component carefu y before connect ng t.
Connects VCRs and other perlpnera! equipment
m AV Input terminal 1 is used
Or--;ertightening ,,_ut type" RF coaxial cabJes may damage
ks. Finger tighten on!y.
i Antenna Connection
Connect the cane from the Antenna to the VHF/UHF terminal
on the unit.
UHF
Antenna
!/i
!i_i__i__ii_i_iiiii_i_i_!_iii__i__!i_iiii____
m Cable Connection
Connect the cable supplied by your local cane company
to the VHF!UHF terminal on the unit.
i i i _I i
Cable Box
o;_ o ;JT L
$ $ $
Notes:
- Similar connections are available at the "1, 2" AV input terminals.
o AV Input termH- al 2 is }oca_ed on the front of the unit.
10
Note to CABLE system installer:
This reminder is provided to call the CABLE (Cable TV) System
Installer's attention to Article 820°40 of the NEC that provides
guidelines for proper grounding and, in particular, specifies that
the cable ground shall be connected to the grounding system of
the building, as dose to the point of cable entry as practical.
+

+
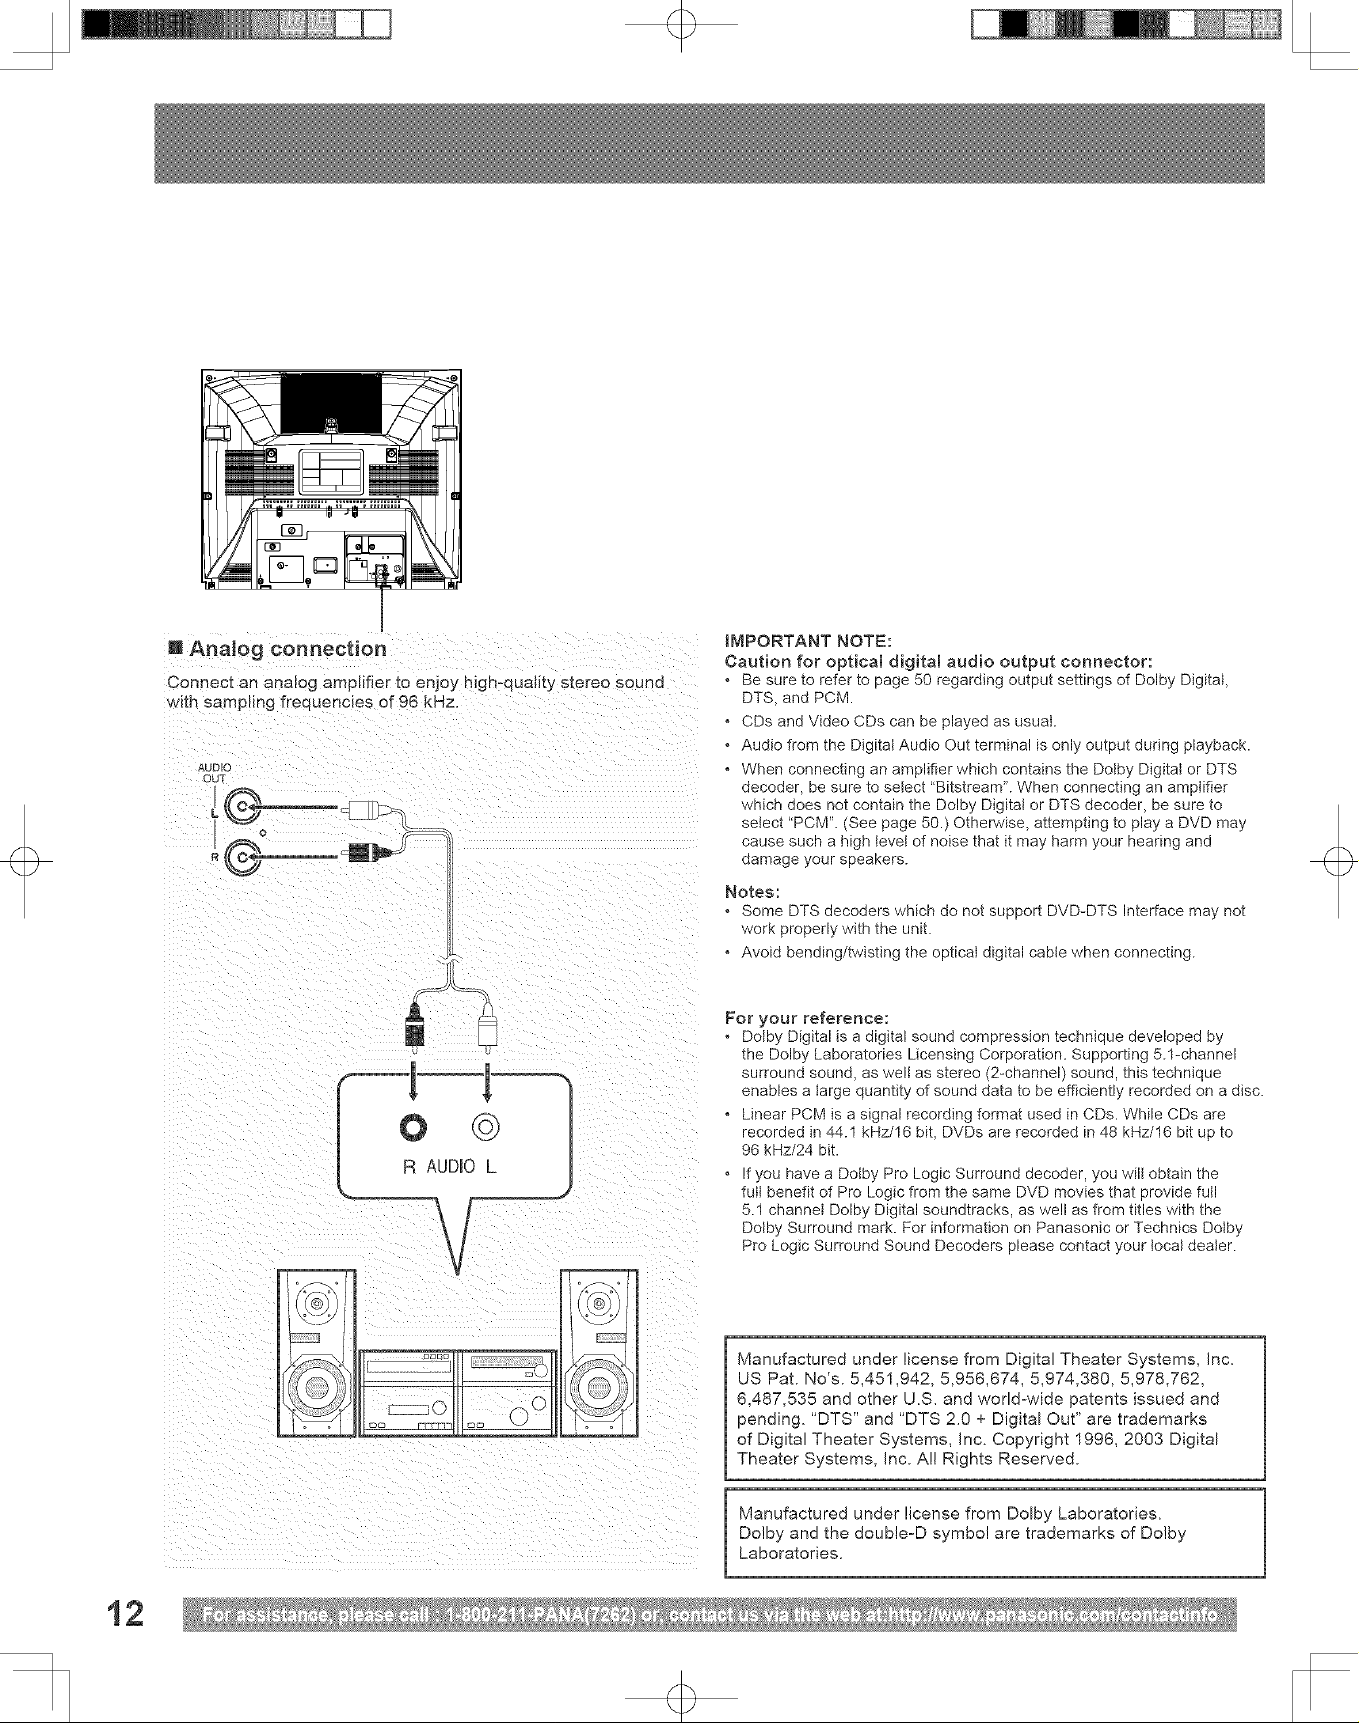
Enjoy the powerful movie theater and hall-like sound available with multiple channel audio found on DVDs by connecting an amplifier and
speakers. There are two types of connection, digital and ana!og.
Don't place the unit on amplifier or
equipment that may become hot.
The heat can damage the unit.
8 Digital connection
Connect an AV ampJifier with Dolby Digital or DTS
decoders
Enjoy "Dolby Digital" or "DTS" surround sound.
Firmly connect the
cable to the connector.
i
Connect a Digitat amplifier
Smart one-line connection Js possible.
@
OPTICAL
o.. _ ....... = Amplifierwithbmk m DolbyD1glta]
orDTS decoders.
i
i
| Speakers (example)
Please see amplifier manuM
t_r speaker requlrellrents.
+
((@))
lYh_
b.__J4;
_C 0
{(®)II
d-__//
11
+
m AnaJog connection
Conn _c_ an analog amplifier to enjoy high-quality s_ereo souno
with sampling frequencies of 96 kHz.
AUDIO
OUT
IMPORTANT NOTE:
Caution for optical digital audio output connector:
, Be sure to refer to page 50 regarding output settings of Dolby Digital,
DTS, and PCM.
, CDs and Video CDs can be played as usual.
, Audio from the Digital Audio Out terminal is only output during playback.
, When connecting an amplifier which contains the Dotby Digital or DTS
decoder, be sure to setect "Bitstream". When connecting an amplifier
which does not contain the Dolby Digitat or DTS decoder, be sure to
setect "PCM'L (See page 50.) Otherwise, attempting to play a DVD may
cause such a high level of noise that it may harm your hearing and
damage your speakers.
Notes:
, Some DTS decoders which do not support DVD-DTS Interface may not
work properly with the unit.
, Avoid bending/twisting the optical digital cabte when connecting.
For your reference:
, Dotby Digital is a digital sound compression technique developed by
the Dolby Laboratories Licensing Corporation. Supporting 5.l-channel
surround sound, as well as stereo (2-channel) sound, this technique
enables a large quantity of sound data to be efficiently recorded on a disc.
, Linear PCM is a signal recording format used in CDs. While CDs are
recorded in 44.1 kHz/16 bit, DVDs are recorded in 48 kHz/16 bit up to
96 kHz/24 bit.
, If you have a Dolby Pro Logic Surround decoder, you will obtain the
full benefit of Pro Logic from the same DVD movies that provide futl
5.1 channel Dolby Digital soundtracks, as well as from titles with the
Dotby Surround mark. For information on Panasonic or Technics Dotby
Pro Logic Surround Sound Decoders please contact your local dealer.
12
Manufactured under license from Digital Theater Systems, inc.
US Pat. No's. 5,451,942, 5,956,674, 5,974,380, 5,978,762,
6,487,535 and other U.S. and worldowide patents issued and
o
pending. "DTS" and "DTS 2.0 + Digital Out" are trademarks
of Digital Theater Systems, inc. Copyright 1996, 2003 Digital
Theater Systems, Inc. All Rights Reserved.
Manufactured under license from Dolby Laboratories.
Dolby and the doubleoD symbol are trademarks of Dolby
Laboratories.
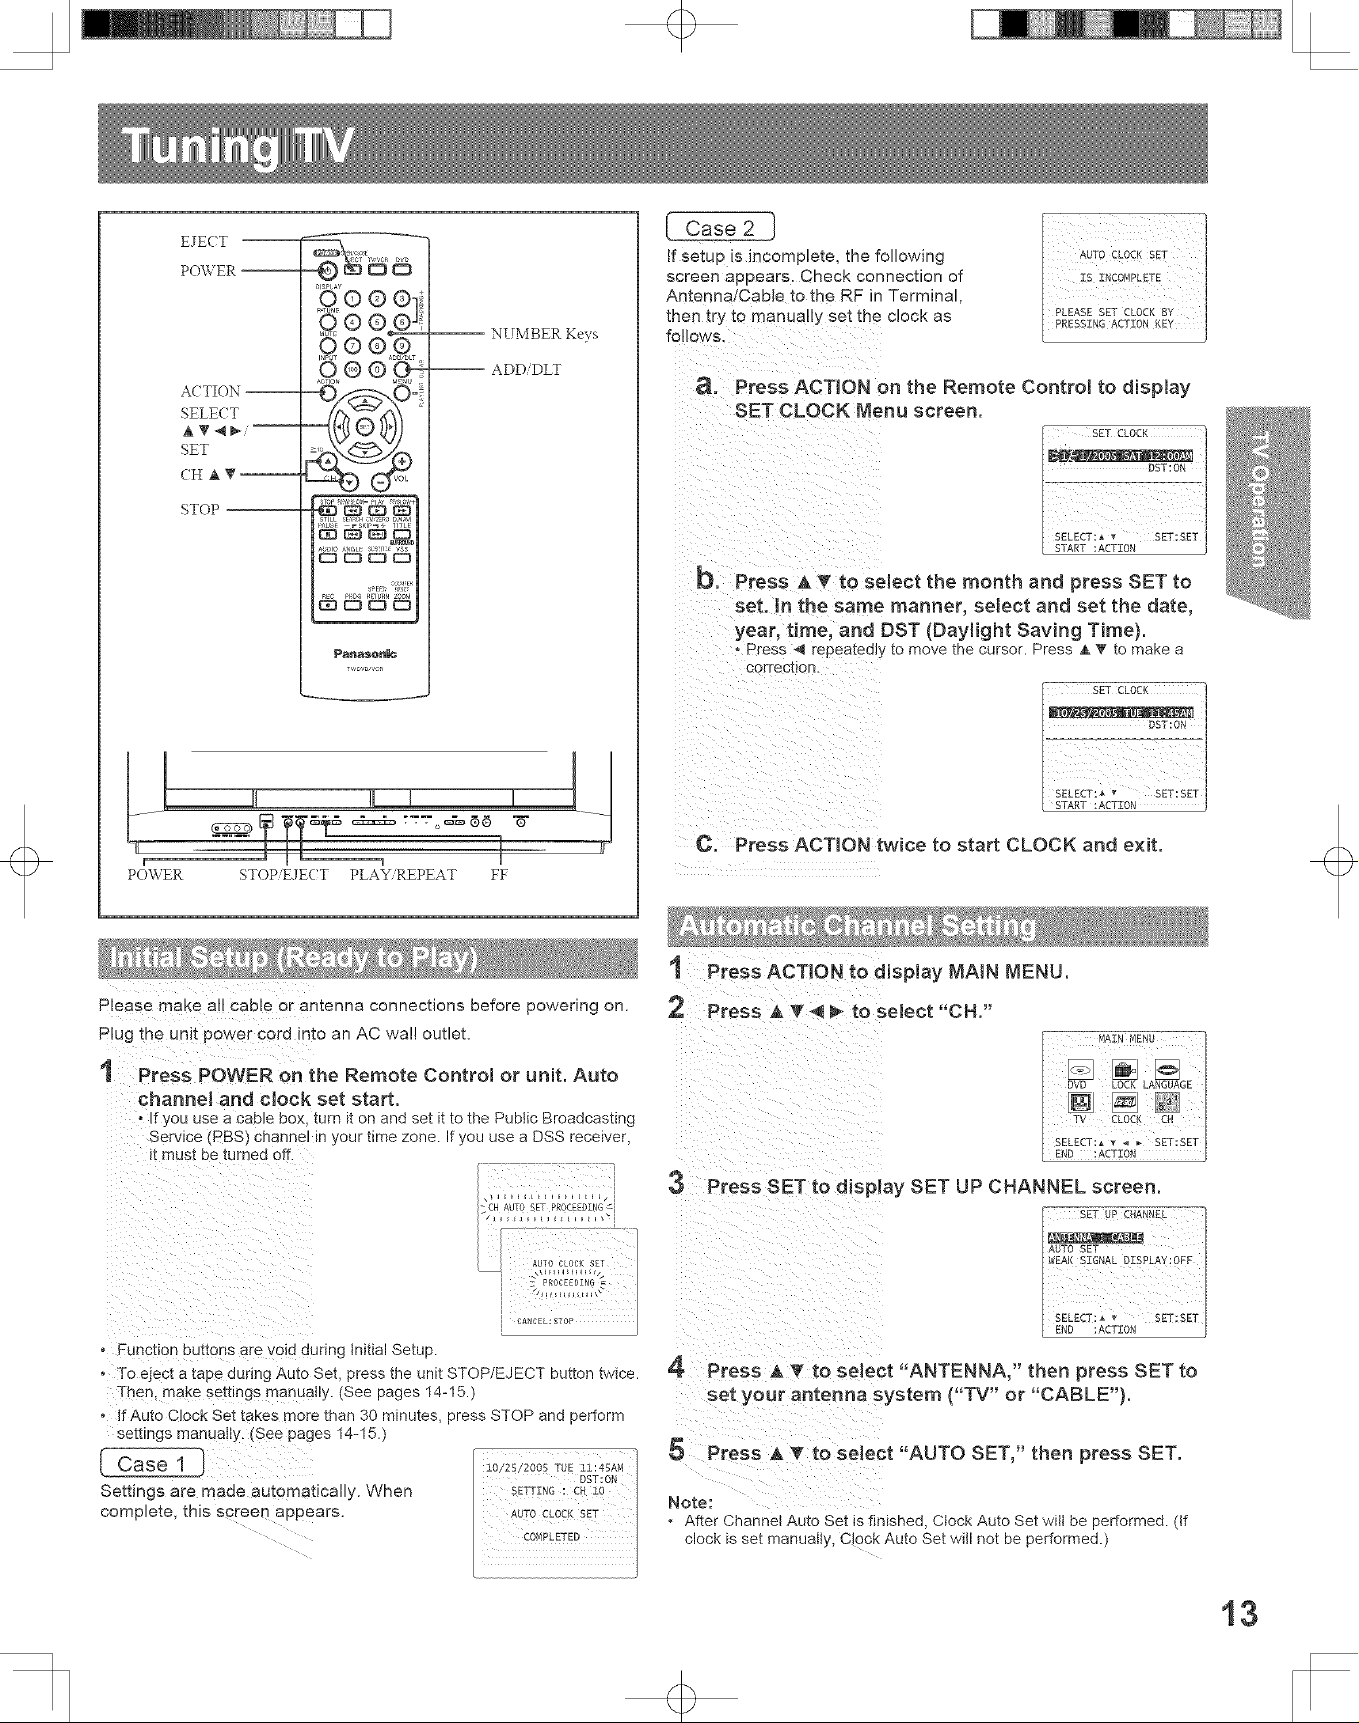
+
EJECT
POV, ER --
A( TION --
SELE( T
SET
(H A _ --
STOP
_ls_t_r
o ®o el_
°6rooxo !
90 O_PL_
OOO_
_anaso_{_
£
{ Case 2 }
If setup is incomplete, the following
screen appears. Check connection of
Antenna/Cable to the RF in Terminal
then try to manuaNy set the clock as
NUMBER Keys
-- ADD DLT
a. Press ACTION on the Remote Control to display
SET CLOCK Menu screen.
b. PreSSAVtoselectthemonthandpressSETto
set. In the same manner, select and set the date,
year, timel and DST (Day{ight Saving Time).
. Press _ repeatedly to move the cursor. Press ,&_' to make a
correction.
__T_ _=_ _-o_
POWER STOP E,1ECT PLAY, REPEAT FF
Please make a!! cable or antenna connections before powering on.
Plug the un!t power cord !nto an AC wal! outlet.
t Press POWER onthe Remote Controm or unit. Auto
channel and clock set start.
• If you use a cable box, turn it on and set it to the Public Broadcasting
Service (PBS) channel in your time zone. If you use a DSS receiver,
it must be turned off.
o Function buttons are void during tnitial Setup.
. To eject a tape during Auto Set, press the unit STOP/EJECT button twice.
Then, make settings manually. (See pages 14-15.)
o If Auto Clock Set takes more than 30 minutes, press STOP and perform
settings manuaiiy. (see pages 14-15.)
[ Case 1
Settings are made automatically. When
complete, this s_reen appears.
- 7 77 T 77:7q
_Ji_LLIJE_iE_iII
CH AUTO SET PROEEEDI_G _i
I _ _oc_ _ E
C. Press ACTION twice to start CLOCK and exit.
1 Press ACTION to display _AIN MENU.
Press _ '_'4 m to select "CH."
Press SET to display SET UP CHANNEL screen.
AUTO SET
WEAl( SZGNAL OZSPLAY:OFF
si_2g_7_L 1
SELECT: • _ SET:SET
:ACTEON
4 Press _ _' to select "ANTENNA/' then press SET to
set your antenna system ("TV" or "CABLE").
Press _ _' to select "AUTO SET," then press SET.
Note:
• After Channet Auto Set is fln_shec, Clock Auto Set witl be performed. (tf
clock _sset manuaIly, C_OCKAuto Set wfi not be performed.)
4
13
+
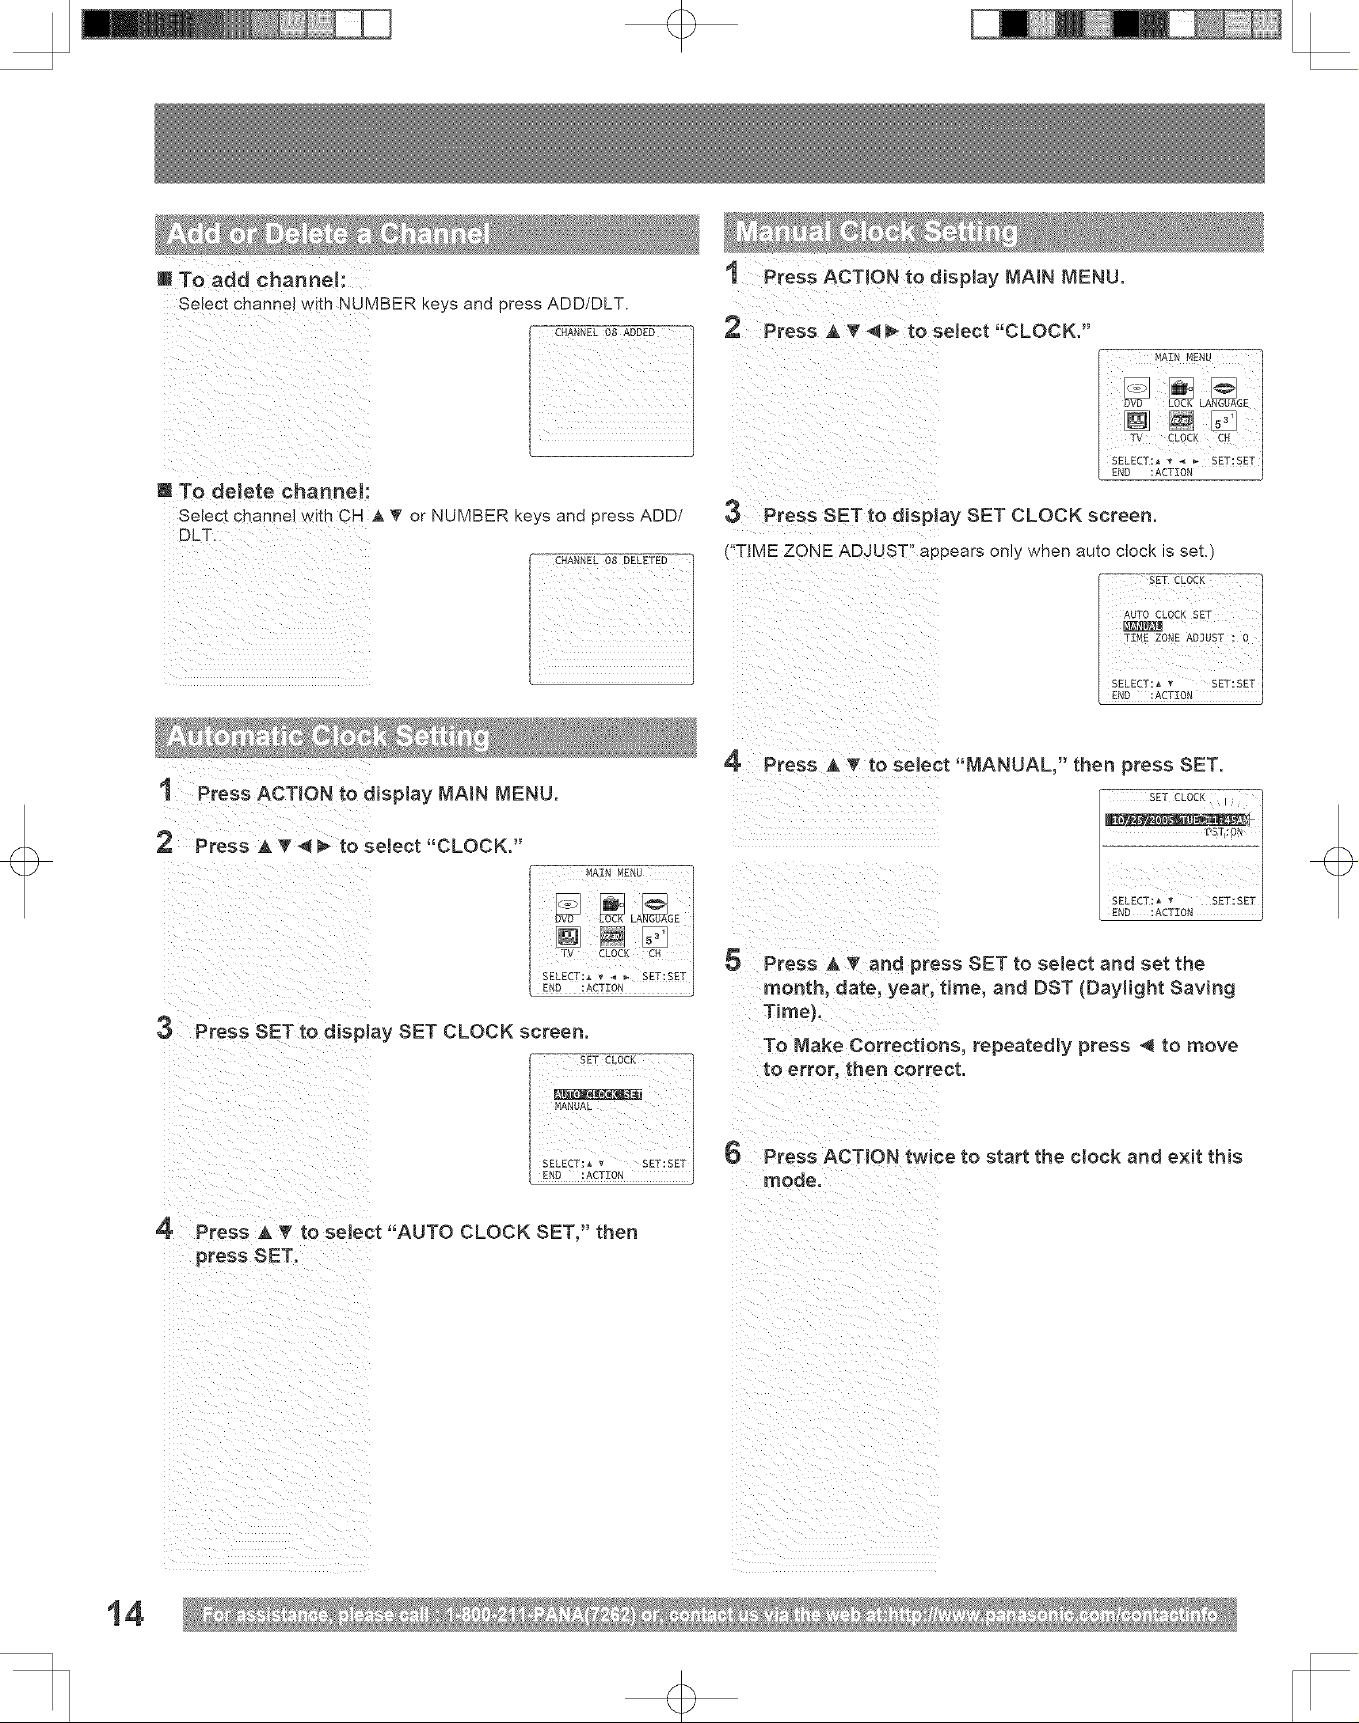
U To add channek
Select channel with NUMBER keys and press ADD/DLT.
i/i_ii:_i_i?_iiii__iiiii_i_i_
m To delete channeh
Select channel with CH JkT or NUMBER keys and press ADD/
DLT.
iiiiii
1 Press ACTION to display MAIN MENU.
1 PressACT!O.t0d_spmayMAI.ME.U.
2 Press A _ ,_ _ to seJect "CLOCK,"
3 PressSETt0d!Sp!aySETCLOCKscreen.
("T ME ZONE ADJUST'! appears only when auto clock is set.)
TIME ZONE ADJUST :3_ iSELECT: • • SET:SET
ENO :ACTZON
4 Press _ T to select "MANUAL," then press SET.
SET CLOCK I ,
mmmm_%_
....... _ MENU
3 PressSETtOd_sp!aySETCLOCKscreen.
SET CLOCK
MANUAL
SELECT: • v SET:SET
E_D :
4 Press_v toseJect"AUTOCLOCKSET,"then
press SET_
ENoSELECT:ACTZ0N"' sE_SET
5 Press A Y and press SET to select and set the
month' date Year, time, and DST (Daylight Saving
To Make Corrections, repeatedly press 4 to move
to error, then Correct.
6 PressACT!ONtwicetostarttheolookande×itthis
mode.
14

Onb when Auto Clock is set,)
1 Press ACTION to display MAIN MENU.
2 Press _ T _i _ to select "CLOCK."
3
Press SET to display SET CLOCK screen.
SET CLOCK
AUT0 CLOCK SET
+
[ French
For English
SELECT:_ v SET:SET
END :ACTION ]
4
Press A _ to select "T_ME ZONE ADJUST" and
press SET to subtract or add hour(s) as necessary.
AUTO CLOCK SET
[_IANUAL
SELECTI • t_ SET:SET
5 Press ACTION twice to exit.
Note:
, If set manua_} [_mezone cues not appear.
SET CLOCK
For Spanish
_i_I:_(!i_ _ _i_ii__ii_
For French
ii_ii(_))iii_)i_ilI/i((_i_ii__(iii!_i_i_i_i_!i
i iiI i i
4 Press ACTION to exit.
Returns to factory setting. Use if relocating unit, or if Initial Setup
needs to be redone.
• Make sure a tape a_d/or disc is not inserted in unit.
I Turn the unit Power on.
2 Hold down both PLAY/REPEAT and FF on the unit
for more than 5 seconds.
, Thepowerwitlshutoff,
3 Perform"J"!t!aisetup"onpage13.
+
15
RAPID --
TUNE
MUTE --
nX'PUT --
ACTION --
SELECT
SET
CH A T --_
I==
DISPLAY
ooo
®e ®]i
NUMBER
-- keys
-- 100 key
_===\ OL+ -
+
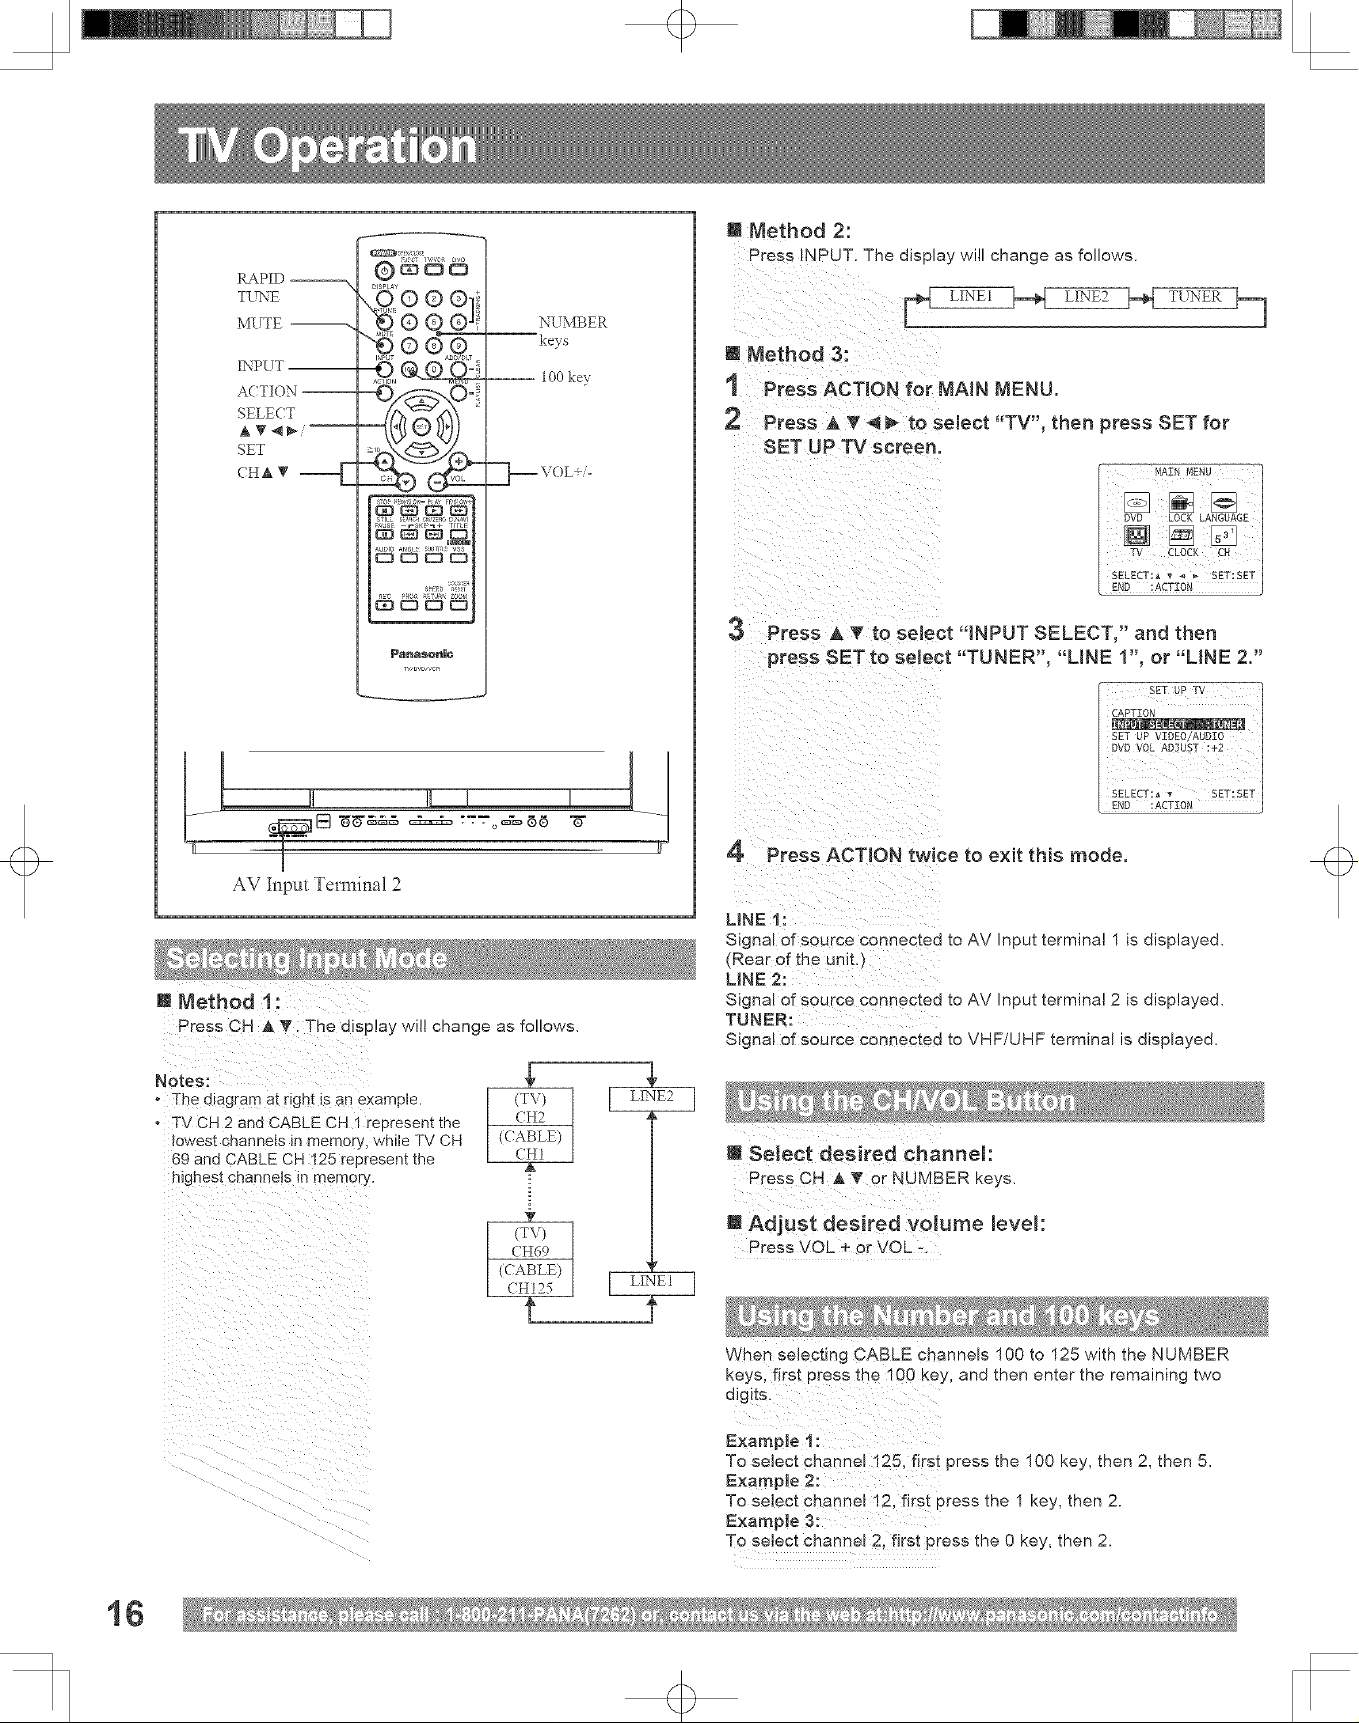
m Method 2:
Press INPUT. The aisp_ay will change as follows.
[_ LIN]2, _.._ L]-X!]22 _._{ TLTNER _..]
It Method 3:
1 Press ACTION for NA_N MENU.
Press A _' _ _ to select "TV", then press SET for
SET UP TV screen,
w, bv_,,cn
AV Input Tem_inal 2
Press CH _ V: The display will change as follows.
°Th e diagra m at right is an example.
o TV CH 2 and CABLE CH 1 represent the
lowest channels in memory, while TV CH
69 and CABLE CH 125 represent the
highest channels in memory.
3 Press A _" to seJect "INPUT SELECT," and then
press SET to select "TUNER", "LINE 1", or "LINE 2."
4 Press ACTION twice to exit tNs mode.
LINE 1:
Signal of source connected to AV Input terminal 1 is displayed.
(Rear of the unit,
UNE 2:
Signal of source connected to AV Input terminal 2 is displayed.
TUNER:
Signal of source connected to VHF/UHF terminal is displayed.
m Select desired channek
Press CH & _ or NJMBER keys.
1B
(H69
(CABLE)
(T\) t
(H125
m Adjust desired volume JeveJ:
Press VOL ÷ or VOL -
When selecting CABLE cnannels 100 to 125 with the NUMBER
<eys, first press me 100 key, and then enter the remaining two
digits.
Exampie 1:
To select channel 125. firs[ press the 100 key, then 2, then 5.
Example 2:
To select channel !2. firs[ press me 1 key, then 2.
Example 3:
To select channel 2, first press me 0 key, then 2.
+
+
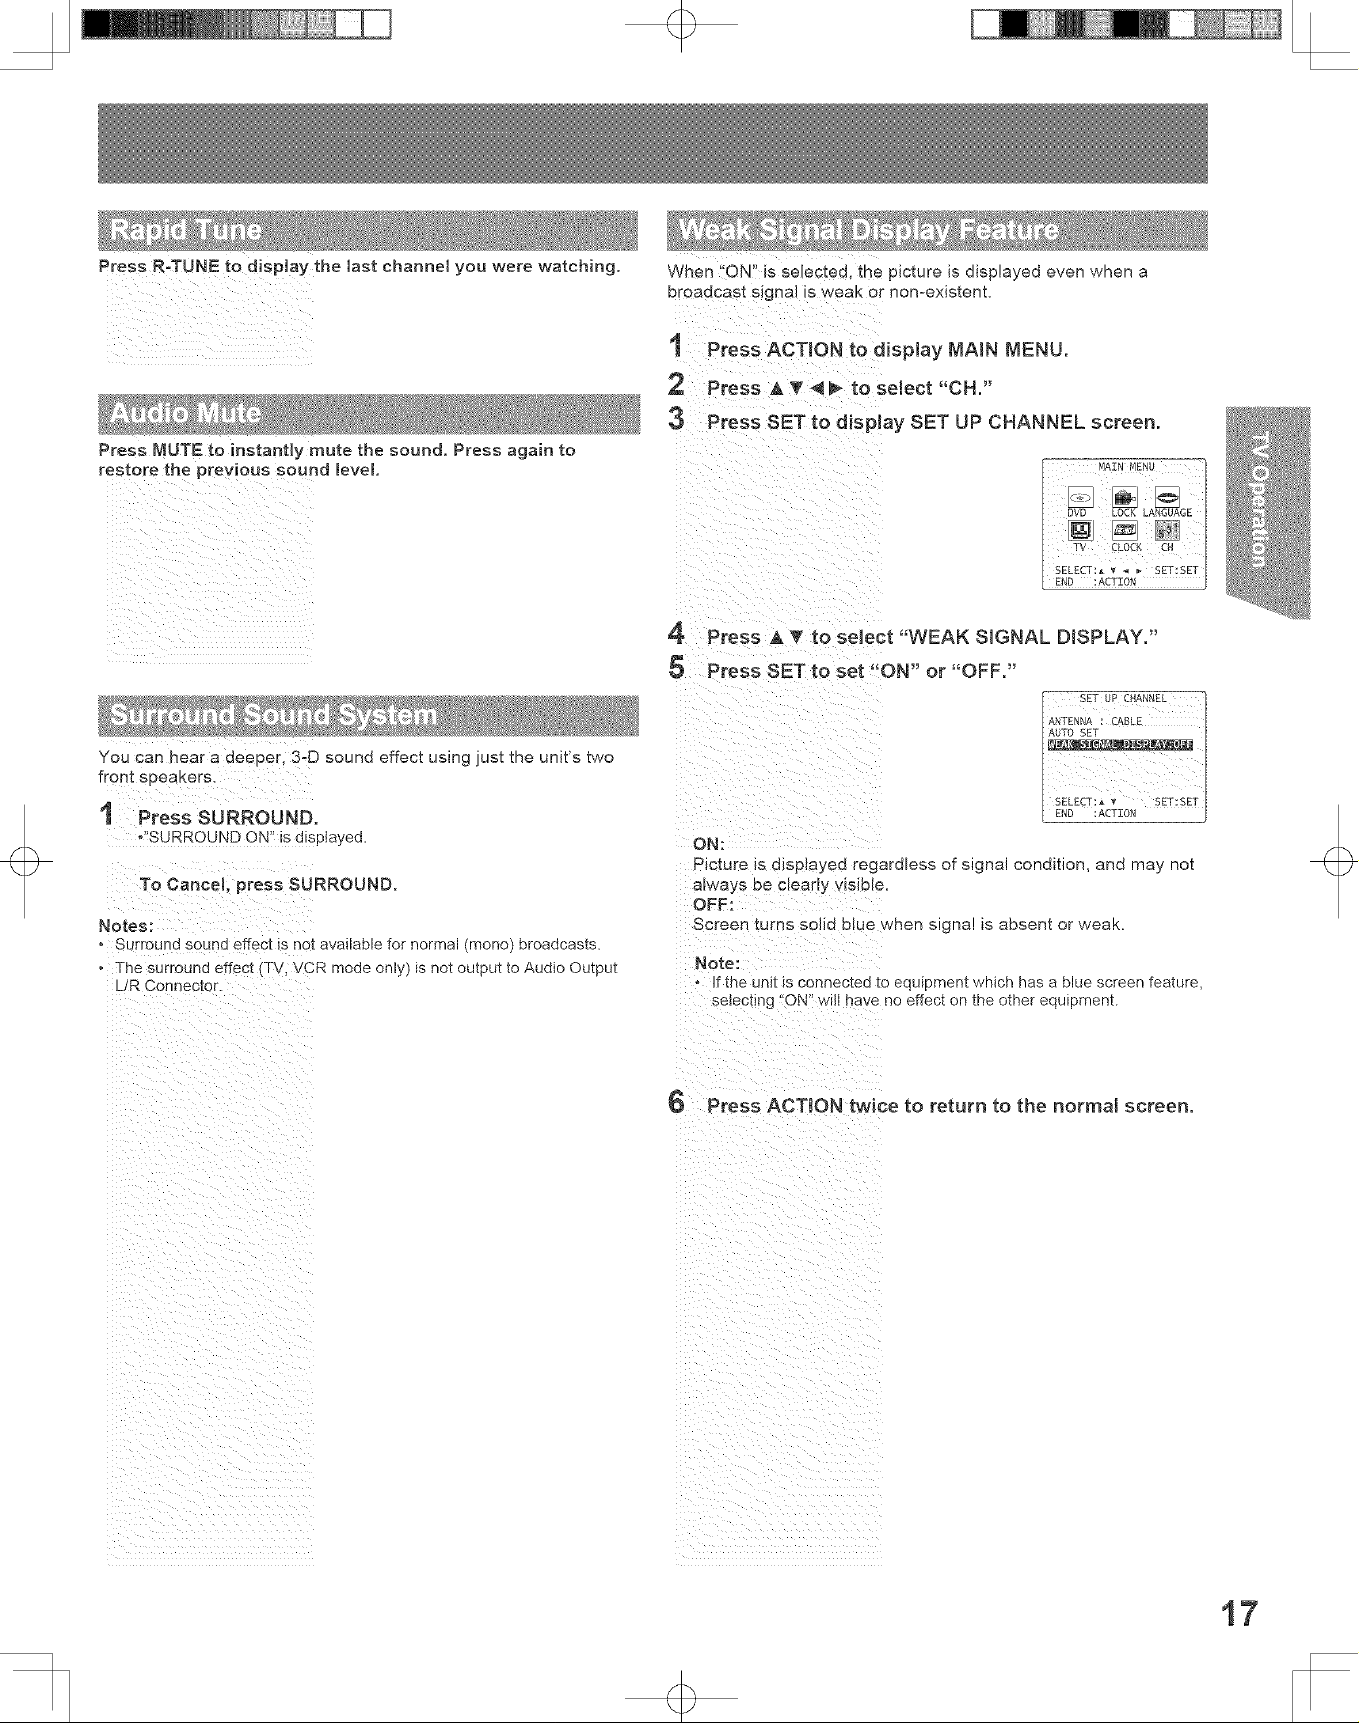
When ON" is selected, the picture is displayed even when a
eroaocast slgna is NeaK or non-existent.
t Press ACTION to display MAIN MENU.
2 Press A T _ _ to select "OH."
:3 Press SET to display SET UP CHANNEL screen.
iiiii
You can hear a deeper, 3-D sound effect using just the unit's two
front speakers.
I Press SURROUND.
*'!SURROUND ON" is displayed.
To Cancel; press SURROUND.
Notes:
, Surr0und soun d effect is not available for normal (mono) broadcasts.
, The surround effect (TV, VCR mode only) is not output to Audio Output
L/R Connector.
4 Press A _' to select "WEAK SIGNAL DISPLAY."
5 Press SET to set "ON" or "OFF."
ON:
PicIure Is alsplayea regardless of signal condition, and may not
a_ways oe cleady visible.
OFF:
Screen turns solid blue when slgna! is absent or weak.
Note:
o _Tthe unit Jsconnecte ] [o equipment which has a blue screen feature,
selecting "'ON" wtt have no effect on the other equipment.
6 Press ACTION twice to return to the normal screen.
i _ ii ii i i i i i
17
q>
DISPLAY --
DISPLAY
@®e®
OOOO
0 0_ h+
AUDIO --
T",bV_,,Cn
L_! , ,,, , !1
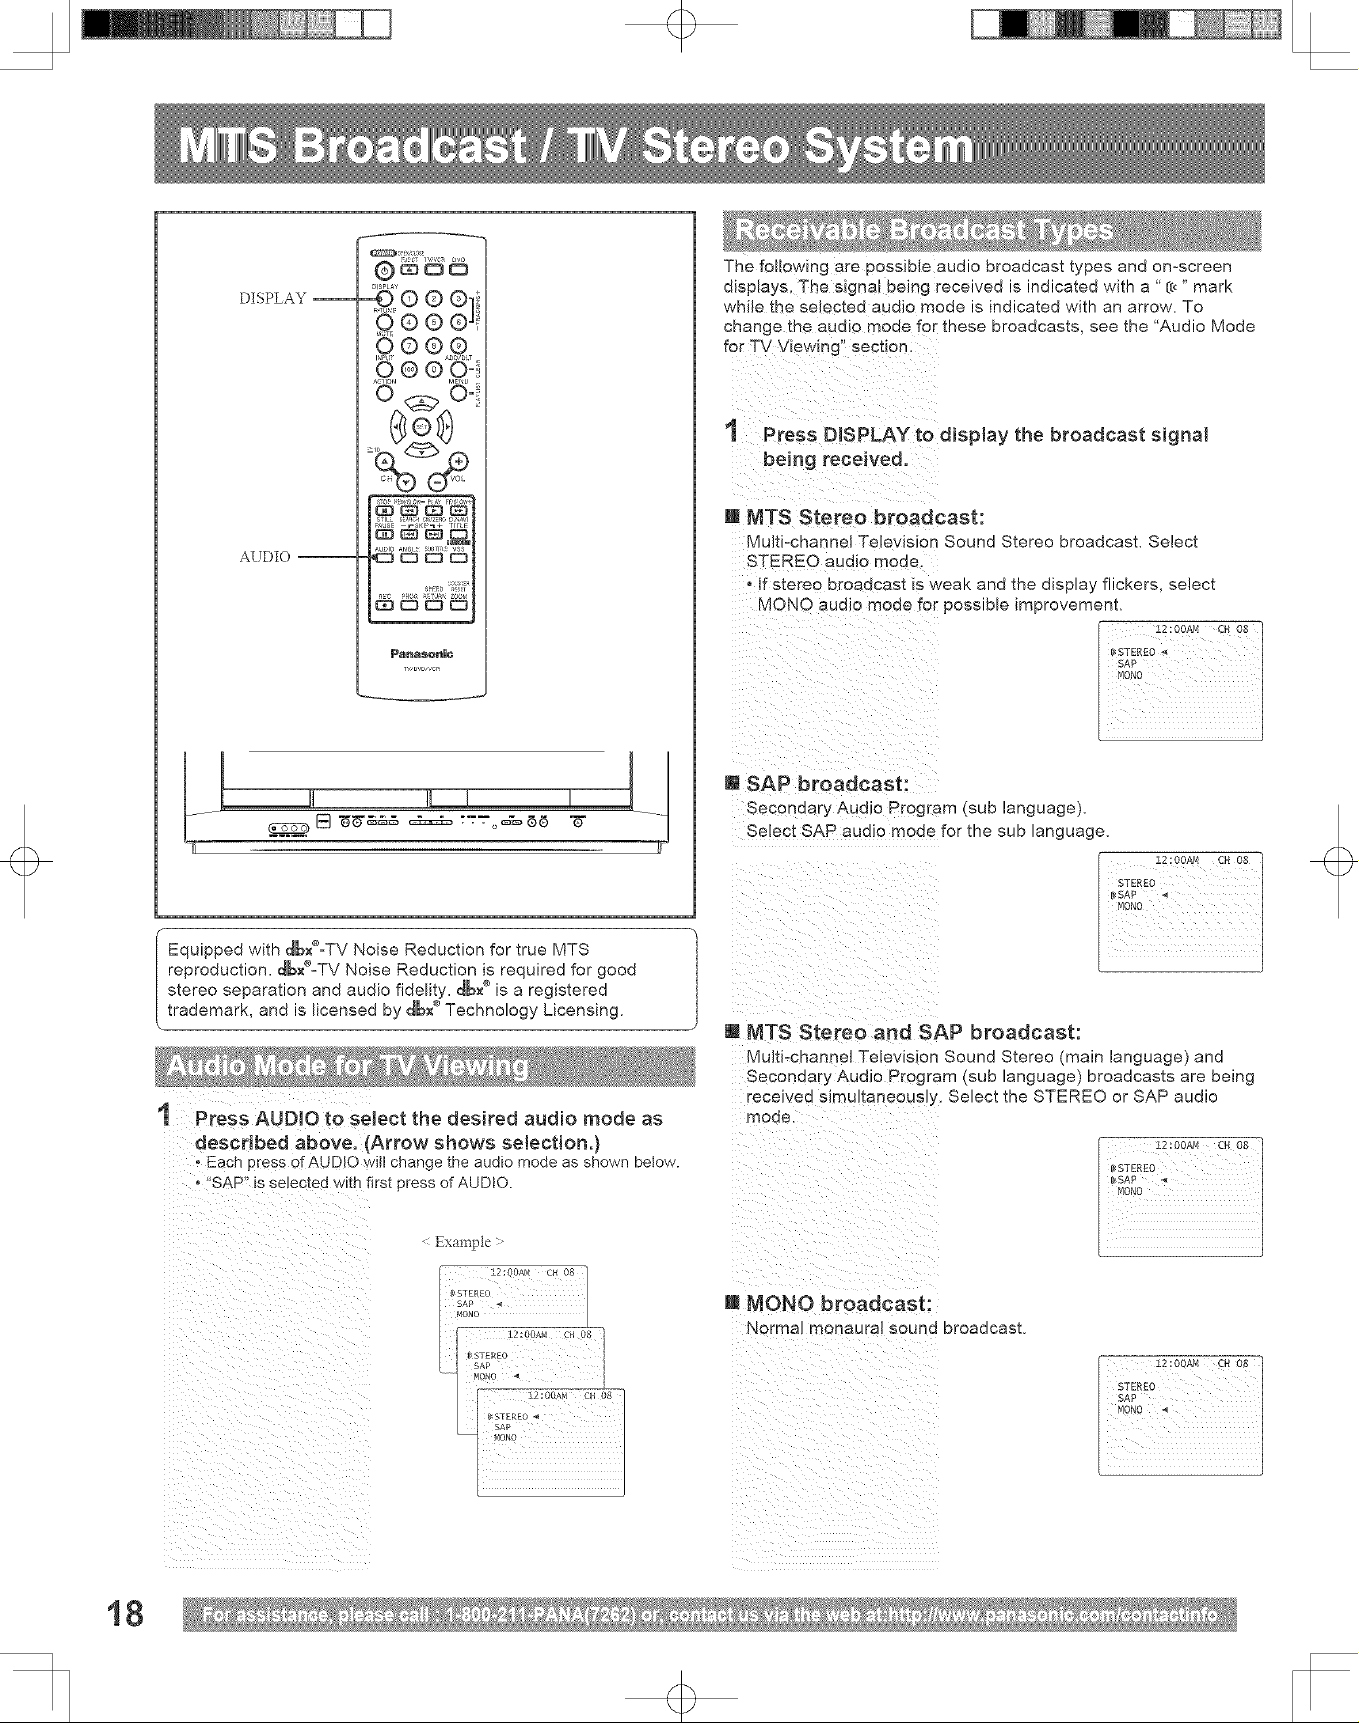
The following are possible aualo broadcast types and on-screen
displays, The signal being receivee is indicated with a ' (c_" mark
wh+Je the se+ected auaJo moae is indicated with an arrow. To
cnange the audio mooe for these broadcasts, see the "Audio Mode
for TV Viewing" section,
1 Press DISPLAY to display the broadcast signal
being received.
U MTS Stereo broadcast:
Multbchannel Television Sound Stereo broadcast. Select
STEREO audio moae
o if stereo broaacast _sweak and the display flickers, select
MONO audio moae for possible improvement.
m SAP broadcast:
Seconaary Audio Program (sub language).
Select SAP audio mode for the sub language.
Equipped with dbx®=TV Noise Reduction for true MTS
reproduction, dbx®=TV Noise Reduction is required for good
stereo separation and audio fidelity, d6x® is a registered
trademark, and is licensed by dbx ®Technology Licensing.
t Press AUDIO to select the desired audio mode as
described above. (Arrow shows selection.)
+ Each press of AUDIO will change the audio mode as shown below.
° "SAP" is selected with first press of AUDIO.
_xample >
m MTS Stereo and SAP broadcast:
Multi-channe! Television Sound Stereo (main language) and
Secondary Audio Program (sub language) broadcasts are being
received slmulzaneousJy, Select the STEREO or SAP audio
mode.
M MONO broadcast:
Norma_ monaural sound broadcast.
_!//_!__i_i_!ii_i_iii_i!i_iiiiiii}_iiiiiii_iiiiiiii_i__I_!_
18
+
DISPLAY --
SELE(T
AT<_ .......
SET
PROG --
90oo
OOO
Panaso_
w,v¢o/,,ca
[] -_g-_ .4.-.4.. r-'r - ¢_g)
--ADD DLT
[
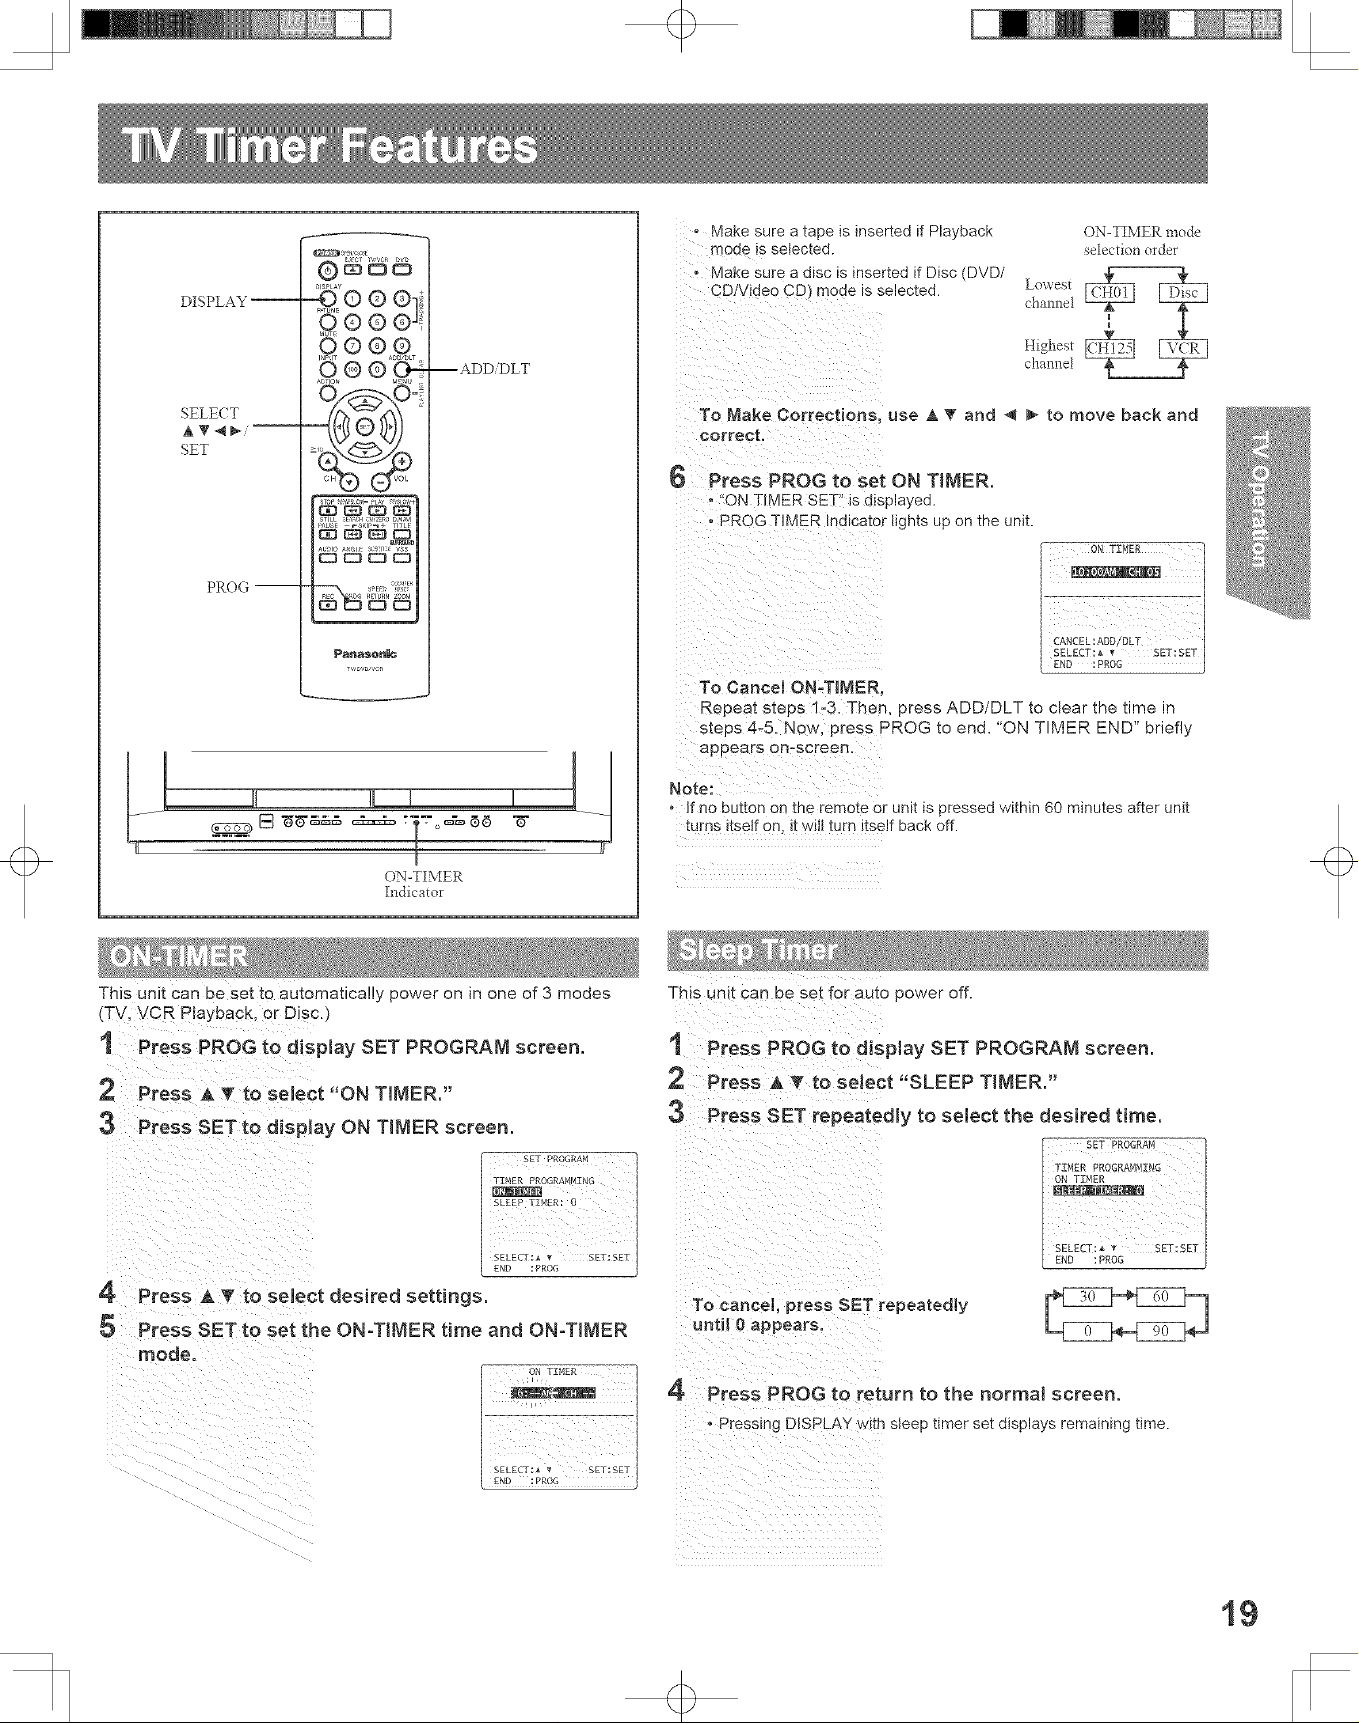
ON-TIMER
Indicator
channel
Lowest
Higl:est
channel
ON-TIMER mode
selection order
o Make sure a tape is inserted if Playback
mode is selected.
, Make sure a disc is inserted if Disc (DVD/
CDIVide0 CD) mode is selected.
To Nake Corrections, use _, _g and _ _ to move back and
6 Press PROG to set ON TIMER.
'!ONTIMER SETI'is displayed.
•PROG TIMER Indicator lights upon the unit.
To Cancel ON,TINER,
Repeat steps 1-3. Then, press ADD/DLT to clear the time in
steps 4-5. Now, press PROG to end. 'ON TIMER END" briefly
appears enrscreen.
Note:
o If no button on the remote or unit is pressed within 60 minutes after unit
turns itsetf on, it witt turn itself back off.
This Unit Can be set to automatically power on in one of 3 modes
(TV, VQR P_ayback, or Disc.)
This unit can oe set for auto power off.
t Press PROG to display SET PROGRAM screen, t Press PROG to display SET PROGRAM screen.
Press A _' to seJect "ON TIMER."
Press A T to select "SLEEP TIMER."
3 Press SET to display ON TIMER screen. 3 Press SET repeatedly to select the desired t{me.
SET PROGRAm4
1XNER PROGRANMXNG
SLEEP ]ZNER: 0
END : PROG
SELECT : • _ Ski; SET
4 Press A _" to select desired settings. To cancel, press SET repeatedly
Press SET to set the ON-TIMER time and ON-Tff_ER until 0 appears.
4 Press PROG to return to the normal screen.
, Pressinc DISPLAY with sleep timer set displays remaining time.
SELECT:,_ _ SET:SET:SETI
+
19
+
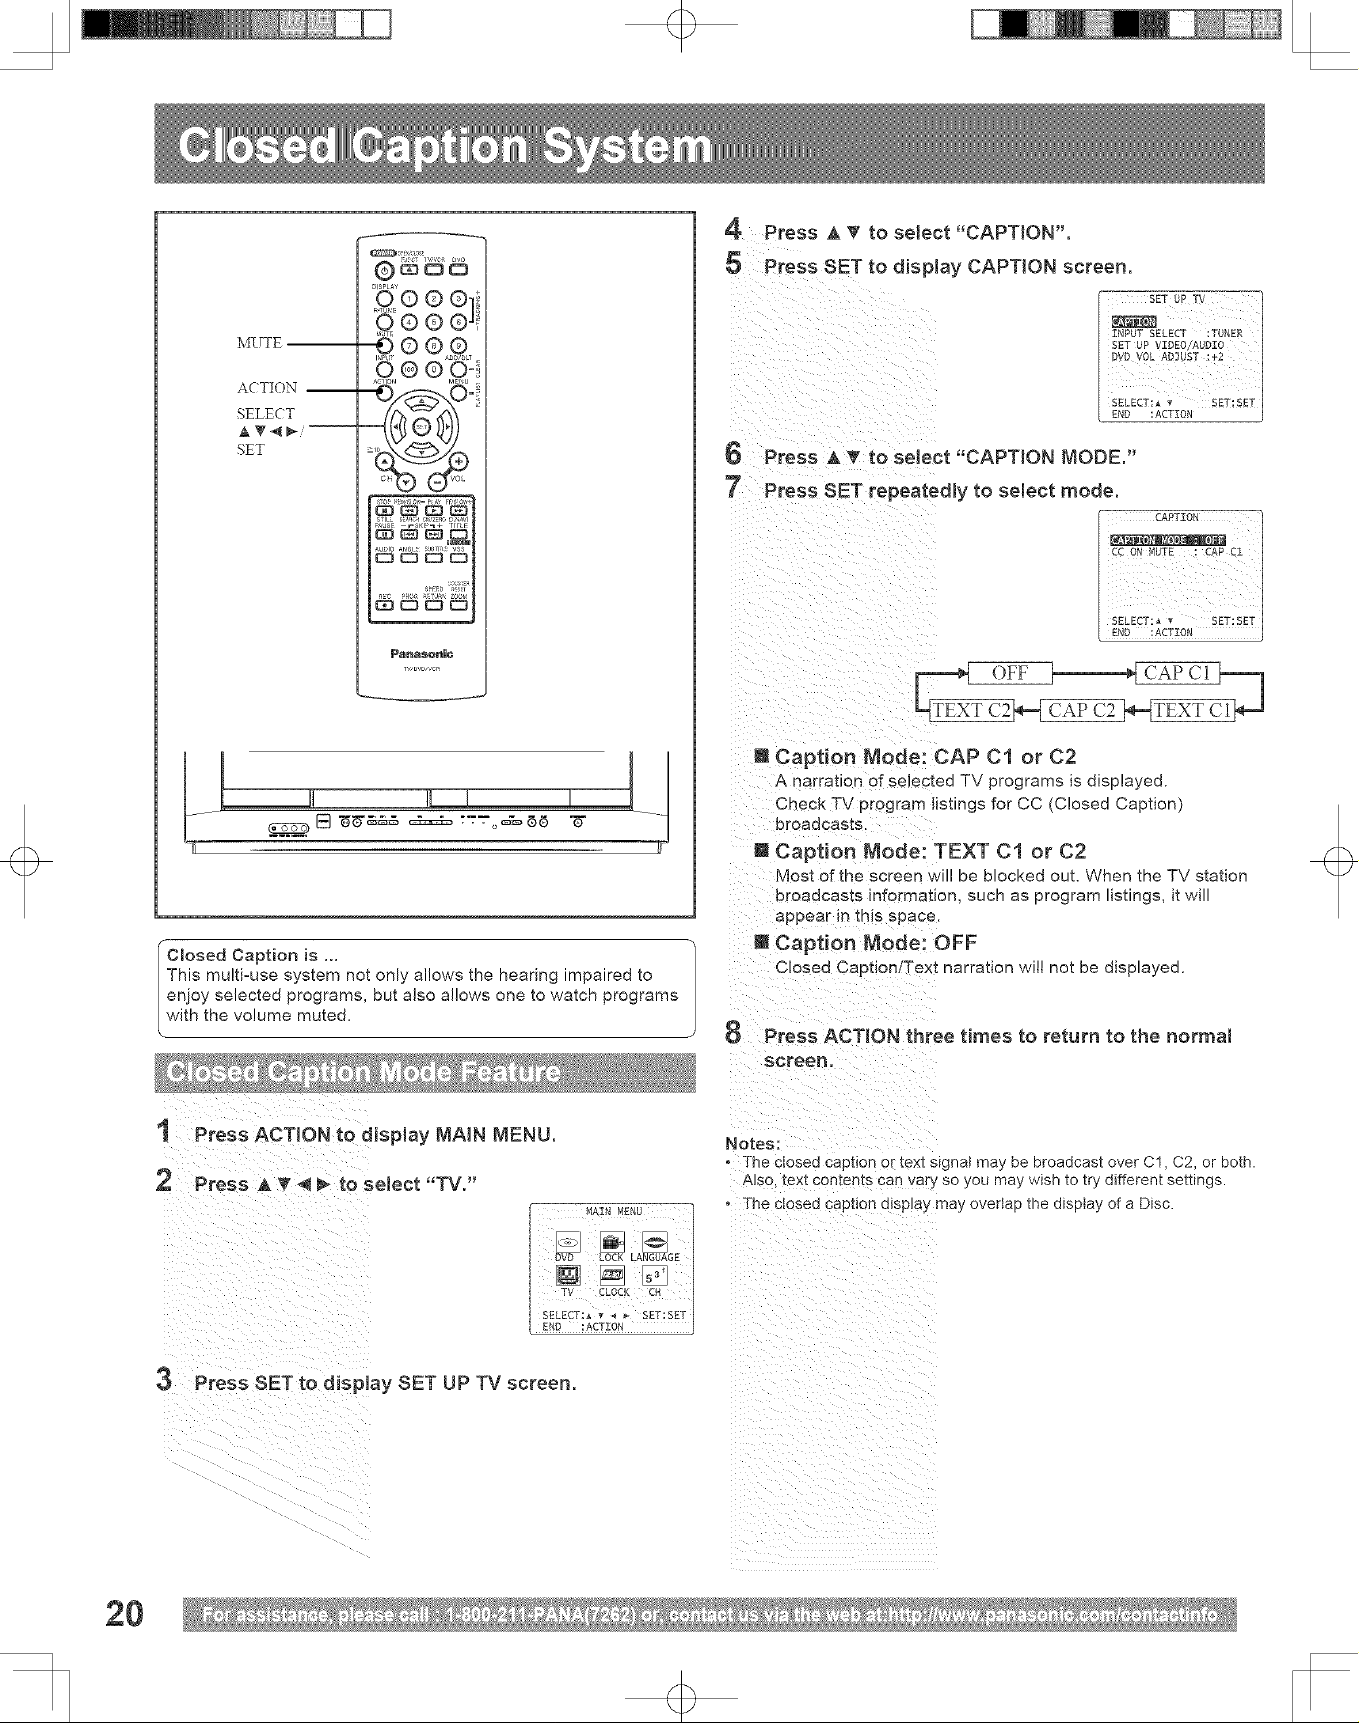
4 Press A T to select "CAPTION".
DISPLAY
£®®®]
MUTE
ACTION --
SELE(T
AT4_i--
SET
, ,,! , !l
Closed Caption is ...
This multbuse system not only allows the hearing impaired to
enjoy selected programs, but also allows one to watch programs
with the volume muted.
Q®®®
@©®®
® ®_2_
ASION ME U ,
T",bV_,,Cn
[] "_" ..... o_6 ------
5 Press SET to display CAPTION screen.
6 Press A I_'to select "CAPTION MODE."
"7 Press SET repeatedly to select mode.
[_ OFF _CAPC1]-_
[] Caption Mode: CAP Cl or 02
A narration of selected TV programs is displayed.
Check TV program listings for CC (Closed Caption)
broadcasts
[] Caption Mode: TEXT O1 or 02
Most of the screen w_ be blocked out. When the TV station
broadcasts information, such as program listings, it will
appear in this space.
[] Caption Mode: OFF
Closed Caption/Text narration will not be displayed.
Press ACTION three times to return to the normal
screen.
t PreSsACT_ONt0d_sp_WMA_NMENU.
ii i I iii i
3 PressSETiod!spio_,sETuPTvscreen.
20
Notes:
The ctosed caption or text s_gna_may be broadcast over C1, C2, or both.
Also [ex_ concerns can fary so you may wish to try different settings.
• The ctosea capuon d_sp]ay may overlap the display of a Disc.
_k_[] _ [_ME_U
TV CLOCK CH
 Loading...