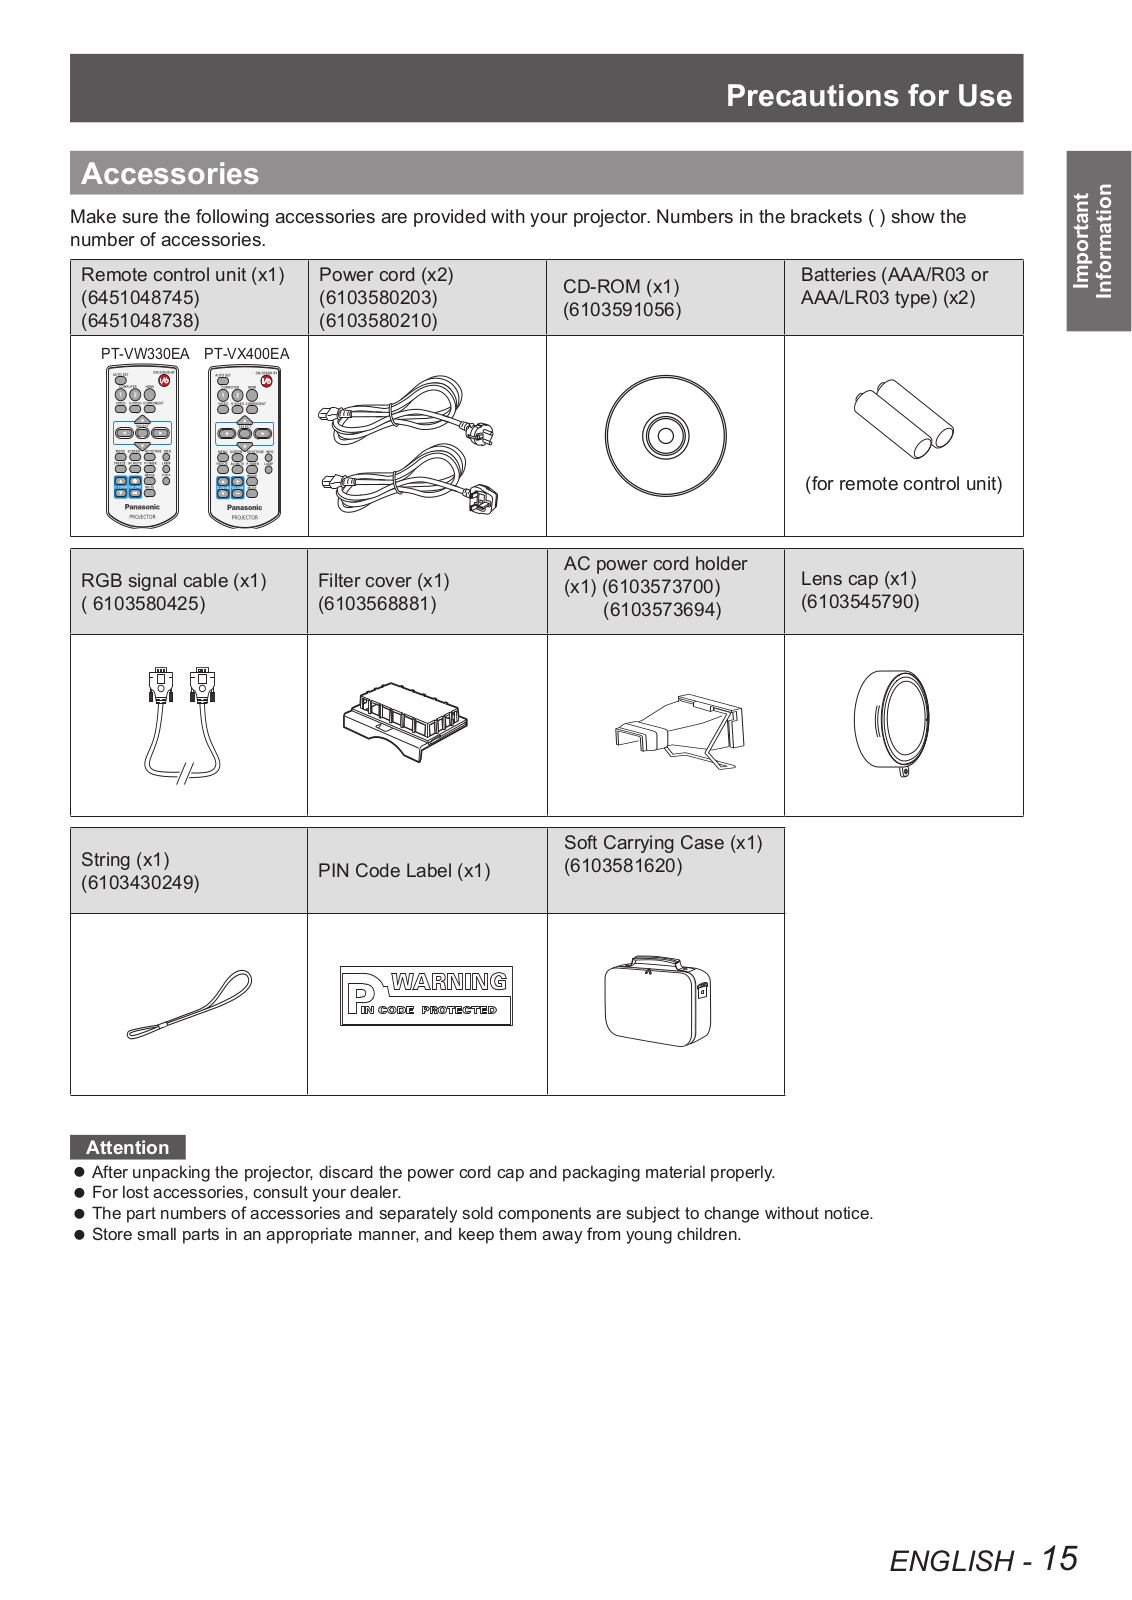
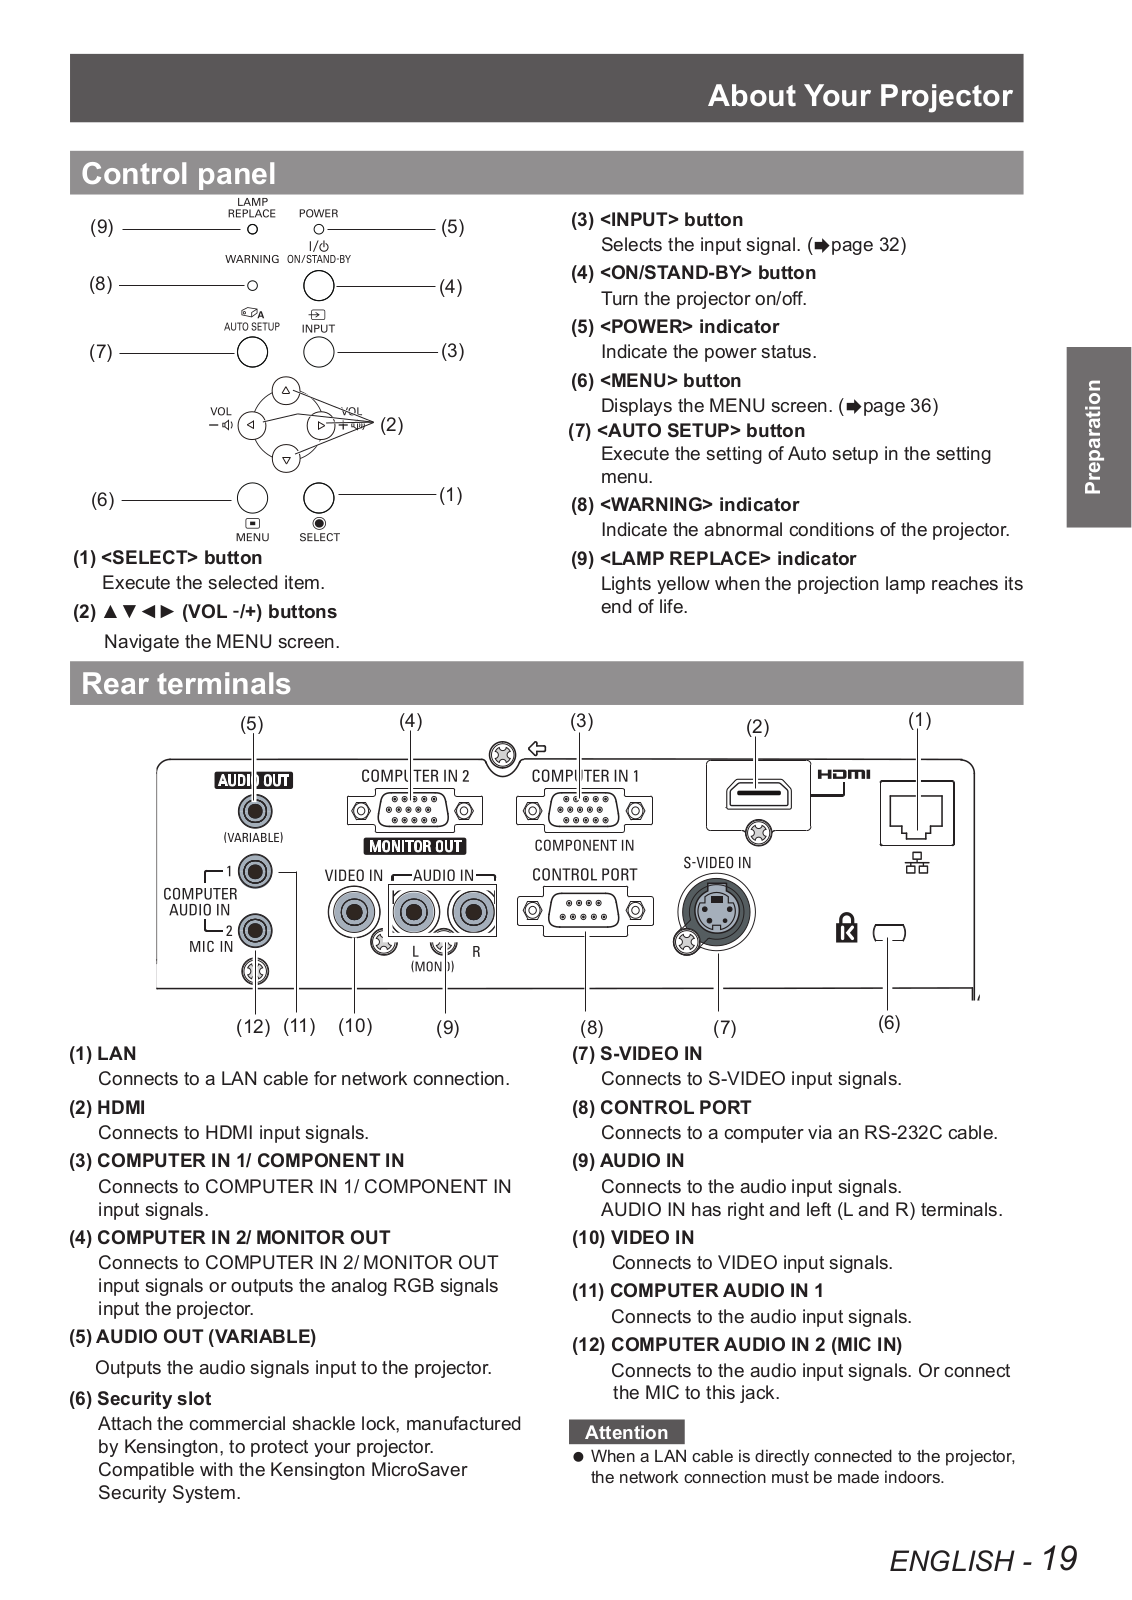
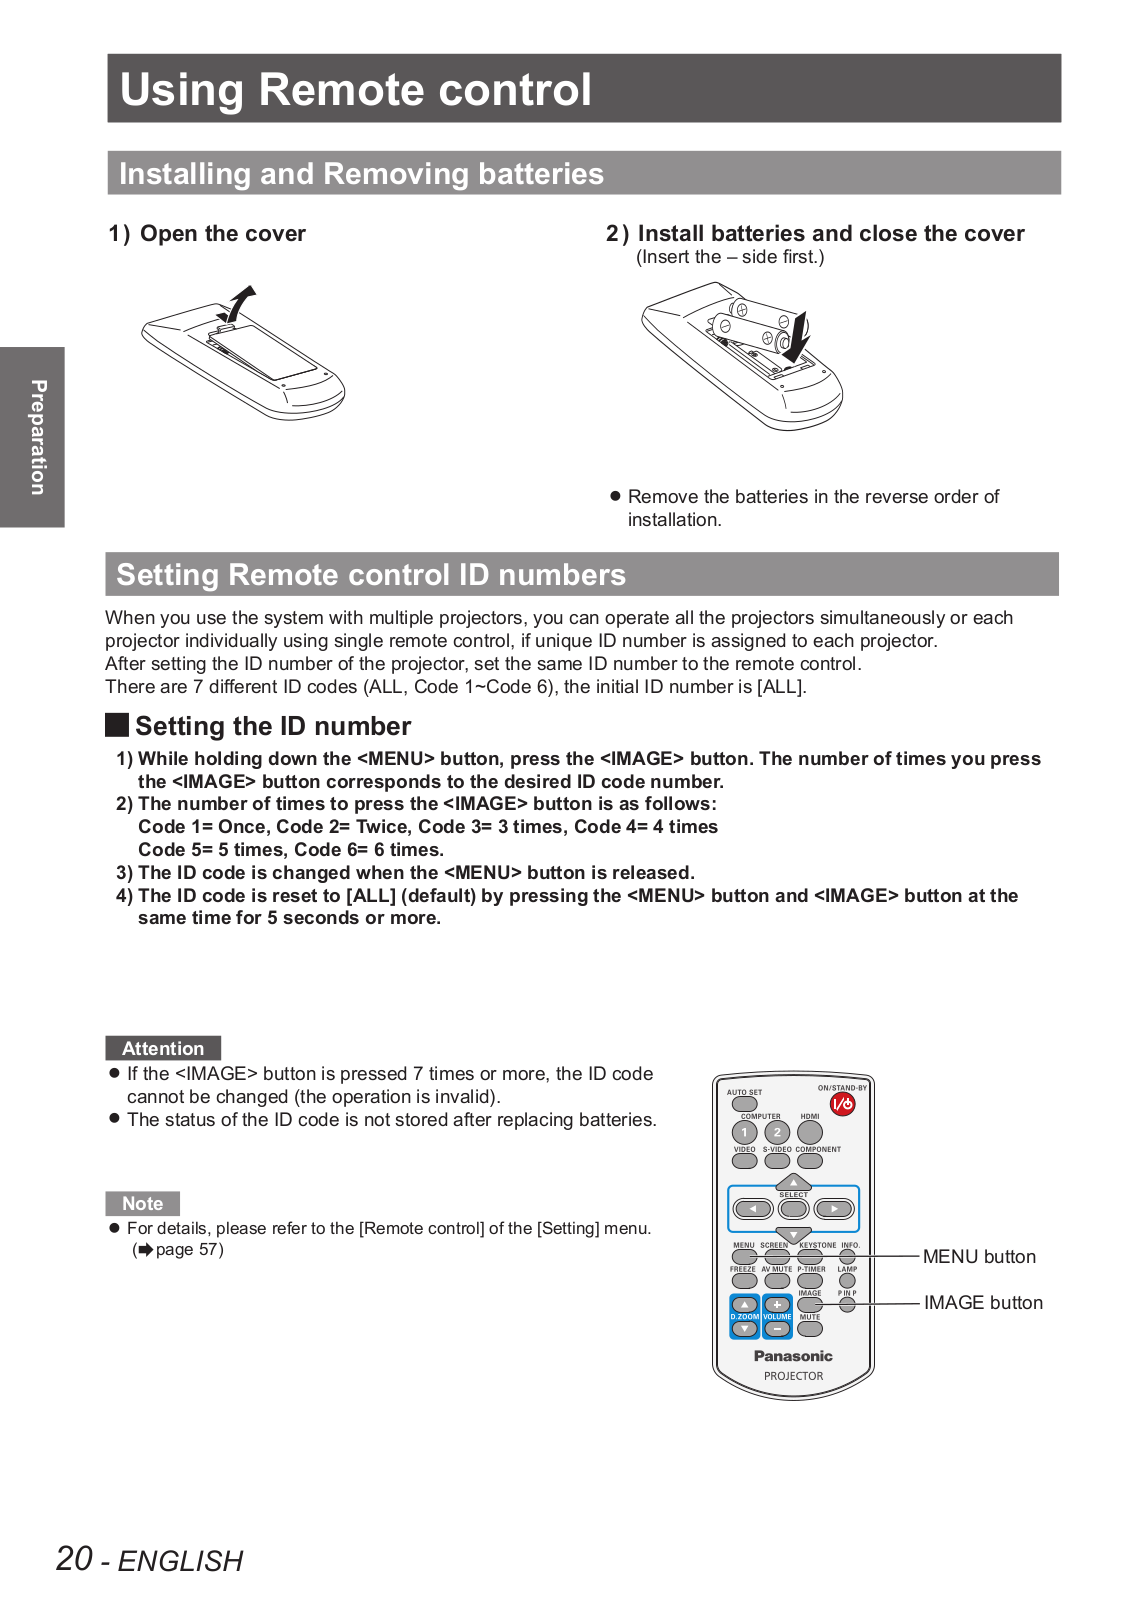
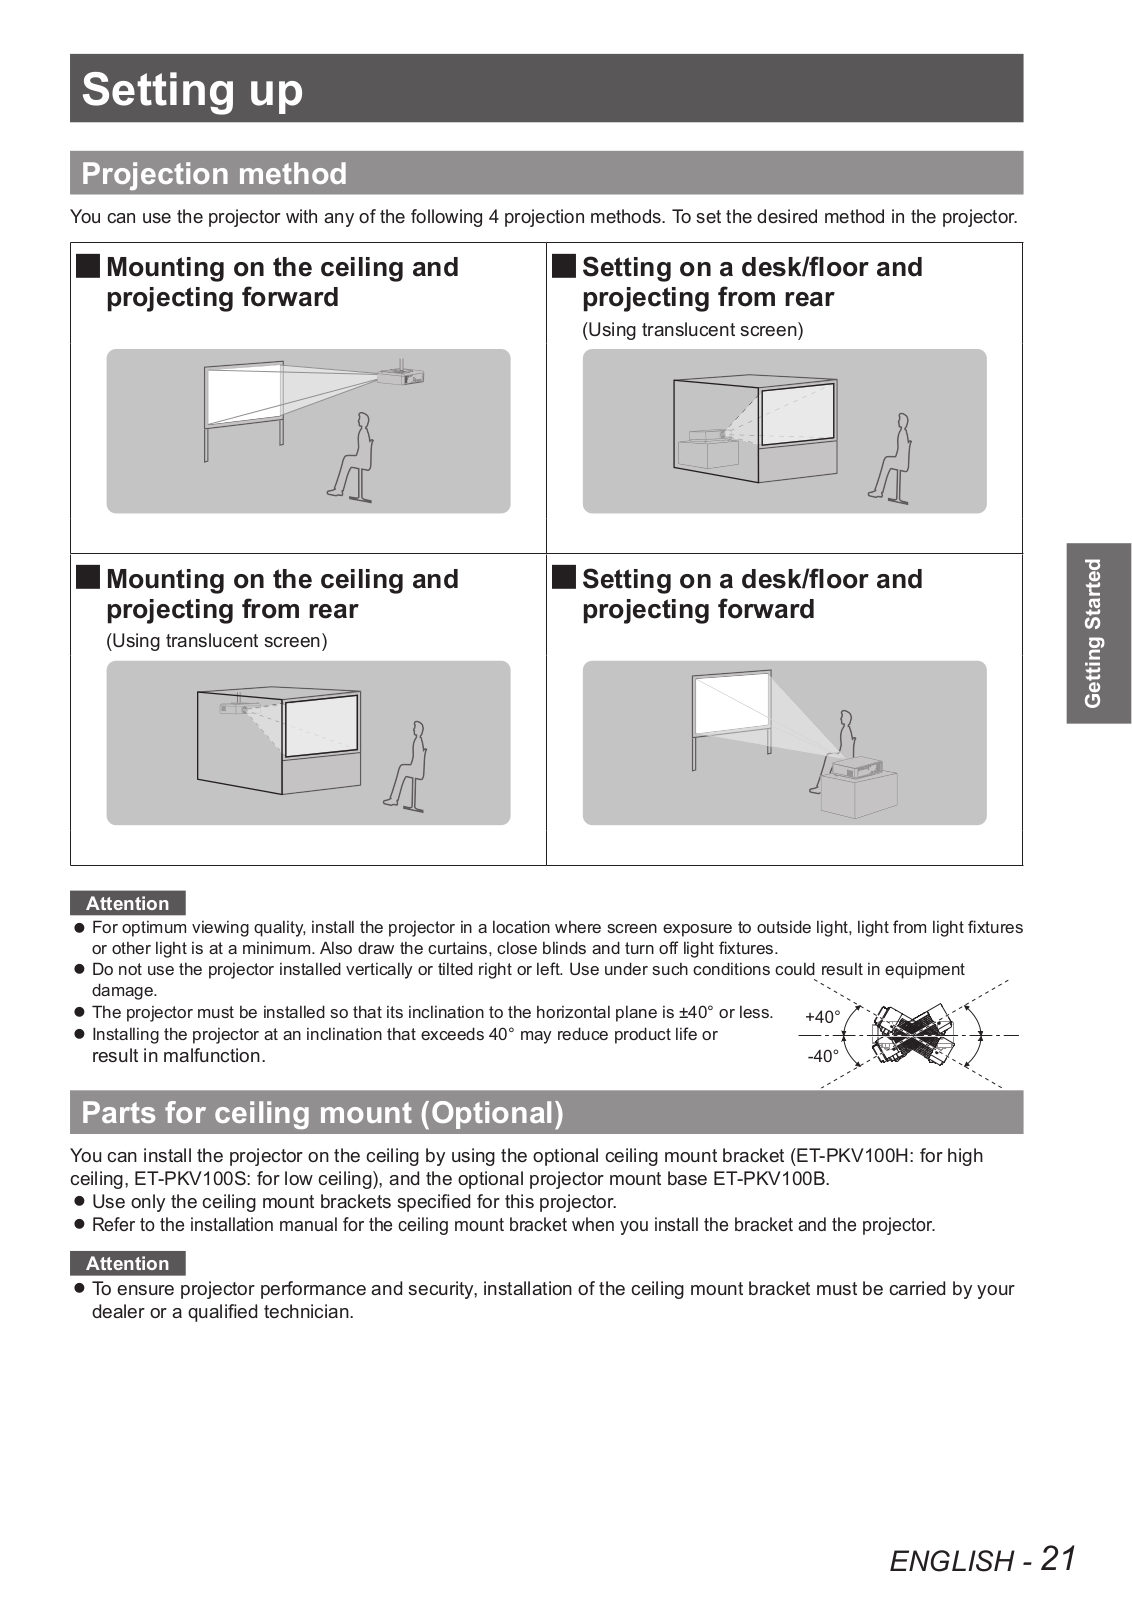
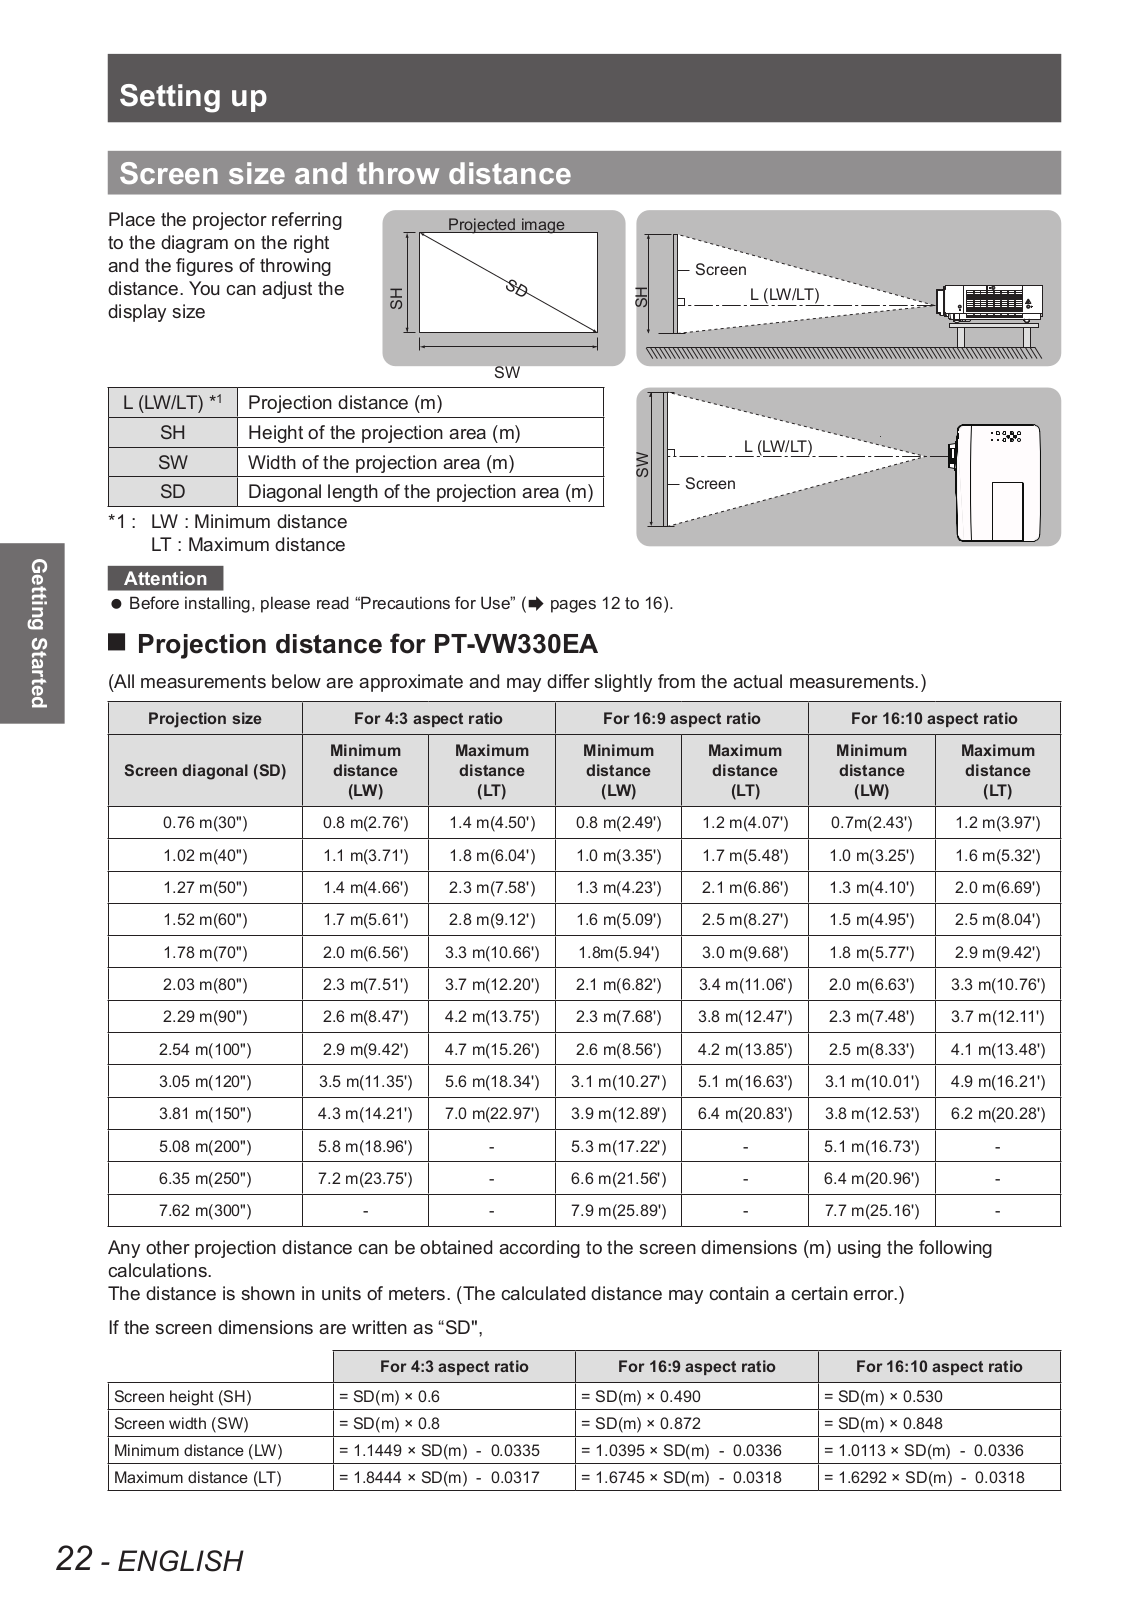
How it Works
Log In / Sign Up
Buy Points
How it Works
FAQ
Contact Us
Questions and Suggestions
Users
Panasonic
Loading...
P
PT-TX310E
PT-TX312
PT-TX312E
PT-TX312U
PT-TX320
2
PT-TX320U
PT-TX340
4
PT-TX350
PT-TX350U
PT-TX400
2
PT-TX400E
PT-TX402
PT-TX402E
PT-TX402U
PT-TX410
PT-TX410U
PT-TX430
PT-TX440
PT-TX440U
PT-U1S66
PT-U1S80
2
PT-U1S87A
PT-U1S90
2
PT-U1X66
PT-U1X67A
PT-U1X80
2
PT-U1X86
PT-U1X87A
PT-U1X90
2
PT-U1X92
PT-UX10
PT-UX11
PT-UX20
PT-UX21
PT-UX30
PT-VMW50EJ
2
PT-VMW50U
PT-VMW60EJ
PT-VMW60U
3
PT-VMZ40
3
PT-VMZ40EJ
PT-VMZ40U
3
PT-VMZ50
2
PT-VMZ50U
PT-VMZ60BEJ
PT-VMZ60BU
PT-VMZ60EJ
PT-VMZ60U
PT-VW330
7
PT-VW330E
3
PT-VW330EA
3
PT-VW330U
4
PT-VW340Z
2
PT-VW340ZE
pt-vw345
PT-VW345NZ
3
PT-VW345NZE
PT-VW345NZU
PT-VW350
4
PT-VW350E
PT-VW350U
2
pt-vw355
PT-VW355N
4
PT-VW355NE
PT-VW355NU
pt-vw355nzu
PT-VW360
PT-VW360EJ
PT-VW400EA
PT-VW430
4
PT-VW430E
2
PT-VW430EA
PT-VW430U
6
PT-VW431D
3
PT-VW431DE
2
PT-VW431DEA
PT-VW431DU
2
pt-vw435
PT-VW435N
3
PT-VW435NE
2
PT-VW435NEA
2
PT-VW435NU
4
PT-VW440
2
PT-VW440E
2
PT-VW440EA
PT-VW440U
PT-VW530
4
PT-VW530E
PT-VW530U
2
PT-VW535N
PT-VW535NE
PT-VW535NU
2
PT-VW540
PT-VW540EJ
pt-vw540u
PT-VW545N
PT-VW545NEJ
pt-vw545nu
PT-VX400
7
PT-VX400E
4
Loading...
Loading...
Nothing found
PT-VW330EA
Operating Instruction
82 pgs
9.76 Mb
0
Operating Instructions Manual
80 pgs
13.4 Mb
0
User Manual
26 pgs
6.18 Mb
0
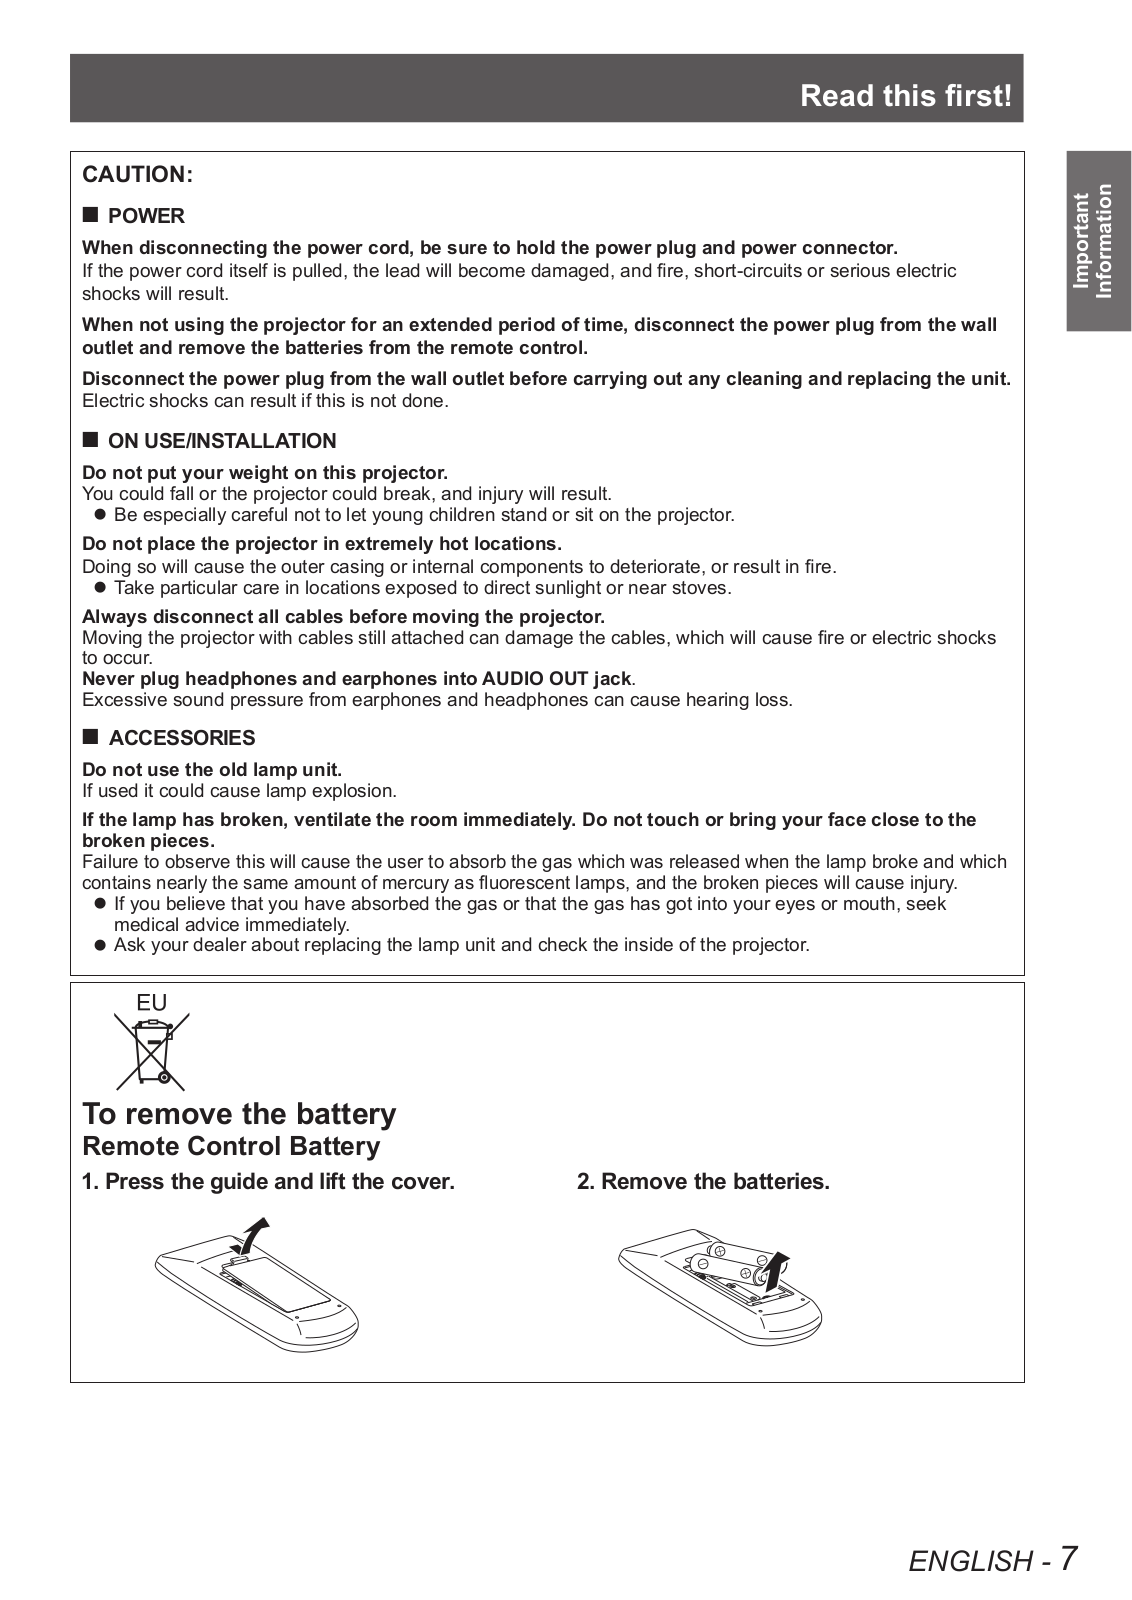
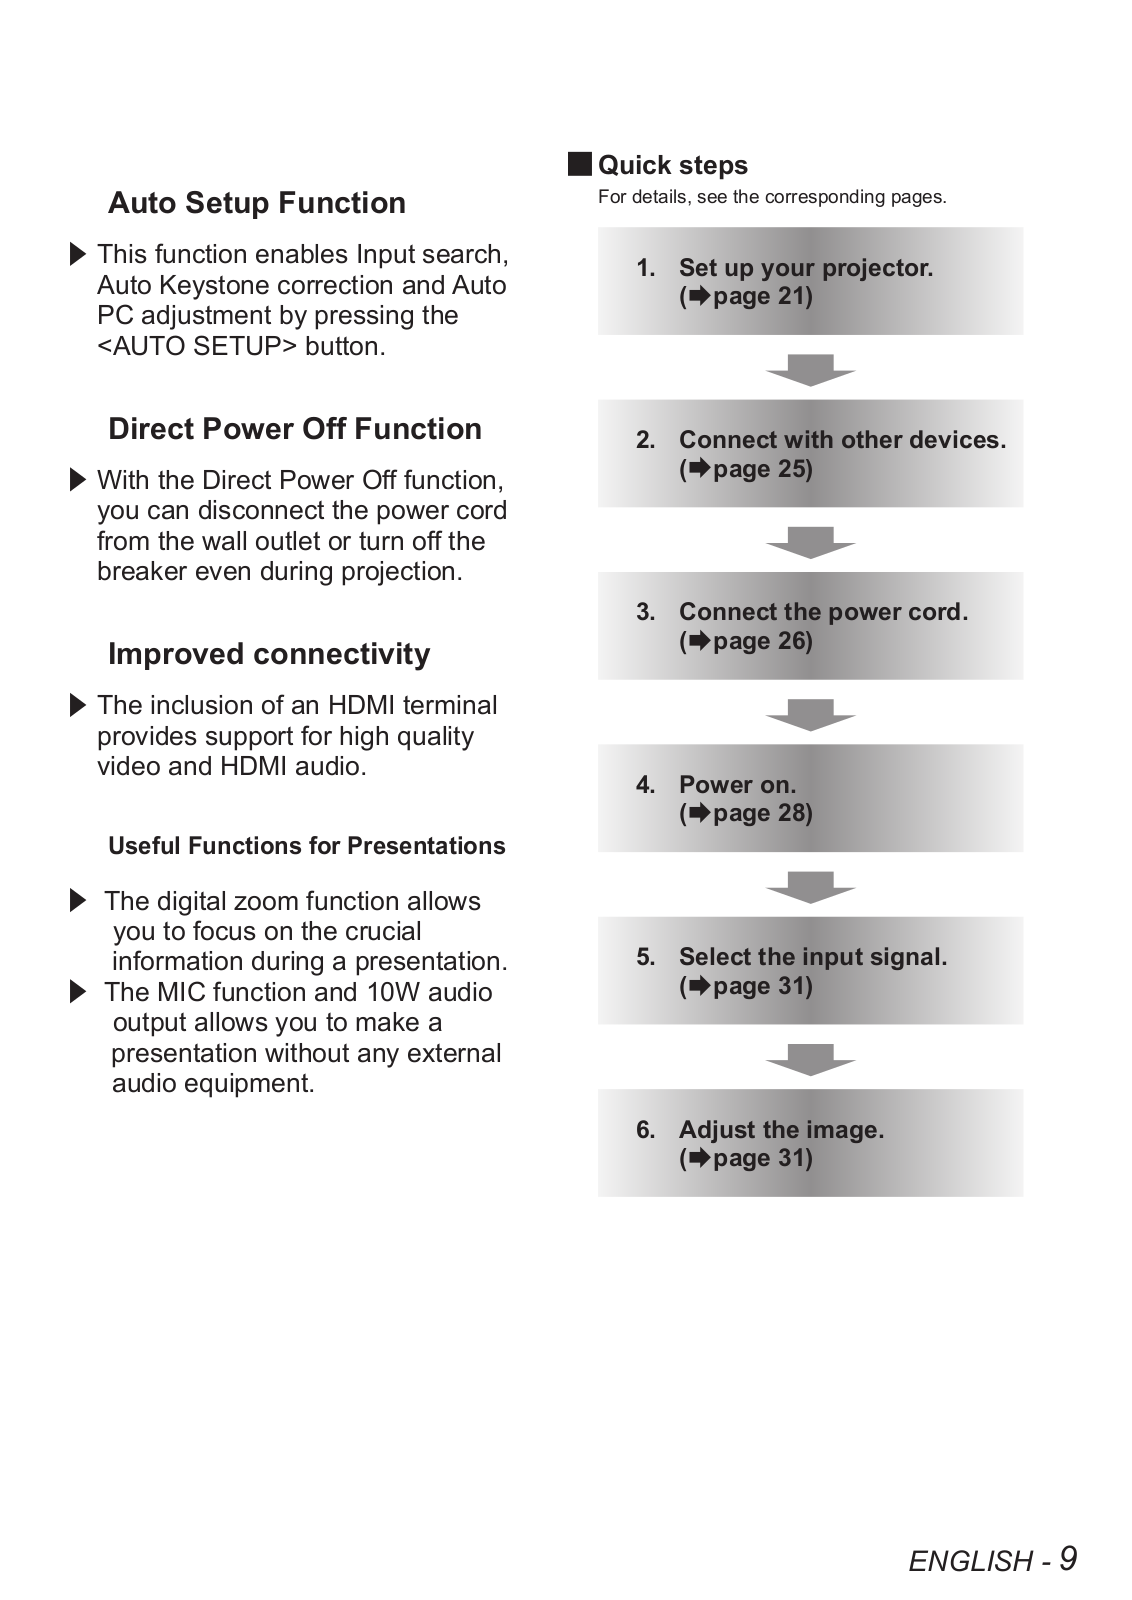
Table of contents
Loading...
Panasonic PT-VW330EA Operating Instruction
...
Panasonic Operating Instruction
Download
Specifications and Main Features
Frequently Asked Questions
User Manual
Download
Loading...
+
57
hidden pages
Unhide
You need points to download manuals.
1 point = 1 manual.
You can buy points or you can get point for every manual you upload.
Buy points
Upload your manuals