

Page 1
Installation Instructions
Before attempting to connect or operate this product,
please read these instructions completely.
SPECIFICATIONS
Dimensions: 4.6"(w) x 3.81"(h) x 2.8"(d)
Weight: 7.4 oz.
Power Source: 24V AC, 50/60 Hz
1.5 watts
Blower: On 95° (35°C), Off 80° (27°C)
GENERAL INSTRUCTIONS
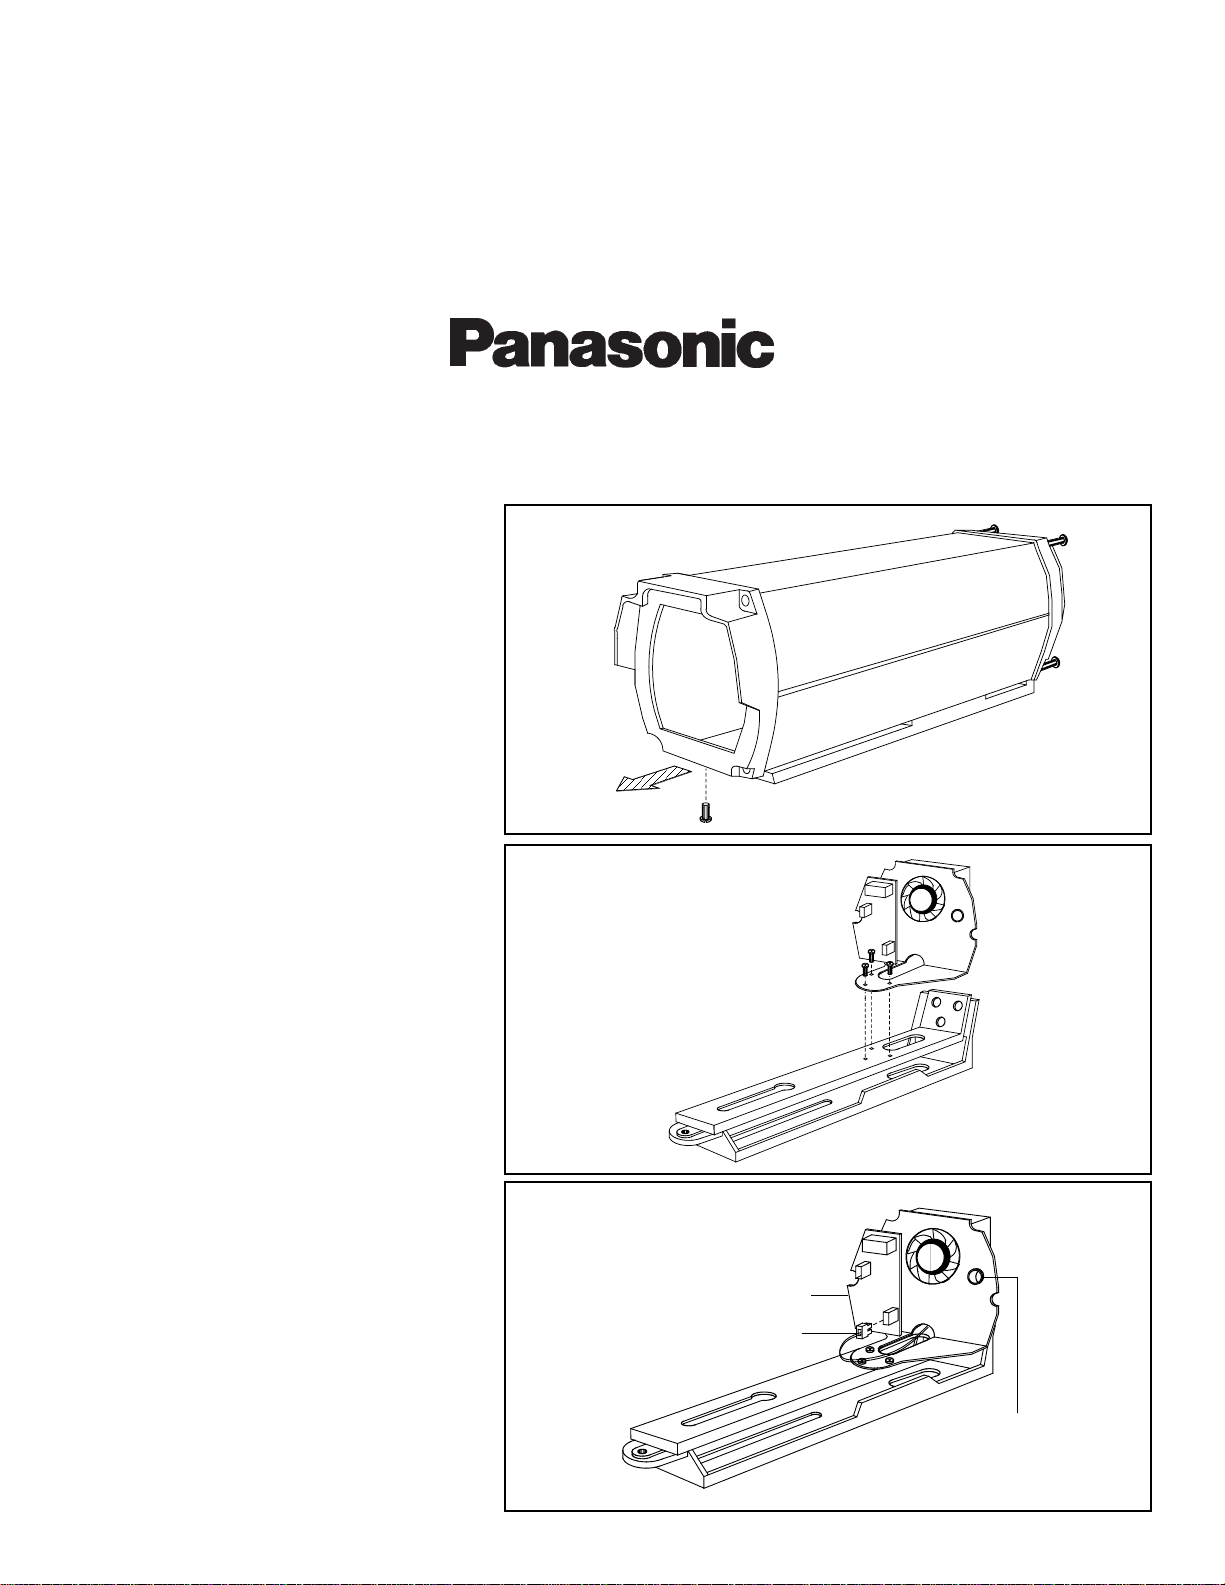
1. Carefully remove the housing body
from the unit by first removing the (1) #10
bolt located on the bottom front of the
housing. Next, loosen the (4) bolts on the
rear cap of the housing. Then, remove the
housing body and front cap assembly by
pulling forward on the housing. Slide
assembly completely away from the housing mount and set aside. (fig. 1)
Blower Kit
PBK-12
®
fig. 1
2. Place the powerboard bracket with
blower at the indicated position and secure in place with (3) screws. (fig.2)
3. Next, feed 2 pos. plug on blower through
back of bracket as shown and connect the
plug to the powerboard.
(fig. 3)
fig. 2
powerboard
2 pos. plug
1/2" bushing
fig. 3
Page 2
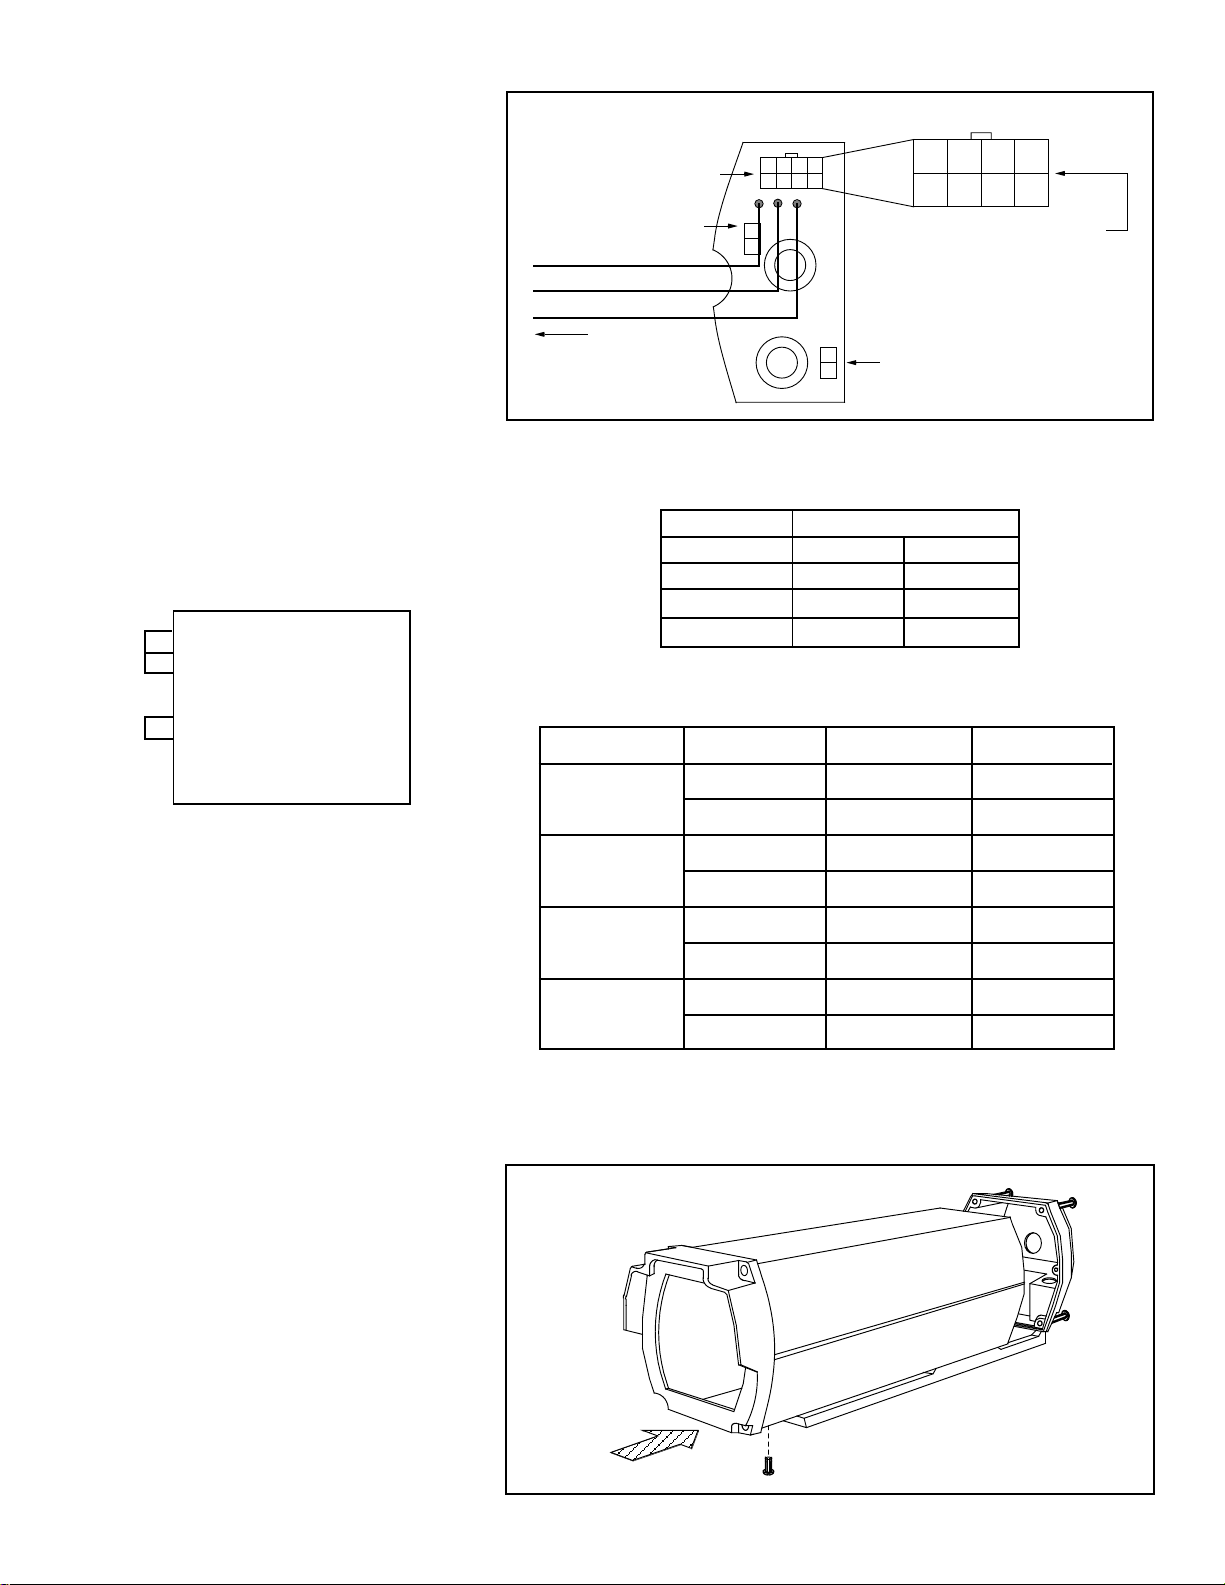
3. Use the wiring diagram for proper
installation of the 24V AC to powerboard.
(fig. 4)
HEATER OUTPUT
GND
1 (24V AC)
2 (24V AC)
TO CAMERA
24V AC INPUT
POWERBOARD
78
4
POWER INPUT FOR CAMERA/HEATER/BLOWER
NOTE: UTILIZES MOLEX CONNECTOR/PINS
Molex part # 39-01-2085 (provided)
BLOWER OUTPUT
PIN NUMBERS
5
6
123
fig. 4
4. For further wiring and molex connector/
terminal information, refer to the following
charts.
Pin Assignment
connected on PC board
*
PIN 1 24V AC Camera
PIN 2 Heater/Blower
*
PIN 3 Heater/Blower
PIN 4 Not Used
PIN 5 AC Common
*
PIN 6 AC Common
PIN 7 Not Used
PIN 8 Ground
Pin connection to 3 wire and
6 wire is shown below
PIN #'s to connect
3 WIRE 6 WIRE
GND 8 8
AC1 (COM) 1 1,2,3
AC2 5 5,6
MAXIMUM CABLE LENGTH CHART
AWG SIZE 3 WIRE 6 WIRE
#24 ft 33 83
m1025
#22 ft 53 133
m1640
#20 ft 84 211
m2564
#18 ft 130 327
m3999
5. To reassemble unit, slide the housing
body over the camera into the rear cap.
Tighten the (4) bolts on the rear cap.
Finally, replace the #10 bolt to bottom front
of housing body and tighten.
(fig. 5)
NOTE: 1) The maximum cable length is based on 11 watts power
consumption in camera.
2) By using six wires instead of three wires, maximum cable
length can be extended as shown in above table.
fig. 5
03/94 81-IN3008
 Loading...