

Panasonic NV-GS11EGE Operating Instructions
15EGE-ENG.book 1 ページ 2004年2月9日 月曜日 午前11時10分
Operating Instructions
Instrukcja obsługi
Kezelési utasítás
Digital Video Camera
Model No. NV-GS 8 EGE
NV-GS11EGE
NV-GS15EGE
R
Návod k použití
Before use, please read these instructions completely.
Przed pierwszym włączeniem kamery prosimy o dokładne przeczytanie
instrukcji obsługi.
Před použitím si, prosíme, přečtěte celý návod.
Használat előtt kérjük, hogy teljesen olvassa el ezt a kezelési utasítást.
LSQT0780 A
15EGE-ENG.book 2 ページ 2004年2月9日 月曜日 午前11時10分
Information for Your Safety
As this equipment gets hot during use,
operate it in a well-ventilated place; do
not install this equipment in a confined
space such as a bookcase or similar unit.
To reduce the risk of fire, electric shock
or product damage, do not expose this
equipment to rain, moisture, dripping or
splashing and ensure that no objects
filled with liquids, such as vases, shall be
placed on the equipment.
Movie Camera
≥The rating plate is on the underside of
the Movie Camera.
AC Adaptor
≥The rating plate is on the underside of
the AC Adaptor.
ª Carefully read the Operating
Instructions and use the Movie
Camera correctly.
≥Injury or material damage resulting from any
kind of use that is not in accordance with the
operating procedures explained in these
Operating Instructions are the sole
responsibility of the user.
Operating Instructions
≥These Operating Instructions apply to models
NV-GS8, NV-GS11, and NV-GS15.
≥The illustrations used in these Operating
Instructions show model NV-GS15, however,
parts of the explanation refer to different
models.
≥Depending on the model, some functions are
not available.
Try out the Movie Camera.
Be sure to try out the Movie Camera before
recording your first important event and check
that it records properly and functions correctly.
The manufacturer is not liable for loss of
recorded contents.
The manufacturer shall in no event be liable for
the loss of recordings due to malfunction or
defect of this Movie Camera, its accessories or
cassettes.
Carefully observe copyright laws.
Recording of pre-recorded tapes or discs or other
published or broadcast material for purposes
other than your own private use may infringe
copyright laws. Even for the purpose of private
use, recording of certain material may be
restricted.
≥The Movie Camera uses copyright-protected
technologies and is protected by the patented
technologies and intellectual properties of
Japan and the U.S. To use these
copyright-protected technologies, authorization
of the Macrovision Company is required. It is
prohibited to disassemble or modify the Movie
Camera.
≥Windows is a trademark or registered
trademark of Microsoft Corporation U.S.A.
≥SD Logo is a trademark.
≥All other company and product names in the
operating instructions are trademarks or
registered trademarks of their respective
corporations.
Files recorded on a MultiMediaCard or SD
Memory Card
It may not be possible to play back the files on
this Movie Camera recorded on and created by
other equipment or vice versa. For this reason,
check the compatibility of the equipment in
advance.
≥Keep the Memory Card out of reach of children
to prevent swallowing.
Pages for reference
Pages for reference are indicated by dashes
either side of a number, for example:
-00-
ª WARNING
Do not remove the cover (or back); there are
no user serviceable parts inside.
Refer servicing to qualified service personnel.
ª EMC Electric and magnetic
compatibility
This symbol (CE) is located on the rating
plate.
Use only the recommended accessories.
-2-
15EGE-ENG.book 3 ページ 2004年2月9日 月曜日 午前11時10分
Contents
ENGLISH
Information for Your Safety.............................. 2
Before Use
Standard Accessories...................................... 5
Optional Accessories....................................... 5
Controls and Components............................... 6
The Remote Controller
(supplied with NV-GS11 and NV-GS15) ....... 8
Power Supply .................................................. 9
Charging Time and Available Recording
Time............................................................ 10
The Grip Belt ................................................. 11
Re-attaching the Lens Cap............................ 11
Attaching the Shoulder Strap......................... 11
Inserting a Cassette....................................... 12
Using a Card (NV-GS15 only) ....................... 12
Turning on the Movie Camera ....................... 13
Selecting Modes ............................................ 13
Using the Viewfinder/LCD Monitor ................ 13
Using the Menu Screen ................................. 14
List of Menus ................................................. 15
Setting Date and Time................................... 17
Internal Lithium Battery Recharge................. 18
LP Mode ........................................................ 18
Audio Recording Mode.................................. 18
Recording Mode
About Recording............................................ 19
Recording on a Tape..................................... 19
Recording a Still Picture on a Tape
(Photoshot) (NV-GS8/NV-GS11 only)......... 20
Recording a Still Picture on a Card
(Photoshot) (NV-GS15 only) ....................... 21
Recording with the Built-in LED Video
Light ............................................................ 21
Quick Start..................................................... 22
Self-timer Recording...................................... 22
Zoom In/Out Functions.................................. 22
Digital Zoom Function ................................... 23
Image Stabilizer Function .............................. 23
Fade In/Out Functions ................................... 23
Backlight Compensation Function................. 24
Night View Functions..................................... 24
Soft Skin Function ......................................... 25
Wind Noise Reduction Function .................... 25
Cinema Function ........................................... 25
Recording in Special Situations..................... 25
Recording in Natural Colours ........................ 26
Adjusting White Balance Manually ................ 26
Manual Shutter Speed Adjustment................ 27
Manual Iris Adjustment.................................. 28
Manual Focus Adjustment............................. 28
Digital Effect Functions.................................. 29
-3-
15EGE-ENG.book 4 ページ 2004年2月9日 月曜日 午前11時10分
Playback Mode
Playing Back a Tape...................................... 31
Finding a Scene You Want to Play Back....... 31
Slow Motion Playback
(Remote Control only)................................. 32
Still Playback/Still Advance Playback............ 32
Index Search Functions
(Remote Control only)................................. 33
Playback Zoom Function
(Remote Control only)................................. 34
Playback Digital Effect Functions.................. 34
Playing Back a Card (NV-GS15 only)............ 35
Slide Show (NV-GS15 only) .......................... 36
Creating a Title (NV-GS15 only).................... 36
Adding a Title (NV-GS15 only) ...................... 37
Writing Printing Data on a Card
(NV-GS15 only)........................................... 37
Protecting the Files on a Card
(NV-GS15 only)........................................... 38
Deleting the Files Recorded on a Card
(NV-GS15 only)........................................... 38
Formatting a Card (NV-GS15 only) ............... 38
Playing Back on Your TV............................... 39
Editing Mode
Recording from a Tape onto a Card
(NV-GS15 only) .......................................... 40
Recording Pictures from a Card onto a
Tape (NV-GS15 only) ................................. 40
Audio Dubbing
(Remote Control only)................................. 40
Copying on an S-VHS (or a VHS)
Cassette...................................................... 41
Using the DV Cable for Recording ................ 41
With a PC
Importing still pictures onto a PC
(NV-GS15 only) .......................................... 43
Using as a Web Camera or with
DV STUDIO ................................................ 43
Using a Card in a Personal Computer
(NV-GS15 only) .......................................... 43
Others
Indications ..................................................... 45
Initializing the Modes..................................... 46
Warning/Alarm Indications ............................ 46
Notes and Hints............................................. 47
Cautions for Use............................................ 52
Before Requesting Repair
(Problems and Solutions) ........................... 56
Using the RESET button ............................... 58
Explanation of Terms .................................... 58
Specifications
Specifications ................................................ 60
-4--4-
15EGE-ENG.book 5 ページ 2004年2月9日 月曜日 午前11時10分
Before Use
Before Use
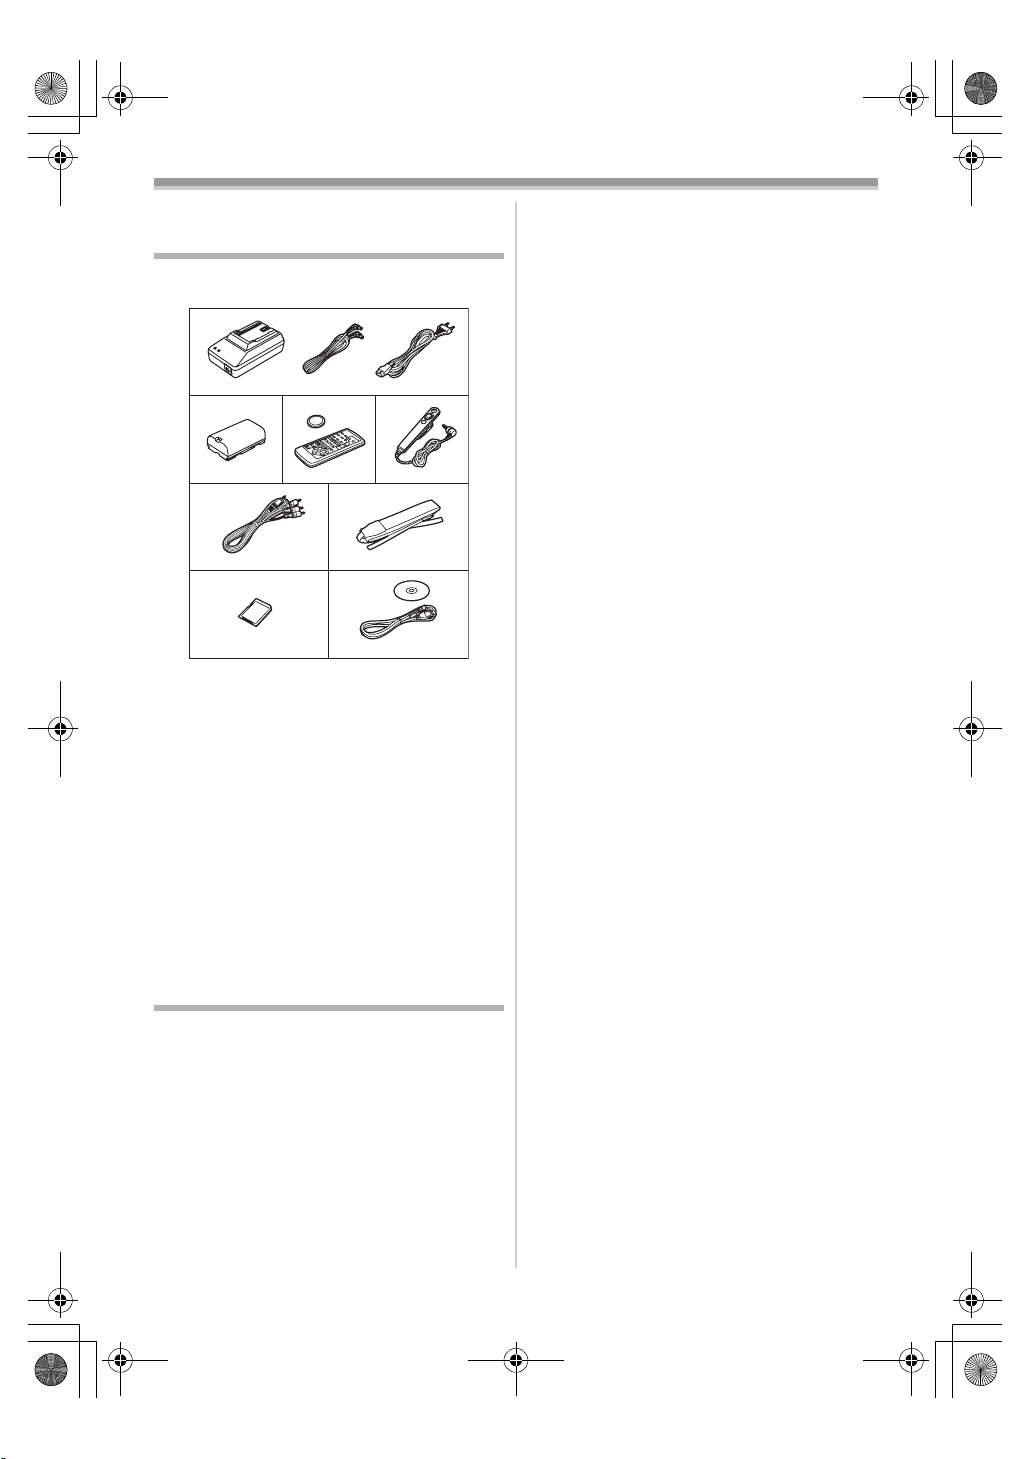
Standard Accessories
Illustrated are accessories supplied with the
Movie Camera.
1)
2)
7)
3)
1) AC Adaptor, DC Input Lead and AC Mains
-9-
Lead
2) Battery Pack -10-
3) Remote Controller and Button-Type
Battery
(supplied with NV-GS11 and NV-GS15)
≥If you wish to operate NV-GS8 with a
Remote Controller, consult the Panasonic
Service Centre.
4) Free Style Remote Controller
5) AV Cable -57-
6) Shoulder Strap -11-
7) SD Memory Card (supplied with NV-GS15)
-12-
8) USB Connection Kit (USB Cable and
CD-ROM)
-43-
Optional Accessories
1) AC Adaptor (VW-AD9E)
2) Battery Pack (Lithium/CGR-D08S/800mAh)
3) Battery Pack (Lithium/CGR-D16S/1600mAh)
4) Battery Pack (Lithium/CGP-D28S/2800mAh)
5) Car Battery Charger (VW-KBD2E)
6) Wide Conversion Lens (VW-LW2707N2E)
7) Tele Conversion Lens (VW-LT2714N2E)
8) ND Filter (VW-LND27E)
9) MC Protector (VW-LMC27E)
10) Stereo Microphone (VW-VMS2E)
11) Video DC Light (VW-LDC10E)
12) Light Bulb for Video DC Light (VZ-LL10E)
13) Shoe Adaptor (VW-SK11E)
14) Tripod (VW-CT45E)
4)
6)5)
8)
-7-
-8-
15) DV Cable (VW-CD1E)
16) DV Editing Software with DV Interface Board
(VW-DTM41E)
17) DV Editing Software (VW-DTM40E)
The following is for the NV-GS15 model only.
18) SD Memory Card
(RP-SD008/RP-SD016/RP-SD032/
RP-SD064/RP-SD128/RP-SDH256/
RP-SDH512)
19) MultiMediaCard (VW-MMC8E/VW-MMC16E)
20) PC Card Adaptor for SD Memory Card
(BN-SDABPE)
21) USB Reader Writer for SD Memory Card
(BN-SDCAPE)
≥Some optional accessories may not be
available in some countries.
-5-
15EGE-ENG.book 6 ページ 2004年2月9日 月曜日 午前11時10分
Before Use
(7)
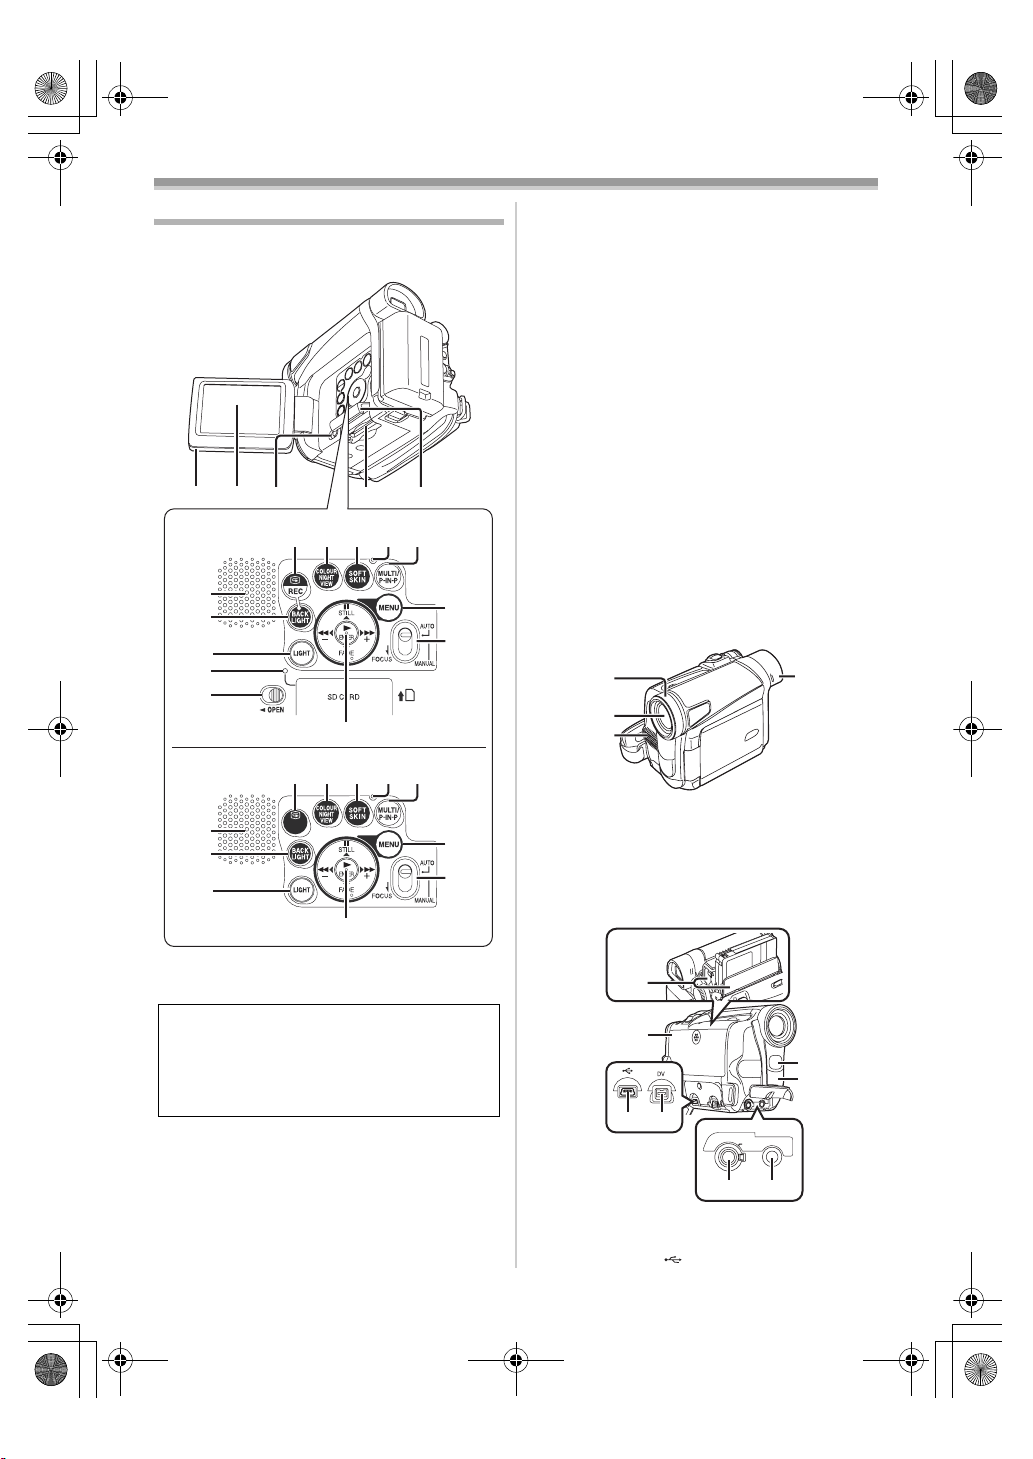
Controls and Components
Colour Night View Button
[COLOUR NIGHT VIEW]
(8)
ª Movie Camera
Soft Skin Button [SOFT SKIN] -25-
Reset Button [RESET] -47-, -58-
(9)
Multi Button [MULTI] -29-, -35-
(10)
Picture-in-Picture Button [P-IN-P] -30-
Speaker -31-
(11)
Backlight Button [BACK LIGHT] -2 4-
(12)
(13)
Light Button [LIGHT] -21-
Card Access Lamp (NV-GS15 only) -12-
(14)
Pause Button [;] -32-
(15)
Still Button [STILL] -20-
Fast Forward/Cue Button [5] -31-, -35-
(16)
Play Button [1] -31-, -35 -
(17)
Enter Button [ENTER] - 14-
Stop Button [∫] -31-, -35-
(1) (2) (3)
NV-GS15
(11)
(12)
(13)
(14)
(3)
NV-GS8/NV-GS11
(11)
(12)
(13)
(6)
(15)(16)(17)(18)(19)
(6)
REVIEW
(7)
(7)
REC
(4) (5)
(8) (9) (10)
RESET
(8) (9) (10)
RESET
(20)
(21)
(20)
(21)
(18)
Fade Button [FADE] -24-
Rewind/Review Button [6] -31-, -35-
(19)
Menu Button [MENU] -14-
(20)
Mode Selector Switch
(21)
[AUTO/MANUAL/FOCUS]
(22)
(23)
(24)
Lens Hood -56-
(22)
Lens
(23)
(24) Microphone (built-in, stereo) -23-, -25-
Eyecup
(25)
-24-
-19-, -25-
(25)
(15)(16)(17)(18)(19)
(1) LCD Monitor Open Knob [OPEN4] -13-
LCD Monitor -13-, -55-
(2)
Due to limitations in LCD production
technology, there may be some tiny bright or
dark spots on the LCD Monitor screen.
However, this is not a malfunction and does
not affect the recorded picture.
(3)
Card Slot Cover Open Lever [OPEN]
(NV-GS15 only)
(4)
Card Slot (NV-GS15 only) -12-
Card Slot Cover (NV-GS15 only) -12-
(5)
Recording Check Button [S] -20-
(6)
-12-
Recording Button [REC]
(Available only with NV-GS15)
-42-
(26)
(27)
(29)(28)
(26) Cassette Holder
(27) Cassette Compartment Cover -12-
USB Socket [ ] -43-
(28)
A/V OUT
PHONES/
REMOTE
(32) (33)
-6-
(30)
(31)
MIC
15EGE-ENG.book 7 ページ 2004年2月9日 月曜日 午前11時10分
Before Use
(29) DV Terminal [DV]
(Input function on NV-GS15 Model only)
-42-
≥Connect this to the digital video equipment
(30) Built-in LED Video Light -21-
White Balance Sensor -26-
(31)
Remote Control Sensor -9-
Audio-Video Output Socket [A/V OUT] -39-
(32)
Socket for Free Style Remote Controller
[REMOTE]
Headphone Socket [PHONES]
≥Connecting an AV Cable to this socket
activates the Movie Camera’s built-in
speaker, but connecting a headphone, etc.
deactivates it.
≥When connecting the pin plug of the AV
Cable to this socket, plug it in as far as it
goes.
≥When connecting the pin plug of the Free
style Remote Controller to this socket, plug
it in as far as it goes.
≥When using headphones, set [AV JACK] of
the [INITIAL] sub-menu to [OUT/PHONES].
If you set [AV JACK] to [OUT], you may
hear noises on the right.
(33) Microphone Socket [MIC]
≥When connecting an external microphone
or audio equipment to this socket, the
built-in microphone does not operate.
(34)(35)(36)(37)(38)
NV-GS15
NV-GS8/
NV-GS11
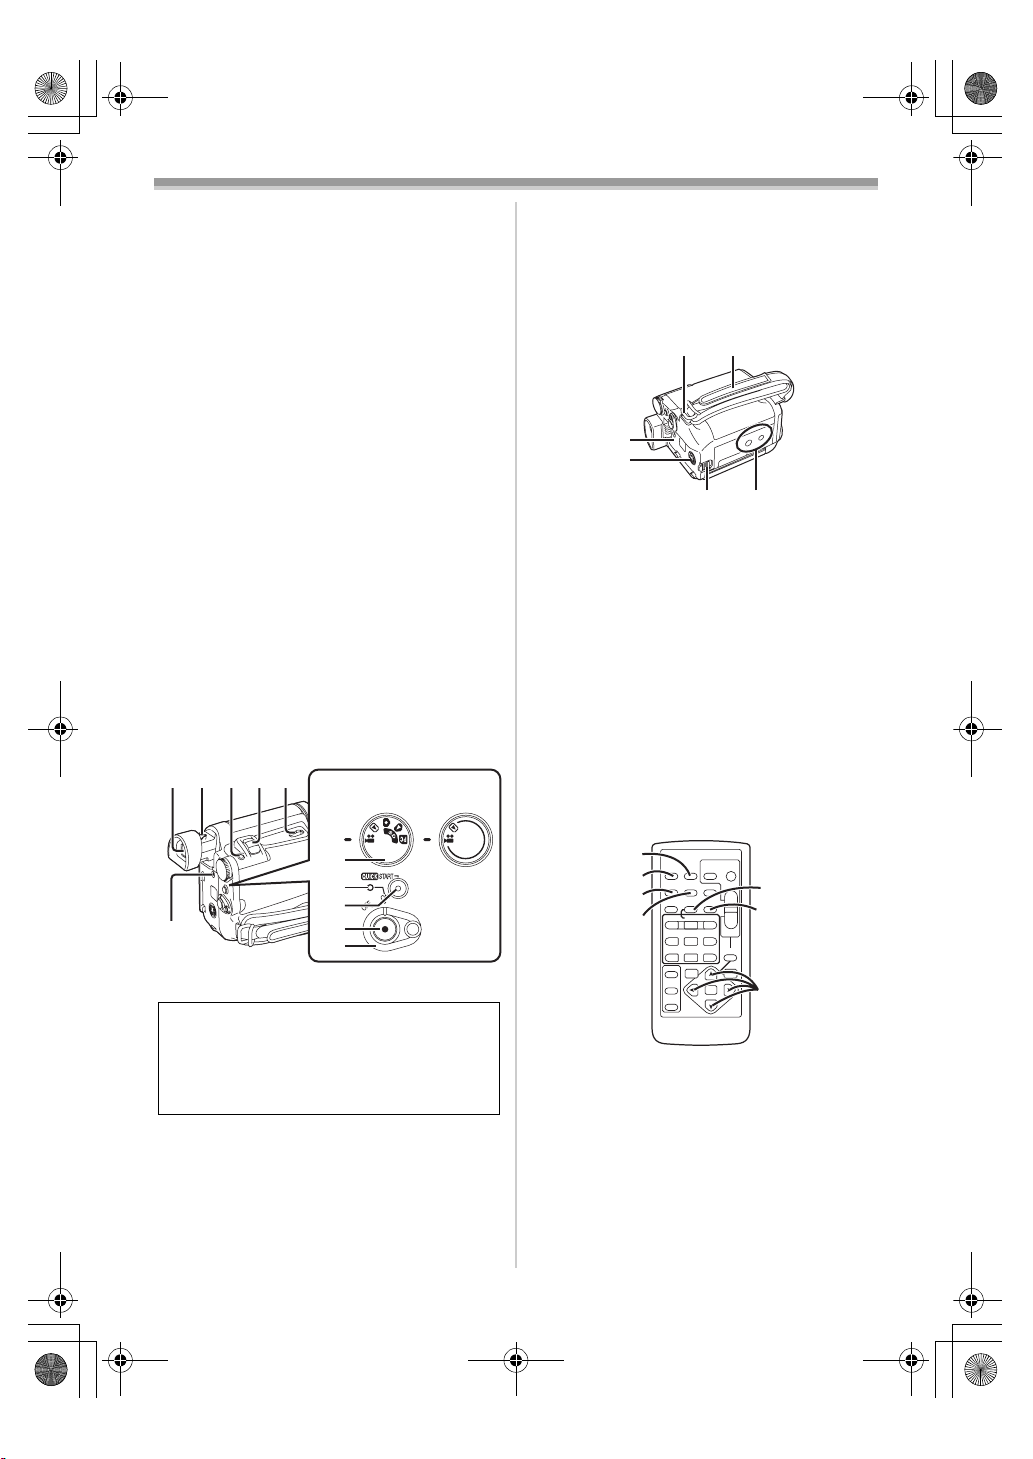
(41)
Quick Start Recording Button
[QUICK START]
-22-
Quick Start Recording Lamp -22-
Recording Start/Stop Button -19-
(42)
Power Switch [OFF/ON] -13-, -19-, -52-
(43)
DC Input Socket [DC/C.C.IN] -9-
(44)
(45) (46)
(47)
(48)
(49) (50)
Shoulder Strap Holders -11-
(45)
Grip Belt -11-
(46)
(47)
Battery Holder
(48) S-Video Output Socket [S-VIDEO OUT]
-39-
Battery Release Lever
(49)
[BATTERY RELEASE]
Tripod Receptacle
(50)
-10-
≥Used for mounting the Movie Camera on an
optional tripod.
ª Remote Controller
(supplied with NV-GS11 and NV-GS15)
Using the wireless Remote Controller that is
supplied with the Movie Camera, most of the
Movie Camera functions can be operated from a
distance.
(39)
(40)
(41)
(44)
(42)
(43)
(34) Viewfinder -13-, -55-
Due to limitations in LCD production
technology, there may be some tiny bright or
dark spots on the Viewfinder screen.
However, this is not a malfunction and does
not affect the recorded picture.
Eyepiece Corrector Knob -13-
(35)
(36)
Photoshot Button [PHOTO SHOT] - 20-,
-21-, -40-
Zoom Lever [W/T] [`VOL/JOG_] -22-
(37)
Cassette Eject Lever [OPEN/EJECT] - 12-
(38)
Mode Dial -13-
(39)
Power Lamp -13-, -19-, -31-
(40)
(51)
(52)
(53)
(54)
DISPLAY
MULTI/
V
STILL ADV
OFF/ON
P.B. DI G I TA L
PHOTO
DATE/
OSD
SHOT
TIME
RESET
TITLE
¥REC
A.DUB
P-IN-P
W
/REW
FF/
PLAY
615
PAUSE
STILL ADV
;
ED
STOP
INDEX INDEX
KL
∫
SELECT
VAR.
SEARCH
STORE
ENTER
START/
STOP
ZOOM
sVOLr
P.B. ZOOM
MENU
(55)
T
(56)
W
(57)
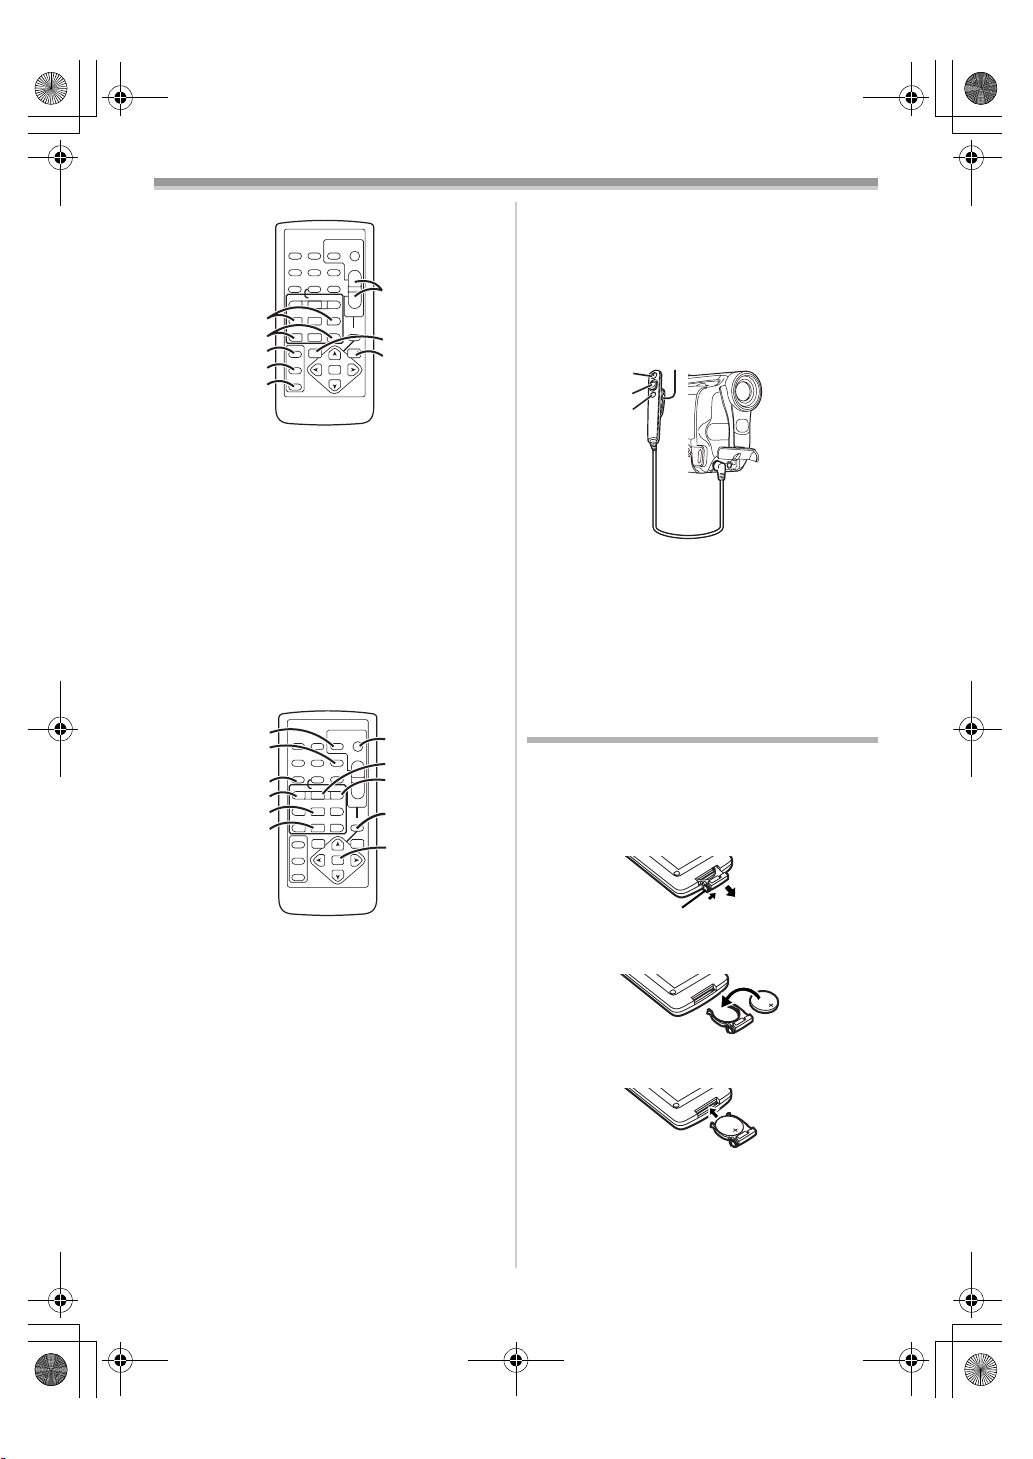
(51) Date/Time Button [DATE/TIME] -46-
Indication Output Button [OSD] -39-
(52)
(53)
Display Button [DISPLAY] -46-
Reset Button [RESET] -59-
(54)
Recording Button [¥REC] (Available only
(55)
with NV-GS15)
Audio Dubbing Button [A.DUB] -40-
(56)
Cursor Buttons for Variable Speed
(57)
Search Function [π, ∫]
-42-
-32-
Direction Buttons for Playback Zoom
Function [π, ∫, ∑, ∏]
-34-
-7-
15EGE-ENG.book 8 ページ 2004年2月9日 月曜日 午前11時10分
Before Use
ª Free Style Remote Controller
This controller allows the scene to be shot from
various angles, high to low, and is also
convenient when the Tripod is used. When the
controller is not in use, attach the clip to the Grip
Belt for convenience.
This controller allows the Movie Camera to be for
left-handed users.
(77)
(78)
(79)
(58)
(59)
(60)
(61)
(62)
PHOTO
DATE/
OSD
SHOT
TIME
DISPLAY
RESET
TITLE
MULTI/
¥REC
A.DUB
P-IN-P
V
W
/REW
FF/
PLAY
615
STILL ADV
PAUSE
STILL ADV
;
ED
STOP
INDEX INDEX
KL
∫
SELECT
VAR.
SEARCH
STORE
ENTER
OFF/ON
P.B. DI G I TA L
START/
STOP
ZOOM
sVOLr
P.B. ZOOM
MENU
T
(63)
W
(64)
(65)
(80)
(58) Slow Motion/Still Advance Buttons [E, D]
(E: reverse, D:forward)
Index Search Buttons [:, 9]
(59)
(:: reverse, 9:forward)
(60)
Selection Button [SELECT] -34-
Store Button [STORE] -35-
(61)
Off/On Button [OFF/ON] -34-
(62)
Zoom/Volume Button [ZOOM/VOL]
(63)
-32-
-33-
-22-, -31-, -34-
Variable Speed Search Button
(64)
[VAR. SEARCH]
Menu Button [MENU] -14-
(65)
(66)
(67)
(68)
(69)
(70)
(71)
(66)
Photoshot Button [PHOTO SHOT] - 21-, -40-
Title Button [TITLE] -37-
(67)
(68)
Multi-Picture/Picture-in-Picture Button
[MULTI/P-IN-P]
Rewind/Review Button [6] -31-, -35-
(69)
Pause Button [;] -32-
(70)
Stop Button [∫] -31-, -35-
(71)
Recording Start/Stop Button
(72)
[START/STOP]
Play Button [1] -31-, -35-
(73)
Fast-forward/Cue Button [5] -31- , -35-
(74)
Playback Zoom Button [P.B. ZOOM] - 34-
(75)
Enter Button [ENTER] -14-
(76)
-32-
PHOTO
DATE/
OSD
SHOT
TIME
DISPLAY
RESET
TITLE
MULTI/
¥REC
A.DUB
P-IN-P
V
W
/REW
FF/
PLAY
615
STILL ADV
PAUSE
STILL ADV
;
ED
STOP
INDEX INDEX
KL
∫
SELECT
VAR.
SEARCH
STORE
ENTER
OFF/ON
P.B. DI G I TA L
-29-, -35-
-19-
START/
STOP
ZOOM
sVOLr
P.B. ZOOM
MENU
(72)
(73)
T
(74)
W
(75)
(76)
(77) Recording Start/Stop Button [REC]
(78) Zoom Lever [W/T]
(79) Photoshot Button [PHOTO SHOT]
(80) Clip
≥Insert the plug securely into the [REMOTE]
Socket as far as it will goes. A loose
connection will spoil normal operation.
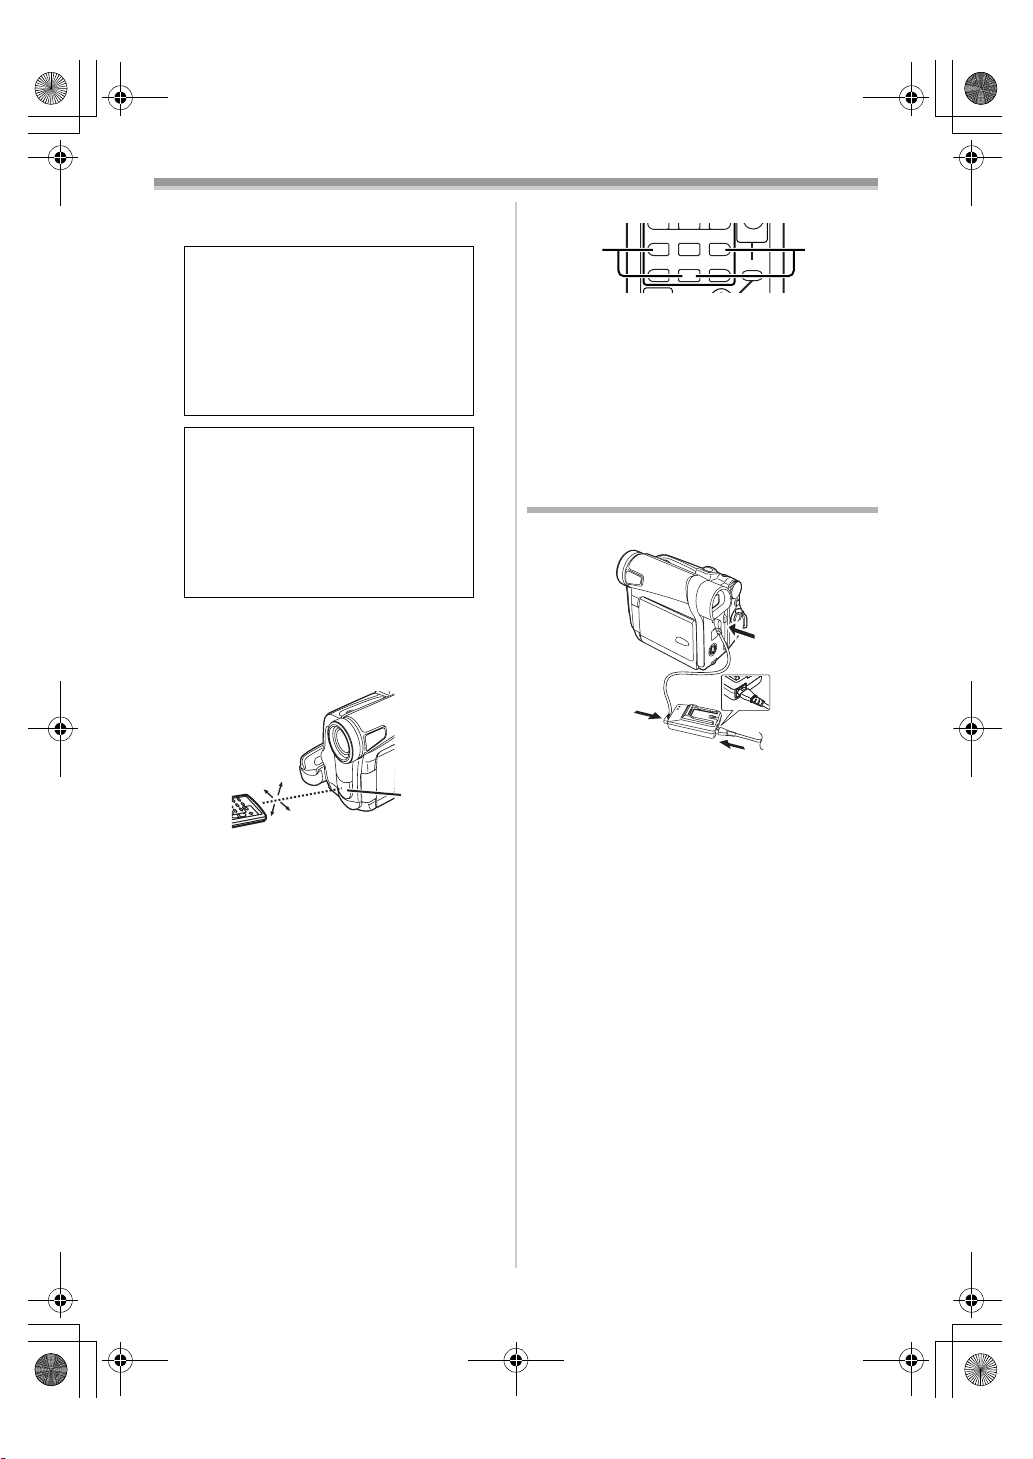
The Remote Controller (supplied
with NV-GS11 and NV-GS15)
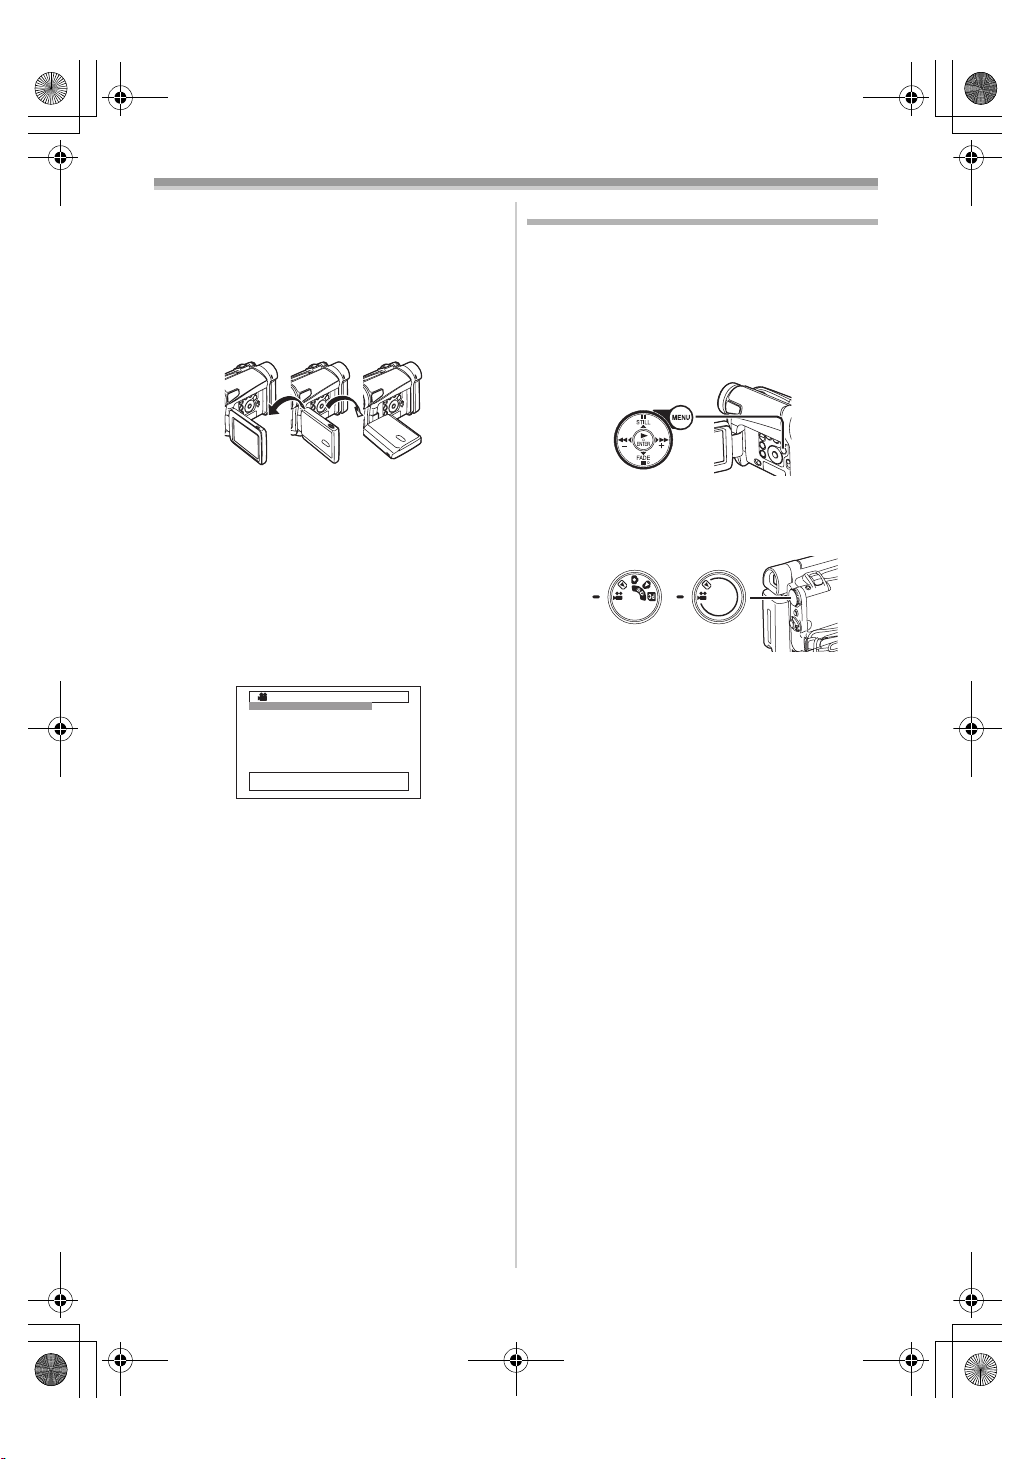
ª Inserting a Button-type Battery
Before using the Remote Controller, insert the
supplied button-type battery.
1 While pressing the Stopper 1, pull out the
Battery Holder.
1
2 Insert the button-type battery with the (i)
marking facing upward.
3 Insert the Battery Holder into the Remote
Controller.
≥When the button-type battery is exhausted,
replace it with a new CR2025 battery. (A battery
is normally expected to last about 1 year.
However, it depends on operation frequency.)
-8-
T
W
615
15EGE-ENG.book 9 ページ 2004年2月9日 月曜日 午前11時10分
Before Use
≥Make sure to match the poles correctly when
inserting the battery.
CAUTION
Danger of explosion if battery is
incorrectly replaced. Replace only
with the same or equivalent type
recommended by the equipment
manufacturer. Discard used batteries
according to manufacturer’s
instructions.
WARNING
Risk of fire, explosion and burns. Do
not recharge, disassemble, heat
above 100xC or incinerate. Keep the
Button-Type battery out of the reach
of children. Never put Button-Type
battery in mouth. If swallowed call
your doctor.
ª Using the Remote Controller
1 Direct the Remote Controller at the Remote
Control Sensor
and press an appropriate button.
≥Distance from the Movie Camera: Within
approximately 5 metres
≥Angle: Within approximately 15o in the
vertical and horizontal directions from the
central axis
≥The above operating ranges are for indoor use.
Outdoors or under strong light, the Movie
Camera may not operate properly even within
the above ranges.
Selecting Remote Controller Modes
When 2 Movie Cameras are used
simultaneously, they can be operated individually
by selecting different Remote Controller Modes.
≥If the Remote Controller Mode of the Movie
Camera and that of the Remote Controller do
not match, [REMOTE] Indication is displayed.
Setup on the Movie Camera:
Set [REMOTE] on the [INITIAL] Sub-Menu to the
desired Remote Controller Mode. (
(31) of the Movie Camera
15˚
15˚
15˚
15˚
(31)
-16-)
Setup on the Remote Controller:
STILL ADV
PAUS E
STILL ADV
;
21
ED
INDEX INDEX
STOP
KL
P.B. ZOOM
∫
[VCR1]:
Press the [D] Button and [∫] Button
simultaneously. 1
[VCR2]:
Press the [E] Button and [∫] Button
simultaneously. 2
≥When the battery in the Remote Controller is
replaced, the mode is automatically reset to
[VCR1] Mode.
Power Supply
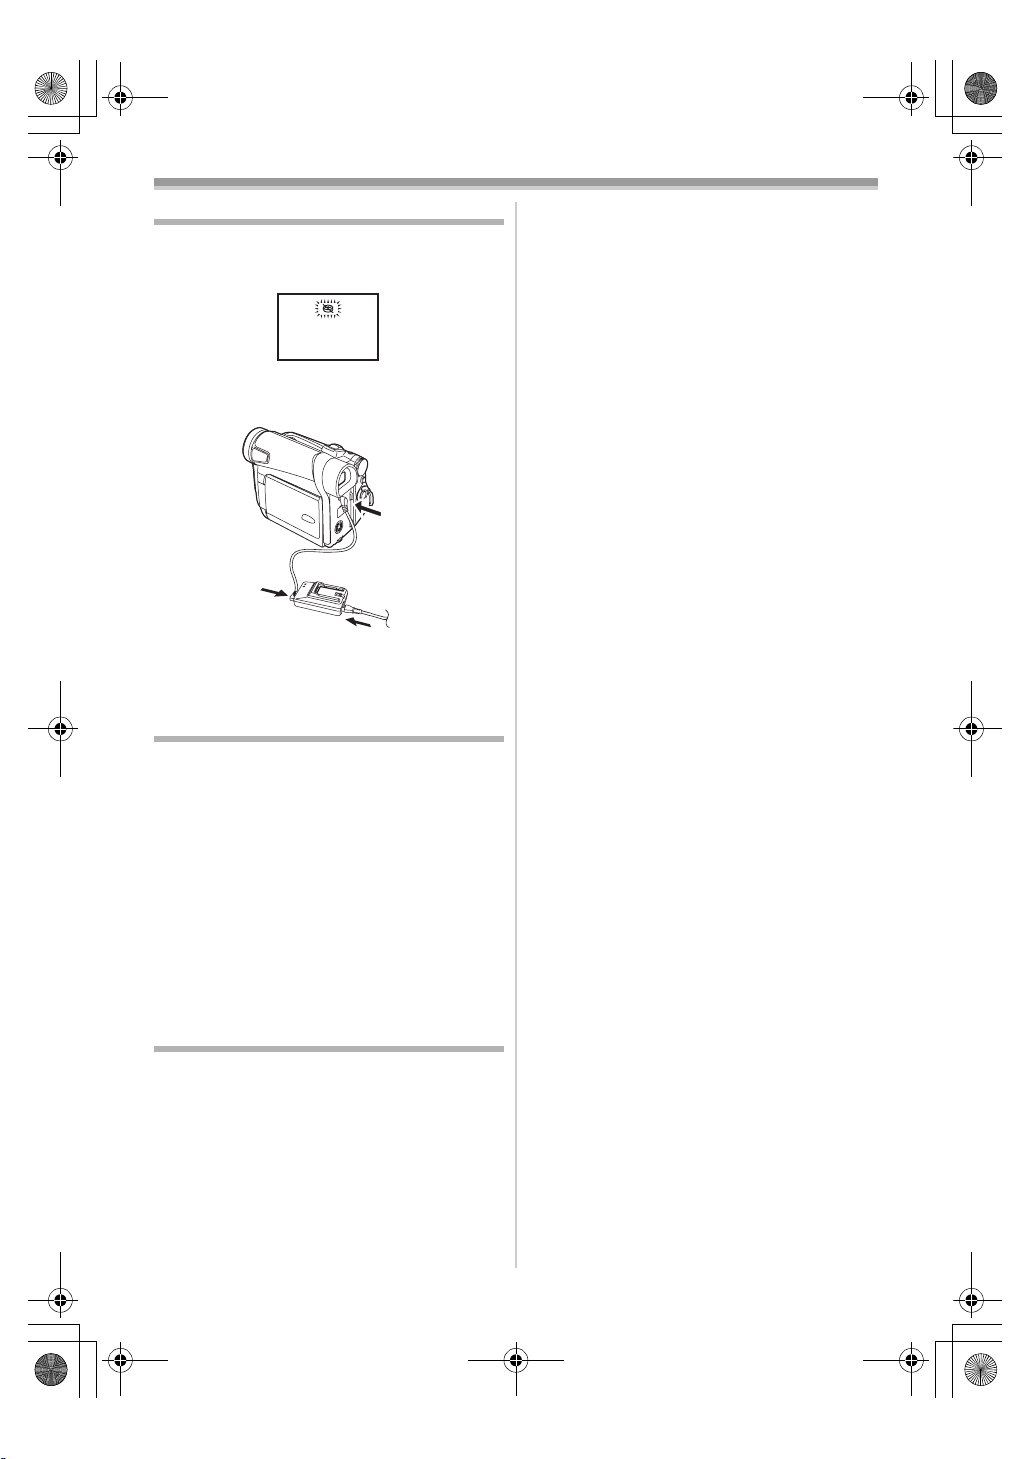
ª Using the AC Adaptor
1
1
2
3
1
Connect the DC Input Lead to the
[DC/C.C.IN] Socket on the Movie Camera.
2 Connect the DC Input Lead to the AC
Adaptor.
3 Connect the AC Mains Lead to the AC
Adaptor and the AC mains socket.
≥The AC Mains Lead’s outlet plug does not fit
entirely into the AC Adaptor socket. A gap will
remain as shown 1.
≥Before connecting or disconnecting the
power supply, set the [OFF/ON] Switch on
the Movie Camera to [OFF] and make sure
that Power Lamp is not lit.
-9-
15EGE-ENG.book 10 ページ 2004年2月9日 月曜日 午前11時10分
Before Use
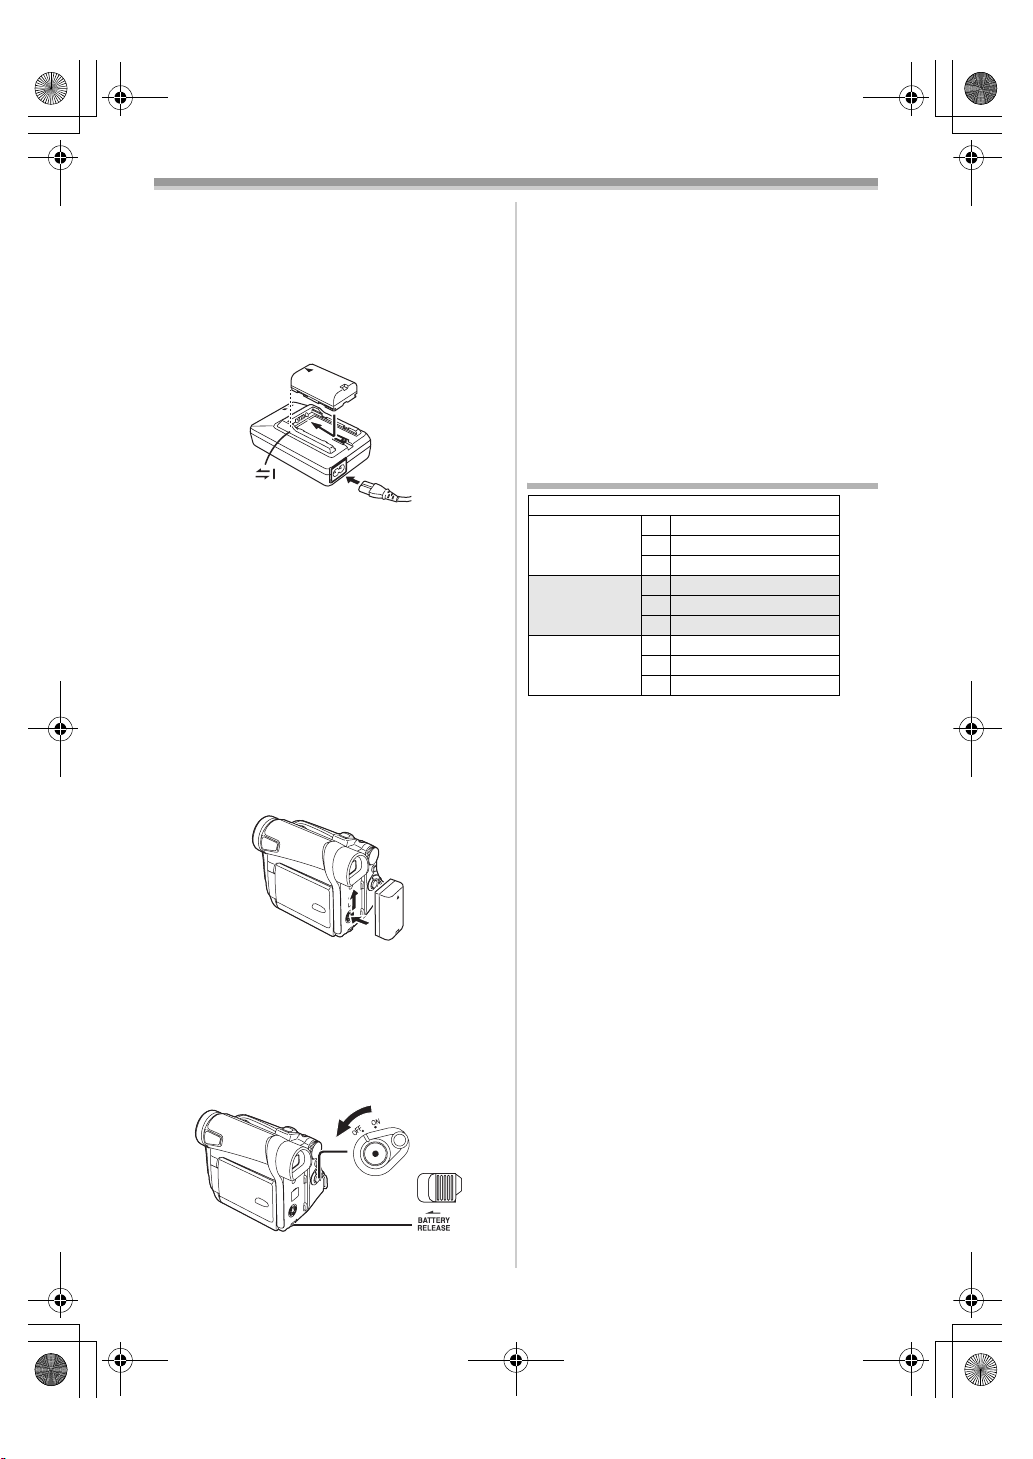
ª Using the Battery
Before use, fully charge the Battery.
≥We recommend using Panasonic’s Battery.
≥We cannot guarantee the quality of this Movie
Camera when batteries of other companies are
used.
1 Attach the Battery to the AC Adaptor and
charge it.
≥Since the Battery will not be charged when
the DC Input Lead is connected to the AC
Adaptor, disconnect it from the AC Adaptor.
≥The [POWER] Lamp and [CHARGE] Lamp
lights up, and charging starts.
≥When the [CHARGE] Lamp goes off,
charging is completed.
≥When charging the overdischarged battery,
the [CHARGE] lamp blinks at first, but the
battery is charged normally. When the
temperature of the battery is too high or low,
the [CHARGE] lamp blinks and the charging
time becomes longer than usual.
2 Attach the charged Battery to the Movie
Camera.
To Remove the Battery
Set the [OFF/ON] Switch (43) to [OFF], and while
sliding the [BATTERY RELEASE] Lever
slide the Battery to remove it.
≥When attaching or removing Battery, set the
[OFF/ON] Switch to [OFF] and make sure the
[POWER] Lamp is not lit.
(49),
(43)
ª Using the Car Battery Charger
(optional)
If you use the Car Battery Charger (VW-KBD2E;
optional), you can supply power to the Movie
Camera and charge the battery inside your car.
For further information, refer to the instruction
manual of the Car Battery Charger.
≥Be sure to start the car engine before you
connect the Car Adaptor Cord, otherwise the
fuse may blow.
≥For other notes concerning this item, see
-47-.
Charging Time and Available
Recording Time
NV-GS8/NV-GS11/NV-GS15
CGR-D08R
CGR-D08S
CGR-D16S A 2h
CGP-D28S A 3h15min.
A Charging Time
B Maximum Continuous Recording Time
C Intermittent Recording Time
(Intermittent Recording Time is the available
recording time with repeated recording and
stopping actions.)
“1h10min.” indicates 1 hour and 10 minutes.
≥Battery CGR-D08R is supplied.
≥The times shown in the table are approximate
times. The numbers indicate the recording time
when the Viewfinder is used. The numbers in
parentheses indicate the recording time when
the LCD Monitor is used. In actual use, the
available recording time may be shorter.
≥The times shown in the table are for continuous
recording at a temperature of 25oC and humidity
of 60%. If the Battery is charged at a higher or
lower temperature, the charging time may be
longer.
≥The available recording time becomes shorter if
you use both of Viewfinder and LCD Monitor
simultaneously when using the Colour Night
View function, rotating the LCD Monitor
frontward to record yourself or setting
[EVF ON/AUTO] to [ON].
A 1h
B 2h10min. (1h45min.)
C 1h5min. (55min.)
B 4h20min. (3h30min.)
C 2h10min. (1h45min.)
B 7h40min. (6h)
C 3h50min. (3h)
(49)
-10-
15EGE-ENG.book 11 ページ 2004年2月9日 月曜日 午前11時10分
Before Use
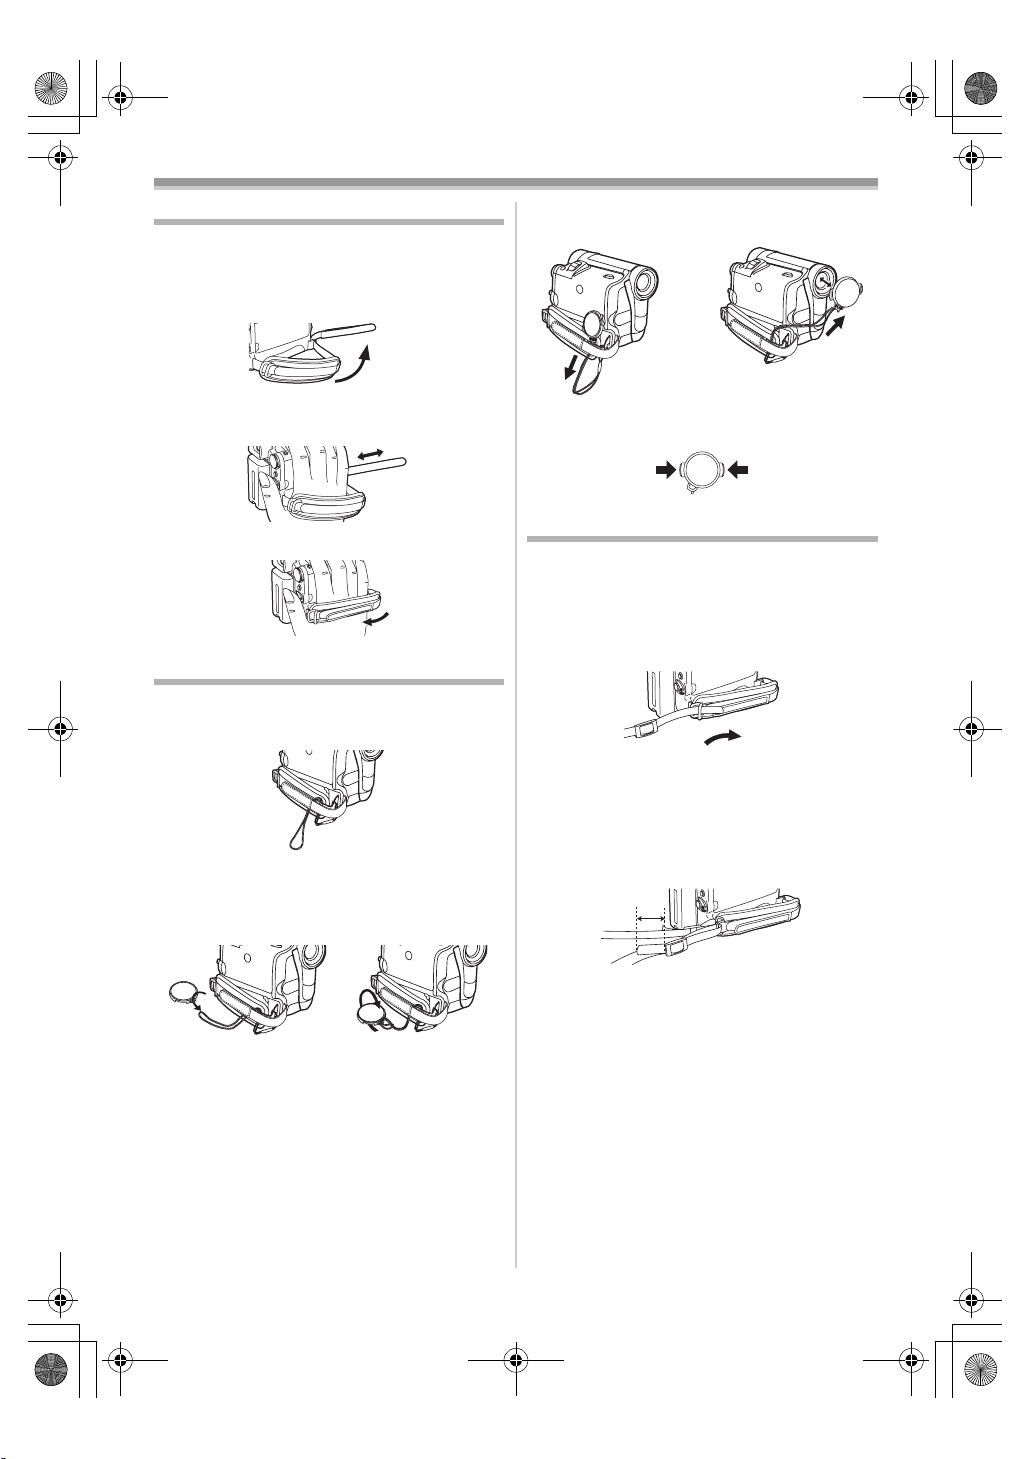
The Grip Belt
ª To Use as a Grip Belt
Adjust the length of the Grip Belt to the size of
your hand.
1 Detach the end of the Grip Belt.
2 Adjust the length of the Grip Belt to the size
of your hand.
3 Reattach the Grip Belt.
Re-attaching the Lens Cap
To protect the Lens surface, attach the Lens Cap.
1 The Lens Cap and Lens Cap Cord comes
preattached to the Grip Belt.
2 Pass the end of the Lens Cap Cord through
the attached eye on the Lens Cap. Then
pass the Lens Cap through the loop made
by itself and pull tight.
≥When you are not recording, be sure to cover
the Lens with the Lens Cap for protection.
1
≥When you remove the Lens Cap, press the
knobs firmly.
2
2
Attaching the Shoulder Strap
We recommend that you attach the Shoulder
Strap before going out of doors to record so as to
avoid dropping the Movie Camera.
1 Pull the end of the Shoulder Strap through
the Shoulder Strap Holder on the Movie
Camera.
2 Fold the end of the Shoulder Strap, run it
through the Shoulder Strap Length
Adjuster, and pull it.
≥Pull it out more than 2 cm 1 from the
Shoulder Strap Length Adjuster so that it
cannot slip off.
1
≥When not using the Lens Cap, pull the Lens
Cap Cord in the direction of the arrow. 1
≥Attach the other end of the Shoulder Strap to
the other Shoulder Strap Holder in the same
way.
-11-

15EGE-ENG.book 12 ページ 2004年2月9日 月曜日 午前11時10分
Before Use
Inserting a Cassette
1 Slide the [OPEN/EJECT] Lever (38) toward
the front and pull down to fully open the
Cassette Compartment Cover.
≥To protect the tape, if the cover is not fully
opened, the cassette cannot be ejected.
2 Insert a Cassette.
3 Close the Cassette Holder by pressing the
[PUSH] mark 1.
1
PUSH
4 Close the Cassette Compartment Cover.
ª Accidental Erasure Prevention
Opening the accidental erasure prevention slider
1 on the cassette (by sliding it to the [SAVE]
arrow direction) prevents recording. To enable
recording, close the accidental erasure
prevention slider (by sliding it to the [REC] arrow
direction).
1
R E C
SAVE
≥For other notes concerning this item, see
OPEN/
EJECT
(38)
-47-.
Using a Card (NV-GS15 only)
A Card can be used to record pictures.
Before inserting or removing a Card, be sure
to turn off the Movie Camera.
≥Otherwise, the Movie Camera may not function
properly or it may cause the loss of recorded
data in a Card.
ª Inserting a Card
1 Slide the [OPEN] Lever (3) to open the Card
Slot Cover
2 While holding the Memory Card with its cut
corner facing right 1, insert it into the Card
Slot
3 Close the Card Slot Cover (5) securely.
Removing the Card
Open the Card Slot Cover and press the centre of
the Card and then pull it straight out.
≥After removing the Card, close the Card Slot
Cover.
≥The Movie Camera may be damaged if the
Card is forced out when the Card is fully
inserted.
ª Card Access Lamp (14)
While the Movie Camera is accessing the Card
(reading, recording, playback or erasing), Card
Access Lamp lights up.
≥While Card Access Lamp is on, never attempt
to open the Card Slot Cover, to pull out the
Card, to turn off the Movie Camera, or to turn
the Mode Dial. Such actions will damage the
Card, and recorded data, and cause the Movie
Camera to malfunction.
(4).
(14)
(3)
OPEN
(5).
(5)
(4)
1
RESET
-12-
15EGE-ENG.book 13 ページ 2004年2月9日 月曜日 午前11時10分
Before Use
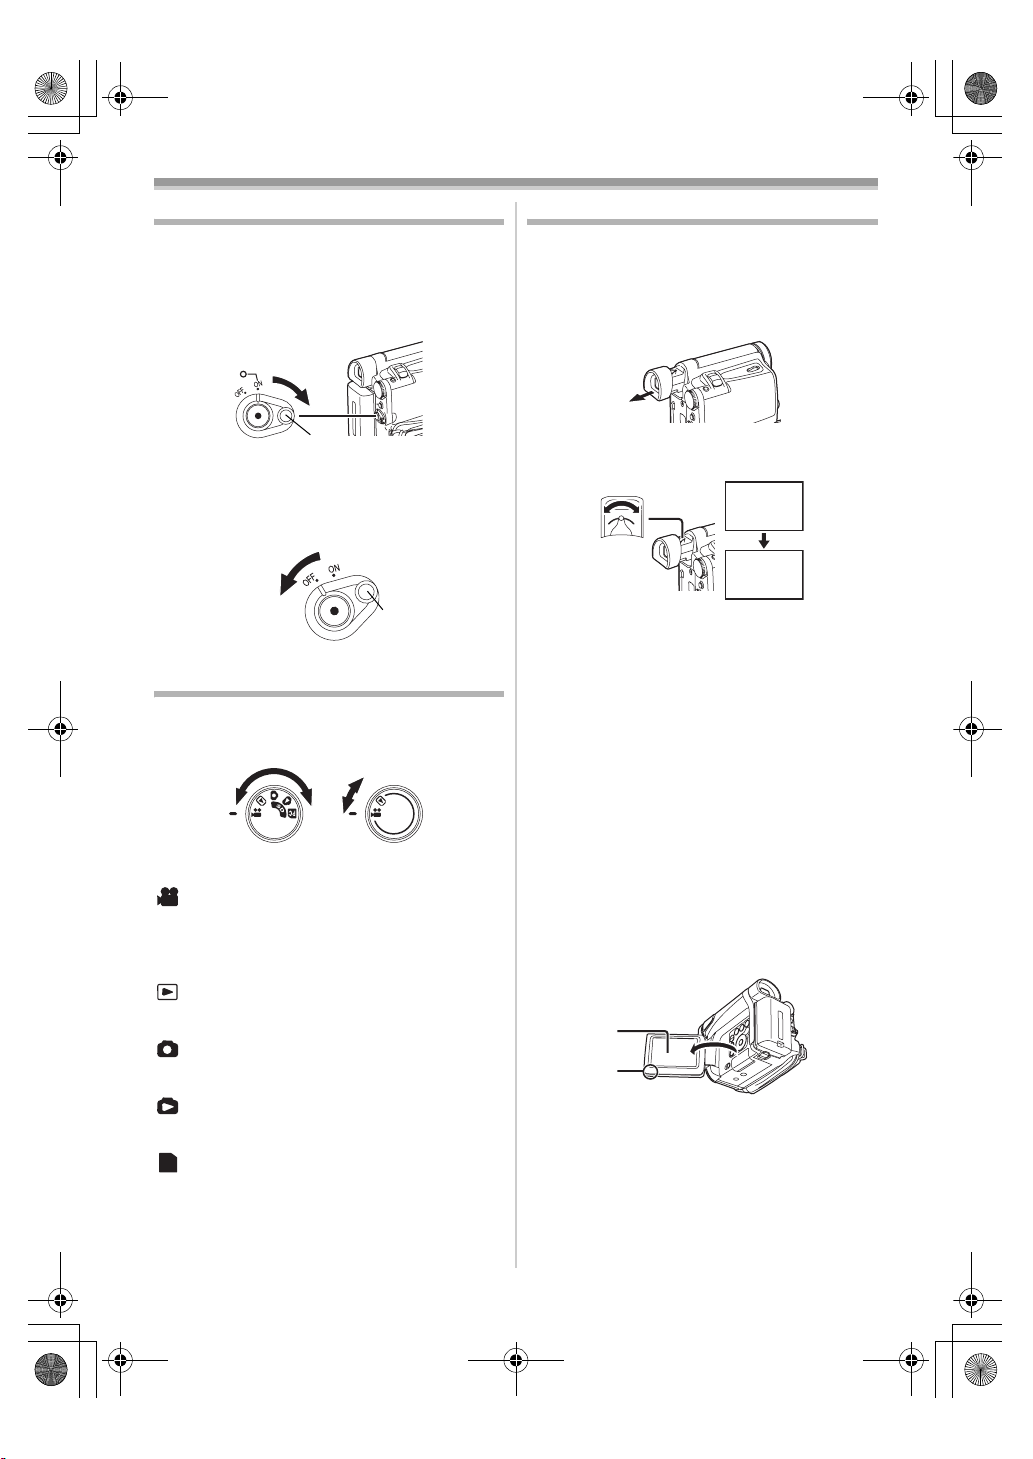
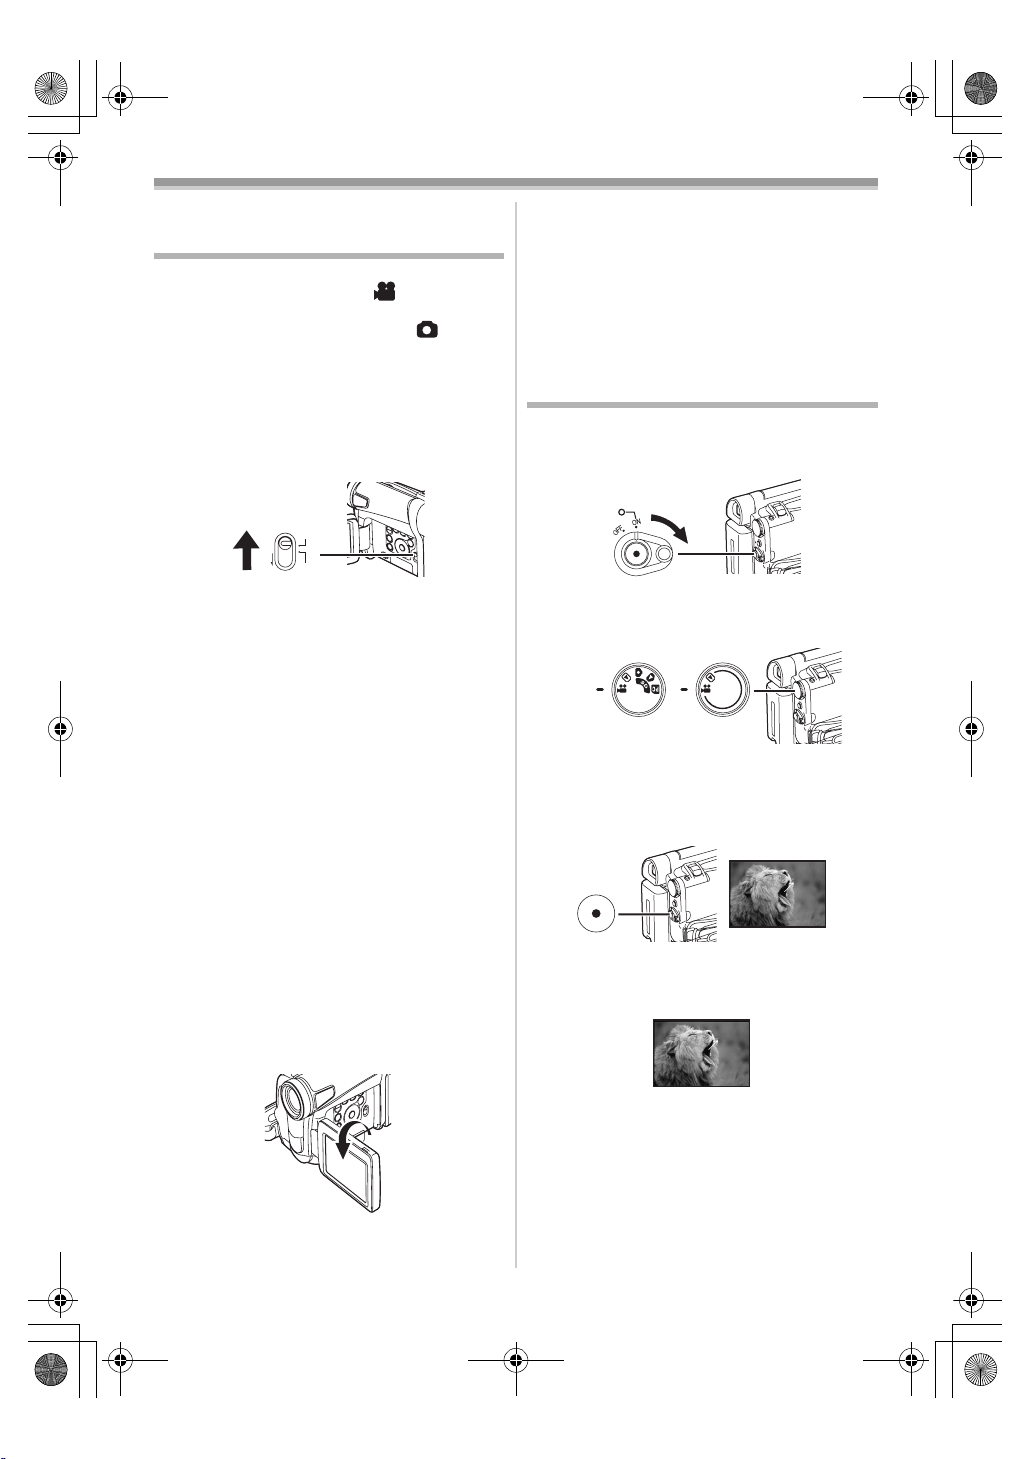
Turning on the Movie Camera
ª How to Turn on the Power
1 Set the [OFF/ON] Switch (43) to [ON] while
pressing the button 1.
≥The [POWER] Lamp
(40)
(43)
(40) lights up.
1
ª How to Turn off the Power
1 Set the [OFF/ON] Switch (43) to [OFF] while
pressing the button 1.
(43)
1
Selecting Modes
You can choose a desired mode by rotating the
Mode Dial.
1 Rotate the Mode Dial (39).
(39)
NV-GS15 NV-GS8/NV-GS11
:Tape Recording Mode
Use this mode when recording pictures on a tape.
NV-GS15 only: Also, you can record still pictures
on the card simultaneously during recording on a
tape.
:Tape Playback Mode
Use this mode when playing back the recorded
scene on a tape.
:Card Recording Mode (NV-GS15 only)
Use this mode when recording still pictures on a
card.
:Picture Playback Mode (NV-GS15 only)
Use this mode when playing back the recorded
still picture on a card.
:PC Mode (NV-GS15 only)
PC
Use this mode when you want to connect the
Movie Camera to your Personal Computer.
Using the Viewfinder/LCD Monitor
ª Using the Viewfinder
Before using the Viewfinder, adjust the field of
view so that the displays inside the Viewfinder
become clear and easy to read.
1 Pull the Viewfinder.
2 Adjust by turning the Eyepiece Corrector
To Use the Viewfinder at the Same Time as the
LCD Monitor
Set [LCD/EVF] >> [EVF ON/AUTO] >> [ON].
≥The Viewfinder does not turn off even if the LCD
≥When you turn the Movie Camera off, this
ª Using the LCD Monitor
With the LCD Monitor open, you can also record
the picture while watching it.
1 Put a finger on the [OPEN4] Knob (1) and
(35).
Knob
12:30:45
12:30:45
12:30:45
15.10.2004
15.10.2004
15.10.2004
(35)
12:30:45
15.10.2004
Monitor is opened.
setting is cancelled.
pull the LCD Monitor
(2) out in the direction
of the arrow.
≥The Viewfinder is deactivated.
≥The LCD Monitor can be opened a maximum
of 120o. If you open the LCD monitor by 120o,
it becomes convenient to operate menus or to
play back pictures.
(2)
(1)
-13-
15EGE-ENG.book 14 ページ 2004年2月9日 月曜日 午前11時10分
Before Use
2 Adjust the LCD Monitor angle according to
the desired recording angle.
≥The LCD Monitor can rotate a maximum of
180o 1 from the vertical position upwards
and a maximum of 90o 2 to the downward
direction. Forcefully rotating the LCD Monitor
beyond these ranges will damage the Movie
Camera.
290o1180o
Closing the LCD Monitor
Push the LCD Monitor until it is securely locked.
≥Make sure the Card Slot Cover is closed
(NV-GS15 only).
ª Adjusting Brightness and Colour
Level
When [LCD/EVF SET] on the [LCD/EVF]
Sub-Menu is set to [YES], the following items are
displayed.
LCD/EVF SETUP
1LCD BRIGHTNESS
[-]||||----[+]
LCD COLOUR LEVEL
[-]||||----[+]
EVF BRIGHTNESS
[-]||||----[+]
;/∫:SELECT &/%:SETUP
!/MENU:EXIT
LCD Brightness [LCD BRIGHTNESS]
Adjusts the brightness of the image on the LCD
screen.
LCD Colour Level [LCD COLOUR LEVEL]
Adjusts the colour saturation of the image on the
LCD screen.
Brightness of the Viewfinder
[EVF BRIGHTNESS]
Adjusts the brightness of the image in the
Viewfinder.
To Adjust
Press the [;/∫] Button and select the item to be
adjusted, and then press the [6/5] Button to
raise or lower the number of vertical bars in the
Bar Indication.
≥A larger number of vertical bars indicates
stronger brightness or colour saturation.
≥For other notes concerning this item, see
.
-55-.
Using the Menu Screen
To facilitate the selection of a desired function or
setup, this Movie Camera displays various
function setups on Menus.
≥When operating the menu with the Viewfinder,
set [LCD/EVF] >> [EVF ON/AUTO] >> [ON] or
rotate the LCD monitor by 180o.
1 Press the [MENU] Button (20).
(20)
≥The Menu corresponding to the Mode
selected by using the Mode Dial
displayed.
(39)
NV-GS15 NV-GS8/
NV-GS11
2 Press the [;/∫] Button to select a desired
Sub-Menu.
≥Press the [;/∫] Button to display the
highlighted item.
3 Press the [5] Button to display the
selected Sub-Menu.
4 Press the [;/∫] Button to select the item.
5 Press the [5] Button to display the
selected item.
6 Press the [;/∫] Button to select the desired
mode and press [ENTER] Button to
determine the setting.
≥While a Menu is displayed, you cannot record or
play back. Menus can be displayed during
playback but not during recording. The above
operations can be done using the [MENU]
Button, [π, ∫, ∑, ∏] Buttons and [ENTER]
Button on the Remote Controller (supplied with
NV-GS11 and NV-GS15). (
To Return the Previous Screen
Press the [6] Button.
To Exit the Menu Screen
Press the [MENU] Button again.
About the Menu Mode Setting
The setting selected on the Menu will be retained
even when the Movie Camera is turned off.
However, if the Battery or AC Adaptor is
disconnected before turning off the Movie
Camera, the selected setup may not be retained.
(The setups of [EFFECT2] (
-29-) are not retained.)
(39) is
-7-)
≥Menu operation flow is shown in this text by >>.
-14-
15EGE-ENG.book 15 ページ 2004年2月9日 月曜日 午前11時10分
Before Use
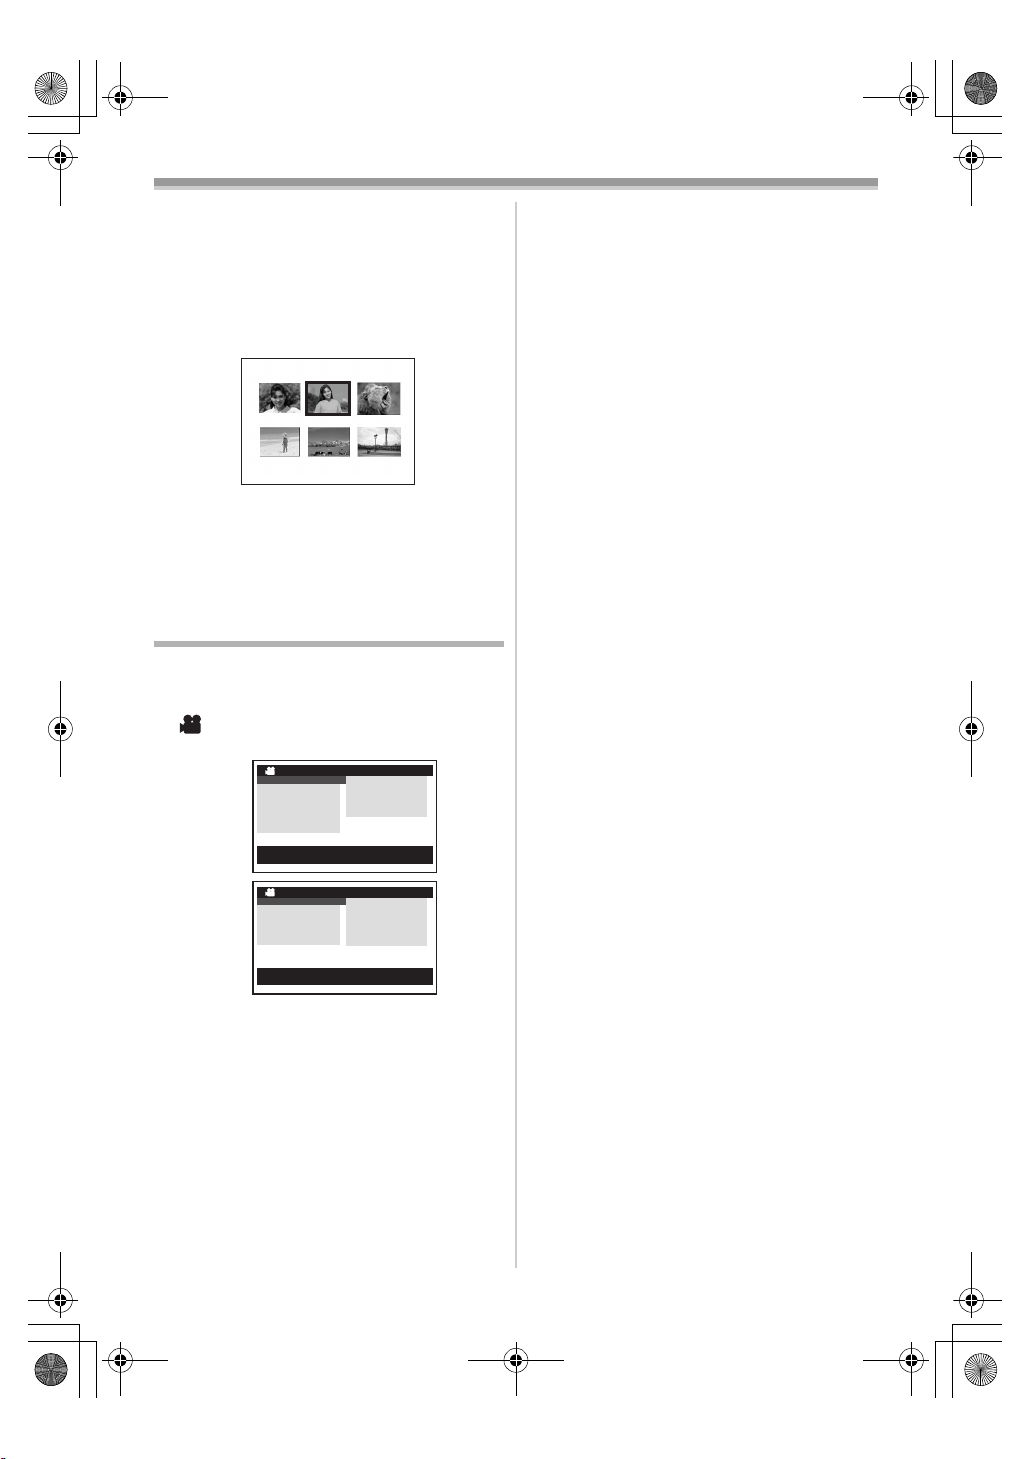
ª File Selection in the Picture Playback
Mode (NV-GS15 only)
A File Selection Operation may be necessary
during Menu Operations. In this case, carry out
the following procedure.
1 Press the [;/∫/6/5] Button and select
a file.
≥The selected file is marked by a frame.
PICTURE
No.25 100-0012
2 Press the [ENTER] Button (17) to confirm
the selection of the file.
≥After the above File Selection Procedure, carry
out the various Menu Operations. (The above
procedure will not be repeated in the following
instructions.)
List of Menus
The figures of the Menus are for explanation
purposes only, and they are different from the
actual Menus.
ª [TAPE RECORDING MENU]
Tape Recording Mode
NV-GS15
NV-GS8/
NV-GS11
1) [CAMERA]
Camera Setup Sub-Menu
[PROG.AE]
Auto Exposure Mode
[SIS]
Image Stabilizer
[D.ZOOM]
Digital Zoom
[SHTR EFFECT] (NV-GS8 and NV-GS11 only)
Shutter Effect
≥You can add a sound like releasing the shutter.
[SELF TIMER]
Self-timer Recording
[USB FUNCTION]
USB Functions Mode
TAPE RECORDING MENU
CAMERA !
DIGITAL
CARD
RECORDING
DISPLAY
LCD/EVF
INITIAL
;/∫:SELECT %:NEXT
MENU:EXIT
TAPE RECORDING MENU
CAMERA !
DIGITAL
RECORDING
DISPLAY
LCD/EVF
INITIAL
;/∫:SELECT %:NEXT
MENU:EXIT
PROG.AE
SIS
D.ZOOM
SELF TIMER
USB FUNCTION
PROG.AE
SIS
D.ZOOM
SHTR EFFECT
SELF TIMER
USB FUNCTION
-25-
-23-
-23-
-20-
-22-
-43-
≥If you press [6] Button, the menu changes
back to the previous screen.
2) [DIGITAL]
Digital Setup Sub-Menu
[EFFECT1]
Digital Effects 1
-29-
[EFFECT2]
Digital Effects 2
-29-
[MULTI MODE]
Multi-Picture Mode
-29-
[TITLE IN] (NV-GS15 only)
Adding a Title
-37-
3) [CARD] (NV-GS15 only)
Card Setup Sub-Menu
[PICT QUALITY]
Picture Quality
-21-
[CREATE TITLE]
Title Creation
-36-
4) [RECORDING]
Recording Setup Sub-Menu
[REC SPEED]
Recording Speed Mode
-18-
[AUDIO REC]
Audio Recording Mode
-18-
[SCENE INDEX]
Scene Index Mode
-33-
[WIND CUT]
Wind Noise Reduction
-25-
[ZOOM MIC]
Zoom Microphone
-23-
[CINEMA]
Cinema-like Format Recording
-25-
5) [DISPLAY]
Display Setup Sub-Menu
[DISPLAY]
Display Mode
-46-
[DATE/TIME]
Date and Time Indication
-46-
[C.DISPLAY]
Counter Display Mode
-46-
[C.RESET]
Counter Reset
-59-
≥It resets the counter to zero. However, it cannot
reset the Time Code.
6) [LCD/EVF]
LCD/EVF Setup Sub-Menu
[LCD/EVF SET]
LCD and Viewfinder Adjustment
-14-
[SELF REC]
Recording Yourself
-19-
[EVF ON/AUTO]
Using the Viewfinder
-13-
7) [INITIAL]
Initial Setup Sub-Menu
[BLANK SEARCH]
Blank Search
-20-
-15-
15EGE-ENG.book 16 ページ 2004年2月9日 月曜日 午前11時10分
Before Use
[DEMO MODE]
Demonstration Mode
≥If no operation takes place for approximately
10 minutes after the AC Adaptor is connected to
the Movie Camera and the [OFF/ON] Switch is
turned to [ON] without inserting a Cassette or a
Card, the Movie Camera is automatically set to
Demonstration Mode for introducing its
functions. If any button is pressed or operated,
the Demonstration Mode is cancelled. The
Demonstration Mode can be started by setting
[DEMO MODE] to [ON] and by exiting the
Menu. To terminate the Demonstration Mode,
insert a Cassette or set the [DEMO MODE] to
[OFF].
[AV JACK]
AV Socket
-57-
[REMOTE]
Remote Controller Mode
-9-
[BEEP SOUND]
Beep Sound
-47-
[CLOCK SET]
Date and Time Setting
-17-
[INITIAL SET]
Initial Setting Mode
-46-
ª [TAPE PLAYBACK MENU]
Tape Playback Mode
NV-GS15
NV-GS8/
NV-GS11
1) [PLAYBACK]
Playback Functions Sub-Menu
[SEARCH]
Index Search Mode
[12bit AUDIO]
Audio Selector
[AUDIO OUT]
Audio Output Mode
[USB FUNCTION]
USB Functions Mode
2) [DIGITAL]
Playback Digital Setup Sub-Menu
[EFFECT ON]
Digital Effect On/Off
[EFFECT SEL]
Digital Effect Selection
TAPE PLAYBACK MENU
PLAYBACK !
DIGITAL
CARD
RECORDING
DISPLAY
LCD/EVF
INITIAL
;/∫:SELECT %:NEXT
MENU:EXIT
TAPE PLAYBACK MENU
PLAYBACK !
DIGITAL
RECORDING
DISPLAY
LCD/EVF
INITIAL
;/∫:SELECT %:NEXT
MENU:EXIT
SEARCH
12bit AUDIO
AUDIO OUT
USB FUNCTION
SEARCH
12bit AUDIO
AUDIO OUT
USB FUNCTION
-33-
-41-
-51-
-43-
-34-
-34-
[TITLE IN] (NV-GS15 only)
Adding a Title
-37-
3) [CARD] (NV-GS15 only)
Card Setup Sub-Menu
[PICT QUALITY]
Picture Quality
-21-
[CREATE TITLE]
Title Creation
-36-
4) [RECORDING]
Recording Setup Sub-Menu
[REC SPEED]
Recording Speed Mode
-18-
[AUDIO REC]
Audio Recording Mode
-18-
5) [DISPLAY]
Display Setup Sub-Menu
≥All of the items on the [DISPLAY] Sub-Menu are
the same as those on the [DISPLAY] Sub-Menu
of the [TAPE RECORDING MENU] Main-Menu.
6) [LCD/EVF]
Adjusting Brightness and Colour Level
[LCD/EVF SET]
LCD and Viewfinder Adjustment
-14-
[EVF ON/AUTO]
Using the Viewfinder
-13-
7) [INITIAL]
Initial Setup Sub-Menu
[BLANK SEARCH]
Blank Search
-20-
[AV JACK]
AV Socket
-57-
[REMOTE]
Remote Controller Mode
-9-
[BEEP SOUND]
Beep Sound
-47-
ª [CARD RECORDING MENU]
(NV-GS15 only)
Card Recording Mode
CARD RECORDING MENU
CAMERA !
DIGITAL
CARD
DISPLAY
LCD/EVF
INITIAL
;/∫:SELECT %:NEXT
MENU:EXIT
PROG.AE
SHTR EFFECT
SELF TIMER
1) [CAMERA]
Camera Setup Sub-Menu
[PROG.AE]
Auto Exposure Mode
-25-
[SHTR EFFECT]
Shutter Effect
-48-
≥You can add a sound like releasing the shutter.
[SELF TIMER]
Self-timer Recording
-22-
2) [DIGITAL]
Digital Setup Sub-Menu
-16-
15EGE-ENG.book 17 ページ 2004年2月9日 月曜日 午前11時10分
Before Use
[TITLE IN]
Adding a Title
-37-
3) [CARD]
Card Setup Sub-Menu
[PICT QUALITY]
Picture Quality
-21-
[CREATE TITLE]
Title Creation
-36-
[BURST MODE]
Continuous Photoshot
-21-
4) [DISPLAY]
Display Setup Sub-Menu
[DISPLAY]
Display Mode
-46-
[DATE/TIME]
Date and Time Indication
-46-
5) [LCD/EVF]
Adjusting Brightness and Colour Level
≥All of the items on the [LCD/EVF] Sub-Menu are
the same as those on the [LCD/EVF] Sub-Menu
of the [TAPE RECORDING MENU].
6) [INITIAL]
Initial Setup Sub-Menu
[AV JACK]
AV Socket
-57-
[REMOTE]
Remote Controller Mode
-9-
[BEEP SOUND]
Beep Sound
-47-
[CLOCK SET]
Date and Time Setting
-17-
[INITIAL SET]
Initial Setting Mode
-46-
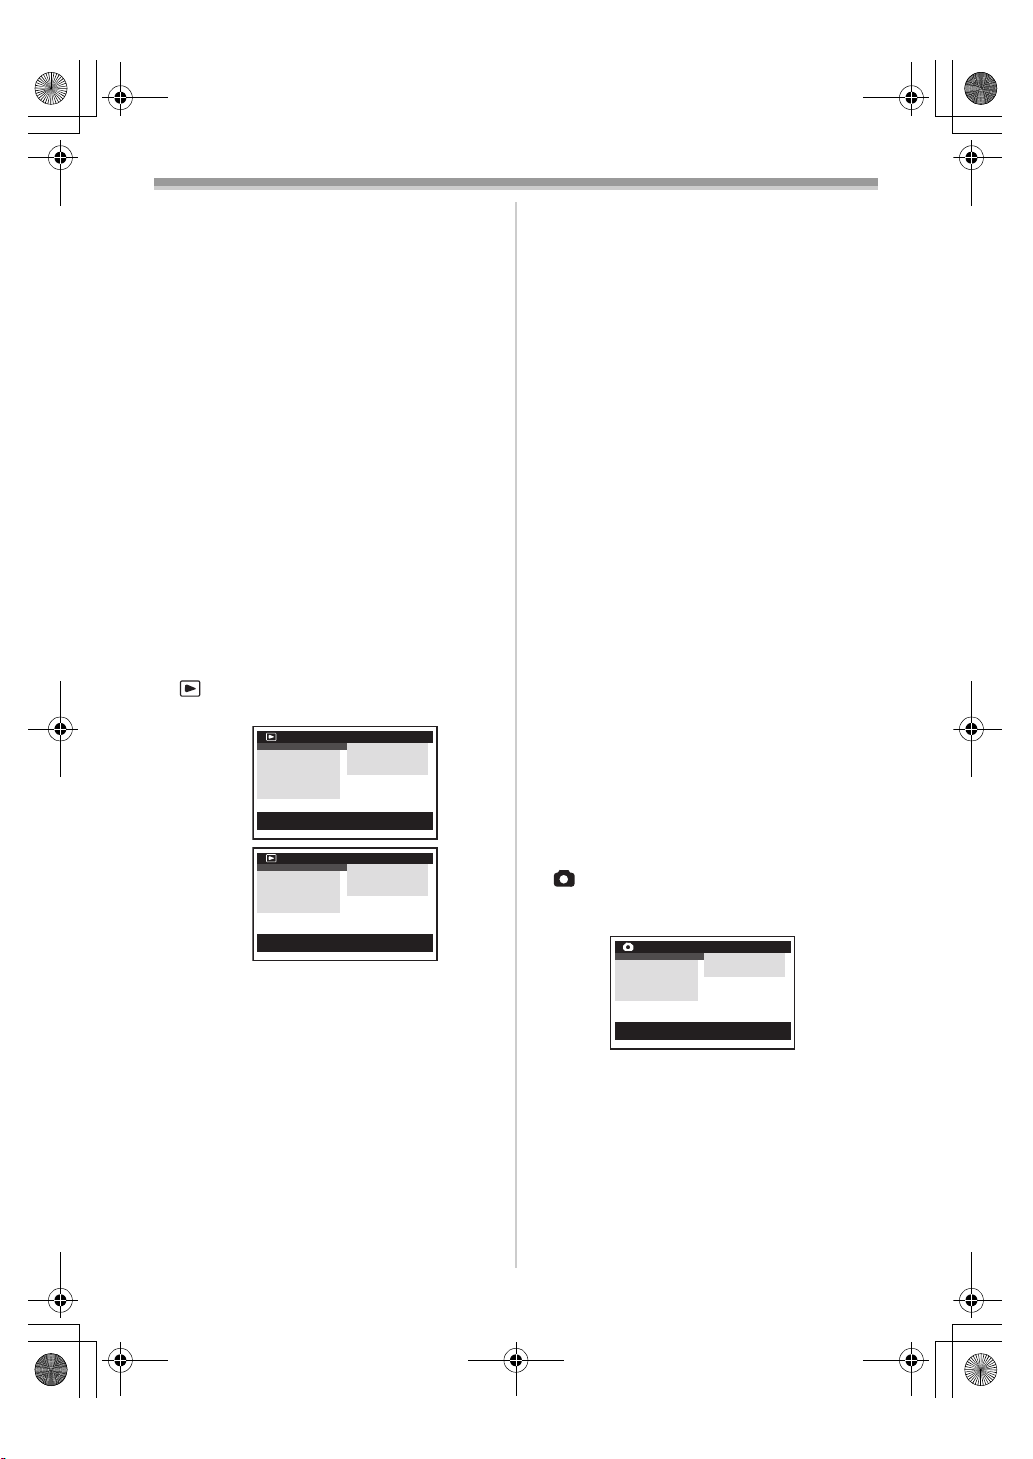
ª [PICTURE PLAYBACK MENU]
(NV-GS15 only)
Picture Playback Mode
PICTURE PLAYBACK MENU
DELETE !
EDITING
DIGITAL
DISPLAY
LCD/EVF
INITIAL
;/∫:SELECT %:NEXT
MENU:EXIT
1) [DELETE]
Deleting a File Sub-Menu
[FILEBYSEL]
Selecting and Deleting a File
[ALL FILES]
Deleting All Files
[TITLE BY SEL]
Selecting and Deleting a Title
2) [EDITING]
Editing a File Sub-Menu
[FILE LOCK]
Setting the Lock
[DPOF SET]
Setting DPOF
-37-
-38-
-38-
FILE BY SEL
ALL FILES
TITLE BY SEL
-38-
-38-
[CARD FORMAT]
Formatting a Card
-38-
3) [DIGITAL]
Playback Digital Setup Sub-Menu
[TITLE IN]
Adding a Title
-37-
4) [DISPLAY]
Display Setup Sub-Menu
≥All of the items on the [DISPLAY] Sub-Menu are
the same as those on the [DISPLAY] Sub-Menu
of the [TAPE RECORDING MENU].
5) [LCD/EVF]
Adjusting Brightness and Colour Level
[LCD/EVF SET]
LCD and Viewfinder Adjustment
-14-
[EVF ON/AUTO]
Using the Viewfinder
-13-
6) [INITIAL]
Initial Setup Sub-Menu
[AV JACK]
AV Socket
-57-
[REMOTE]
Remote Controller Mode
-9-
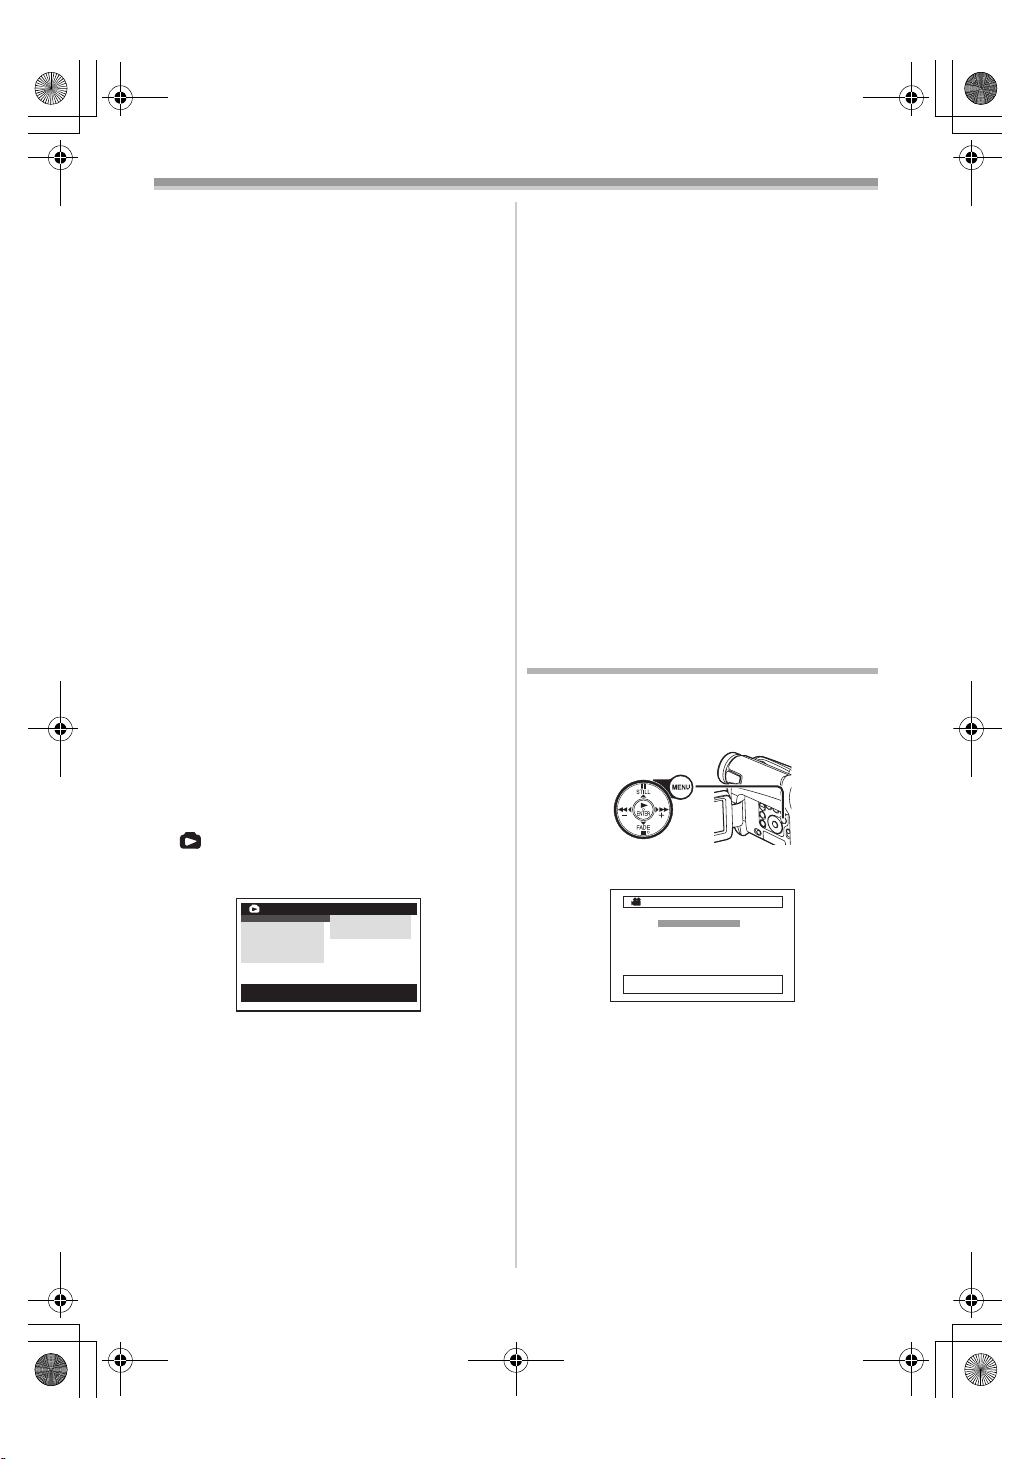
Setting Date and Time
Since the internal clock of the Movie Camera has
a slight imprecision, make sure to check the time
before recording.
(20)
1 Set [INITIAL] >> [CLOCK SET] >> [YES].
CLOCK SET
1YEAR 2004
MONTH 10
DAY 8
HOUR 14
MIN. 30
;/∫:SELECT &/%:SETUP
!/MENU:EXIT
2 Press the [;/∫] Button to select [YEAR],
[MONTH], [DAY], [HOUR] or [MIN.] and
press the [6/5] Button to set it to the
desired value.
≥Year will cycle in the order shown below.
2000, 2001, ..., 2089, 2000, ...
3 Press the [MENU] Button (20) to finish
setting the date and time.
≥The clock operation starts from [00] second.
≥If the built-in battery is weak, the [0] Indication
flashes. In this case, charge the built-in battery.
≥The clock uses the 24-hour system.
-17-
15EGE-ENG.book 18 ページ 2004年2月9日 月曜日 午前11時10分
Before Use
Internal Lithium Battery Recharge
The internal lithium battery sustains the operation
of the clock. When the [0] Indication flashes,
the internal lithium battery is near exhaustion.
1 Connect the AC Adaptor to the Movie
Camera with the power turned off and then
connect to the AC Mains socket.
1
2
3
≥After charging for 4 hours, the built-in lithium
battery can power the clock for approximately
3 months.
LP Mode
A desired recording speed can be selected with
[REC SPEED] on the [RECORDING] Sub-Menu.
If LP Mode is selected, the recording time
becomes 1.5 times longer than that of SP
Mode.
Although the image quality does not decrease
with the LP Mode recording, mosaic-pattern noise
may appear on a playback image, or some
normal functions may be restricted.
≥The contents that are recorded in LP Mode are
not completely compatible with other
equipment.
≥Audio dubbing is not possible with LP Mode.
-40-)
(
Audio Recording Mode
The sound quality of the recorded sound can be
selected with [AUDIO REC] on the
[RECORDING] Sub-Menu.
High sound-quality recording is possible with
“16 bit 48 kHz 2 track” Mode. With the “12 bit
32 kHz 4 track” Mode, the original sound can be
recorded on 2 tracks in stereo, while the other
2 tracks can be used for Audio Dubbing.
-18-
15EGE-ENG.book 19 ページ 2004年2月9日 月曜日 午前11時10分
Recording Mode
Recording Mode
About Recording
When recording pictures on a tape, set the Mode
Dial to Tape Recording Mode [ ].
When recording still pictures on a card, set the
Mode Dial to Card Recording Mode [ ]
(NV-GS15 only).
When recording with the
[AUTO/MANUAL/FOCUS] Switch
[AUTO], the Movie Camera automatically adjusts
the focus and white balance. In some cases, they
cannot be adjusted automatically and need to be
FOCUS
-26-, -28-)
(21)
AUTO
MANUAL
adjusted manually. (
≥Before turning on the power, remove the
Lens Cap. If the Lens Cap is still attached
when the power is turned on, Automatic
White Balance Adjustment (
function correctly.
≥When the Recording Pause Mode continues for
more than 6 minutes, the power is turned off
automatically for tape protection and power
conservation. (If the AC Adaptor is used, the
power is turned off only when the tape is
inserted in Tape Recording Mode.) When the
tape is inserted in Tape Recording Mode and if
the Recording Pause Mode continues for more
than 6 minutes, the power is turned off
automatically.
To resume recording from this condition, turn
off, then turn on the power again.
≥When the Movie Camera is connected to a
personal computer with a USB Cable, Standby
mode is not available.
ª Recording Yourself
By opening the LCD Monitor and rotating it
frontward (to the lens side), you can let the
subject in front of the Movie Camera monitor the
shot while recording is in progress.
(21) set to
-26-) may not
≥When the LCD Monitor is opened, the
Viewfinder is disabled automatically. However,
when the LCD Monitor is rotated frontward, the
image is also shown in the Viewfinder.
≥If you prefer to have the image on the LCD
Monitor to look like an image in a mirror, set
[SELF REC] on the [LCD/EVF] Sub-Menu to
[MIRROR]. Images are recorded normally and
no left and right reversal occurs.
Recording on a Tape
1 Set the [OFF/ON] Switch (43) to [ON].
≥The [POWER] Lamp
(40)
(43)
2 Set the Mode Dial (39) to Tape Recording
Mode.
(39)
NV-GS15 NV-GS8/
3 Press the Recording Start/Stop Button (42).
≥Recording starts.
≥After the [RECORD] is displayed, it changes
to [REC].
(42)
4 Press the Recording Start/Stop Button (42)
again to pause the recording.
≥The [PAUSE] Indication is displayed.
(40) lights up.
NV-GS11
REC
RECORD
PAUSE
PAUSE
Recording “Simultaneous Motion/Still Record
Mode” (NV-GS15 only)
≥Even if the Mode Dial is set to Tape Recording
Mode and the recording to a tape is in progress,
you can also record a still picture on a card by
pressing the [PHOTO SHOT] Button.
-19-
15EGE-ENG.book 20 ページ 2004年2月9日 月曜日 午前11時10分
Recording Mode
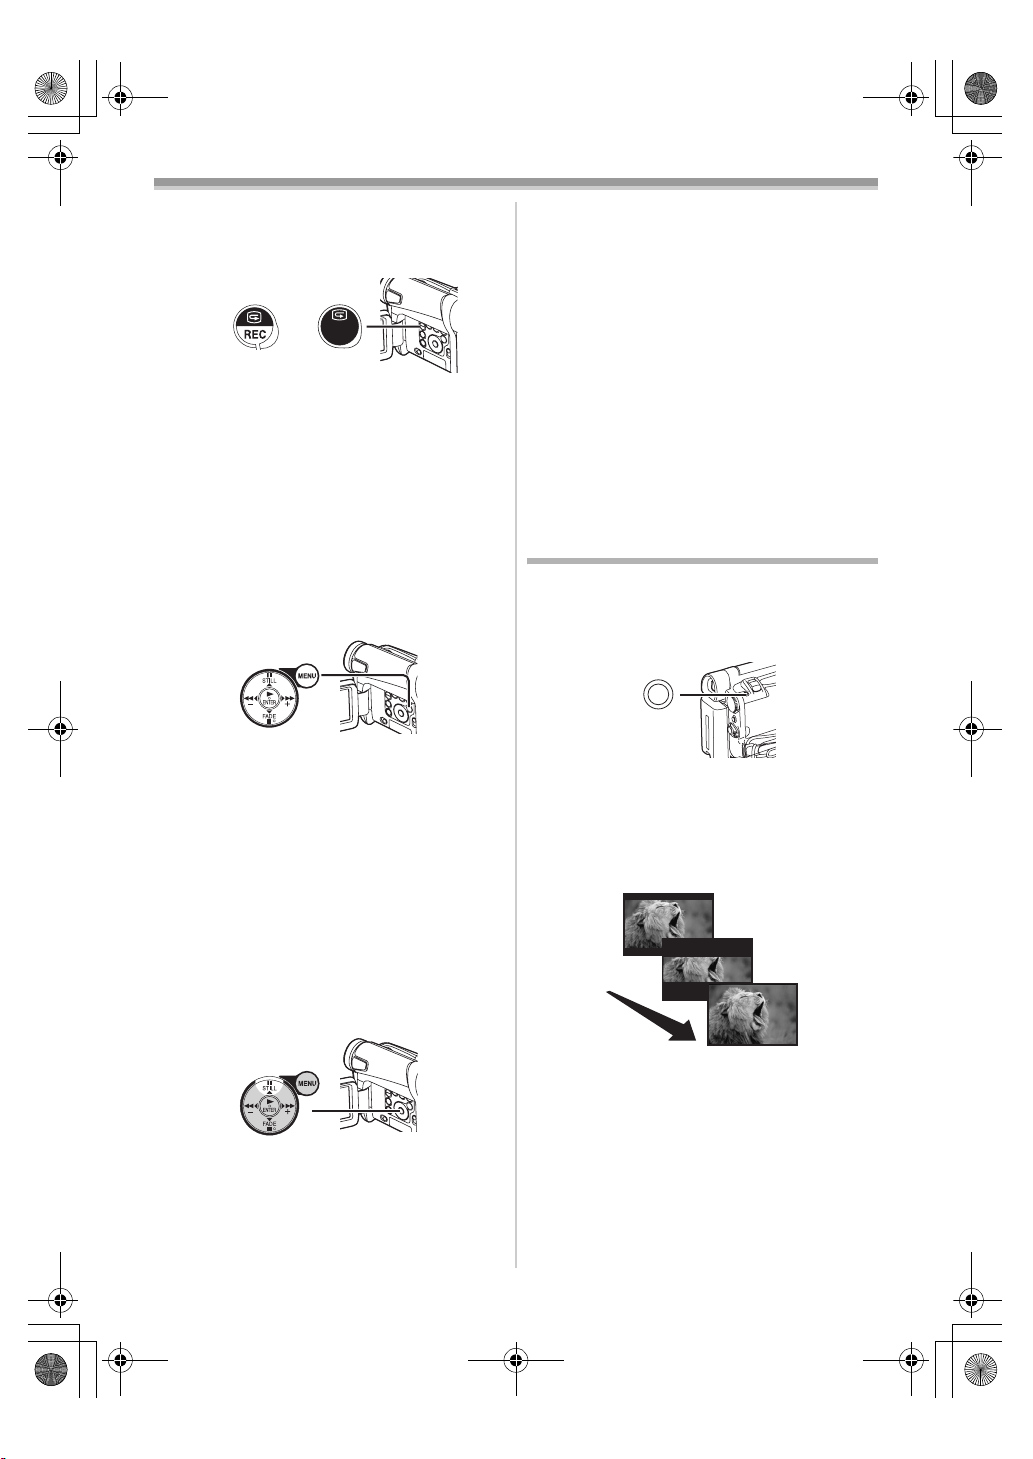
ª To Check the Recording
By pressing the [S] Button (6) briefly in the
Recording Pause Mode, you can play back the
last few seconds of the recorded scene.
(6)
REC
REVIEW
NV-GS15 NV-GS8/
NV-GS11
≥The [CHK] Indication is displayed. After
checking, the Movie Camera resumes the
Recording Pause Mode.
≥For other notes concerning this item, see
-48-.
ª Finding the End of Recording
(Blank Search Function)
The Blank Search Function aids you to locate the
end of the recording on the Cassette quickly.
1 Set [TAPE RECORDING MENU] or
[TAPE PLAYBACK MENU] >> [INITIAL] >>
[BLANK SEARCH] >> [YES].
(20)
≥The [BLANK] Indication appears during the
Blank Search.
≥Approximately 1 second before the last
recorded scene, the Movie Camera switches
to the Recording Pause Mode or the Still
Playback Mode.
≥If there is no blank left on the Cassette, the
Movie Camera stops at the end of the tape.
To Cancel Blank Search Before Completion
Press the [∫] Button.
ª Digital Still Picture
When the [STILL] Button (15) is pressed, images
become still pictures. When the button is pressed
again, the Digital Still Picture Mode is cancelled.
ª Progressive Photoshot
When the [æ] Indication is displayed,
Progressive Photoshot Function works.
You can record still pictures as frame still pictures
with higher quality by this function.
≥The Progressive Photoshot Function may not
be activated depending on the function you use.
-46-)
(
NV-GS15 only:
≥To record still pictures with higher quality, we
recommend setting to the Card Recording
Mode. (To activate the progressive function
regardless of the function you use)
≥When you record the tape and the card
simultaneously, the progressive function is not
activated.
Recording a Still Picture on a Tape
(Photoshot) (NV-GS8/NV-GS11 only)
Still pictures can be recorded from the Movie
Camera lens.
1 Press the [PHOTO SHOT] Button (36) in the
Recording Pause Mode.
(36)
PHOTO SHOT
≥The Movie Camera records a still picture for
about 7 seconds and then switches back to
the Recording Pause Mode.
≥If you set [SHTR EFFECT] on the [CAMERA]
Sub-Menu to [ON], you can add image and a
sound like releasing the shutter.
PHOTO
PHOTO
PHOTO
PHOTO
(15)
≥We recommend that you press the [STILL]
Button first at the position where you wish to
record the still picture so as to enter the Digital
Still Picture Mode and then press the
[PHOTO SHOT] Button.
≥Photoshot Recording results in slightly inferior
image quality.
ª Continuous Photoshot
If you set [SHTR EFFECT] on the [CAMERA]
Sub-Menu to [ON] and keep the [PHOTO SHOT]
Button pressed, the Movie Camera will
continuously record still pictures in approximately
0.7 seconds intervals until the button is released.
≥The screen blinks and, at the same time, a
shutter clicking sound is recorded.
-20-
15EGE-ENG.book 21 ページ 2004年2月9日 月曜日 午前11時10分
Recording Mode
Recording a Still Picture on a Card
(Photoshot) (NV-GS15 only)
Still pictures can be recorded on the Memory
Card from the Movie Camera.
1 Set the Mode Dial (39) to Card Recording
Mode.
(39)
2 Press the [PHOTO SHOT] Button (36).
(36)
PHOTO SHOT
≥The [ ] Indication lights up in red.
PICTURE
Selecting the Quality of Photoshot images
1 Set [CARD RECORDING MENU] >> [CARD]
>> [PICT QUALITY] >> a desired image
quality.
(20)
Maximum number of images recordable on
the supplied Card (8MB)
[FINE] (high image quality): approximately
45 pictures
[NORMAL] (normal image quality): approximately
95 pictures
[ECONOMY] (low image quality): approximately
190 pictures
≥These figures vary depending on the subject
being photographed.
Maximum number of still pictures recordable
on an SD Memory Card (optional)
PICTURE
QUALITY
16 MB 100 200 400
32 MB 220 440 880
64 MB 440 880 1760
128 MB 880 1760 3520
256 MB 1760 3520 7040
512 MB 3520 7040 14080
≥These figures vary depending on the subject
being photographed.
FINE NORMAL ECONOMY
ª Continuous Photoshot
The still pictures can be recorded on a Card at a
regular intervals.
1 Set [CARD RECORDING MENU] >> [CARD]
>> [BURST MODE] >> [ON].
(20)
≥The [ ] Indication appears.
2 Press the [PHOTO SHOT] Button (36).
(36)
PHOTO SHOT
≥When [ON] is selected, the still pictures can
be recorded in approximately 0.5 second
intervals until the [PHOTO SHOT] Button is
released or 10 pictures are recorded.
≥For other notes concerning this item, see
-48-.
Recording with the Built-in LED
Video Light
To brighten the natural colours in a scene. Gain
Up mode works with the Built-in LED Video Light
to enhance the light’s brightness.
1 Press the [LIGHT] Button (13). 1
(13)
LIGHT
≥The Built-in LED Video Light lights and the
Gain Up mode is set to on.
≥Gain Up mode will be brighter than when only
the LED Video Light is on, however, ghost
images will appear.
2 Press the [LIGHT] Button (13). 2
≥Gain Up mode is set to off.
≥To eliminate ghost images, use this mode.
-21-
15EGE-ENG.book 22 ページ 2004年2月9日 月曜日 午前11時10分
Recording Mode
Press the [LIGHT] Button (13). 3
3
≥The LED Video Light turns off.
≥Pressing the [LIGHT] Button again returns to
1.
1
GAINUP
Self-timer Recording
When you set the self-timer, the recording starts
automatically after 10 seconds.
1 Set [TAPE RECORDING MENU] or
[CARD RECORDING MENU] (NV-GS15 only)
>> [CAMERA] >> [SELF TIMER] >> [ON].
2
(20)
3
≥For other notes concerning this item, see
-48-.
Quick Start
By pressing the [QUICK START] Button (41), and
the Movie Camera will be ready for recording in
approximately 1.3 seconds after the Movie
Camera is turned on.
1 Press the [QUICK START] Button (41).
≥The Quick Start Recording Lamp
up.
(41)
QUICK START
(41)
2 Set the [OFF/ON] Switch (43) to [OFF].
≥The Quick Start Recording Lamp remains lit.
3 Set the [OFF/ON] Switch (43) to [ON].
≥The Movie Camera will be ready for recording
in approximately 1.3 seconds.
To Cancel the Quick Start
Keep the [QUICK START] Button pressed for
approximately 2 seconds and make sure the
Quick Start Recording Lamp is not lit.
(41) lights
(43)
≥The [ ] Indication appears.
2 Press the [PHOTO SHOT] Button (36).
(36)
PHOTO SHOT
≥The [ ] Indication flashes and the recording
starts after 10 seconds.
≥You can also use the Continuous Photoshot
(NV-GS15 only). (
≥For other notes concerning this item, see
-21-)
-48-.
Zoom In/Out Functions
It gives special effects to the picture by recording
objects close by or with wide-angle shot.
1 For wide-angle shots (zoom out):
Push the [W/T] Lever
For close-ups (zoom in):
Push the [W/T] Lever towards [T].
VOL/JOG
WT
(37)
≥Zoom Magnification Indication is displayed for
a few seconds.
1tW
(37) towards [W].
T
5tW
T
24tW
T
≥For other notes concerning this item, see
-48-.
-22-
Z.MIC
15EGE-ENG.book 23 ページ 2004年2月9日 月曜日 午前11時10分
Recording Mode
ª To Take Close-up Shots of Small
Subjects
(Macro Close-up Function)
When the zoom magnification is 1k, the Movie
Camera can focus on a subject that is as close as
approximately 20 mm from the Lens. Small
subjects like insects can be recorded with this
function.
ª To Use the Zoom Microphone
Function
Along with the zooming operation, the
microphone’s directional angle and sensitivity are
varied for recording sounds.
≥Set [TAPE RECORDING MENU] >>
[RECORDING] >> [ZOOM MIC] >> [ON].
(The [Z.MIC] Indication is displayed.)
Z.MIC
≥For other notes concerning this item, see
-49-.
Digital Zoom Function
This function is useful when you want to record
close-up shots of subjects located beyond a
normal zoom range of 1k to 24k magnification.
With the Digital Zoom Function, you can select a
magnification from 60k up to 800k.
1 Set [TAPE RECORDING MENU] >>
[CAMERA] >> [D.ZOOM] >> [60k] or [800k].
(20)
To Cancel the Digital Zoom Function
Set [TAPE RECORDING MENU] >> [CAMERA]
>> [D.ZOOM] >> [OFF].
≥For other notes concerning this item, see
-49-.
Image Stabilizer Function
If the Movie Camera is shaken while recording,
the camera shake in the image can be corrected.
≥If the Movie Camera shakes too much, the
images may not be stabilized.
1 Set [TAPE RECORDING MENU] >>
[CAMERA] >> [SIS] >> [ON].
(20)
≥The [[] Indication appears.
2 Press the Recording Start/Stop Button (42)
or [PHOTO SHOT] Button
recording.
(36)
PHOTO SHOT
(42)
(36) to start
≥60k: Digital zooming to 60k
≥800k: Digital zooming to 800k
60tW
D.ZOOM
T
2 Push the [W/T] Lever (37) towards [W] or
towards [T] to zoom in or out.
VOL/JOG
WT
(37)
To Cancel Image Stabilizer Function
Set [TAPE RECORDING MENU] >> [CAMERA]
>> [SIS] >> [OFF].
≥For other notes concerning this item, see
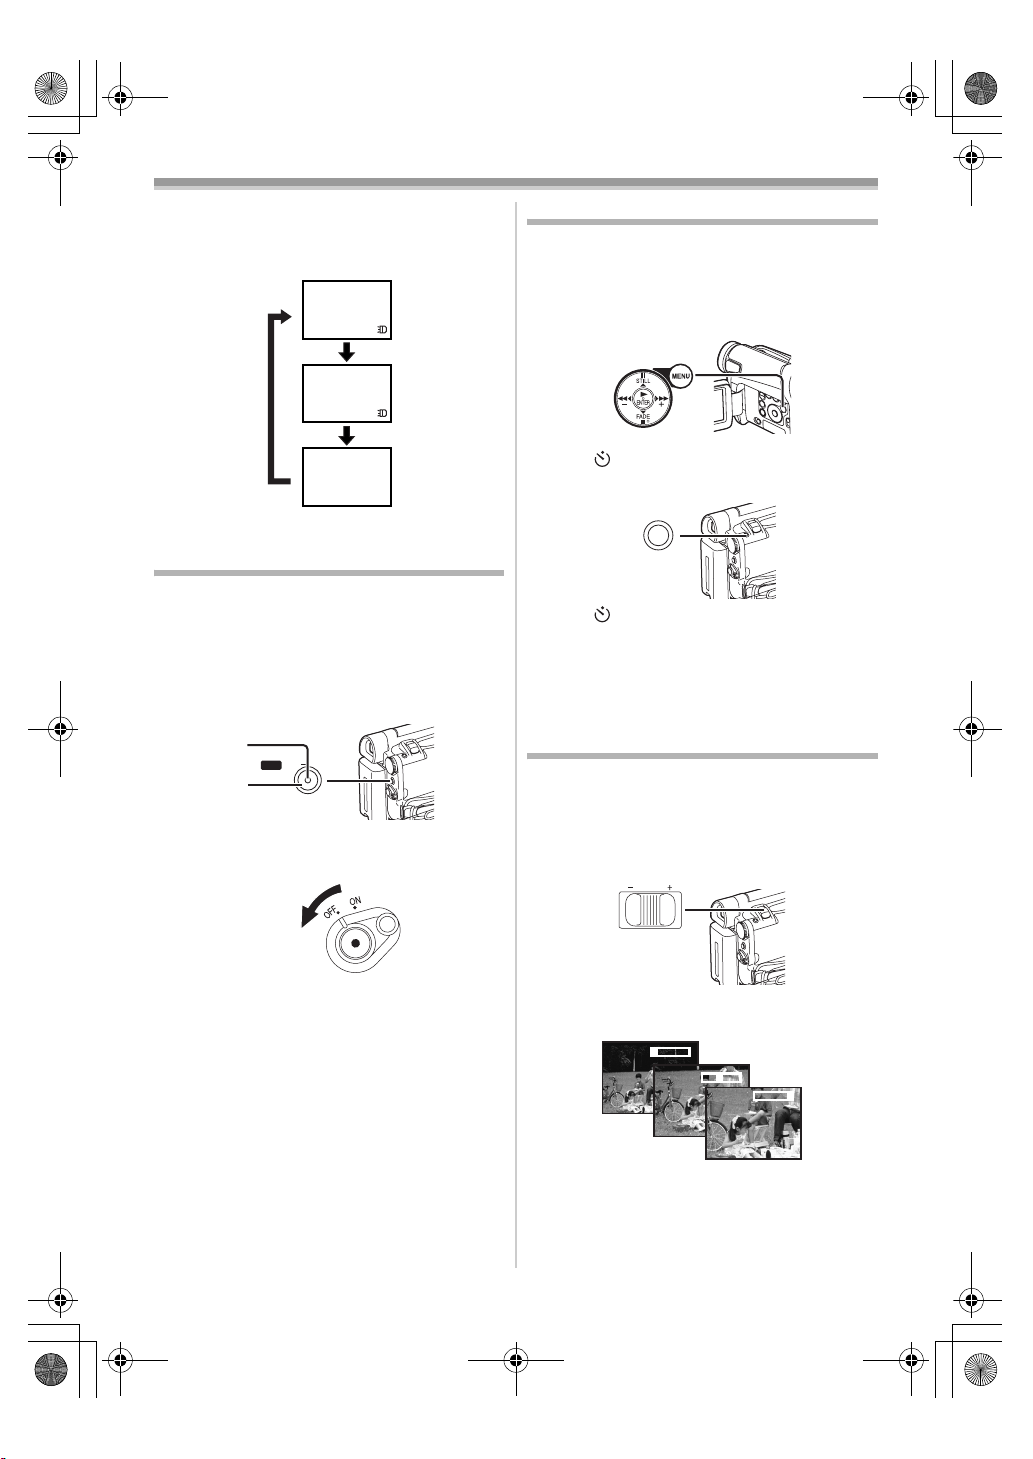
Fade In/Out Functions
Fade In
Fade In brings out images and sounds gradually
from a black screen at the beginning of a scene.
-23-
-49-.
15EGE-ENG.book 24 ページ 2004年2月9日 月曜日 午前11時10分
Recording Mode
Keep pressing the [FADE] Button (18)
1
during the Recording Pause Mode.
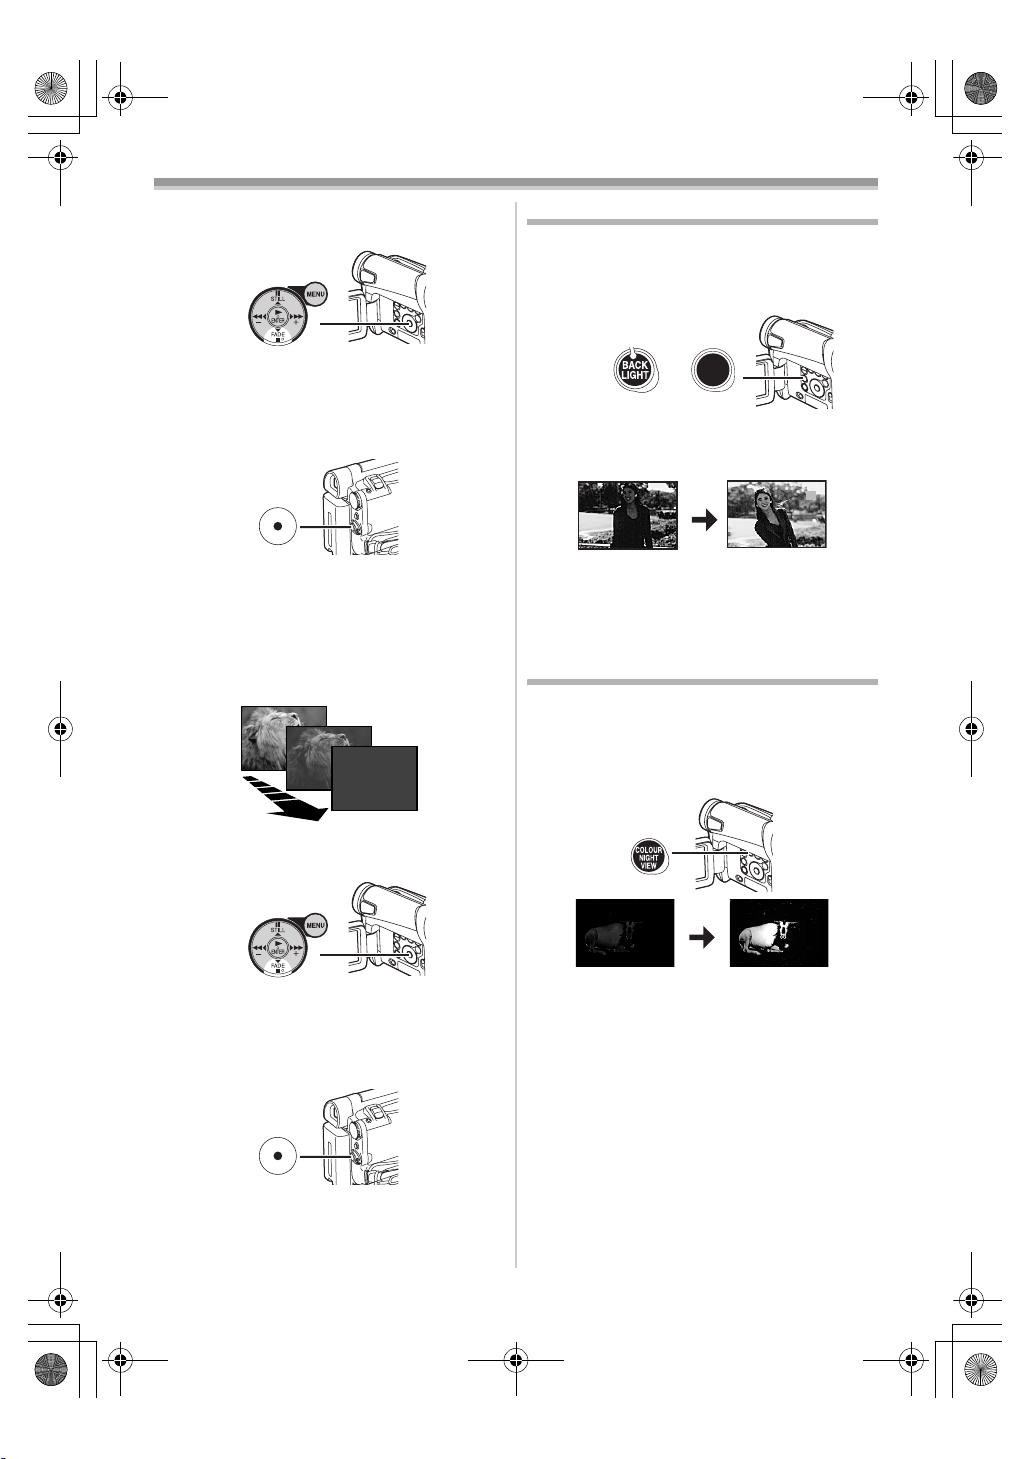
Backlight Compensation Function
This prevents the subject from being recorded too
darkly when backlit. (Backlight is the light that
shines from behind the subject being recorded.)
1 Press the [BACK LIGHT] Button (12).
(18)
≥The image fades out gradually.
NV-GS15
(12)
2 When the image is completely gone, press
the Recording Start/Stop Button
start recording.
(42)
(42) to
≥The [ª] Indication flashes and then is
displayed.
≥The entire screen becomes brighter.
NV-GS8/
NV-GS11
BACK
LIGHT
ª
3 Release the [FADE] Button (18) about
3 seconds after starting recording.
≥The image reappears gradually.
Fade Out
Fade Out causes images and sounds to
disappear gradually, leaving a black screen at the
end of a scene.
1 Keep pressing the [FADE] Button (18) while
recording.
(18)
≥The image fades out gradually.
2 When the image is completely gone, press
the Recording Start/Stop Button
recording.
(42)
(42) to stop
To Resume Normal Recording
Press the [BACK LIGHT] Button.
≥For other notes concerning this item, see
-49-.
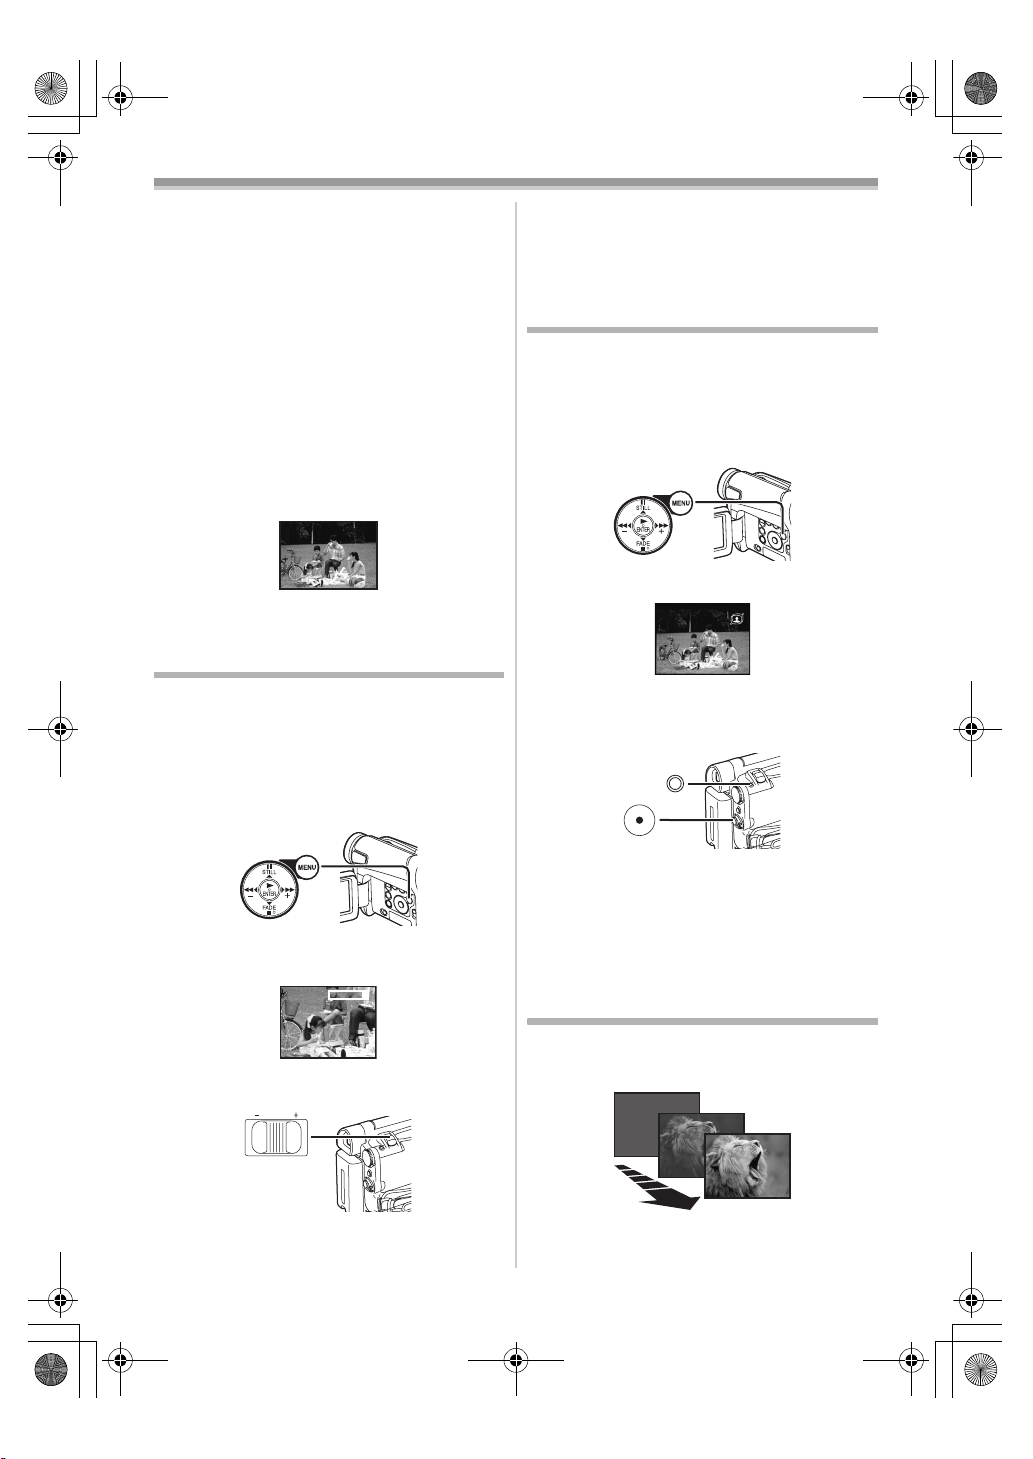
Night View Functions
Colour Night View Function
This function allows you to record colour images
brightly in a dark place.
1 Press the [COLOUR NIGHT VIEW] Button
(7).
(7)
C.NIGHT
VIEW
≥The [C.NIGHT VIEW] Indication appears.
To Cancel the Night View Functions
Press the [COLOUR NIGHT VIEW] Button
repeatedly.
≥For other notes concerning this item, see
-49-.
3 Release the [FADE] Button (18).
≥The still picture cannot fade in or fade out.
-24-
15EGE-ENG.book 25 ページ 2004年2月9日 月曜日 午前11時10分
Recording Mode
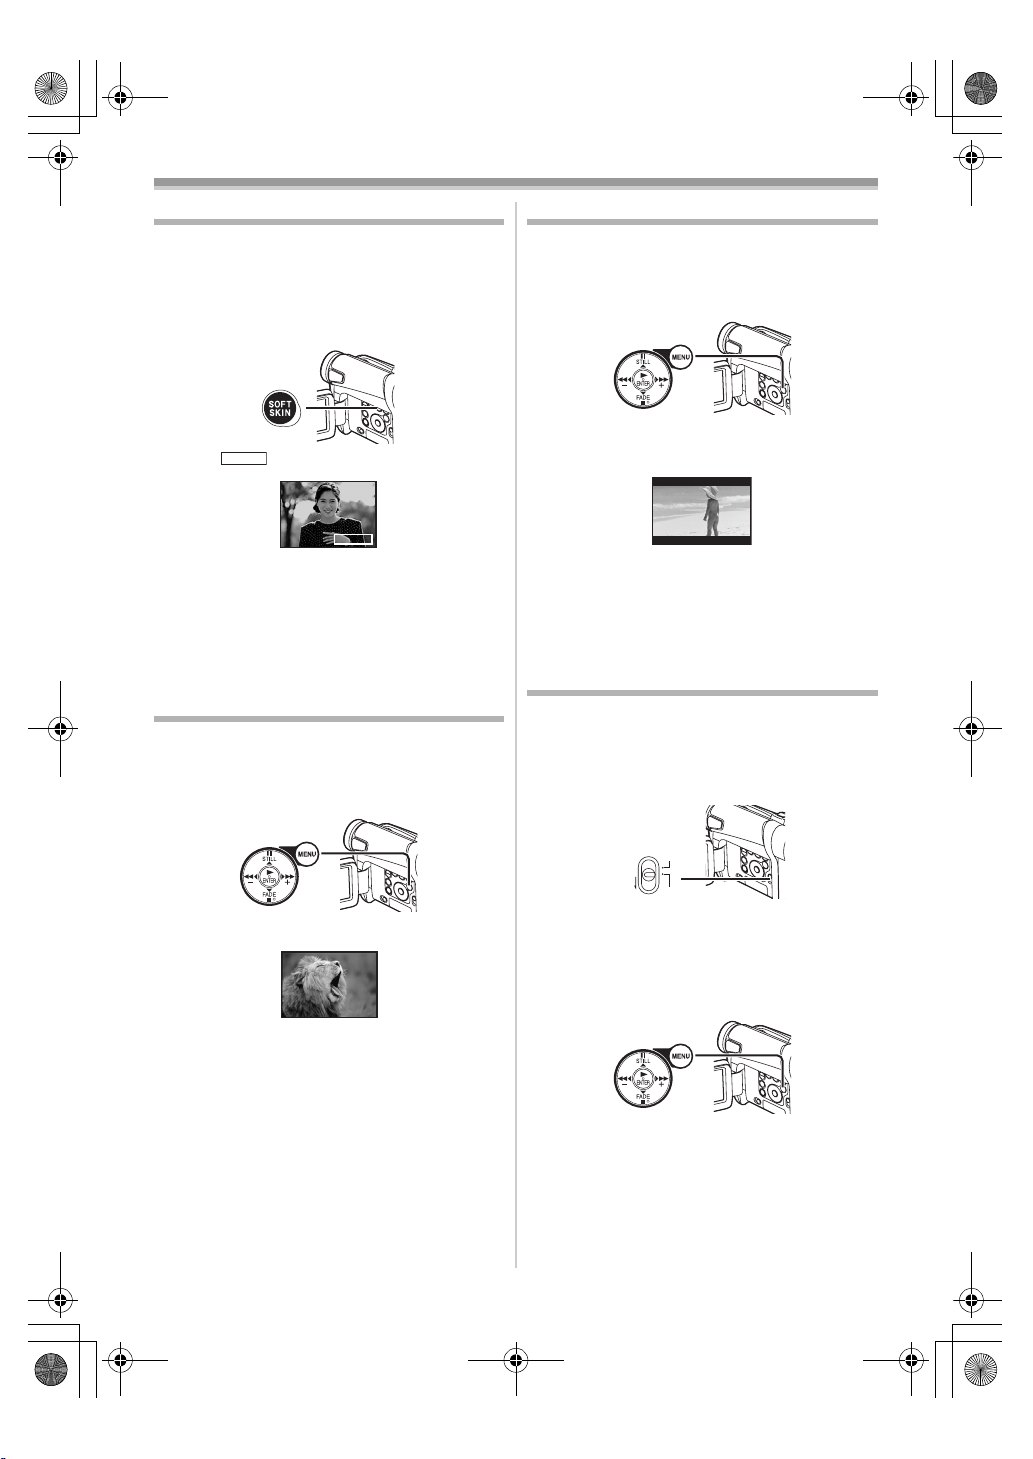
Soft Skin Function
This enables you to record skin colours in a softer
tone. In order to get the best result, avoid
background colours similar to the skin colour of
the subject. Otherwise, this may result in a softer
background lacking in detail.
1 Press the [SOFT SKIN] Button (8).
(8)
SOFT SKIN
≥The [ ] Indication appears.
SOFT SKIN
≥To obtain the best effect, we recommend to
take the bust shot, so that the upper part from
the breast of the subject can be framed in the
screen.
To Cancel the Soft Skin Function
Press the [SOFT SKIN] Button.
Wind Noise Reduction Function
This function reduces the sound of wind hitting
the microphone when recording.
1 Set [TAPE RECORDING MENU] >>
[RECORDING] >> [WIND CUT] >> [ON].
(20)
≥The [WIND CUT] Indication appears.
WIND CUT
To Cancel the Wind Noise Reduction Function
Set [TAPE RECORDING MENU] >>
[RECORDING] >> [WIND CUT] >> [OFF].
Cinema Function
This function is for recording in a cinema-like
screen.
1 Set [TAPE RECORDING MENU] >>
[RECORDING] >> [CINEMA] >> [ON].
(20)
≥Black bars appear at the top and bottom of
the screen.
CINEMA
To Cancel the Cinema Mode
Set [TAPE RECORDING MENU] >>
[RECORDING] >> [CINEMA] >> [OFF].
≥For other notes concerning this item, see
-49-.
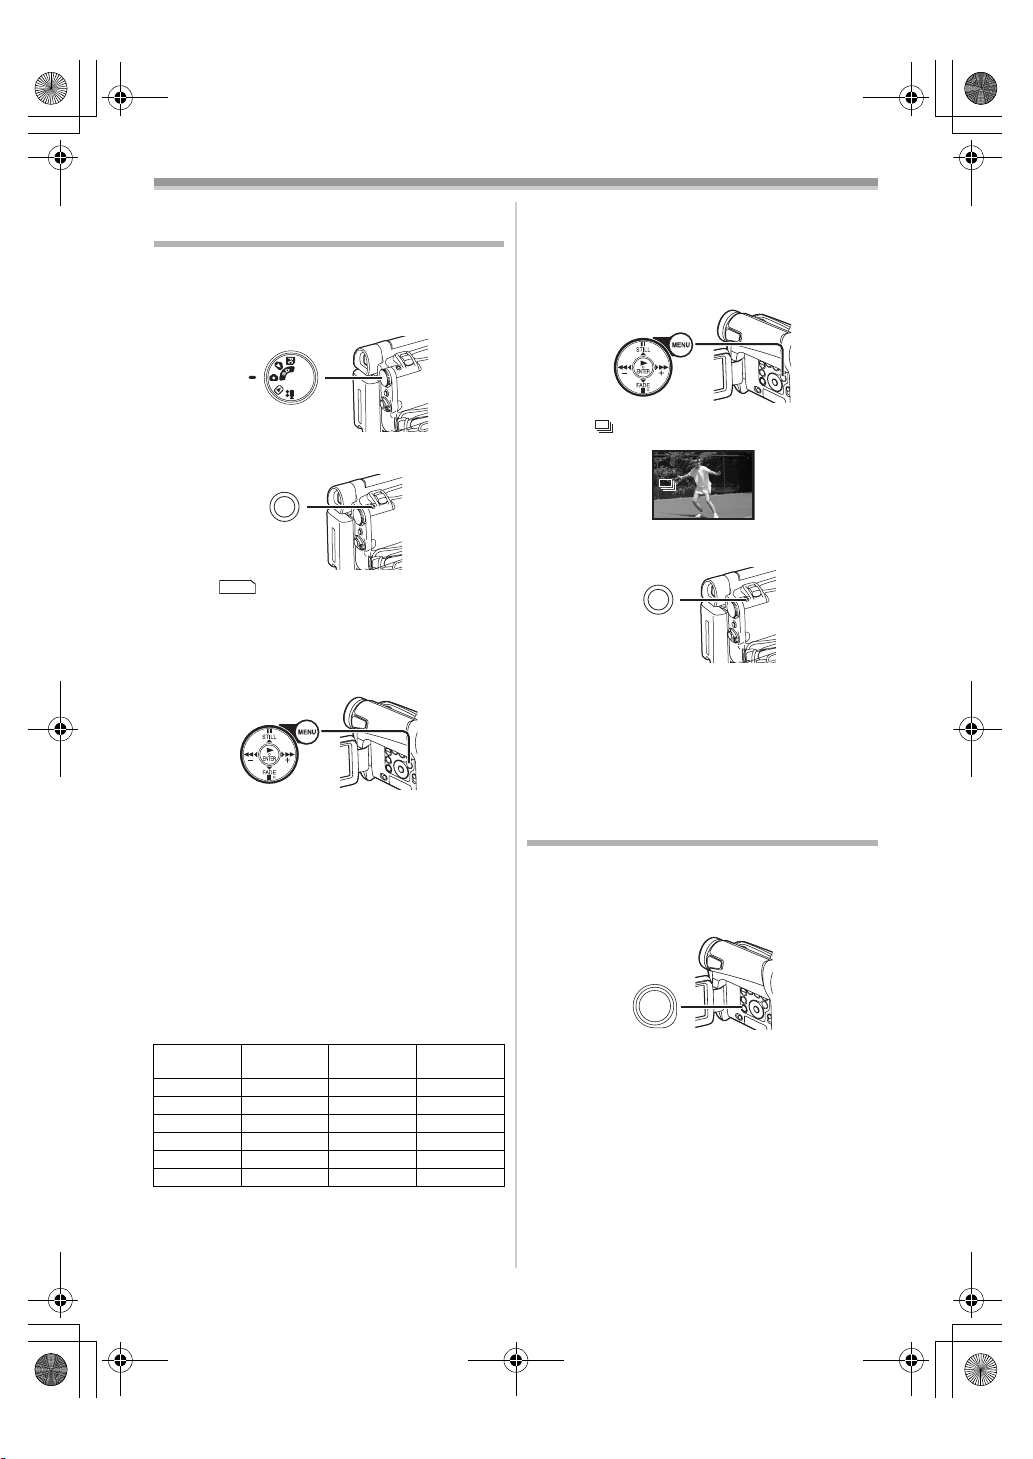
Recording in Special Situations
(Programme AE)
You can select optimal automatic exposure under
specific recording situations.
1 Set the [AUTO/MANUAL/FOCUS] Switch
(21) to [MANUAL].
(21)
AUTO
MANUAL
FOCUS
≥The [MNL] Indication appears.
2 Set [TAPE RECORDING MENU] or
[CARD RECORDING MENU] (NV-GS15 only)
>> [CAMERA] >> [PROG.AE] >> a desired
mode ([5], [7], [4], [Ω] or [º]).
(20)
≥For other notes concerning this item, see
-49-.
-25-
15EGE-ENG.book 26 ページ 2004年2月9日 月曜日 午前11時10分
Recording Mode
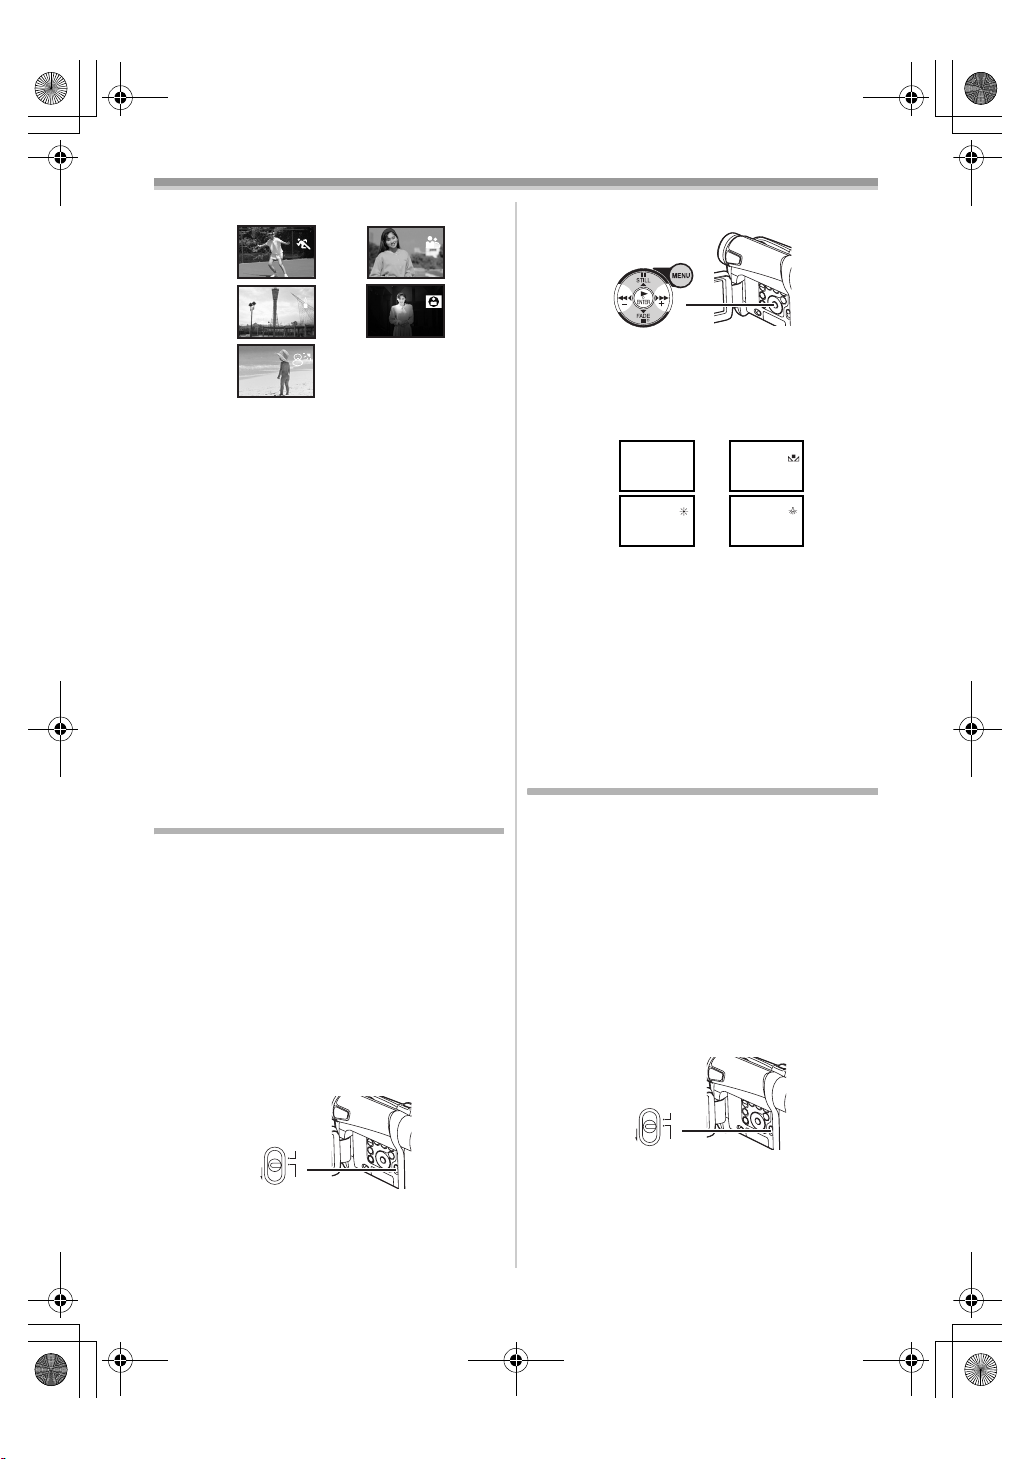
≥The Indication of the selected Mode appears.
1)
3)
2)
4)
5)
1) [5] Sports Mode
≥For recording scenes involving quick
movements, such as sports scenes.
2) [7] Portrait Mode
≥For bringing up people clearly from the
background.
3) [4] Low Light Mode
≥For recording a dark scene brighter.
4) [Ω] Spotlight Mode
≥For recording a subject under a spotlight in
a party, theatre, etc.
5) [º] Surf & Snow Mode
≥For recording in a glaring surrounding, such
as ski slopes, beaches, etc.
To Cancel the Programme AE Function
Set the [PROG.AE] on the [CAMERA] Sub-menu
to [OFF]. Or, set the [AUTO/MANUAL/FOCUS]
Switch to [AUTO].
≥For other notes concerning this item, see
-49-.
Recording in Natural Colours
(White Balance)
Depending on the scene or lighting conditions,
the Automatic White Balance Adjustment Mode
may not be able to bring out natural colours. In
this case, the white balance can be adjusted
manually.
When the Movie Camera is turned on with the
Lens Cap on, the Automatic White Balance
Adjustment may not function properly. Please
turn on the Movie Camera after removing the
Lens Cap.
1 Set the [AUTO/MANUAL/FOCUS] Switch
(21) to [MANUAL].
(21)
AUTO
MANUAL
FOCUS
≥The [MNL] Indication appears.
2 Press the [ENTER] Button (17).
(19)(17)(16)
≥The [AWB] Indication appears.
3 Press the [5] Button (16) or [6] Button
(19) to select a desired White Balance
Mode.
1)
3)
1AWB
1
2)
4)
1
1
1) Automatic White Balance Adjustment [AWB]
2) The white balance setting that was previously
set manually [1]
3) Outdoor Mode [z]
4) Indoor Mode (recording under incandescent
lamp) [{]
To Resume Automatic Adjustment
Press the [5] Button (16) or [6] Button (19)
until the [AWB] Indication appears. Or, set the
[AUTO/MANUAL/FOCUS] Switch to [AUTO].
Adjusting White Balance Manually
White Balance Adjustment recognizes the colour
of light and adjusts so that white will appear pure
white. The Movie Camera determines the hue of
light that comes through the Lens and White
Balance Sensor, thereby judging the recording
condition, and selects the closest hue setting.
This function is called Automatic White Balance
Adjustment.
For light outside the functional Auto White
Balance Adjustment range, use the Manual White
Balance Adjustment Mode.
1 Set the [AUTO/MANUAL/FOCUS] Switch
(21) to [MANUAL].
(21)
AUTO
MANUAL
FOCUS
≥The [MNL] Indication appears.
2 Point the Movie Camera at a full-screen
white subject.
-26-
15EGE-ENG.book 27 ページ 2004年2月9日 月曜日 午前11時10分
Recording Mode
Press the [ENTER] Button (17).
3
(19)(17)(16)
≥The [AWB] Indication appears.
4 Press the [5] Button (16) or [6] Button
(19) until the [1] Indication is displayed.
MNL
1
5 Keep pressing [ENTER] Button (17) until the
[1] Indication stops flashing.
To Resume Automatic Adjustment
Press the [5] Button (16) or [6] Button (19)
until the [AWB] Indication is displayed. Or, set the
[AUTO/MANUAL/FOCUS] Switch to [AUTO].
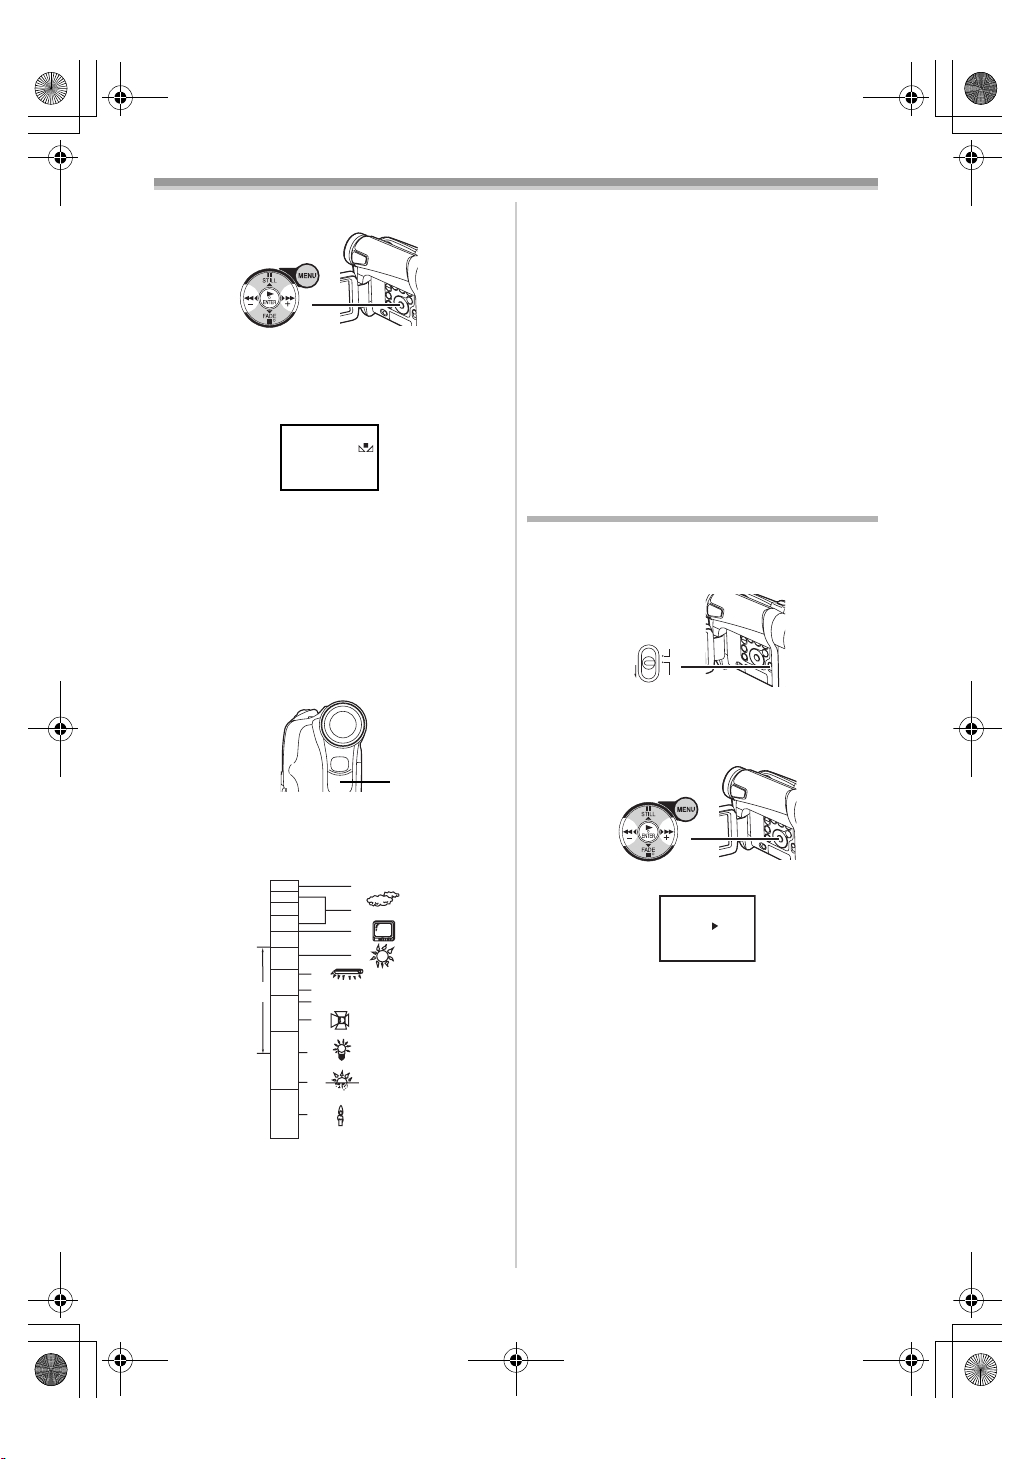
ª About White Balance Sensor
The White Balance Sensor (31) determines the
nature of the light source during recording.
(31)
≥Do not cover the White Balance Sensor with
your hand during recording because White
Balance will not function normally.
10 000K
9 000K
8 000K
7 000K
6 000K
5 000K
4 000K
1)
3 000K
2 000K
1 000K
Outside of the effective range of Automatic White
Balance Adjustment, the image will become
reddish or bluish. Even within the effective range
of Automatic White Balance Adjustment, the
Automatic White Balance Adjustment may not
function properly if there is more than one light
source. In this case, adjust the White Balance.
10)
11)
12)
2)
3)
4)
5)
6)
7)
8)
9)
1) The effective range of Automatic White
Balance Adjustment on this Movie Camera
2) Blue sky
3) Cloudy sky (rain)
4) TV screen
5) Sunlight
6) White fluorescent lamp
7) 2 hours after sunrise or before sunset
8) 1 hour after sunrise or before sunset
9) Halogen light bulb
10) Incandescent light bulb
11) Sunrise or sunset
12) Candlelight
≥For other notes concerning this item, see
Manual Shutter Speed Adjustment
Useful for recording fast-moving subjects.
1 Set the [AUTO/MANUAL/FOCUS] Switch
(21) to [MANUAL].
(21)
AUTO
MANUAL
FOCUS
≥The [MNL] Indication appears.
2 Press the [ENTER] Button (17) until the
Shutter Speed Indication appears.
(19)(17)(16)
MNL
1/1000
3 Press the [5] Button (16) or [6] Button
(19) to adjust the shutter speed.
Range of Shutter Speed Adjustment
1/50–1/8000 s in Tape Recording Mode
1/50–1/500 s in Card Recording Mode (NV-GS15
only)
The standard shutter speed is 1/50 s.
Selecting a speed closer to [1/8000] causes the
shutter speed to be faster.
To Resume Automatic Adjustment
Set the [AUTO/MANUAL/FOCUS] Switch to
[AUTO].
≥For other notes concerning this item, see
-27-
-50-.
-50-.
15EGE-ENG.book 28 ページ 2004年2月9日 月曜日 午前11時10分
Recording Mode
Manual Iris Adjustment
(F Number)
You can use this function when the screen is too
bright or too dark.
1 Set the [AUTO/MANUAL/FOCUS] Switch
(21) to [MANUAL].
(21)
AUTO
MANUAL
FOCUS
≥The [MNL] Indication appears.
2 Press the [ENTER] Button (17) until the Iris
Indication appears.
(19)(17)(16)
MNL
1/50
F2.4
3 Press the [5] Button (16) or [6] Button
(19) to adjust the iris.
Range of Iris Adjustment
CLOSE (Closed), F16, ..., F2.0,
OP (Opened)i0dB, ..., OPi18dB
When a value closer to [CLOSE] is selected, the
image becomes darker.
When a value closer to [OPi18dB] is selected,
the image becomes brighter.
The value to which idB is attached indicates a
Gain-up value. If this value is too large, the quality
of the image deteriorates.
To Resume Automatic Adjustment
Set the [AUTO/MANUAL/FOCUS] Switch to
[AUTO].
≥For other notes concerning this item, see
-50-.
Manual Focus Adjustment
Focus can be adjusted manually for recording in
a situation where auto focus may not function
well.
1 Set the [AUTO/MANUAL/FOCUS] Switch
(21) to [MANUAL].
(21)
AUTO
MANUAL
FOCUS
≥The [MNL] Indication appears.
2 Slide the [AUTO/MANUAL/FOCUS] Switch
(21) to [FOCUS].
(21)
AUTO
MANUAL
FOCUS
≥The [1MF] Indication (Manual Focus Mode)
appears.
MNL
MF
3 Press the [5] Button (16) or [6] Button
(19) to adjust the focus.
(19) (16)
≥If you keep pressing the [5] Button or [6]
Button, the speed of adjusting becomes
faster.
To Resume Automatic Adjustment
Set the [AUTO/MANUAL/FOCUS] Switch to
[AUTO] or [FOCUS].
-28-
15EGE-ENG.book 29 ページ 2004年2月9日 月曜日 午前11時10分
Recording Mode
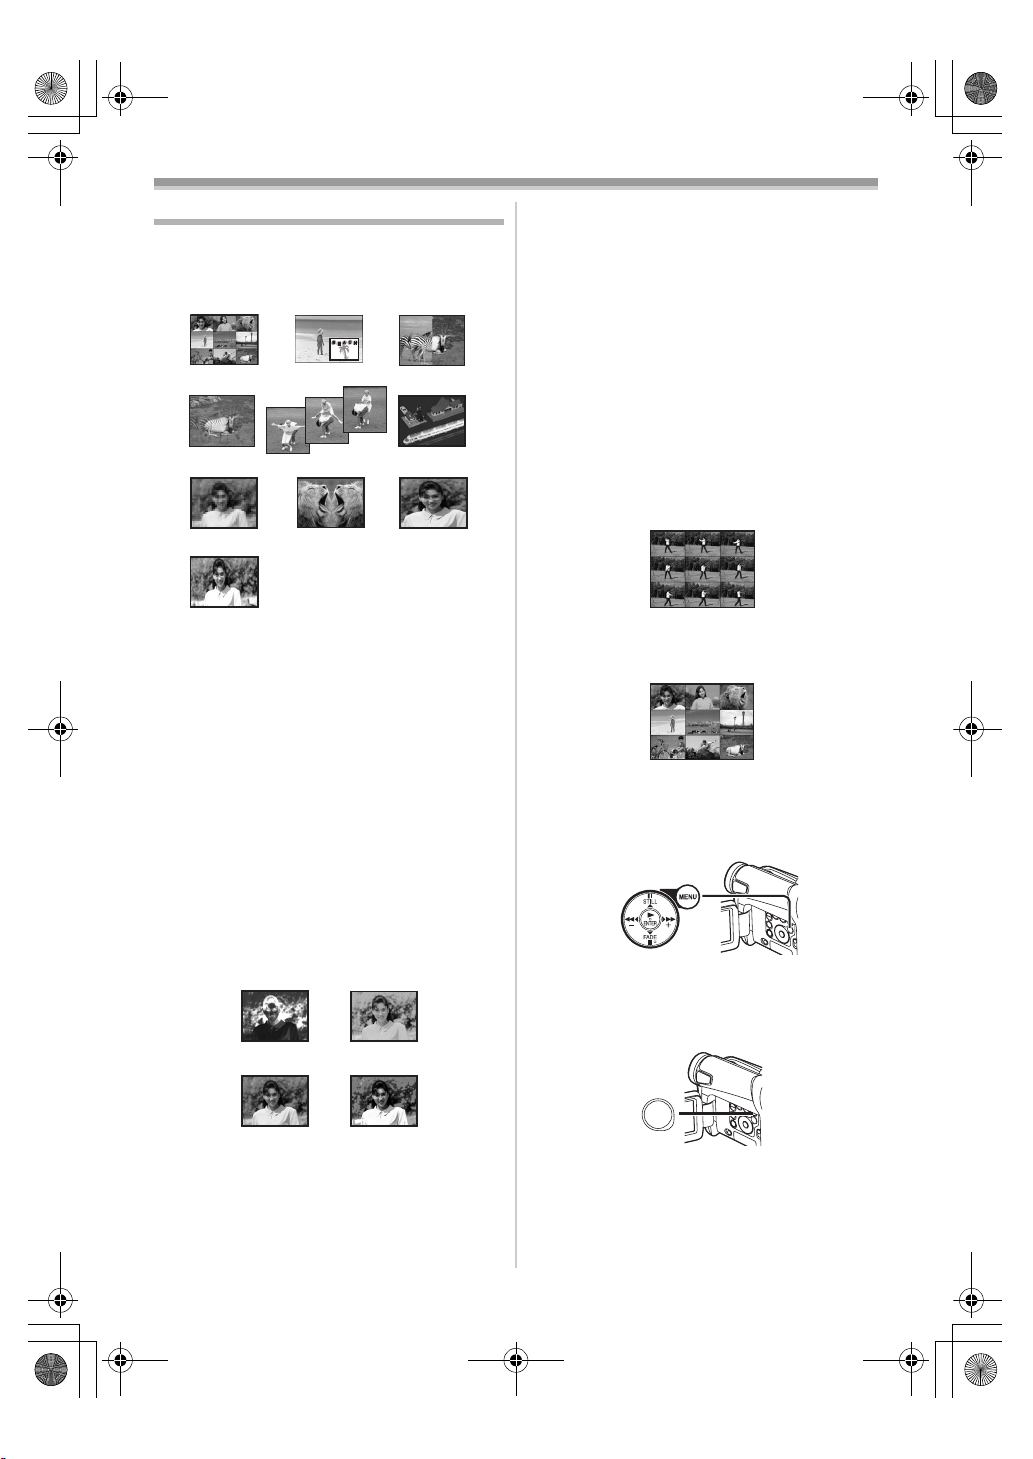
Digital Effect Functions
This Movie Camera is equipped with Digital Effect
Functions that add special effects to the scene.
Digital Effects 1 [EFFECT1]
1) MULTI 2) P-IN-P
4) MIX
7) MOSAIC 8) MIRROR 9) STRETCH
10) SLIM
5) STROBE 6) TRAIL
1) Multi Mode [MULTI]
2) Picture-In-Picture Mode [P-IN-P]
3) Wipe Mode [WIPE]
4) Mix Mode [MIX]
5) Strobe Mode [STROBE]
≥It records images with a stroboscopic effect.
6) Trailing Effect Mode [TRAIL]
≥It records images with a trailing effect.
7) Mosaic Mode [MOSAIC]
≥It produces a mosaic-like image.
8) Mirror Mode [MIRROR]
≥The right half of an image becomes a mirror
image of the left half.
9) Stretch Mode [STRETCH]
≥The Picture is expanded horizontally.
10) Slim Mode [SLIM]
≥The picture is expanded vertically.
Digital Effects 2 [EFFECT2]
11) NEGA 12) SEPIA
13) B/W 14) SOLARI
3) WIPE
14) Solarisation Mode [SOLARI]
≥It records an image with a painting-like
effect.
To Select a Desired Digital Effect
Set [TAPE RECORDING MENU] >> [DIGITAL]
>> [EFFECT1] or [EFFECT2] >> a desired Digital
Effect.
To Cancel the Digital Effect
Set [TAPE RECORDING MENU] >> [DIGITAL]
>> [EFFECT1] or [EFFECT2] >> [OFF].
≥If the Movie Camera is turned off, the
[EFFECT2] settings are cancelled.
≥For other notes concerning this item, see
-50-.
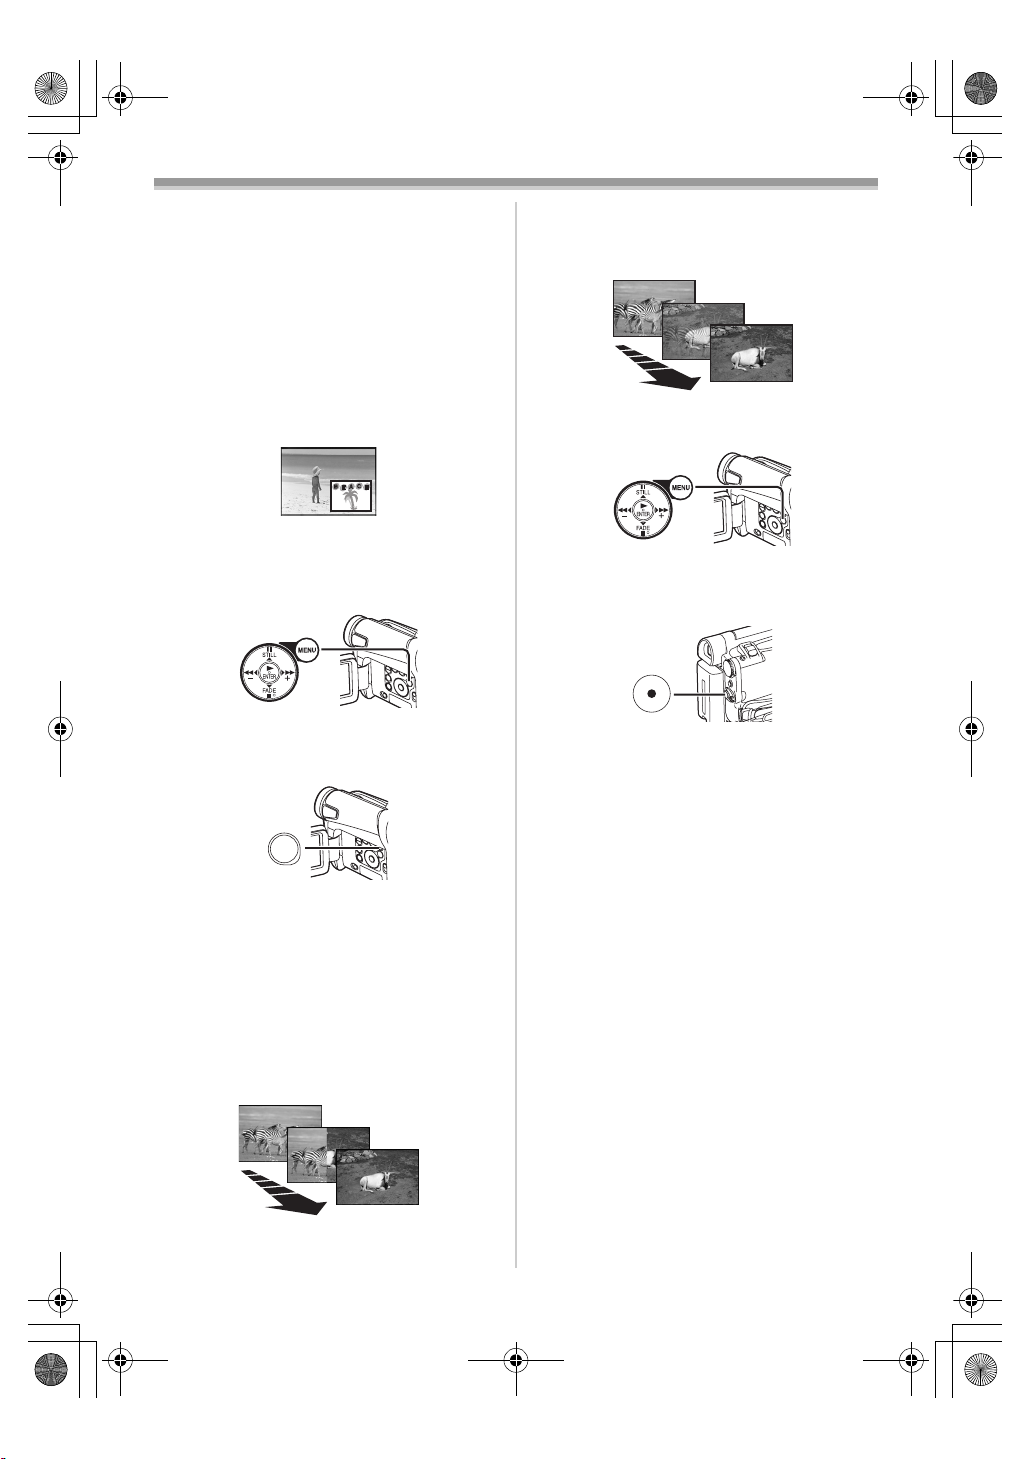
ª Multi-Picture Mode
Strobe Multi-Picture Mode:
You can capture and record 9 consecutive small
still pictures.
Manual Multi-Picture Mode:
You can manually capture and record 9 small still
pictures.
1 Set [TAPE RECORDING MENU] >>
[DIGITAL] >> [EFFECT1] >> [MULTI].
(20)
2 Set [TAPE RECORDING MENU] >>
[DIGITAL] >> [MULTI MODE] >> [STROBE]
or [MANUAL].
3 Press the [MULTI] Button (10).
11) Negative Mode [NEGA]
≥The colours of the recorded image are
inverted as seen in a negative.
12) Sepia Mode [SEPIA]
≥It records a scene with a brownish tint, like
the colour of old pictures.
13) Black & White Mode [B/W]
≥It records an image in black and white.
MULTI/
(10)
P-IN-P
≥If [MANUAL] is selected, press the [MULTI]
Button at each scene you want to capture.
Deleting All the Captured Multi-Pictures
While 9 multi-pictures are displayed, press the
[MULTI] Button.
≥If [MANUAL] has been selected, press the
[MULTI] Button after 9 pictures are displayed.
-29-
15EGE-ENG.book 30 ページ 2004年2月9日 月曜日 午前11時10分
Recording Mode
To Display the Multi-Pictures Again
Press the [MULTI] Button for 1 second or longer.
To Delete Multi-Pictures One by One
(When pictures were captured in [MANUAL])
When the [MULTI] Button is pressed for 1 second
or longer while the still pictures are displayed, the
pictures captured last is deleted continuously.
≥After still pictures are deleted one by one, they
cannot be displayed again.
≥For other notes concerning this item, see
-50-.
ª Picture-in-Picture Mode
You can display a sub-screen (still picture) inside
the screen.
1 Set [TAPE RECORDING MENU] >>
[DIGITAL] >> [EFFECT1] >> [P-IN-P].
(20)
2 Aim the Movie Camera at the scene you
want to capture and press the [P-IN-P]
(10) to insert a small still picture.
Button
MULTI/
(10)
P-IN-P
≥A small still picture is displayed in a normal
picture.
≥If the [P-IN-P] Button is pressed again, the
small still picture is cleared.
Mix Mode:
While the moving image of a new scene fades in,
the still image of the last recorded scene
gradually fades out.
MIX
MIX
MIX
1 Set [TAPE RECORDING MENU] >>
[DIGITAL] >> [EFFECT1] >> [WIPE] or [MIX].
(20)
≥The [WIPE] or [MIX] Indication appears.
2 Press the Recording Start/Stop Button (42)
to start recording.
(42)
3 Press the Recording Start/Stop Button (42)
to pause the recording.
≥The last scene is stored in memory. The
[WIPE] or [MIX] Indication changes to [B]
or [C].
4 Press the Recording Start/Stop Button (42)
to restart the recording.
≥The last image of the previous scene
gradually changes to the new scene.
≥For other notes concerning this item, see
-50-.
≥For other notes concerning this item, see
-50-.
ª Wipe Mode and Mix Mode
Wipe Mode:
Like drawing a curtain, the still picture of the last
recorded scene gradually changes to the moving
image of a new scene.
WIPE
WIPE
WIPE
-30-
 Loading...