

Page 1
Operating Instructions (Original instructions)
Gebruiksaanwijzing (Vertaling van de oorspronkelijke instructies)
Bedienungsanleitung (Übersetzung der Originalanweisungen)
Microwave Oven
Magnetron
Mikrowellengerät
Household Use Only
Uitsluitend voor huishoudelijk gebruik
Nur für Haushaltsgebrauch
English Deutsch
Nederlands
ModelNo.NN-S29KSM
Page 2

Page 3

Important safety instructions. Before
operating this oven, please read these
instructions and precautions carefully and keep
for future reference.
Warning! The appliance should be inspected
for damage to the door seals and door seal
areas and if these areas are damaged the
appliance should not be operated until it has
been repaired by a service technician trained
by the manufacturer.
Warning! Do not attempt to tamper with or
make any adjustments or repairs to the door,
control panel housing, safety interlock switches
or any other part of the oven. Do not remove
the outer panel from the oven which gives
protection against exposure to microwave
energy. Repairs should only be carried by a
qualied service person.
Warning! Liquids and other foods must not
be heated in sealed containers since they are
liable to explode.
English
Warning! When heating liquids, e.g. soup,
sauces and beverages in your oven,
overheating the liquid beyond boiling point can
occur without evidence of bubbling. This could
result in a sudden boil over of the hot liquid.
EN
1
Page 4

Warning! The contents of feeding bottles and
baby food jars are to be stirred or shaken. The
temperature has to be checked before
consumption to avoid burns.
Warning! The appliance shall be
disconnected from its power source during
service and when replacing parts. Following
the removal of the supply plug, the plug should
remain visible to the service operator to ensure
that inadvertent reconnection is avoided.
Warning! Ensure that the appliance is
switched off before replacing the lamp to avoid
the possibility of electric shock.
This appliance can be used by children aged
from 8 years and above and persons with
reduced physical, sensory and mental
capabilities or lack of experience and
knowledge if they have been given supervision
or instruction by a person responsible for their
safety concerning the use of the appliance in a
safe way and understand the hazards involved.
Children shall not play with the appliance.
Cleaning and user maintenance shall not be
made by children without supervision. Keep
the appliance and its cord out of reach of
children less than 8 years.
EN
2 3
Page 5

When this oven is installed, it should be easy
to isolate the appliance from the electricity
supply by pulling out the plug or operating a
circuit breaker.
If the supply cord is damaged, it must be
replaced by the manufacturer or its service
agent or a similarly qualied person in order to
avoid a hazard.
Do not place this oven near an electric or gas
cooker range.
This oven is intended for counter-top use
only. It is not intended for Built-in use or for use
inside a cupboard.
Oven must be placed on a at, stable surface
85 cm above the oor, with rear of oven placed
against a back wall. If one side of the oven is
placed ush to a wall, the other side or top
must not be blocked. Allow 15 cm of space on
the top of the oven.
When heating food in plastic or paper
containers, keep an eye on the oven as these
types of containers ignite if overheated.
English
If smoke is emitted or a re occurs in the
oven, press Stop/Reset and keep the door
closed in order to stie any ames. Disconnect
the power cord, or shut off power at fuse or
circuit breaker panel.
EN
Page 6

This appliance is intended to be used in
household and similar applications such as:
- staff kitchen areas in shops, ofces and other
working environments;
- farm houses;
- by clients in hotels, motels and other
residential environments;
- bed and breakfast type environments.
Do not cook eggs in their shells and whole
hard-boiled eggs by MICROWAVE. Pressure
may build up and the eggs may explode, even
after the microwave heating has ended.
Clean the inside of the oven, door seals and
door seal areas regularly. When food splatters
or spilled liquids adhere to the oven walls, door
seals and door seal areas wipe off with a damp
cloth. Mild detergent may be used if they get
very dirty. The use of harsh detergent or
abrasive is not recommended.
DO NOT USE COMMERCIAL OVEN
CLEANERS.
Failure to maintain the oven in a clean
condition could lead to deterioration of surfaces
that could affect the life of the appliance and
possibly result in a hazardous situation.
A steam cleaner is not to be used for cleaning.
EN
4 5
Page 7

Do not use harsh, abrasive cleaners or sharp
metal scrapers to clean the oven door glass
since they can scratch the surface, which may
result in shattering of the glass.
This appliance is not intended to be operated
by means of an external timer or separate
remote-control system.
Only use utensils that are suitable for use in
microwave ovens.
The microwave oven is intended for heating
food and beverages only. Take care when
heating foods low in moisture, e.g. bread
items, chocolate, biscuits and pastries. These
can easily burn, dry out or catch on re if
cooked too long. We do not recommend
heating foods low in moisture such as popcorn
or poppodums. Drying of food, newspapers or
clothing and heating of warming pads, slippers,
sponges, damp cloth, wheat bags, hot water
bottles and similar may lead to risk of injury,
ignition or re.
English
The oven lamp must be replaced by a
service technician trained by the manufacturer.
DO NOT attempt to remove the outer casing
from the oven.
Metal containers or dishes with metallic trim
should not be used during microwave cooking.
Sparking will occur.
EN
Page 8

Contents
Installation and connection ............................................. 7
Placement of your oven .................................................. 7
Important safety instructions........................................... 8
Parts of your oven ........................................................ 12
Control panel ................................................................ 13
Setting the clock ........................................................... 14
Child safety lock ........................................................... 14
Microwave cooking and defrosting ............................... 15
Multi-stage cooking....................................................... 17
Quick 30 feature .......................................................... 18
Add time feature ........................................................... 18
Using the timer ............................................................. 19
Kitchen timer ............................................................. 19
Standing time ............................................................ 19
Delay start ................................................................. 20
Auto programmes ......................................................... 21
Auto defrost .............................................................. 21
Auto reheat ............................................................... 23
Auto cook .................................................................. 24
Questions and answers ................................................ 25
Care of your oven ......................................................... 26
Specications ............................................................... 27
Thank you for purchasing a Panasonic appliance.
Panasonic Corporation Osaka, Japan
Imported by: Panasonic Marketing Europe GmbH
Panasonic Testing Centre,
Winsbergring 15, 22525 Hamburg, Germany
EN
6 7
Page 9
Installation and connection
Examine your microwave oven
Unpack the oven, remove all
packing material, and examine the
oven for any damage such as dents,
broken door latches or cracks in the
door. If you nd any damage, notify
your dealer immediately. Do not
install a damaged microwave oven.
Earthing instructions
Important!
THIS UNIT HAS TO BE
PROPERLY EARTHED FOR
PERSONAL SAFETY.
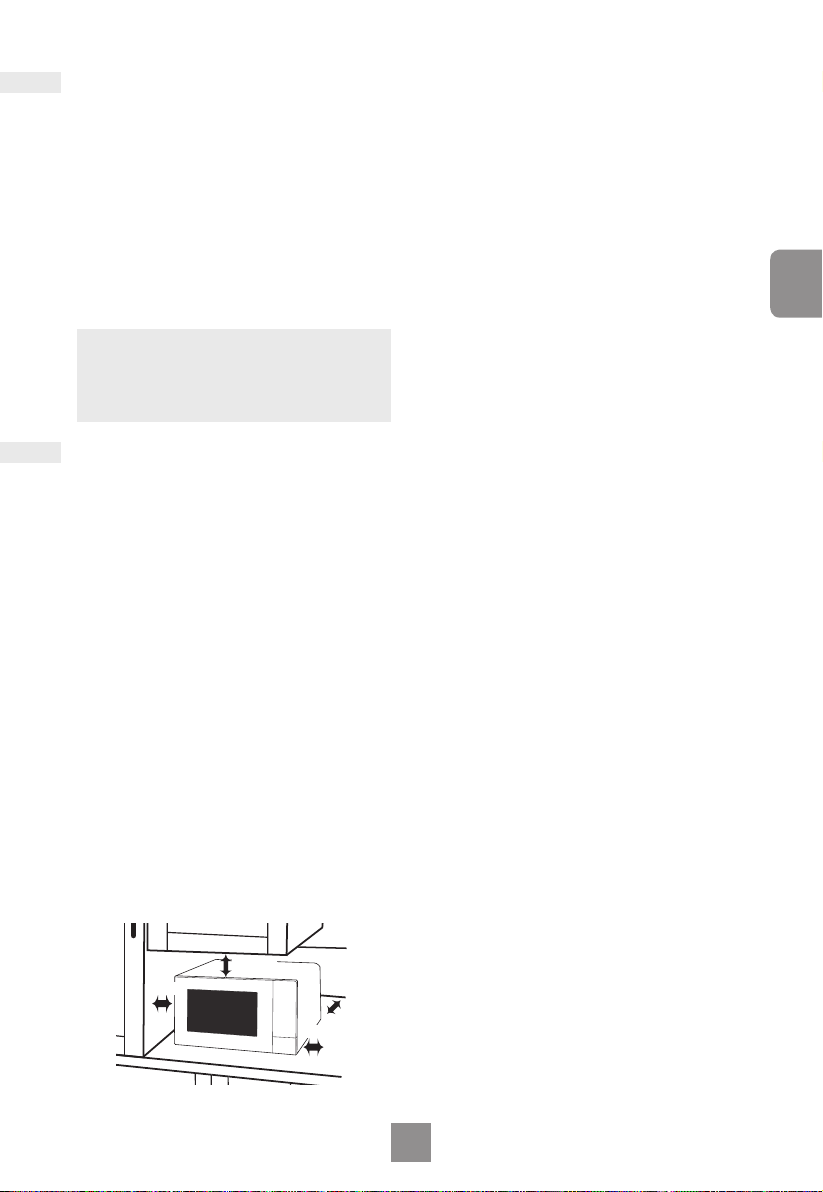
Placement of your oven
This oven is intended for counter-top
use only. It is not intended for built-in
use or for use inside a cupboard.
1. Place the oven on a at and
stable surface more than 85 cm
above the oor.
2. When this oven is installed, it
should be easy to isolate the
appliance from the electricity
supply by pulling out the plug or
operating a circuit breaker.
3. For proper operation, ensure a
sufcient air circulation for the
oven.
Counter-top use:
Allow 15 cm of space on the top
of the oven, 10 cm at the back
and 5 cm on both sides.
15 cm
5 cm
counter top
10 cm
5 cm
If your AC outlet is not earthed, it is
the personal responsibility of the
customer to have it replaced with a
properly earthed wall socket.
Operation voltage
The voltage has to be the same as
specied on the label on the oven.
If a higher voltage than specied is
used, it may cause a re or other
damages.
4. Do not place this oven near an
electric or gas cooker range.
5. The power cord should not
touch the outside of the oven.
Keep the cord away from hot
surfaces. Do not let the cord
hang over the edge of a table or
work top. Do not immerse the
cord, plug or oven in water.
6. The feet should not be
removed.
7. This appliance is intended to be
used in household and similar
applications such as:
- staff kitchen areas in shops,
ofces and other working
environments;
- farm houses;
- by clients in hotels, motels
and other residential
environments;
- bed and breakfast type
environments.
Do not use outdoors.
8. Avoid using the oven in high
humidity.
English
If one side of the oven is placed
ush to a wall, the other side or
top must not be blocked.
EN
Page 10

Placement of your oven
9. Do not block the air vents on
left side and back of the oven. If
these openings are blocked
during operation the oven may
overheat. In this case the oven
is protected by a thermal safety
device and resumes operation
only after cooling down.
10. This appliance is not intended
to be operated by means of an
external timer or separate
remote-control system.
Important safety instructions
1. The door seals and seal areas
should be cleaned with a damp
cloth. The appliance should be
inspected for damage to the
door seals and door seal areas
and if these areas are damaged
the appliance should not be
operated until it has been
repaired by a service technician
trained by the manufacturer.
2. Do not attempt to tamper with
or make any adjustments or
repairs to the door, control
panel housing, safety interlock
switches or any other part of
the oven. Do not remove the
outer panel from the oven
which gives protection against
exposure to microwave energy.
Repairs should only be
carried out by a qualied
service person.
3. Do not operate this appliance if
it has a damaged CORD OR
PLUG, if it is not working
properly, or if it has been
damaged or dropped. It is
dangerous for anyone other
than a service technician
trained by the manufacturer to
perform repair service.
4. If the supply cord is damaged, it
must be replaced by the
manufacturer, its service agent
or a similarly qualied person in
order to avoid a hazard.
5. Liquids and other foods must
not be heated in sealed
containers since they are liable
to explode.
6. This appliance can be used by
children aged from 8 years and
above and persons with
reduced physical, sensory and
mental capabilities or lack of
experience and knowledge if
they have been given
supervision or instruction by a
person responsible for their
safety concerning the use of the
appliance in a safe way and
understand the hazards
involved. Children shall not play
with the appliance. Cleaning
and user maintenance shall not
be made by children without
supervision. Keep the appliance
and its cord out of reach of
children less than 8 years.
EN
8 9
Page 11

Use of your oven
Do not use the oven for any reason
other than the preparation of food.
This oven is specically designed
to heat or cook food. Do not use
this oven to heat chemicals or
other non-food products.
Before use, check that utensils/
containers are suitable for use in
microwave ovens.
When the oven is not being used,
do not store any objects inside
the oven in case it is accidentally
turned on.
The appliance must not be
operated WITHOUT FOOD IN
THE OVEN. Operation in this
manner may damage the
appliance.
If smoke is emitted or a re
occurs in the oven, press Stop/
Reset and keep the door closed
in order to stie any ames.
Disconnect the power cord, or
shut off power at fuse or circuit
breaker panel.
Fan motor operation
After using the oven the fan motor
may rotate for a few minutes to
cool the electric components. This
is normal and you can take out
food even though the fan motor
operates. You can continue using
the oven during this time.
Accessories
The oven comes equipped with a
variety of accessories. Always
follow the directions given for use
of the accessories.
Glass tray
Do not operate the oven without
the roller ring and the glass tray
in place.
Never use another type of glass
tray than the one specially
designed for this oven.
If the glass tray is hot, let it cool
before cleaning or placing in water.
The glass tray can turn in either
direction.
If the food or cooking vessel on
the glass tray touches the oven
walls and stops the tray rotating,
the tray will automatically rotate
in the opposite direction. This is
normal.
Roller ring
The roller ring and the oven oor
should be cleaned frequently to
prevent noise and build-up of
remaining food.
The roller ring must always be
used for cooking together with
the glass tray.
English
Oven light
When it becomes necessary to
replace the oven light, please
consult your dealer.
EN
Page 12

Important safety instructions
Cooking time
The cooking time depends on the
condition, temperature, amount of
food and on the type of cookware.
Begin with the minimum cooking
time to help prevent overcooking.
If the food is not sufciently
cooked you can always cook it
for a little longer.
Important!
If the recommended cooking
time is exceeded, the food will
be spoiled and in extreme
circumstances could catch re
and possibly damage the
interior of the oven.
Small quantities of foods
Small quantities of food or foods
with low moisture content can
burn, dry out or catch on re if
cooked too long. If materials
inside the oven should ignite,
keep the oven door closed, turn
the oven off and remove the plug
from the socket.
Foods low in moisture
The microwave oven is intended
for heating food and beverages
only. Take care when heating
foods low in moisture, e.g. bread
items, chocolate, biscuits and
pastries. These can easily burn,
dry out or catch on re if cooked
too long. We do not recommend
heating foods low in moisture
such as popcorn or poppodums.
Drying of food, newspapers or
clothing and heating of warming
pads, slippers, sponges, damp
cloth, wheat bags, hot water
bottles and similar may lead to
risk of injury, ignition or re.
Eggs
Do not cook eggs in their shells
and whole hard-boiled eggs by
MICROWAVE. Pressure may
build up and the eggs may
explode, even after the
microwave heating has ended.
Piercing skin
Food with non porous skins, such
as potatoes, egg yolks and
sausages must be pierced before
cooking by MICROWAVE to
prevent bursting.
Meat thermometer
Use a meat thermometer to
check the degree of cooking of
roasts and poultry only when the
meat has been removed from the
oven. Do not use a conventional
meat thermometer in the
microwave oven because it may
cause sparking.
EN
10 11
Page 13

Liquids
When heating liquids, e.g. soup,
sauces and beverages in your
microwave oven, overheating the
liquid beyond boiling point can
occur without evidence of
bubbling. This could result in a
sudden boil over of the hot liquid.
To prevent this possibility the
following steps should be taken:
a Avoid using straight-sided
containers with narrow necks.
b Do not overheat.
c
Stir the liquid before placing the
container in the oven and again
halfway through the cooking time.
d After heating, allow it to stand
in the oven for a short time, stir
again before carefully removing
the container.
Paper/plastic
When heating food in plastic or
paper containers, keep an eye on
the oven as these types of
containers ignite if overheated.
Do not use recycled paper
products (e.g. kitchen roll) unless
the paper product is labelled as
safe for microwave oven use.
Recycled paper products may
contain impurities which may
cause sparks and/or res during
use.
Remove wire twist-ties from
roasting bags before placing the
bags in the oven.
Utensils/foil
Do not heat any closed cans or
bottles because they might
explode.
Metal containers or dishes with
metallic trim should not be used
during microwave cooking.
Sparking will occur.
If you use any aluminium foil,
meat spikes or metalware the
distance between them and the
oven walls and door should be at
least 2 cm to prevent sparking.
Feeding bottles/baby food jars
The top and teat or lid must be
removed from feeding bottles or
baby food jars before placing in
the oven.
The contents of feeding bottles
and baby food jars are to be
stirred or shaken.
The temperature has to be
checked before consumption to
avoid burns.
English
EN
Page 14
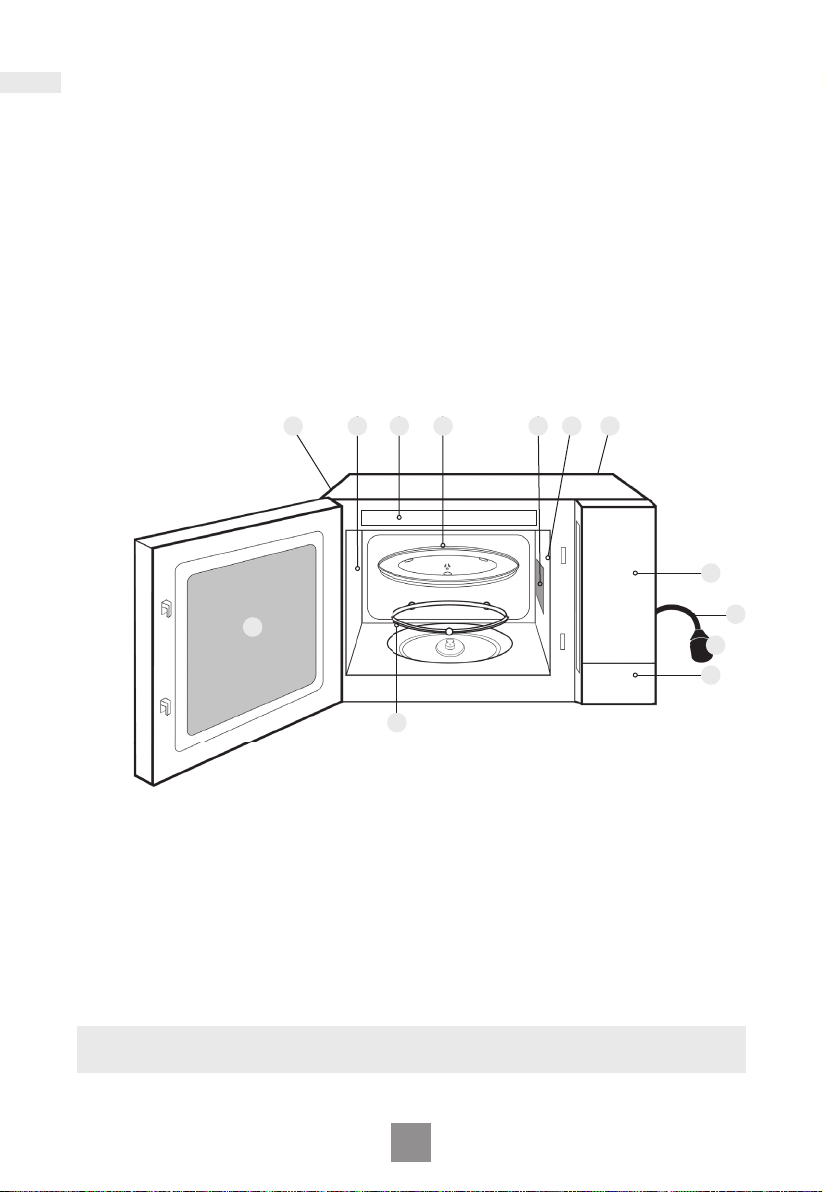
Parts of your oven
1. Door Release Button
Press to open the door. Opening
the door during cooking will stop
the cooking process without
cancelling the programme. Cooking
resumes after the door is closed
and Start is pressed. It is quite safe
to open the door at any time during
a cooking programme and there is
no risk of microwave exposure.
2. Oven window
2
3. Air vents
4. Microwave feed guide
(Do not remove.)
5. External air vents
6. Control panel
7. Power supply cord
8. Plug
9. Glass tray
10. Roller ring
11. Menu label
11 95 3 4 3 5
6
7
8
1
10
Identi cation label is attached on the oven.
Note
This illustration is for reference only.
12 13
EN
Page 15

Control panel
2
7
1 Display window
2 Micro Power pads
3 Auto Defrost pad
4 Auto Reheat pad
5 Auto Cook pad
1
6 Time / Weight Select dial
7 Timer / Clock pad
8 Quick 30 pad
9 Stop / Reset pad:
3
Before Cooking:
One press clears your instructions.
4
During Cooking:
One press temporarily stops the
cooking process. Another press
5
cancels all your instructions and a
dot or the time of day will appear in
the display.
10 Start pad
6
One press allows oven to begin
functioning. If door is opened or
Stop/Reset is pressed once during
oven operation, Start must be
pressed again to restart oven.
8
English
9
• Your control panel may have
differences in appearance, but the
words and functionality will be the
same.
Beep sound
When a pad is pressed correctly a
beep will be heard. If a pad is pressed
and no beep is heard, the unit has not
or cannot accept the instruction. The
oven will beep twice between
programmed stages. At the end of any
complete programme, the oven will
beep 5 times and "End" will be
displayed.
10
Note
If Start is not pressed for 6 minutes
after cooking programme setting, the
oven will automatically cancel the
cooking programme. The display will
revert back to clock or dot.
EN
Page 16
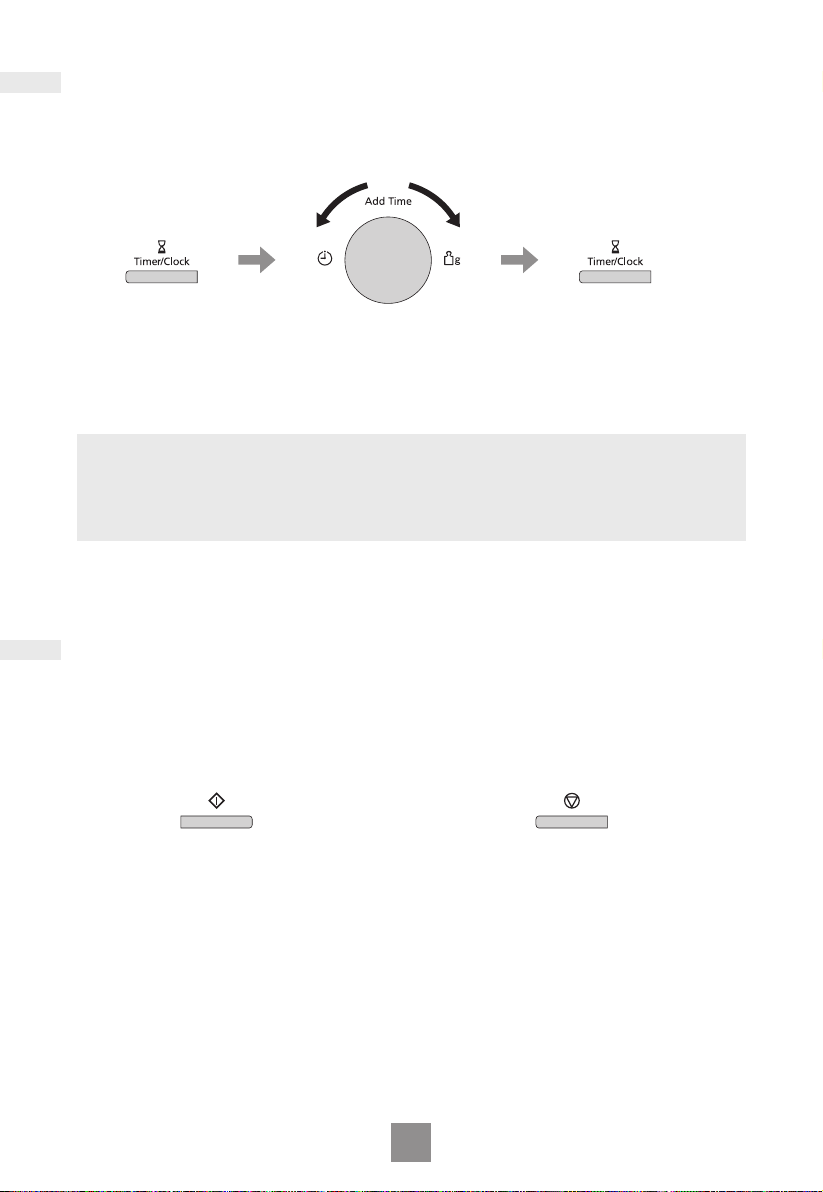
Setting the clock
When the oven is rst plugged in, “88.88” appears in display.
Example: To set 11:25 am
Press Timer/Clock
twice.
A colon starts to blink.
Turn the dial until 11:25
appears in the display.
Press Timer/Clock.
The colon stops
blinking. Time of day
is now locked into
the display.
Notes
1. To reset time of day, repeat step 1 through to step 3, as above.
2. The clock will keep the time of day as long as the oven is plugged in and
electricity is supplied.
3. This is a 24 hour clock, ie 2 pm = 14:00 not 2:00.
Child safety lock
This feature will make the oven controls inoperable; however, the door can be
opened. Child Lock can be set when the display shows a dot or the time.
To Set:
Press Start 3 times in 10 seconds.
The time of day will disappear. Actual
time will not be lost. ‘L ---’ is indicated
in the display.
To Cancel:
Press Stop/Reset 3 times in
10 seconds.
The time of day will reappear in the
display.
EN
14 15
Page 17
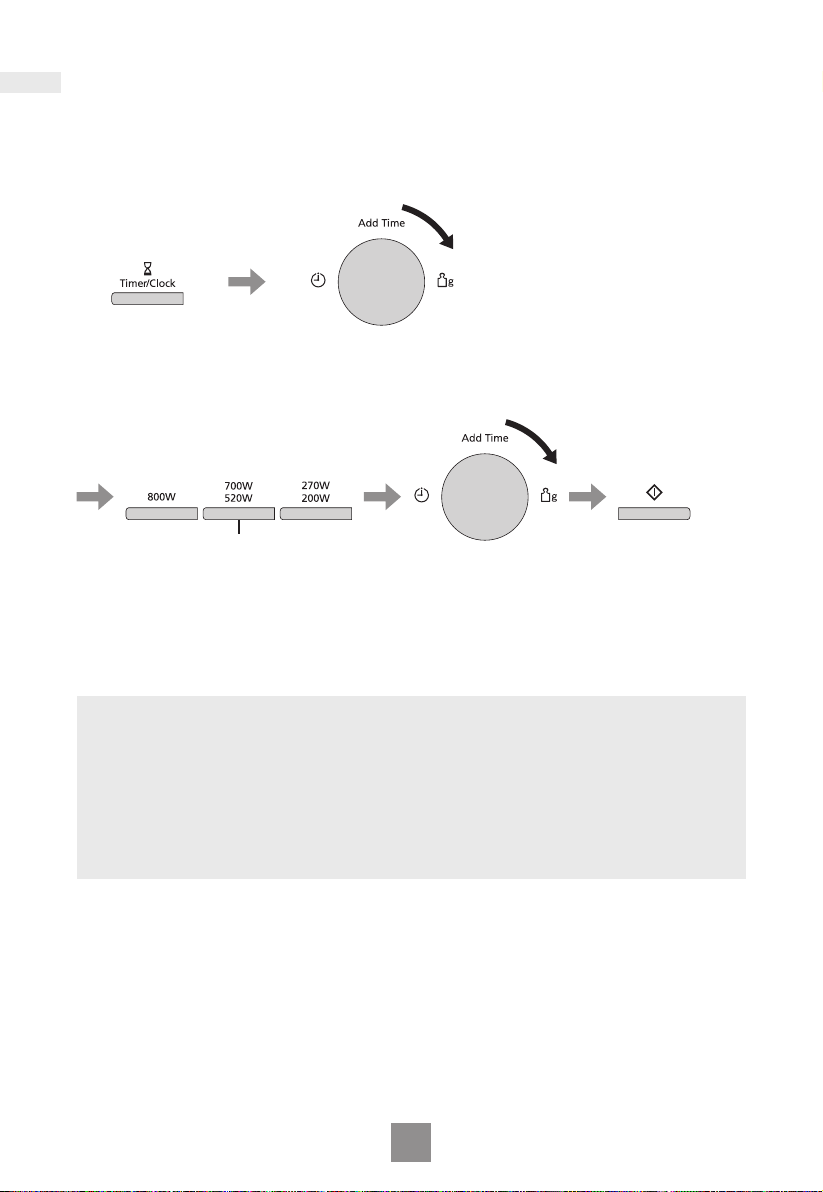
Microwave cooking and defrosting
The glass tray must always be in position when using the oven.
English
Press Micro Power to
select the desired power
level.
Power Level
800 W High
700 W Medium
520 W Low
270 W Defrost
200 W Warm
Turn the dial to set the
cooking time.
Your oven can be programmed
for up to 90 minutes in 700 W
(Medium), 520 W (Low), 200 W
(Warm) and 270 W (Defrost)
power. 800 W (High) power can
be programmed for up to
30 minutes.
Press Start.
The time
counts down
in the display.
Notes
1. After the operation is nished, “Add” is displayed for about 1 minute on the
display. While displaying, you can use ADD TIME feature, refer to page 18.
2. The oven will automatically work on 800 W (High) microwave power if a
cooking time is entered without the power level previously being selected.
3. While cooking, the glass tray may vibrate. This will not affect cooking
performance.
4. For MULTI-STAGE COOKING, refer to page 17.
5. STANDING TIME can be programmed after microwave power and time setting.
Refer to page 19.
6. DO NOT use microwave only with any metal accessory in the oven.
7. Always check the food during defrosting by opening the door then restarting. It
is not necessary to cover food during defrosting. To ensure an even result, stir,
turn or separate several times during defrosting. For large joints and poultry,
turn halfway through defrosting and protect ends and tips with foil.
EN
Page 18
Microwave cooking and defrosting
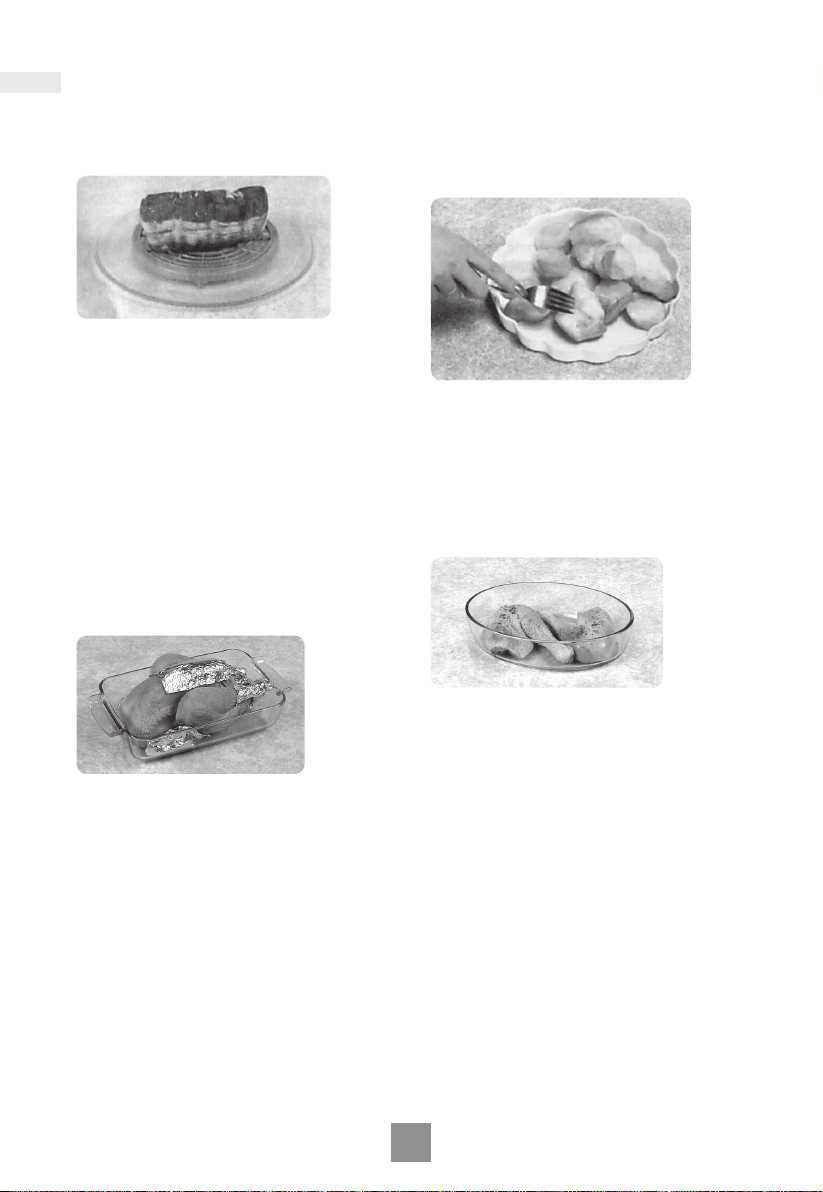
Defrosting Guidelines
Standing times
Individual portions of food may be
cooked almost immediately after
defrosting. It is normal for large
portions of food to be frozen in the
centre. Before cooking, allow to stand
for a minimum of one hour. During
this standing time, the temperature
becomes evenly distributed and the
food is defrosted by conduction. N.B. If
the food is not going to be cooked
immediately, store it in the refrigerator.
Never refreeze defrosted food without
rst cooking it.
Joints and poultry
It is preferable to place the joints on an
upturned plate or plastic rack so that
they are not resting in the juices. It is
essential to protect delicate or
projecting parts of this food with small
pieces of foil to prevent these parts
from cooking. It is not dangerous to
use small pieces of foil in your oven,
provided they do not come into
contact with the oven walls.
Minced meat or cubes of meat
and seafood
Since the outside of these foods
quickly defrosts, it is necessary to
separate them, break the blocks into
pieces frequently while defrosting and
remove them when they have
defrosted.
Small portions of food
Chops and chicken pieces must be
separated as soon as possible so that
they defrost evenly throughout. Fatty
parts and the ends defrost more
quickly. Place them near the centre of
the turntable or protect them.
Bread
Loaves will require standing time to
allow the centre to thaw. Standing time
can be shortened if slices are
separated and rolls and loaves cut in
half.
EN
16 17
Page 19
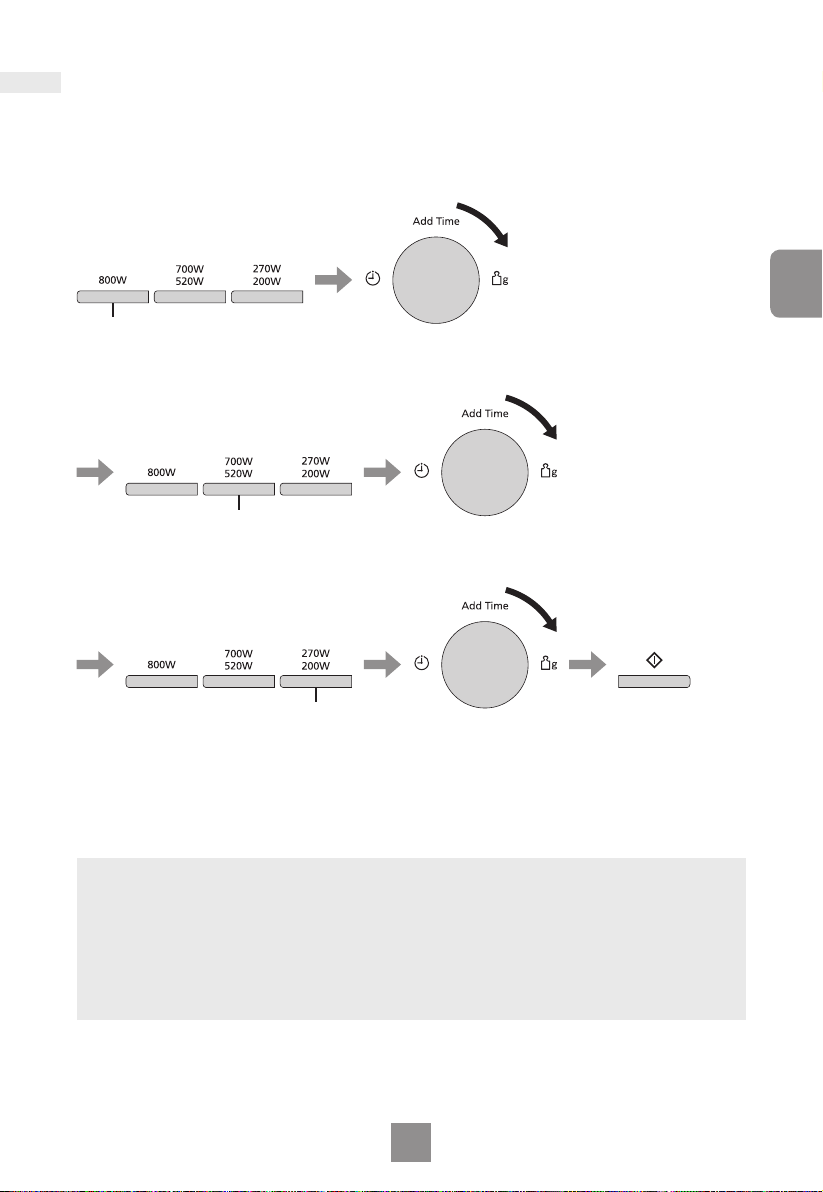
Multi-stage cooking
This feature allows you to programme up to 3 stages of cooking continuously.
Example: To continually set 800 W (High) power for 2 minutes, 700 W (Medium)
Press once.
Select 800 W (High)
power.
power for 3 minutes and 200 W (Warm) power for 2 minutes.
Turn the dial until 2.00
appears in the display.
Press once.
Select 700 W (Medium)
power.
Turn the dial until 3.00
appears in the display.
English
Press twice.
Select 200 W (Warm)
power.
Turn the dial until 2.00
appears in the display.
Press Start.
The time for the
rst stage
counts down in
the display.
Notes
1. After the operation is nished, “Add” is displayed for about 1 minute on the
display. While displaying, you can use ADD TIME feature, refer to page 18.
2. AUTO PROGRAMMES cannot be used with MULTI-STAGE COOKING.
3. When operating, 2 beeps will sound between each stage, and 5 beeps will
sound after all stages have nished.
4. 800 W (High) MICROWAVE power can be set only for a single stage of
MULTI-STAGE COOKING.
EN
Page 20
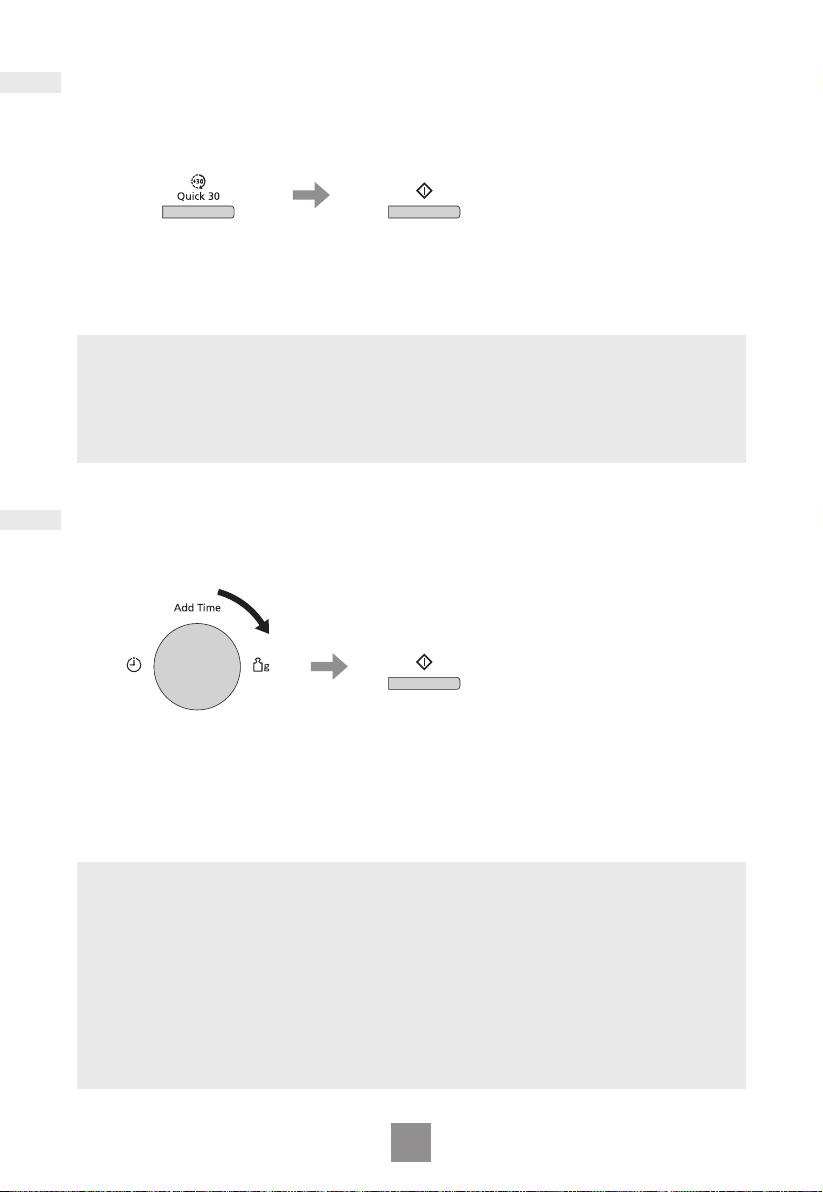
Quick 30 feature
This feature allows you to set cooking time in 30 seconds increments up to
5 minutes at 800 W (High) MICROWAVE power.
Press Quick 30 to set the
desired cooking time.
Time appears in the display.
Press Start.
The time counts
down in the
display.
Notes
1. After the operation is nished, “Add” is displayed for about 1 minute on the
display. While displaying, you can use ADD TIME feature, refer to below.
2. If desired, you can use other power levels. Select the desired power level
before pressing Quick 30.
3. After setting the time by Quick 30, you cannot use dial.
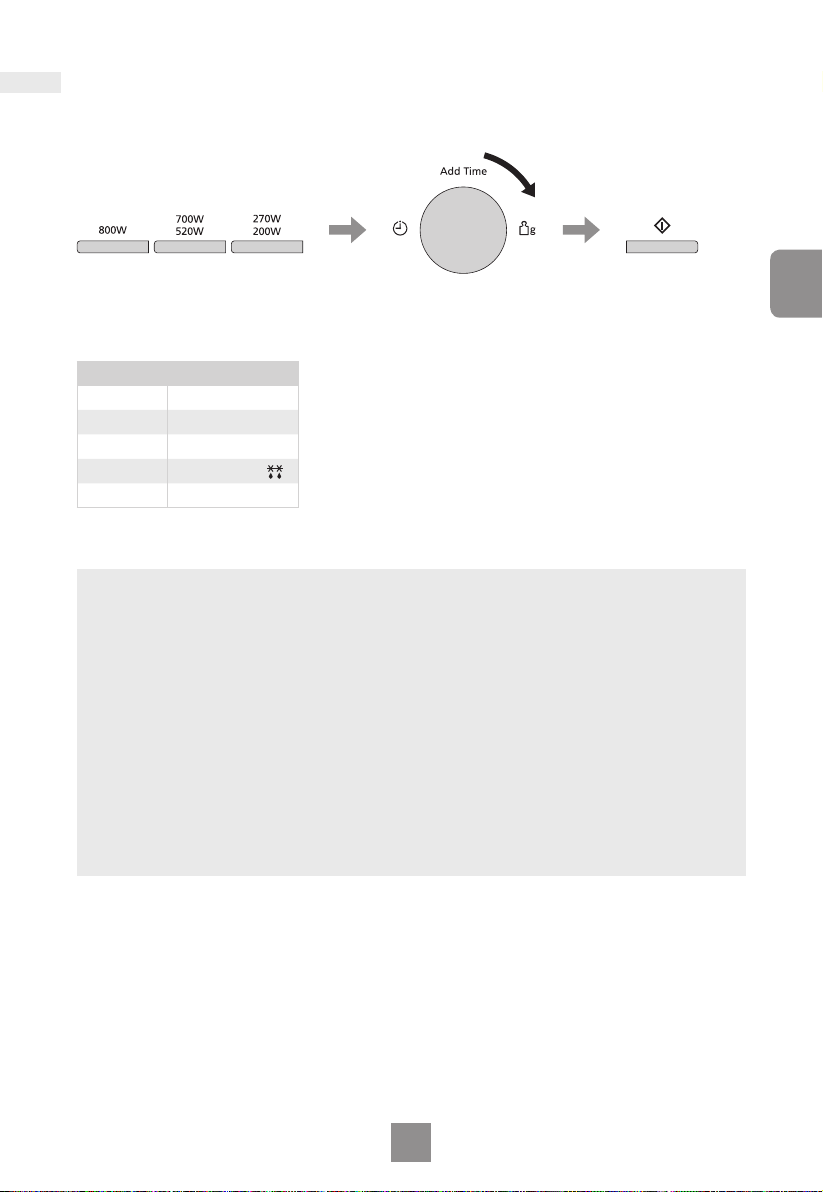
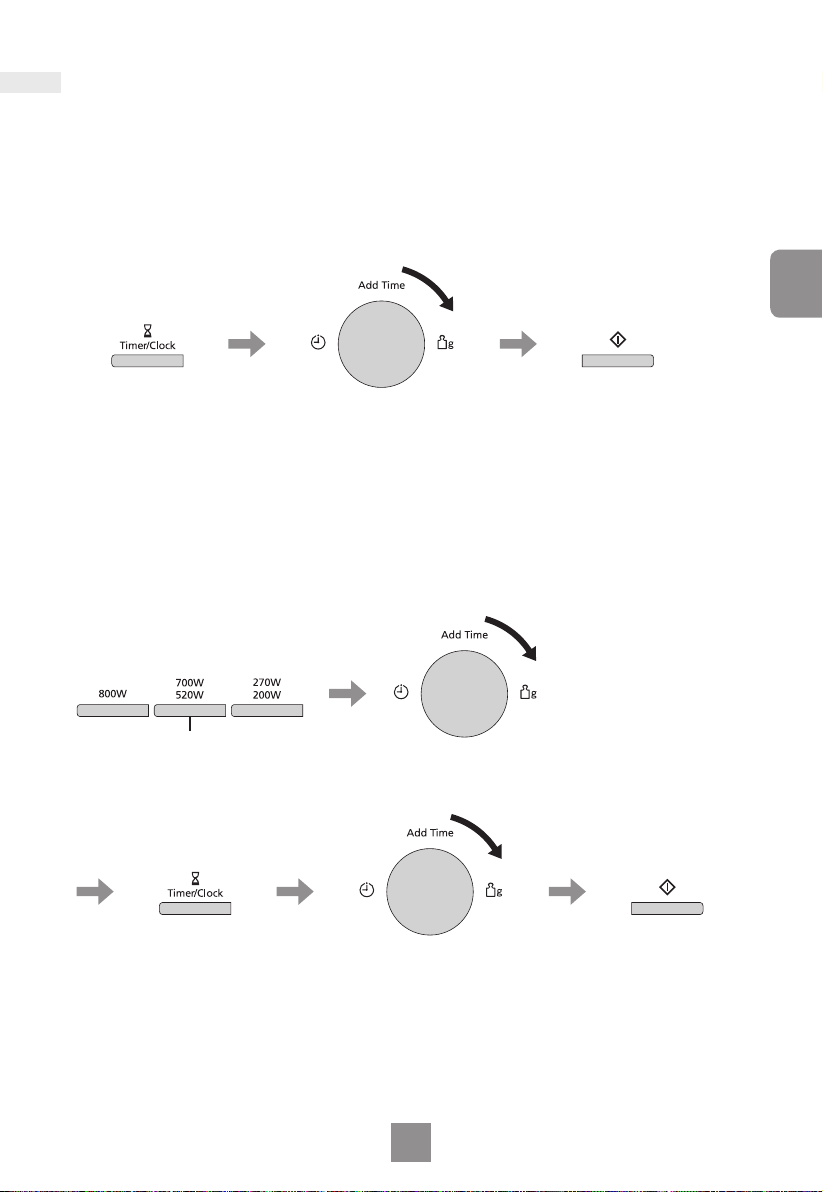
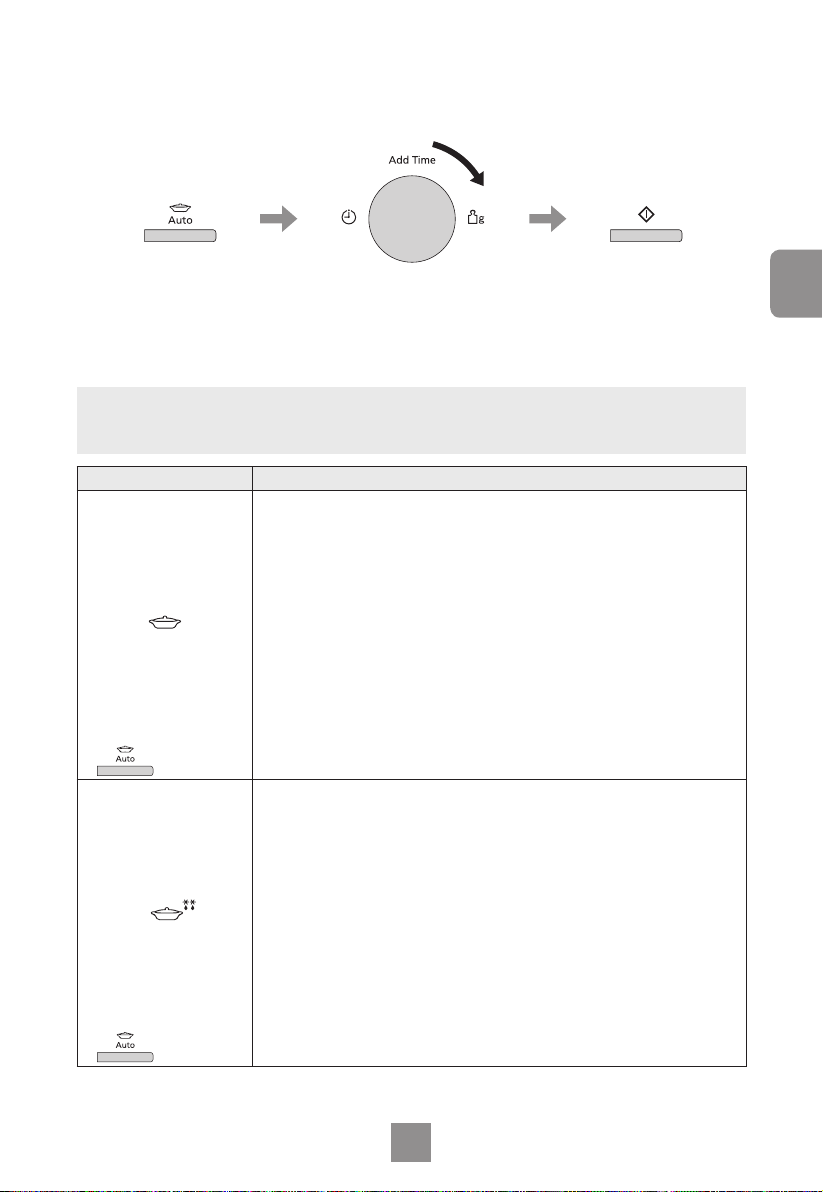
Add time feature
This feature allows you to add cooking time at the end of previous cooking.
Turn the dial to set the
additional time.
Up to 30 minutes for 800 W
(High) MICROWAVE power
and 90 minutes for other
MICROWAVE powers.
Press Start.
The time counts
down in the
display.
Notes
1. After the operation is nished, “Add” is displayed for about 1 minute on the
display. While displaying, you can use ADD TIME feature again.
2. During cooking, turn the dial to set the additional cooking time (10 seconds to
10 minutes).
3. ADD TIME feature will be cancelled, if you don’t perform any operation for
1 minute after cooking.
4. ADD TIME feature can be used after MULTI-STAGE COOKING. The power
level is the same as the last stage. This function will not operate if the last
stage was standing time.
5. ADD TIME feature is not available for AUTO PROGRAMMES.
EN
18 19
Page 21
Using the timer
This feature operates as a KITCHEN TIMER or allows you to programme the
STANDING TIME/DELAY START.
Kitchen timer
Example: To count 5 minutes.
English
Press Timer/
Clock.
Turn the dial until 5.00
appears in the display.
(up to 90 minutes)
Press Start.
The time counts
down without the
oven operating.
Standing time
Example: To stand for 5 minutes after cooking at 700 W (Medium) MICROWAVE
Select 700 W (Medium)
power.
power for 3 minutes.
Press once.
Press Timer/
Clock.
Turn the dial until 3.00
appears in the display.
Turn the dial until 5.00
appears in the display.
(up to 90 minutes)
Press Start.
Cooking starts.
After cooking,
standing time will
count down without
the oven operating.
EN
Page 22
Using the timer
Delay start
Example: To start cooking at 700 W (Medium) MICROWAVE power for 3 minutes
after 5 minutes of standing time.
Press Timer/
Clock.
Press once.
Select 700 W (Medium)
power.
Turn the dial until 5.00
appears in the display.
(up to 90 minutes)
Turn the dial until 3.00
appears in the display.
Press Start.
Delayed time
counts down,
then start
cooking.
Notes
1. After DELAY START is nished, “Add” is displayed for about 1 minute on the
display. While displaying, you can use ADD TIME feature, refer to page 18.
2. MULTI-STAGE COOKING can be programmed including STANDING TIME or
DELAY START.
3. Even if the oven door is opened during KITCHEN TIMER, STANDING TIME or
DELAY START, the time in the display window will continue to count down.
4. STANDING TIME/DELAY START cannot be programmed before/after any
AUTO PROGRAMME.
EN
20 21
Page 23
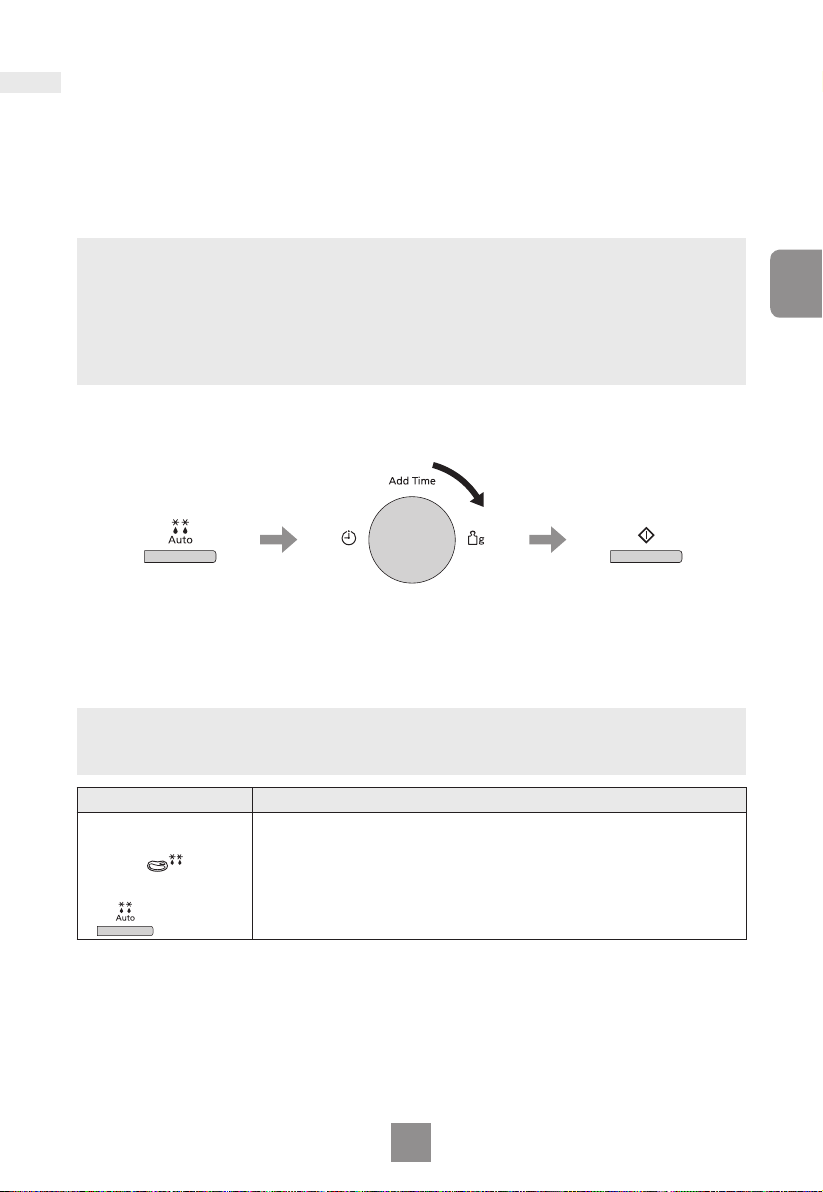
Auto programmes
With this feature you can defrost/reheat/cook food according to the weight.
Select the category and set the weight of the food. The weight is programmed
in grams. The oven determines MICROWAVE power level, and cooking time
automatically. For quick selection, the weight starts from the most commonly
used weight for each category. Do not include the weight of any added water
or the container weight.
Notes
1. Always operate the oven with the roller ring and glass tray in place.
2. The AUTO PROGRAMMES must ONLY be used for foods described.
3. Only defrost/cook foods within the weight ranges described.
4. Always weigh the food rather than relying on the package information.
5. Most foods benet from a STANDING TIME. After cooking with an AUTO
PROGRAMME, allow heat to continue conducting to the centre.
Auto defrost
English
Select the desired Auto
Defrost programme.
The AUTO PROGRAMME
number appears in the
display.
Turn the dial to set the
weight of the frozen
food.
The weight counts up/
down in 10 g increments.
Press Start.
Remember to stir
or turn the food
during defrosting.
Note
The shape and size of the food will determine the maximum weight the oven can
accommodate.
Programme Instructions
1. Small Pieces
1 press
Weight: 200 g - 1000 g
For defrosting small pieces of meat, escallop, sausages,
minced meat, steak, chops, sh llets (each 100 g to 400 g).
Press Auto Defrost once. Set the weight of the food and
press Start. Allow to stand for 15 to 30 minutes.
EN
Page 24
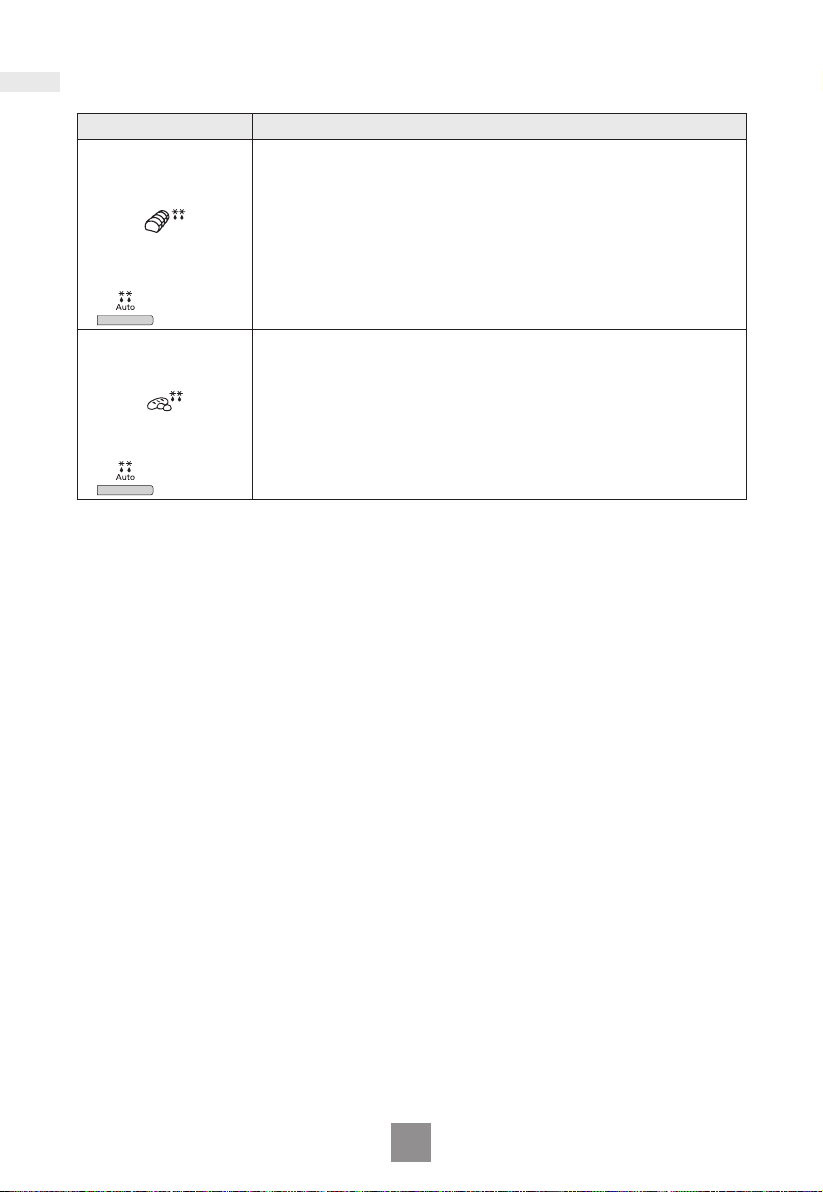
Auto programmes
Programme Instructions
Weight: 600 g - 1600 g
For defrosting big pieces of meat, whole chickens, meat
2. Big Piece
2 presses
3. Bread/Cake
3 presses
joints. Press Auto Defrost twice. Set the weight of the food
and press Start. Whole chickens and meat joints will require
shielding during defrosting. Protect wings, breast and fat
with smooth pieces of aluminium foil secured with cocktail
sticks. Do not allow the foil to touch the walls of the oven.
Standing time of 1 to 2 hours should be allowed before
cooking.
Weight: 100 g - 600 g
For defrosting bread (whole, slices, rolls) and cakes. Cream
cakes and iced cakes are unsuitable for this programme.
Place the bread or cake on a large plate or shallow dish.
Press Auto Defrost 3 times. Set the weight of the food and
press Start. Allow bread to stand for 10 (white light bread) to
30 minutes (dense rye bread). Cut large loaves in half
during standing time.
EN
22 23
Page 25
Auto reheat
English
Select the desired Auto
Reheat programme.
The AUTO PROGRAMME
number appears in the
display.
Turn the dial to set the
weight of the food.
The weight counts up/
down in 10 g increments.
Press Start.
The time counts
down in the
display.
Note
As some variations may occur in food, check that food is thoroughly cooked and
piping hot before serving.
Programme Instructions
Weight: 200 g - 800 g
For reheating a fresh pre-cooked meal. All foods must be
pre-cooked. Foods should be at refrigerator temperature
approx. +5 °C. Reheat in container as purchased. Pierce
1. Chilled Meal
1 press
2. Frozen Meal
2 presses
covering lm with a sharp knife once in the centre and
4 times around the edge. If transferring food to a dish, cover
with pierced cling lm. Place container on glass tray. Press
Auto Reheat once. Set the weight of the food and press
Start. Stir at beeps. Stir again at end of programme and
allow a few minutes standing time. Large pieces of meat/sh
in a thin sauce may require longer cooking. This programme
is not suitable for starchy foods such as rice, noodles or
potatoes. Meals in irregular bowl shaped containers may
need longer cooking.
Weight: 300 g - 600 g
For reheating a frozen pre-cooked meal. All foods must be
pre-cooked and frozen (-18 °C). Reheat in container as
purchased. Pierce covering lm with a sharp knife once in
the centre and 4 times around the edge. If transferring food
to a dish, cover with pierced cling lm. Place container on
glass tray. Press Auto Reheat twice. Set the weight of the
food and press Start. Stir at beeps and cut the blocks into
pieces. Stir again at end of programme and allow a few
minutes standing time. Large pieces of meat/sh in a thin
sauce may require longer cooking. This programme is not
suitable for starchy foods such as rice, noodles or potatoes.
Meals in irregular bowl shaped containers may need longer
cooking.
EN
Page 26
Auto programmes
Auto cook
Select the desired Auto
Cook programme.
The AUTO PROGRAMME
number appears in the
display.
Turn the dial to set the
weight of the food.
The weight counts up/
down in 10 g increments.
Press Start.
The time counts
down in the
display.
Note
As some variations may occur in food, check that food is thoroughly cooked and
piping hot before serving.
Programme Instructions
1. Fresh
Vegetables
1 press
2. Frozen
Vegetables
2 presses
3. Potatoes
3 presses
4. Fresh Fish
4 presses
Weight: 100
For cooking fresh vegetables like carrots, broccoli,
cauliower and green beans. Place prepared vegetables in
a suitable sized container. Sprinkle with 1 tbsp water per
100 g vegetables. Cover with cling lm. Pierce cling lm with
a knife once in the centre and 4 times around the edge.
Press Auto Cook once. Set the weight of the food and press
Start. Stir at beeps.
Weight: 100 g - 800 g
For all types of frozen vegetables, like frozen peas,
sweetcorn or mixed vegetables. Place prepared vegetables
into a suitable size microwave safe casserole and add
2-6 tbsp of water if desired. Cover with a well tting lid. Place
the casserole on glass tray. Press Auto Cook twice. Set the
weight of the food and press Start. Stir at beeps. At the end
of cooking, let it covered and stand for 3 to 5 minutes.
Weight: 200 g - 600 g
For cooking potatoes. Pare potatoes well and cut into even
size pieces. Place in a suitable size microwave safe
casserole. Cover with a well tting lid. Place the casserole
on glass tray. Press Auto Cook 3 times. Set the weight of the
food and press Start.
Weight: 200
For cooking fresh sh lets and steaks. Place in a suitable
sized container. Add 1-3 tbsp liquid. Cover with cling lm.
Pierce cling lm once in the centre and 4 times around the
edge. Press Auto Cook 4 times. Set the weight of the food
and press Start. Allow a few minutes standing time.
g -
g -
1000 g
800 g
EN
24 25
Page 27

Questions and answers
Q: Why won’t my oven turn on?
A: When the oven does not turn on,
check the following:
1. Is the oven plugged in securely?
Remove the plug from the outlet,
wait 10 seconds and reinsert.
2. Check the circuit breaker and the
fuse.
Reset the circuit breaker or replace
the fuse if it is tripped or blown.
3. If the circuit breaker or fuse is all
right, plug another appliance into
the outlet. If the other appliance
works, there probably is a problem
with the oven. If the other appliance
does not work, there probably is a
problem with the outlet.
If it seems that there is a problem
with the oven, contact an
authorised Service Centre.
Q: My oven causes interference
with my TV. Is this normal?
A: Some radio and TV interference
might occur when you cook with the
oven. This interference is similar to
the interference caused by small
appliances such as mixers,
vacuums, blow dryers, etc. It does
not indicate a problem with your
oven.
Q: Sometimes warm air comes from
the oven vents. Why?
A: The heat given off from the cooking
food warms the air in the oven
cavity. This warmed air is carried
out of the oven by the air ow
pattern in the oven. There are no
microwaves in the air. The oven
vents should never be blocked
during cooking.
English
Q: The oven won’t accept my
programme. Why?
A: The oven is designed not to accept
an incorrect programme. For
example, the oven will not accept a
4th stage.
EN
Page 28

Care of your oven
1. The oven should be unplugged
before cleaning.
2. Clean the inside of the oven, door
seals and door seal areas regularly.
When food splatters or spilled
liquids adhere to the oven walls,
door seals and door seal areas
wipe off with a damp cloth. Mild
detergent may be used if they get
very dirty. The use of harsh
detergent or abrasive is not
recommended. Avoid cleaning the
microwave feed guide area situated
on the right hand side of the cavity
wall.
DO NOT USE COMMERCIAL
OVEN CLEANERS.
3. Do not use harsh, abrasive
cleaners or sharp metal scrapers to
clean the oven door glass since
they can scratch the surface, which
may result in shattering the glass.
4. The outside oven surface should be
cleaned with a damp cloth. To
prevent damage to the operating
parts inside the oven, water should
not be allowed to seep into the
ventilation openings.
5. If the Control Panel becomes dirty,
clean it with a soft cloth. Do not use
harsh detergents or abrasives on
the Control Panel. When cleaning
the Control Panel leave the oven
door open to prevent the oven from
accidentally turning on. After
cleaning press Stop/Reset to clear
display window.
6. If steam accumulates inside or
around the outside of the oven
door, wipe with a soft cloth. This
may occur when the oven is
operated under high humidity
conditions and in no way indicates
a malfunction of the unit.
7. It is occasionally necessary to
remove the glass tray for cleaning.
Wash the tray in warm soapy water
or in a dishwasher.
8. The roller ring and oven cavity oor
should be cleaned regularly to
avoid excessive noise. Simply wipe
the bottom surface of the oven with
mild detergent and hot water then
dry with a clean cloth. The roller
ring may be washed in mild soapy
water. Cooking vapours collect
during repeated use but in no way
affect the bottom surface or roller
ring wheels. After removing the
roller ring from the cavity oor for
cleaning, be sure to replace it in the
proper position.
9. A steam cleaner is not to be used
for cleaning.
10. This oven should only be serviced
by qualied personnel. For
maintenance and repair of the oven
contact the nearest authorised
dealer.
11. Failure to maintain the oven in a
clean condition could lead to
deterioration of surfaces that could
affect the life of the appliance and
possibly result in a hazardous
situation.
12. Keep air vents clean at all times.
Check that no dust or other material
is blocking any of the air vents on
the top, bottom or rear of the oven.
If air vents become blocked this
could cause overheating which
would affect the operation of the
oven and possibly result in a
hazardous situation.
EN
26 27
Page 29

Specifications
Power Source: 230 V, 50 Hz
Power Consumption:
Maximum; 1250 W
Output: 800 W (IEC-60705)
Outside Dimensions:
443 mm (W) x 328 mm (D) x 258 mm (H)
Oven Cavity Dimensions:
306 mm (W) x 308 mm (D) x 214 mm (H)
Overall Cavity Volume: 20 L
Glass Tray Diameter: 255 mm
Operating Frequency: 2450 MHz
Net Weight: 11.5 kg
Noise: L
Weight and Dimensions shown are
approximate.
Specications subject to change
without notice.
This product is an equipment that fulls
the European standard for EMC
disturbances (EMC = Electromagnetic
Compatibility) EN 55011. According to
this standard this product is an
equipment of group 2, class B and is
within required limits. Group 2 means
that radio-frequency energy is
intentionally generated in the form of
electromagnetic radiation for purpose
of warming or cooking food. Class B
means that this product may be used in
normal household areas.
WA 63 dB
Information on
Disposal for Users of
Waste Electrical &
Electronic Equipment
(private households)
and/or accompanying documents
means that used electrical and
electronic products should not be
mixed with general household waste.
This symbol on the products
For proper treatment, recovery and
recycling, please take these products
to designated collection points, where
they will be accepted on a free of
charge basis.
Alternatively, in some countries you
may be able to return your products to
your local retailer upon the purchase of
an equivalent new product.
Disposing of this product correctly will
help to save valuable resources and
prevent any potential negative effects
on human health and the environment
which could otherwise arise from
inappropriate waste handling. Please
contact your local authority for further
details of your nearest designated
collection point.
Penalties may be applicable for
incorrect disposal of this waste, in
accordance with national legislation.
For business users in the
European Union
If you wish to discard electrical and
electronic equipment, please contact
your dealer or supplier for further
information.
Information on Disposal in
other Countries outside the
European Union
This symbol is only valid in the
European Union.
If you wish to discard this product,
please contact your local authorities or
dealer and ask for the correct method
of disposal.
English
EN
Page 30

Page 31

Belangrijke veilIgheidsinstructies. Voordat u deze
magnetron gebruikt, lees deze instructies en
voorzorgen zorgvuldig door en bewaar ze zodat u
ze opnieuw kunt raadplegen wanneer nodig.
WAARSCHUWING! De deurafdichtingen en de
plaatsen hieromheen moeten worden
schoongemaakt met een vochtige doek. Het
Nederlands
apparaat moet gecontroleerd worden op
beschadigingen aan de deurafdichtingen en de
plaatsen rondom deze afdichtingen; indien er sprake
van beschadiging is, mag het apparaat niet gebruikt
worden totdat het door een door de fabrikant
erkende onderhoudstechnicus is gerepareerd.
WAARSCHUWING! Probeer niet zelf reparaties uit te
voeren aan de magnetrondeur, het bedieningspaneel,
de veiligheidsvergrendelingsschakelaars of welk ander
deel van de magnetron dan ook. Verwijder de behuizing
van de magnetron niet; deze biedt bescherming tegen
blootstelling aan magnetronenergie. Reparaties mogen
alleen door een gekwaliceerde onderhoudstechnicus
worden uitgevoerd.
WAARSCHUWING! Ontplofngsgevaar bestaat
indien voedsel of dranken in een gesloten blik of es
worden verwarmd.
WAARSCHUWING! Indien vloeistoffen, zoals
soep, sauzen en dranken opgewarmd worden in uw
magnetron, kunnen deze zonder te gaan borrelen
heter worden dan het kookpunt. Hierdoor kan de
hete vloeistof plotseling gaan overkoken.
NL
1
Page 32

WAARSCHUWING! Schud zuigessen goed en
roer de inhoud van de potjes met babyvoeding een
paar maal om. Controleer de temperatuur, voor het
nuttigen van het voedsel zorgvuldig, om verbranden
te voorkomen.
WAARSCHUWING! Het apparaat moet tijdens
onderhoud van zijn stroombron worden losgekoppeld. Na
het verwijderen van de stekker uit het stopcontact, moet
de stekker zichtbaar zijn voor de onderhoudstechnicus
om te voorkomen dat de stekker door onachtzaamheid
terug in het stopcontact wordt gestoken.
WAARSCHUWING! Zorg ervoor dat het apparaat
is uitgeschakeld voordat u de lamp vervangt om
elektrische schok te voorkomen.
Dit apparaat mag gebruikt worden door kinderen
vanaf de leeftijd van 8 jaar en ouder en mensen met
verminderde fysieke, zintuiglijke en mentale
vermogens of gebrek aan ervaring en kennis mits zij
onder toezicht staan of instructies hebben gekregen
van iemand die verantwoordelijk is voor hun veiligheid
bij het gebruik van het apparaat op een veilige wijze
en zij de relevante risico’s begrijpen. Kinderen mogen
niet met het apparaat spelen. Reiniging en
gebruikersonderhoud mogen zonder toezicht niet door
kinderen uitgevoerd worden. Houd het apparaat en
zijn snoer buiten bereik van kinderen jonger dan 8 jaar.
Wanneer de magnetron is geïnstalleerd dan moet
op een eenvoudige wijze de stroom middels een
schakelaar kunnen worden onderbroken of de
stekker uit het stopcontact worden gehaald.
NL
2 3
Page 33

Gebruik dit apparaat niet, indien het NETSNOER
en/of de STEKKER beschadigd zijn. Indien het
apparaat niet goed functioneert, beschadigd of
gevallen is, mogen in verband met de veiligheid
reparaties uitsluitend door een door de fabrikant
erkende onderhoudstechnicus worden uitgevoerd.
Plaats de magnetron niet vlak naast andere
Nederlands
elektrische apparatuur of een gasfornuis.
Deze magnetron is uitsluitend bedoeld voor
gebruik boven op een werkvlak. Hij is niet bedoeld
voor ingebouwd gebruik of voor gebruik in een kast.
De magnetron moet worden geplaatst op een
effen, stabiel oppervlak 85 cm boven de vloer, met
de achterkant van de oven tegen een achtermuur.
Als een van de kanten vlak tegen de muur staat,
moeten de andere kant en de bovenkant vrij staan.
Boven de magnetron moet een ruimte vrij gelaten
worden van 15 cm.
Als u voedingsmiddelen gaat verwarmen in
kunststof of papieren verpakkingen, dient u de oven
regelmatig te controleren omdat deze verpakkingen
bij oververhitting vlam kunnen vatten.
Als er rook vrijkomt of er een brand in de oven
ontstaat, druk dan op Stop/Reset en houd de deur
gesloten om eventuele vlammen te verstikken.
Koppel het netsnoer los of sluit de stroom af met de
zekering of de stroomschakelaar.
NL
Page 34

Dit apparaat is bedoeld voor gebruik in
huishoudelijke en soortgelijke toepassingen, zoals:
- personeelskitchenette in winkels, kantoren en
andere werkomgevingen;
- boerderijen;
- gebruik door klanten in hotels, motels en andere
verblijfsomgevingen;
- bed and breakfast-achtige omgevingen.
Kook geen ongepelde eieren en verwarm geen
hardgekookte eieren met de MAGNETRON functie. Er
kan een te hoge druk in de eieren ontstaan, waardoor
ze exploderen, zelfs na bereiding/verwarmen.
Houd de deurafdichtingen en de plaatsen
hieromheen schoon. Wanneer er spetters voedsel of
vloeistof tegen de magnetronwand, keramische
plaat, de deurafdichtingen of het gebied eromheen
zijn gekomen, veeg dit dan af met een vochtige
doek. Als zij zeer vuil zijn geworden mag gebruik
gemaakt worden van een mild reinigingsmiddel. Het
gebruik van agressieve reinigings-middelen of
schuursponsjes wordt niet aanbevolen.
GEBRUIK GEEN COMMERCIËLE OVENREINIGERS.
Als u de magnetron niet schoon houdt, is het
mogelijk dat de kwaliteit van de oppervlakken
vermindert waardoor de levensduur van het toestel
verkort en er mogelijk gevaarlijke situaties ontstaan.
Gebruik geen stoomreiniger voor het reinigen.
NL
4 5
Page 35

Gebruik geen ruwe, schurende reinigingsmiddelen of
scherpe metalen schrapers om de ruit van de
magnetrondeur te reinigen, aangezien deze het oppervlak
kunnen krassen en het glas kunnen doen barsten.
Dit apparaat is niet geschikt voor gebruik met een
externe timer of met een afzonderlijk systeem voor
afstandsbediening.
Gebruik alleen vaatwerk dat geschikt is voor
Nederlands
gebruik in een magnetron.
De magnetron is uitsluitend bedoeld voor het verwarmen
van voedingsmiddelen en dranken. Wees voorzichtig bij
het verwarmen van voedingsmiddelen die weinig vocht
bevatten, bijv. brood, chocolade, koekjes en gebak. Deze
kunnen gemakkelijk verbranden, uitdrogen of vuur vatten
als ze te lang worden gekookt. We raden u niet aan om
voedingsmiddelen te verwarmen die weinig vocht
bevatten, zoals popcorn of papadums. Het drogen van
voedingsmiddelen, kranten of kleding en het verwarmen
van verwarmingskussens, slippers, sponzen, vochtige
doeken, pitzakken, hete wateressen en dergelijke, kan
leiden tot gevaar voor letsel, ontbranding of brand.
De lamp moet vervangen worden door een
onderhoudstechnicus die door de fabrikant is
opgeleid. Probeer NIET de buitenbehuizing van de
magnetron te verwijderen.
Gebruik geen metalen bakjes of schotels met
metalen randen tijdens de magnetronfunctie.
Hierdoor kunnen er vonken ontstaan.
NL
Page 36

Inhoud
Installatie en aansluiting ............................................................7
Plaatsing van uw magnetron .....................................................7
Belangrijke veiligheidsinstructies ...............................................8
Onderdelen van uw magnetron ...............................................12
Bedieningspaneel ....................................................................13
De klok instellen ......................................................................14
Kinderslot.................................................................................14
Koken en ontdooien met de magnetron ..................................15
Bereiding in meerdere stappen ...............................................17
Quick 30 (Snel 30)-functie ......................................................18
Tijd toevoegen-functie .............................................................18
De timer gebruiken ..................................................................19
Keukentimer ........................................................................19
Nagaartijd ............................................................................19
Uitgestelde start ..................................................................20
Automatische programma’s .....................................................21
Automatisch ontdooien ........................................................21
Automatisch opwarmen .......................................................23
Automatisch koken ..............................................................24
Vragen en antwoorden ............................................................25
Verzorging van uw magnetron .................................................26
Specicaties ............................................................................27
Bedankt voor het aanschaffen van een Panasonic apparaat.
Panasonic Corporation Osaka, Japan
Geïmporteerd door: Panasonic Marketing Europe GmbH
Panasonic Testcentrum,
Winsbergring 15, 22525 Hamburg, Duitsland
NL
6 7
Page 37

Installatie en aansluiting
Uw magnetron controleren
Pak uw magnetron uit, verwijder al het
verpakkingsmateriaal en controleer de
magnetron op schade, zoals deuken,
beschadigde deurvergrendelingen of
barsten in de deur. Waarschuw uw dealer
onmiddellijk als u beschadigingen aantreft.
Een beschadigde magnetron mag niet
geinstalleerd worden.
Aarding
Belangrijk!
DIT APPARAAT DIENT VOOR UW
Indien uw stopcontact niet is geaard, is
het de persoonlijke
verantwoordelijkheid van de klant om
het te laten vervangen door een correct
geaarde wandcontactdoos.
Bedrijfsspanning
Het voltage dient in overeenstemming
te zijn met de op het label van de oven
opgegeven spanning. Wanneer een
hogere spanning gebruikt wordt, kan
dit brand of andere beschadigingen
veroorzaken.
PERSOONLIJKE VEILIGHEID JUIST
GEAARD AANGESLOTEN TE WORDEN.
Plaatsing van uw magnetron
Deze magnetron is uitsluitend bedoeld
voor gebruik boven op een werkvlak.
Hij is niet bedoeld voor ingebouwd
gebruik of voor gebruik in een kast.
1.
Zet het toestel op een platte,
stevige ondergrond, minimaal
85 cm boven de vloer.
2.
Wanneer de magnetron is geïnstalleerd
dan moet op een eenvoudige wijze de
stroom middels een schakelaar kunnen
worden onderbroken of de stekker uit
het stopcontact worden gehaald.
3.
De magnetron kan alleen op de
juiste wijze functioneren, indien er
voldoende ventilatie is.
Plaatsing op een meubel:
Laat 15 cm ruimte aan de bovenkant
van de oven, 10 cm aan de
achterkant en 5 cm aan weerszijden.
15 cm
5 cm
Plaatsing op een meubel
Wanneer één van de zijden van de
magnetron tegen een wand staat,
10 cm
5 cm
mogen de andere zijde of de
bovenkant niet geblokkeerd zijn.
4.
Plaats de magnetron niet vlak
naast andere elektrische
apparatuur of een gasfornuis.
5.
Het netsnoer mag niet in aanraking
komen met de buitenzijde van de
magnetron houd het snoer uit de
buurt van warme of hete
oppervlakken. Laat het snoer niet
over de rand van een tafel of aanrecht
hangen. Dompel het snoer, de stekker
of de oven niet onder in water.
6.
Verwijder de voetjes van de
magnetron niet.
7.
Dit apparaat is bedoeld voor
gebruik in huishoudelijke en
soortgelijke toepassingen, zoals:
-
personeelskitchenette in winkels,
kantoren en andere werkomgevingen;
- boerderijen;
- gebruik door klanten in hotels,
motels en andere
verblijfsomgevingen;
- bed and breakfast-achtige
omgevingen.
Niet buitenshuis gebruiken.
8.
Het is af te raden de magnetron in
een vochtige omgeving te gebruiken.
NL
Nederlands
Page 38

Plaatsing van uw magnetron
9.
De ventilatie-openingen aan de
linkerkant en achterkant van de
magnetron niet blokkeren. Als deze
openingen tijdens gebruik worden
geblokkeerd, kan de magnetron
oververhit raken. De magnetron
wordt in dergelijk geval beschermd
door thermisch
beveiligingsapparatuur en de
werking wordt pas na afkoelen
hervat.
10.
Dit apparaat is niet geschikt voor
gebruik met een externe timer of
met een afzonderlijk systeem voor
afstandsbediening.
Belangrijke veiligheidsinstructies
1.
De deurafdichtingen en de plaatsen
hieromheen moeten worden
schoongemaakt met een vochtige
doek. Het apparaat moet gecontroleerd
worden op beschadigingen aan de
deurafdichtingen en de plaatsen
rondom deze afdichtingen; indien er
sprake van beschadiging is, mag het
apparaat niet gebruikt worden totdat
het door een door de fabrikant erkende
onderhoudstechnicus gerepareerd is.
2.
Probeer niet zelf reparaties uit te
voeren aan de magnetrondeur, het
bedieningspaneel, de veiligheidsvergrendelingsschakelaars of welk
ander deel van de magnetron dan
ook. Verwijder de behuizing van de
magnetron niet; deze biedt be
scherming tegen blootstelling aan
magnetronenergie. Reparaties
mogen uitsluitend door gekwali-
ceerd onderhoudspersoneel
worden uitgevoerd.
3.
Gebruik dit apparaat niet, indien het
NETSNOER en/of de STEKKER
beschadigd zijn. Indien het apparaat
niet goed functioneert, beschadigd
of gevallen is, mogen in verband
met de veiligheid reparaties
uitsluitend uitgevoerd worden door
onderhoudspersoneel welke door
de fabrikant erkend zijn.
-
4.
Indien het netsnoer beschadigd is,
moet dit direct vervangen worden
door de fabrikant, zijn
onderhoudsagent of een
gelijkaardige gekwaliceerde
persoon om gevaar te voorkomen.
5.
Ontplofngsgevaar bestaat indien
voedsel of dranken in een gesloten
blik of es worden verwarmd.
6.
Dit apparaat mag gebruikt worden
door kinderen vanaf de leeftijd van 8
jaar en ouder en mensen met
verminderde fysieke, zintuiglijke en
mentale vermogens of gebrek aan
ervaring en kennis mits zij onder
toezicht staan of instructies hebben
gekregen van iemand die
verantwoordelijk is voor hun
veiligheid bij het gebruik van het
apparaat op een veilige wijze en zij
de relevante risico’s begrijpen.
Kinderen mogen niet met het
apparaat spelen. Reiniging en
gebruikersonderhoud mogen zonder
toezicht niet door kinderen
uitgevoerd worden. Houd het
apparaat en zijn snoer buiten bereik
van kinderen jonger dan 8 jaar.
NL
8 9
Page 39

Gebruik van uw magnetron
Gebruik de magnetron uitsluitend
voor het bereiden van voedsel. Deze
magnetron is speciaal ontworpen
voor het opwarmen en bereiden van
voedsel. Gebruik de magnetron niet
om chemische of andere niet eetbare
producten te verwarmen.
Voor gebruik dient u er zich van te
verzekeren dat alle te gebruiken
hulpmiddelen (schalen/bakvormen
enz.) geschikt zijn voor gebruik in de
magnetron.
Gebruik de magnetron niet om
voorwerpen in op te bergen.
Het apparaat mag niet ZONDER
VOEDINGSMIDDELEN IN DE
MAGNETRON worden gebruikt.
Door werking op deze manier kan
het apparaat beschadigd raken.
Als er rook vrijkomt of er een brand
in de oven ontstaat, druk dan op
Stop/Reset en houd de deur gesloten
om eventuele vlammen te verstikken.
Koppel het netsnoer los of sluit de
stroom af met de zekering of de
stroomschakelaar.
Werking van de ventilatormotor
Na gebruik van de magnetron kan de
ventilatormotor enkele minuten
draaien om de elektrische
componenten af te koelen. Dit is
normaal en u kunt het voedsel eruit
halen, ook al draait de
ventilatormotor. U kunt in die tijd de
magnetron nog steeds gebruiken.
Accessoires
Er wordt een aantal toebehoren bij
deze magnetron geleverd. Volg altijd
de instructies op van het betreffende
toebehoren.
Glazen draaiplateau
Laat de magnetron niet werken
zonder de rolring en het glazen
plateau.
Gebruik uitsluitend het glazen
draaiplateau dat speciaal voor deze
magnetron ontworpen is.
Als het glazen draaiplateau heet is,
moet het eerst afkoelen voordat u
het schoonmaakt of in water
onderdompelt.
Het glazen draaiplateau kan in beide
richtingen draaien.
Indien het voedsel in de schaal op
het plateau de wanden van de
magnetron raakt, waardoor het
draaien stopt, gaat het draaiplateau
automatisch in de tegengestelde
richting draaien. Dit is normaal.
Rolring
De rolring en de bodem van de
magnetron moete regelmatig worden
schoongemaakt om lawaai en een
teveel aan voedselresten te
voorkomen.
Gebruik altijd de rolring bij het koken
met het glazen plateau.
Nederlands
Magnetronverlichting
Voor vervanging van de lamp moet u
contact opnemen met uw dealer.
NL
Page 40

Belangrijke veiligheidsinstructies
Kooktijd
De in het kookboek vermelde
kooktijden zijn bij benadering
gegeven. Factoren, die invloed
hebben op de kookduur, zijn: de
begintemperatuur, de hoeveelheid
voedsel en de materialen die voor
het koken worden gebruikt.
Begin met de minimale kooktijd om
te voorkomen dat het voedsel te gaar
wordt. Als het voedsel niet gaar
genoeg geworden is, kunt u het altijd
nog wat langer bereiden.
Belangrijk!
Als u het voedsel langer kookt dan
de aanbevolen kooktijd, kan het
bederven, en in extreme gevallen
zelfs vlam vatten en de magnetron
beschadigen.
Kleine hoeveelheden voedsel
Kleine hoeveelheden voedsel met
een gering vochtgehalte kunnen
uitdrogen, aanbranden of zelfs
verbranden als ze te lang doorkoken.
Indien het voedsel in de magnetron
vlam vat, moet de magnetrondeur
gesloten blijven, de magnetron
uitgezet worden en moet de stekker
uit het stopcontact worden genomen.
Voedsel met weinig vocht
De magnetron is uitsluitend bedoeld
voor het verwarmen van
voedingsmiddelen en dranken. Wees
voorzichtig bij het verwarmen van
voedingsmiddelen die weinig vocht
bevatten, bijv. brood, chocolade, koekjes
en gebak. Deze kunnen gemakkelijk
verbranden, uitdrogen of vuur vatten als
ze te lang worden gekookt. We raden u
niet aan om voedingsmiddelen te
verwarmen die weinig vocht bevatten,
zoals popcorn of papadums. Het drogen
van voedingsmiddelen, kranten of
kleding en het verwarmen van
verwarmingskussens, slippers, sponzen,
vochtige doeken, pitzakken, hete
wateressen en dergelijke, kan leiden tot
gevaar voor letsel, ontbranding of brand.
Eieren
Kook geen ongepelde eieren en
verwarm geen hardgekookte eieren
met de MAGNETRON functie. Er kan
een te hoge druk in de eieren
ontstaan, waardoor ze exploderen,
zelfs na bereiding/verwarmen.
Niet-poreuze schil
Voedsel zonder poreuze schil, zoals
aardappelen, eierdooiers en
worstjes, moeten doorprikt worden
alvorens ze met de MAGNETRONfunctie te bereiden. Zo voorkomt u
dat ze exploderen.
Vleesthermometer
Indien u gebruik maakt van een
vleesthermometer voor vlees en
gevogelte, gebruik deze dan alleen
wanneer het voedsel buiten de
magnetron is. Gebruik geen
conventionele vleesthermometer
binnen de Magnetron, omdat vonken
kunnen optreden.
NL
10 11
Page 41

Vloeistoffen
Indien vloeistoffen, zoals soep,
sauzen en dranken opgewarmd
worden in uw magnetron, kunnen
deze zonder te gaan borrelen heter
worden dan het kookpunt. Hierdoor
kan de hete vloeistof plotseling gaan
overkoken.
Om dit te voorkomen, kunnen de
volgende stappen ondernomen
worden:
a Gebruik geen rechte glazen of
bekers met smalle of toelopende
bovenkant.
b Niet te lang verwarmen.
c Roer de vloeistof om alvorens
deze in de oven te plaatsen en
roer halverwege de opwarmtijd
nogmaals om.
d Laat de vloeistof na het verwarmen
nog even in de oven staan en roer
goed om voordat u de vloeistof uit
de magnetron haalt.
Papier/kunststof
Als u voedingsmiddelen gaat
verwarmen in kunststof of papieren
verpakkingen, dient u de oven
regelmatig te controleren omdat
deze verpakkingen bij oververhitting
vlam kunnen vatten.
Gebruik geen gerecycled papier (b.v.
keukenrol), tenzij het papierproduct
gekenmerkt is als zijnde veilig voor
gebruik in een magnetron.
Onzuiverheden in recycled papier
kunnen in de magnetron vonken en/
of brand veroorzaken.
Verwijder metalen sluitingen van
braadzakken voordat u deze in de
magnetron plaatst.
Keukengerei/folie
Verwarm nooit gesloten potjes of
essen omdat deze kunnen
exploderen.
Gebruik geen metalen bakjes of
schotels met metalen randen tijdens
de magnetronfunctie. Hierdoor
kunnen er vonken ontstaan.
Bij gebruik van aluminiumfolie,
vleesspiesen of andere metalen
voorwerpen, moet de afstand tot de
wanden minimaal 2 cm bedragen om
vonkoverslag te voorkomen.
Zuigessen/potjes babyvoeding
De speen of deksel moeten
verwijderd worden van zuigessen of
potjes babyvoedsel alvorens ze in de
magnetron te plaatsen.
Schud zuigessen goed en roer de
inhoud van de potjes met
babyvoeding een paar maal om.
Controleer de temperatuur van het te
nuttigen voedsel voor zorgvuldig om
verbranden te voorkomen.
Nederlands
NL
Page 42

Onderdelen van uw magnetron
1.
Deur-ontgrendelknop
Druk om de deur te openen. Als u de
deur opent tijdens het koken, dan stopt
het kookproces zonder het programma
te annuleren. Het koken wordt hervat
nadat de deur is gesloten en op Start is
gedrukt. Het is veilig om de deur op elk
moment tijdens een kookprogramma te
openen en er is geen risico op
blootstelling aan microgolven.
2.
Doorkijkvenster
3.
Ventilatie-openingen
4.
Magnetronbuis
(Niet verwijderen.)
5.
Externe ventilatie-openingen
6.
Bedieningspaneel
7.
Netsnoer
8.
Stekker
9.
Glazen draaiplateau
10.
Rolring
11.
Menu label
11 95 3 4 3 5
6
2
10
Een identi catieplaatje is op de magnetron bevestigd.
Opmerking
Deze afbeelding is alleen ter referentie.
NL
12 13
7
8
1
Page 43

Bedieningspaneel
2
7
9
10
1
Display
2
Micro Power (Magnetron vermogen)toetsen
3
Automatisch ontdooien-toets
4
1
3
4
5
6
8
Automatisch opwarmen-toets
5
Automatisch koken-toets
6
Tijd/Gewicht keuzedraaiknop
7
Timer/Clock (Klok)-toets
8
Quick 30 (Snel 30)-toets
9
Stop/Reset-toets:
Voor het koken:
Eén keer drukken wist uw instructies.
Tijdens het koken:
Eén keer drukken stopt tijdelijk het
kookproces. Als u nog een keer drukt,
worden al uw instructies geannuleerd
en er verschijnt een punt of de tijd van
de dag op het display.
10
Start-toets
Met één druk op de knop kan de oven
beginnen te werken. Als tijdens het
gebruik van de magnetron de deur
wordt geopend of op Stop/Reset
gedrukt, moet u opnieuw op Start
drukken om de magnetron opnieuw te
starten.
Nederlands
•
Uw bedieningspaneel kan er anders
uitzien, maar de woorden en functies
zullen hetzelfde zijn.
Pieptoon
Als u een toets correct indrukt, hoort u een
pieptoon. Als u op een toets drukt en u
hoort geen pieptoon, dan heeft het
apparaat de instructie niet ontvangen of
niet geaccepteerd. De oven piept twee keer
tussen de geprogrammeerde fasen. Aan
het einde van een compleet programma
piept de oven 5 keer en wordt “End” (Einde)
weergegeven.
Opmerking
Als na het instellen van het
kookprogramma binnen de 6 minuten niet
op Start wordt gedrukt, zal de magnetron
het kookprogramma automatisch
annuleren. Het display keert terug naar de
klok of een punt.
NL
Page 44

De klok instellen
Wanneer de magnetron voor het eerst wordt aangesloten, verschijnt “88.88” op het display.
Bijvoorbeeld: Om 11:25 uur in te stellen
Druk tweemaal op
Timer/Clock (Klok).
Een dubbele punt begint
te knipperen.
Opmerkingen
1.
Om de tijd opnieuw in te stellen, herhaalt u stap 1 tot en met stap 3, zoals hierboven.
2. De klok zal de tijd van de dag behouden zolang de oven is aangesloten en er
elektriciteit is.
3. Dit is een 24-uurs klok, dwz 2 pm = 14:00 niet 2:00.
Draai aan de draaiknop
totdat 11:25 op het display
verschijnt.
Druk op Timer/Clock
(Klok).
Het dubbele punt stopt
met knipperen. De tijd
van de dag op het
display is nu vergrendeld.
Kinderslot
Met deze functie worden de bedieningselementen van de magnetron onbruikbaar; de
deur kan echter wel worden geopend. Het kinderslot kan worden ingesteld als op het
display een punt of de tijd wordt weergegeven.
Instellen:
Druk in 10 seconden 3 keer op Start.
De tijd van de dag zal verdwijnen. De
werkelijke tijd gaat niet verloren. ‘L ---’ wordt
aangegeven op het display.
Om te annuleren:
Druk in 10 seconden 3 keer op Stop/
Reset.
De tijd van de dag zal opnieuw op het
display verschijnen.
NL
14 15
Page 45

Koken en ontdooien met de magnetron
Het glazen draaiplateau dient tijdens het gebruik van de magnetron, altijd op de juiste
positie geplaatst te zijn.
Druk op Micro Power
(Magnetron vermogen) om het
gewenste vermogensniveau
te selecteren.
Vermogensniveau
800 W Hoog
700 W Midden
520 W Laag
270 W Ontdooien
200 W Opwarmen
Opmerkingen
1.
Nadat de werking is beëindigd, verschijnt “Add” (Toevoegen) voor ongeveer 1 minuut
op het display. Terwijl dit wordt weergeven, kunt u de TIJD TOEVOEGEN-functie
gebruiken, zie pagina 18.
2. De magnetron werkt automatisch op 800 W (Hoog) magnetronvermogen als een
bereidingstijd wordt ingevoerd zonder dat het vermogensniveau eerder is geselecteerd.
3. Tijdens het koken kan het glazen draaiplateau vibreren. Dit heeft geen invloed op de
kookprestaties.
4. Raadpleeg pagina 17 voor BEREIDING IN MEERDERE STAPPEN.
5. De NAGAARTIJD kan worden geprogrammeerd na het instellen van het
magnetronvermogen en de tijd. Raadpleeg pagina 19.
6. Gebruik de magnetron NIET met een metalen accessoire in de magnetron.
7. Controleer tijdens het ontdooien altijd het voedsel door de deur te openen en opnieuw
te starten. Het is niet nodig om het voedsel tijdens het ontdooien te bedekken. Om een
gelijkmatig resultaat te garanderen het voedsel tijdens het ontdooien meerdere keren
roeren, omdraaien of scheiden. Voor grote bouten en gevogelte, halverwege het
ontdooien omdraaien en de uiteinden en punten beschermen met folie.
Draai de draaiknop om de
kooktijd in te stellen.
Uw magnetron kan tot maximaal
90 minuten worden
geprogrammeerd aan een
vermogen van 700 W (Midden),
520 W (Laag), 200 W (Opwarmen)
en 270 W (Ontdooien). Het
vermogen van 800 W (Hoog) kan
tot 30 minuten worden
geprogrammeerd.
Druk op start.
De tijd op het
display begint af
te tellen.
Nederlands
NL
Page 46

Koken en ontdooien met de magnetron
Ontdooien
NAGAARTIJDEN
Afzonderlijke porties voedsel kunnen
praktisch onmiddellijk na het ontdooien
bereid worden. Het is normaal dat grotere
porties voedsel in het midden nog bevroren
zijn. Alvorens te gaan bereiden minimaal
een uur laten staan. Tijdens de rusttijd,
wordt de temperatuur gelijkmatig verdeeld
en wordt het voedsel door geleiding
ontdooid. Opmerking: Indien het voedsel
niet onmiddellijk bereid wordt, moet het in
de koelkast bewaard worden. Ontdooid
voedsel mag nooit opnieuw ingevroren
worden zonder dat het eerst gekookt is.
BRAADSTUK EN GEVOGELTE
Plaats de braadstukken bij voorkeur op een
omgekeerd bord of plastic rooster, zodat ze
niet in hun sappen komen te liggen. Het is
van essentieel belang om delicate of
uitstekende delen van dit vlees af te dekken
met kleine stukjes folie, om te voorkomen
dat deze delen gaan koken. Het is niet
gevaarlijk om kleine stukjes folie in uw
magnetron te gebruiken, mits zij niet in
contact komen met de wanden van de
magnetron.
GEHAKT OF BROKJES VLEES EN
VIS
Omdat de buitenkant van dit soort voedsel
snel ontdooit, moeten zij van elkaar
gescheiden worden; breek het blok in
regelmatige stukken tijdens het ontdooien
en verwijder de stukjes die reeds ontdooid
zijn.
KLEINE PORTIES VOEDSEL
Koteletten en stukken kip moeten zo snel
mogelijk van elkaar gescheiden worden,
zodat zij gelijkmatig en volledig ontdooien.
Vettige delen en de uiteinden ontdooien
sneller. Leg deze in de buurt van het
midden van het draaiplateau of dek ze af.
BROOD
Voor brood is de standaard insteltijd
noodzakelijk om deze geheel te ontdooien.
De standaard insteltijd kan verkort worden
door de sneden uiteen te halen of het brood
door te snijden.
NL
16 17
Page 47

Bereiding in meerdere stappen
Met deze functie kunt u tot 3 bereidingsstappen continu programmeren.
Bijvoorbeeld: Om 800 W (Hoog) vermogen gedurende 2 minuten, 700 W (Midden)
Druk één keer.
Selecteer 800 W (Hoog)
vermogen.
Selecteer 700 W (Midden)
vermogen.
vermogen gedurende 3 minuten en 200 W (Opwarmen) gedurende 2 minuten
continu in te stellen.
Draai aan de draaiknop totdat
2.00 op het display verschijnt.
Druk één keer.
Draai aan de draaiknop totdat
3.00 op het display verschijnt.
Nederlands
Druk twee keer.
Selecteer 200 W (Opwarmen)
vermogen.
Opmerkingen
1.
Nadat de werking is beëindigd, verschijnt “Add” (Toevoegen) voor ongeveer 1 minuut
op het display. Terwijl dit wordt weergeven, kunt u de TIJD TOEVOEGEN-functie
gebruiken, zie pagina 18.
2. AUTOMATISCH PROGRAMMA’S kunnen niet worden gebruikt met BEREIDING IN
MEERDERE STAPPEN.
3. Tijdens de werking klinken er 2 pieptonen tussen elke stap en 5 pieptonen nadat alle
stappen zijn beëindigd.
4. 800 W (Hoog) MAGNETRON-vermogen kan alleen worden ingesteld voor één enkele
stap van BEREIDING IN MEERDERE STAPPEN.
Draai aan de draaiknop totdat
2.00 op het display verschijnt.
NL
Druk op start.
De tijd voor de
eerste stap begint
op het display af
te tellen.
Page 48

Quick 30 (Snel 30)-functie
Met deze functie kunt u de bereidingstijd in stappen van 30 seconden instellen tot
maximum 5 minuten bij 800 W (hoog) MAGNETRON-vermogen.
Druk op Quick 30 (Snel 30) om
de gewenste bereidingstijd te
selecteren.
De tijd verschijnt op het display.
Opmerkingen
1.
Nadat de werking is beëindigd, verschijnt “Add” (Toevoegen) voor ongeveer 1 minuut
op het display. Terwijl dit wordt weergeven, kunt u de TIJD TOEVOEGEN-functie
gebruiken, zie hieronder.
2. Indien gewenst, kunt u andere vermogensniveaus gebruiken. Selecteer het gewenste
vermogensniveau voordat u op Quick 30 (Snel 30) drukt.
3. Nadat u de tijd hebt ingesteld met Quick 30 (Snel 30), kunt u de draaiknop niet meer
gebruiken.
Druk op start.
De tijd op het display
begint af te tellen.
Tijd toevoegen-functie
Met deze functie kunt u bereidingstijd aan het einde van de vorige bereidingstijd toevoegen.
Draai aan de draaiknop om de
toegevoegde bereidingstijd te
selecteren.
Tot 30 minuten voor 800 W (Hoog)
MAGNETRON-vermogen en
90 minuten voor andere
MAGNETRON-vermogens.
Druk op start.
De tijd op het display
begint af te tellen.
Opmerkingen
1.
Nadat de werking is beëindigd, verschijnt “Add” (Toevoegen) voor ongeveer 1 minuut
op het display. Terwijl dit wordt weergeven, kunt u de TIJD TOEVOEGEN-functie
opnieuw gebruiken.
2. Draai tijdens het koken aan de draaiknop om de toegevoegde bereidingstijd in te stellen
(10 seconden tot 10 minuten).
3. De TIJD TOEVOEGEN-functie wordt geannuleerd als u na het koken gedurende
1 minuut geen bewerking uitvoert.
4. De TIJD TOEVOEGEN-functie kan na BEREIDING IN MEERDERE STAPPEN worden
gebruikt. Het vermogensniveau is hetzelfde als de laatste stap. Deze functie werkt niet
als de laatste stap nagaartijd was.
5. De TIJD TOEVOEGEN-functie is niet beschikbaar in de AUTOMATISCHE PROGRAMMA’S.
NL
18 19
Page 49

De timer gebruiken
Deze functie werkt als een KEUKENTIMER of stelt u in staat om de NAGAARTIJD/
UITGESTELDE START te programmeren.
Keukentimer
Bijvoorbeeld: Om 5 minuten te tellen.
Nederlands
Druk op Timer/
Clock (Klok).
Draai aan de draaiknop totdat 5.00
op het display verschijnt.
(tot 90 minuten)
Druk op start.
De tijd op het
display begint af te
tellen zonder dat
de oven werkt.
Nagaartijd
Bijvoorbeeld: Om na het koken op 700 W (Midden) MAGNETRON-vermogen gedurende
Selecteer 700 W (Midden)
vermogen.
Druk op Timer/
Clock (Klok).
3 minuten, de voedingsmiddelen gedurende 5 minuten te laten rusten.
Druk één keer.
Draai aan de draaiknop totdat
3.00 op het display verschijnt.
Draai aan de draaiknop totdat 5.00
op het display verschijnt.
(tot 90 minuten)
Druk op start.
Het koken begint.
Na het koken begint
de nagaartijd af te
tellen zonder dat de
magnetron werkt.
NL
Page 50

De timer gebruiken
Uitgestelde start
Bijvoorbeeld: Om na het koken op 700 W (Midden) MAGNETRON-vermogen gedurende
3 minuten, 5 minuten nagaartijd te beginnen.
Druk op Timer/
Clock (Klok).
Druk één keer.
Selecteer 700 W (Midden)
vermogen.
Opmerkingen
1.
Nadat UITGESTELDE START is beëindigd, verschijnt “Add” (Toevoegen) voor
ongeveer 1 minuut op het display. Terwijl dit wordt weergeven, kunt u de TIJD
TOEVOEGEN-functie gebruiken, zie pagina 18.
2. BEREIDING IN MEERDERE STAPPEN kan worden geprogrammeerd inclusief
NAGAARTIJD of UITGESTELDE START.
3. Zelfs als de magnetrondeur wordt geopend tijdens KEUKENTIMER, NAGAARTIJD of
UITGESTELDE START, blijft de tijd op het display verder aftellen.
4. NAGAARTIJD/UITGESTELDE START kan niet vóór/na eender welk AUTOMATISCH
PROGRAMMA worden geprogrammeerd.
Draai aan de draaiknop totdat 5.00
op het display verschijnt.
(tot 90 minuten)
Draai aan de draaiknop totdat
3.00 op het display verschijnt.
Druk op start.
De nagaartijd
begint af te tellen
en de bereiding
begint.
NL
20 21
Page 51

Automatische programma’s
Met deze functie kunt u voedsel ontdooien/opwarmen/bereiden volgens het gewicht.
Selecteer de categorie en stel het gewicht van het voedsel in. Het gewicht is
geprogrammeerd in grammen. De magnetron bepaalt automatisch het
vermogensniveau van de MAGNETRON en de kooktijd. Voor een snelle selectie begint
het gewicht met het meest gebruikte gewicht voor elke categorie. Dit gewicht is zonder
het gewicht van het eventueel toegevoegde water of de schaal.
Opmerkingen
1.
Gebruik de magnetron altijd met de rolring en glazen draaiplateau op hun plaats.
2. De AUTOMATISCH PROGRAMMA’S mogen ALLEEN worden gebruikt voor het
beschreven voedsel.
3. Ontdooi/bereid alleen voedsel binnen de beschreven gewichtsbereiken.
4. Weeg altijd het voedsel in plaats van te vertrouwen op de informatie op de verpakking.
5. Het meeste voedsel heeft voordeel van een NAGAARTIJD. Na het koken met een
AUTOMATISCH PROGRAMMA, laat de warmte tot in het midden.doordringen.
Automatisch ontdooien
Nederlands
Selecteer het gewenste
programma voor
automatisch ontdooien.
Het nummer van het
AUTOMATISCH
PROGRAMMA verschijnt op
het display.
Opmerking
De vorm en grootte van het voedsel bepalen het maximale gewicht dat de magnetron kan
bevatten.
Programma Instructies
1. Kleine stukjes
1 keer drukken
Draai aan de draaiknop om
het gewicht van het bevroren
voedsel in te stellen.
Het gewicht verhoogt/
verlaagt in stappen van 10 g.
Gewicht: 200 g - 1000 g
Voor het ontdooien van kleine stukjes vlees, escalope, worstjes,
gehakt, biefstuk, karbonades, vislet (elk 100 g tot 400 g). Druk
een keer op de automatisch ontdooien. Stel het gewicht van het
voedsel in en druk op Start. Laat 15 tot 30 minuten rusten.
NL
Druk op start.
Vergeet niet om in
het voedsel te
roeren of het om te
keren tijdens het
ontdooien.
Page 52

Automatische programma’s
Programma Instructies
Gewicht: 600 g - 1600 g
Voor het ontdooien van grote stukken vlees, hele kip, bouten. Druk
2. Grote stukken
2 keer drukken
3. Brood/Cake
3 keer drukken
twee keer op de automatisch ontdooien. Stel het gewicht van het
voedsel in en druk op Start. Hele kip en bouten moeten tijdens het
ontdooien worden afgeschermd. Bescherm vleugels, borst en vet
met gladde stukjes aluminiumfolie bevestigd met cocktailprikkers.
Laat de folie de wanden van de magnetron niet aanraken. Een
nagaartijd van 1 tot 2 uur moet voorafgaand aan het koken worden
gehandhaafd.
Gewicht: 100 g - 600 g
Voor het ontdooien van brood (geheel, sneden, broodjes) en
cakes. Roomcakes en glacétaarten zijn niet geschikt voor dit
programma. Plaats het brood of de cake op een groot bord of een
ondiepe schotel. Druk 3 keer op de automatisch ontdooien. Stel
het gewicht van het voedsel in en druk op Start. Laat het brood
10 (wit, licht brood) tot 30 minuten (dicht roggebrood) rusten. Snij
grote broden in de helft tijdens de nagaartijd.
NL
22 23
Page 53

Automatisch opwarmen
Selecteer het gewenste
programma voor
Automatisch opwarmen.
Het nummer van het
AUTOMATISCH PROGRAMMA
verschijnt op het display.
Opmerking
Aangezien er variaties in voedsel kunnen voorkomen, moet u controleren of het voedsel
goed is gekookt en gloeiend heet is voordat u het serveert.
Programma Instructies
1. Gekoelde maaltijd
1 keer drukken
2. Diepvries maaltijd
2 keer drukken
Draai aan de draaiknop om
het gewicht van het
voedsel in te stellen.
Het gewicht verhoogt/
verlaagt in stappen van 10 g.
Gewicht: 200 g - 800 g
Voor het opwarmen van een verse voorgekookte maaltijd. Al het voedsel
moet voorgegaard zijn. Het voedsel moet op koelkasttemperatuur zijn.
ongeveer +5 °C. Opwarmen in een schaal zoals het werd gekocht.
Doorprik de folie met een scherp mes eenmaal in het midden en 4 keer
rondom de randen. Als voedsel naar een schotel wordt overgebracht,
bedek het met doorprikte folie. Plaats de schaal op het glazen
draaiplateau. Druk één keer op Automatisch opwarmen. Stel het gewicht
van het voedsel in en druk op Start. Roeren bij de pieptonen. Roer aan het
einde van het programma opnieuw en laat een paar minuten nagaren.
Grote stukken vlees/vis in een dunne saus kunnen meer tijd nodig hebben
om gaar te worden. Dit programma is niet geschikt voor zetmeelrijk
voedsel zoals rijst, noedels of aardappelen. Maaltijden in een verpakking
met een onregelmatige komvorm moeten mogelijk langer worden gekookt.
Gewicht: 300 g - 600 g
Voor het opwarmen van een bevroren voorgekookte maaltijd. Al het
voedsel moet voorgekookt en bevroren (-18 °C) zijn. Opwarmen in een
schaal zoals het werd aangekocht. Doorprik de lm met een scherp mes
eenmaal in het midden en 4 keer rondom de randen. Als voedsel naar een
schotel wordt overgebracht, bedek het met doorprikte folie. Plaats de
schaal op het glazen draaiplateau. Druk twee keer op Automatisch
opwarmen. Stel het gewicht van het voedsel in en druk op Start. Roer bij
de pieptonen en snijd de brokken in stukjes. Roer aan het einde van het
programma opnieuw en laat een paar minuten nagaren. Grote stukken
vlees/vis in een dunne saus kunnen meer tijd nodig hebben om gaar te
worden. Dit programma is niet geschikt voor zetmeelrijk voedsel zoals rijst,
noedels of aardappelen. Maaltijden in een verpakking met een
onregelmatige komvorm moeten mogelijk langer worden gekookt.
Druk op start.
De tijd op het
display begint af te
tellen.
Nederlands
NL
Page 54

Automatische programma’s
Automatisch koken
Selecteer het gewenste
programma voor
automatisch koken.
Het nummer van het
AUTOMATISCH
PROGRAMMA verschijnt op
het display.
Opmerking
Aangezien er variaties in voedsel kunnen voorkomen, moet u controleren of het voedsel
goed is gekookt en gloeiend heet is voordat u het serveert.
Programma Instructies
1. Verse groenten
1 keer drukken
2. Diepvriesgroenten
2 keer drukken
3. Aardappelen
3 keer drukken
4. Verse vis
4 keer drukken
Draai aan de draaiknop om
het gewicht van het
voedsel in te stellen.
Het gewicht verhoogt/
verlaagt in stappen van 10 g.
Gewicht: 100
Voor het koken van verse groenten zoals wortels, broccoli, bloemkool en
groene bonen. Plaats de bereide groenten in een schaal van geschikte
grootte. Besprenkel met 1 eetlepel water per 100 g groenten. Bedekken
met folie. Doorprik de folie met een scherp mes eenmaal in het midden
en 4 keer rondom de randen. Druk één keer op Automatisch koken. Stel
het gewicht van het voedsel in en druk op Start. Roeren bij de pieptonen.
Gewicht: 100 g - 800 g
Voor alle soorten diepvriesgroenten, zoals bevroren erwten, suikermaïs
of gemengde groenten. Plaats de bereide groenten in een geschikte
magnetronbestendige kom en voeg desgewenst 2-6 eetlepels water
toe. Bedek met een goed passend deksel. Plaats de kom op het glazen
draaiplateau. Druk twee keer op Automatisch koken. Stel het gewicht
van het voedsel in en druk op Start. Roeren bij de pieptonen. Aan het
einde van de kooktijd, bedekt laten rusten gedurende 3 tot 5 minuten.
Gewicht: 200 g - 600 g
Voor het koken van aardappelen. Schil de aardappelen en snijd ze in
stukken van gelijke grootte. Plaats ze in een magnetronbestendige
kom van geschikte grootte. Bedek met een goed passend deksel.
Plaats de kom op het glazen draaiplateau. Druk 3 keer op Automatisch
koken. Stel het gewicht van het voedsel in en druk op Start.
Gewicht: 200
Voor het bereiden van verse vislets en steaks. Plaats de vis in een schaal
van geschikte grootte. Voeg 1-3 eetlepels vloeistof toe. Bedekken met folie.
Doorprik de folie met een scherp mes eenmaal in het midden en 4 keer
rondom de randen. Druk 4 keer op Automatisch koken. Stel het gewicht van
het voedsel in en druk op Start. Een paar minuten laten rusten.
g -
g -
1000 g
800 g
Druk op start.
De tijd op het
display begint af te
tellen.
NL
24 25
Page 55

Vragen en antwoorden
V: Waarom kan de magnetron niet
worden ingeschakeld?
A: Controleer het volgende wanneer de
magnetron niet kan worden
ingeschakeld:
1.
Is de stekker goed aangesloten? Neem
de stekker uit het stopcontact, wacht
tien seconden en steek de stekker weer
in het stopcontact.
2.
Controleer de zekering en de
stroomonderbreker. Schakel de
stroomonderbreker in of vervang de
zekering als hij uitgeschakeld resp.
doorgeslagen is.
3.
Indien de stroomonderbreker of de
zekering in orde zijn, probeer dan een
ander apparaat op het stopcontact aan
te sluiten. Indien het andere apparaat
werkt, is er waarschijnlijk een probleem
met de magnetron. Indien het andere
apparaat niet werkt, is er waarschijnlijk
een probleem met het stopcontact.
Indien het er naar uitziet dat er een
probleem met de magnetron is, moet
contact opgenomen worden met een
erkend servicecentrum.
V: Mijn magnetron stoort mijn TV-
toestel. Is dit normaal?
A: Er kan een bepaalde mate van storing
op de radio en TV optreden wanneer de
magnetron wordt gebruikt. Deze storing
is gelijk aan het soort interferentie dat
veroorzaakt wordt door kleine
huishoudelijke apparaten zoals mixers,
stofzuigers, haardrogers e.d. Dit duidt
niet op een storing in uw magnetron.
V: Soms komt er warme lucht uit de
ventilatie-openingen van de
magnetron. Waarom?
A: De warmte afkomstig van het bereiden
van het voedsel verwarmt de lucht in de
magnetron. Deze warme lucht wordt de
magnetron uitgeleid via het
luchtstroompatroon in de magnetron.
Deze lucht bevat geen
magnetronstraling. De ventilatieopeningen van de magnetron mogen
nooit geblokkeerd worden.
Nederlands
V: De magnetron wil mijn programma
niet accepteren. Waarom?
A: De magnetron is ontworpen om een
verkeerd programma niet te
accepteren. Bijvoorbeeld de magnetron
zal geen 4e stap accepteren.
NL
Page 56

Verzorging van uw magnetron
1.
De stekker van de oven magnetron uit
het stopcontact worden verwijderd
alvorens deze te reinigen.
2.
Houd de deurafdichtingen en de plaatsen
hieromheen schoon. Wanneer er spetters
voedsel of vloeistof tegen de
magnetronwand, keramische plaat, de
deurafdichtingen of het gebied eromheen
zijn gekomen, veeg dit dan af met een
vochtige doek. Als zij zeer vuil zijn
geworden mag gebruik gemaakt worden
van een mild reinigingsmiddel. Het gebruik
van agressieve reinigings-middelen of
schuursponsjes wordt niet aanbevolen.
Vermijd het reinigen van de magnetronbuis
aan de rechterkant van de binnenruimte.
GEBRUIK GEEN COMMERCIËLE
OVENREINIGERS.
3.
Gebruik geen ruwe, schurende
reinigingsmiddelen of scherpe metalen
schrapers om de ruit van de
magnetrondeur te reinigen, aangezien
deze het oppervlak kunnen krassen en
het glas kunnen doen barsten.
4.
De buitenzijde van de magnetron moet
worden schoongemaakt met een vochtige
doek. Ter voorkoming van schade aan de
onderdelen binnen in de magnetron, mag
er geen water via de ventilatie-openingen
naar binnen sijpelen.
5.
Als het bedieningspaneel vies wordt,
maakt u het schoon met een zachte
doek. Gebruik geen agressieve
schoonmaakmiddelen of schuurmiddelen
op het bedieningspaneel. Laat bij het
reinigen van het bedieningspaneel de
magnetrondeur open staan om te
voorkomen dat de magnetron per
ongeluk wordt ingeschakeld. Na het
reinigen drukt u op Stop/Reset om het
display te wissen.
6.
Als er dampvorming is op de binnen- of
buitenkant van de magnetrondeur,
veegt u dit af met een zachte doek. Dit
kan optreden als de magnetron onder
hoge vochtigheidsomstandigheden
wordt gebruikt en is op geen enkele
wijze de aanduiding voor een storing
van het apparaat.
7.
Van tijd tot tijd moet het glazen
draaiplateau verwijderd worden om het
schoon te maken. Reinig het
draaiplateau in warm water met een
afwasmiddel of in een vaatwasmachine.
8.
De rolring en de holte in de bodem van
de oven moeten regelmatig worden
schoongemaakt om overdreven lawaai
te voorkomen. Veeg het oppervlak van
de bodem van de magnetron schoon
met een zacht detergent en heet water,
en droog het af met een schone doek.
Was de rolring in zacht zeepwater. Bij
een regelmatig gebruik worden
kookdampen verzameld. Dit heeft
26 27
echter geen invloed op het oppervlak
van de bodem of op de wielen van de
rolring. Wanneer u de rolring voor het
schoonmaken uit de holte in de bodem
haalt, moet u hem daarna in de juiste
positie terugplaatsen.
9.
Gebruik geen stoomreiniger voor het
reinigen.
10.
De magnetron mag uitsluitend door
gekwaliceerd servicepersoneel
worden gerepareerd. Neem voor
onderhoud en reparaties van de
magnetron contact op met de
dichtstbijzijnde erkende verdeler.
11.
Als u de magnetron niet schoon houdt,
is het mogelijk dat de kwaliteit van de
oppervlakken vermindert waardoor de
levensduur van het toestel verkort en er
mogelijk gevaarlijke situaties ontstaan.
12.
Houd ventilatie-openingen altijd zuiver.
Controleer dat stof of andere materialen
de ventilatie-openingen boven-, onderof achteraan de magnetron niet
blokkeren. Een blokkering van de
ventilatie-openingen kan leiden tot
oververhitting en de werking van de
magnetron hinderen. Een blokkering
van de luchtuitlaten kan oververhitting
veroorzaken die een invloed kan
hebben op de werking van de
magnetron en mogelijk een gevaarlijke
situatie kan opleveren.
NL
Page 57

Specificaties
Netvoeding: 230 V, 50 Hz
Stroomverbruik: Maximum; 1250 W
Capaciteit: 800 W (IEC-60705)
Buitenafmetingen:
443 mm (B) x 328 mm (D) x 258 mm (H)
Binnenafmetingen:
306 mm (B) x 308 mm (D) x 214 mm (H)
Totaal volume van de binnenruimte: 20 L
Diameter van het glazen draaiplateau:
255 mm
Bedrijfsfrequentie: 2450 MHz
Netto gewicht: 11.5 kg
Lawaai: L
De aangegeven afmetingen en gewicht
De specicaties kunnen zonder nadere
aankondiging worden gewijzigd.
Dit product is een apparaat dat voldoet aan
de Europese norm voor EMC-storingen
(EMC = Elektromagnetische Compatibiliteit)
EN 55011. Volgens deze norm is dit product
een apparaat van groep 2, klasse B en ligt
binnen de vereiste grenzen. Groep 2
betekent dat radiofrequente energie
opzettelijk wordt gegenereerd in de vorm
van elektromagnetische straling met als
doel het verwarmen of koken van
voedingsmiddelen. Klasse B betekent dat
dit product in normale huishoudelijke
ruimten mag worden gebruikt.
WA 63 dB
zijn bij benadering.
Informatie over de
Verwijdering van Afval
van Elektrische en
Elektronische Apparaten
Dit symbool op de producten en/
betekent dat gebruikte elektrische en
elektronische producten niet mogen worden
gemengd met gewoon huishoudelijk afval.
of begeleidende documenten
Voor een correcte behandeling, herstel en
recyclage moet u deze producten naar de
aangeduide verzamelpunten brengen waar
ze gratis zullen worden aanvaard.
In sommige landen kunt u uw producten
ook teruggeven aan uw lokale handelaar bij
de aankoop van een gelijkwaardig, nieuw
product.
Een correcte verwijdering van dit product
zal een bijdrage leveren tot het behoud van
waardevolle hulpbronnen en tot het
voorkomen van alle mogelijke negatieve
gevolgen voor de gezondheid van de mens
en voor het milieu die een ongeschikte
behandeling van het afval zou kunnen
opleveren. Vraag meer details over een
verzamelpunt in uw buurt bij de lokale
overheid.
De nationale wetgeving kan boeten
voorzien voor een verkeerde verwijdering
van dit afval.
Voor zakelijke gebruikers in de
Europese Unie
Wanneer u elektrische en elektronische
apparaten wilt verwijderen, zoekt u best
contact met uw handelaar of leverancier
voor meer informatie.
Informatie over de Verwijdering
in andere Landen buiten de
Europese Unie
Dit symbool geldt slechts in de Europese
Unie.
Wanneer u dit product wilt verwijderen,
zoekt u best contact met uw lokale overheid
of handelaar voor meer informatie over de
correcte verwijderingsmethode.
Nederlands
NL
Page 58

Page 59

Wichtige Sicherheitsanweisungen. Bitte sorgfältig
durchlesen und zur weiteren Bezugnahme aufbewahren.
WARNUNG! Die Türverriegelungen und die
Türdichtungen sollten mit einem feuchten Tuch
abgewischt werden. Das Gerät ist vom Benutzer auf
mögliche Beschädigungen an den Türdichtungsächen
zu prüfen, und falls ein solcher Schaden aufgetreten
ist, darf das Gerät nicht betrieben werden, bevor es
vom Panasonic-Kundendienst repariert worden ist.
WARNUNG! Führen Sie weder eine Manipulation
Deutsch
oder Reparatur an der Tür, an den Kontrolleinrichtungen
oder Sicherheitsvorrichtungen noch an irgendeinem
anderen Teil des Gerätes durch. In keinem Fall das
Gehäuse, das den Schutz gegen das Austreten von
Mikrowellenenergie sicherstellt, abbauen. Das Gerät
darf nur von einem geschulten Panasonic
Kundendienst-Techniker geprüft oder repariert werden.
WARNUNG! Keine Flüssigkeiten und
Nahrungsmittel in versiegelten Behältern (z.B.
Konserven) erhitzen, da diese platzen können.
WARNUNG! Beim Erhitzen von Flüssigkeiten im
Mikrowellengerät kann durch kurzfristiges Aufkochen
(Siedeverzug) die Flüssigkeit im Gerät oder bei der
Entnahme schlagartig verdampfen und explosionsartig
aus dem Gefäß geschleudert werden. Dies kann zu
Verbrennungen führen. Sie vermeiden einen
Siedeverzug, indem Sie beim Erhitzen von
Flüssigkeiten in Gläsern oder Tassen immer ein
hitzebeständiges Glasstäbchen mit hineinstellen oder
größere Gefäße mit einem Deckel bzw. Teller abdecken.
DE
1
Page 60

WARNUNG! Nach dem Erhitzen sollte die Babynahrung
in Fläschchen oder Gläsern gut geschüttelt bzw.
durchgerührt werden, damit ein Temperaturausgleich
stattnden kann. Überprüfen Sie die Temperatur vor dem
Verzehr, um Verbrennungen zu vermeiden.
WARNUNG! Während Servicearbeiten und beim
Austausch von Teilen muss das Gerät von seiner
Stromversorgung getrennt werden. Nachdem der
Netzstecker des Gerätes gezogen wurde, sollte er
stets für den Servicetechniker sichtbar sein, damit
dieser sicher sein kann, dass der Stecker nicht
versehentlich wieder eingesteckt wurde.
WARNUNG! Es muss sichergestellt werden, dass
das Gerät vor dem Austauschen der Beleuchtung
ausgeschaltet wird, um die Gefahr eines
elektrischen Schlags zu vermeiden.
Dieses Gerät darf von Personen ab 8 Jahren und
von Menschen mit verminderten körperlichen,
sensorischen oder geistigen Fähigkeiten oder
mangelnden Erfahrungen/Kenntnissen benutzt
werden, insofern sie durch eine für ihre Sicherheit
verantwortliche Person in die sichere Benutzung
des Geräts eingewiesen wurden und die
betreffenden Gefahren verstehen oder von einer
solchen Person beaufsichtigt werden. Kinder dürfen
nicht mit dem Gerät spielen. Die Reinigung und
Wartung des Geräts darf von Kindern nur unter der
Aufsicht eines Erwachsenen erfolgen. Gerät und
Kabel außerhalb der Reichweite von Kindern unter
8 Jahren halten.
DE
2 3
Page 61

Achten Sie beim Aufstellen des Gerätes darauf, dass bei
Gefahr jederzeit der Stecker gezogen oder die Sicherung
am Sicherungskasten ausgeschaltet werden kann.
Aus Sicherheitsgründen muss ein beschädigtes
Anschlusskabel durch den Hersteller, seinen
Kundendienst oder eine andere gleichwertig
qualizierte Person ersetzt werden.
Das Gerät nicht in unmittelbarer Nähe eines Gasoder Elektroherdes aufstellen.
Deutsch
Das Gerät ist nur für Tischbetrieb gedacht. Es ist
nicht für Einbauküchen oder Verwendung in einem
Schrank gedacht.
Das Mikrowellengerät muss auf einer achen, stabilen
Oberäche, die sich mehr als 85 cm über dem Boden
bendet, mit dem Rücken gegen die Wand aufgestellt
werden. Sollte das Gerät an einer Seite direkt an der
Wand stehen, müssen die anderen Seiten frei bleiben.
Sicherheitsrichtlinien empfehlen die Einhaltung eines
Mindestabstands von 15 cm über dem Gerät.
Wenn Behälter aus Papier, Kunststoff oder
anderen leicht entammbaren Materialien zum
Erwärmen benutzt werden, darf das
Mikrowellengerät nicht unbeaufsichtigt betrieben
werden! Diese Behälter können sich entzünden.
Sollten sich im Mikrowellengerät Rauch oder
Flammen bilden, drücken Sie Stoppen/Rücksetzen und
lassen Sie die Tür geschlossen, um eventuelle
Flammen zu ersticken. Ziehen Sie den Stecker aus der
Netzdose oder schalten Sie den Strom am Sicherungsbzw. Verteilerkasten aus.
DE
Page 62

Dieses Gerät ist zur Verwendung im Haushalt und
für ähnliche Anwendungen gedacht, wie etwa:
- Personalküchenbereiche in Geschäften, Büros und
anderen Arbeitsumgebungen;
- Bauernhöfe;
- Gäste in Hotels, Motels und anderen
Beherbergungseinrichtungen;
- Gästeservice wie Zimmer mit Frühstück.
Weder rohe, gekochte Eier mit Schale noch
gepellte hartgekochte Eier mit der Mikrowelle
erhitzen oder kochen. Nach Ende des MikrowellenKochvorgangs kann sich noch weiterhin Druck
bilden und die Eier können explodieren.
Halten Sie stets den Garraum, die Tür und den
Türrahmen sauber. Wenn Nahrungsmittel spritzen oder
verschüttete Flüssigkeiten an Gerätewänden,
Keramikplatte und den Türdichtungsbereichen haften,
wischen Sie sie mit einem feuchten Tuch ab. Scharfe
Reinigungs- und Scheuermittel sind nicht empfehlenswert.
VERWENDEN SIE IN KEINEM FALL
BACKOFENREINIGUNGSMITTEL.
Wird das Mikrowellengerät nicht in einem
sauberen Zustand gehalten, kann dies zu einer
Güteminderung der Oberächen führen, was
wiederum eine Beeinträchtigung der Lebensdauer
des Geräts mit sich bringen und eventuell eine
Gefahr für den Benutzer darstellen kann.
Ein Dampfreiniger darf nicht zur Reinigung
verwendet werden.
DE
4 5
Page 63

Verwenden Sie zur Reinigung der gläsernen
Mikrowellentür keine Scheuermittel oder scharfe
Metallschaber, da dies eine Beschädigung der
Oberäche zur Folge haben und zum Zerspringen
des Glases führen könnte.
Dieses Gerät ist nicht zur Bedienung mit einer externen
Zeitschaltuhr oder separaten Fernbedienung gedacht.
Verwenden Sie nur solche Reinigungsmittel, die zur
Benutzung in einem Mikrowellenherd geeignet sind.
Deutsch
Das Mikrowellengerät ist nur zum Erwärmen von
Lebensmitteln und Getränken gedacht. Seien Sie
vorsichtig, wenn Sie Lebensmittel mit niedrigem
Feuchtigkeitsgehalt erwärmen, wie z. B. Brotwaren,
Schokolade, Kekse und Gebäck. Diese können leicht
anbrennen, austrocknen oder in Brand geraten, wenn
sie zu lange erwärmt werden. Wir raten davon ab, sehr
trockene Lebensmittel wie Popcorn oder Papadams zu
erwärmen. Trocknen von Lebensmitteln, Zeitungen
oder Kleidung und Erwärmen von Wärmkissen,
Pantoffeln, Schwämmen, feuchten Textilien,
Weizenbeuteln, Warmwasseraschen o. ä. kann zu
Verletzungen, Entzündungen oder Bränden führen.
Die Garraumbeleuchtung darf nur von einem vom
Hersteller geschulten Kundendienst-Techniker
ersetzt werden. Versuchen Sie NICHT, die
Außenabdeckung des Geräts abzunehmen.
Verwenden Sie während des Mikrowellenbetriebes
weder Geschirr aus Metall noch Geschirr mit Metallrand.
DE
Page 64

Inhalt
Aufstellen und Anschließen .......................................................7
Aufstellung Ihres Gerätes ..........................................................7
Wichtige Sicherheitshinweise ....................................................8
Teile Ihres Gerätes ..................................................................12
Bedienfeld................................................................................13
Einstellen der Uhrzeit ..............................................................14
Kindersicherung.......................................................................14
Kochen und Auftauen mit Mikrowelle ......................................15
Mehrstufen-Kochen .................................................................17
Quick 30 (Schnell 30)-Funktion ..............................................18
Zeit-Zufügen-Funktion .............................................................18
Verwendung des Timers ..........................................................19
Kurzzeitwecker ....................................................................19
Standzeit .............................................................................19
Verzögerter Start .................................................................20
Auto-Programme .....................................................................21
Auto-Auftauen .....................................................................21
Auto-Aufwärmen ..................................................................23
Auto-Kochen ........................................................................24
Fragen und Antworten .............................................................25
Pege des Mikrowellengerätes................................................26
Technische Daten ....................................................................27
Herzlichen Glückwunsch zum Kauf eines PanasonicProdukts.
Panasonic Corporation Osaka, Japan
Importiert von: Panasonic Marketing Europe GmbH
Panasonic Testing Centre,
Winsbergring 15, 22525 Hamburg, Deutschland
DE
6 7
Page 65

Aufstellen und Anschließen
Überprüfung Ihres
Mikrowellengerätes
Das Gerät auspacken, Verpackungsmaterial
entfernen und auf Beschädigungen wie z.B.
Stoßstellen, gebrochene Türverriegelungen
oder Risse in der Tür überprüfen. Sofort den
Händler benachrichtigen, wenn das Gerät
beschädigt ist. Kein beschädigtes
Mikrowellengerät installieren.
Erdungsvorschriften
Wichtig!
ZUR SICHERHEIT VON PERSONEN
MUSS DIESES GERÄT GEERDET SEIN!
Ist die Steckdose nicht geerdet, muss
der Kunde die Steckdose durch eine
ordnungsgemäße
Schutzkontaktsteckdose ersetzen
lassen.
Betriebsspannung
Die Netzspannung muss der auf dem
Typenschild des Gerätes angegebenen
Spannung entsprechen. Wird eine
höhere Spannung als angegeben
verwendet, so kann ein Brand
entstehen oder ein Unfall die Folge
sein.
Aufstellung Ihres Gerätes
Das Gerät ist nur für Tischbetrieb gedacht.
Es ist nicht für Einbauküchen oder
Verwendung in einem Schrank gedacht.
1.
Stellen Sie das Gerät auf eine ache
und stabile Oberäche, die sich mehr
als 85 cm über dem Boden bendet.
2.
Achten Sie beim Aufstellen des
Gerätes darauf, dass bei Gefahr
jederzeit der Stecker gezogen oder
die Sicherung am Sicherungskasten
ausgeschaltet werden kann.
3.
Das Gerät arbeitet ordnungsgemäß,
wenn eine ausreichende
Luftzirkulation stattnden kann.
Aufstellen auf der Arbeitsäche:
Sicherheitsrichtlinien empfehlen die
Einhaltung eines Mindestabstands
von 15 cm über dem Ofen, 10 cm
zur Rückwand, sowie 5 cm zu
beiden Seiten.
15 cm
5 cm
Arbeitsäche
Sollte das Gerät an einer Seite
direkt an der Wand stehen, müssen
10 cm
5 cm
4.
5.
6.
7.
8.
DE
Deutsch
die anderen Seiten frei bleiben.
Das Gerät nicht in unmittelbarer Nähe
eines Gas- oder Elektroherdes aufstellen.
Das Netzanschlusskabel darf die
Gerätegehäuseoberäche nicht
berühren, da diese während des
Betriebes heiß wird. Das Kabel auch
nicht mit anderen heißen
Oberächen in Berührung bringen.
Das Netzanschlusskabel nicht über
Tisch- oder Thekenkanten hängen
lassen. Das Kabel oder den
Netzstecker nicht in Wasser tauchen.
Die Stellfüße dürfen nicht entfernt
werden.
Dieses Gerät ist zur Verwendung
im Haushalt und für ähnliche
Anwendungen gedacht, wie etwa:
- Personalküchenbereiche in
Geschäften, Büros und anderen
Arbeitsumgebungen;
- Bauernhöfe;
-
Gäste in Hotels, Motels und anderen
Beherbergungseinrichtungen;
- Gästeservice wie Zimmer mit
Frühstück.
Nicht in Außenbereichen verwenden.
Das Gerät nicht bei zu hoher
Luftfeuchtigkeit benutzen.
Page 66

Aufstellung Ihres Gerätes
9.
Die Entlüftungsschlitze auf der
linken Seite und Rückseite des
Gehäuses nicht verdecken. Sind
diese Öffnungen blockiert, während
das Gerät arbeitet, kann es
überhitzen. In diesem Fall wird das
Gerät durch den Überhitzungsschutz
ausgeschaltet und kann erst wieder
in Betrieb gesetzt werden, wenn es
abgekühlt ist.
10.
Dieses Gerät ist nicht zur
Bedienung mit einer externen
Zeitschaltuhr oder separaten
Fernbedienung gedacht.
Wichtige Sicherheitshinweise
1.
Die Türverriegelungen und die
Türdichtungen sollten mit einem
feuchten Tuch abgewischt werden.
Das Gerät ist vom Benutzer auf
mögliche Beschädigungen an den
Türdichtungsächen zu prüfen, und
falls ein solcher Schaden
aufgetreten ist, darf das Gerät nicht
betrieben werden, bevor es vom
Panasonic-Kundendienst repariert
worden ist.
2.
Führen Sie weder eine
Manipulation oder Reparatur an
der Tür, an den
Kontrolleinrichtungen oder
Sicherheitsvorrichtungen noch an
irgendeinem anderen Teil des
Gerätes durch. In keinem Fall das
Gehäuse, das den Schutz gegen
das Austreten von
Mikrowellenenergie sicherstellt,
abbauen. Das Gerät darf nur von
einem geschulten Panasonic
Kundendienst-Techniker
repariert werden.
3.
Das Gerät nicht in Betrieb setzen,
wenn das Netzanschlusskabel oder
der Netzstecker beschädigt ist,
bzw. wenn es nicht
ordnungsgemäß arbeitet oder eine
sichtbare Beschädigung aufweist.
4.
Aus Sicherheitsgründen muss ein
beschädigtes Netzkabel durch den
Hersteller, seinen Kundendienst
oder eine andere gleichwertig
qualizierte Person ersetzt werden.
5.
Keine Flüssigkeiten und
Nahrungsmittel in versiegelten
Behältern (z.B. Konserven)
erhitzen, da diese platzen können.
6.
Dieses Gerät darf von Personen ab
8 Jahren und von Menschen mit
verminderten körperlichen,
sensorischen oder geistigen
Fähigkeiten oder mangelnden
Erfahrungen/Kenntnissen benutzt
werden, insofern sie durch eine für
ihre Sicherheit verantwortliche
Person in die sichere Benutzung
des Geräts eingewiesen wurden
und die betreffenden Gefahren
verstehen oder von einer solchen
Person beaufsichtigt werden.
Kinder dürfen nicht mit dem Gerät
spielen. Die Reinigung und
Wartung des Geräts darf von
Kindern nur unter der Aufsicht
eines Erwachsenen erfolgen. Gerät
und Kabel außerhalb der
Reichweite von Kindern unter
8 Jahren halten.
DE
8 9
Page 67

Gebrauch und Ausstattung des Gerätes
Das Mikrowellengerät nur zur
Zubehör
Nahrungsmittelzubereitung benutzen.
Dieses Gerät ist speziell zum
Auftauen, Erwärmen und Garen von
Lebensmitteln entsprechend der
Bedienungs- und Kochanleitung
Glasdrehteller
konzipiert. Erhitzen Sie in keinem Fall
Chemikalien oder andere Produkte.
Prüfen Sie vor der ersten Benutzung
Ihres Geschirrs, ob es für den Gebrauch
im Mikrowellengerät geeignet ist.
Im Garraum des Mikrowellengerätes
dürfen keine Gegenstände
aufbewahrt werden, um gefährliche
Situationen zu vermeiden, falls der
Schalter irrtümlich betätigt wird.
Nehmen Sie das MIKROWELLENGERÄT
NIE OHNE LEBENSMITTEL in Betrieb.
Dies kann zu Beschädigungen des
Gerätes führen.
Sollten sich im Mikrowellengerät Rauch
oder Flammen bilden, drücken Sie
Stoppen/Rücksetzen und lassen Sie
die Tür geschlossen, um eventuelle
Flammen zu ersticken. Ziehen Sie den
Rollenring
Stecker aus der Netzdose oder
schalten Sie den Strom am
Sicherungs- bzw. Verteilerkasten aus.
Lüftermotorbetrieb
Nach der Verwendung des Geräts kann
der Lüftermotor noch einige Minuten
lang laufen, um die elektrischen
Komponenten abzukühlen. Dies ist
normal, und Lebensmittel können
entnommen werden, obwohl der
Lüftermotor läuft. Sie können das Gerät
während dieser Zeit weiter verwenden.
Das Mikrowellengerät ist mit
unterschiedlichem Zubehör
ausgestattet. Verwenden Sie dieses
bitte laut Anweisung.
Verwenden Sie das Gerät nicht ohne
den Rollenring und den Glasteller.
Benutzen Sie in keinem Fall einen
anderen als den speziell für dieses
Gerät konzipierten Glasdrehteller.
Den evtl. heißen Glasdrehteller
abkühlen lassen, bevor Sie diesen
reinigen bzw. mit Wasser abspülen.
Der Drehteller kann rechts- oder
linksherum laufen. Dies stellt keine
Fehlfunktion dar.
Berührt das Lebensmittel bzw.
Kochgeschirr die Garraumwände,
läuft der Drehteller nicht weiter,
sondern stoppt und beginnt, sich in
die entgegengesetzte Richtung zu
drehen.
Rollenring und Boden sollten
regelmäßig gereinigt werden, um
Betriebsgeräusche und die
Ansammlung von
Lebensmittelrückständen zu
vermeiden.
Zum Kochen mit der Mikrowelle
müssen stets Rollenring und
Glasteller eingesetzt sein.
Deutsch
Garraumbeleuchtung
Wenn es nötig wird, die eingebaute
Garraumbeleuchtung zu wechseln,
wenden Sie sich bitte an Ihren Händler.
DE
Page 68

Wichtige Sicherheitshinweise
Kochzeit
Die Kochzeit ist abhängig von
Beschaffenheit, Ausgangstemperatur
und Menge des Lebensmittels sowie
von der Art des verwendeten
Kochgeschirrs.
Gehen Sie zunächst von einer
kürzeren Kochzeit aus, um ein
Übergaren der Speisen zu vermeiden.
Hat das Lebensmittel noch nicht den
gewünschten Auftau-, Erwärmungsoder Garzustand erreicht, haben Sie
immer noch die Möglichkeit, die
Garzeit zu verlängern.
Wichtig!
Wird die empfohlene Kochzeit
überschritten, kann das
Lebensmittel leicht verbrennen
und ggf. einen Brand auslösen und
somit den Garraum zerstören.
Geringe Lebensmittelmengen
Sehr kleine Lebensmittelmengen oder
Speisen mit geringem
Feuchtigkeitsgehalt können schnell
austrocknen und verbrennen, wenn sie
zu lange gegart werden. Kommt es zu
einem Brand, die Tür des
Mikrowellengerätes geschlossen
halten, das Gerät abschalten und den
Netzstecker aus der Steckdose ziehen.
Lebensmittel mit niedrigem
Feuchtigkeitsgehalt
Das Mikrowellengerät ist nur zum
Erwärmen von Lebensmitteln und
Getränken gedacht. Seien Sie
vorsichtig, wenn Sie Lebensmittel mit
niedrigem Feuchtigkeitsgehalt
erwärmen, wie z. B. Brotwaren,
Schokolade, Kekse und Gebäck. Diese
können leicht anbrennen, austrocknen
oder in Brand geraten, wenn sie zu
lange erwärmt werden. Wir raten davon
ab, sehr trockene Lebensmittel wie
Popcorn oder Papadams zu erwärmen.
Trocknen von Lebensmitteln, Zeitungen
oder Kleidung und Erwärmen von
Wärmkissen, Pantoffeln, Schwämmen,
feuchten Textilien, Weizenbeuteln,
Warmwasseraschen o. ä. kann zu
Verletzungen, Entzündungen oder
Bränden führen.
Eier
Weder rohe, gekochte Eier mit
Schale noch gepellte hartgekochte
Eier mit der Mikrowelle erhitzen oder
kochen. Nach Ende des MikrowellenKochvorgangs kann sich noch
weiterhin Druck bilden und die Eier
können explodieren.
Lebensmittel mit Schale oder Haut
Bei Lebensmitteln wie z.B. Kartoffeln
und Würstchen empehlt es sich, sie
vorher anzustechen, um ein evtl.
Platzen zu vermeiden.
Speisethermometer
Falls Sie den Garzustand mit einem
Speisethermometer überprüfen
wollen, verwenden Sie bitte keine
herkömmlichen Thermometer im
Mikrowellengerät. Diese können
Funken verursachen. Benutzen Sie
diese Speisethermometer nur
außerhalb des Mikrowellengerätes.
DE
10 11
Page 69

Flüssigkeiten
Beim Erhitzen von Flüssigkeiten im
Mikrowellengerät kann durch
kurzfristiges Aufkochen (Siedeverzug)
die Flüssigkeit im Gerät oder bei der
Entnahme schlagartig verdampfen
und explosionsartig aus dem Gefäß
geschleudert werden. Dies kann zu
Verbrennungen führen.
Sie vermeiden einen Siedeverzug,
indem Sie beim Erhitzen von
Flüssigkeiten in Gläsern oder Tassen
immer ein hitzebeständiges
Glasstäbchen mithineinstellen oder
größere Gefäße mit einem Deckel
bzw. Teller abdecken. Zusätzlich
sollten Sie folgende Punkte beachten:
a Vermeiden Sie die Verwendung von
geraden Gefäßen mit engem Ausguss.
b Überhitzen Sie die Flüssigkeit nicht.
c Rühren Sie die Flüssigkeit einmal
um, bevor Sie das Gefäß ins Gerät
stellen sowie nochmals nach der
halben Kochzeit.
d Lassen Sie nach Ablauf der Kochzeit
das Gefäß kurze Zeit im Gerät
stehen, bevor Sie es herausnehmen.
Rühren Sie die Flüssigkeit
anschließend noch einmal um.
Papier und Plastik
Wenn Behälter aus Papier, Kunststoff
oder anderen leicht entammbaren
Materialien zum Erwärmen benutzt
werden, darf das Mikrowellengerät
nicht unbeaufsichtigt betrieben werden!
Diese Behälter können sich entzünden.
Verwenden Sie keine recycelten
Papierprodukte (z.B. Küchenrollen), die
nicht ausschließlich für die Benutzung
im Mikrowellengerät geeignet sind. Im
Recyclingpapier können Bestandteile
sein, die Funkenbildung oder einen
Brand verursachen.
Entfernen Sie Metallverschlüsse von
Bratfolien, bevor Sie diese ins Gerät
stellen
.
Hilfsmittel und Folien
Erhitzen Sie keine geschlossenen
Flaschen oder Konserven im
Mikrowellengerät, da diese durch
den Druck explodieren können.
Verwenden Sie während des
Mikrowellenbetriebes weder Geschirr
aus Metall noch Geschirr mit Metallrand.
Bei Benutzung von Alufolie,
Metallspießen oder anderen
Metallwaren darauf achten, dass sie
mindestens 2 cm von der
Gerätewand entfernt sind, um
Funkenbildung zu vermeiden.
Babynahrung
Benutzen Sie nur Fläschchen oder
Glasformen aus hochwertigen
hitzebeständigen Materialien und
plazieren Sie diese ohne Deckel in
der Mitte des Drehtellers.
Nach dem Erhitzen sollte die
Babynahrung in Fläschchen oder
Gläsern gut geschüttelt bzw.
durchgerührt werden, damit ein
Temperaturausgleich stattnden kann.
Überprüfen Sie die Temperatur vor
dem Verzehr, um Verbrennungen zu
vermeiden.
DE
Deutsch
Page 70

Teile Ihres Gerätes
1.
Türöffnungstaste
Drücken, um die Tür zu öffnen. Durch
Öffnen der Tür beim Betrieb wird der
Garvorgang unterbrochen, ohne das
Programm zu beenden. Der
Kochvorgang wird fortgesetzt, nachdem
die Tür geschlossen und Start gedrückt
wurde. Die Tür kann gefahrlos bei
jedem Kochprogramm geöffnet werden,
ohne dass eine Gefahr durch
austretende Mikrowellen besteht.
2.
Sichtfenster
3.
Entlüftungsschlitze
4.
Mikrowellenaustritt
(Abdeckung bitte nicht entfernen)
5.
Äußere Entlüftungsschlitze
6.
Bedienfeld
7.
Netzkabel
8.
Stecker
9.
Glasdrehteller
10.
Rollenring
11.
Automatikprogramme
11 95 3 4 3 5
6
2
10
Das Typenschild ist am Gerät angebracht.
Anmerkung
Diese Abbildung dient zur Bezugnahme.
7
8
1
DE
12 13
Page 71

Bedienfeld
2
7
1
Displayfenster
2
Micro Power (Mikrowellenleistungs)Taste
3
Auto-Auftauen-Taste
4
1
3
4
5
6
8
Auto-Aufwärmen-Taste
5
Auto-Kochen-Taste
6
Drehregler für Zeit/Gewicht-Wahl
7
Timer/Clock (Zeitschaltuhr/Uhrzeit)Taste
8
Quick 30 (Schnell 30)-Taste
9
Stoppen/Rücksetzen-Taste:
Vor dem Kochen:
Ein Tastendruck löscht Ihre
Anweisungen.
Beim Kochen:
Ein Tastendruck stoppt den Kochvorgang
kurzzeitig. Ein weiterer hebt alle Ihre
Anweisungen auf, und ein Punkt oder die
Tageszeit erscheint im Display.
10
Start-Taste
Ein Tastendruck aktiviert das Gerät.
Wenn die Tür geöffnet oder Stoppen/
Rücksetzen einmal beim Gerätebetrieb
gedrückt wird, muss Start erneut gedrückt
werden, um das Gerät neu zu starten.
Deutsch
9
•
Ihr Bedienfeld mag anders aussehen,
aber die Bezeichnungen und die
Funktionalität sind gleich.
Piepton
Wenn eine Taste richtig gedrückt wird,
ertönt ein Piepton. Wenn eine Taste
gedrückt wird und kein Piepton ertönt, hat
das Gerät die Anweisung nicht
angenommen oder kann sie nicht
akzeptieren. Das Gerät piept zweimal
zwischen Programmstufen. Am Ende eines
vollständigen Programms gibt das Gerät
5 Pieptöne aus, und „End“ (Ende) wird
angezeigt.
10
Anmerkung
Wenn 6 Minuten lang nach der Einstellung
es Kochprogramms nicht Start gedrückt
wird, bricht das Gerät das Kochprogramm
automatisch ab. Das Display schaltet auf
Uhrzeit oder Punkt zurück.
DE
Page 72

Einstellen der Uhrzeit
Wenn das Gerät zuerst mit dem Netz verbunden wird, erscheint „88.88“ im Display.
Beispiel: Zum Einstellen von 11:25 Vormittags
Drücken Sie Timer/
Clock (Zeitschaltuhr/
Uhrzeit) zweimal.
Ein Doppelpunkt
beginnt zu blinken.
Anmerkungen
1.
Zum Rücksetzen der Tageszeit wiederholen Sie Schritt 1 bis Schritt 3 wie oben.
2. Die Uhr bewahrt die Tageszeit, solange das Gerät mit dem Stromnetz verbunden ist
und mit Strom versorgt wird.
3. Die Uhrzeit wird im 24-Stunden-Format angezeigt, also 2 pm = 14:00 und nicht 2:00.
Drehen Sie den Drehregler,
bis 11:25 im Display
erscheint.
Drücken Sie Timer/
Clock (Zeitschaltuhr/
Uhrzeit).
Der Doppelpunkt hört zu
blinken auf. Die
Tageszeit ist nun im
Display festgelegt.
Kindersicherung
Diese Funktion deaktiviert die Bedienungselemente des Geräts; die Tür kann aber
geöffnet werden. Die Kindersicherung kann eingestellt werden, wenn das Display
einen Punkt oder die Zeit zeigt.
Zum Aktivieren:
Drücken Sie Start 3 Mal in 10 Sekunden.
Die Tageszeit verschwindet. Die
tatsächliche Uhrzeit geht nicht verloren.
„L ---“ wird im Display angezeigt.
Zum Deaktivieren:
Drücken Sie Stoppen/Rücksetzen 3 Mal
in 10 Sekunden.
Die Tageszeit erscheint erneut im Display.
DE
14 15
Page 73

Kochen und Auftauen mit Mikrowelle
Vor Gebrauch des Gerätes vergewissern, dass der Glasdrehteller in der richtigen
Position ist.
Drücken Sie auf Micro Power
(Mikrowellenleistungs), um
den gewünschten
Leistungspegel zu wählen.
Leistungsstufe
800 W Hoch
700 W
520 W
270 W Auftauen
200 W Ausquellen
Anmerkungen
1.
Wenn der Vorgang beendet ist, wird „Add“ (Zufügen) etwa 1 Minute lang im Display
angezeigt. Während dies angezeigt wird, können Sie das Merkmal ZEIT ZUFÜGEN
verwenden, siehe Seite 18.
2. Das Gerät arbeitet automatisch mit 800 W (Hoch) Mikrowellen-Leistung, wenn eine
Kochzeit eingegeben wird, ohne dass vorher ein Leistungspegel gewählt wurde.
3. Während des Garvorgangs kann der Glasdrehteller vibrieren. Dies beeinträchtigt nicht
die Garleistung.
4. Für MEHRSTUFEN-KOCHEN siehe Seite 17.
5. STANDZEIT kann nach der Einstellung von Mikrowellen-Leistung und Zeit
programmiert werden. Siehe Seite 19.
6. Verwenden Sie Mikrowellen NICHT, wenn sich Metallgegenstände im Gerät benden.
7. Prüfen Sie immer die Nahrungsmittel beim Auftauen, indem Sie die Tür öffnen und
dann neu starten. Es ist nicht nötig, Nahrungsmittel beim Auftauen abzudecken. Um ein
gleichmäßiges Ergebnis zu gewährleisten, rühren, wenden oder trennen Sie mehrmals
während des Auftauens. Wenden Sie bei großen Schnitten und Geügel auf halbem
Weg beim Auftauen und schützen Sie die Enden und Spitzen mit Folie.
Medium/
Erwärmen
Niedrig/
Fertigkochen
Drehen Sie den Drehregler, um
die Kochzeit zu wählen.
Ihr Gerät kann für bis zu
90 Minuten mit 700 W (Medium),
520 W (Niedrig), 200 W
(Ausquellen) und 270 W (Auftauen)
Leistung programmiert werden.
800 W (Hoch) Leistung kann für bis
zu 30 Minuten programmiert
werden.
Drücken Sie
Start.
Die Zeit zählt im
Display herunter.
Deutsch
DE
Page 74

Kochen und Auftauen mit Mikrowelle
Hinweise zum Auftauen
STANDZEIT
Einzelne Nahrungsmittelportionen können
fast unverzüglich nach dem Auftauen
gegart werden. Es ist normal, daß größere
Portionen in der Mitte noch gefroren sind.
Vor dem Garen bitte mindestens eine
Stunde stehenlassen. Während dieser
Standzeit verteilt sich die Temperatur
gleichmäßig und das Nahrungsmittel wird
durch Wärmeleitung aufgetaut. Falls das
Nahrungsmittel nicht sofort
weiterverarbeitet wird, sollten Sie es im
Kühlschrank aufbewahren. Niemals
aufgetaute Lebensmittel wieder einfrieren
bevor sie nicht gekocht wurden.
BRATEN UND GEFLÜGEL
Vorzugsweise sollten Braten auf einen
umgedrehten Teller oder ein
Kunststoffgestell gelegt werden, sodaß sie
nicht im Saft liegen. Es ist äußert wichtig,
daß em ndliche oder herausstehende Teile
der Lebensmittel mit kleinen Stücken
Alufolie geschützt werden, damit sie nicht
garen. Es ist ungefährlich, kleine Stücke
Alufolie im Gerät zu verwenden,
vorausgesetzt sie kommen mit den
Garraumwänden nicht in Kontakt.
HACKFLEISCH, GEWÜRFELTE
FLEISCHSTÜCKE ODER FISCH
Da die Außenseite dieser Lebensmittel
schnell auftaut, ist es notwendig die Teile
während des Auftauvorgangs regelmäßig
auseinanderzubrechen und aufgetaute
Stücke aus der Mikrowelle zu entfernen.
KLEINE PORTIONEN /
FLEISCHTEILE
Kleine Fleischteile wie Koteletts und
Hühnerteile müssen so schnell wie möglich
voneinander gelöst werden, damit sie
gleichmäßig auftauen. Fettreiche Stellen
und Enden tauen schneller auf. Plazieren
Sie diese daher nahe der Mitte des
Drehtellers oder decken Sie sie ab.
BROT
Ganze Brote benötigen eine Standzeit,
damit der Kern auftauen kann. Sie können
die Standzeit verringern, indem Sie
Scheiben voneinander trennen und
Brötchen und ganze Brote in Hälften
schneiden.
DE
16 17
Page 75

Mehrstufen-Kochen
Dieses Merkmal erlaubt es Ihnen, bis zu 3 Stufen kontinuierlichen Kochens zu
programmieren.
Beispiel: Um kontinuierlich 800 W (Hoch) Leistung für 2 Minuten, 700 W (Medium) Leistung
Einmal drücken.
Wählen Sie 800 W (Hoch)
Leistung.
für 3 Minuten und 200 W (Ausquellen) Leistung für 2 Minuten einzustellen.
Drehen Sie den Drehregler,
bis 2.00 im Display erscheint.
Einmal drücken.
Wählen Sie 700 W (Medium)
Leistung.
Drehen Sie den Drehregler,
bis 3.00 im Display erscheint.
Deutsch
Drücken Sie zweimal.
Wählen Sie 200 W
(Ausquellen) Leistung.
Anmerkungen
1.
Wenn der Vorgang beendet ist, wird „Add“ (Zufügen) etwa 1 Minute lang im Display
angezeigt. Während dies angezeigt wird, können Sie die Funktion ZEIT ZUFÜGEN
verwenden, siehe Seite 18.
2. AUTO-PROGRAMME können nicht mit MEHRSTUFEN-KOCHEN verwendet werden.
3. Beim Betrieb ertönen 2 Pieptöne zwischen jeder Stufe, und 5 Pieptöne nachdem alle
Stufen abgeschlossen sind.
4. 800 W (Hoch) MIKROWELLEN-Leistung kann nur für eine Stufe von MEHRSTUFENKOCHEN eingestellt werden.
Drehen Sie den Drehregler,
bis 2.00 im Display erscheint.
DE
Drücken Sie
Start.
Die Zeit für die
erste Stufe wird
im Display
heruntergezählt.
Page 76

Quick 30 (Schnell 30)-Funktion
Diese Funktion erlaubt es Ihnen, eine Kochzeit in Schritten von 30 Sekunden bis zu
5 Minuten bei 800 W (Hoch) MIKROWELLEN-Leistung einzustellen.
Drücken Sie Quick 30 (Schnell
30), um die gewünschte
Kochzeit einzustellen.
Die Zeit erscheint im Display.
Anmerkungen
1.
Wenn der Vorgang beendet ist, wird „Add“ (Zufügen) etwa 1 Minute lang im Display
angezeigt. Während dies angezeigt wird, können Sie die Funktion ZEIT ZUFÜGEN
verwenden, siehe unten.
2. Wenn gewünscht, können Sie andere Leistungsstufen verwenden. Wählen Sie die
gewünschte Leistungsstufe, bevor Sie Quick 30 (Schnell 30) drücken.
3. Nach dem Einstellen der Zeit mit Quick 30 (Schnell 30) können Sie den Drehregler
nicht verwenden.
Drücken Sie Start.
Die Zeit zählt im
Display herunter.
Zeit-Zufügen-Funktion
Diese Funktion erlaubt es Ihnen, Kochzeit am Ende des vorherigen Kochvorgangs
hinzuzufügen.
Drehen Sie den Drehregler, um
die zusätzliche Zeit einzustellen.
Bis zu 30 Minuten für 800 W
(Hoch) MIKROWELLEN-Leistung
und 90 Minuten für andere
MIKROWELLEN-Leistungen.
Anmerkungen
1.
Wenn der Vorgang beendet ist, wird „Add“ (Zufügen) etwa 1 Minute lang im Display
angezeigt. Während dies angezeigt wird, können Sie die Funktion ZEIT ZUFÜGEN
erneut verwenden.
2. Während des Kochvorgangs drehen Sie den Drehregler, um die zusätzliche Kochzeit
(10 Sekunden bis 10 Minuten) einzustellen.
3. Das Merkmal ZEIT ZUFÜGEN wird abgebrochen, wenn Sie 1 Minute nach dem
Kochvorgang keine Bedienung ausführen.
4. Das Merkmal ZEIT ZUFÜGEN kann nach dem MEHRSTUFEN-KOCHEN verwendet
werden. Der Leistungspegel ist gleich wie bei der letzten Stufe. Diese Funktion arbeitet
nicht, wenn die letzte Stufe Standzeit war.
5. Die Funktion ZEIT ZUFÜGEN ist nicht für AUTO-PROGRAMME verfügbar.
Drücken Sie Start.
Die Zeit zählt im
Display herunter.
DE
18 19
Page 77

Verwendung des Timers
Dieses Merkmal arbeitet als Kurzzeitwecker oder erlaubt Ihnen, die STANDZEIT/
VERZÖGERTER START zu programmieren.
Kurzzeitwecker
Beispiel: Zum Messen von 5 Minuten.
Drücken Sie
Timer/Clock
(Zeitschaltuhr/
Uhrzeit).
Drehen Sie den Drehregler, bis
5.00 im Display erscheint.
(bis zu 90 Minuten)
Drücken Sie Start.
Die Zeit zählt
herunter, ohne dass
das Gerät arbeitet.
Standzeit
Beispiel: Um 5 Minuten nach dem Kochen mit 700 W (Medium) MIKROWELLEN-Leistung
Wählen Sie 700 W (Medium)
Leistung.
für 3 Minuten zu stehen.
Einmal drücken.
Drücken Sie
Timer/Clock
(Zeitschaltuhr/
Uhrzeit).
Drehen Sie den Drehregler, bis
3.00 im Display erscheint.
Drehen Sie den Drehregler, bis
5.00 im Display erscheint.
(bis zu 90 Minuten)
Drücken Sie Start.
Der Kochvorgang
beginnt.
Nach dem Kochvorgang
zählt die Standzeit
herunter, ohne dass das
Gerät arbeitet.
Deutsch
DE
Page 78

Verwendung des Timers
Verzögerter Start
Beispiel: Um den Kochvorgang mit 700 W (Medium) MIKROWELLEN-Leistung für
3 Minuten nach 5 Minuten Standzeit zu starten.
Drücken Sie
Timer/Clock
(Zeitschaltuhr/
Uhrzeit).
Einmal drücken.
Wählen Sie 700 W (Medium)
Leistung.
Anmerkungen
1.
Wenn der VERZÖGERTE START beendet ist, wird „Add“ (Zufügen) etwa 1 Minute lang
im Display angezeigt. Während dies angezeigt wird, können Sie die Funktion ZEIT
ZUFÜGEN verwenden, siehe Seite 18.
2. MEHRSTUFEN-KOCHEN kann programmiert werden, einschließlich STANDZEIT oder
VERZÖGERTER START.
3. Auch wenn die Gerätetür während KURZZEITWECKER, STANDZEIT oder
VERZÖGERTER START geöffnet wird, zählt die Zeit im Displayfenster weiter herunter.
4. STANDZEIT/VERZÖGERTER START kann nicht vor/nach einem AUTO-PROGRAMM
programmiert werden.
Drehen Sie den Drehregler, bis
5.00 im Display erscheint.
(bis zu 90 Minuten)
Drehen Sie den Drehregler,
bis 3.00 im Display erscheint.
Drücken Sie
Start.
Verzögerte Zeit
zählt herunter,
dann startet der
Kochvorgang.
DE
20 21
Page 79

Auto-Programme
Mit dieser Funktion können Sie Nahrungsmittel entsprechend dem Gewicht auftauen/
aufwärmen/kochen. Wählen Sie das Programm und stellen Sie das Gewicht des
Nahrungsmittels ein. Das Gewicht ist in Gramm programmiert. Das Gerät bestimmt die
MIKROWELLEN-Leistungsstufen und die Kochzeit automatisch. Zur schnellen Wahl
beginnt das Gewicht mit dem in jeder Kategorie am häugsten verwendeten Gewicht.
Berücksichtigen Sie nicht das Gewicht hinzugefügten Wassers oder das
Behältergewicht.
Anmerkungen
1.
Betreiben Sie das Gerät immer mit vorhandenem Rollenring und Glasdrehteller.
2. Die AUTO-PROGRAMME dürfen NUR für die angegebenen Nahrungsmittel verwendet
werden.
3. Führen Sie Auftauen/Kochen von Nahrungsmitteln nur innerhalb der angegebenen
Gewichtsbereiche aus.
4. Wiegen Sie das Nahrungsmittel, anstelle sich auf die Angaben auf der Verpackung zu
verlassen.
5. Für die meisten Speisen ist eine STANDZEIT vorteilhaft. Nach dem Kochen mit einem
AUTO-PROGRAMM erlauben Sie der Hitze, bis zur Mitte zu dringen.
Auto-Auftauen
Deutsch
Wählen Sie das
gewünschte AutoAuftauen-Programm.
Die AUTO-PROGRAMMNummer erscheint im Display.
Anmerkung
Die Form und Größe des Nahrungsmittels bestimmt das maximale Gewicht, das in das
Gerät eingebracht werden kann.
Programm Anweisungen
1. Kleine Stücke
1 Mal drücken
Drehen Sie den Drehregler,
um das Gewicht des
gefrorenen
Nahrungsmittels
einzustellen.
Das Gewicht zählt in Schritten
von 10 g höher/niedriger.
Gewicht: 200 g - 1000 g
Zum Auftauen kleiner Stücke Fleisch, Schnitzel, Würstchen,
Hackeisch, Steak, Koteletten, Fischlets (jeweils 100 g bis 400 g).
Drücken Sie einmal auf Auto-Auftauen. Stellen Sie das Gewicht
des Nahrungsmittels ein und drücken Sie Start. Lassen Sie die
Speise 15 bis 30 Minuten stehen.
DE
Drücken Sie Start.
Denken Sie daran,
das Nahrungsmittel
während des
Auftauens zu rühren
oder zu wenden.
Page 80

Auto-Programme
Programm Anweisungen
Gewicht: 600 g - 1600 g
Zum Auftauen großer Stücke Fleisch, ganzer Hühnchen,
2. Großes Stück
2 Mal drücken
3. Brot/Kuchen
3 Mal drücken
Fleischschnitte. Drücken Sie zweimal auf Auto-Auftauen. Stellen
Sie das Gewicht des Nahrungsmittels ein und drücken Sie Start.
Ganze Hühnchen und Fleischschnitte erfordern Abdeckung beim
Auftauen. Schützen Sie Flügel, Brüste und Fett mit glatten Stücken
Alufolie, gesichert mit Cocktail-Sticks. Lassen Sie die Folie nicht
die Wände des Garraums berühren. Eine Standzeit von 1 bis
2 Stunden sollte vor dem Kochen erlaubt werden.
Gewicht: 100 g - 600 g
Zum Auftauen von Brot (Laibe, Scheiben, Brötchen) und Kuchen.
Sahnetorten und Eistorten sind für dieses Programm ungeeignet.
Legen Sie das Brot oder den Kuchen auf eine große Platte oder in
eine ache Schüssel. Drücken Sie Auto-Auftauen 3 Mal. Stellen
Sie das Gewicht des Nahrungsmittels ein und drücken Sie Start.
Lassen Sie Brot für 10 (leichtes Weißbrot) bis 30 Minuten (dichtes
Roggenbrot) stehen. Schneiden Sie große Laibe für die Standzeit
in zwei Hälften.
DE
22 23
Page 81

Auto-Aufwärmen
Wählen Sie das
gewünschte AutoAufwärmen-Programm.
Die AUTO-PROGRAMMNummer erscheint im Display.
Anmerkung
Da gewisse Variationen im Nahrungsmittel auftreten können, prüfen Sie, ob das
Nahrungsmittel gründlich gegart und kochend heiß ist, bevor Sie es servieren.
Programm Anweisungen
1. Gekühlte Mahlzeit
1 Mal drücken
2. Gefrorene Mahlzeit
2 Mal drücken
Drehen Sie den Drehregler,
um das Gewicht des
Nahrungsmittels einzustellen.
Das Gewicht zählt in Schritten
von 10 g höher/niedriger.
Gewicht: 200 g - 800 g
Zum Aufwärmen eines frischen Fertiggerichts. Alle Nahrungsmittel müssen
Fertiggerichte sein. Nahrungsmittel sollten bei Kühlschranktemperatur von
etwa +5 °C sein. In dem beim Kauf vorhandenen Behälter aufwärmen.
Durchstechen Sie den Decklm mit einem scharfen Messer einmal in der
Mitte und 4 Mal um den Rand. Falls Sie Nahrungsmittel auf einen Teller
umfüllen, überspannen Sie diese mit einer durchstochenen Klarsichtfolie.
Stellen Sie den Behälter auf den Glasdrehteller. Drücken Sie einmal auf
Auto-Aufwärmen. Stellen Sie das Gewicht des Nahrungsmittels ein und
drücken Sie Start. Rühren Sie bei Pieptönen um. Rühren Sie erneut am
Ende des Programms um und erlauben Sie einige Minuten Standzeit.
Große Stücke Fleisch/Fisch in einer dünnen Soße benötigen eine längere
Kochzeit. Dieses Programm ist nicht für stärkehaltige Nahrungsmittel wie
Reis, Nudeln oder Kartoffeln geeignet. Mahlzeiten in normalen
schüsselförmigen Behältern benötigen längere Kochzeit.
Gewicht
Zum Aufwärmen eines gefrorenen Fertiggerichts. Alle Nahrungsmittel
müssen zubereitet und gefroren sein (-18 °C). Wärmen Sie in dem beim
Kauf verwendeten Behälter auf. Durchstechen Sie die Abdeckung mit
einem scharfen Messer einmal in der Mitte und 4 Mal um den Rand. Falls
Sie Nahrungsmittel auf einen Teller umfüllen, überspannen Sie diese mit
einer durchstochenen Klarsichtfolie. Stellen Sie den Behälter auf den
Glasdrehteller. Drücken Sie zweimal auf Auto-Aufwärmen. Stellen Sie das
Gewicht des Nahrungsmittels ein und drücken Sie Start. Rühren Sie bei
Pieptönen um und schneiden Sie die Blöcke in Stücke. Rühren Sie erneut
am Ende des Programms um und erlauben Sie einige Minuten Standzeit.
Große Stücke Fleisch/Fisch in einer dünnen Soße benötigen eine längere
Kochzeit. Dieses Programm ist nicht für stärkehaltige Nahrungsmittel wie
Reis, Nudeln oder Kartoffeln geeignet. Mahlzeiten in normalen
schüsselförmigen Behältern benötigen längere Kochzeit.
: 300 g - 600 g
Drücken Sie Start.
Die Zeit zählt im
Display herunter.
Deutsch
DE
Page 82

Auto-Programme
Auto-Kochen
Wählen Sie das
gewünschte Auto-KochenProgramm.
Die AUTO-PROGRAMMNummer erscheint im Display.
Anmerkung
Da gewisse Variationen im Nahrungsmittel auftreten können, prüfen Sie, ob das
Nahrungsmittel gründlich gegart und kochend heiß ist, bevor Sie es servieren.
Programm Anweisungen
1. Frisches
Gemüse
1 Mal drücken
2. Gefrorenes
Gemüse
2 Mal drücken
3. Kartoffeln
3 Mal drücken
4. Frischer Fisch
4 Mal drücken
Drehen Sie den Drehregler,
um das Gewicht des
Nahrungsmittels einzustellen.
Das Gewicht zählt in Schritten
von 10 g höher/niedriger.
Gewicht: 100
Zum Kochen von frischem Gemüse wie Karotten, Brokkoli, Blumenkohl
und grünen Bohnen. Legen Sie zubereitetes Gemüse in einen Behälter
geeigneter Größe. Besprenkeln Sie mit 1 EL Wasser pro 100 g Gemüse.
Mit einer Klarsichtfolie abdecken. Durchstechen Sie die Klarsichtfolie mit
einem Messer einmal in der Mitte und 4 Mal um den Rand. Drücken Sie
einmal auf Auto-Kochen. Stellen Sie das Gewicht des Nahrungsmittels
ein und drücken Sie Start. Rühren Sie bei Pieptönen um.
Gewicht: 100 g - 800 g
Für alle Arten von gefrorenem Gemüse, wie gefrorene grüne Bohnen, Mais
oder gemischtes Gemüse. Legen Sie zubereitetes Gemüse in einen
mikrowellengeeigneten Behälter und geben Sie bei Bedarf 2-6 EL Wasser
hinzu. Mit einem gut passenden Deckel abdecken. Stellen Sie den Behälter
auf den Glasdrehteller. Drücken Sie zweimal auf Auto-Kochen. Stellen Sie
das Gewicht des Nahrungsmittels ein und drücken Sie Start. Rühren Sie bei
Pieptönen um. Am Ende des Kochvorgangs lassen Sie die Speicher
abgedeckt 3 bis 5 Minuten lang stehen.
Gewicht: 200 g - 600 g
Zum Kochen von Kartoffeln. Reinigen Sie die Kartoffeln gründlich und
schneiden Sie sie in gleichmäßige Stücke. In einen mikrowellengeeigneten
Behälter. Mit einem gut passenden Deckel abdecken. Stellen Sie den
Behälter auf den Glasdrehteller. Drücken Sie Auto-Kochen 3 Mal. Stellen Sie
das Gewicht des Nahrungsmittels ein und drücken Sie Start.
Gewicht: 200
Zum Kochen frischer Fischlets und Steaks. In einen Behälter geeigneter Größe
legen. Geben Sie 1-3 EL Flüssigkeit zu. Mit einer Klarsichtfolie abdecken.
Durchstechen Sie die Klarsichtfolie einmal in der Mitte und 4 Mal um den Rand.
Drücken Sie Auto-Kochen 4 Mal. Stellen Sie das Gewicht des Nahrungsmittels
ein und drücken Sie Start. Erlauben Sie einige Minuten Standzeit.
g -
g -
1000 g
800 g
Drücken Sie Start.
Die Zeit zählt im
Display herunter.
DE
24 25
Page 83

Fragen und Antworten
F: Warum lässt sich das
Mikrowellengerät nicht einschalten?
A: Lässt sich das Mikrowellengerät nicht
einschalten, dann überprüfen Sie bitte
folgendes:
1.
Steckt der Netzstecker fest in der
Steckdose? Ziehen Sie den Stecker
aus der Steckdose und warten Sie
10 Sekunden, bevor Sie diesen wieder
hineinstecken.
2.
Überprüfen Sie die Netzsicherung und
ersetzen Sie diese gegebenenfalls.
3.
Ist die Netzsicherung in Ordnung,
schließen Sie ein anderes Elektrogerät
an die Steckdose an. Arbeitet dieses
Gerät auch nicht, ist die Steckdose
defekt. Arbeitet das Gerät jedoch
ordnungsgemäß, ist wahrscheinlich Ihr
Mikrowellengerät defekt. Wenden Sie
sich in diesem Fall unbedingt an einen
Panasonic-Kundendienst.
F: Das Gerät verursacht
Fernsehstörungen. Ist das normal?
A: Beim Betrieb des Gerätes können
Fernseh- und Radiostörungen
auftreten. Es handelt sich um ähnliche
Störungen, wie sie durch kleine
Elektrogeräte wie Mixer, Staubsauger,
Haartrockner usw. verursacht werden
können. Dies bedeutet nicht, dass Ihr
Gerät defekt ist.
F: Warum strömt manchmal warme Luft
aus dem Mikrowellengerät?
A: Die erhitzten Lebensmittel erwärmen
den Garraum. Diese warme Luft wird
durch die zirkulierende Luftströmung
aus dem Gerät heraus befördert. In
dieser erwärmten Luft sind keine
Mikrowellen enthalten. Die
Lüftungsöffnungen dürfen während des
Garens in keinem Fall abgedeckt
werden.
Deutsch
F: Das Gerät akzeptiert mein Programm
nicht. Warum?
A: Das Gerät kann kein fehlerhaftes
Programm akzeptieren. Zum Beispiel
akzeptiert das Gerät nicht eine 4. Stufe.
DE
Page 84

Pflege des Mikrowellengerätes
1.
Das Gerät muss vor der Säuberung
vom Netz getrennt werden.
2.
Halten Sie stets den Garraum, die Tür
und den Türrahmen sauber. Wenn
Nahrungsmittel spritzen oder
verschüttete Flüssigkeiten an
Gerätewänden, Keramikplatte und den
Türdichtungsbereichen haften, wischen
Sie sie mit einem feuchten Tuch ab.
Scharfe Reinigungs- und Scheuermittel
sind nicht empfehlenswert. Reinigen
Sie nicht die Mikrowellenzuführung an
der rechten Seite des Garraums.
VERWENDEN SIE IN KEINEM FALL
BACKOFENREINIGUNGSMITTEL.
3.
Verwenden Sie zur Reinigung der
gläsernen Mikrowellentür keine
Scheuermittel oder scharfe Metallschaber,
da dies eine Beschädigung der
Oberäche zur Folge haben und zum
Zerspringen des Glases führen könnte.
4.
Das Gehäuse des Gerätes sollte mit
einem weichen Tuch abgewischt
werden. Achten Sie darauf, dass kein
Wasser durch die Entlüftungsschlitze
ins Geräteinnere gelangt, da das Gerät
sonst Schaden nehmen könnte.
5.
Wenn das Bedienfeld verschmutzt wird,
reinigen Sie es mit einem weichen Lappen.
Verwenden Sie keine rauen Reinigungsoder Scheuermittel auf dem Bedienfeld.
Damit es nicht zu einem unvorhergesehenen
Betrieb des Gerätes kommt, lassen Sie die
Tür des Gerätes beim Säubern des
Bedienfelds geöffnet. Drücken Sie nach dem
Reinigen auf Stoppen/Rücksetzen, um das
Displayfenster zu löschen.
6.
Während des Betriebes kann sich durch
Verdampfen von Feuchtigkeit innen oder
außen auf dem Sichtfenster des Gerätes
Kondenswasser niederschlagen und evtl.
unter der Tür abtropfen. Dieser Vorgang ist
normal und kann verstärkt bei niedrigen
Raumtemperaturen und hoher
Luftfeuchtigkeit auftreten. Die Sicherheit des
Gerätes ist dadurch nicht beeinträchtigt.
7.
Den Glasdrehteller herausnehmen und
abkühlen lassen, bevor Sie diesen in
warmem Seifenwasser oder in der
Spülmaschine reinigen.
8.
Der Rollenring und der innere Geräteboden
sollten regelmäßig gereinigt werden, um
Betriebsgeräusche zu vermeiden. Wischen
Sie die Bodenäche des Geräts einfach mit
einem milden Reinigungsmittel und heißem
Wasser ab und trocknen Sie sie mit einem
sauberen Tuch. Der Rollenring kann in
Wasser mit einem milden Spülmittel
abgewaschen werden. Bei wiederholtem
Gebrauch sammeln sich Kochdünste an,
die aber die Bodenäche und den
Rollenring in keiner Form beeinträchtigen.
Stellen Sie sicher, dass Sie den Rollenring
nach dem Herausnehmen und Reinigen
wieder korrekt einsetzen.
9.
Ein Dampfreiniger darf nicht zur
Reinigung verwendet werden.
10.
Das Mikrowellengerät darf ausschließlich
von einem qualizierten Panasonic-
Kundendienst geprüft oder repariert werden.
11.
Wird das Mikrowellengerät nicht in einem
sauberen Zustand gehalten, kann dies zu
einer Güteminderung der Oberächen
führen, was wiederum eine
Beeinträchtigung der Lebensdauer des
Geräts mit sich bringen und eventuell eine
Gefahr für den Benutzer darstellen kann.
12.
Die Entlüftungsschlitze immer sauber
halten.
Überprüfen Sie, dass die Luftabzüge an
der Ober-, Unter- und Rückseite des
Geräts nicht durch Staub oder anderes
Material verstopft werden. Wenn die
Luftabzüge verstopft sind, kann dies zu
Überhitzung führen und die
Funktionsfähigkeit des Geräts
beeinträchtigen. Wenn die
Lüftungsöffnungen verstopft sind, kann
dies zu einem Überhitzen des Geräts
führen und dessen Betriebsfähigkeit
beeinträchtigen, was eine potenzielle
Gefahrsituation darstellt.
DE
26 27
Page 85

Technische Daten
Netzspannung: 230 V, 50 Hz
Leistungsaufnahme: Maximum; 1250 W
Ausgangsleistung: 800 W (IEC-60705)
Äußere Abmessungen:
443 mm (B) x 258 mm (H) x 328 mm (T)
Garraumabmessungen:
306 mm (B) x 214 mm (H) x 308 mm (T)
Gesamt-Garraumvolumen: 20 L
Glasdrehteller-Durchmesser: 255 mm
Betriebsfrequenz: 2450 MHz
Nettogewicht: 11.5 kg
Geräusch: L
Die Angaben für Gewicht und
Abmessungen sind Annäherungswerte.
Die Angaben sind Annäherungswerte;
Änderungen ohne Vorankündigung sind
vorbehalten.
Dieses Produkt erfüllt die europäische
EMV-Norm (EMV = elektromagnetische
Verträglichkeit) für gegenseitige
Beeinussung EN 55011. Gemäß dieser
Norm handelt es sich bei diesem Produkt
um ein Gerät der Gruppe 2, Klasse B, und
es hält die vorgeschriebenen Grenzen ein.
Gruppe 2 bedeutet, dass die
Hochfrequenzenergie absichtlich in der
Form von elektromagnetischer Strahlung zu
dem Zweck erzeugt wird, Speisen zu
wärmen und zu kochen. Klasse B bedeutet,
dass dieses Produkt in normalen
Haushalten benutzt werden kann.
WA 63 dB
Informationen zur
Entsorung von Elektround ElektronikAltgeräten (private
Zur ordnungsgemäßen Behandlung,
Wiedergewinnung und Wiederverwertung
sind die Geräte bei ofziellen
Rücknahmestellen abzugeben, wo sie
kostenfrei angenommen werden.
In manchen Ländern können die Geräte
beim Kauf eines gleichwertigen
Neuprodukts auch beim Fachhändler
abgegeben werden.
Durch die ordnungsgemäße Entsorgung
dieses Produkts tragen Sie zur Einsparung
wertvoller Ressourcen bei und helfen zu
vermeiden, dass menschliche Gesundheit
und Umwelt durch unsachgemäße
Abfallentsorgung geschädigt werden.
Informationen zu Ihrer nächsten
Annahmestelle erhalten Sie von Ihrer
Stadtverwaltung.
Die unsachgemäße Abfallentsorgung kann
in Übereinstimmung mit den nationalen
Vorschriften strafrechtlich verfolgt werden.
Für gewerbliche Nutzer in der
Europäischen Union
Zur Entsorgung von Elektro- und
Elektronikgeräten wenden Sie sich bitte an
Ihren Fachhändler oder Lieferanten.
Information zur Entsorgung in
Ländern außerhalb der
Europäischen Union
Dieses Symbol ist nur innerhalb der
Europäischen Union gültig.
Wenn Sie das Gerät entsorgen möchten,
fragen Sie bitte Ihre örtliche Ortsverwaltung
oder Ihren Fachhändler, wie das Gerät
ordnungsgemäß zu entsorgen ist.
Haushalte)
oder Begleitdokumenten bedeutet, dass
Elektro- und Elektronik-Altgeräte nicht im
Haushaltsmüll entsorgt werden dürfen.
Dieses Symbol auf Gerät und/
Deutsch
DE
Page 86

Page 87

Page 88

Panasonic Corporation
Website: http://www.panasonic.com
© Panasonic Corporation 2018
PN:16170000A69507
F1218-0
Printed in P.R.C.
 Loading...