

Panasonic NNCD989S Operation Manual
COOK BOOK
Microwave / Convection Oven
NN-CD989S / NN-CD989B / NN-CD989W

- 1 -
TABLE OF CONTENTS
Cooking with your Combination Oven ..................... 2
Cookware and Utensil Guide ................................... 3
Food Characteristics/Cooking Techniques .............. 4
Special Features
Sensor Reheat ................................................... 5
Sensor Cooking ................................................ 5
Convection Cooking ........................................... 6
Defrosting Techniques........................................ 6
Inverter Turbo Defrost ........................................ 7
Appetizers ................................................................ 8
Sauces ................................................................... 10
Soups .................................................................... 11
Eggs ...................................................................... 12
Meats ..................................................................... 13
Poultry ................................................................... 19
Fish and Seafood .................................................. 24
Casseroles ............................................................. 28
Vegetables and Side Dishes .................................. 32
Pasta, Grains and Cereals..................................... 35
Desserts and Breads ............................................. 39
Pies ........................................................................ 47
Metric and Imperial measures are different. DO NOT crossover from one to another within a recipe.
POWER SELECT SETTINGS
Your microwave oven is equipped with ten power
select settings. This variety of settings offers you
flexibility in microwave cooking.
Listed on the right is the approximate percentage of
cooking power at each power setting.
© Panasonic Corporation 2010
Press Power Level % Power
once P10 (HIGH) 100%
twice P9 90%
3 times P8 80%
4 times P7 (MEDIUM-HIGH) 70%
5 times P6 (MEDIUM) 60%
6 times P5 50%
7 times P4 40%
8 times P3 (MEDIUM-LOW) 30%
9 times P2 20%
10 times P1 (LOW) 10%
A000B7V20AP
F0210-0
Printed in Japan
PRECAUTIONS TO AVOID POSSIBLE
EXPOSURE TO EXCESSIVE MICROWAVE
ENERGY:
(a) DO NOT attempt to operate this oven with
the door open since open-door operation can
result in harmful exposure to microwave energy.
It is important not to defeat or tamper with the
safety interlocks.
(b) DO NOT place any object between the oven
front face and the door, or allow soil or cleaner
residue to accumulate on sealing surfaces.
(c) DO NOT operate the oven if it is damaged.
It is particularly important that the oven door close
properly and that there is no damage to the:
(1) door (bent)
(2) hinges and latches (broken or loosened)
(3) door seals and sealing surfaces.
(d) The oven should not be adjusted or repaired
by anyone except properly qualified service
personnel.
DO NOT use this oven to heat chemicals or other non-food products. DO NOT clean this oven with any
product that is labelled as containing corrosive chemicals. The heating of corrosive chemicals in this oven
may cause radiation leaks.
- 2 -
COOKING WITH YOUR COMBINATION OVEN
Microwave
Microwaves are a form of high frequency
electromagnetic waves similar to those used by a
radio. Electricity is converted into microwave energy
by the magnetron tube. The microwaves travel from
the magnetron tube to the oven cavity where they
are reflected, transmitted or absorbed.
Bake
The convection bake oven has a heating element in
the ceiling equipped with a fan to circulate the hot
air into the oven cavity. This mode of cooking will
provide the dry heat required to produce crisp,
brown exteriors on baked and roasted products.
Temperatures range from 200 - 450˚F (100 - 230˚C).
Consult charts and recipes to determine
temperature settings and cooking times. Many of
your favourite recipes may be baked at their usual
temperature, however, times may be slightly shorter.
For convection cooking, use the Oven Rack.
Preheat with this rack on the Ceramic Tray.
Broil
Broiling is done with high heat to give foods a rich
brown appearance. The oven must be preheated on
the broil mode with the oven rack in place.
During preheating, prepare food and place on the
spatter shield of your broiler pan to be ready for
broiling.
Cooking on Combination
Combination cooking uses microwave energy in
conjunction with a heater element. It will produce
browning, maintain juiciness and reduce cooking
time. Combination cooking is ideal for roasting meats
and poultry, and for cooking casseroles and other
recipes such as pies.
There are four combination settings which
automatically regulate the oven temperature and the
microwave energy.
Combination
Setting
Oven
Temperature
Microwave
Energy
(Approx.)
1 275˚F (130˚C)
30 % power
2 300˚F (150˚C)
3 325˚F (165˚C)
4 375˚F (190˚C)
Consult the charts and recipes to determine which
combination setting to use. This is described in the
recipe method. When adapting conventional recipes
to the combination cooking mode, find a similar
recipe in the cookbook using the same quantities
and ingredients. Use the combination setting and
time in the cookbook.
When roasting, use the Chicken Pieces or Whole
Chicken or Beef-medium or Pork of Auto
Convection Button.
The combination system is used for manual
combination and time or Auto Convection Button.
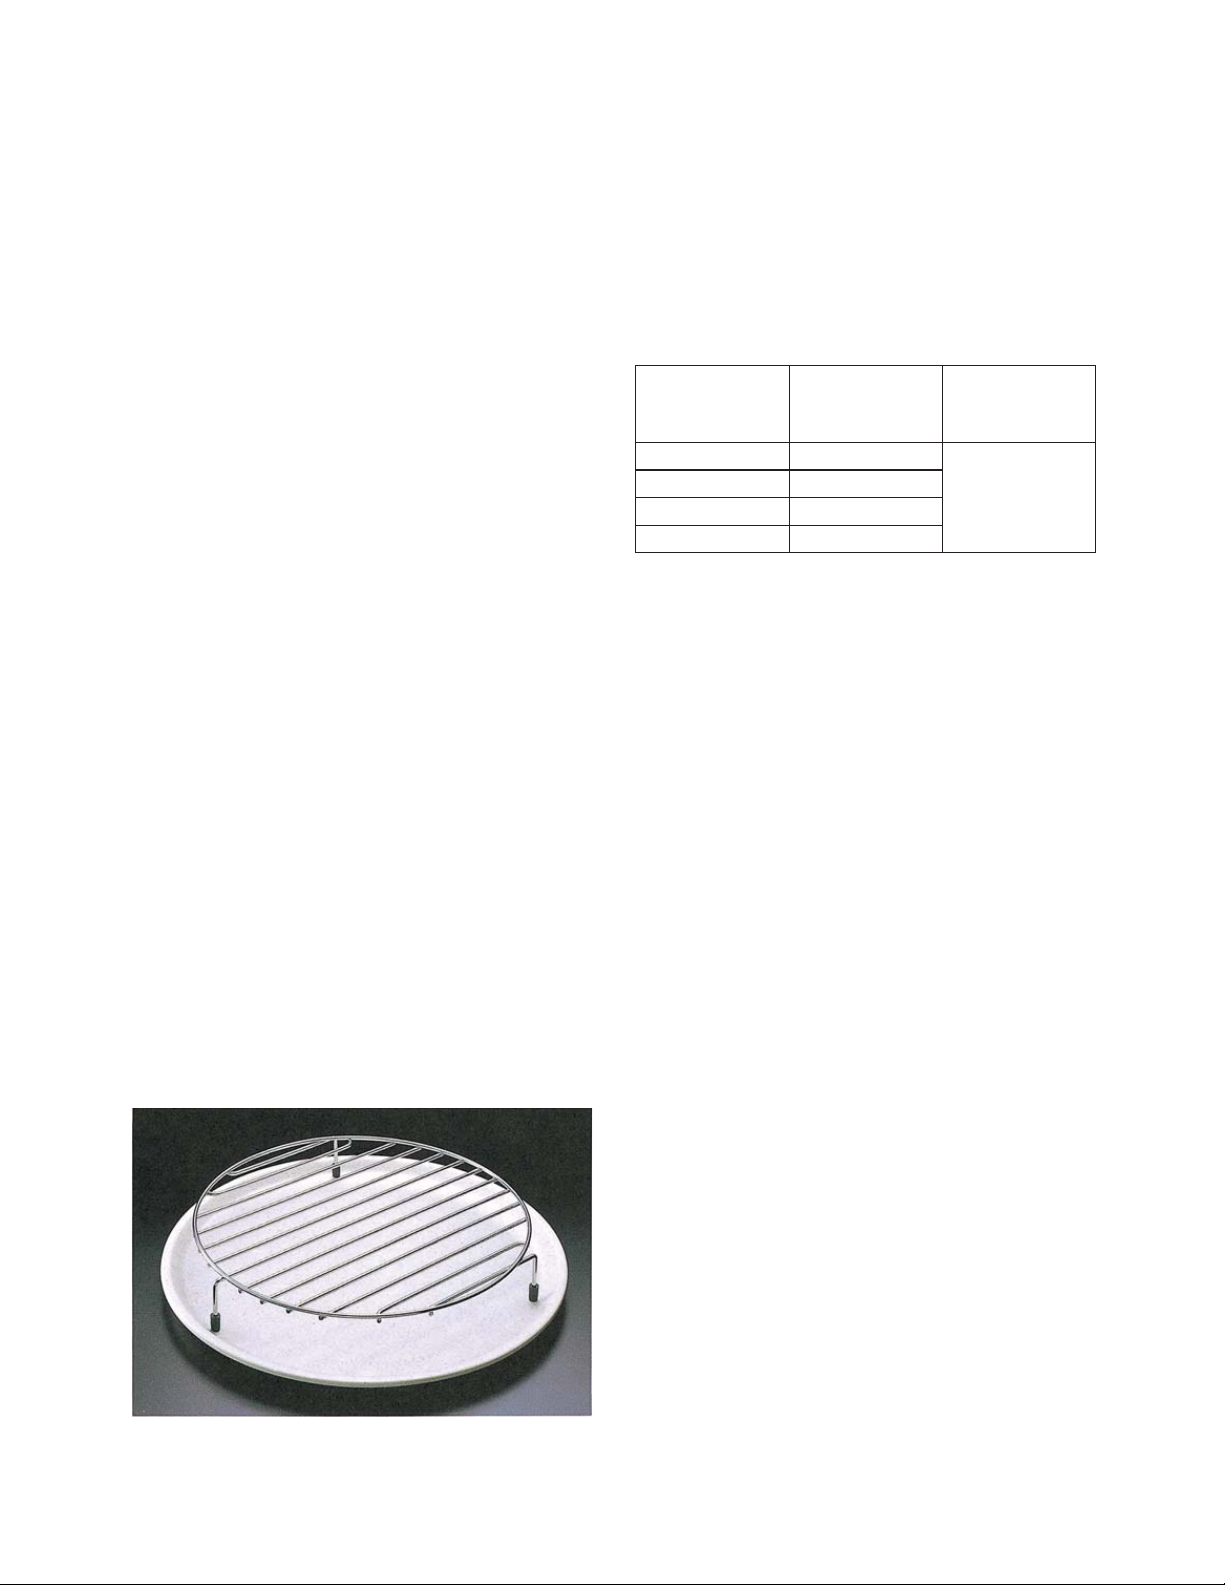
OVEN ACCESSORY
The oven comes equipped with an oven rack. Always follow specific directions given in the charts or recipes for
use of the oven rack.
Oven Rack is used for Broil and Bake and
Combination cooking.
Broil –– For Broil, oven rack is placed on the
Ceramic Tray. The oven is then preheated at BROIL.
Food is placed on your broiler pan. Broiler pan is
then placed on the oven rack after preheat time.
You can purchase broiler pans from your local stores.
Metal or teflon coated pans are available. The broiler
pan may be sprayed with a non-stick cooking product
to aid in clean-up. Program the oven according to the
chart or recipe directions.
DO NOT use a broiler pan for microwave cooking.
Bake –– The oven rack is placed directly on the
Ceramic Tray. Preheat the oven according to the
temperature recommended in the chart or recipe.
Food in cooking container is then placed on the oven
rack.

- 3 -
COOKWARE AND UTENSIL GUIDE
Item Microwave Bake Combination Broil
Aluminum Foil for shielding yes for shielding yes
Broiler Pan/Spatter Shield no no no yes
Browning Dish yes no no no
Dinnerware/Cookware
Oven/Microwave Safe yes yes yes no
Non-Oven Safe
use container test
no no no
Frozen Dinner Tray
Metal no yes no yes
Plastic yes follow manufacturers’
directions
no
Paperboard yes no
Glass-Ceramic yes yes yes yes
Metal Bakeware no yes no yes
Metal Twist Ties no yes no no
Oven Cooking Bags yes yes yes no
Ovensafe Glassware yes yes yes no
Paper Bags no no no no
Paper Towels/Napkins/Plates
with supervision
no no no
Parchment/Cooking Paper yes yes yes no
Plastic Cookware:
Microwave Safe (labelled) yes check maximum temperature no
Plastic Wrap yes
(labelled)
no no no
Styrofoam Cups short term no no no
Thermometers
Microwave Safe yes no no no
Conventional no yes no yes
Wax Paper yes no no no
CONTAINER TEST
TO TEST A CONTAINER FOR SAFE MICROWAVE OVEN USE:
Fill a microwave safe cup with cool water and place it in the microwave oven alongside the empty container to
be tested; heat one (1) minute at P10 (HIGH). If the container is microwave oven-safe (transparent to
microwave energy), the empty container should remain comfortably cool and the water should be hot. If the
container is hot, it has absorbed some microwave energy and should NOT be used. This test cannot be used
for plastic containers.

- 4 -
FOOD CHARACTERISTICS
AND THEIR EFFECTS ON
MICROWAVE COOKING
Bone and Fat
Both bone and fat affect cooking. Bones may cause
irregular cooking. Meat next to the tips of bones may
be overcooked while meat positioned under a large
bone, such as a ham bone, may be undercooked.
Large amounts of fat absorb microwave energy and
the meat next to these areas may be overcooked.
Density
Porous, airy foods such as breads, cakes or rolls
take less time to cook than heavy, dense foods such
as potatoes and roasts.
Quantity
Two potatoes take longer to cook than one potato.
As the quantity of the food decreases so does the
cooking time. Overcooking will cause the moisture
content in the food to decrease and a fire could
result. Never leave microwave unattended while in
use.
Shape
Uniform sizes heat more evenly. The thin end of a
drumstick will be cooked more quickly than the
meaty end. To compensate for irregular shapes,
place thin parts toward the centre of the dish and
thick pieces toward the edge.
Size
Small or thin pieces cook more quickly than thick
pieces.
Starting Temperature
Foods that are room temperature take less time to
cook than if they are at refrigerator temperature or
frozen.
COOKING TECHNIQUES
Arrangement: Individual foods, such as baked
potatoes, will be cooked more evenly if placed in the
oven equal distances apart. When possible, arrange
foods in a circular pattern. Foods should not be
overlapped.
Browning: Foods will not have the same brown
appearance as conventionally cooked foods. Meats
and poultry may be coated with browning sauce,
Worcestershire sauce, barbecue sauce or shake-on
browning sauce. To use, combine browning sauce
with melted butter or margarine, brush on before
cooking.
Covering: As with conventional cooking, moisture
evaporates during microwave cooking. Casserole lids
or plastic wrap are used for a tighter seal. When
using plastic wrap, vent the plastic wrap by folding
back part of the plastic wrap from the edge of the
dish to allow steam to escape. Loosen or remove
plastic wrap as recipe directs for stand time. When
removing plastic wrap covers, as well as any glass
lids, be careful to remove them facing away from you
to avoid steam burns. Various degrees of moisture
retention are also obtained by using wax paper or
paper towels. However, unless specified, a recipe is
cooked uncovered.
Piercing: Foods with skins or membranes must be
pierced, scored or have a strip of skin peeled before
cooking to allow steam to escape. Pierce clams,
oysters, chicken livers, chicken wing, whole potatoes
and whole vegetables. Whole apples or new potatoes
should have a 1-inch (2.5 cm) strip of skin peeled
before cooking. Score sausages and frankfurters.
DO NOT Cook/Reheat whole eggs with or without
the shell. Steam built up in whole eggs may cause
them to explode, and possibly damage the oven or
cause injury.
Reheating SLICED hard-boiled eggs and cooking
SCRAMBLED eggs is safe.
Shielding: Thin areas of meat and poultry cook
more quickly than meaty portions. To prevent
overcooking, these thin areas can be shielded with
strips of aluminum foil. Wooden toothpicks may be
used to hold the foil in place.
Timing: A range in cooking time is given in the
charts or recipe. The time range compensates for the
uncontrollable differences in food shapes, starting
temperature and regional preferences. Always cook
food for the minimum cooking time given in the
recipe and check for doneness. If the food is
undercooked, continue cooking. It is easier to add
time. Once the food is overcooked, nothing can be
done.
Turning: It is not possible to stir some foods to
redistribute the heat. At times microwave energy will
concentrate in one area of a food. To help ensure
even cooking, some foods need to be turned over
once, halfway through cooking.
Stirring: Stirring is usually necessary during
microwave cooking. We have noted when stirring is
helpful, using the words once, twice, frequently or
occasionally to describe the amount of stirring
necessary.
Rearranging: Rearrange small items such as
chicken pieces, shrimp, or hamburger patties by
moving pieces from the edge to the center and
pieces from the center to the edge of the dish.
Stand Time: Most foods will continue to be cooked
by conduction after microwave cooking. In meat
cookery, the internal temperature will rise 5 - 15˚F
(3 - 8˚C) if allowed to stand, tented with foil, for
10 - 15 minutes. Casseroles and vegetables need a
shorter stand time, but it is necessary to allow foods
to complete cooking in the center without
overcooking on the edges.
Testing for Doneness: The same tests for
doneness used in conventional cooking may be used
for microwave cooking. Meat is done when forktender or splits at fibers. Chicken is done when juices
are clear yellow and drumstick moves freely. Fish is
done when it flakes and is opaque.

- 5 -
SPECIAL FEATURES
Your oven can be set by Micro Power, Convection, Combination or Inverter Turbo Defrost with desired time.
These methods are duplicated by the following preprogrammed special features.
Look for the symbol
A
to indicate recipes and charts with Sensor Cooking/Convection Cooking directions. Use
these recipes and charts as a basis for determining which of your own similar conventional recipes may be
converted to the Sensor Cooking/Convection Cooking method of cooking.
Sensor Reheat
Sensor Reheat is a quick and easy way to reheat
refrigerated foods. Simply press the Sensor Reheat
Button. There is no need to select cooking time or
power.
Use a dish to correspond to the quantity of food
being heated.
Sensor Cooking
The Sensor Cooking system works by detecting a
build up of steam on the humidity sensor. As food is
cooking in a microwave, steam is produced. When
food is covered and vented, the steam will escape
from the vent. The steam is detected by the humidity
sensor and then the oven automatically calculates
the remaining cooking time.
When the program is selected, it will be shown in the
Display Window.
While the program is in use, opening the door may
cause inaccurate cooking results. Once the steam is
detected, the remaining cooking time immediately
appears in the Display Window and begins to countdown. At this time, the oven door may be opened to stir
turn or add foods.
Potatoes, Vegetables
For root vegetables such as potatoes, carrots and
dense vegetables such as squash and turnips, press
the Sensor Cook Button once. Potatoes and whole
vegetables should be pierced several times before
cooking and placed on a microwave-safe dish.
For other fresh vegetables, press the
Sensor Cook
Button
twice. For canned vegetables, press the
Sensor Cook Button
three times. For frozen
vegetables, press the Sensor Cook Button four times.
Rice, Pasta
There are two categories for rice and one for pasta.
Press the Sensor Cook Button five times is for
White Rice.
Press the Sensor Cook Button six times is for
Brown Rice.
Press the Sensor Cook Button seven times is for
Pasta.
When cooking Rice or Pasta, add rice or pasta to
hot tap water, salt and butter according to package
directions.
Sensor Cooking Hints
For proper cooking results for the Sensor cooking
categories, use the directions given in the recipes
and charts. Lids should fit properly.
Cover dishes without matching lids loosely, but
completely, with plastic wrap except when using
Casserole. Use non extendable plastic wrap for
microwave ovens. Large dishes need two
overlapping pieces of plastic wrap. Securely mold
wrap around sides of dish. Foods with bones should
not be pierced through the wrap. Steam builds up
under plastic wrap and lids, so carefully remove
them away from you to avoid steam burns.
Shield, if necessary, at the beginning of the cooking
time.
DO NOT open the oven door longer than one minute
when the category setting is in the display window.
Loosen or remove the plastic wrap for the stand time
or according to the recipe directions.
Since this sensor detects a sudden burst of steam
from the dish, the dish must be covered with a
matching lid or loosely, but completely, with a
microwaveable plastic wrap. When heating
commercially prepared foods, check the cookware
guide to determine if the container is suitable or
follow manufacturer’s directions.
Casserole 1, Casserole 2
This category is designed to cook casseroles
automatically.
Press Sensor Cook Button eight times for
Casserole 1.
Press Sensor Cook Button nine times for
Casserole 2.
When cooking Casserole, choose cooking dishes
that are both microwave and heat safe, as the last
stage of the program uses the Combination feature.
There are two sub-categories. Casserole 1 is for
foods such as gratin and lasagna. Casserole 2 is for
foods such as stew.
- 6 -
Convection Cooking
Beef, pork and poultry
To use, select the category for the roast and then
enter the weight.
Once the weight is programmed, the cooking time
will appear in the display window.
Press Auto Convection Button once for Chicken
Pieces.
Press Auto Convection Button twice for whole
Chicken.
Press Auto Convection Button three times for Beef-
medium.
Press Auto Convection Button four times for Pork.
Place roasts fat-side down and whole poultry breastside down on a microwaveable, heat-safe rack set in
a microwaveable, heat-safe shallow dish.
Turn the meat and poultry over halfway through the
cook time. The meat and poultry chapters describe
special procedures to follow.
Chicken Pieces
Up to 2 lb (1 kg)
Whole Chicken
Up to 6 lb (3 kg)
Beef - medium
Up to 4 lb (2 kg)
Pork
Up to 4 lb (2 kg)
Cake
Oven temperature and time are automatically
programmed when using this feature to bake butter
cakes, quick bread loaves, chiffon, sponge and angel
food cakes. Use cake mixes for your favorite recipes,
or choose a recipe from the dessert section of this
cookbook.
For cakes that will be conventionally baked in less
than 28 minutes, press Auto Convection Button
five times.
The display will show Cake 1.
For cakes that will be conventionally baked
in 28 minutes to 55 minutes, press Auto Convection
Button six times.
The display will show Cake 2.
For cakes that will be conventionally baked
in 55 minutes or more, press Auto Convection
Button seven times.
The display will show Cake 3.
Always use metal pans of standard shapes, such as
a square, round, oblong or a shallow tube pan.
Cook one pan at a time.
Place the Oven Rack on the Ceramic Tray. Place the
cake on the Oven Rack and press Start Button.
The cake categories are not suitable for fudge cakes,
brownies or traditional fruit cake recipes.
Pie
Oven temperature and time are automatically
programmed to bake double-crust pies.
There are three sub-categories for Pie.
Press Auto Convection Button eight times for
double-crust pies with fresh fruit filling. The display
will show Fresh Pie.
Press Auto Convection Button nine times for
double-crusted frozen pies. The display will show
Frozen Pie.
Press Auto Convection Button ten times for baking
double-crust pies made with pre-cooked or canned
pie filling. The display will show Pre Cooked Pie.
Always use a metal pie pan and bake one at a time.
Prepare pies so that they are less than 2-inches
(5 cm) high. Refrigerated or frozen pie crusts are not
recommended.
Frozen pies must be placed on a small cookie sheet
on the Oven Rack for best results.
Place the Oven Rack on the Ceramic Tray. Place the
pie on the Oven Rack and press Start Button.
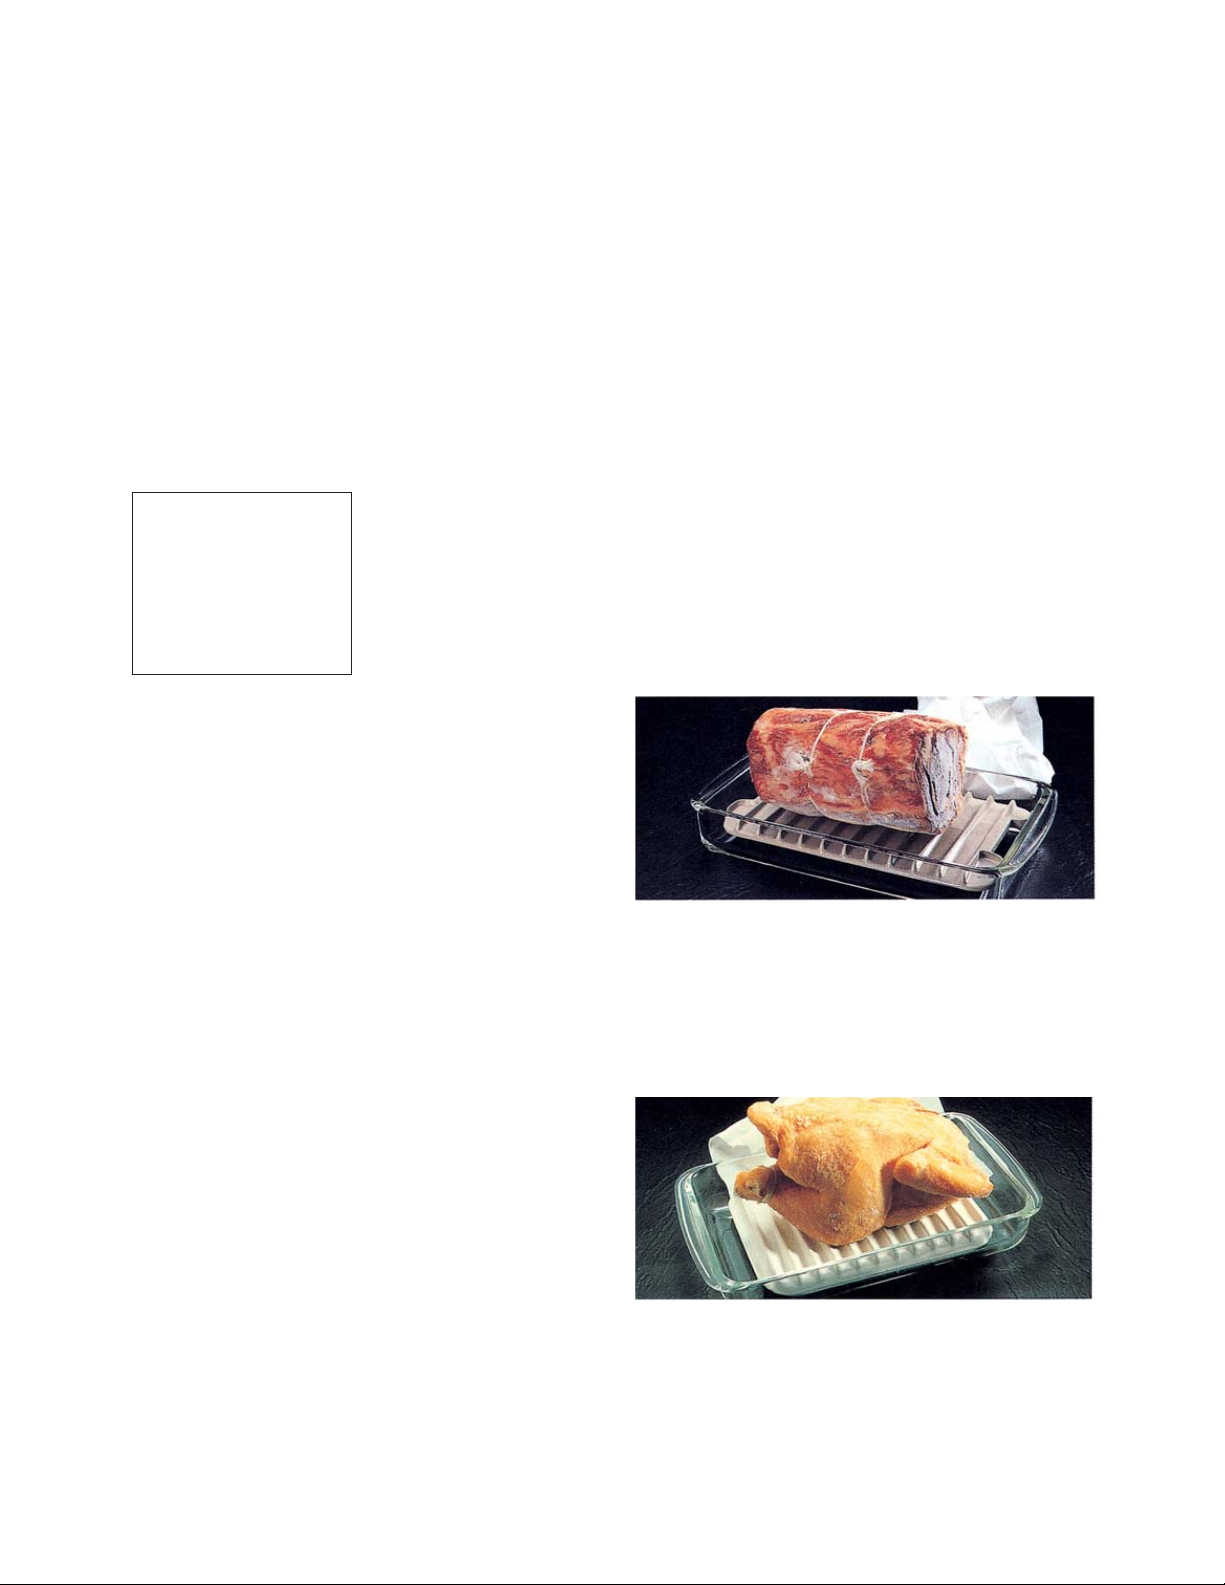
Defrosting Techniques
Remove wrapper. Otherwise, the wrap will hold
steam and juice close to the food, which can cause
the outer surface of the food to cook.
Remove ground meat from its tray.
Place meat in an appropriate dish.
Place small items, such as chops, chicken pieces,
shrimp, scallops or fish on a microwave roasting rack
in a dish.
Place roast fat-side down and whole poultry
breast-side down on a microwave roasting rack in a
dish. The rack helps prevent the food from sitting in
its own juice. The juice will get hot during defrosting
and the bottom will begin to cook.

- 7 -
Inverter Turbo Defrost
Turbo Defrost can be used to defrost many cuts of
meat, poultry and fish by weight. To use, simply
press the Inverter Turbo Defrost Button and enter
the weight of the food.
Items that can be defrosted, are meat (chops,
ground or roasts), poultry (whole or pieces) and fish
or seafood. Place meat on a microwave roasting rack
in an appropriate sized dish. Remove ground meat
from its tray.
Place roast fat-side down and whole poultry breastside down on a microwave roasting rack in an oblong
dish. The rack helps prevent the food from sitting in
its own juice. The juice will get hot during defrosting
and if the food is sitting in the juice, the bottom will
cook. Place small items, such as chops, chicken
pieces, shrimp, scallops and fish on a microwave
roasting rack set in an oblong dish. Break apart small
pieces, turn over roasts and remove thawed portions
of ground meat. Should shielding be required, do it
when the two-beep signal is heard. The oven will not
stop operating and some items may not require
attention.
Use defrost by time for food that is not recommended
for Turbo Defrost.
Follow the times and information given in the meat,
poultry, fish and seafood sections. Disinfect all
surfaces that have come in contact with thawed
meat, fish and poultry.
To prevent overdefrosting, thin areas or edges can
be shielded with strips of aluminum foil. However,
when using foil, allow at least 1-inch (2.5 cm) of
space between foil and interior oven walls. Also, if
using two or more small pieces of foil to shield, place
at least 1-inch (2.5 cm) apart from each other. This is
to avoid arcing.
The oven beeps during the defrosting cycle to signal
that the food needs to be turned or rearranged.
Follow the directions given in the chart for the best
results.
FOOD AT BEEPS AFTER DEFROSTING
MEAT
Chops Separate/Turn Over/Shield Stand 5 min.
Frankfurters/
Sausage
Turn Over/Separate/Remove Defrosted Pieces Stand 2 min.
Ground meat
Turn Over/Remove Defrosted Pieces/Turn Over/Break Apart/
Remove Defrosted Pieces
Stand 10 min.
Hamburger Patties
Turn Over/Separate/Turn Over/Remove Defrosted Pieces Stand 5 min.
Roast Shield/Turn Over/Shield
Stand 30 min. in refrigerator.
Ribs Shield/Turn Over/Shield/Remove Defrosted Pieces Stand 10 min.
Steak Shield/Turn Over/Shield Stand 5 min.
Stew Turn Over/Separate/Remove Defrosted Pieces Stand 5 min.
POULTRY
Split Cornish Hens Turn Over/Shield Stand 5 min.
Whole Cornish
Hens
Shield/Turn Over/Shield
Stand 10 min.
Rinse under cold water.
Chicken Pieces Turn Over/Separate/Rearrange/Remove Defrosted Pieces Stand 5 min.
Whole Chicken Turn Over/Shield/Turn Over/Shield Stand 20 min.
Rinse under cold water.
Turkey Breast* Turn Over/Shield
Stand 30 min. in refrigerator.
Rinse under cold water.
Turkey* Turn Over/Shield
Stand 30 min. in refrigerator.
Rinse under cold water.
SEAFOOD
Sea scallops Separate/Remove Defrosted Pieces/Turn Over/Separate/
Remove Defrosted Pieces
Stand 5 min.
Rinse under cold water.
Shrimp Separate/Remove Defrosted Pieces/Turn Over/Separate/
Remove Defrosted Pieces
Stand 5 min.
Rinse under cold water.
Fish, individual
fillets
Turn Over/Shield/Separate Stand 5 min.
Rinse under cold water.
Whole Fish Turn Over/Shield Tail Stand 5 min.
NOTE:
If necessary, shield thin ends of meat and poultry with aluminum foil.
* The recommended maximum weight for meat is 4 lbs (2 kg), 3 lbs (1.5 kg) for seafood and 6 lbs (3 kg) for
poultry.

- 8 -
ADAPTING RECIPES
Many of your favorite appetizer recipes can be
cooked easily in your Dimension 4 Oven.
Bake temperatures may need to be 25˚F (10˚C)
lower than conventional temperatures. Prepare
appetizer according to the recipe directions. Place
the Oven Rack on the Ceramic Tray. Place a dish on
the Oven Rack. Check doneness at the minimum
cooking time.
Combination 3 and 4 can both be used to cook
appetizers. Prepare appetizer according to the
recipe directions. Find a similar recipe in this
cookbook and use it as a guideline. Generally,
conventional recipes that require a temperature of
350˚F (180˚C) or 375˚F (190˚C) can be cooked on
Combination 3, and recipes which require a
temperature of 400˚F (200˚C) or 425˚F (220˚C) can
be cooked on Combination 4.
Use a microwaveable and heat-safe dish. Place the
dish in the oven. Appetizers that conventionally
cook in about 15 minutes should be checked for
doneness after cooking 10 - 12 minutes.
Microwave appetizers can be assembled and
refrigerated until needed. Arrange in a circular
pattern on a microwave-safe serving dish.
To keep breads and crackers crisp, line dish with a
paper towel.
APPETIZERS
SHRIMP OPEN-FACE SANDWICHES
1⁄2 lb cooked shrimp, 250 g
chopped
1 cup fresh bread crumbs 250 ml
1
⁄3 cup finely chopped celery 80 ml
2 tbsp minced onion 30 ml
2 tbsp mayonnaise 30 ml
2 tbsp chopped parsley 30 ml
1 tbsp chili sauce 15 ml
1 tbsp lemon juice 15 ml
1 egg, beaten 1
1
⁄2 tsp salt 2 ml
dash cayenne pepper
8 slices of toasted bread 8
of your choice
3
⁄4 cup grated Swiss cheese 180 ml
paprika
To Cook by Combination: Preheat at 375˚F
(190˚C). In a medium bowl, combine shrimp, bread
crumbs, celery, onion, mayonnaise, parsley, chili
sauce, lemon juice, egg, salt and cayenne pepper.
Mix well. Divide mixture into eight portions and
spread on toast. Top with cheese and sprinkle with
paprika. Arrange 4 sandwiches on a microwave,
heat-safe plate. Reset oven to Combination 4. Cook
5 - 7 minutes. Repeat with remaining sandwiches.
Makes: 4 servings
STUFFED MUSHROOMS
18 large mushrooms 18
1
⁄4 cup bread crumbs 60 ml
1
⁄4 cup ground walnuts 60 ml
1
⁄4 - 1⁄2 60 -
cup grated Edam cheese 125 ml
1 tsp Worcestershire sauce 5 ml
1
⁄4 tsp oregano 1 ml
pepper to taste
2 tbsp onion, minced 30 ml
Remove stems from mushrooms. Chop enough
stems to equal
1
⁄2 cup (125 ml). Combine with
remaining ingredients and stuff each mushroom cap.
To Cook by Combination: Preheat at 375˚F
(190˚C). Arrange mushrooms on a heat-safe dish.
Reset oven to Combination 4. Cook 5 - 7 minutes.
To Microwave: Arrange mushrooms on a dish. Cook
at P6 5 - 8 minutes, or until mushrooms are tender.
Makes: 18 appetizers

- 9 -
APPETIZERS
BACON-WRAPPED SCALLOPS
10-12 slices bacon 10-12
24 small scallops 24
To Broil: Place oven rack on Ceramic Tray. Preheat
on Broil. Cut bacon slices in half and wrap around
scallops. Secure with a wooden tooth pick. Evenly
space on spatter shield. Place broiler pan on rack.
Cook on Broil 10 - 12 minutes. Turn and continue to
broil until browned.
To Microwave: Cut bacon slices in half. Place on
bacon rack or paper towel and cover with paper
towel. Partially cook at P7 4 - 6 minutes. Wrap bacon
around scallops and secure with a wooden tooth
pick. Arrange half on a microwave-safe plate. Cover
with a paper towel. Cook at P4 4 - 6 minutes. Repeat
with remaining hors d’œuvres. Serve hot.
Makes: 24 appetizers
Variation:
Fresh shelled oysters may be substituted for
scallops.
CHICKEN TERIYAKI
2 lb chicken wings, cut apart 1 kg
8 oz can of chunk 240 g
pineapple
1 clove garlic, finely 1
chopped
1
⁄4 cup soy sauce 60 ml
2 tbsp packed brown sugar 30 ml
1
⁄2 tsp salt 2 ml
1
⁄4 tsp ginger 1 ml
Arrange chicken in an 8" (20 cm) square dish with
meatier portions toward edge of dish. In a small
bowl, combine remaining ingredients; stir well. Pour
sauce over chicken.
To Bake: Place oven rack on Ceramic Tray. Preheat
at 400˚F (200˚C). Bake at 400˚F (200˚C)
35 - 45 minutes. Stir once.
To Microwave: Cover with wax paper. Cook at
P7 12 - 14 minutes, or until chicken is tender.
Rearrange chicken halfway through cooking.
Serve with sauce.
Makes: 10 servings
BRIE IN PASTRY
1 sheet of frozen puff 1
pastry [half of a 17
1
⁄4 oz
(518 g) package]
1 round of Brie cheese 1
[14 - 18 oz (420 - 540 g)]
water
1 egg, beaten with 1 tbsp 1
(15 ml) water, optional
To Bake: Place oven rack on Ceramic Tray. Preheat
oven at 375˚F (190˚C). Thaw pastry
20 minutes, then unfold. Roll into a 12" (31 cm)
square. Cut 1" (2.5 cm) strip from each side of
square. Roll 3 of the strips to 18" (45 cm) length and
braid or twist to make 1 strip. If desired, remove rind
from top of Brie. Place Brie, top down, in center of
square of dough. Wrap dough over cheese,
completely enclosing cheese. Moisten edges of
dough with water and seal well. Place sealed-side
down on cookie sheet. Moisten bottom side of dough
and gently press braid around side; press ends
together to seal. Use remaining strip of dough to
make decorative cut-outs for top. If desired, brush
egg mixture over dough. Place cookie sheet on oven
rack. Bake at 375˚F (190˚C), 32 - 35 minutes, or until
pastry is puffed and lightly browned. Let stand
20 minutes before serving. Serve with crackers.
COCKTAIL MEATBALLS
A
1⁄2 lb ground beef 250 g
1
⁄4 cup dry bread crumbs 60 ml
1 egg 1
2 tbsp green onion, finely 30 ml
chopped
1 garlic clove, chopped 1
1
⁄2 tsp salt 2 ml
1
⁄2 tsp Italian seasoning 2 ml
1
⁄4 tsp basil 1 ml
dash of pepper
1
⁄2 cup grape jelly 125 ml
1
⁄2 cup chili sauce 125 ml
1 tbsp prepared mustard 15 ml
In a medium bowl, combine ground beef, bread
crumbs, egg, onion, garlic and seasonings. Mix
lightly. Shape into 25 meatballs.
In a
1
⁄2-quart (0.5 L) casserole dish, combine jelly,
chili sauce and mustard. Add meatballs and coat
with sauce. Cover.
To Cook by Sensor Cooking: Press Sensor Cook
Button eight times, then Start.
To Microwave: Cook at P6 6 minutes, then at P4
9 minutes.
Serve with sauce.
Makes: 25 meatballs

- 10 -
CRANBERRY SAUCE
1 lb fresh cranberries 500 g
1 cup sugar 250 ml
grated rind of 1 orange
1
⁄3 cup orange juice 80 ml
To Microwave: Combine all ingredients in a large
bowl. Cook at P7 4 - 5 minutes, or until berries are
soft. If desired, mash berries. Serve cold.
Makes: 3 servings
BASIC WHITE SAUCE
2 tbsp butter or margarine, 30 ml
melted
2 tbsp flour 30 ml
1
⁄4 tsp salt, optional 1 ml
dash of white pepper,
optional
1 cup milk 250 ml
To Microwave: In a 4-cup (1 L) bowl, combine
melted butter, flour, salt and pepper. Gradually add
milk; stir until smooth. Cook at P6 4 - 5 minutes, or
until sauce is thickened. Stir occasionally.
Makes: 1 cup (250 ml)
Variations:
Cheese Sauce: Stir in
1
⁄2 - 3⁄4 cup (125 - 180 ml)
shredded cheese. Cook at P4 1 minute, if necessary,
to melt cheese completely.
Velouté Sauce: Use chicken broth in place of half of
the milk.
Cream Soup Base: Add 1 cup (250 ml) chicken
broth, 1 cup (250 ml) puréed vegetables and
seasonings.
CARAMEL SAUCE
1 cup water 250 ml
1
⁄2 cup brown sugar 125 ml
2 tbsp cornstarch 30 ml
1 tbsp butter 15 ml
1 tsp salt 5 ml
1 tsp vanilla extract 5 ml
To Microwave: Combine all of the ingredients in a
large bowl. Cook at P7 3 - 5 minutes, stirring twice.
Should be thick and translucent.
Makes: 1 cup (250 ml)
SAUCES
HOLLANDAISE SAUCE
1⁄2 cup butter or margarine 125 ml
1
⁄4 cup lemon juice 60 ml
4 egg yolks 4
salt and pepper to
taste
To Microwave: In a medium bowl or cup, melt butter
at P7 50 - 60 seconds. Combine lemon juice with
egg yolks. Vigorously stir into butter with a fork or
whisk. Cook at P4 50 - 60 seconds, stirring several
times. Season to taste. May be reheated at P4
30 - 40 seconds, stirring twice.
Makes:
3
⁄4 cup (180 ml)
SPAGHETTI SAUCE
2 tbsp oil 30 ml
3
⁄4 cup chopped onion 180 ml
2 cloves garlic, finely 2
chopped
1 can of whole tomatoes, 1
(28 oz) chopped (840 g)
1 can of tomato paste 1
(
2
⁄3 cup) (165 ml)
1
⁄2 cup water 125 ml
1 bay leaf 1
1
⁄2 tsp salt 2 ml
1
⁄4 tsp basil 1 ml
1
⁄4 tsp oregano 1 ml
To Microwave: In a 2-quart (2 L) dish, combine oil,
onion and garlic. Cook at P7 1
1
⁄2 - 2 minutes. Add
remaining ingredients. Cook, covered with wax
paper, at P7 6 - 7 minutes and at P1 1 hour; stir
occasionally. Remove bay leaf before serving.
Makes: 6 cups (1.5 L)
GRAVY
1 - 2 15 tbsp butter or margarine 30 ml
2 tbsp flour 30 ml
salt and pepper to
taste
few drops of browning
sauce, optional
1 cup roast drippings* 250 ml
To Microwave: Heat butter in a small glass bowl at
P7 30 - 45 seconds, or until melted. Stir in flour, salt,
pepper and browning sauce. Gradually add
drippings. Stir until smooth. Cook at P7
2
1
⁄2 - 4 minutes, or until gravy is thickened; stir twice.
Makes: 1 cup (250 ml)
* If necessary, add broth, milk or water to roast
drippings to equal 1 cup (250 ml). If using milk,
cook at P4 3 - 5 minutes.

- 11 -
SOUPS
CHICKEN SOUP
2 - 3 1 lb chicken parts 1.5 kg
8 cups boiling water 2 L
3 celery stalks, cut-up 3
2 carrots, diced 2
1 onion 1
2 bay leaves 2
1 tsp peppercorns or pepper 5 ml
salt to taste
To Microwave: Put all ingredients in a 4-quart (4 L)
casserole. Cover with wax paper or a lid. Cook at P7
20 minutes and at P3 2 - 3 hours, (more liquid may
be added during cooking if required) or until chicken
is tender. Remove bay leaves, peppercorns and
onion before serving. Cut chicken off bone and return
to broth.
Makes: 10 cups (2.5 L)
Variations:
Beef Soup: Substitute beef bones and stewing beef
for chicken and cook at least 3 hours.
CREAM OF BROCCOLI SOUP
6 tbsp butter or margarine 90 ml
1 tbsp finely chopped onion 15 ml
1
⁄3 cup flour 80 ml
2 cups milk 500 ml
1 cup chicken broth 250 ml
3
⁄4 tsp salt 3 ml
dash pepper
dash nutmeg, optional
10 oz package frozen chopped 300 g
broccoli, defrosted
To Microwave: Combine butter and onion in a
2-quart (2 L) casserole. Cook at P7 1
1
⁄2 - 2 minutes,
blend in flour. Gradually add milk, broth, salt, pepper
and nutmeg, stir until smooth. Cook at P4 7 - 9
minutes, or until soup is slightly thickened, stir
occasionally. Add broccoli and purée in food
processor or blender. Return to casserole. Cook at
P4 3 - 4 minutes, stir once.
Makes: 4 servings
Variations:
Cream of Mushroom Soup: follow above
procedure. Substitute 1 cup (250 ml) sliced,cooked
mushrooms for broccoli.
Cream of Spinach or Asparagus Soup: follow
above procedure. Substitute 1 package 10 oz
(300 g) frozen spinach or asparagus, for broccoli.
Cream of Chicken Soup: follow above procedure.
With butter and onion, cook
1
⁄4 lb (125 g) chicken
meat, diced, 2
1
⁄2 - 3 minutes, stir once. Use 2 cups
(500 ml) of chicken broth and 1 cup (250 ml) milk,
omit broccoli.
POTATO SOUP
A
2 potatoes, peeled 2
and diced
2 green onions, sliced 2
1 cup chicken stock 250 ml
1
⁄2 tsp salt 2 ml
1
⁄4 tsp pepper 1 ml
2 tbsp chopped parsley 30 ml
1 cup milk 250 ml
Combine potatoes, onions, chicken stock, salt and
pepper in a 2-quart (2 L) casserole. Cover with wax
paper.
To Cook by Sensor Cooking: Press Sensor Cook
Button once, then Start.
To Microwave: Cook at P7 3 minutes, then at P4
10 - 12 minutes, or until potatoes are tender.
To Complete: Purée potato mixture in batches. Stir
in parsley and milk, heat at P6 2 minutes, or until hot.
Makes: 4 servings
Variations:
s#OOKWITHCHOPPEDLEEKSINSTEADOFONIONS
s3ERVEWITH
1
⁄4 cup (60 ml) grated Blue or Cheddar
cheese.
s3ERVEWITHDICEDCOOKEDCHICKENHAMORBACON
PUMPKIN SOUP
4 cups cubed pumpkin or 1 L
squash
4 cups chicken broth, divided 1 L
1
⁄2 cup chopped potato 125 ml
1 leek, sliced 1
1 small onion, minced 1
2
tbsp chopped parsley 30 ml
1 tsp salt 5 ml
1
⁄2 tsp nutmeg 2 ml
1 cup milk, optional 250 ml
To Microwave: Combine all ingredients and
1 cup (250 ml) broth in a 2-quart (2 L) casserole.
Cover and cook at P7 10 - 15 minutes, or until
potatoes are soft. Purée the mixture in batches.
Return to a dish with remaining chicken broth and
heat at P7 10 - 12 minutes, or until hot. Add milk if
desired.
Makes: 8 cups (2 L)

- 12 -
SCRAMBLED EGGS
For each egg, add 1 tbsp (15 ml) milk, water or
tomato juice and a dash of salt. Beat eggs. Pour into
a greased bowl. Cook eggs according to the chart.
Stir two or three times during cooking.
EGGS
COUNTRY BREAKFAST
2 medium potatoes 2
1
⁄4 cup butter or margarine 60 ml
1
⁄4 cup chopped green pepper 60 ml
1
⁄4 cup chopped onion 60 ml
4 eggs 4
1
⁄2 cup milk 125 ml
1
⁄2 tsp salt 2 ml
1
⁄8 tsp pepper 0.5 ml
2 slices processed 2
cheese, halved,
optional
To Microwave: Cook potatoes according to
directions on page 32. Let stand 5 minutes; peel and
slice. Meanwhile, in an 8" (20 cm) round dish,
combine butter, green pepper and onion. Cook at P7
3 - 4 minutes, or until vegetables are tender; add
sliced potatoes. Beat eggs, milk, salt and pepper
together; stir into potatoes mixture. Cook, covered
with plastic wrap, at P4 5 - 6 minutes, or until eggs
are set; stir twice. Top with cheese. Let stand,
covered,
5 minutes before serving.
Makes: 4 servings
BASIC OMELETTE
1 tbsp butter or margarine 15 ml
2 eggs 2
2 tbsp milk 30 ml
1
⁄8 tsp salt 0.5 ml
dash pepper
To Microwave: Heat butter in a 9" (23 cm) pie plate,
at P7 30 seconds, or until melted, turn plate to coat
bottom with butter. Meanwhile, beat remaining
ingredients together; Pour into pie plate. Cook,
covered loosely, but completely with plastic wrap or a
lid, at P4 2
1
⁄4 - 31⁄4 minutes, or until omelette is almost
set; stir after 1 minute. Let stand, covered,
2
1
⁄2 minutes. With a spatula, loosen edges of
omelette from plate; fold into thirds to serve.
Makes: 1 serving
Variations:
Cheese omelette: before folding, sprinkle
1
⁄4 cup
(60 ml) of shredded cheese down center of omelette.
Ham omelette: before folding, sprinkle
1
⁄4 cup (60 ml) of finely chopped cooked ham down
center of omelette.
Herb omelette: blend in
1
⁄8 tsp (0.5 ml) of basil,
thyme or crushed rosemary with eggs and milk.
Jelly omelette: before folding, spoon
1
⁄4 cup
(60 ml) of jelly down center of omelette.

- 13 -
MEATS
DIRECTIONS FOR COOKING MEAT BY MICROWAVE
For best results, select roasts that are uniform in
shape.
Boneless roasts are cooked more evenly.
Season as desired, but salt after cooking. Flavor and
color enhancers are best applied before cooking.
These may be soy sauce, barbecue sauce, pastes of
herbs, oils and mustard, Kitchen Bouquet thinned
with butter or margarine, and seasoned crumb
coatings.
Tender roasts should be shielded at the ends with
small pieces of aluminum foil. Narrow parts, where
the bone and meat taper, should also be shielded.
Press the foil against the meat or secure with a
wooden tooth pick. Foil should not be allowed to
come close to the oven walls. Shielding should be
done at the beginning of the cooking time and
removed halfway through the cooking; however it
may be added halfway through.
Place the roast on a microwave-safe rack set in a
cooking dish, so that meat will not sit in the juices.
Place beef roasts fat-side down and other roasts fatside up. Turn the beef over halfway through the
cooking time.
Beef and lamb roasts may be covered with wax
paper to hold the heat and prevent spattering. Pork,
ham and veal roasts will benefit from covering
loosely, but completely, with plastic wrap.
Hams should be skinned about 20 minutes before
the end of the cooking time. Score fat in a decorative
pattern and glaze, if desired, and recover with the
plastic wrap.
Drain juices occasionally and reserve for gravy.
Let stand, tented with a piece of foil, 10 - 15 minutes
to make carving easier and complete cooking.
Internal temperature will rise 5 - 15˚F (3 - 8˚C) on
standing.
Pot Roasts should be placed in a deep casserole
along with 1
1
⁄2 cups (375 ml) liquid such as broth,
tomato juice, wine or water and seasonings. Add
vegetables, if desired. Cover and cook as
recommended. Let stand 10 minutes.
Final temperatures may be checked using an instant
read thermometer. DO NOT use a conventional meat
thermometer on the microwave mode.
Meat Roasting Chart for Microwave Cooking
Meat Power
Approximate Cooking Time Approximate
Temperature
after Cooking
minute/lb minute/kg
Beef 2
1
⁄2 - 4 lb (1.25 - 2 kg)
Beef Roast
Rare
P4
9 - 13 19 - 26 120˚F (50˚C)
Medium
P4
14 - 16 26 - 33 130˚F (55˚C)
Well
P4
17 - 19 32 - 39 160˚F (70˚C)
Pot Roast
Chuck, Rump
P4
40 - 45 80 - 90 ––––––
Pork 2
1
⁄2 - 4 lb (1.25 - 2 kg)
Roast
Bone-in
P4
24 - 27 48 - 55 170˚F (80˚C)
Boneless
P4
19 - 21 38 - 42 170˚F (80˚C)
Ham (fully cooked), canned
3 - 5 lb (1.5 - 2.5 kg)
P4
10 - 12 20 - 25 140˚F (60˚C)
Shank [up to 8 lb (4 kg)]
P4
12 - 16 24 - 33 140˚F (60˚C)
Lamb 2
1
⁄2 - 4 lb (1.25 - 2 kg)
Boneless
Medium
P4
11 - 13 22 - 26 140˚F (60˚C)
Well
P4
13 - 15 27 - 34 160˚F (70˚C)
Bone-in
Medium
P4
14 - 18 29 - 39 140˚F (60˚C)
Well
P4
18 - 20 36 - 40 160˚F (70˚C)
Veal 2
1
⁄2 - 4 lb (1.25 - 2 kg)
Medium
P4
10 - 13 20 - 26 150˚F (65˚C)
Well
P4
12 - 15 24 - 31 160˚F (70˚C)

- 14 -
MEATS
DIRECTIONS FOR ROASTING MEAT ON COMBINATION
Choose tender and moderately tender cuts for dry
roasting and less-tender cuts for pot roasting.
Season as desired, but salt after cooking. Tie on bay
leaves and make slits to insert slivers of garlic for
flavor, if desired. Parchment paper may be used as a
cover.
Beef, Veal, Pork and Lamb roasts should be placed
fat-side down on a microwaveable, heat-safe roasting
rack set in a shallow dish. Shield the cut edges,
narrow ends and bony areas with small pieces of
aluminum foil for half of the roasting time. Basting
may be done near the end of the roasting time.
Turn roasts fat-side up after half the cooking time.
Ham with skin, should be placed in a dish, with a
narrow strip of aluminum foil around cut edge. After
60 minutes of cooking, remove skin and excess fat.
Turn, shield cut edge and continue cooking. Glaze
during the last 30 minutes of cooking. Canned and
ready-cooked hams may be shielded as described
and glazed during the last 10 minutes of cooking.
Pot roast should be placed in a microwaveable
heat-safe casserole along with vegetables,
seasonings and liquid. Cover with a lid. Use for less-
tender cuts of beef, veal or lamb. Turn roast. Place
the dish on the Ceramic Tray.
To Cook by Time: Multiply the weight of the meat by
the time recommended in the chart, using the
recommended combination setting.
To Cook by Convection Cooking: Press the Auto
Convection Button three times for Beef-Medium. For
pork press the Auto Convection Button four times,
then enter the weight.
After cooking, let stand tented with foil, 10 - 15 minutes
to complete cooking and make carving easier. During
stand time, check the internal temperature of the
roast using a microwave or conventional
thermometer. The thermometer should not touch
bone or fat. If it does, the reading could be
inaccurate. If the temperatures are lower than
desired, return the roast to the oven and cook for a
few more minutes at the recommended Combination
Setting. DO NOT use a Microwave or Conventional
meat thermometer in the oven when cooking on
Combination.
Meat Roasting Chart for Combination Cooking
Item
Combination Cooking Time
Final Internal
Temperature
Combination
Setting
minute/lb minute/kg
Beef 2
1
⁄2 - 4 lb (1.25 - 2 kg)
Rib
Rare 2 12 - 15 24 - 30 120˚F (50˚C)
Medium 2 15 - 18 30 - 36 130˚F (55˚C)
Well 1 24 - 28 45 - 46 160˚F (70˚C)
Boneless Rib, top Sirloin
Rare 2 14
1
⁄2 - 17 29 - 35 120˚F (50˚C)
Medium 2 17
1
⁄2 - 19 36 - 42 130˚F (55˚C)
Well 1 24 - 26 48 - 52 160˚F (70˚C)
Tenderloin
Rare 4 10 - 12 20 - 25 120˚F (50˚C)
Medium 4 13 - 14 26 - 29 130˚F (55˚C)
Pot Roast 2 2 - 2
1
⁄2 hours total –––––––
Pork 2
1
⁄2 - 4 lb (1.25 - 2 kg)
Bone-in or Boneless 3 19 - 22 38 - 45 170˚F (80˚C)
Ham (Ready-cooked) 1 18 - 21 36 - 43 –––––––
Chops 2
4
3
3
14 - 16 minutes total
18 - 26 minutes total
170˚F (80˚C)
170˚F (80˚C)
Veal 2
1
⁄2 - 4 lb (1.25 - 2 kg) 1 20 - 23 41 - 47 160˚F (70˚C)
Lamb 2
1
⁄2 - 4 lb (1.25 - 2 kg)
Bone-in
Medium 2 15 - 18 30 - 36 140˚F (60˚C)
Well 1 19 - 21 38 - 42 160˚F (70˚C)
Boneless
Medium 2 15 - 18 30 - 36 140˚F (60˚C)
Well 1 19 - 21 38 - 42 160˚F (70˚C)
 Loading...