

Page 1

What can you do with
MotionSD STUDIO?
Couverture
Input mode
Edit mode
Process mode
Output mode
Operating Instructions
Digital Video Editing Software
MotionSD STUDIO 1.0E
Before use, please read these
instructions completely.
Easily save data on SD
memory card to DVD.
Need help
VQT0T78
Page 2
Contents
Before use
Please read the following first ....................................................................................... 10
Operating environment ................................................................................................. 12
Requirements ........................................................................................................................................... 13
Features........................................................................................................................14
Convenient functions ...............................................................................................................................15
What can you do? ......................................................................................................... 16
Easy DVD production.................................................................................................... 18
Activating MotionSD STUDIO ....................................................................................... 20
Exiting MotionSD STUDIO .......................................................................................................................21
About MotionSD STUDIO ............................................................................................. 22
Operation Mode .......................................................................................................................................22
Screen configuration for MotionSD STUDIO ...........................................................................................24
Input mode
Contents
About the Input mode.................................................................................................... 25
SD memory card input mode ....................................................................................... 26
SD Browser Activation .............................................................................................................................26
Screen configuration ................................................................................................................................ 27
Imports the images on the SD Memory Card to the computer .................................................................28
Outputting SD Memory Card video to DVD-RAM or DVD R/RW disc. .....................................................30
- 2 -
Page 3
File playback and deletion................................................................................................................ 31
Setting the import destination folder................................................................................................. 31
Edit mode
About the Edit mode ..................................................................................................... 32
Non-linear edit mode..................................................................................................... 33
Screen configuration ................................................................................................................................ 33
About library screen ................................................................................................................................. 40
Displaying files ................................................................................................................................. 41
Displaying all folders registered ....................................................................................................... 42
Changing a file icon arrangement .................................................................................................... 42
Renaming a file ................................................................................................................................ 43
Deleting a file ................................................................................................................................... 43
Registering a folder.......................................................................................................................... 44
Arranging clips on the edit track ...............................................................................................................47
Changing the order of the clips ................................................................................................................ 50
Copying clips ............................................................................................................................................51
Deleting clips ............................................................................................................................................52
Playing the edited contents ......................................................................................................................53
Setting the aspect ratio of the preview screen .........................................................................................56
Capturing a still image clip (Snapshot) ....................................................................................................57
Saving the edit information (edited contents) ...........................................................................................59
Trimming clips ..........................................................................................................................................61
Dividing a clip ........................................................................................................................................... 64
Adding audio (Audio Mix) .........................................................................................................................66
Applying effects to a clip ..........................................................................................................................72
Types of video effects...................................................................................................................... 72
Applying a video effect..................................................................................................................... 74
- 3 -
Contents
Page 4
Applying effects between clips .................................................................................................................77
Types of transition effects ................................................................................................................ 77
Applying a transition effect............................................................................................................... 82
Combining special effect into clip (Manual Rendering) ............................................................................85
Rotating still images .................................................................................................................................87
Process mode
About the Process mode............................................................................................... 88
Title editor mode .......................................................................................................... 89
Screen configuration ................................................................................................................................ 89
Setting the preferences of edit screen .....................................................................................................92
Setting the preferences.................................................................................................................... 92
Setting the display............................................................................................................................ 93
Preparing a clip in which a title will be inserted ........................................................................................95
Preparing video clip from edit track.................................................................................................. 95
Preparing clip from library ................................................................................................................ 96
Preparing video clip from menu ....................................................................................................... 97
Setting the background aspect ratio ........................................................................................................99
Applying effects to the image .................................................................................................................100
Setting Brightness & Contrast/Hue & Saturation/Sharpness ......................................................... 101
Changing to Sepia/Negative/Monochrome .................................................................................... 103
Changing colours ........................................................................................................................... 103
Inserting a frame ....................................................................................................................................105
Inserting text-based title .........................................................................................................................106
Entering the text............................................................................................................................. 106
Decorating text-based title ............................................................................................................. 108
Applying detailed settings to text.................................................................................................... 109
Inserting an animation ............................................................................................................................116
- 4 -
Contents
Page 5
Placing animation........................................................................................................................... 116
Operating placed animation ........................................................................................................... 118
Inserting a video clip as sub-screen .......................................................................................................120
Placing video clip as sub-screen.................................................................................................... 120
Changing the form of sub-screen video ......................................................................................... 122
Applying fade effects to text, animation and sub-screen (video clip) .....................................................123
Applying motion effects to text, animation and sub-screen (video clip) .................................................125
Drawing graphics and lines ....................................................................................................................130
Drawing graphics .......................................................................................................................... 131
Changing the line width and colour of graphics and lines.............................................................. 132
Confirming the title created ....................................................................................................................134
Saving the title .......................................................................................................................................135
Saving as a title file (TTE file) ........................................................................................................ 136
Saving as a video clip .................................................................................................................... 138
Saving as a still image clip ............................................................................................................. 139
Output mode
About the Output mode ............................................................................................... 140
File output mode ........................................................................................................ 142
Screen configuration .............................................................................................................................. 143
Preparing the data to be output from the edit track ................................................................................ 148
Preparing data to be output from the library .......................................................................................... 149
Preparing from the library in the File output mode ........................................................................ 149
Preparing from the library in the Edit mode.................................................................................... 150
Outputting as a file .................................................................................................................................151
Video email mode ...................................................................................................... 153
Screen configuration .............................................................................................................................. 153
Contents
- 5 -
Page 6

Preparing the data to be output from the edit track ................................................................................ 156
Preparing the data to be output from the library ....................................................................................157
Preparing from the library in the Video email mode ...................................................................... 157
Preparing from the library in the Edit mode.................................................................................... 158
Exporting to email software ....................................................................................................................159
DVD R/RW output mode ............................................................................................. 161
Outputting video clips directly to DVD R/RW disc ..................................................................................163
Select the video clip (MPEG2 file) and activate DVDWriter ........................................................... 163
Setting the DVD menu and playback method ............................................................................... 164
Outputting to DVD R/RW ............................................................................................................... 165
Editing video clips and writing to DVD R/RW disc .................................................................................168
Preparing edit results on the edit track for output .......................................................................... 168
Adjusting the encoder settings and activate DVDWriter .............................................................. 169
Screen Configuration (DVD R/RW output panel) ...................................................................................171
DVD-RAM output mode .............................................................................................. 173
Outputting video clips directly to DVD-RAM disc ...................................................................................175
Select the video clip (MPEG2 file) and activate VRWriter ............................................................. 175
Outputting to DVD-RAM disc ......................................................................................................... 176
Editing video clips and writing to DVD-RAM disc ................................................................................... 179
Preparing edit results on the edit track for output .......................................................................... 179
Adjusting the encoder settings and activate VRWriter .................................................................. 180
Screen configuration (DVD-RAM output panel) ............................................................................................... 182
SD memory card output mode .................................................................................... 184
Screen configuration .............................................................................................................................. 184
Outputting to SD Memory Card .............................................................................................................185
Contents
- 6 -
Page 7
Help mode
About the Help mode .................................................................................................. 186
Help mode .................................................................................................................. 187
Displaying the Operating Instructions ....................................................................................................187
Settings mode
Settings mode ............................................................................................................ 188
Library setting screen..................................................................................................................... 188
TOOL BOX setting screen ............................................................................................................. 189
Detecting function setting screen................................................................................................... 190
Advanced settings screen ............................................................................................................. 191
Addition applications to TOOL BOX .......................................................................................................192
Listing of menus
Menus of MotionSD STUDIO...................................................................................... 195
File menu ...................................................................................................................................... 195
Edit menu ...................................................................................................................................... 196
View menu .................................................................................................................................... 197
Library menu ................................................................................................................................. 197
Tools menu ................................................................................................................................... 198
Help menu ..................................................................................................................................... 198
Menus of Title editor ................................................................................................... 199
File menu ...................................................................................................................................... 199
Edit menu ...................................................................................................................................... 200
Contents
- 7 -
Page 8

View menu .................................................................................................................................... 200
Object menu .................................................................................................................................. 201
Tools menu ................................................................................................................................... 203
Background menu ......................................................................................................................... 203
Menus of Library ......................................................................................................... 205
File menu ...................................................................................................................................... 205
Library menu ................................................................................................................................. 205
Help menu ..................................................................................................................................... 205
Q&A
You are unable to connect or operate the SD video camera. .................................... 206
Video cannot be imported from the SD Video Camera .............................................. 208
Special effects cannot be used normally .................................................................. 209
Audio mix does not work well ..................................................................................... 211
Recording on the SD memory card cannot be performed normally ........................... 212
Titles cannot be created normally .............................................................................. 214
About video editing (Non-linear edit) with MotionSD STUDIO ................................... 215
Writing to DVD R/RW disc is not successful. ............................................................. 216
Playback of recorded DVD R/RW discs ..................................................................... 218
Writing to DVD-RAM disc is not successful ............................................................... 219
Other .......................................................................................................................... 222
Contents
- 8 -
Page 9
Glossary................................................................................................226
Requests and tips ................................................................................229
Other .....................................................................................................231
Contents
- 9 -
Page 10
Please read the following first
Before use
Before use
Please read the following first
• Read the Operating Instructions of the SD Video
Camera before installing MotionSD STUDIO and
connecting the SD Video Camera.
• To use SD memory cards, connect the SD video camera
with which this software is supplied to the PC.
• The video screen on a PC does not display information
such as the date from the device connected.
• Sample images, etc., supplied with this software can be
used for your personal use only. You must be authorised
to use them for profit.
• This software does not support Content Protection for
Recordable Media (CPRM), consequently video
recorded with CPRM will not be displayed.
• Observe the following conditions for use of SBG sounds
(@
227). It is prohibited to distribute (sell, rent, freely
distribute, loan, etc.) the music data itself separated or
duplicated, or the music created from the music data
separated from videos or images (including an Internet
website), or to distribute them through public
transmission (transmission through the Internet or
broadcasting) as an independent trade object.
It is also prohibited to use them for the purpose of
offending public order and morals, defamation of
character, or other purposes which run foul of the law.
• The actual contents and screen, and those described in
these operating instructions may differ depending on the
version of the software or PC operating environments
used, etc. Please be aware of this beforehand.
• In this manual, the operations are described basically
based on the Windows
may be different depending on the PC used or the OS
version.
• Pages to be referred to are shown as
• In this manual, the operations are described using the
screen display on the English version.
• No information is provided about basic PC operations
and terms. Please refer to the relevant PC manual.
• In this manual, the MotionSD STUDIO 1.0E is partially
referred to as MotionSD STUDIO for short.
• Before using the MotionSD STUDIO, exit any other
operating applications and the resident programmes.
• Before using the MotionSD STUDIO, exit screen savers
and power-saving programme. (@
- 10 -
®
XP screen. The screen display
(>00).
223)
Page 11
Please read the following first
This product is licensed under the MPEG-4 Visual
patent portfolio license for the personal and
non-commercial use of a consumer for (i) encoding
video in compliance with the MPEG-4 Visual
Standard (“MPEG-4 Video”) and/or (ii) decoding
MPEG-4 Video that was encoded by a consumer
engaged in a personal and non-commercial activity
and/or was obtained from a video provider licensed
by MPEG LA to provide MPEG-4 Video. No license is
granted or shall be implied for any other use.
Additional information including that relating to
promotional, internal and commercial uses and
licensing may be obtained from MPEG LA, LLC. See
http://www.mpegla.com.
∫ About usable file formats
This software allows the following file formats to be
input and edited, or output:
Input/Edit Output
MPEG2/BMP/JPEG/
WAV
(uncompressed)
• MPEG2 format files are limited to files recorded with
the SD Video Camera with which this software is
supplied and files created with this software.
• Some files in the above file format may not be used.
MPEG1/MPEG2/ASF
Before use
∫ Compliant disc/DVD drives
DVD R/RW
12 cm and 8 cm DVD R/RW discs and 12 cm +R DL
discs can be written to.
• DVD-R DL discs are not compatible.
DVD-RAM
UDF 2.0 formatted 4.7 GB/9.4 GB DVD-RAM discs and
8 cm DVD-RAM discs can be written to.
Use generally available video recording DVD-RAM
discs or format the discs using a DVD video recorder or
software compatible with DVD-RAM disc.
• A single-sided 2.6 GB or double-sided 5.2 GB
DVD-RAM disc cannot be used.
• A DVD video recorder or software compatible
DVD-RAM discs are required for DVD-RAM disc
playback.
• Before using, enable “Synchronous data transfer” or
“DMA” for the DVD-RAM drive.
- 11 -
Page 12

Operating environment
Before use
Operating environment
The following PC environments are required for the
MotionSD STUDIO to be installed and used.
• A drive that can read a CD-ROM is needed for
installation.
• The operation of this software cannot be guaranteed
when fonts other than English font are selected and
used. Set the English font.
• To play back created videos (ASF files, etc.), a video
player such as Windows Media
In order to record the data onto recording media such as
CD-R/RW, the media, a drive supporting the media and
writing software are necessary.
• Even if the system requirements mentioned in these
operating instructions are fulfilled, some personal
computers cannot be used.
• Operation on an OS other than the one pre-installed is
not guaranteed.
• This software is not Macintosh compatible.
• This software is not compatible with Microsoft
®
Windows
Me and Windows
3.1, Windows® 95, Windows® 98, Windows®
®
NT.
• Operation is not guaranteed on an upgraded OS.
• This software is not compatible with a multi-boot
environment.
• This software is not compatible with a multi-CPU
®
Player is necessary.
®
environment.
• Operation is not guaranteed on Microsoft
®
Windows®
XP Media Center Edition, Tablet PC Edition and 64-bit
computers.
• When you use this software, log on the PC with a user
name having administrative rights.
(including installation and uninstallation)
Compliant PC:
®
IBM
PC/AT compatible device with Intel® Pentium® III
800 MHz or higher of CPU (including compatible CPU.
®
Intel
Pentium® 4 1.6 GHz or higher recommended.)
Compliant OS:
The following OS pre-installed
Microsoft
Microsoft
Microsoft
®
Windows® XP Home Edition SP2
®
Windows® XP Professional SP2
®
Windows® 2000 Professional SP4
Available memory:
256 MB or more (512 MB or more recommended)
- 12 -
Page 13

Operating environment
Before use
Graphic display:
High Colour (16 bit) or more (32 bit or more
recommended)
Desktop resolution of 1024k768 pixels or more (1280 k
1024 pixels or more recommended)
Graphics card complying with DirectX
®
DirectDraw
overlay
®
9.0b or 9.0c, and
Free hard disk space:
Ultra DMA - 33 or more (100 or more is recommended)
640 MB or more
• When writing to DVD, the same amount of free space as
the disc is necessary.
Necessary software:
Microsoft
®
DirectX® 9.0b or 9.0c
• If you install the software in a personal computer that is
®
not compatible with DirectX
9.0b or 9.0c, the personal
computer may stop operating properly. If you are unsure
if your personal computer is compatible, contact the
maker.
®
Microsoft
Windows Media® Player 6.4 to10
Sound:
®
Sound device compatible with Windows (DirectSound
support)
Drive:
CD-ROM drive (for installtion)
• When writing to DVD, a compatible drive and media are
necessary.
Interface:
USB port (USB2.0 High Speed recommended)
• Connect the USB cable supplied with the SD Video
Camera. No guarantees can be made for operation if
any other cable is connected.
• Not guaranteed when the SD Video Camera is
connected via USB-hub and USB extension cable.
Others requirements:
Mouse or equivalent pointing device
Requirements
• The SD Video Camera with which this software is
supplied
• SD Memory Card (supplied), etc.
• USB cable (supplied)
• The AC adaptor (supplied) and battery (supplied) of
the SD Video Camera
For information about connecting, refer to the Operating
Instructions of the SD Video Camera.
- 13 -
Page 14
Features
Before use
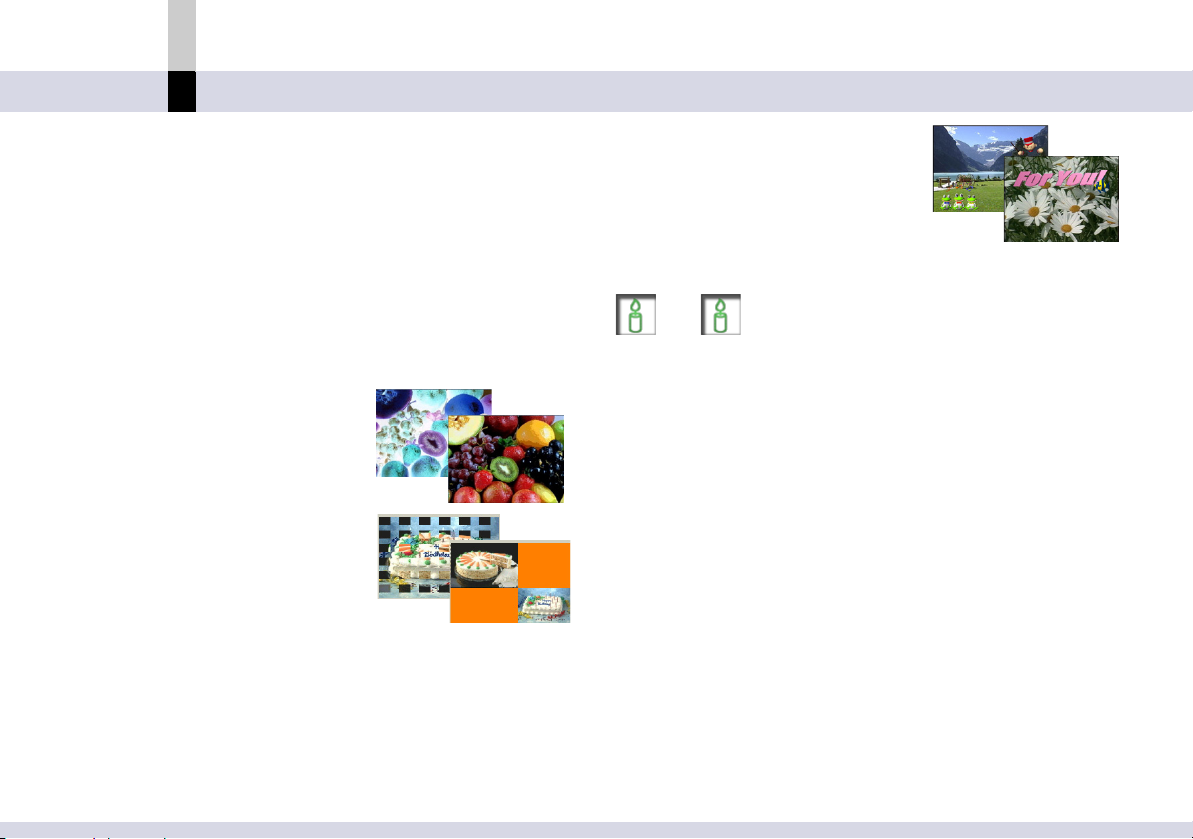
Features
The MotionSD STUDIO is the software that allows videos
to be captured from the SD Video Camera, edited and
outputted.
Digital edition on a PC (Non-linear edit) enables you to
create video works with minimum deterioration of image
quality. You can also apply various special effects such as
fade effects, transition effects and titles to videos.
∫ Video effects
Applies digital effects to videos
captured.
∫ Transition effects
Applies digital effects to scene
transitions of the video
captured to produce a creative
scene transition.
∫ Audio mix
Adds audio to videos captured.
∫ Creating titles (using the Title
editor mode)
Adds a title using characters
and illustrations on the Title
editor mode.
Note
` Refer to “Glossary” for details about “Non-linear editing”.
(@
227)
- 14 -
Page 15

Features
Convenient functions
∫ Locating TOOL BOX on the desktop
TOOL BOX is located on the desktop. Icons to call out
the functions, [Input], [Edit], [Process], [Output]... are
arranged in it. (@
∫ Capturing still image clip (Snapshot)
Still image clips can be captured from clips on the edit
track. (@
57)
∫ Sending motion image with e-mails by Video email
mode
You can send a video captured from the SD Video
Camera by e-mail. (@
∫ Output to DVD R/RW disc
When a DVD R/RW drive is connected, edited video
can be written to DVD R/RW discs. (@
24)
153)
161)
Before use
∫ Output to DVD-RAM disc
When a DVD-RAM drive is connected, edited video can
be written to DVD-RAM discs. (@
173)
- 15 -
Page 16
What can you do?
Before use
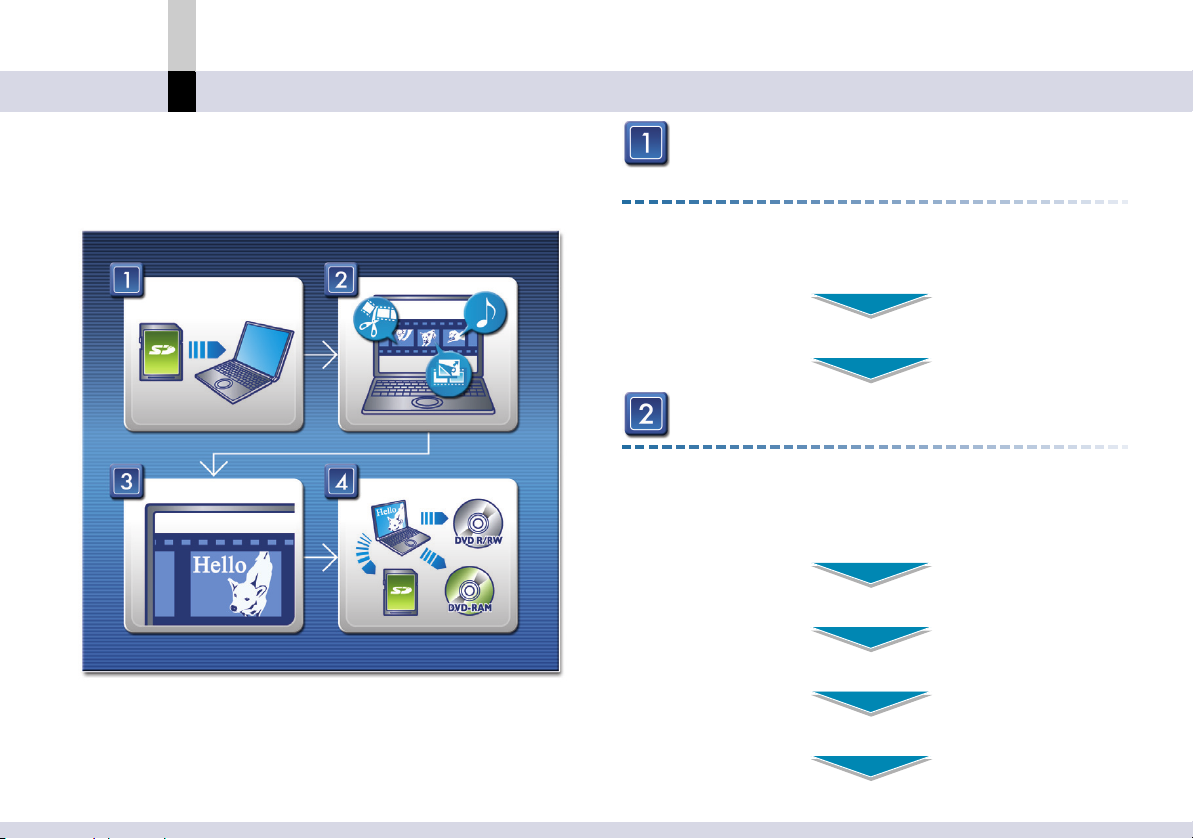
What can you do?
The basic flow of video editing using MotionSD STUDIO.
Importing video from a SD Memory Card
(Input mode)
Video imported from SD Memory Cards can be
imported as either video clips or still image clips.
SD Browser activation (@
Importing the video on the card to the computer (@
26)
Editing imported video (Edit mode)
Video clips and still image clips are arranged in the
desired order on the edit track, and effects are
inserted to the video or video transitions.
Arranging clips on the edit track (@
Dividing a clip (@
Deleting clips (@
64)
52)
47)
28)
- 16 -
Inserting scene transition effects (@
77)
Page 17
What can you do?
Adding audio (@66)
Processing the video (Process mode)
Titles can be inserted to the video and processed.
Before use
Inserting text-based title (@
106)
Outputting edited data to SD memory card,
DVD-RAM or DVD R/RW disc (Output mode)
Outputs (records) the results of the editing process.
•You can output the edited contents as a file or
send them to the email software as an ASF file.
Outputting to SD memory card, DVD-RAM or
DVD R/RW disc (@
184) (@173) (@161)
- 17 -
Page 18
Easy DVD production
Before use
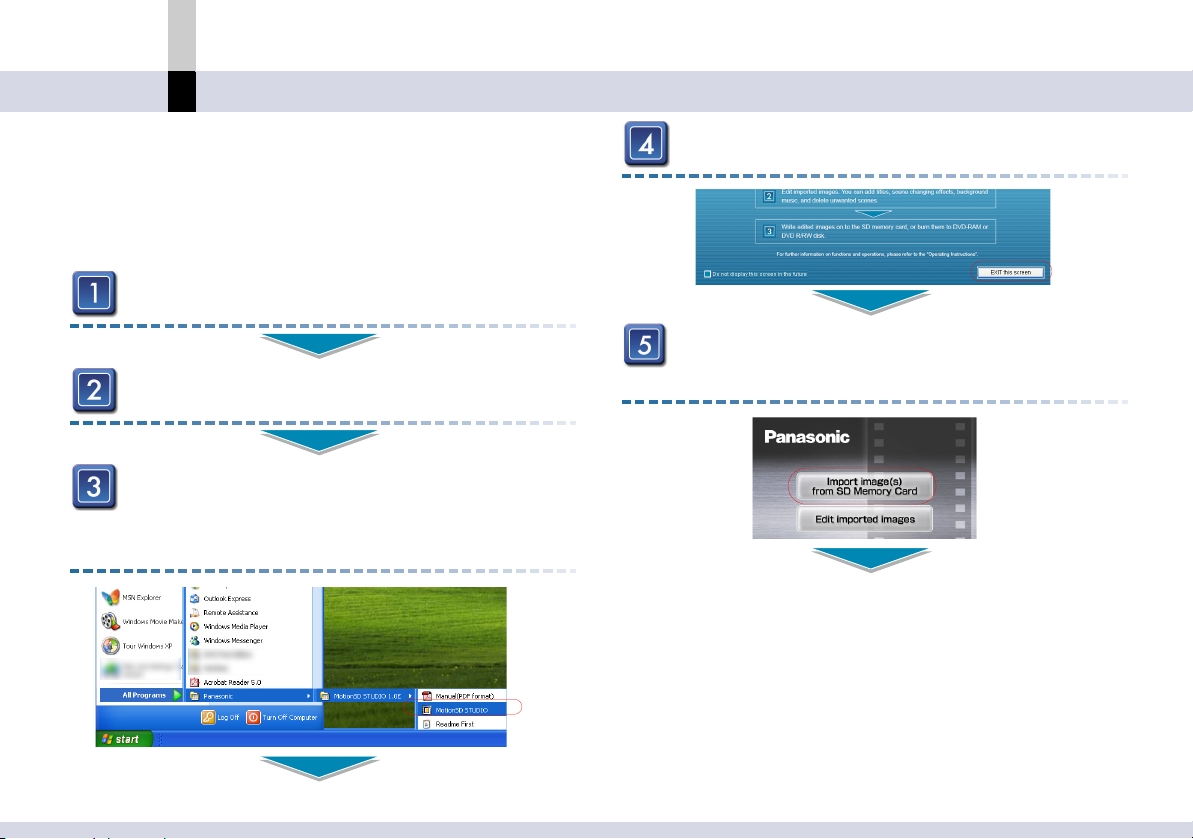
Easy DVD production
SD card data can be easily output to DVD R/RW or
DVD-RAM disc.
Refer to “SD memory card input mode” for more
information. (@
Insert a card into the SD Video Camera.
Connecting the SD Video Camera and PC.
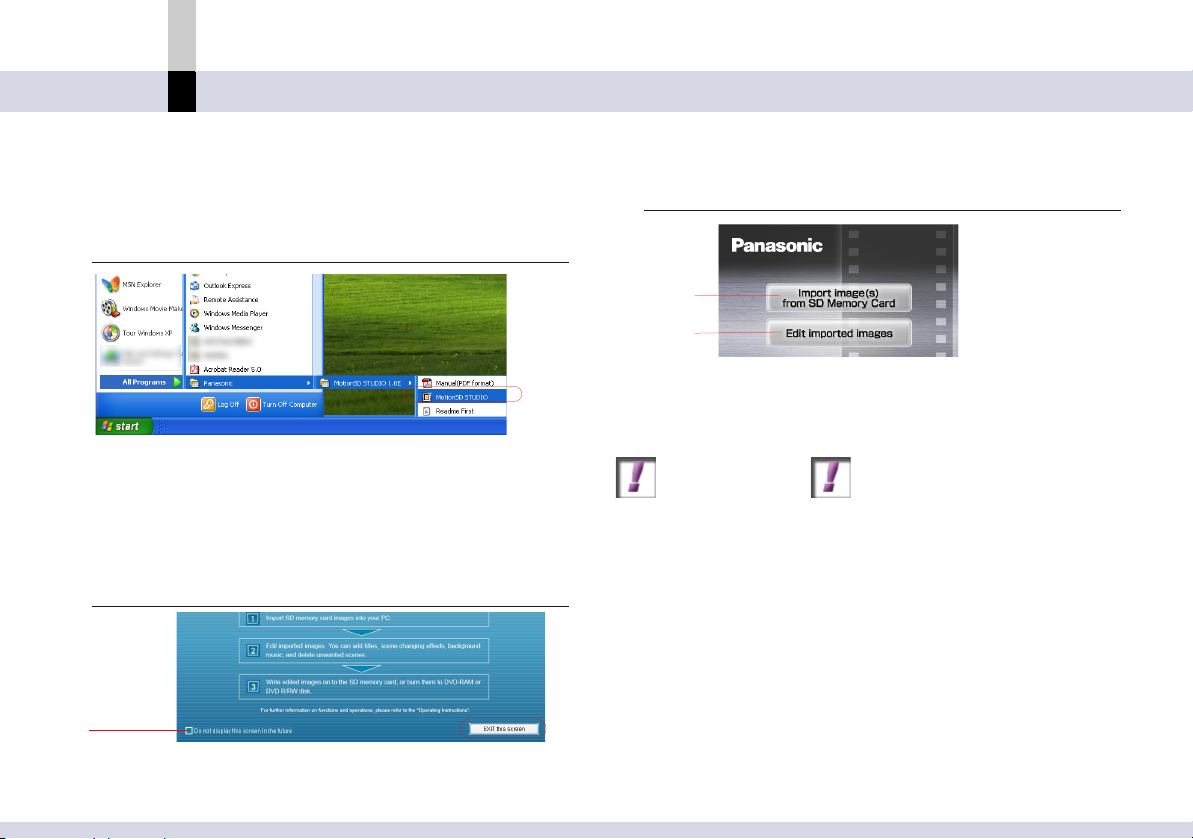
Select [start] >> [All Programs (Programs)]
>> [Panasonic] >> [MotionSD STUDIO 1.0E]
>> [MotionSD STUDIO].
26)
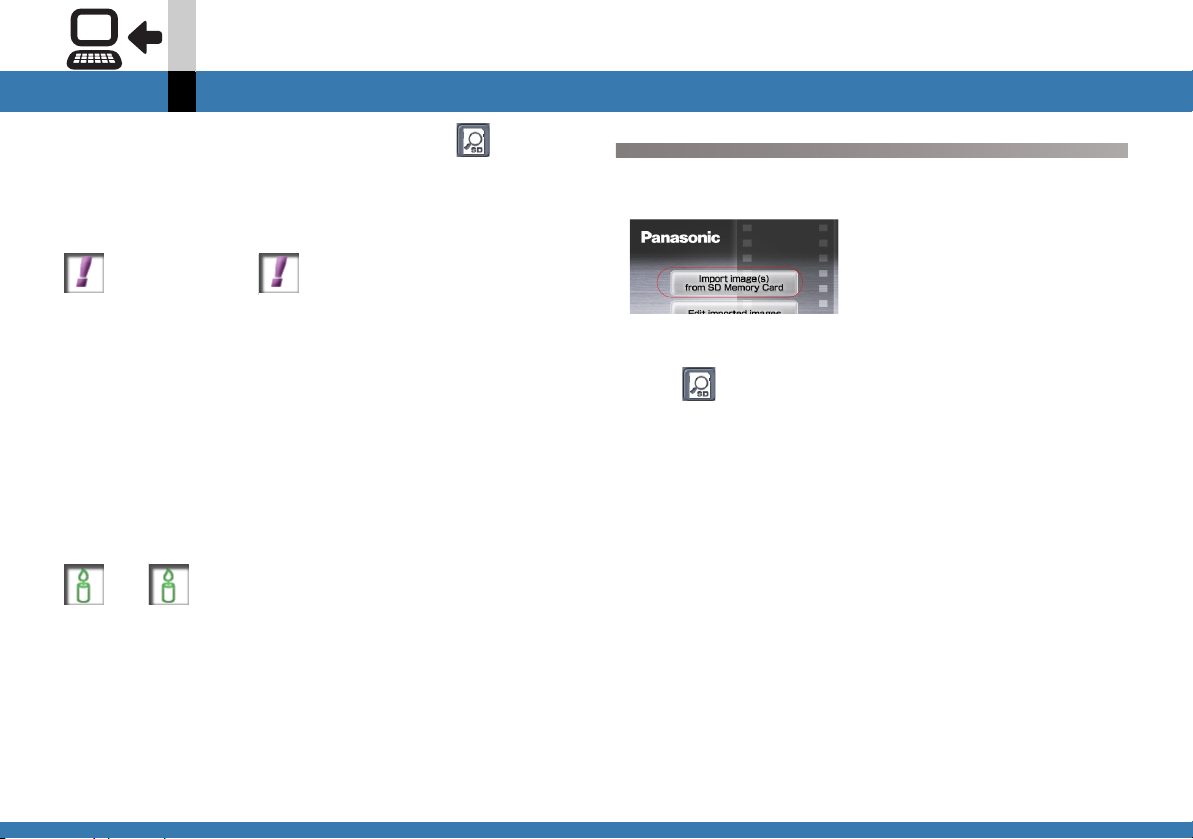
Click [Exit this screen].
Click [Import image(s) from SD Memory
Card].
- 18 -
Page 19
Easy DVD production
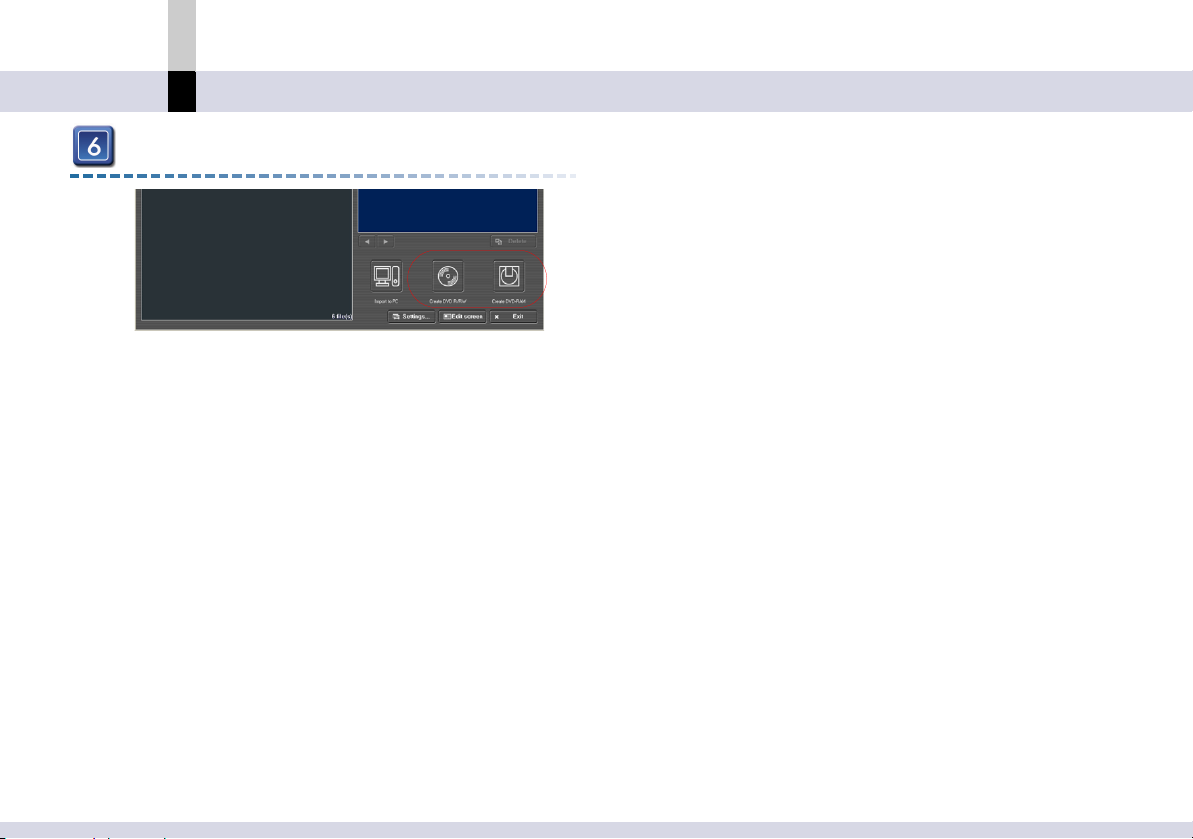
Select the target disc for output.
Video files only are output.
[Create DVD R/RW]
Data is sent to DVDWriter and output to DVD R/RW
disc. (@
[Create DVD-RAM]
Data is sent to VRWriter and output to DVD-RAM disc.
(@
165)
176)
Before use
- 19 -
Page 20
Activating MotionSD STUDIO
Before use
Activating MotionSD STUDIO
1.
Select [start] >> [All Programs (Programs)] >>
[Panasonic] >> [MotionSD STUDIO 1.0E] >>
[MotionSD STUDIO].
An overview of MotionSD STUDIO is displayed on the
screen.
• When it is activated for the first time, the Licence
Agreement will appear. Please read it carefully and
click [I agree].
2.
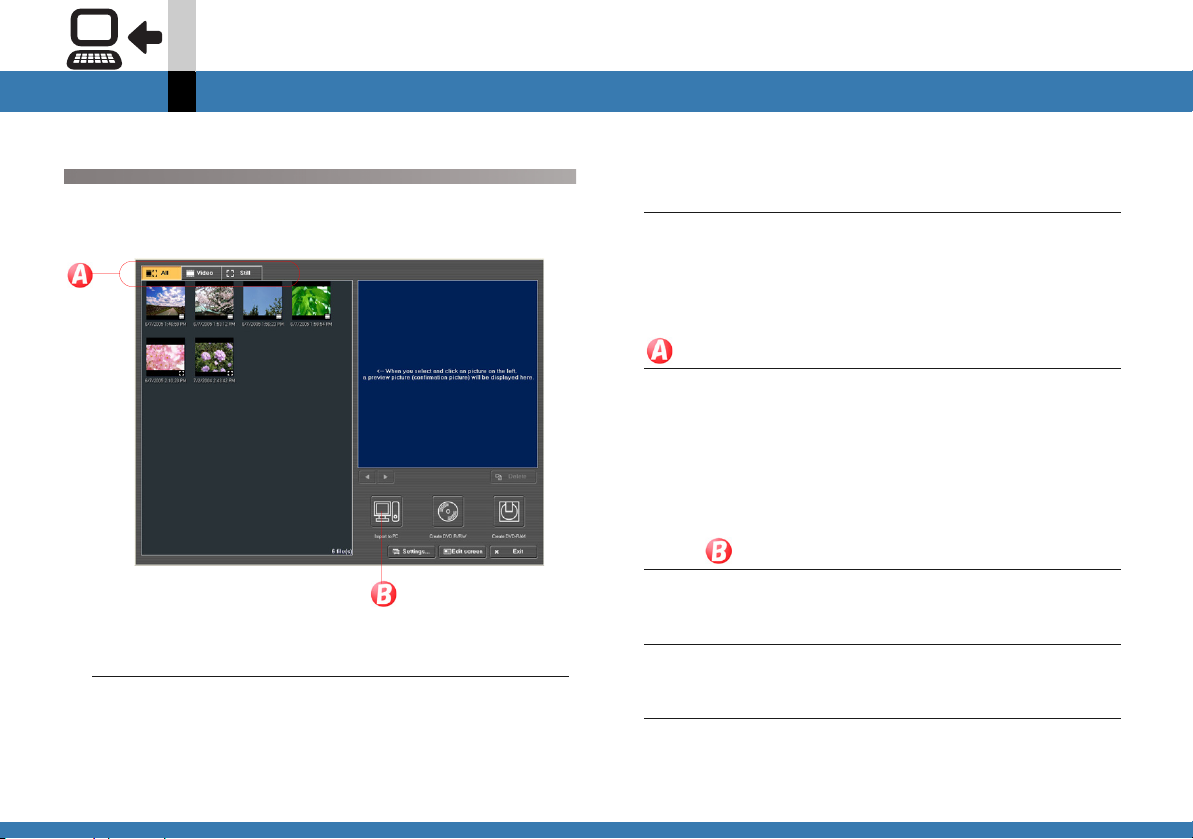
Click [Exit this screen].
A
• Clicking A will prevent the screen from being
displayed in the future.
3.
Select the item to be activated.
A
B
A Select when importing a file from the memory card.
The SD Browser is activated. (@
B The Non-linear edit mode is activated. (@
Action Required
` Before activating:
- SD Video Camera and PC connection (refer to the
Operating Instructions of the SD Video Camera)
- Exit other operating applications and the resident
programmes.
- Cancel the screen saver and the power-saving
programme.
- Check the supplementary description and the latest
information.
Select [start] >> [All Programs (Programs)] >>
[Panasonic] >> [MotionSD STUDIO 1.0E] >> [Readme
First] to check it.
- 20 -
27)
33)
Page 21
Activating MotionSD STUDIO
Before use
Note
`
If the amount of data registered in the
library is large, the activation of the
slow down because it takes time to read the data.
MotionSD
MotionSD
STUDIO
STUDIO will
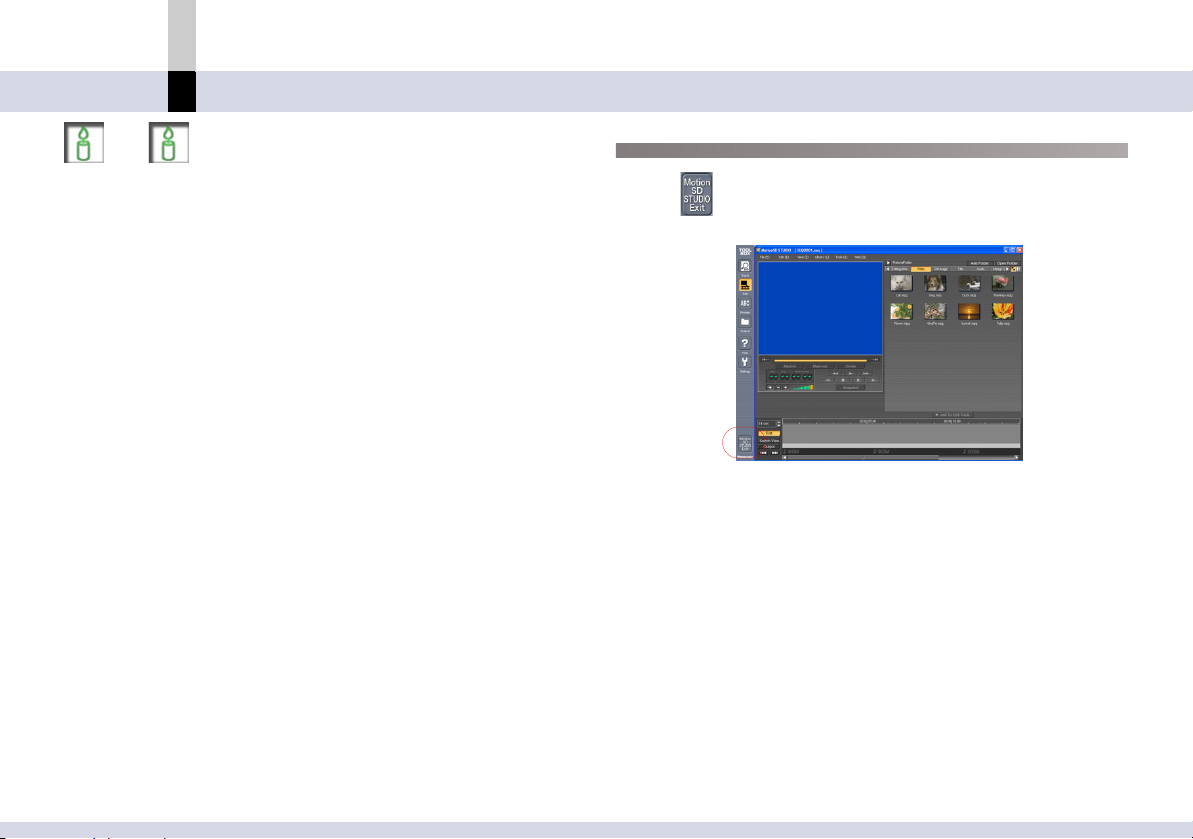
Exiting MotionSD STUDIO
Select from the TOOL BOX, and the MotionSD
STUDIO will exit.
• You may also select [File] >> [Exit] to exit the MotionSD
STUDIO.
• When the [Exit] button is clicked while the SD Browser is
activated, MotionSD STUDIO will exit.
- 21 -
Page 22
About MotionSD STUDIO
Before use
About MotionSD STUDIO
Operation Mode
The MotionSD STUDIO has the following operation
modes.
Switch the operation modes in accordance with editing.
∫ Input mode (@
Select when inputting video or still images from the SD
Video Camera, etc.
SD memory card input mode: (@
Select when inputting video or still images from the SD
Video Camera.
∫ Edit mode (@
Select when the data is edited.
Non-linear edit mode:
Select when you edit.
∫ Process mode (@
Select when inserting a title and processing the video.
Title editor mode:
Select when a title is added to a video using the title
editor.
25)
26)
32)
(@33)
88)
(@89)
∫ Output mode (@
140)
Select when outputting video or still images to an
external device.
File output mode: (@
142)
Select when outputting video or still images as 1 file.
Video email mode: (@
153)
Select this mode when you want to export video or still
images in a format which can be sent by e-mail.
DVD R/RW output mode: (@
161)
Select when outputting video to DVD R/RW disc.
DVD-RAM output mode: (@
173)
Select when outputting video to DVD-RAM disc.
SD memory card output mode: (@
184)
Select when outputting video or still images to the SD
Video Camera.
∫ Help mode (@
186)
Select when you need help for operation.
Help mode:
(@187)
Select when you want to read the Operating
Instructions for the MotionSD STUDIO.
- 22 -
Page 23
About MotionSD STUDIO
∫ Settings mode: (@188)
Select when you want to change various settings for
the MotionSD STUDIO.
∫ Quit:
Select when you want to quit MotionSD STUDIO.
Before use
- 23 -
Page 24
About MotionSD STUDIO
Before use
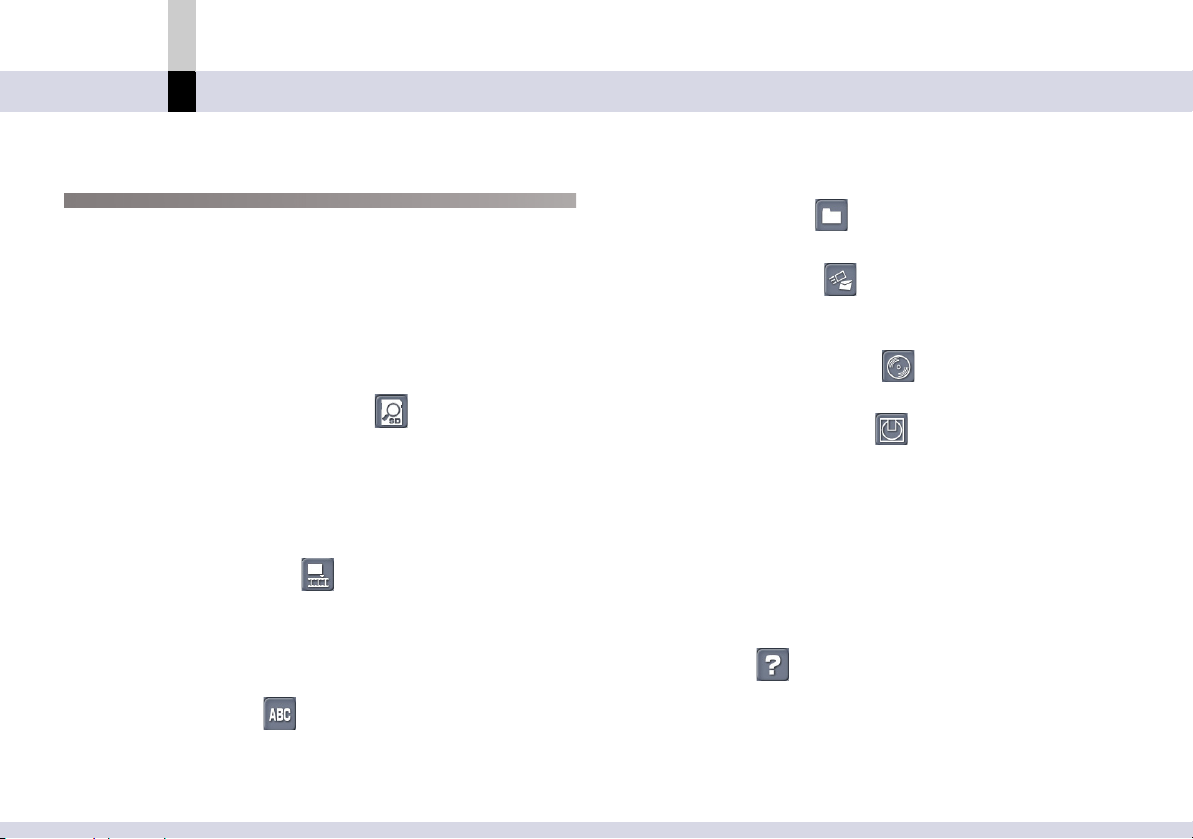
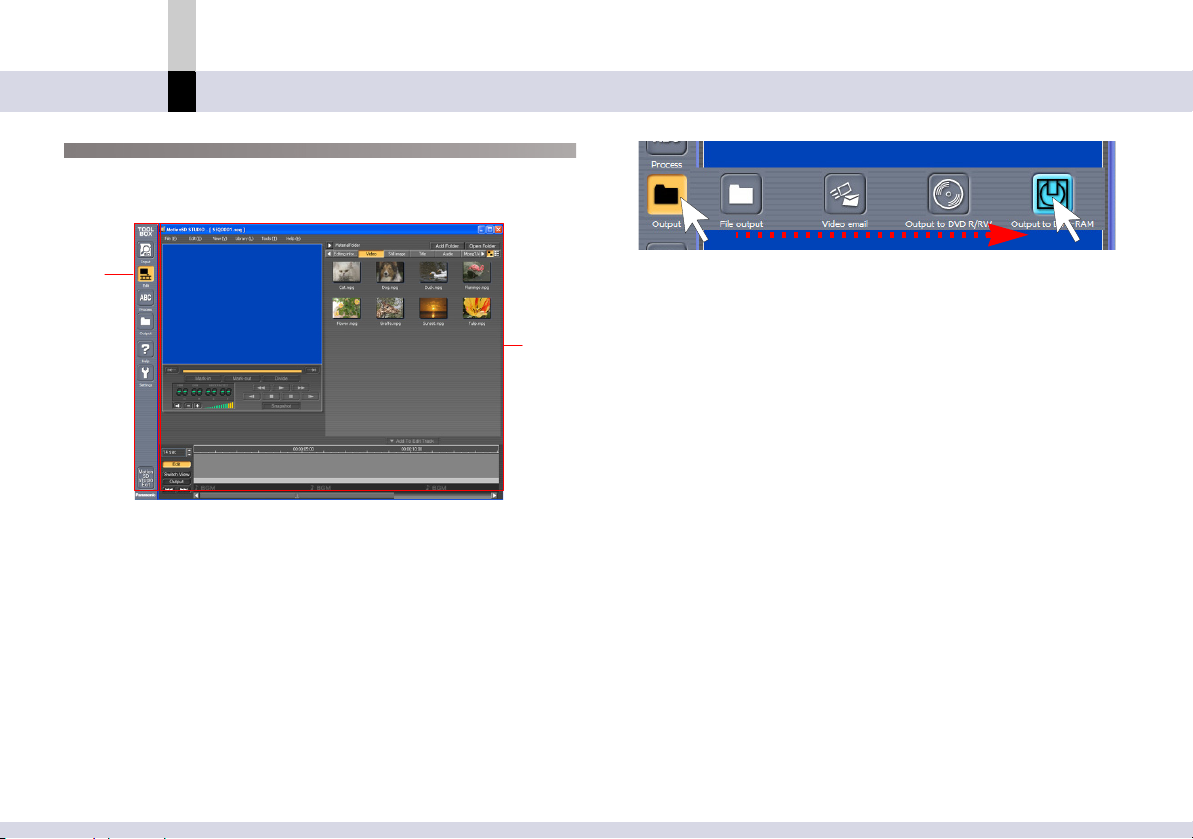
Screen configuration for MotionSD STUDIO
The MotionSD STUDIO screen mainly consists of the
TOOL BOX (1) and the work area (2).
1
2
1 TOOL BOX
The icons to switch the operation modes are located in
the TOOL BOX.
∫ How to switch the operation modes
Move the mouse cursor onto an icon in the TOOL BOX,
and the operation mode icons will appear. When you
select an icon, the mode will be switched and the
screen corresponding to the mode will appear in the
work area.
Example:
Clicking an icon in the TOOL BOX switches to the
operation mode corresponding to the icon.
• The icon of the mode selected is displayed in orange
in the TOOL BOX.
• The setting for the TOOL BOX can be done on the
TOOL BOX setting screen in the Settings mode.
(@
189)
2 Work area
In the work area, various screens are displayed in
conjunction with the operation mode selected in the
TOOL BOX. For details, please refer to the page
describing each operation mode.
In some operation modes, the work area may be
displayed as an independent window.
- 24 -
Page 25
About the Input mode
Input mode
About the Input mode
Set to Input mode to import video for editing with
MotionSD STUDIO.
Note
` For details on how to switch the operation modes, see
@
24.
Input mode
∫ SD memory card input mode: (@
Use this mode when importing video from the card of
the connected SD Video Camera.
26)
- 25 -
Page 26
SD memory card input mode
Input mode
SD memory card input mode
Video clips (video) and still image clips (stills) can be
imported from card in the SD Video Camera.
Action Required
` Connect the SD Video Camera to the PC in PC
Connection Mode.
` Do not remove the card or cable while the connected
device is accessing the card or data is being transferred.
Doing so may cause the software to crash or data to
become corrupted.
` Do not perform other operations or use other
applications while data is being transferred. Doing so
may cause the software to crash or data to become
corrupted.
Note
` This software does not support Content Protection for
Recordable Media (CPRM), consequently video
recorded with CPRM will not be displayed.
` When changing the card, close and restart the SD
Browser to update to the latest information.
SD Browser Activation
Clicking [Import image(s) from SD Memory Card] on the
menu screen when activating will start the SD Browser.
It can also be displayed with the following methods:
• Click in the TOOL BOX.
• In the MotionSD STUDIO menu, select [File] >> [Input]
>> [Start SD browser] or [Tools] >> [Start SD browser].
- 26 -
Page 27
SD memory card input mode
Input mode
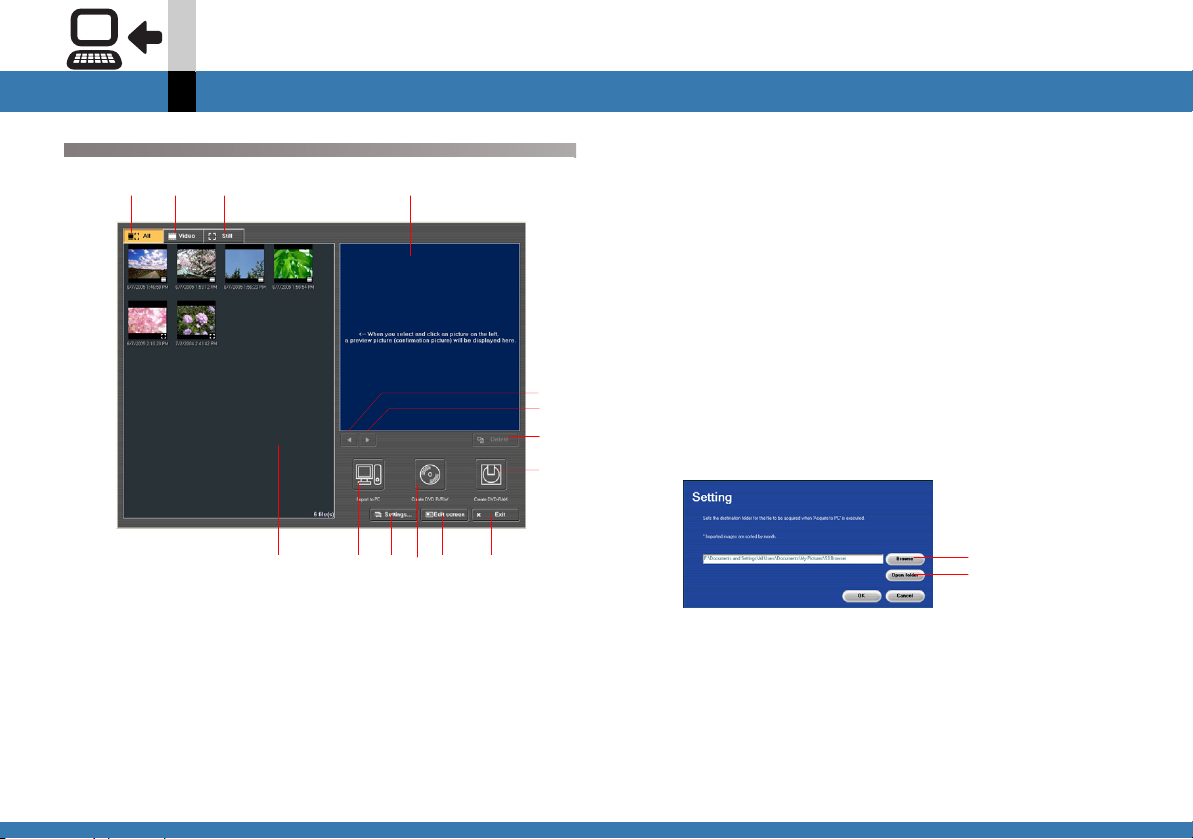
Screen configuration
A B
A. Displays all files on the card.
B. Displays Video files only.
DC
E
F
G
H
I
K
JNL
M
C. Displays still image files only.
D. Previews images on the card.
• Clicking an image on I will preview it.
E. Displays the previous image.
F. Displays the next image.
G.Deletes the selected file.
H. Sends video files only from the card to the VRWriter
and outputs to DVD-RAM disc. (@
I. Displays thumbnails of the files on the card.
• Clicking the video thumbnail will automatically
repeat the playback in D.
J. Imports the video on the card to the computer.
K. Displays the computer destination settings screen.
A Selects the import destination folder.
B Opens the import destination folder.
L. Sends video files only from the card to the
DVDWriter and outputs to DVD R/RW disc. (@
M.Change to non-linear edit mode.
N. Exits MotionSD STUDIO.
176)
A
B
165)
- 27 -
Page 28
SD memory card input mode
Input mode
Imports the images on the SD Memory Card to the computer
Connecting the SD Video Camera enables import of SD
Memory Card images to the computer.
1.
Insert a card into the SD Video Camera.
• If the MotionSD STUDIO has already been activated,
first exit from it.
• For details on how to insert a memory card, please
read carefully the Operating Instructions for the SD
Video Camera and the card.
2.
Connect the SD Video Camera to the
computer and activate the SD Browser (@26).
• For information regarding SD Video Camera and PC
connection refer to the Operating Instructions of the
SD Video Camera.
3.
Select the type of image to be imported from
.
[All]
Import all images.
[Video]
Import videos only.
[Still]
Import still images only.
4.
Click .
A confirmation message appears.
5.
Click [Yes].
The capture complete message is displayed.
6.
Click [Yes].
Change to Non-linear edit mode.
• Click [No] to return to the SD Browser.
- 28 -
Page 29
SD memory card input mode
Note
` If the card contains a large volume of data, it will take
some moments for the images to be displayed.
` All video in the card [SD_VIDEO] and [DCIM] folders are
displayed.
` Depending on the operating system and the USB
transfer speed, etc., frames may be dropped and audio
may be interrupted during video play back. This is
reduced once the files are imported into the computer.
` A video file of less than 2 seconds will not be displayed
by the SD Browser.
` If the "There may be a problem in the video card you are
using" message appears, check whether the PC used
satisfies the operating environment requirements. (@
If you do not know exactly what your PC supports,
contact the manufacturer of the PC.
12)
Input mode
- 29 -
Page 30

SD memory card input mode
Input mode
Outputting SD Memory Card video to DVD-RAM or DVD R/RW disc.
When connecting the SD Video Camera, the video files on
the SD memory card can be output all together to
DVD-RAM or DVD R/RW disc.
1.
Insert a card into the SD Video Camera.
• If the MotionSD STUDIO has already been activated,
first exit from it.
• For details on how to insert a memory card, please
read carefully the Operating Instructions for the SD
Video Camera and the card.
2.
Connect the SD Video Camera to the
computer and activate the SD Browser (@26).
• For information regarding SD Video Camera and PC
connection refer to the Operating Instructions of the
SD Video Camera.
3.
Select the target disc for output.
[Create DVD R/RW]
Data is sent to DVDWriter and output to DVD R/RW
disc. (@
• When more than 40 video files are sent, only the first
40 are read.
165)
• Video files with a playback time of less than
3 seconds are not read and cannot be output to DVD
R/RW disc.
[Create DVD-RAM]
Data is sent to VRWriter and output to DVD-RAM disc.
(@
176)
• Video files with a playback time of less than
3 seconds cannot be output to DVD-RAM disc.
Note
` Only video files are sent to DVDWriter and VRWriter.
` If there are unnecessary video files, confirm which are
unnecessary by playing back the video thumbnails in SD
Browser and then set for the unnecessary files not to be
written in DVDWriter or VRWriter.
` It may take a few minutes to launch VRWriter.
- 30 -
Page 31

SD memory card input mode
Input mode
File playback and deletion
1.
Click on the thumbnail of the image to be
deleted from the card.
The selected image is displayed in the preview screen.
• For video, the playback is looped automatically.
2.
Click [Delete] and then click [Yes] when the
confirmation message is displayed.
The selected file is deleted.
Note
` Multiple files cannot be deleted simultaneously.
Setting the import destination folder
1.
Click [Setting].
The setting screen appears.
2.
Click [Browse], select the folder and click
[OK].
The folder’s path (C:\, etc.) is displayed.
• The folder’s path (location) can also be directly
entered.
When you create a new folder, make sure to enter the
folder name to the end of the path name of the folder.
(Up to 100 alphanumeric <single-byte> characters
can be entered for folder name including the path.)
- 31 -
Page 32

About the Edit mode
Edit mode
About the Edit mode
In order to edit video or audio using the MotionSD
STUDIO, set to the Edit mode.
Note
` For how to switch the operation modes, see @
24.
Edit mode
∫ Non-linear edit mode
When linking captured videos or editing the video
captured using special effects, etc., use this mode.
(@33)
- 32 -
Page 33

Non-linear edit mode
Edit mode
Non-linear edit mode
You can arrange videos captured onto the hard disk in the
PC on the edit track to splice or process them.
You can use the following functions:
Arranging clips on the edit track (@
Changing the order of the clips (@
Copying clips (@
Deleting clips (@
51)
52)
Playing the edited contents (@
Setting the aspect ratio of the preview screen (@
Capturing a still image clip (Snapshot) (@
Saving the edit information (edited contents) (@
Trimming clips (@
Dividing a clip (@
Adding audio (Audio Mix) (@
Applying effects to a clip (@
61)
64)
66)
72)
47)
50)
53)
56)
57)
59)
Screen configuration
The Non-linear edit mode consists of 3 screens: the
control screen (1), the library screen (2), and the edit
track screen (3).
12
3
Applying effects between clips (@
77)
- 33 -
Page 34

Non-linear edit mode
Edit mode
1 Control screen
The control buttons to play or edit the clips (images
captured) on the edit track are identified.
A
B
C
D
E
F G H
P Q
RS
I J
LM
K
N O
T
- 34 -
A. Displays the videos of the clip arranged. (Preview
screen)
• You can change the screen size with [Preview size]
in the [View] menu. (This function may be disabled
depending on the resolution of the PC screen.)
B. Moves the current bar (@
transition while the clip is being played.
• The detect sensitivity, etc. can be changed on
[Detecting function] screen in the Settings mode.
(@
190)
C. Displays the position of the video played on the clip
with the slider.
You can drag the slider to check the video.
D. Displays the time code of the video being played.
E. Displays the information of the clip selected on the
edit track.
• This section may not appear depending on the
preview screen (A) size or the resolution of the PC
screen.
F. Trims the start point of the clip.
G.Trims the end point of the clip.
H. Divides a clip.
I. Moves the current bar to the start point of the clip.
Subsequently, each click moves the current bar to
the start point of the previous clip.
J. Plays the clip.
K. Moves the current bar to the start point of the
subsequent clip.
38) to the next scene
Page 35

Non-linear edit mode
Edit mode
Subsequently, each click moves the current bar to
the start point of the subsequent clip.
In the last clip, moves the current bar to the end point
of the clip.
L. Clicking while the video is stopped or paused jumps
to the previous frame.
M.Stops the clip that is currently playing.
N. Stops the clip that is currently playing.
O.Clicking while the clip is stopped or paused jumps to
the subsequent frame.
P. Mutes or cancels mute.
Q.Turns down the volume.
R. Turns up the volume.
S. Displays the current volume.
T. Captures a still image.
(The [Speed] bar is displayed during playback.
(@
55))
Note
` The function to automatically detect scene transitions
(B.) may malfunction (wrong detection, excessive
detection, etc.) when there are many noises on the
video, or the file is compressed at a high compression
ratio.
Not all transitions can be detected. If a wrong detection
occurs, manually correct it on the edit track.
∫ About wheel mouse
If you use a wheel mouse, rotating the wheel (scroll)
button while the video is being played, paused, or
stopped functions as follows:
Rotating downward (towards you):
The video is advanced by 1 frame.
Rotating upward (away from you):
The video is reversed by 1 frame.
(The directions may vary depending on the shape of
the wheel mouse.)
- 35 -
Page 36

Non-linear edit mode
Edit mode
2 Library screen
The library screen displays data usable with MotionSD
STUDIO.
D
A
B
C
E
F
G
A. Displays the folder in use from those folders
registered.
• The data edited (captured, converted, processed,
etc.) by the MotionSD STUDIO are basically saved
in this folder.
• The [MaterialFolder] is registered beforehand.
When importing images in SD memory card input
mode, a folder is created for each month.
You can also add any custom folders as required.
(@
44)
• Click to display all the registered folders. You
can switch the folder here.
Click it again to restore.
B. Activates the screen to register a new folder.
C. The data in the folder used are displayed by
Windows Explorer.
D. Switches the file types.
Click each tab to display the data in the folder used
on the file display area (F), classified by type.
[Editing infor...]
Displays the file (SEQ File) in which the information
of the edit track (editing information) has been
saved.
[Video]
Displays compressed MPEG2 files (MPEG File).
• Limited to video recorded with the SD Video
Camera with which this software is supplied and
files that have been created with this software.
• Videos of less than 1 second cannot be used with
MotionSD STUDIO. They can be imported to the
PC, however cannot be displayed in the library.
- 36 -
Page 37

Non-linear edit mode
Edit mode
[Still image]
Displays the still image files (BMP/JPEG files).
[Title]
Displays the TTE files created in the Title editor
mode.
[Audio]
Displays the WAV (uncompressed) files and SBG
files.
[Mpeg1/Asf]
Displays the MPEG1 format files (MPEG File) and
ASF format files (ASF File).
E. Switches the file display.
:
Files are displayed in thumbnail format.
:
Files are displayed in thumbnail format together with
the detailed information.
F. Displays the data in the folder used in accordance
with the type selected in D.
G.Arranges the clip selected in F at the end of the edit
track.
Note
` You can operate: "Displaying all folders registered"
(@42), "Changing a file icon arrangement" (@42),
"Renaming a file"
(@43), "Deleting a file" (@43), etc.
` If the library display does not change after a file is
deleted, etc., select [Library] >> [Refresh].
` For file formats, please read “Glossary”. (@
226)
` In [Audio] library, there are some sample audio (SBG
files) which can be used for Audio mix. (@
66)
Refer to “Please read the following at first” for usage
conditions of the sample audio. (@
10)
- 37 -
Page 38

Non-linear edit mode
Edit mode
3 Edit track screen
Arrange the clip to be edited in this screen to proceed
to editing.
There are 2 types of display: time profile display and
icon display.
B
A
C
D
E
F
G
A. Displays the time code.
B. Clicks to adjust the extent of the time on the edit
track.
(min= minutes, sec= seconds, frames= frames)
C. Indicates that this is an edit track.
D. Clicking switches the display for the edit track.
Time profile display
The clip arranged is displayed in proportion to the
time length.
H
Icon display
The clips arranged are displayed in icons having the
same size for each clip.
E. Displays the output destination selection screen.
When an output destination is selected, the
corresponding Output mode is set. You can output
the clip to the SD Video Camera or output it as one
file. (@
F. :
Sends the current bar to the forefront of the track.
Sends the current bar to the back end of the track.
G.Displays the position of the video played on the clip.
(Current bar)
H. You can arrange an audio file. (background music
track)
If you want to add audio (Audio Mix) to a clip (video
clip or still image clip), arrange the audio file here.
(@
140)
:
66)
- 38 -
Page 39

Non-linear edit mode
Note
` The maximum number of clips to be arranged on the edit
track is 1024 and the maximum duration is 6 hours 45
minutes.
` The minimum number of frames for a clip on the edit
track is 30 for MPEG2 files and 5 for still image files.
Edit mode
- 39 -
Page 40

Non-linear edit mode
About library screen
In the library screen, the data in the registered folders
which can be used by the MotionSD STUDIO are
displayed.
You can add and register a folder other than the
pre-registered [MaterialFolder] and delete or rename the
file (Clip).
Note
` If the amount of data registered is large, the activation of
the MotionSD STUDIO will slow down.
` While a file in the library is being used by other software,
it cannot be deleted or renamed. If you cannot delete or
rename a file which is not used by other software, exit
the MotionSD STUDIO and reactivate it.
Edit mode
- 40 -
Page 41

Non-linear edit mode
Edit mode
Displaying files
The library displays the files in the folder used in
thumbnail form by type, such as [Video], [Still image],
[Title], etc.
If you select the file type tab in , the files corresponding
to the type are displayed in .
• For the file type tab, refer to the “Library screen” in the
“Non-linear edit mode”. (@
36)
Note
` You can move a file from the library to the desktop, etc.
by dragging and dropping it. You can also move a file
from the desktop, etc. to the library by dragging and
dropping it. (Before placing files in the libraries, display
the corresponding library: for instance, display the [Still
image] library when you place still images in the
libraries.)
` When MPEG2 files are dragged & dropped, the MTV
files which are paired up with these files will not be
moved together with the MPEG2 files, so you will no
longer be able to use them.
To move MPEG2 files with their accompanying MTV
files, move them together with their folders.
- 41 -
Page 42

Non-linear edit mode
Edit mode
Displaying all folders registered
1.
Click .
All the folders registered are displayed.
• Click it again to restore.
• Even if there is data in the folder registered, the files
other than those which can be used by the MotionSD
STUDIO will not be displayed in the library screen.
Changing a file icon arrangement
The files can be sorted by name, date, or file size.
1.
Select [Library] >> [Line up icons] >> [By
name], [By date] or [By size] from the menu.
The files are rearranged.
- 42 -
Page 43

Non-linear edit mode
Edit mode
Renaming a file
1.
Click the file to be renamed.
• You cannot rename multiple files at a time.
2.
Select [Library] >> [Change name] from the
menu.
You can rename the file.
Deleting a file
1.
Click the file to be deleted and then select
[Library] >> [Delete] from the menu.
The selected file is deleted.
• If the library display does not change, select [Library]
>> [Refresh].
Note
` If direct deletion is set for the process method for
deletion in the Settings mode, the file will be deleted
from the PC.
If deletion of files via Recycle Bin is set on Windows, the
files will be moved to Recycle Bin and deleted from the
PC when Recycle Bin is emptied on Windows. (@
(However, if direct deletion is set in the [Recycle Bin
Properties] screen in Windows Explorer, the files will be
directly removed from the PC without moving to Recycle
Bin.)
188)
- 43 -
Page 44

Non-linear edit mode
Edit mode
Registering a folder
The [MaterialFolder] is pre-registered in the library screen.
(When the MotionSD STUDIO is installed, a folder named
[MotionSD STUDIO] is created on the personal computer
and registered with the indication name [MaterialFolder].)
Video, audio, edit information, etc. will be saved in it as
default, but you can register another folder to save the
data in.
• When importing images in SD memory card input mode,
a folder is registed for each month.
1.
Click .
The new folder creation screen is displayed.
• You can also display the new folder creation screen
from [Library] >> [New folder] in the menu.
2.
Determine the folder to be registered and its
name.
A
B
A You can select a folder to be registered.
Click to select a folder to be registered and click
[OK].
The folder’s path (C:\, etc.) is displayed.
• The folder’s path (location) can also be directly
entered.
When you create a new folder, make sure to enter
the folder name to the end of the path name of the
folder. (Up to 100 alphanumeric <single-byte>
characters can be entered for folder name including
the path.)
B You can enter the display name for the folder in the
library.
• Up to 128 alphanumeric (single-byte) characters
can be entered for display name.
3.
Click [OK].
- 44 -
The folder is registered.
Click , and the registered folder will be displayed.
Page 45

Non-linear edit mode
Note
` The free space of the folder to be registered is not
available if it is less than about 300 MB.
Edit mode
- 45 -
Page 46

Non-linear edit mode
Edit mode
∫ To switch the folders
You can freely switch the registered folders to be used.
1.Click to display the registered folders.
2.Select a folder.
The name of the folder selected is displayed in
and the files in the folder are displayed in .
∫ To unregister a folder
1.Click to display the registered folders.
2.Right-click the folder to be deleted and select
[Delete folder].
A confirmation message appears.
3.Click [OK].
The folder is unregistered.
• Neither [SDBrowser] folder nor folder categorized by
month that have been imported in SD memory card
input mode can be deleted.
• The folder disappears in the MotionSD STUDIO, but
it will not be deleted from the PC.
To delete it from the PC, use Windows Explorer etc.
- 46 -
Page 47

Non-linear edit mode
Edit mode
Arranging clips on the edit track
To edit the video captured, it is necessary to arrange it on
the edit track.
Use the [Add To Edit Track] button to position the file in
the library on the edit track.
1.
Select the clip to be arranged from .
• If you want to arrange multiple clips, select them
while pressing the [Ctrl] key.
2.
Click .
A message indicating processing appears, then the
clip is arranged at the back end of the edit track.
A mark is given to each type of clip arranged.
Video clip:
Still image clip:
• If a TTE file (extension [.tte]) is arranged on the edit
track, it will become a video file (Video clip) for which
a title is set.
However, if the background image of the title is a still
image or the title cannot be previewed, you cannot
arrange the TTE file on the edit track. To use such a
TTE file in editing, save it as a video file.
(For details about TTE files, please read the
“Glossary”. (@
227))
- 47 -
Page 48

Non-linear edit mode
Edit mode
• You can also arrange the desired clips on the edit
track by drag and drop.
Note
` The minimum number of frames of a clip on the edit
track is 5 frames for MPEG2 and still image files.
` The maximum number of clips to be arranged on the edit
track is 1024 and the maximum duration is 6 hours 45
minutes.
` If you have arranged materials on removable media,
such as CD-R, do not remove the media while using the
MotionSD STUDIO.
` If you use the data in the network drive, MotionSD
STUDIO may not be operated properly because enough
transmission speed may not be obtained. Copy the data
to your local drive and then use it.
- 48 -
Page 49

Non-linear edit mode
Edit mode
∫ To check the contents of a video clip in the library
Double-click the icon on the [Video] library. The
software, such as Multi Player supporting the file format
of the video clip is activated and plays it.
About Multi Player
D
A
B
C
E
F
A. Play
B. Pause
C. Stop
D. Play images in the full-screen display
• To return to the original display, right-click the
screen, and select [Return to normal screen play].
E. Display the playback position on the clip using the
slider
• It is also possible to check the images by dragging
the slider.
F. Close Multi Player.
Note
` When playing a file, a part of the video may be distorted
or it may not be played smoothly depending on the
environment of your PC.
` Windows Media
the [Mpeg1/Asf] library is double-clicked.
For detailed operations of the Windows Media
please refer to the Help of the Windows Media
®
Player is activated when the icon on
®
Player,
®
Player.
- 49 -
Page 50

Non-linear edit mode
Edit mode
Changing the order of the clips
You can change the order of the clips arranged on the edit
track.
1.
Select the clip of which order is to be
changed.
2.
Drag it to any location.
During dragging, a line ( ) with the same colour as
that of the clip is indicated as an insertion location.
3.
Drop it.
The clip is inserted at the location where it is dropped.
• Special effects (video effect, etc.) applied to the clip
are moved together with the clip.
However, for the transition effect (@
immediately before and after the clip will be deleted.
WAV (uncompressed) files (audio files) on the
background music track will not be moved together
with the clip.
77), those set
- 50 -
Page 51

Non-linear edit mode
Edit mode
Copying clips
You can duplicate a clip on the edit track.
1.
While pressing the [Ctrl] key, drag the clip.
The clip is duplicated.
• The special effects (video effect, etc.), if applied, will
be duplicated, too.
However, the transition effect or WAV
(uncompressed) files (audio files) on the background
music track will not be duplicated.
Note
` When you copy a clip with a title and change the title, the
copy source and the TTE file are also changed similarly.
- 51 -
Page 52

Non-linear edit mode
Edit mode
Deleting clips
You can delete unnecessary clips from the edit track.
1.
Select a clip to be deleted.
2.
Select [Edit] >> [Delete] from the menu.
The clip is deleted from the edit track.
The clips subsequent to the clip deleted will be moved
forward.
• You may also hit the [Delete] key on the keyboard to
delete the clip.
• You may also right-click the clip and select [Delete]
from the context menu to delete it.
• The special effects (video effect, transition effect,
etc.), if applied, will be deleted, too.
• The clip will not be deleted from the library.
∫ To delete all clips
You can delete all the clips on the edit track all at once.
1.Select [Edit] >> [Clear] from the menu.
All the clips on the edit track are deleted.
- 52 -
Page 53

Non-linear edit mode
Edit mode
Playing the edited contents
You can play the edited contents to check it.
1.
Click .
The current bar ( ) is sent to the forefront of the edit
track.
• You can move the current bar in the following manner
to determine the play start point.
- Move the current bar directly to the beginning or any
location by dragging it with the mouse.
- Click any part of the clip to move it.
- Click in the control screen to move it to the
start point of the clip.
Thereafter, each click of the mouse moves the
current bar to the start point of the previous clip.
(For the other control buttons, refer to the "Control
screen"
2.
Click .
The edited contents are played and the video is
displayed in the preview screen.
(@34)).
- 53 -
Page 54

Non-linear edit mode
Note
` You can also check the video by selecting the clip and
dragging the slider in the control screen. (You can only
check the clip one by one and cannot check the audio.)
` When the special effects are set on the clip, playing
video may be slowed down or the audio may be
interrupted. This occurs because the preview data is
temporarily generated but it does not affect the output.
Edit mode
- 54 -
Page 55

Non-linear edit mode
Edit mode
∫ Changing playback speed
The playback speed bar is displayed during playback.
Playback speed can be changed by dragging the slider
or clicking anywhere on the playback speed bar.
• Depending on the operating environment of the
computer being used, the playback of the video and
audio at the set playback speed may not be smooth.
This does not affect the output data file.
• The given playback speed is an indicator only,
playback at the set speed is not precise.
∫ To adjust the volume of the playback clip
You can adjust the volume by double-clicking a clip in
the edit track and entering a numeric value in the
volume setting column on the [Properties] screen.
• You can set the volume from 0.0 to 4.0 times.
• This is a different control from the volume setting in
Audio Mix (@
control to 0% in Audio Mix, setting the volume in the
[Properties] screen even to 4.0 times will not play the
audio.
66). For example, if you set the volume
- 55 -
Page 56

Non-linear edit mode
Edit mode
Setting the aspect ratio of the preview screen
The aspect ratio of the preview screen can be set.
1.
Arrange the clips on the edit track (@47)
The aspect ratio is set to that of the first file placed on
the edit track.
2.
Select [Edit] >> [Screen aspect ratio] >> [4:3
Normal] or [16:9 Wide] from the menu.
Each aspect ratio is applied.
[4:3 Normal]
Displayed at the normal 4:3 aspect ratio.
[16:9 Wide]
Displayed at the wide 16:9 aspect ratio.
Note
` When the aspect ratio is different from the original data,
a black area is displayed above and below and to the
right and left of the image.
Displaying 4:3 data at 16:9 aspect ratio.
Displaying 16:9 data at 4:3 aspect ratio.
- 56 -
Page 57

Non-linear edit mode
Edit mode
Capturing a still image clip (Snapshot)
While viewing the video, press the [Snapshot] button as
soon as you find a position you want to capture, then you
can easily capture a still image clip (still image).
1.
Click .
The preview screen presents the video being played.
2.
Click when you capture.
Playback is stopped.
3.
Click .
The still image clip is captured and displayed in [Still
image] in the library.
Note
` Double-click the still image clip in the library, and the
software associated with its format will be activated and
the image will be displayed.
- 57 -
Page 58

Non-linear edit mode
Edit mode
∫ To change the settings for capturing still images
You can change the save format, resolution, length,
etc. when capturing a still image clip on the still image
setting screen in the Settings mode.
A
B
C
D
E
F
G
A. The first half of the clip name.
B. You can select a serial number for the clip name.
C. You can select a save method.
Select the interpolation method when capturing
objects in motion.
[No interpolation]
It is suitable when you capture still pictures from the
progressive video or the video with less motions.
[Motion interpolation]
Automatically switches the interpolation method
according to the scale of the motion.
[alternative field interpolation]
It is suitable when you capture still pictures from the
video with drastic motions.
D. You can select an image size.
E. You can select a save format.
Select from BMP (uncompressed)/JPEG.
F. You can select a compression ratio for JPEG
images.
G.You can set a display duration when a still image clip
is arranged in the edit track. (@
47)
- 58 -
Page 59

Non-linear edit mode
Edit mode
Saving the edit information (edited contents)
You can save the edited contents.
It is recommended to save the edited contents frequently.
1.
Select [File] >> [Editing information] >> [Save
editing information as] from the menu.
The save destination setting screen is displayed.
2.
Enter the file name and click [Save].
The edit information is saved and displayed in [Editing
infor...] in the library.
• For the saving destination, select a folder registered
in the library.
Note
` The extension for an edit information file is [.seq].
` Do not delete or move video files etc. used for the edit
information file from the hard disk, or do not rename the
files.
The edit information will not be able to be used.
∫ To display the edit information saved
1.Double-click the edit information file to be
viewed.
The edit information is displayed on the edit track.
- 59 -
Page 60

Non-linear edit mode
Edit mode
∫ To change the icon for edit information
You can change the icon (Displayed Image) for the edit
information file.
1.Double-click the edit information file of the icon to
be changed.
The edit information is displayed in the edit track.
2.Click .
The edit information is played back.
3.Click at the video that you want to use as an
icon.
The video display is paused.
4.Click .
The icon for the scene divided is added on the edit
track.
5.Double-click the icon for the scene divided.
The [Properties] screen appears.
and then [OK].
7.Select [File] >> [Editing information] >> [Save
editing information] from the menu.
The icon for the edit information file is changed.
Note
` You cannot set images of the scene other than divided
as a representative icon.
` You can also change the icon by double-clicking any
division on the edit track and clicking the Representative
Icon Setting button.
6.Click the Representative Icon Setting button ( )
(The edit information must be overwritten.)
- 60 -
Page 61

Non-linear edit mode
Edit mode
Trimming clips
You can cut the unnecessary beginning and/or ending
portions of a video clip or a still image clip arranged on the
edit track.
You can use the Mark in or Mark out buttons or directly
enter the time code.
1.
Adjust the display width of a clip in .
• When trimming, it is convenient to show the edit track
in time profile display. (@
2.
Select the clip to be trimmed.
3.
Click the point at which you wish to start the
38)
clip and move the Current bar ( ).
4.
Click .
The video before the start point set is cut.
5.
Click the point at which you wish to end the
clip and move the Current bar ( ).
6.
Click .
The video after the end point set is cut.
- 61 -
Page 62

Non-linear edit mode
Note
` Use the Scene Move button to find the subsequent
scenery transition. (@
` If the duration of the clip is too short, the video may not
be displayed.
` If a special effect is added to a clip, it may not be
possible to trim the clip or the trimming range may be
limited depending on the type or effect itself.
Remove the special effect or process the clip using
rendering to make it a video file, then you can trim it.
(@
85)
34)
Edit mode
- 62 -
Page 63

Non-linear edit mode
Edit mode
∫ To trim using trimming marks
Bring the cursor close to . When the cursor changes
to , drag it to adjust.
• To cut the beginning of the scene, drag the left
trimming mark to the right.
To cut the ending of the scene, drag the right trimming
mark leftward.
• Set the edit track to the time profile display for
operation. (@
38)
∫ To trim by entering the time code directly
Double-click the clip to be trimmed, enter the start point
and the end point, and click [OK].
• For video clips, settings over the duration or the end
point defined at the moment of capturing are not
allowed.
You cannot change the start point of a still image clip.
- 63 -
Page 64

Non-linear edit mode
Edit mode
Dividing a clip
Divides a video clip or still image clip arranged on the edit
track.
When divided, special effects can be applied to a part of
the clip or another video can be inserted in the midway of
the clip.
1.
Click and click at the location to be
divided.
The video display is paused.
• You can also drag the current bar directly to
determine the position of division.
2.
Click .
The clip is divided into 2 at the point of the current bar
().
• The clip in the library is not divided into 2.
• To cancel the division, right-click and select
[Unsplit].
However, if a special effect is applied or the clip is
trimmed after division, the division cannot be
cancelled.
• If the clip is applied with special effect, it may not be
possible to divide the clip or the dividing position may
be limited depending on the type or settings of effect.
Remove the special effect or process the clip using
rendering to make it a video file, then you can divide
it. (@
85)
• If a video effect has been set to the clip, the effect will
be applied to both the left and right clips divided.
However, fading, one of video effects, has been set,
- 64 -
Page 65

Non-linear edit mode
fade-in will be applied only to the first half of the clip
and fade-out only to the last half. (You cannot divide a
clip in the fade-effective range.)
• If the number of frames of a clip after division is the
minimum number of frames (30 frames in the case of
MPEG2 files/5 frames in the case of still image files)
or less, the division is not effective.
Note
` Use the Scene Move button to find the subsequent
scenery transition. (@
` The detect sensitivity, etc. for finding scene transitions
can be changed on the detecting function setting screen
in the Settings mode. (@
34)
190)
Edit mode
- 65 -
Page 66

Non-linear edit mode
Edit mode
Adding audio (Audio Mix)
You can add audio (Audio Mix) to a video clip or still
image clip arranged on the edit track.
Add a WAV (uncompressed) file (audio file) onto the
background music track by dragging and dropping it.
1.
Drag and drop a WAV (uncompressed) file
onto the background music track below the
clip to which audio is to be added.
The WAV (uncompressed) file is placed on the
background music track.
• Even if the duration of the audio file is longer than that
of the clip, the audio file will be placed according to
the duration of the clip.
2.
Click to set to the time profile display and
right-click the WAV (uncompressed) file to
select [Audio mix information].
The Audio Mix setting screen appears.
3.
Set the Audio Mix parameters. (@69)
4.
Click [OK].
- 66 -
Page 67

Non-linear edit mode
5.
To change the position where Audio Mix is
set, drag the WAV (uncompressed) file.
Now, the Audio Mix setting is completed.
• Note that if , located at the right and left sides of the
WAV (uncompressed) file, is dragged, the WAV
(uncompressed) file applicable range is varied. (This
is not applicable for the icon-display edit track.)
• To delete the Audio Mix setting, right-click the WAV
(uncompressed) file you want to delete and select
[Delete audio mix].
• If you want to change the Audio Mix parameters,
right-click the WAV (uncompressed) file and select
[Audio mix information]. Change them in the Audio
Mix setting screen.
Edit mode
- 67 -
Page 68

Non-linear edit mode
Edit mode
Note
` To use files other than WAV (uncompressed) files in a
library, either register the folder containing the WAV
(uncompressed) files in the library or store the WAV
(uncompressed) files in a folder which is already
registered in the library.
` If you delete or move a video clip added with audio, the
WAV (uncompressed) file (audio file) remains as it is.
However, if the edit track contains only the WAV
(uncompressed) file, you cannot play or edit the edited
data.
` To combine the clip with the audio added, the rendering
process (to form 1 video clip added with special effects)
is necessary. Rendering is automatically carried out at
the time of output, but you may render manually. (@
85)
` Another WAV (uncompressed) file can be added to any
section where Audio Mix has not been set. In other
words, two or more WAV (uncompressed) files can be
added to one clip.
(uncompressed) file set, and another WAV
(uncompressed) file can be added. (@
85)
` You can add audio to still image clips. If the clip added
with audio is rendered, it will be converted into a video
clip.
` You cannot change the order of the WAV
(uncompressed) files by dragging.
` In [Audio] library, there are some sample audio (SBG
files) and you can use them for Audio mix.
The conditions for using the sample audio are described
in the “Please read the following first”. Please read it
carefully. (@
10)
` You can also use the audio data in the video clip
(MPEG2 file) for Audio Mix. Follow the similar procedure
for WAV files to place the video clip on the background
music track.
` WAV (uncompressed) files of which duration is 2 hours
or more cannot be added to a clip.
However, WAV (uncompressed) files cannot be
overlapped.
If you want to add multiple audio data, render the WAV
- 68 -
Page 69

Non-linear edit mode
Edit mode
∫ Audio Mix setting screen
You can make detailed settings in the Audio Mix setting
screen.
A
B
E
C
F
D
A. The names of WAV (uncompressed) files and their
locations are displayed.
B. You can set the volumes for the original audio and
the added audio (WAV <uncompressed> file) by
moving the slider.
[BGM]
You can adjust the volume for the added audio.
[Edit track]
You can adjust the volume for the original audio.
• In the initial setting, both are set to 100%.
• Move it to the right for higher volume levels or to the
left for lower volume levels.
If both [BGM] and [Edit track] are set to 0%, no
audio will be played.
C. You can set the applicable range of the audio added.
Drag / to set the times for the start point and
the end point. (The applicable range will be shown in
red.)
• In the initial setting, the start point is set to 0 and the
end point is set so that the audio is applied only to
the added clip.
You can extend the range to set the audio over to
the subsequent clip.
• You can also set it by clicking in the start point
and end point boxes.
• In the duration box, you can set the duration
between the start point and the end point.
• The duration of the background music file and that
between the start point and the end point may not
coincide. This is due to only the display and does
not affect the processing.
D. Check, and the start point and the end point will be
interlocked.
It is convenient if you want to keep the length of the
WAV (uncompressed) file.
E. You can check the settings on video
• You can also check the setting by moving the slider.
- 69 -
Page 70

Non-linear edit mode
:
Plays the video.
:
Ends the video played.
F. Check, and you can apply fading to the added audio.
[Fade-in]
The mixed audio starts and its volume is gradually
increased.
[Fade-out]
The mixed audio ends and its volume is gradually
decreased.
Edit mode
- 70 -
Page 71

Non-linear edit mode
Edit mode
∫ To make the Audio Mix settings on the edit track
You can make simple Audio Mix settings on the
background music track.
• Set the edit track to the time profile display for
operation.
To set the applicable range of the WAV
(uncompressed) file (audio file):
Bring the cursor close to at the both sides of the
WAV (uncompressed) file. When the cursor changes to
, drag it right or left to adjust.
You can set the start point with the left and the end
point with the right .
• You cannot set the range exceeding the start point or
the end point of the entire WAV (uncompressed) file.
To change the setting position of the audio mix:
Drag the WAV (uncompressed) file to move it to any
position.
• You cannot overlap it on another WAV
(uncompressed) file or set by changing the order of
the WAV (uncompressed) files.
- 71 -
Page 72

Non-linear edit mode
Edit mode
Applying effects to a clip
You can apply a special effect (Effect) by digital
processing to a video clip or still image clip arranged on
the edit track.
The MotionSD STUDIO refers to this as “Video Effect”.
Types of video effects
∫ [Fade-in]
The video and/or audio appears
gradually.
• You can change the duration
for which the video fully
appears and the colour of the
screen before the video starts to appear.
∫ [Fade-out]
The video and/or audio
disappears gradually.
• You can change the duration
for which the video fully
disappears and the colour of
the screen after the video disappears.
∫ [Mosaic]
Mosaic is applied to the video.
• You can change the mosaic
block size.
∫ [Strobe]
The video is presented like a
single frame step display.
• You can change the interval of
strobe actions.
∫ [Art]
The video is presented like
paintings.
∫ [Negative-Positive]
The video is presented like a
negative film.
- 72 -
Page 73

Non-linear edit mode
Edit mode
∫ [Monotone]
The video is presented in black
and white.
∫ [Sepia]
The video is presented in sepia
colours like old photos.
∫ [Slow]
The video slows down.
(Audio is not played.)
• You can change the slow speed
factor.
∫ [Mirror]
The video image is reversed
horizontally (mirrored).
∫ [Brightness]
You can adjust the brightness of
the video.
• You can change the brightness
of the video.
- 73 -
Page 74

Non-linear edit mode
Edit mode
Applying a video effect
Sets a video effect to a video clip or still image clip
arranged on the edit track.
For setting, use the video effect setting screen.
1.
Right-click the clip to which a video effect is to
be applied and select [Video effect].
The video effect setting screen appears.
2.
Set the video effect parameters. (@75)
3.
Click [OK].
The video effect is set.
The video clip on the edit track is marked .
• If you want to delete the video effect settings,
right-click and select [Delete effect].
• If you want to change the video effect parameters,
right-click and select [Video effect information].
Change them in the video effect setting screen.
• Effects are applied to the entire clip except [Fade-in]
and [Fade-out].
Note
` To combine the clip with the video effect set, the
rendering process (to form 1 video clip added with
special effects) is necessary. Rendering is automatically
carried out at the time of output, but you may render
manually. (@
` If you want to add a special effect which cannot be set
together with the video effect, you can add other effects
by rendering the video effect manually. (@
` You can also apply a video effect to a still image clip.
(However, the applicable effect types are limited.)
The still image clip will be converted into a video clip
after rendering.
` If you apply a video effect to a part of the clip, first divide
the clip. (@
` [EF] is an abbreviation of EF
85)
85)
64)
fect.
- 74 -
Page 75

Non-linear edit mode
Edit mode
∫ Video effect setting screen
A
B
C
A. You can select types of video effects. (@
B. You can check the effect on the preview screen by
moving the slider.
C. Some types of effects have advanced settings.
A
B
• In order to set A, either move the slider or click
, set any value in , and click [Settings].
[Fade-in]
A The duration between the time the video begins to
appear to the time it fully appears
72)
• You cannot set this exceeding the duration of the
clip.
B Initial screen colour
• Click [Colour settings] to select a colour. For
how to make a favourite colour, refer to the
“When the standard colours contain no colour
you wish to select” in the Title editor mode.
(@
104)
Click [Define Custom Colors], and the colour
creation screen will appear.
[Fade-out]
A The duration between the time the video begins to
disappear to the time it fully disappears
• You cannot make a setting exceeding the
duration of the clip.
B Last screen colour
• Click [Colour settings] to select a colour. For how
to make a favourite colour, refer to the “When the
standard colours contain no colour you wish to
select” in the Title editor mode. (@
Click [Define Custom Colors], and the colour
creation screen will appear.
[Mosaic]
A Block size
You can enter an integer from 2 to 32.
104)
- 75 -
Page 76

Non-linear edit mode
[Strobe]
A The interval at which the screens are switched
(seconds)
You can enter a value from 0.10 to 1.00.
[Slow]
A Speed multiplication factor
You can enter a value from 0.10 to 0.90.
• You cannot set the value which causes the
playback time of the video to exceed 6 hours 45
minutes.
[Brightness]
A The brightness of video
You can enter an integer from
`100 to 100.
Edit mode
- 76 -
Page 77

Non-linear edit mode
Edit mode
Applying effects between clips
You can apply a special effect (Effect) by digital
processing between clips (video clip or still image clip)
arranged on the edit track.
The MotionSD STUDIO refers to this as “Transition
Effect”.
Types of transition effects
∫ [Mix]
The subsequent screen appears
while overlapping on the current
screen.
∫ [Wipe]
The subsequent screen replaces
the current screen as if a curtain
is drawn.
∫ [Slide]
The current screen slides out for
the subsequent screen to
appear.
∫ [Stretch]
The current screen shrinks for
the subsequent screen to
appear.
∫ [Both slides]
Both the 2 screens slide for the
subsequent screen to appear.
∫ [Both stretches]
The original screen shrinks and
the subsequent screen swells.
- 77 -
Page 78

Non-linear edit mode
Edit mode
∫ [Door-Wipe]
The subsequent screen replaces
the current screen as if a curtain
is drawn from the centre towards
the sides.
∫ [Door-Slide]
The subsequent screen replaces
the current screen as if a French
door is opened.
∫ [Door-Slide-Stretch]
The current screen is split off at
the centre and its both sides
shrink for the subsequent screen
to appear.
∫ [Door-Centre-Stretch]
The current screen is split off at
the centre. The subsequent
screen swells towards both sides
for the subsequent screen to
appear.
∫ [Box wipe]
The subsequent screen starts to
appear at the centre of the
current screen extending
towards the four corners.
∫ [Zoom]
The whole subsequent screen
appears zooming towards the
four corners.
∫ [Page (Bottom left)]
The subsequent screen appears
as if a page is flipped from the
bottom left.
∫ [Page (Top left)]
The subsequent screen appears
as if a page is flipped from the
top left.
- 78 -
Page 79

Non-linear edit mode
Edit mode
∫ [Clock wipe 1]
The current screen is wiped as if
a clock hand moves for the
subsequent screen to appear.
∫ [Clock wipe 2]
The current screen is wiped as if
a fan is flicked open for the
subsequent screen to appear.
∫ [Cross wipe]
Clock wipe 2 takes place at the
top and bottom simultaneously
for the subsequent screen to
appear.
∫ [Corner wipe]
The subsequent screen starts to
appear at the top left corner of
the current screen extending
towards the other three corners.
∫ [Corner slide]
The subsequent screen starts to
appear at the top left corner of
the current screen extending
towards the bottom right corner.
∫ [Corner zoom]
The subsequent screen starts to
appear at the top left corner of
the current screen zooming up
towards the bottom right corner.
∫ [Corner both slides]
The 2 screens slide from the top
left towards the bottom right
simultaneously until the
subsequent screen fully
appears.
∫ [Corner both zooms]
The current screen is zoomed
out towards the bottom right,
while the subsequent screen is
zoomed in from the top left.
- 79 -
Page 80

Non-linear edit mode
Edit mode
∫ [Line wipe]
The current screen is marked out
by the subsequent screen from
the top to the bottom.
∫ [Multi corner]
The current screen is divided
into 36 screens; each screen is
Corner-Wiped by the
subsequent screen.
∫ [Multi wipe 1]
The current screen is sliced
vertically; each sliced screen is
wiped by the subsequent screen.
∫ [Multi wipe 2]
The current screen is sliced
vertically; each sliced screen is
wiped by the subsequent screen
from the left.
∫ [Flip]
The current screen is flipped and
the subsequent screen appears.
∫ [Mosaic]
The current screen is obscured
by mosaic then the subsequent
screen appears.
∫ [Blind 1]
The current screen is sliced
horizontally; each sliced screen
is wiped by the subsequent
screen.
∫ [Blind 2]
The current screen is sliced
horizontally; each sliced screen
is wiped from the top to the
bottom by the subsequent
screen.
- 80 -
Page 81

Non-linear edit mode
∫ [Spin]
The current screen shrinks while
rotating towards the centre and
the subsequent screen appears.
Edit mode
- 81 -
Page 82

Non-linear edit mode
Edit mode
Applying a transition effect
Sets a transition effect between video clips arranged on
the edit track.
Use the transition effect setting screen.
1.
Right-click in the scene to be applied with
a transition effect and select [Create
transition].
The transition effect setting screen appears.
2.
Set the transition effect parameters. (@84)
3.
Click [OK].
The transition effect is set.
changes to .
• If you want to delete the transition effect settings,
right-click and select [Delete transition].
• If you want to change the transition effect parameters,
right-click and select [Transition information].
Change them in the transition effect setting screen.
- 82 -
Page 83

Non-linear edit mode
Note
` If the clip to which a transition effect has been set is
moved, the transition effects before and after the clip will
be deleted.
` To combine the clip with the transition effect set, the
rendering process (to form 1 video clip added with
special effects) is necessary. Rendering is automatically
carried out at the time of output, but you may render
manually. (@
` If you want to add a special effect which cannot be set
together with the video effect, you can add other effects
by rendering the special effect manually. (@
` If the clip has been set with title, the effect is also applied
to the transition effect applied sections.
If you do not want to apply other effects to the transition
effect applied sections, carry out the rendering process
for the other effects and create a video file. (@
` You can also apply a transition effect to a still image clip.
The still image clip will be converted into a video clip
after rendering.
` If you apply a transition effect midway into the clip, divide
the clip. (@
` In the preview, the audio may be interrupted or noises
appear on the video. However, the data which is output
in file output mode will not be affected.
` [T] is an abbreviation of T
85)
85)
85)
64)
ransition effect.
Edit mode
- 83 -
Page 84

Non-linear edit mode
Edit mode
∫ Transition effect setting screen
A
C
D
B
A. You can select different types of transition effects.
(@
77)
B. If checked, the scenes will transit in the reverse
direction.
• This effect is not applicable with some types of
transition effects.
C. You can check the effect on the preview screen by
moving the slider.
D. Allows more detailed settings for the effect.
A
A The duration for which the transition effect is
applied.
• In order to set, either move the slider or click
, set any value in , and click [Settings].
• You cannot set it over the maximum allowable
value.
B The width and colour of the border line between
the current and subsequent screens.
• Click [Colour settings] to select a colour. For
details on how to make a favourite colour, refer
to “When the standard colours contain no colour
you wish to select” in the Title editor mode.
(@
104)
Click [Define Custom Colors], and the colour
creation screen will appear.
• This may not be set or the settable values or the
items may be limited depending on some
transition effect types.
B
- 84 -
Page 85

Non-linear edit mode
Edit mode
Combining special effect into clip (Manual Rendering)
To combine special effects or audio (WAV
<uncompressed> files, etc.) set to a clip on the edit track,
the rendering process (to form 1 video clip added with
special effects) is necessary. Rendering is automatically
carried out at the time of output, but you may render
manually.
Note
` Special effects include video effects, transition effects,
and titles.
` When you cannot add another effect because an effect
which cannot be set with other special effects has
already been set, you can add the new effect by manual
rendering.
1.
Right-click the mark representing the special
effect or audio file to be rendered and select
[Render....].
The rendering setting screen appears.
- 85 -
• The special effect marks are as follows:
:Video effect
:Transition effect
:Title
2.
Set the output destination and click [OK].
Rendering starts and a video clip combined with the
special effect or audio is created.
When the rendering is completed, the special effect
mark or the audio file will disappear.
• For the output destination, you can select it from the
folders (the default is [MaterialFolder]) registered in
the library.
• Rendering takes time. (It takes several times of the
length of the edit data.) Do not operate the PC during
rendering.
• If the transition effect is rendered, the part used for
the transition effect will be cut from the clips before
and after and then 1 video clip will be created.
Therefore, if a non-separable effect is set to the clip,
Page 86

Non-linear edit mode
Edit mode
first render it. Otherwise, you cannot render the
transition effect.
Note
` If 1 clip is rendered several times, the image quality will
degrade in stages.
` If a clip is rendered, a new video clip containing the
special effect will be created, which is displayed in the
library.
` The format of the video clip created is MPEG2 format.
∫ About the priority of special effects to be displayed
When multiple special effects are set in a clip, the
priority of display is as follows. (The title is in the lowest
priority.)
Title
Transition effect
Video effect
Video clip, still image clip
Last
If you want to add a special effect in the different order,
set only the effect to be applied first and carry out
manual rendering.
(Right-click the mark of each effect, and select
[Render....], to run the manual rendering.)
- 86 -
Page 87

Non-linear edit mode
Edit mode
Rotating still images
Still images can be rotated in 90-degree increments.
1.
Right click on the clip to be rotated in the [Still
image] library and select [Rotate]
The Rotation Settings screen is displayed.
2.
Select the rotation angle
A
3.
Click [OK].
Note
` Files containing Exif information are rotated updating the
Exif information. Files not containing Exif information
create a new rotated file.
` Exif rotation information does not affect playback with
the SD Video Camera with which this software is
supplied.
` File names for files not containing Exif information are
displayed in (A).
- 87 -
Page 88

About the Process mode
Process mode
About the Process mode
To add a title to a video clip with MotionSD STUDIO, open
the Process mode.
Note
` For how to switch the operation modes, see @
24.
Process mode
∫ Title editor mode
When adding a title to a video, use this operation mode.
(@89)
- 88 -
Page 89

Title editor mode
Process mode
Title editor mode
This mode enables you to insert a title (text, an animation,
frame) in a video clip or still image clip.
You can use the following functions:
Setting the preferences of edit screen (@
Applying effects to the image (@
Inserting a frame (@
105)
Inserting text-based title (@
Inserting an animation (@
116)
100)
106)
Inserting a video clip as sub-screen (@
Applying fade effects to text, animation, and
sub-screen (video clip) (@
123)
Applying motion effects to text, animation and
sub-screen (video clip) (@
Drawing graphics and lines (@
Confirming the title created (@
Saving as a title file (TTE file) (@
Saving as a video clip (@
Saving as a still image clip (@
125)
130)
134)
136)
138)
139)
92)
120)
Screen configuration
The Title editor mode consists of 2 screens: the edit
screen (1) and the library screen (2).
1
2
- 89 -
Page 90

Title editor mode
Process mode
1 Edit screen
The edit screen is provided with the screen, animations,
frames and others for adding, creating or editing the
title.
BC D
A
E
A. This is the screen used to edit the title. (edit screen)
It displays the first scene of the clip where the title is
inserted, the title, and other elements.
B. :
Used to select a target to be edited with the mouse
cursor.
:
Used to enter or add text on the edit screen.
:
Used to draw lines on the edit screen.
:
Used to draw circles on the edit screen.
:
Used to draw rectangles on the edit screen.
:
Used to draw free-form lines on the edit screen.
C. :
Used to save edited data as the video clip (MPEG2
format).
:
Used to save edited data as the still image clip (BMP/
JPEG format).
D. :
Used to select any text font.
:
Used to select any text size.
- 90 -
Page 91

Title editor mode
Process mode
:
Used to select any text colour.
:
Used to add any shadow effect on text.
E. In this area, there are animations, frames, and others
that can be used as the title. (Animation and frame
window)
[Animations]
Displays animations.
[Frames]
Displays frames designed to events.
[Text Attributes]
Displays the templates of text attributes.
2 Library screen
The library screen displays data usable with MotionSD
STUDIO.
The file types displayed in this mode is [Video], [Still
image], or [Title].
For details, refer to “Library screen” in “Non-linear edit
mode”. (@
36)
- 91 -
Page 92

Title editor mode
Process mode
Setting the preferences of edit screen
This section describes how to set the preferences of the
edit screen.
You can specify whether to show/hide each toolbar (menu
icons) and the animation and frame window, whether to
expand/reduce the image display, and so on.
You can also set the clip length and screen colour.
Setting the preferences
Set the colour of the edit screen and the length of edit
data.
1.
Select [File] >> [Preferences] from the menu.
The preferences screen will be displayed.
2.
Set the background colour and file length.
A
A You can set the background colour when no image is
placed on the background.
• For how to set the solid colour, refer to "Solid
Colour setting screen"
• For how to set the gradient colour, refer to
"Gradient Colour setting screen"
B You can set the file length (time) when saving edited
data without background or a still image background,
in the video format.
• The file length can be set between 1 and 300
seconds.
• When a video clip is placed on the background, the
length of that clip is saved as the file length.
3.
Click [OK].
The settings will be applied.
(@112).
(@113).
B
- 92 -
Page 93

Title editor mode
Process mode
Setting the display
Change the display size of the image placed, specify
whether to show/hide the effective frame and each
toolbar, and make other setting.
Make various types of setting from [View] menu.
∫ To show the toolbar
Check the name of a toolbar you wish to show in [View]
menu.
If unchecked, the toolbar is not displayed.
[Main Toolbar]
Shows .
[Movie Toolbar]
Shows .
[Text Toolbar]
Shows .
∫ To change the display size of image placed
Check any desired display size in [View] menu.
• It only changes the display size on the edit screen.
The size of the title that will actually be created
remains unchanged.
[Actual Size]
Displays the full-scale image.
[Zoom In]
Displays an expanded image.
You can select from among [k2], [k4], [k6], [k8].
[Zoom Out]
Displays a reduced image.
You can select from among [k1/2] and [k1/4].
∫ When you wish to place the title precisely
The grid can be displayed to use it as a placement
guide.
Check each item in [View] menu.
If unchecked, the unchecked items are not displayed.
[Grid Alignment On]
Snaps the title to a grid. It facilitates positioning.
[Show Grid Lines]
Shows the grid on the edit screen.
- 93 -
• The grid is not recorded as the title.
Page 94

Title editor mode
Process mode
∫ To hide placed title
You can hide any placed title.
Check [Hide Foreground Objects] in [View] menu.
If unchecked, the title will be shown again.
• This is useful when you wish to confirm the
background image.
∫ To show the guide line
You can show the index (guide line) of the placement
range of the title, etc.
Placing the title, etc. inside the guide line can prevent it
from going beyond the screen.
Uncheck [Hide Safety Zone] in [View] menu.
If checked, the guide line will be hidden.
∫ To temporarily cancel the transparency effect
applied to text
Check [Hide Transparency Effect] in [View] menu.
If unchecked, the transparency effect will be applied
again.
∫ To show animations, frames, and other templates
Check [Sprite Panel] in [View] menu.
If unchecked, the templates will be hidden.
∫ To confirm the effect of title placed
You can confirm the effect of the title placed.
Select [View] >> [Enter Preview] from the menu, and
confirm the effect on the preview screen.
- 94 -
Page 95

Title editor mode
Process mode
Preparing a clip in which a title will be inserted
First of all, prepare a clip (file) in which the title will be
inserted.
You can prepare it from the edit track, menu, or library.
Note
` The file formats that the title can be added to are the
MPEG2, BMP, JPEG and TTE formats.
` For the video clip, only the still image in the first scene is
displayed on the edit screen.
` If there is no video clip that the title can be added to, first
capture a video clip in the Input mode. (@
` When you wish to insert the title in part of a video clip,
divide the clip in advance. (@
64)
25)
Preparing video clip from edit track
Prepare any clip from the edit track in the Edit mode.
1.
Right-click the clip on the edit track, and
select [Title editor].
The operation mode will switch to the Title editor mode
and the first scene of the clip will be displayed on the
edit screen.
• You may accomplish this preparation by selecting the
clip on the edit track and clicking on in the TOOL
BOX.
Note
` If you cannot set the title because special effects that
cannot be set together with the title are set, you can set
the title by deleting the special effects or turning the clip
into the video file with rendering (@
` If you prepare a clip from the edit track, it is impossible to
delete the clip or replace it with another clip.
Even if replaced, it is not reflected on the edit track.
85).
- 95 -
Page 96

Title editor mode
Process mode
Preparing clip from library
1.
Right-click a desired clip from the library in
the Edit mode and select [Title editor].
The Title editor mode will be established and the first
scene of the clip will be displayed on the edit screen.
• To delete the clip, select [Background] >> [Clear
Background] from the menu.
• To replace the clip, drag and drop desired file in the
library on the edit screen.
Note
` You can also prepare a clip in the library by dragging
and dropping it after setting the MotionSD STUDIO to
the Title editor mode.
However, you cannot drag and drop a clip in the library
with a clip on the edit track prepared.
- 96 -
Page 97

Title editor mode
Process mode
Preparing video clip from menu
Prepare a video clip from [Background] menu when in the
Title editor mode.
You may also prepare any image in a folder not registered
in the library.
1.
Select [Background] >> [Background Import]
from the menu.
The background import screen will be displayed.
2.
Select a desired file and click [Open].
The first scene of the file will be displayed on the edit
screen.
• To delete the clip, select [Background] >> [Clear
Background] from the menu.
• To replace the file, import the other file with the same
procedure described above.
Note
` You cannot prepare a file from the menu with a clip on
the edit track prepared on the edit screen.
- 97 -
Page 98

Title editor mode
Process mode
∫ How to locate a small still image clip
For any still image clip smaller than 640k480 (pixels),
you can specify the way of locating it.
To make the setting, select [Background] >> [Image
Arrangement] from the menu.
[Centre Image]
Places the video clip in the centre of the screen.
When the clip has just been prepared, it is located as
below.
[Stretch Image]
Fills the screen with the video clip extended.
[Tile Image]
Fills the screen with a repeated pattern of the video clip.
[Zoom Image]
Stretches the video clip without changing its aspect
ratio to fill the screen.
- 98 -
Page 99

Title editor mode
Process mode
Setting the background aspect ratio
When using a background image from the library, the
aspect ratio can be set.
• When using one from the edit track, the aspect ratio
cannot be set.
1.
From the menu select [Background] >>
[Background aspect ratio] >> [4:3 Normal] or
[16:9 Wide].
Each aspect ratio is applied.
[4:3 Normal]
Displayed at the normal 4:3 aspect ratio.
[16:9 Wide]
Displayed at the wide16:9 aspect ratio.
• The edit screen is displayed at 4:3 aspect ratio so it is
not possible to confirm the change when [16:9 Wide]
is selected.
From menu select [View] >> [Enter Preview] and
confirm on the Preview screen.
Note
` When the aspect ratio is different from the original data a
black area is displayed above and below and to the right
and left of the image. (@
` Even if you select [Edit] >> [Undo] from the menu, the
aspect ratio setting will not return to the original aspect
ratio.
56)
- 99 -
Page 100

Title editor mode
Process mode
Applying effects to the image
You can apply various effects to the image.
The following effects can be added.
- Brightness & Contrast
- Hue & Saturation
- Sharpness
- Sepia
- Negative
- Monotone
- Colour effect
Note
` The effect which is applicable to the video clip (MPEG2
file) is only 1 type of the special effect. When a new
effect is applied, the previous effect will be removed.
However, once the video clip is rendered and saved as a
video clip (MPEG2 file) (@
effect.
` When a still image placed on the Edit track is set in the
background image, save the still image as a video clip or
a still image clip with the title editor to reflect the effects
set on the still image.
` Even though nothing is placed in the background, you
can apply some effects.
` If an effect is applied more than once, the Preview
screen is not normally displayed in some cases.
` To remove the applied effect, select [Edit] >> [Undo]
from the menu. The immediately preceding state will be
restored.
` After applying effects to a still image, the effect is
removed when changing [Background] >> [Image
Arrangement] or [Background aspect ratio] settings from
the menu.
138), you can add a new
- 100 -
 Loading...