

Panasonic MICRO-IMAGECHECKER AX40 User Manual
MACHINE VISION SYSTEM
MICRO-IMAGECHECKER
AX40
User’s Manual
Read this with
User’s Manual
(
Hardware, Operations
(
Color Extraction
)
)
ARCT1F463E
2009.3
panasonic-denko.co.jp/ac/e
Panasonic Electric Works
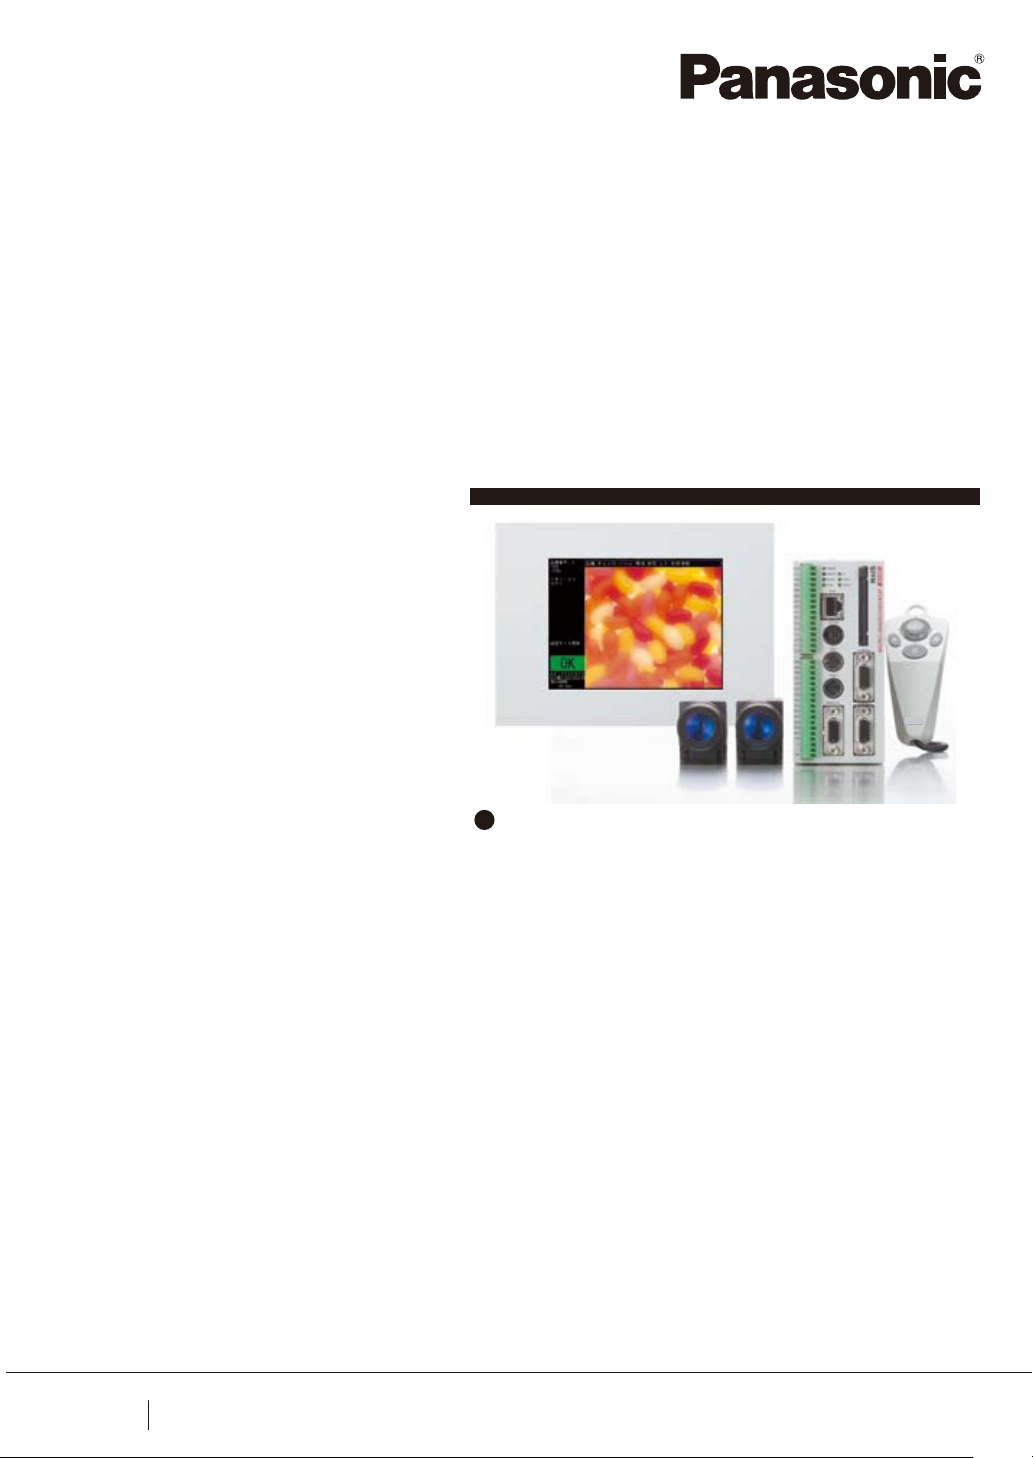
Vision System MICRO-IMAGECHECKER
AX40
The color information data captured by the CCD camera are converted into three color attributes, Hue,
Saturation and Luminosity which are closer to the human sense. The AX40 extracts the color and executes an
inspection based on this color system.
The AX40 ensures the high accuracy image processing not only using the color extraction processing but also
using the Gray scale processing and the Differential processing together.
Color Extraction and Displaly Image
Color Extraction
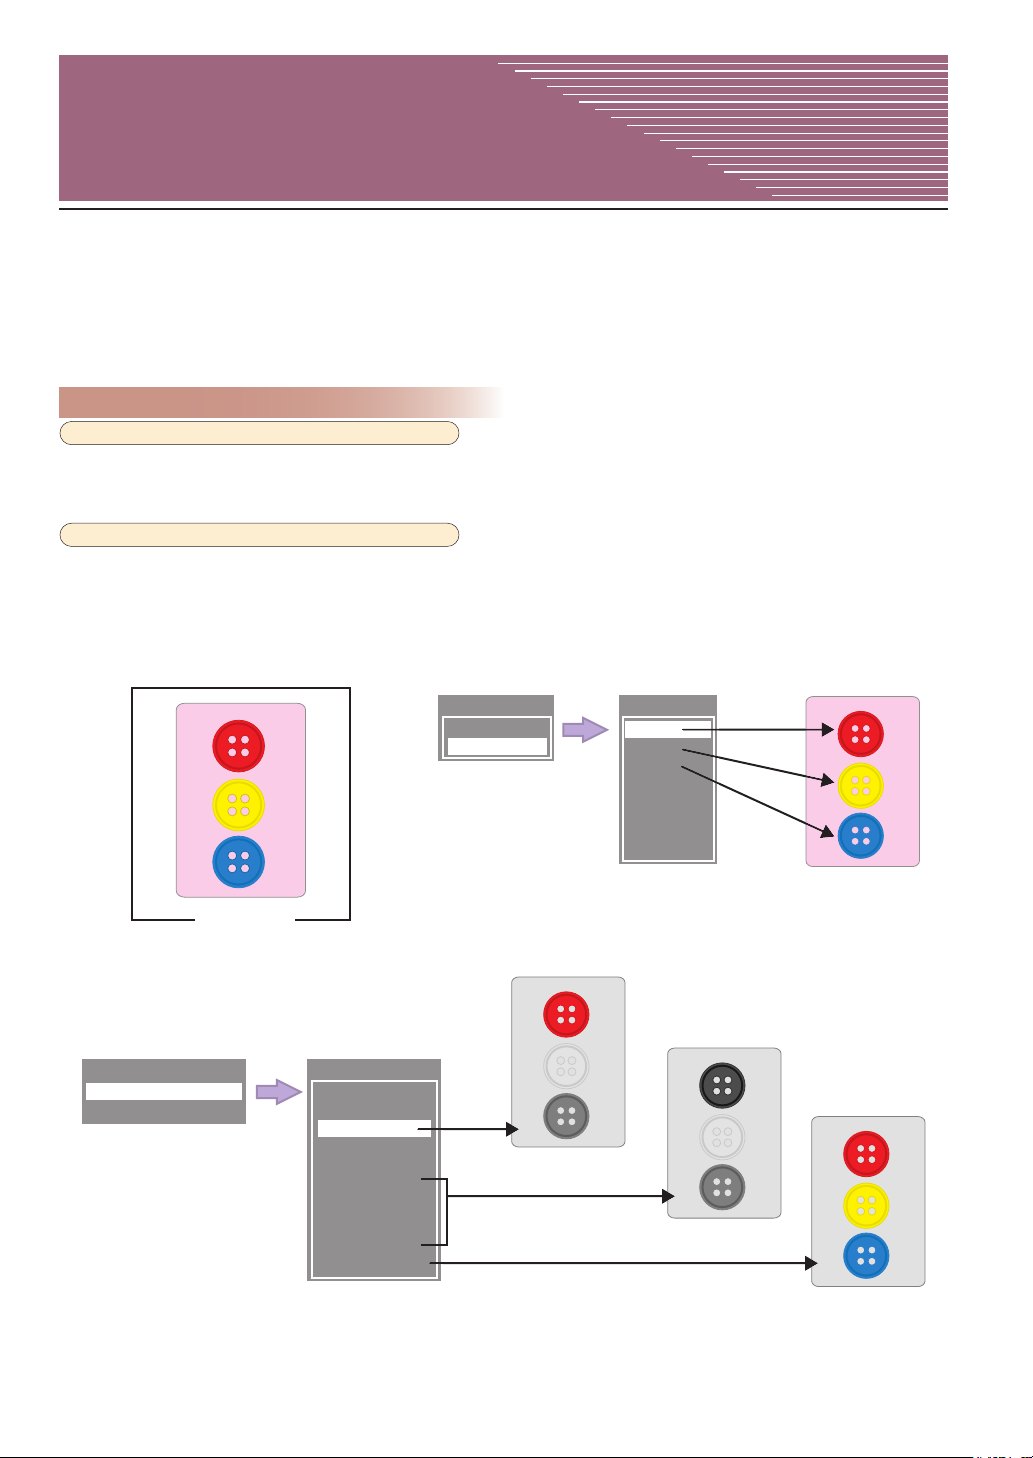
Specifying the particular color in the color image is called "Color Extraction." At this point, specified color is called "Extracted
color". The specified part in the image is called "Extracted part" and not specified part is called "Not Extracted part."
You can register 8 colors (Group A to H) in one product type. (Fig.1)
Display Image
A color extracted image is called an extracted image and an inspection is executed based on this image.
To switch the display image, press the B key in the setting mode and select "Display Color..." and then specify the group to be
displayed. (Fig. 2)
Displaying the extracted image, only the extacted part is colored and others (Not Extracted part) are displayed in gray-
scale.(Fig.3)
Display Image...
Display Color...
Background...
Color image
Display Color
Color
Gray
Group A
Group B
Group C
Group D
Group E
Group F
Group G
Group H
Group A to H
Group Select
Select
Modify
Modify
A
B
C
D
E
F
G
H
Fig.1 Registration of the color
Fig.2 Switching the Display Color Fig.3 The Display Color and color extracted images
2
Workings of Color Extraction
AX40
Color system
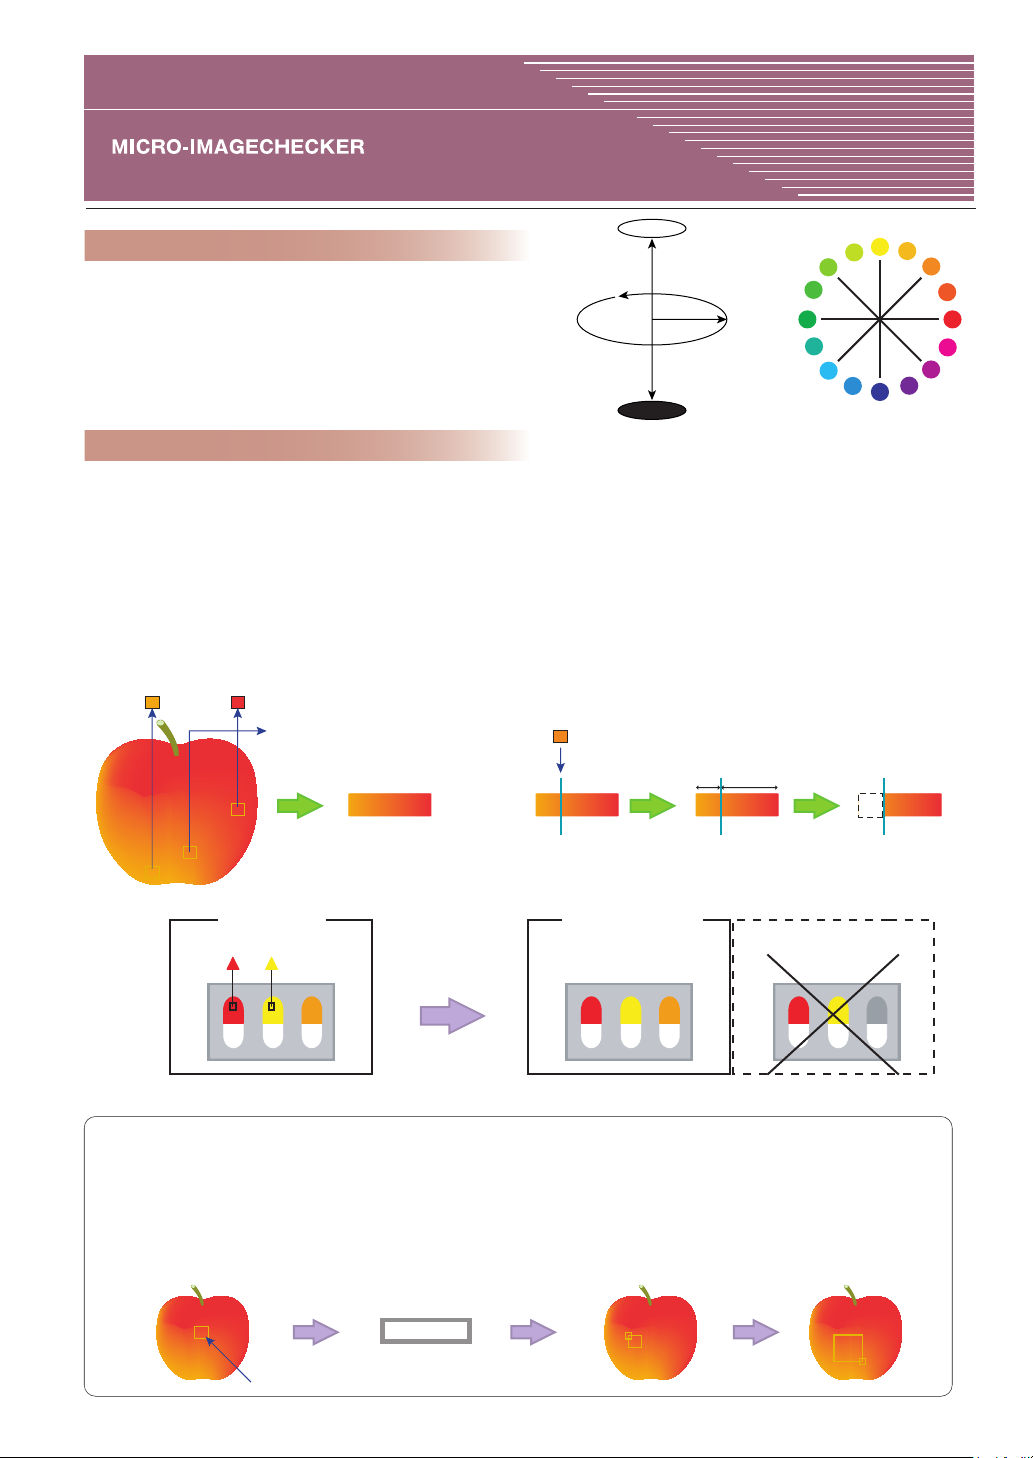
AX40 uses the L*C*h color system converted from the RGB data of
the image. Fig.4 shows the image of the three attributes, Hue,
Luminosity and Saturation, in L*C*h color sytem.
Hue: The Color such as red, blue or yellow.
Luminosity: The lightness of color such as light or dark.
Saturation: The vividness of color such as dull or vivid.
Fig.5 shows the ring image of Hue which is called the color circle.
Hue
White
Luminosity
Saturation
Black
Color Range
By registering two different parts, the fruit part of the below apple will be extracted.
The extracted color has its color range. The actual range of the extracted color is specified across three attributes, Hue, Luminosity
and Saturation. In this case of Fig.6 shows and explains the Hue only.
Fig.7 explains how the specified color is deleted in the extracted color range.
The specified color and colors in the smaller range (in the figure shows "a") are going to be deleted. This may give you unexpected
color to be deleted. By this, the display image is immediately reflected with this change. Note that you may not get the desired image.
in some cases. (Fig. 8)
Two different part to be registered.
The part to be deleted.
Fig.6 Extracted color range Fig.7 The workings of deleting extracted color range
Color image
Register two colors in A
Display Color:
Group A
Specified to be deleted
Fig.4 An image of Color Space Fig.5 An image of Hue circle
a<b
a b
Extracted image
(An image to be inspected)
displayed/extracted.
Deleted
Unable to be
Fig.8 Display images by the color extraction.
Changing the size of the color specify window
The window size can be changed in 1x1 to 32x32 pixels.(Only available when New, Add or Delete.)
The bigger window ensures to widen the range of extraction color at a time. This is effective to extract the mottled color
objects like the apple below or to extract the part which is too small to be specified.
1.Confirm that there is the color
specify window appears.
Color specify window
2. Press the B key and
select Size Change.
Size Change
3. A start mark is displayed. Adjust the size and press the
ENTER key to determine, and then the mark moves
diagonally, if you wish to re-size, adjust it again and
press the ENTER key.
3
For more details about checkers, refer to the User's manual (Hardware and Operation).
Basic Operation
AX40
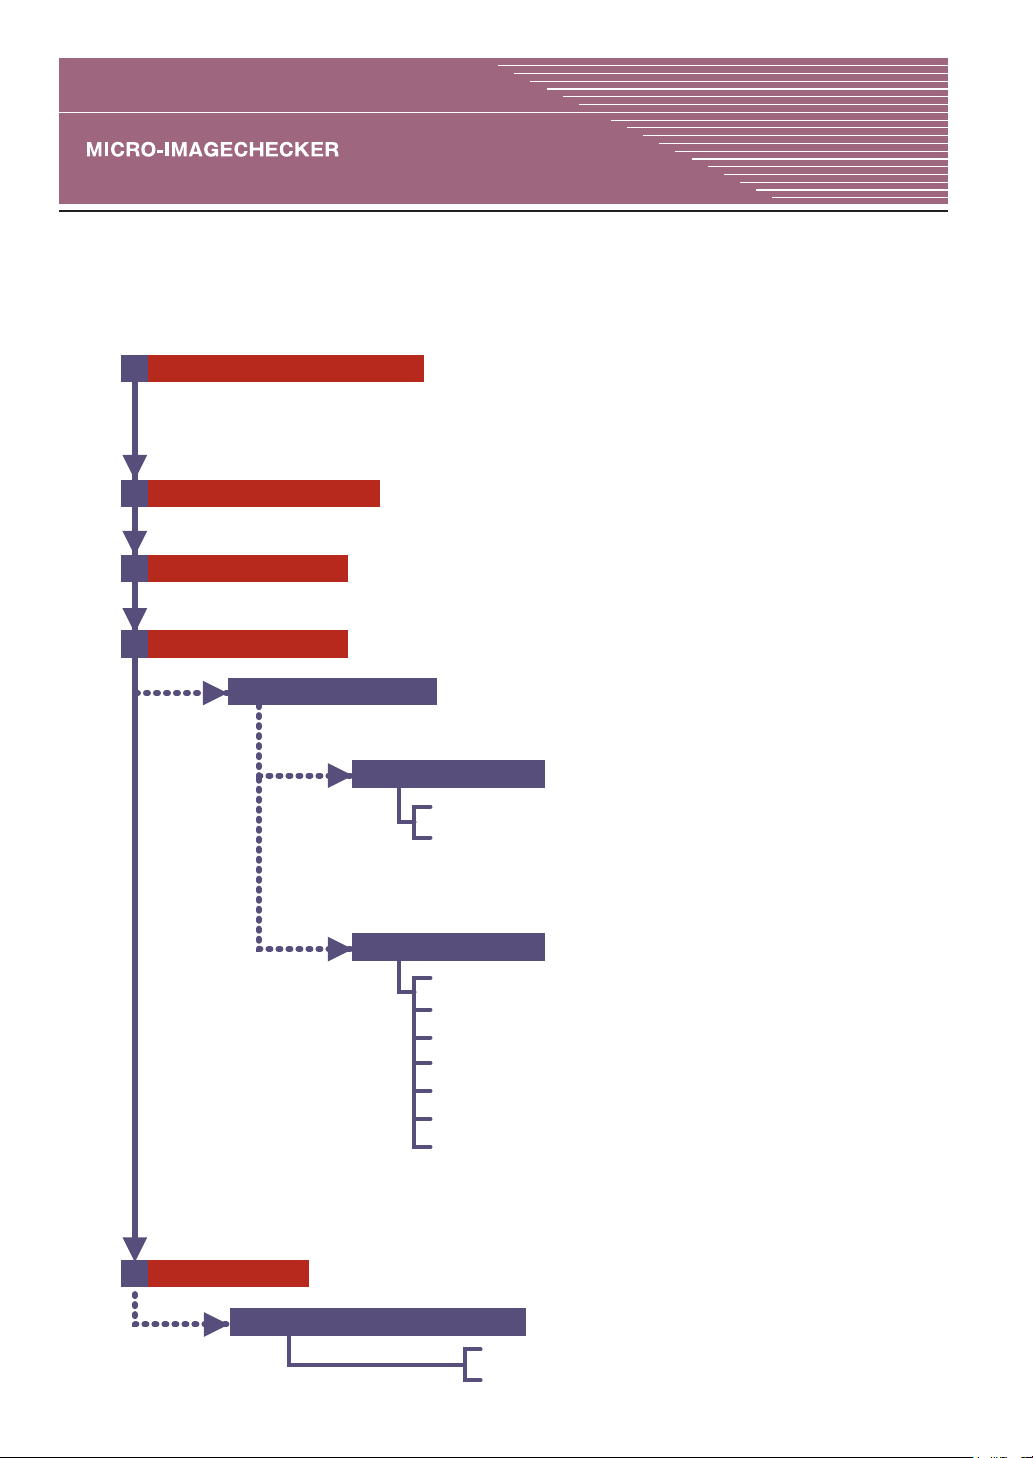
The inspection procedure is mainly devided into 5 steps. Setting items may vary depending on the
environmental condition, inspection types and checker types.
This manual mainly explains the step 4 Checker settings, basic and applied operation using the color extraction.
Regarding with the details of checkers, input/output from the external devices and the communication, refer to
the User's manual (Hardware and Operation).
1
Setting the image processing
Select the type of the image processing from "Color", "Gray" or "Differential" for the inspection
image to be set on "Memory1" and "Memory2".
Note that the default setting is "Color" for both Memory1 and Memory2.
2
Setting the product type
Up to 16 product types can be set.
3
Capturing the image
Press the A key to capture.
4
Setting the checker
Specify the checker no.
Up to 99 (No.1 to No.99) can be set.
Adjustment Checker *
POSITION ADJUSTMENT
ROTATION ADJUSTMENT
* The specified number of adjustment checkers should be set smaller than the ones of
inspection checkers in sequence. This enables adjustment checkers to follow the
inspection checkers.
*
Inspection Checker
*
BINARY WINDOW
GRAY WINDOW
BINARY
GRAY
FEAT
SMART
CONTO
** Note that checkers in gray color cannot be selected. Available checkers can be
determined by the initial settings of "Memory1" and "Memory2."
EDGE
EDGE
URE EXTRACTION
MATCHING
UR MATCHING
5
Setting the tool
Calculation, Statistics and Output
Numerical Calculation
Judgement
4
FEATURE EXTRACTION
Inspection
Memory
1
A
Group Select
Modify
A
B
C
For more details about checkers, refer to the User's manual (Hardware and Operation).
Basic Operation
AX40
Before starting the color extraction, set "Color" from ENVIRONMENT menu > Initial Settings > Memory1.
1. Register New Extraction Color
Register the new extraction color in Group A with using a FEATURE EXTRACTION checker.
1. Select "Group Select" in the Inspection tab.
The Group Select window appears and select "Modify".
Select : Use when selecting the already registered
Modify: Use when registering the new extraction color
2. Select the group (A to H) to be registered.
The Modify window appears and select "A". Then, press the ENTER key.
A to H : When the extraction color is already registered, the
3. Select "New".
A sub window appears and select "New". Then, press the ENTER key.
Add : Adds the extraction color.
Widen Lumi.: Enhances the luminosity range by 10.
Delete : Deletes the already specified extraction
Adjust : Adjusts the already registered extraction
Undo : Returns to the previous extraction status.
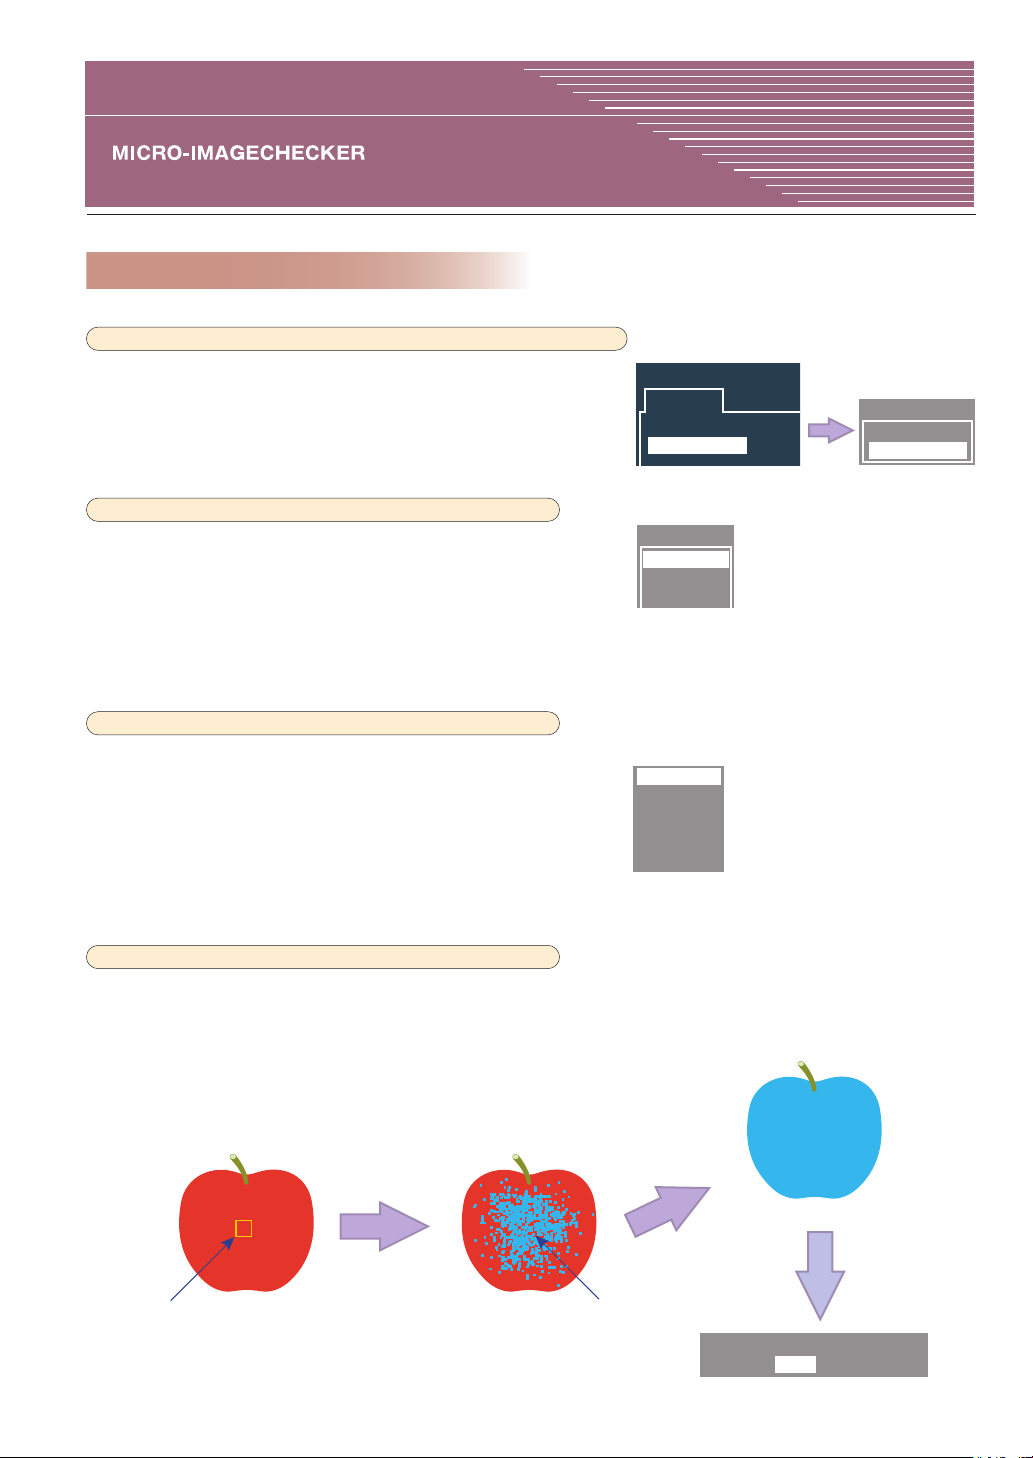
4. Specify the part you want to extract with the color specify window.
When the color specify window appears, move it to the color part you want to extract
and press the ENTER key. The extracted part is displayed in light blue. Repeat this
operation until the part you want to extract is full filled in light blue. If you wish to return
to the previous extraction status, press the C key and select "Undo".
When you have finished extracting, press the C key twice and register the extraction
color as following to the message. It returns to The FEATURE EXTRACTION window.
(Registering the new extraction color in A is completed.)
extraction color.
and modify the already registered extraction
color.
extracted part in the image on the screen is displayed.
* If there is "black" in the object, it seems to be extracted.
But this is because of the AX40's default setting, it will never affect
when you register the new extraction color. So, please continue the procedure.
Widen Lumi.
color.
color, by entering a value of Hue, Luminosity
and Saturation.
(Up to 9 times)
Group Select
Select
Modify
New
Add
Delete
Adjust
Undo
The color specify window
ENTER
Extracted part
(in light blue)
5
ENTER
The extraction is completed
C
Press twice
Do you want to register?
[YES] [NO]
 Loading...